
HP Gaming Computers and Redragon Accessory Gold Box | Amazon
Source: Kotaku – Upgrade Your Gaming Rig With Today’s Amazon Gold Box
A walk through guide on what to do after installing Debian 10 (Buster) workstation in your system
Source: Linux Today – Top 8 Things to do after Installing Debian 10 (Buster)
After unveiling it at CES 2019, Vizio has announced that it’s finally rolling out support for Apple’s AirPlay 2 and HomeKit platforms. Coming via an update to its SmartCast 3.0 platform, it’ll let users play videos, music and photos directly from iPh…
Source: Engadget – Vizio begins updating its TVs with AirPlay 2 and HomeKit
![]()
Everspin has announced that Sage Microelectronics is introducing a new enterprise SSD controller that supports Everspin’s latest 1Gb magnetoresistive memory (MRAM) chips. A similar partnership between Everspin and Phison was announced last week.
Everspin’s toggle MRAM is well-established as a non-volatile memory option for embedded and industrial applications, with a strong record for reliability. However, their small capacities of up to 16Mb (so far) have severely limited the potential use cases. Everspin’s more recent spin-transfer torque MRAM (STT-MRAM) still can’t directly compete with NAND flash on capacity, but with 1Gb parts now in production and larger parts in development, STT-MRAM is becoming useful for a new class of applications.
DDR memory controller IP that supports DRAM and Everspin’s STT-MRAM is readily available, so designers of SSD controllers and other ASICs can easily add support for MRAM to products that can benefit from 1Gb or more of high-speed non-volatile memory. For SSDs, the most compelling use for MRAM is to reduce or eliminate the need for supercapacitors in enterprise SSDs. MRAM capacity is not quite high enough to entirely replace DRAM buffers in large, high-performance SSDs, but the 1Gb parts make for a decent write cache that is inherently non-volatile. Since MRAM has performance competitive with DRAM, it can be used to store FTL updates and newly written user data while still meeting the strict performance consistency requirements of enterprise SSDs.
It’s not clear how much cost savings MRAM currently allows compared to a bank of supercapacitors, but Everspin and their partners cite other benefits as well: it’s often much easier to fit MRAM into a small SSD form factor, and MRAM chips can outlast the useful lifespan of large capacitors, which sometimes fail before an SSD’s NAND flash write endurance is exhausted.
Using DRAM, MRAM and NAND flash together in a solid state drive is not a new idea. Seagate showed prototypes at Flash Memory Summit 2017 based around Marvell controllers, and last year at FMS IBM announced a shipping product with all three types of memory and an FPGA-based controller. Now that two more controller designers are on board with the concept, it’s clear that this is a viable market for Everspin if they can follow through on reducing cost per bit and continuing to increase capacities.
Everspin and Sage are both exhibiting at Flash Memory Summit next week, and we are expecting more MRAM-related announcements at the show.
Source: AnandTech – Sage Microelectronics To Introduce Enterprise SSD Controller Supporting STT-MRAM

These sneakers and sandals are proof that footwear production can be gentler on the environment.
Source: TreeHugger – 5 pairs of eco-friendly footwear

Enlarge / NASA concept for an in-space propellant depot. (credit: NASA)
On Tuesday afternoon, NASA announced 19 new partnerships with 10 U.S. companies to help bring more cutting edge technologies closer to production use in spaceflight. There were a lot of useful engineering ideas here, such as precision landing systems and robotic plant farms, but perhaps the most intriguing one involved the rocket company SpaceX and two of NASA’s field centers—the Glenn Research Center in Ohio and the Marshall Space Flight Center in Alabama.
“SpaceX will work with Glenn and Marshall to advance technology needed to transfer propellant in orbit, an important step in the development of the company’s Starship space vehicle,” the NASA news release states. This is a significant announcement for reasons both technical and political.
For its part, SpaceX welcomed the opportunity to help advance NASA’s Artemis Program, which NASA hopes will send humans to the Moon by 2024 (and, later on, to Mars). “We believe SpaceX’s fleet of advanced rockets and spacecraft, including Falcon Heavy and Starship, are integral to accelerating NASA’s lunar and Mars plans,” a company spokesperson told Ars.
Read 13 remaining paragraphs | Comments
Source: Ars Technica – NASA agrees to work with SpaceX on orbital refueling technology

I’m fascinated by time capsules. Sometimes they’re incredibly boring, but every once in a while they’re filled with some very cool stuff. So I was surprised this week when I did a search for “time capsule” on YouTube and saw a bunch of young people creating videos that were directed at the year 2024. It’s just five…
Source: Gizmodo – What Would You Put in a Time Capsule For the Year 2024?
When Starfleet calls, Trekkies will answer, and Starfleet’s latest call to action involves the world’s first free-roam Star Trek experience. Later this year Sandbox VR will launch the first Holodeck VR experience, where fans can enter the world of St…
Source: Engadget – ‘Away Mission’ is a free-roaming ‘Star Trek’ VR experience
This guide describes how to set up time synchronization on Ubuntu and its variants like Linux Mint, Elementary OS.
Source: LXer – How To Set Up Time Synchronization On Ubuntu
Thomas Cook is in the middle of very strong turbulence as its share prices rapidly at the end of May and even dropped further by 14 percent to just £10. The UK’s oldest travel company is struggling with massive debts and has seen its value plummet from £2.2 billion to £180 million in one year. […]
The post Will James Richman Lend the Struggling Giant Thomas Cook a Hand? appeared first on TGDaily.
Source: TG Daily – Will James Richman Lend the Struggling Giant Thomas Cook a Hand?
Hey, good morning! You look fabulous.
July is almost over. So after you double-check your UltraViolet account, it’s time to look over quarterly results from Apple and Samsung to find out what’s working (services) and what isn’t (high-end phones). Pl…
Source: Engadget – The Morning After: Google delivers a new look for Android Auto
We’ve been eagerly watching Intel’s open-source LLVM-based SYCL compiler support developed over the past number of months and today it finally premiered as an experimental feature in their modern OpenCL Linux driver package…
Source: Phoronix – Intel’s OpenCL “NEO” Linux Driver Stack Rolls Out The Experimental SYCL Support
In the three months since Spotify crested the 100 million Premium user mark, the company has added a further 8 million paying customers. It’s another sign of health from a music streaming service that continues to grow in the face of tough and well-h…
Source: Engadget – Spotify adds 8 million paying customers in three months

Enlarge / A collision in the LHC’s Compact Muon Solenoid (CMS) detector produces a telltale Higgs boson signature. (credit: Thomas McCauley/Lucas Taylor, CMS)
The trickiest part of hunting for new elementary particles is sifting through the massive amounts of data to find telltale patterns, or “signatures,” for those particles—or, ideally, weird patterns that don’t fit any known particle, an indication of new physics beyond the so-called Standard Model. MIT physicists have developed an analytical method to essentially automate these kinds of searches. The method is based on how similar pairs of collision events are to one another and how hundreds of thousands of such events are related to each other.
The result is an intricate geometric map, dubbed a “collision network,” that is akin to mapping complex social networks. The MIT team described its novel approach in a new paper in Physical Review Letters: “Maps of social networks are based on the degree of connectivity between people, and for example, how many neighbors you need before you get from one friend to another,” co-author Jesse Thaler said. “It’s the same idea here.”
The Large Hadron Collider (LHC) produces billions of proton/antiproton collisions per minute. Physicists identify exactly which particles are produced in high-energy collisions by the electronic signatures the particles leave behind, known as nuclear decay patterns. Quarks, for instance, only exist for fractions of a second before they decay into other secondary particles. Since each quark has many different ways of decaying, there are several possible signatures, and each must be carefully examined to determine which particles were present at the time of the collision.
Read 13 remaining paragraphs | Comments
Source: Ars Technica – MIT physicists: Social networks could hold the key to finding new particles
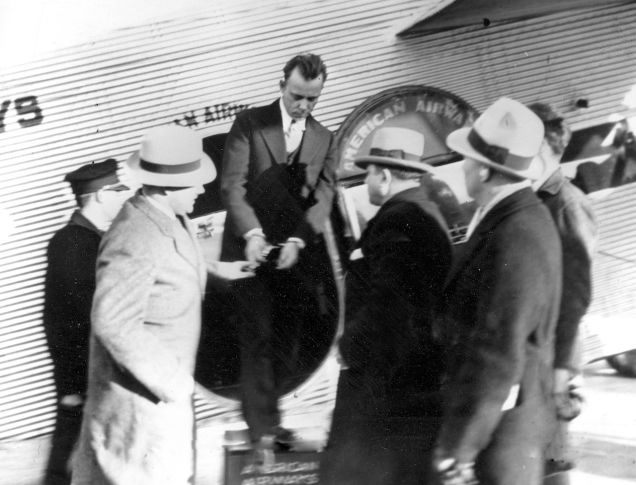
The History Channel has received a permit to dig up the body of 1930s gangster John Dillinger from his grave at a cemetery in Indiana. Why? Nobody really knows yet.
Source: Gizmodo – The History Channel is Digging Up John Dillinger’s Body But Nobody Really Knows Why
The NetBSD 9.0 code has now been branched and preparations underway for releasing the next version of this BSD operating system known for its vast architecture support…
Source: Phoronix – NetBSD 9.0 Prepping For Release With AArch64 Support, Kernel ASLR & Better NVMe Perf
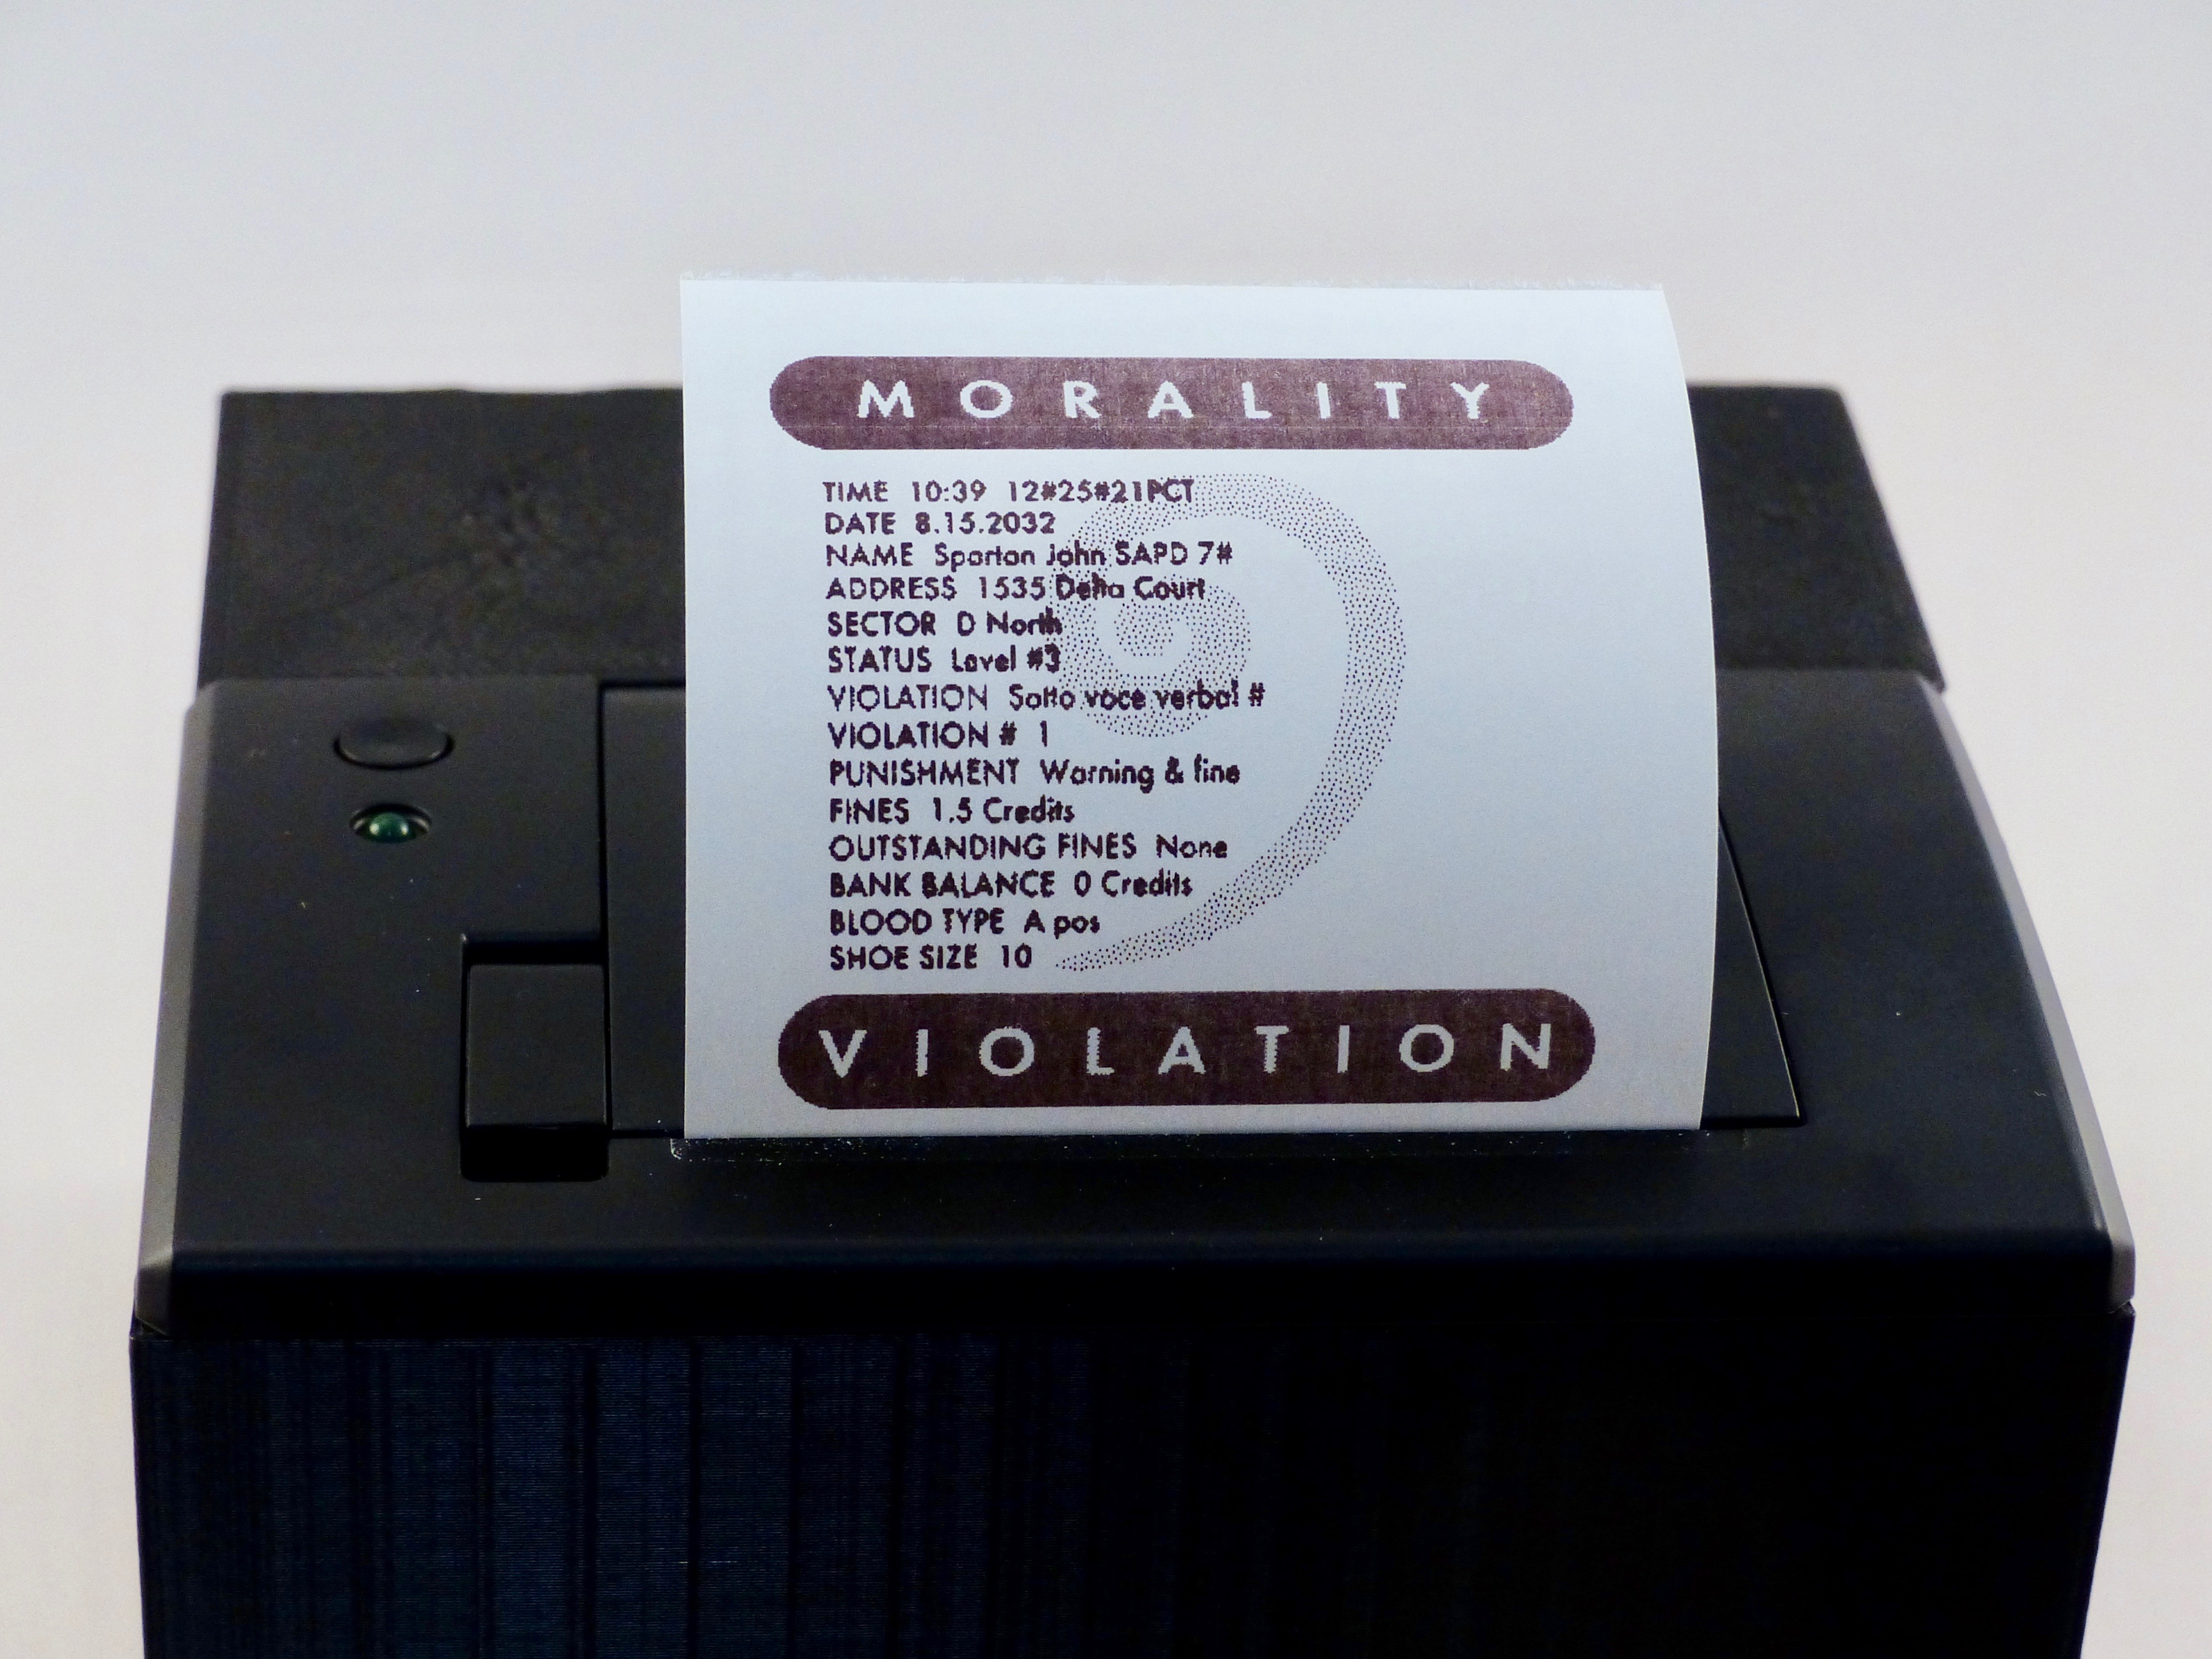
In the 1993 action movie Demolition Man, Sylvester Stallone stars as a 1990s cop transported to the near-future. Technology plays a central role in the film, often bemusing the lead character. In a memorable scene, he is repeatedly punished by a ticketing machine for using bad language (a violation of the verbal morality statute).
In the future of Demolition Man, an always-listening government machine detects every banned word and issues a fine in the form of a receipt from a wall-mounted printer. This tutorial shows you how to build your own version using Raspberry Pi, the Google Voice API, and a thermal printer. Not only can it replicate detecting banned words, but it also doubles as a handy voice-to-paper stenographer (if you want a more serious use).
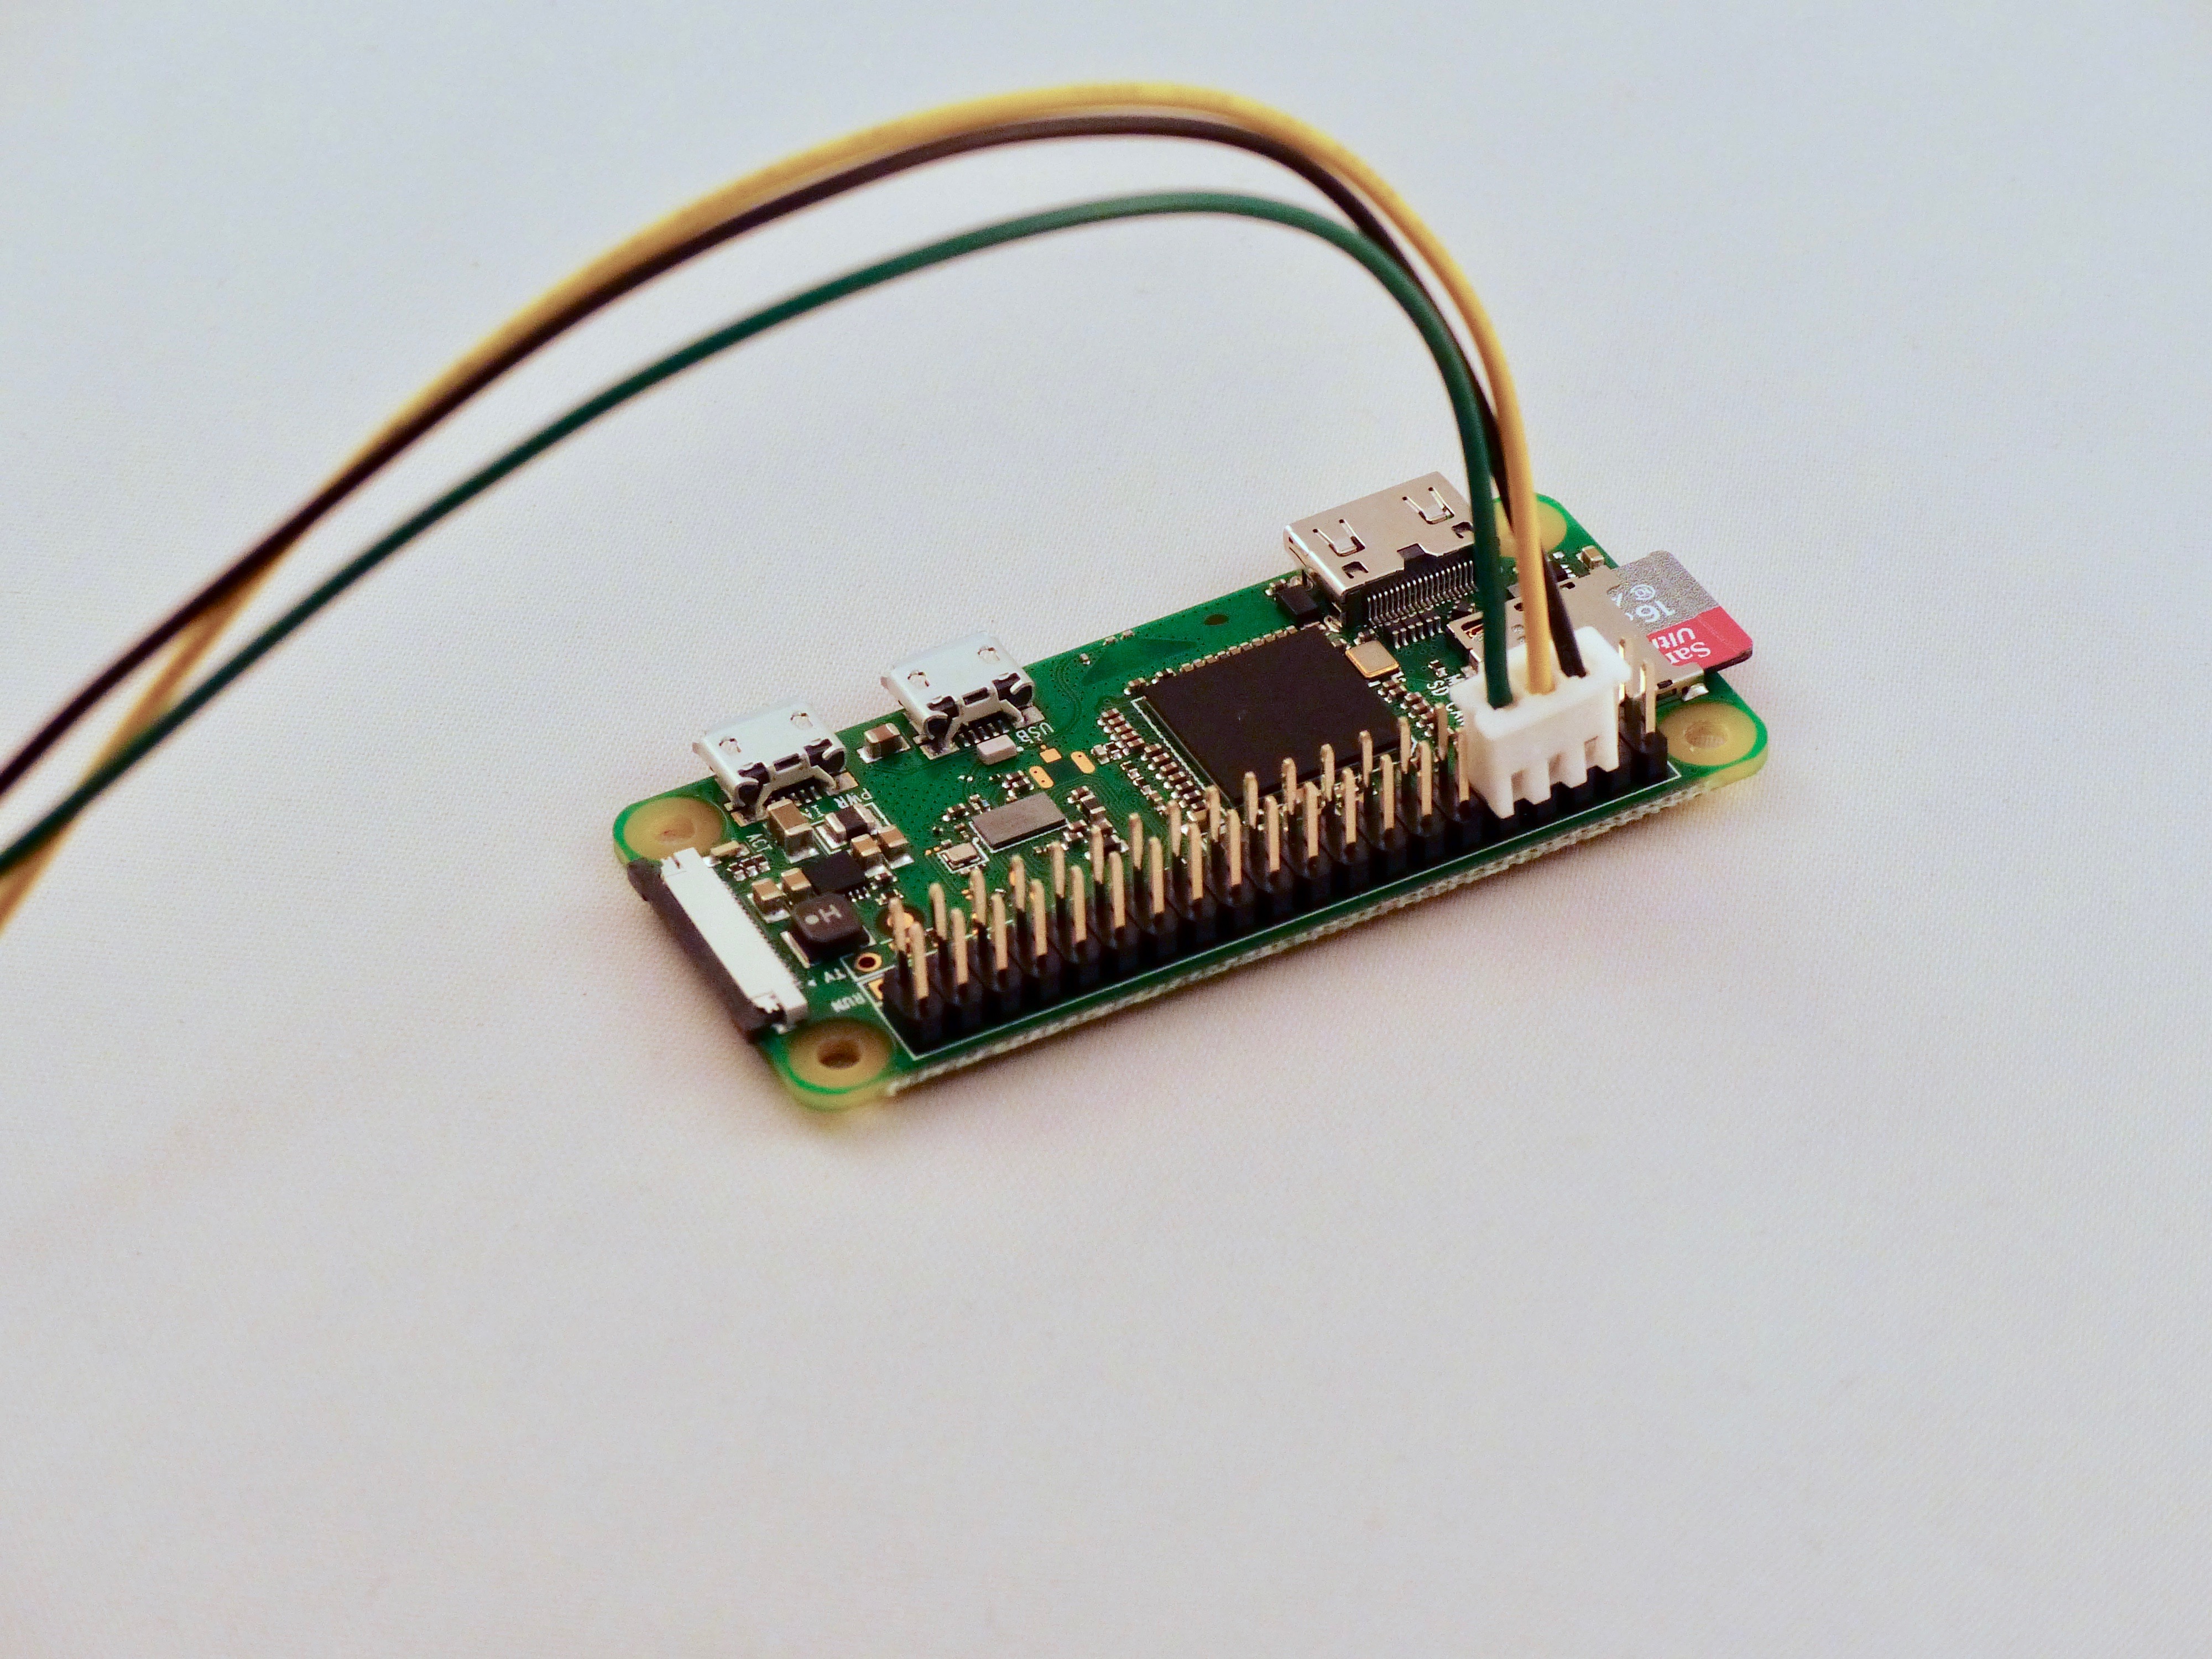
We built a full ‘boxed’ project, but you can keep it simple if you wish. Your Raspberry Pi needs a method for listening, speaking, and printing. The easiest solution is to use USB for all three.
After prototyping using Raspberry Pi 4 and various USB devices, we settled on Raspberry Pi Zero W with a small USB mic and Pimoroni Speaker pHAT to save space. A Pico HAT Hacker allowed the connection of both the printer and Speaker pHAT, as they don’t share GPIO pins. This bit of space-saving means we could install the full assembly inside the 3D-printed case along with the printer.
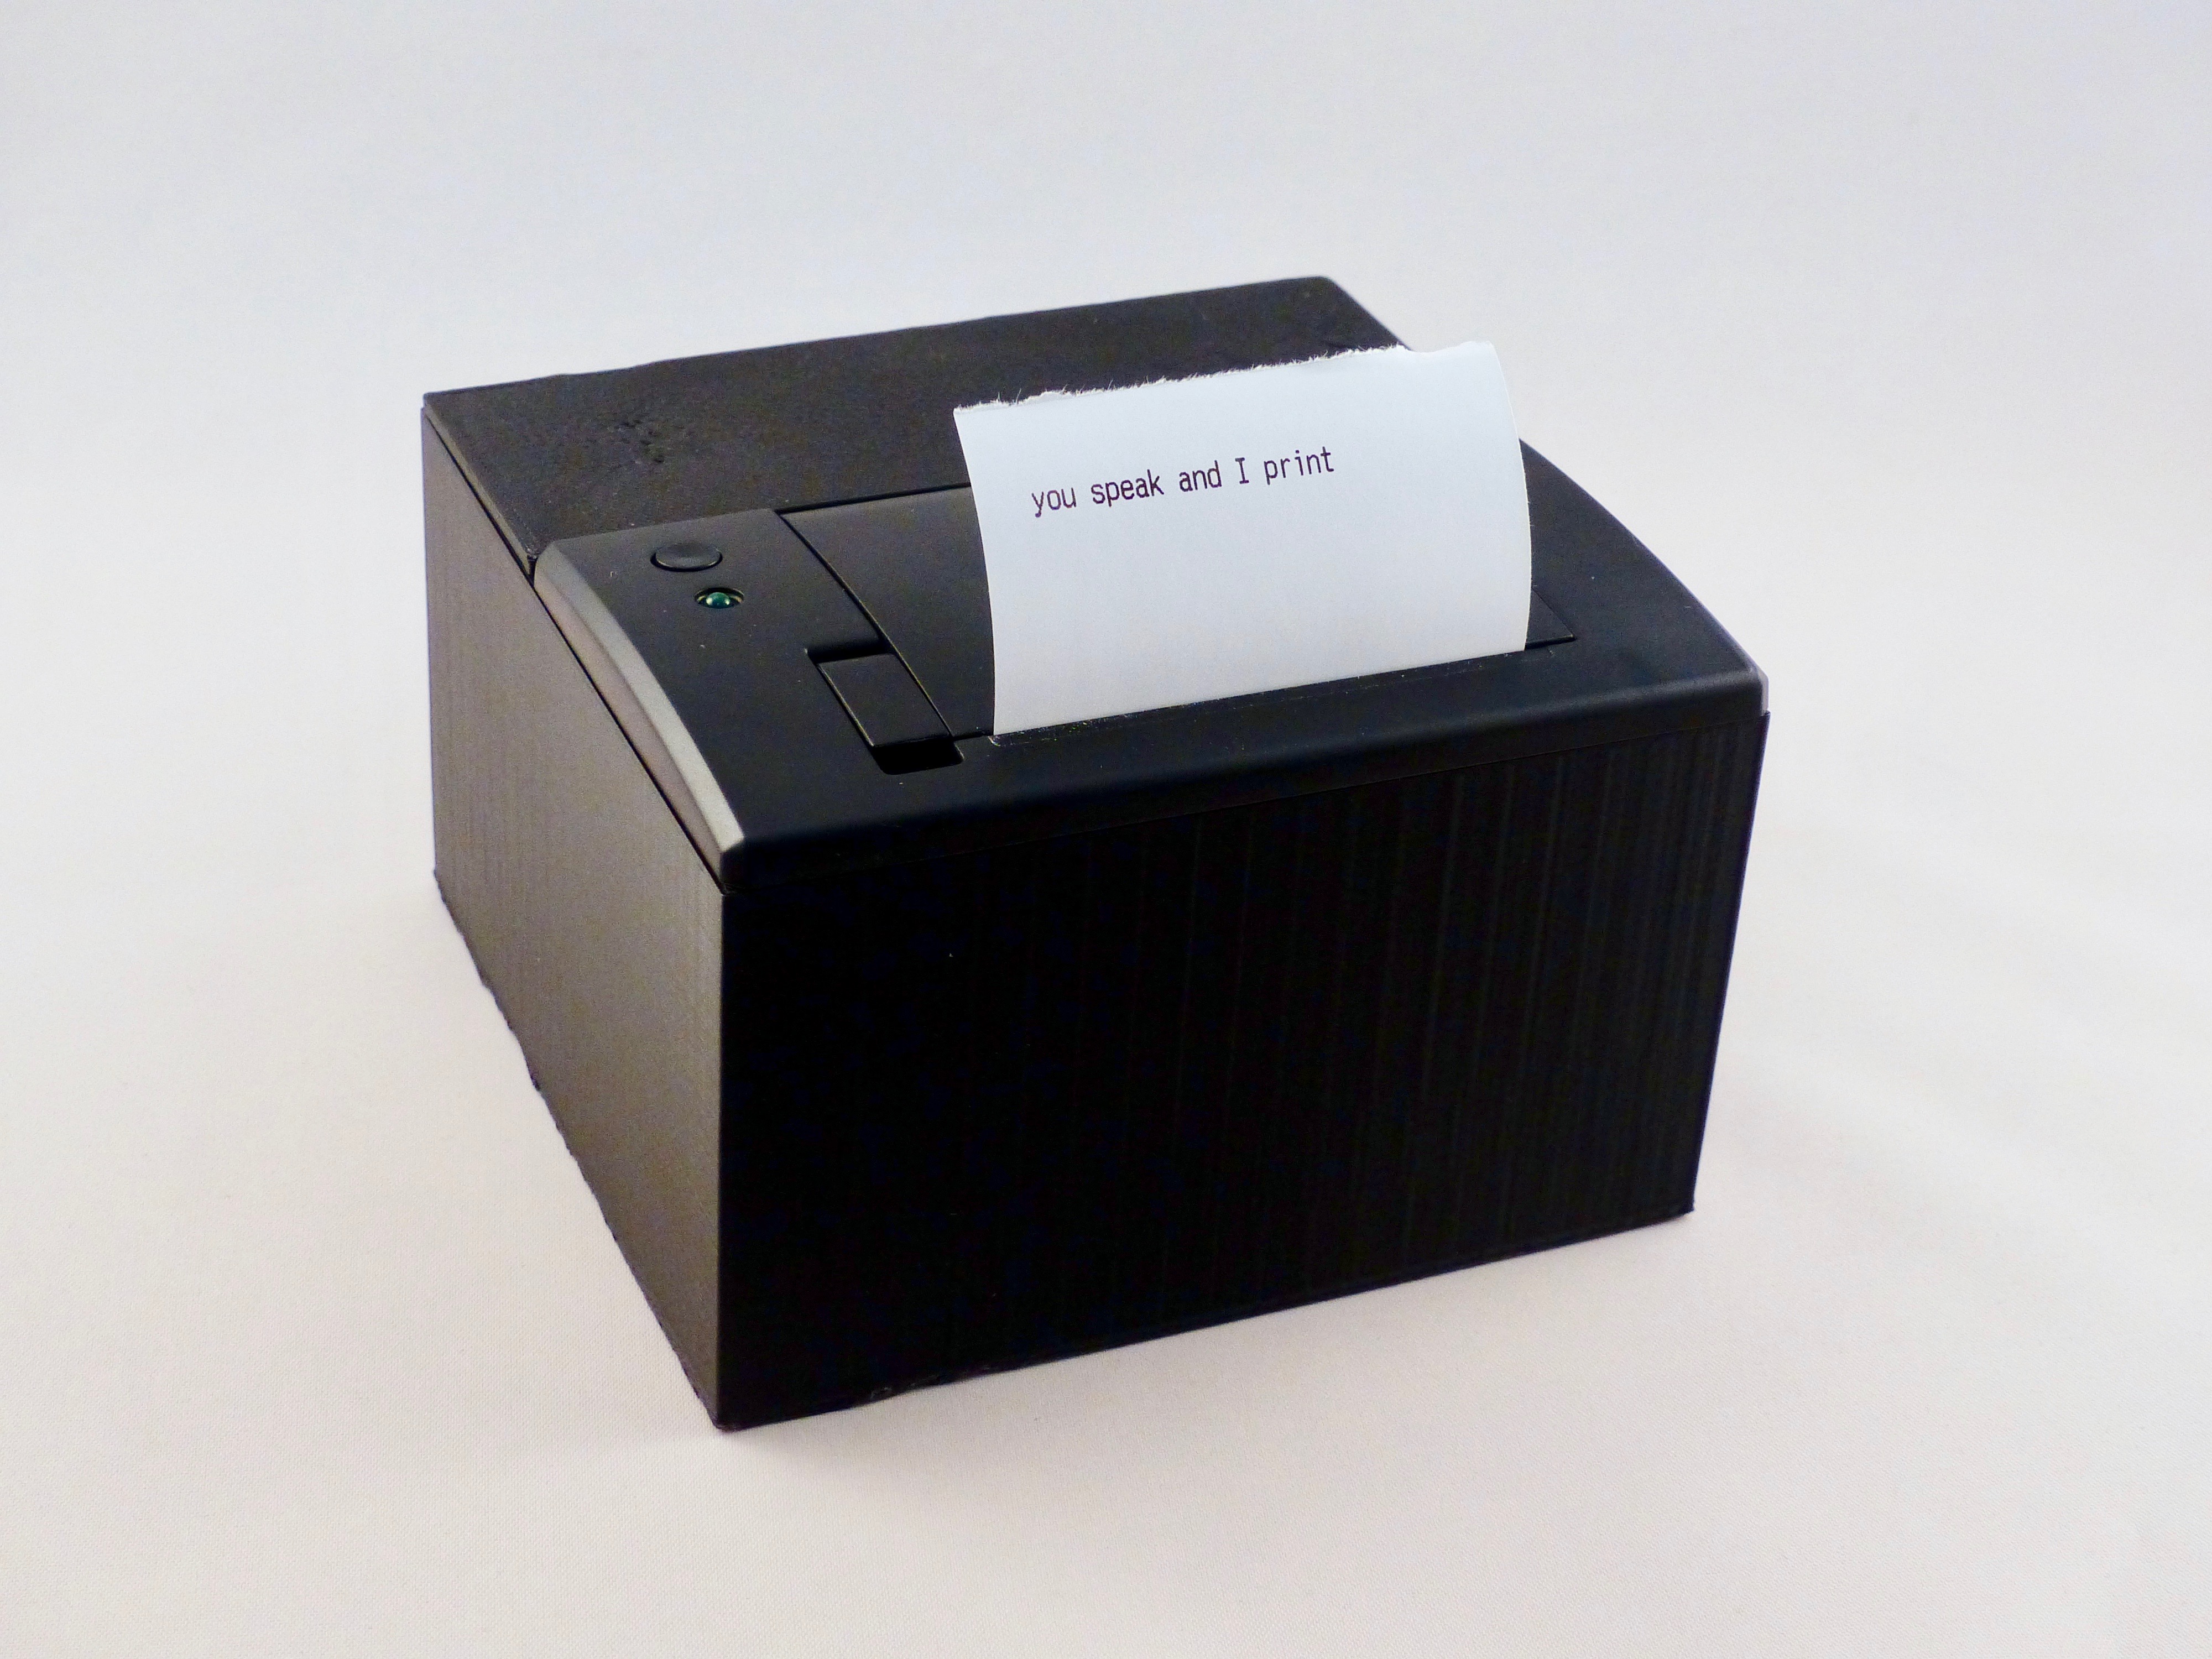
To issue our receipts we used a thermal printer, the kind found in supermarket tills. This particular model is surprisingly versatile, handling text and graphics.
It takes standard 2.25-inch (57mm) receipt paper, available in rolls of 15 metres. When printing, it does draw a lot of current, so we advise using a separate power supply. Do not attempt to power it from your Raspberry Pi. You may need to fit a barrel connector and source a 5V/1.5A power supply. The printer uses a UART/TTL serial connection, which neatly fits on to the GPIO. Although the printer’s connection is listed as being 5V, it is in fact 3.3V, so it can be directly connected to the ground, TX, and RX pins (physical pins 6, 8, 10) on the GPIO.
Get yourself a copy of Raspbian Buster Lite and burn it to a microSD card using a tool like Etcher. You can use the full version of Buster if you wish. Perform the usual steps of getting a wireless connection and then updating to the latest version using sudo apt update && sudo apt -y upgrade. From a command prompt, run sudo raspi-config and go to ‘Interfacing options’, then ‘Enable serial’. When asked if you would like the login shell to be accessible, respond ‘No’. To the next question, ‘Would you like the serial port hardware to be enabled?’, reply ‘Yes’. Now reboot your Raspberry Pi.
Make sure the printer is up and running. Double-check you’ve connected the header to the GPIO correctly and power up the printer. The LED on the printer should flash every few seconds. Load in the paper and make sure it’s feeding correctly. We can talk to the printer directly, but the Python ‘thermalprinter‘ library makes coding for it so much easier. To install the library:
sudo apt install python3-pip

pip3 install thermalprinter
Create a file called printer.py and enter in the code in the relevant listing. Run the code using:
python3 printer.py
If you got a nice welcoming message, your printer is all set to go.
Once your microphone is connected to Raspberry Pi, check the settings by running:
alsamixer
This utility configures your various sound devices. Press F4 to enter ‘capture’ mode (microphones), then press F6 and select your device from the list. Make sure the microphone is not muted (M key) and the levels are high, but not in the red zone.
Back at the command line, run this command:
arecord -l
This shows a list of available recording devices, one of which will be your microphone. Make a note of the card number and subdevice number.
To make a test recording, enter:
arecord --device=hw:1,0 --format S16_LE --rate 44100 -c1 test.wav
If your card and subdevice numbers were not ‘0,1’, you’ll need to change the device parameter in the above command.
Say a few words, then use CTRL+C to stop recording. Check the playback with:
aplay test.wav
STT means speech to text and refers to the code that can take an audio recording and return recognised speech as plain text. Many solutions are available and can be used in this project. For the greatest accuracy, we’re going to use Google Voice API. Rather than doing the complex processing locally, a compressed version of the sound file is uploaded to Google Cloud and the text returned. However, this does mean Google gets a copy of everything ‘heard’ by the project. If this isn’t for you, take a look at Jasper, an open-source alternative that supports local processing.
To use the Google Cloud API, you’ll need a Google account. Log in to the API Console at console.developers.google.com. We need to create a project here. Next to ‘Google APIs’, click the drop-down menu, then ‘New Project’. Give it a name. You’ll be prompted to enable APIs for the project. Click the link, then search for ‘speech’. Click on ‘Cloud Speech-to-Text API’, then ‘Enable’. At this point you may be prompted for billing information. Don’t worry, you can have up to 60 minutes of audio transcribed for free each month.
Once the Speech API is enabled, the screen will refresh and you’ll be prompted to create credentials. This is the info our code needs to be granted access to the speech-to-text API. Click on ‘Create Credentials’ and on the next screen select ‘Cloud Speech-to-text API’. You’re asked if you’re planning to use the Compute Engine; select ‘no’. Now create a ‘service account’. Give it a different name from the one used earlier, change the role to ‘Project Owner’, leave the type of file as ‘JSON’, and click ‘Continue’. A file will be downloaded to your computer; transfer this to your Raspberry Pi.
When you’re happy with the recording levels, record a short piece of speech and save it as test.wav. We’ll send this to Google and check our access to the API is working. Install the Google Speech-To-Text Python library:
sudo apt install python3-pyaudio

pip3 install google-cloud-speech
Now set an environment variable that the libraries will use to locate your credentials JSON:
export GOOGLE_APPLICATION_CREDENTIALS="/home/pi/[FILE_NAME].json"
(Don’t forget to replace [FILE_NAME] with the actual name of the JSON file).
Using a text editor, create a file called speech_to_text.py and enter the code from the relevant listing. Then run it:
python3 speech_to_text.py
If everything is working correctly, you’ll get a text transcript back within a few seconds.
Amazingly, Google’s speech-to-text service can also support streaming recognition, so rather than capture-then-process, the audio can be sent as a stream, and a HTTP stream of the recognised text comes back. When there is a pause in the speech, the results are finalised, so then we can send the results to the printer. If all the code you’ve entered so far is running correctly, all you need to do is download the stenographer.py script and start it using:
python3 stenographer.py
You are limited on how long you can record for, but this could be coupled with a ‘push to talk’ button so you can make notes using only your voice!
Back to Demolition Man. We need to make an alarm sound, so install a speaker (a passive one that connects to the 3.5mm jack is ideal; we used a Pimoroni Speaker pHAT). Download the banned.py code and edit it in your favourite text editor. At the top is a list of words. You can change this to anything you like (but don’t offend anyone!). In our list, the system is listening for a few mild naughty words. In the event anyone mentions one, a buzzer will sound and a fine will be printed.
Make up your list and start the game by running:
python3 banned.py
Now try one of your banned words.
Whatever you decide to use this project for, why not finish it up with a 3D-printed case so you package up the printer and Raspberry Pi with the recording and playback devices and create a portable unit? Ideal for pranking friends or taking notes on the move!
See if you can invent any other games using voice recognition, or investigate the graphics capability of the printer. Add a Raspberry Pi Camera Module for retro black and white photos. Combine it with facial recognition to print out an ID badge just using someone’s face. Over to you.
This project was created by PJ Evans for The MagPi magazine issue 84, available now online, from your local newsagents, or as a free download from The MagPi magazine website.

The post Build Demolition Man’s verbal morality ticketing machine appeared first on Raspberry Pi.
Source: Raspberry Pi – Build Demolition Man’s verbal morality ticketing machine
Elon Musk isn’t the only one who wants us to communicate via brainwaves. Facebook also has ambitious plans to interface with computers using wearables and one day let us type rapidly with our brains. Now, neuroscientists from the University of Califo…
Source: Engadget – Facebook is inching closer to a think-to-type computer system
Google promoted today the Chrome 76 web browser to the stable channel for all supported platforms, including GNU/Linux, Windows, and macOS.
Source: LXer – Google Chrome 76 Released for Linux, Windows, and Mac with 43 Security Fixes

Our photo of the day comes from Rogue Valley, Oregon.
Source: TreeHugger – Photo: Black-tailed jackrabbit is all ears