Bill Negotiation Services Are a Waste of Money

You may have heard ads promising that professional bill negotiation services can help you save big money on your medical bills, credit card statements, cable bills, and more. While it’s a promising offer, the truth is negotiating bills on your own is simple, effective, and most importantly: free. You may be surprised at how willing many companies are to reduce your rates, especially for long-time loyal customers. With some preparation and persuasive negotiation tactics, you can trim hundreds of dollars from your annual expenses. Follow these simple steps to start saving—without paying any unnecessary fees.

How to lower your bills for free

Bill negotiation works because companies have incentives to keep customers happy and retain business. It costs more for them to acquire new customers than to keep existing ones. As long as you make reasonable requests and politely threaten to take your business elsewhere, many service providers will offer discounts or perks.

Contact service providers yourself

Don’t wait for a third party to step in—contact providers directly to dispute problematic charges or rates. Call their billing department about discrepancies or overcharges on your statements, armed with your notes from reviewing the itemized bill. Ask about applying for hardship assistance programs or discounts. Service representatives are often authorized to make adjustments to retain you as a customer.

Know your stuff

Request an itemized bill from any provider to scrutinize the charges in detail. Identify overcharges, duplicate charges, and services you did not receive. Federal law also allows you to request interest rate reductions on credit card bills.

Send formal dispute letters

If a phone call yields unsatisfactory results, follow up with a formal dispute letter stating which charges you disagree with and why. Provide evidence of errors or unfair rates by including notes from researching reasonable costs or comparing with past statements. Request that the disputed charges be removed and clearly communicate you expect a response by a specific date.

Use free templates and tools

Instead of paying steep sign-up and commission fees for bill negotiation services, use free scripts, online dispute letter templates, and cost-of-living calculators to bolster your case. Seek form letters specific to cable bills, hospital bills, credit card statements, phone bills, etc. to save time and effort.

How to tell if a bill negotiation service is worth it

Of course, negotiating your own bills is not nearly as effortless and appealing as downloading an app that does all the work for you. The thing is, bill negotiation services aren’t worth it if their fees exceed the savings you get from lowered billed. To evaluate if an app is going to be worth it for you, compare the fees with the potential benefits.

For most these apps, the fees will be any combination of the following:

  • Service fees (monthly, one-time, or annual)

  • Membership fees (usually annual or recurring/monthly)

  • Bill negotiation fee (percentage of your savings)

Let’s take a look at an example of how these services make money while cutting down your bill costs: BillShark is one that negotiates monthly bills and doesn’t charge customers upfront fees. Instead, it charges a one-time fee of 40% of the savings it creates. If you don’t have time to hop on the phone and negotiate your bills yourself, that 40% may be worth it. Otherwise, that’s a decent chunk of savings that could be all yours, if you use the tips above. The bottom line is before you pay for these services, remember that you have the power to effectively negotiate your own bills without an expensive middlemen.


Source: LifeHacker – Bill Negotiation Services Are a Waste of Money

How to Find Your Sound Town and Listening Character in Spotify Wrapped 2023

The year is winding down, which means Spotify Wrapped is here yet again to reveal just how cringe your taste in music really is. Like it does every year, Spotify will show you basic listening stats, like your total listen time, favorite artists, top songs, and top podcasts, if that’s your thing. But this year, there’s more.

For one thing, for the first time you don’t need to use the app to get your Wrapped. You can get it from Spotify’s Wrapped website, as well. Of course, if you open the app, Spotify will show a splash screen, or a banner to guide you through retrieving your Wrapped. If it doesn’t, you’ll find a Wrapped button in the top toolbar.

And along with the usual stats, Spotify Wrapped has a few new surprises: You’ll be assigned both a “Sound Town” and a listening character, each based on your musical habits during the year.

How to check your Spotify Wrapped Sound Town

One of Spotify Wrapped’s new hooks is called Sound Town. Basically, Spotify will match you with a city in the world that had similar listening habits or listening activity as you do. It’s fascinating, to say the least. 

I live in India, and my two biggest genres were Bollywood, and Atmospheric lo-fi music. And turns out my Sound Town is Leuven, Belgium, whose residents I suspect are bigger fans of atmospheric music, more than the latest Bollywood number. Still, that’s interesting to know.

Spotify Wrapped in 2023, showing different music personalities like Time Traveller, Shapeshifter, and more.

Credit: Spotify

Spotify is also assigning users a listening character, as it assigned a listening personality last year. I’m apparently a Vampire, because I like listening to atmospheric and sad music. I’m a bit surprised to learn I’m emo, but hey, data doesn’t lie. 

Lastly, Spotify is adding a new angle to its list of your top artists: This time, it will tell you when your consumption of a particular artist peaked. I listened to Post Malone a lot in August, and then it dropped off. Summers are weird. 

Once your Wrapped is wrapped, you can add your top songs of 2023 to a playlists, and Spotify will make it easy to share your stats on Instagram Stories, and other social media platforms (because that’s the entire reason it exists—to give your friends who use Apple Music or Amazon Music major FOMO). 

The Verge


Source: LifeHacker – How to Find Your Sound Town and Listening Character in Spotify Wrapped 2023

These Fancy Appetizers Are Dead Simple to Make

There is a part of my heart that will forever belong to a simple chip and dip, that loves a taquito, that will happily dig into a cheese ball. Simple is great. On the other hand, it’s … simple. Occasionally, I want to put on a show and impress people. Luckily, beautiful appetizers don’t have to be expensive or take long. Here are a few that’ll take no time, have only a few ingredients, aren’t expensive, and will leave an impression. 

Fresh radishes with compound butter

photograph of buttered radishes with sea salt and dill

Credit: Amanda Blum

Ingredients

  • 1 bunch radishes

  • ½ stick salted butter, room temperature (you can substitute vegan butter)

  • 2 tablespoons fresh dill

  • 1 teaspoon flaky salt (optional)

  1. Trim the radishes so only a tiny bit of green stem shows. Trim off the root, just below where the radish becomes a point. Wash the radishes really well, allow them to dry, and then cut radishes in half the long way, through the green stem and radish point.

  2. Place the butter in a mason jar or container with the dill. Using a stick blender, combine the two until the dill is completely incorporated. You’ll have a pale green whipped butter. 

  3. Use a butter knife to place a swipe of butter on each radish. 

  4. Sprinkle on additional dill or flaky salt if you’d like. 

Artichoke and parmesan crostini

image of artichoke and parmesan crosttini

Credit: Amanda Blum

Ingredients

  • ½ baguette, or one package of prepared crostini

  • 24 ounces of marinated artichoke hearts in oil

  • 1 cup grated parmesan cheese

  • Salt and pepper to taste

  • 1 clove garlic

  1. Drain the artichoke hearts and set aside. 

  2. Slice the baguette into slices, no more than ½ inch thick. Rub each slice with the garlic clove and place into oven, on a cookie sheet, at 350 degrees for 4-5 minutes, or just until the bread is lightly golden. 

  3. Blend half of the artichoke hearts, cheese and the rest of the garlic clove, using a stick blender, food processor, or regular blender. You want a consistent, well-blended texture. 

  4. Spoon a tablespoon of the blended mixture onto each crostini, and spread out. From the remaining half, place one artichoke heart on top of each crostini. If they’re particularly large, slice them in half. 

  5. Season with salt and pepper. 

Shrimp and roast beef with cream on cucumber rounds

picture of shrimp and roast beef on cucumber cream rounds

Credit: Amanda Blum

Ingredients

  • 12 precooked shrimp, medium to large

  • ¼ pound very rare deli roast beef, medium thickness

  • 1 English cucumber, or 2 small-circumference long cucumbers

  • ¼ cup sour cream

  • ¼ cup mayonnaise

  • Salt and pepper to taste

  • Fresh dill or chives to garnish (optional)

  1. Slice the cucumber into long rounds, cutting diagonally, ¼-½ inch thick. Lay out the cucumber rounds on your serving dish. You should aim for 24 rounds, total. 

  2. In a bowl, mix the sour cream and mayonnaise together, combining well. Spoon a small dab of the mixture onto each cucumber round with a spoon. 

  3. Rinse and dry the precooked shrimp by setting them on a dry paper towel. Once dry, season them each with salt and pepper, lightly. 

  4. Place one shrimp atop 12 of the cucumber rounds. On the remaining 12 rounds, place half of a folded piece of roast beef. 

  5. You can garnish each with a chive or two, or a sprig of dill. 

These appetizers can satisfy every possible kind of guest—and all are finger food, requiring nothing more than a napkin.


Source: LifeHacker – These Fancy Appetizers Are Dead Simple to Make

These Are The Best Ways to Save Money When Renting a Car

The holiday travel season is in full swing and more people are hitting the roads than ever, so if you haven’t already reserved your own rental car, it’s time to do so.

We’ve written before about why you should book your rental car early to lock in your rate, because you can (usually) cancel and rebook with no penalty if prices drop. But regardless of when you reserve and how rates fluctuate, there are a number of strategies for saving money on both base rates and fees (such as upcharges for young or additional drivers) when you book so you don’t wind up blowing your whole travel budget on your rental car.

Shop around for the cheapest rate—and get creative about it

You should obviously compare prices across rental companies to get the cheapest option, especially if you aren’t a member of any loyalty programs, and include rental car alternatives like Turo and Getaround. AutoSlash tracks rental car rates—for free—so you can set up an alert for your reservation.

But go one step further than just comparing companies. your rental company has multiple locations in your area—both in-town and at the airport, for example—check for price differences if you pick up and drop off at one versus another. Downtown pickup is cheaper on average than airport locations, according to NerdWallet. However, you should also factor in convenience (taking a rideshare to a location further away could offset any savings) and business hours, as well as available inventory and one-way fees if you pick up at one location and drop off at another.

Sign up for a membership club with an auto discount

AAA is perhaps the best-known auto club to offer car rental discounts, but there are a handful of membership programs with similar perks:

  • AARP: up to 30% off base rates

  • BJ’s: up to 30% off base rates

  • Costco: up to 30% off base fares

  • USAA: up to 25% off

  • Sam’s Club: up to 25% off

Each of the above contracts with certain rental car companies to offer discounts to their members, so if you prefer a specific provider, you should check the specifics before joining. Note that other than USAA (which offers membership only to military service members and their families), these clubs have fees to join that range from $12 to $110, and you may have to book your rental through the club’s portal to take advantage of your discount.

But if you use this perk (and others) often, the money you save could quickly offset the price of admission.

Book with your travel credit card

As The Points Guy lays out, there are a handful of travel credit cards—the Chase Sapphire Reserve, The Platinum Card from American Express, and the United Club Infinite Card, for example—that have solid rental car benefits, such as discounts, waived fees, free upgrades, and priority service.

Another potential perk of using a travel credit card to book your rental is that insurance coverage such as damage waivers may be included, so you don’t have to purchase costly coverage from the rental company or file a claim with your personal insurance in the event of a collision. (Obviously, you should check what’s covered with your card before declining any additional insurance options.)

Go through your travel loyalty program

Hotel and airline loyalty program members may be able to score rental car discounts with partner companies and earn bonus points or miles on the booking. For example, Alaska Air offers 35% off Avis and Budget rentals and up to 1,250 miles for its Mileage Plan customers who use their membership number when booking, while Marriott has a partnership with Hertz to offer discounts to Bonvoy members.

If you use rental cars frequently and/or have a preference for a certain provider, you may want to consider joining their rewards program, which can earn you points that can be redeemed for rate discounts and upgrades.

Use your company or school perks

Ask your employer about a corporate code for rental car discounts (just be sure you understand any restrictions, such as using it for personal vs. business travel). Similarly, some universities have partnerships with rental companies to offer discounts and perks to students and alumni. Union members may also have access to car rental benefits through UnionPlus.

Note that you may have to show proof of employment, enrollment, or membership to qualify for your discount.


Source: LifeHacker – These Are The Best Ways to Save Money When Renting a Car

You Can Finally Change the iPhone's Default Notification Sounds and Haptics

The iPhone’s notification sound is iconic at this point. While you’ve had the option to change the alert sound for notifications like messages, incoming emails, and reminders, as well as certain third-party apps, Apple never let us change the default alert sound for other notifications. That chime is arguably almost as strong as the iPhone brand itself, much like the Windows XP Bliss wallpaper or the Mac boot up sound.

In any case, Apple finally letting go of that legacy, and we’re all better for it. In the fourth public beta for iOS 17.2, Apple added a brand new section for changing the default alerts sound. While the feature is currently in testing, the iOS 17.2 should be available for the general audience in a matter of weeks. If you’re curious, you can install the public beta, without even installing a new profile.

How to change the default alert tone on your iPhone

Once your iPhone is updated, go to Settings > Sounds & Haptics to find the brand new Default Alerts at the bottom of the list. Here, you can change the sound to any of the text tones, new or classic.

While you’re here, you might also want to change the default haptic feedback. iOS 17 changed the haptic alerts, and there was no way to go back. With the iOS 17.2 update, Apple is letting you customize the haptics as well, so you can go back to how it used to be, or choose the haptic feedback level that works best for you.


Source: LifeHacker – You Can Finally Change the iPhone’s Default Notification Sounds and Haptics

These Unusual Cordless Tools Are Surprisingly Useful for Your DIY Projects

As cordless tools become more popular, the variety of tools available keeps expanding. Once confined to drills, the cordless assortment of options has increased dramatically, as more and more tools have untethered themselves from extension cords. Here are some of the coolest and weirdest tools that are both odd and surprisingly useful.

Cool cordless saws

For DIY masters, there’s nothing more fun than a new saw. Since many tool sets already include a jigsaw or a circular saw, here are some more interesting saws to add to your collection.

  • This Milwaukee Fuel mini chainsaw that runs on 18v batteries is great for pruning, cutting up small firewood, or those adventurous DIYers who like to do chainsaw carving. Because it’s smaller, it doesn’t pack the same punch as a full-sized chainsaw, and you need to be careful to keep clear of the blade—but it sure is fun!

  • The Makita 18v cut out saw is great for making smaller, more precise cuts. Using a small rotating bit, the cut-out saw will work in places that larger saws, even a jig saw, can’t go. Although this saw is great for making smaller, more precise cuts, the blade isn’t designed to handle thicker, more heavy-duty material, so keep that in mind.

  • If you do metal work, a band saw is indispensable. The DeWalt portable 20 volt band saw will do light- to medium-duty metal cutting on the go and is great for jobs where stretching out an extension cord is difficult or impossible. The saw is unmounted, so a steady hand is required, and the saw can only cut up to a 2 ½ inch diameter, but it packs a punch for a small tool.

Cordless tools for working on your car

For vehicle enthusiasts, the trickiest part of getting projects done is getting power to where you’re working. If you don’t have a garage or an outdoor outlet, or if you need a tool on the go for roadside repairs, here are some cordless options that will make things a lot easier.

  • The DeWalt portable 20 volt tire inflator can provide enough air pressure to inflate a tire on the roadside anywhere. It’s a good idea to have an emergency option for flat tires in areas where roadside assistance might not be available. The tire inflator also has a gauge and an automatic shutoff to prevent overfilling the tires. This tool weighs less than three pounds and will fill all four tires on one battery, but will likely need to be charged after that. For higher-pressure tires (above 70 PSI) it might not quite have the juice to get the job done, but for regular car tires, it will work well.

  • For getting your vehicle all shined up, the Ryobi 18 volt buffer is a handy tool. Since it’s cordless, you can use it anywhere without dragging the extension cord along, and it will polish up your wax job to a glossy finish. The battery will last about two hours, so it will work on one charge for a medium-sized vehicle, but after that, it will need a charge.

  • The Milwaukee cordless impact wrench is a good tool for getting nuts and bolts securely fastened or for getting them unstuck. It’s a little more powerful than a regular impact driver and is specifically designed for driving nuts. The impact-assisted driver helps give you more power when you’re using it on stubborn nuts and bolts. This driver has a ⅜ inch connector for sockets and is good for mid-duty use on vehicles or other projects.

Small and precise jobs

For smaller, more fiddly projects, there are some really interesting cordless options out there.

  • Smaller projects where adhesives play a role can always benefit from a hot glue gun. Ryobi has you covered for crafty or small scale home projects with their cordless glue gun. This tool is compatible with a Ryobi one battery system and has about a three and a half hour run time before needing to be recharged.

  • The DeWalt heat gun is great for using heat shrink on wiring projects, drying or removing paint, taking off old bumper stickers, or shaping PVC. It has multiple attachments for different applications and also has variable temperature settings up to 990 degrees. The battery only lasts about 45 minutes on this tool, though, so having a spare battery for larger projects is a good idea. 

  • The Ryobi cordless rotary tool has a flexible shaft that allows for maximum mobility when cutting, polishing, or grinding. It’s compatible with a foot pedal to keep your hands free for controlling the tool, and it comes with 40 bits as well. Since this tool is small, it’s best adapted for small woodworking or crafting—it won’t work well for larger projects.


Source: LifeHacker – These Unusual Cordless Tools Are Surprisingly Useful for Your DIY Projects

These Are the Best Holiday Gifts for Creative Kids

If your kids are anything like mine, they love exploring their creative, artistic sides—that is, until a screen comes on. But it doesn’t have to be this way: There are all kind of toys and games available that will effectively lure them from the siren song of their iPads.

If you’re looking for a gift that will stimulate your child’s brain instead of straining their eyes, we’ve compiled a list of presents that will get your kid using their imaginations and having fun, to boot.

Learn to Mix & Spin DJ Pad

Check out the beats while your toddler revolves it on this portable turntable with an 18-key synth, sound effects, and the ability to create hip-hop fills like the DJ at your favorite club (or the one you went to in college).

Resources Building Blocks

If your LEGO budget is running low, the 72 wooden pieces in this set, inspired by nature, offer a natural alternative to the expensive plastic bricks your creative kid uses. But don’t worry—they’ll probably still find a way to create a robot bent on destroying the world. 

Art-chitect Home Model Building Kit

Ever since I took my oldest son to a Frank Lloyd Wright house, he’s been obsessed with design and architecture. This set has everything he needs to bring his ideas to life, from the walls required to model his 3-D home to floor plan tracing sheets. 

Robot Building Toy

When your kid puts together a LEGO set, there isn’t much they can do with it after building is complete. With this 635-piece toy, you have a remote-controlled device that (hopefully) won’t get smashed to bits once it is in motion. 

The Woobles Easy Peasy Beginner Bundle Crochet Kit 

Chances are your child wants a Squishmallow this year for the holidays. Now they can crochet their own cute, fluffy friend. One Lifehacker editor can’t recommend these enough for DIY-obsessed older kids—they include everything needed to stitch these animals together, including a crochet hook.

Illustory Book Making Kit

The one thing I love about Dav Pilkey’s collection of books (Captain Underpants and DogMan series) is that they encourage readers to write their own stories. With this gift, once your kid is done putting pen to paper, they can send in their masterpiece and will have a professionally printed hardcover book in a few weeks. 

Create Your Own Video Game Set

Kids can create and play their own 8-bit games on this Game Boy-like device. It works with the help of a web-based visual editor that will familiarize them with programming languages like JavaScript and Python. It also functions as a smartwatch and pedometer. 

Arts and Crafts Vault

If making friendship bracelets for the Taylor Swift tour whetted your child’s appetite for making their own jewelry, this kit has over 1000 pieces to get their next project off the ground. It includes everything from pipe cleaners to googly eyes!

Diary of an Awesome Kid

Even the great authors kept a journal. Give your kid a head start with this one, which has the best title and can be used as a diary, planner, or even a canvas for their illustrations. It comes in a variety of colors.

KidiZoom Creator Cam

Is your kid a movie fiend? Help them evolve from consumer to creator with this HD video camera designed specifically for the younger set. Kids can run away from dinosaurs, visit space, or put on their own newscasts with the included green screen. A selfie stick and tripod are included. 

Buddha Board

This painting board is usually marketed toward adults, but it’s also the perfect gift for your creative kid. You paint with water using a bamboo brush, but the masterpiece fades as it dries, returning to a blank slate. Adults see Zen; parents see a mess-free way for kids to express themselves. 

Kids Create Absurdity Card Game

This stocking stuffer has been described as Cards Against Humanity for the grade school set, and your entire family can have some fun together during winter break. 

Help your kid explore their creativity with one of these gifts:


Source: LifeHacker – These Are the Best Holiday Gifts for Creative Kids

Use This Infrared Thermometer to Find Where Heat Is Escaping Your House

When it’s cold outside and you’re paying to heat your home, you don’t want to feel a chill breeze whipping through your living room—especially if its source is a mystery. Perhaps you’ve already insulated your electrical outlets, installed weatherstripping around your windows and doors, and caulked all the holes, gaps, and cracks you could find, but still can’t detect the draft.

While you can always try using a candle to locate the air leaks, that’s not exactly the most precise method. Instead, why not use an infrared thermometer? Not the kind you point at a person’s forehead to take their temperature, but one designed for this and other household tasks. Here’s why it’s worth investing in an infrared thermometer, and a few of our favorite models.

Household uses for infrared thermometers

The infrared thermometers used for finding air leaks look similar to the ones used for medical purposes, but typically are orange and black, or yellow and black, instead of white, gray, or light blue. This is probably a good time to mention that household infrared thermometers shouldn’t be used to take a person’s temperature.

Apart from that, these digital devices come in handy for a variety of household tasks, including but not limited to:

  • Locating air leaks and drafts

  • Checking the temperature of walls, ceilings, and other areas in your home to see if they need to be better insulated 

  • Measuring the temperature of the wall surrounding a circuit breaker box or electrical outlet if you smell or otherwise suspect a potential electrical fire, or faulty wiring

  • Cooking, baking, grilling, frying, and other aspect of food preparation 

  • Automotive temperature measurement 

  • Checking the temperature of metal slides and/or other playground equipment before a child uses it on a hot day

  • Checking the temperature of the pavement in the summer to see if it’s too hot for your dog’s paws

What to look for when purchasing an infrared thermometer

It’s not hard to find a solid infrared thermometer for your basic household needs for between $15 and $25—or even less when they’re on sale. These tend to be easy to use and read. The more bells and whistles one has, the less straightforward operating it becomes, so unless you’re going to use it for a specific purpose that requires a special feature, simpler models are usually your best bet.

There are, however, some differences among the entry-level infrared thermometers that you may want to consider before making your purchase. For instance:

  • Temperature range

  • Adjustable emissivity (to accurately measure temperatures on a variety of different surfaces)

  • Water and/or dust resistance 

  • Rechargeable (usually via USB cable) versus battery operated

The best infrared thermometers for household tasks

To help you take some of the guesswork out of making a purchase, here are some of our favorite infrared thermometers:

Best overall

Inkbird Rechargeable Infrared Thermometer ($24.99)

Though rechargeable infrared thermometers cost slightly more than those that are battery operated; it’s worth it not to have to deal with or pay for AA or AAA batteries, and simply plug in a USB cable instead. Fully charged, the thermometer can last up to 12 hours with backlight, and has a range of -58℉ to 1022℉(-50℃ to 550℃). It’s also easy to operate, with a single button controlling all the settings and functions.

Best budget option

Etekcity Infrared Thermometer Temperature Gun ($14.99)

This solid, basic option gets the job done. It’s battery operated, but the thermometer comes with two AAA batteries, so that’s convenient. It’s temperature range of -58° to 842°F (-50° to 450°C) isn’t as wide as other models, but it should be sufficient for most household uses.

Best for cooking

SOVARCATE Infrared Thermometer ($18.69)

The ability to adjust this thermometer’s emissivity makes it easy to get accurate temperature readings on hot oil, ice, and any other food or cooking surface—as does a temperature range of -58°F to 1112°F(-50°C to 600°C). In addition to two AAA batteries, a meat thermometer with a stainless steel probe is included with the purchase.

Best automotive option

ThermoPro TP30 Infrared Thermometer Gun ($19.99)

This versatile thermometer can be used for any household tasks—including in the garage. The display retains the minimum, maximum, and average temperature of the last scan, which is especially helpful in automotive work, like checking engine temperatures.

Best for construction

Ketotek Digital Infrared Thermometer Temperature Gun ($21.99)

This heavy-duty infrared thermometer with a scratch-resistant UV coating can withstand more than the usual wear-and-tear, while still retaining the sensitivity necessary for cooking.


Source: LifeHacker – Use This Infrared Thermometer to Find Where Heat Is Escaping Your House

Everything You Need to Know About Grok, Elon Musk's Answer to ChatGPT

AI chatbots are suddenly a dime a dozen. Beyond the massively successful and overhyped options (like OpenAI’s ChatGPT and Google’s Bard), now Elon Musk’s xAI is getting on on the action. Musk’s AI company has released the first version of Grok, an AI chatbot that the SpaceX leader heralds as a more humorous and free-thought version of ChatGPT. But what exactly is Grok, is it worth paying to use it?

What is Grok?

According to xAI’s website, Grok is an “AI modeled after the Hitchhikers Guide to the Galaxy.” The Hitchhiker’s Guide to the Galaxy is, of course, an old sci-fi novel (slash radio drama slash TV show slash movie), but the name “Grok” appears to be drawn from a different old sci-fi novel, Robert Heinlein’s Stranger in a Strange Land. In that book, “grok” is a Martian word with a definition roughly along the lines of “to know something (or someone) on a truly intimate level.”

The company says Grok is intended to be used answer almost anything, while also being able to suggest some questions users can ask it. Additionally, the company says that Grok is designed to answer with “a bit of wit” and that the AI has a “rebellious streak,” and warns not to use it if you “hate humor.” Sure. Elon Musk is, after all, famously hilarious.

The product is still in very early beta, and currently it only has around four to five months of training. As such, xAI says that Grok should improve exponentially over the coming months. But how is it right now?

Is Grok good?

Grok is…not the worst AI chatbot that has been released in recent months, and based on how hard Elon Musk likes to push his companies to iterate, it is likely we’ll see some degree of “improvement” in the service in the months going forward. Whether or not that improvement means making the bot more like its premium competitors—ChatGPT and Claude—remains to be seen.

As it stands, Grok is probably on par with what we saw with ChatGPT’s earliest iterations, though xAI continues to claim the service will improve rapidly as it is trained on the content and information freely available on X, formerly known as Twitter, which Elon Musk also owns. (X/Twitter is also, after all, famously filled with accurate information). So far, the company says the chatbot it has shown substantial improvements since Grok-0, the very first iteration of the large language model.

How accurate is Grok?

Because Grok is designed to respond with “wit” and to be “a bit rebellious,” the chatbot is a good deal different than OpenAI’s ChatGPT, or the even more ethically restricted Claude, from Anthropic. According to xAI, Grok was more than 60% accurate across three of the four tests that the company ran it through. However, it’s unclear if that information has been tested and verified by independent parties.

Hallucinations—that is, instances of an AI making up facts or answers—are common with chatbots like Grok. And while Grok is still being trained, as noted, the model learns based on of all the information posted on X, which means it has license to leaf every dumb post sent out by millions of users, including all the ones full of misinformation and bad data. As such, I’d recommend double checking everything Grok tells you, because you never know what kind of “fact” it’s going to pull from a random user of that service.

How much does Grok cost to use?

The Grok waitlist is currently only open to Premium+ subscribers on X. That means you will need to become a verified user on the service, which costs roughly $16 a month. Sure, it’s cheaper than a subscription to ChatGPT or Claude—but consider that both those options have had more training, and also offer higher ethical restrictions. Any intensive use of AI chatbots is probably best saved for those two platforms, or others like them. And as I said, you can’t even try it yet—you’re only able to apply for the waitlist right now—so that monthly payment doesn’t exactly guarantee you access.

Doubts aside, Grok isn’t necessarily a bad thing, and more than any AI chatbot is. The more competition in the AI space, the more every company will have to strive to make their products better, which will hopefully be a win for consumers like you and me. If you’re debating trying out an AI chatbot, though, I’d recommend giving Grok some more time to build up its features.

The fact that Grok can pull data from X is intriguing in theory, but there’s so much dumb data, hateful content, and straight-up misinformation on there, the answers you get from the chatbot might not be be worth taking seriously.


Source: LifeHacker – Everything You Need to Know About Grok, Elon Musk’s Answer to ChatGPT

How to Use Audio Message Transcriptions in iOS 17

The latest major software update for iPhone, iOS 17, ushered in a number of new features including Contact Posters and StandBy. One feature that might have been overlooked is the addition of audio message transcriptions built into iMessage.

Audio messages have been a part of iMessage for a number of years and are a quick and easy way to send info to someone on the fly, or when a message is too long to type out manually. With the new transcription feature in iOS 17, you’ll automatically see a written version of the audio message below the waveform. This is great for those moments when you’re in a loud environment and can’t listen to their audio message right away, but you want to get a quick impression of what it’s about. You know, in case it’s something serious that you really should make time for.

How to use audio message transcriptions in iOS 17

To see this feature in action, try sending an audio message. To do this, open your Messages and open or start a new conversation. Next to where you’d type out your message, you should see a “+” icon. Tapping on that icon will open a pop-up menu that allows you to send photos, GIFs, live locations, and—drum roll—audio messages. Once you tap the audio icon, it’ll automatically start recording your message. (If you don’t like where the audio message option shows up in the new menu, you can rearrange it by tapping and holding, then moving it wherever you like.)

Once you’re done recording and send the audio message, the audio transcript will appear below the waveform. For longer audio messages, the transcript might get cut off behind a “Show More option.” Tap that to expand the audio transcription and read the message in full.

An iOS screenshot showing a transcription of a short audio message

Credit: Sachin Bahal

If you get a particularly good audio message and want to hang onto it, long-press the audio message and tap “Save to Voice Memos.” Keep in mind that audio message transcriptions are automatically enabled once your iPhone downloads and installs iOS 17. At this time, it’s not possible to disable the feature.


Source: LifeHacker – How to Use Audio Message Transcriptions in iOS 17

Today's NYT Connections Hints (and Answer) for Thursday, November 30, 2023

So many BIRDS today, and yet none of them are what they seem. If you’re looking for the Connections answer for Thursday, November 30, 2023, read on—I’ll share some clues, tips, and strategies, and finally the solutions to all four categories. Along the way, I’ll explain the meanings of the trickier words and we’ll learn how everything fits together. Beware, there are spoilers below for November 30, NYT Connections #172! Read on if you want some hints (and then the answer) to today’s Connections game. 

If you want an easy way to come back to our Connections hints every day, bookmark this page. You can also find our past hints there as well, in case you want to know what you missed in a previous puzzle.

Below, I’ll give you some oblique hints at today’s Connections answers. And farther down the page, I’ll reveal the themes and the answers. Scroll slowly and take just the hints you need!

NYT Connections board for November 30, 2023: COTTAGE, ESCAPE, REBECCA, ROBIN, DUCK, CREAM, GOOSE, SKIRT, STRING, BIRDS, SAY, ROPE, HOBBES, DODGE, NOTORIOUS, WATSON.

Credit: Connections/NYT


Does today’s Connections game require any special knowledge?

Today is a good puzzle for movie buffs. One category relates to movies, and another to famous fictional characters.

Hints for the themes in today’s Connections puzzle

Here are some spoiler-free hints for the groupings in today’s Connections:

  • Yellow category – Get out of the way!

  • Green category – Other possible entries in this group could be PSYCHO and LIFEBOAT. 

  • Blue category – Always the bridesmaid…

  • Purple category – Think dairy.

Does today’s Connections game involve any wordplay?

There’s a fill-in-the-blank with three nouns and a verb; they’re trying to be cute.

Ready to hear the answers? Keep scrolling if you want a little more help.


BEWARE: Spoilers follow for today’s Connections puzzle!

We’re about to give away some of the answers. Scroll slowly if you don’t want the whole thing spoiled. (The full solution is a bit further down.)

What are the ambiguous words in today’s Connections?

  • DUCK and GOOSE are both BIRDS, but you’ll find those three words in different categories today. 

  • HOBBES is the philosopher who famously said that life without government would be “solitary, poor, nasty, brutish, and short.” HOBBES is also the stuffed tiger in the comic strip Calvin and HOBBES. 

  • A COTTAGE is a little house in a bucolic setting. It is also a much-maligned member of the cheese family. 

What are the categories in today’s Connections?

  • Yellow: AVOID

  • Green: HITCHCOCK MOVIES

  • Blue: SIDEKICKS

  • Purple: ____ CHEESE

DOUBLE BEWARE: THE SOLUTION IS BELOW

Ready to learn the answers to today’s Connections puzzle? I give them all away below.

What are the yellow words in today’s Connections?

The yellow grouping is considered to be the most straightforward. The theme for today’s yellow group is AVOID and the words are: DODGE, DUCK, ESCAPE, SKIRT.

What are the green words in today’s Connections?

The green grouping is supposed to be the second-easiest. The theme for today’s green category is HITCHCOCK MOVIES and the words are: BIRDS, NOTORIOUS, REBECCA, ROPE.

What are the blue words in today’s Connections?

The blue grouping is the second-hardest. The theme for today’s blue category is SIDEKICKS and the words are: GOOSE, HOBBES, ROBIN, WATSON.

What are the purple words in today’s Connections?

The purple grouping is considered to be the hardest. The theme for today’s purple category is ____ CHEESE and the words are: COTTAGE, CREAM, SAY, STRING.

How I solved today’s Connections

The first thing I pick out is that ROBIN, HOBBES, and WATSON are all sidekicks (to Batman, Calvin, and Holmes, of course). But I’m not sure about a fourth, so it’s time to move on. 

I see the cheeses next: COTTAGE, CREAM, STRING, and SAY. (“Say cheese!”) 🟪 Then we have SKIRT, ESCAPE, DODGE, and DUCK. 🟨 

I’m tempted to use REBECCA as the fourth sidekick, just because she’s a name, but then I remember the DUCK and GOOSE series of books. That’s it! 🟦 I have absolutely no clue what unites BIRDS, NOTORIOUS, ROPE, and REBECCA, but they’re Hitchcock movies. 🟩

Connections 
Puzzle #172
🟪🟪🟪🟪
🟨🟨🟨🟨
🟦🟦🟦🟦
🟩🟩🟩🟩

How to play Connections

I have a full guide to playing Connections, but here’s a refresher on the rules:

First, find the Connections game either on the New York Times website or in their Crossword app. You’ll see a game board with 16 tiles, each with one word or phrase. Your job is to select a group of four tiles that have something in common. Often they are all the same type of thing (for example: RAIN, SLEET, HAIL, and SNOW are all types of wet weather) but sometimes there is wordplay involved (for example, BUCKET, GUEST, TOP TEN, and WISH are all types of lists: bucket list, guest list, and so on).

Select four items and hit the Submit button. If you guessed correctly, the category and color will be revealed. (Yellow is easiest, followed by green, then blue, then purple.) If your guess was incorrect, you’ll get a chance to try again.

You win when you’ve correctly identified all four groups. But if you make four mistakes before you finish, the game ends and the answers are revealed.

How to win Connections

The most important thing to know to win Connections is that the groupings are designed to be tricky. Expect to see overlapping groups. For example, one puzzle seemed to include six breakfast foods: BACON, EGG, PANCAKE, OMELET, WAFFLE, and CEREAL. But BACON turned out to be part of a group of painters along with CLOSE, MUNCH, and WHISTLER, and EGG was in a group of things that come by the dozen (along with JUROR, ROSE, and MONTH). So don’t hit “submit” until you’ve confirmed that your group of four contains only those four things.

If you’re stuck, another strategy is to look at the words that seem to have no connection to the others. If all that comes to mind when you see WHISTLER is the painting nicknamed “Whistler’s Mother,” you might be on to something. When I solved that one, I ended up googling whether there was a painter named Close, because Close didn’t fit any of the obvious themes, either.

Another way to win when you’re stuck is, obviously, to read a few helpful hints–which is why we share these pointers every day. Check back tomorrow for the next puzzle!


Source: LifeHacker – Today’s NYT Connections Hints (and Answer) for Thursday, November 30, 2023

Your Meat and Cheese Board Needs a Glow-up

I would have resisted a new style of meat and cheese board in the past. Even one year ago, I was digging in my heels when my partner suggested I change the way I made my holiday appetizer spread. But after a year of taste tests, I’m finally ready. It’s time to reconsider the ways of the old meat and cheese board. You don’t have to give it all up, but this year swap out that second wheel of brie or the bowl of water crackers for a more daring and delicious option.

The ultimate veggie chips

A purple bag of vegetable chips.

Credit: Photo courtesy of Confetti Snacks.

While many vegetable chips in the grocery stores are fried, these bright and punchy veggies from Confetti Snacks are sliced thick and prepared without frying, but in a low heat cooking process that preserves their color and flavor. Each bag contains a mixture of carrots, whole okra, shiitake mushrooms, radishes, and purple sweet potato. Each veggie is as crunchy as the last, and you can buy them accented in three flavors: teriyaki BBQ, tandoori curry, and summer truffle. Once again, I love all the flavors so I recommend buying one of each. Made from upcycled veggies that are too unsightly to sell in grocery stores, you can feel good about reducing waste and putting these ugly beauties on your cheese board.


Try this product:


Irresistible mushroom chips

Whole shiitake mushrooms are baked at a low heat so they gently dry out. This results in a snack so completely crunchy, it’s hard to believe it was once a squishy mushroom. You can buy a bagful of plain mushroom chips, but Confetti Snacks also offers versions dusted in seasonings: black truffle and green curry. You can’t make a wrong choice, I love them both. Serve these mushroom chips in a bowl between the sliced salami and Camembert. 


Try these products:


Wagyu shaved beef

Beef on a charcuterie board.

Credit: Photo courtesy of KC Cattle Company

There are a lot of high-quality sliced meats adorning cheese boards already. I was perfectly happy noshing away on black pepper salami and prosciutto di Parma when wagyu shaved beef rolled in and ruined everything for me. Now no meat spread will be complete without it. KC Cattle Company offers pre-sliced peppered wagyu that is flavorful, juicy, and impossibly tender. A half-pound of this beautiful charcuterie will run you $9.99 on their website, and after one bite, you’ll realize that’s a steal. Do yourself a favor and slice the slices in half or in quarters before you build the board. Hopefully then every guest will nab a piece before it’s gone.


Try this product:


Hickory smoked cheese sticks

Smoked cheese sticks on a white plate.

Credit: Robert Sils/Shutterstock

Wheels and large wedges of cheese are tempting to put on a cheese board because of their easy preparation. You just drop them on the board and let the guests hack them apart. While that will never lose its allure, consider the smoked cheese stick as an option. It has the same ease for the host—unpackage and place—but with the added benefit of tidiness and ease for the guest. The sticks are already individual, there’s no need for knives or toothpicks, and no smears and gooey bits left behind. I like smoked cheese sticks because they’re an upgrade to the kind most people are used to.


Try these products:


Flavored edamame crunchies

Freshly steamed edamame is delicious, but dry roasted edamame is stellar. I’m a fan of the crunchy gems from The Only Bean. They’re absolutely irresistible; and luckily, with their low net carb count and sizable protein content, resisting isn’t necessary. The Only Bean offers their roasted edamame in three flavors: buffalo, ranch, and sriracha. It was hard for me to choose a favorite but I think I ate the buffalo just a tad faster than the other two. A four-ounce bag might not seem like a lot, but edamame weighs nearly nothing so each bag lasts a while. Serve a bowl full of these to replace nuts on your board, or nestled amongst the hard, aged cheeses.


Try these products:


Parmesan crisps 

Parmesan cheese crisps on a slate board.

Credit: Brent Hofacker/Shutterstock

You might have noticed I’m leaning toward texture this year. Can you blame me? With so many soft components on the average cheese board—cheeses, fruits, meats, breads—I wind up longing for something crunchy to wake up my senses. Crackers deliver crunch, but what if your crackers were also cheese? Parmesan cheese crisps are just the thing. Cheese is simply cooked until it becomes crunchy just like a cracker. This leap-frogs the need for a wheat cracker, and streamlines your meat and cheese snack. You can make your own parmesan crisps, or you can buy them premade and ready to chomp.


Try these products:


Source: LifeHacker – Your Meat and Cheese Board Needs a Glow-up

A Reminder That Trusting Everything to Cloud Storage Can Screw You Over

So much of our digital lives now exist solely in the cloud. Companies like Apple, Google, and Microsoft make it all too easy to upload our important files to cloud storage from the moment we set up our devices.

On one hand, that’s a good thing: If something happens to your phone, tablet, or laptop, that doesn’t mean you lose all your messages, photos, and documents—assuming all that info is properly backed up to the cloud. When you get your device fixed or replaced, you can sign back into your account and pull all that data down from the cloud without losing anything in the transition. In fact, I suspect that our collective data has never been more secured than it is today, thanks to the abundance and simplicity of cloud storage.

However, that’s not to say that our backup situation is perfect—far from it. Relying solely on the cloud for data storage can have disastrous consequences.

Google recently lost up to six months’ worth of data for some Drive users

You can see those consequences in play this week: Unfortunately, some Google Drive users are reporting missing files dating back to May 2023. Google has publicly acknowledged the issue and is investigating, but that investigation won’t necessarily bring back any of the files that have vanished from these users’ Google Drive accounts. (I guess they’d just have to take comfort in knowing that Google figured out why it happened?)

For your protection, one Google Drive team member did warn users not to click disconnect account on Google Drive for desktop, and to avoid deleting or moving data in the following folders:

  • Windows: %USERPROFILE%AppDataLocalGoogleDriveFS

  • macOS: ~/Library/Application Support/Google/DriveFS 

…but that’s not exactly a big comfort.

To be clear, this event is not common. Companies like Google, Apple, and Microsoft host a lot of data from millions, if not billions, of users, without regularly losing any of it. Still, if it can happen once, it can happen again. Perhaps Apple announces next year that iCloud had an issue, and three months worth of photo uploads are now gone. Maybe Microsoft loses OneDrive user’s data next October. You can’t assume these services will be infallible forever.

That isn’t to say don’t use them. I use iCloud for just about everything I do in the Apple ecosystem. However, for anything important, you need to make sure you have a secondary backup in case something goes wrong.

That’s what’s likely playing out with these affected Google Drive users right now: Some of them will have used their Google Drive accounts as a secondary backup for their files, keeping another backup of them stored on a hard drive or another cloud service. They’ll be frustrated, but not panicked, as the lost files will still be in this alternate location. Unfortunately, any users that added these files to Google Drive and deleted them from their computer (or created them in Drive and never made a backup) are likely very unhappy this week.

How to securely back up your files

So let’s talk about a secure backup situation looks like. Say you have an archive of important documents stored on your computer. They only exist on your computer, so if your SSD goes belly-up, those files are toast. So, what can you do? One easy solution is to add a copy of these files to a secondary location, whether that’s an external hard drive or cloud storage. Now, these files exist in two places separate from each other. If the SSD breaks, they’re in the cloud. If the cloud glitches out, they’re on your computer. If the files are super important, making additional backups ensures that should an unlikely disaster strike, you’ll still have access. Having files stored in at least two separate locations is usually enough protection for most of us.

But let’s say your computer is running out of storage, and you don’t want to store the files locally anymore. Don’t simply dump them on the cloud or on an external SSD, delete them from your PC, and call it a day—one backup is no backup, after all. You’ll want to copy them to another cloud storage or external storage solution to ensure there are at least two copies of those files somewhere.

Be careful with automated cloud storage solutions

Where this starts to get a bit tricky is when using automated cloud storage options like iCloud. Apple makes it easy to connect all your data to iCloud so you never really need to think about constantly backing things up. When you take a photo, it stores on your iPhone and iCloud: When you send a message, same thing.

While you technically have two files in two separate locations, a service like iCloud is tied to your iPhone. If you delete a message from your iPhone, it helpfully deletes that text from the cloud too. If you delete a photo from your library, it gets deleted from iCloud (after a 30 day countdown, anyway). That’s by design, and it means your files aren’t totally secure against data loss.

What I like to do is rely on cloud storage solutions like iCloud for general backing up purposes (if I lose my iPhone, signing into a new one with my Apple ID brings all my data back), while also making a full backup of my devices to an external source. You can make a backup of your iPhone to iTunes or Finder on your computer, for example, while still having all your data stored in iCloud. That way, if you accidentally delete a thread of messages from your iPhone and iCloud at once, you can restore from your backup to get them back. The same goes for missing photos, notes, contacts, or anything else that gets lost.

While you can rely on full cloud backups for a similar approach, they tend to back up automatically and overwrite the previous backup, so your chances of restoring to a backup that also is missing the data you’re looking for is high. The tradeoff with external backups, such as to a computer, is they’re less frequent, so you may miss new messages and photos that were added since the last backup. It’s a balancing act, but the point is to protect your data in as many ways as possible.

Photos are probably the thing I worry about losing most, and would be devastated if something happened to Apple’s servers and I lost every photo I’ve ever taken with mu iPhone. So on my Mac, I choose the “Download Originals to this Mac” option in Photos’ settings under iCloud. That way, my Mac always has a backup of the full-res photos and videos in my library, while my other devices can pull from the cloud as needed. Should something happen to the photos on Apple’s end, my Mac has all my media saved securely.

This conversation can get a little in the weeds, especially as you start to focus on specific services. (OneDrive, Google Drive, iCloud, etc.) But the general rule of thumb for all backups is simple: You need to keep all of your important files stored in at least two separate locations. So long as you have another source to pull your files from, you can safely weather any disaster—digital or physical—that befalls your data.


Source: LifeHacker – A Reminder That Trusting Everything to Cloud Storage Can Screw You Over

How to Print Documents From an Android Phone

We spend a lot of time on our phones, which means we’re always looking for ways to make our lives just a little bit easier. If you’re anything like me, then you’ve probably done your fair share of document editing while on the go using a tablet or a phone. Well, if you’re working off an Android phone, you can actually forego the need to email the document to yourself and just print it right off your phone.

How to print a document off an Android phone or tablet

In recent years, it’s become really easy to print documents from your phone, iPhones included. In fact, most apps offer a built-in way to print directly from the app. If the app doesn’t have a built-in printing option, you can always print from the File Manager on your phone. All you need is your phone, a document you need to print, and a printer that has Bluetooth capabilities (which is pretty much every printer released in the last five years or so).

The easiest way to print a document from your Android phone is to do it through Google Drive. Chances are, you’re probably already storing your files in Google Drive, and if you’re editing them on your device, then you’re probably using Google Docs, Google Slides, or Google Sheets.

  • Make your way to the Google Drive app, and then find the document you want to print and open it.

  • Now, look for the hamburger menu, which is usually symbolized by three horizontal lines on top of each other. (Some phones might offer three dots instead.) Tap on this to open the menu.

  • Scroll down the list until you find the Print option and tap it.

  • Next, you’ll need to select your printer from the dropdown list that appears, and then tap Print. Voila: You’ve now learned how to print your document on Android phones and tablets.

Printing from the file manager on your phone is just as easy, too. Find the document, open it, and then select the Print option from the menu.


Source: LifeHacker – How to Print Documents From an Android Phone

The Best White Noise Machine for Every Purpose

White noise can be a powerful tool for helping you fall asleep, but not all devices that produce white noise are built to relax you. I once opened my Spotify Wrapped to learn that my top song for the year was something like “Box Fan White Noise Long Loop.” Devastated by the hijacking of my annual music stats, that I started investigating white noise machines.

While I landed on buying a real box fan (for the dual purpose of generating sound and keeping me cool), there are loads of dedicated white noise machines designed simply to produce consistent background noise. And while white noise can be great for helping you fall asleep, research reveals it can also help you focus during waking hours. Here are some of the best white noise machines available, whatever your motivation for buying one.

The best white noise machines for sleeping

Bedtime is where white noise machines really shine. You can opt for a classic one or one with extra features, so here are some options. 

  • A classic white noise machine doesn’t have to be featureless. The Houseby white noise machine ($24.98) has 31 sounds, an auto-off timer, and adjustable volume controls. Reviewers say that in addition to simply looking nice (which is important!), it exceeds expectations by having such a wide variety of sound options. 

  • The LC-dolida sleep mask and white noise machine combo ($18.59) is killer for those of us who want to sleep in darkness and peace. The eye mask fits over your eyes, blocking out light, while speakers near your ears deliver eight different white noise sounds. A two-hour charge yields 10 hours of playback time, but it also comes with an auto-off timer that can be set between 30 and 120 minutes from when you fall asleep. Plus, it has Bluetooth connectivity, in case you’d like to listen to something else before bed for a change.

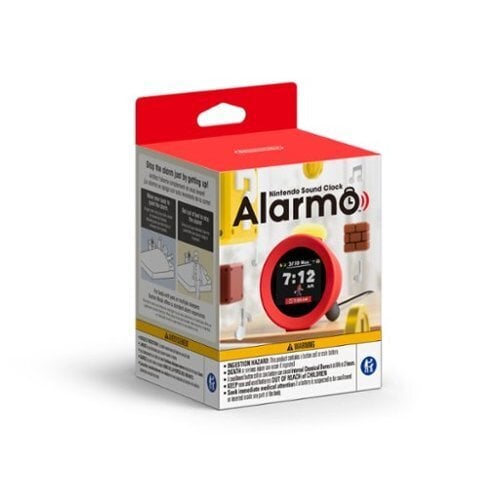
  • Falling asleep peacefully is one thing; waking up is another. The Reacher sound machine ($35.99) handles both, since it’s also a sunrise alarm clock. You can pick white noise like rain or nature sounds, then wake up hours later to a gradual increase of light designed to mimic the sunrise before the alarm kicks in. 


Products to consider:


Best white noise machines for focusing

Whether you want to get work done or study, having a white noise machine around to provide steady sounds can really help. 

  • Try the mini sound machine from Babelio ($18.99) for a white noise machine you can take on the go. Reviewers say the charge lasts a few days, the machine features a variety of sounds, and it’s super easy to travel with, so you can bring it with you anywhere you need to get work done. 

  • The Voraiya light therapy lamp ($89.99) has a white noise machine built in, which makes it a versatile machine. It’s one of those lamps that is supposed to replicate the effects of the sun, boosting your mood, but that brightness is good for studying and working, too—so really, this thing has it all.

  • The LectroFan Micro2 ($34.99) features 11 white noise sounds, but also acts as a Bluetooth speaker, which is helpful if you’re toggling between noise and recorded lectures or YouTube videos. It can even act as a speakerphone for your calls, so you stay in the zone on whatever you’re working on without having to pick up your phone at all.


Products to consider:


Source: LifeHacker – The Best White Noise Machine for Every Purpose

You Can Finally Make Collaborative Apple Music Playlists

No music streaming service is perfect, and most of Apple Music’s biggest weaknesses center around sharing and collaboration. Sure, you can send your playlists to others, but until now, there was no way to create a collaborative playlist on the service. That all changes with iOS 17.2, which Apple is soon to release. If you want to try creating a shared playlist today, you can install the iOS 17.2 public beta. Otherwise, you’ll need to wait for Apple to drop the update in coming weeks. Either way, once you have it installed, you’ll find the option to create Apple Music playlists that you are your friends can perfect together. Here’s how it works.

How to create and use collaborative playlists in Apple Music

Once you’ve updated to iOS 17.2, open any of the playlists you’ve previously created in the app. You’ll notice an icon above the playlist search bar featuring two people. Tap the icon and you’ll see a popover menu with the title ‘Invite Friends to Join.’ This is where you can start inviting people to join your existing playlists.

By default, Apple allows anyone with your playlist link to add or remove songs, and to reorder them. To limit this, enable the Approve Collaborators option. That way, you can check who wants to join your collaborative playlists and approve the people you’d actually like to share music with. You also have an option to edit your name and photo that will appear when working on a playlist. Tap the Edit button next to your name to change this to your liking. Once you’re ready, tap Start Collaboration.

This will open the share sheet allowing you to send an invite link to your friends or family. From there, they’ll be able to tap the link and join your playlist. To manage your playlist in the future (or invite more people), you can hit the people icon up top once again. Here you’ll see the name of your playlist and two options to share an invite—via an invite link (valid for seven days from the time you send it) as well as a QR code that others can scan to quickly join your playlist as a collaborator.

From the same menu, you also have the ability to stop collaboration at any point, and to add or remove collaborators. Apple Music allows you to disable manually approving collaborators as well, if you’re sure only people you know and trust will obtain the link (and thus the ability to join your collaborative playlist).

Once all of this is done, you’ll notice a few changes to your playlist. A profile picture will appear next to all the songs to help identify who added which one. And at the end of the playlist, you’ll see a list of all the collaborators, so you’ll know exactly who to thank for their contributions (assuming they have good taste, of course).


Source: LifeHacker – You Can Finally Make Collaborative Apple Music Playlists

Use the Shaper System to Easily Recall up to 100 Things

Remembering things can be difficult, yes, but there are all kinds strategies to make it easier. One way is by using association, or creating links between unrelated, easy-to-recall concepts or items and the ones you’re struggling to remember. A more advanced version of that is called the Shaper System and once you master it, you can more easily recall up to 100 things.

What is the Shaper System?

The Shaper System was developed by Erol Ozvatan, author of How to Memorize: The Science & Art of Memorizing. The goal of the system is to convert two-digit numbers into shapes that help you make associations, going way above and beyond what the standard number association system of 0 – 9 covers. 

Each number is supposed to look like something. For instance, a zero can be an egg, a three can be a butterfly, and a seven can be a boomerang. Ozvatan has created his own list of images to be associated with every number from 00 to 99; while these are great, go through the list and make sure you really see each of the images in their corresponding numbers. If you don’t, you can use your own image. The goal is to create images and associations that make sense for you

How to use the shapes in the Shaper System

Once you’ve figured out the shapes that work best for you (or think you have a good idea), try practicing with the Shaper System. Practice with a decently long list, like the US states in order of size. Imagine something like this: 

  1. Alaska: If your 00 is represented by two eggs, imagine an ice fisherman eating two eggs.

  2. Texas: If your 01 is a plate and knife, imagine a Texan cutting into some barbecue on a plate.

  3. California: If your 02 is a swan, imagine it walking down Rodeo Drive.

  4. Montana: If your 03 is a rabbit, imagine the bunny admiring the glaciers.

  5. New Mexico: If your 04 is a chopping board and big knife, imagine Bigfoot using it to prepare a meal.

  6. Arizona: If your 05 is a lantern with a handle, imagine someone peering into the Grand Canyon with one, trying to illuminate all the crevices.

  7. Nevada: If your 06 is a golf ball and club, this one’s easy. Imagine someone at Topgolf in Vegas.

  8. Colorado: If your 07 is a megaphone, imagine someone skiing and yelling into one.

  9. Wyoming: If your 08 is a pool ball, imagine someone shooting pool in Jackson Hole.

  10. Oregon: If your 09 is a tennis ball and racket, imagine someone playing tennis in downtown Portland. 

This can go on and on, but only works if you really commit your images and their associations with numbers to your mind first, so create your associations from 00 to 99 before tackling any big lists. 


Source: LifeHacker – Use the Shaper System to Easily Recall up to 100 Things

What to Do When You’re a Financial Late Bloomer

Many people find themselves behind financially in their 30s, 40s, or even later in life. Maybe you’re a financial procrastinator, or you faced setbacks like job loss or health issues that hampered your earnings—or you simply didn’t make finances a priority in your youth. Regardless of the reason, there are steps you can take to improve your money situation, no matter your age.

Review your spending and budget

First, take an honest look at your current financial habits. Document everything you spend for a month. Look for areas where you can cut back, even in small ways. Use the data to make a realistic budget based on your income and essential costs. Having a budget is key to freeing up more to put toward your financial goals. To make your goals more actionable, look into budgeting apps or other tools to automate and remind you of key tasks and deadlines.

Start by rerouting some of your expenses. If you haven’t already, make a list of all the things you spend money on, and consider which non-essential expenses could go to your emergency fund instead.

Start small to build momentum

Tackle just one or two small financial tasks that you’ve been putting off. Build the habit of acting right away on manageable tasks. Getting down on yourself for your money habits can backfire in the form of fear-based decision-making. It can help to zoom out and celebrate your personal finance strengths so you have the confidence to keep making smarter financial decisions down the line. Small wins add up, and you may find your finances aren’t as bad as you think.

Tackle credit card and high interest debt

Next, make a debt payoff plan. List all debts by interest rate and focus on eliminating high rate credit card balances first before moving onto lower rate debts (like cars or student loans). Consider consolidating debts to lower rates where possible. And you should always aim pay off your statement balance in full and on time.

When it comes, specifically, to getting out of debt, you don’t want to live in fear and stay in the dark. Here’s our guide to getting organized enough to pay off your debt.

Focus on saving—even small amounts count

Failure to save and invest early on can mean losing out on years of potential compound growth. Begin saving whatever you can each month. Even $20 or $50 a month is a start towards building saving. Sign up for a high yield online savings account and set up automated transfers from your checking account monthly. Having a dedicated savings makes it easier to leave the money alone and watch it grow with compound interest over time.

Meet with a financial advisor

Consult an advisor like a fee-only certified financial planner to review your unique situation and map out a specific plan toward your monetary goals. An outside expert perspective can help you identify blindspots as well as provide accountability on follow through. Seek second opinions if needed until you have a workable roadmap. Here’s our guide to hiring a financial advisor who won’t rip you off.

Consider ways to increase income

Finally, explore options for increasing your income streams to have more money to put towards debt repayment and reaching future financial aims. Take on freelance work in your off hours, look for a higher paying job, negotiate a raise at your current job, or pick up extra shifts. The more you can dedicate toward financial priorities now, the faster you can exit the late bloomer category for good.

The key is to not get discouraged, but instead get to work mapping out a comeback plan. Regardless of your current financial standing, implementing budgetary discipline, making smart repayment and savings choices, and increasing earnings can all help you gain considerable financial ground—even later in life. For more, check out these steps to start healing your relationship with money.


Source: LifeHacker – What to Do When You’re a Financial Late Bloomer

Use the Last Bit of Leftover Cranberry Sauce to Make These Jam Bars

The mashed potatoes and candied yams may have gone, but the cranberry sauce remains. Its role on the Thanksgiving table can be paralyzing, but I assure you, cranberry sauce isn’t tied to a meal of turkey. It’s truly just a sweet fruit compote, jelly, or jam (depending on your preferences), and can be used as such. And when you can’t seem to use up that last cup or so of cranberry sauce, you should make these cranberry jam bars. (You’ll suddenly wish you had more left over.)

How to make cranberry jam bars

One broken jam bar on a plate.

Credit: Allie Chanthorn Reinmann

These jam bars use a straight forward mixing method, and the recipe works well with a chunky or loose sauce. I used one and a half cups of homemade cranberry sauce in the recipe below, and it made for a reasonably thick jam layer in the bars, but keep in mind that this amount is very flexible. If you have only a half-cup of cranberry sauce, you can make a thin stripe layer instead. Two cups of cranberry sauce will make for a nice jammy center, but I don’t recommend much more than that, or the sauce could bubble over the topping.

1. Mix the wet ingredients

Melt the butter in a medium sized bowl and stir in the brown sugar, egg, almond extract, and salt. The egg should be room temperature so it mixes well with the butter; a cold egg will cause the saturated fat to clump up. Feel free to substitute the almond extract for vanilla if you’d like. 

2. Add the dry ingredients

Mix the flour, oats, and baking powder together in a small bowl. Dump them into the wet ingredients all at once, and stir until just combined. The dough will be thick like cookie dough, because that’s essentially what it is.

3. Press the dough into the pan

Add half of the dough to a buttered baking dish. I used a nine by seven inch Pyrex dish, and I lined it with a strip of parchment paper to keep it from sticking. However, if your dish is well buttered, it won’t stick either. Press the dough down into an even layer across the bottom. Don’t worry about making it smooth, a finger dimples won’t show later.

4. Add the cranberry sauce and topping

Spoon spreading cranberry sauce onto cookie bars.

Credit: Allie Chanthorn Reinmann

Scoop the cranberry sauce onto the dough and spread it out into an even layer. Add chopped pecans to the remaining dough in the bowl and stir it together to incorporate the nuts. (If you don’t like nuts, you can add the same measurement of rolled oats.) Break the topping into small chunks and distribute them across the surface of the sauce. There’s no need to press down, as it’ll relax when it heats up in the oven.

Crumble topping on jam bars.

Credit: Allie Chanthorn Reinmann

Bake the bars for 40 minutes in a 350°F oven, or until the topping is slightly browned, the edges are bubbling, and the center remains firm when pressed.

Once cool, dust with powdered sugar and cut into bars. They’ll strike just the right balance between breakfast bar and jam cookie, which makes them great for breakfast and dessert. I haven’t tried making them with the canned jelly variety of cranberry sauce yet, but it’s worth a shot if you have some hanging out in the fridge. The key there will be to let the bars cool completely before slicing, so the jelly can set up again after being warmed up. 

Cranberry Jam Bars Recipe

Ingredients:

  • 1 stick butter, melted

  • ¾ cup brown sugar

  • 1 egg (room temperature)

  • ½ teaspoon almond extract

  • ¼ teaspoon salt

  • 2 cups flour

  • ½ cup old-fashioned rolled oats

  • ½ teaspoon baking powder

  • ⅓ cup chopped pecans (for crumble)

  • 1 ½  cups cranberry sauce

  • Powdered sugar for dusting

1. Preheat the oven to 350°F. Butter a baking dish well, and line it with parchment if desired.

2. Mix the butter, sugar, egg, extract, and salt together in a medium bowl. In a separate bowl, combine the flour, oats, and baking powder. Add the dry ingredients to the butter mixture all at once. Mix until just combined.

3. Add half of the dough to the baking dish, and press it into the bottom of the dish in an even layer. Spread the cranberry sauce evenly on top of the base layer.

4. Add chopped pecans to the remaining dough in the mixing bowl. Mix to combine. Break the dough into small pieces and distribute them across the surface of the jam layer. Cover the jam evenly, but it’s okay if some of the jam peeks out. Bake at 350°F for 40 minutes, or until the edges have lightly browned, the jam is bubbling on the edges, and the center is firm when pressed. Cool completely before slicing.


Source: LifeHacker – Use the Last Bit of Leftover Cranberry Sauce to Make These Jam Bars

You Can Finally Scan Documents in Google Drive for iPhone

Google Drive is a solid solution for storing important files across your devices. But if you’re an iPhone user, you’ve been missing out on a key feature Android users have had for years: document scanning.

This simple integration makes it much easier to quickly add important documents to your Google Drive. It’s something Apple offers with its own Notes app, but Google was reluctant to add to Drive’s iOS version. A workaround, of course, it to scan your documents using the Notes app, save it to your photos library, then add it to Drive, but that adds a series of cumbersome steps Android users don’t need to worry about.

Native document scanning is also much more convenient than simply taking a photo of the paper: Document scanners automatically crop the image so only the document itself appears and attempts to reproduce the elements of the page the same as a traditional scanner would.

Thankfully, those days are behind us. Google finally added document scanning to Drive on iOS. Now, iPhone users can add documents like receipts, bills, and notices to their Drive just as Android users can. It comes with an update to Drive that sees a few new features across platforms, but more on that in a bit.

How to scan documents in Google Drive

Whether you have an iPhone or an Android, scanning and uploading a document to Drive is easy. To start, open the app and select the Camera icon in the bottom right. (Alternatively, you can tap the (+), then hit Scan.)

Next, frame the camera view over your document. The app will intelligently scan the paper so only the document will be scanned. Tap the shutter button at the bottom of the display when ready to capture.

According to Google, this feature may take one to three days to fully roll out on iOS (I don’t see it on my end as of this morning), so keep an eye out if it isn’t available in your app yet.

What else is new with Google Drive

While document scanning is the big new feature on iOS, Android users can expect some additional features in Google Drive. Going forward, Drive can automatically capture documents when it detects them, so there’s no need to hit the shutter button, unless you prefer to do so manually.

There’s now an improved camera viewfinder to help you position the frame to get the best scan possible for your document. You can also import docs from your camera roll, and there’s now a way to initialize a scan faster using a new scanner button.


Source: LifeHacker – You Can Finally Scan Documents in Google Drive for iPhone