A new Rust-based tool called cpx offers a modern alternative to the traditional cp command on Linux, adding parallel copying, progress bars, resume support, and configurable defaults.
UK’s First Rapid-Charging Battery Train Ready For Boarding
An anonymous reader quotes a report from the Guardian: The UK’s first superfast-charging train running only on battery power will come into passenger service this weekend — operating a five-mile return route in west London. Great Western Railway (GWR) will send the converted London Underground train out from 5.30am to cover the full Saturday timetable on the West Ealing to Greenford branch line, four stops and 12 minutes each way, and now carrying up to 273 passengers, should its celebrity stoke up the demand.
The battery will recharge in just three and a half minutes back at West Ealing station between trips, using a 2,000kW charger connected to a few meters of rail that only becomes live when the train stops directly overhead. There are hopes within government and industry that this technology could one day replace diesel trains on routes that have proved difficult or expensive to electrify with overhead wires, as the decarbonization of rail continues.
The train has proved itself capable of going more than 200 miles on a single charge — last year setting a world record for the farthest travelled by a battery-electric train, smashing a German record set in 2021. The GWR train and the fast-charge technology has been trialled on the 2.5-mile line since early 2024, but has not yet carried paying passengers.
Read more of this story at Slashdot.
Jeffrey Epstein Sent Five Nights At Freddy’s Porn Via 4Chan Links, Emails Show

One email from Epstein included the subject line ‘amazing animations’
The post Jeffrey Epstein Sent <i>Five Nights At Freddy’s</i> Porn Via 4Chan Links, Emails Show appeared first on Kotaku.
AMD EPYC 9755 Delivers Decisive Performance Leadership Over Xeon 6 Granite Rapids With Nearly 500 Benchmarks
Back in December I carried out some fresh benchmarks of the Intel Xeon 6980P vs. AMD EPYC 9755 for these competing 128 core server processors using the latest Linux software stack before closing out 2025. That was done with nearly 200 benchmarks and the AMD EPYC Turin Zen 5 processor delivered terrific performance as we have come to enjoy out of the 5th Gen EPYC line-up over the past year and several months. Since then I have ratcheted up the benchmarks with nearly 500 benchmarks between the AMD EPYC 9755 and Intel Xeon 6980P processors for an even more comprehensive look at these CPUs atop Linux 6.18 LTS.
Emails Reveal Jeffrey Epstein Was Banned From Xbox Live
![]()
Microsoft blocked Epstein’s Xbox account after it discovered he was a registered sex offender
The post Emails Reveal Jeffrey Epstein Was Banned From Xbox Live appeared first on Kotaku.
Oracle seeks to build bridges with MySQL developers
Big Red promises ‘new era’ as long-frustrated contributors weigh whether to believe itOracle is taking steps to “repair” its relationship with the MySQL community, according to sources, by moving “commercial-only” features into the database application’s Community Edition and prioritizing developer needs.…
Apple Reports Best-Ever Quarter For iPhone Sales
Apple posted its biggest quarter ever, with iPhone revenue hitting a record ~$85.3 billion and Services climbing 14% to ~$30 billion. Total revenue reached nearly $143.76 billion.
“The demand for iPhone was simply staggering,” CEO Tim Cook said on a conference call discussing the results. “This is the strongest iPhone lineup we’ve ever had and by far the most popular.”
Read more of this story at Slashdot.
Belkin’s Wemo Smart Devices Will Go Offline On Saturday
Belkin is shutting down cloud support for most Wemo smart home devices on January 31, leaving only Thread-based models and devices already set up in Apple HomeKit functional. Everything else will lose remote access, voice assistant integrations, and future app updates. The Verge reports: The shut down was first announced in July and impacts most Wemo devices, ranging from smart plugs to a coffee maker, with the exception of a handful of Thread-based devices: the 3-way smart light switch (WLS0503), stage smart scene controller (WSC010), smart plug with Thread (WSP100), and smart video doorbell camera (WDC010). Wemo devices configured through Apple’s HomeKit will also continue to work, but you have to set them up in HomeKit before January 31st if you want to use that option.
Other affected devices will only work manually after Saturday. If your Wemo device is still under warranty, you may be able to get a partial refund for it after cloud services shut down.
Read more of this story at Slashdot.
Quest 3 v85 PTC Can Turn Any Surface Into A Virtual Keyboard
With Horizon OS v85 PTC, Quest 3 can turn any surface into a virtual keyboard, and Meta says you can remap the Quest 3S action button.
The Public Test Channel (PTC) is the beta release channel of Quest’s Horizon OS. If you opt in, your headset receives a pre-release build of each upcoming version.
Note that there are often features in the eventual stable version not present in the PTC, and occasionally (but rarely) features or changes in the PTC don’t make it to the stable version.
Here are 2 key features Meta is testing in Horizon OS v85 PTC:
Surface Keyboard
Text entry is a notorious challenge for XR devices when you’re not carrying a connected Bluetooth keyboard.
Exclusively available as an experimental feature on Quest 3, and not the cheaper Quest 3S, Surface Keyboard adds a virtual keyboard on top of any surface, such as a table or desk.
To set it up, you place your hands flat on the table where you want the keyboard to be positioned, and a few seconds later it spawns. This is the height calibration step.
0:00
/1:05
UploadVR testing the Horizon OS v85 PTC Surface Keyboard.
Testing Surface Keyboard out for the first time, as you can see in the video below, I found it to be remarkably accurate. The ability to rest my hands makes it far preferable to a floating virtual keyboard, and I can type far faster already.
For me, and on the current build at least, it only shows up in the Horizon OS home space, passthrough or virtual. Meta has an API for developers to use the floating keyboard, and we’ll keep an eye out for any signs of a similar API for Surface Keyboard when the feature launches to the stable channel.
Meta Research Turns Any Surface Into A Virtual Keyboard
Meta is researching turning any flat surface into a virtual keyboard, leveraging ambient haptics.
 UploadVRDavid Heaney
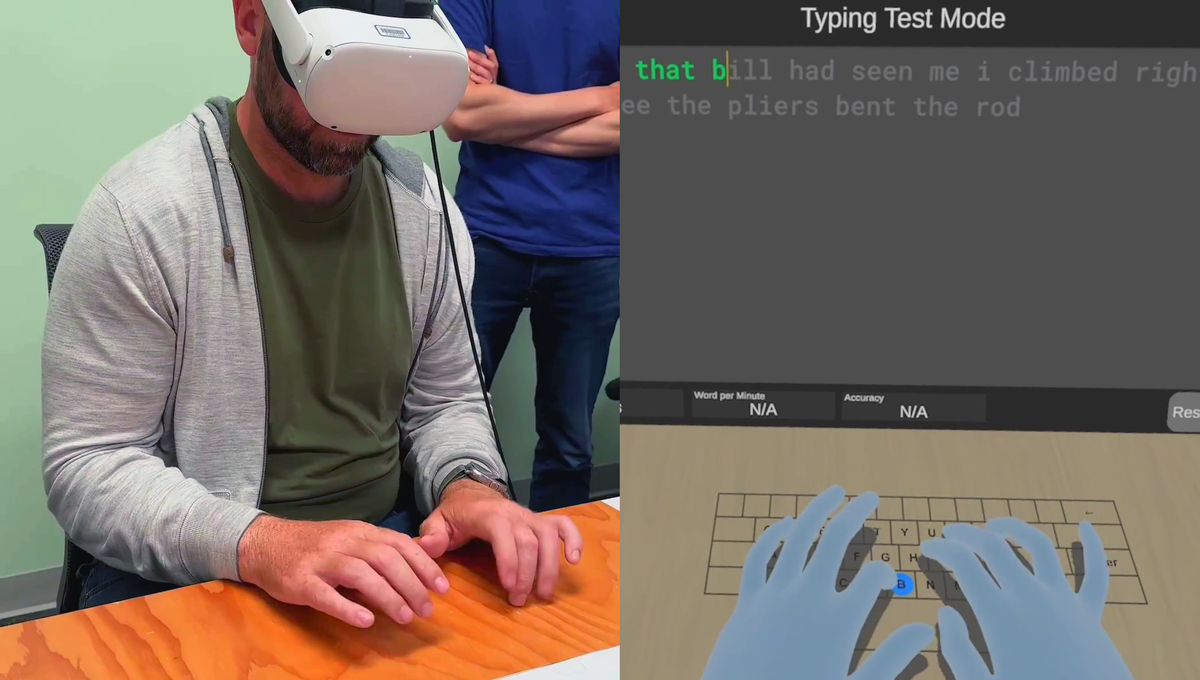
Meta has been researching this technology for at least six years, and executives showed off a well-along prototype in 2023, with Mark Zuckerberg claiming he could reach 100 words per minute. However, that prototype required a tracking marker tag on the table, as could be seen in the clips Meta shared at the time. And the company didn’t disclose the error rate of the prototype.
Then, in 2024, researchers from Meta and ETH Zurich said that they had solved the problem of turning any surface into a keyboard, without markers, by combining a by combining a neural network that predicts touch events with a language model.
Meta hasn’t said whether this research is what led to the shipping feature, but it seems likely to at least be related.
Researchers Say They’ve Solved Turning Any Surface Into A Keyboard
Researchers from Meta and ETH Zurich developed software called TouchInsight, which they say solves turning any surface into a virtual keyboard.
 UploadVRDavid Heaney
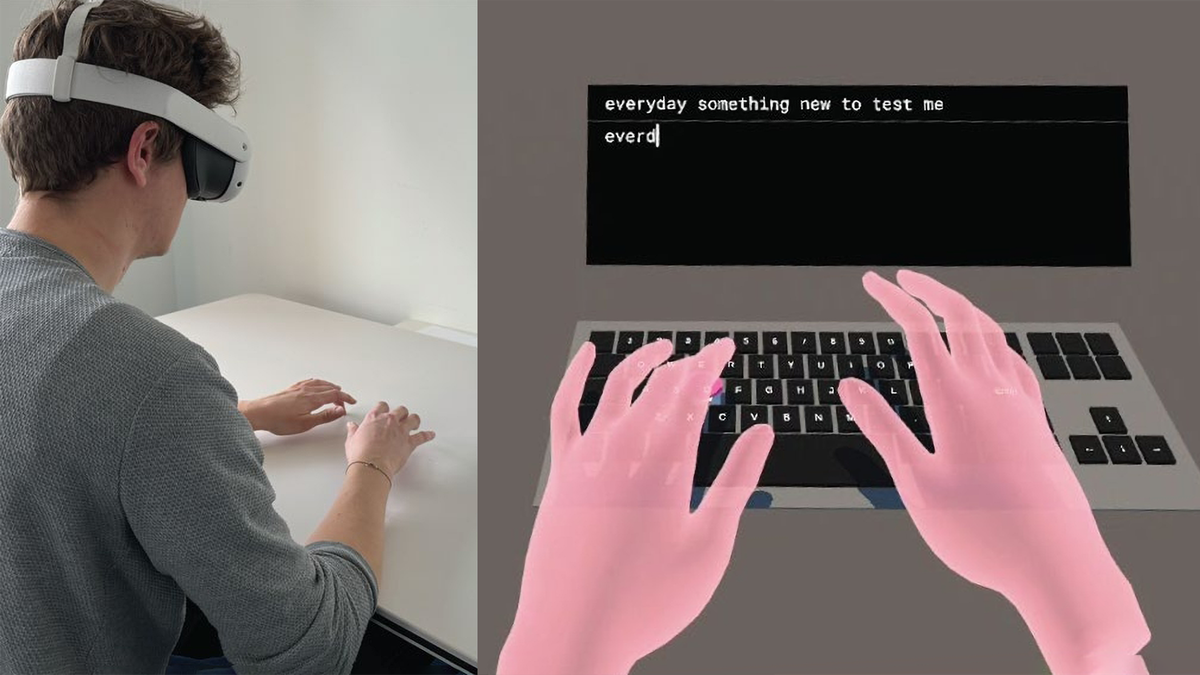
You can find Surface Keyboard in the Advanced settings on Horizon OS v85 if you have a Quest 3.
It’s unclear why the feature isn’t (yet) available on Quest 3S.
Remap Quest 3S Action Button
While Quest 3S doesn’t currently have the Surface Keyboard feature, it does get its own new exclusive feature in Horizon OS v85 PTC, according to Meta.
Quest 3S has an ‘Action Button’, which, since the headset launched, has served one function: toggling passthrough. Press it while in a VR game and the game will pause and you’ll see the real world. It’s essentially a “pause VR, I need to see my surroundings” button.
Now, with v85 PTC, Meta says that Quest 3S owners can remap the Action Button.
Our Quest 3S does not yet have v85 PTC, so we don’t yet know what it can be remapped to. If you have a Quest 3S running Horizon OS v85 PTC and have this ability, please let us know in the comments below.
Navigator Set To Be Default & Horizon Feed Removed
If you missed it, earlier this week we reported Meta’s announcement that “starting” in Horizon OS v85 stable, the new ‘Navigator’ UI will become the default, and, separately, the Horizon Feed will be removed.
Quest’s New ‘Navigator’ UI Becoming Default As Horizon Feed To Be Removed
“Starting” in Quest v85, the new ‘Navigator’ UI is becoming the default, and the Horizon Feed will be “gradually” removed from Horizon OS.
 UploadVRDavid Heaney
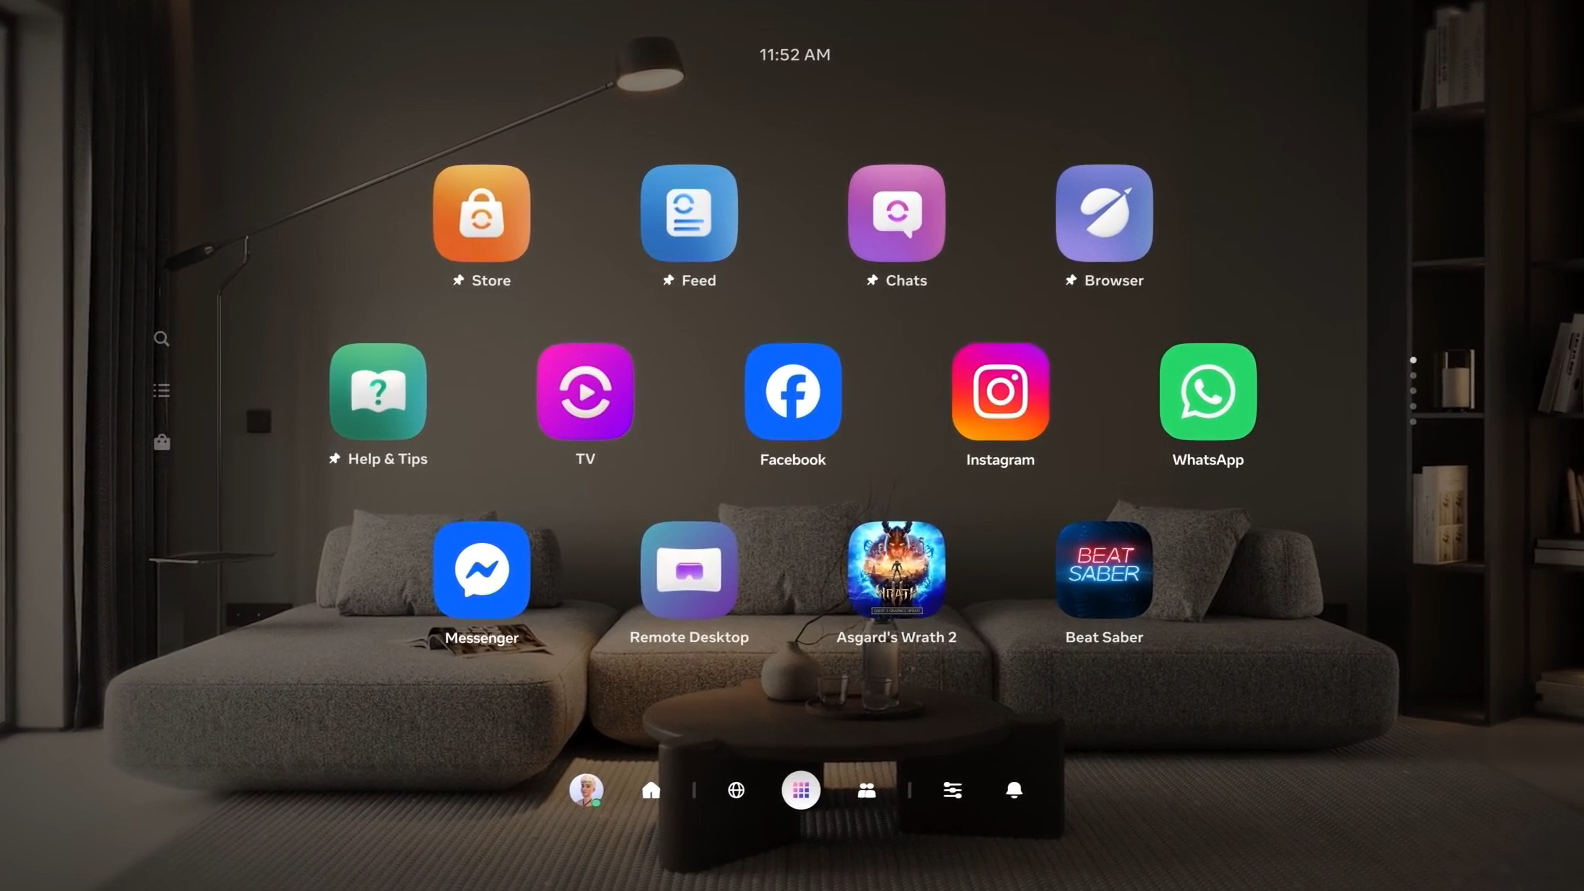
In the PTC build of Horizon v85, at least on my Quest 3, that hasn’t happened yet. This is likely another of Meta’s very slow “rollouts”.
GNU gettext Reaches Version 1.0 After 30 Years
After more than 30 years of development, GNU gettext finally “crossed the symbolic ‘v1.0’ milestone,” according to Phoronix’s Michael Larabel. “GNU gettext 1.0 brings PO file handling improvements, a new ‘po-fetch’ program to fetch translated PO files from a translation project’s site on the Internet, new ‘msgpre’ and ‘spit’ pre-translation programs, and Ocaml and Rust programming language improvements.” From the report: With this v1.0 release in 2026, the “msgpre” and “spit” programs do involve…. Large Language Models (LLMs) in the era of AI: “Two new programs, ‘msgpre’ and ‘spit’, are provided, that implement machine translation through a locally installed Large Language Model (LLM). ‘msgpre’ applies to an entire PO file, ‘spit’ to a single message.”
And when dealing with LLMs, added documentation warns users to look out for the licensing of the LLM in the spirit of free software. More details on the GNU gettext 1.0 changes via the NEWS file. GNU gettext 1.0 can be downloaded from GNU.org.
Read more of this story at Slashdot.
White House Scraps ‘Burdensome’ Software Security Rules
An anonymous reader quotes a report from SecurityWeek: The White House has announced that software security guidance issued during the Biden administration has been rescinded due to “unproven and burdensome” requirements that prioritized administrative compliance over meaningful security investments. The US Office of Management and Budget (OMB) has issued Memorandum M-26-05 (PDF), officially revoking the previous administration’s 2022 policy, ‘Enhancing the Security of the Software Supply Chain through Secure Software Development Practices’ (M-22-18), as well as the follow-up enhancements announced in 2023 (M-23-16).
The new guidance shifts responsibility to individual agency heads to develop tailored security policies for both software and hardware based on their specific mission needs and risk assessments. “Each agency head is ultimately responsible for assuring the security of software and hardware that is permitted to operate on the agency’s network,” reads the memo sent by the OMB to departments and agencies. “There is no universal, one-size-fits-all method of achieving that result. Each agency should validate provider security utilizing secure development principles and based on a comprehensive risk assessment,” the OMB added.
While agencies are no longer strictly required to do so, they may continue to use secure software development attestation forms, Software Bills of Materials (SBOMs), and other resources described in M-22-18.
Read more of this story at Slashdot.
Ubuntu 26.04 Resolute Snapshot 3 Released For Testing
Resolute Snapshot 3 is now available as the newest monthly test candidate leading up the Ubuntu 26.04 LTS release in April…
Oracle May Slash Up To 30,000 Jobs
An anonymous reader shares a report: Oracle could cut up to 30,000 jobs and sell health tech unit Cerner to ease its AI datacenter financing challenges, investment banker TD Cowen has claimed, amid changing sentiment on Big Red’s massive build-out plans.
A research note from TD Cowen states that finding equity and debt investors are increasingly questioning how Oracle will finance its datacenter building program to support its $300 billion, five-year contract with OpenAI.
The bank estimates the OpenAI deal alone is going to require $156 billion in capital spending. Last year, when Big Red raised its capex forecasts for 2026 by $15 billion to $50 billion, it spooked some investors. This year, “both equity and debt investors have raised questions about Oracle’s ability to finance this build-out as demonstrated by widening of Oracle credit default swap (CDS) spreads and pressure on Oracle stock/bonds,” the research note adds.
Read more of this story at Slashdot.
The 35th Annual Housekeeping Olympics
Because a job worth doing is worth doing well (I have yet to find a job worth doing), this is some footage from the 35th Annual ISSA Housekeeping Olympics, held (appropriately) in Las Vegas. Events include mop slalom, vacuum races, bed making, buffer pad toss, and ride-on vacuum extractor obstacle course. It looks like everyone had a good time. And one thing’s for certain — these athletes definitely know their way around some stains. Especially the locals.
Los Angeles Aims To Ban Single-Use Printer Cartridges
Los Angeles is moving to ban single-use printer cartridges that can’t be refilled or taken back for recycling. Tom’s Hardware reports: Printer cartridges are usually built with a combination of plastic, metal, and chemicals that makes them hard to easily dispose. They can be treated as hazardous waste by the city, but even then it would take them hundreds of years to actually disintegrate at a waste site. Since they’re designed to be thrown away in the first place, the real solution is to target the root of the issue — hence the ban.
Read more of this story at Slashdot.
10 Hacks Every Nintendo Switch (or Switch 2) Owner Should Know
We may earn a commission from links on this page.
The Nintendo Switch and the Switch 2 are pretty user-friendly devices, but sometimes, that can be a bit more of a hindrance than a help. It’s easy to jump right into a game, but if you want to toggle on a feature like dark mode or, say, even make a Mii, you have to jump through a lot of hoops in the settings menus.
That’s a shame, because if you’re willing to learn the ins-and-outs, there’s a lot you can do on these systems, whichever version of the Switch you own. Over the past few years, I’ve spent more time playing around in the Switch ecosystem than anyone reasonably should, and along the way, I’ve picked up a handful of tips, tricks, and hacks that every Nintendo gamer would do well to learn.
Turn on dark mode on your Switch
Nintendo might like a bright and fun aesthetic, but if you’re feeling a bit more sleek, both the original Nintendo Switch and Switch 2 have dark modes. On either system, you can turn this on by navigating to System Settings (the cog in the taskbar, which you can either tap or select with a controller), then scrolling down to Themes and selecting Basic Dark. This will turn your home screen and menu pages black, which could even save you some battery life if you have a Nintendo Switch OLED. (Note that games themselves will be unaffected.)
Remap the buttons on your Joy-Cons
Whether it’s for accessibility or just personal preference, you can completely change what your buttons do on both the Nintendo Switch and Nintendo Switch 2, although how you’ll do this differs across the two systems.
Remapping buttons on the original Nintendo Switch
On the original Switch, you’ll need to go to System Settings > Controllers and Sensors > Change Button Mapping. From here, select a connected controller (you can remap both the Joy-Cons and the Nintendo Switch Pro Controller, as well as some third-party options) and start reassigning buttons to your heart’s content. Make your B button into the right trigger. Make up go down. Go nuts!
Remapping buttons on the Nintendo Switch 2
On the Nintendo Switch 2, you can do the same thing, but it’s under System Settings > Accessibility > Button Mapping. Here, you can remap the Joy-Con 2 controllers, a Nintendo Switch Pro or Pro 2 controller, and Joy-Con 2 that are connected via the charging grip. Some third-party controllers may also work.
But wait, there’s more. Back on the Accessibility menu, you can also toggle on Button Mapping in Quick Settings, so you can edit your button mapping on the fly by holding down the physical Home button and selecting Edit Mapping.
Finally, the Switch 2 has some additional button customizations you can make under System Settings > Controllers & Accessories. Here, if you have the Nintendo Switch 2 Pro Controller or Joy-Con 2 charging grip, you can set what the extra GL/GR buttons do using GL/GR Button Settings. Or, if you scroll down a bit, you can also disable or enable Joy-Con 2 Mouse Controls, as well as set your sensitivity for them. Finally, if you’re tired of Nintendo using a different A and B button placement from Xbox, you can select Swap A and B and enable the toggle on the following page. This will remap just those two buttons.
Use GameShare to share Switch games locally, and GameChat to share them online
Credit: Nintendo
There are two features in this one, both of which allow you to play multiplayer games with your friends with just one copy of the game you want to play.
Using GameShare
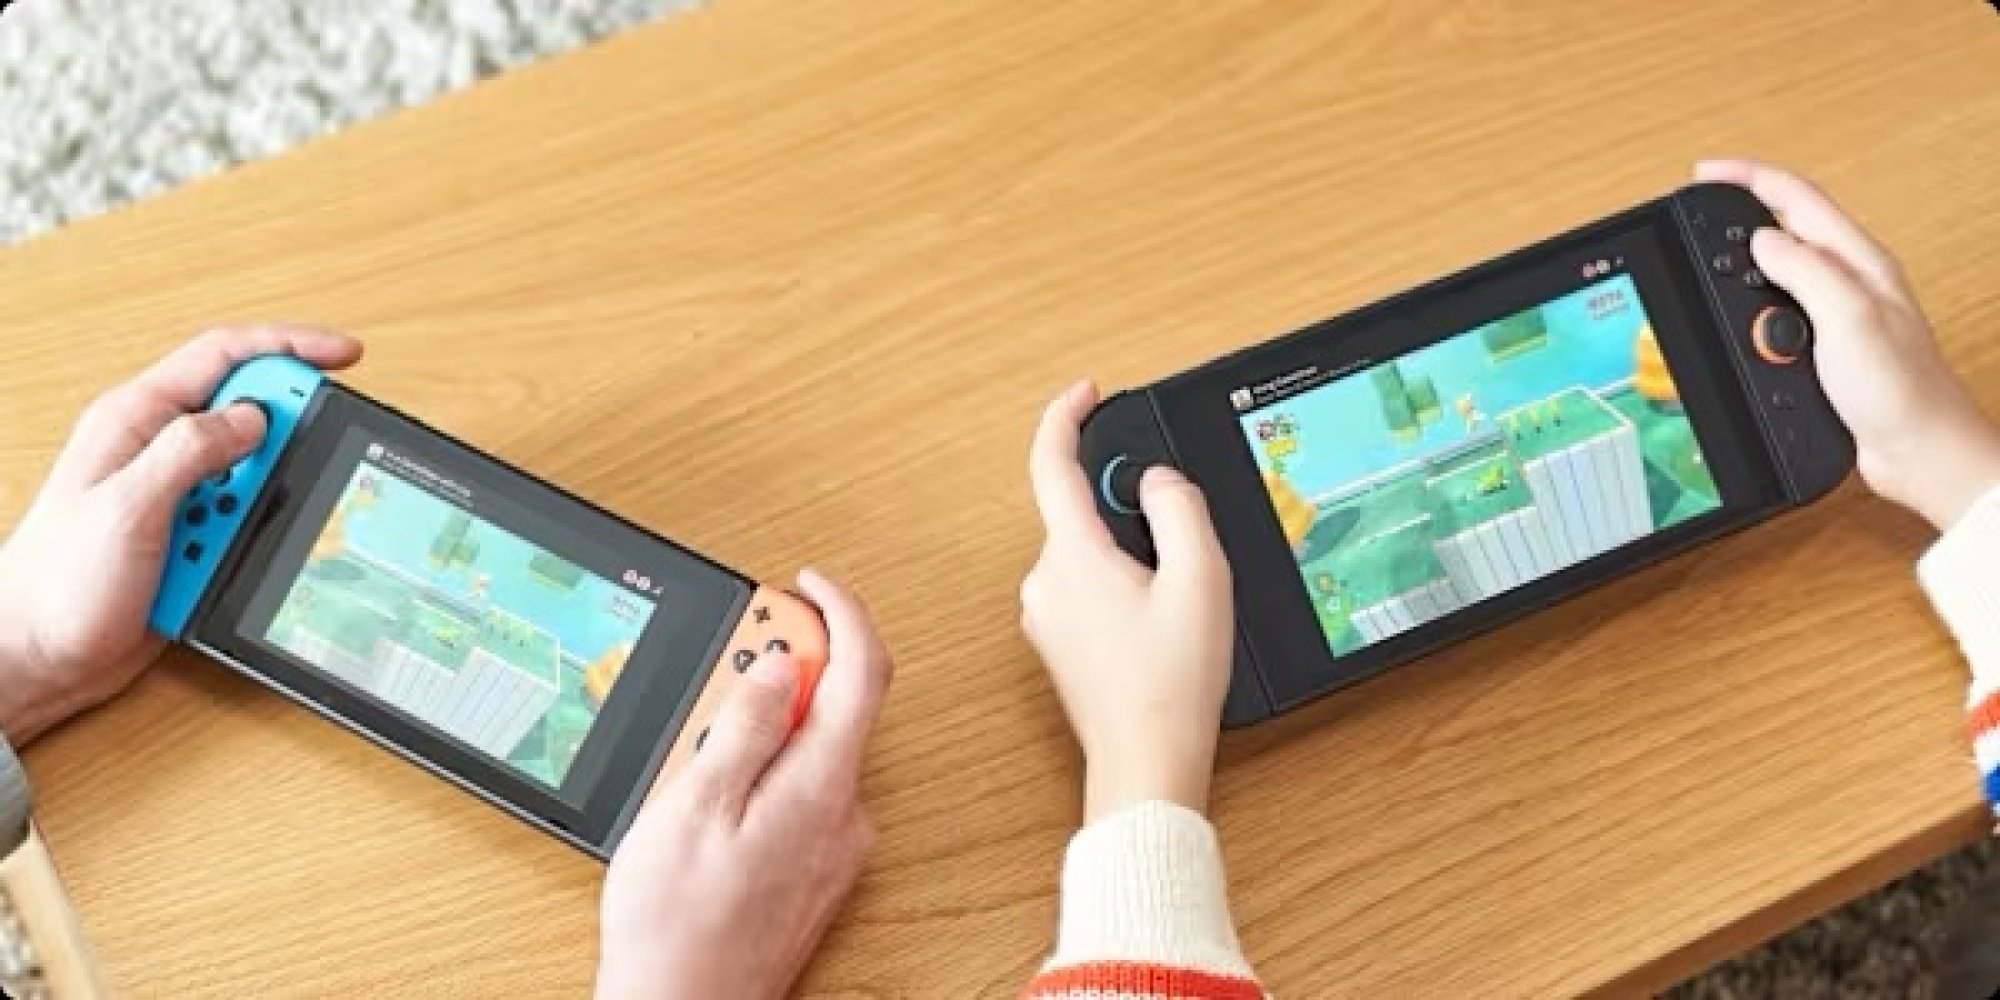
Let’s start with GameShare. This is a Nintendo Switch 2 feature, but it impacts the original Switch as well. Essentially, GameShare allows Switch 2 owners to share copies of their games with Switch 2 and original Switch owners nearby, for local multiplayer play. If you ever used Nintendo DS Download Play, it’s kind of like that, except it streams games from the host system instead.
It’s convenient, but the catch is that GameShare is only available in certain titles (you can find a list of some compatible games here). How you’ll access it also differs from game to game. For instance, in Super Mario Odyssey, GameShare is available when starting or resuming a two-player game, where you can start a session by selecting GameShare + Local Play.
You’ll then have to wait for others to join your GameShare session, and then you can start playing by selecting Start from the on-screen menu. This part is the same across all GameShare-compatible titles, at least. To join a GameShare session that someone else has started, open your Switch or Switch 2 to the main menu, then select GameShare from the taskbar (the icon that looks like a TV receiving a wireless signal), and under Join GameShare, find your friend’s session.
Note that even if a game is a Nintendo Switch 2 exclusive, original Switch systems may still be able to play it using GameShare. For instance, Donkey Kong Bananza supports GameShare.
Using GameChat
Now, let’s talk about sharing games via GameChat. This is a lot like GameShare, but is exclusive to Nintendo Switch 2 systems and works online. It’s also limited to certain games, and takes a bit more setup. To share a game using GameChat, you’ll first need to be in a GameChat session with someone from your friend list, which you can start by pressing the physical C button on your controller or the C icon from the console’s main menu. This will allow you to talk with each other over the internet, see each other’s gameplay, and if you have cameras, even see feeds from them. Now, you can open your game and start sharing it with people in your chat through that game’s menu. In Super Mario Odyssey, you’ll also see the option for this when starting or resuming a two-player game. Whoever else is in your chat will then be able to start playing with you then and there, without having to join the session from a separate menu like in GameShare.
Note that GameChat is free for Nintendo Switch 2 owners until March 31, 2026, after which it will require a Nintendo Switch Online membership.
Archive Switch games you don’t play to save storage space, or move them to a microSD card
Neither the original Switch or Switch 2 are especially generous with storage space, and downloading fancy AAA games can eat into it quickly. Luckily, on both of these consoles, you can quickly delete games from the internal storage or any inserted microSD cards to save space, while keeping them in your library and maintaining your save data.
Archiving games on the Original Nintendo Switch
On the original Switch, you can delete a game by hovering over it on the main menu or in your library, pressing the physical + button, and selecting Manage Software > Archive Software. Alternatively, you could select Delete Software instead, which will largely do the same thing, but will make redownloading the game a little more annoying, since it’ll remove it from your home menu and you’ll need to go to the eShop to do it.
To more quickly delete games, you can navigate to System Settings > Data Management > Quick Archive. From here, you can see how much space each game takes up and how much you’ll save by getting rid of it. You can also delete stored screenshots and videos for games here, either by selecting a game in Quick Archive and pressing the physical X button, or selecting Manage Screenshots and Videos under Data Management. For more detailed control over your game deletion, you can also select Manage Software under Data Management instead, but Quick Archive is a bit snappier and has most of the same controls.
Archiving games on the Nintendo Switch 2
On the Switch 2, the steps are mostly the same as on the original Switch, except Deleting now does the same thing as Archiving by default (you can uncheck Keep HOME Menu Icon if you really don’t want one), so the standalone Archive option has been removed. Regardless, neither console will delete your save date during these steps, as the size it takes up is usually pretty negligible. That said, if you really want to delete a game’s save data, on either console, head over to System Settings > Data Management > Delete Save Data and pick it from the list.
To get a game back after deleting it, simply redownload it. If you kept your game’s home menu icon, you can do this from either your main menu or your library. If you didn’t, you’ll need to navigate to that game’s store page in the eShop to redownload it.
While you’re in Data Management, you can also move games from the internal storage to a microSD card or back. This is under System Settings > Data Management > Move Data Between System / microSD Card. On Switch 2, the final step is called Move System / microSD Express Card Data instead, as that console requires a special type of microSD card.
Send your Switch gameplay screenshots to your phone
Like most modern consoles, the Switch and Switch 2 are both capable of capturing screenshots and video that you can later share online. Back before Twitter was named X and started charging for the API, it used to be easier to share directly from the console. Now, you’ll probably need to share screenshots and videos from your console to the Nintendo app to send them to most social media sites.
Sending screenshots on the original Nintendo Switch
On the original Switch, you have to do this manually. First, go to your Album from the taskbar on the console’s main menu (the icon that looks like a painting). Then, select a screenshot or video you want to send to the app and press the physical A button to bring up the Sharing and Editing menu. Select Send to Smartphone, and then choose Only This One to send just that photo or video to the app, or select Send a Batch to choose more.
Sending screenshots on the Nintendo Switch 2
On the Switch 2, you can upload screenshots and videos to the app automatically or manually.
To upload manually, once again select Album from the taskbar on the console’s main menu. Then, to upload just a single item, select it, press the physical A button, and choose Upload to Smart Device. To batch upload, instead choose Quick Actions from the sidebar on the left, select Upload to Smart Device, and choose as many items as you’d like before continuing.
To upload automatically, open Album from the taskbar on the console’s main menu, select Upload Settings from the sidebar on the left, and toggle on Automatic Uploads.
To see your uploads, open the Nintendo Switch App on your phone and tap the Album icon in the bottom-right corner. Then, simply download them to share them to your favorite social media site as usual. Note that uploaded items don’t actually take up space on your phone, and are instead stored in Nintendo’s servers. You can keep up to 100 files uploaded for 30 days each, and any new items over that limit will delete the oldest entries first. If this happens, your original screenshot or video will still remain on your console.
Transfer your Switch game data between systems
Credit: Michelle Ehrhardt
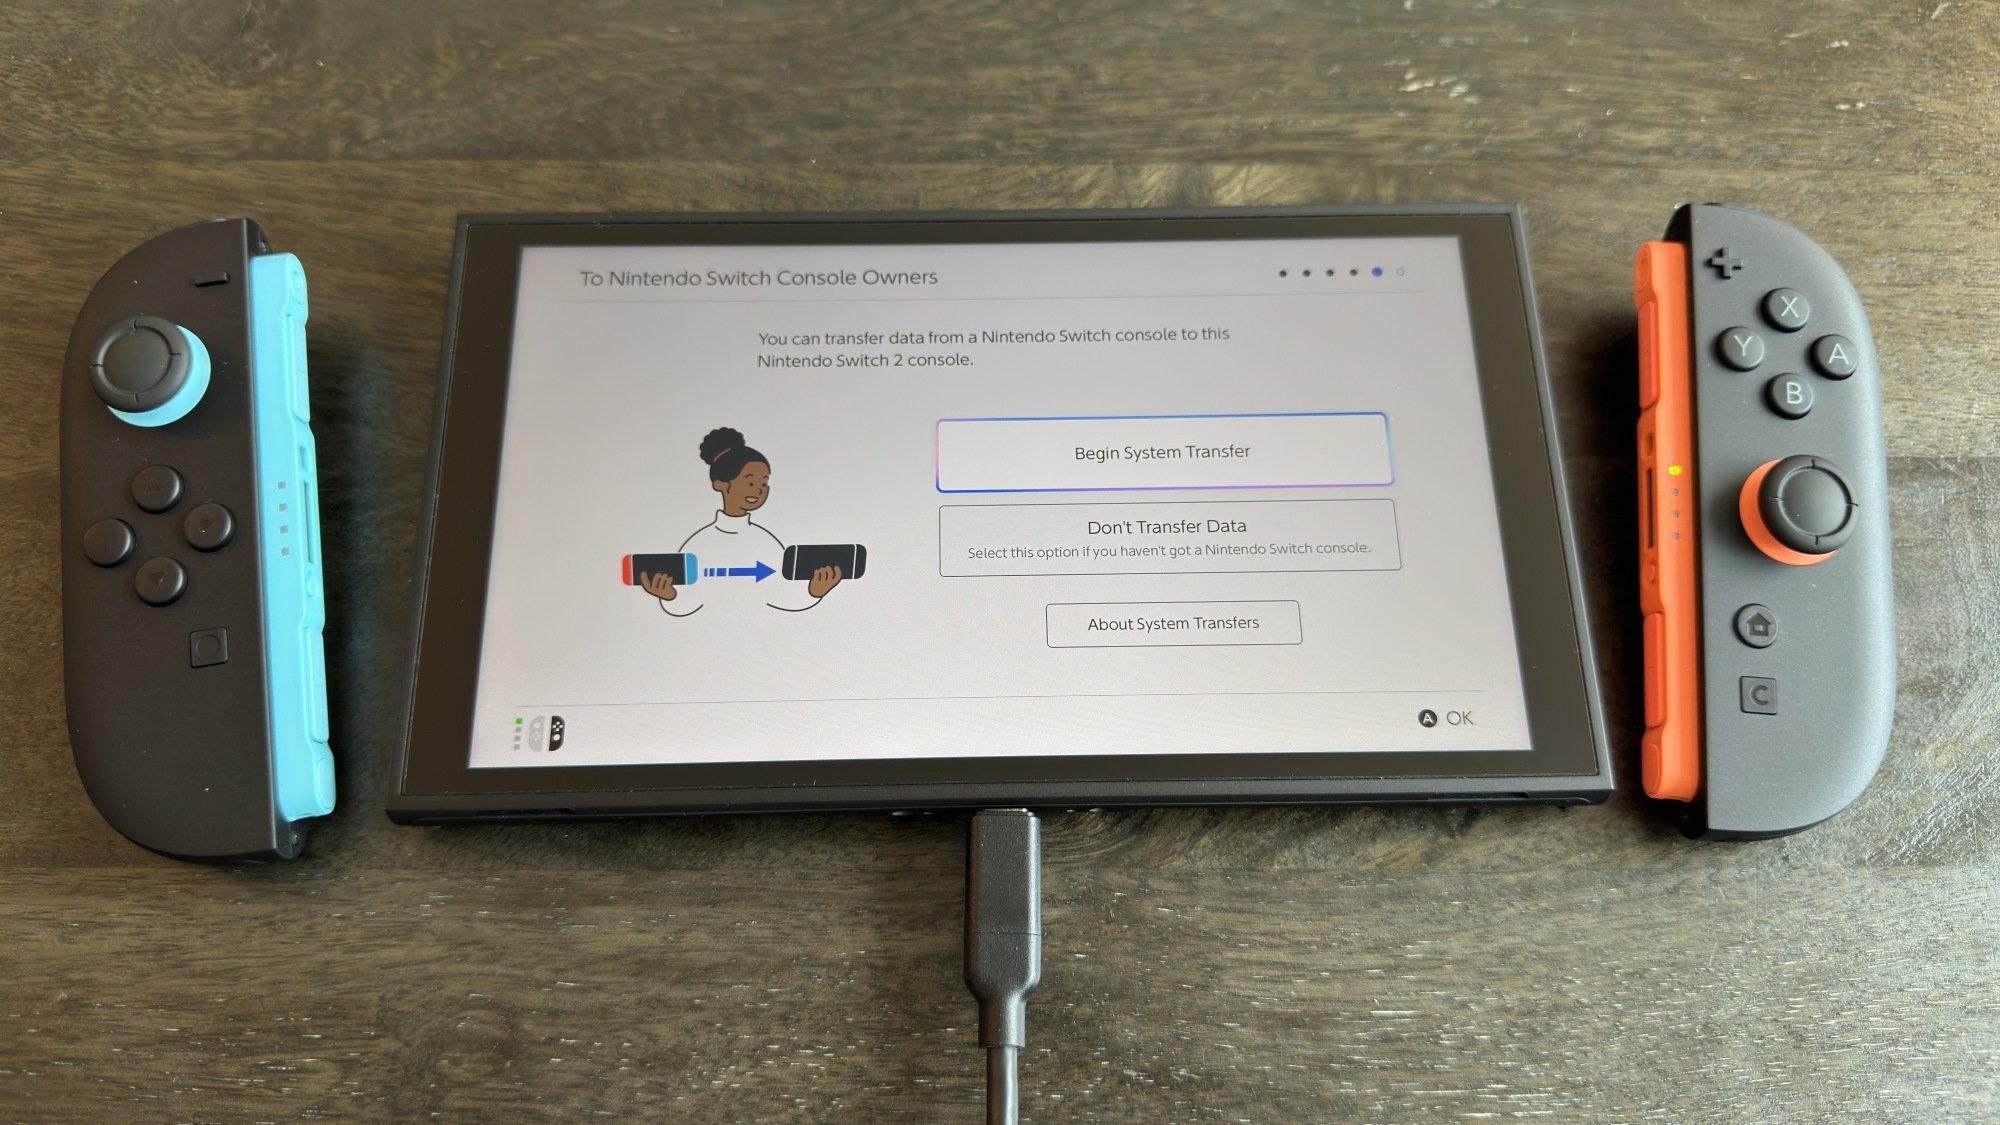
On both the original Switch and Switch 2, there are a number of ways to transfer save data between systems. This is especially helpful when upgrading from the original Switch to the Switch 2, although the easiest way to transfer data when upgrading is through a system transfer.
A system transfer is only available during Switch 2 setup, and will be available on the screen that says To Nintendo Switch Console Owners. For the easiest experience, select Begin System Transfer on this page and ensure your original Switch and Switch 2 are near each other. You’ll be able to transfer over your games and saves, while keeping your games installed on your original console (specific games might need to be deleted to be transferred, but the console will warn you about this, and you can get them back later). If you absolutely need to, you can also perform a system transfer without your original Switch present, but it’s not advised, as it will factory reset that device. Note that you’ll also need to do some setup on your original Switch in-person first, so if you already have your Switch 1 and Switch 2 in-hand, you might as well go with the more straightforward option above.
If a system transfer isn’t an option, you can also transfer games and save data over on a case-by-case basis. This can be useful if you still plan to play on your original Switch every once in a while, too. To transfer physical games, simply remove them from one console and place them in another. To transfer digital games, select the Virtual Game Cards icon on either your Switch or Switch 2’s main menu (the icon that looks like a game card), then choose a game and select Load on Other System to send it to another system on your account. You can move a virtual game card between systems as often as you’d like.
To transfer save data, on either the Switch or Switch 2, navigate to System Settings > Data Management > Transfer Your Save Data. You’ll be able to send it to another nearby console for free from this menu, but to send save data online, you’ll need a Nintendo Switch Online membership. If that’s not an issue, you can manage your cloud save data under System Settings > Data Management > Save Data Cloud. Or, if a game already has save data in the cloud, you can download it simply by hovering over its icon, pressing the physical + button, and selecting the data under Save Data Cloud.
Make Miis on the Nintendo Switch
Miis did not die with the Nintendo Wii! You can still create one on both the Nintendo Switch and Switch 2, and it’s as simple as navigating to System Settings > Mii > Create/Edit a Mii. On the original Switch, this will take you right to the Mii creation menu, but on the Switch 2, you’ll also be able to choose if you want to start from a preset or get a Mii based on an amiibo instead. Either way, make your choice, and you’ll also be taken to the familiar Mii creation menu.
From here, customizing your Mii is pretty much identical to how it worked on the Wii, except you can now choose any hair color you’d like.
As for why you’d want a Mii when they don’t show up in the main menu at all, aside from making one being fun in and of itself, some games will be able to put your Miis to use. For instance, Super Smash Bros. Ultimate can let you fight as your Mii.
Keep your friends from seeing when you’re online on your Switch
Sometimes, you want to game without others knowing what you’re up to. You can do this on both the original Switch and the Switch 2.
On either the Switch or Switch 2, from the main menu, select your profile icon in the top left corner. Then, in the sidebar on the left, scroll down to User Settings. From here, scroll to Friend Settings, under Friend Functions. Then, on the Switch 1, select No One under Display online status to:. On the Switch 2, Display online Status to: will instead say Online-Status Display, but changing this to No One will do the same thing.
This will hide your online status from your Friends List, but your friends will still be able to see your recently played games. To stop them from seeing this, on either console, back out from Friend Settings and scroll up to Play Activity Settings (under your profile icon > User Settings > Profile Settings). In the first option on this screen, which again has different names depending on which console you’re on, select No One.
Make the most of mouse mode on the Switch 2 (including using a USB-C mouse)
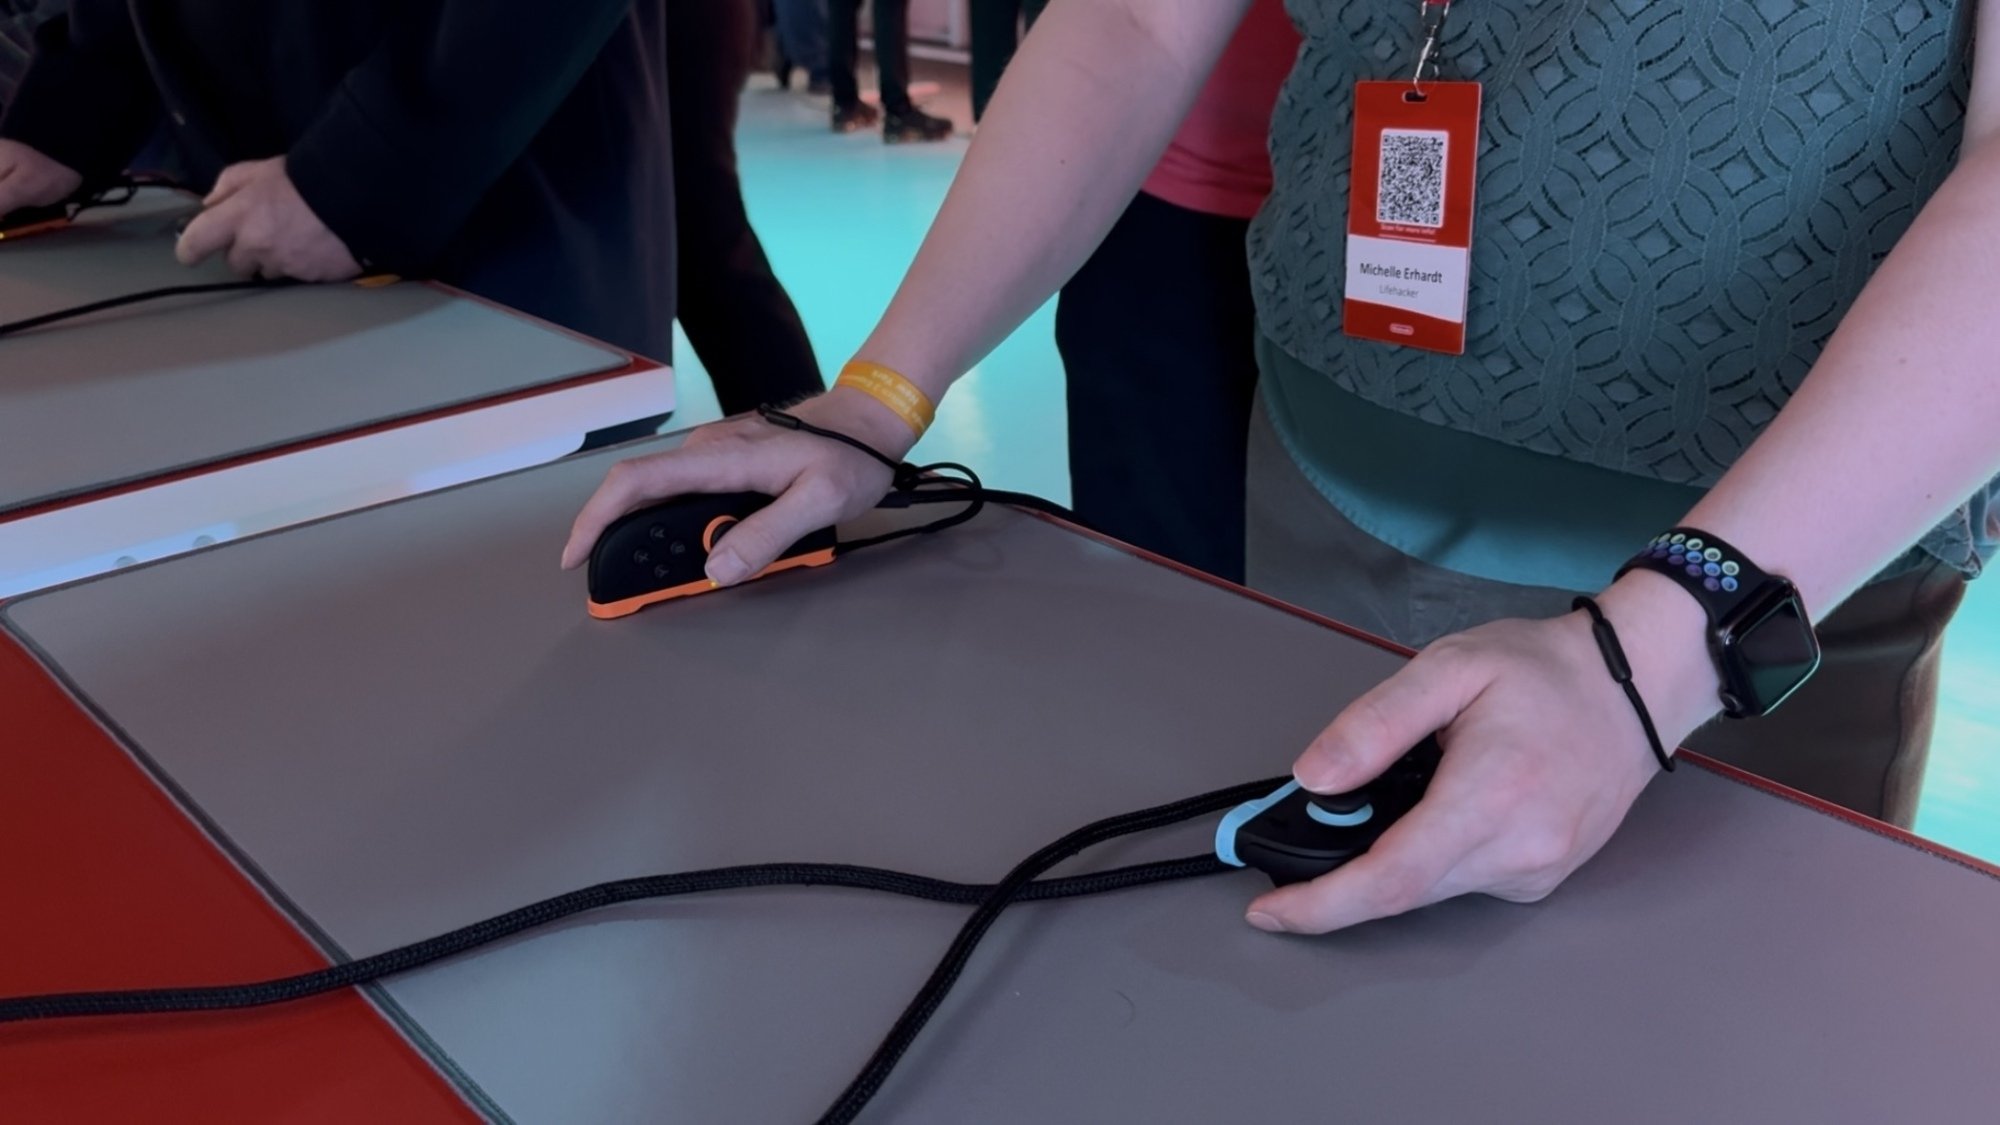
Credit: Michelle Ehrhardt
One of the coolest additions to the Nintendo Switch 2 is mouse controls, which allow you to remove a Joy-Con 2 controller and use it on its side like a mouse. Usually, you’ll only use one controller at a time this way, but some games might actually want you to use both Joy-Con 2 as mice at once. Mouse controls let you navigate around the main menu like a PC, and in certain games, will even open up new modes of play. For instance, Cyberpunk 2077 lets you use mouse controls to aim like you’re playing a first-person shooter on PC.
That’s all pretty self-explanatory, but did you know that you can also plug in a USB-C mouse to play with instead? Not every mouse will work in every game, but if the Joy-Con 2 on its side isn’t comfortable enough for you, it’s worth trying out the mice you have laying around. Alternatively, you could get a mouse shell to place the Joy-Con 2 into, for more grip.
Finally, it’s worth noting that some games on the original Switch also support mouse controls, although the selection is more limited than on Switch 2, and you won’t be able to use a Joy-Con as a mouse. Instead, you’ll have to plug in a USB-C mouse.
Ping your lost Switch controllers
Want to game, but your Joy-Con, Joy-Con 2, or Pro Controller is trapped underneath a couch cushion somewhere? The Switch or Switch 2 can make them vibrate to help you find them. From the main menu, select Controllers from the taskbar (the icon that looks like a Joy-Con). Then, select the second option from the top, called Find Controllers on the original Switch and Search for Controllers on the Switch 2. Select a connected controller to make it vibrate.
Contribute to Fedora 44 KDE and GNOME Test Days
Fedora test days are events where anyone can help make certain that changes in Fedora Linux work well in an upcoming release. Fedora community members often participate, and the public is welcome at these events. If you’ve never contributed to Fedora before, this is a perfect way to get started. There are two test periods […]
Highguard: The Kotaku Review

Boring visuals and too many ideas make it hard to enjoy this free-to-play shooter’s excellent combat
The post <i>Highguard</i>: The <i>Kotaku</i> Review appeared first on Kotaku.
This Entry-Level Roborock Robot Vacuum Is 44% Off Right Now
We may earn a commission from links on this page. Deal pricing and availability subject to change after time of publication.
Robot vacuums can get expensive quickly, especially as you move into models with features such as self-emptying bins and hot-water mopping. But if you’re looking to dip your toe into this world without dropping major cash, the Roborock Q7 L5 robot vacuum and mop is a low-stakes entry-level option that checks many boxes, and right now it’s at a record-low 44% off at $139.99 (originally 249.99) on Amazon, according to price-trackers.
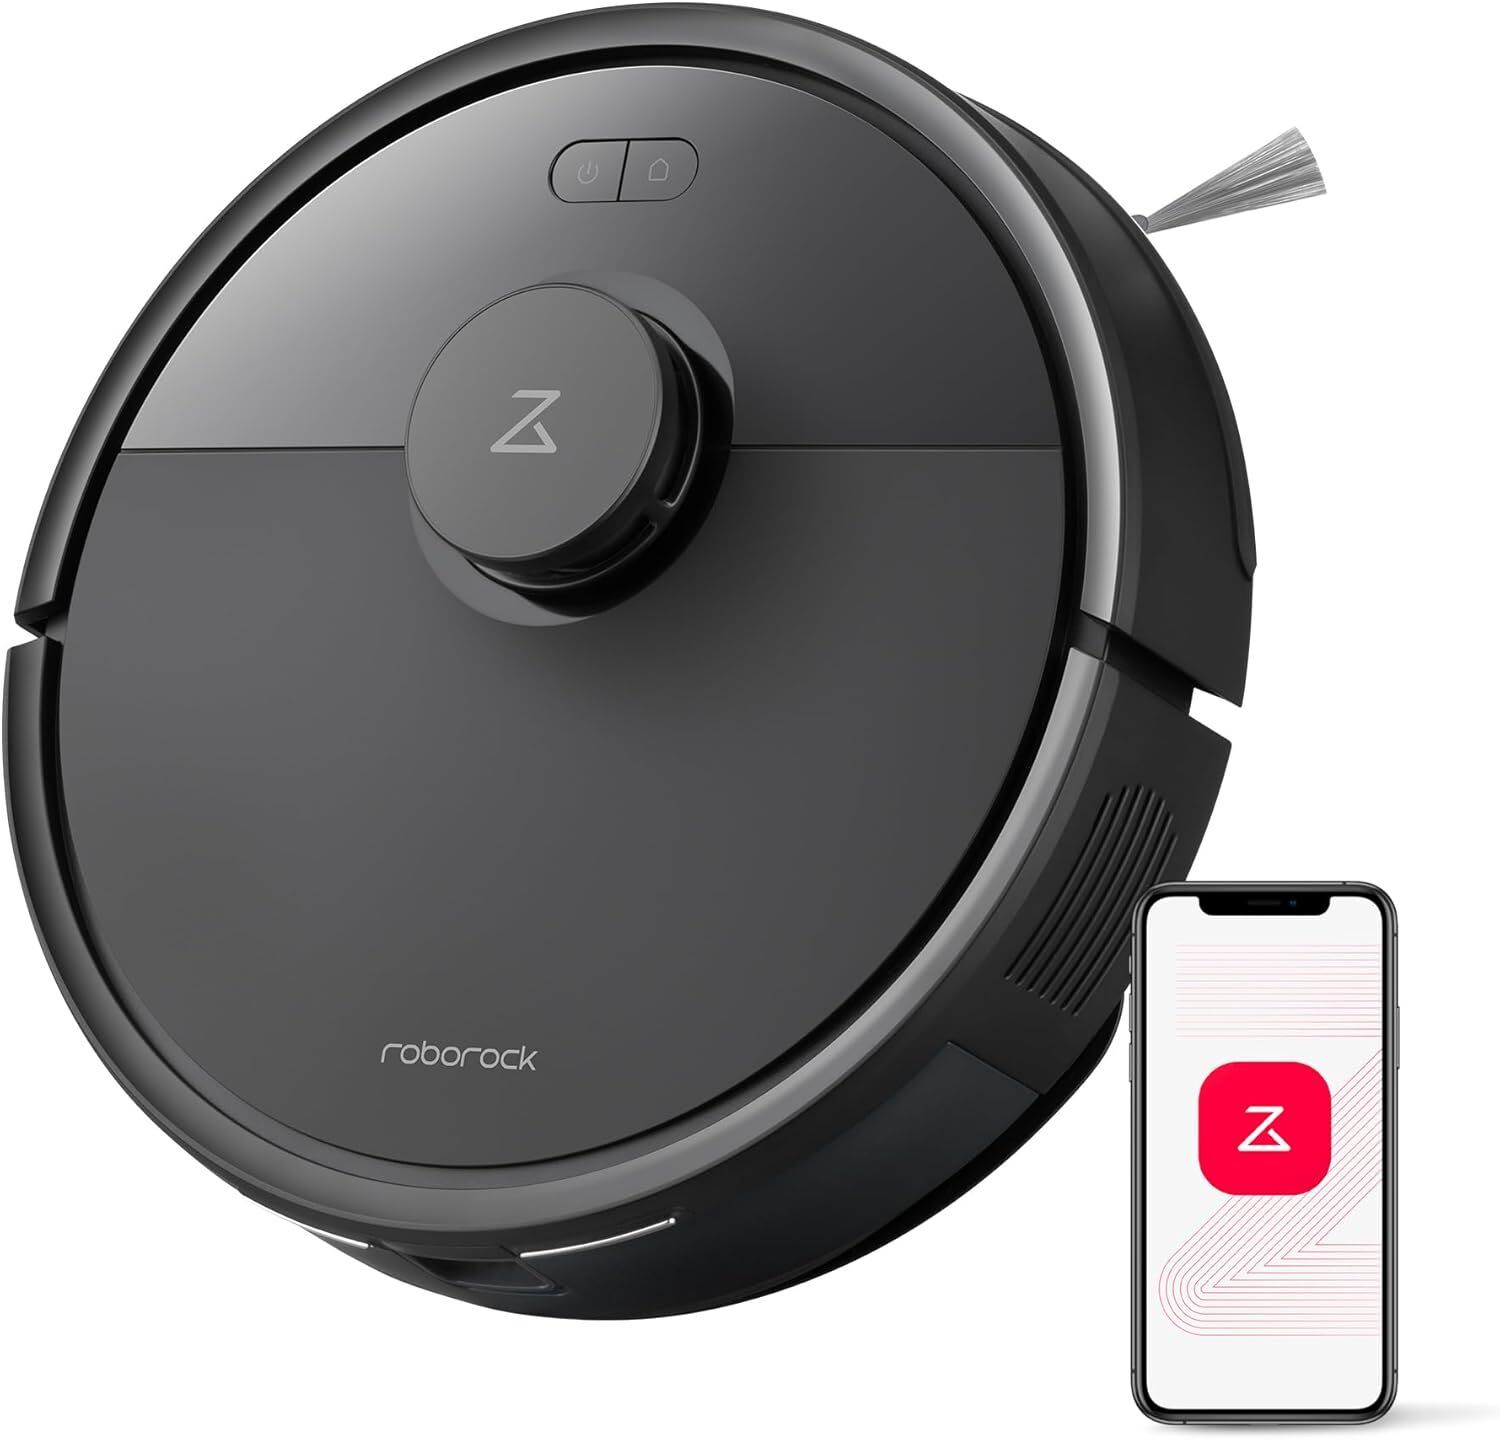
The Q7 L5 has 8,000 Pa HyperForce suction (surprisingly powerful for this price point), multiple anti-tangle brushes, LiDAR navigation, and multi-floor mapping. It also has a mopping feature, which is rare at the under-$150 price point; the 270 ml water tank allows the device to vacuum and mop simultaneously. Some reviews also note that the mopping function can leave floors slightly wet, which is something to keep in mind for people with delicate floor surfaces.
Like pricier models, you can customize zones, schedules, and suction levels via the Roborock app, but it’s worth noting that this vacuum only supports 2.4 GHz wifi. The dual anti-tangle system is especially appealing for pet owners, and navigation runs smoothly and efficiently with obstacle avoidance, as well as suggesting no-go zones to avoid getting stuck. Compared to more feature-rich mop and vacuum hybrids, the dock on the base is compact and has a water tank and dustbin as a single integrated part in the machine, making it a good choice for people with smaller homes.
While it doesn’t have the automation bells and whistles of pricier models, for $139.99, it’ll perform most everyday cleaning jobs effectively. If you’re a first-time robot vacuum buyer or have a specific budget and are looking for a robot vacuum to help automate your cleaning sessions, the Roborock Q7 L5 robot vacuum and mop will give you strong value without breaking the bank.
Our Best Editor-Vetted Tech Deals Right Now
Deals are selected by our commerce team
Fallout 76 Cashes In On Season 2 Hype With $30 NCR Power Armor

Fans can’t use their hard-earned Atoms to buy it either
The post <i>Fallout 76</i> Cashes In On Season 2 Hype With $30 NCR Power Armor appeared first on Kotaku.