You Can Still Harvest These Vegetables After a Frost

Experienced gardeners in parts of the country with cold, potentially snowy winters don’t mess around when it comes to frost. Over time, they figure out when to plant certain fruits and vegetables so they’re ready to harvest well before the first frost of the season.

These gardeners also know that there are hardier vegetables that have a more flexible schedule and can stay in the ground a bit longer. Whether the first frost happens unusually early, or they want to harvest their crops gradually instead of having to store all of them at once, the following veggies aren’t bothered by a bit of winter weather. In fact, some of them taste even better after the first frost. Let’s dig in.

Which vegetables can be harvested after a frost?

This will depend on a variety of factors, including your local climate—which traditionally has dictated the types of vegetables that have been grown outdoors—and the increasingly unpredictable weather patterns. In other words, a plant that’s able to survive a frost in one part of the country may not make it in another. But generally speaking, here are some examples of veggies that can be harvested after a frost, broken down by category:

Root vegetables

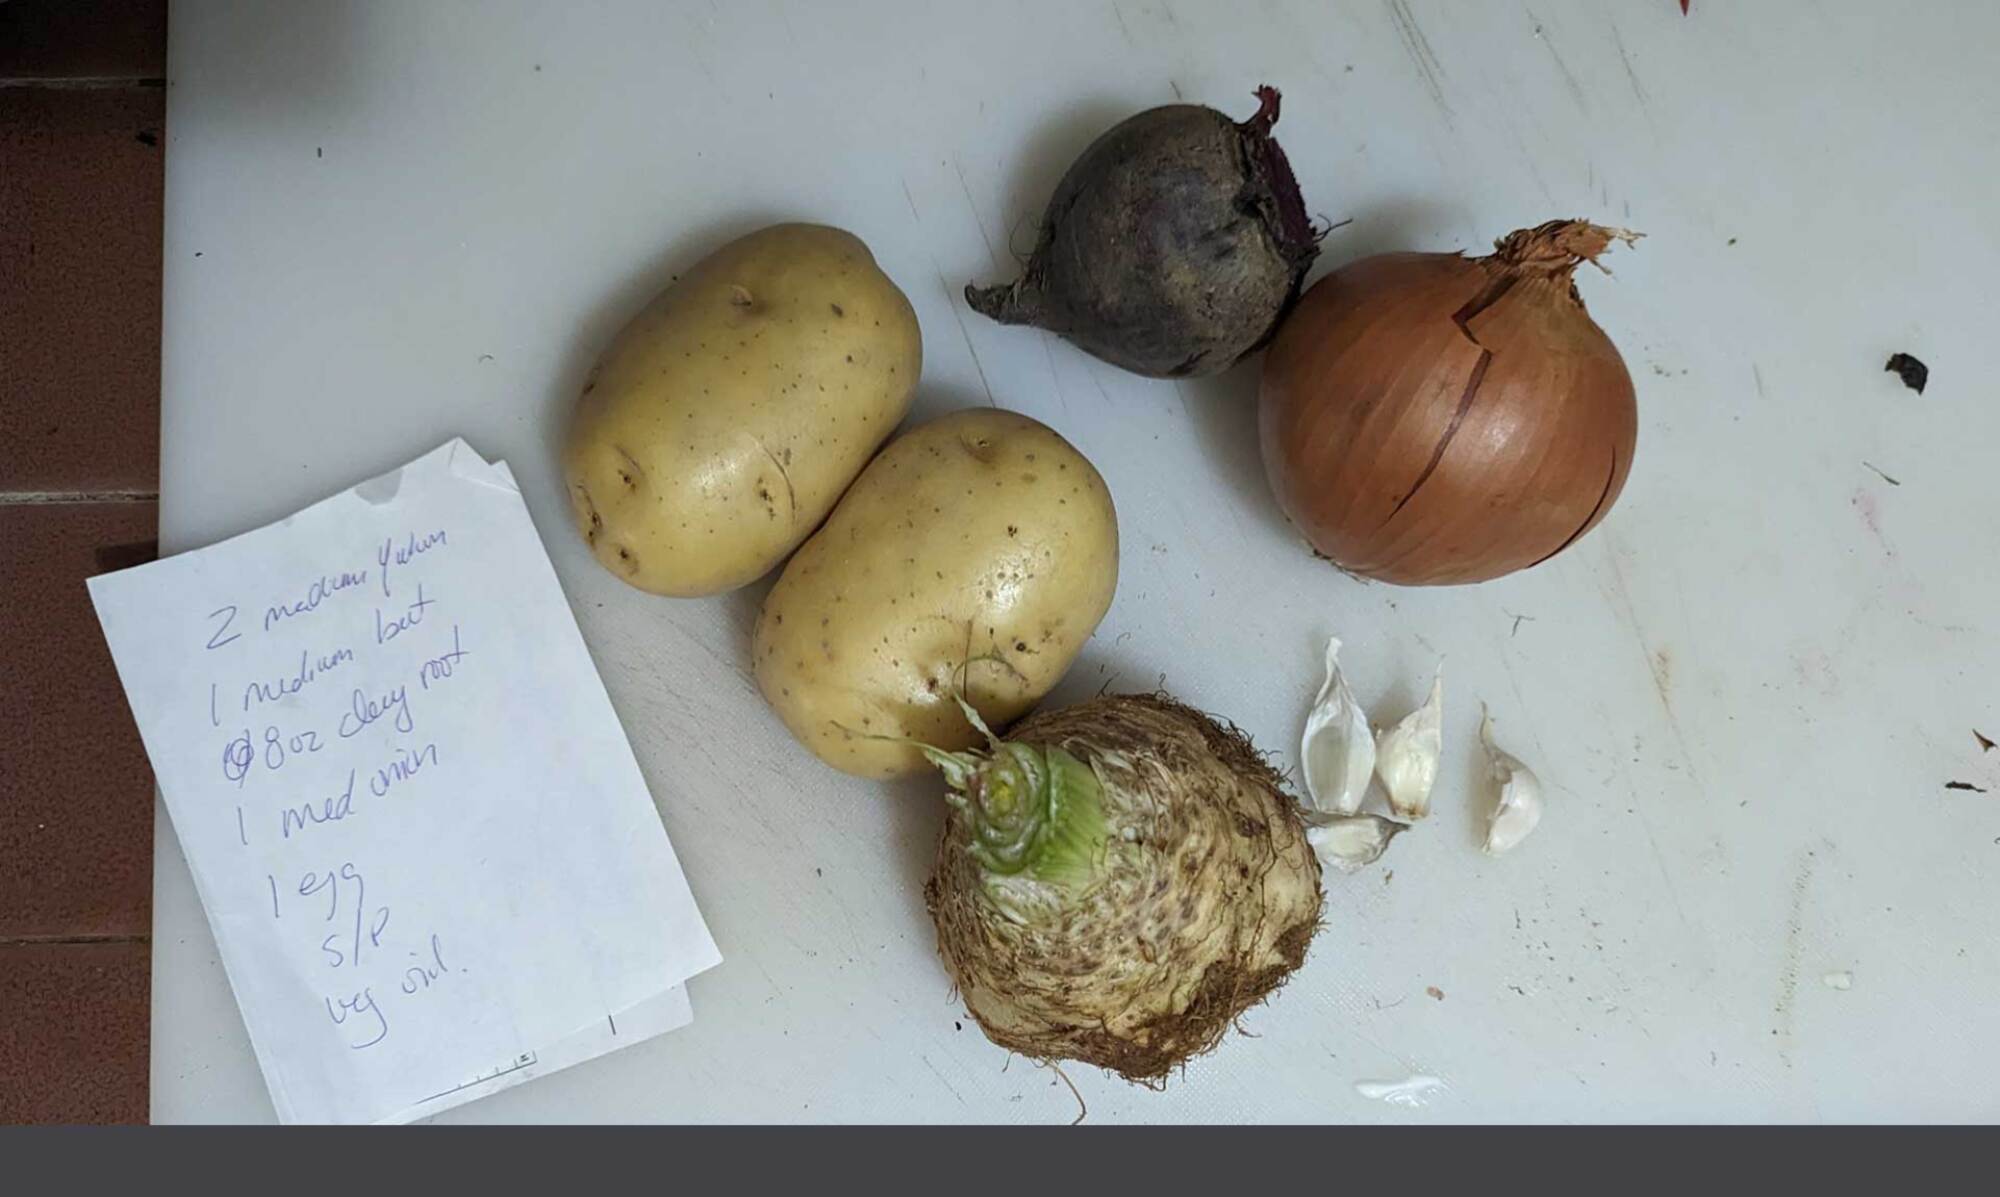
Because vegetables like carrots, parsnips, turnips, rutabagas, and beets grow (mostly) underground, they have some protection from the frost, Gretchen Voyle, a horticulture educator at the Michigan State University Extension, writes in a university news release. While frost itself only affects the garden’s surface, things change after the ground freezes. Once that happens, these root vegetables will be damaged, if not killed.

The other factor to consider is the moisture of the soil, Voyle explains. These veggies are fine if the ground is damp and not frozen, but if the soil is too wet, they can rot.

Also, don’t worry if the green tops of root vegetables like carrots, parsnips, and beets don’t survive a frost, says Jim Myers, a plant breeder and researcher at the Oregon State University Extension Service. They may die, but as long as the ground doesn’t freeze or get too wet, the actual roots—the main parts we eat—will still be alive.

Potatoes

Spuds are a special case, according to Voyle, because while they can be harvested after a frost, they must be removed from the garden almost immediately after they are dug. If potatoes are left sitting on the soil’s surface for even a short amount of time, they may start developing a poisonous chemical called solanine, which also turns them a sickly green. If someone eats enough solanine, Voyle says it could lead to gastrointestinal and neurological disorders.

Greens

While leaf lettuces won’t survive a frost, hardier greens like kale, collards, and Swiss chard will, Voyle explains. Not only that, but they may get slightly sweeter following a light frost.

You can also harvest red and green ball cabbages, as well as their cousins kohlrabi and Brussels sprouts, after a frost—though you may need to remove some of the outer leaves if they’re damaged, according to both Voyle and Myers. Similarly, if you realize that the leaves of any of these greens have gotten tough to chew, cooking will soften them up.


Source: LifeHacker – You Can Still Harvest These Vegetables After a Frost

How to Make Extra Crispy Red Flannel Latkes

No one can fault a latke; fried potatoes in oil are going to be delicious no matter what form they take, but I don’t particularly enjoy when recipes for foods specific to Jewish holidays stray too far from the path. I’ve recently seen recipes for wild variations that are no longer majority potato and oil and have thought, “Hmm, not a lot of latke.”

However, within the confines of the tater-oil relationship, there’s some room to play, and red flannel latkes are a good way to add color and a little sweetness to this traditional, religious dish. While the hill I’ll die on is latke-shaped and made of potato, oil, onion, and some egg, a little color isn’t going to hurt. The addition of celery root and beets give these latkes some body and a beautiful, rich color and are the source of the “red flannel” moniker. You can make them on their own or alongside their more traditional brethren. 

image of latke ingredients

Credit: Amanda Blum

A good shred can still be achieved in a food processor

There are many great thinkpieces on whether it is necessary to hand-grate your potatoes or use a food processor, the idea being that grating by hand will result in more consistent threads of potato, which then results in lacier latkes. I say these folks need more food processor training. If you use a shredding disk on your machine, the key is to use long chunks of vegetable that fit in the feeder tube of the chute that you push through rapidly, resulting in long shreds. When you simply throw vegetables into the chute, bypassing the feeder tube, the vegetables fall horizontally and end up getting macerated against the disk. You certainly can hand grate, I just don’t have the will. 

Regardless, you’ll take your potatoes, beet, celery root, and onion (all peeled and broken down into long pieces that will fit into the chute) and pass them through the feeder tube as quickly as possible. 

Removing moisture from the latke ingredients is top priority

The goal is to remove as much moisture as possible from the shredded vegetables, and I’m afraid draining alone isn’t going to get it done.

Dump everything out into a colander and mix it by hand so all the vegetables are combined. The vegetables will all take on a beautiful ruby color from the beets. Sprinkle two tablespoons of salt over the vegetables and mix it through. Leave the colander in the sink for twenty minutes to drain. That step alone isn’t really enough: to get out all the moisture, take a clean tea towel, dump the vegetables into it, and roll up the towel lengthwise. Twist both ends until tight, over the sink, and then keep twisting. This should put pressure on the vegetables, which will release even more moisture. Repeat this a few times. When no more moisture comes out, spread the vegetables in a flat layer onto a clean cookie sheet lined with paper towels and let it dry. I like to aim a fan at it and leave everything alone for 20 minutes. If you’re pressed for time, you can skip some of these steps to dry the vegetables, but it’ll affect how crispy you can get the latkes. 

Now it’s time to add the binder, which is just an egg. Some recipes call for flour or breadcrumbs, but an egg is enough. Make sure it is well incorporated, mixing everything together in the colander. 

image of latke ingredients before adding egg

Credit: Amanda Blum

A double fry ensures the crispiest potatoes

The only thing left to do is cook these latkes up. In as large a fry pan as you have, add an inch of vegetable oil. While olive oil is the traditional holiday oil, it has too low of a burn point. Vegetable oil will tolerate those higher temperatures that will result in lacy latkes. Over a medium-high heat, allow the oil to come to a temperature high enough that a droplet of water will sizzle and dance. Add the peeled garlic cloves; they’re just there to flavor the oil. 

Take a heaping tablespoon of latke mix and drop it into the oil. It will form an irregular shape, but should hold together. The pan should accommodate three or four latkes at a time, so continue making them until the pan is full. Flipping a latke is serious business. Do it too soon and the thing will fall apart; do it too late and it’s going to burn. Check your latkes by peeking underneath them, and as soon as they turn golden, flip them. It’s OK to use two spatulas to do so, so you’re not splashing oil around. Do not try to use tongs; these are delicate and will fall apart. You want to turn them over as delicately as possible. 

Once they are golden brown on the second side, it’s time to pull the latke out with the spatula and relocate it to some paper towels on a plate where it can dry off. 

image of red flannel latkes on a cookie sheet

Credit: Amanda Blum

Here’s where I differ from others. I like to give the latkes a second fry in the oil once they’ve all been through once. Double frying potatoes is a long held way to get really crispy exteriors, and with the beet and celery root addition, I find that the second fry really gets the latkes from a little crispy to crunchy on the outside, soft on the inside. I’ve tried an air fryer at this point, but found it dried the latkes out too much for my liking. Once the latkes come out of the second fry and have drained on paper towels, you can serve them immediately, or keep them warm on a cookie sheet in a 350-degree oven for about an hour, or let them cool and freeze them flat. 

To keep things traditional, serve these latkes with sour cream or applesauce.

Red flannel latkes on a plate with sour cream

Credit: Amanda Blum

Red Flannel Latkes Recipe

(based on the New York Times recipe)

Ingredients

  • 2 medium-sized gold potatoes

  • 1 medium-sized beet

  • 1 small celery root

  • 1 medium-sized sweet yellow onion

  • 1 egg

  • Salt and pepper

  • 4 cloves garlic

  • 1 cup vegetable oil

  1. Peel the potatoes, beet, celery root, and onion and cut everything into long chunks small enough to fit through the feeding tube of the food processor chute. 

  2. Using the shredding disk on your food processor, push the vegetables through quickly.

  3. Dump everything into a strainer and mix together thoroughly. Sprinkle in two tablespoons of salt and mix again, then leave to drain in the sink for twenty minutes. 

  4. Place all the vegetables into a clean tea towel, roll it up and wring as much as possible, two or three times, until you’ve gotten as much moisture out of the vegetables as you can. 

  5. Lay out the vegetables on a cookie sheet lined with paper towels and allow to air dry, optimally in front of a fan, for at least 20 minutes. Throw the vegetables back into the colander and mix thoroughly with one egg. 

  6. Heat an inch of vegetable oil in a large skillet over medium-high heat. Add a droplet or two of water to the oil. When the water starts to sizzle, the oil is ready. Add your garlic cloves. 

  7. Drop a heaping tablespoon of latke mix into the oil, and then repeat as many times as the pan will fit. Check the latkes for a golden color on the bottom, and then carefully, using two spatulas, gently flip the latkes and fry until golden brown on the other side. 

  8. Remove the latkes to a paper-towel-lined plate to drain. Once you’ve completed all the latkes, give them a second fry using the same method. This time, wait for them to come to a deeper brown, but watch them closely so they don’t burn. Remove them and place them on a clean paper-towel-lined plate and serve immediately. You can keep them hot in the oven on 350F in a single layer on a cookie sheet for an hour if necessary. 


Source: LifeHacker – How to Make Extra Crispy Red Flannel Latkes

Today's NYT Connections Hints (and Answer) for Friday, December 1, 2023

I found this to be one of the easier puzzles lately. If you’re looking for the Connections answer for Friday, December 1, 2023, read on—I’ll share some clues, tips, and strategies, and finally the solutions to all four categories. Along the way, I’ll explain the meanings of the trickier words and we’ll learn how everything fits together. Beware, there are spoilers below for December 1, NYT Connections #173! Read on if you want some hints (and then the answer) to today’s Connections game. 

If you want an easy way to come back to our Connections hints every day, bookmark this page. You can also find our past hints there as well, in case you want to know what you missed in a previous puzzle.

Below, I’ll give you some oblique hints at today’s Connections answers. And farther down the page, I’ll reveal the themes and the answers. Scroll slowly and take just the hints you need!

NYT Connections board for December 1, 2023: WAX, PIECE, CRESCENT, STORE, MONKEY, OUTLET, THREAD, SOCKET, SHARE, SHAVE, MARKET, CUT, MALL, TAKE, TWEEZE, ALLEN.

Credit: Connections/NYT


Does today’s Connections game require any special knowledge?

Nope, it’s all pretty straightforward today.

Hints for the themes in today’s Connections puzzle

Here are some spoiler-free hints for the groupings in today’s Connections:

  • Yellow category – Shopping time.

  • Green category – At the salon.

  • Blue category – Your portion.

  • Purple category – Here’s a tool you can throw in the works.

Does today’s Connections game involve any wordplay?

There’s a fill-in-the-blank category. 

Ready to hear the answers? Keep scrolling if you want a little more help.


BEWARE: Spoilers follow for today’s Connections puzzle!

We’re about to give away some of the answers. Scroll slowly if you don’t want the whole thing spoiled. (The full solution is a bit further down.)

What are the ambiguous words in today’s Connections?

  • ALLEN can be a name, but today it’s something else entirely. You’ll want to think of an ALLEN wrench, also known as a hex key.

  • An OUTLET can be a place where water flows, where you can get electricity (a wall OUTLET), or a place where a manufacturer cheaply sells products they’d like to get rid of (often, these days, in a STORE in an OUTLET MALL). 

  • You can get hair CUT or TWEEZEd, but those words are in different categories today. 

What are the categories in today’s Connections?

  • Yellow: PLACES TO SHOP

  • Green: WAYS TO REMOVE HAIR

  • Blue: PORTIONS OF PROFIT

  • Purple: KINDS OF WRENCHES

DOUBLE BEWARE: THE SOLUTION IS BELOW

Ready to learn the answers to today’s Connections puzzle? I give them all away below.

What are the yellow words in today’s Connections?

The yellow grouping is considered to be the most straightforward. The theme for today’s yellow group is PLACES TO SHOP and the words are: MALL, MARKET, OUTLET, STORE.

What are the green words in today’s Connections?

The green grouping is supposed to be the second-easiest. The theme for today’s green category is WAYS TO REMOVE HAIR and the words are: SHAVE, THREAD, TWEEZE, WAX.

What are the blue words in today’s Connections?

The blue grouping is the second-hardest. The theme for today’s blue category is PORTIONS OF PROFIT and the words are: CUT, PIECE, SHARE, TAKE.

What are the purple words in today’s Connections?

The purple grouping is considered to be the hardest. The theme for today’s purple category is KINDS OF WRENCHES and the words are: ALLEN, CRESCENT, MONKEY, SOCKET.

How I solved today’s Connections

CRESCENT and MONKEY? Clearly we’re looking at wrenches. SOCKET and ALLEN round out the group. 🟪 (This is purple? It was the easiest one!)

CUT and TWEEZE stand out as things you might get done at a salon, but then I realize I need to narrow this category down. SHAVE, WAX, and THREAD are all hair removal techniques. 🟩

With only two groups left, the others are pretty obvious. SHARE, CUT, PIECE, and TAKE are all portions of earnings or winnings; 🟦 MALL, OUTLET, STORE, and MARKET are places to buy things. 🟨

Connections 
Puzzle #173
🟪🟪🟪🟪
🟩🟩🟩🟩
🟦🟦🟦🟦
🟨🟨🟨🟨

How to play Connections

I have a full guide to playing Connections, but here’s a refresher on the rules:

First, find the Connections game either on the New York Times website or in their Crossword app. You’ll see a game board with 16 tiles, each with one word or phrase. Your job is to select a group of four tiles that have something in common. Often they are all the same type of thing (for example: RAIN, SLEET, HAIL, and SNOW are all types of wet weather) but sometimes there is wordplay involved (for example, BUCKET, GUEST, TOP TEN, and WISH are all types of lists: bucket list, guest list, and so on).

Select four items and hit the Submit button. If you guessed correctly, the category and color will be revealed. (Yellow is easiest, followed by green, then blue, then purple.) If your guess was incorrect, you’ll get a chance to try again.

You win when you’ve correctly identified all four groups. But if you make four mistakes before you finish, the game ends and the answers are revealed.

How to win Connections

The most important thing to know to win Connections is that the groupings are designed to be tricky. Expect to see overlapping groups. For example, one puzzle seemed to include six breakfast foods: BACON, EGG, PANCAKE, OMELET, WAFFLE, and CEREAL. But BACON turned out to be part of a group of painters along with CLOSE, MUNCH, and WHISTLER, and EGG was in a group of things that come by the dozen (along with JUROR, ROSE, and MONTH). So don’t hit “submit” until you’ve confirmed that your group of four contains only those four things.

If you’re stuck, another strategy is to look at the words that seem to have no connection to the others. If all that comes to mind when you see WHISTLER is the painting nicknamed “Whistler’s Mother,” you might be on to something. When I solved that one, I ended up googling whether there was a painter named Close, because Close didn’t fit any of the obvious themes, either.

Another way to win when you’re stuck is, obviously, to read a few helpful hints–which is why we share these pointers every day. Check back tomorrow for the next puzzle!


Source: LifeHacker – Today’s NYT Connections Hints (and Answer) for Friday, December 1, 2023

You Can Now Play PC VR Games on Your Meta Quest Headset With Steam Link

When it comes to VR headsets right now, there are Meta’s Quest 2, Quest 3, and Quest Pro, and then there’s everything else. You already know you can use the Meta Quest devices to play bespoke VR games like Beat Saber and Among Us VR, but if you have a powerful gaming PC, you can now more easily play demanding PC-based VR titles on your Quest headset with minimal fuss.

Previously in order to play PC VR titles on your Meta Quest, you needed to use a compatible Quest Link USB-C cable to connect your headset to your PC. Barring that, you could use the built-in Air Link feature to wirelessly connect your headset to your PC over wifi or by using a third-party app like Virtual Desktop.

However, Valve recently launched the Steam Link app for Meta Quest 2, 3, and Pro, which offers an easier way to connect your headset wirelessly to your PC. This is especially useful if most of the PC VR titles you’ve bought were via Steam.


Products to consider:

Looking to pick up a new Meta Quest headset? You can buy the Meta Quest 2, 3, or Pro on Amazon:


Requirements to use Steam Link

To use Steam Link, you’ll need to check if your PC meets Valve’s minimum requirements. First, Valve says your PC should be wired to your router for better connectivity, while you should connect your headset to a 5GHz wifi network. Other minimum specs include an NVIDIA GPU (GTX970 or better) and Windows 10 (or newer).

Of course, those are just minimum requirements. Valve’s recommended PC specs for Steam Link include an internet connection with Wi-Fi 6 or Wi-Fi 6E support, 16GB of RAM, and a Nvidia RTX 2070 GPU or better.

Getting started with Steam Link

You can start using Steam Link on your Meta Quest headset in a few quick steps. The first is to make sure Steam and SteamVR are installed on your PC. There’s a chance you might need to restart Steam to make sure you’re on the latest version of both programs. After that, make sure your Meta Quest headset is connected to the same network as your PC.

On your headset, download the Steam Link app. Once you open the app, it will look for your PC running SteamVR. Once it finds your PC, press the green Connect button. You’ll then be given a four-digit code, which you’ll need to enter into a pop-up on your PC.

pairing code for steam link to meta quest

Credit: Sachin Bahal

After you’ve paired your PC with the Steam Link app, the app wirelessly connect to your PC and open the Steam VR environment. Here, you’ll be able to launch all the installed VR games on your PC. You can also play non-VR games that you have installed on your PC on a virtual big screen.

Steam via Steam Link app on Meta Quest

Credit: Sachin Bahal


Source: LifeHacker – You Can Now Play PC VR Games on Your Meta Quest Headset With Steam Link

How to Make a Collaborative Playlist on Spotify

Spotify first released the option to make collaborative playlists back in September of 2020, but a lot of people still don’t know how to use it. Thankfully, the process isn’t difficult. With this tutorial, you and your friends can get started making playlists together in no time.

How to make a collaborative playlist in Spotify

Whether you’re creating a playlist from scratch or looking to invite friends to add to one you already have, the process to create a collaborative playlists on Spotify is actually very easy, though it doesn’t seem to be available on the website. Instead, you’ll need to open up the Spotify desktop or mobile app.

Next, tap Your Library and find the playlist you want to collaborate on, or create a new one. (If you want to create a brand-new playlist, you will need to make it first, and then share it with your friends.)

From the Playlists section of your library, tap or click on the playlist that you want to collaborate on, then find the button that looks like a person with a plus beside it. This is how you’ll invite others to collaborate on your playlist. How you share the link to this playlist will vary slightly depending on which app you’re using—if you’re on mobile, you’ll be able to share it directly using your phone’s share function. If you’re on the desktop app, though, it’ll just copy the link to your clipboard, allowing you to paste it wherever you want. From there, anyone who clicks the link and adds the playlist to their own Spotify library will be able to add songs to it, allowing you all to collaborate quite easily.

Apple also recently added the option to create collaborative playlists in Apple Music, so now is a great time to start sharing your favorite music, podcasts, and other audio with your friends.


Source: LifeHacker – How to Make a Collaborative Playlist on Spotify

Holiday Cookie Shots Are Fun for Drinkers and Stoners Alike

The holiday season is in full swing, parties are filling your schedule, and cookies are always in style. This year, I’ve got a very special cookie project for you. One for the drinkers, non-drinkers, and the stoners in your group (and even the ones who manage to do both without tossing their cookies). Whether you’re hosting or bringing a gift, bake a batch of cookie shots for the holidays. Here’s how to do it so they look cute too. 

A cookie shot, or more accurately a cookie shot glass, is cookie dough baked into the shape of a little cup. I had only eaten (drank? used?) experienced a cookie shot once before. It was four or five years ago, and I was both thrilled and confused. Would it be gross? Would a cookie even hold liquid? My boyfriend’s cousin had purchased them from Dominique Ansel Bakery (you might know the chef as the creator of the decadent cronut). So the question about flavor was answered—Ansel’s pastries are anything but gross—but how do you prevent leakage? Well, the inside of the cup gets brushed with a layer of melted chocolate. This adds more chocolate-y flavor, but also creates an impermeable layer on the inside. She’s a modern marvel. 

We had more than one shot, because the cookie doesn’t get soggy, and then we ate them. The cookie shots were incredible, and I’m sure we became very responsibly buzzed. It’s a fun way to do normal shots, and a hell of a talking point. All of these things are great for a party. But I never had them again. You see, Dominique Ansel knows his worth. That’s nice for him, but I will not purchase three chocolate chip cookies for 22 American dollars, regardless of their shape. Luckily, the universe heard my sorrow, and now I can make as many as I want at home. 


Products to consider:


You can buy metal cookie shot pans specifically for this purpose or you can buy shot glass molds made of silicone. Most silicone molds are oven-safe up to 500°F, but double check on the packaging, of course. Nestle Toll House currently has a cookie shot sweepstakes going on too, where you can enter to win your own cookie shot kit. It comes with the Wilton cookie shot mold above, which is a non-stick, quality piece of bakeware. The real value is that it’s basically a 12-cup popover pan set, and I don’t have one of those yet. (Get ready for some popover recipes, y’all.)

Tips for making the perfect cookie shot

Once you get your mold and make your favorite drop cookie dough (standard chocolate chip is my go-to), you should be able to follow the directions to success. However there are some things I wish I had done better the first time. Here’s what I learned, so you can make sure everything goes well even on the first batch.

Don’t overfill the mold

Two cookie shot glasses on a table.
Left: A cookie shot that had too much dough. Right: A cookie shot with the right amount of dough.
Credit: Allie Chanthorn Reinmann

I got greedy. It happens. I’m not proud of it, but I overfilled my cookie mold. On the bright side, no one’s going to be mad that they got the cookie shot with an extra-cookie-umbrella top. Remember, if there’s a leavening agent in your dough, it will expand. If you’re using the Wilton-style mold (where you fill the cavity and use a plunger), fill it only halfway up the mold. Plunging the indentation in the center drives the dough up the sides, but even then there should be a half-inch or more of space at the top of the mold. Dough in the other style of mold should also sit with a little room to grow.

Make sure they’re cooked crisp

Once I had baked the cookie shots for about 12 minutes, according to the baking directions and the pan instructions, I noticed the plungers were lifted as a result of the baking powder and probably steam. If that happens, just press them down again while the cookie dough is soft and let them cool. They won’t fight you. 

Once I twisted out the plunger, I could tell they were set, but still too flexible for a shot. Once they were cooler, but still warm, I gently twisted the dough in the mold and lifted it out while twisting. I gripped the top edge with four fingers spaced around the rim to prevent breakage. Then I put them on a baking sheet, and baked them at the same temperature for another five to seven minutes. They cooled on a wire rack, and were crispy and stable. I have only used the Wilton mold, so I’m not sure how evenly the silicone molds cook.

Get your hands dirty

A hand holding a cookie shot glass.
Here’s the interior I coated with chocolate using my finger, and another “glass” with sprinkles on the edge.
Credit: Allie Chanthorn Reinmann

In order to hold liquid, the cookie must be coated with chocolate or icing on the inside. At first, I figured I could use a pastry brush to swipe chocolate along the inside of the cookie shot. Silly me. Not only is a pastry brush too big, but you need to ensure there are no holes in your coating. A brush is not dependable for that. 

Use your finger. Melt down any old chocolate or use icing. Scoop with a spoon, or use a piping bag (or zipper bag with the corner clipped), and put a teaspoon or so inside the shot glass. Use your finger to smash chocolate all the way down into the bottom corners and up the sides while you rotate the glass for complete coverage. Hey, you can always wear a food-safe rubber glove.

Let the chocolate cool in the fridge for 10 minutes or so, and the shot glasses are ready to roll. Different cocktails will pair well with different cookie doughs, but you can’t go wrong with dessert shots. Whiskeys pair well with chocolate cookies. Add Baileys, a white Russian, or a mudslide. Try coffee-flavored mocktails, a chilled espresso, or kick it old school with milk. Then you’ve already got your snack in hand. If you can help yourself, I suggest eating it slowly and taking incrementally smaller shots as the night goes on. 


Source: LifeHacker – Holiday Cookie Shots Are Fun for Drinkers and Stoners Alike

What People are Getting Wrong This Week: The Chiefs Fan Wearing ‘Blackface’

The screenshot above, taken from CBS’s broadcast of Sunday’s football game between the Las Vegas Raiders and the Kansas City Chiefs, caused an online controversy after it was posted on Twitter on Sunday night. It seems to depict a double-dose of racism—a white kid in blackface wearing a traditionally native American headdress—and people were (understandably) appalled at such a blatantly racist image. But a look at the context of the photo reveals that this is a photo illustrating the impossibly complex maze of racism in America.

The missing context in a seemingly racist photograph

Given the disturbing history of blackface, it’s not surprising that people would react with anger at the sight of it on national television. But a straight-on picture of the fan reveals that only half of his face is painted black. The other half is red. Red and black: the Chiefs’ colors.

Chiefs fan in headdress and face-paint

Credit: HistoryInc/Twitter

Maybe a white person painting any part of their face black is problematic regardless, but intent is important, and the makeup seems more likely to be part of the tradition of sports fans painting their faces with team colors than a reference to minstrel shows. If he’d been an Eagles’ fan, it would have been green and white, and we wouldn’t be talking about it at all.

But it gets even more complex when you consider the “cultural appropriation” of the feathered headdress. Wearing Native American gear is generally regarded as a shitty thing for a white person to do, but the young fan in question is reportedly Native American himself. His grandfather, reportedly, is Raul Armenta, who sits on the board of the Chumash Tribe in Santa Ynez, Calif. The Chumash didn’t wear feathered warbonnets though—that was a plains Indian thing, a group thousands of miles from the Chumash’s west coast home. See what I mean by complicated? Inter-tribal-cultural-appropriation aside, I think most people would agree that this fan’s attire at the game was perhaps not the most sensitive choice, but it’s far from a hate crime.

How racist is the NFL?

The knee-jerk reaction of many to the fan’s appearance during the game was “The NFL is racist.” True, the NFL has a troubling history of racism, but the NFL isn’t football. The early days of the game itself point to the possibility of a more egalitarian professional football league that never came to be.

Organized football was always racist—this is America after all—but the contributions of both Native and African Americans to the formation of the sport are undeniable, and the early days of collegiate and pro football were less segregated than the NFL later became. Black players and player/coaches were vital to the success of early college football powerhouses like Nebraska, Ohio State, and Cornell beginning in the late 1800s, and Charles W. Follis (aka “The Black Cyclone”) led the Shelby Blues to an 8-1-1 season in 1904 in the professional Ohio League.

It was different down south of course, and this was pre-integration, so there weren’t many African American students at universities to begin with, but football in its early days was seen by some as an exemplification of American equality. Ideally, it was open to all who were courageous enough to step onto the gridiron, no matter who they were. But real life has a way of failing to live up to lofty ideals, especially when things become more structured and racism becomes institutionalized. In other words: Enter the National Football League.

The NFL wasn’t fully segregated to start with. In the two years after the league (then called the American Professional Football Association) was formed in 1920, not only were there a handful of Black players, African American hall-of-fame running back Fritz Pollard was the head coach of the Akron Pros. But even though the NFL’s segregation was never explicit, it may as well have been. A “gentleman’s agreement” among team owners in the mid 1920s limited the number of Black players allowed to play in the league, and by 1934, there were no African American players left in the NFL. It wasn’t until 1947 that the league was reintegrated.

These days, the NFL owns up publicly to its racist past, and proudly proclaims its intention to “End Racism” on end zones and team uniforms, but how they’re actually going about the racism-ending is unclear. It is clear that race isn’t a barrier to entry in the NFL any longer, nor is it a barrier to stardom—Patrick Mahomes is a household name. But on the other hand, there’s the dual attorneys-general investigation of the league for racial, sexual, and ageist discrimination, the Colin Kapernick situation, and on and on. There’s also the league’s relationship with Native Americans.

Native Americans and football

Native Americans have been intertwined with football since the game began, and not as racist mascots. Jim Thorpe, a member of Sac and Fox Nation did more to popularize football in its early days than just about anyone. Thorpe lead the Canton Bulldogs to unofficial professional world championships in 1916, 1917, and 1919. Thorpe cut his football teeth on Glenn “Pop” Warner’s squad, the Indians, a team of Native Americans from the Carlisle Indian Industrial School. If you like the forward pass, you can thank the Carlisle Indians, who perfected the play, leading to a 14 year record of 167–88–13 playing against well-funded college teams like Yale and Princeton. But again, it’s complicated: the Carlisle School may have had a great football squad, but the institution’s focus on assimilation as an antidote to segregation was part of the US’s ongoing cultural genocide against Native people, and the football program could be seen as part of that.

Native Americans were ultimately “thanked” for their contributions to football with organizations like the Washington Redskins, who clung to their racist name until 2020, long passed the point that any “but it was a different time” arguments had any merit.

As for the K.C. Chiefs, the team is named for H. Roe “Chief” Bartle, the mayor who brought pro football to Kansas City in 1960, so the squad’s name isn’t based on Native Americans. But the organization definitely used (and uses) harmful, stereotypical Native American imagery heavily for promotion. So do the fans; just look at the “Tomahawk Chop.”

In response to accusations of insensitivity, in 2014 the Chiefs initiated a dialogue with the American Indian Community Working Group, a collection of leaders from American Indian communities around Kansas City, and took many of their suggestions on how to seem less bigoted and dial down the cultural appropriation. One of the rules the Chiefs say they adopted is “the outright banning of headdresses and face paint at the stadium on gameday.” I guess they aren’t too strict about that one.


Source: LifeHacker – What People are Getting Wrong This Week: The Chiefs Fan Wearing ‘Blackface’

Your Electric Kettle Is Dirtier Than You Think

When you’re used to the speed and efficiency of an electric kettle, waiting for water to boil on the stove can feel unbelievably slow. And if you’ve someone who has granted precious counter space to what’s essentially a single-use appliance, you probably rely on it for everything from making hot beverages, to boiling water to transfer it to a pot on the stove, to making instant oatmeal or noodles.

When it comes to keeping the kitchen clean, you probably focus on the visible messes, while ignoring the device you use to boil water—which, after all, you may use to clean or sanitize other items in the room. Unfortunately, electric kettles (or any kettles, for that matter) are not self-cleaning. This is especially true if you have hard water, as mineral deposits might stain the bottom, build up on the filter, and leave streaks on the outside (particularly those with a stainless steel exterior). The good news is that deep-cleaning your electric kettle is much easier than you might think. Let me walk you through the process.

How to clean an electric kettle with citric acid

There are different ways to deep-clean an electric kettle, and after trying many of them, the citric acid method is the one I find to be the most effective, while requiring the least effort. Before we get started, this is your reminder that while the insides of these kettles are designed to come into contact water, their electric components are not. In other words, never submerge your kettle in water, and avoid getting the part(s) that connects to the power source—typically the bottom, or a component on the side—wet at all.

First, peek inside the kettle and take a quick mental inventory of the stains and mineral buildup so you know what you’re trying to remove. Here’s the inside of mine before cleaning it:

Rust colored stains on bottom of stainless steel electric kettle

Credit: Elizabeth Yuko

I’ve seen much, much worse—like limescale that had accumulated into barnacle-like formations covering the heating element and inside of the spout—but there are some mineral depots on the filter, and my water has left its signature rust-colored stains on the bottom.

Now, let’s actually get started cleaning it.

Fill your kettle roughly halfway with water, then add two small scoops/spoonfuls of powdered citric acid. (I just eyeball everything.)

Adding a spoon of citric acid to stainless steel electric kettle

Credit: Elizabeth Yuko

Technically, you can use white distilled vinegar or lemon juice in place of citric acid, but I’ve found of the three, citric acid is best at removing the rust-colored stains my water leaves behind. Plus, although I love vinegar, I don’t always want the smell of hot vinegar wafting through my apartment, and even if you buy bottled lemon juice, using this much can get pricey, so citric acid wins. Still, to try either of those alternatives, fill the kettle one-quarter of the way with water, then top if off with white vinegar or lemon juice until the kettle is filled about halfway.

dirty stainless steel electric kettle next to container of citric acid

Credit: Elizabeth Yuko

Whichever acid you’ve chosen, you next want to boil the water and the acid in the kettle. When it’s finished, and has cooled off a bit, open the kettle and remove the little filter from the inside of the spout (if you have one). It usually clips on or snaps into place, and is easy to remove. (Below is a picture of mine, still locked in place before I started cleaning.)

mineral deposits on filter of stainless steel electric kettle

Credit: Elizabeth Yuko

Drop the filter into the kettle—which is still filled with recently boiled water and your acid of choice—close the lid, and let it sit for around 20 to 30 minutes. Don’t boil the kettle again: Just leave it. In fact, unplug the kettle.

Next, remove the filter from the kettle water (use a pair of tongs if the water is still hot), and set it aside. While you’re in there, check the inside of the kettle to assess your stain- and limescale-removing progress. Before dumping the water, use a bottle brush to scrub the sides and bottom of the inside of the kettle, in case there are mineral deposits or a layer of film that needs some more loosening.

clean open stainless steel electric kettle in sink next to bottle brush

Credit: Elizabeth Yuko

If you don’t have a bottle brush, you can use a wooden spoon. Pretend you’re thoroughly stirring something—making sure the spoon scrapes the bottom and sides with each rotation.

After all of that, dump the water and rinse out the kettle. If there is still limescale, stains, or a film present, sprinkle some citric acid inside the kettle. When it mixes with the remaining drops of water in the kettle, it’ll form a paste. Use a clean cloth or sponge to work the paste into the remaining stains or deposits until they’re gone. Rinse the kettle again, then fill it halfway with water, and boil it.

While it’s boiling, rinse off the little filter and remove any remaining mineral deposits, using a toothpick on stubborn areas if necessary. Rinse it off with clean water.

After all of that, here’s how my kettle turned out:

Clean filter in front of stainless steel electric kettle

Credit: Elizabeth Yuko

When the kettle has boiled, dump the water, and leave the lid open while it cools and dries. When it’s not too hot, replace the filter, then close the lid again. Now it’s time to tackle the outside of the kettle.

Hopefully, at this point, you’ll only need to wipe the outside down with a clean, damp cloth to get rid of any stains. Kettles with plastic or ceramic exteriors are likely done at this point. But if yours, like mine, is stainless steel, the mineral content in your water has probably left some streaks. In this case, use your usual method of cleaning stainless steel cookware or appliances. I just gave mine a quick wipe with a dry microfiber cloth, which worked well enough. If it hadn’t, I would have put a drop of olive oil on the microfiber cloth and buffed out the remaining streaks.

stainless steel electric kettle before and after cleaning

Credit: Elizabeth Yuko

I don’t clean my electric kettle on any kind of schedule; I typically wait until I notice stains on the bottom, or I spot a tiny white fleck of mineral deposit in my cup of tea (which has only happened once). As long as you occasionally take a peek inside your kettle when you’re filling it, you’ll know when it’s time to clean it again.


Source: LifeHacker – Your Electric Kettle Is Dirtier Than You Think

You Need to Update Your Apple Devices Now

It’s time to update your Apple devices yet again, but not for new features. Rather than adding things like collaborative playlists or the ability to change your default alert tone, this latest update patches two zero-day security vulnerabilities within iOS, iPadOS, and macOS.

What’s new with iOS 17.1.2 and macOS Sonoma 14.1.2

Apple dropped the updates, iOS 17.1.2, iPadOS 17.1.2, and macOS Sonoma 14.1.2, on Thursday. Interestingly, each patches the same two issues, so the Mac update is essentially the same as the iOS and iPadOS updates.

The two zero-day vulnerabilities concern WebKit, the underlying platform that powers Safari. The first, tracked as CVE-2023-42916, leaves users vulnerable if they process malicious web content, which can disclose sensitive information to bad actors. The second, tracked as CVE-2023-42917, potentially allows for arbitrary code execution when the user processes malicious web content. That means a bad actor could potentially inject your system with their own code, and take control over your machine.

What makes these two vulnerabilities zero-days are that they may have been exploited against users. Apple acknowledged this in its security notes, specifically for versions of iOS before version 16.7.1. That implies that versions of iOS (and macOS) since aren’t necessarily affected by the zero-day, but may in the future if bad actors figure out how to exploit the vulnerabilities on these versions. In any case, it’s critical that all Apple users update their devices as soon as possible.

These updates come on the heels of Tuesday’s Chrome update, which patches one zero-day affecting Chromium-based browsers, like Chrome, Edge, and Brave.

How to update your iPhone and iPad

To update to iOS and iPadOS 17.1.2, open Settings > General > Software Update. Allow your iPhone or iPad to look for the new update. When available, follow on-screen instructions to download and install the software on your device.

How to update your Mac

On macOS, open System Settings > General > Software Update. Once the update appears, follow the on-screen instructions to download and install it.


Source: LifeHacker – You Need to Update Your Apple Devices Now

You Can Watch Augmented Reality Porn on a Meta Quest 3

Meta’s just-released Quest 3 virtual reality headset features some serious upgrades from the Quest 2: and probably the most notable is its array of front-facing color cameras. This allows better pass-through video than the grainy, black-and-white of the previous generation. Better pass-through cameras means better mixed reality; and better mixed reality means a new kind of porn. In other words: The Quest 3 lets you invite virtual naked people into your home. Whether you actually want to invite porn stars into your home is a different matter.

The Quest 3 is not the only headset with cameras in front. PC-based headsets like the HTC VIVE Pro 2 and others have front-facing cameras, and the not-released-yet Apple Vision Pro will probably crush all others when it comes to augmented reality, but the release of the relatively inexpensive Quest 3 is leading to more pass-through porn production. But the genre is in its early days, and like any early innovation, it can be fairly complicated to get right. You may have to spend a little money, too. Below is a step-by-step guide to watching augmented reality VR porn on a Meta Quest 3 headset.

How to watch virtual reality porn on a Meta Quest 3

There are basically three “levels” of porn-viewing on a VR headset. The first two—simply streaming video, and streaming “immersive” 3D video—work the same on the Quest 3 as on any other VR headset. I covered the basics of how to stream VR porn here. Below is how the new kind of porn—mixed reality, or augmented reality porn—works on a Meta Quest 3 and other VR headsets with decent front-facing cameras.

  • Get the right VR headset: I have a Quest 3, so this guide is based on that that, but the general ideas apply to any headset with cameras out front. Scroll down for some suggestions on headsets.

  • Make sure you have a fast connection: In order to work, streaming VR video requires huge files to transfer to your headset. I have a cable modem and it worked great, but a slower connection will require you to down-rez the content or result in buffering (probably at inopportune times).

  • Download and install DeoVR. You can download this app either directly from your headset or through the Meta Quest app on either Google Play or Apple’s App store. This free VR video player and browser can be used for any type of content, but the largest creator of pass-through porn uses this for streaming its videos. Which brings me to:

  • Sign up for a membership to a site producing pass-through porn content. At the time of this posting, there aren’t many companies creating this kind of content. The industry leader in this niche is Sexlikereal, which requires a subscription. I realize that paying money for porn is very 2003, but for something as new as this, you have to shell out for a monthly subscription for the full experience. But you could try some other free sites, and there might be dribs and drabs available.

  • Use DeoVR to navigate to the website of your choice.

  • Click “Pass Through” on the search panel to your left.

  • Select a video and start streaming.

  • Congratulate yourself: You are now on the cutting-edge of porn-viewing.

If you’ve had to patience to jump through these hoops, you should now have a virtual version of a your porn of choice in your home. But to really get the most out of your experience, you have some work to do.


Suggested VR headsets for streaming pass-through porn


How to get the most out of augmented porn

A passthrough VR porn image of two clothed but skimpily clad women appearing to stand in the author's living room. Black bars have been placed over their faces to hide their identities. women
It looks like they’re right in my house—kind of.
Credit: Sexlikereal/Stephen Johnson

If you were hoping that pass-through enabled pornography would instantly make it seem like your porn-star-of-choice was actually in your home, you are no doubt disappointed. Convincingly integrating live video and pre-recorded 3D content is so technologically difficult, I give producers props for even trying, but my results have been mixed at best. Still, I gave this the best shot I could, and here are some tips.

  • Have a wide open area: You’ll need a fair amount of open space to make this work.

  • Make sure it’s brightly lit: Current pass-through cameras aren’t great, but they work better with more light.

  • Assume the correct position: VR porn is generally shot from a static camera, so the POV is standing, lying down, or sitting. If you’re not in that same position it will look wrong. Clicking the pass through button (it looks like an eye) to see the scene without the blue screen being stripped out can help. It will look like this:

    A VR porn passthrough image showing a blond woman in a sheer gold dress appearing to be seated in the author's home. A black box has been placed over her face to hide her identity.
    How the VR porn sausage is made.
    Credit: Sexlikereal/Stephen Johnson

  • Align the video content: Try to connect video elements with real-world furniture and body parts. This content, generally, involves simple items like tables and chairs, so have some ready to put in the right places. I found that the simplest thing to make work was content of people standing in front of me.

  • Work with the settings: DeoVR allows you to mess with all kinds of settings, from the size of images to their position, pitch, hue, and more. How these should be set depends on your device, your house, the video that was shot, and too many other factors to tell you how these setting should be, so the only thing you can do is experiment. DeoVR’s guide is helpful, but ultimately, it’s a trial-and-error thing.

A VR porn passthrough image of a woman seeming to appear in the author's home. A black bar has been placed over her face to hide her identity. Floating app control menus are visible in the screen captured image.
No one said virtual sex was going to be easy.
Credit: Sexlikereal/Stephen Johnson

  • Avoid the floating sausage effect and giant people: Much pass-through porn is shot with a blue-screen suit covering the actor with the exception of a body part. If your video isn’t positioned in the right place, said part will appear to float in space. This is low-key hilarious, but can be avoided by lining up the video and jiggering with its size and position until the sausage is where the sausage belongs. Another problem: scale. Get it wrong, and you’ll have a giant on your dining room table.

A passthrough VR porn image of a blond woman in a short, sheer gold dress appearing to be lying on the author's dining table. A black box has been placed over her face to hide her identity.
Do not do it like this. Unless this is what you’re into.
Credit: Sexlikereal/Stephen Johnson

Is augmented reality porn worth it?

Your mileage may vary, but I found this experiment in cutting-edge porn to be mainly a chore—a lot of effort for little result. Part of the issue is that the content itself must be rigidly controlled to work within the narrow parameters needed for VR porn. The camera has to be locked down in only one of a few positions, and one half of a coupling (almost always the male half) has to stay perfectly still most of the time. The result is a static, lifeless feeling made worse by the fact that the “action” doesn’t really fit together with the setting.

Any change in camera position requires you to change positions physically to try to get the “you are there” effect, and you’ll probably have to monkey with 15 menus to try to match everything up again. Trying to make it “look right” is an interesting challenge, but it’s about as far from “erotic” as you can get.


Source: LifeHacker – You Can Watch Augmented Reality Porn on a Meta Quest 3

Why You Should Reset Your PC for the New Year

For most of us, resetting our PC or tech is simply a last-ditch effort to fix some annoying and troublesome issue that has been plaguing our computer. But resetting your PC in December or January can actually make a huge difference going into the new year: Not only does it resolve any of those tech hurdles you might be dealing with, but it gives you a clean slate, and that technical and mental refresh can feel great.

Why you should reset your PC every year

For many of us, much of our work and personal lives revolve around what we can do with tech. Whether you’re watching movies with friends, playing games, or spending most of your time writing and creating for work, your computer is an important tool in your technical arsenal.

As useful as computers can be, though, they can also pick up a lot of junk over the course of the year, especially as you download new apps, images, and other files. Sure, you could go in and erase all of that individually. But, sometimes, apps leave extra data behind, or they create changes in your computer’s system files that can lead to other issues down the line, like corrupted files and even performance problems. One way to avoid all of this is to reset your PC every year. While the tediousness of the process might be enough to turn most people off, I’ve got three reasons why you should always reset your PC at the end of the year.

It’s a technical and mental refresh

If you’re anything like me, the more junk you have on your computer, the more overwhelming it can be to deal with. Trying to find a particular image when you already have hundreds or even thousands saved on your computer is a huge hassle. As someone who writes hundreds of articles a year, my Documents folder is chock full of articles I’ve written, and while I love keeping track of all that, it really starts to build up over time.

Sure, you’re going to want much of this stuff, which is why things like OneDrive and Google Drive exist, allowing you to easily sync that data up with the cloud. When it comes to the rest of the junk you don’t need, though, it can be exceptionally freeing to just delete it all.

Additionally, storage drives aren’t designed to hold all of your data forever—even those large multi-terabyte ones. For those who don’t know, solid-state drives are much better than older mechanical hard drives. They don’t have moving parts, so they don’t generate as much heat. But, they do have one significant problem: The fuller they are, the slower they work. So it’s important to always keep your SSD from filling up too much.

Not only is a yearly PC reset mentally refreshing, but it also helps clear out those unneeded apps and files you don’t need anymore. This enables you to get your storage space back, giving your PC a technical refresh as well.

It can solve performance issues and glitches

One of the main reasons most people reset their PCs or tech is because of performance issues and glitches. Sometimes, things just go wrong. Files get downloaded incorrectly, corrupting them, or if you’re on Windows, some program you downloaded makes a change to the Registry that just doesn’t work out in the long run.

No matter what the tech hurdle is, a full reset to factory settings can often help overcome it. And if you haven’t reset your PC in a long while, you’re probably carrying around a lot of extra junk you just don’t need. Resetting your PC every year can help ensure that you don’t get a lot of this buildup. It helps clean out the old and make room for the new.

Sure, you still might encounter some issues throughout the next year, but you’re less likely to run into performance issues relating to registry changes from apps or programs you installed and then uninstalled years ago if you reset at the end of ever year.

It’s a lot easier than it used to be

Resetting your PC used to mean losing everything. Now, though, things are a lot easier. We’ve got services like iCloud and Google Drive, which let you sync up important files, like photos, videos, and documents. You can pick and choose what you want to sync up, and you can even use external hard drives to back things up, too. (It’s important to have at least a second backup for all your important data.)

Microsoft and Apple have also made it easier than ever to reset your PC. You used to have to go through all the trouble of resetting and reinstalling using a CD or a USB drive with the correct files. Now, though, Windows lets you reset back to basic settings without setting up any kind of external media drive. You can still reinstall Windows from scratch, but this new way is really handy, and it makes the entire process a lot easier than it was on older versions of Windows. Apple also offers a similar option for Mac users. You’re missing out if you don’t take advantage of this easy way to refresh your tech and give yourself a clean slate each year.

It’s not just your computer that needs resetting, either: Here’s why you should factory reset the rest of your older tech.


Source: LifeHacker – Why You Should Reset Your PC for the New Year

The Differences Between Pressure Washers and Power Washers (and When to Use Each)

When it comes to maintaining a home’s exterior—from the house itself, to the driveway, sidewalk, deck, and patio—pressure washers can shave hours off of an otherwise time-consuming, tedious job. For example, if you’re restoring your wood deck, you could spend countless hours scrubbing stains and old paint with a stiff-bristled brush or broom—or use a pressure washer, and get it done much faster. 

In that particular DIY scenario, and many others, using a pressure washer—rather than a power washer—makes the most sense. That’s right: Though the terms are often used interchangeably, they’re not the same piece of equipment. Here’s a breakdown of the difference between pressure washers and power washers, and when to use each.

The difference between pressure washers and power washers

Both pressure washers and power washers use highly pressurized streams of water to clean exterior surfaces. The main difference is that pressure washers use cold or room temperature water (whatever comes out of the hose), while power washers heat the water to temperatures up to 311°F before blasting it out. But that heat comes at a price: While a pressure washer will set you back between $100 and $200, power washers start around $2,000.


Recommended products:


Here’s some more information on both types of equipment, including when to use each:

Pressure washers

  • Cheaper

  • More versatile

  • Lighter and easier to move and maneuver 

  • Can be powered by gas or electricity

  • Gas-powered: Louder, more powerful, fumes, can move around without being plugged in

  • Electric: Quieter, not quite as powerful, no fumes, some must be plugged into an electrical outlet, while others have rechargeable batteries

  • Typically connected to a hose, but can be attached to a sink faucet (with an attachment) and use hot tap water (which typically gets up to between 105°F and 140°F

  • Remove dirt, leaves, moss, and other yard debris from driveways, sidewalks, patios, decks, outdoor furniture

  • Safe for concrete, brick, softer stone surfaces, other masonry, vinyl siding

  • Using the fan attachment and lower pressure, it’s safe to use on wood (e.g., decks, platforms, walkways, and docks), windows, vehicles, tile, and painted surfaces

  • Better for getting into tight spaces and crevices

  • Requires less water than power washer

Power washers

  • Much pricier to purchase, but can be rented from hardware stores and equipment rental companies for $150 to $400 per day, which is still cheaper than hiring a professional

  • Can be used to sanitize surfaces, getting rid of germs, bacteria, fungi (including mold and mildew), and other types of organic growths

  • Cleans surfaces faster than pressure washing

  • Surfaces dry faster than they do after being pressure washed

  • Better for removing grease and oil

  • Gets the job done with less detergent 

  • Heat + pressure can damage surfaces softer than concrete

  • Better for larger surface areas and commercial projects 

Pressure washers to consider

Given the high cost of power washers—and the versatility of pressure washers—it typically makes more sense for homeowners and DIYers to purchase a pressure washer. Here are some of our favorite models:

  • Homdox Cordless Pressure Washer ($119.99): Weighing in at seven pounds, this rechargeable electric pressure washer has a battery that lasts for up to 80 minutes when fully charged. It does need to be connected to a water source, but its 20-foot hose doesn’t need to hook up to a spigot: It can draw water from a bucket, pool, river, or anywhere else the hose can reach. It’s easy to assemble and use, has a 6-in-1 spray nozzle, and can get up to 960 PSI.

  • PowRyte Electric Pressure Washer ($119.99): This powerful pressure washer has a max PSI of 3800 and comes with four nozzles, and a foam cannon that turns ordinary detergent into a shaving-cream-like consistency. It’s electric and must be connected to an outlet, but does have a 20-foot-long hose.

  • Kärcher Cube Electric Pressure Washer ($82.90): This highly rated, easy-to-use pressure washer operates at 1800 PSI, but can get up to a max PSI of 2250. It’s lightweight, compact, and has a 20-foot cord, making it a good option for most exterior household projects, as well as washing vehicles. 

  • Westinghouse WPX3200 Gas Pressure Washer ($292.41): If you’re leaning towards a gas-powered pressure washer, consider this one from Westinghouse. It’s quick to set up, simple to operate, and can get up to 3200 PSI. Its solid construction will withstand wear-and-tear, but if it doesn’t, it comes with three-year limited service, labor, and parts coverage.

If you’re still on the fence and need to clean yours, you can also rent a pressure washer for a day for between $25 and $100.


Source: LifeHacker – The Differences Between Pressure Washers and Power Washers (and When to Use Each)

Pressurized Walls Can Embiggen Your Crowded Apartment

Housing has become pretty expensive—rent is super high all over the country, and mortgage rates have shot up 4.6% since just last year. So it’s not really all that surprising that more adults are entering into roommate situations in order to afford their housing. A roommate can magically turn an apartment that makes you choose between rent and groceries into an affordable home.

Roommates, of course, come with downsides—especially if you’ve lived on your own for a while and thought your days of sharing space and splitting bills were long over. And it’s one thing to take on a roommate when you have the actual bedroom to offer; it’s something else entirely when you’re living in a studio or one-bedroom apartment and need someone to split the rent. There are a lot of relatively easy and affordable ways to create a second private space in your apartment, but most of them either don’t offer true privacy or require you to be able to actually renovate your place, which a landlord probably isn’t excited about.

So what can you do if you want to add a wall to your place without endangering your lease or your security deposit? You can install a pressurized wall.

Under pressure

So what’s a pressurized wall? It’s a freestanding wall that uses tension to hold itself in place. They are non-load-bearing and not permanently attached in any way, but resemble real walls in every superficial way. These walls can even have doors or windows built into them, and can have soundproofing added to enhance their privacy features. These walls typically have to be ordered custom from a company that makes them, but the upside to that is that they can be customized to match the apartment’s decor and style so they blend in pretty seamlessly. And best of all, they can be completely removed when the time comes to move out, leaving no trace behind.

The cost of having a pressurized wall installed in your apartment depends on the size of the wall needed and the features you want included. A typical price range is between $800 to $2,000, though you can spend much more on very large or super-fancy walls. Still, if the cost is split with your roommates, it can be an affordable solution because it can turn a large bedroom into two bedrooms in a way that looks professional and natural.

Legalities and downsides

Unfortunately, you can’t just order a pressurized wall off the Internet and install it whenever you want. Because a pressurized wall changes the layout of the apartment you, have to follow certain basic guidelines when installing them:

  • Get permission. Your first stop is your landlord, who may or may not allow pressurized walls in the building. Some buildings have specific posted policies concerning pressurized walls, so if you’re apartment hunting and looking for a bargain you can target studios or one-bedrooms in buildings that explicitly allow them. Otherwise, you’ll need to get permission.

  • Permits. You also might need to get a permit from the Department of Buildings or another entity that issues certificates of occupancy. Many jurisdictions consider pressurized walls to be the same as any other wall, which means installing one is treated similarly to any major renovation.

  • Follow the law. Wherever you live, there are laws pertaining to bedroom size and shape, ventilation, window access, and fire escape routes. When adding a pressurized wall to your apartment to create a new bedroom you’ll need to follow all of those rules whether you had to pull a permit or not. The company you order your wall from should be able to assist in the planning, but you might need to hire an architect or other contractor if not.

  • Strength. Since these walls aren’t true walls, you may not be able to attach anything heavy to them, like bookshelves. You should check with the manufacturer about the load they can handle before you plan to attach anything to them.

Most companies that manufacture these walls will lease them to you for a period of years, so you don’t have to purchase them outright if you’re renting. This is good because you can simply end the lease and give the wall back if and when you move, but if you stay in the apartment for a long time you might end up paying more in leasing fees than you would have if you bought the wall.

A pressurized wall isn’t right for everyone, but if you can swing one it can add rooms to your apartment with a finished feel and a real sense of privacy without damaging anything. It’s certainly better than trying to convince potential roommates that your spacious walk-in closet is actually a second bedroom.


Source: LifeHacker – Pressurized Walls Can Embiggen Your Crowded Apartment

You Should Update Chrome Right Now (Again)

Attention Chrome and Chromium-browser users: Your internet activity is vulnerable to cyberattacks, unless you update to the latest version of your browser.

On Tuesday, Google announced on the Chrome Releases blog that a new version of Chrome, 119.0.6045.199 for Mac and Linux and 119.0.6045.199/.200 for Windows, is available, and patches seven different security vulnerabilities. All of these discovered issues are rated as “high” in severity, but Google only names six of them:

  • High CVE-2023-6348: Type Confusion in Spellcheck. Reported by Mark Brand of Google Project Zero on 2023-10-10

  • High CVE-2023-6347: Use after free in Mojo. Reported by Leecraso and Guang Gong of 360 Vulnerability Research Institute on 2023-10-21

  • High CVE-2023-6346: Use after free in WebAudio. Reported by Huang Xilin of Ant Group Light-Year Security Lab on 2023-11-09

  • High CVE-2023-6350: Out of bounds memory access in libavif. Reported by Fudan University on 2023-11-13

  • High CVE-2023-6351: Use after free in libavif. Reported by Fudan University on 2023-11-13

  • High CVE-2023-6345: Integer overflow in Skia. Reported by Benoît Sevens and Clément Lecigne of Google’s Threat Analysis Group on 2023-11-24

While all vulnerabilities are important to patch, it’s the last one, CVE-2023-6345, this is the most concerning. Google confirmed it is aware an exploit for this vulnerability exists in the wild, which means bad actors either know how to use it against users, or they already have.

We don’t know much about the issue, other than that it’s an integer overflow flaw in Skia. Skia is an open source 2D graphics engine, while an integer overflow occurs when the result of an operation doesn’t fit the respective amount of memory the system sets aside. While not all integer overflow flaws lead to vulnerabilities, this one does—which means bad actors may be able to use it to take over the system.

This update follows a Nov. 14 update that patched four security flaws, as well as a Nov. 7 update that patched one. The last update that patched a zero-day security flaw was issued Sept. 11.

How to update your browser

As this flaw affects the underlying code used in Chrome, all Chromium-based browsers should be updated to patch this issue. That means Chrome, of course, but also browsers like Edge, Opera, and Brave.

Your browser may be set to update automatically, but you can trigger an update manually if the update hasn’t been installed yet. Usually, that’s in the browser’s settings. In Chrome, for example, you can click the three dots in the top-right corner of the window, head to Help > About Google Chrome, then allow the browser to look for an update. If one is available, follow the on-screen instructions to install the update.


Source: LifeHacker – You Should Update Chrome Right Now (Again)

These Are the Best New Accessibility Features in macOS Sonoma

Apple continues to improve the accessibility features available for all of its devices, and the Mac is no exception. macOS Sonoma ships with a few accessibility features that launched earlier in iOS and iPadOS, but never on the Mac. This version of macOS comes with unique and useful features, such as the ability to create and store your own voice—invaluable to people who are at risk of losing their voice. Let’s take a look at the best new accessibility features on the Mac.

Easily set up custom font sizes for Apple’s apps

macOS Sonoma has a new accessibility feature which lets you force apps to use a larger or smaller size depending on your preferences. You can check this out by going to System Settings > Accessibility > Display > Text Size. This page allows you to set a default text size for all apps and lets you customize preferred sizes for some Apple apps. You can also adjust the font size in any app by pressing Command + or Command –.

Create your own voice

If you’re at risk of losing your voice entirely, you can now use your Mac to create a voice that sounds like you. Apple allows you to use this voice with the Live Speech accessibility feature on phone and FaceTime calls that you answer on your Mac. Go to System Settings > Accessibility > Personal Voice to set this up. You can check out our guide for this feature on iPhone to see how it works.

Use your voice on calls

To use the voice you’ve created with the Personal Voice feature, you should enable the Live Speech feature too. You can go to System Settings > Accessibility > Live Speech and enable Live Speech. This will allow you to type out your replies and your Mac will convert it to speech in your voice. 

More natural sounding voices for VoiceOver

VoiceOver is essential for people who live with low vision. With VoiceOver enabled, your Mac will read out descriptions for all items on the screen and allow you to use the computer much better if you can’t see the screen clearly. In macOS Sonoma, the Siri voices that are used with VoiceOver sound far more natural particularly at high rates of speech.

Customize Siri voices for VoiceOver and Spoken Content

For VoiceOver and Spoken Content—a new macOS feature that lets you ask Siri to read articles out loud—you can set up AI voices to your liking. macOS Sonoma allows you to tweak the pitch range. You can adjust these for Spoken Content by going to System Settings > Accessibility > Spoken Content. Similarly for VoiceOver, you can go to System Settings > Accessibility > VoiceOver and click Open VoiceOver Utility. Go to the Speech tab and hit Edit to make the changes you need.

On a related note, Apple also claims that navigating your code in Xcode is now a much smoother experience with Voice Control.

Enhanced Voice Control features

Controlling your Mac with your voice is becoming easier with Sonoma. When you fire up Voice Control, your Mac will give you tutorials to learn how to make the most of this feature. You’ll also notice that text editing with Voice Control is more accurate as you can use phonetic corrections to pick the correct word from a list of similar-sounding words.

Animated images are paused automatically

Some people find it hard to look at continuously looping GIFs and macOS Sonoma has a solution for that problem. Animated images will no longer loop forever in Messages and Safari. They pause automatically and you can click these images to keep viewing their animation.

Set a custom zoom level for each monitor

For those who use multiple monitors, macOS Sonoma has a new feature that allows you to set up a custom zoom level for each monitor. This will allow you to make text easier to read on the monitor you use for reading, without affecting the UI elements on other monitors.

Switch Control lets you create a virtual game controller

Gaming is pretty difficult for people who have motor control challenges. You can use the Switch Control feature in macOS Sonoma to turn your facial expressions or other actions into controls on a virtual game controller. You can configure this by going to System Settings > Accessibility > Switch Control.


Source: LifeHacker – These Are the Best New Accessibility Features in macOS Sonoma

How to Tell When Rust Has Won

Rusted tools, cars, bolts or even your stainless steel appliances can often be salvaged—if the rust is caught early enough. At those early stages, rust is more of an aesthetic issue and an annoyance. But rust is a process of corrosion that will eventually render its victims unusable and unrepairable, making any effort to clean them up and protect them against further ruin a waste of time. The trick is knowing when rust has won and you’re better off replacing that car panel, old power tool, or kitchen utensil.

Stages of rust

The first thing to know is that rust goes through several distinct stages as it quietly consumes your beloved stuff:

  • Surface rust. The earliest stage of rust shows up as isolated reddish-brown patches, often quite small. This surface rust is generally harmless and doesn’t penetrate below the surface of the metal, so it can be scraped away pretty easily—and if you take steps to protect the metal by keeping it away from moisture and adding a coating of lubrication (WD-40 will work), it will be just fine.

  • Scale rust. If left to its own devices, the rust will keep eating away at the iron in your tool or component. The brown, dusty discoloration will spread—but more importantly, pitting will start to show up. These tiny pinpricks in the metal are where the rust process has started to invade below the surface. Your stuff can still be saved, but it’s going to take more work.

  • Structural rust. At this stage, literal holes have begun to appear in the metal. In sheet metal, like a car panel, this usually means the metal is thin and papery, and might have been eaten away entirely. In thicker components, the structural integrity may still be viable, but the pitting is probably so severe that any attempt at repair will be futile.

If the rust is very severe, you can often tell visually—at a glance—that the thing you’re trying to save is a lost cause. But with more complex things, like tools, it sometimes takes a bit more investigation.

Assessing rust

When it comes to rusted stuff, the “lost cause” stage often depends on its role. Car panels, for example, are usually designed more for aesthetics than safety or strength, and thus can often be filled in, sanded, and painted, and still perform their basic functions. Stuff like metal furniture that gets badly rusted can often be salvaged by applying a rust-specific primer that stops the oxidation process.

For anything that requires a high level of strength, like a car’s rocker panels or tools, however, cosmetic repairs won’t be sufficient. A few considerations:

  • Pitting. If the metal is visibly pitted and etched by rust, the process of reduced structural integrity has already begun. If the component is intended to be load-bearing or needs to apply a lot of torque (like a wrench or power drill), severe pitting is a sign that it probably needs to be replaced.

  • Thickness. The use and thickness of the metal is a factor, too. A hammer that’s suffered a lot of rust may still be usable as long as a stable core remains in the head and you repair it properly. A badly rusted drywall knife, on the other hand, might not be salvageable at the same level of damage.

  • Power tools. If rust on a power tool has compromised its moving parts, it can be dangerous to operate even if you manage to remove the caked-on surface rust and get it moving again. A good rule of thumb is if the power tool won’t initially work due to thick rust deposits, it’s probably best to just replace it unless you’re willing to put in a lot of work to salvage it.


Source: LifeHacker – How to Tell When Rust Has Won

Bill Negotiation Services Are a Waste of Money

You may have heard ads promising that professional bill negotiation services can help you save big money on your medical bills, credit card statements, cable bills, and more. While it’s a promising offer, the truth is negotiating bills on your own is simple, effective, and most importantly: free. You may be surprised at how willing many companies are to reduce your rates, especially for long-time loyal customers. With some preparation and persuasive negotiation tactics, you can trim hundreds of dollars from your annual expenses. Follow these simple steps to start saving—without paying any unnecessary fees.

How to lower your bills for free

Bill negotiation works because companies have incentives to keep customers happy and retain business. It costs more for them to acquire new customers than to keep existing ones. As long as you make reasonable requests and politely threaten to take your business elsewhere, many service providers will offer discounts or perks.

Contact service providers yourself

Don’t wait for a third party to step in—contact providers directly to dispute problematic charges or rates. Call their billing department about discrepancies or overcharges on your statements, armed with your notes from reviewing the itemized bill. Ask about applying for hardship assistance programs or discounts. Service representatives are often authorized to make adjustments to retain you as a customer.

Know your stuff

Request an itemized bill from any provider to scrutinize the charges in detail. Identify overcharges, duplicate charges, and services you did not receive. Federal law also allows you to request interest rate reductions on credit card bills.

Send formal dispute letters

If a phone call yields unsatisfactory results, follow up with a formal dispute letter stating which charges you disagree with and why. Provide evidence of errors or unfair rates by including notes from researching reasonable costs or comparing with past statements. Request that the disputed charges be removed and clearly communicate you expect a response by a specific date.

Use free templates and tools

Instead of paying steep sign-up and commission fees for bill negotiation services, use free scripts, online dispute letter templates, and cost-of-living calculators to bolster your case. Seek form letters specific to cable bills, hospital bills, credit card statements, phone bills, etc. to save time and effort.

How to tell if a bill negotiation service is worth it

Of course, negotiating your own bills is not nearly as effortless and appealing as downloading an app that does all the work for you. The thing is, bill negotiation services aren’t worth it if their fees exceed the savings you get from lowered billed. To evaluate if an app is going to be worth it for you, compare the fees with the potential benefits.

For most these apps, the fees will be any combination of the following:

  • Service fees (monthly, one-time, or annual)

  • Membership fees (usually annual or recurring/monthly)

  • Bill negotiation fee (percentage of your savings)

Let’s take a look at an example of how these services make money while cutting down your bill costs: BillShark is one that negotiates monthly bills and doesn’t charge customers upfront fees. Instead, it charges a one-time fee of 40% of the savings it creates. If you don’t have time to hop on the phone and negotiate your bills yourself, that 40% may be worth it. Otherwise, that’s a decent chunk of savings that could be all yours, if you use the tips above. The bottom line is before you pay for these services, remember that you have the power to effectively negotiate your own bills without an expensive middlemen.


Source: LifeHacker – Bill Negotiation Services Are a Waste of Money

How to Find Your Sound Town and Listening Character in Spotify Wrapped 2023

The year is winding down, which means Spotify Wrapped is here yet again to reveal just how cringe your taste in music really is. Like it does every year, Spotify will show you basic listening stats, like your total listen time, favorite artists, top songs, and top podcasts, if that’s your thing. But this year, there’s more.

For one thing, for the first time you don’t need to use the app to get your Wrapped. You can get it from Spotify’s Wrapped website, as well. Of course, if you open the app, Spotify will show a splash screen, or a banner to guide you through retrieving your Wrapped. If it doesn’t, you’ll find a Wrapped button in the top toolbar.

And along with the usual stats, Spotify Wrapped has a few new surprises: You’ll be assigned both a “Sound Town” and a listening character, each based on your musical habits during the year.

How to check your Spotify Wrapped Sound Town

One of Spotify Wrapped’s new hooks is called Sound Town. Basically, Spotify will match you with a city in the world that had similar listening habits or listening activity as you do. It’s fascinating, to say the least. 

I live in India, and my two biggest genres were Bollywood, and Atmospheric lo-fi music. And turns out my Sound Town is Leuven, Belgium, whose residents I suspect are bigger fans of atmospheric music, more than the latest Bollywood number. Still, that’s interesting to know.

Spotify Wrapped in 2023, showing different music personalities like Time Traveller, Shapeshifter, and more.

Credit: Spotify

Spotify is also assigning users a listening character, as it assigned a listening personality last year. I’m apparently a Vampire, because I like listening to atmospheric and sad music. I’m a bit surprised to learn I’m emo, but hey, data doesn’t lie. 

Lastly, Spotify is adding a new angle to its list of your top artists: This time, it will tell you when your consumption of a particular artist peaked. I listened to Post Malone a lot in August, and then it dropped off. Summers are weird. 

Once your Wrapped is wrapped, you can add your top songs of 2023 to a playlists, and Spotify will make it easy to share your stats on Instagram Stories, and other social media platforms (because that’s the entire reason it exists—to give your friends who use Apple Music or Amazon Music major FOMO). 

The Verge


Source: LifeHacker – How to Find Your Sound Town and Listening Character in Spotify Wrapped 2023

These Fancy Appetizers Are Dead Simple to Make

There is a part of my heart that will forever belong to a simple chip and dip, that loves a taquito, that will happily dig into a cheese ball. Simple is great. On the other hand, it’s … simple. Occasionally, I want to put on a show and impress people. Luckily, beautiful appetizers don’t have to be expensive or take long. Here are a few that’ll take no time, have only a few ingredients, aren’t expensive, and will leave an impression. 

Fresh radishes with compound butter

photograph of buttered radishes with sea salt and dill

Credit: Amanda Blum

Ingredients

  • 1 bunch radishes

  • ½ stick salted butter, room temperature (you can substitute vegan butter)

  • 2 tablespoons fresh dill

  • 1 teaspoon flaky salt (optional)

  1. Trim the radishes so only a tiny bit of green stem shows. Trim off the root, just below where the radish becomes a point. Wash the radishes really well, allow them to dry, and then cut radishes in half the long way, through the green stem and radish point.

  2. Place the butter in a mason jar or container with the dill. Using a stick blender, combine the two until the dill is completely incorporated. You’ll have a pale green whipped butter. 

  3. Use a butter knife to place a swipe of butter on each radish. 

  4. Sprinkle on additional dill or flaky salt if you’d like. 

Artichoke and parmesan crostini

image of artichoke and parmesan crosttini

Credit: Amanda Blum

Ingredients

  • ½ baguette, or one package of prepared crostini

  • 24 ounces of marinated artichoke hearts in oil

  • 1 cup grated parmesan cheese

  • Salt and pepper to taste

  • 1 clove garlic

  1. Drain the artichoke hearts and set aside. 

  2. Slice the baguette into slices, no more than ½ inch thick. Rub each slice with the garlic clove and place into oven, on a cookie sheet, at 350 degrees for 4-5 minutes, or just until the bread is lightly golden. 

  3. Blend half of the artichoke hearts, cheese and the rest of the garlic clove, using a stick blender, food processor, or regular blender. You want a consistent, well-blended texture. 

  4. Spoon a tablespoon of the blended mixture onto each crostini, and spread out. From the remaining half, place one artichoke heart on top of each crostini. If they’re particularly large, slice them in half. 

  5. Season with salt and pepper. 

Shrimp and roast beef with cream on cucumber rounds

picture of shrimp and roast beef on cucumber cream rounds

Credit: Amanda Blum

Ingredients

  • 12 precooked shrimp, medium to large

  • ¼ pound very rare deli roast beef, medium thickness

  • 1 English cucumber, or 2 small-circumference long cucumbers

  • ¼ cup sour cream

  • ¼ cup mayonnaise

  • Salt and pepper to taste

  • Fresh dill or chives to garnish (optional)

  1. Slice the cucumber into long rounds, cutting diagonally, ¼-½ inch thick. Lay out the cucumber rounds on your serving dish. You should aim for 24 rounds, total. 

  2. In a bowl, mix the sour cream and mayonnaise together, combining well. Spoon a small dab of the mixture onto each cucumber round with a spoon. 

  3. Rinse and dry the precooked shrimp by setting them on a dry paper towel. Once dry, season them each with salt and pepper, lightly. 

  4. Place one shrimp atop 12 of the cucumber rounds. On the remaining 12 rounds, place half of a folded piece of roast beef. 

  5. You can garnish each with a chive or two, or a sprig of dill. 

These appetizers can satisfy every possible kind of guest—and all are finger food, requiring nothing more than a napkin.


Source: LifeHacker – These Fancy Appetizers Are Dead Simple to Make

These Are The Best Ways to Save Money When Renting a Car

The holiday travel season is in full swing and more people are hitting the roads than ever, so if you haven’t already reserved your own rental car, it’s time to do so.

We’ve written before about why you should book your rental car early to lock in your rate, because you can (usually) cancel and rebook with no penalty if prices drop. But regardless of when you reserve and how rates fluctuate, there are a number of strategies for saving money on both base rates and fees (such as upcharges for young or additional drivers) when you book so you don’t wind up blowing your whole travel budget on your rental car.

Shop around for the cheapest rate—and get creative about it

You should obviously compare prices across rental companies to get the cheapest option, especially if you aren’t a member of any loyalty programs, and include rental car alternatives like Turo and Getaround. AutoSlash tracks rental car rates—for free—so you can set up an alert for your reservation.

But go one step further than just comparing companies. your rental company has multiple locations in your area—both in-town and at the airport, for example—check for price differences if you pick up and drop off at one versus another. Downtown pickup is cheaper on average than airport locations, according to NerdWallet. However, you should also factor in convenience (taking a rideshare to a location further away could offset any savings) and business hours, as well as available inventory and one-way fees if you pick up at one location and drop off at another.

Sign up for a membership club with an auto discount

AAA is perhaps the best-known auto club to offer car rental discounts, but there are a handful of membership programs with similar perks:

  • AARP: up to 30% off base rates

  • BJ’s: up to 30% off base rates

  • Costco: up to 30% off base fares

  • USAA: up to 25% off

  • Sam’s Club: up to 25% off

Each of the above contracts with certain rental car companies to offer discounts to their members, so if you prefer a specific provider, you should check the specifics before joining. Note that other than USAA (which offers membership only to military service members and their families), these clubs have fees to join that range from $12 to $110, and you may have to book your rental through the club’s portal to take advantage of your discount.

But if you use this perk (and others) often, the money you save could quickly offset the price of admission.

Book with your travel credit card

As The Points Guy lays out, there are a handful of travel credit cards—the Chase Sapphire Reserve, The Platinum Card from American Express, and the United Club Infinite Card, for example—that have solid rental car benefits, such as discounts, waived fees, free upgrades, and priority service.

Another potential perk of using a travel credit card to book your rental is that insurance coverage such as damage waivers may be included, so you don’t have to purchase costly coverage from the rental company or file a claim with your personal insurance in the event of a collision. (Obviously, you should check what’s covered with your card before declining any additional insurance options.)

Go through your travel loyalty program

Hotel and airline loyalty program members may be able to score rental car discounts with partner companies and earn bonus points or miles on the booking. For example, Alaska Air offers 35% off Avis and Budget rentals and up to 1,250 miles for its Mileage Plan customers who use their membership number when booking, while Marriott has a partnership with Hertz to offer discounts to Bonvoy members.

If you use rental cars frequently and/or have a preference for a certain provider, you may want to consider joining their rewards program, which can earn you points that can be redeemed for rate discounts and upgrades.

Use your company or school perks

Ask your employer about a corporate code for rental car discounts (just be sure you understand any restrictions, such as using it for personal vs. business travel). Similarly, some universities have partnerships with rental companies to offer discounts and perks to students and alumni. Union members may also have access to car rental benefits through UnionPlus.

Note that you may have to show proof of employment, enrollment, or membership to qualify for your discount.


Source: LifeHacker – These Are The Best Ways to Save Money When Renting a Car