Where to Find Cheap Home Cleaning Services for the Holidays

With the holidays closing in and so much left to do, now is a good time to consider getting a home cleaning, even if (or maybe especially if) you’ve never done it before. There is a certain etiquette involved when you first hire a cleaner, so keep that in mind, but know that first-timers often get great discounts on the service.

Deals on home cleaning

A lot of the cleaning services you’ll be able to access depend on where you live, but some major brands have wide service areas. For instance, your first three-hour cleaning with Home Aglow is just $19—but you have to check your area here first and be aware that to access the lower prices, you have to pay a $49 monthly membership fee.

Other national brands, like the Maids and Merry Maids, offer prices dependent on if you’re doing a one-time or even holiday-exclusive cleaning and will provide an estimate after you put in some information. 

You can also try apps and services like Handy or Angi, which connect professionals with people looking for plumbing, electrical help, and, of course, cleaning. They almost always have first-time discounts and a wide network of professionals who use the app to book appointments. For instance, I just checked availability on Handy for my childhood home in North Dakota and found that there was not only a professional available there, but the three-hour cleaning would be $55. Angi, meanwhile, lets you compare prices from a number of nearby providers. The professionals and prices they pull together are based on how urgent your need is, how big your space is, and what you need done. 

Things to keep in mind if hiring a holiday cleaner

There are several ways to secure a pre-holiday cleaning on the cheap, with first-time and holiday-specific deals all over. Keep in mind that some (again, like Home Aglow) want you to pay a monthly membership fee to keep your cleanings low-cost on the surface and others won’t always be that cheap if you decide to keep using them after your initial discount. 

It’s also important to keep in mind that this is a skilled and personal service from a human being who is going to be required to touch your dirty stuff no matter how much it costs you. Whether you’re paying $19 for three hours or $100 for two, that person still has to scrub the same amount of gunk and grime, so make sure you tip especially well if you’re using a discount of any kind. It’s hard to know if the discounted money comes out of their pocket or the company’s, so you can always ask—but even if they tell you they’re not allowed to discuss that (which has happened to me), tip well just in case.

If you decide to clean on your own again this year…

If you’re determined to get ready for the holidays on your own or can’t find a cleaner at the right price in your area, here are some the products you’ll need:

  • First, stock up on microfiber cloths. They work on practically everything and aren’t abrasive. Every cleaning tutorial you’ll come across will demand you have these. Here are 50 for $12.99.

  • Get the always-popular O-Cedar mop and wringer set for $24.49 to minimize the sloppiness of mopping and keep your mop nice and clean.

  • You deserve a holiday splurge, so maybe this is the right moment to finally grab a Dyson vacuum. The V11 cordless is $399 right now.

  • Take some of the manual labor out of your cleaning routine with a motorized brush that spins to get gunk and grime out of cracks and off your surfaces. The Voweek scrubber comes with four different heads and is $42.49, plus it’s expandable, so you don’t have to bend down.


Source: LifeHacker – Where to Find Cheap Home Cleaning Services for the Holidays

The Best Deals on Smartwatches That Will Arrive in Time for Christmas

With Christmas drawing ever closer, it’s more than time to start crossing some names off of your gift-buying list. But procrastination doesn’t have to mean overspending: There are some very good deals on smartwatches to be found right now—from brands like Garmin, Fitbit, Apple, and Google—that will still arrive in time for Christmas.

These watches are at historic low prices right now, so order soon if you want to get one under the tree by Christmas morning.

The Garmin Forerunner 745, for the triathlete on your list

The Garmin Forerunner 745 is a great smartwatch for those very outdoor and active people who like to do a variety of sports, including biking, track running, triathlon mode, swimming, etc. It also has preloaded workout suggestions based on your activity. It has a seven-day battery life, and it can sync to streaming services like Amazon Music, Deezer, and Spotify. You can also pay using Garming Pay if they want to leave their wallet at home.

The Garmin Forerunner 745 was originally priced at $499 when it was released in 2020, but you can get it now for its lowest price yet: $269.99 at Amazon.

The Fitbit Versa 4, for those who want to monitor their energy levels

The Fitbit Versa 4 is more user-friendly and better at tracking sleep and energy levels than the Garmin Forerunner 745. If you know your targeted giftee is into monitoring their sleep, tracking their energy levels throughout the day, or having their heart rate or blood pressure monitored, the Fitbit Versa 4 will fit their wrist. It has six-day battery life, Bluetooth connectivity to take calls and texts from your wrist, and even support for Google Maps (only for Android users).

The Fitbit Versa 4 was originally $229.99 when it was released in the fall of 2022, but you can get it now for its lowest price ever, $149.95 from Amazon.

The Apple Watch Ultra, for the discriminating Apple user

The Apple Watch Ultra is Apple’s flagship line of smartwatches. The first generation Ultra was recently eclipsed by the Apple Watch Ultra 2, released this past September. The Ultra 2 doesn’t offer that much of an improvement in terms of functionality, so if you want to gift a pricey, full-featured watch but don’t mind a (slightly) older model, it’s a good time to grab the original Ultra: It’s currently $639 from Best Buy, ts lowest price yet according to Honey’s price history, and $20 cheaper than Amazon.

For the Googler on your list

If you have someone on your list in the Google ecosystem, the Google Pixel Watch is a safe bet. Google’s first smartwatch came two years after they acquired Fitbit, in the form of the Google Pixel Watch, released in 2022. It was recently succeeded by the Pixel Watch 2, but there isn’t that much of a difference in features to warrants the big difference in price.

You can get the Google Pixel Watch for $199.99 from Amazon right now; that’s the lowest price it has reached—matching what it sold for on Black Friday, according to Camelcamelcamel’s price history.


Recommended products:

These smartwatches at at all-time low prices and will arrive by Christmas (if you act fast).

Garmin Forerunner 745 $269.99

Fitbit Versa 4 $149.95

Apple Watch Ultra $639

Google Pixel Watch $199.99


Source: LifeHacker – The Best Deals on Smartwatches That Will Arrive in Time for Christmas

What I Learned From Tracking My Sleep With an Apple Watch

After having the same Apple Watch for six years, I was recently moved to upgrade to a newer model—partly because newer versions simply have more features, partly because I am curious about my bodily processes, and also because I am an impulsive spender convinced that every new purchase will be the one that brings me to the precipice of pure wellness. In the week that I’ve had my fancy new doodad, I have not become a paragon of perfect health, but I have gained some insights into my activity levels and, importantly, my sleeping habits. I am a firm believer in over-preparing for luxurious sleep sessions, so I wanted to see if the data my watched gleaned from my body overnight backed up my insistence that better sleep is possible through investments in things like fancy pillow sprays and silky sheets.

What the Apple Watch measures overnight

The Apple Watches you get nowadays come preloaded with a Sleep app that will estimate the amount of time you spend in REM, core sleep, and deep sleep, provided you wear your device when you hop in the sheets. It’s important to know that you have to pre-define your sleep schedule within the app for this to work; it doesn’t necessarily magically detect that you’ve gone to bed. I set mine to be from 1 a.m. to 8:30 a.m. after some internal debate about whether I wanted to lie to it (which would be useless) or be honest about what kind of person I am and when I actually go to bed. To get data from the watch, you also need to give it at least four hours of sleep to work with per night. You can set separate schedules for weekdays, weekends, or any other days you have special requirements or schedules.

When you wake up every day, the watch will figure out that you’re up and at ‘em and halt sleep monitoring. Then, you can see a little chart that estimates how long you were in each sleep phase. The sleep phases are defined like this: 

  • REM is the phase where you’re dreaming most

  • Deep sleep is a restorative phase that is good for your brain and body

  • Core sleep is how Apple refers to lighter sleep that doesn’t fall into either of those categories

You get a chart that shows you how long you were in all three the previous night and can see trends for the previous two weeks. My average sleep time since acquiring the watch is six hours and 26 minutes. This is sad, but there is room to improve.

What you can learn from your Apple Watch sleep data

My watch claims that last night, I slept for six hours and eight minutes, with REM sleep comprising an hour and 21 of those, deep sleep making up just 45 minutes, and core sleep coming in at four hours and two minutes. That tracks with how it’s been all week: I’m mostly in core sleep and dabble a little bit in REM and deep. The watch, of course, isn’t measuring my brain’s electrical activity or any of the super science-y elements that would give medical-grade insight, but it does monitor breathing and movement. 

The most important insight you really gain from wearing this thing to bed is how long you’re actually sleeping. For me, gamification is one of the only ways I can tolerate the boring parts of adult life, so challenging myself to stop emailing, scrolling, reading, or doing who-knows-what-else I do instead of going to sleep in an effort to maximize my total sleep time data is fun. The amount of sleep you get is important, whereas the phases are more like bonus information (unless you really have a sleep issue that you’re trying to hone in on, which you should work on with a professional). 

Things to note before tracking sleep with Apple Watch

When I woke up this morning, I learned my Apple Watch had died at some point in the night. Nevertheless, my sleep data claims that I woke up at 8:32, though I don’t know how it got that information if it was dead when I did that. Whether it died at 8:31 or some other time, I’m regarding today’s new data with some skepticism. 

To prevent this from happening to you, be smart about your charging. Charge the watch while you’re in the shower or during your wind-down time before bed, times when you don’t need your activity tracked or to be responding to emails at all and, thus, the watch is largely useless. You can also use the watch’s Sleep app to set up reminders for charging, so if your pre-defined wind-down and sleep schedule coincides with a time when the device is under 30% battery, it will remind you to stick it on the charger.

Helpful tools to make sleep tracking on Apple Watch work

There are a few ways you can maximize the efficiency of the sleep tracking and necessary charging. Consider these items:

  • Try a portable Apple Watch charger so you can charge it in the car, while you shower after the gym, or wherever and whenever else that will make it possible for the thing to be powered up overnight. This one from Newdery ($7.59) is a simple charger on a USB stick, so you can use it in the car or plug it into any computer or wall adapter. Or, you can use the kind that you pre-charge at home and take on the go, like this one from Huoto ($15.99), which has a convenient keychain.

  • The watch needs to be snug to collect your data overnight, so if you wear it looser in the daytime and only care about seeing notifications on it, consider adjustable bands that you can tighten up before bed. Here’s a pack of 10 in a variety of colors for $14.19.

  • Grab a sleek three-in-one charger ($19.93) to keep next to your bed for your phone, Airpods, and (when necessary) Apple Watch. God forbid you get that lower-than-30%-charge notification before tucking in, you can just slip the watch on the stand with the rest of your devices.


Source: LifeHacker – What I Learned From Tracking My Sleep With an Apple Watch

Governments Can Spy on Your Push Notifications

If I told you governments were spying on you through your smartphone, would you be surprised? Probably not. We all know these little black mirrors are privacy nightmares, even with the extensive data protection features both Apple and Google have added over the years.

However, you’ll likely be surprised to learn that governments aren’t necessarily tracking your location through your phone’s GPS, or tapping into your phone calls (although who knows): We now know they’re actually spying on you through your push notifications, of all things.

How governments steal your push notification data

The only reason we know about this is thanks to Ron Wyden. The Oregon senator sent a letter to the Department of Justice (DOJ) on Wednesday urging them to let Apple and Google warn their customers about requests for their smartphone usage.

In the letter, Wyden explains his office received a tip in the spring of 2022 which claims foreign governments were demanding Apple and Google hand over push notification records from users. In the time since, Wyden’s office has investigated the issue: When they contacted Apple and Google about this concerning assertion, the companies both said the federal government had blocked them from being able to comment on the practice. That’s chilling.

As the letter explains, push notifications aren’t a one-to-one connection from your smartphone to the app or service pushing the alert. These notifications need to first pass through Apple and Google’s servers: On Apple’s side, that’s Apple Push Notification Service, while Google uses Firebase Cloud Messaging. All of your push notifications that rely on an internet connection run through these servers before ending up on your iPhone or Android, which means they’re all susceptible to this overreach from government agencies.

These push notifications contain quite a bit of data, too. When Apple and Google receive push notification data to their servers, they intercept metadata (data about the app that is receiving the push notification), as well as details about the phone and account that notification belongs to. If Duolingo is trying to send a notification to “Jake’s iPhone 14 Pro” on Thursday at 10 a.m., governments demanding my push notification info from Apple might be able to see exactly that.

This is a great moment to implore you to use encrypted messaging services for your texting needs. Encrypted content won’t appear in the data that third-parties receive from Apple and Google, so governments aren’t actually able to read your iMessages, RCS texts, or WhatsApp alerts, for example. However, if they intercept push notifications from unencrypted alerts, such as messages sent using SMS or an unencrypted Instagram DM, they might be able to see that as part of the data they obtain. The secrets you text through unencrypted methods are kept by you, your friend, and governments around the world.

According to Wired, governments and law enforcement agencies that want this data must first retrieve your push notification “token” from an app developer. You’re assigned a token by the apps you download on your devices, which connects you to their push notifications. The government can then take your token to Apple or Google to demand information on the account associated with that token. This has happened in the US before: In 2021, in a Jan. 6-related case, the FBI requested the push notification data for two Meta accounts. Meta did not respond to Wired’s request for comment.

Wyden is imploring the DOJ to allow Apple and Google to be more transparent about these requests with the public. Apple, for their part, says that this letter now empowers them to be more public about the practice, although how public they’ll be remains to be seen.

What you can do to protect your data from push notification spies

At this point, the details surrounding this practice are still muddy, but that doesn’t mean we should sit idly by and wait for Apple and Google to make statements.

If you want to go extreme, you should disable push notifications for all your apps. I’m a big supporter of keeping notifications off for almost all apps, except the ones you actually need, and the recent news only bolsters my stance. There’s absolutely no reason that governments, foreign or domestic, should be allowed to see what my apps are notifying me about, but it feels especially egregious to allow them to do it when it’s just Snapchat desperately asking me to open the app.

I think you’ll find a solid 90% of the apps sending you alerts on your iPhone or Android are bullshit anyway, so disabling them with give you peace of mind and strengthen your privacy. Of course, disabling notifications for certain apps can backfire: You’re likely to fall behind in group chats if you disable notifications for your messaging apps, and you might miss meetings and appointments disabling notifications for your calendar. (Sorry, boss.)

At the end of the day, it’s a balancing act between privacy and convenience, as it always is. Even with today’s news, I’d have trouble disabling notifications for Messages, although it helps that iMessage is encrypted. But other apps I’m more than happy to keep turned off, so I can catch up with them on my own time. (Looking at you, Snapchat.)

All that said, the larger solution will have to come from larger forces. You shouldn’t have to disable notifications to preserve your privacy, and governments shouldn’t be allowed to ask for this info anyway. Hopefully, Sen. Wyden’s letter makes some change in Washington.


Source: LifeHacker – Governments Can Spy on Your Push Notifications

Use These Five Strategies for Finding an Affordable Rental in an Unaffordable City

Living in a city like New York, San Francisco, or Boston often means forking over a large portion of your income to pay your rent—especially if you don’t want to live with roommates. This often prompts those living in more affordable housing markets to wonder, or even ask, why you don’t simply pack up your life and move somewhere cheaper.

While that might be an option for some people, others have ties to pricey cities, like their job or family, or have other reasons why relocating isn’t on the table. But until more affordable housing is available, people who call those major metro areas home will have to figure out how to stretch their rent budget as far as possible. Because strategy is important in real estate, I reached out to Andrea Neculae, a research analyst at RentCafe, for some insider tips on finding a rental you can afford in an unaffordable city. Here’s what to know.

How to find an affordable rental in an expensive city

A recent report from RentCafe determined how much living space you can get for $1,700 per month (roughly the national average rent) in the 50 largest U.S. cities. In one Memphis neighborhood, you can find a rental home with nearly 2,000 square feet of living space for $1,700. Meanwhile, in Manhattan, you’ll barely be able to rent a 200-square-foot space for the same amount.

Here are Neculae’s takeaways from analyzing those data—which, she says, might help improve your chances of finding a rental that won’t break the bank in a notoriously expensive city.

Find the sweet spots

When analyzing the study data, Neculae and the rest of her team noticed a pattern emerging in many of the larger rental markets: The ring of ZIP codes surrounding a city’s downtown area often has the best balance of price and location. “These spots can be real gems without costing a fortune,” she tells Lifehacker. That said, if you wander too far outside the city center, you might find that the cost of rent spikes in neighborhoods with a mix of urban and suburban features. “These are now highly coveted by older millennials with families looking for urban amenities in a suburban setting,” Neculae explains.

Relocate your home office

It’s no surprise that people who work remotely often want a rental with space for a home office. But before blowing your budget on an extra room, Neculae suggests looking into rentals near coworking spaces. You’ll need to do the math, but it could work out to be cheaper to rent a desk in a shared office than to pay more to rent a home with room for an office. “In cities like Chicago and New York, for example, giving up a spare bedroom could save you anywhere between $9,000 to $20,000 each year,” she notes.

Consider a transit-oriented development

According to Neculae, you may be able to save money living in a transit-oriented development (TOD). A combination of residential and commercial areas, TODs are designed to maximize access to public transit, offering easy access to work, and city amenities, without having to rely on a car. “Plus, several states have announced initiatives to build more housing close to transit, so you can expect to see more of these projects in the future,” she adds.

Look for rentals in the fall or winter

Typically, more people are on the hunt for rentals in the spring and summer, meaning there’s more competition over properties, and less room for negotiation at this time of year, Neculae explains. “If you’re hoping to find a good deal, consider looking in the autumn and winter months when rental demand is typically lower, giving you the chance to score the apartment you love—often with a rent special,” she says. Neculae recommends starting your search early in January or February for the best chances of finding a property that meets your needs at a decent price.

Don’t ignore the fees

If you find an apartment with rent so low that it seems too good to be true, there’s a good chance that it’s either a scam, or you haven’t factored in all the various fees the resident is required to pay on top of their rent. “These not-so-obvious charges like application fees, security deposits, charges for trash collection, or pet fees can pile up to a significant amount that would raise your monthly expenses,” says Neculae.


Source: LifeHacker – Use These Five Strategies for Finding an Affordable Rental in an Unaffordable City

Nanoleaf's String Lights Are Worth It for Your Christmas Tree

Holiday lights are possibly the best application of smart features—they make it easy to turn your lights on and off from inside, or to be scheduled. When you add smart features to LED lights, they turn holiday lights into a magical color- and motion-making machine that you can change with the touch of your fingertips. If you’re looking for the easiest smart string lights to control, Nanoleaf smart string lights are what you’re looking for. 

Upscale quality with intense brightness and color range

I am, admittedly, already smitten with Nanoleaf products, and have spent fall in hue-induced bliss inside my living room. Once I learned they had outdoor string lights, it was an easy sell for me. For now, Nanoleaf is only producing one holiday light, these indoor/outdoor strings. They’re 65 feet long, broken into two strings that can mirror each other. They’re all on black wire, and I imagine that the perfect application is wrapped around a Christmas tree, much as their marketing suggests. These are waterproof, rated IP44, and suggested for both indoor and out.

These are small, sturdy led lights that don’t feel cheap. Each light has 250 lumens, which is substantial, and a 130-degree beam; there are about 250 lights on the string. In other words, these lights demand to be seen.  The LEDs are RGB, so they support about 16 million colors including white, but don’t have the expanded palette of RBGWW, which the Govee Permanent Lights Pro have. 

Multiple connection modalities

Nanoleaf products are all Matter-enabled, which makes it possible to add them to any Matter hub, but they also paired easily into the Nanoleaf app; you’ll want to do that anyway, since the molecular level controls are all available there. Nanoleaf also uses Bluetooth and wifi—you can control the major functions via wifi, but you need a Bluetooth connection to affect changes like colors.  

An immense spectrum of achievable color

The Nanoleaf app is where these lights really stand apart. It helps to compare them to the Govee smart string lights, which I’ve reviewed as well. The Nanoleaf app doesn’t give you every option or tool in the world, but because it gives you just enough options, in precisely the place you’d expect. In other words, you’re more likely to achieve a color and motion design you want with Nanoleaf. It’s unfortunate that Nanoleaf only offers this one style of outdoor light, but you could still achieve a lot with an entire house lit with them. 

screenshots from the Nanoleaf app
it’s easy to navigate to, and group your Nanoleafs in the app. From there, you can select one color, or a preset scene, and most of the out of the box scenes are really usable and tasteful. Remember, these colors will become an ombre in practice. Nanoleaf uses gradients to transition between colors.
Credit: Nanoleaf

Nanoleaf starts with presets set into two options: color- and music-reactive. In the Nanoleaf app, you can see the actual color band that’s going to be used, unlike the Govee app where they use words and expect you to guess the colors (with stunning inaccuracy). You can obviously set the entire light string to one color, including a pretty decent-looking white. While you can assign a maximum of six colors to your string as a base, the app will handle color shifts between them, creating really gorgeous ombres and color runs of gradients. The lights don’t have to have motion, but it can, and that motion can be sound-reactive or not, just like Govee lights. 

Creating your own color scenes is easy

You can edit any of the presets to change the colors or motion, but you can also create your own from scratch. Doing so is far easier in the Nanoleaf app: You hit a plus sign, and either pick your own colors one by one, or start with a massive list of color themes. Then you decide what kind of motion you’d want to use. Nanoleaf does a great job of telling you how the motion acts, and lets you adjust it. 

screenshots from the Nanoleaf app
When you create your own scene from scratch, you can start with a preset palette, and there are many, or roll your own, as I did here, with pinks. Then you choose a motion, if you want, and it clearly shows what each motion does.
Credit: Nanoleaf

These lights handle gradients so elegantly. A rainbow is represented by six colors in the app, but the lights, when you select that rainbow, clearly display millions of colors to achieve that color run, seamlessly transitioning between colors. It’s why I think trees are the best use of these lights, to see one color run go up a tree. 

But what I found even more appealing was the way Nanoleaf handles motion. There are 10 or so options for motion in the Nanoleaf app, from twinkle to flow and organic. Each of these produce incredibly elegant, advanced-looking motion. “Fireworks” really impressed me by being able to accurately capture the way a campfire looks. A single star can chase across the light string in another setting. These settings can turn color scenes like red, green and white—which can look a little unsophisticated—into an impressive array.

Nanoleaf holiday string lights

Credit: Amanda Blum

Nanoleaf holiday string lights

Credit: Amanda Blum

Nanoleaf holiday string lights

Credit: Amanda Blum

Not-so-great bluetooth range and no expansion capacity

There are a few downsides to the Nanoleaf string lights. First, you can’t string multiple lights together. Each has to be run on its own, which means connecting each string to a power supply. This is also true for Govee’s version of these lights. You can, of course, group these lights together and then assign the same scene to each of the lights, but in most applications, you want to string lights together. Second, Govee’s bluetooth is sturdier than Nanoleaf’s. While connecting wasn’t problematic, I didn’t have the range Govee offers, so I often had to move closer to the lights. 

Great for a one-off application like your tree

Compared to Govee, I prefer the app experience on Nanoleaf. It’s not even close—you are much closer to achieving the effect you want, quickly, with Nanoleaf.  I prefer the appearance of the lights, overall, from the bulb to the wire. But, since this is the only string light or outdoor product that Nanoleaf offers, it’s limiting. In a small application like a Christmas tree, I’d choose Nanoleaf, but for a whole house, Govee would have the advantage. Price-wise, Govee is also cheaper at $89, vs $119 for the Nanoleaf. While that’s more expensive than most string lights, these have a lot more to offer because of their smart functionality. Once the season is over, the lights can go behind a couch or mirror in your living room to add some reactive glow while playing video games or music.


Source: LifeHacker – Nanoleaf’s String Lights Are Worth It for Your Christmas Tree

How to Watch the 2023 Game Awards Tonight

The Game Awards are back. Host Geoff Knightley, who started The Game Awards back in 2014, is set to take the stage tonight, Thursday Dec. 7, to honor some of the best games of the year. If you’re looking to tune in to see if your favorite game of 2023 will be honored, here’s what you need to know.

When and where to watch The Game Awards

Unless you snagged tickets to the event, you’re most likely watching The Game Awards at home like the rest of us. Luckily, it’s super easy to do. The show will begin airing at 7:30pm ET (4:30pm PT) on Thursday, Dec. 7. As for where you can stream the awards, well, the choice is yours. The Game Awards is partnering with 11 different outlets, all of whom are hosting the show live. That includes usual suspects like YouTube and Twitch, but the list includes plenty of others, from Steam, to Facebook, to X (Elon will be thrilled)—even Google Play will host.

Of course, I’m partial to YouTube livestreams since I’m always on the site to begin with. The stream is live now if you want to keep it in the background until tonight:

The Game Awards also has partners outside the US, with dedicated streamers available in China, India, Japan, South Korea, Southeast Asia, and Germany.

Which games are nominated?

The Game Awards, like all award shows, has many different categories they’re honoring tonight, from Best Game Direction, to Best Narrative, and Best Multiplayer. In total, there are 31 award categories that will be featured tonight, so you’ll see plenty of games and devs celebrated. You can find a full list of the awards and nominees here. For me, I’m most interested in who will win Game of the Year, which comes down to the following titles:

  • Alan Wake 2

  • Baldur’s Gate 3

  • Marvel’s Spider-Man 2

  • Resident Evil 4

  • Super Mario Bros. Wonder

  • The Legend of Zelda: Tears of the Kingdom

Damn, it was a good year for gaming.

Win a Lenovo Legion

The Game Awards is also partnering with Lenovo to offer 100 Legion handheld gaming devices throughout the night. If you’re interested, head to the official content page during the show and punch in your info to enter.


Source: LifeHacker – How to Watch the 2023 Game Awards Tonight

You Should Join the Audubon Society’s Christmas Bird Count This Year

The annual Christmas Bird Count (CBC) conducted by the Audubon Society has been an annual event since the beginning of the 20th century. As an answer to declining bird populations, the tradition began in 1900 by early proponents of conservation to record what they feared were shrinking bird populations and promote bird watching as a hobby. Joining your local bird count can be a holiday tradition to treasure, connecting to the outdoors and helping to gather information on birds and habitat at the same time.

What is the Christmas Bird Count?

As a participant in the count, you will get connected with your local circle and contact the organizer for details. Each count occurs on one calendar day between December 14th and January 5th within the boundaries of a 15-mile circle on the map, recording not just each species that is seen or heard, but each individual bird. Participants will tally their counts and turn in their data to their count compiler, who is then tasked with turning in the data to the Audubon Society.

Find your local count

To find your circle, you can start on the map page that lists the existing circle for the Audubon CBC. Each circle has the location and contact information for the compiler listed if you click on it so that you can arrange to participate in your local count. There are locations all over North and South America, so it’s likely that there’s a circle near you.

If you don’t have a local count

If you don’t see a count near you, you can either choose to participate in the National Backyard Bird Count (NBBC) as an alternative, or you can apply to start your own circle if you’re a skilled and ambitious bird watcher. Keep in mind that organizing your own count requires that you have at least a few other participants willing to pitch in and that you have a solid area in mind where the count can be conducted.

The count is for everyone

The CBC is open to anyone who wants to participate through a circle, and is conducted much the same way a census would be. It’s free to participate and is open to all skill levels. If you’re new, you will be paired up with a more experienced birder so you can learn the ropes. This can be a great family activity, but I wouldn’t bring younger kids, who might have shorter attention spans and be more vulnerable to inclement weather.

Be prepared

You should be prepared to stay outdoors for the whole time the count goes on unless you’re lucky enough to live within the boundaries of a circle. You are responsible for bringing your own binoculars and weather-appropriate clothing to the count. If you reside inside of one of the circles, you can participate from home simply by recording all of the birds that visit your feeder and then turning in your results to the compiler.

How the data from your count gets used

The data that’s collected during the Christmas Bird Count is used as a resource for science-based publications, studies, and as a resource for those studying wildlife and ecology. Summaries of the data collected every year are also published for the public and can be found online through the Audubon Society website.

Stay in the loop

To follow the data as it comes in and stay informed on community science events from the Audubon Society, you can sign up for American Birds and check out the CBC Live Tracker for photos and updates from Christmas Bird Count participants. If you choose to participate in the count, you can also upload your photos for others to see how your count is going.


Source: LifeHacker – You Should Join the Audubon Society’s Christmas Bird Count This Year

The Best Gifts for DIYers (That Aren’t Tools)

For someone who’s just starting out on their DIY journey, or for those who already seem to have just about every tool you could think of, it can be hard to choose tools to gift. But the DIY community isn’t just about tools, and makers can use other things besides glue guns and 3D printers to hone their craft. There are lots of non-tool gifts that anyone from novices to DIY masters would love.

Books

Books by DIY masters, experts on a particular subject, or personal stories related to a particular DIY subject can be a good option. Here are a few of my favorites:

  • For the renter in your life who’s looking to become more handy, Safe and Sound: A Renter-Friendly Guide to Home Repair by Mercury Stardust (aka, The Trans Handy Ma’am) is the perfect gift. Her focus on empowering ordinary people to tackle all their maintenance tasks with confidence is peppered with both practical advice as well as guidance on how to overcome your apprehensions about your maintenance needs.

  • For woodworkers, Working with Hand Tools: Essential Techniques for Woodworking by Paul N. Hasluck is a guide to the traditional hand tools and methods of woodworking. The book guides readers not just about tools, but also has project guides and inspiration for shop set-up, including work benches and clamps that can be made by hand.

  • For gardeners, How to Grow: Nurture Your Garden, Nurture Yourself by Markus Bridgewater (aka, Garden Marcus) is more than just a treasure trove of gardening wisdom; it’s also a calming and inspiring journey peppered with relatable personal stories. His book is a must-read for anyone looking to gardening for improved mental and physical health.

Classes and workshops

Classes and workshops are another great gift for your favorite DIY enthusiast—but matching the class to the skill level and particular interests of your recipient is key.

For online classes, Udemy has a variety of woodworking and home repair classes to offer. But for many makers, in-person classes tend to be more fulfilling because the materials and tools will be arranged by the instructor, and there will likely be a workspace set up for the desired project. These types of classes can be found through local community colleges, libraries, maker spaces, and sometimes through private programs hosted by shops or studios. The nice thing is that the gift of a class like this offers some community building for a new maker or DIYer as well as instruction.

Maker memberships

A membership to a maker space for your favorite DIY craftsperson who maybe doesn’t have room for a garage or basement shop is a really good gift. Maker spaces often include access not just to space, but to some tools as well, so for someone who is either looking to expand their skills or who is newer and needing to try out some different techniques or projects, a maker space can be just the right fit. These memberships can range from a $10 day pass to as much as $600 per month, depending on the space and location, but many of them tend to be in the $35 to $60 per-month range. 

Tool library membership

Another membership you could consider for someone who is a new homeowner or just getting into gardening or DIY is membership to a tool library. Although some tool libraries are free, others will charge an annual fee for access to borrowing tools, equipment, and other materials. These memberships can range from $10 to $100 per year, and they often also offer classes in repair and maintenance. They’re also an excellent resource for getting involved in your local DIY and repair community.

Software subscriptions

Craftspeople, from beginners to experts, often use planning software to design and sketch their projects. This software can also be used to make sure that objects will fit where you plan to put them, and to try out layouts and designs before you start building. While there are some free apps out there for these purposes, having access to more advanced features can make the software easier to use.

  • Sketchup is a 3D rendering program you can use to draw all parts and components of a project to scale.

  • Realtime Landscaping Pro is another option used primarily for outdoor spaces. This software will allow your favorite gardener to design and visualize plants, decks, sprinklers location, and even holiday displays using photos of the exterior of your home to make it realistic.

  • For creating detailed schematics and layouts for more complex projects, Autodesk is a handy gift for a carpenter, designer, or builder. The various packages range from $100 to more than $4,000 a year, but the most common tools for DIYers will be between $100 and $600 per year.


Source: LifeHacker – The Best Gifts for DIYers (That Aren’t Tools)

This Medium-rare Brisket Is a Sous Vide Miracle

To achieve a perfect brisket, you generally have had to cook it the heck out of it, at least enough to render out all the fat to make it tender. The result is delicious, but well-done. If you’re looking for a medium-rare solution with all the tenderness and silkiness of a normal brisket, sous vide is the answer. The best part is that the recipe is delightfully hands-off; the worst part is that from the time you read this recipe, you are at least 50 hours away from eating. It’s worth the wait.

Prep is blissfully simple

I’ve previously discussed how briskets are quite large and made up of two parts (the flat and the point), both of which are also quite large. However, most markets sell cross cuts that include a little of both, plus a hefty amount of fat that needs to be trimmed off. This recipe uses a 5-pound cut, but could adjust to any size cut that will fit into the sous vide bag. Regardless of what cut you go with, be sure to trim all the fat down to ¼ inch at most. 

Briskets need seasoning, and in particular, they benefit from some salt. The internet is full of complicated rubs and recipes for brisket, but I find za’atar to be a woefully underutilized choice. I liberally applied this spice mix of marjoram, thyme, cumin, coriander, sumac, salt, and sesame seed, all over the cuts of meat, using 6 or 7 tablespoons of it, and then sprinkled an additional 2 tablespoons of table salt over the meat as well. 

Occasionally top up the water bath

In many cases when sous viding meat, a sear at the start (or a reverse sear at the end) is required. We’re doing neither. Simply place the meat into the sous vide bag once it’s seasoned, set the temperature to 131°F and let it go for 50 hours. Check every 12 hours or so to ensure the water level is sufficient in the container you’re using. 

After 50 hours, take the brisket out and let the bag sit on the counter to rest for 20 minutes. At that point, remove the brisket from the bag and move it to a cutting board. Slice it to ¼-⅜ of an inch, on the bias.  Serve it with your favorite grainy mustard and some pickles; I used pickled green beans, but cornichons or pickled red onions would be perfect. 

Luxuriously silky and melt in your mouth

All brisket made well is tender, but this was the silkiest brisket I’ve ever had, and perfectly pink through and through. Melt-in-your-mouth is the phrase I kept thinking of, and it was all so very simple to make. It reheats beautifully, even in the microwave.

Sous vide brisket seasoned simply with flaky salt, served with grainy mustard, and pickled green beans and red onions
Credit: Amanda Blum

Sous Vide Za’atar Brisket Recipe

Ingredients:

  • 1 5-pound cut of brisket, well trimmed of fat (ask the butcher to do this if you prefer)

  • 6-8 tablespoons za’atar seasoning (or another seasoning mix you enjoy)

  • 2 tablespoons table salt

  1. Trim the brisket of all but ¼ inch of fat, if not already done. 

  2. Season the meat liberally with the seasoning and salt, rubbing it into all surfaces of the meat. 

  3. Place the meat in the sous vide bag, and then ensure all air is removed from the bag.

  4. Cook at 131°F for 50 hours, checking occasionally that the container has enough water. 

  5. Remove the bag from the water and let sit for 20 minutes. 

  6. Remove the meat and slice on the bias thinly. Serve with mustard and pickles.


Source: LifeHacker – This Medium-rare Brisket Is a Sous Vide Miracle

Reheat Fried Chicken Without Losing the Crunch

Fried chicken is one of those foods that changes me. If it becomes an option for dinner, I’m pretty sure my pupils grow like a cat who’s spotted prey (but probably a dust mote). I usually only enjoy the skin that first night, though, because the leftovers get rubbery and humid. Thankfully, there are two ways to bring fried chicken back to crisp perfection—and these methods actually make fried chicken better than the first day.

Air-fryer-refried chicken

This is the best of the two methods. The crust becomes resoundingly crunchy, the kind where you can hear someone else eat it in another room, and the cooking time is ridiculously fast. Add the cold fried chicken to the air fryer, make sure it’s on a grate or wire rack made for your appliance. Have the machine on the “air fry” setting at 400°F and let it rip for 10 minutes, flipping the chicken half way after five. It is exactly that simple, and better than the original. (I’ll discuss why that is in a moment.)


Consider these products:


Conventional-oven-revived fried chicken

Two piece of fried chicken on a wire rack
The wire rack allows the rendered fats to drip out and away from the crust.
Credit: Allie Chanthorn Reinmann

This oven method is a close second to the air fryer if you don’t have one. (You should consider getting one though; I love the darn thing.) The skin returns to the original level of crunchiness—great texture with a bit of flexibility in the thin coated areas—but doesn’t surpass it like it can in the air fryer. It also takes more than twice as long to get to this point, which puts the chicken meat in danger of drying out. That said, it’s still worlds better than microwaving it.

Put a wire rack over a foil lined sheet tray. (The foil makes clean-up easier, but it’s not necessary other than that.) Put the cold fried chicken on the wire rack and bake it at 400°F for 20 to 25 minutes. Flip the chicken halfway through the cooking time.

These methods can save oily fried chicken

Reheating leftover fried chicken in the oven or the air fryer might not blow your mind with innovation, but the real hero is the wire rack or air fryer grate. In the tests I ran, the air fryer wins out because of the high heat and circulating air, but both methods resulted in a quarter cup of discharged fat that had collected in the sheet pan or basket. All of the chicken I had revived with a rack of some sort was still juicy inside, but distinctly less oily in the breading. That’s just better fried chicken. 

The whole point of frying anything from fritters to corndogs is to make a crust that’s cooked through but not oily. It’s often easier said than done. If you have fried chicken that came out way too oily, give the cold leftovers a second spin in the air fryer for 10 minutes. The excess oil will drip right out and give you a perfectly crisp, un-oily crust. It’s one of the only times leftovers reheat better than the original.


Source: LifeHacker – Reheat Fried Chicken Without Losing the Crunch

You Can Create Your Own Custom iPhone Browser With Quiche

Safari on the iPhone is fast, convenient—and, admittedly, a bit boring. There are plenty of third-party options on the App Store, but seeing as Apple forces them all to use WebKit, most are essentially Safari. However, that hasn’t stopped one indie developer from trying to make things interesting. 

Greg De J’s Quiche browser is unique, engaging, and fully customizable, down to every button and toolbar you see in the interface. You can take advantage of this to make the browser much more functional, like adding a button dedicated to private mode in the toolbar. Plus, it has many color and layout options to explore for truly fine-tuning your browsing experience. 

How to customize your iPhone browser using Quiche 

You can build the entire UI from scratch, but it’s better to start with one of the presets. Go to the Settings page and you’ll find the Toolbar Gallery option at the top. Here, you have a myriad of options. You can go with the traditional Safari style, with an address bar at the top and buttons below, and customize all parts of it. Or you can choose to hide all the buttons behind a menu, and rock a superbly minimal browser interface. 

Once you’ve picked the starting point, go back to settings to customize the theme color, the toolbar layout, the address bar style, the menu button, and the context menu.

Customizing the address bar and toolbar in Quiche browser.

Credit: Khamosh Pathak

In the Address Bar option, you can add the Read Time for articles you open, and in the Layout option, you’re free to switch out buttons to anything you like. Once you’re happy, save your interface, and voila: You now have a custom browser made just for you, by you. 

Interesting features in the Quiche browser

Quiche has some excellent ideas that other browsers should take note of. In the Settings section in the tab switcher, there’s an option to sort all open websites based on read time, with the shortest reads on top. The tab switcher is also quite customizable: You can display tabs as a list, or large previews.

The way Quiche handles both the toolbar menu and the context menu is also really interesting. You can choose to have only the address bar showing, as you can hide all other important buttons in the long-press menu, or behind the Menu button. By default, Quiche uses DuckDuckGo as the search engine, but you’re free to switch to Google, or even Kagi. The browser will even let you change your browser agent, or disable JavaScript entirely. 

Quiche will let you switch out its default icon as well, but this can only be unlocked using a $0.99 per month Quiche+ subscription. Given that the entire browser is available for free, this is a nice way to support the developer if you’re so inclined.

Overall, Quiche makes for a nice, custom alternative to Safari. For me, this level of customization improves the overall browsing experience, and I imagine for most users, it has enough going for it to serve as a default browser. That said, the lack of extension support, content blocker, and a dedicated reading mode might deter some. 

[Macstories]


Source: LifeHacker – You Can Create Your Own Custom iPhone Browser With Quiche

Gemini Is Google's Answer to GPT-4

Google Gemini is the latest (and greatest) AI language model from Google, and it stands to offer solid capabilities that rival that of OpenAI’s GPT-4. With all the recent releases of AI chatbots and systems, though, understanding exactly what Gemini is and how you can use it might be a bit difficult.

What is Google Gemini?

The simple answer here is that Gemini is Google’s answer to GPT-4, the large language model (LLM) that powers ChatGPT Plus and Microsoft’s Copilot. It’s the most up-to-date and capable model that the search giant has created thus far, and it plans to use it in a myriad of ways.

Who can use Gemini?

Anyone can use Gemini, however, you won’t use it like ChatGPT. As I noted above, Gemini is the language model that will run Google’s AI chatbot, similarly to how GPT runs things behind the scenes in ChatGPT. As such, you won’t be able to go to Google’s website and start talking to Gemini. Instead, you’ll need to utilize one of its three different versions to create an application that harnesses the power Gemini offers. Alternatively, you can just wait for someone else to make one—or utilize Bard, Google’s chatbot, to see what Gemini has to offer once it gets updated.

Gemini has three tiers

Google designed Gemini 1.0 to offer three different sizes, or tiers. These sizes are designed to help the model make the most of its capabilities for complex tasks, everyday tasks, and on-device tasks.

Gemini Ultra is the largest and most capable version of Google Gemini and it will be utilized to complete the most complex tasks that Gemini can handle. This will likely be one of the primary versions seen behind Bard Advanced and other AI chatbots that utilize Gemini for extensive and complex tasks and it’ll offer the most next-generation performance out of the three.

Gemini Pro is what Google considers the “best model for scaling” and the company says that it will be able to handle a wide range of tasks while delivering state-of-the-art performance. It’s the middle-ground plan, which will probably be the most widely utilized and is currently available to try in Bard.

Gemini Nano is the smallest and most efficient version of the model and Google says it was designed to run off devices as small as smartphones. The company already plans to utilize Gemini Nano in the Pixel 8 and Pixel 8 Pro smartphones, where it hopes to let AI expand how we use our devices going forward.

How does Gemini compare to GPT-4?

As I noted above, Google wants Gemini to be its answer to OpenAI’s GPT-4. According to some of the stats that Google shared in its official announcement, the new model stands up really well to GPT-4V (GPT-4 with vision) and other models, as well. Google says Gemini can achieve 59.4% when benchmarked in MMMU (Multi-discipline college-level reasoning problems), whereas GPT-4V reaches 56.8%.

Google Gemini benchmarks compared to GPT-4V and other models
Benchmarks showing how Gemini compares to GPT-4V and other models.
Credit: Google

The differences between the two are not staggering, by any means, but Gemini’s performance should hopefully push OpenAI to make GPT-4 even better. This kind of competition is exceptionally useful for consumers, as it ensures that both models will continue to improve going forward as they try to keep up with and surpass the other.

Google says that Gemini was trained to recognize and understand text, audio, images, and more, all at the same time. This more sophisticated reasoning should allow the model to handle whatever you throw at it, though time will tell exactly how good it does in real-world applications.

Is Gemini accurate?

Like any AI language model, Gemini will be susceptible to hallucinating and generating bad information. While the company hasn’t shared any specifics about how accurate Gemini is comparatively, it will always be important to double-check any information the model returns to you before publishing it anywhere. That said, these AI systems will undoubtedly continue to become more accurate over time, though the risk of hallucinations will likely always be there.

When can I develop with Gemini?

If you’re interested in developing with Gemini, Google says it will release developer access for the Gemini Pro and Gemini API starting on Dec. 13. Gemini Ultra is still slated as “coming soon,” as Google says it is working through extensive trust and safety checks at the moment. Google has yet to share any pricing-related information about Gemini at this time. Google also hasn’t shared what kind of character or context limits Gemini will work with, though I expect that information to come out once users have open access to the model. We know that ChatGPT’s character limit is around 4,000 characters (based on community research), so it is likely we’ll see a similar approach with Gemini.


Source: LifeHacker – Gemini Is Google’s Answer to GPT-4

How to Share Your Location in iPhone's 'Find My' App

Location sharing is one of those things you set and forget, but can be helpful in a pinch. For example, if you happen to get separated from friends or family while out and about, location sharing can be helpful to find each other. You might also enjoy seeing what your closest contacts are up to (just don’t be surprised when they ask to track you back.)

When you share your location on your iPhone, the people you share it with will be able to find your exact location on a map in the Find My app. It’s easy to set up, so long as you know where to look.

How to enable Location Sharing in the Find My app

Find My is your one-stop shop for tracking friends, devices, and items. That includes everything from your iPad, AirPods, and AirTags, in addition to any friends and family members you share your location with.

To start location sharing in the Find My app, open the app. Next, tap on Me in the bottom right. You should see a toggle to enable Share My Location.

If it’s already active, the toggle will be green; otherwise, it’ll be gray. Tapping on Location will give you some options to give a nickname to your current location, like Home, Work, School, etc.

How to share your location on iPhone in the Find My app

To share your location with friends or family, go to the Find My app. Then tap on the People tab. After that, tap the + icon and tap Share My Location in the pop-up menu.

Another menu will pop up allowing you to type in the name you want to share your location with. After choosing the person and tapping on Send, you’ll be given the option to choose how long to share your location for. You can share your location for an hour, until the end of the day, or indefinitely. The latter is what most people choose when they want to be “friends” on Find My, while the former two works well for temporarily sharing your location with a contact. That way, you won’t accidentally forget to disconnect from sharing.

Pro tip: You can also share your location with someone from Messages. Just tap their name at the top of the screen, hit Share My Location, then choose your desired length of time. You can also do the same from a contact’s card in Contacts. Apple loves offering multiple ways to do the same thing.

How to stop sharing your location on iPhone in the Find My app

Sometimes you want to stop sharing with people for one reason or another. To stop sharing your location, go back to the Find My app. Tap on the People tab and choose the person you’re location sharing with. From here, choose Stop Sharing My Location, and you won’t need to worry about them tracking you going forward.


Source: LifeHacker – How to Share Your Location in iPhone’s ‘Find My’ App

These Smart Holiday Lights Are Designed to Stay up All Year Long

In the middle of winter, many of us risk life and limb to climb across our roofs putting up and taking down holiday lights. Govee, a company that specializes in smart home technology, thinks its new permanent lights might be the answer. The idea is you put up its smart LED lights once (preferably when it’s not icy and cold out) and then adjust how they look from within the Govee app to change things up throughout the year.

As with all things Govee, the results are a little chaotic. Overall, there is a lot of potential with these lights, and the user is given an enormous amount of control over how the lights look and act, from dancing green lights in sixty shades of green for St. Patrick’s, to a simple warm white glow for the rest of the year. With sound reactivity, millions of colors, and the ability to individually control each “bulb,” the possibilities are limitless.

Professional level build and flexibility

First, it’s worth noting these lights are getting a lot of support from actual professional installers, who share plenty of tips and tricks on Reddit. The permanent lights come in cord colors of black or white, and kits of 100 and 200 feet, so you can pick the kit that works best for your home.

A few notable things distinguish these from regular holiday lights. These lights require connection to a hefty power base, so you can’t break the strings of lights into multiple sets. In fact, string more than five lines together (and kits include far more than five, so you will) and you’ll have to attach a chunky driver they include inline. 

The light strings and splicing connectors included in the set

Credit: Amanda Blum

What is nice about this kit is that Govee expects you to cut and splice the lights as you need, and provides connectors for that purpose. However, the company doesn’t provide wyes or tees for branching the lights in different directions, as they expect you to always string the lights in succession. I found a workaround on YouTube, but it makes sense they want the lights in a line. These smart lights use all kinds of logic for their patterns, so when you split them, the system doesn’t realize there are different branches of lights.

Completely different from other holiday lights

The lights themselves are set about 12 inches apart and aren’t shaped like any other holiday lights. You can ditch the plastic clips you buy online, as the set includes all the clips you’ll need specifically for these lights. The lights are small squares of LED color, and they come with sticky 3m tape attached to each that, so far, has been surprisingly resilient through a Pacific Northwest winter. The strings themselves are IP67 waterproof with an IP65 power base. You also don’t place them where normal lights go: These are meant to go under eaves or your gutters, aiming down. Think of each as a tiny 50-lumen downlight, meant to shine a cone of color onto the house wall. 

Your kit comes with a few components: The lights themselves, broken into multiple strings, each with waterproof, screw-on connections. There are a few extension pieces, so you can jump from one floor to another without lights, if need be. Each of the lights has a 3m sticker already, but they include a substantial number of extras, so you can move them if need be. However, treat these like a permanent installation. I was able to get the stickers off using a metal edge, but those buggers had moved in for life.

You can, of course, space the lights as far apart as the wire will allow, but I spaced them closer since it’s a small house. I also followed a popular tip, which was to cover the cord with either wood or a cord cover for a nice, clean look. We also ran the lights up onto the roof out of curiosity how they’d look. In darkness, the result ranges from breathtaking to outrageous, based on the scene I choose. Over the last two weeks, I’ve had endless neighbors stop to gush about the lights. 

Matter, wifi, and Bluetooth support

Govee has the edge on a lot of smart tech companies by being very Matter-forward in their products, which makes adding new devices to the app a breeze. Changes to the lights take place via Bluetooth, so you need to be in range, but I haven’t experienced any issues connecting, even in situations where other devices in the same area have failed.

A million app options allow for great control but a confusing UI

The app experience with Govee products is always a struggle. I found it difficult to navigate the app, specifically when I was looking to affect specific aspects of the lights. There are so many (almost too many) possibilities to choose from, plus more options hidden in sub-menus and tabs I didn’t expect. Govee offers a plethora of ways to affect the lights, so the best advice is to start hitting buttons and trying things out. It took a week or so before I really started to understand how the app works. Since you’ll never be replacing a bulb again, you can focus on throwing creativity at the color, motion, brightness and reactivity. 

A house with green-colored holiday lights
A more spring-appropriate color palette
Credit: Amanda Blum

Although you will not lack for pre-programmed color and motion schemes, none of them are that tasteful, so you’ll likely want to create your own. Remember: instead of one light color or even four or five light colors, you can now create an entire rainbow ombre across one string with gradients. These lights support RGBWW, which means in addition to the RGB spectrum, you get two true whites at the same time—a warm and cool. You can choose pastels versus vivids, or choose from 60 different purples. You can customize every single light on a string. While you can do some limited editing of pre-existing scenes, the best way to create your own is to go to the “DIY” tab and create a brand new scene. Here, you can assign a color to every single light and add in motion effects. 

Sound reactivity, motion, and brightness

These lights have a built in microphone, so they can be sound reactive. Pre-programmed reactive scenes were fun, but garish and migraine-inducing to my neighbors. Using the DIY function, I was able to create a few scenes using sound reactivity that were quite soothing and beautiful. A soft white that just lightly twinkled occasionally, and a pastel rainbow that color shifted. It turns out that Govee has a massive community building more usable scenes, which anyone can explore in the Discover menu.

A house with white-colored holiday lights

Credit: Amanda Blum

You don’t have to use the sound reactivity, of course. If you prefer, you can leave the lights on a soft motion of your choosing or simply leave them static. You can affect the overall brightness and even the brightness of the lights relative to each other. You can tell the house which “bulbs” sit on the corner of the house so they’re designated different colors or motion—the theme here is that you can really do almost anything, it just takes some dedication to finding the right solution in the Govee app. 

It is worth mentioning that there are a variety of tools Govee offers in the app, from AI bots that will take color schemes from a picture, or generate a scene based on a phrase you give it. I found most of them to be unhelpful, but I may not have tapped into the right tool yet. 

Smart features like automation and scheduling

Govee has tons of integrations with other smart home technologies, so you can use the Govee app or your preferred home assistant (Google or Alexa, anyways) to schedule the lights, involve them in automations, etc. You can also group these bulbs with other Govee bulbs so they all use the same scene automatically, in time with each other. 

Govee also offers the permanent lights in a standard version, which only lacks a few key features of the Pro version. Notably, the lights can’t be cut and spliced, and they only support RGB, so you’re not getting as many shades of white. You also can’t get black wires (just white), they’re about half as bright, and they lack Matter support. What they have going for them is price: The Govee Permanent Lights Pro are $399.99 for 100 feet, vs. $299.99 for the standard version. 

Bottom line: reliable strings you never have to install again

I do not celebrate Christmas, and have always enjoyed being able to avoid putting up lights. However, I have discovered through testing these lights how absurdly happy they make people—my neighbors, kids, even me, a qualified Grinch. I’d feel very differently about static bulbs, but these are like turning your whole house into an interactive game.  I quite enjoy standing in my driveway playing around with the colors on the fly, and have been playing music outside for the lights to dance to. The immediate neighbors are all in love with them.

Sure, the Govee app is subpar, but it still offers tons of way to create interactive scenes. The lights are solid, beefy, and seem up to the task of surviving winter, plus they’re backed by a 3-year warranty. In the past, I’ve found Govee customer service to be nimble and helpful.

These lights installed with two people in less than an hour. While decidedly not cheap, I think these are worth the investment if you routinely set up holiday lights and consider the price of your time installing, uninstalling, and untangling every year. They’ll serve you year-round, you’ll find reasons to celebrate all kinds of holidays (I honestly cannot wait for Pride) and in the grand scheme of absurd expenditures on holiday decor, these will stand the test of time much better than an inflatable reindeer. 


Source: LifeHacker – These Smart Holiday Lights Are Designed to Stay up All Year Long

Every New Feature in the Google Pixel December Drop

With their annual Pixel hardware launch in the rearview mirror, Google is now turning their attention to the software side of things. First up: a new Pixel Feature Drop. This isn’t something out of the blue, though: A Pixel Feature Drop happens every few months, and adds some cool new features to compatible Pixel phones.

For the December 2023 drop, there are a couple of new features coming exclusively to the Pixel 8 Pro (sorry Pixel 8 users) like Gemini Nano, Video Boost, Night Sight Video, and more.

Gemini Nano on Pixel 8 Pro

Google introduced a new AI model on Wednesday called Gemini that can run on devices from data centers to mobile devices. Lucky for Pixel 8 Pro users, Gemini Nano, the smallest and most efficient form of Gemini, is coming in the December drop.

Gemini Nano on Pixel 8 Pro powers the new Summarize feature in the Recorder app. With it, you’ll be able to quickly get a summary of your recordings without a network connection since all the processing is done on-device. In addition, Gemini Nano powers Smart Reply in Gboard: The on-device AI model suggests responses by using conversational awareness, so hopefully the suggested replies are more useful than ever.

You can try the new Gemini Nano-powered Smart Reply in WhatsApp to start, with more apps will be supported in the new year.

Video Boost and Night Sight Video on Pixel 8 Pro

During their hardware event in October, Google showed off Video Boost as a powerful Pixel 8 Pro exclusive. The feature uploads your videos to the cloud, then processes the video using Google’s computational photography models to adjust the lighting, color, stabilization and graininess. After your video has been processed, Google says your video should be more “true to life.”

Video Boost also enables another new feature called Night Sight Video, which uses AI to apply noise reduction to your videos recorded at night or in low-light situations.

Another camera feature coming to both the Pixel 8 Pro and Pixel 8 is Night Sight in Time Lapse. Once you set your phone on a sturdy surface, like a rock or tripod, you’ll be able to record time-lapse videos in low light. This is perfect for shooting the night sky or a vibrant cityscape at nighttime.

Photography improvements

This drop introduces a series of photography improvements for your Pixel. Google is adding a new AI model to help improve Portrait light in Google Photos, which can remove harsh shadows so that Portrait photos look their best. In addition, Photo Unblur has also been improved to sharpen images of dogs and cats, in addition to refocusing people’s faces.

If you have a Pixel Fold, you can now enable Dual Screen Preview, which displays a camera preview on the outer screen when taking a photo. You can also use your Pixel as a webcam, now. Just connect your Pixel 6 or newer (or Pixel Fold) via a USB cable to your computer and choose the webcam option under USB Preferences.

If you’re someone who scans documents on your Pixel, then the new Clean feature will be useful. “Clean” can remove any smudges, stains and creases from your scanned documents, so they’re both more presentable and legible.

Repair Mode

If you need to send in your Pixel phone in for repair, check out the new Repair Mode. When you enable it, Repair Mode will protect your apps and personal data in a secure environment. The only way in is by entering the secure code you set. (Google, of course, recommends you take care to make this code strong.) After you exit the Repair Mode, access to your phone, and its data, will return to normal.

Smarter replies in Call Screen

One of the best features on Pixel phones is Call Screen: This feature can answer calls on your behalf, and display a transcription of the call, so you can decide whether or not you want to take it. Now, it’s even better with the December Feature Drop. Call Screen will now give contextual replies, such as confirming or cancelling an appointment when a doctor’s office calls, in addition to weeding out spam callers. Call Screen also works on Pixel Watch, so you can see who’s calling before picking up your phone.

Speaking of the Pixel Watch, you’ll now be able to unlock your phone using your watch when they’re connected. So long as you’re wearing your Pixel Watch, you won’t have to use fingerprint or face unlock on your phone every time you wake it up.

Smaller features

Google also added some smaller features that improve quality of life while using your Pixel devices. For example, we now have Clearing Calling support for video calls on Pixel Tablet, weather in the Clock app, and Google Password Manager can now identify which accounts support passkeys. Additionally, if you have a first-gen Pixel Watch, you’ll see features like syncing Do Not Disturb and Bedtime Modes, new watch face designs like Adventure and Analog Arcs, and updated complication styles such as arcs and redesigned bulbs.

Which Pixel phones will be getting the December Feature Drop?

The December Feature Drop is rolling out to Pixel devices today, including Pixel 8 Pro, Pixel 8, Pixel Fold, Pixel 7 Pro, Pixel 7, Pixel 7a, Pixel 6 Pro, Pixel 6, Pixel 5a 5G, and Pixel Tablet. Not all features from the December Feature Drop will be coming to all Pixel devices.


Source: LifeHacker – Every New Feature in the Google Pixel December Drop

How to Wrap Absolutely Any Gift (Even If You’ve Run Out of Tape or Paper)

The holidays are here, which means you have a lot of stuff to do. You have to make travel plans to visit loved ones, hosting plans for visiting loved ones, party plans, shopping plans, cleaning plans, decorating plans, and every other kind of plan. While most of these plans are well within a grown adult’s capabilities, there’s one plan that confounds even the smartest people: wrapping all those gifts.

If you’ve ever sat down to wrap a mountain of gifts only to have a nervous breakdown some unknown time later when you run out of tape, you know how surprisingly stressful the gift-wrapping process can be. Even simple, classic boxes can turn out looking like you wrapped them in a dark room after a long day—and oddly shaped gifts can often seem impossible. But don’t despair—wrapping gifts, even those with non-standard packaging (or no packaging at all), is easier than you think.

How to wrap a gift

First things first: the fundamentals. If your approach to wrapping gifts is to haphazardly apply wrapping paper with gobs of tape, resulting in what holiday scientists call abominations, rejoice: Wrapping a traditional box-shaped gift is actually easy once you know the basic approach, and there are plenty of gift wrapping hacks and ideas out there if you’re looking to up your wrapping game or facing a specifically challenging gift shape.

Classic methods

The easiest way to wrap a gift is to put that gift into a traditional square or rectangular box, if you can. That way you can employ the classic approach:

  1. Place the box face-down on the back of the wrapping paper, still attached to the roll. You should have enough paper on either side to come up about three-quarters of the height of the box.

  2. Fold the free end of the paper over the box until it can fold over the other end of the box and touch the back of the paper.

  3. Cut your paper, adding a three-inch margin past the edge of the box.

  4. Trim the paper so you have the same margins all around.

  5. Flip your box so it’s face-up.

  6. Fold about two inches of paper over the top of the box on the shorter side and secure with tape.

  7. Pull the other side over the top of the box and secure with tape. For extra style points, you can fold it under itself and use double-sided tape to create a neat seam instead of a taped edge in the middle of the box.

  8. On the ends, fold the paper into triangles on top and bottom, crease, and fold up. Then pull the edge down and tape. Repeat on the other end.

Voila! A cromulently wrapped gift (you can see it done here). Some of the folding isn’t 100% necessary, but results in a neater-looking job. And you can employ double-sided tape to hide it, creating a seamless look, but this is also extra credit and not absolutely required.

If speed is more important than an exquisite final product, you can do some speed wrapping:

  1. Measure your paper so it wraps all the way around your box with two inches extra.

  2. Place the box on its narrow side, diagonally across the back of the paper.

  3. Take the corner closest to you and fold it so it lines up with the edge of the box to your left, secure with tape.

  4. Fold along the edge created and bring the flap of paper up flush with the box edge. Secure with tape.

  5. Repeat on the other three sides.

These classic approaches require a lot of tape, which means you will likely run out of tape. Plus, all that tape can get maddening and messy, especially as you grow increasingly frantic as the clock winds down toward gifting deadlines. But you don’t actually need tape to wrap a gift:

  1. Cut your paper so you have two-inch margins all around your box.

  2. Turn the paper so it’s a diamond shape, place the box in the middle.

  3. Fold the bottom point of the diamond up and tuck it under the box.

  4. Fold in both sides and fold up along the top of the box.

  5. Holding those ends in place (awkwardly with your wrist), fold the top down and over.

  6. Tuck the point under the folded sides.

You can see it done here—no tape used at all!

Pro tip: Just as with any artistic endeavor, the key is in the finishing. Now that you have a perfectly wrapped gift, add some ribbon to really play up the fact that you’re better than everyone else—and for the final coup de grace, use custom labels. You can use a fancy label maker to create labels, grab some label templates for your printer, or just buy some custom gift tags.

Different materials

Having no tape is one thing, but what if you have no wrapping paper (or you’re concerned about the environmental impact)? You have plenty of options:

  • Other papers. Newspaper, butcher paper, tissue paper, brown paper bags (like the kind you get at the grocery store) cut into sheets—the fundamental quality of wrapping paper is paper, after all. If you have leftover wallpaper from a renovation project, that can be used as well. Using paper without any design on it also affords the opportunity to add unique, custom doodling and art to each one.

  • Containers. If your gift isn’t in a box, you don’t need to go buy a box and wrap it if you have an alternative container. Old (cleaned) jars, metal tins, or cans (paint cans, for example, if properly cleaned) can contain a gift. If you do need a small box, turning a cereal box inside-out can serve pretty well.

  • Fabric. Fabric can be a terrific way to wrap a gift that feels both more upscale and more personal and craft-y. You can go full elegant and use Japanese furoshiki, or make your own fabric gift bags, turn old sweaters into gift bags, or even use old towels, pillowcases, and sheets to wrap up your gifts.

  • Trash. If you don’t have any of the above materials, you can whip something up from the stuff you normally throw away. Toilet paper or paper towel rolls can be transformed into nifty gift boxes with a few cuts and folds—they work very well for loose jewelry that doesn’t have its own box. In a pinch, aluminum foil can make a glam wrapping paper. And empty (and cleaned) chip bags can be cut, turned inside out, and used as shiny wrapping paper in a pinch.

Different shapes

Of course, classic wrapping techniques—no matter the materials involved—work best when you have a nice square-ish shape to cover. What happens when you’re trying to wrap something that isn’t (and can’t be) in a box? You have a few choices here:

  • Illusion. If you have some oddly shaped things, combine them and make them look like a totally different and hilariously inappropriate gift (toilets are a popular shape!).

  • Literal. You could also just wrap it in a straightforward way that does nothing to hide what the gift is. This works best if the gift comes in several parts that can be wrapped individually and then placed together.

  • Envelopes and bags. One of the easiest ways to wrap an oddly shaped gift is to place it in a gift bag. TikTok shows us that you can make your own gift envelope from wrapping paper (or any kind of paper, really) just by cutting an appropriate amount of paper and folding/taping it into shape.

    • Pro tip: Use a piece of cardboard on the bottom of your DIY gift bag/envelope to add some stability.

There are also some shape-specific approaches for gifts that aren’t boxes:

  • Cylindrical. There are two simple ways to wrap a cylindrical object. Both start with cutting a piece of wrapping paper that will go all the way around the gift with an inch or so of overlap. One approach is to make a series of cuts to the top and bottom of your paper, then wrap the gift and tuck the tabs you’ve created in to create a neat top and bottom. Alternatively, cinch the paper at the top and bottom with a ribbon to get a “party favor” look.

  • Bottles. These are kind of a sub-category of cylinders, so you can use a hybrid of the two approaches above: Cut tabs into the bottom of your paper to fold over into a nice base, but use the ribbon “party favor” approach at the top.

  • Flat and round. For large, flat objects like a tennis racquet or guitar, trace their shape onto your paper, adding a healthy margin of three to four inches. Then cut the shape out twice and sandwich the gift between like you’re making a pie.

  • Spherical. When wrapping a spherical gift, fabric is your easiest choice, as you can simply wrap the fabric around it and cinch the top with some ribbon. For a more “finished” look, use a variation on the envelope technique above that takes the dimensions of your gift into account, as seen here. The easiest choice? An appropriately sized gift bag of any kind.

Alternatives

For very large gifts like a bicycle or exercise equipment (or if you live in a world where commercials are real, an entire new car), it might not be worth it to wrap them at all—just slap a bow on there and keep them out of sight until it’s time for the gift exchange. In fact, if your gift-giving cohort is amenable, you can skip gift wrapping entirely and just put your gifts in a bag until it’s time to exchange.

If you need things wrapped but you don’t trust your ability to take simple measurements, make crisp seams, and apply tape without inviting ruin (you are my people), don’t forget that we live in a consumerist society and there are professional wrapping services out there you can avail yourself of. Many stores will happily wrap your purchases if you ask (sometimes for free), and there is probably a wrapping service in your area (or a mobile one that will come to you) if you Google for it (you can find a small directory of these services here).

Gift wrapping is also a side hustle for some folks, so it’s worth it to check places like TaskRabbit or Thumbtack for wrapping services in your area.


Source: LifeHacker – How to Wrap Absolutely Any Gift (Even If You’ve Run Out of Tape or Paper)

Today’s Wordle Hints (and Answer) for Thursday, December 7, 2023

If you’re looking for the Wordle answer for December 7, 2023 read on. We’ll share some clues, tips, and strategies, and finally the solution. Today’s puzzle is going to take some time for most of us to figure out, but it’s not too hard; I got it in 4. Beware, there are spoilers below for December 7, Wordle #901! Keep scrolling if you want some hints (and then the answer) to today’s Wordle game.

How to play Wordle

Wordle lives here on the New York Times website. A new puzzle goes live every day at midnight, your local time.

Start by guessing a five-letter word. The letters of the word will turn green if they’re correct, yellow if you have the right letter in the wrong place, or gray if the letter isn’t in the day’s secret word at all. For more, check out our guide to playing Wordle here, and my strategy guide here for more advanced tips. (We also have more information at the bottom of this post, after the hints and answers.)

Ready for the hints? Let’s go!


Does today’s Wordle have any unusual letters?

We’ll define common letters as those that appear in the old typesetters’ phrase ETAOIN SHRDLU. (Memorize this! Pronounce it “Edwin Shirdloo,” like a name, and pretend he’s a friend of yours.)

Only three of our letter slots are filled with common letters; the other two I’d say are neither unusual nor common.

Can you give me a hint for today’s Wordle?

You’ll want to get some shut-eye.

Does today’s Wordle have any double or repeated letters?

Yep, today has a double vowel.

How many vowels are in today’s Wordle?

Just one, but it’s in there twice.

What letter does today’s Wordle start with?

Today’s word starts with S.

What letter does today’s Wordle end with?

Today’s word ends with P.

What is the solution to today’s Wordle?

Ready? Today’s word is SLEEP.

How I solved today’s Wordle

The yellow S and E from ARISE are promising, but I need more information before I start guessing. The lack of any hits at all on TOUCH was interesting. Where else can I put that E besides at the end of the word? Might it be doubled? I try SEEDY, and that told me that the word does have two E’s, and they must be in the middle of the word: S_EE_. Looks like it must be SLEEP!

Wordle 901 4/6

⬜⬜⬜🟨🟨
⬜⬜⬜⬜⬜
🟩🟨🟩⬜⬜
🟩🟩🟩🟩🟩

A primer on Wordle basics

The idea of Wordle is to guess the day’s secret word. When you first open the Wordle game, you’ll see an empty grid of letters. It’s up to you to make the first move: type in any five-letter word. 

Now, you can use the colors that are revealed to get clues about the word: 

  • Green means you correctly guessed a letter, and it’s in the correct position. (For example, if you guess PARTY, and the word is actually PURSE, the P and R will be green.)

  • Yellow means the letter is somewhere in the word, but not in the position you guessed it. (For example, if you guessed PARTY, but the word is actually ROAST, the R, A and T will all be yellow.)

  • Gray means the letter is not in the solution word at all. (If you guessed PARTY and everything is gray, then the solution cannot be PURSE or ROAST.)

With all that in mind, guess another word, and then another, trying to land on the correct word before you run out of chances. You get six guesses, and then it’s game over.

The best starter words for Wordle

What should you play for that first guess? The best starters tend to contain common letters, to increase the chances of getting yellow and green squares to guide your guessing. (And if you get all grays when guessing common letters, that’s still excellent information to help you rule out possibilities.) There isn’t a single “best” starting word, but the New York Times’s Wordle analysis bot has suggested starting with one of these:

  • CRANE

  • TRACE

  • SLANT

  • CRATE

  • CARTE

Meanwhile, an MIT analysis found that you’ll eliminate the most possibilities in the first round by starting with one of these:

  • SALET

  • REAST

  • TRACE

  • CRATE

  • SLATE

Other good picks might be ARISE or ROUND. Words like ADIEU and AUDIO get more vowels in play, but you could argue that it’s better to start with an emphasis on consonants, using a starter like RENTS or CLAMP. Choose your strategy, and see how it plays out.

How to win at Wordle

We have a few guides to Wordle strategy, which you might like to read over if you’re a serious student of the game. This one covers how to use consonants to your advantage, while this one focuses on a strategy that uses the most common letters. In this advanced guide, we detail a three-pronged approach for fishing for hints while maximizing your chances of winning quickly.

The biggest thing that separates Wordle winners from Wordle losers is that winners use their guesses to gather information about what letters are in the word. If you know that the word must end in -OUND, don’t waste four guesses on MOUND, ROUND, SOUND, and HOUND; combine those consonants and guess MARSH. If the H lights up in yellow, you know the solution.

One more note on strategy: the original Wordle used a list of about 2,300 solution words, but after the game was bought by the NYT, the game now has an editor who hand-picks the solutions. Sometimes they are slightly tricky words that wouldn’t have made the original list, and sometimes they are topical. For example, FEAST was the solution one Thanksgiving. So keep in mind that there may be a theme.

Wordle alternatives

If you can’t get enough of five-letter guessing games and their kin, the best Wordle alternatives, ranked by difficulty, include:


Source: LifeHacker – Today’s Wordle Hints (and Answer) for Thursday, December 7, 2023

Today's NYT Connections Hints (and Answer) for Thursday, December 7, 2023

In which I lose my first Connections game ever. Join me for this historic moment and learn from my mistakes. If you’re looking for the Connections answer for Thursday, December 7, 2023, read on—I’ll share some clues, tips, and strategies, and finally the solutions to all four categories. Along the way, I’ll explain the meanings of the trickier words and we’ll learn how everything fits together. Beware, there are spoilers below for December 7, NYT Connections #179! Read on if you want some hints (and then the answer) to today’s Connections game. 

If you want an easy way to come back to our Connections hints every day, bookmark this page. You can also find our past hints there as well, in case you want to know what you missed in a previous puzzle.

Below, I’ll give you some oblique hints at today’s Connections answers. And farther down the page, I’ll reveal the themes and the answers. Scroll slowly and take just the hints you need!

NYT Connections board for December 7, 2023: ALFA, BET, POM, MA, USA, YO, LA, TANGO, BRAVO, OK, BOO, E, HI, TOM, HALLMARK, ROMEO.

Credit: Connections/NYT


Does today’s Connections game require any special knowledge?

Do you know what a radiotelephonic spelling alphabet is? Good, you’re all set. If you watch TV, that will help, too.

Hints for the themes in today’s Connections puzzle

Here are some spoiler-free hints for the groupings in today’s Connections:

  • Yellow category – These are abbreviations. (I won’t say of what, though.)

  • Green category – Watching TV.

  • Blue category – Spelling words.

  • Purple category – Doubled up.

Does today’s Connections game involve any wordplay?

Yes. There are abbreviations, code words, and words that can be repeated. Good luck.

Ready to hear the answers? Keep scrolling if you want a little more help.


BEWARE: Spoilers follow for today’s Connections puzzle!

We’re about to give away some of the answers. Scroll slowly if you don’t want the whole thing spoiled. (The full solution is a bit further down.)

What are the ambiguous words in today’s Connections?

  • ALFA can refer to the car maker (as in the ALFA ROMEO) or it can be the letter A in the NATO phonetic alphabet. Browse that list and see if any others look familiar, hint hint.

  • HI is how you say hello. It’s also what you’d need to write on a postcard to mail it to Hawaii. 

  • E is a letter. It’s also a television channel about entertainment. (And it’s a party drug, but that’s not important today.)

What are the categories in today’s Connections?

  • Yellow: STATE ABBREVIATIONS

  • Green: CABLE CHANNELS

  • Blue: IN THE NATO ALPHABET

  • Purple: ____-____

DOUBLE BEWARE: THE SOLUTION IS BELOW

Ready to learn the answers to today’s Connections puzzle? I give them all away below.

What are the yellow words in today’s Connections?

The yellow grouping is considered to be the most straightforward. The theme for today’s yellow group is STATE ABBREVIATIONS and the words are: HI, LA, MA, OK.

What are the green words in today’s Connections?

The green grouping is supposed to be the second-easiest. The theme for today’s green category is CABLE CHANNELS and the words are: BET, E, HALLMARK, USA.

What are the blue words in today’s Connections?

The blue grouping is the second-hardest. The theme for today’s blue category is IN THE NATO ALPHABET and the words are: ALFA, BRAVO, ROMEO, TANGO.

What are the purple words in today’s Connections?

The purple grouping is considered to be the hardest. The theme for today’s purple category is ____-____ and the words are: BOO, POM, TOM, YO.

How I solved today’s Connections

OK, I know they are trying to trick me, with ALFA/BET and YO/LA/TANGO, among other cutesy setups. (The band, by the way, is Yo La Tengo. Nice try, Connections.) ALFA would have to be ALFA/ROMEO, the car, right? But then I remember that the alphabet used by pilots and air traffic control is designed to be readable and pronounceable by people in multiple languages, and they sometimes spell the word for letter A–Alpha–as ALFA. BRAVO, ROMEO, and TANGO are also in that alphabet. 🟦 (This is one of the random things I memorized as a child, for some reason: alpha, bravo, charlie, delta, echo, foxtrot, golf, hotel, india, kilo, lima…)

Now I feel very smart, yet I have no clue what to make of the rest. Hmm…BET and E are television channels; could they go with HALLMARK and USA? They do. 🟩 

After several more minutes of staring at the board, I think of MA-MA and BOO-BOO, children’s words. How about YO-YO and POM-POM? I’m one away. I swap POM for LA, and I’m getting colder. I make three more random guesses, and finally admit defeat. This is the first Connections game I have ever lost. TOM-TOM should have been in that group; MA-MA was not. And the rest were state abbreviations. 

Connections 
Puzzle #179
🟦🟦🟦🟦
🟩🟩🟩🟩
🟪🟪🟨🟪
🟪🟨🟨🟪
🟨🟪🟨🟪
🟨🟨🟨🟪

How to play Connections

I have a full guide to playing Connections, but here’s a refresher on the rules:

First, find the Connections game either on the New York Times website or in their Crossword app. You’ll see a game board with 16 tiles, each with one word or phrase. Your job is to select a group of four tiles that have something in common. Often they are all the same type of thing (for example: RAIN, SLEET, HAIL, and SNOW are all types of wet weather) but sometimes there is wordplay involved (for example, BUCKET, GUEST, TOP TEN, and WISH are all types of lists: bucket list, guest list, and so on).

Select four items and hit the Submit button. If you guessed correctly, the category and color will be revealed. (Yellow is easiest, followed by green, then blue, then purple.) If your guess was incorrect, you’ll get a chance to try again.

You win when you’ve correctly identified all four groups. But if you make four mistakes before you finish, the game ends and the answers are revealed.

How to win Connections

The most important thing to know to win Connections is that the groupings are designed to be tricky. Expect to see overlapping groups. For example, one puzzle seemed to include six breakfast foods: BACON, EGG, PANCAKE, OMELET, WAFFLE, and CEREAL. But BACON turned out to be part of a group of painters along with CLOSE, MUNCH, and WHISTLER, and EGG was in a group of things that come by the dozen (along with JUROR, ROSE, and MONTH). So don’t hit “submit” until you’ve confirmed that your group of four contains only those four things.

If you’re stuck, another strategy is to look at the words that seem to have no connection to the others. If all that comes to mind when you see WHISTLER is the painting nicknamed “Whistler’s Mother,” you might be on to something. When I solved that one, I ended up googling whether there was a painter named Close, because Close didn’t fit any of the obvious themes, either.

Another way to win when you’re stuck is, obviously, to read a few helpful hints–which is why we share these pointers every day. Check back tomorrow for the next puzzle!


Source: LifeHacker – Today’s NYT Connections Hints (and Answer) for Thursday, December 7, 2023

The Meta Quest 3 Is Still Searching for a Reason to Exist

Virtual reality is suffering from an identity problem. Users’ first experiences are generally awe-inspiring, but once the “wow” factor of entering a fully immersive 3D world wears off, you’re left with the question, “but what is it for?”

Meta’s Quest 3 VR headset does not provide a compelling answer, but it does offer some intriguing glimpses at our possible VR future. It ultimately works better as a toy than as a tool, but it’s an insanely great toy. 

What’s improved about the Quest 3?

Meta’s line of VR headsets are the only major stand-alone VR gear out, so the Quest 3’s main competition is the last generation of Meta’s VR gear, and the Quest 3 is better than the Quest 2 in every way but the price (the Quest 2’s new base price is $299.99, whereas the Quest 3 is $499.99) The 3’s display resolution is higher—2064×2208 per eye with a 90Hz refresh rate versus 1832×1920 on the Quest 2. (The Quest 3 even supports 120Hz, but Meta notes this is currently experimental only.)

The Snapdragon XR2 Gen 2 processor is faster then the Quest 2’s first-get Snapdragon. It has 8GB of DRAM compared to the Quest 2’s 6GB. The new pancake lenses are way better than the fresnel lenses of the Quest 2. The headset is slimmer and more comfortable to wear. The controllers are lighter and feature improved haptics. It even looks cooler.

But the Quest’s 3’s most striking improvement over the Quest 2 may be its array of six front-facing cameras that take you out of the blurry black-and-white of the Quest 2 and into a possible future where augmented reality exists alongside virtual reality.

Quest 3 specs

  • Processor: Snapdragon XR2 Gen 2

  • DRAM: 8GB

  • Display resolution: 2064×2208 per eye

  • Refresh rate: 72Hz, 80Hz, 90Hz, 120Hz (experimental setting only)

  • Field of view: 110 degrees horizontal, 96 degrees vertical

  • Lens adjustment: Accommodated IPD range: 53-75 mm

  • Cameras: 4 IR cameras and 2 RGB cameras

  • Audio: Stereo speakers compatible with 3D spatial audio, 3.5mm audio jack

  • Storage: 128GB or 512GB

  • Battery life: 1.5–2.9 hours, depending on usage (according to Meta)

  • Charge time: 2.3 hours via 18W power adapter

  • Wifi: Wi-Fi 6E

  • Headset weight: 515g


Recommended products


Virtual reality’s “thank God that’s over” effect

As advanced as the Quest 3 is, it’s up against a serious problem that I call the “thank god that’s over” effect. I’ve had great experiences in virtual reality—fake-fishing with my kid on father’s day, watching Dr. Phil re-runs with strangers, pornography—but no matter how much I enjoy anything VR, every time I take the headset off, I feel a palpable sense of relief. 

For me, and other’s I’ve spoken to, being immersed in virtual reality is mentally overwhelming. It’s partly from the bright colored lights bombarding your eyes. It’s partly from the uncanny nature of the experience itself. Then there’s the slightly queasy feeling caused by microsecond lag in motion (and I’m actually not as prone to VR sickness as many). Just the weight and snugness of feeling the thing strapped to your face can be off-putting. It all adds up to a claustrophobic, unsettling experience that some primal part of me ceaselessly wants to escape. Eventually, even the thought of attaching the thing to my face becomes a deterrent, and my shiny VR gear is relegated to a closet, to break out only for friends who have never used VR before.

A more gentle immersion into virtual reality

The Quest 3’s cameras do a lot to alleviate that sense of “I gotta get out of here.” When you start it up, instead of being fully inside the machine, your lobby is a full color, real-time video stream of your living room. It’s blurry, but way less jarring than plunging into the full-reality-separation of “immersive” VR. From there, you can choose to step into a virtual space, with the knowledge that a tap on the side of the helmet will bring you back to the living room, or stay in that half-in, half-out world for an augmented reality experience.

The front-facing cameras also allow for useful hand and finger tracking too, although in most situations, I preferred the controllers—clicking a button is easier than remembering which gesture does what. The improved controllers are lighter and more compact than the Quest 2’s, and they don’t have that weird ring thing from the last generation. For newer, non-gamer users, they’re more comfortable and intuitive.

Technology that makes people less sick

The faster processor, better resolution, and extra RAM means the Quest 3 is able to “keep up” with your face movements and display graphics with higher frame-rate and less latency. Theoretically, that means it’s less likely to make you feel queasy than previous Quest generations. I didn’t actually notice much difference in practice; it still makes me mildly ill, especially when moving quickly—stationary VR experiences like Beat Saber remain the best VR experiences. Motion-sensitivity aside, the Quest 3’s graphical and computational performance is way better than the Quest 2’s—visuals are brighter, with a 15% wider field-of-view than the last generation, and games and apps load noticeably more quickly. 

The physical design of the Quest 3 headset is way better

The Quest 3 headset’s design is a huge improvement over the Quest 2. Even though the Quest 3 is slightly heavier than the Quest 2 (515g vs. 503g), the weight is better distributed, so the headset itself is more comfortable, slimmer, and more spread out, which lessens the off-balance feeling that can make virtually reality subtly unpleasant. There are also much-needed air vents to instances of lessen fogged up lenses when the experience gets strenuous.

The improvement in weight distribution isn’t the kind of thing you notice in 30 seconds, but when you wear it for an hour or so, it’s a huge improvement, and does a surprising amount to make virtual reality feel less claustrophobic. For a bit, anyway. Even with the improved ergonomics, the Quest 3 still gives me that uncomfortable, too-hot, “why is this thing strapped to my face?” feeling after prolonged use, if less so than other headsets I’ve tried. 

The improved head-strap is easier to adjust to get a good fit to your face. With the Quest 2, buying an improved head-strap was practically mandatory, but here, the right-out-of-the-box strap works fine. (That said, it would be nice if Quest 2 accessories were compatible with the new headset, but I suppose the change in design makes that impossible.) 

Glasses-wearers are also in luck: While you can get prescription lenses for the Quest 3 (another must with the Quest 2), the device’s adjustable glasses spacer is built in and works on all but the most oversized spectacles.

All that is great, but what is the Quest 3 good for?

From a technological and design perspective, the Quest 3 is an impressive piece of kit, but none of that matters if you can’t use it for anything. To get to the soul of the Quest 3, I put it through its paces by using it for gaming, productivity, and socialization. Maybe unsurprisingly, the winner was gaming.

The Meta Quest 3 is a first-rate augmented and virtual reality gaming console

The Quest 3 is fantastic for gaming. I checked out Assassin’s Creed: Nexus for a “traditional” VR-style game and Drop Dead: The Cabin for a look at the possibilities of mixed-reality gaming. Both are excellent examples of the kind of fun you can have in virtual reality.

Without getting fully into “game review” territory, AC: Nexus is great. A lot of VR games are still glorified tech demos, but Nexus feels close to an actual game. It’s not there yet, but it’s close. Nexus is short and simple compared to “real” Assassin’s Creed games, but its 16 levels are impressively immersing. The combat, parkour, and stealth actually work, and the beefed up Quest 3 hardware makes the game run like butter. Graphically, it’s maybe on par with a PlayStation 3 title, but you can’t get inside a PS3 game.

Drop Dead: The Cabin, Home Invasion mode
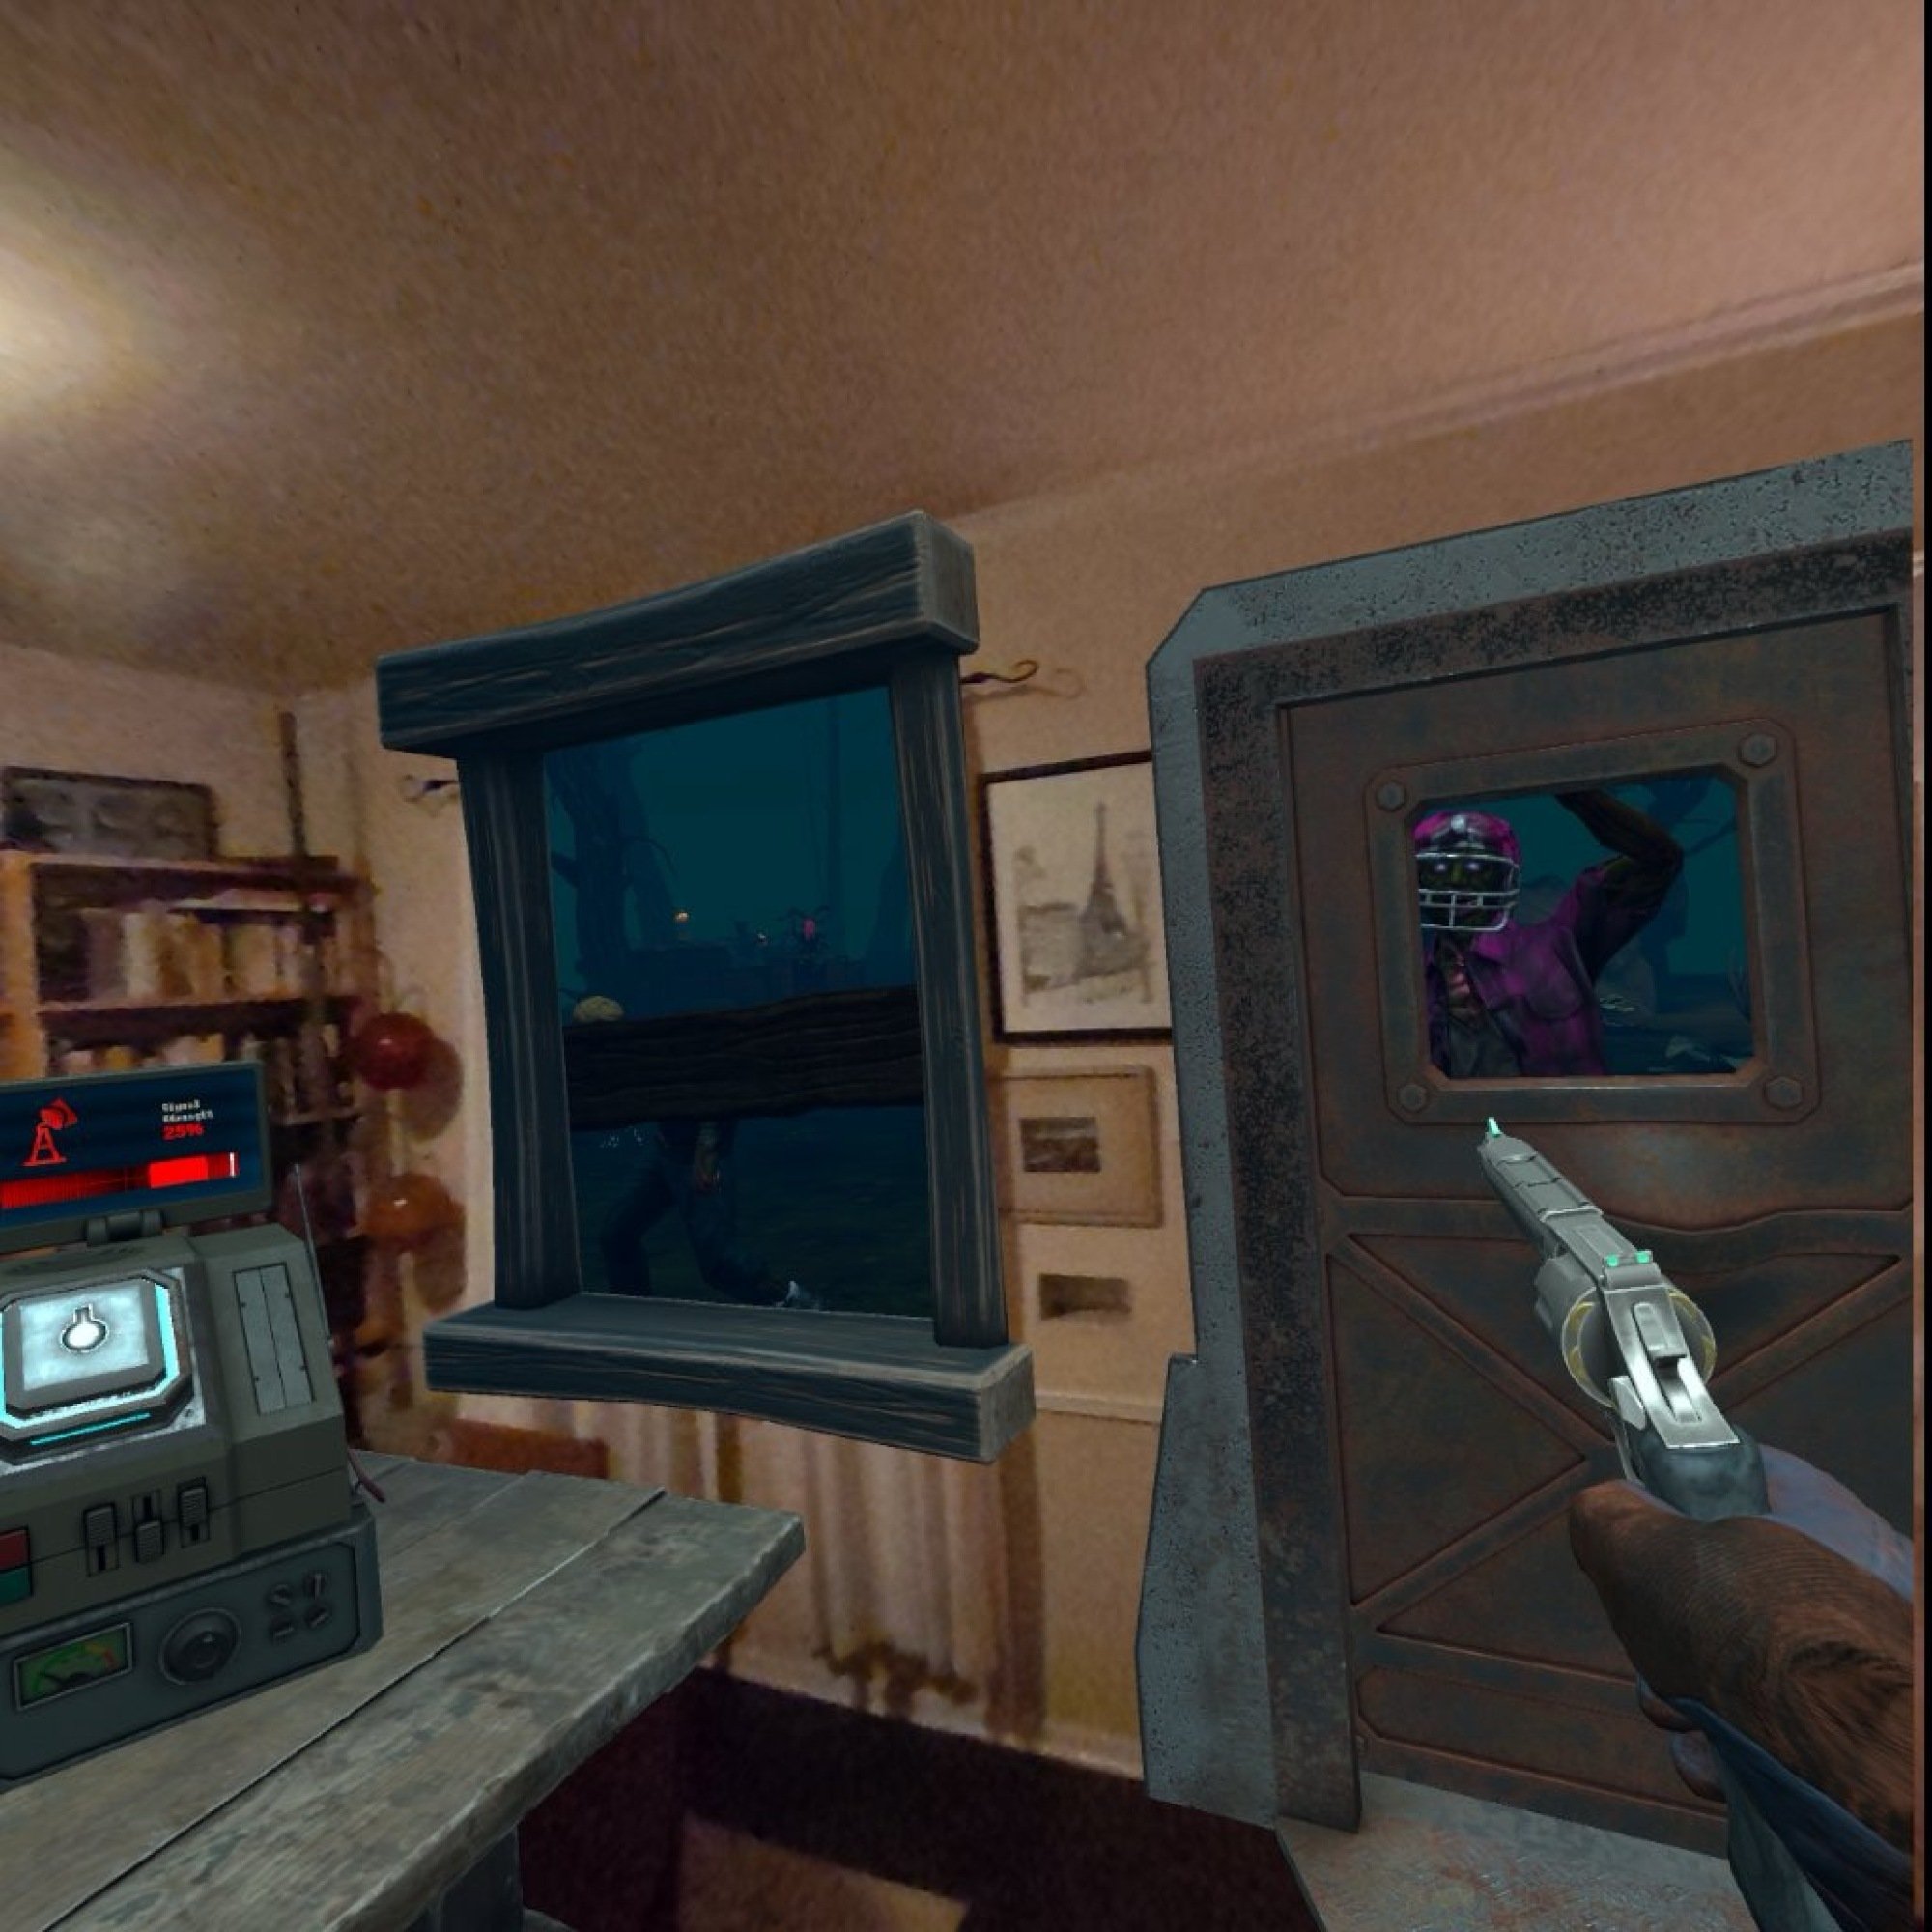
Those aren’t my real window and door.
Credit: Soul Assembly/Stephen Johnson

But I had the most fun with Drop Dead: The Cabin. It’s a pretty standard “shoot a lot of zombies” title, but the “home invasion” mode shows off the possibility of AR gaming. You map the room you’re playing in, and the game overlays fictional elements into your house. The screenshot above doesn’t really do the impressive tech justice—you have to see it in motion. It’s got a classic coin-op arcade vibe of simplicity and ever-increasing difficulty that make it perfect for the short play-time and lack of complexity of VR gaming. 

The Quest 3 also shines when it’s connected to a PC and used as VR monitor. You’ll need a fairly powerful PC, but if you have that, you can either physically or virtually link your Quest 3 to it to play more “advanced” games than the standalone headset will allow like Half-Life: Alyx. Linking to a PC might be the Quest’s killer app, and it makes the $500 price tag seems less outrageous. A Vive headset, which doesn’t act as a standalone unit, costs nearly twice that much, and the performance is comparable. 

Can you do productive things with a Quest 3?

PianoVision Screenshot
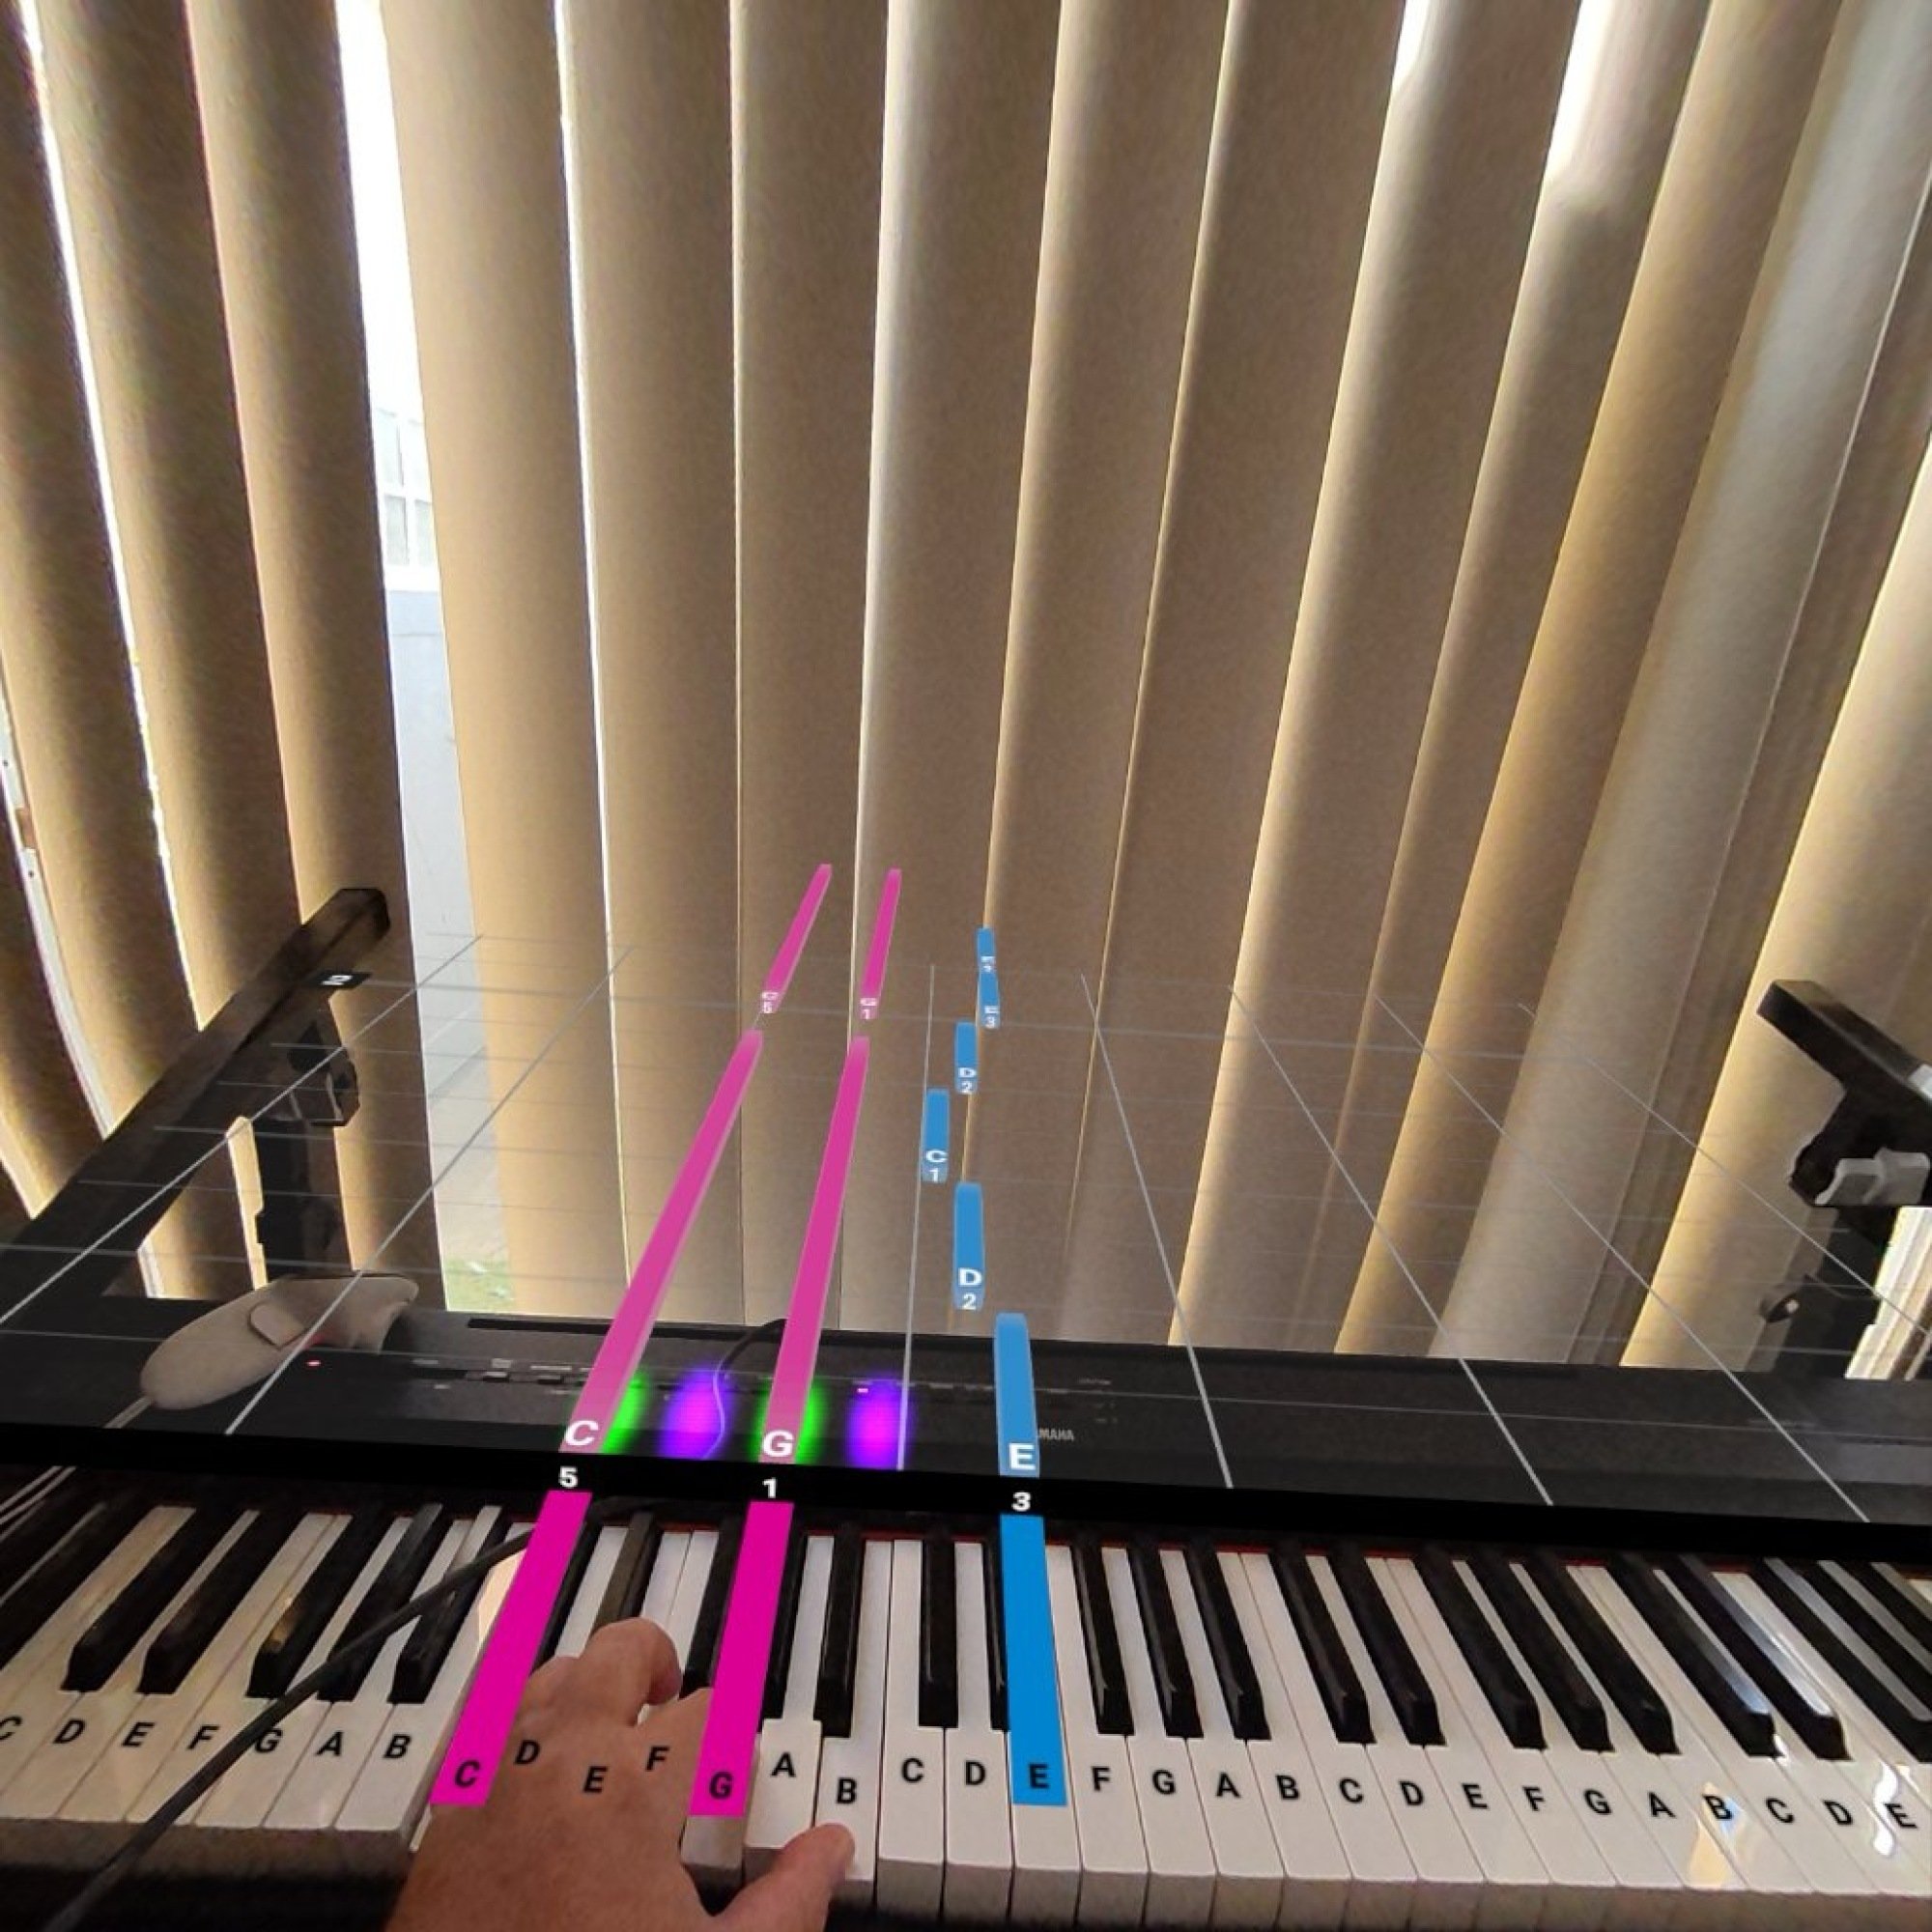
All the ladies love how I play “Camptown Races.”
Credit: ZarApps/Stephen Johnson

To see if I could do something “useful” with my Quest 3, I installed Pianovision and attempted to learn to a little music. The concept is solid—a virtual piano tutor allows you to you learn piano, Guitar Hero style—but it’s not great in practice. You can use Pianovision to learn to play “Mary Had a Little Lamb,” but the fiddly adjustments needed to overlay a virtual keyboard over a real one are annoying, and I never managed to get them exactly right. Worse, the lag time between pressing a key and hearing the note is noticeable, rendering it fairly useless for true music study (unless you want to play off the beat). Playing a “keyboard” that doesn’t exist is another option, but the finger-recognition isn’t good enough to make it work, and not being able to feeling the keyboard makes playing it extremely difficult. In other words, it’s all more trouble than it’s worth.

I can’t make much of a case for using the Quest 3 for work-based productivity either. I was able to use Virtual Desktop to control my Mac from the cyber-verse, which is cool for sure, but the virtual keyboard is as awkward and slow as the air-piano, and using the Quest controller as a mouse isn’t great either. Like a virtual piano, it’s an appreciably worse experience than just using the real thing, and any benefits it offers are marginal—a lot more work with little reward. 

There are collaborative possibilities with the Quest 3, but I don’t know how realistic they are at this time. To think that anyone you work with is going to have a VR headset and be willing to strap one on when you could have a Zoom meeting instead is laughable. 

Can you use the Quest 3 to make new friends?

There are two main avenues people use to hang out in VR: Meta Horizon Worlds and VRChat. They’re both terrible, but each offers a unique flavor of awful. Horizon World’s tightly controlled social spaces and user created worlds are an empty wasteland, while VRChat’s anything-goes style attracts a lot of people, but they’re extremely annoying people. Just about everyone in either place is 10 years old, and not the kind of 10-year-olds with good parents. So pick your poison: A handful of 10-year-olds being annoying in an orderly, corporately controlled space, or 5,000 10-year-olds spamming and screaming in VRChat. I spent several hours searching for a human connection in these two social spaces, and my overall verdict is that I never want to do anything like that again for the rest of my life.

Can you use the Quest 3 to get fit?

Thrill of the Fight
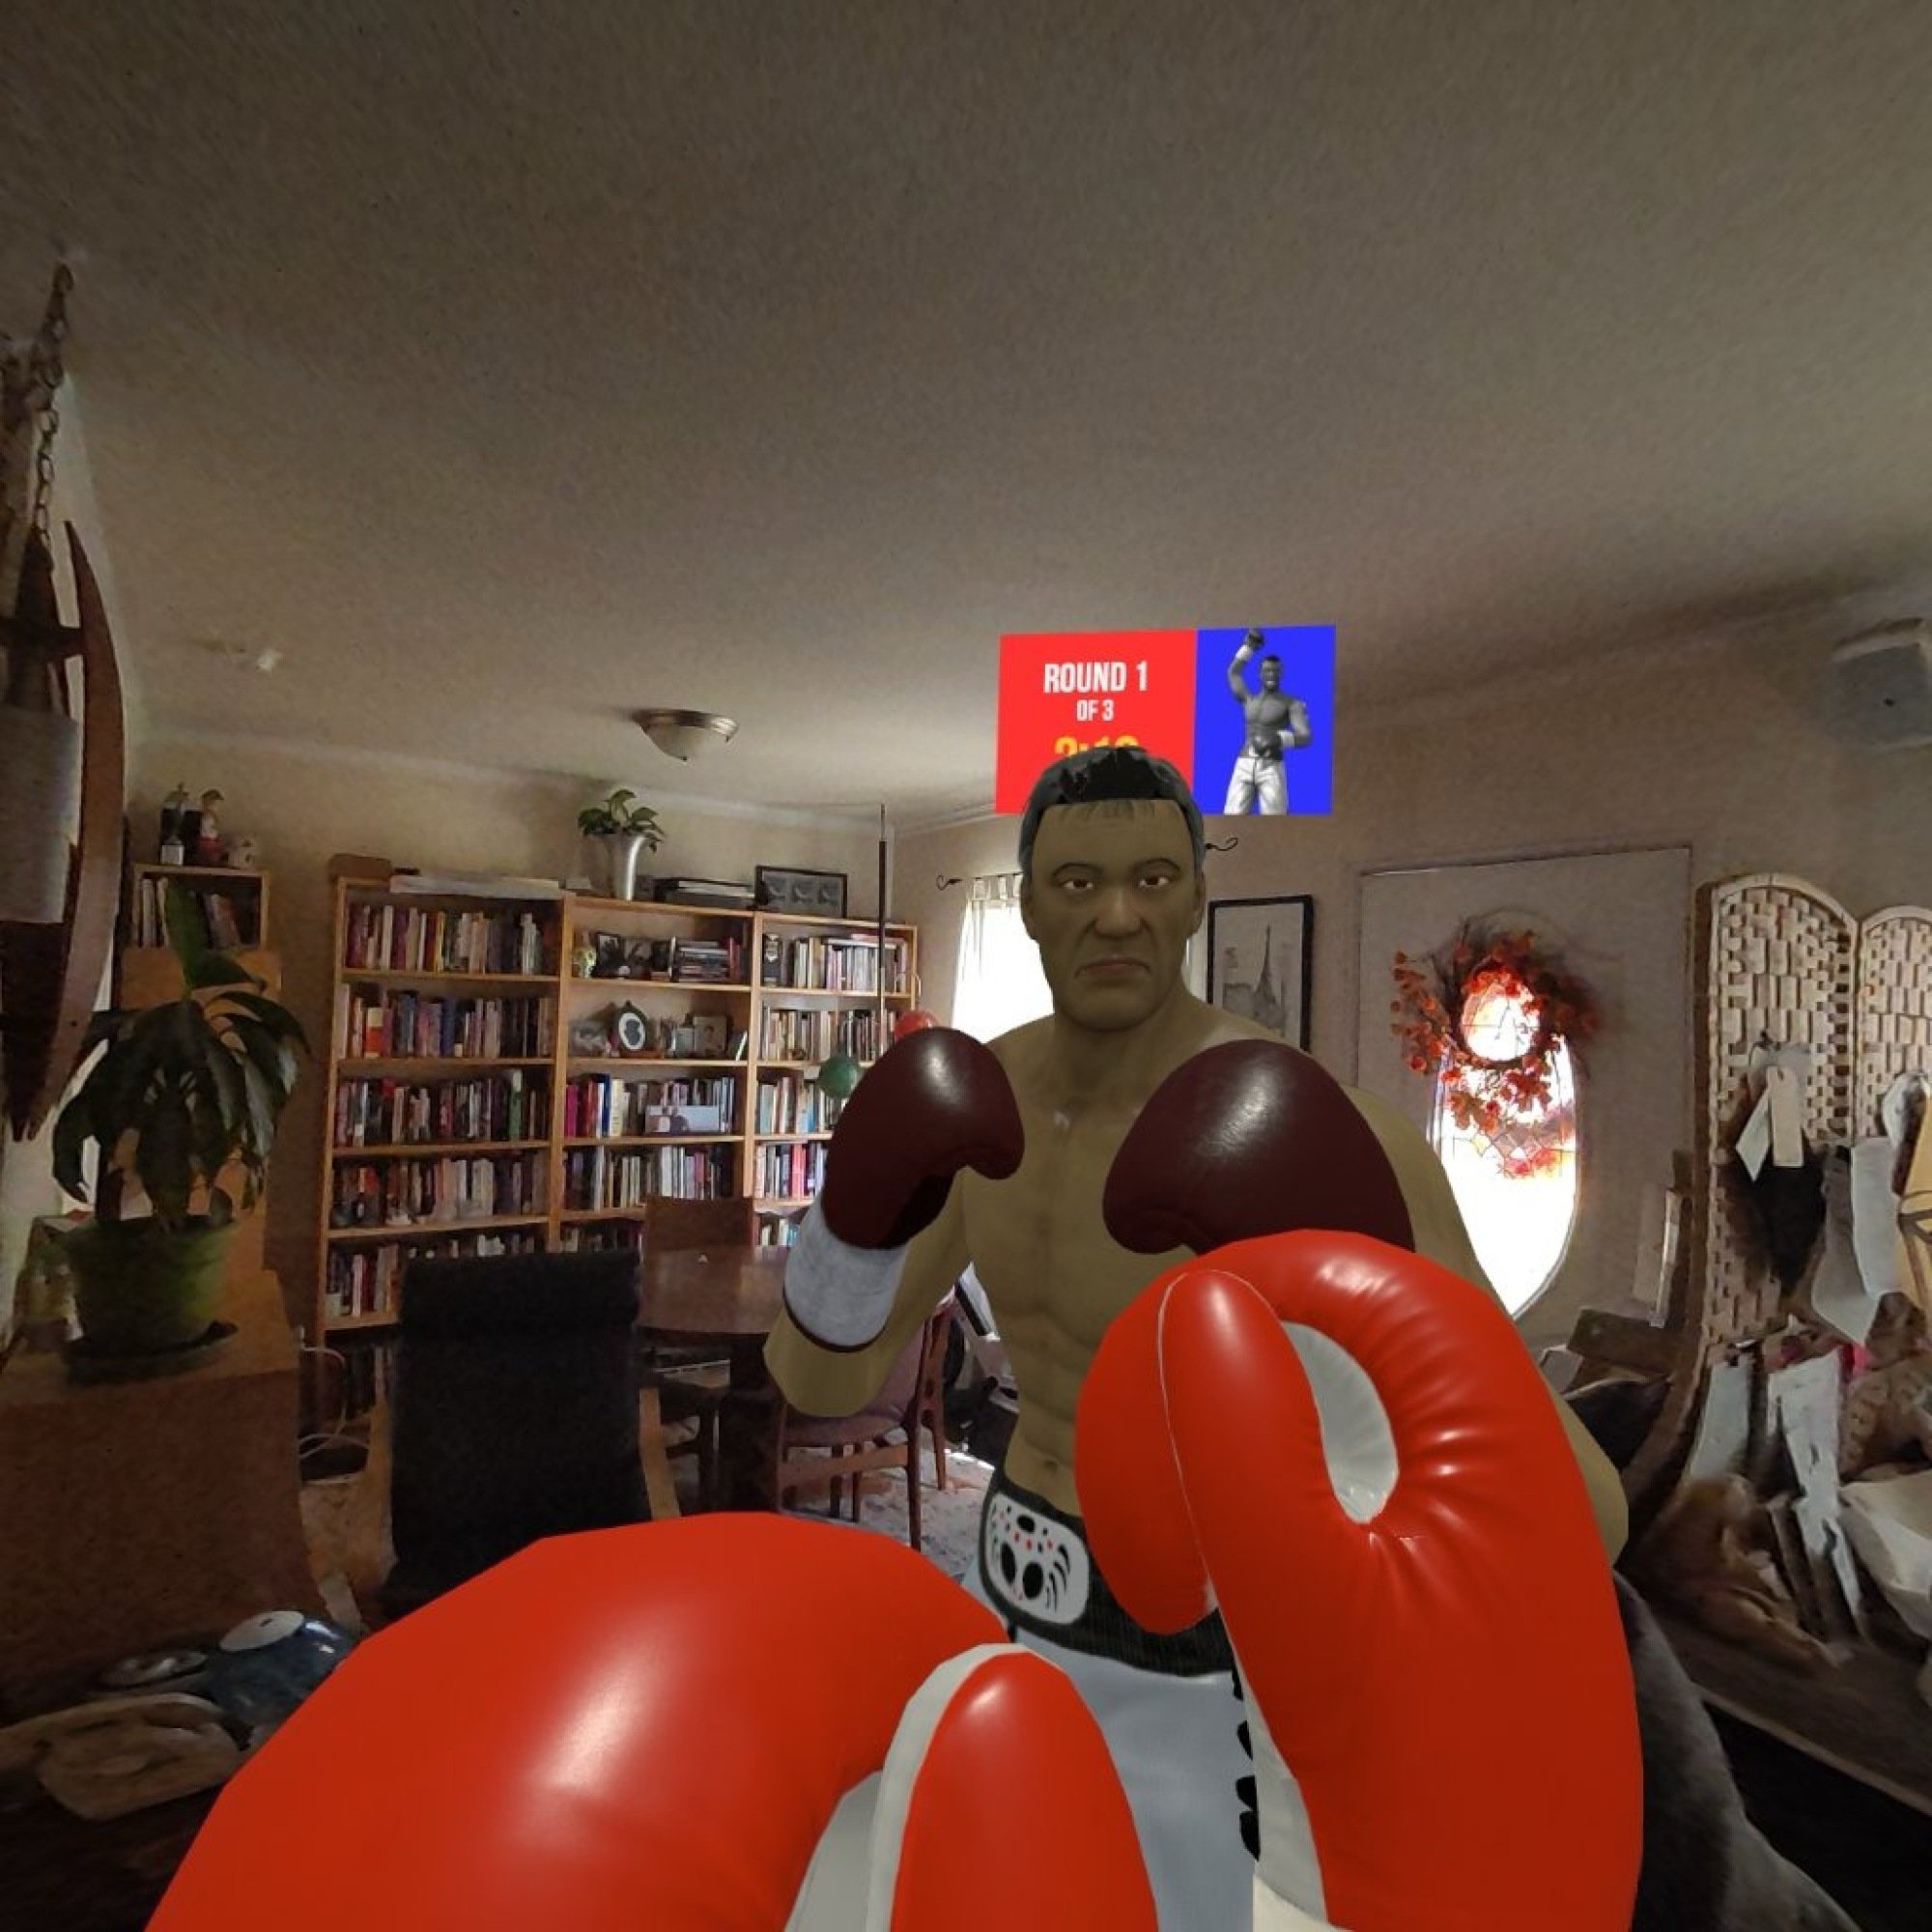
This guy came to my house and punched me in the face.
Credit: Sealost Interactive, LLC

If you think virtual reality fitness might work for you, the Quest 3 provides a better overall experience than the Quest 2, mainly due to the improved headgear. The vents in headset means less fogged up views when things get sweaty, and the better ergonomics makes things more comfortable overall. That said, the Quest 2 is $200 cheaper than the Quest 3, and while there are new passthrough options in some VR fitness programs (including my personal favorite, Thrill of the Fight), if you’re buying it as a workout gadget, the improvements the Quest 3 offers over the Quest 2 probably aren’t worth it.

The bottom line: It’s a toy, but a really great toy

Richie's Plank Experience
The original and still the champion
Credit: Toast Interactive/Stephen Johnson

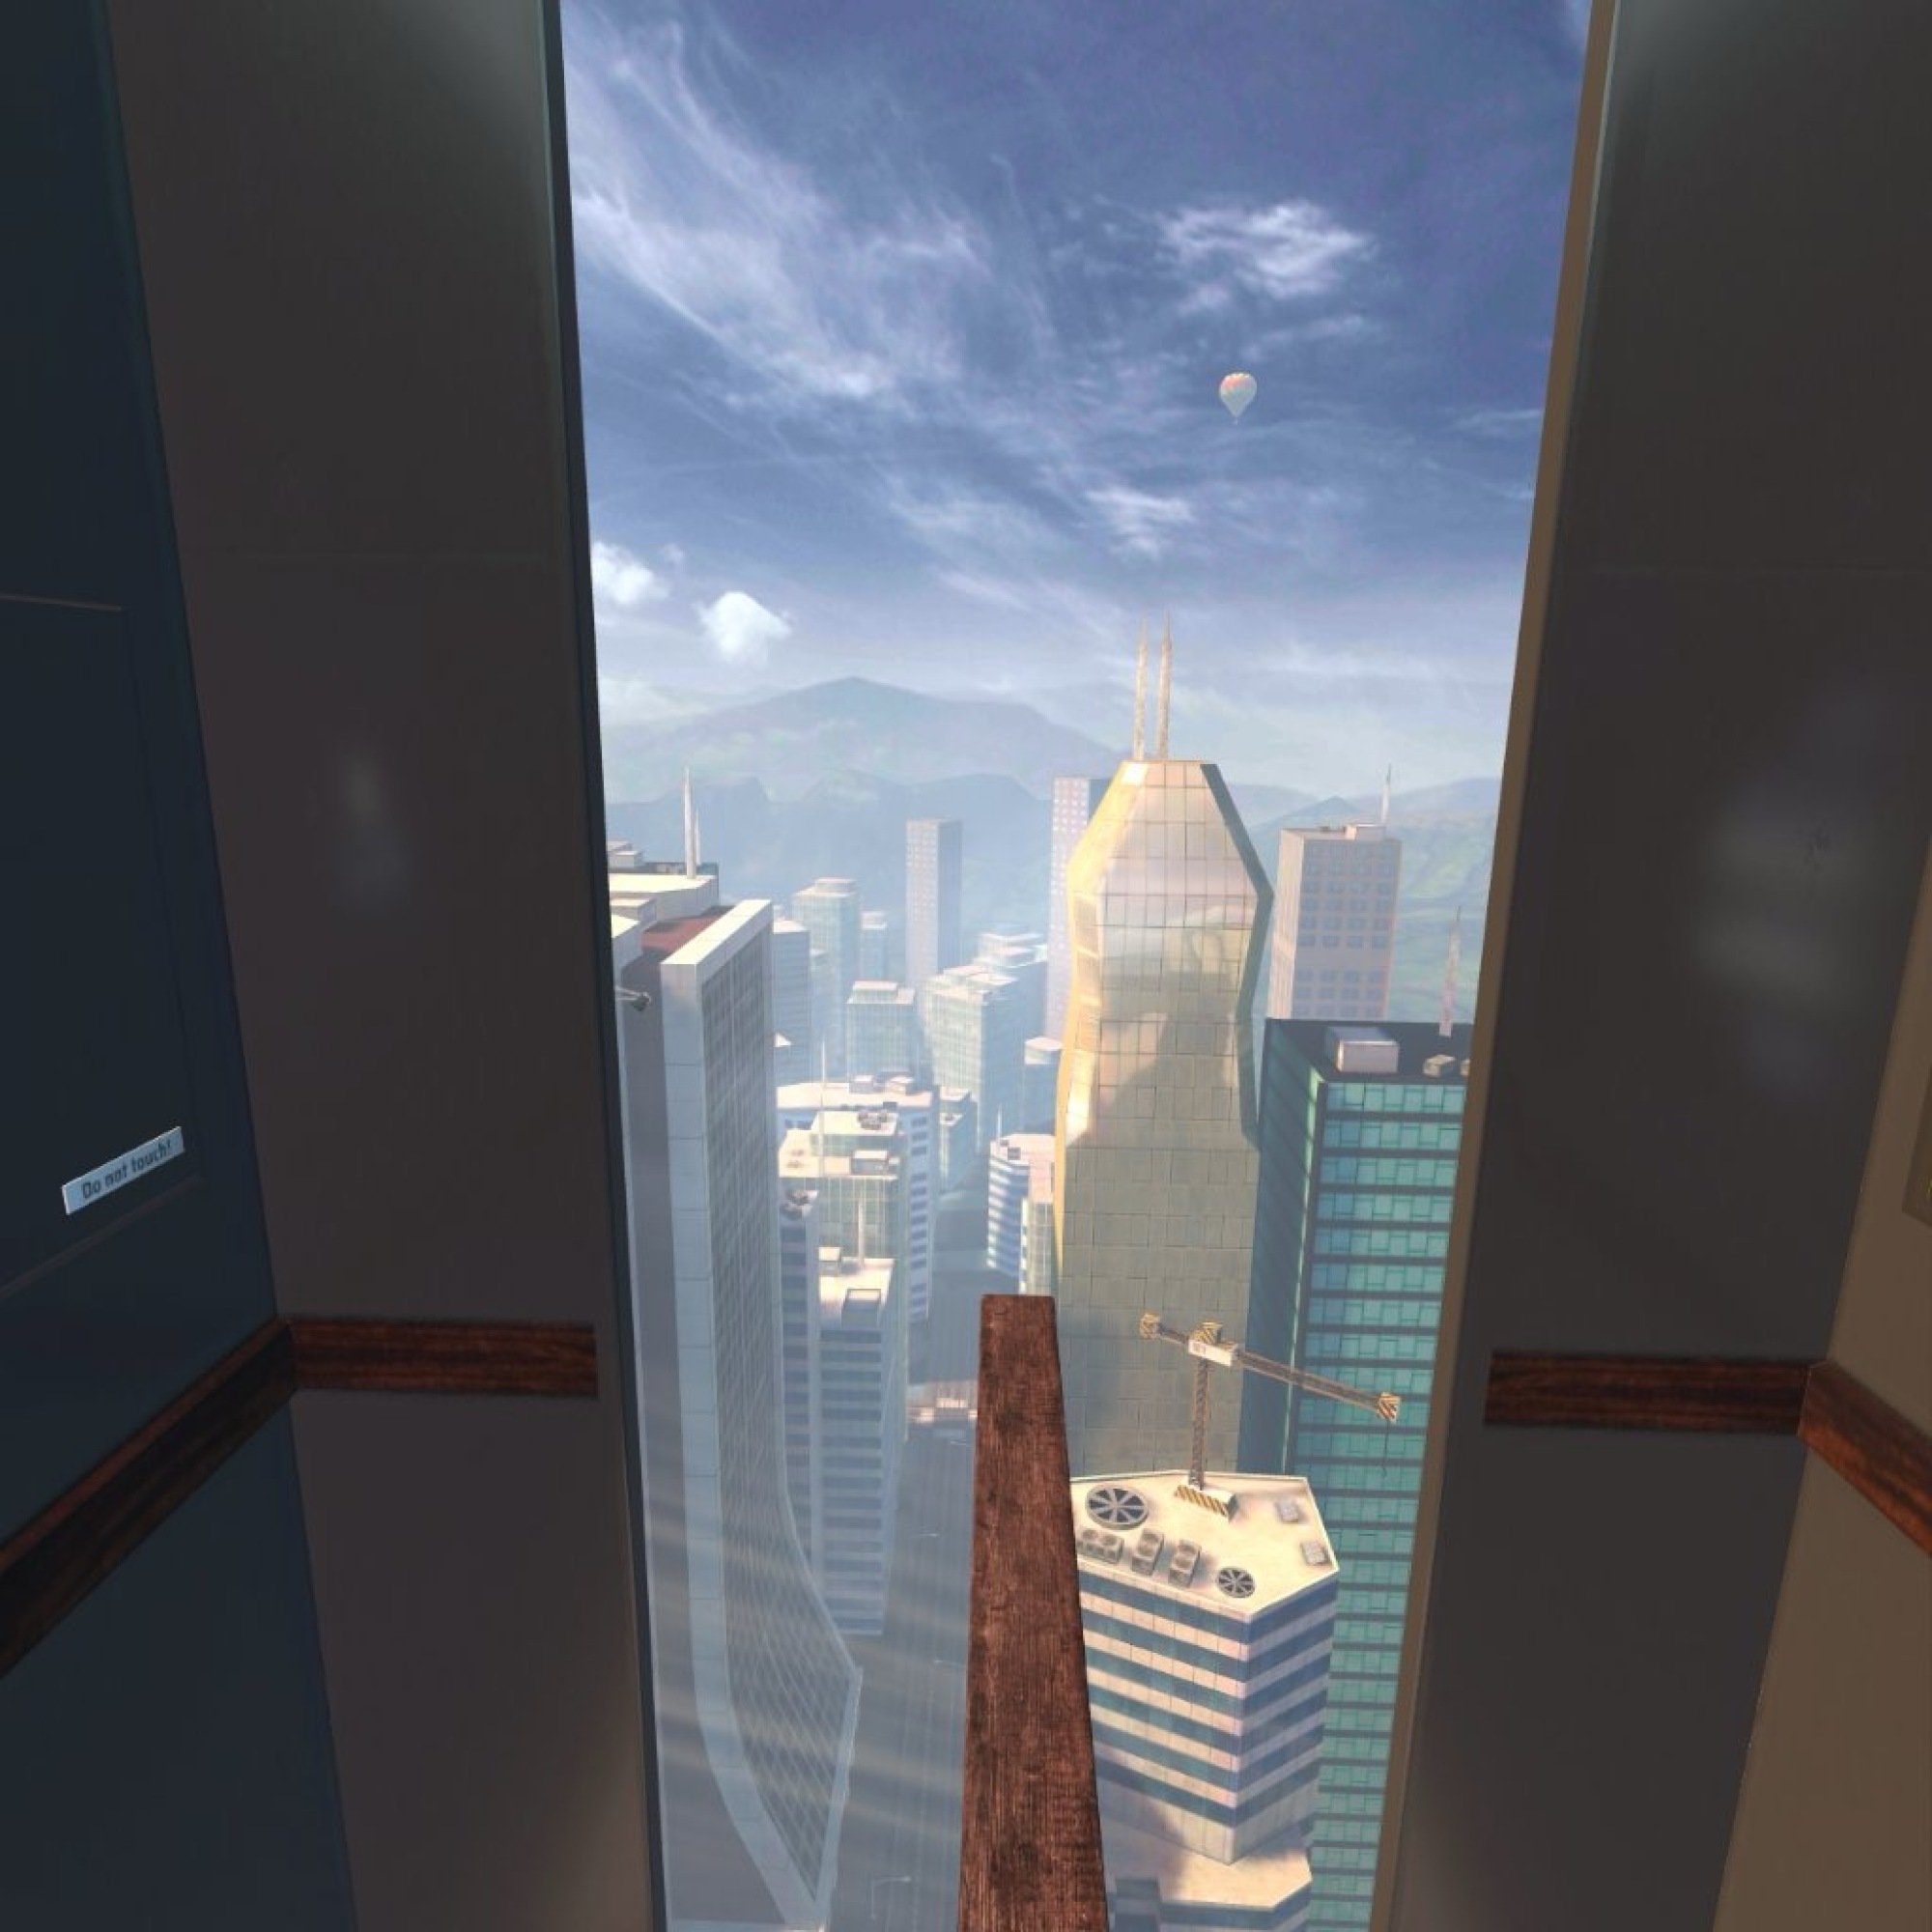
My all-time favorite app for both the Quest 2 and the Quest 3 remains Richie’s Plank Experience. Released in 2016, this tech demo puts users in an elevator that ascends many stories into the sky. The doors slide and open to reveal a wooden plank hanging in mid-air. That’s basically it. The fun comes from letting other people try it and watching them experience the terrifying feeling of being on a board teetering 200 feet above the street. It’s not useful, deep, or life-changing, but it’s hilarious.

While the Quest 3’s technological and ergonomic improvements point to the possibility of VR becoming useful in the future, at present, it’s but a cool novelty that will make you say “wow” or “I am going to fall off this building.” It’s a cheap thrill, but sometimes cheap thrills make life feel worth living, so if you’re looking for a fun gift for the techie in your life, or if you just want to blow your Grandpa’s mind, the Quest 3 should top your gift list. If you’re expecting to live in the virtual world, you might have to give it a few years.


Source: LifeHacker – The Meta Quest 3 Is Still Searching for a Reason to Exist