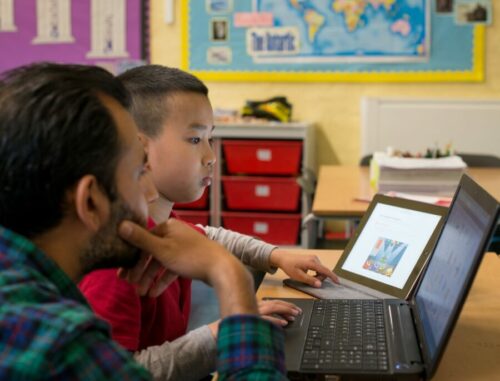
We’re super excited to announce that the European Astro Pi Challenge is back for another year of amazing space-based coding adventures.
This time we are delighted to tell you that we’re upgrading the Raspberry Pi computers on the International Space Station (ISS) and adding new hardware to expand the range of experiments that young people can run in space!
What’s new with Astro Pi?
The first Astro Pi units were taken up to the ISS by British ESA astronaut Tim Peake in December 2015 as part of the Principia mission. Since then, 54000 young people from 26 countries have written code that has run on these specially augmented Raspberry Pi computers.
Working with our partners at the European Space Agency, we are now upgrading the Astro Pi units to include:
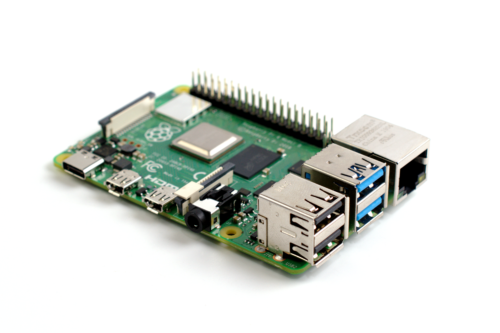
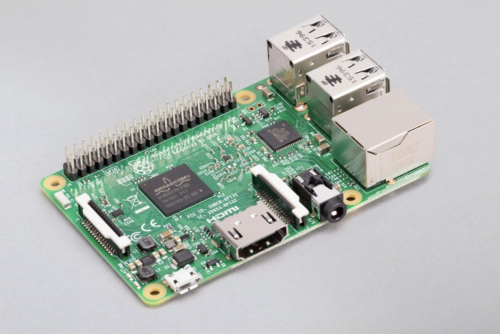
Raspberry Pi 4 Model B with 8GB RAM
Raspberry Pi High Quality Camera
Google Coral machine learning accelerator
Colour and luminosity sensor
Passive infrared sensor
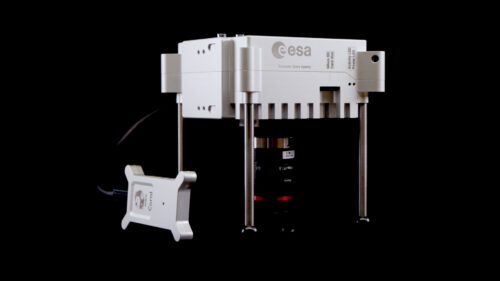
The augmented Raspberry Pi computers we are sending up to the International Space station, in all their glory
The units will continue to have a gyroscope; an accelerometer; a magnetometer; and humidity, temperature, and pressure sensors.
The little device on the left is the Google Coral machine learning accelerator
The new hardware makes it possible for teams to design new types of experiments. With the Raspberry Pi High Quality Camera they can take sharper, more detailed images, and, for the first time, teams will be able to get full-colour photos of the beauty of Earth from space. This will also enable teams to investigate plant health thanks to the higher-quality optical filter in conjunction with the IR-sensitive camera. Using the Coral machine learning accelerator, teams will also be able to develop machine learning models that allow high-speed, real-time processing.
Getting into space
The Astro Pi units, in their space-ready cases of machined aluminium, will travel to the ISS in December on the SpaceX Dragon Cargo rocket, launching from Kennedy Space Center. Once the resupply vehicle docks with the ISS, the units will be unpacked and set up ready to run Astro Pi participants’ code in 2022.
Getting the units ready for launch has been a significant effort from lots of people. Once we worked with our friends at ESA to agree on the new features and hardware, we commissioned the design of the new case from Jon Wells. Manufacturing was made significantly more challenging by the pandemic, not least because we weren’t able to attend the factory and had to interact over video calls.
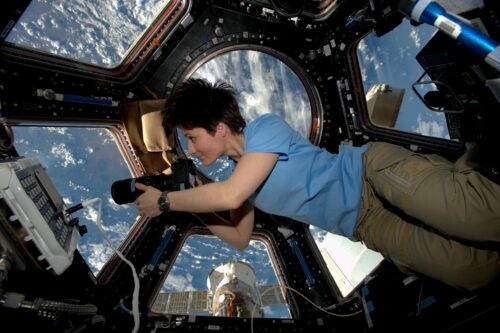
ESA astronaut Samantha Cristoforetti aboard the ISS. Credit: ESA
Once we had the case and hardware ready, we could take on the huge battery of tests that are required before any equipment can be used on the ISS. These included the vibration test, to ensure that the Astro Pi units would survive the rigours of the launch; thermal testing, to make sure that units wouldn’t get too hot to touch; and stringent, military-grade electromagnetic emissions and susceptibility tests to guarantee that the Astro Pi computers wouldn’t interfere with any ISS systems, and would not themselves be affected by other equipment that is on board the space station.
Huge thanks to Jon Wells and our collaborators at Airbus, Google, MidOpt, and Shearline Precision Engineering for everything they’ve done to get us to the point where we were able to ship the new Astro Pi units to the Aerospace Logistics Technology Engineering Company (ALTEC) in Italy for final preparations before their launch.
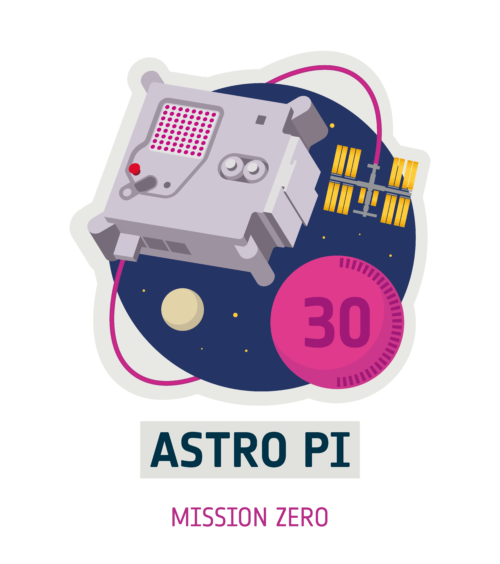
There are two Astro Pi missions for young people to choose from: Mission Zero and Mission Space Lab. Young people can participate in one or both of the missions!
This free initiative is open for young people up to age 19.
Mission Zero
In Mission Zero, young people write a simple Python program that takes a sensor reading and displays a message on the LED screen. This year, participation in Mission Zero also gives young people the opportunity to vote for the names of the two new computers. Mission Zero can be completed in around an hour and is open to anyone aged 7 to 19 years old. Every eligible entry is guaranteed to run on board the ISS and participants will receive an official certificate with the exact time and location of the ISS when their program ran.
Mission Zero opens today and runs until 18 March 2022.
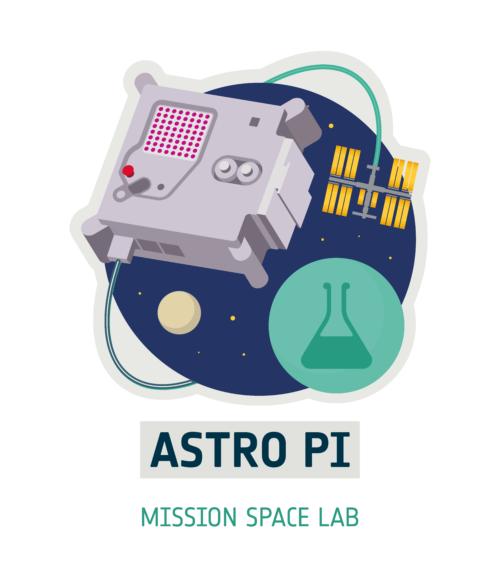
Mission Space Lab is for teams of young people who want to run their own scientific experiments on the Astro Pi units aboard the ISS. It runs over eight months in four phases, from idea registration to data analysis.
Have a look at the winning teams from last year for amazing examples of what teams have investigated in the past. But remember — the new Astro Pi computers offer exciting new ways of investigating life in space and on Earth. We can’t wait to see what ideas participants come up with this year.
To start, Mission Space Lab team mentors just need to send us their team’s experiment idea by 29 October 2021.
You can keep updated with all of the latest Astro Pi news, including the build-up to the rocket launch in December, by following the Astro Pi Twitter account.
Researchers from the University of Trento have developed a Raspberry Pi-powered device that automatically detects pests in fruit orchards so they can get sorted out before they ruin a huge amount of crop. There’s no need for farmer intervention either, saving their time as well as their harvest.
One of the prototypes used during indoor testing
The researchers devised an embedded system that uses machine learning to process images captured inside pheromone traps. The pheromones lure the potential pests in to have their picture taken.
Hardware
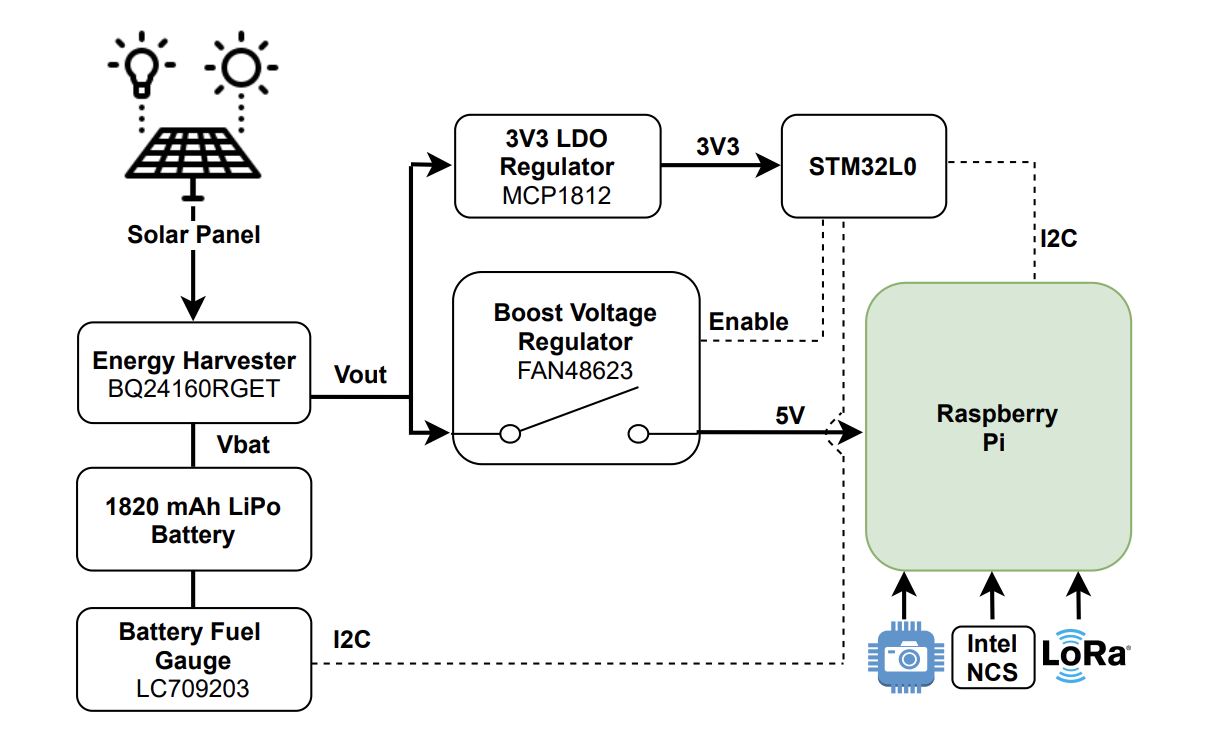
Each trap is built on a custom hardware platform that comprises:
Sony IMX219 image sensor to collect images (chosen because it’s small and low-power)
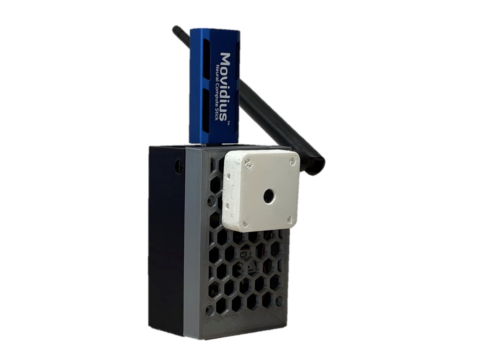
Intel Neural Compute module for machine learning optimisation
Long-range radio chip for communication
Solar energy-harvesting power system
Here’s a diagram showing how all the hardware works together
The research paper mentions that Raspberry Pi 3 was chosen because it offered the best trade-off between computing capability, energy demand, and cost. However, we don’t know which Raspberry Pi 3 they used. But we’re chuffed nonetheless.
How does it work?
The Raspberry Pi computer manages the sensor, processing the captured images and transmitting them for classification.
Then the Intel Neural Compute Stick is activated to perform the machine learning task. It provides a boost to the project by reducing the inference time, so we can tell more quickly whether a potentially disruptive bug has been caught, or just a friendly bug.
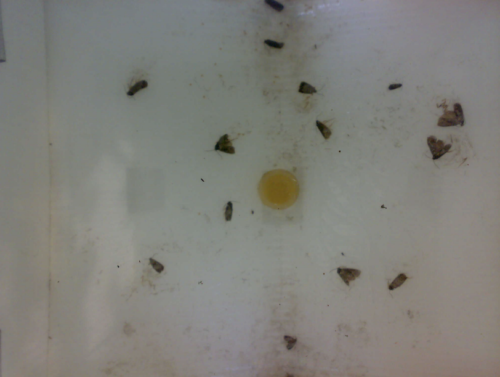
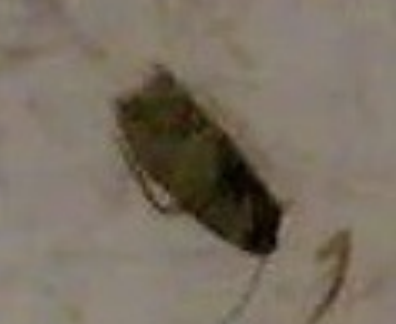
The image on the far left is a photo taken inside a pheromone based trap by the smart camera. The images in the middle and on the right are examples of extracted regions of interest with a single insect
In this case, it’s codling moths we want to watch out for. They are major pests to agricultural crops, mainly fruits, and they’re the reason you end up with apples that look like they’ve been feasted on by hundreds of maggots.
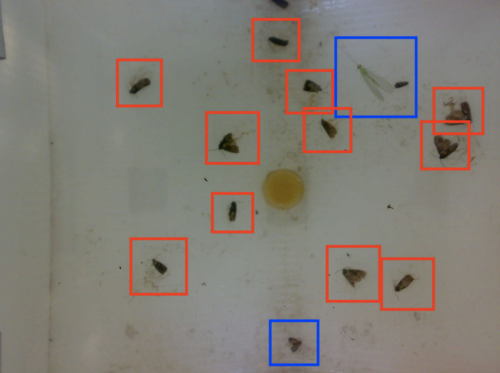
Red boxes = bad codling moths Blue boxes = friendly bugs
When this task is done manually, farmers typically check codling moth traps twice a week. But this automated system checks the pheromone traps twice every day, making it much more likely to detect an infestation before it gets out of hand.
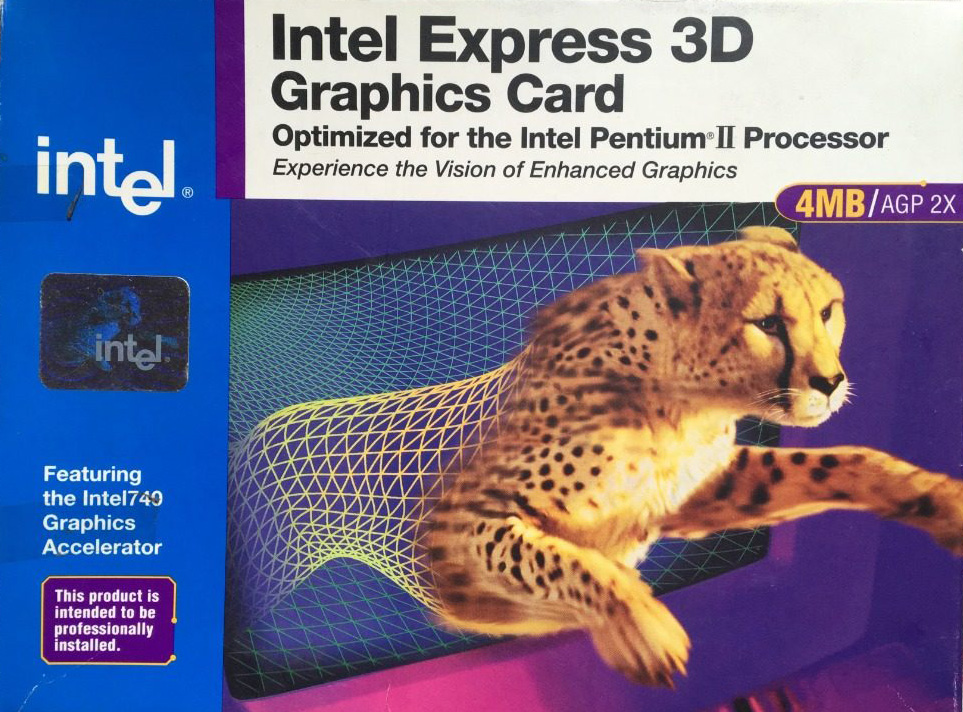
With Intel attempting to get into 3D gaming graphics again, Custom PC’s Ben Hardwidge looks at the time it failed to take on 3dfx in the late 1990s.
Back in the late 1990s, I worked at a computer shop in Derby, where we sold components over the counter, while pointing to a sign that said ‘components are sold on the basis that the customer is competent to fit it themselves’. There were often compatibility issues between components, but there were two cards I’d always try to steer customers away from, as they nearly always came back to the shop, accompanied by a tired, angry face and colourful vocabulary.
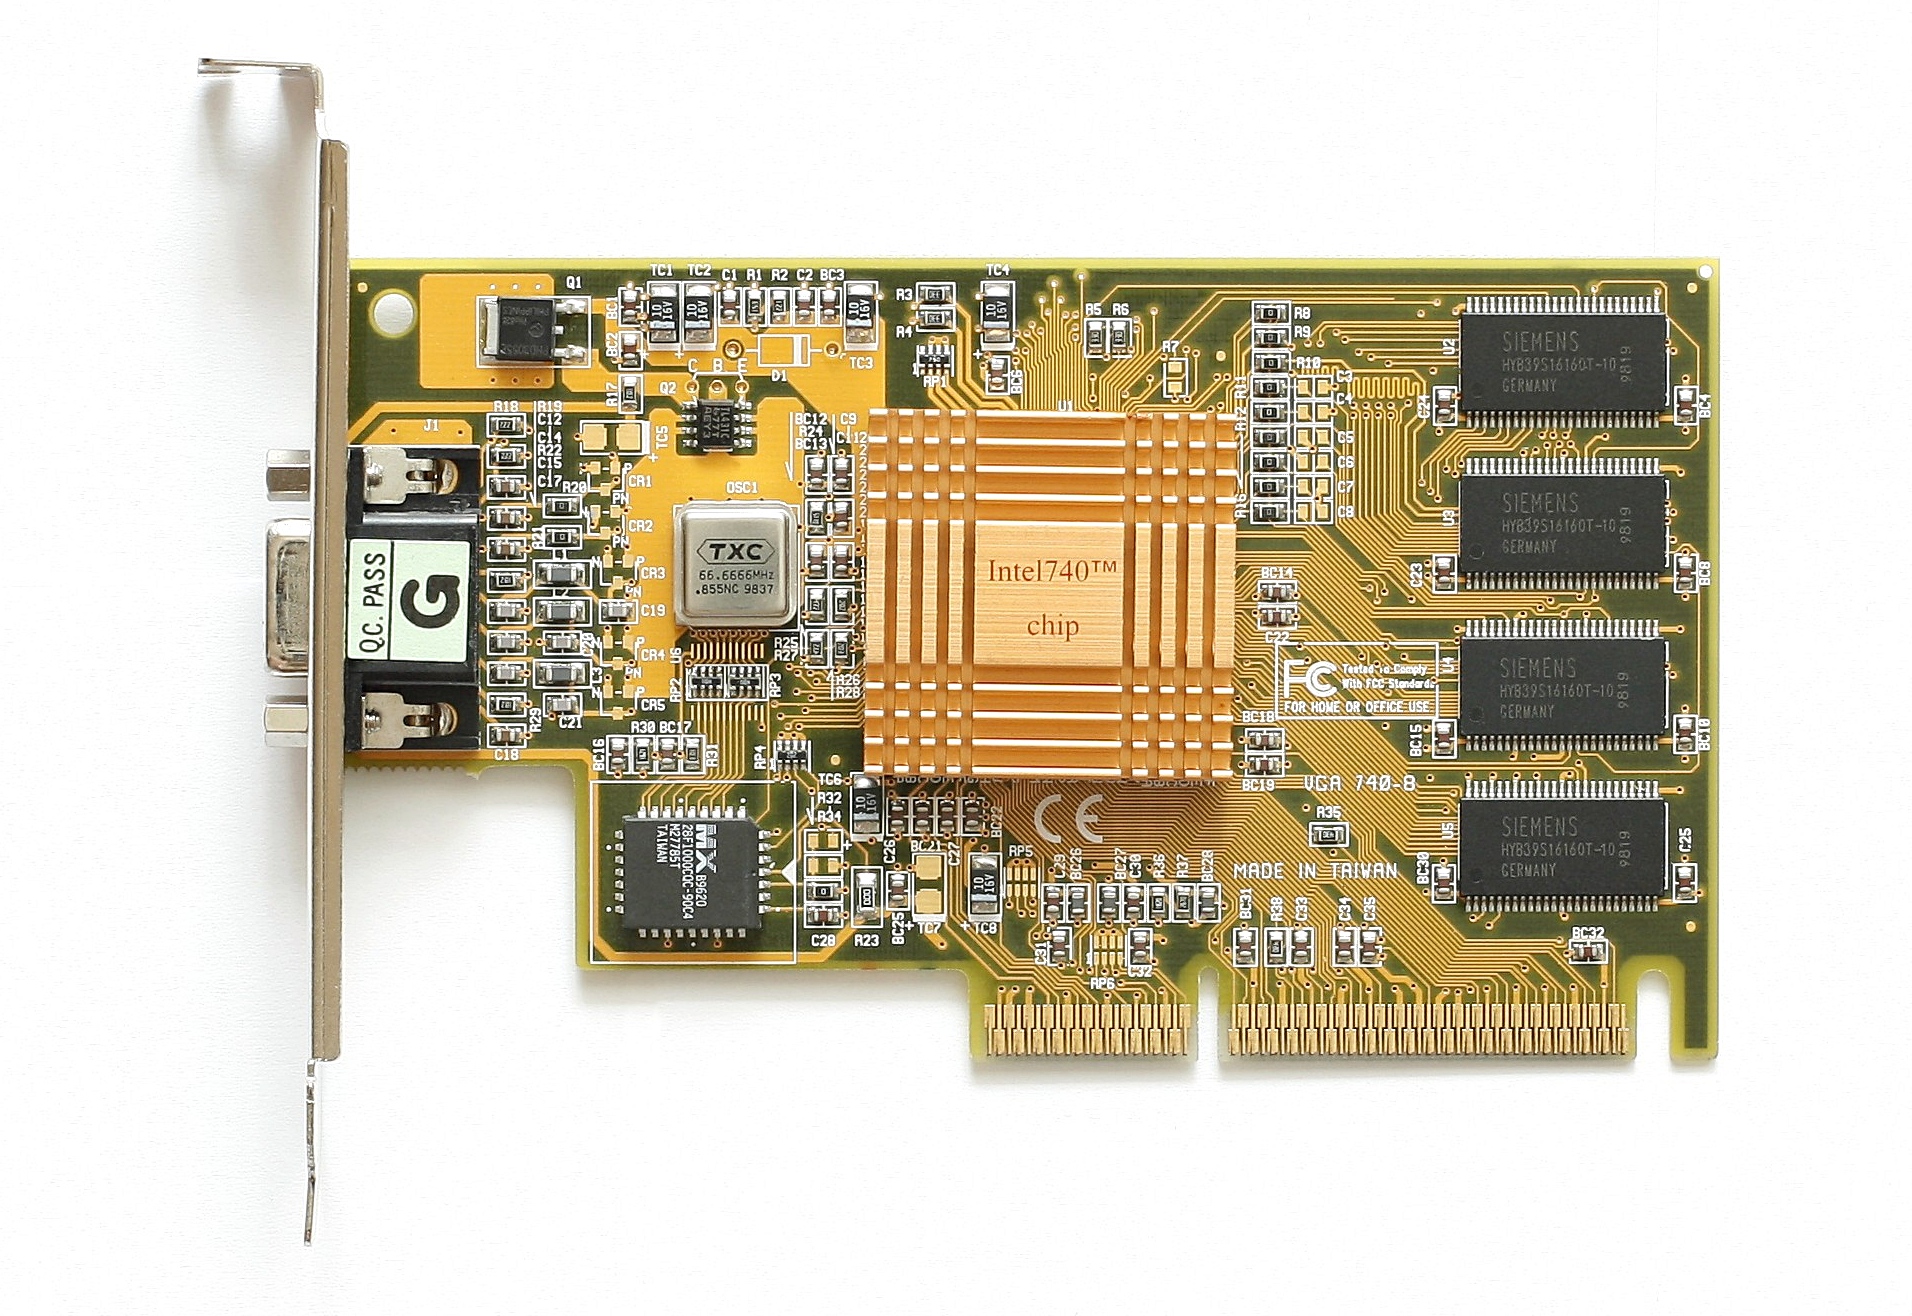
One was a PCI soft modem that required an MMX CPU and refused to cooperate with Freeserve, Dixons’ free ISP that was taking the UK by storm. The other was Express 3D graphics card, based on Intel’s 740 gaming chip.
This was before Nvidia had coined the term ‘GPU’ for its first GeForce cards, which could take the burden of transform and lighting calculations away from the CPU. The CPU was still expected to do a fair bit of work in the 3D pipeline, but you bought a 3D card to speed up the process and make games look much smoother than software rendering.
However, unlike the 3dfx Voodoo and VideoLogic PowerVR cards at the time, which required a 2D card to output to a monitor, the i740 wasn’t a sole 3D card – it could function as a 2D and a 3D card in one unit, and at £30 it was also cheap. You can see why people were drawn to it.
Another factor in its popularity was being made by Intel; thanks to the company’s relentless marketing campaigns, this meant people assumed it would just work without problems. It also used the brand-new Accelerated Graphics Port (AGP) interface, which people often assumed meant it would be faster than the PCI-based 3D accelerator cards.
The problem for us was that people who wanted cheap graphics cards usually also wanted cheap CPUs and motherboards, which meant going for an AMD K6 or Cyrix 6×86 CPU and a non-Intel motherboard chipset. The i740 didn’t like the AGP implementation on non-Intel chipsets very much, and it particularly didn’t like the ALi Aladdin chipset on which our most popular Super Socket 7 motherboards were based.
If you wanted the i740 to run properly, you really needed a Pentium II CPU and Intel 440LX or 440BX motherboard, and they were expensive. Then, once you’d paired your cheap graphics card with your expensive foundation gear, the i740 wasn’t actually that great, with comparably poor performance and still a load of compatibility issues. However, it had some interesting tech and history behind it that’s worth revisiting.
Aerospace beginnings
Intel didn’t have much in the way of graphics tech in the 1990s, but it had spotted a big market for 3D acceleration. The ATX motherboards for its latest Pentium II CPUs also came with an AGP slot, and a 3D AGP graphics card could potentially encourage people to upgrade (more on this later).
With little 3D accelerator expertise in house, Intel teamed up with US aerospace company Lockheed Martin to develop a consumer graphics card. That might seem a bit left field, but Lockheed Martin had acquired a variety of assets through various mergers and takeovers. In 1993, GE Aerospace was sold to Martin Marietta, and in 1995, Martin Marietta merged with Lockheed to form Lockheed Martin.
GE Aerospace was a division of General Electric, and its main business was providing systems and electronic gear to the aerospace and military industries, including simulators. In 1994, it started to branch out, working with Sega to produce the hardware for its Model 2 arcade machines, including 3D graphics tech for texture-mapped polygons and texture filtering. It was used for titles such as Daytona USA and Virtua Fighter 2.
In 1995, Lockheed Martin created a spin-off dedicated to consumer 3D graphics tech called Real3D, mostly using employees from GE Aerospace. Real3D worked with Sega on the 3D graphics hardware in its Model 3 cabinet, which was released in 1996, and then later began working with Intel to produce a consumer 3D graphics card, codenamed ‘Auburn’, which would become the 740.
An AGP showcase?
Intel had clear aims for the i740 when it was released in 1998 – it needed to be cheap and it needed to showcase the new AGP interface featured on the latest Pentium II motherboards. AGP had huge potential.
Although AGP was mainly based on the existing PCI interface, it had a direct connection to the CPU, as opposed to sharing the PCI bus with other cards. This not only freed up bandwidth, but also meant the AGP bus could run at a higher clock speed than the PCI bus.
Real3D’s PCI i740 card was often faster than the AGP equivalent, as it didn’t rely on system memory. Photo credit: vgamuseum.ru
Another one of its benefits was sideband addressing via a dedicated bus, meaning that all the usual address/data lines could be used solely for data throughput rather than both addressing and data functions, with the sideband bus handling address requests.
This massively increased the speed at which an AGP card could read from system memory compared with a PCI card, and meant an AGP card could practically use system memory as well as its on-board memory. You may remember the ‘AGP aperture’ setting in old motherboard BIOS screens – that was the amount of system memory you could allocate to your graphics card.
Most 3D cards didn’t rely on this feature, instead being piled with fast on-board memory to maximise performance, but Intel decided to go all out on it with the i740. The result was a card that only used its on-board memory as a frame buffer, with textures being stored in system memory.
This meant Intel could save money on memory (the cheapest i740 cards only came with 2MB compared to 8MB on the cheapest Voodoo2 cards), while also ensuring the cards required the new AGP interface.
The first problem, of course, was that using system memory and its interface wasn’t anywhere near as fast as using on-board graphics memory. The other problem was that the need for the graphics card to constantly access system memory ended up starving the CPU of memory bandwidth.
That was a big problem at a time when the CPU was still doing a fair bit of the work in the 3D pipeline. The growing use of larger textures in 3D games to improve detail made the situation even worse. What’s more, as I mentioned earlier, the AGP implementations on most Super Socket 7 motherboards just weren’t designed with a card such as the i740 in mind.
It also didn’t help that some board makers (including Real3D under the Starfighter brand) started making PCI versions of the i740 with a bridge chip and more on-board memory, and these cards were usually faster than the AGP equivalents, as they didn’t rely on system memory for texture storage.
Curtains for the i740
What seems bizarre now is that, at the time, I remember a lot of discussion before the launch about how Intel’s work with Real3D was going to result in Intel having a monopoly on 3D graphics, and putting the likes of ATi, 3dfx and VideoLogic out of business.
Intel had access to huge silicon manufacturing facilities, it had a massive research and development budget, and it had the proven expertise of Real3D at its disposal. In reality, the i740 was soon cancelled and almost completely forgotten by the end of 1999.
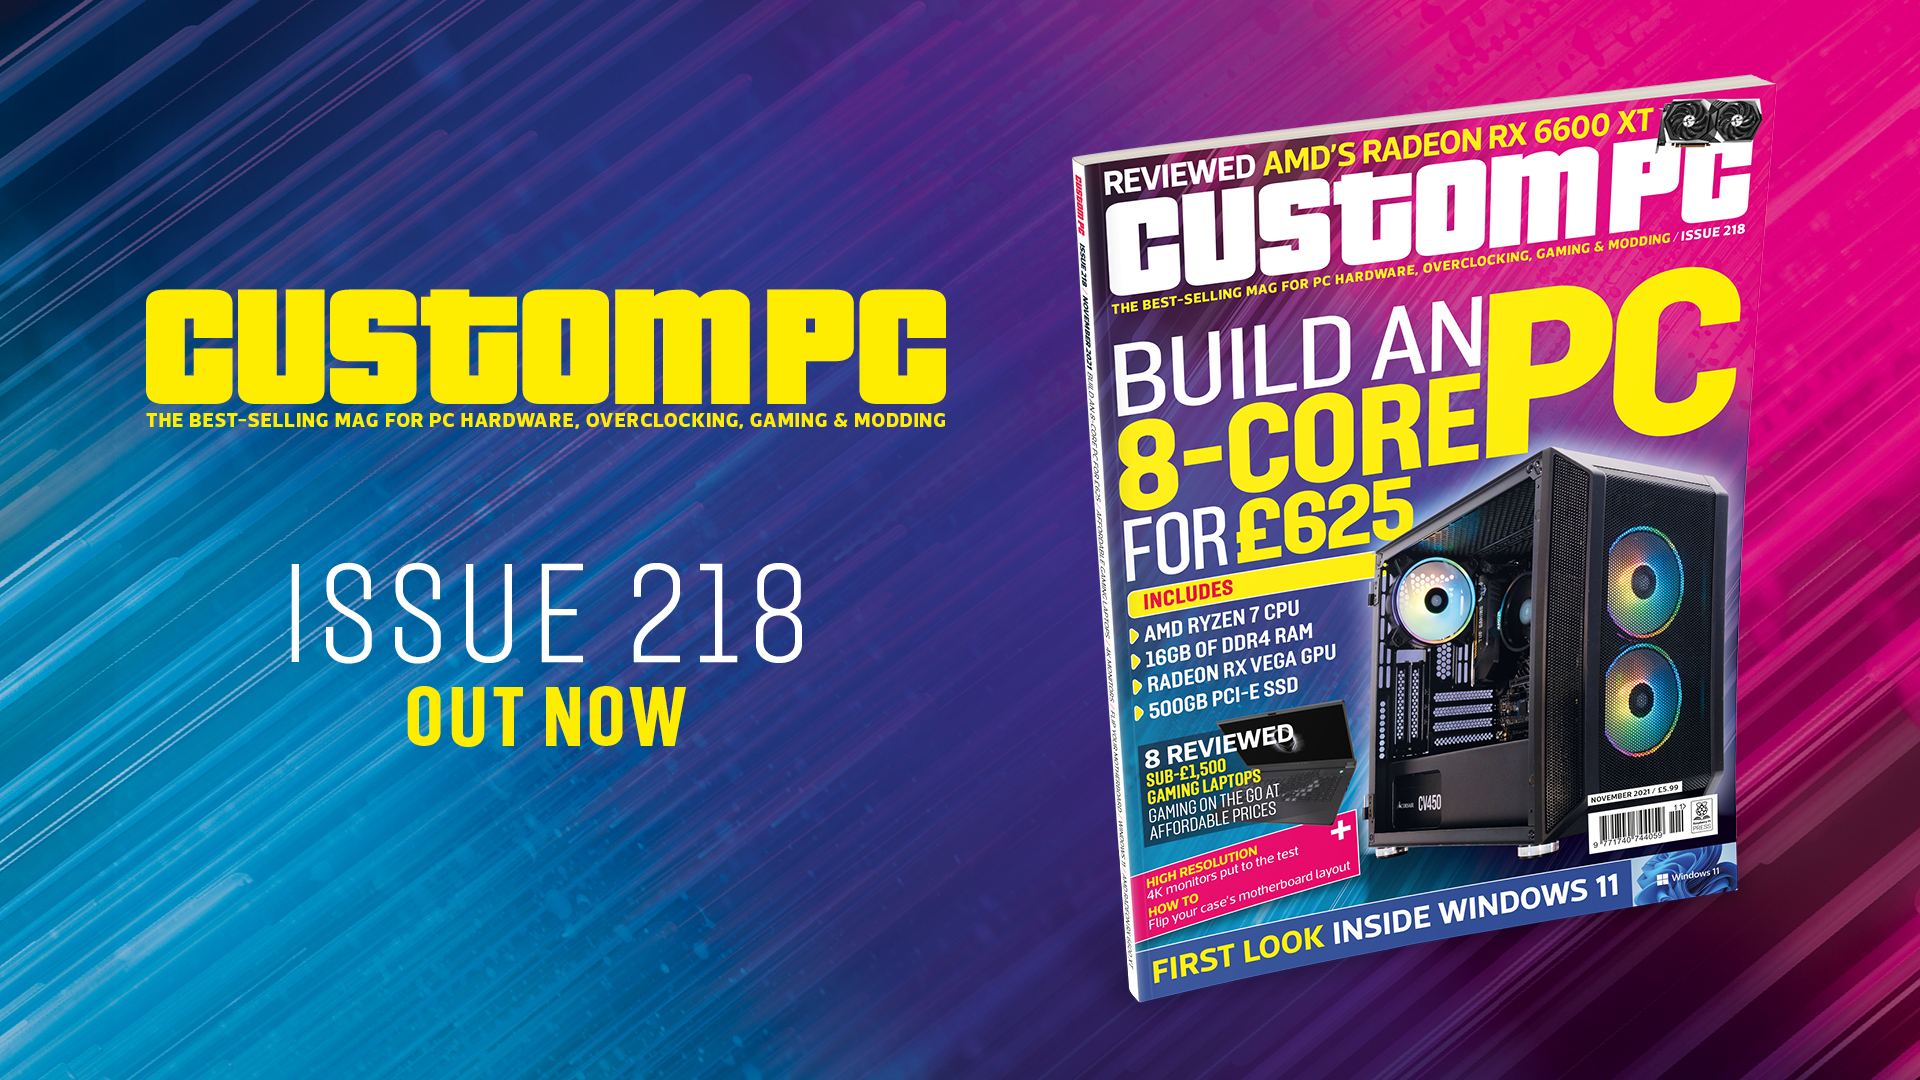
Custom PC #218 out NOW!
Get your hands on the latest issue of Custom PC at your usual outlet, or online from the Raspberry Pi Press store.
Maker Mellow was inspired by watching the progress of NASA’s Perseverance Mars rover and wanted in on the interplanetary robot scene. Their first idea was to build a scale version of Perseverance, but when their partner stepped in to suggest that starting smaller might be a little easier, Zippy was born.
ProtoTank (a bolt-together modular tank-style robotics platform)
Inside Zippy
Zippy’s basic parts haven’t changed much through its three iterations. You can follow the journey of Zippy 1.0 through 3.0 on Mellow’s website. You’ll see that some additional hardware was required when Mellow made some improvements.
Baby Zippy
The first version of Mellow’s mini Mars rover was just a motor on a 3D-printed body, controlled by plugging in wires to the battery. But Mellow was desperate to level up their robot and build something that could be controlled by an Xbox controller. They reached that goal with Zippy 2.0 and can drive the mini Mars rover remotely via Bluetooth. However, the range is quite tight, so slow runners need not apply for the job of pilot.
Zippy 3.0 comes complete with a DJI Osmo Action camera to capture its adventures.
Baby Zippy 1.0 playing on the carpet
What surfaces can Zippy ride on?
Our favourite part of Mellow’s original project post is the list rating how good Zippy is at navigating various types of terrain (some of which are showcased in the video up top):
Sand – NO it gets stuck in the wheels
Big rocks – NO the robot is too low to the ground and gets stuck
Pebbles – with determination
Grass – only very short grass
Human bodies – surprisingly well
Carpets – Zippy loves carpets
Flat terrain – definitely
Zippy 2.0 out on the road
Here’s all the code you need to build your own mini Mars rover.
Follow the real thing on Mars
Keep up with NASA’s Perseverance Mars rover on Twitter. Perseverance spent its summer drilling into rocks, and has photos to prove it.
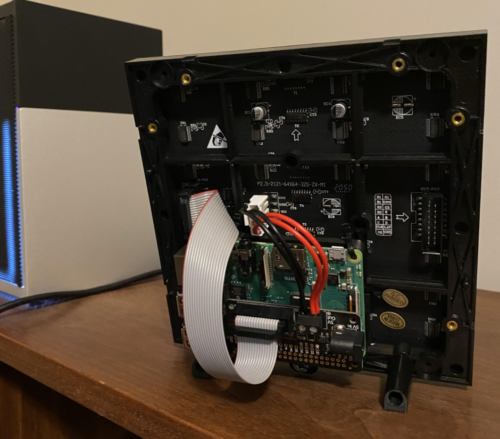
Redditor u/gonnabuysomewindows was looking for a fun project combining Raspberry Pi and Adafruit’s LED matrix, and has created the latest cool album art display to grace our blog.
The maker turned to PowerShell – a cross-platform task automation solution – to create a script (available on GitHub) that tells the Raspberry Pi which album is playing, and sends it the album artwork for display on the LED matrix.
Raspberry Pi runs a flaschen-taschen server to display the album artwork. The PowerShell script runs a ‘send image’ command every time the album art updates. Then the Raspberry Pi switches the display to reflect what is now playing. In the demo video, the maker runs this from iTunes, but says that any PowerShell-compatible music player (ie: Spotify) will work too.
Setting up your own LED album art display
The maker’s original reddit post shares a step-by-step guide to follow on the software side of things. And they detail the terminal code you’ll need to run on the Raspberry Pi to get your LED Matrix displaying the correct image.
An artist and maker, Geeky Faye describes themself as a one-man band, tackling whole areas of creation. In the latest issue of The MagPi Magazine, Rob Zwetsloot meets the cosplaying polymath.
Having multiple hobbies and interests can be fun, but they can sometimes get on top of you. Allie, also know online as Geeky Faye, seems to have thrived with so many. “As it currently stands, I will happily refer to myself as a maker, artist, designer, and filmmaker because all of those are quite accurate to describe the stuff I do!” Allie tells us.
“I’ve been making almost my whole life. I dove headlong into art as a young teen, to be quickly followed by cosplay and building things that I needed for myself. I would go on to get a degree in fine arts and pursue a professional career as an artist, but that actually ended out resulting in me being on a computer all day more than anything! I’ve always needed to use my hands to create, which is why I’ve always been drawn to picking up as many making skills as possible… These days my making is all very ‘multimedia’ so to speak, involving 3D printing, textiles, electronics, wood working, digital design, and lots of paint!”
Testing out various functions of BMOctoPrint
When did you learn about Raspberry Pi?
I’d heard about Raspberry Pi years ago, but I didn’t really learn about it until a few years back when I started getting into 3D printing and discovered that you could use one to act as a remote controller for the printer. That felt like an amazing use for a tool I had previously never gotten involved with, but once I started to use them for that, I became more curious and started learning a bit more about them. I’m still quite a Raspberry Pi novice and I am continually blown away by what they are capable of.
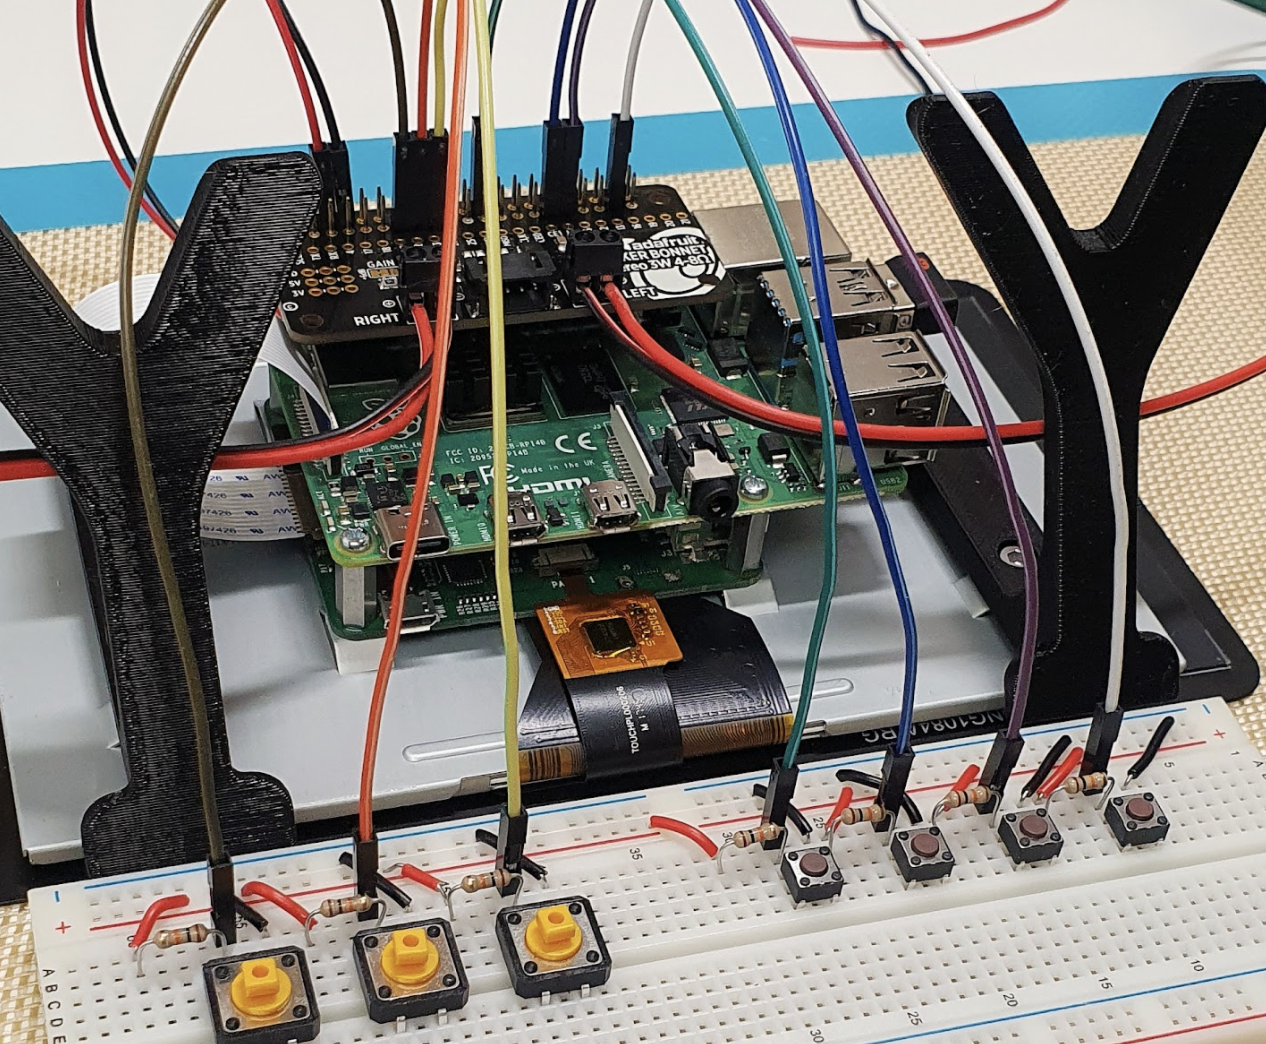
The PCB for this project was custom-made by Geeky Faye
What have you made with Raspberry Pi?
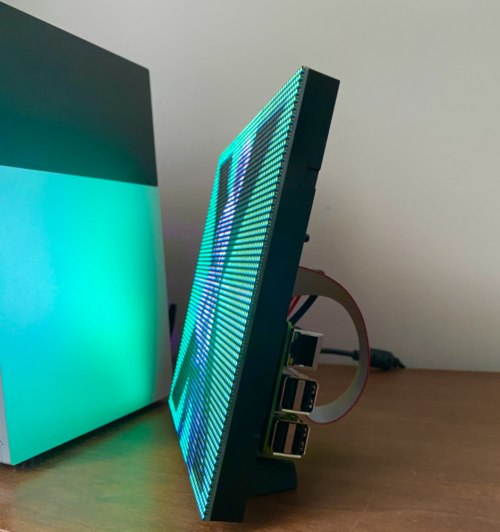
I am actually working on my first ever proper Raspberry Pi project as we speak! Previously I have only set them up for use with OctoPrint, 3D-printed them a case, and then let them do their thing. Starting from that base need, I decided to take an OctoPrint server [Raspberry] Pi to the next level and started creating BMOctoPrint; an OctoPrint server in the body of a BMO (from Adventure Time). Of course, it would be boring to just slap a Raspberry Pi inside a BMO-shaped case and call it a day.
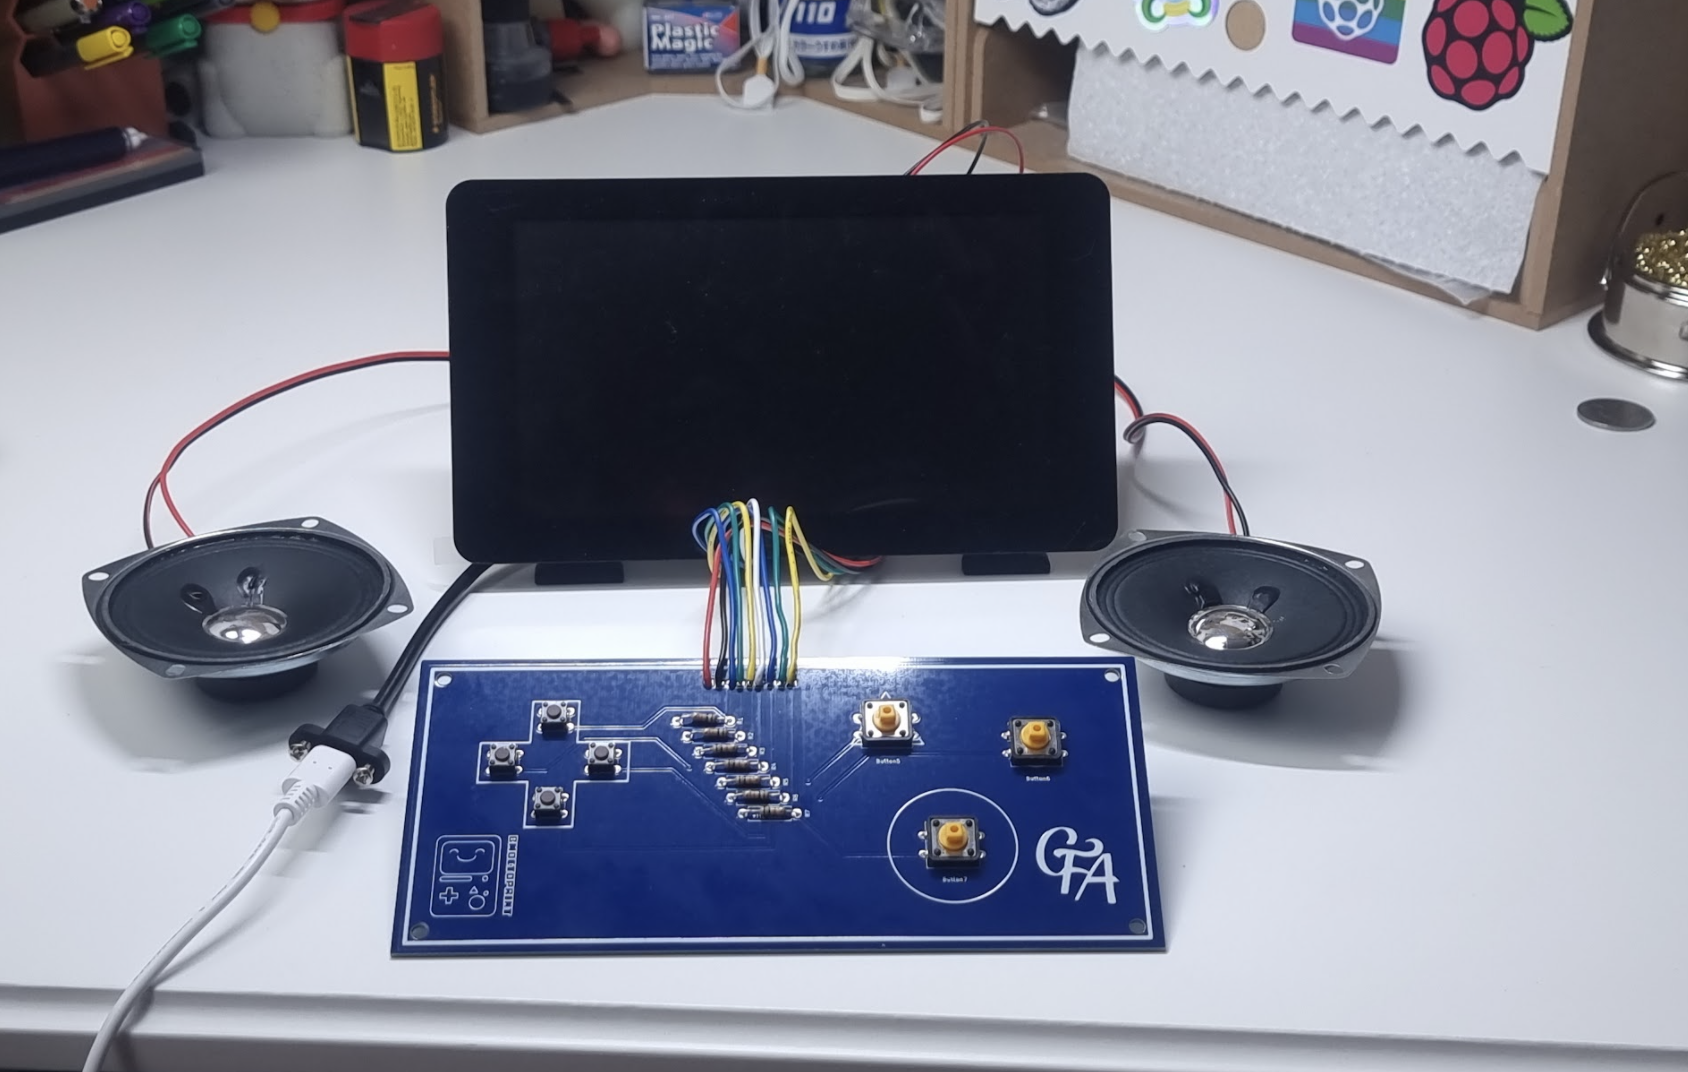
So, in spite of zero prior experience (I’m even new to electronics in general), I decided to add in functionality like physical buttons that correspond to printer commands, a touchscreen to control OctoPrint (or anything on Raspberry Pi) directly, speakers for sound, and of course user-triggered animations to bring BMO to life… I even ended out designing a custom PCB for the project, which makes the whole thing so clean and straightforward.
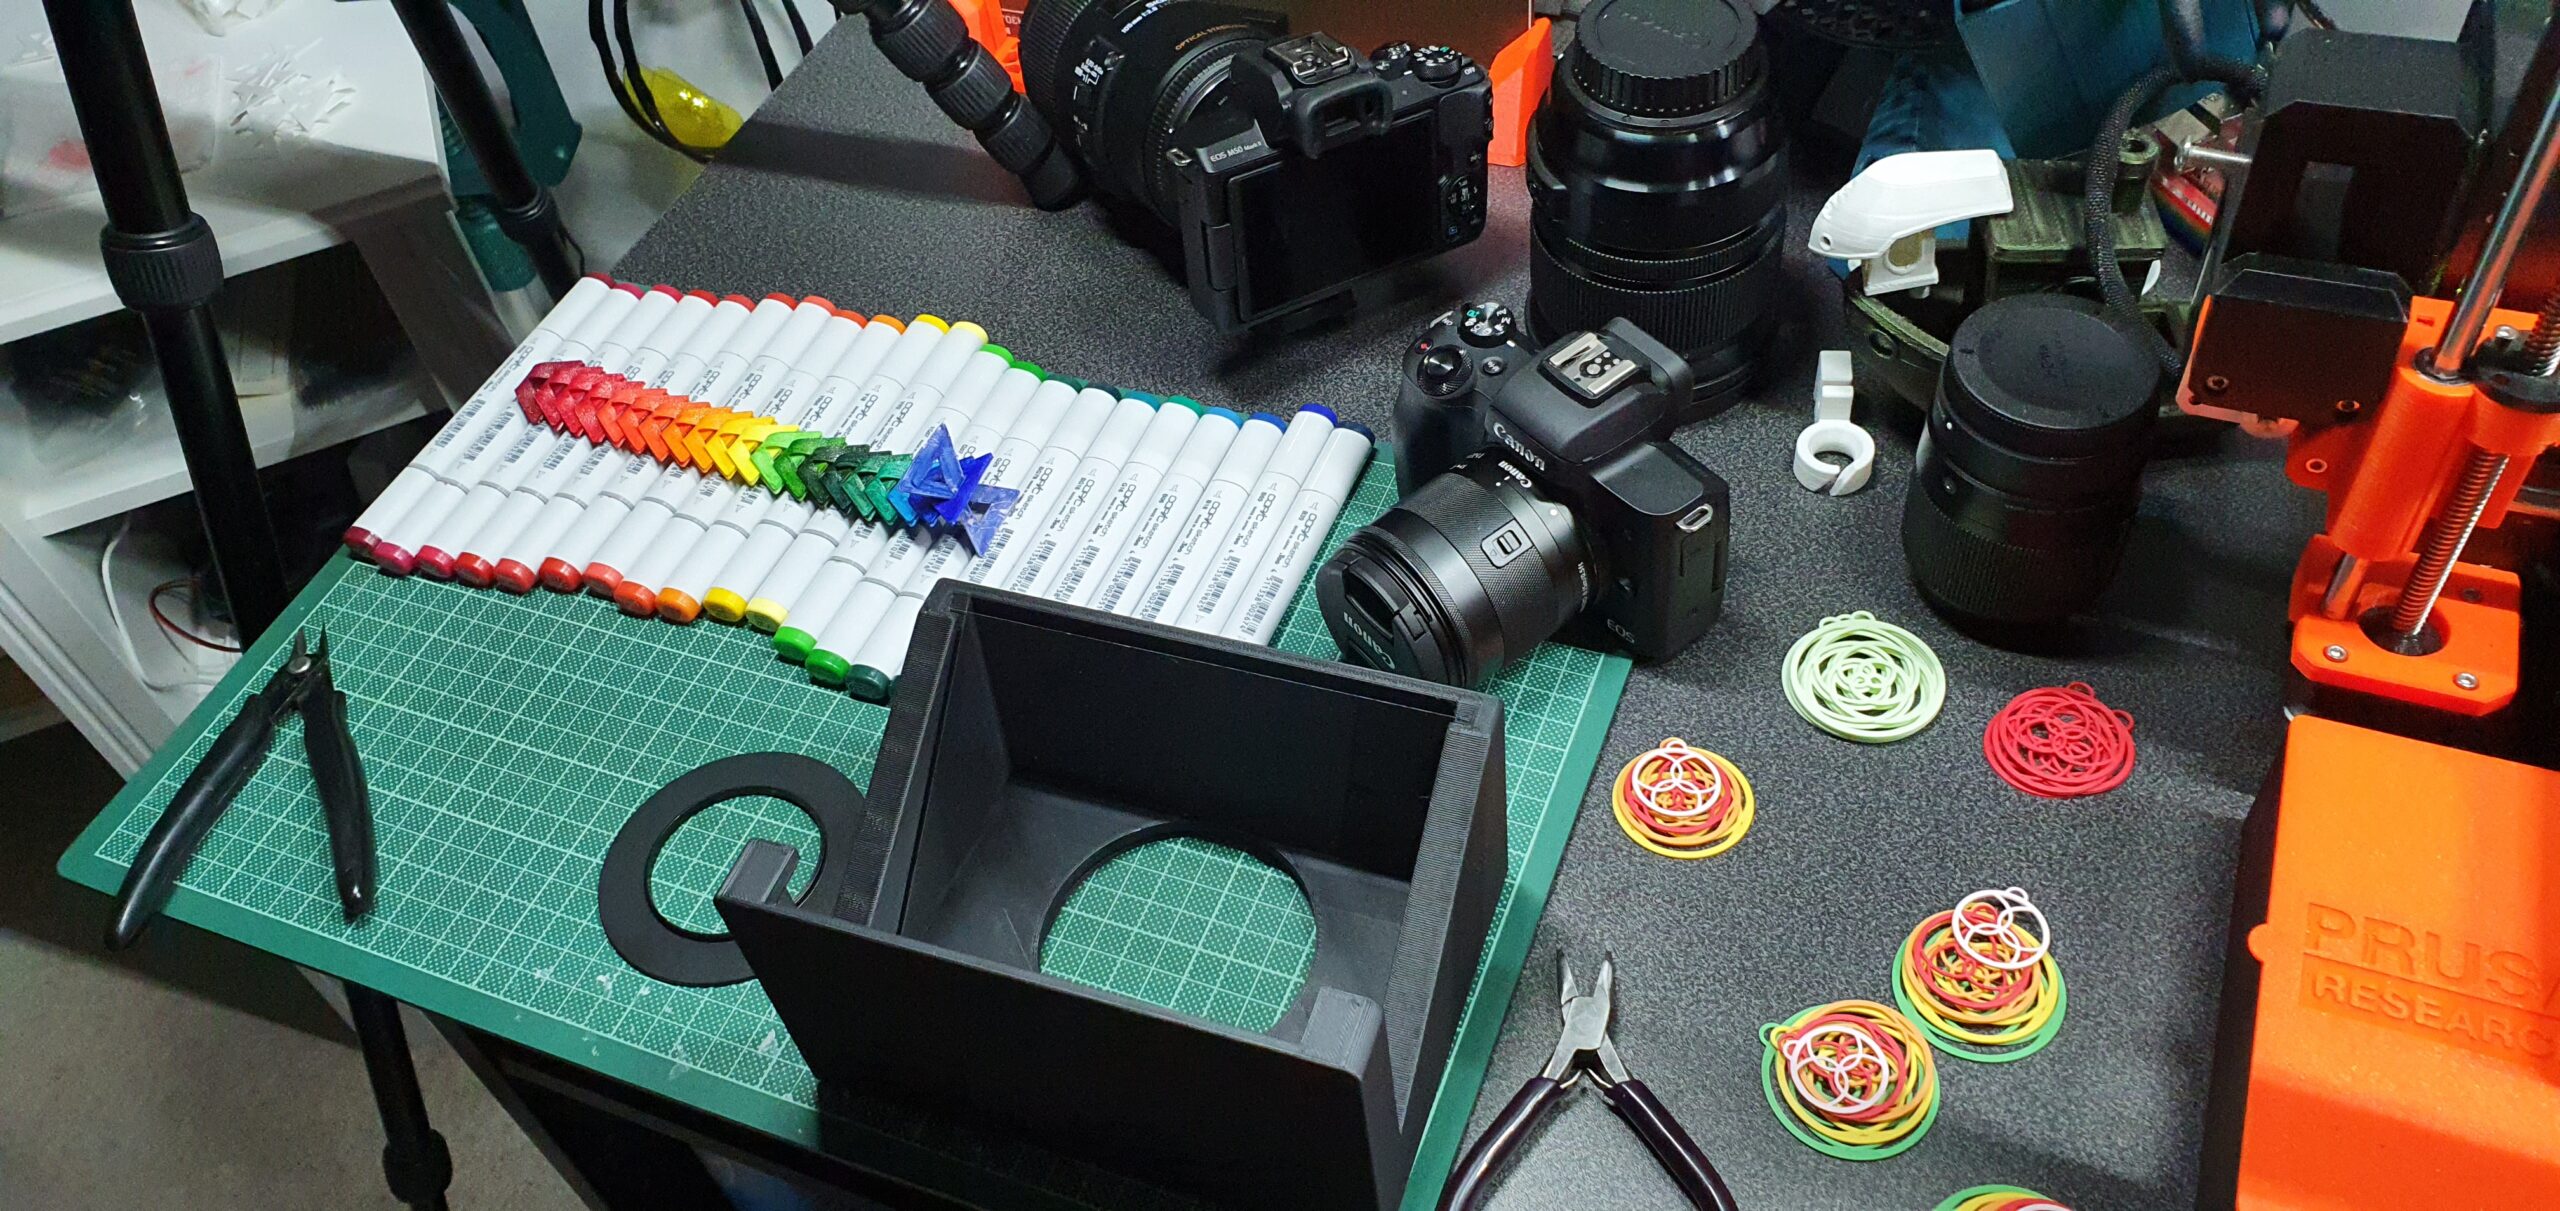
Photography, 3D-printing, and making come together in another project
What’s your favourite project that you’ve done?
Most recently I redesigned my teleprompter for the third time and I’m finally really happy with it. It is 3D-printable, prints in just two pieces that assemble with a bit of glue, and is usable with most kinds of lens adapters that you can buy off the internet along with a bit of cheap plastic for the ‘glass’. It is small, easy to use, and will work with any of my six camera lenses; a problem that the previous teleprompter struggled with! That said, I still think my modular picture frame is one of the coolest, hackiest things that I’ve made. I highly recommend anyone who frames more than a single thing over the course of their lives to pick up the files, as you will basically never need to buy a picture frame again, and that’s pretty awesome, I think.
Geeky Faye’s amazing Hange Zoë cosplay from the Attack on Titan series
You can grab the brand-new issue right now from the Raspberry Pi Press store, or via our app on Android or iOS. You can also pick it up from supermarkets and newsagents. There’s also a free PDF you can download.
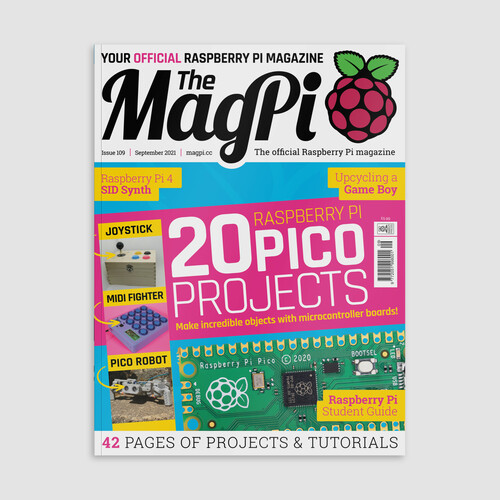
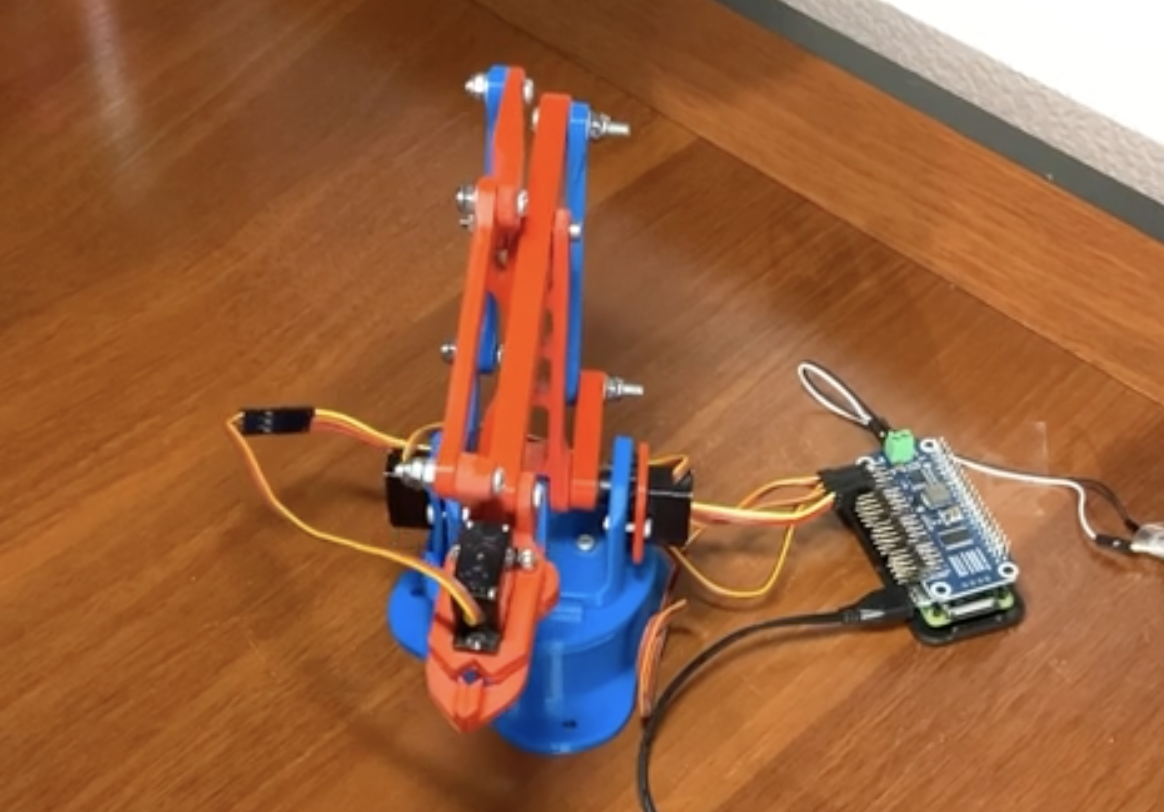
The maker of this robotic waiter had almost all of the parts for this project just sat around collecting dust on a shelf. We’re delighted they decided to take the time to pick up the few extra bits they needed online, then take the extra hour (just an hour?!) to write a program in Python to get this robotic waiter up and running.
It’s learning! Bartending is hard
We are also thrilled to report (having spotted it in the reddit post we found this project on) that the maker had “so much fun picking up and sometimes crushing small things with this claw.” The line between serving drinks and wanting to crush things is thinner than you might imagine.
And in even better news, all the code you need to recreate this build is on GitHub.
One of our favourite things about finding Raspberry Pi-powered projects on reddit is the comments section. It’s (usually) the perfect mix of light adoration, constructive suggestions, and gateways to tangents we cannot ignore.
Like this one recalling the Rick and Morty sketch in which a cute tiny robot realises their sole purpose is to pass butter:
No swears in this scene! But it is an adult cartoon in general
And also this one pointing us to another robotic arm having a grand old time picking up a tiny ball, sending it down a tiny slide, and then doing it all over again. Because it’s important we know how to make our own fun:
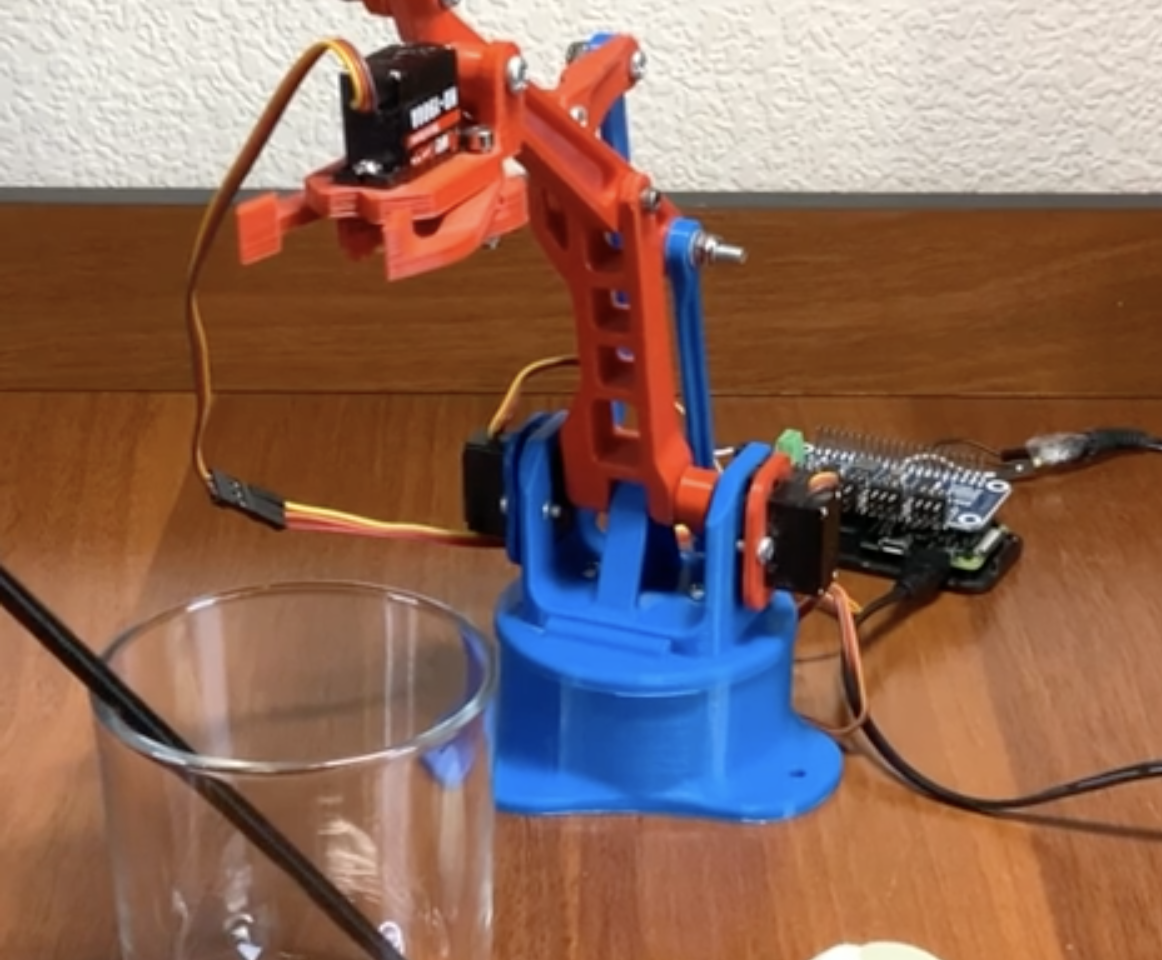
We also greatly enjoyed the fact that the original maker couldn’t use the Rick and Morty “what is my purpose” line to share this project because they are such an uber fan that they already used it for a project they posted just the day before. This cute creation’s sole reason for existing is to hold an Apple pencil while looking fabulous. And we are HERE for it:
Putt the ball around irrational obstacles in our retro take on golf. Mark Vanstone has the code
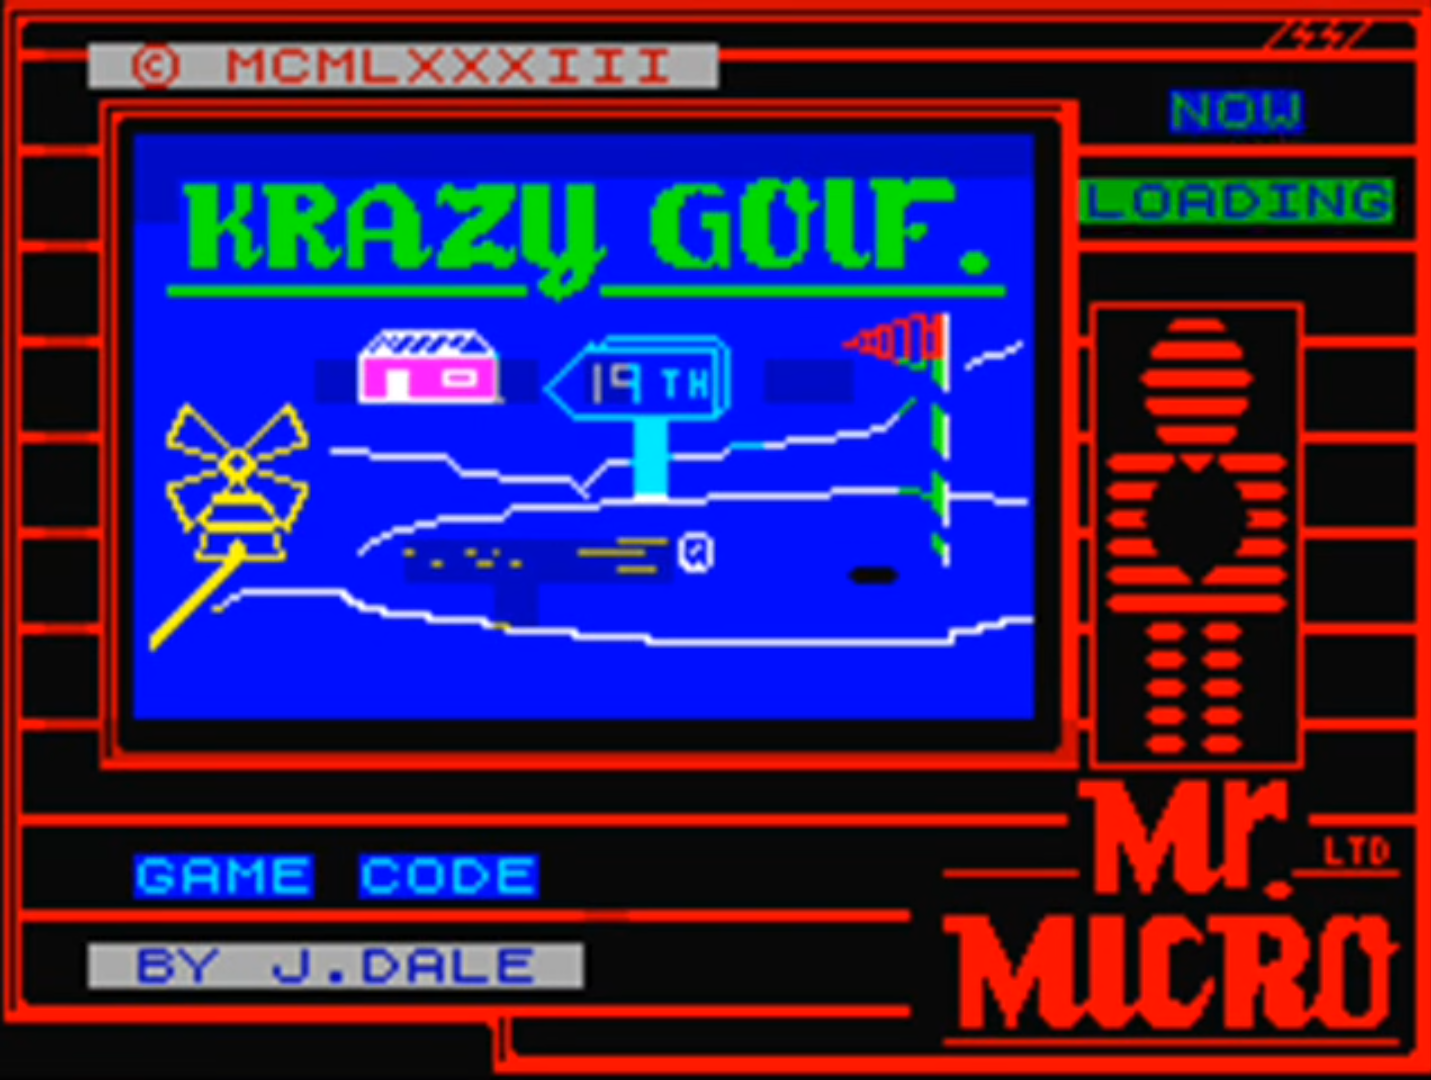
First released by Mr. Micro in 1983 – then under the banner of Sinclair Research – Krazy Golf was, confusingly, also called Crazy Golf. The loading screen featured the Krazy spelling, but on the cover, it was plain old Crazy Golf.
Designed for the ZX Spectrum, the game provided nine holes and a variety of obstacles to putt the ball around. Crazy Golf was released at a time when dozens of other games were hitting the Spectrum market, and although it was released under the Sinclair name and reviewed in magazines such as Crash, it didn’t make much impact. The game itself employed a fairly rudimentary control system, whereby the player selects the angle of the shot at the top left of the screen, sets the range via a bar along the top, and then presses the RETURN key to take the shot.
The game was called Crazy Golf on the cover, but weirdly, the loading screen spelled the name as Krazy Golf. The early games industry was strange.
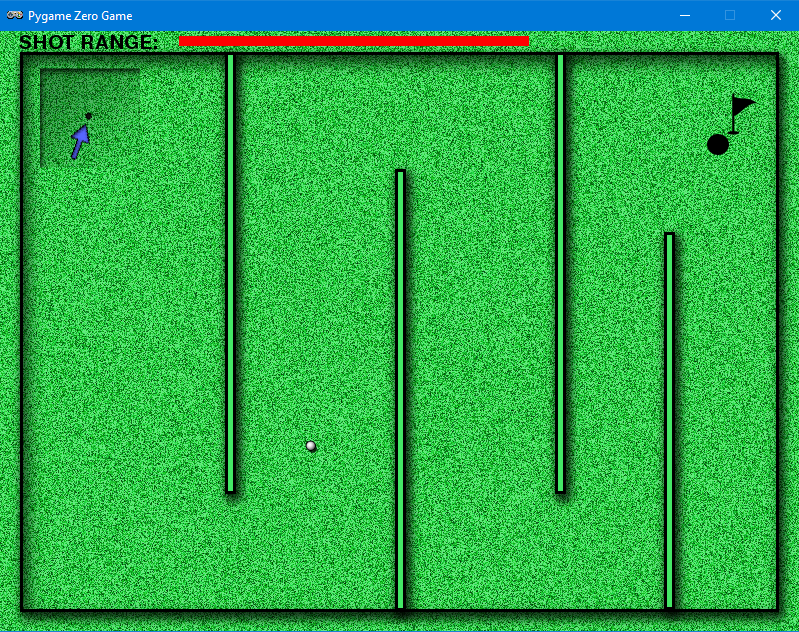
If you’ve been following our Source Code articles each month, you will have seen the pinball game where a ball bounces off various surfaces. In that example, we used a few shortcuts to approximate the bounce angles. Here, we’re only going to have horizontal and vertical walls, so we can use some fairly straightforward maths to calculate more precisely the new angle as the ball bounces off a surface. In the original game, the ball was limited to only 16 angles, and the ball moved at the same speed regardless of the strength of the shot. We’re going to improve on this a bit so that there’s more flexibility around the shot angle; we’ll also get the ball to start moving fast and then reduce its speed until it stops.
Horizontal or vertical obstruction?
To make this work, we need to have a way of defining whether an obstruction is horizontal or vertical, as the calculation is different for each. We’ll have a background graphic showing the course and obstacles, but we’ll also need another map to check our collisions. We need to make a collision map that just has the obstacles on it, so we need a white background; mark all the horizontal surfaces red and all the vertical surfaces blue.
As we move the ball around the screen (in much the same way as our pinball game) we check to see if it has collided with a surface by sampling the colours of the pixels from the collision map. If the pixel’s blue, we know that the ball has hit a vertical wall; if it’s red, the wall’s horizontal. We then calculate the new angle for the ball. If we mark the hole as black, then we can also test for collision with that – if the ball’s in the hole, the game ends.
The pointer’s angle is rotated using degrees, but we’ll use radians for our ball direction as it will simplify our movement and bounce calculations.
Get the code
We have our ball bouncing mechanism, so now we need our user interaction system. We’ll use the left and right arrow keys to rotate our pointer, which designates the direction of the next shot. We also need a range-setting gizmo, which will be shown as a bar at the top of the screen. We can make that grow and shrink with the up and down arrows.
Then when we press the RETURN key, we transfer the pointer angle and the range to the ball and watch it go. We ought to count each shot so that we can display a tally to the player once they’ve putted the ball into the hole. From this point, it’s a simple task to create another eight holes – and then you’ll have a full crazy golf game!
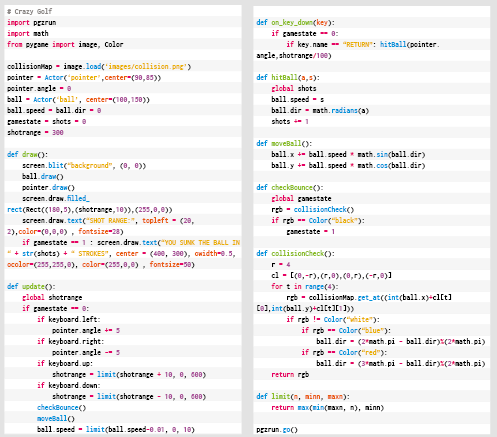
Here’s Mark’s code for a simple golf game. To get it running on your system, you’ll need to install Pygame Zero. And for the full code, head to our Github.
Get your copy of Wireframe issue 55
You can read more features like this one in Wireframe issue 54, available directly from Raspberry Pi Press — we deliver worldwide.
And if you’d like a handy digital version of the magazine, you can also download issue 54 for free in PDF format.
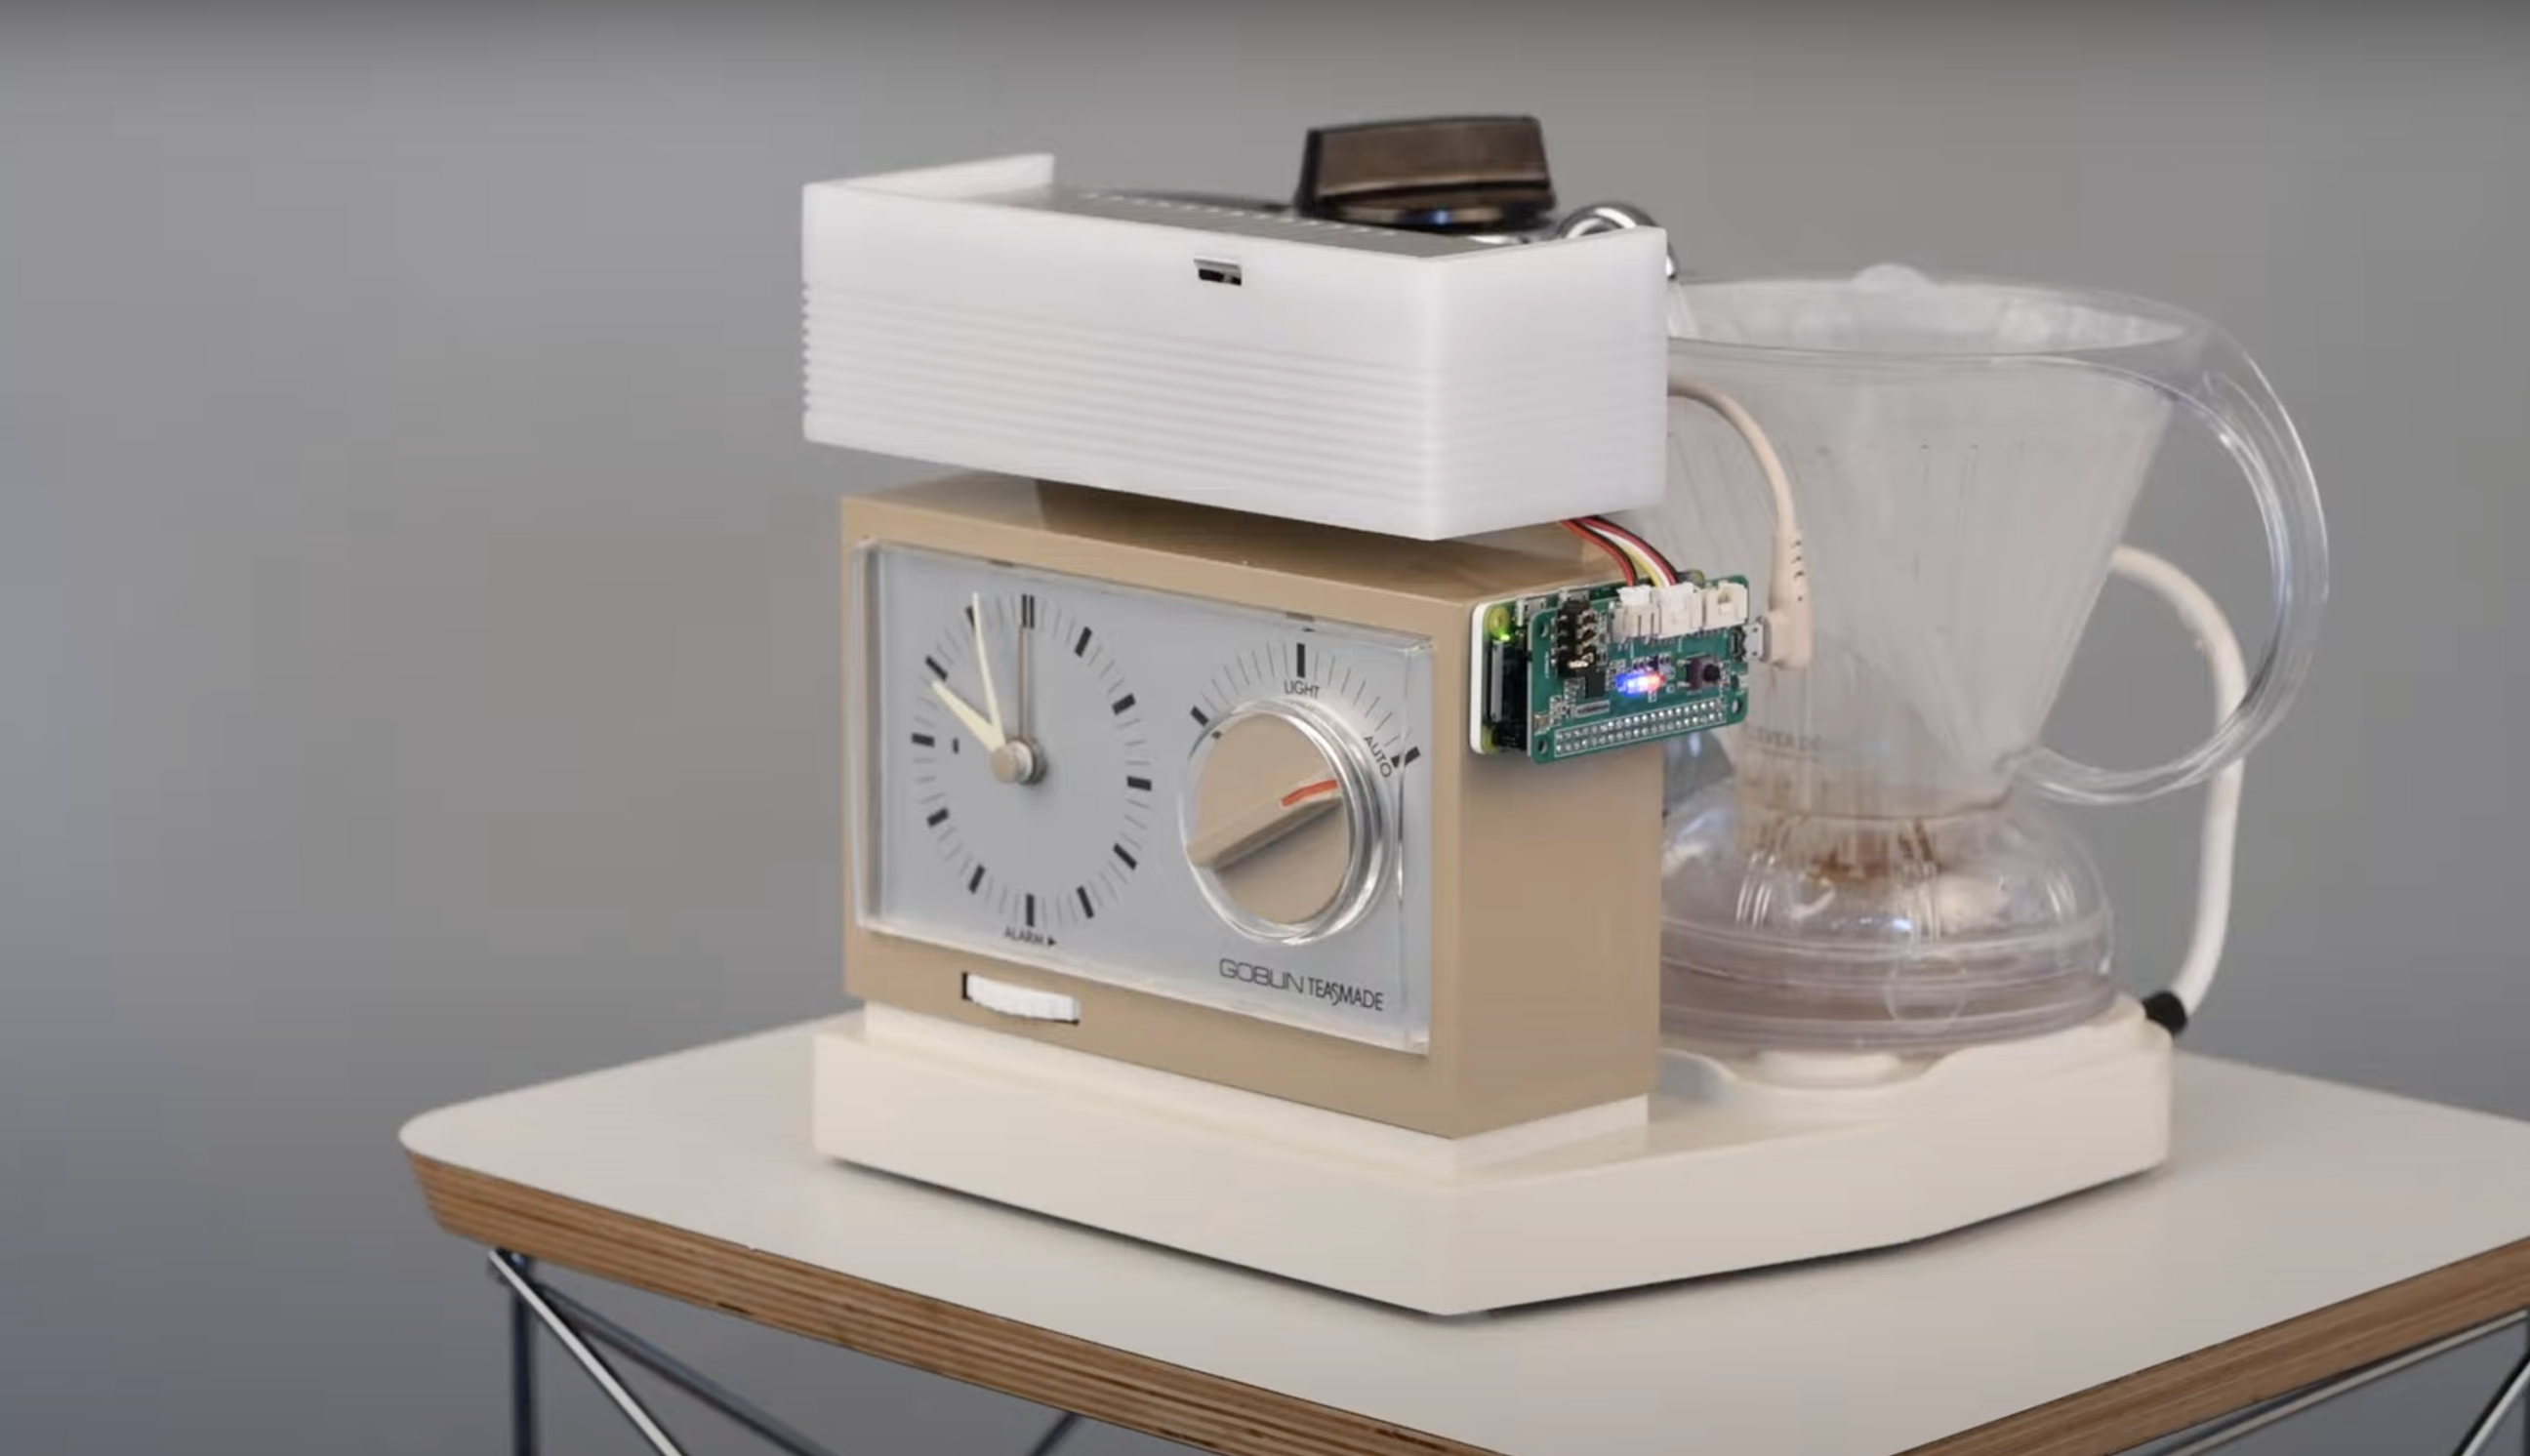
It hurts our aged soul to think how many of you won’t know what a teasmade is. So here is a quick overview of this classic 20th-century technology. Now we will tell you how VEEB brought such a contraption back to life with Raspberry Pi.
Yeah, we love the project video as much as you do. The clattering trolley rolling in with this ancient tea-making machine on top. Then loudly making a Google calendar note to brew the tea for you while you do something more useful. Genius.
Look how cute we look stuck on the side of a Teasmade
How does it work?
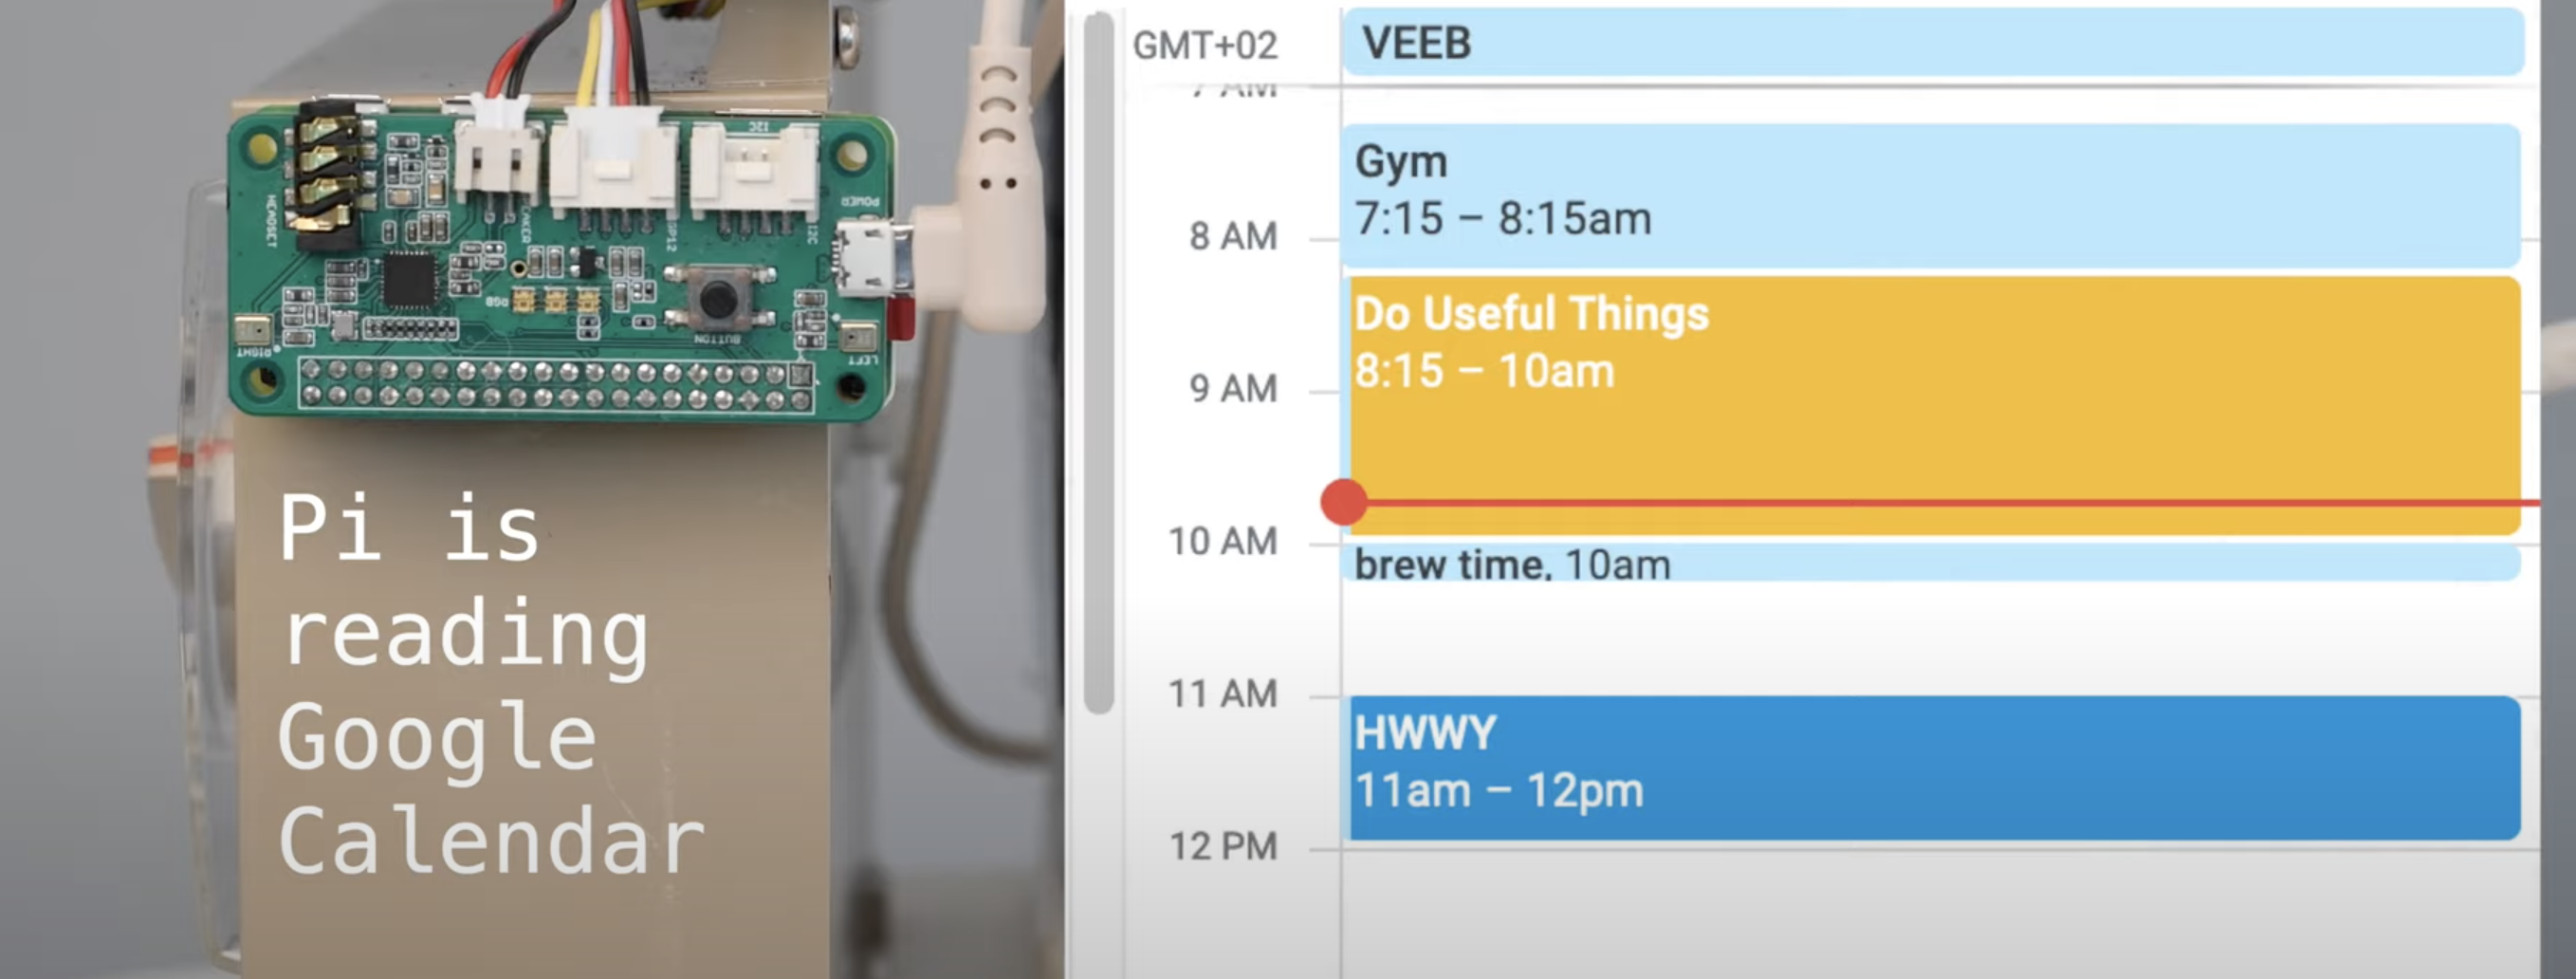
Raspberry Pi reads your Google calendar and automatically activates the kettle ten minutes before the time when you’ve said you want a coffee.
Then it gets super noisy. Teasmades are like that. But it’s worth it, trust me. To cover the sound of the janky old machine, VEEB has added a speaker that plays God save the Queen as the water heats up and pours into the clever dripper with the coffee filter in it. I’m not sure there is anything more English than that, other than if this project actually made tea and not coffee. I think coffee belongs to Seattle, but I’m not sure Seattle has a national anthem of its own. Correct me in the comments. Maybe Nirvana?
You have to log that brew time
Anywho, then you sprinkle your coffee grounds into the hot water, give it a stir with a spoon, and hey presto, you have [kind of automatically brewed] coffee!
File this in the list of projects we love because engineers like to spend several hours building something to automate an activity that takes one second. In this case, switching on a kettle to boil water for your coffee.
A quick PSA to share with those not in the know the wonder that is the limited television series Father Ted. The Mrs Doyle character was infamous for her fervent insistence on making everyone a cup of tea and she was crushed when her parochial employer, Father Ted, gave her a Teasmade for Christmas to take the “misery” out of making tea. It is not a miserable task. It is a calming, soothing ritual. Stupid Father Ted.
If you want to watch the whole episode, it’s the 1996 Christmas special
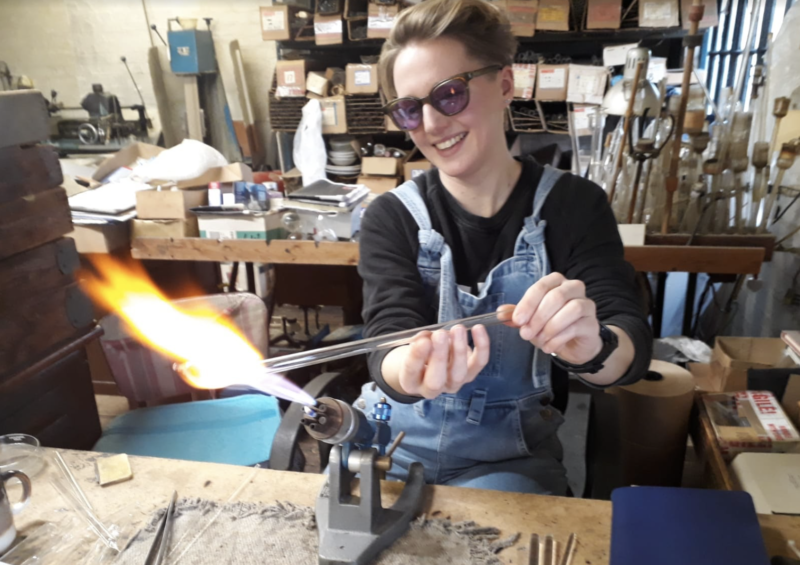
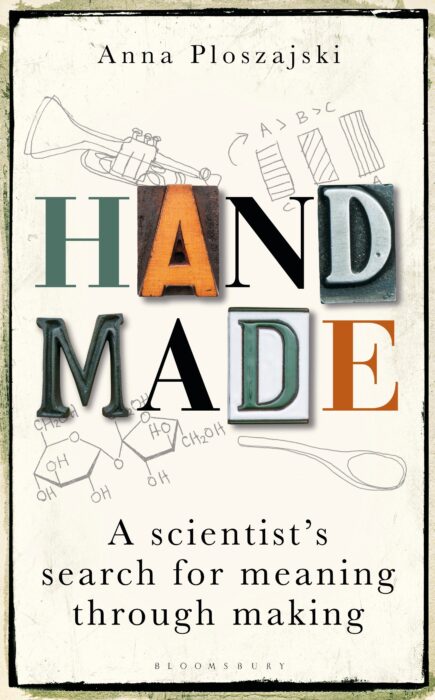
In the latest issue of HackSpace magazine, Andrew Gregory meets Anna Ploszajski to explore the bit of the Venn diagram where making and materials meet.
Anna Ploszajski (pronounced Por-shy-ski) is a cross-channel swimmer, a materials scientist, a writer, and a breaker-down of barriers to scientific understanding. 50% of the HackSpace editorial team listen to her podcast, Handmade, from which has arisen a book: Handmade: A scientist’s search for meaning through making. Naturally, we wanted to talk to her to find out why we humans do what we do when we turn object A into object B. That’s a pretty big question, but if anyone can answer it for us, Anna can.
Anna’s journey into making began with watching a bit of broken glassware getting fixed (Image: Charlie Murphy)
HackSpace: Hi Anna! You’ve written a book about making. Before we get on to that, though, we’d like to ask you about something you’ve been working on in your non-writing life – 4D printing. A while ago we saw a box with a hinged lid; the hinges were fabric, and the box was PLA, so you get the benefits of two types of material in one object. I guess what you’re doing is rather more advanced than that?
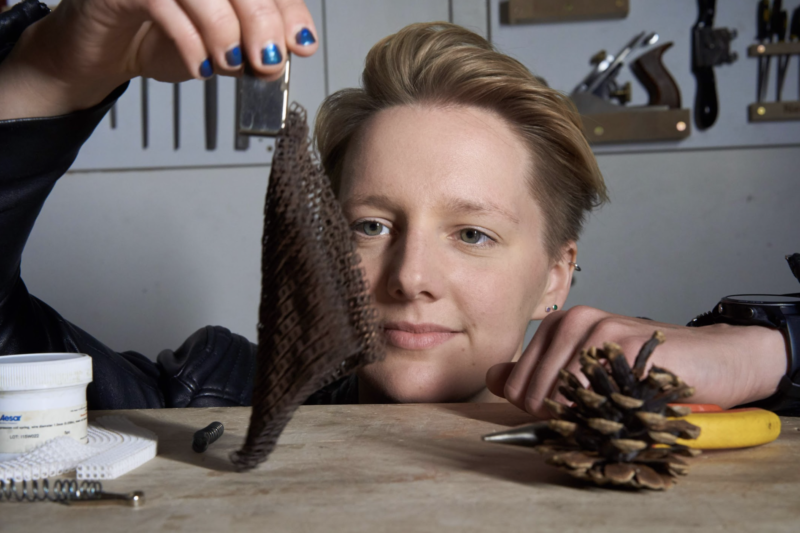
Anna Ploszajski: You say that, but I’ve been doing quite a lot of experiments in 3D printing onto fabric to try and make a 4D thing, because PLA has a kind of shape memory. I was wanting to do the experiment that I was doing (which actually I described at the end of the book). I’m trying to draw a conclusion about how my adventures in craft had also impacted my scientific research life. And the example that I use is this experiment that I did 3D printing onto fabrics.
What I was doing began with sort of pre-stressing, just normal textiles. I think there was a cotton, linen, pre-stressing it, just stretching them out with my hands, and then attaching them onto the print bed. And so, you already put in a kind of internal strain into the fabric, then 3D-print a very simple design that was either a circle, or just simple lines. And then obviously, when you print onto it, then the PLA plastic is bonded onto the textile. My idea was that if you then heated that material up, then it would soften, and that tension that you’d put into the fabric would be released. So that was my idea.
Anna’s mission is to make science available to non-scientists (Image: Steve Cross)
My project was all to do with exploring this idea of 4D printing. So printing, using 3D printing, to make objects that move in some way after you’ve printed them. The thing about it is, it’s adjacent to this topic of smart materials. There’s a family of materials that have some kind of smart property, usually it’s colour-changing or shape-changing in response to an external stimulus. So, that could be temperature change, or light levels or moisture levels.
And those smart materials are not actually that smart, it turns out, because what they do is really simple. Let’s take the example of a really simple shape change: wood is a really good example. It expands when it gets wet. And it contracts when it dries out. By our definition of a smart material, that is a smart material because it changes shape when there’s a change in environment. And that’s a very simple movement. And these smart materials tend to just have this kind of flip-flopping between two simple states – either, you know, an expanded state or a contracted state in this example. That’s not actually that useful, unless you can do a clever design to use that movement to form a clever kind of motion.
A really good example in nature is the pine cone; the spines of a pine cone have this really ingenious bi-layer structure, where one side of them has a very hygroscopic wood – it expands a lot when it gets wet. And the other side doesn’t expand a lot when it gets wet. So, when the pine cone gets wet, it’s that bi-layer structure that causes that movement. The wood itself is just expanding. But the contrast between the two is what causes that motion. So I was trying to get inspired by that and combine, using clever design, a quite simple, smart material with some design that would combine it with a non-smart material that would cause some kind of motion.
It’s all to do with stored tension, and triggering that tension release. And to be honest with you, I didn’t get very far with it. I understand the material side; that was fine. And I could do all my experiments in the lab, and I could characterise the materials fine, but I just don’t have a designer’s brain.
And that is what the book is about in a way: trying to access or tap into these other skills that designers and makers and craftspeople have which I don’t.
Anna’s book Handmade: A scientist’s search for meaning through making is available to buy now
HS: How much have you learned over the course of writing the book? You must have had to speak to all sorts of people to research it.
AP: I think that meeting all those craftspeople, and getting a view into their world, really gave me an appreciation for exactly how much work and time and skill and practice goes into really honing these skills. Wood is a really good example: when I did the wood carving workshop with Barn the Spoon, it took hours trying to make a spoon, but when I did it, mine didn’t look anything like his spoons.
The skills themselves are often not that complicated or difficult to do. It’s the constant practice in refinement and design, which are the skills that I didn’t necessarily have.
HS: What led you to write the book?
AP: A few things. Firstly, I wanted to write a popular science book that didn’t cater to the normal popular science audience, by which I mean people who are already relatively interested in science, the types of people who would browse the popular science sections in a bookshop and pick things up about space, or the gut, or whatever. I feel like that audience is already very well catered for.
What I wanted to do was try and write a popular book that would be read by someone who would never normally read a science book – that’s the whole of the rest of the population. So you’ll notice in the book that there are a lot of scientific analyses and explanations, but they’re all quite short. And my hope was that, if someone’s coming at this with not very much prior knowledge of science, they get to a description of the quantum mechanics behind why glass is transparent. But on the next page, we’re back to the story. And it’s really those stories that were the most important thing to me.
Like the sound of a materials scientist on a journey into making? Listen to Anna’s excellent Handmade podcast (Image: Steve Cross)
And so, in each of the ten chapters on different materials, the story isn’t the story of the material – it’s the story of something else. So in Plastics, it’s the story of my Polish grandad and, you know, his life story throughout the 20th century, which intertwines with the story of the rise and fall of plastics.
I wanted to draw all these other audiences in by storytelling, and then hopefully, sneak the science in when they weren’t looking.
The story of the book itself is to do with feeling very inadequate, I suppose. I had this realisation, having walked into the Institute of Making for the first time, that I was supposedly this expert in materials, having studied the science of it, having studied all on paper, but actually, there were all of these different people that had so much more in-depth knowledge than me. The craftspeople and the makers and the artists and the historians and the designers and the architects… And so it was them that I really wanted to spend time with and learn from.
That was four years ago. That was when I started my podcast, which is also called Handmade. And that was where I started interviewing makers and craftspeople. And the book just grew from that. Quite a few of the people that I interviewed on the podcast have ended up being featured in the book as the very, very, very kind craftspeople that took me under their wing and showed me the ropes of what they do.
To take blacksmithing as one example – I thought I was an expert in materials, but I had never felt metal softening under my fingers. Yes, I knew the theory, I could draw you the iron-carbon phase diagram, I could talk about the phases and melting, and all of the ways that carbon and iron interact at the atomic level inside steel. But I’ve never done it. And I didn’t know how hard you had to hit it to make it change shape. Agnes, the blacksmith who taught me, is just so, so brilliant. I’m such a huge fangirl of her. And it was very humbling, actually, to spend time with people like that.
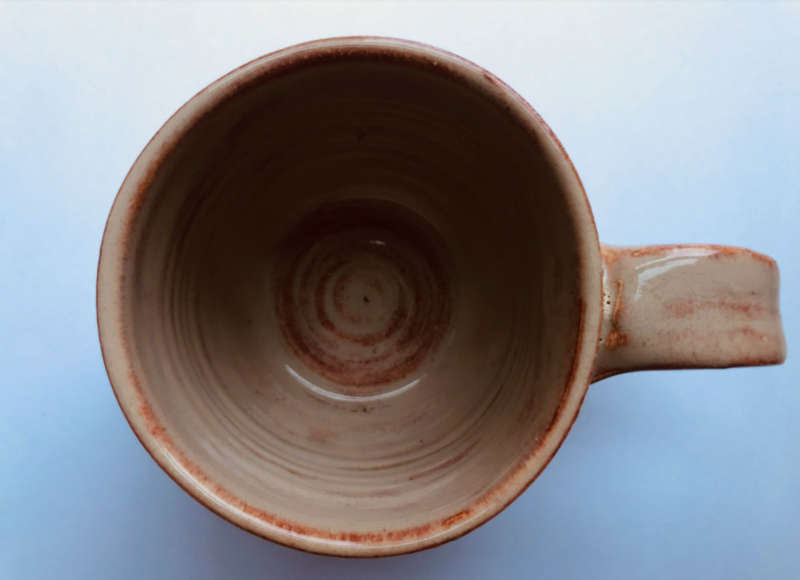
It’s one thing to understand the molecular changes that occur when you fire clay; it’s another thing entirely to be able to make a pot
HS: Getting to touch and feel the materials rather than study them, was there any one in particular that you gained an appreciation of?
AP: My favourite chapter in the book is Sugar, because it was the most fun story to write. And it’s the story of my English Channel swim. [Yes, you read that right – Anna has swum the English Channel.] One of the reasons was, I think, it already is one of the strongest chapters for storytelling. Because it is this kind of archetypal physical journey from A to B, but also a journey of discovery about yourself. And intertwined in that story is the story of sugar, and all its different forms, and how it affects the body and the mind.
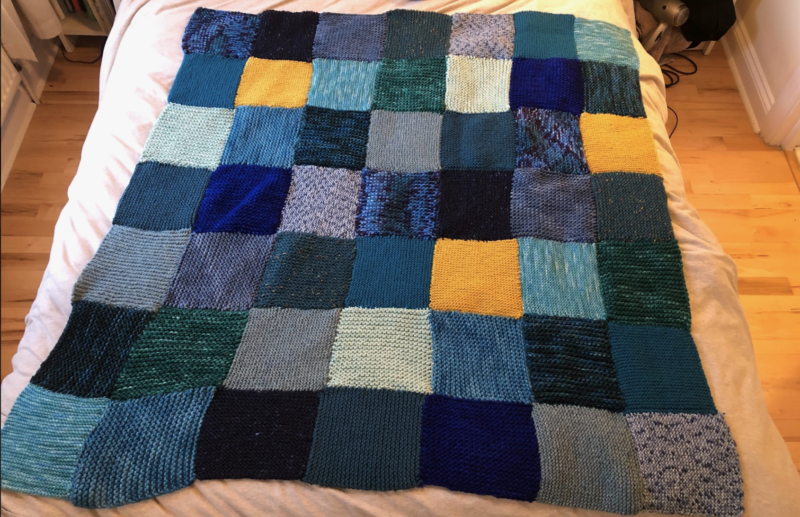
In terms of the crafts, it was really wool that caught my imagination, and I’ve stuck with it. The story of wool is the story of my camper-van trip around Scotland and the north of England. I acquired wool from all these different places that I went to on my trip, and then knitted a patchwork blanket with all the wool I got from the different places. And through doing that, I taught myself how to knit and I met all of these kinds of amazing knitters and wool-craft people throughout Scotland and the north of England, and chatted to them and got an insight into this amazing world of women who knit – and they were all women – and what it means to them, and how it connects them. And it’s very meditative, I find, and that’s the craft that I’ve taken through since finishing the book a year ago. That’s the craft that I’ve continued with.
Knitting contains loads of mathematical patterns, which knitters seem to understand intuitively
I don’t know what it is about it. It just feels so nice to create something, you know, especially in the last year when we were all sitting at home watching Netflix and trawling through the movies and TV shows on there. Although that felt like perhaps a bit of a waste of time, actually, if I was knitting while watching TV, it wasn’t all a waste of time; I had something to show for it at the end. And I think that’s what craft gives us – it’s a sense of purpose almost, and a sense of achievement at the end.
You know, to have that sense of achievement of ‘I’ve made this’ and now I can wear it, or now I can use it. I haven’t had that in science before. I only got that when I started entering this world of craft.
HS: It sounds like you see a disconnect between science and making. Is that fair to say?
AP: I’ve thought a lot about this: this kind of compartmentalising of making and science, or art and science as I talk about in the book (and I know that art and making are absolutely not the same thing). And I think there are a lot of reasons why the arts and sciences have been sort of severed from each other. In formal education, we separate them. At school, we have to often choose between those types of subjects. I ended up going down the science route, but I did A-level music. I love writing and music and history, and I was always crap at art, but I enjoy it. I think it’s really unhelpful that we do that, because it means that we brand people as ‘you’re a scientist’, or ‘you’re more of an artist’. And actually, I think the majority of people are probably somewhere in the middle. Actually, they have interest in both.
Wool was hugely important for England’s development into a major mediaeval power. It’s also good for keeping your feet warm
It’s a real shame that we often get siphoned off into these different camps, and often don’t get the chance to rediscover the other one. As someone who was siphoned off into the scientific track, it was really liberating to be able to discover the craft and artistic world. It was, like I say, very humbling. It was also really nice to be a complete beginner again at something, to be able to ask the silly questions from a place of curiosity, with no pressure, no educational pressure. I wasn’t trying to achieve anything apart from trying to make a spoon, or forge a knife, or throw a pot, or whatever it was.
Materials is a really interesting subject because it can sit at this intersection between the artistic world and the scientific world. Materials, perhaps uniquely in the sciences, is a really lovely way to explore the more artistic side. And what I’ve discovered through the book and through the podcast, is that we all understand these materials, maybe in slightly different ways. But quite often, it’s just that we use different language to talk about them. I remember interviewing a silversmith on my podcast called John Cussell, who described cold-working silver metal to me as making the atoms angry. So, when you cold-work silver, it becomes more and more stiff. I would describe that as putting dislocations into the material and putting internal stresses and strains to make them more brittle. We’re both talking about the same thing in different ways. And I think that, really, the wonderful thing that I love about materials is that it can be this common substance, literally, through which all sorts of different people can talk to each other.
We’re fascinated by the idea of 4D printing – printing an object that’s designed to move (Image: Steve Cross)
HS: Citizen science has taken huge steps forward recently in broadening access to scientific research, but very often it’s locked away inside university buildings and it’s a real shame. What do you think can be done about that?
AP: That’s my life’s mission, to try and break science out of universities through doing things like writing the book and the podcast, and the talks that I give. I really want to invite people in and show them that science – it’s a huge cliché but science really is everywhere. It’s never been more important than in the last 18 months to understand science, virology, how contagions spread – that’s all science. And the science communication that’s going on around that has been mixed. Some of it’s been really good, but some of it’s been really damaging. That’s what’s important to me is to break science out of these institutions, because a lot of people are turned off science at a very early age. And unlike a lot of other areas, it’s impossible to turn back. If you go down a non-scientific route, through school, and then maybe through university or through a job, it’s impossible to go back on that and pick it up again later. I feel like subjects like history and literature are much more accessible to everybody. Whereas science is considered to be more for a select few, you know, a chosen few who are allowed to do it. And that’s really not fair.
HS: Are craftspeople scientists? There must be a lot of crossover in terms of learning, experimentation, and so on.
AP: I think you’d have to ask them, but whatever it is they do is experimentation, right? And they do experiments all the time – what temperature do I need to make my steel to make it do X? Or, what composition do I need my clay to be to make it do Y? How do I do the settings on my furnace to make sure that my pots don’t explode? And that is exactly the sort of stuff that we would do in the lab, you know: methodical experimentation. So in that way, definitely. I can’t see that there’s any difference at all between that. And in terms of the way that craftspeople and scientists think, that’s much more difficult to answer.
Most science has arisen from craftspeople and early experimenters. The subject of material science arose out of the subject of metallurgy, which arose out of blacksmiths like Agnes. If you go back far enough, it’s all the same thing.
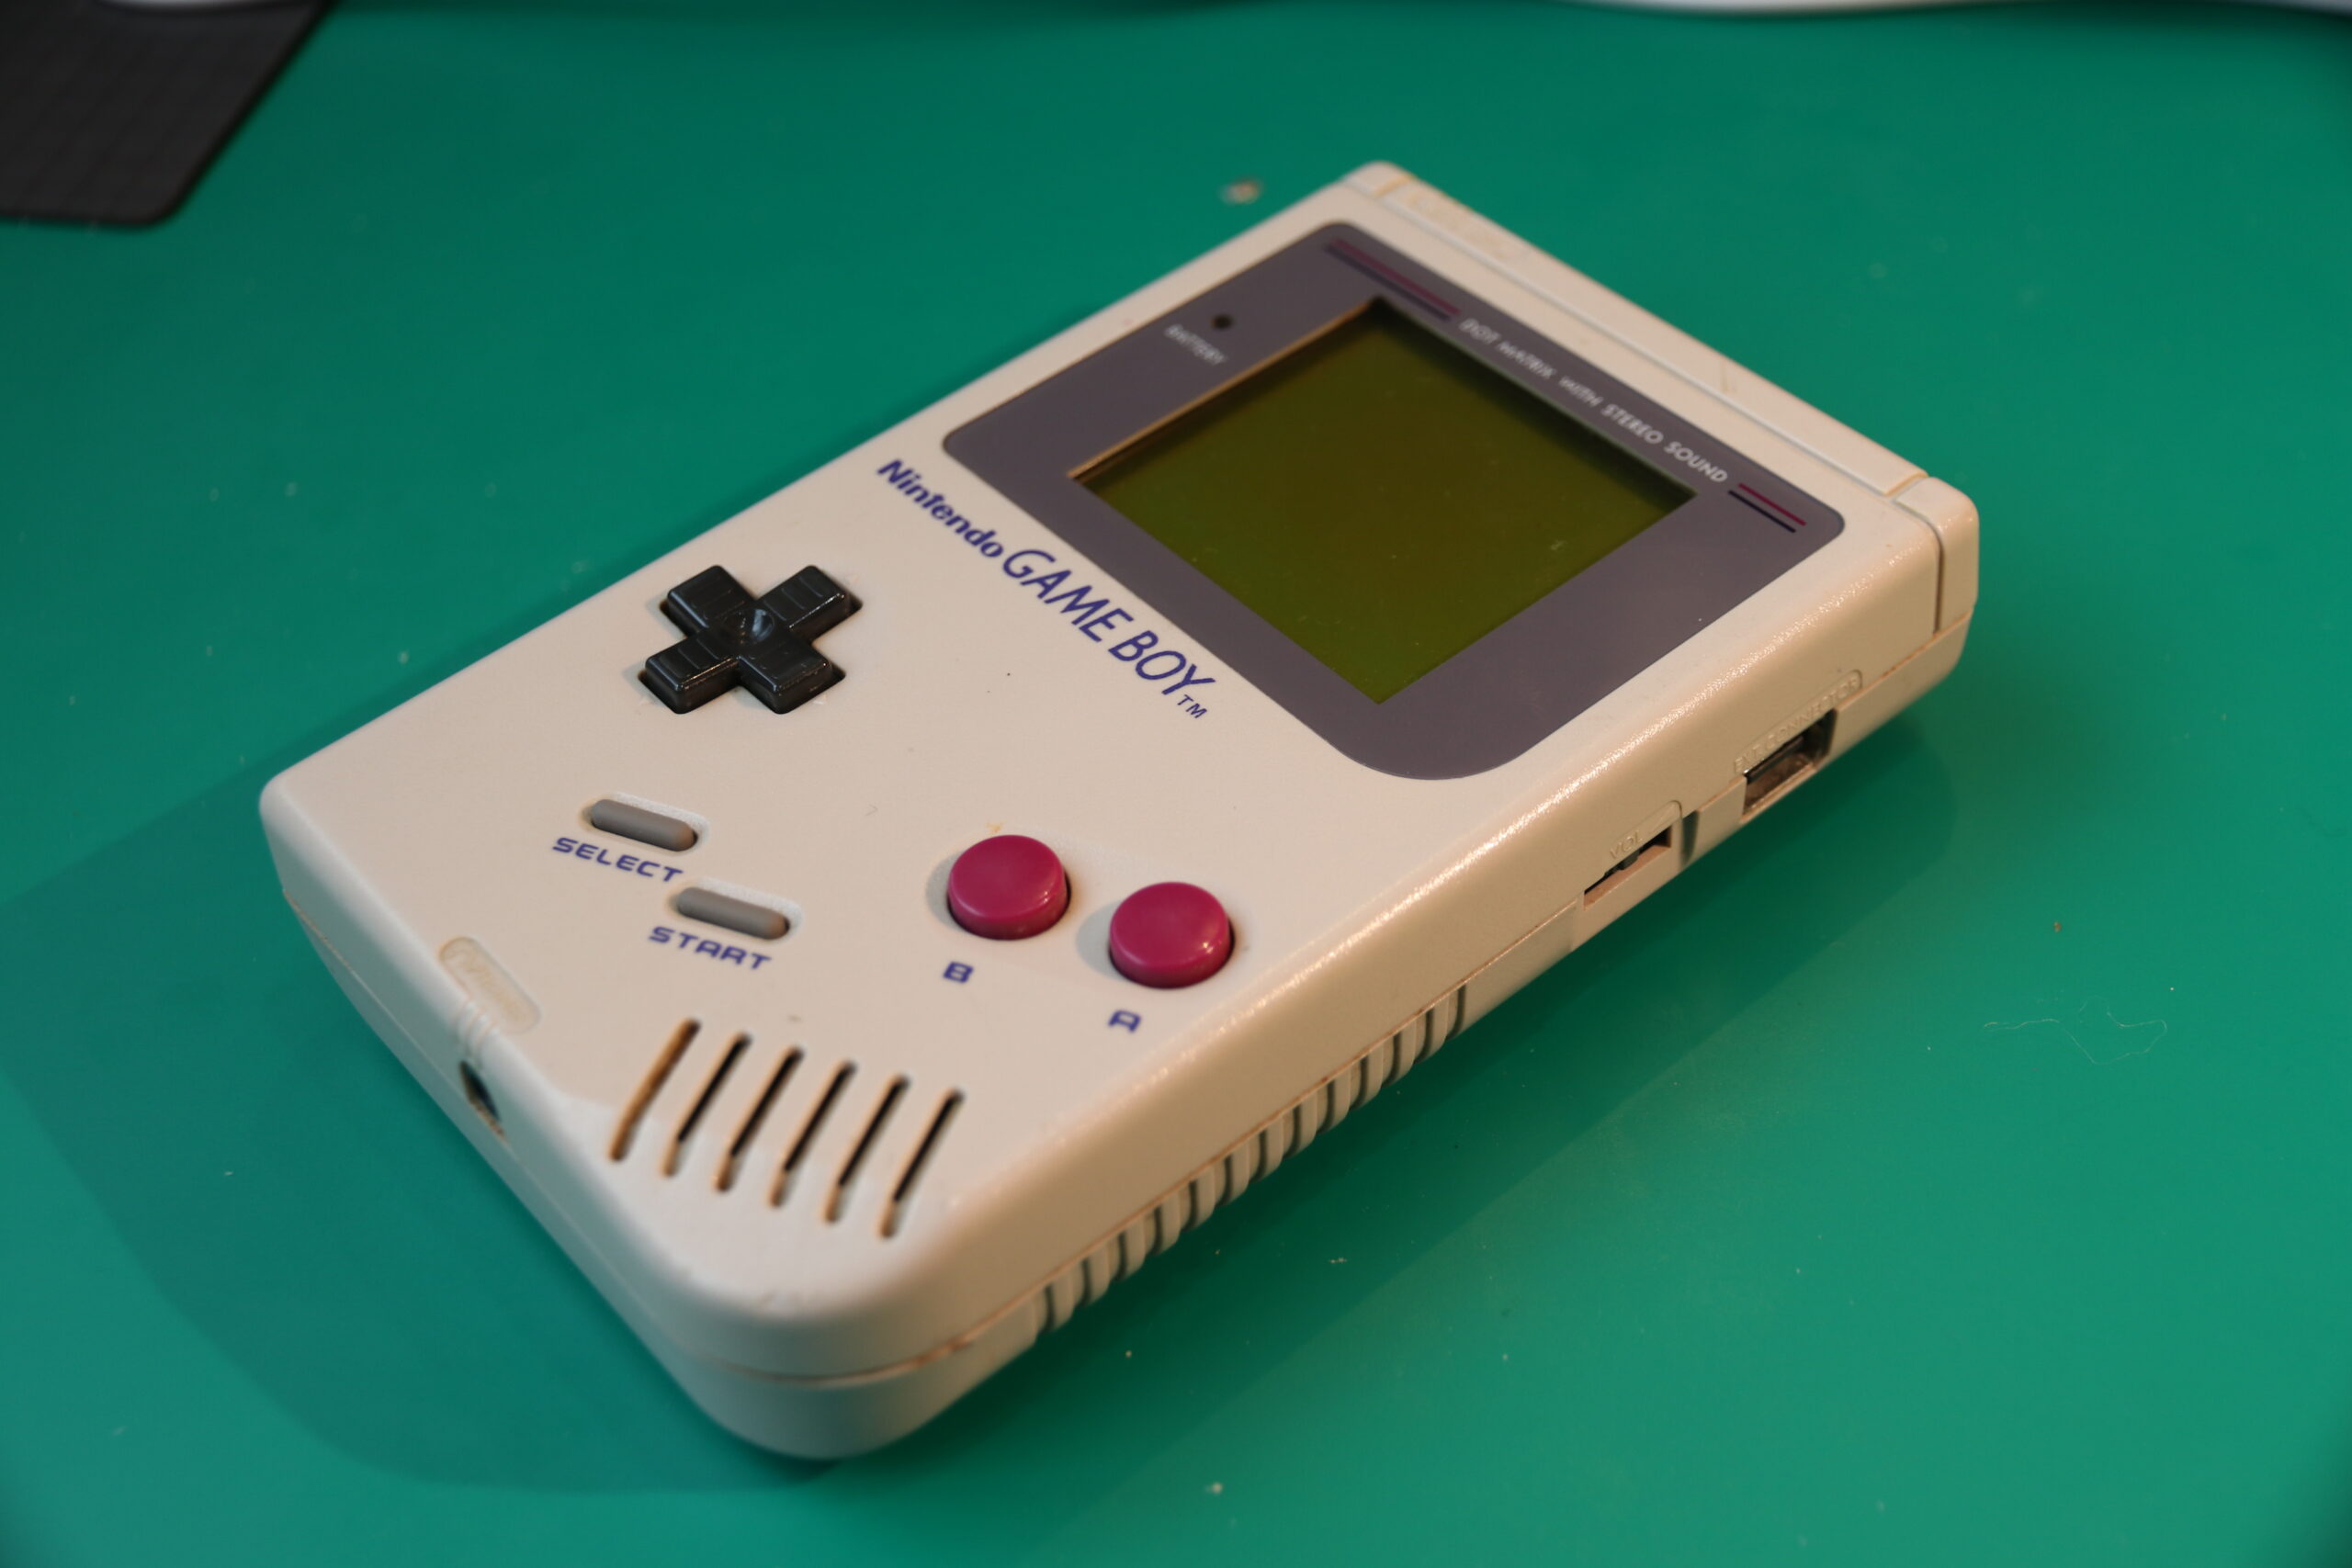
In the latest issue of The MagPi Magazine, Jeroen Domburg showcases his refurbed Nintendo Game Boy.
The Nintendo Game Boy – the iconic handheld video game console launched in 1989 – is no stranger to the pages of The MagPi. We’ve seen makers either stuff a Raspberry Pi computer into an original case or buy off-the-shelf projects, such as the superb RetroFlag GPi, and create their own from scratch. It’s great to see the device kept alive.
You can’t tell the difference between the finished DMGPlus project and the original Game Boy – all the alterations are inside
But just as we thought we’d seen it all, along came Jeroen Domburg, aka Sprite_tm. Like us, he’d seen a reasonable number of people modifying Game Boy cases to create portable RetroPie machines. “But because they wanted the thing to emulate as many consoles as possible, they usually went all-out with the modifications: high-resolution screen, Li-ion battery, HDMI and USB, multiple front buttons, shoulder buttons, the works,” he says.
“Obviously this would work really well, but it went against the original Game Boy looks. The projects could look like a weird mutation and it made me think, what if I went the other way? What if instead of sacrificing the original looks for playability, I sacrificed playability for the original looks?” Welcome then, DMGPlus: a handheld that looks familiar but has its internals replaced by something more powerful.
Pressing the right buttons
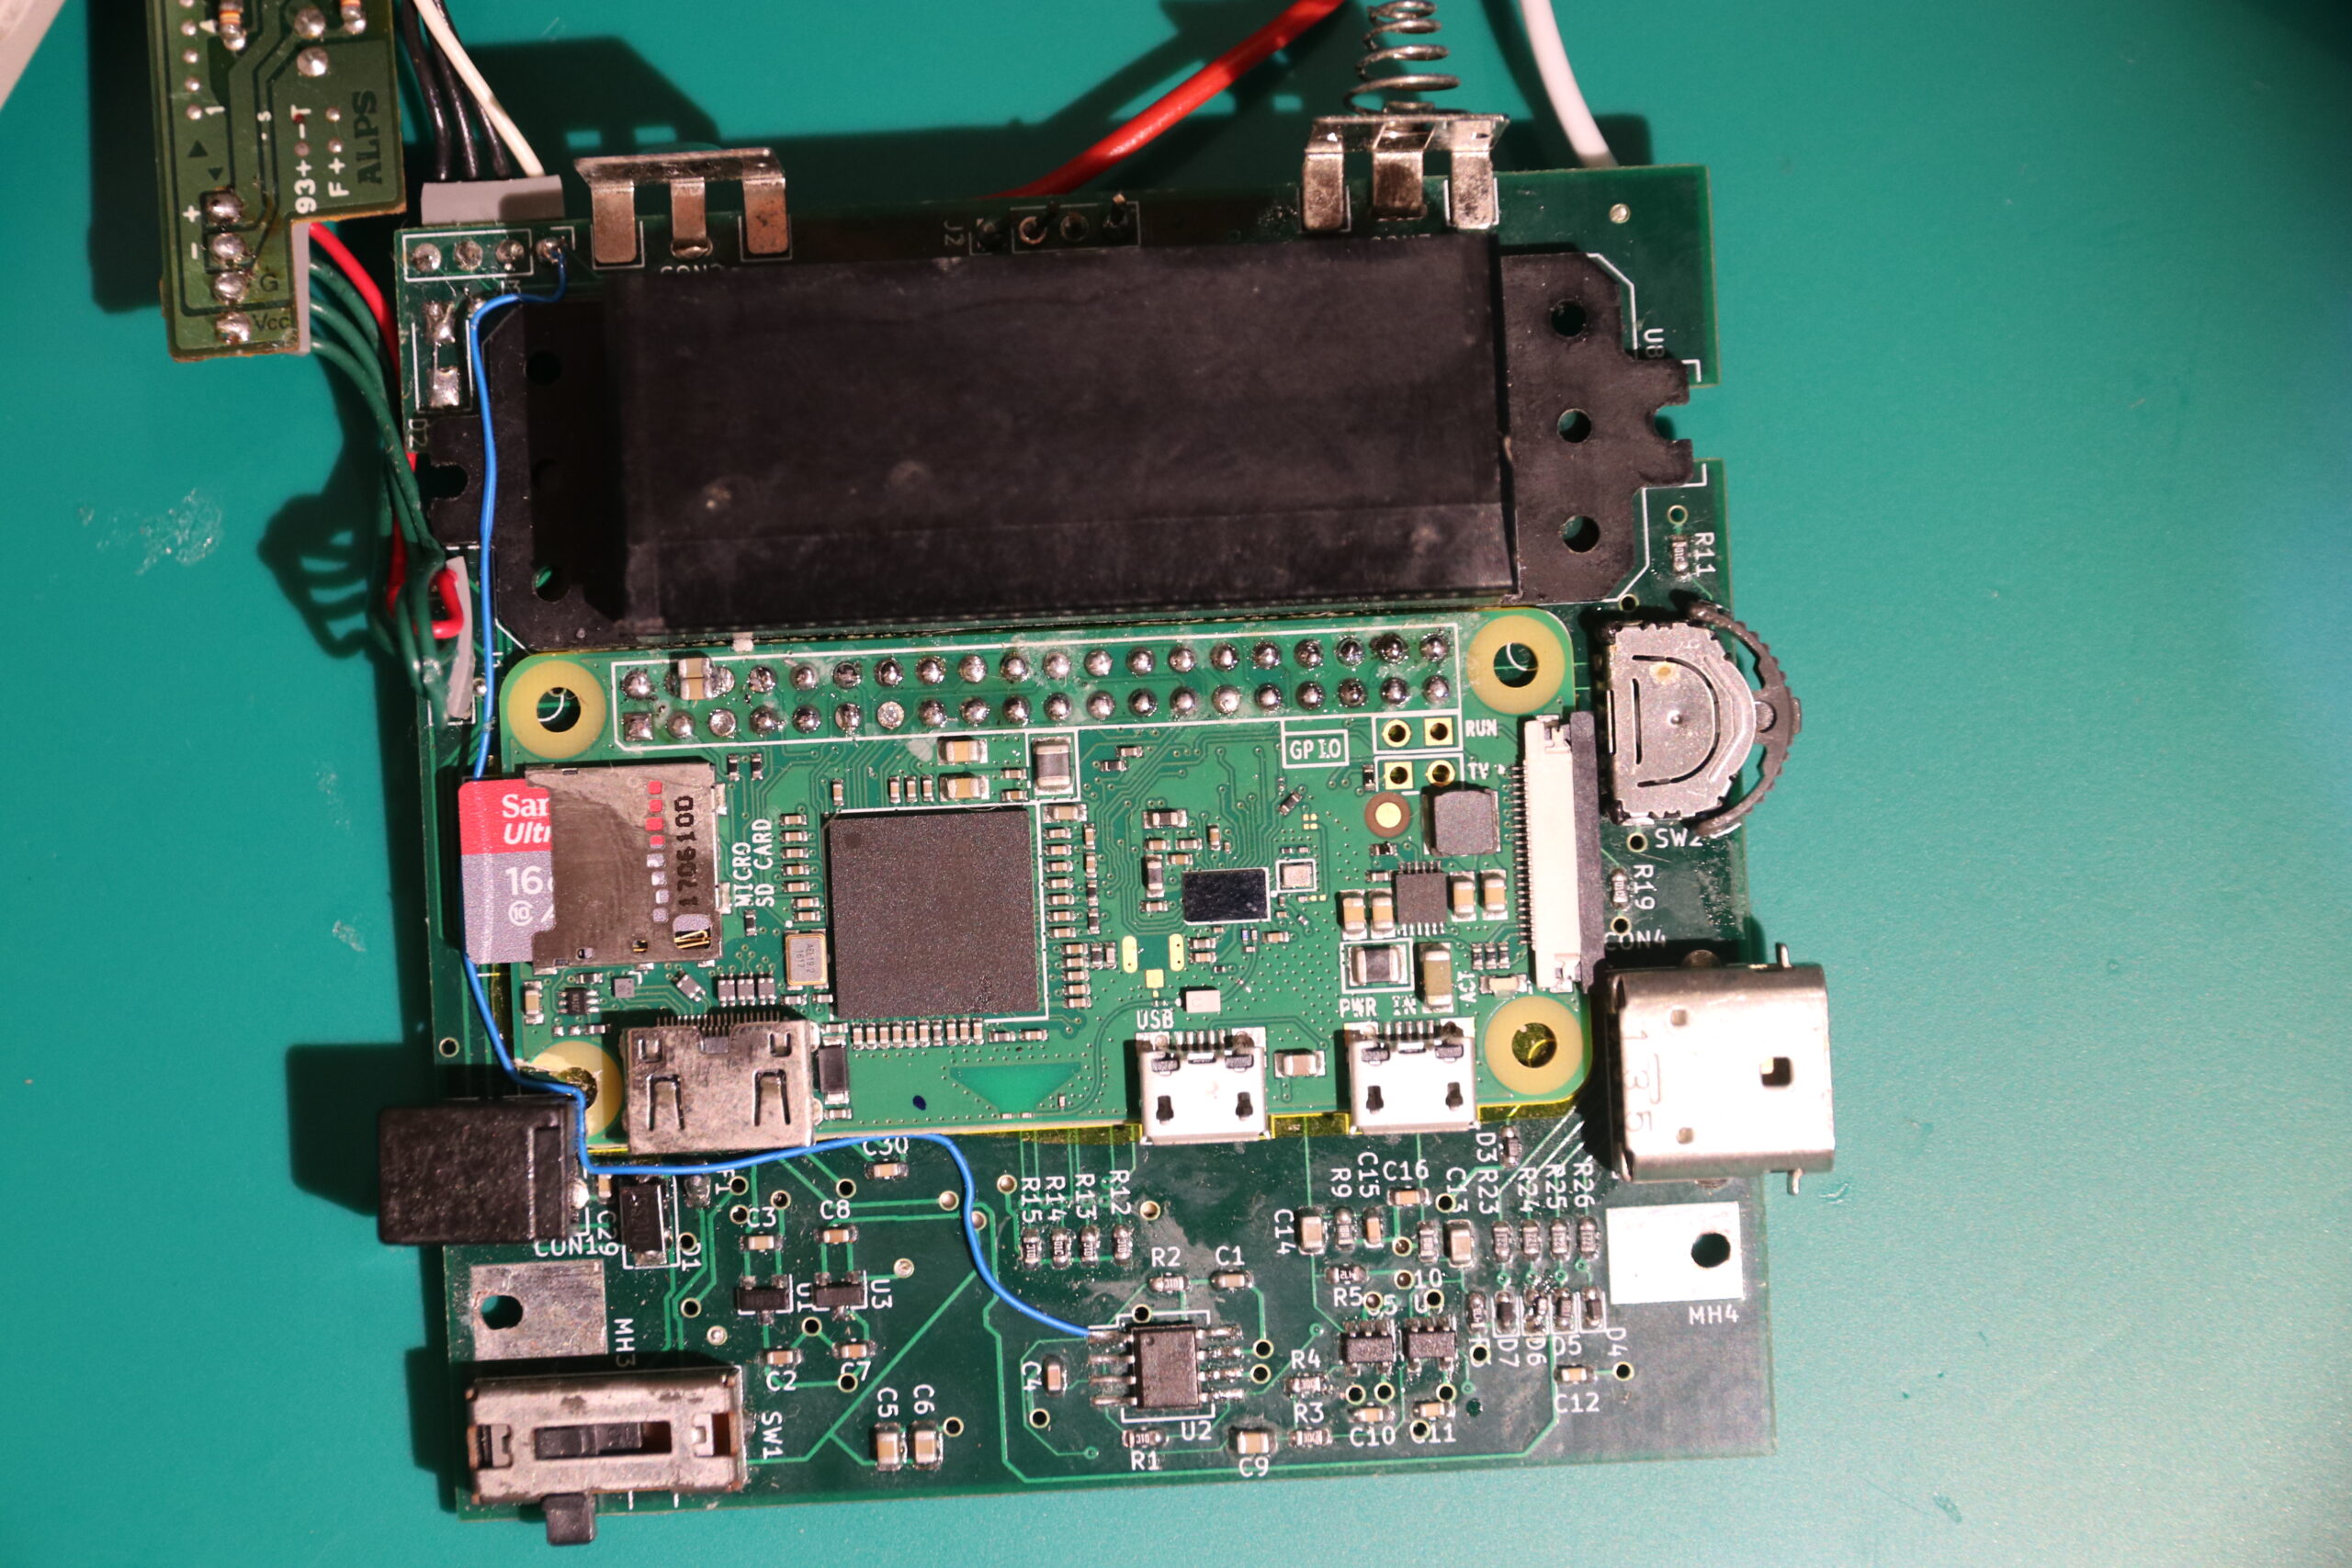
That something includes a Raspberry Pi Zero computer and a replacement motherboard containing a lower power, high performance ICE40 field-programmable gate array (FPGA). These are fixed either side of a new, printed circuit board, replacing the CPU, GPU, and memory.
The original hardware had a direct connection to the cartridge, but Raspberry Pi Zero has to communicate with the FPGA via the SPI port. To speed things up, the emulator reads an entire region from a cart
Jeroen has retained the buttons, cartridge port, speaker, and link port, with everything capable of being run from four AA batteries, just like the original. “I did change the LCD a little bit by driving it in a smart way so that it can display 16 greys instead of the original four,” he enthuses.
And the upshot of that? “It ends up substantially increasing the number of games the Game Boy can play,” he continues. “Because of emulation, all of a sudden you can have access to games that originally ran on other consoles, some of which have specs way better than the original Game Boy.”
Work hard, play hard
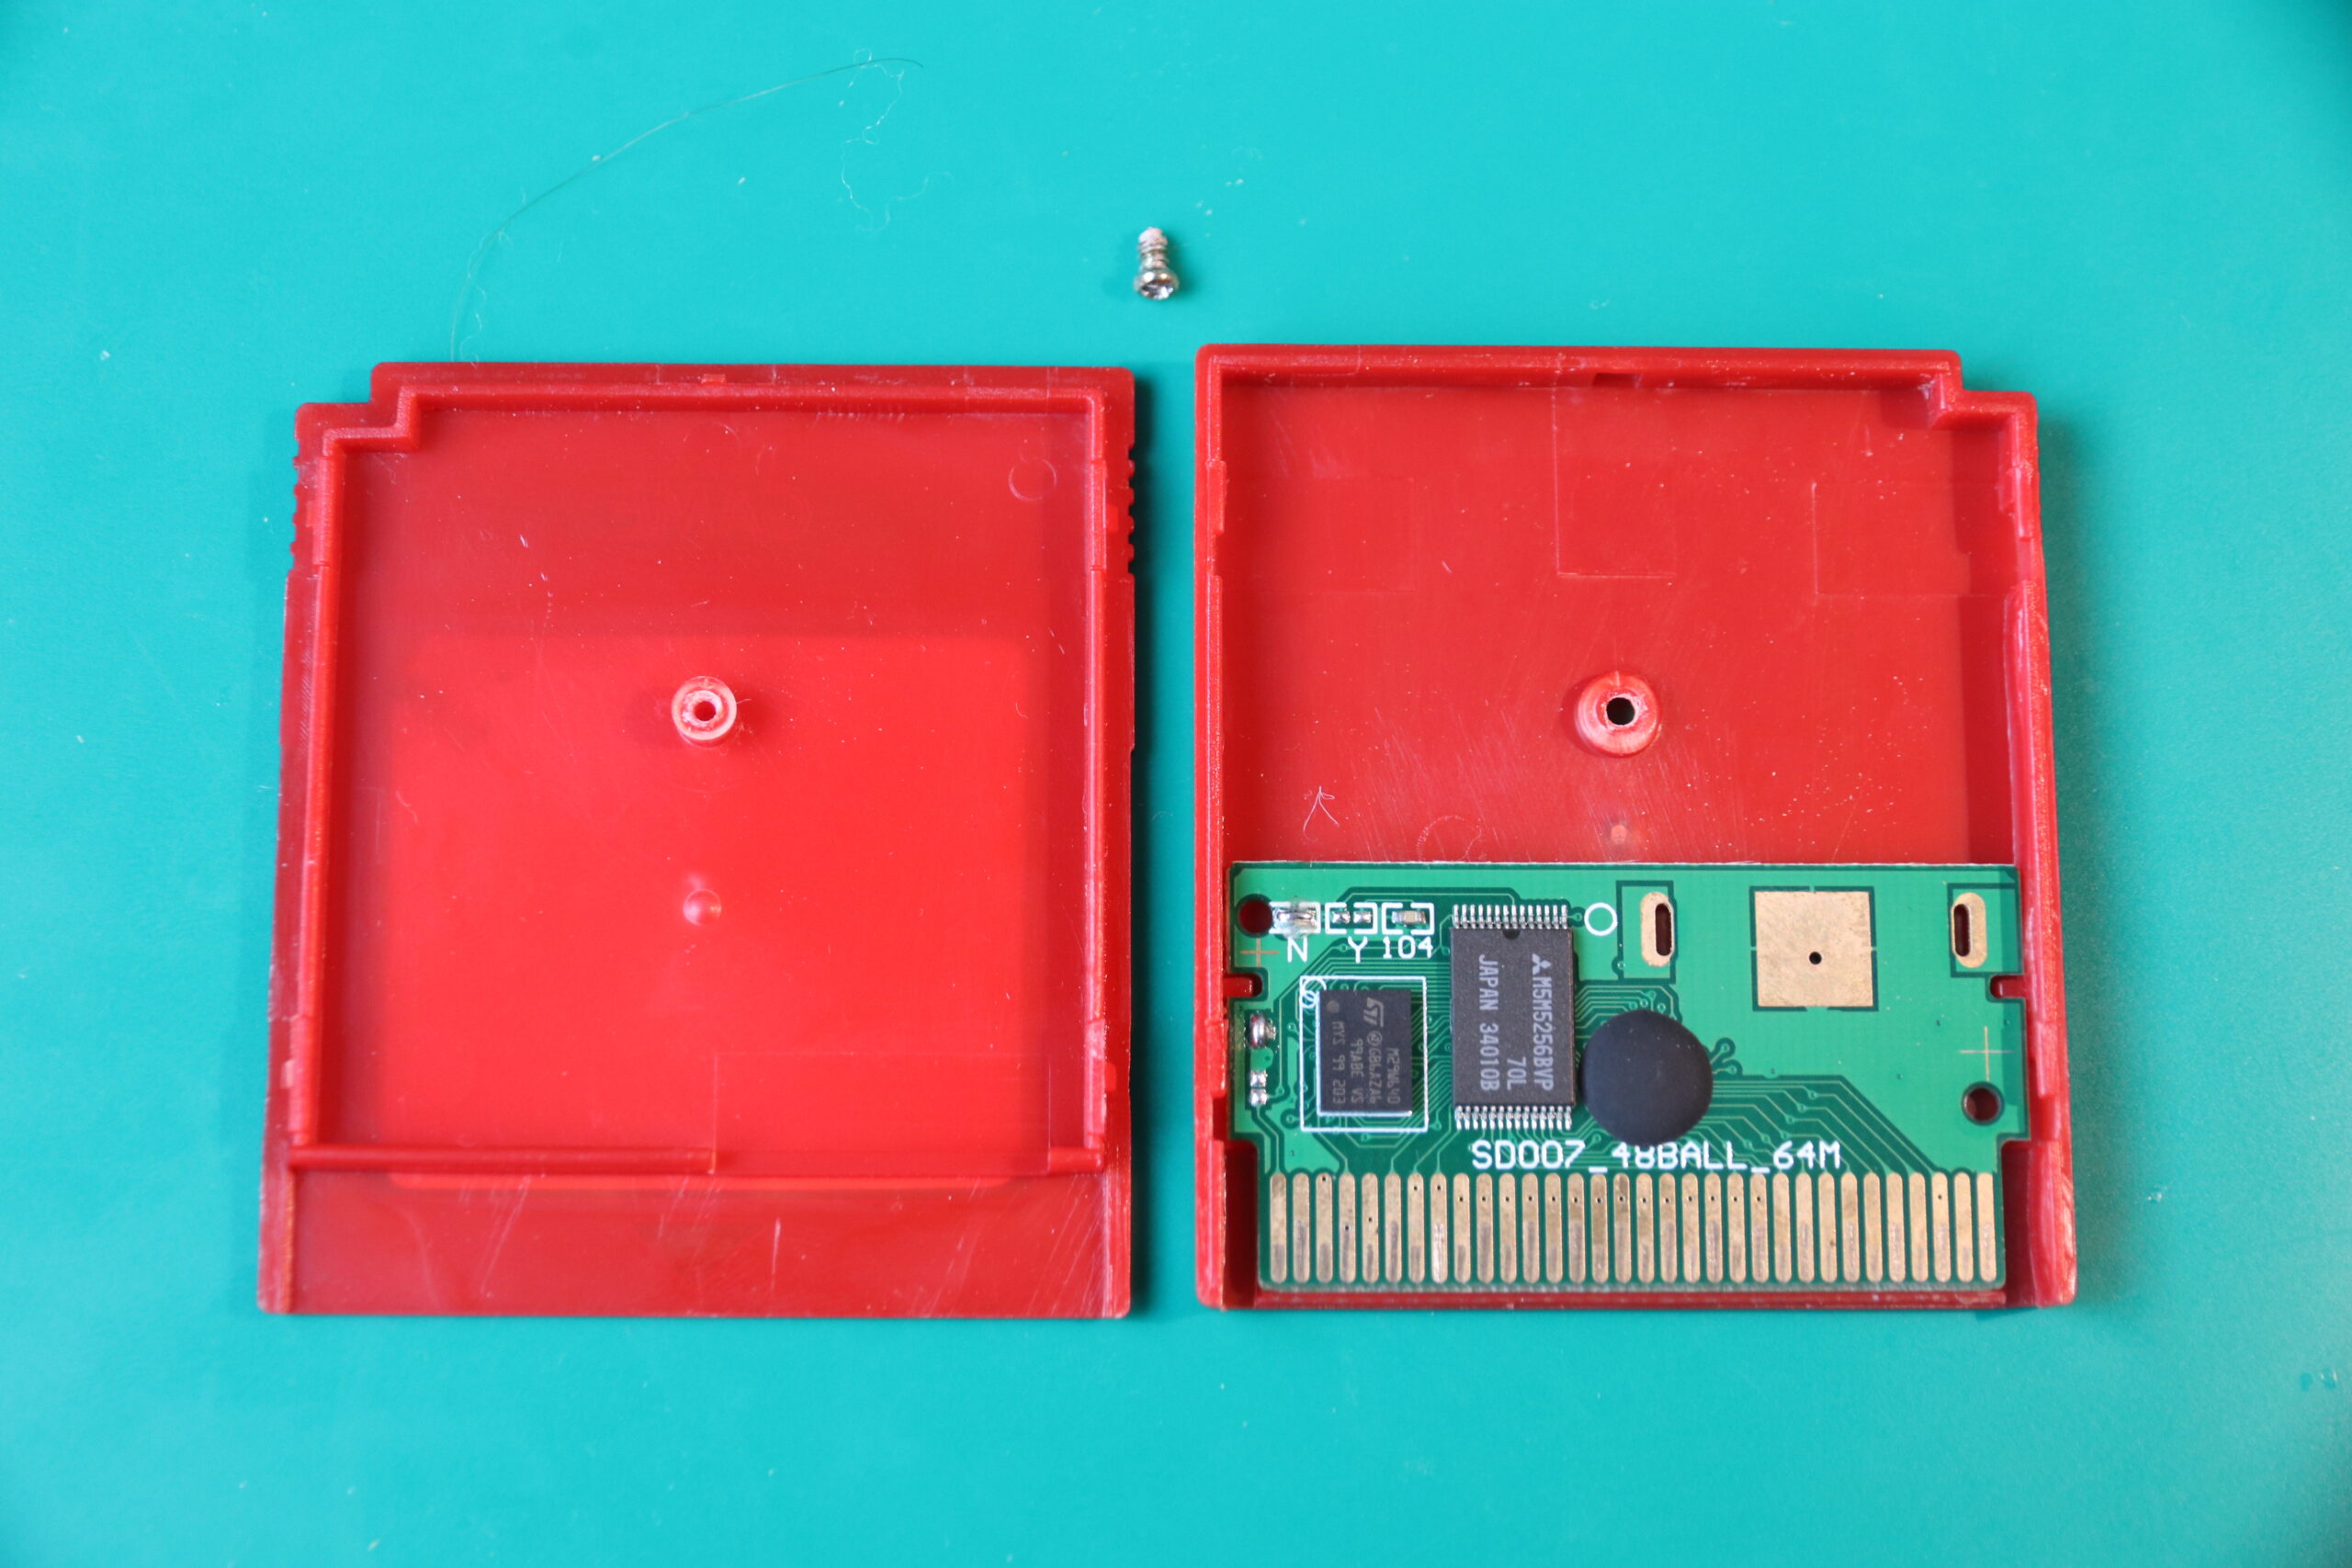
Making the build extra-special is its use of original carts, emulating the Game Boy experience so closely it’s difficult to tell if anything has changed. It uses the emulator Gnuboy and when Jeroen uses his own reproduction carts containing games not originally made for the Game Boy, Raspberry Pi Zero kicks in and runs the title natively.
This is a reproduction cart. Figuring how to program them properly was tricky because they’re used outside of their specified voltage range, even in a standard Game Boy
“Getting Raspberry Pi Zero to boot as fast as possible was tricky because it needed some rethinking of the boot process, as well as a kernel recompile to make it load within the time it took the Game Boy startup screen to finish,” Jeroen explains. “My hardware also takes a longer path: Raspberry Pi has to talk through the SPI port to the FPGA, which then needs to control the cartridge. Doing this for every byte that the game needs would be very slow, so the emulator uses caching.”
Raspberry Pi Zero seemed the perfect choice. Aside from being able to fit in the case, Jeroen said he knew he could get the video interface to do what he wanted. “Raspberry Pi has proper DPI support, outputting video over the GPIO pins so I could make the Game Boy LCD show up as just another frame buffer device,” he says. “That was important because I didn’t want to hack the video output system of every emulator or game I wanted to run it.”
The result is a stunning handheld console, but not one for the faint-hearted. “The big challenge was the need for custom hardware, custom software, custom gateware, and so on and it took a fair bit of time and effort to develop,” he says. “If you’re looking to replicate it, be prepared to put some work into tweaking and fixing things.”
Get The MagPi #109 NOW!
You can grab the brand-new issue right now from the Raspberry Pi Press store, or via our app on Android or iOS. You can also pick it up from supermarkets and newsagents. There’s also a free PDF you can download.
We came across this ‘Top 15 Raspberry Pi Zero Projects’ video and realised that it’s been a while since we showed our tiniest computer some love on this blog.
Too many cool projects to blog about here, so give the full compilation video a watch for more ideas
The compilation features full build videos for 15 Raspberry Pi Zero projects. Too many to go into detail about here, so we’ve picked out a few of our favourites to share.
Origami sunrise lamp
Time to wake up!
This Sunrise lamp doubles as a psychedelic night light, and is built with snapology origami. Raspberry Pi Zero W powers an Adafruit NeoPixel ring and does a great job of letting maker Russell Eveleigh sleep in past 5am.
Russell coded different sequences to make the NeoPixel lights turn to a calming blue at bedtime, and then brighten up to sunshine yellow when it’s time for the kids to wake up.
mintyPi retro gaming handheld
How could we not share a retro gaming device hidden in an Altoids tin? Raspberry Pi Zero runs RetroPie software, and gameplay lasts up to five hours!
mintyPi is a nice simple do-it-yourself project, and you can find links for the parts at sudomod.com. Good luck finding an Altoids tin in the UK though. If you’ve found a good alternative, let us know in the comments.
Fresh coffee monitor
Brew is ready
We picked this project because Raspberry Pi Towers coffee drinkers have been thinking about making something similar.
Caleb Brewer made his office coffee machine smart by building an alert system that sends notifications when someone brews a fresh pot. A waterproof temperature sensor constantly monitors the coffee pot, and Raspberry Pi Zero W turns on an alert light and sends a Slack notification when a new hot tasty brew is ready.
If you’re into compilation videos featuring Raspberry Pi and Arduino projects, follow Top Projects Compilation on YouTube, Facebook or Instagram for more.
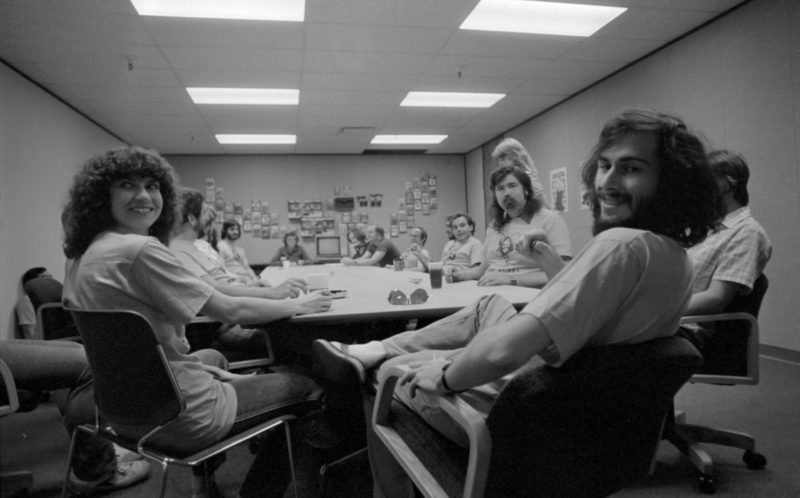
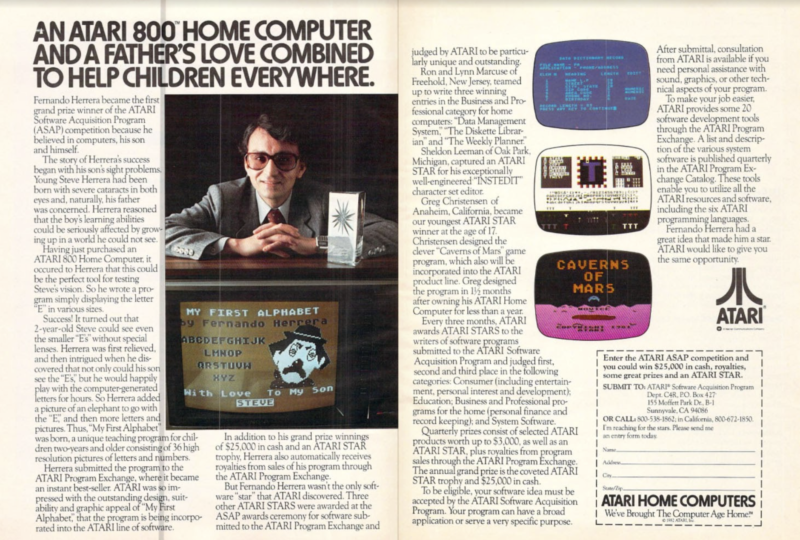
We love Wireframe magazine’s regular feature ‘The principles of game design’. They’re written by video game pioneer Howard Scott Warshaw, who authored several of Atari’s most famous and infamous titles. In the latest issue of Wireframe, he provides a snapshot of the hell-raising that went on behind the scenes at Atari…
A moment of relative calm in Atari’s offices, circa the early 1980s. There’s Howard nearest the camera on the right
Video game creation is unusual in that developers need to be focused intently on achieving design goals while simultaneously battling tunnel vision and re-evaluating those goals. It’s a demanding and frustrating predicament. Therefore, a solid video game creator needs two things: a way to let ideas simmer (since rumination is how games grow from mediocre to fabulous) and a way to blow off steam (since frustration abounds while trying to achieve fabulous). At Atari, there was one place where things both simmered and got steamy… the hot tub. The only thing we couldn’t do was keep a lid on the antics cooked up inside.
The hot tub was situated in the two-storey engineering building. This was ironic, because the hot tub generated way more than two stories in that building. The VCS/2600 and Home Computer development groups were upstairs. The first floor held coin-op development, a kitchen/cafeteria, and an extremely well-appointed gym. The gym featured two appendages: a locker area and the hot tub room. Many shenanigans were hatched and/or executed in the hot tub. One from the more epic end of the spectrum comes to mind: the executive birthday surprise.
Those prizes look pretty impressive
It was during the birthday celebration of a VP who shall remain nameless, but it might have been the one who used to keep a canister of nitrous oxide and another of pure oxygen in his office. The nitrous oxide was for getting high and laughing some time away, while the oxygen was used for rapid sobering up in the event a spontaneous meeting was called (which happened regularly at Atari). As the party raged on, a small crew of revellers migrated to the small but accommodating hot tub room. Various intoxicants (well beyond the scope of nitrous) were being consumed in celebration of the special event (although by this standard, nearly every day was a special event at Atari).
As the party rolled on, inhibitions were shed along with numerous articles of clothing. At one point, the birthday boy was adjudged to be in dire need of a proper tubbing as he hadn’t lost sufficient layers to keep pace with the party at large. The birthday boy disagreed, and the ensuing negotiation took the form of a lively chase around the area. The VP ran out of the hot tub room and headed for the workout area with a wet posse in hot pursuit, all in varying stages of undress.
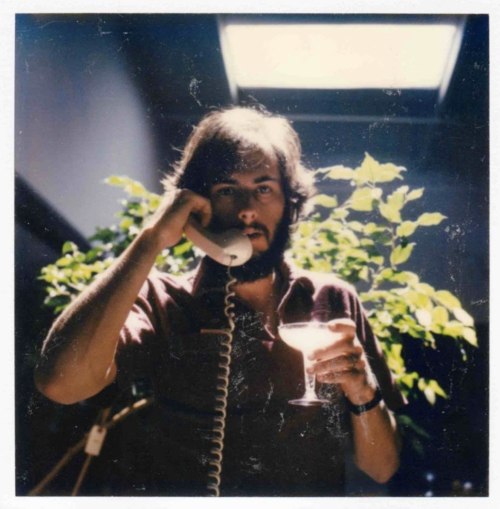
Refreshments were readily available at Atari in its heyday
It’s important to note here that although refreshments and revelry were widely available at Atari, one item in short supply was conference rooms. Consequently, meetings could pop up in odd locales. Any place an aggregation could be achieved was a potential meeting spot. The sensitivity of the subject matter would determine the level of privacy required on a case-by-case basis. Since people weren’t always working out, the gym had enough places to sit that it could serve as a decent host for gatherings. And as for sensitivity, the hot tub room was well sound-proofed, so intruding ears weren’t a concern.
As the crew of rowdy revellers followed the VP into the workout area, they were confronted by just such a collection of executives who happened to be meeting at the time. I don’t think the birthday party was on the agenda. However, they may have been pleased that the absentee VP had ultimately decided to join their number. It was embarrassing for some, entertaining for others, and nearly career-ending for a couple. The moral of this story being that Atari executives should never go anywhere without their oxygen tanks in tow.
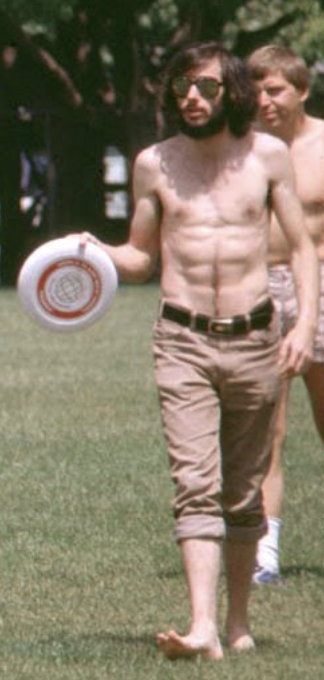
Between developing games, Howard and Atari’s other programmers found time to play a bit of Frisbee
But morals aside, there was work to be done at Atari. In a place where work can lead to antics and antics can lead to work breakthroughs, it’s difficult at times to suss out the precise boundary between work and antics. It takes passion and commitment to pursue side quests productively and yet remain on task when necessary.
The main reason this was a challenge comes down to the fact there are so many distractions constantly going on. Creative people tend to be creative frequently and spontaneously. Also, their creativity is much more motivated by fascination and interest than it is by task lists or project plans. Fun can break out at any moment, and answering the call isn’t always the right choice, no matter how compelling the siren.
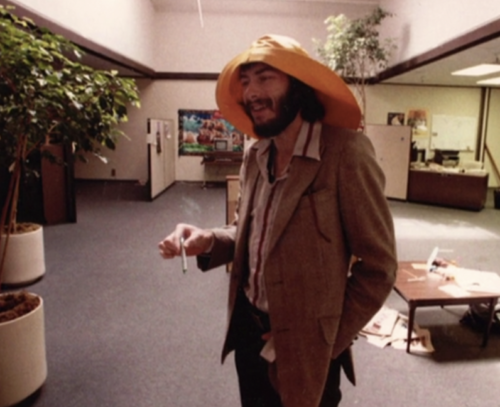
Nice hat
Rob Fulop, creator of Missile Command and Demon Attack for the Atari 2600 (among many other hits) isn’t only a great game maker, he’s also a keen observer of human nature. We used to chat about just where the edge is between work and play at Atari. Those who misjudge it can easily fall off the cliff.
Likewise, we explored the concept of what makes a good game designer. Rob said it’s just the right combination of silly and anal. He believed that the people who did well at Atari (and as game makers in general) were the people who could be silly enough to recognise fun, and anal enough to get all the minutia and details aligned correctly in order to deliver the fun. Of course, Rob (being the poet he is) created a wonderful phrasing to describe those with the right stuff. He put it like this: the people who did well at Atari were the people who could goof around as much as possible but still go to heaven.
Get your copy of Wireframe issue 53
You can read more features like this one in Wireframe issue 53, available directly from Raspberry Pi Press — we deliver worldwide.
And if you’d like a handy digital version of the magazine, you can also download issue 53 for free in PDF format.
Ever wondered what to do with Raspberry Pi boards you haven’t used in a while? Do you tend to upgrade your projects to newer models, leaving previous ones languishing at the back of a drawer? There are a lot of venerable Raspberry Pis out there doing useful stuff just as well as ever, and we take great care to make sure new versions of Raspberry Pi OS continue to run on these models, but we’re realists: we understand that ending up with older boards lying around doing nothing is a thing. Rather than leave them to gather dust, you now have a sustainable way to get your unused tech back in the hands of makers who’ll put it to work.
OKdo has partnered with Sony to launch the first official Raspberry Pi recycling initiative. OKdo Renew gives you rewards in return for your preloved boards.
Which boards can I recycle?
If you have any of these boards sitting around unused, you can recycle them:
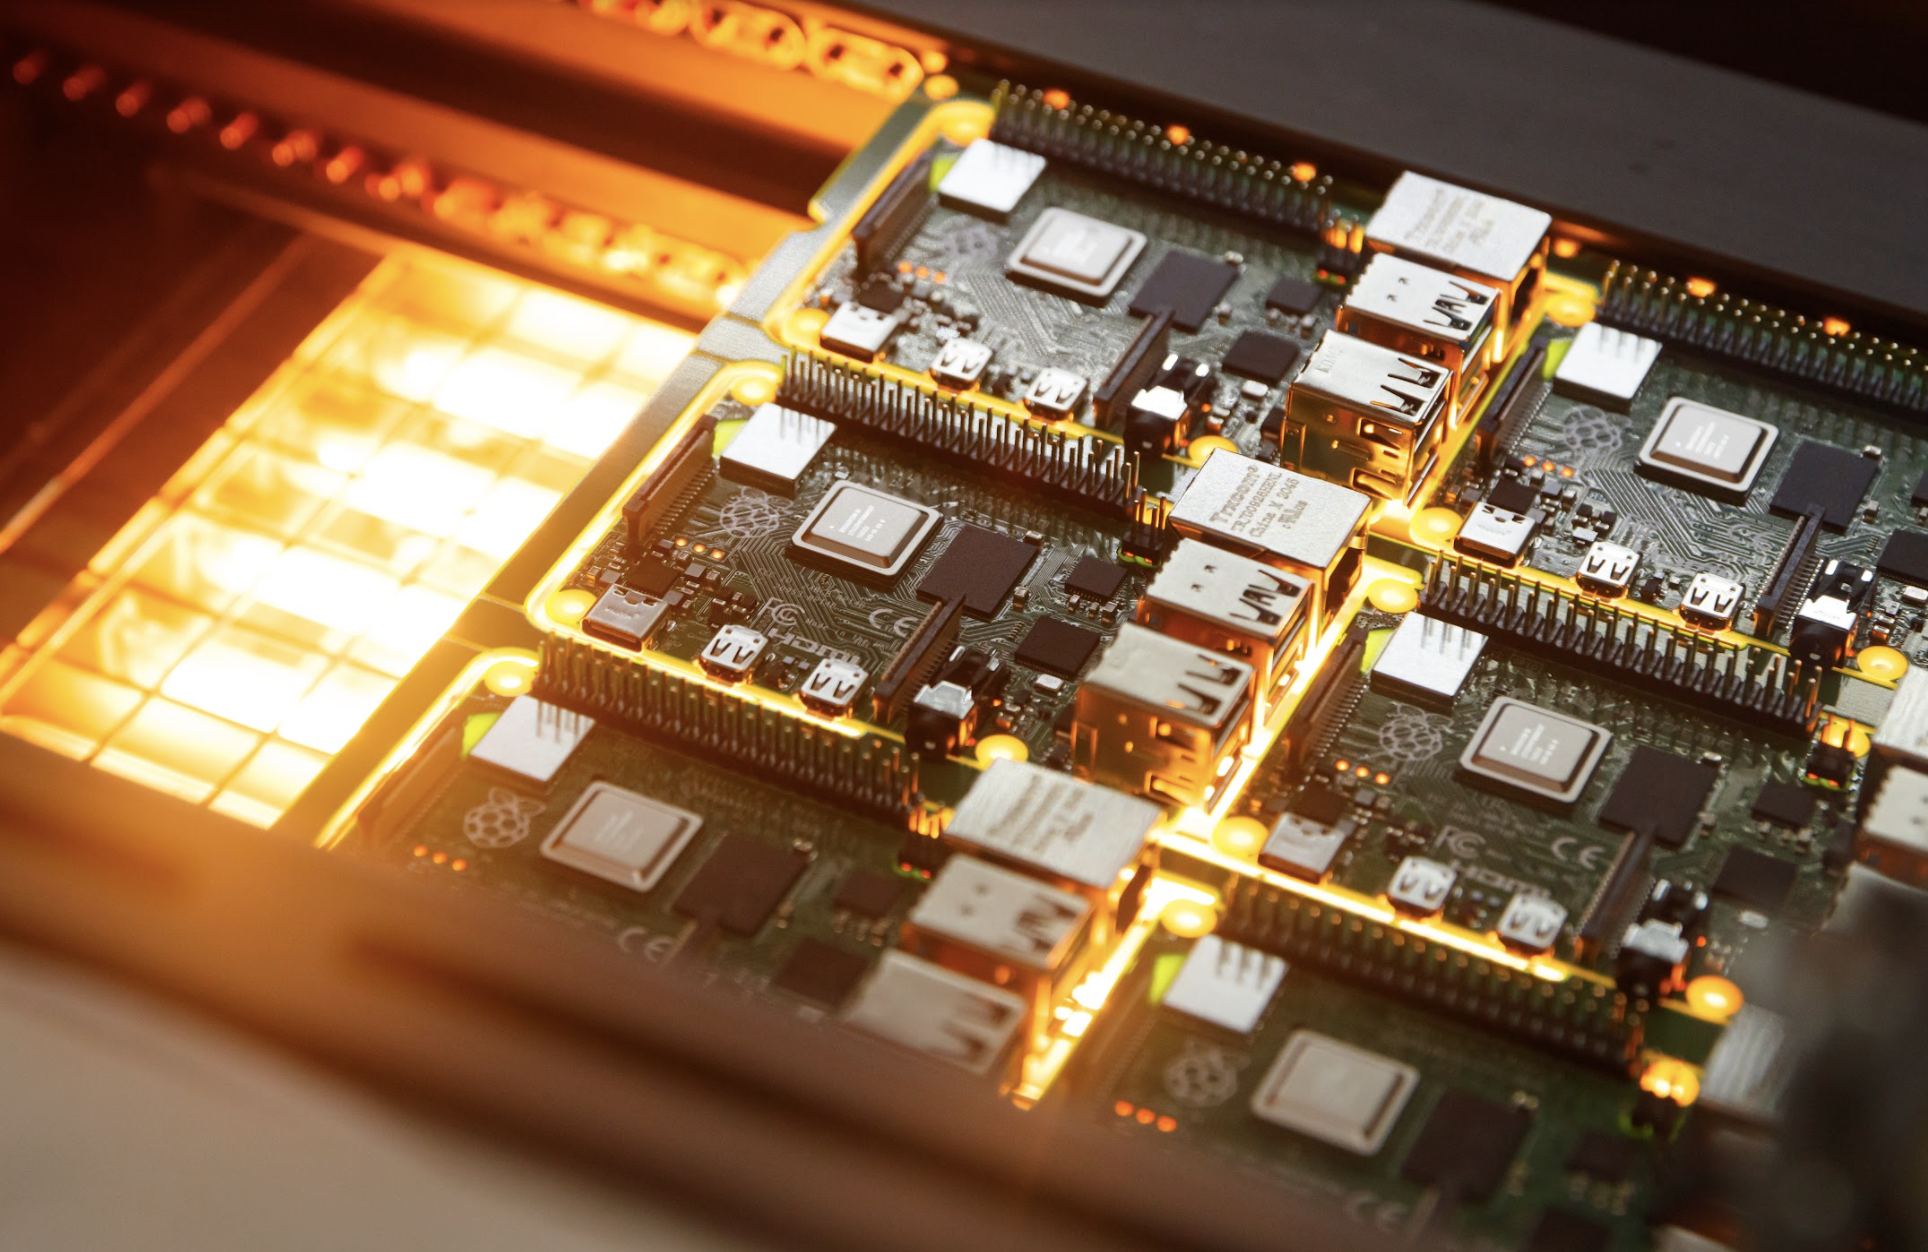
Our Raspberry Pi boards are manufactured at the Sony Technology Centre in Wales, and that’s where OKdo returns all the hardware you donate. When it gets there, it’ll be tested, reconditioned, and repackaged, ready to be sold to its new home. OKdo will be offering the refurbished boards at a lower price than new boards, and they all come with a twelve-month warranty.
Some brand new Raspberry Pi boards coming to life at the Sony factory
How do I send my preloved Raspberry Pi boards to Sony?
If you have one of the boards listed above and it’s still in working order, you can register to renew your Raspberry Pi. Print the prepaid label so you can return you board for free! Then package up your board to avoid damage, being careful not to exceed the dimensions listed here.
Make sure you remove your memory card before posting your board. Sony can’t return them and we don’t want you to lose any important stuff you’ve got stored.
What’s my reward?
In return for recycling your board, you will get a £10 voucher to use towards your next OKdo purchase. You could upgrade to a faster board than the one you recycled, or pick up a new accessory.
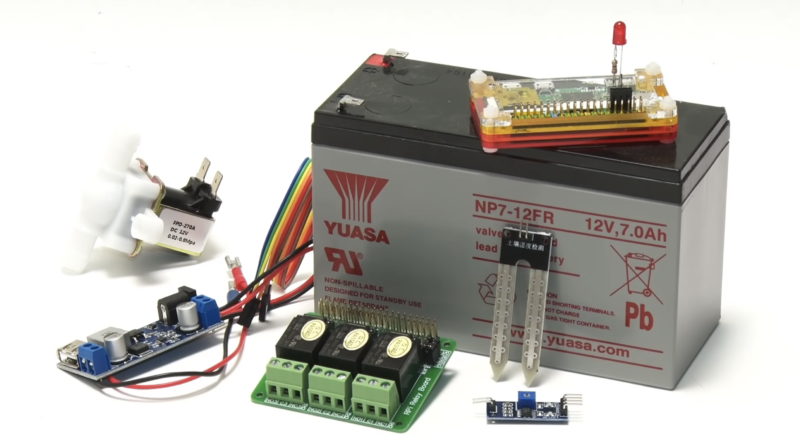
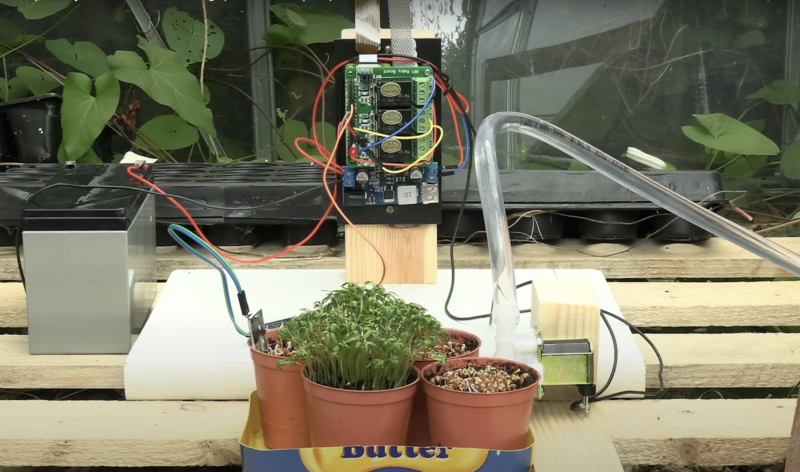
We’re not going to lie — the thing we like most about this automated plant watering project is the timelapse at the very end of the build video. But we also thought now might be a good time to show you another Raspberry Pi project for keeping an eye on your plants, since some of us are getting back to something more like our usual routines and our houseplants are no longer our best friends, so they might need a little extra automated attention.
Raspberry Pi can’t make your plants grow this fast in real life, sorry
Maker Christopher Barnatt chose Raspberry Pi Zero for this project because although Raspberry Pi Pico could handle it, he needed a camera connector to record timelapse video of his plants’ growth.
Christopher is a gem and has included links to all the hardware he used. There are also some cheaper, smaller alternatives listed in the info section of his build video.
The moisture sensor checks every half hour to determine whether or not the plant has enough water, and communicates with the Raspberry Pi. Water flow is controlled by the solenoid valve, and if the Raspberry Pi finds the soil is too dry, it opens the valve for a set amount of time to let water out.
Check out the full build video for detailed setup instructions and code tests
Code your own plant watering machine
Christopher has shared all the code you need to make your own plant watering system:
Watering.py — the final watering system and timelapse code
Check out Christopher’s YouTube channel Explaining Computers where he posts new videos every week on topics like PC hardware, single board computers such as Raspberry Pi, AI, Big Data, and quantum computing.
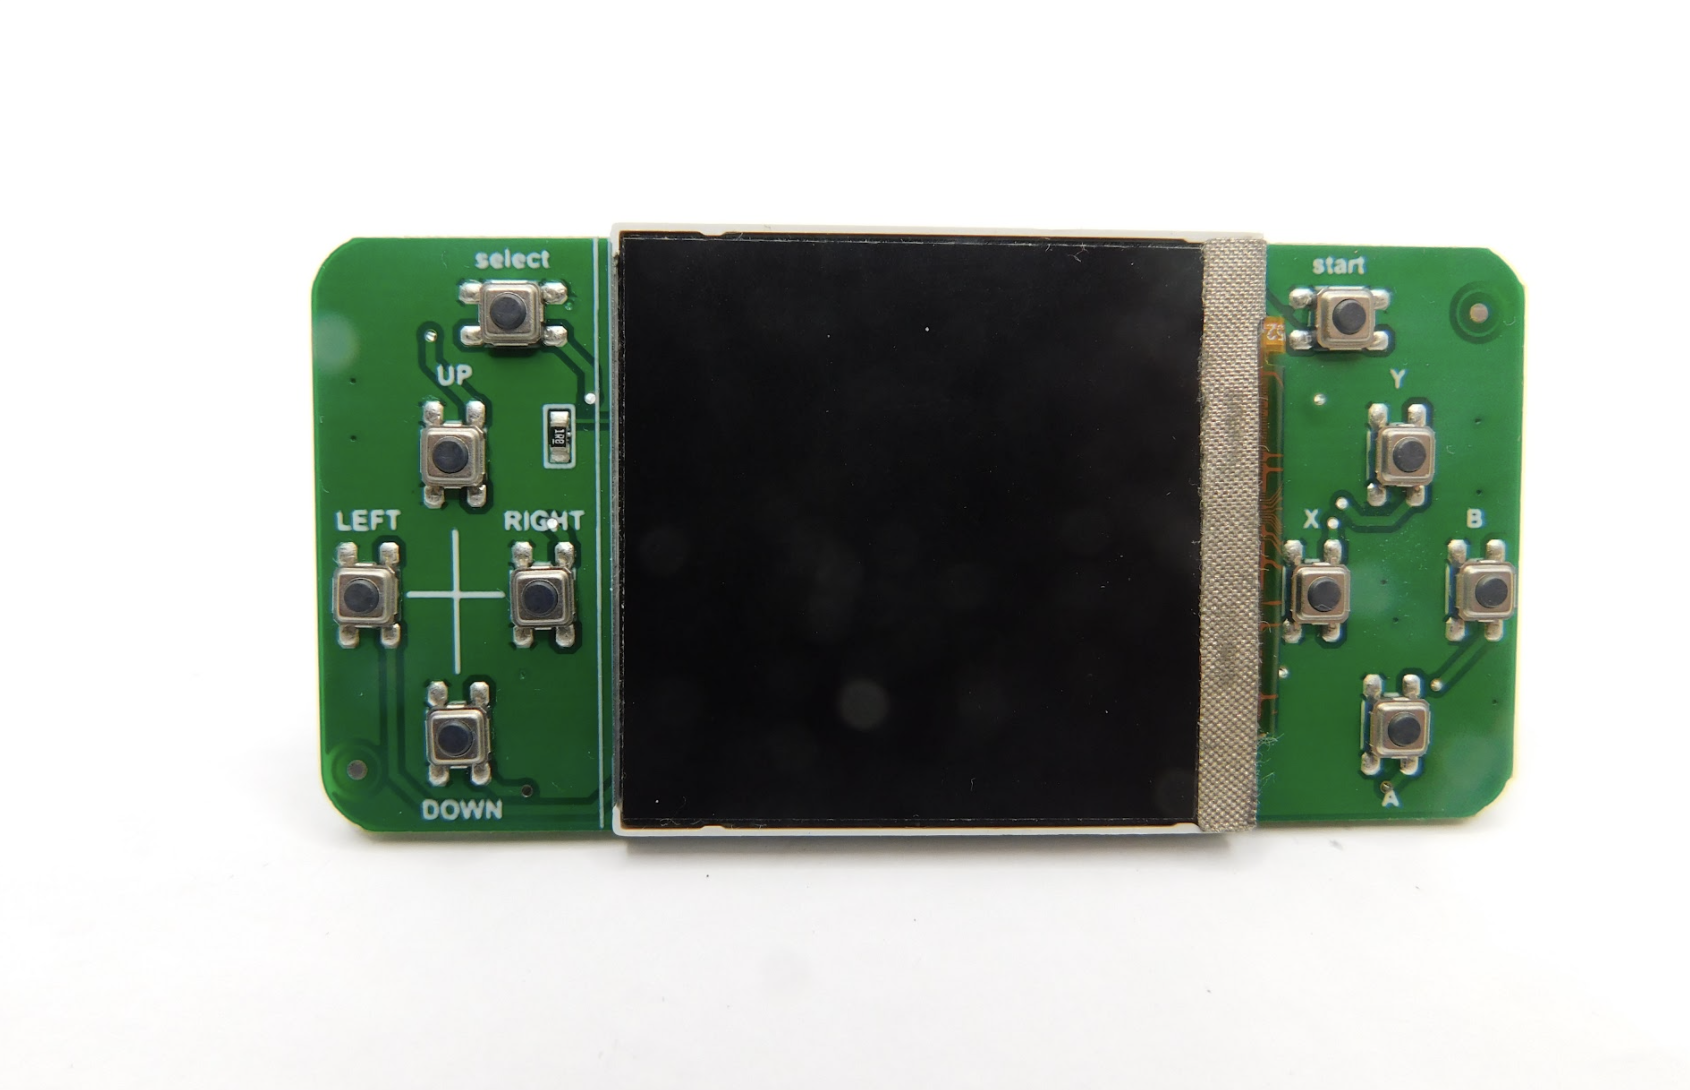
In the latest issue of HackSpace magazine, Ben Everard tests whether a bit of kit from Spotpear can turn Raspberry Pi Pico into a games machine.
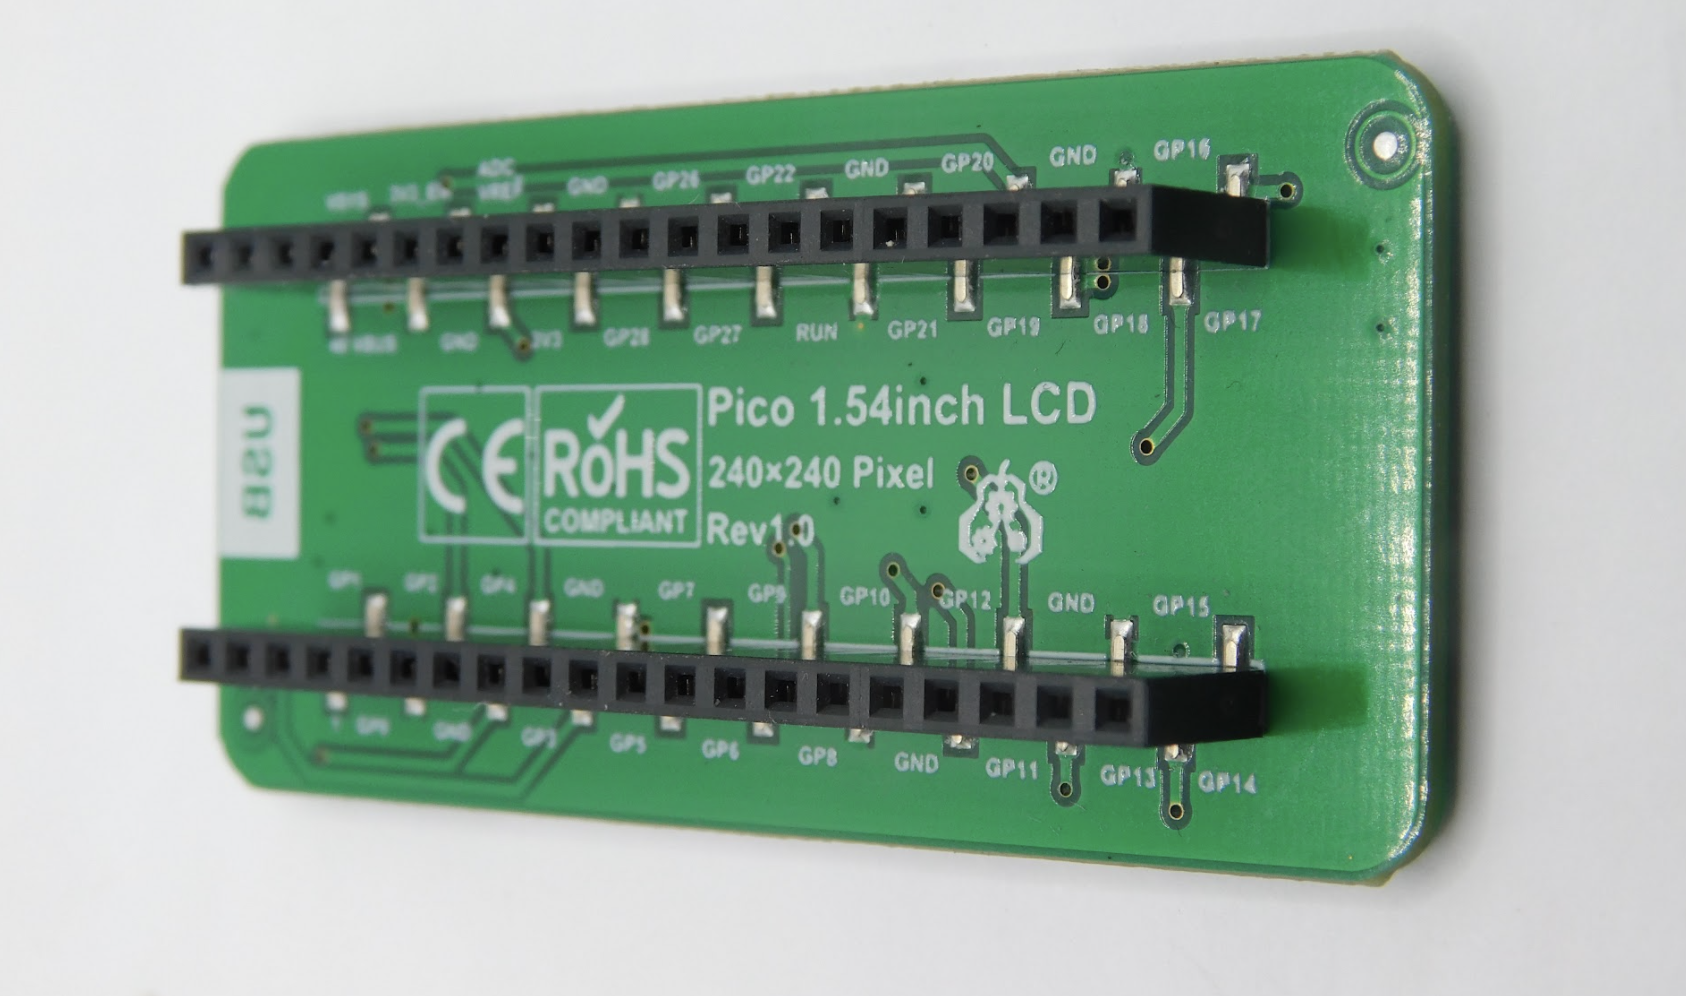
The snappily named Raspberry Pi Pico display 1.54-inch LCD by Spotpear ($11.89) brings in a 240×240 pixel IPS screen and ten buttons in a joypad-like arrangement. There’s four for direction, four for action, a select, and a start. At least, they’re labelled like this. You can use them for anything you like.
The buttons are just a bit too small and fiddly for us
To help you get started, there’s a short manual, which includes example code for MicroPython and C.
This example code is easy enough to use, but it is a little messy. The mechanism for controlling the hardware isn’t separated into its own module, so you’re left with either the task of building the library yourself or having slightly untidy code. Not the biggest inconvenience, but compared to how neatly some maker hardware companies manage their code, we found ourselves off to a disappointing start.
There are also some sample UF2 files included along with the C example code, but these appear to have been built for different hardware and work either partially or not at all. The actual example code did compile and work properly.
Impressive quality
When we ran the example code, we were impressed with the quality of the screen. With 240×240 pixels in just 1.54 inches, there’s a high pixel density that can give crisp graphics. Obviously, high pixel densities are a double-edged sword. While they can look great, it does mean higher RAM use, more time transferring data, and more data to process.
Fortunately, Pico is well-suited to the task of driving screens. Each pixel can take 16 bits of colour data, so a full-frame buffer is just 115,200 bytes. The display data is transferred by SPI, and Pico has a maximum SPI frequency of half the clock speed. For MicroPython, that means 62.5MHz. The actual data transfer rate is a little less than this because of overhead of the protocol, but we were able to drive full-frame refreshes at over 40 fps, which is plenty for smooth animations.
Pico slots in the back, which is perfect for space-constrained builds
Obviously, if you’re looking to do animations, sending the data is only half the story. You also need to calculate the frame before it’s displayed. If you’re using MicroPython, you are quite limited by the amount of processing you can do and still keep a high frame rate (though you could use the second core to offload some of the processing). With C, you’ve got much more scope, especially as you could potentially offload the data transfer using direct memory access (DMA).
Battery-sucking light
The one disappointing thing about the screen is that there’s no control over the backlight. According to the documentation, it should be attached to pin 13, but it isn’t. You can’t turn it on or off – it’s just permanently on, and quite bright. That’s a deal-breaker for anything running off battery power, as it will suck up a lot of power. However, if you want a display permanently on, this might be perfectly acceptable.
While we were quite impressed by the screen, we can’t say the same for the other part of the hardware – the buttons. They’re small, stiff, and have very little movement. The end result is a button that is hard to press, and hard to know if you’ve pressed it. They’re the sort of buttons that are commonly used as reset buttons as they’re hard to accidentally press.
We had hoped that this screen would make a good base for a games console, but unfortunately these buttons would just make for a frustrating experience. They might be OK for a menu-driven user interface, but that’s about it.
Another minor annoyance in this is the lack of any mounting holes. This makes it hard to embed into a project as the user interface.
We wanted to like this project. It’s got a good, high-res screen and a nice layout of buttons. However, the choice of components makes it hard to see how we’ll use this in our projects. We’re considering removing the surface-mount buttons and soldering wires onto them to make a more useful device, but if you’re going to go to that level of surgery, it’s probably better to start with a plain screen and work your way up from there.
Today, it’s easy to run Edge Impulse machine learning on any operating system, like Raspberry Pi OS, and on every cloud, like Microsoft’s Azure IoT. Evan Rust, Technology Ambassador for Edge Impulse, walks us through it.
Building enterprise-grade IoT solutions takes a lot of practical effort and a healthy dose of imagination. As a foundation, you start with a highly secure and reliable communication between your IoT application and the devices it manages. We picked our favorite integration, the Microsoft Azure IoT Hub, which provides us with a cloud-hosted solution backend to connect virtually any device. For our hardware, we selected the ubiquitous Raspberry Pi 4, and of course Edge Impulse, which will connect to both platforms and extend our showcased solution from cloud to edge, including device authentication, out-of-box device management, and model provisioning.
From edge to cloud – getting started
Edge machine learning devices fall into two categories: some are able to run very simple models locally, and others have more advanced capabilities that allow them to be more powerful and have cloud connectivity. The second group is often expensive to develop and maintain, as training and deploying models can be an arduous process. That’s where Edge Impulse comes in to help to simplify the pipeline, as data can be gathered remotely, used effortlessly to train models, downloaded to the devices directly from the Azure IoT Hub, and then run – fast.
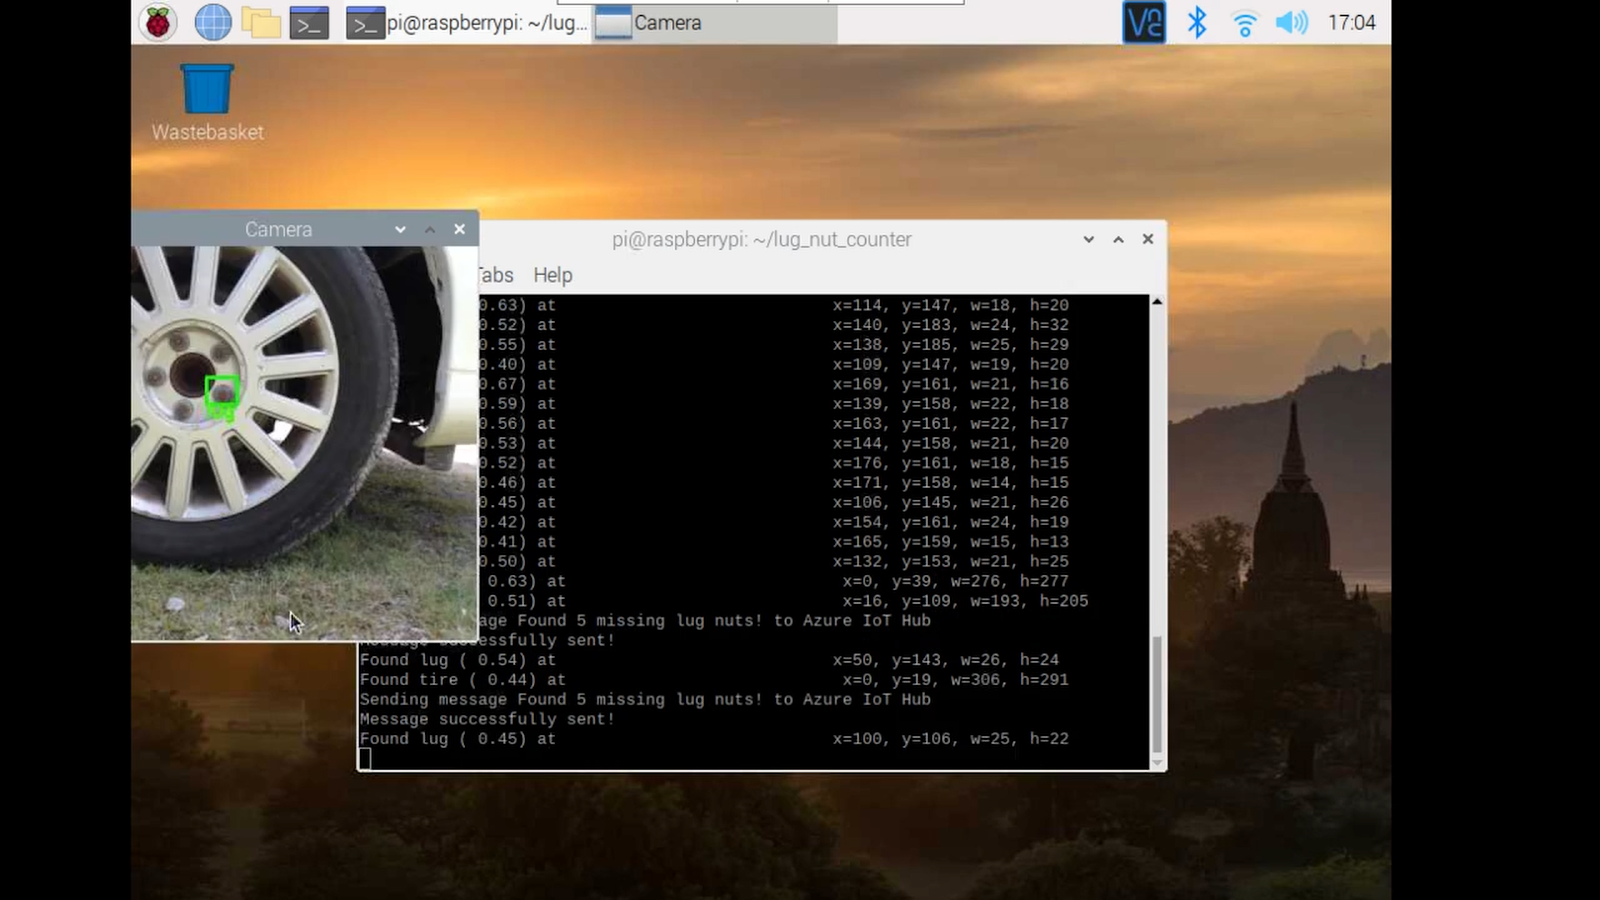
This reference project will serve you as a guide for quickly getting started with Edge Impulse on Raspberry Pi 4 and Azure IoT, to train a model that detects lug nuts on a wheel and sends alerts to the cloud.
Setting up the hardware
Raspberry Pi 4 forms the base for the Edge Impulse machine learning setup
To begin, you’ll need a Raspberry Pi 4 with an up-to-date Raspberry Pi OS image which can be found here. After flashing this image to an SD card and adding a file named wpa_supplicant.conf
along with an empty file named ssh (both within the /boot directory), you can go ahead and power up the board. Once you’ve successfully SSH’d into the device with
and the password raspberry, it’s time to install the dependencies for the Edge Impulse Linux SDK. Simply run the next three commands to set up the NodeJS environment and everything else that’s required for the edge-impulse-linux wizard:
Since this project deals with images, we’ll need some way to capture them. The wizard supports both the Pi Camera modules and standard USB webcams, so make sure to enable the camera module first with
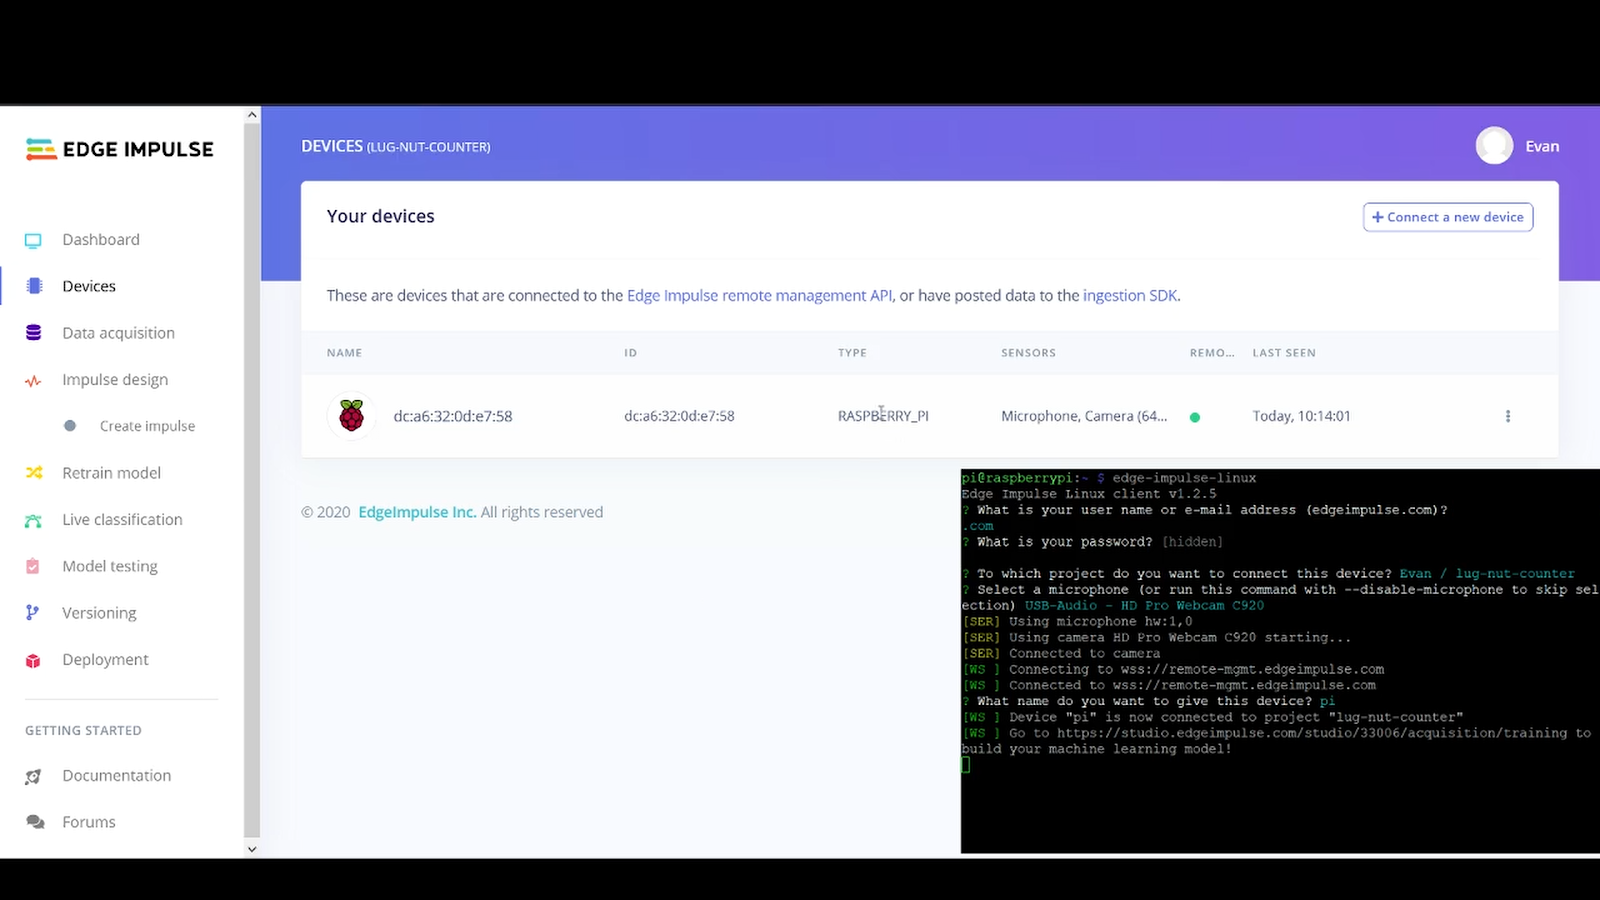
and make sure your device appears within the Edge Impulse Studio’s device section after logging in and selecting your project.
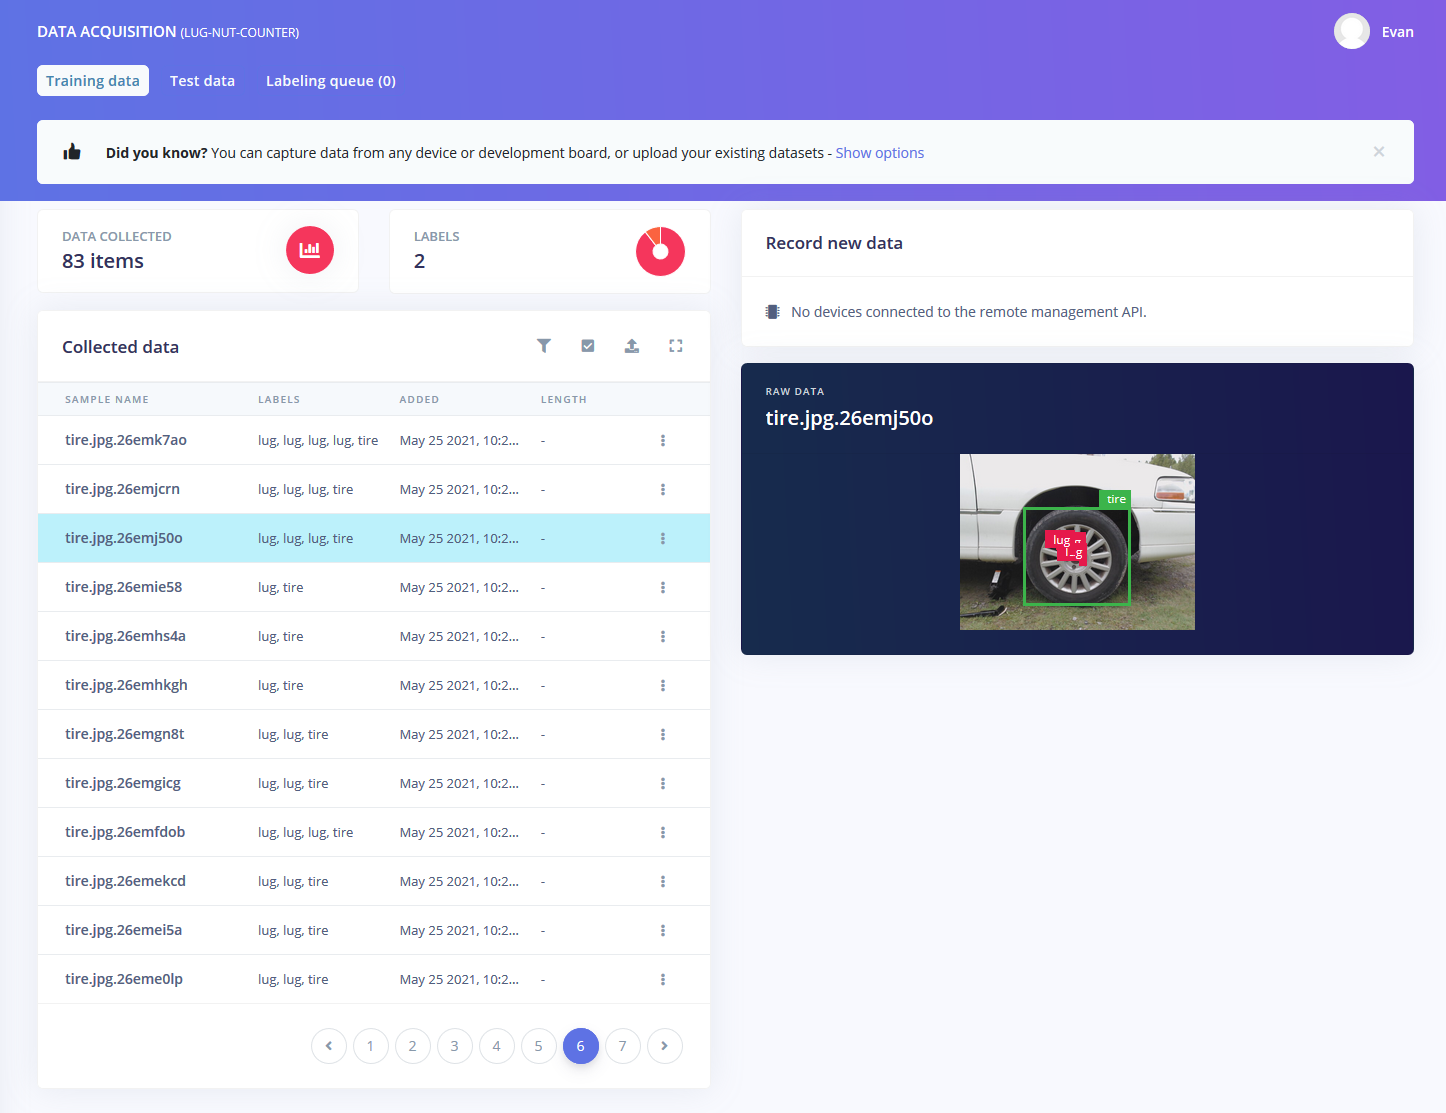
Capturing your data
Training accurate machine learning models requires feeding plenty of varied data, which means a lot of images are required. For this use case, I captured around 50 images of a wheel that had lug nuts on it. After I was done, I headed to the Labeling queue in the Data Acquisition page and added bounding boxes around each lug nut within every image, along with every wheel.
To add some test data, I went back to the main Dashboard page and clicked the Rebalance dataset button, which moves 20% of the training data to the test data bin.
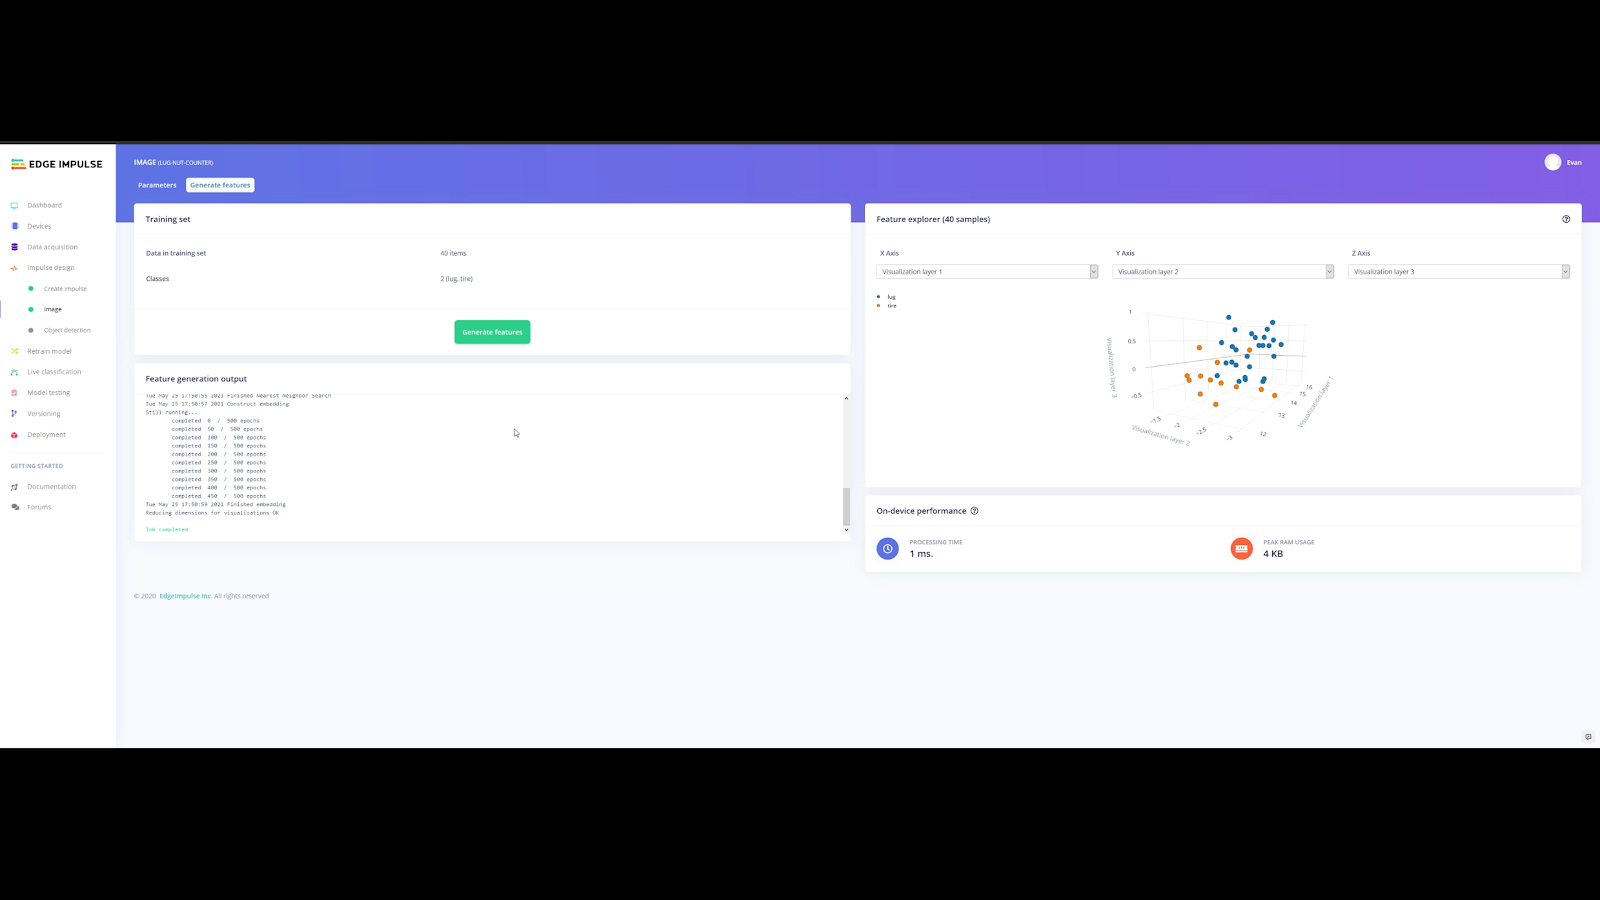
Training your models
So now that we have plenty of training data, it’s time to do something with it, namely train a model. The first block in the impulse is an Image Data block, and it scales each image to a size of 320 by 320 pixels. Next, image data is fed to the Image processing block which takes the raw RGB data and derives features from it.
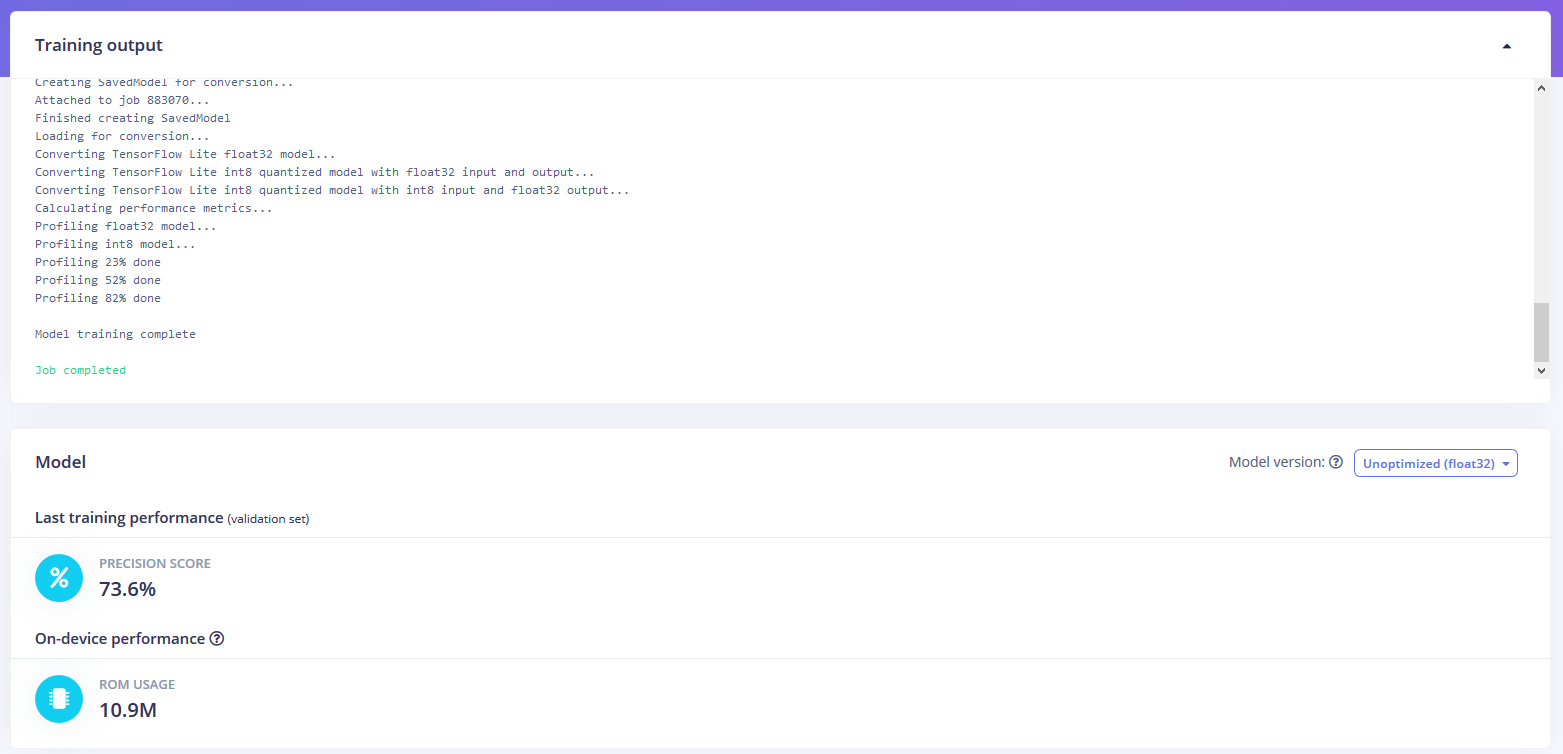
Finally, these features are sent to the Transfer Learning Object Detection model which learns to recognize the objects. I set my model to train for 30 cycles at a learning rate of .15, but this can be adjusted to fine-tune the accuracy.
As you can see from the screenshot below, the model I trained was able to achieve an initial accuracy of 35.4%, but after some fine-tuning, it was able to correctly recognize objects at an accuracy of 73.5%.
Testing and deploying your models
In order to verify that the model works correctly in the real world, we’ll need to deploy it to our Raspberry Pi 4. This is a simple task thanks to the Edge Impulse CLI, as all we have to do is run
which downloads the model and creates a local webserver. From here, we can open a browser tab and visit the address listed after we run the command to see a live camera feed and any objects that are currently detected.
Integrating your models with Microsoft Azure IoT
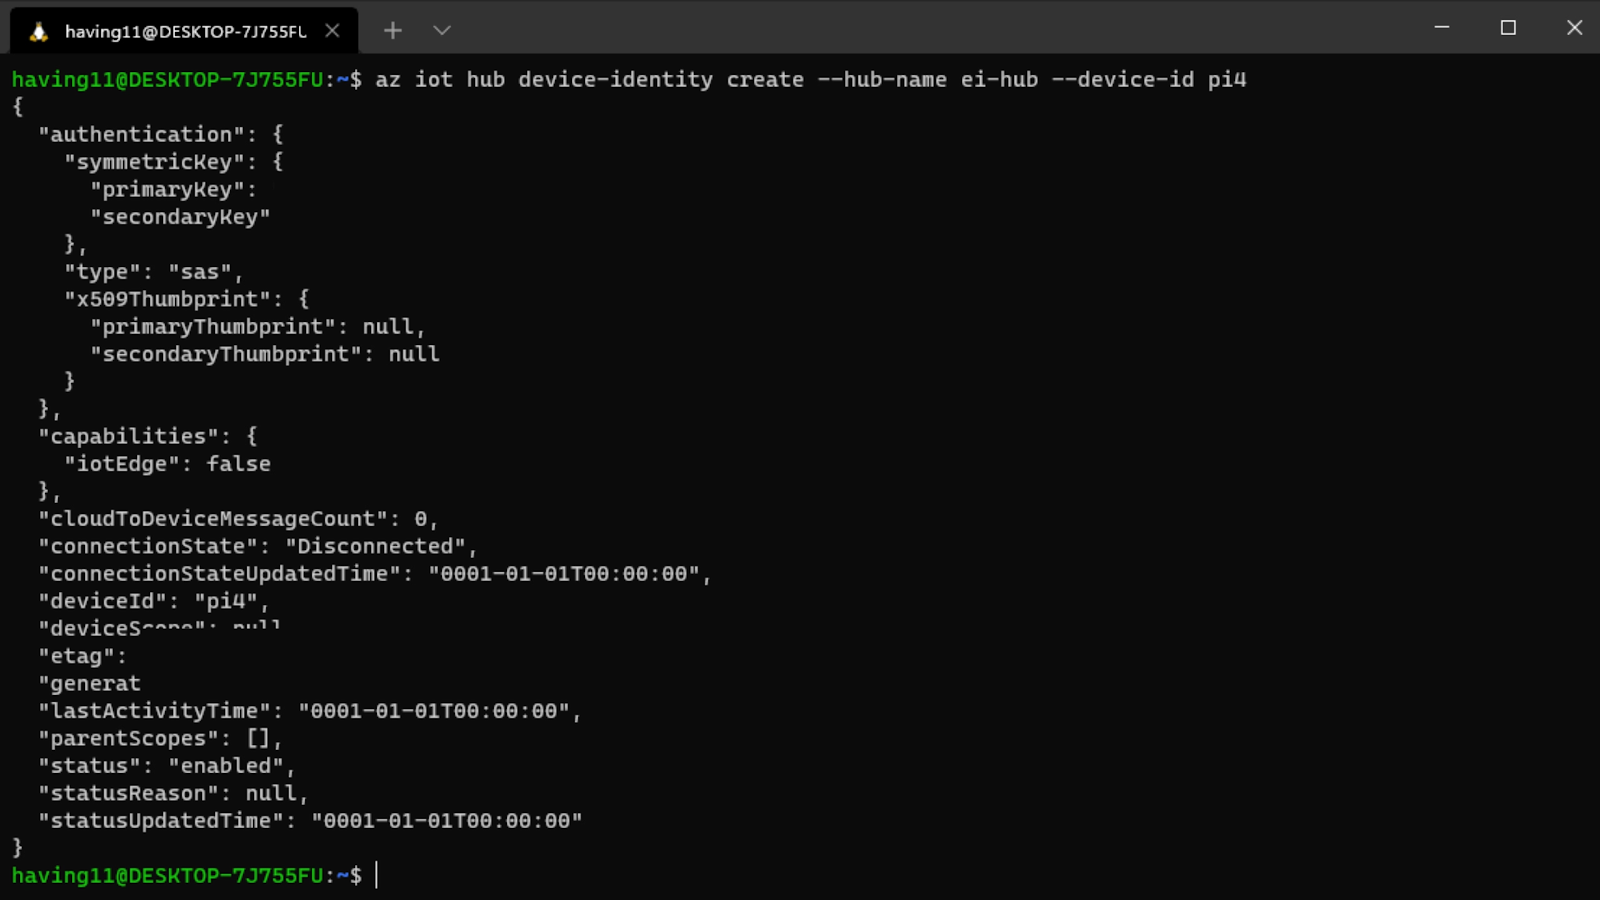
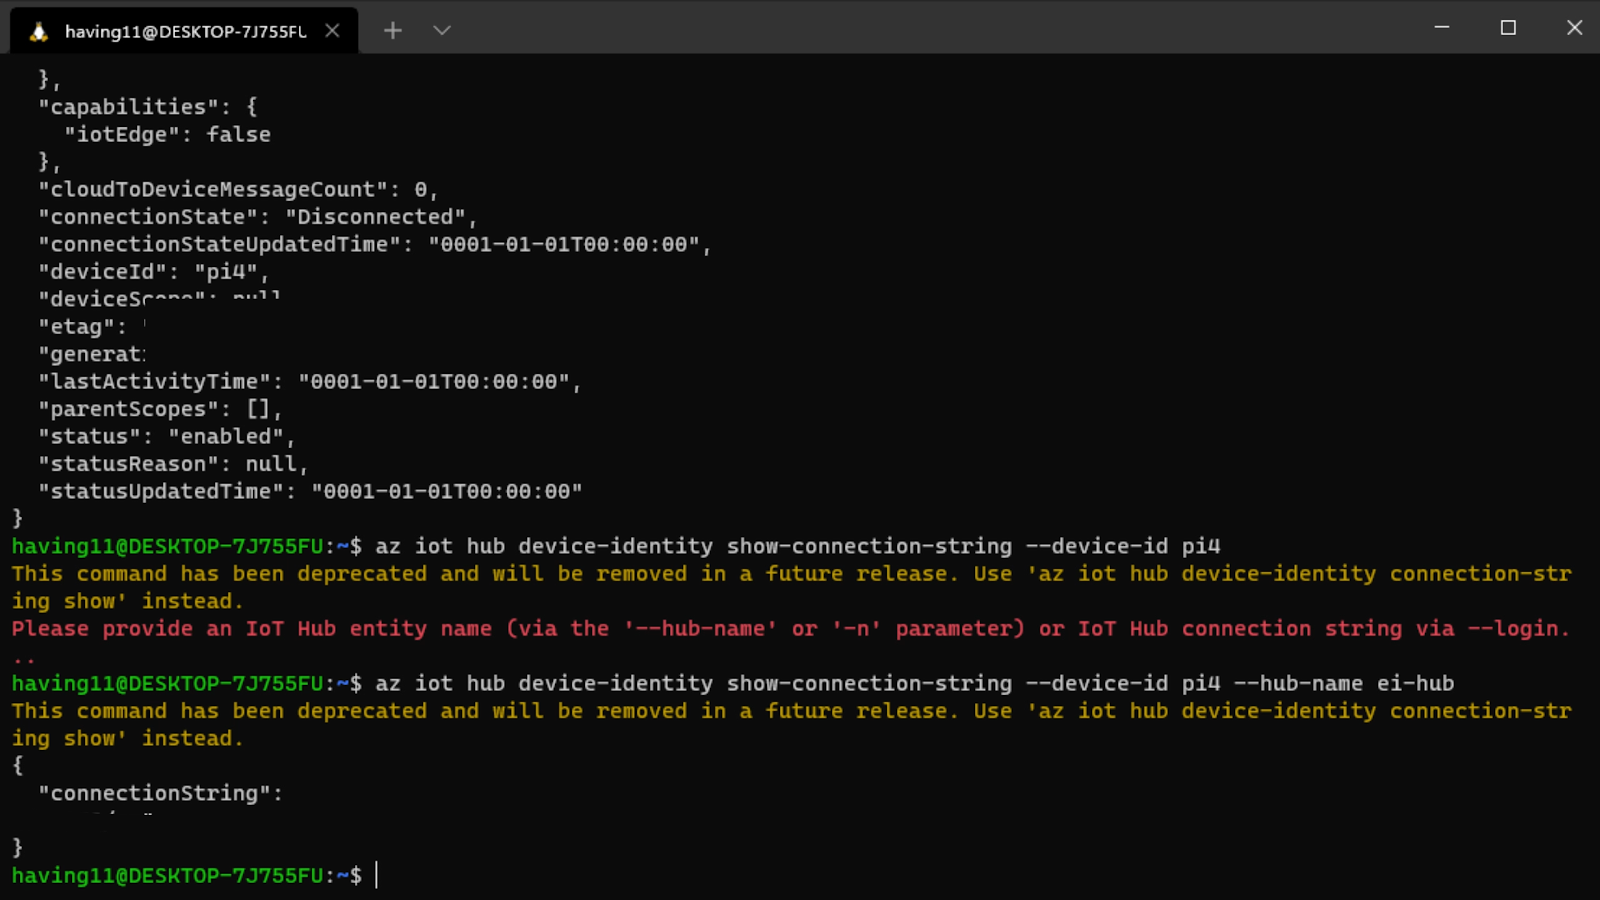
With the model working locally on the device, let’s add an integration with an Azure IoT Hub that will allow our Raspberry Pi to send messages to the cloud. First, make sure you’ve installed the Azure CLI and have signed in using az login. Then get the name of the resource group you’ll be using for the project. If you don’t have one, you can follow this guide on how to create a new resource group. After that, return to the terminal and run the following commands to create a new IoT Hub and register a new device ID:
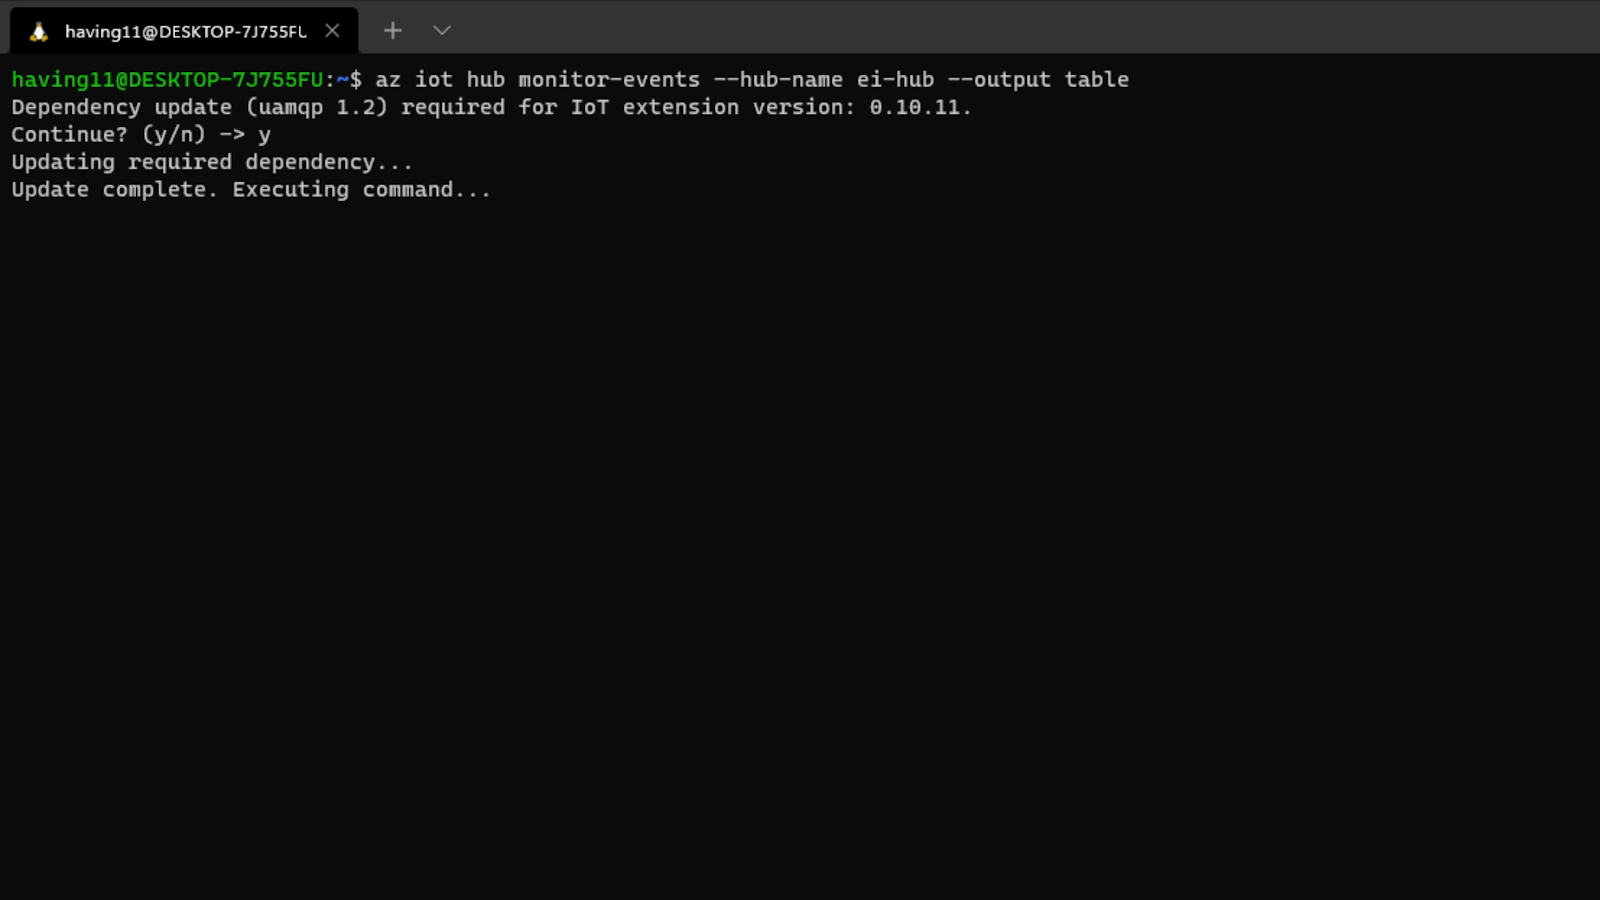
to add the necessary libraries. (Note: if you do not set the environment variable or pass it in as an argument, the program will not work!) The connection string contains the information required for the device to establish a connection with the IoT Hub service and communicate with it. You can then monitor output in the Hub with
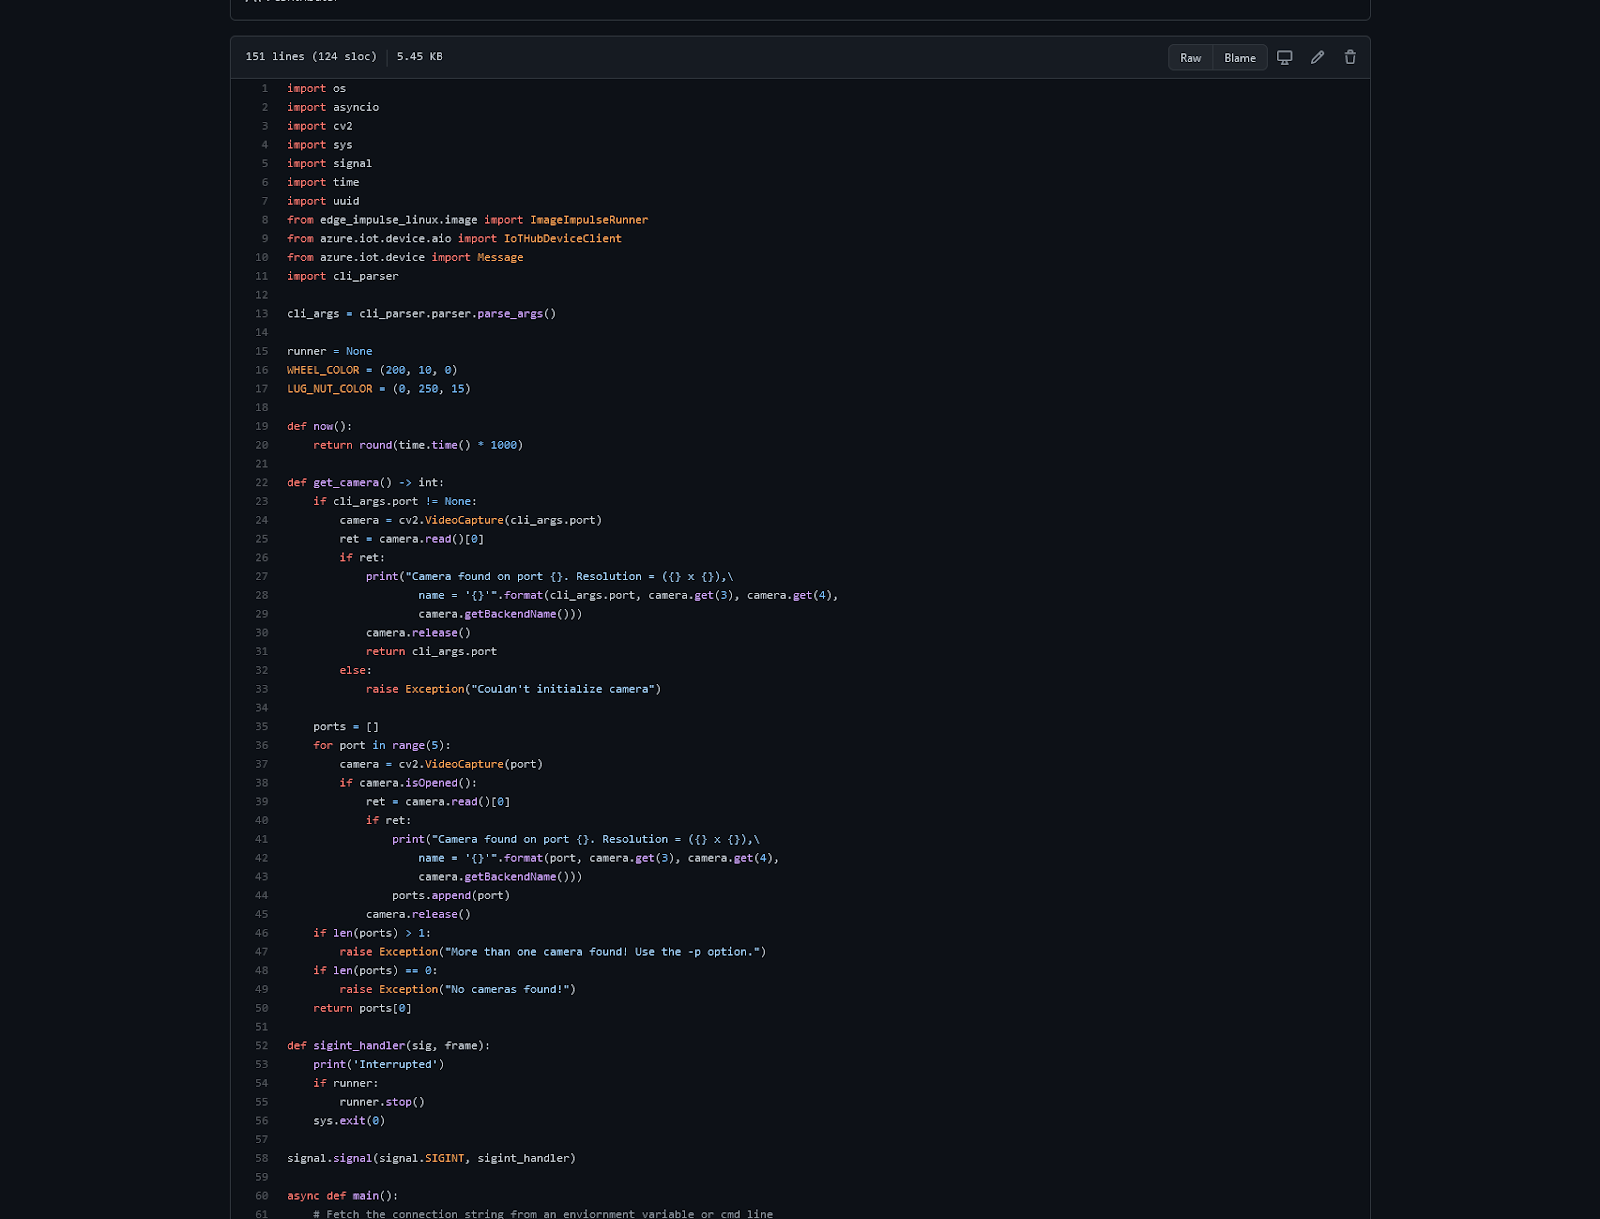
To make sure it works, download and run this example to make sure you can see the test message. For the second half of deployment, we’ll need a way to customize how our model is used within the code. Thankfully, Edge Impulse provides a Python SDK for this purpose. Install it with
where <LUG_NUT_COUNT> is the correct number of lug nuts that should be attached to the wheel (you might have to use python3 if both Python 2 and 3 are installed).
Now whenever a wheel is detected the number of lug nuts is calculated. If this number falls short of the target, a message is sent to the Azure IoT Hub.
And by only sending messages when there’s something wrong, we can prevent an excess amount of bandwidth from being taken due to empty payloads.
The possibilities are endless
Imagine utilizing object detection for an industrial task such as quality control on an assembly line, or identifying ripe fruit amongst rows of crops, or detecting machinery malfunction, or remote, battery-powered inferencing devices. Between Edge Impulse, hardware like Raspberry Pi, and the Microsoft Azure IoT Hub, you can design endless models and deploy them on every device, while authenticating each and every device with built-in security.
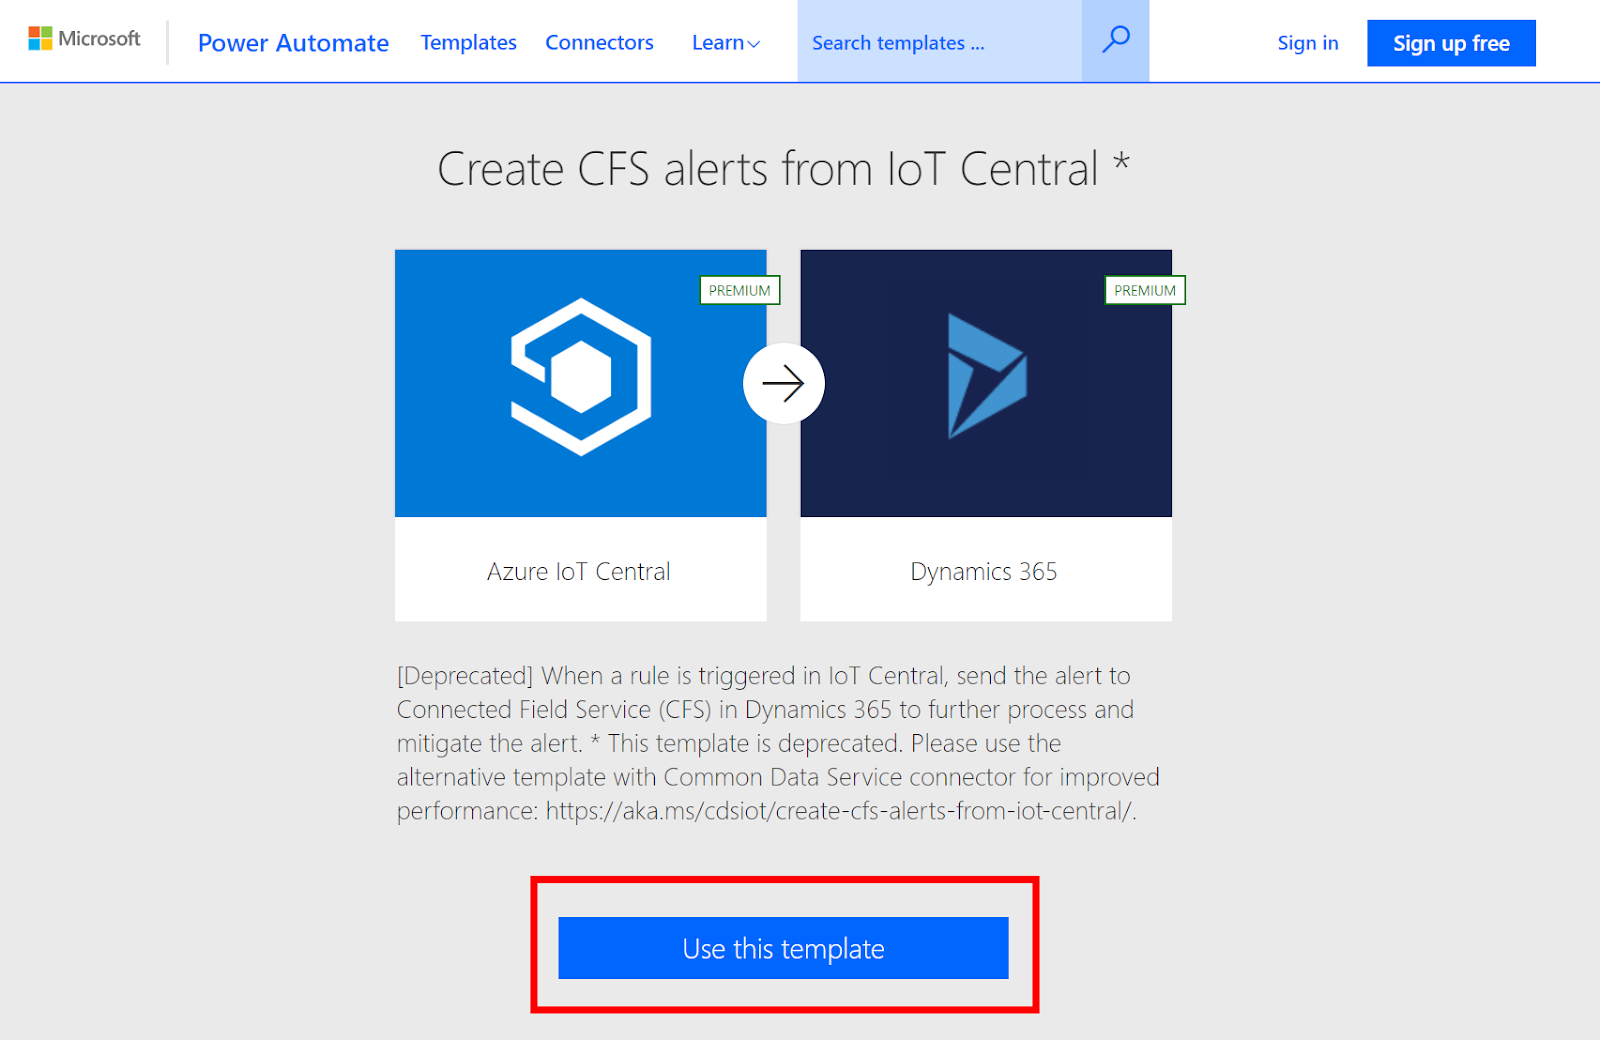
You can set up individual identities and credentials for each of your connected devices to help retain the confidentiality of both cloud-to-device and device-to-cloud messages, revoke access rights for specific devices, transmit code and services between the cloud and the edge, and benefit from advanced analytics on devices running offline or with intermittent connectivity. And if you’re really looking to scale your operation and enjoy a complete dashboard view of the device fleets you manage, it is also possible to receive IoT alerts in Microsoft’s Connected Field Service from Azure IoT Central – directly.
Today we bring you the fourth film in our series of inspirational community stories! Incredible young people from the community have collaborated with us to create these videos, where they tell their tech stories in their own words.
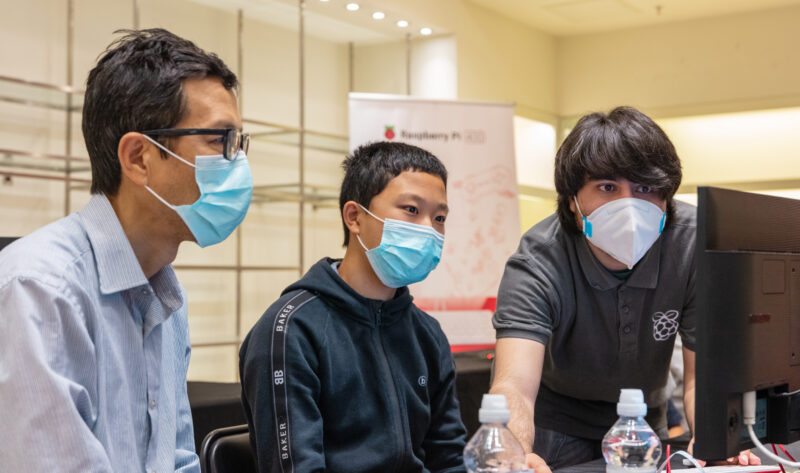
Toshan had community support when he started learning to code, so now he mentors other young people at his CoderDojo club.
Watch the new film to meet a “mischievous” tech creator who is helping other young people in his community to use technology to bring their ideas to life.
This is Toshan
Toshan’s story takes place in his hometown of Bangalore, India, where his love for electronics and computing sent him on a journey of tech discovery!
Toshan (16) first encountered coding aged 12, thanks to his computing teacher Miss Sonya. Describing his teacher, he says: “The unique thing is, she just doesn’t stop where the syllabus ends.” The world of digital making and Raspberry Pi computers that Miss Sonya introduced him to offered Toshan “limitless opportunities”, and he felt inspired to throw himself into learning.
“If we help people with their ideas, they might bring something new into the world.”
Toshan
Having found help in his local community and the online Raspberry Pi Foundation community that enabled him to start his tech journey, Toshan decided to pass on his skills: he set up a CoderDojo for other young people in Bangalore when he was 14. Toshan says, “I wanted to give something back.” Mentoring others as they learn coding and digital making helped his confidence grow. Toshan loves supporting the learners at his Dojo with problem-solving because “if we help people with their ideas, they might bring something new into the world.”
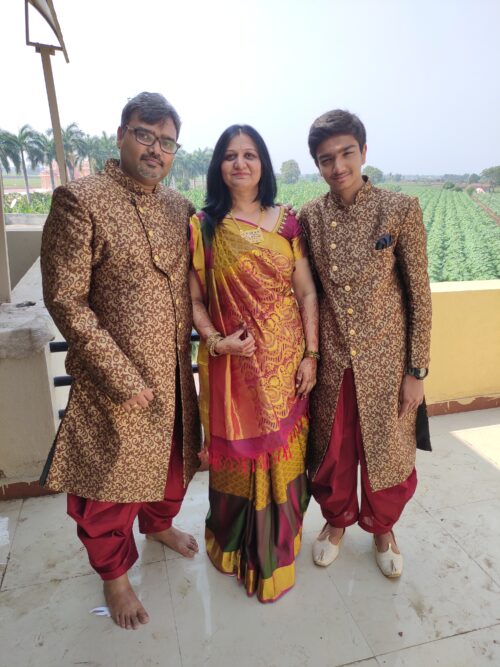
Supported by his mum and dad, Toshan’s commitment to helping others create with technology is leading him to extend his community beyond the city he calls home. Through his YouTube channel, he reaches people outside of Bangalore, and he has connected with a worldwide community of like-minded young tech creators by taking part in Coolest Projects online 2020 with an automated hand sanitiser he built.
Toshan’s enthusiasm and love for tech are already motivating him to empower others, and he has only just begun! We are delighted to be a part of his journey and can’t wait to see what he does next.
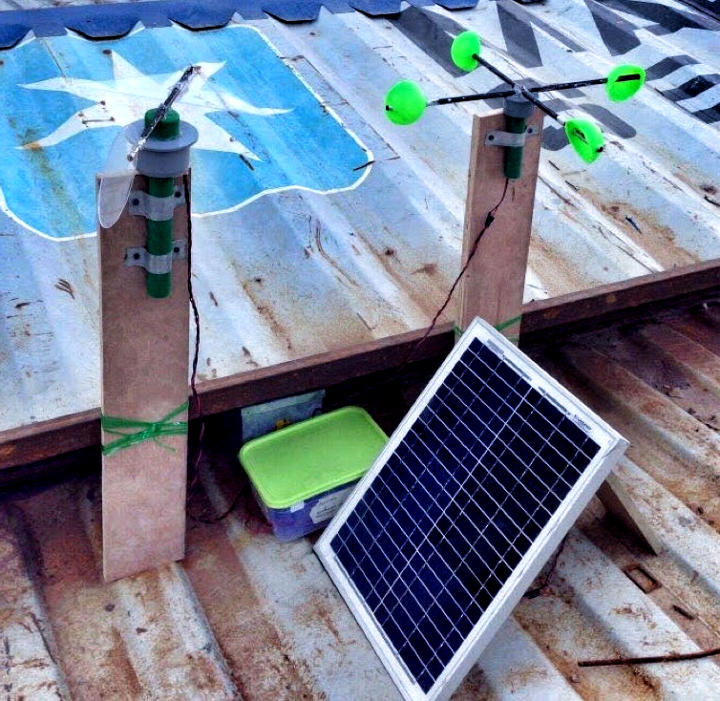
This Raspberry Pi-powered weather station is a vital tool for Nepalese farmers, who work in remote, changeable conditions, and rely heavily on monitoring the environment.
All the parts had to be low-cost and easy to maintain
It’s hard to forecast the weather in Nepal. Conditions can vary a lot within a small area because the country is so mountainous. Plus, there is no national weather service. This makes life even harder for farmers working in remote villages. There were a few essentials elements that any solution had to have:
Low-cost
Reliable and easy to maintain
Solar-powered
Able to run off readily available motorcycle batteries when the solar panels don’t get enough sun
A simple plastic food container keeps the hardware safe and dry
How was it made?
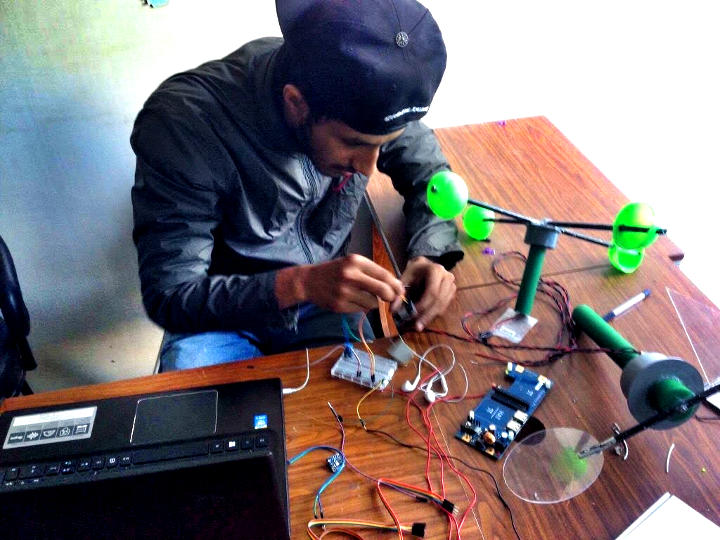
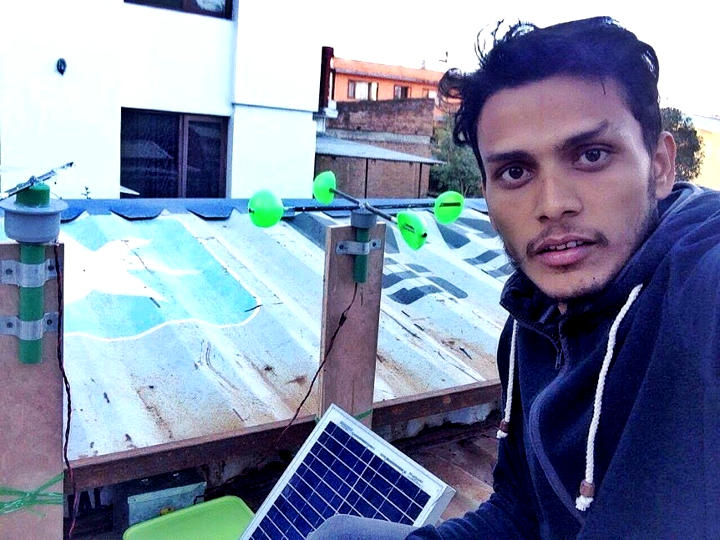
Prabesh Sapkota and Binod Kandel from the Robotics Association of Nepal led the team that built the solar-powered weather station with battery back-up. They were able to complete the project affordably using Raspberry Pi. Prabesh and his team wrote the software and created a display dashboard in Raspberry Pi OS Jessie.
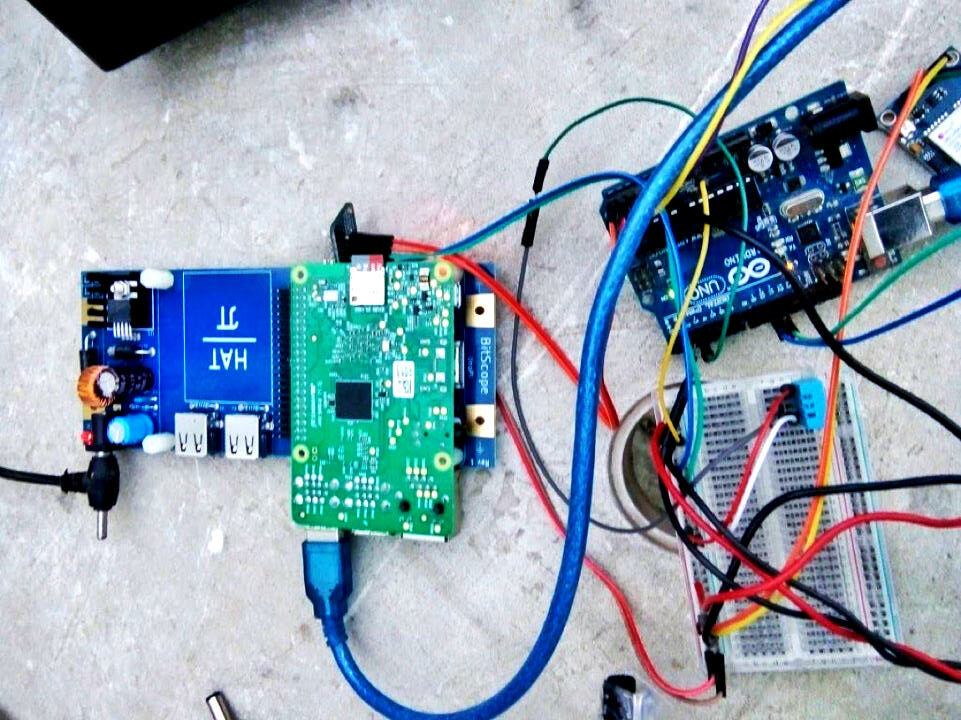
The core components put together as a prototype with a breadboard to check everything worked
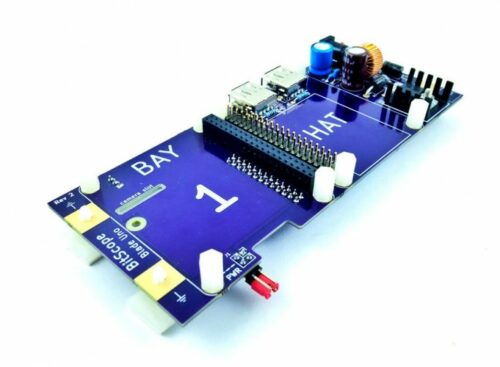
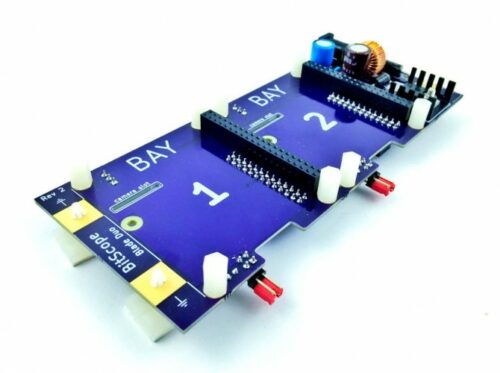
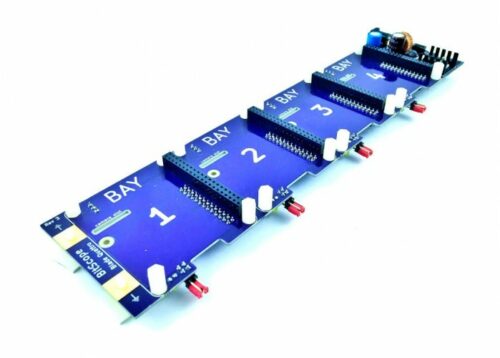
One of the challenges they faced was being able to power the Raspberry Pi and Arduino reliably, and that’s where the BitScope Blade Uno came in to play (more on that later).
The weather station sensors measure temperature, barometric pressure, humidity, wind direction and wind speed, and all of the sensors are connected to the Arduino, which records the data and sends it to the Raspberry Pi to display on the dashboard.
BitScope Blade Uno (directly powers Raspberry Pi and Arduino)
GPS module (NEO-6M-0-001)
Pressure sensor (BMP180)
Humidity sensor (DHT11)
12V Lead-acid battery
20 Watt solar panel
Hall effect sensor (used together with magnets in an anemometer to measure wind speed)
8 reed switches (used with a wind vane that has an attached magnet to sense wind direction)
Testing out the weather station on the roof
The team is working with an Australian sponsor to run workshops on basic electronics, with the intention of helping people build more of these affordable weather stations for rural schools and remote areas.
What is Bitscope Blade?
This weather station is an inspiring application of BitScope Blade, available to buy from element14. BitScope developed these power and mounting solutions for people working in challenging conditions, making them perfect for remote areas of Nepal without access to reliable power. They’re designed for industrial deployment as well as being suitable for off-grid hobbyist and educational applications.
You can choose from three variants, according to how many Raspberry Pi computers you need to support: BitScope Blade Uno for one Raspberry Pi and optional HAT, useful for makers and students; Duo for a pair of Raspberry Pis, ideal for building a standalone desktop and server system; and Quattro for four Raspberry Pis in applications such as compute clusters, private clouds or build farms.
A whole lot of super free hands-on activities are happening at the Raspberry Pi Store this summer.
We have teamed up with the Centre for Computing History to create an interactive learning space that’s accessible to all ages and abilities. Best of all, everything is free. It’s all happening in a big space new space we’ve borrowed a few doors down from the Raspberry Pi Store in the Grand Arcade in Cambridge, UK.
What is Raspberry Pi doing?
Everyone aged seven to 107 can get hands-on and creative with our free beginner-friendly workshops. You can make games with Scratch on Raspberry Pi, learn simple electronics for beginners, or get hands-on with the Raspberry Pi camera and Python programming.
Learners of all ages can have a go
If you don’t know anything about coding, don’t worry: there are friendly people on hand to help you learn.
The workshops take place every Monday, Wednesday and Friday until 3 September. Pre-booking is highly advisable. If the one you want is fully booked, it’s well worth dropping by if you’re in the neighbourhood, because spaces often become available at the last minute. And if you book and find you can no longer come along, please do make sure you cancel, because there will be lots of people who would love to take your space!
Come and celebrate thirty years of the World Wide Web and see how things have changed over the last three decades.
This interactive exhibition celebrates the years since Tim Berners-Lee changed the world forever by publishing the very first website at CERN in 1991. You can trace the footsteps of the early web, and have a go on some original hardware.
So much retro hardware to get your hands on
Here are some of the things you can do:
Browse the very first website from 1991
Search the web with Archie, the first search engine
While we would love to have a Raspberry Pi store in every town in every country all over the world (cackles maniacally), we are sticking with just the one in our hometown for now. But we make lots of cool stuff you can access online to relieve the FOMO.
The Raspberry Pi Foundation’s livestreamed Digital Making at Home videos are all still available for young people to watch and learn along with. You can chat, code together, hear from cool people, and see amazing digital making projects from kids who love making with technology.
There are also more than thirty Raspberry Pi courses available for free on FutureLearn. There’s something for every type of user and level of learner, from coders looking to move from Scratch to Python programming, to people looking to start up their own CoderDojo. Plus tons of materials for teachers sharing practical resources for the classroom.