How musical game worlds are made | Wireframe #8

88 Heroes composer Mike Clark explains how music and sound intertwine to create atmospheric game worlds in this excerpt from Wireframe issue 8, available now.

Music for video games is often underappreciated. When I first started writing music in my bedroom, it took me a while to realise how much I was influenced by the worlds that came from my tiny CRT TV. A couple of years ago, I was lucky enough to be approached by Bitmap Bureau, an indie startup who hired me to compose the music for their first game, 88 Heroes.

88 Heroes is a platformer styled like a Saturday morning cartoon. Interestingly, cartoon soundtracks have a lot in common with those for stage productions: short musical cues accompany the actions on screen, so if someone violently falls downstairs, you hear a piano rolling down the keys. This is called ‘mickey mousing’ in cartoons, but we hear similar things in film soundtracks.

Take Raiders of the Lost Ark, scored by John Williams: for every heroic rope swing, leap of faith, or close encounter with danger, the main theme can be heard powering through the dissonances and changing rhythms. It fills the audience with hope and becomes synonymous with the lead character – we want to see him succeed. Let’s not forget the title theme. Every time you see the Star Wars logo, does that grand title theme play in your head? It’s the same with video games. The challenge here, of course, is that players often leave the title screen after three seconds.

Three seconds is all you need though. Take Super Mario World’s soundtrack, composed by Koji Kondo. Many of its levels have the same leading melody, which changes subtly in tonality and rhythm to create the appropriate mood. The most repeating part of the melody is four bars long, but we hear it in so many forms that we only need the first two bars to know where it’s from. In classical music, this is called ‘variations on a theme’. In video games, we call it a ‘sonic identity’.

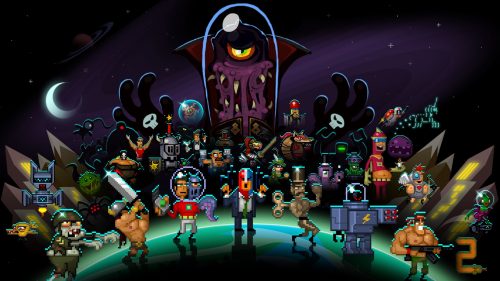
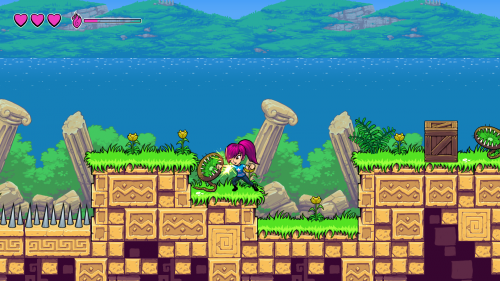
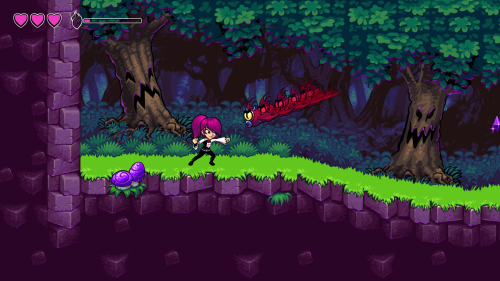
Action platformer 88 Heroes, featuring music by Mike Clark.

How a picture should ‘sound’

Sonic identity informed my approach to the 88 Heroes soundtrack. The title screen tells us that an unknown group is going to save the day. I first thought about unlikely heroes who end up on an adventure, and Back to the Future, scored by Alan Silvestri, sprang to mind. The second inspiration came from traditional superheroes, like Superman. I composed a melody which travels between the first and fifth notes in the scale (in this case C and G), with little flourishes of the notes in-between. It’s a triumphant, heroic melody.

This concept helps to connect these worlds beyond their visuals. It took a long time for games to evolve into the cohesive open-world sandboxes or MMOs we see today; the technology that masked loading screens to create a seamless experience was unheard of in the 1990s, so a melody that you hear in different ‘costumes’ gives these games a sense of cohesion.

Intelligent instruments

What if you have levels (or worlds) so big that some areas need to be loaded? That’s where non-linear composition comes in. Banjo-Kazooie, released for the N64 in 1998, was among the first 3D games to feature dynamic music. It used a technique called MIDI channel fading. MIDI stands for Musical Instrument Digital Interface; think of it as a universal language for music that is played back in real time by the hardware. As you walk into caves, fly in the sky, or move near certain characters, instruments fade in and out using the different MIDI channels to mimic the atmosphere, give the player an audio cue, and build and release tension.

Learning how to write music that changes as you play might seem impossible at first, but it becomes second nature once you understand the relationship between every instrument in your composition. Many digital audio workstations, like Logic and FL Studio, let you import MIDI data for a song (so you have all the notes in front of you) and set the instruments yourself. Try slowly fading out or muting certain tracks altogether, and listen to how the mood changes. What could this change represent in a video game? It’s like when you’re riding Yoshi in many of the Mario games; the fast bongos come in to represent the quick-footed dinosaur as he dashes at high speeds.

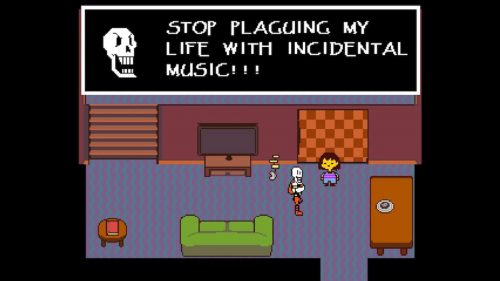
Undertale’s soundtrack blends analogue synth instruments with a plethora of real instruments to help create emotion.

Music is used to evoke emotions that wouldn’t be possible with visuals alone. Beep: A Documentary History of Game Sound shows a six-second video of a boat accompanied by two soundtracks; one is a light and happy guitar piece, the other a grating, scary, orchestral dissonance. Through these two extremes, the music creates the mood by itself. I remember playing Metroid Prime and finding the Chozo Ghost enemies rather scary, not because of their appearance, but because of the unnerving music that accompanies them. Music and sound design are one and the same. Think about what feelings you can create by taking music away entirely — it’s a great way to create tension before a boss battle or pivotal plot point, and it really works. In Undertale, scored by Toby Fox, there are times when the music stops so abruptly during NPC dialogue that you feel shivers down your spine.

So, what if you’re trying to come up with some game music, and you have writer’s block? Well, the next time you play a new game, turn the sound off. As you’re playing, focus on how the story, art, or characters make you feel, and focus on the emotions the game is trying to convey. Then, think of a time when a song made you feel happy, sad, joyful, anxious, or even frightened. Maybe you can use the music to create the mood you want for that game, as opposed to what the game makes you feel. By finding these emotions and understanding how they can change, you’ll be able to write a score that helps strengthen the immersion, escapism, and player investment in your game.

You can read the rest of the feature in Wireframe issue 8, available now in Tesco, WHSmith, and all good independent UK newsagents.

Or you can buy Wireframe directly from us – worldwide delivery is available. And if you’d like to own a handy digital version of the magazine, you can also download a free PDF.

Markets, moggies, and making in Wireframe issue 8

Make sure to follow Wireframe on Twitter and Facebook for updates and exclusives, and for subcriptions, visit the Wireframe website to save 49% compared to newsstand pricing!

The post How musical game worlds are made | Wireframe #8 appeared first on Raspberry Pi.


Source: Raspberry Pi – How musical game worlds are made | Wireframe #8

MagPi 79: get making in March with #MonthOfMaking

Hi folks! Rob from The MagPi here. This month in issue 79 of The MagPi, we’re doing something a little different: we invite all of you (yes, you!) to join us in the #MonthOfMaking.

Learn more about the #MonthOfMaking inside issue 79!

#MonthOfMaking

What does this mean? Well, throughout March, we want you to post pictures of your works-in-progress and completed projects on Twitter with the hashtag #MonthOfMaking.

#MonthOfMaking

As well as showing off the cool stuff you’re creating, we also want you to feel comfortable to ask for help with projects, and to share top tips for those that might be struggling.

If you’re not sure where to start, we’ve put together a massive feature in issue 79 of The MagPi, out now, to help you decide. On top of various project ideas for different skill levels, our feature includes some essential resources to look at, as well as inspirational YouTubers to follow, and some competitions you might want to take part in!

So, go forth and make! I’m really looking forward to seeing what you all get up to during this inaugural #MonthOfMaking!

Get The MagPi 79

You can get The MagPi 79 from WHSmith, Tesco, Sainsbury’s, and Asda. If you live in the US, head over to your local Barnes & Noble or Micro Center in the next few days for a print copy. You can also get the issue online: check it out on our store, or digitally via our Android or iOS apps. And don’t forget, there’s always the free PDF.

Free Raspberry Pi 3A+ offer!

We’re still running our super special Raspberry Pi 3A+ subscription offer! If you subscribe to twelve months of The MagPi, you’ll get a Raspberry Pi 3A+ completely free while stocks last. Make sure to check out our other subs offers while you’re there, like three issues for £5, and our rolling monthly subscription.

Get a 3A+ completely free while stocks last!

The post MagPi 79: get making in March with #MonthOfMaking appeared first on Raspberry Pi.


Source: Raspberry Pi – MagPi 79: get making in March with #MonthOfMaking

Celebrate with us this weekend!

The Raspberry Jam Big Birthday is almost here! In celebration of our seventh birthday, we’re coordinating with over 130 community‑led Raspberry Jams in 40 countries across six continents this weekend, 3-4 March 2019.

Raspberry Jams come in all shapes and sizes. They range from small pub gatherings fueled by local beer and amiable nerdy chatter to vast multi-room events with a varied programme of project displays, workshops, and talks.

To find your nearest Raspberry Jam, check out our interactive Jam map.

And if you can’t get to a Jam location this time, follow #PiParty on Twitter, where people around the world are already getting excited about their Big Birthday Weekend plans. Over the weekend you’ll see Raspberry Jams happening from the UK to the US, from Africa to – we hope – Antarctica, and everywhere in between.

Coolest Projects UK

The first of this year’s Coolest Projects events is also taking place this weekend in Manchester, UK. Coolest Projects is the world’s leading technology fair for young people, showcasing some of the very best creations by young makers across the country (and beyond), and it’s open for members of the public to attend.

Tickets are still available from the Coolest Projects website, and you can follow the action on #CoolestProjects on Twitter.

CBeebies’ Maddie Moate and the BBC’s Greg Foot will be taking over Raspberry Pi’s Instagram story on the day, so be sure to follow @RaspberryPiFoundation on Instagram.

The post Celebrate with us this weekend! appeared first on Raspberry Pi.


Source: Raspberry Pi – Celebrate with us this weekend!

A smart guitar for blind, deaf, and mute people

ChordAssist aims to bring the joy of learning the guitar to those who otherwise may have problems with accessing guitar tutorials. Offering advice in Braille, in speech, and on-screen, ChordAssist has been built specifically for deaf, blind, and mute people. Creator Joe Birch, who also built the BrailleBox device, used Raspberry Pi, Google Assistant, and a variety of accessibility tools and technology for this accessible instrument.

Chord Assist: An accessible smart guitar for the blind, deaf and mute

Powered by the Google Assistant, read more at chordassist.com

Accessibility and music

Inspired by a hereditary visual impairment in his family, Buffer’s Android Lead Joe Birch spent six months working on ChordAssist, an accessible smart guitar.

The Braille converter of the ChordAssist guitar
The ChordAssist guitar
The screen of the ChordAssist guitar

“This is a project that I used to bring my love of music and accessibility (inspired by my family condition of retinitis pigmentosa) together to create something that could allow everyone to enjoy learning and playing music — currently an area which might not be accessible to all,” explained Joe when he shared his project on Twitter earlier this month.

BrailleBox

This isn’t Joe’s first step into the world of smart accessibility devices. In 2017, he created BrailleBox, an Android Things news delivery device that converts daily news stories into Braille, using wooden balls atop solenoids that move up and down to form Braille symbols.

Demonstration of Joe Birch's BrailleBox

ChordAssist

This same technology exists within ChordAssist, along with an LCD screen for visual learning, and a speaker system for text-to-speech conversion.

Chord Assist was already an Action on the Google Project that I built for the Google Home, now I wanted to take that and stick it in a guitar powered by voice, visuals, and Braille. All three of these together will hopefully help to reduce the friction that may be experienced throughout the process of learning an instrument.

ChordAssist is currently still at the prototype stage, and Joe invites everyone to offer feedback so he can make improvements.

To learn more about ChordAssist, visit the ChordAssist website and check out Joe’s write-up on Medium.

The post A smart guitar for blind, deaf, and mute people appeared first on Raspberry Pi.


Source: Raspberry Pi – A smart guitar for blind, deaf, and mute people

Digital lava lamp!

Forget the iconic conic shape of the lava lamp from the sixties and seventies — Julian Butler’s digital lava lamp gives you all the magic of its predecessor, without any of the hassle!

My programmable digital lava lamp

Showcasing the construction and display modes of my programmable digital lava lamp. Built with the help of Processing software, FadeCandy + Raspberry Pi hardware this lamp can respond to sound and other aspects of it’s environment via wifi etc.

I lava you (I lava you not)

When I was a teenager, we had a lava lamp at home. It was orange, it took an age to get going, and once the lava was in full flow, it radiated with the heat of a thousand suns.

Julian Butler’s modern version is so much better. “Showcasing the construction and display modes of [his] programmable digital lava lamp,” Julian has shared a rather hypnotic video on his YouTube channel. He’s also created a three-part build tutorial about the project.

Inspired by his co-worker’s salt mood lamp, Julian decided to build something similiar, aiming to smoothe out the creases and add more functionality.

Using a Raspberry Pi and Micah Elizabeth Scott‘s FadeCandy board, plus 120 NeoPixel LEDs, Julian got to work programming lights and prototyping casings until he was happy with the result.

The face of Julian happy with the result

And the result is a beautiful, programmable digital lava lamp: all the mesmerising fun of a regular lava lamp, without the excruciating wait time and significant risk of second-degree burns. Plus, it will never leak, and it can be any colour you like!

Get groovy, baby

Watch Julian’s video, ooh and aah at the swirly-whirly wonderment of his digital creation, and then visit his blog for all the details of how to make your own. Julian has plans to add more interactive elements to the lamp, including voice recognition, and we can’t wait to see the final result!

The post Digital lava lamp! appeared first on Raspberry Pi.


Source: Raspberry Pi – Digital lava lamp!

What we are learning about learning

Across Code Clubs, CoderDojos, Raspberry Jams, and all our other education programmes, we’re working with hundreds of thousands of young people. They are all making different projects and learning different things while they are making. The research team at the Raspberry Pi Foundation does lots of work to help us understand what exactly these young people learn, and how the adults and peers who mentor them share their skills with them.

Coolest Projects International 2018

Senior Research Manager Oliver Quinlan chats to participants at Coolest Projects 2018

We do our research work by:

  • Visiting clubs, Dojos, and events, seeing how they run, and talking to the adults and young people involved
  • Running surveys to get feedback on how people are helping young people learn
  • Testing new approaches and resources with groups of clubs and Dojos to try different ways which might help to engage more young people or help them learn more effectively

Over the last few months, we’ve been running lots of research projects and gained some fascinating insights into how young people are engaging with digital making. As well as using these findings to shape our education work, we also publish what we find, for free, over on our research page.

How do children tackle digital making projects?

We found that making ambitious digital projects is a careful balance between ideas, technology, and skills. Using this new understanding, we will help children and the adults that support them plan a process for exploring open-ended projects.

Coolest Projects USA 2018

Coolest Projects USA 2018

For this piece of research, we interviewed children and young people at last year’s Coolest Projects International and Coolest Projects UK , asking questions about the kinds of projects they made and how they created them. We found that the challenge they face is finding a balance between three things: the ideas and problems they want to address, the technologies they have access to, and their skills. Different children approached their projects in different ways, some starting with the technology they had access to, others starting with an idea or with a problem they wanted to solve.

Achieving big ambitions with the technology you have to hand while also learning the skills you need can be tricky. We’re planning to develop more resources to help young people with this.

Coolest Projects International 2018

Research Assistant Lucia Florianova learns about Rebel Girls at Coolest Projects International 2018

We also found out a lot about the power of seeing other children’s projects, what children learn, and the confidence they develop in presenting their projects at these events. Alongside our analysis, we’ve put together some case studies of the teams we interviewed, so people can read in-depth about their projects and the stories of how they created them.

Who comes to Code Club?

In another research project, we found that Code Clubs in schools are often diverse and cater well for the communities the schools serve; Code Club is not an exclusive club, but something for everyone.

Code Club Athens

Code Clubs are run by volunteers in all sorts of schools, libraries, and other venues across the world; we know a lot about the spaces the clubs take place in and the volunteers who run them, but less about the children who choose to take part. We’ve started to explore this through structured visits to clubs in a sample of schools across the West Midlands in England, interviewing teachers about the groups of children in their club. We knew Code Clubs were reaching schools that cater for a whole range of communities, and the evidence of this project suggests that the children who attend the Code Club in those schools come from a range of backgrounds themselves.

Scouts Raspberry Pi

Photo c/o Dave Bird — thanks, Dave!

We found that in these primary schools, children were motivated to join Code Club more because the club is fun rather than because the children see themselves as people who are programmers. This is partly because adults set up Code Clubs with an emphasis on fun: although children are learning, they are not perceiving Code Club as an academic activity linked with school work. Our project also showed us how Code Clubs fit in with the other after-school clubs in schools, and that children often choose Code Club as part of a menu of after-school clubs.

Raspberry Jam

Visitors to Pi Towers Raspberry Jam get hands-on with coding

In the last few months we’ve also published insights into how Raspberry Pi Certified Educators are using their training in schools, and into how schools are using Raspberry Pi computers. You can find our reports on all of these topics over at our research page.

Thanks to all the volunteers, educators, and young people who are finding time to help us with their research. If you’re involved in any of our education programmes and want to take part in a research project, or if you are doing your own research into computing education and want to start a conversation, then reach out to us via research@raspberrypi.org.

The post What we are learning about learning appeared first on Raspberry Pi.


Source: Raspberry Pi – What we are learning about learning

Make art with LEDs | HackSpace magazine #16

Create something beautiful with silicon, electricity, your endless imagination, and HackSpace magazine issue 16 — out today!

HackSpace magazine 16

LEDs are awesome

Basically, LEDs are components that convert electrical power into light. Connect them to a power source (with some form of current limiter) in the right orientation, and they’ll glow.

Each LED has a single colour. Fortunately, manufacturers can pack three LEDs (red, green, and blue) into a single component, and varying the power to each LED-within-an-LED produces a wide range of hues. However, by itself, this type of colourful LED is a little tricky to control: each requires three inputs, so a simple 10×10 matrix would require 300 inputs. But there’s a particular trick electronics manufacturers have that make RGB LEDs easy to use: making the LEDs addressable!

An RGB LED

Look: you can clearly see the red, green, and blue elements of this RGB LED

Addressable LEDs

Addressable LEDs have microcontrollers built into them. These aren’t powerful, programmable microcontrollers, they’re just able to handle a simple communications protocol. There are quite a few different types of addressable LEDs, but two are most popular with makers: WS2812 (often called NeoPixels) and APA102 (often called DotStars). Both are widely available from maker stores and direct-from-China websites. NeoPixels use a single data line, while DotStars use a signal and a clock line. Both, however, are chainable. This means that you connect one (for NeoPixels) or two (for DotStars) pins of your microcontroller to the Data In connectors on the first LED, then the output of this LED to the input of the next, and so on.

Exactly how many LEDs you can chain together depends on a few different things, including the power of the microcontroller and the intended refresh rate. Often, though, the limiting factor for most hobbyists is the amount of electricity you need.

Which type to use

The big difference between NeoPixels and DotStars comes down to the speed of them. LEDs are made dimmer by turning them off and on very quickly. The proportion of the time they’re off, the dimmer they are. This is known as pulse-width modulation (PWM). The speed at which this blinking on and off can have implications for some makes, such as when the LEDs are moving quickly.

NeoPixels

  • Cheap
  • Slowish refresh rate
  • Slowish PWM rate

DotStars

  • More expensive
  • Faster refresh rate
  • Fast PWM rate
NeoPixels moving in the dark

As a NeoPixel is moved through a long-exposure photograph, you can see it blink on and off. DotStars – which have a faster PWM rate – avoid this.

Safety first!

HackSpace magazine’s LED feature is just a whistle-stop guide to the basics of powering LEDs — it’s not a comprehensive guide to all things power-related. Once you go above a few amperes, you need to think about what you’re doing with power. Once you start to approach double figures, you need to make sure you know what you’re doing and, if you find yourself shopping for an industrial power supply, then you really need to make sure you know how to use it safely.

Read more

Read the rest of the exclusive 14-page LED special in HackSpace magazine issue 16, out today. Buy your copy now from the Raspberry Pi Press store, major newsagents in the UK, or Barnes & Noble, Fry’s, or Micro Center in the US. Or, download your free PDF copy from the HackSpace magazine website.

HackSpace magazine 16 Front Cover

We’re also shipping to stores in Australia, Hong Kong, Canada, Singapore, Belgium, and Brazil, so be sure to ask your local newsagent whether they’ll be getting HackSpace magazine.

Subscribe now

Subscribe to HackSpace on a monthly, quarterly, or twelve-month basis to save money against newsstand prices.

Twelve-month print subscribers get a free Adafruit Circuit Playground Express, loaded with inputs and sensors and ready for your next project. Tempted?

The post Make art with LEDs | HackSpace magazine #16 appeared first on Raspberry Pi.


Source: Raspberry Pi – Make art with LEDs | HackSpace magazine #16

Play multiple sounds simultaneously with a Raspberry Pi

Playing sound through a Raspberry Pi is a simple enough process. But what if you want to play multiple sounds through multiple speakers at the same time? Lucky for us, Devon Bray figured out how to do it.

Play multiple audio files simultaneously with Raspberry Pi

Artist’s Website: http://www.saradittrich.com/ Blog Post: http://www.esologic.com/multi-audio/ Ever wanted to have multiple different sound files playing on different output devices attached to a host computer? Say you’re writing a DJing application where you want one mix for headphones and one for the speakers.

Multiple audio files through multiple speakers

While working with artist Sara Dittrich on her These Blobs installation for Provincetown Art Association and Museum, Devon was faced with the challenge of playing “8 different mono sound files on 8 different loudspeakers”. Not an easy task, and one that most online tutorials simply do not cover.

These Blobs - Sarah Dittrich

These Blobs by Sara Dittrich

Turning to the sounddevice Python library for help, Devon got to work designing the hardware and code for the project.

The job was to create some kind of box that could play eight different audio files at the same time on eight different unpowered speakers. New audio files had to be able to be loaded via a USB thumb drive, enabling the user to easily switch files without having to use any sort of UI. Everything also had to be under five inches tall and super easy to power on and off.

Devon’s build uses a 12v 10 amp power supply controlled via a DC/DC converter. This supply powers the Raspberry Pi 3B+ and four $15 audio amplifiers, which in turn control simple non-powered speakers designed for use in laptops. As the sound is only required in mono, the four amplifiers can provide two audio tracks each, each track using a channel usually reserved for left or right audio output.

A full breakdown of the project can be seen in the video above, with more information available on Devon’s website, including the link to the GitHub repo.

And you can see the final project in action too! Watch a video of Sara Dittrich’s installation below, and find more of her work on her website.

These Blobs

Poem written and recorded by Daniel Sofaer, speakers, conduit, clay, spray paint, electrical components; 4′ x 4′ x 5′ ft.


The post Play multiple sounds simultaneously with a Raspberry Pi appeared first on Raspberry Pi.


Source: Raspberry Pi – Play multiple sounds simultaneously with a Raspberry Pi

Build a dial-up ISP server using a Raspberry Pi

Trying to connect an old, dial-up–compatible computer to modern-day broadband internet can be a chore. The new tutorial by Doge Microsystems walks you through the process of using a Raspberry Pi to bridge the gap.

The Sound of dial-up Internet

I was bored so I wanted to see if I could get free dial up internet so I found that NetZero still has free service so I put in the number and heard the glorious sound of the Dial-up. Remind me of years gone. Unfortunately I was not able to make a connection.

Dial-up internet

Ah, there really is nothing quite like it: listen to the sweet sound of dial-up internet in the video above and reminisce about the days of yore that you spent waiting for your computer to connect and trying to convince other members of your household to not use the landline for a few hours.

But older computers have fallen behind these times of ever faster broadband and ever more powerful processors, and getting your beloved vintage computer online isn’t as easy as it once was.

For one thing, does anyone even have a landline anymore?

Enter Doge Microsystems, who save the day with their Linux-based dial-up server, the perfect tool for connecting computers of yesteryear to today’s broadband using a Raspberry Pi.

Disclaimer: I’m going to pre-empt a specific topic of conversation in the comment section by declaring that, no, I don’t like the words ‘vintage’, ‘retro’, and yesteryear’ any more than you do. But we all need to accept that the times, they are a-changing, OK? We’re all in this together. Let’s continue.

Building a Raspberry Pi dial-in server

For the build, you’ll need a hardware modem — any model should work, as long as it presents as a serial device to the operating system. You’ll also need a Linux device such as a Raspberry Pi, a client device with a modem, and ‘some form of telephony connection to link the two modems’, described by Doge Microsystems as one of the following:

We need a way to connect our ISP modem to clients. There are many ways to approach this:

  • Use the actual PSTN (i.e. real phone lines)
  • Use a PBX to provide local connectivity
  • Build your own circuity (not covered here, as it would require extra configuration)
  • Build a fake PSTN using VoIP ATAs and a software PBX

I’ve gone with the fourth option. Here’s the breakdown:

  • Asterisk — a VoIP PBX — is configured on the dial-in server to accept connections from two SIP client accounts and route calls between them
  • A Linksys PAP2T ATA — which supports two phone lines — is set up as both of those SIP clients connected to the PBX
  • The ISP-side modem is connected to the first line, and the client device to the second line

Doge Microsystems explains how to set up everything, including the Linux device, on the wiki for the project. Have a look for yourself if you want to try out the dial-up server first-hand.

The sound of dial-up

For funsies, I asked our Twitter followers how they would write down the sound of a dial-up internet connection. Check them out.

Alex on Twitter

@Raspberry_Pi dialtone, (phone beeps), rachh racchh rachh rechhhhhhh reccchhhhhh rechhhh, DEE-DONG-DEE-DONG-DI, BachhhhhhhhhhhhBACHHHHBACHHHHHHHHHHHHHHHHHHHHHHHHH

The post Build a dial-up ISP server using a Raspberry Pi appeared first on Raspberry Pi.


Source: Raspberry Pi – Build a dial-up ISP server using a Raspberry Pi

Build your own Commodore PET model 8032

Build a mini version of one of history’s most iconic personal computers with Lorenzo ‘Tin Cat’ Herrera and his Commodore PET Mini, which is based on the Commodore PET model 8032.

Commodore PET Mini Retrowave intro

3D Print your own Commodore PET Mini retro computer with a Raspberry Pi and Retropie for retro gaming or retro emulation. Fully documented DIY project: https://commodorepetmini.com The Commodore PET is one of the most iconic-looking computer of the 70’s, it reminds us of an era of frenetic innovation, harsh competition and bold design choices that shaped the computer industry as we know it today.

Commodore PET — a (very) brief history

Presented to the world in 1977, the Commodore PET represents a truly iconic piece of computer history: it was the first personal computer sold to the general public. With a built-in keyboard, screen, and cassette deck, and an introductory price of US$795 — roughly $3287 today — it offered everything a home computer user needed. And it beat the Apple II to market by a few months, despite Jobs and Wozniak offering to sell their Apple II technology to Commodore in September 1976.

Commodore PET model 8032

Commodore was also the first company to license Microsoft’s 6502 BASIC, and in the 1980s the Commodore became a staple in many school classrooms, bringing about a surge in the numbers of future computer engineers — a few of which now work in the Raspberry Pi Trading office.

The Commodore PET model was discontinued in 1982, then resurrected briefly in 1986, before finally stepping aside to make way for the popular Commodore 128, 1571, and 1581 models.

Redesigning a mini PET

Based on the Commodore PET model 8032, Lorenzo Herrera’s 3D-printable remake allows users to fit an entire computer — the Raspberry Pi — inside a miniature iconic shell. Lorenzo designed this case to house a working screen, and once you connect the Pi to a Bluetooth keyboard, your Commodore PET Mini will be fully functional as well as stylish and cute as a button.


You’ll need access to a 3D printer to build your own — all parts are listed on the project’s website. You can also purchase them as a kit directly from Lorenzo if you want to save time on sourcing your own.

3D-printing the Commodore PET

To build your own Commodore PET Mini, start by visiting its official website. And if you don’t own a 3D printer, search online for your nearest maker space or 3D printing service to get the parts made.

We’re definitely going to be building our own here at Raspberry Pi, and if you build one for yourself, or use a Raspberry Pi in any iconic computer rebuild, let us know.

The post Build your own Commodore PET model 8032 appeared first on Raspberry Pi.


Source: Raspberry Pi – Build your own Commodore PET model 8032

Inside the Dreamcast homebrew scene | Wireframe issue 7

Despite its apparent death 17 years ago, the Sega Dreamcast still has a hardcore group of developers behind it. We uncover their stories in this excerpt from Wireframe issue 7, available now.

In 1998, the release of the Dreamcast gave Sega an opportunity to turn around its fortunes in the home console market. The firm’s earlier system, the Saturn, though host to some beloved titles, was running a distant third in sales behind the Nintendo 64 and PlayStation. The Dreamcast, by contrast, saw a successful launch and quickly became the go-to system for arcade-quality ports of fighting games, among other groundbreaking titles like Seaman and Crazy Taxi.

Unfortunately for fans, it wasn’t to last. The Dreamcast struggled to compete against the PlayStation 2, which launched in 2000, and at the end of March 2001, in the face of the imminent launch of the Nintendo GameCube and Microsoft’s new Xbox, Dreamcast left the stage, and Sega abandoned the console market altogether.

None of this stopped a vibrant homebrew development scene springing up around the console in Sega’s place, and even years later, the Dreamcast remains a thriving venue for indie developers. Roel van Mastbergen codes for Senile Team, the developers of Intrepid Izzy, a puzzle platformer coming soon to the PC, PS4, and Dreamcast.

Of the port to Sega’s ageing console, van Mastbergen tells us, “I started this project with only the PC in mind. I’m more used to developing for older hardware, though, so I tend to write code with low CPU and RAM requirements by force of habit. At some point I decided to see if I could get it running on the Dreamcast, and I was happy to find that it ran almost perfectly on the first try.”

It runs at a lower resolution than on PC, but Intrepid Izzy still maintains a smooth 60fps on Dreamcast.

One of the pluses of the Dreamcast, van Mastbergen points out, is how easy it is to develop for. “There are free tools and sufficient documentation available, and you can run your own code on a standard Dreamcast without any hardware modifications or hacks.”

Games burned to CD will play in most models of unmodified Dreamcast, usually with no extra software required. While this doesn’t result in a huge market — the customer base for new Dreamcast games is difficult to measure but certainly small — it makes development for original hardware far more viable than on other systems, which often need expensive and difficult-to-install modchips.

Many of the games now being developed for the system are available as digital downloads, but the state of Dreamcast emulation lags behind that of its competitors, with no equivalent to the popular Dolphin and PCSX2 emulators for GameCube and PS2. All this makes boxed games on discs more viable than on other systems — and, in many cases, physical games can also become prized collectors’ items.

Intrepid Izzy is developed with a custom code library that works across multiple systems; it’s simple to downscale PC assets and export a Dreamcast binary.

Kickstarting dreams

By now, you might be asking yourself what the point of developing for these old systems is — especially when creating games for PC is a much easier and potentially more profitable route to take. When it comes to crowdfunding, though, catering to a niche but dedicated audience can pay dividends.

Belgian developer Alice Team, creators of Alice Dreams Tournament, asked for €8000 in funding to complete its Dreamcast exclusive, which began development in 2006. It eventually raised €28,000 — more than treble its goal.

Intrepid Izzy didn’t quite reach such dizzying heights, only just meeting its €35,000 target, but van Mastbergen is clear it wouldn’t have been funded at all without the dedicated Dreamcast base. “The project has been under-funded since the beginning, which is slightly problematic,” van Mastbergen tells us. “Even so, it is true that the Dreamcast community is responsible for the lion’s share of the funding, which is a testament to how well-loved this system still is.”

You can read the rest of the feature in Wireframe issue 7, available in Tesco, WHSmith, and all good independent UK newsagents.

Or you can buy Wireframe directly from us – worldwide delivery is available. And if you’d like to own a handy digital version of the magazine, you can also download a free PDF.

Face your fears in the indie horror, Someday You’ll Return.

Make sure to follow Wireframe on Twitter and Facebook for updates and exclusives, and for subscriptions, visit the Wireframe website to save 49% compared to newsstand pricing!

The post Inside the Dreamcast homebrew scene | Wireframe issue 7 appeared first on Raspberry Pi.


Source: Raspberry Pi – Inside the Dreamcast homebrew scene | Wireframe issue 7

GPIO Zero v1.5 is here!

GPIO Zero is a zero-boilerplate Python library that makes physical computing with Python more accessible and helps people progress from zero to hero.

Today, I’m pleased to announce the release of GPIO Zero v1.5.0. It’s packed full of updates, including new features, bug fixes, and lots of improvements to the documentation.

Guido, the creator of Python, happened across the library recently, and he seemed to like it:

Guido van Rossum on Twitter

GPIOzero I love you! https://t.co/w3CnUGx3yO

Pin factories – take your pick

GPIO Zero started out as a friendly API on top of the RPi.GPIO library, but later we extended it to allow other pin libraries to be used. The pigpio library is supported, and that includes the ability to remotely control GPIO pins over the network, or on a Pi Zero over USB.

This also gave us the opportunity to create a “mock” pin factory, so that we could emulate the effect of pin changes without using real Raspberry Pi hardware. This is useful for prototyping without hardware, and for testing. Try it yourself!

As well as the pin factories we provide with the library (RPi.GPIO, pigpio, RPIO, and native), it’s also possible to write your own. So far, I’m aware of only one custom pin factory, and that has been written by the AIY team at Google, who created their own pin factory for the pins on the AIY Vision Kit. This means that you can connect devices to these pins, and use GPIO Zero to program them, despite the fact they’re not connected to the Pi’s own pins.

If you have lots of experience with RPi.GPIO, you might find this guide on migrating from RPi.GPIO to GPIO Zero handy.

Ultrasonic distance sensor

We had identified some issues with the results from the DistanceSensor class, and we dealt with them in two ways. Firstly, GPIO co-creator Dave Jones did some work under the hood of the pins API to use timing information provided by underlying drivers, so that timing events from pins will be considerably more accurate (see #655). Secondly, Dave found that RPi.GPIO would often miss edges during callbacks, which threw off the timing, so we now drop missed edges and get better accuracy as a result (see #719).

The best DistanceSensor results come when using pigpio as your pin factory, so we recommend changing to this if you want more accuracy, especially if you’re using (or deploying to) a Pi 1 or Pi Zero.

Connecting devices

A really neat feature of GPIO Zero is the ability to connect devices together easily. One way to do this is to use callback functions:

button.when_pressed = led.on
button.when_released = led.off

Another way is to set the source of one device to the values of another device:

led.source = button.values

In GPIO Zero v1.5, we’ve made connecting devices even easier. You can now use the following method to pair devices together:

led.source = button

Read more about this declarative style of programming in the source/values page in the docs. There are plenty of great examples of how you can create projects with these simple connections:

Testing

An important part of software development is automated testing. You write tests to check your code does what you want it to do, especially checking the edge cases. Then you write the code to implement the features you’ve written tests for. Then after every change you make, you run your old tests to make sure nothing got broken. We have tools for automating this (thanks pytest, tox, coverage, and Travis CI).

But how do you test a GPIO library? Well, most of the GPIO parts of our test suite use the mock pins interface, so we can test our API works as intended, abstracted from how the pins behave. And while Travis CI only runs tests with mock pins, we also do real testing on Raspberry Pi: there are additional tests that ensure the pins do what they’re supposed to. See the docs chapter on development to learn more about this process, and try it for yourself.

pinout

You may remember that the last major GPIO Zero release introduced the pinout command line tool. We’ve added some new art for the Pi 3A+ and 3B+:

pinout also now supports the -x (or --xyz) option, which opens the website pinout.xyz in your web browser.

Zero boilerplate for hardware

The goal of all this is to remove obstacles to physical computing, and Rachel Rayns has designed a wonderful board that makes a great companion to GPIO Zero for people who are learning. Available from The Pi Hut, the PLAY board provides croc-clip connectors for four GPIO pins, GND, and 3V3, along with a set of compatible components:

Since the board simply breaks out GPIO pins, there’s no special software required. You can use Scratch or Python (or anything else).

New contributors

This release welcomed seven new contributors to the project, including Claire Pollard from PiBorg and ModMyPi, who provided implementations for TonalBuzzer, PumpkinPi, and the JamHat. We also passed 1000 commits!

<GITHUB PULSE>

Watch your tone

As part of the work Claire did to add support for the Jam HAT, she created a new class for working with its buzzer, which works by setting the PWM frequency to emit a particular tone. I took what Claire provided and added some maths to it, then Dave created a whole Tones module to provide a musical API. You can play buzzy jingles, or you can build a theremin:

GPIO Zero theremin

from gpiozero import TonalBuzzer, DistanceSensor buzzer = TonalBuzzer(20) ds = DistanceSensor(14, 26) buzzer.source = ds

…or you can make a siren:

GPIO Zero TonalBuzzer sine wave

from gpiozero import TonalBuzzer from gpiozero.tools import sin_values buzzer = TonalBuzzer(20) buzzer.source = sin_values()

The Tones API is a really neat way of creating particular buzzer sounds and chaining them together to make tunes, using a variety of musical notations:

>>> from gpiozero.tones import Tone
>>> Tone(440.0)
>>> Tone(69)
>>> Tone('A4')

We all make mistakes

One of the important things about writing a library to help beginners is knowing when to expect mistakes, and providing help when you can. For example, if a user mistypes an attribute or just gets it wrong – for example, if they type button.pressed = foo instead of button.when_pressed = foo – they wouldn’t usually get an error; it would just set a new attribute. In GPIO Zero, though, we prevent new attributes from being created, so you’d get an error if you tried doing this. We provide an FAQ about this, and explain how to get around it if you really need to.

Similarly, it’s common to see people type button.when_pressed = foo() and actually call the function, which isn’t correct, and will usually have the effect of unsetting the callback (as the function returns None). Because this is valid, the user won’t get an error to call their attention to the mistake.

In this release, we’ve added a warning that you’ll see if you set a callback to None when it was previously None. Hopefully that will be useful to people who make this mistake, helping them quickly notice and rectify it.

Update now

Update your Raspberry Pi now to get the latest and greatest GPIO Zero goodness in your (operating) system:

sudo apt update
sudo apt install python3-gpiozero python-gpiozero

What’s next?

We have plenty more suggestions to be working on. This year we’ll be working on SPI and I2C interfaces, including I2C expander chips. If you’d like to make more suggestions, or contribute yourself, find us over on GitHub.

The post GPIO Zero v1.5 is here! appeared first on Raspberry Pi.


Source: Raspberry Pi – GPIO Zero v1.5 is here!

Jenni Sidey inspires young women in science with Astro Pi

Today, ESA Education and the Raspberry Pi Foundation are proud to celebrate the International Day of Women and Girls in Science! In support of this occasion and to encourage young women to enter a career in STEM (science, technology, engineering, mathematics), CSA astronaut Jenni Sidey discusses why she believes computing and digital making skills are so important, and tells us about the role models that inspired her.

Happy International Day of Women and Girls in Science!

The International Day of Women and Girls in Science is part of the United Nations’ plan to achieve their 2030 Agenda for Sustainable Development. According to current UNESCO data, less than 30% of researchers in STEM are female and only 30% of young women are selecting STEM-related subjects in higher education
Jenni Sidey

That’s why part of the UN’s 2030 Agenda is to promote full and equal access to and participation in science for women and girls. And to help young women and girls develop their computing and digital making skills, we want to encourage their participation in the European Astro Pi Challenge!

The European Astro Pi Challenge

The European Astro Pi Challenge is an ESA Education programme run in collaboration with the Raspberry Pi Foundation that offers students and young people the amazing opportunity to conduct scientific investigations in space! The challenge is to write computer programs for one of two Astro Pi units — Raspberry Pi computers on board the International Space Station.

Astro Pi Mission Zero logo

Astro Pi’s Mission Zero is open until 20 March 2019, and this mission gives young people up to 14 years of age the chance to write a simple program to display a message to the astronauts on the ISS. No special equipment or prior coding skills are needed, and all participants that follow the mission rules are guaranteed to have their program run in space!

Take part in Mission Zero — in your language!

To help many more people take part in their native language, we’ve translated the Mission Zero resource, guidelines, and web page into 19 different languages! Head to our languages section to find your version of Mission Zero and take part.

If you have any questions regarding the European Astro Pi Challenge, email us at astropi@esa.int.

The post Jenni Sidey inspires young women in science with Astro Pi appeared first on Raspberry Pi.


Source: Raspberry Pi – Jenni Sidey inspires young women in science with Astro Pi

Stereoscopic photography with StereoPi and a Raspberry Pi

StereoPi allows users to attached two Camera Modules to their Raspberry Pi Compute Module — it’s a great tool for building stereoscopic cameras, 360º monitors, and virtual reality rigs.

StereoPi draft 1

No Description

My love for stereoscopic photography goes way back

My great-uncle Eric was a keen stereoscopic photographer and member of The Stereoscopic Society. Every memory I have of visiting him includes looking at his latest stereo creations through a pair of gorgeously antique-looking, wooden viewers. And I’ve since inherited the beautiful mahogany viewing cabinet that used to stand in his dining room.

It looks like this, but fancier

Stereoscopic photography has always fascinated me. Two images that seem identical suddenly become, as if by magic, a three-dimensional wonder. As a child, I couldn’t make sense of it. And even now, while I do understand how it actually works, it remains magical in my mind — like fairies at the bottom of the garden. Or magnets.

So it’s no wonder that I was instantly taken with StereoPi when I stumbled across its crowdfunding campaign on Twitter. Having wanted to make a Pi-based stereoscopic camera ever since I joined the organisation, but not knowing how best to go about it, I thought this new board seemed ideal for me.

The StereoPi board

Despite its name, StereoPi is more than just a stereoscopic camera board. How to attach two Camera Modules to a Raspberry Pi is a question people ask us frequently and for various projects, from home security systems to robots, cameras, and VR.

Slim and standard editions of the StereoPi

Slim and standard editions of the StereoPi

The board attaches to any version of the Raspberry Pi Compute Module, including the newly released CM3+, and you can use it in conjunction with Raspbian to control it via the Python module picamera.

StereoPi stereoscopic livestream over 4G

StereoPi stereoscopic livestream over 4G. Project site: http://StereoPi.com

When it comes to what you can do with StereoPi, the possibilities are almost endless: mount two wide-angle lenses for 360º recording, build a VR rig to test out virtual reality games, or, as I plan to do, build a stereoscopic camera!

It’s on Crowd Supply now!

StereoPi is currently available to back on Crowd Supply, and purchase options start from $69. At 69% funded with 30 days still to go, we have faith that the StereoPi project will reach its goal and make its way into the world of impressive Raspberry Pi add-ons.

The post Stereoscopic photography with StereoPi and a Raspberry Pi appeared first on Raspberry Pi.


Source: Raspberry Pi – Stereoscopic photography with StereoPi and a Raspberry Pi

How do you define ‘maker’?

In our brand-new video, we ask some of our favourite content creators how they define the word ‘maker’, and what being a maker means to them.

How do you define ‘maker’?

We asked some of our favourite content creators how they define the word ‘maker’, and what being a maker means to them.

Joel Telling

Joel took the ultimate content creator plunge in early 2018, quitting his job at Adobe to follow his 3D printing passion full time.

Joel Telling – 3D Printing Nerd on Twitter

It was at this very hour 1 year ago TODAY I left the Adobe offices for the last time and began my career as a host and content creator. ONE YEAR HOLY COW! #highfive https://t.co/fQ6wBGY8Ch

You can find Joel on YouTube as 3D Printing Nerd, and he also makes appearances for Matter Hatters at various conventions — including Maker Faire New York, where we accosted him for this video.

Jackie Craft

Jackie Craft is a cosplay goddess. She has turned her passion for prop making and costume design into her career, and her creations are incredible. Seriously, look at how cool they are:

Jackie Craft Cosplay

You can find Jackie on Instagram, and at her website, where you can also buy costume patterns to recreate her designs.

Laura Kampf

Based in Cologne, Germany, Laura Kampf is best known for her dog, Smudo. Avid Smudo devotees may have noticed that Laura is a talented wood and metal worker with a penchant for turning unwanted scrap into fantastic and stylish creations. She also built her own tiny house, complete with an additional tiny house for Smudo.

Smudo´s Tiny Doghouse

Thank You Rockler for supporting this Project! visit them at www.rockler.com I had so much leftover material from my Tiny House Trailer that i figured i might as well build smudo his own Tiny Doghouse.

Yes, okay, we’re all about Smudo here at Raspberry Pi.

Bob Clagett

Bob Clagett likes to make stuff. All kinds of stuff, from wood, to metal, to electronics. His 2.3 million YouTube subscribers tune in for weekly tutorials, tips, and Josh, who occasionally makes appearances on screen, and otherwise helps Bob run I Like To Make Stuff behind the scenes.

Please note: our actual favourite member of the ILTMS team is Ginny Clagget, Queen of Hugs and Wonderfulness.

Jimmy DiResta

You know who he is. We know who he is. So here’s Jimmy cutting things in half with Ron Swanson Nick Offerman.

Making It – “Will It Saw?” with Nick Offerman and Jimmy DiResta (Digital Exclusive)

In the most exciting video you ever saw, Nick Offerman and Jimmy DiResta test the durability of a rollerblade, bongos, a baseball and a roll of salami.

What does it mean to you?

From woodwork and electronics, to crocheting and baking: makers come in all flavours. How do you define the word ‘maker’, and what does being a maker mean to you? Tell us on YouTube, or in the comments below.

The post How do you define ‘maker’? appeared first on Raspberry Pi.


Source: Raspberry Pi – How do you define ‘maker’?

Celebrate our seventh birthday at a Raspberry Jam near you!

Seven years ago, the Raspberry Pi was launched, and that kickstarted everything the Foundation has done. We always celebrate this “birthday” with community-focused events, and this year on the first March weekend, we are again coordinating local Jams all over the world so you can join the party!

Raspberry Pi - Raspberry Jam Big Birthday Weekend animated GIF

Calling all community members

Whether you’re a Raspberry Pi user, club volunteer, avid forum question answerer, regular blog commenter, or brand-new community member, we want you to feel welcome! Look at the map, find a Jam near you, and meet the real-world Raspberry Pi community on 2 or 3 March.

Interactive map of Raspberry Jam locations across the globe

Click through for an up-to-date interactive map

Manchester is coolest!

Coolest Projects UK, our world-leading technology fair for young people, will take place in Manchester on 2 March, and Manchester’s Birthday Jam is going to happen inside the Coolest Projects venue! We’re tying the two events together so that those of you in the North West can attend Coolest Projects without missing out on the Birthday Jam. Keep your eye on mcrraspjam.org.uk for information on Jam tickets — coming soon!

Project idea registration for Coolest Projects UK is on closing 10 Feb — only a scant few days left for the creative young maker in your life to register their idea! If you know someone who might want to participate, head over to the Coolest Projects UK website for more details.

Photobooth fun

One of the treats in the Big Birthday Weekend kit we’ve got for Jam organisers is an arcade button they can use to make their own Raspberry Pi–powered tweeting photobooths for the big day. Download the code for the project and make it your own!

A Raspberry Pi-based photobooth created for last years Raspberry Jam Big Birthday Weekend

RGVSA on Twitter

PiParty photo booth @RGVSA & @ @Nerdvana_io #Rjam

There’s still time

If you’re only just hearing about this now, and you want to run a Jam on the Big Birthday Weekend, all you need to do is:

  1. Find a venue
  2. Create a sign-up page (e.g. on Eventbrite)
  3. Submit the event to the Jam map

Once we’ve checked your submission, we’ll add your Jam to the map and send you a coupon you can use to get a free Big Birthday Weekend kit from ModMyPi.

Along with the kit, you’ll also get up to three free T-shirts. They’re also available to buy just £5.65.

A Raspberry Jam t-shirt - black, with the logo on the front

2020 vision

I’m already looking forward to our eighth birthday — next year is a leap year, so we’ll be able to celebrate on Saturday 29 February 2020!

The post Celebrate our seventh birthday at a Raspberry Jam near you! appeared first on Raspberry Pi.


Source: Raspberry Pi – Celebrate our seventh birthday at a Raspberry Jam near you!

Monitoring insects at the Victoria and Albert Museum

A simple Raspberry Pi camera setup is helping staff at the Victoria and Albert Museum track and identify insects that are threatening priceless exhibits.

“Fiacre, I need an image of bug infestation at the V&A!”

The problem with bugs

Bugs: there’s no escaping them. Whether it’s ants in your kitchen or cockroaches in your post-apocalyptic fallout shelter, insects have a habit of inconveniently infesting edifices, intent on damaging beloved belongings.

And museums are as likely as anywhere to be hit by creepy-crawly visitors. Especially when many of their exhibits are old and deliciously dusty. Yum!

Tracking insects at the V&A

As Bhavesh Shah and Maris Ines Carvalho state on the V&A blog, monitoring insect activity has become common practice at their workplace. As part of the Integrated Pest Monitoring (IPM) strategy at the museum, they even have trained staff members who inspect traps and report back their findings.

“But what if we could develop a system that gives more insight into the behaviour of insects and then use this information to prevent future outbreaks?” ask Shah and Carvalho.

The team spent around £50 on a Raspberry Pi and a 160° camera, and used these and Claude Pageau’s PI-TIMOLO software project to build an insect monitoring system. The system is now integrated into the museum, tracking insects and recording their movements — even in low-light conditions.

Emma Ormond, Raspberry Pi Trading Office Manager and Doctor of Bugs, believes this to be a Bristletail or Silverfish.

“The initial results were promising. Temperature, humidity, and light sensors could also be added to find out, for example, what time of day insects are more active or if they favour particular environmental conditions.”

For more information on the project, visit the Victoria & Albert Museum blog. And for more information on the Victoria & Albert Museum, visit the Victoria & Albert Museum, London — it’s delightful. We highly recommend attending their Videogames: Design/Play/Disrupt exhibition, which is running until 24 February.

The post Monitoring insects at the Victoria and Albert Museum appeared first on Raspberry Pi.


Source: Raspberry Pi – Monitoring insects at the Victoria and Albert Museum

Building a text adventure | Wireframe #6

Game developer Andrew Gillett explains how to make a simple text adventure in Python — and what pitfalls to avoid while doing so — in the latest issue of Wireframe magazine, out now.

Writing games in BASIC

The first game I ever wrote was named Pooh. It had nothing to do with the bear. In September 1982, I was four years old, and the ZX Spectrum home computer had just been released. It was incredible enough that the Spectrum let you play games on the TV, but like most home computers of the time, it also came with a built-in language called BASIC, and a manual which explained how to program it. In my first game, Pooh (the title was a misspelling), the player controlled a baby, represented by a pound sign, and had to guide it to a potty, represented by the letter O. There were no obstacles, no enemies, and if you tried to walk off the screen, the program would stop with an error message. I didn’t have any idea how to create a graphical game more complex than Pooh. I didn’t even know how to display a sprite on the screen.

The Hobbit, released in 1982, was widely praised for its intuitive parser.

Text adventures

Instead, I focused on writing text adventures, where the game describes scenes to the player (“You are in a comfortable, tunnel-like hall. You can see a door,” from 1982’s The Hobbit) and the player enters commands such as “Go through door” or “Kill goblin with sword.” Although this type of game is comparatively easy to write, I implemented it in the worst way possible. The code was essentially a huge list of IF statements. Each room had its own set of code, which would print out a description of the room and then check to see what the player typed. This ‘hard-coding’ led to the code being much longer than necessary, and more difficult to maintain.

The correct way would have been to separate my code and data. Each room would have had several pieces of data associated with it, such as an ID number, the description of the room (“You are in a small cave”), an array of objects which can be found in the room, and an array of room numbers indicating where the player should end up if they try to move in a particular direction – for example, the first number could indicate which room to go to if the player enters ‘NORTH’. You’d then have the main game code which keeps track of the room the player is currently in, and looks up the data for that room. With that data, it can then take the appropriate action based on the command the player typed.

Getting it right

The code below shows how to implement the beginnings of a text adventure game in Python. Instead of numeric IDs and arrays, the code uses string IDs and dictionary data structures, where each piece of data is associated with an ID or ‘key’. This is a more convenient option which wasn’t available in Spectrum BASIC. We first create a list of directions in which the player can potentially move. We then create the class Location which specifies each location’s properties. We store a name, a description, and a dictionary data structure which stores the other locations that the current location is linked to. For example, if you go north from the woods, you’ll reach the lake. The class includes a method named addLink, which adds entries to the linked locations dictionary after checking that the specified direction and destination exist.

Following the class definition, we then create a dictionary named locations. This has two entries, with the keys being woods and lake, and the values being instances of the Location class. Next, we call the addLink method on each of the locations we’ve just created, so that the player will be able to walk between them. The final step of the setup phase is to create the variable currentLocation, specifying where the player will start the game.

We then reach the main game loop, which will repeat indefinitely. We first display the description of the current location, along with the available directions in which the player can move. Then we wait for the player to input a command. In this version of the code, the only valid commands are directions: for example, type ‘north’ at the starting location to go to the lake. When a direction is entered, we check to make sure it’s a valid direction from the current location, then update currentLocation to the new location. When the main loop restarts, the description of the new location is displayed.

I moved on from the ZX Spectrum eight years after my dad first unpacked it. Despite the poor design of my code, I’d learned the essentials of programming. Ten years later, I was a game developer.

Further reading

If you’re keen to learn more about making a text adventure in Python, you could check out Phillip Johnson’s guide to the subject, Make Your Own Python Text Adventure. The author has also written a condensed version of the same guide.

You may also be interested in our free online course Object-oriented Programming in Python: Create Your Own Adventure Game.

More from Wireframe

You can discover more tutorials, alongside great reviews, articles and advice, in Wireframe issue 6, out now and available in Tesco, WHSmith, and all good independent UK newsagents.

Or you can buy Wireframe directly from the Raspberry Pi Press store — worldwide delivery is available. And if you’d like to own a handy digital version of the magazine, you can also download the PDF for free.

The post Building a text adventure | Wireframe #6 appeared first on Raspberry Pi.


Source: Raspberry Pi – Building a text adventure | Wireframe #6

Upcycle a vintage TV with the Raspberry Pi TV HAT | The MagPi #78

When Martin Mander’s portable Hitachi television was manufactured in 1975, there were just three UK channels and you’d need to leave the comfort of your sofa in order to switch between them.

A page layout of the upcycled vintage television project using the Raspberry Pi TV HAT from The MagPi issue 78

Today, we have multiple viewing options and even a cool Raspberry Pi TV HAT that lets us enjoy DVB-T2 broadcasts via a suitable antenna. So what did nostalgia-nut Martin decide to do when he connected his newly purchased TV HAT to the Pi’s 40-pin GPIO header? Why, he stuck it in his old-fashioned TV set with a butt-busting rotary switch and limited the number of channels to those he could count on one hand – dubbing it “the 1982 experience” because he wanted to enjoy Channel 4 which was launched that year.

Going live

Martin is a dab hand at CRT television conversions (he’s created six since 2012, using monitors, photo frames, and neon signs to replace the displays). “For my latest project, I wanted to have some fun with the new HAT and see if I’d be able to easily display and control its TV streams on some of my converted televisions,” he says. It’s now being promoted to his office, for some background viewing as he works. “I had great fun getting the TV HAT streams working with the rotary dial,” he adds.

Raspberry Pi TV HAT

The project was made possible thanks to the new Raspberry Pi TV HAT

Although Martin jumped straight into the HAT without reading the instructions or connecting an aerial, he eventually followed the guide and found getting it up-and-running to be rather straightforward. He then decided to repurpose his Hitachi Pi project, which he’d already fitted with an 8-inch 4:3 screen.

Upcycled television using the Raspberry Pi TV HAT

The boards, screen, and switches installed inside the repurposed Hitachi television

“It’s powered by a Pi 3 and it already had the rotary dial set up and connected to the GPIO,” he explains. “This meant I could mess about with the TV HAT, but still fall back on the original project’s script if needed, with no hardware changes required.”

Change the channel

Indeed, Martin’s main task was to ensure he could switch channels using the rotary dial and this, he says, was easier to achieve than he expected. “When you go to watch a show from the Tvheadend web interface, it downloads an M3U playlist file for you which you can then open in VLC or another media player,” he says.

Upcycled television using the Raspberry Pi TV HAT

– The Hitachi television is fitted with a Pimoroni 8-inch 4:3 screen and a Raspberry Pi 3
– Programmes stream from a Pi 2 server and the channels are changed by turning the dial
– The name of the channel briefly appears at the bottom of the screen – the playlist files are edited in Notepad

“At first, I thought the playlist file was specific to the individual TV programme, as the show’s name is embedded in the file, but actually each playlist file is specific to the channel itself, so it meant I could download a set of playlists, one per channel, and store them in a folder to give me a full range of watching options.”

Sticking to his theme, he stored playlists for the four main channels of 1982 (BBC1, BBC2, ITV, and Channel 4) in a folder and renamed them channel1, channel2, channel3, and channel4.

Upcycled television using the Raspberry Pi TV HAT

A young Martin Mander decides the blank screen of his black and white Philips TX with six manual preset buttons is preferable to the shows (but he’d like to convert one of these in the future)

“Next, I created a script with an infinite loop that would look out for any action on the GPIO pin that was wired to the rotary dial,” he continues. “If the script detects that the switch has been moved, then it opens the first playlist file in VLC, full-screen. The next time the switch moves, the script loops around and adds ‘1’ to the playlist name, so that it will open the next one in the folder.”

Martin is now planning the next stage of the project, considering expanding the channel-changing script to include streams from his IP cameras, replacing a rechargeable speaker with a speaker HAT, and looking to make the original volume controls work with the Pi’s audio. “It been really satisfying to get this project working, and there are many possibilities ahead,” he says.

More from The MagPi magazine

The MagPi magazine issue 78 is out today. Buy your copy now from the Raspberry Pi Press store, major newsagents in the UK, or Barnes & Noble, Fry’s, or Micro Center in the US. Or, download your free PDF copy from The MagPi magazine website.

The MagPi magazine issue 78

Subscribe now

Subscribe to The MagPi magazine on a monthly, quarterly, or twelve-month basis to save money against newsstand prices!

Twelve-month print subscribers get a free Raspberry Pi 3A+, the perfect Raspberry Pi to try your hand at some of the latest projects covered in The MagPi magazine.

The post Upcycle a vintage TV with the Raspberry Pi TV HAT | The MagPi #78 appeared first on Raspberry Pi.


Source: Raspberry Pi – Upcycle a vintage TV with the Raspberry Pi TV HAT | The MagPi #78