Penguin Watch — Pi Zeros and Camera Modules in the Antarctic

Long-time readers will remember Penguin Lifelines, one of our very favourite projects from back in the mists of time (which is to say 2014 — we have short memories around here).

Penguins

Click on penguins for fun and conservation

Penguin Lifelines was a programme run by the Zoological Society of London, crowdsourcing the tracking of penguin colonies in Antarctica. It’s since evolved into something called Penguin Watch, now working with the World Wildlife Fund (WWF) and British Antarctic Survey (BAS). It’s citizen science on a big scale: thousands of people from all over the world come together on the internet to…click on penguins. By counting the birds in their colonies, users help penguinologists measure changes in the birds’ behaviour and habitat, and in the larger ecosystem, thus assisting in their conservation.

The penguin people say this about Penguin Watch:

Some of these colonies are so difficult to get to that they haven’t been visited for 50 years! The images contain unprecedented detail, giving us the opportunity to gather new data on the number of penguins in the region. This information will help us understand how they are being affected by climate change, the potential impact of local fisheries, and how we can help conserve these incredible species.

Pis in the coldest, wildest place

And what are those special cameras? The static ones providing time-lapse images are Raspberry Pi Camera Modules, mounted on Raspberry Pi Zeros, and we’re really proud to see just how robust they’ve been in the face of Antarctic winters.

Alasdair Davies on Twitter

Success! The @arribada_i timelapse @Raspberry_Pi Zero cameras built for @penguin_watch survived the Antarctic winter! They captured these fantastic photos of a Gentoo penguin rookery for https://t.co/MEzxbqSyc1 #WorldPenguinDay 🐧@helenlynn @philipcolligan https://t.co/M0TK5NLT6G

These things are incredibly tough. They’re the same cameras that Alasdair and colleagues have been sticking on turtles, at depths of down to 500m; I can’t think of a better set of tests for robustness.

Want to get involved? Head over to Penguin Watch, and get clicking! We warn you, though — it’s a little addictive.

The post Penguin Watch — Pi Zeros and Camera Modules in the Antarctic appeared first on Raspberry Pi.


Source: Raspberry Pi – Penguin Watch — Pi Zeros and Camera Modules in the Antarctic

Motion-controlled water fountain…for cats!

Tired of the constant trickle of your cat’s water fountain? Set up motion detection and put your cat in control.


Cats are fickle

My cat, Jimmy, loves drinking from running water. Or from the sink. Or from whatever glass I am currently using. Basically, my cat loves drinking out of anything that isn’t his water bowl…because like all cats, he’s fickle and lives to cause his humans as much aggravation as possible.

Here’s a photo of my gorgeous boy, because what cat owner doesn’t like showing off their cat at the slightest opportunity?

Jimmy’s getting better now, thanks to the introduction of a pet water fountain in the kitchen, and we’ve somehow tricked him into using it — but what I don’t like is how the constant trickle of water makes me want to pee all the time.

Thankfully, this motion-controlled water foundation from Hackster.io maker vladimirm is here to save the day by only turning on the fountain when his cat approached it.

Motion-controlled pet water foundation

So how does it work? Vladimir explains:

When the PIR sensor detects movement, it sends a message to the radio dongle plugged to the Raspberry Pi, which sends the message to the MQTT server. On the other side, the MQTT message is processed by the Home Assistant, which then, using the automation, triggers the smart plug and starts the configured countdown.

The build uses an old Raspberry Pi 1 Model B, and a BigClown Motion Detector Kit, alongside a TP-Link smart plug and an open-source Home Assistant. The Home Assistant smartphone app documents when the smart plug is activated, and for how long, which also means you can track when your pet is drinking and check they’re getting enough water.

Vladimir goes into far more detail in the project tutorial. Now go help your cat stay hydrated!

The post Motion-controlled water fountain…for cats! appeared first on Raspberry Pi.


Source: Raspberry Pi – Motion-controlled water fountain…for cats!

We’re on holiday!

It’s a bank holiday here in the UK, so we’re taking the day off to spend some time with our families. If you’re desperate to read some content, I’ve got good news for you: there are thousands of posts about the Raspberry Pi that you can leaf through right here. Head over to the archive and fill your boots!

Normal service will resume tomorrow. In the meantime, here’s Hypnotoad so you can have something to look at.

The post We’re on holiday! appeared first on Raspberry Pi.


Source: Raspberry Pi – We’re on holiday!

Liverpool MakeFest | HackSpace magazine #19

The news that UK Maker Faire was to shut its doors came as a bit of a surprise to many. This vibrant weekend of makers meeting, sharing, and learning was absolutely brilliant, and left us fizzing with ideas after our visits there. We’re sad that it’s gone.

Makers being makers though, if there’s demand, it will be filled. And that’s exactly what’s happening in Liverpool with Liverpool MakeFest. On 29 June 2019, the MakeFest will hold its fifth iteration. This is the UK’s biggest free maker event, attracting thousands of visitors, and its vision of a free, maker-focused festival is spreading far and wide.

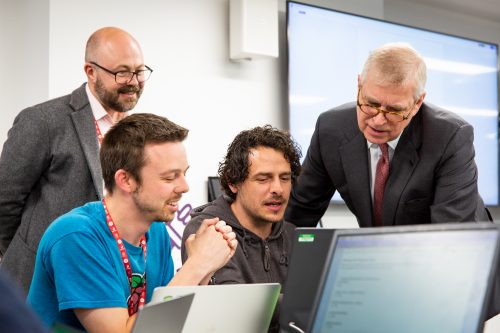
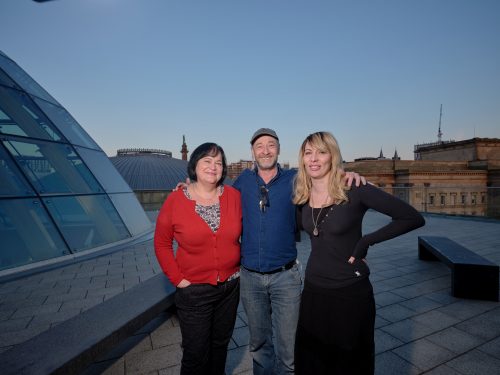
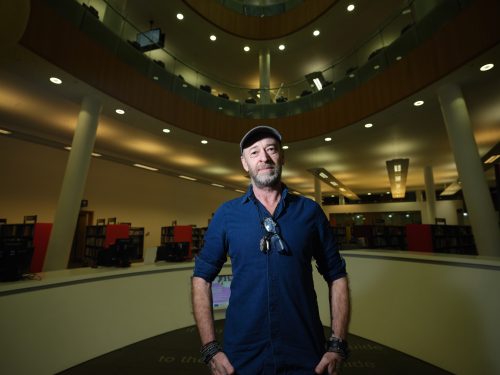
We visited the mid-Victorian splendour of Liverpool Central Library, the home of MakeFest, to talk to the founders — Denise Jones, Mark Feltham, and Caroline Keep — to find out what makes this event special.

Liverpool MakeFest 2019 is taking place at the Central Library, Saturday 29 June 2019, and it’s completely free to attend

HackSpace magazine: Hello! Thanks for having us over here. How did the three of you come together to start Liverpool MakeFest?

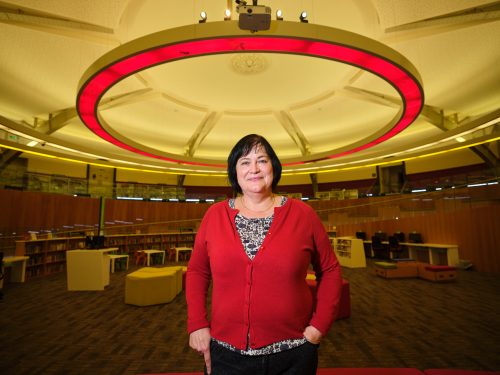
Caroline Keep: I was a geotechnical engineer, Mark’s an academic, and Denise is a librarian. We bumped into each other watching a workshop in lantern making. Mark had all the academic experience. When I came to work with Mark on his makerspace, I was the geeky maker — he didn’t even have a smartphone at that time. I got the education bug and then moved into secondary school teaching.

Mark Feltham: It all started over there, as a chance meeting. We bumped into each other and got chatting. Within six weeks, we’d filled the library. We thought it would be a one-off, but since then it’s taken off.

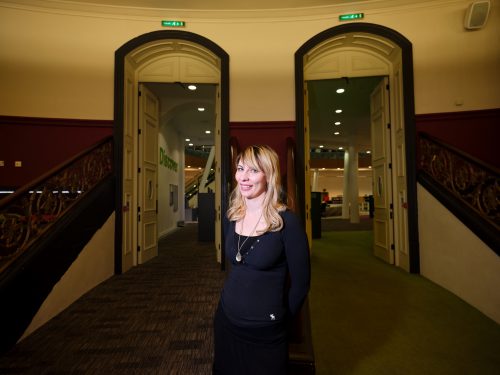
Caroline is the reigning TES New Teacher Of The Year

HS: So no business plan, no franchising fees, no world domination?

CK: We’ve just winged it. We made all the banners, bunting. The first year my PGCE fund paid for MakeFest! This building reopened again in 2013, and in 2014 we were lucky that they were running a programme of events and initiatives to make it a really vibrant building, so it was the right time as well. We thought we’d have a little room off to the side and get maybe six tables. We’d already done a Mini Maker Faire, and we’ve always been good friends with [local makerspace] DoES Liverpool, so we were confident we’d get at least a few people turning up. And in six weeks we were full.

MF: We pulled the first one off, we’re talking the first three floors of the library and 60 makers, for £850. And that included feeding them and making badges as well.

One of the spin-offs that have come out of MakeFest is Little Sandboxes, which takes making out to deprived areas of the city

HS: For context, this building is huge. It’s bigger than most libraries; it’s probably about the same size as the Life Centre in Newcastle, where UK Maker Faire was held until recently. It must have helped to have a librarian on board to negotiate with the powers that be?

Denise Jones: I had to sell it to the people in charge back then, which were the head of service and the manager of this building. The Department for Culture, Media and Sport has a Taskforce for Libraries, which is funded until next year. We’re close to finishing the national guidance now for the Taskforce — the idea is to get one of these [MakeFests] in every library. We wanted the guidance doc to be inclusive of museums and libraries, because we knew that Manchester had opted to put their MakeFest in a museum. We’ve got Chester and Stoke MakeFest, and there’s one in the pipeline in Wrexham. We were having the same conversations over and over again, so we decided to write a document: how to run a MakeFest.

Liverpool Central Library was renovated a few years ago — the precious books went into temporary storage in a salt mine in Cheshire to keep them dry

HS: What have we got to look forward to this year and beyond?

CK: That’s a good question. We’ve got some corking stuff coming this year. We’ve given it the theme ’Space and time – creativity in the making’. We’ve got events planned for the Apollo anniversary, and [just] before MakeFest we’re going to kick off with a music day, showing people how to make music, and making the instruments to make music. That’s another spin-off that’s come out of MakeFest: the MakerNoise Unconference at Edge Hill University.

MF: We’ve always felt that we hold MakeFest in trust for makers. In terms of where it goes long-term, I don’t see it ever becoming more than a one-day event here, because one day is good. It gives people Sunday to get over things, and get home because they have day jobs on a Monday. We’re always very sensitive to that, we don’t want to take up too much of people’s time. The other thing is that I don’t see it spilling out into a bigger building; it’s always going to be in the library. But the way to grow it is to put it in other libraries. Not to make this one, Liverpool, bigger and take over. Then each maker community gets its own feel, and its own vibe — Stoke MakeFest has a very different feel to ours, because their maker scene is different to ours, and their city is different to ours.

The other way to expand it is that, rather than by just expanding to other cities, you can have more events on throughout the year. Rather than being solely a one-day event, you can have all these spin-offs, so once a month there’s something going on. Rather than it just being about tech and digital, we’ve always liked to have some sort of fantasy element. Things like Doctor Who, Star Wars, Darth Vader, K-9 — the kids love that. We have a lot of friends who are into steampunk; they get roped in to do front-of-house duties. You know what the funny thing was at the first one? Not only did the public enjoy it, but also the makers. It’s kind of like a musician playing an acoustic set. We’ve got a get-together on the Thursday before, we’ve got a Friday night party going, we always do an after-party. The public come on the Saturday, but there’s always stuff going on that week for makers.

In addition to always wanting it to be free for the public, and for the makers to not have to pay for their stand, we feel very strongly that we should give something back. We always give them lunch, we always give them a badge, and there’s always a party. We can’t pay them, but it’s our way of showing our appreciation to the makers who come and make it what it is. The celebration and sharing are big parts of the maker ethos.

People like to show [their projects] not to show off, not to say ‘Look at how clever I am’ — it’s more to say ‘Look at this awesome thing, isn’t this cool?’ Trying to explain that to people can be tricky. You can make this: here’s how you do it. That’s the ethos.

CK: I always feel with MakeFest — you said it’s like an acoustic gig. I always envisioned it as Liverpool’s party for makers. It’s our little get-together, and that’s how I like it.

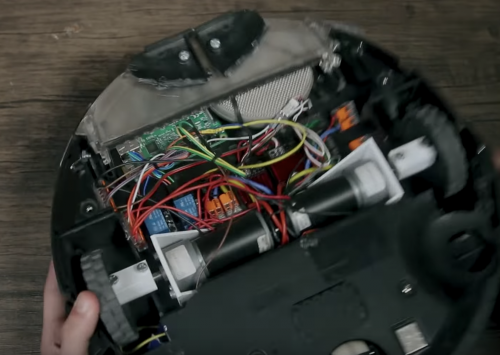
Read the full interview in HackSpace magazine issue 19, out now! This month we’re looking at building a walking robot, laser cutting LED jewellery, the 55 timer chip, and much more. Download the issue for free, or buy it in print on our website.

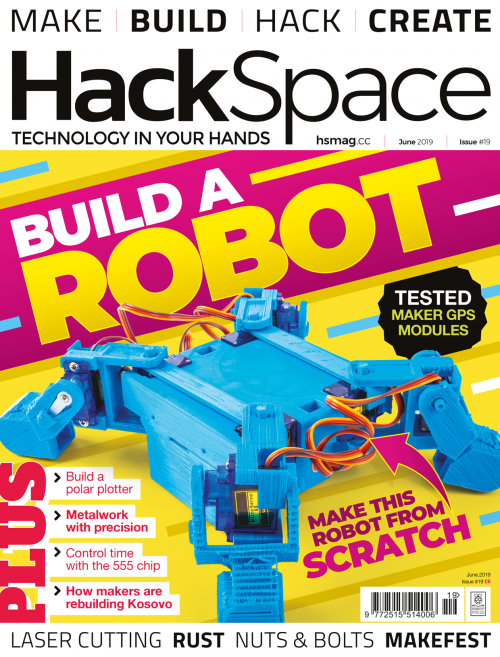
Get HackSpace magazine issue 19 from all good newsagents

Special subscription offer

To have 132 pages of making delivered to your doorstep every month, subscribe to HackSpace magazine from just £5 for your first three issues.

The post Liverpool MakeFest | HackSpace magazine #19 appeared first on Raspberry Pi.


Source: Raspberry Pi – Liverpool MakeFest | HackSpace magazine #19

Make a Donkey Kong–style walk cycle | Wireframe issue 14

Effective animation gave Donkey Kong barrels of personality. Raspberry Pi’s own Rik Cross explains how to create a similar walk cycle.

Donkey Kong wasn’t the first game to feature an animated character who could walk and jump, but on its release in 1981, it certainly had more personality than the games that came before it. You only have to compare Donkey Kong to another Nintendo arcade game that came out just two years earlier — the half-forgotten top-down shooter Sheriff — to see how quickly both technology and pixel art moved on in that brief period. Although simple by modern standards, Donkey Kong’s hero Jumpman (later known as Mario) packed movement and personality into just a few frames of animation.

In this article, I’ll show you how to use Python and Pygame to create a character with a simple walk cycle animation like Jumpman’s in Donkey Kong. The code can, however, be adapted for any game object that requires animation, and even for multiple game object animations, as I’ll explain later.

Jumpman’s (aka Mario’s) walk cycle comprised just three frames of animation.

Firstly, we’ll need some images to animate. As this article is focused on the animation code and not the theory behind creating walk cycle images, I grabbed some suitable images created by Kenney Vleugels and available at opengameart.org.

Let’s start by animating the player with a simple walk cycle. The two images to be used in the animation are stored in an images list, and an animationindex variable keeps track of the index of the current image in the list to display. So, for a very simple animation with just two different frames, the images list will contain two different images:

images = [‘walkleft1’,‘walkleft2’

To achieve a looping animation, the animationindex is repeatedly incremented, and is reset to 0 once the end of the images list is reached. Displaying the current image can then be achieved by using the animationindex to reference and draw the appropriate image in the animation cycle:

self.image = self.images[self.state][self.animationindex]

A list of images along with an index is used to loop through an animation cycle.

The problem with the code described so far is that the animationindex is incremented once per frame, and so the walk cycle will happen way too quickly, and won’t look natural. To solve this problem, we need to tell the player to update its animation every few frames, rather than every frame. To achieve this, we need another couple of variables; I’ll use animationdelay to store the number of frames to skip between displayed images, and animationtimer to store the number of frames since the last image change.

Therefore, the code needed to animate the player becomes:

self.animationtimer += 1
if self.animationtimer >= self.animationdelay:
self.animationtimer = 0
self.animationindex += 1
if self.animationindex > len(self.images) - 1:
self.animationindex = 0
self.image = self.images[self.animationindex]

So we have a player that appears to be walking, but now the problem is that the player walks constantly, and always in the same direction! The rest of this article will show you how to solve these two related problems.

There are a few different ways to approach this problem, but the method I’ll use is to make use of game object states, and then have different animations for each state. This method is a little more complicated, but it’s very adaptable.

The first thing to do is to decide on what the player’s ‘states’ might be — stand, walkleft, and walkright will do as a start. Just as we did with our previous single animation, we can now define a list of images for each of the possible player’s states. Again, there are lots of ways of structuring this data, but I’ve opted for a Python dictionary linking states and image lists:

self.images = { ‘stand’ : [‘stand1’],
‘walkleft’ : [‘walkleft1’,‘walkleft2’],
‘walkright’ : [‘walkright1’,‘walkright2’]
}

The player’s state can then be stored, and the correct image obtained by using the value of state along with the animationindex:

self.image = self.images[self.state][self.animationindex]

The correct player state can then be set by getting the keyboard input, setting the player to walkleft if the left arrow key is pressed or walkright if the right arrow key is pressed. If neither key is pressed, the player can be set to a stand state; the image list for which contains a single image of the player facing the camera.

Animation cycles can be linked to player ‘states’.

For simplicity, a maximum of two images are used for each animation cycle; adding more images would create a smoother or more realistic animation.

Using the code above, it would also be possible to easily add additional states for, say, jumping or fighting enemies. You could even take things further by defining an Animation() object for each player state. This way, you could specify the speed and other properties (such as whether or not to loop) for each animation separately, giving you greater flexibility.

Here’s Rik’s animated walk cycle, coded in Python. To get it running on your system, you’ll first need to install Pygame Zero. And to download the full code, go here.

Get your copy of Wireframe issue 14

You can read more features like this one in Wireframe issue 14, available now at Tesco, WHSmith, and all good independent UK newsagents.

Or you can buy Wireframe directly from Raspberry Pi Press — delivery is available worldwide. And if you’d like a handy digital version of the magazine, you can also download issue 14 for free in PDF format.

Make sure to follow Wireframe on Twitter and Facebook for updates and exclusive offers and giveaways. Subscribe on the Wireframe website to save up to 49% compared to newsstand pricing!

The post Make a Donkey Kong–style walk cycle | Wireframe issue 14 appeared first on Raspberry Pi.


Source: Raspberry Pi – Make a Donkey Kong–style walk cycle | Wireframe issue 14

His Royal Highness the Duke of York visits Raspberry Pi HQ

We welcomed a very special guest to Raspberry Pi HQ today.

Our Patron, His Royal Highness Prince Andrew, the Duke of York, visited our central Cambridge HQ to meet our team, learn more about our work, and give his support for our mission to help more young people learn how to create with computers.

Prince Andrew speaking at a lectern

Royalty and Raspberry Pi

Avid readers of this blog will know that this isn’t Raspberry Pi’s first royal encounter. Back in 2014, Raspberry Pi was one of the UK tech startups invited to showcase our product at a reception at Buckingham Palace. At that stage, we had just celebrated the sale of our two millionth credit card–sized computer.

Fast forward to October 2016, when were celebrating the sale of our ten millionth Raspberry Pi computer with a reception at St James Palace and 150 members of our community. By this time, not only was our product flying off the shelves, but the Foundation had merged with Code Club, had expanded its teacher training programmes, and was working with thousands of volunteers to bring computing and digital making to tens of thousands of young people all over the world.

Prince Andrew and a woman watching a computer screen

Both of our trips to the royal palaces were hosted by Prince Andrew, who has long been a passionate advocate for technology businesses and digital skills. On top of his incredible advocacy work, he’s also an entrepreneur and innovator in his own right, founding and funding initiatives such as iDEA and Pitch at the Palace, which make a huge impact on digital skills and technology startups.

We are really very fortunate to have him as our Patron.

Leaps and bounds

Today’s visit was an opportunity to update Prince Andrew on the incredible progress we’ve made towards our mission since that first trip to Buckingham Palace.

We now have over 25 million Raspberry Pi computers in the wild, and people use them in education, in industry, and for their hobbies in an astonishing number of ways. Through our networks of Code Clubs and CoderDojos, we have supported more than a million young people to learn how to create with technology while also developing essential life skills such as teamwork, resilience, and creativity. You can read more about what we’ve achieved in our latest Annual Review.

Prince Andrew speaking to two seated people

We talked with Prince Andrew about our work to support computing in the classroom, including the National Centre for Computing Education in England, and our free online teacher training that is being used by tens of thousands of educators all over the world to develop their skills and confidence.

Prince Andrew shares our determination to encourage more girls to learn about computing and digital making, and we discussed our #realrolemodels campaign to get even more girls involved in Code Clubs and CoderDojos, as well as the groundbreaking gender research project that we’ve launched with support from the UK government.

Dream team

One of our rituals at the Raspberry Pi Foundation is the monthly all-staff meetup. On the third Wednesday of every month, colleagues from all over the world congregate in Cambridge to share news and updates, learn from each other, and plan together (and yes, we have a bit of fun too).

Prince Andrew and three other men watching a computer screen

My favourite part of Prince Andrew’s visit is that he organised it to coincide with the all-staff meetup. He spent most of his time speaking to team members and hearing about the work they do every day to bring our mission to life through creating educational resources, supporting our massive community of volunteers, training teachers, building partnerships, and much more.

In his address to the team, he said:

Raspberry Pi is one of those organisations that I have been absolutely enthralled by because of what you have enabled. The fact that there is this piece of hardware that started this, and that has led to educational work that reaches young people everywhere, is just wonderful.

In the 21st century, every single person in the workplace is going to have to use and interact with some form of digital technology. The fact that you are giving the next generation the opportunity to get hands-on is fantastic.

The post His Royal Highness the Duke of York visits Raspberry Pi HQ appeared first on Raspberry Pi.


Source: Raspberry Pi – His Royal Highness the Duke of York visits Raspberry Pi HQ

The NSFW Roomba that screams when it bumps into stuff

Hide yo’ kids, hide yo’ wife — today’s project is NSF(some)W, or for your kids. LOTS OF SWEARS. You have been warned. We’re not embedding the video here so you can decide for yourself whether or not to watch it — click on the image below to watch a sweary robot on YouTube.

Sweary Roomba

Michael Reeves is best known for such… educational Raspberry Pi projects as:

He’s back, this time with yet another NSFW (depending on your W) project that triggers the sensors in a Roomba smart vacuum to scream in pain whenever it bumps into an object.

Because why not?

How it’s made

We have no clue. So very done with fans asking for the project to be made — “I hate every single one of you!” — Michael refuses to say how he did it. But we know this much is true: the build uses optical sensors, relays, a radio receiver, and a Raspberry Pi. How do I know this? Because he showed us:

Roomba innards

But as for the rest? We leave it up to you, our plucky community of tinkerers, to figure it out. Share your guesses in the comments.

More Michael Reeves

Michael is one of our Pi Towers guilty pleasures and if, like us, you want to watch more of his antics, you should subscribe to him on YouTube.

The post The NSFW Roomba that screams when it bumps into stuff appeared first on Raspberry Pi.


Source: Raspberry Pi – The NSFW Roomba that screams when it bumps into stuff

Build your own animatronic GLaDOS

It’s 11 years since Steam’s Orange Box came out, which is probably making you feel really elderly. Portal was the highlight of the game bundle for me — cue giant argument in the comments — and it still holds up brilliantly. It’s even in the Museum of Modern Art’s collection; there’s nothing that quite says you’re part of the establishment like being in a museum. Cough.

I bought an inflatable Portal turret to add to the decor in Raspberry Pi’s first office (I’m still not sure why; I just thought it was a good idea at the time, like the real-life Minecraft sword). Objects and sounds from the game have embedded themselves in pop culture; there’s a companion cube paperweight somewhere in my desk at home, and I bet you’ve encountered a cake that looks like this sometime in the last 11 years or so.

A lie

But turrets, cakes, and companion cubes pale into viral insignificance next to the game’s outstanding antagonist, GLaDOS, a psychopathic AI system who just happens to be my favourite video game bad guy of all time. So I was extremely excited to see Element14’s DJ Harrigan make an animatronic GLaDOS, powered, of course, by a Raspberry Pi.

Animitronic GLaDOS Head with Raspberry Pi

The Portal franchise is one of the most engaging puzzle games of the last decade and beyond the mind-bending physics, is also known for its charming A.I. antagonist: G.L.a.D.O.S. Join DJ on his journey to build yet more robotic characters from pop culture as he “brings her to life” with a Raspberry Pi and sure dooms us all.

Want to make your own? You’ll find everything you need here. I’ve been trying awfully hard not to end this post on a total cliche, but I’m failing hard: this was a triumph.

The post Build your own animatronic GLaDOS appeared first on Raspberry Pi.


Source: Raspberry Pi – Build your own animatronic GLaDOS

Play musical chairs with Marvel’s Avengers

You read that title correctly.

I played musical chairs against the Avengers in AR

Planning on teaching a 12 week class on mixed reality development starting in June. Apply if interested – http://bit.ly/3016EdH

Playing with the Avengers

Abhishek Singh recently shared his latest Unity creation on Reddit. And when Simon, Righteous Keeper of the Swag at Pi Towers, shared it with us on Slack because it uses a Raspberry Pi, we all went a little doolally.

As Abhishek explains in the video, the game uses a Raspberry Pi to control sensors and lights, bridging the gap between augmented reality and the physical world.

“The physical world communicates with the virtual world through these buttons. So, when I sit down on a physical chair, and press down on it, the virtual characters know that this chair is occupied,” he explains, highlighting that the chairs’ sensors are attached to a Raspberry Pi. To save the physical-world player from accidentally sitting on Thanos’s lap, LEDs, also attached to the Pi, turn on when a chair is occupied in the virtual world.

Turning the losing Avenger to dust? Priceless 👌

Why do you recognise Abhishek Singh?

You might be thinking, “Where do I recognise Abhishek Singh from?” I was asking myself this for a solid hour — until I remembered Peeqo, his robot that only communicates through GIF reactions. And Instagif NextStep, his instant camera that prints GIFs!

First GIFs, and now musical chairs with the Avengers? Abhishek, it’s as if you’ve understood the very soul of the folks who work at Pi Towers, and for that, well…

The post Play musical chairs with Marvel’s Avengers appeared first on Raspberry Pi.


Source: Raspberry Pi – Play musical chairs with Marvel’s Avengers

Raspberry Pi Press: what’s on our newsstand?

Raspberry Pi Press, the publishing branch of Raspberry Pi Trading, produces a great many magazines and books every month. And in keeping with our mission to make computing and digital making as accessible as possible to everyone across the globe, we make the vast majority of our publications available as free PDFs from the day we release new print versions.

We recently welcomed Custom PC to the Press family and we’ve just published the new-look Custom PC 190. So this is a perfect time to showcase the full catalogue of Raspberry Pi Press publications, to help you get the most out of what we have on offer.

The MagPi magazine

The MagPi was originally created by a group of Raspberry Pi enthusiasts from the Raspberry Pi forum who wanted to make a magazine that the whole community could enjoy. Packed full of Pi-based projects and tutorials, and Pi-themed news and reviews, The MagPi now sits proudly upon the shelves of Raspberry Pi Press as the official Raspberry Pi magazine.

The MagPi magazine issue 81

Visit The MagPi magazine online, and be sure to follow them on Twitter and subscribe to their YouTube channel.

HackSpace magazine

The maker movement is growing and growing as ever more people take to sheds and makerspaces to hone their skills in woodworking, blacksmithing, crafting, and other creative techniques. HackSpace magazine brings together the incredible builds of makers across the world with how-to guides, tips and advice — and some utterly gorgeous photography.

Visit the HackSpace magazine website, and follow their Twitter account and Instagram account.

Wireframe magazine

“Lifting the lid on video games”, Wireframe is a gaming magazine with a difference. Released bi-weekly, Wireframe reveals to readers the inner workings of the video game industry. Have you ever wanted to create your own video game? Wireframe also walks you through how you can do it, in their ‘The Toolbox’ section, which features tutorials from some of the best devs in the business.

Follow Wireframe magazine on Twitter, and learn more on their website.

Hello World magazine

Hello World is our free magazine for educators who teach computing and digital making, and we produce it in association with Computing at Schools and the BCS Academy of Computing. Full of lesson plans and features from teachers in the field, Hello World is a unique resource for everyone looking to bring computing into the classroom, and for anyone interested in computing and digital making education.

Hello World issue 8

Educators in the UK can subscribe to have Hello World delivered for free to their door; if you’re based somewhere else, you can download the magazine for free from the day of publication, or purchase it via the Raspberry Pi Press online store. Follow Hello World on Twitter and visit the website for more.

Custom PC magazine

New to Raspberry Pi Press, Custom PC is the UK’s best-selling magazine for PC hardware, overclocking, gaming, and modding. With monthly in-depth reviews, special features, and step-by-step guides, Custom PC is the go-to resource for turning your computer up to 11.

Visit the shiny new Custom PC website, and be sure to follow them on Twitter.

Books

Magazines aren’t our only jam: Raspberry Pi Press also publishes a wide variety of books, from introductions to topics like the C programming language and Minecraft on your Pi, to our brand-new Raspberry Pi Beginner’s Guide and the Code Club Book of Scratch.

An Introduction to C and GUI programming by Simon Long


We also bridge the gap between our publications with one-off book/magazine hybrids, such as HackSpace magazine’s Book of Making and Wearable Tech Projects, and The MagPi’s Raspberry Pi Projects Book series.


Getting your copies

If you’d like to support our educational mission at the Raspberry Pi Foundation, you can subscribe to our magazines, and you can purchase copies of all our publications via the Raspberry Pi Press website, from many high street newsagents, or from the Raspberry Pi Store in Cambridge. And most of our publications are available as free PDFs so you can get your hands on our magazines and books instantly.

Whichever of our publications you choose to read, and however you choose to read them, we’d love to hear what you think of our Raspberry Pi Press offerings, and we hope you enjoy them all.

The post Raspberry Pi Press: what’s on our newsstand? appeared first on Raspberry Pi.


Source: Raspberry Pi – Raspberry Pi Press: what’s on our newsstand?

Video call with a Raspberry Pi and Google Duo

Use Google Duo and a Raspberry Pi to build a video doorbell for your home so you can always be there to answer your door, even when you’re not actually there to answer your door.

“Martin Mander builds a good build,” I reply to Liz Upton as she shares this project, Martin’s latest one, with me on Slack. We’re pretty familiar with his work here at Raspberry Pi! Previously, we’ve shared his Google AIY retrofit intercom, upcycled 1970s TV with built-in Raspberry Pi TV HAT, and Batinator. We love the extra step that Martin always takes to ensure the final result of each project is clean-cut and gorgeous-looking, with not even a hint of hot glue in sight.

Raspberry Pi video doorbell

“I’ve always fancied making a video doorbell using a Raspberry Pi,” explains Martin in the introduction to his project on Hackster.io. “[B]ut until recently I couldn’t find an easy way to make video calls that would both work in a project and be straightforward for others to recreate.”

By ‘recently’, he means February of this year, when Google released their Duo video chat application for web browsers.

With a Raspberry Pi 3B+ and a webcam in hand, Martin tested the new release, and lo and behold, he was able to video-call his wife with relative ease via Chromium, Raspbian‘s default browser.

“The webcam I tested had a built-in microphone, and even on the first thrown-together test call, the quality was great. This was a very exciting moment, unlocking the potential of the video doorbell project as well as many other possibilities.”

By accident, Martin also discovered that you can run Google Duo out of the browser, even on the Raspberry Pi. This allowed him to strip away all the unnecessary “Chromium furniture”.

But, if this was to be a video doorbell, how was he to tell the Raspberry Pi to call his mobile phone when the doorbell was activated?

“If Duo were a full app, then command line options might be available, for example to launch the app and immediately call a specific contact. In the absence of this (for now?) I needed to find a way to automatically start a call with a GPIO button press.”

To accomplish this, Martin decided to use PyUserInput, a community-built cross-platform module for Python. “The idea was to set up a script to wait for a button press, then move the mouse to the Contacts textbox, type the name of the contact, press Enter and click Video Call“, Martin explains. And after some trial and error — and calls to the wrong person — his project was a working success.

To complete the build, Martin fitted the doorbell components into a 1980s intercom (see his previous intercom build), wired them through to a base unit inside the home, and then housed it all within an old Sony cassette player.

The final result? A functional video doorbell that is both gorgeous and practical. You can find out more about the project on the Hackster.io project page.

The post Video call with a Raspberry Pi and Google Duo appeared first on Raspberry Pi.


Source: Raspberry Pi – Video call with a Raspberry Pi and Google Duo

Possibilities of the Raspberry Pi — from Code Club to Coolest Projects USA

Yolanda Payne is a veteran teacher and Raspberry Pi Certified Educator. After discovering a love for computers at an early age (through RadioShack Tandy), Yolanda pursued degrees in Instructional/Educational Technology at Mississippi State University, the University of Florida, and the University of Georgia. She has worked as an instructional designer, webmaster, and teacher, and she loves integrating technology into her lessons. Here’s Yolanda’s story:

My journey to becoming a Raspberry Pi Certified Educator started when an esteemed mentor, Juan Valentin, tweeted about the awesome experience he had while attending Picademy. Having never heard of Picademy or the Raspberry Pi, I decided to check out the website and instantly became intrigued. I applied for a Raspberry Pi STEM kit from the Civil Air Patrol and received a Raspberry Pi and a ton of accessories. My curiosity would not be satisfied until I learned just what I could do with the box of goodies. So I decided to apply to Picademy and was offered a spot after being waitlisted. Thus my obsession with the possibilities of the Raspberry Pi began.

Code Club allows me to provide a variety of lessons, tailored to my students’ interests and skill levels, without me having to be an expert

While at Picademy, I learned about Code Club. Code Club allows me to provide a variety of lessons tailored to my learners’ interests and skill levels, without me having to be an expert in all of the lessons. My students are 6th- to 8th-graders, and there are novice coders as well as intermediate and advanced coders in the group. We work through lessons together, and I get to be a student with them.

I have found a myriad of resources to support their dreams of making

Although I may not have all the answers to their questions, I’m willing to work to secure whatever supplies they need for their project making. Whether through DonorsChoose, grants, student fundraising, or my personal contributions, I have found a myriad of resources to support their dreams of making.

Raspberry Pi group photo!

My district has invested in a one-to-one computer initiative for students, and I am happy to help students become creators of technology and not just consumers. Having worked with Code Club through the Raspberry Pi Foundation, my students and I realize just how achievable this dream can be. I’m able to enhance my Pi skills by teaching a summer hacking camp at our local university, and next year, we have goals to host a Pi Jam! Thankfully, my principal is very supportive of our endeavours.

Students at Coolest Projects USA 2018

This year, a few of my students and my son were able to participate in Coolest Projects USA 2018 to show off their projects, including a home surveillance camera, a RetroPie arcade game, a Smart Mirror, and a photo booth and dash cam. They dedicated a lot of time and effort to bring these projects to life, often on their own and beyond the hours of our Code Club. This adventure has inspired them, and they are already recruiting other students to join them next year! The possibilities of the Raspberry Pi constantly rejuvenates my curiosity and enhances the creativity that I get to bring to my teaching — both inside and outside the classroom.

Learn more

Learn more about the free programmes and resources Yolanda has used on her computer science education journey, such as Picademy, Code Club, and Coolest Projects, by visiting the Education section of our website.

The post Possibilities of the Raspberry Pi — from Code Club to Coolest Projects USA appeared first on Raspberry Pi.


Source: Raspberry Pi – Possibilities of the Raspberry Pi — from Code Club to Coolest Projects USA

Raspberry Pi captures a Soyuz in space!

So this happened. And we are buzzing!

You’re most likely aware of the Astro Pi Challenge. In case you’re not, it’s a wonderfully exciting programme organised by the European Space Agency (ESA) and us at Raspberry Pi. Astro Pi challenges European young people to write scientific experiments in code, and the best experiments run aboard the International Space Station (ISS) on two Astro Pi units: Raspberry Pi 2s and Sense HATs encased in flight-grade aluminium spacesuits.

It’s very cool. So, so cool. As adults, we’re all extremely jealous that we’re unable to take part. We all love space and, to be honest, we all want to be astronauts. Astronauts are the coolest.

So imagine our excitement at Pi Towers when ESA shared this photo on Friday:

This is a Soyuz vehicle on its way to dock with the International Space Station. And while Soyuz vehicles ferry between earth and the ISS all the time, what’s so special about this occasion is that this very photo was captured using a Raspberry Pi 2 and a Raspberry Pi Camera Module, together known as Izzy, one of the Astro Pi units!

So if anyone ever asks you whether the Raspberry Pi Camera Module is any good, just show them this photo. We don’t think you’ll need to provide any further evidence after that.

The post Raspberry Pi captures a Soyuz in space! appeared first on Raspberry Pi.


Source: Raspberry Pi – Raspberry Pi captures a Soyuz in space!

Create an arcade-style zooming starfield effect | Wireframe issue 13

Unparalleled depth in a 2D game: PyGame Zero extraordinaire Daniel Pope shows you how to recreate a zooming starfield effect straight out of the eighties arcade classic Gyruss.

The crowded, noisy realm of eighties amusement arcades presented something of a challenge for developers of the time: how can you make your game stand out from all the other ones surrounding it? Gyruss, released by Konami in 1983, came up with one solution. Although it was yet another alien blaster — one of a slew of similar shooters that arrived in the wake of Space Invaders, released in 1978 — it differed in one important respect: its zooming starfield created the illusion that the player’s craft was hurtling through space, and that aliens were emerging from the abyss to attack it.

This made Gyruss an entry in the ‘tube shooter’ genre — one that was first defined by Atari’s classic Tempest in 1981. But where Tempest used a vector display to create a 3D environment where enemies clambered up a series of tunnels, Gyruss used more common hardware and conventional sprites to render its aliens on the screen. Gyruss was designed by Yoshiki Okamoto (who would later go on to produce the hit Street Fighter II, among other games, at Capcom), and was born from his affection for Galaga, a 2D shoot-’em-up created by Namco.

Under the surface, Gyruss is still a 2D game like Galaga, but the cunning use of sprite animation and that zooming star effect created a sense of dynamism that its rivals lacked. The tubular design also meant that the player could move in a circle around the edge of the play area, rather than moving left and right at the bottom of the screen, as in Galaga and other fixed-screen shooters like it. Gyruss was one of the most popular arcade games of its period, probably in part because of its attention-grabbing design.

Here’s Daniel Pope’s example code, which creates a Gyruss-style zooming starfield effect in Python. To get it running on your system, you’ll first need to install Pygame Zero — find installation instructions here, and download the Python code here.

The code sample above, written by Daniel Pope, shows you how a zooming star field can work in PyGame Zero — and how, thanks to modern hardware, we can heighten the sense of movement in a way that Konami’s engineers couldn’t have hoped to achieve about 30 years ago. The code generates a cluster of stars on the screen, and creates the illusion of depth and movement by redrawing them in a new position in a randomly chosen direction each frame.

At the same time, the stars gradually increase their brightness over time, as if they’re getting closer. As a modern twist, Pope has also added an extra warp factor: holding down the Space bar increases the stars’ velocity, making that zoom into space even more exhilarating.

Get your copy of Wireframe issue 13

You can read the rest of the feature in Wireframe issue 13, available now at Tesco, WHSmith, and all good independent UK newsagents.

Or you can buy Wireframe directly from Raspberry Pi Press — delivery is available worldwide. And if you’d like a handy digital version of the magazine, you can also download issue 13 for free in PDF format.

Make sure to follow Wireframe on Twitter and Facebook for updates and exclusive offers and giveaways. Subscribe on the Wireframe website to save up to 49% compared to newsstand pricing!

The post Create an arcade-style zooming starfield effect | Wireframe issue 13 appeared first on Raspberry Pi.


Source: Raspberry Pi – Create an arcade-style zooming starfield effect | Wireframe issue 13

Get the new-look Custom PC magazine for free!

After buying top PC hobbyist mag Custom PC earlier this year, we’ve buffed it to a shine and we’re now ready to share our slightly tweaked formula with you.

We’re offering 5000 free copies of Issue 190 of Custom PC

Raspberry Pi and Custom PC

“We’ve been fans of Custom PC for a long time, so when the opportunity arose to add it to the Raspberry Pi Press stable, we couldn’t resist,” says Raspberry Pi co-founder and Raspberry Pi Trading CEO, Eben Upton.

“You’ll already have seen some of the investments we’ve made in the title, from higher-quality paper to more (and more technical) feature content, and this redesign is the next step in that process. This is the Custom PC that we always wanted to see and that our shared communities deserve.”

“We’re looking forward to hearing your feedback, and to many more years of hacking, modding, and learning. The engineering skills you learn as you work through the trade-offs of building a custom gaming rig on a budget are every bit as valuable as those you learn from building a robot or writing a computer game on a Raspberry Pi.”

Get the relaunch issue for free

The first issue with our new-look design is now on sale at all good newsagents. With a dash of electric pink and a lovely spot-gloss finish, it will be easy to spot on the shelf. What’s more, you can try it out for free! We’re giving away 5000 copies to the first people who take advantage of this offer. Postage is free in the UK and heavily subsidised overseas.

Custom PC has regularly featured computer hobbyist content

Custom PC issue 190

Custom PC is all about making the computer that you want, and issue 190’s lead cover feature is a great example, showing you how to turn a standard PC into a lavish system with your own personal stamp. We take you through the whole process of building a dream PC, from the initial inspiration, through to design, planning, and cooling considerations, and then onto painting and cutting.

Also in this issue:

  • Monitors with FreeSync and G-Sync
  • How to cut air vents
  • How LCD monitors work
  • £200–£300 graphics cards group test

The latest issue’s lead cover feature is all about turning a standard PC into something really special

We hope you enjoy reading the new-look Custom PC as much as we’ve enjoyed making it. And while we were at it, we’ve also launched a new Custom PC website. If you’re interested in the wonderful world of PC building, overclocking, modding, and gaming, then visit the site to order your free copy now!

The post Get the new-look Custom PC magazine for free! appeared first on Raspberry Pi.


Source: Raspberry Pi – Get the new-look Custom PC magazine for free!

Make a retro console with RetroPie and a Raspberry Pi — part 2

Here’s part two of Lucy Hattersley’s wonderful retro games console tutorial. Part 1 of the tutorial lives here, for those of you who missed it.

Choose the network locale

RetroPie boots into EmulationStation, which is your starter interface. It’s currently displaying just the one option, RetroPie, which is used to set up the emulation options. As you add games to RetroPie, other systems will appear in EmulationStation.

With RetroPie selected, press the A button on the gamepad to open the configuration window. Use the D-pad to move down the options and select WiFi. You will see a warning message: ‘You don’t currently have your WiFi country set…’. Press the D-pad left to choose Yes, and press A. The interface will open raspi-config. At this point, it’s handy to switch to the keyboard and use that instead.

Choose 4 Localisation Options, and press the right arrow key on the keyboard to highlight Select, then press Enter.

Now choose 4 Change Wi-fi Country and pick your country from the list. We used GB Britain (UK). Highlight OK and press Enter to select it.

Now move right twice to choose Finish and press Enter. This will reboot the system.

Connect to wireless LAN

If you have a Raspberry Pi with an Ethernet connection, you can use an Ethernet cable to connect directly to your router/modem or network.

More likely, you’ll connect the Raspberry Pi to a wireless LAN network so you can access it when it’s beneath your television.

Head back into RetroPie from EmulationStation and down to the WiFi setting; choose Connect to WiFi network.

The window will display a list of nearby wireless LAN networks. Choose your network and use the keyboard to enter the wireless LAN password. Press Enter when you’re done. Choose the Exit option to return to the RetroPie interface.

Configuration tools

Now choose RetroPie Setup and then Configuration Tools. Here, in the Choose an option window, you’ll find a range of useful tools. As we’re using a USB gamepad, we don’t need the Bluetooth settings, but it’s worth noting they’re here.

We want to turn on Samba so we can share files from our computer directly to RetroPie. Choose Samba and Install RetroPie Samba shares, then select OK.

Now choose Cancel to back up to the Choose an option window, and then Back to return to the RetroPie-Setup script.

Run the setup script

Choose Update RetroPie-Setup script and press Enter. After the script has updated, press Enter again and you’ll be back at the Notice: window. Press Enter and choose Basic install; press Enter, choose Yes, and press Enter again to begin the setup and run the configuration script.

When the script has finished, choose Perform a reboot and Yes.

Turn on Samba in Windows

We’re going to use Samba to copy a ROM file (a video game image) from our computer to RetroPie.

Samba used to be installed by default in Windows, but it has recently become an optional installation. In Windows 10, click on the Search bar and type ‘Control Panel’. Click on Control Panel in the search results.

Now click Programs and Turn Windows features on or off. Scroll down to find SMB 1.0/CIFS File Sharing Support and click the + expand icon to reveal its options. Place a check in the box marked SMB 1.0/CIFS Client. Click OK. This will enable Samba client support on your Windows 10 PC so it can access the Raspberry Pi.

We’ve got more information on how Samba works on The MagPi’s website.

Get the game

On your Windows PC or Mac, open a web browser, and visit the Blade Buster website. This is a homebrew video game designed by High Level Challenge for old NES systems. The developer’s website is in Japanese — just click BLADE BUSTER Download to save the ROM file to your Downloads folder.

Open a File Explorer (or Finder) window and locate the BB_20120301.zip file in your Downloads folder. Don’t unzip the file.

Click on Network and you’ll see a RETROPIE share. Open it and locate the roms folder. Double-click roms and you’ll see folders for many classic systems. Drag and drop the BB_20120301.zip file and place it inside the nes folder.

Play the game

Press the Start button on your gamepad to bring up the Main Menu. Choose Quit and Restart EmulationStation. You’ll now see a Nintendo Entertainment System option with 1 Games Available below it. Click it and you’ll see BB_20120301 — this is Blade Buster. Press A to start the game. Have fun shooting aliens. Press Start and Analog (or whatever you’ve set as your hotkey) together when you’re finished; this will take you back to the game selection in EmulationStation.

If you’ve been setting up RetroPie on your monitor, now is the time to move it across to your main television. The RetroPie console will boot automatically and connect to the network, and then you can move ROM files over to it from your PC or Mac. At this point, you may notice black borders around the screen; if so, see the Fix the borders tip.

Enjoy your gaming system!

More top tips from Lucy

Change the resolution

Some games were designed for a much lower resolution, and scaling them up can look blocky on modern televisions. If you’d prefer to alter the resolution, choose ‘RetroPie setup’. Open raspi-config, Advanced Options, and Resolution. Here you’ll find a range of other resolution options to choose from.

Fix the borders

These are caused by overscan. Choose RetroPie from EmulationStation and raspi-config. Now select Advanced Options > Overscan and select No on the ‘Would you like to enable compensation for displays with overscan?’ window. Choose OK and then Finish. Choose Yes on the Reboot Now window. When the system has rebooted, you will see the borders are gone.

The MagPi magazine issue 81

This article is from the latest issue of The MagPi magazine, which is out today and can be purchased online, at the Raspberry Pi Store, or from many newsagents and bookshops, such as WHSmith and Barnes & Noble.

The MagPi magazine issue 81

You can also download issue 81 for free from The MagPi website, where you’ll also find information on subscription options, and the complete MagPi catalogue, including Essentials guides and books, all available to download for free.

the MagPi subscription

The post Make a retro console with RetroPie and a Raspberry Pi — part 2 appeared first on Raspberry Pi.


Source: Raspberry Pi – Make a retro console with RetroPie and a Raspberry Pi — part 2

Make a retro console with RetroPie and a Raspberry Pi — part 1

Discover classic gaming on the Raspberry Pi and play homebrew ROMs, with this two-part tutorial from The MagPi Editor Lucy Hattersley.

Raspberry Pi retro games console

Turning a Raspberry Pi device into a retro games console is a fun project, and it’s one of the first things many a new Pi owner turns their hand to.

The appeal is obvious. Retro games are fun, and from a programming perspective, they’re a lot easier to understand than modern 3D powerhouses. The Raspberry Pi board’s small form factor, low power usage, HDMI connection, and wireless networking make it a perfect micro-console that can sit under your television.

RetroPie

There are a bunch of different emulators around for Raspberry Pi. In this tutorial, we’re going to look at RetroPie.

RetroPie combines Raspbian, EmulationStation, and RetroArch into one handy image. With RetroPie you can emulate arcade games, as well as titles originally released on a host of 8-bit, 16-bit, and even 32- and 64-bit systems. You can hook up a joypad; we’re going to use the Wireless USB Game Controller, but most other USB game controllers will work.

You can also use Bluetooth to connect a controller from most video games consoles. RetroPie has an interface that will be very familiar to anyone who has used a modern games console, and because it is open-source, it is constantly being improved.

You can look online for classic games, but we prefer homebrew and modern releases coded for classic systems. In this tutorial, we will walk you through the process of setting up RetroPie, configuring a gamepad, and running a homebrew game called Blade Buster.

Get your microSD card ready

RetroPie is built on top of Raspbian (the operating system for Raspberry Pi). While it is possible to install RetroPie from the desktop interface, it’s far easier to format a microSD card† and copy a new RetroPie image to the blank card. This ensures all the settings are correct and makes setup much easier. Our favourite method of wiping microSD cards on a PC or Apple Mac is to use SD Memory Card Formatter.

Attach the microSD card to your Windows or Mac computer and open SD Card Formatter. Ensure the card is highlighted in the Select card section, then click Format.

Download RetroPie

Download the RetroPie image. It’ll be downloaded as a gzip file; the best way to expand this on Windows is using 7-Zip (7-zip.org).

With 7-Zip installed, right-click the retropie-4.4-rpi2_rpi3.img.gz file and choose 7-Zip > Extract here. Extract GZ files on a Mac or Linux PC using gunzip -k <filename.gz> (the -k option keeps the original GZ file).

gunzip -k retropie-4.4-rpi2_rpi3.img.gz

Flash the image

We’re going to use Etcher to copy the retropie-4.4-rpi2_rpi3.img file to our freshly formatted microSD card. Download Etcher. Open Etcher and click Select Image, then choose the retropie-4.4-rpi2_rpi3.img image file and click Open.

Etcher should have already located the microSD card; remove and replace it if you see a Select Drive button. Click Flash! to copy the RetroPie image to the microSD card.

See our guide for more information on how to use Etcher to flash SD cards.

Set up the Raspberry Pi

Insert the flashed microSD card to your Raspberry Pi. Now attach the Raspberry Pi to a TV or monitor using the HDMI cable. Connect the USB dongle from the Wireless USB Game Controller to the Raspberry Pi. Also attach a keyboard (you’ll need this for the setup process).

Insert the batteries in the Wireless USB Game Controller and set the power switch (on the back of the device) to On. Once everything is connected, attach a power supply to the Raspberry Pi.

See our quickstart guide for more detailed information on setting up a Raspberry Pi.

Configure the gamepad

When RetroPie starts, you should see Welcome screen displaying the message ‘1 gamepad detected’. Press and hold one of the buttons on the pad, and you will see the Configuring screen with a list of gamepad buttons and directions.

Tap the D-pad (the four-way directional control pad on the far left) up on the controller and ‘HAT 0 UP’ will appear. Now tap the D-pad down.
Map the A, B, X, Y buttons to:

A: red circle
B: blue cross
X: green triangle
Y: purple square

The Left and Right Shoulder buttons refer to the topmost buttons on the rear of the controller, while the Triggers are the larger lower buttons.

Push the left and right analogue sticks in for the Left and Right Thumbs. Click OK when you’re done.

Top tips from Lucy

Install Raspbian desktop

RetroPie is built on top of the Raspbian operating system. You might be tempted to install RetroPie on top of the Raspbian with Desktop interface, but it’s actually much easier to do it the other way around. Open RetroPie from EmulationStation and choose RetroPie setup. Select Configuration tools and Raspbian tools. Then choose Install Pixel desktop environment and Yes.

When it’s finished, choose Quit and Restart EmulationStation. When restarted, EmulationStation will display a Ports option. Select it and choose Desktop to boot into the Raspbian desktop interface.

Username and password

If RetroPie asks you for the username and password during boot, the defaults are pi and raspberry.

The MagPi magazine issue 81

The rest of this article can be found in the latest issue of The MagPi magazine, which is out now and can be purchased online, at the Raspberry Pi Store, or from many independent bookshops, such as WHSmith and Barnes & Noble. We’ll also post the second half on the blog tomorrow!

The MagPi magazine issue 81

You can also download issue 81 for free from The MagPi website, where you’ll find information on subscription options, and the complete MagPi catalogue, including Essentials guides and books, all available to download for free.

the MagPi subscription

The post Make a retro console with RetroPie and a Raspberry Pi — part 1 appeared first on Raspberry Pi.


Source: Raspberry Pi – Make a retro console with RetroPie and a Raspberry Pi — part 1

Meet us at Maker Faire Bay Area 2019

We’ll be attending Maker Faire Bay Area this month and we’d love to see as many of you there as we can, so be sure to swing by the Raspberry Pi stand and say hi!

Our North America team will be on-hand and hands-on all weekend to show you the wonders of the Raspberry Pi, with some great tech experiments for you to try. Do you like outer space? Of course, why wouldn’t you? So come try out the Sense HAT, our multi-sensor add-on board that we created especially for our two Astro Pi units aboard the International Space Station!

We’ll also have stickers, leaflets, and a vast array of information to share about the Raspberry Pi, our clubs and programmes, and how you can get more involved in the Raspberry Pi community.

And that’s not all!

Onstage talks!

Matt Richardson, Executive Director of the Raspberry Pi Foundation North America and all-round incredible person, will be making an appearance on the Make: Electronics by Digi-Key stage at 3pm Saturday 18 May to talk about Making Art with Raspberry Pi.

Matt Richardson

Hi, Matt!

And I’m presenting too! On the Sunday, I’ll be on the DIY Content Creators Stage at 12:30pm with special guests Joel “3D Printing Nerd” Telling and Estefannie Explains it All for a live recording of my podcast to discuss the importance of community for makers and brands.

There will also be a whole host of incredible creations by makers from across the globe, and a wide variety of talks and presentations throughout the weekend. So if you’re a fan of creative contraptions and beastly builds, you’ll be blown away at this year’s Maker Faire.

Showcasing your projects

If you’re planning to attend Maker Faire to showcase your project, we want to hear from you. Leave a comment below with information on your build so we can come and find you on the day. Our trusty videographer Fiacre and I will be scouting for our next favourite Raspberry Pi make, and we’ll also have Andrew with us, who is eager to fill the pages of HackSpace magazine with any cool, creative wonders we find — Pi-related or otherwise!

Discounted tickets!

Maker Fair Bay Area 2019 will be running at the San Mateo County Event Center from Friday 17 to Sunday 19 May.

If you’re in the area and would like to attend Maker Fair Bay Area, make use of  our 15% community discount on tickets. Wooh!

For more information on Maker Faire, check out the Maker Faire website, or follow Maker Faire on Twitter.

See you there!

The post Meet us at Maker Faire Bay Area 2019 appeared first on Raspberry Pi.


Source: Raspberry Pi – Meet us at Maker Faire Bay Area 2019

Portable retro CTR game console: the one-thumb entertainment system

OTES is the one-thumb entertainment system that, unsurprisingly, requires only one thumb to play.

One-Thumb Entertainment System

Uploaded by gocivici on 2019-04-29.

Retro handheld gaming

Straight out the bat, I have to admit that had this existed in the 80s, it would have been all I played with. OTES oozes gaming nostalgia, and the constant clicking would have driven my mother mad, as did the tap tap tap of my Game Boy or NES controller.

Designed to play PICO8 games, with its developers eager to see more people create one-button controlled games for the console, OTES replaces the concept of game cartridges with individual SD cards, allowing for players to swap out games as they would have with a Nintendo Game Boy, SEGA Game Gear, Atari Lynx, and other stand-alone cartridge consoles.

Building OTES

As mentioned, OTES uses the PICO-8 environment at its core and runs on a Raspberry Pi Zero W with interchangeable SD cards. And as the games designed for the project only require one button, it makes for a fairly simple setup.

For the body, the project’s maker, govinci, sources an old JVC video camera in order to cannibalise the CRT viewfinder.

The most important thing first. You have to find an old camcorder which has a CRT viewfinder. It’s usually easy to tell if a camcorder has a CRT viewfinder since it’s a bulky part sticking off the side of the camcorder. I found this viewfinder on an old JVC camcorder which I bought from the flea market. To test the viewfinder I used a 9v battery to power up the camcorder. There was no image on the viewfinder but I got a static white noise which is enough to tell if the viewfinder works.

The CRT viewfinder (that’s it to the right of the battery) was then connected to the Raspberry Pi and power source, and nestled snugly into a 3D-printed body.

Close the case up, turn on the Pi, and boom: one working, single-button console game player with a very personal point of view.

Govinci says:

Currently, It has one game called ODEF (Ocean Defender) developed by me and my friends. (You can play it here.) And I hope there will be many others as people develop games that can be played with only one button on this platform.

You heard the man: go get developing. (I can think of plenty of circumstances where only needing one free finger to fit in a spot of gaming would be really, really convenient.) You can make your own console by following the build diary at Instructables. Let us know if you give it a whirl!

The post Portable retro CTR game console: the one-thumb entertainment system appeared first on Raspberry Pi.


Source: Raspberry Pi – Portable retro CTR game console: the one-thumb entertainment system

Recreate Bomberman’s iconic explosions | Wireframe issue 12

Rik Cross, Senior Learning Manager here at the Raspberry Pi Foundation, shows you how to recreate the deadly explosions in the classic game, Bomberman.

An early incarnation of Bomberman on the NES; the series is still going strong today under Konami’s wing.

Creating Bomberman

Bomberman was first released in the early 1980s as a tech demo for a BASIC compiler, but soon became a popular series that’s still going today. Bomberman sees players use bombs to destroy enemies and uncover doors behind destructible tiles. In this article, I’ll show you how to recreate the bombs that explode in four directions, destroying parts of the level as well as any players in their path!

The game level is a tilemap stored as a two-dimensional array. Each tile in the map is a Tile object, which contains the tile type, and corresponding image. For simplicity, a tile can be set to one of five types; GROUND, WALL, BRICK, BOMB, or EXPLOSION. In this example code, BRICK and GROUND can be exploded with bombs, but WALL cannot, but of course, this behaviour can be changed.

Each Tile object also has a timer, which is decremented each frame of the game. When a tile’s timer reaches 0, an action is carried out, which is dependent on the tile type. BOMB tiles (and surrounding tiles) turn into EXPLOSION tiles after a short delay, and EXPLOSION tiles eventually turn back into GROUND. At the start of the game, the tilemap for the level is generated, in this case consisting of mostly GROUND, with some WALL and a couple of BRICK tiles. The player starts off in the top-left tile, and moves by using the arrow keys. Pressing the SPACE key will place a bomb in the player’s current tile, which is achieved by setting the Tile at the player’s position to BOMB. The tile’s timer is also set to a small number, and once this timer is decremented to 0, the bomb tile and the tiles around it are set to EXPLOSION.

Here’s Rik’s example code, which recreates Bomberman’s explosions in Python. To get it running on your system, you’ll first need to install Pygame Zero — you can find full instructions here. And you can download the code here.

The bomb explodes outwards in four directions, with a range determined by the RANGE, which in our code is 3. As the bomb explodes out to the right, for example, the tile to the right of the bomb is checked. If such a tile exists (i.e. the position isn’t out of the level bounds) and can be exploded, then the tile’s type is set to EXPLOSION and the next tile to the right is checked. If the explosion moves out of the level bounds, or hits a WALL tile, then the explosion will stop radiating in that direction. This process is then repeated for the other directions.

There’s a nice trick for exploding the bomb without repeating the code four times, and it relies on the sine and cosine values for the four direction angles. The angles are 0° (up), 90° (right), 180° (down) and 270° (left). When exploding to the right (at an angle of 90°), sin(90) is 1 and cos(90) is 0, which corresponds to the offset direction on the x- and y-axis respectively. These values can be multiplied by the tile offset, to explode the bomb in all four directions.

Get your copy of Wireframe issue 12

You can read the rest of the feature in Wireframe issue 12, available now at Tesco, WHSmith, and all good independent UK newsagents.

Or you can buy Wireframe directly from Raspberry Pi Press – delivery is available worldwide. And if you’d like a handy digital version of the magazine, you can also download issue 12 for free in PDF format.

Make sure to follow Wireframe on Twitter and Facebook for updates and exclusives. Subscribe on the Wireframe website to save up to 49% compared to newsstand pricing!

The post Recreate Bomberman’s iconic explosions | Wireframe issue 12 appeared first on Raspberry Pi.


Source: Raspberry Pi – Recreate Bomberman’s iconic explosions | Wireframe issue 12