The History of Pong | Code the Classics

One topic explored in Code the Classics from Raspberry Pi Press is the origin story and success of Pong, one of the most prominent games in early video game history.

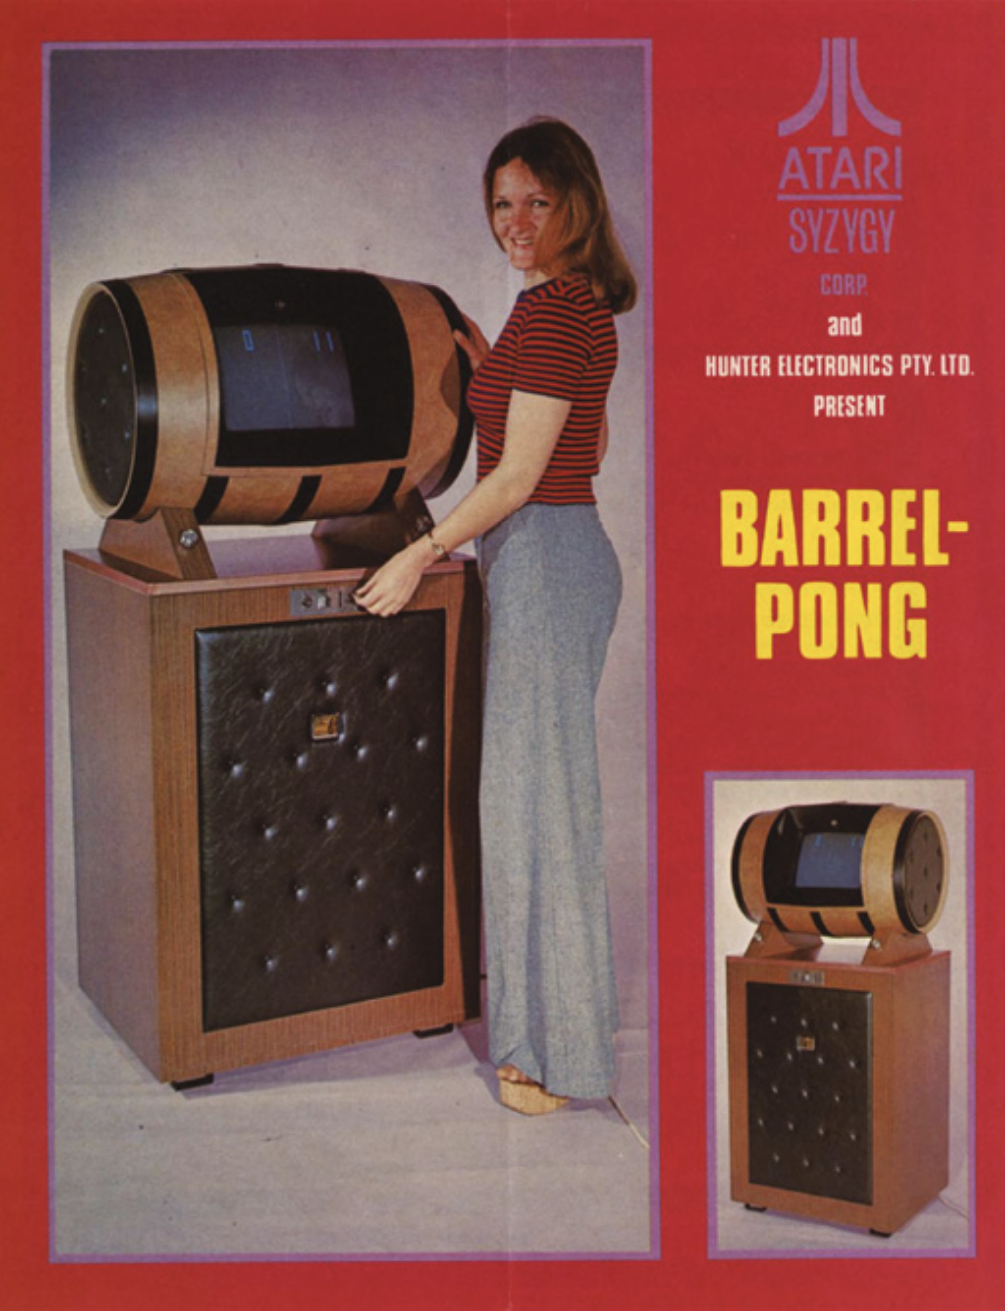
‘The success of Pong led to the creation of Pong home consoles (and numerous unofficial clones) that could be connected to a television. Versions have also appeared on many home computers.’

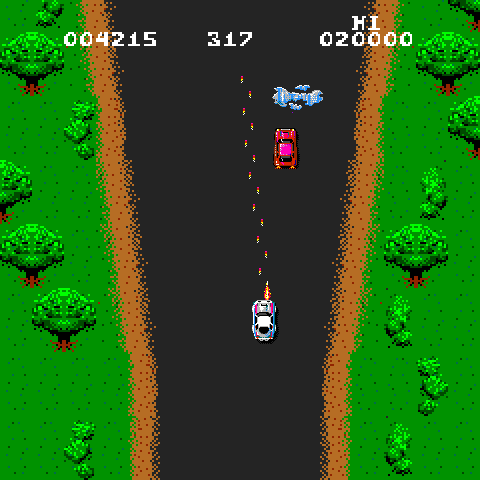
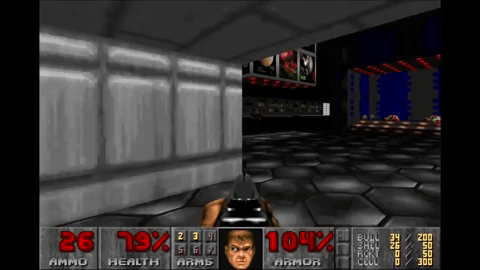
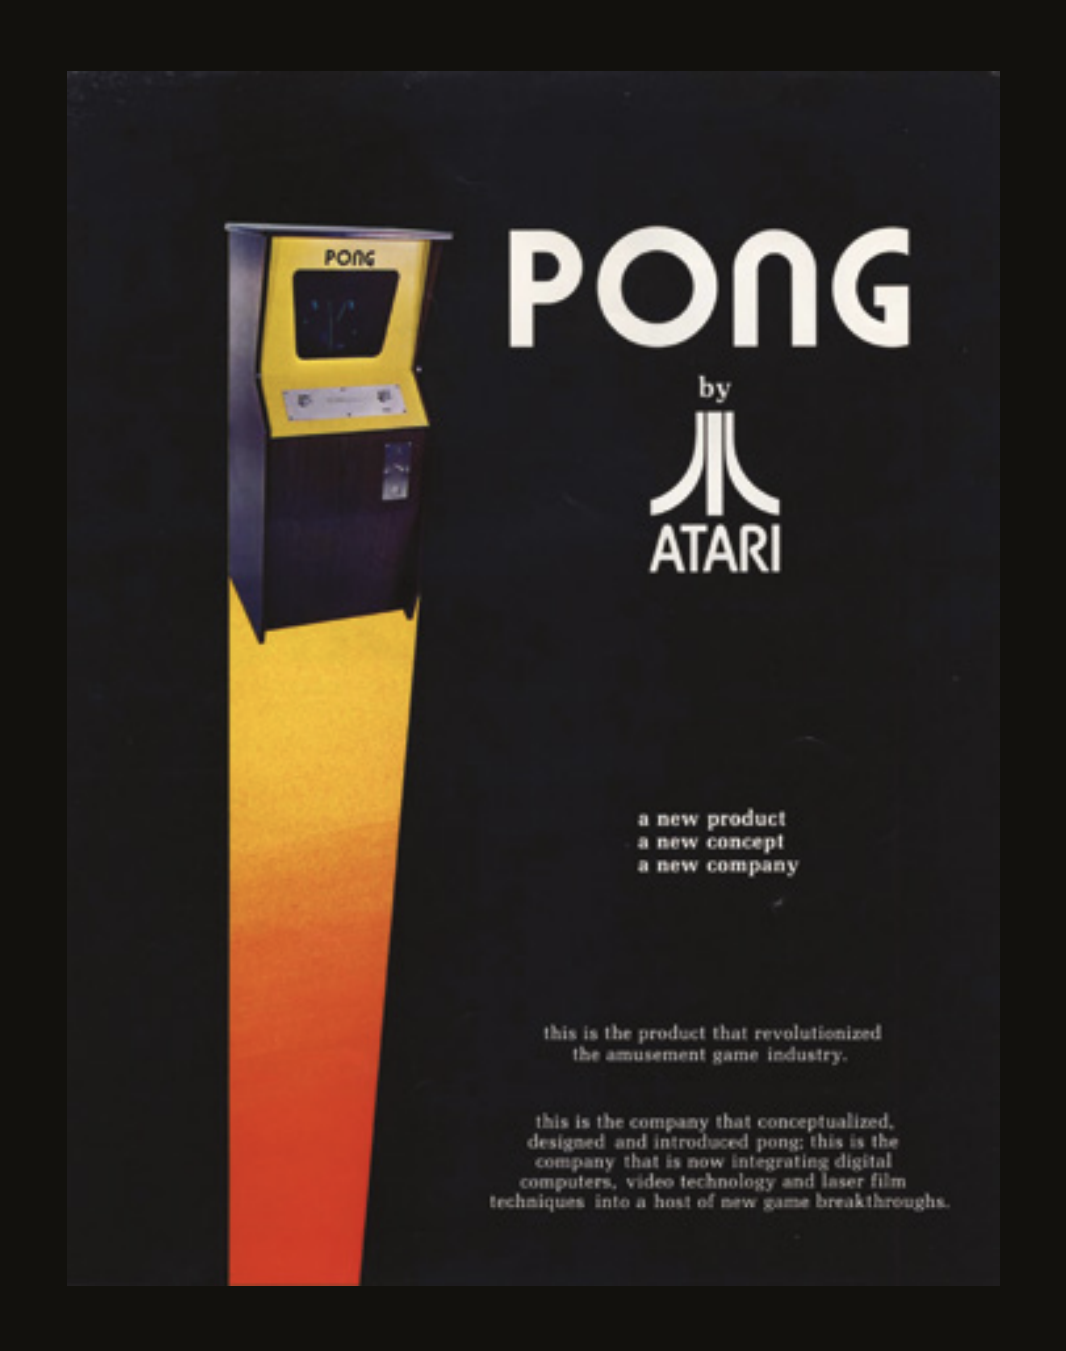
Ask anyone to describe a game of table tennis and they’ll invariably tell you the same thing: the sport involves a table split into quarters, a net dividing the two halves, a couple of paddles, and a nice round ping-pong ball to bat back and forth between two players. Take a look at the 1972 video game Pong, however, and you’ll notice some differences. The table, for instance, is simply split in half and it’s viewed side-on, the paddles look like simple lines, and the ball is square. Yet no one – not even now – would have much trouble equating the two.

Back in the early 1970s, this was literally as good as it got. The smattering of low-powered arcade machines of the time were incapable of realistic-looking graphics, so developers had to be creative, hoping imaginative gamers would fill the gaps and buy into whatever they were trying to achieve. It helped enormously that there was a huge appetite for the new, emerging video game industry at that time. Nolan Bushnell was certainly hungry for more – and had he turned his nose up at Spacewar!, a space combat game created by Steve Russell in 1962, then Pong would never even have come about.

“The most important game I played was Spacewar! on a PDP-1 when I was in college,” he says, of the two-player space shooter that was popular among computer scientists and required a $120,000 machine to run. Although the visuals were nothing to write home about, the game was one of the first graphical video games ever made. It pitted two spaceships against each other and its popularity spread, in part, because the makers decided the code could be distributed freely to anyone who wanted it. “It was a great game, fun, challenging, but only playable on a very expensive computer late at night and the wee hours of the morning,” Nolan says. “In my opinion, it was a very important step.”

Nolan was so taken by Spacewar! that he made a version of the game with a colleague, Ted Dabney. Released in 1971, Computer Space allowed gamers to control a rocket in a battle against flying saucers, with the aim being to get more hits than the enemy in a set period of time. To make it attractive to players, it was placed in a series of colourful, space-age, moulded arcade cabinets. Nolan and Ted sold 1500 of them; even though they made just $500 from the venture, it was enough to spur them into continuing. They came up with the idea for Pong and created a company called Atari.

One of their best moves was employing engineer Al Alcorn, who had worked with Nolan at the American electronics company Ampex. Al was asked to create a table tennis game based on a similar title that had been released on the Magnavox Odyssey console, on the pretence that the game would be released by General Electric. In truth, Nolan simply wanted to work out Al’s potential, but he was blown away by what his employee came up with. Addictive and instantly recognisable, Atari realised Pong could be a major hit. The game’s familiarity with players meant it could be picked up and played by just about anyone.

Even so, Nolan had a hard time convincing others. Manufacturers turned the company down, so he visited the manager of a bar called Andy Capp’s in Sunnyvale, California and asked them to take Pong for a week. The manager soon had to call Nolan to tell him the machine had broken: it had become stuffed full of quarters from gamers who loved the game. By 1973, production of the cabinet was in overdrive and 8000 were sold. It led to the creation of a Pong home console which sold more than 150,000 machines. People queued to get their hands on one and Atari was on its way to become a legendary games company.

For Nolan, it was justification for his perseverance and belief. Suddenly, the man who had become interested in electronics at school, where he would spend time creating devices and connecting bulbs and batteries, was being talked of as a key player in the fledgling video game industry. But what did Nolan, Ted, Al, and the rest of the Atari team do to make the game so special? “We made it a good, solid, fun game to play,” says Nolan. “And we made it simple, easy, and quickly understood. Keeping things simple is more difficult to do than building something complex. You can’t dress up bad gameplay with good graphics.”
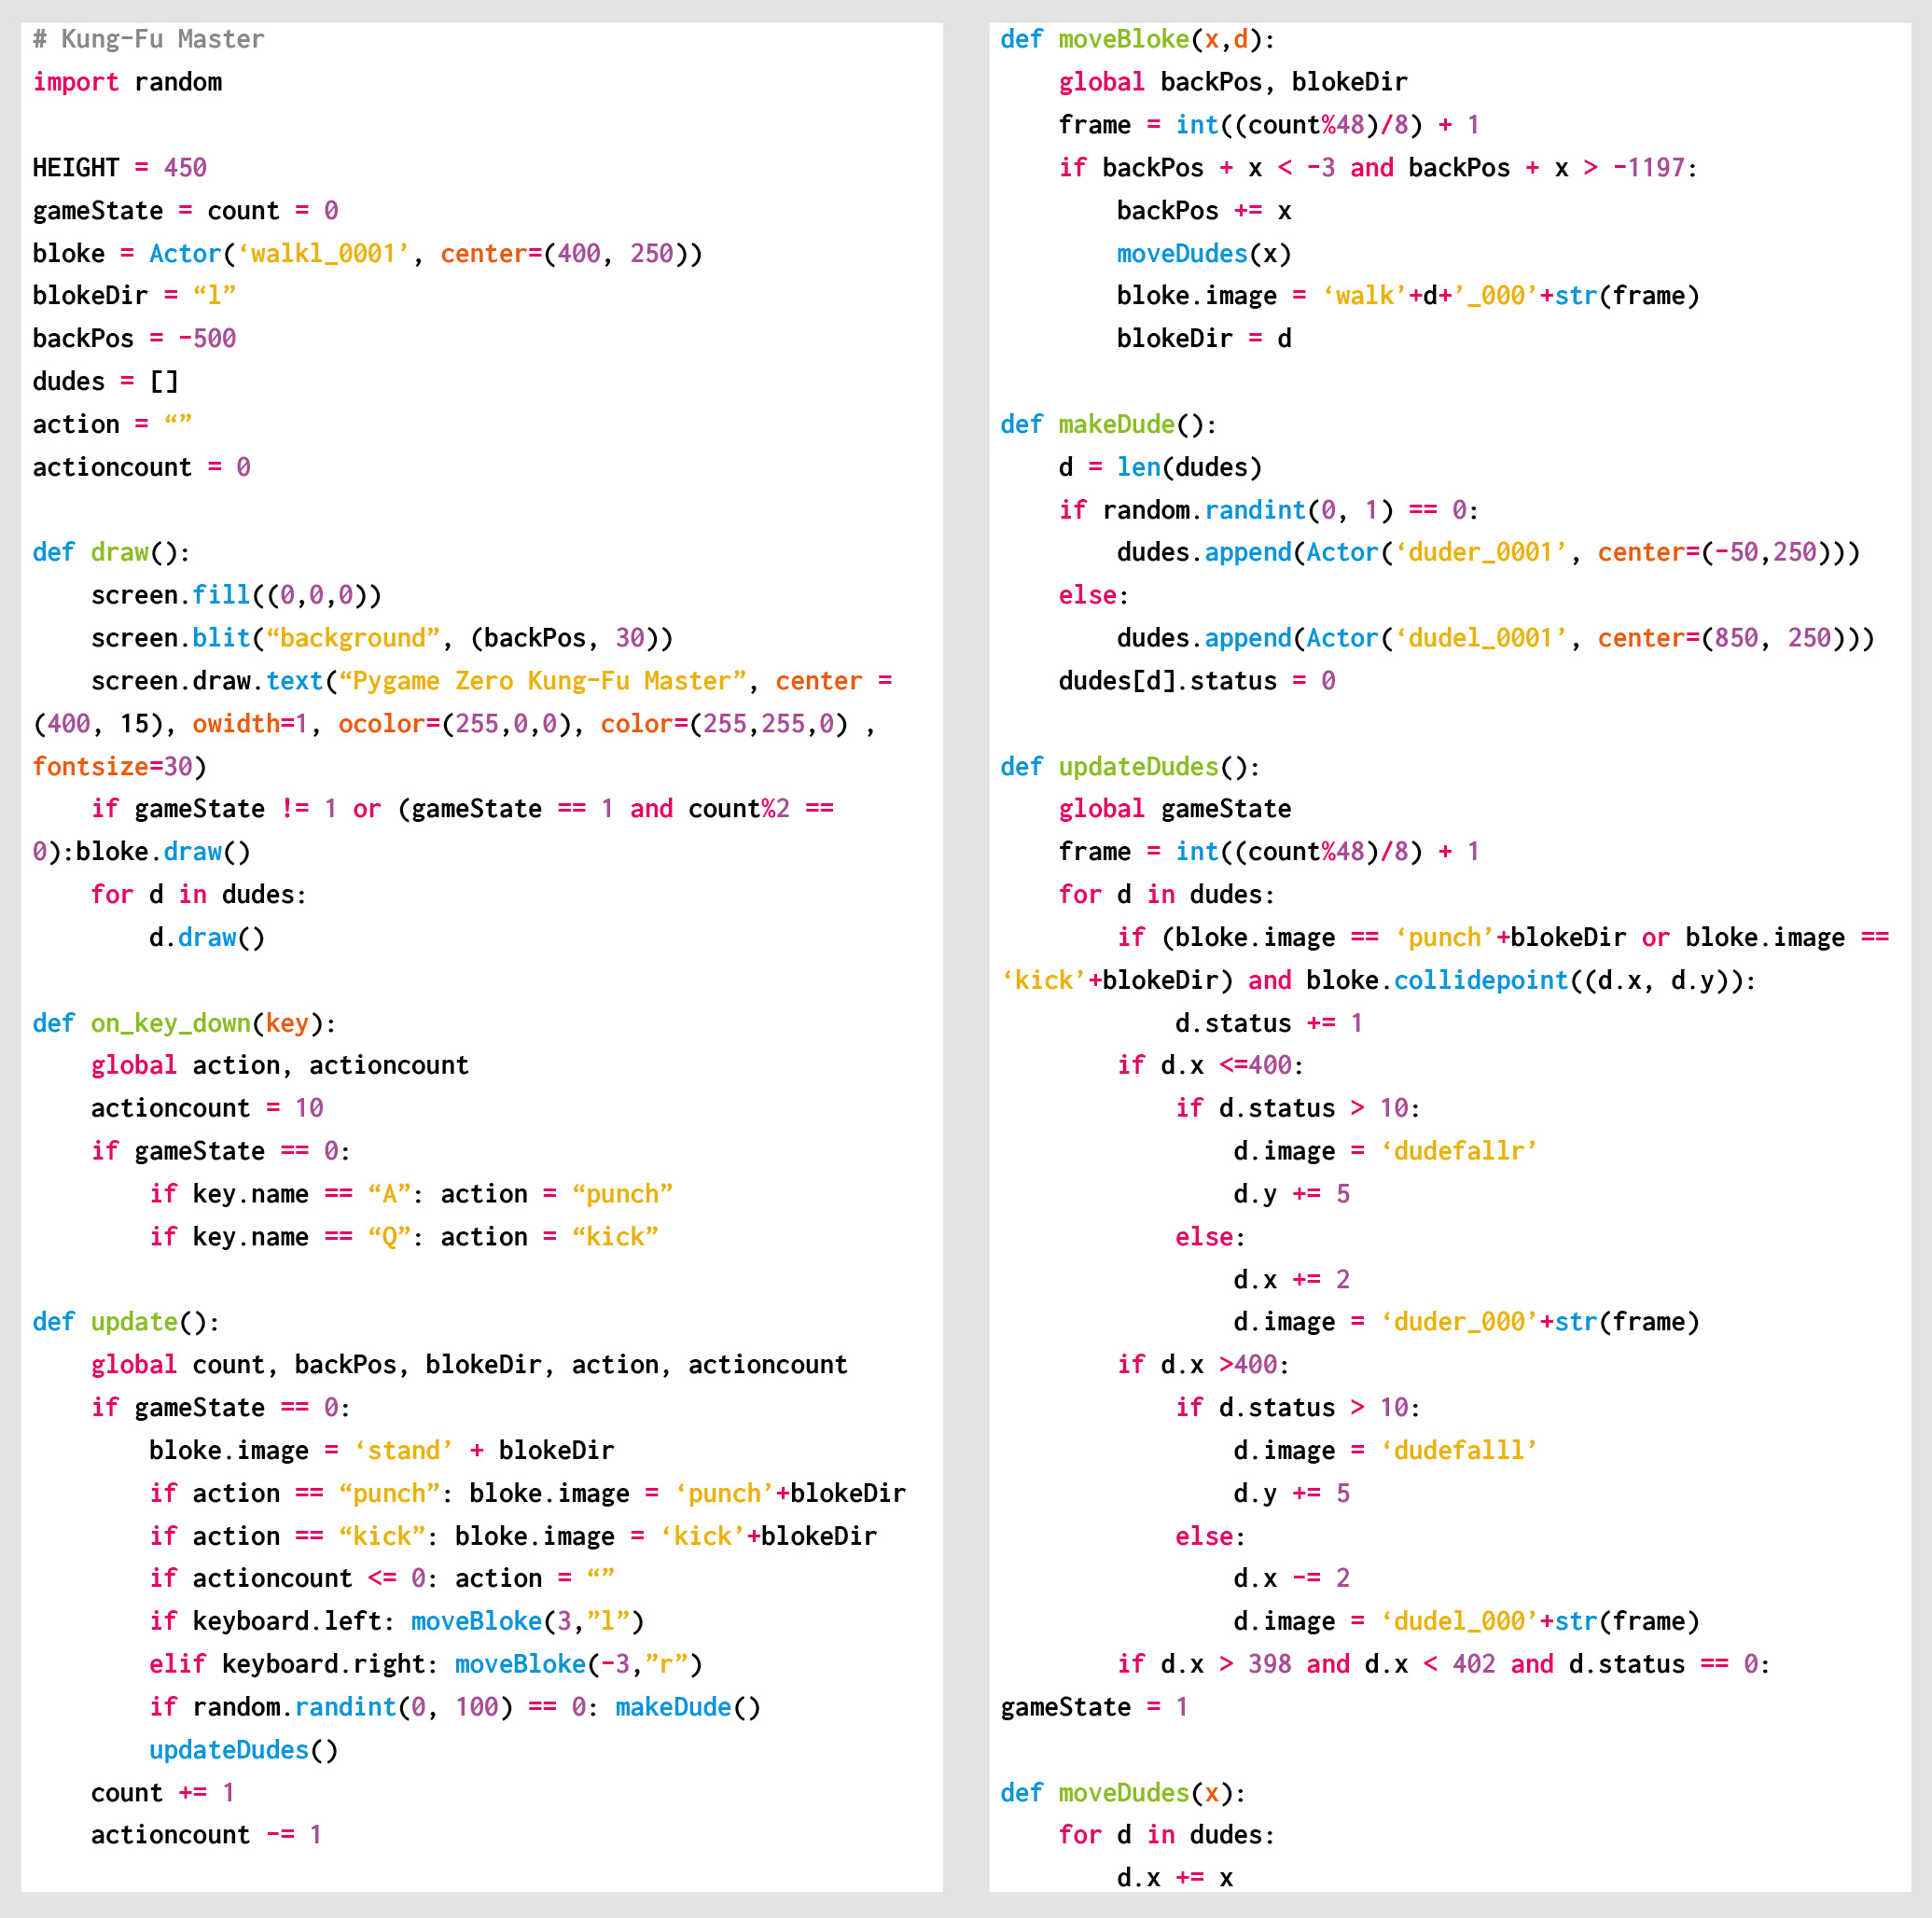
Making Pong

On the face of it, Pong didn’t look like much. Each side had a paddle that could be moved directly up and down using the controller, and the ball would be hit from one side to the other. The score was kept at the top of the screen and the idea was to force the opposing player to miss. It meant the game program needed to determine how the ball was hit and where the ball would go from that point. And that’s the crux of Pong’s success: the game encouraged people to keep playing and learning in the hope of attaining the skills to become a master.

When creating Pong, then, the designers had a few things in mind. One of the most important parts of the game was the movement of the paddles. This involved a simple, vertical rectangle that went up and down. One of the benefits Atari had when it created Pong was that it controlled not just the software but the hardware too. By building the cabinet, it was able to determine how those paddles should be moved. “The most important thing if you want to get the gameplay right is to use a knob to move the paddle,” advises Nolan. “No one has done a good Pong using touchscreens or a joystick.”

Look at a Pong cabinet close up – there are plenty of YouTube videos which show the game in action on the original machine – and you will see what Nolan means. You’ll notice that players turned a knob anticlockwise to move the paddle down, and clockwise to move it up. Far from being confusing, it felt intuitive.

Movement of the ball

With the paddles moving, Atari’s developers were able to look at the movement of the ball. At its most basic, if the ball continued to make contact with the paddles, it would constantly move back and forth. If it did not make contact, then it would continue moving in the direction it had embarked upon and leave the screen. At this stage, a new ball was introduced in the centre of the screen and the advantage was given to the player who had just chalked up a point. If you watch footage of the original Pong, you will see that the new ball was aimed at the player who had just let the ball go past. There was a chance he or she would miss again.

To avoid defeat, players had to be quite nifty on the controls and stay alert. Watching the ball go back and forth at great speed could be quite mesmerising as it left a blurred trail across the cathode ray tube display. There was no need to waste computing power by animating the ball because the main attention was focused on what would happen when it collided with the paddle. It had to behave as you’d expect. “The game did not exist without collisions of the ball to the paddle,” says Nolan.

Al realised that the ball needed to behave differently depending on where it hit the paddle. When playing a real game of tennis, if the ball hits the centre of the racket, it will behave differently from a ball that hits the edge. Certainly, the ball is not going to be travelling in a simple, straight path back and forth as you hit it; it is always likely to go off at an angle. This, though, is the trickiest part of making Pong “The ball should bounce up from an upper collision with more obtuse angles as the edge of the paddle is approached,” Nolan says. “This balances the risk of missing with the fact that an obtuse angle is harder to return.” This is what Pong is all about: making sure you hit the ball with the paddle, but in a manner that makes it difficult for the opposing player to return it. “A player wants the ball to be just out of reach for the opponent or be hard for him or her to predict.”

Read on…

This post is part of a much longer deep dive into the history of Pong in Code the Classics, our 224-page hardback book that not only tells the stories of some of the seminal video games of the 1970s and 1980s, but also shows you how to use Python and Pygame Zero to create your own games inspired by them, following examples programmed by Raspberry Pi founder Eben Upton.

In conjunction with today’s blog post, we’re offering £1 off Code the Classics when you order your copy between now and midnight Wednesday 26 Feb 2020 from the Raspberry Pi Press online store. Simply follow this link or enter the discount code PONG at checkout to get your copy for only £11, with free shipping in the UK.

Code the Classics is also available as a free download, although the physical book is rather delightful, so we really do recommend purchasing it.

The post The History of Pong | Code the Classics appeared first on Raspberry Pi.


Source: Raspberry Pi – The History of Pong | Code the Classics

Colour us bewildered

A Russian-speaking friend over at Farnell pointed us at this video. Apparently it’s been made by Amperot.ru, a Russian Raspberry Pi Approved Reseller, who are running a t-shirt giveaway. We got our hands on a subtitled video, and…words fail me. Please turn the sound up before you start watching.

Конкурс от Amperkot.ru. Розыгрыш фирменной футболки с Raspberry Pi (ENG & RUS Subtitles)

Следи за новостями 1) на сайте Amperkot.ru 2) в группе Вконтакте (vk.com/amperkot) 3) на канале в Телеграме (t.me/amperkot_ru)

We hope you enjoy this as much as we did. I have known Eben for more than twenty years now, and I’ve never seen him try to cram his whole fist into his mouth with mirth before.

Many thanks to Rapanui, who we wrote about here back in November. We suspect this will be as much of a surprise to them as it was to us. (The words coming out of Mart’s mouth are decidedly not his own.)

The post Colour us bewildered appeared first on Raspberry Pi.


Source: Raspberry Pi – Colour us bewildered

How to play sound and make noise with your Raspberry Pi

If your amazing project is a little too quiet, add high-fidelity sound with Raspberry Pi and the help of this handy guide from HackSpace magazine, written by PJ Evans.

The PecanPi HAT features best-in-class components and dual DACs for superior audio reproduction

It’s no surprise that we love microcontrollers at HackSpace magazine. Their versatility and simplicity make them a must for electronics projects. Although a dab hand at reading sensors or illuminating LEDs, Arduinos and their friends do struggle when it comes to high-quality audio. If you need to add music or speech to your project, it may be worth getting a Raspberry Pi computer to do the heavy lifting. We’re going to look at the various audio output options available for our favourite small computer, from a simple buzz, through to audiophile bliss.

Get buzzing

Need to keep it simple and under a pound?
An active buzzer is what you need

The simplest place to start is with the humble buzzer. A cheap active buzzer can be quickly added to Raspberry Pi’s GPIO. It’s surprisingly easy too. Try connecting a buzzer’s red wire (positive) to GPIO pin 22 (Broadcom numbering) and the black wire (ground) to any GND pin. Now, install the GPIO Zero Python library by typing this at the command line:

sudo apt install python3-gpiozero

Create a file called buzz.py in your favourite editor and enter the following:

import time
from gpiozero import Buzzer
buzzer = Buzzer(22)
buzzer.on()
time.sleep(1)
buzzer.off()

Run it at the command line:

python3 buzz.py

You should hear a one-second buzz. See if you can make Morse code sounds by changing the duration of the sleep statement.

Passive but not aggressive

Raspberry Pi computers, with the exception of the Zero range, all have audio output on board. The original Raspberry Pi featured a stereo 3.5mm socket, and all A and B models since feature a four-pole socket that also includes composite video. This provides your cheapest route to getting audio from your Raspberry Pi computer.

A low-cost passive speaker can be directly plugged in to provide sound, albeit probably quieter than you’d like. Of course, add an amplifier or active speaker and you have sound as loud as you like. This is the most direct way of adding sound to your project, but how to get the sound out?

Need a simple solution? USB audio devices come in all shapes and sizes but are mostly plug-and-play

Normally, the Raspbian operating system will recognise that an audio device has been connected and route audio through it. Sometimes, especially if you’ve connected an HDMI monitor with sound capability (e.g. an HDMI TV), sound will not come out of the correct device.

To fix this, open up a terminal window and run sudo raspi-config. When the menu appears, go to Advanced Options and select Audio, then select the option to force the output through the audio jack. You may need to reboot Raspbian for all changes to take effect.

Plug and playback

A USB sound device is another simple choice for audio playback on Raspberry Pi. Literally hundreds are available, and a basic input/output device with better audio quality than the on-board system can be purchased for a few pounds online. Installation tends to be no more complicated than plugging the device into the USB port. You may need to select the new output, as the underlying audio system, ALSA (see the ALSA and PulseAudio section for more), may mute it by default. To fix this, run alsamixer from the command line, press F6 to select the new sound device, and if you see ‘MM’ at the bottom of the volume indicator, press M to unmute and adjust the volume with the cursor keys.

Many DACs also come with on-board amplifiers. Perfect for passive speakers

Unsurprisingly, when choosing your USB sound device, you can start at a few pounds and go right up to professional equipment costing hundreds. As they are low-power, USB devices do not tend to feature amplification, unless they have a separate power source.

Let’s play

The simplest way to play audio on Raspbian is to use OMXPlayer. This is a dedicated hardware-accelerated command-line tool that takes full advantage of Raspberry Pi’s capabilities. It sends audio to the analogue audio jack by default, so playing back an MP3 file is as simple as running:

omxplayer /path/to/audio/file.wav

There are many command-line options that allow you to control how the audio is played. Want the audio to loop forever? Just add --loop to the command. You’ll notice that when it’s running, OMXPlayer provides a user interface of sorts, allowing you to control playback from within the terminal. If you’d just like it to run in the background without user input, run the command like this:

omxplayer --no-keys example.wav &

Here, —-no-keys removes the interface, and the ampersand (&) tells the operating system to run the job ‘in the background’ so that it won’t block anything else you want to do.

OMXPlayer is a great choice for Raspbian, but other players such as mpg321 are available, so find the tool that’s best for you.

Another useful utility is speaker-test. This can produce white noise or vocal confirmation so you can check your speakers are working properly. It’s as simple as this:

speaker-test -t wav -c 2

The first parameter sets the sound to be a voice, and the -c tests stereo channels only: front left and front right.

Phat Beats

If space is an issue, a Raspberry Pi 4, amplifier, and speaker may not be what you have in mind. After all, your cool wearable project is going to be problematic if you’re trailing an amplifier on a cart with a 50-metre extension lead powering everything. Luckily, the clever people at Pimoroni have you covered. The Speaker pHAT is a Raspberry Pi Zero-sized HAT that not only adds audio capability to the smallest of the Raspberry Pi family, but also sports a 3 W speaker. Now you can play any audio with a tiny device and a USB battery pack.

Small, cheap, and fun, the Speaker pHat features a 3 W speaker and LED VU meter

The installation process is fully automated, so no messing around with drivers and config files. Once the script has completed, you can run any audio tool as before, and the sound will be routed through the speaker. No, the maximum volume won’t be troubling any heavy metal concerts, but you can’t knock the convenience and form factor.

Playing the blues

An easy way to get superior audio quality using a Raspberry Pi computer is Bluetooth. Recent models such as the 3B, 4, and even the Zero W support Bluetooth devices, and can be paired with most Bluetooth speakers, even from the command line. Once connected, you have a range of options on size and output power, plus the advantage of wireless connectivity.

Setting up a Bluetooth connection, especially if you are using the command line, can be a little challenging (see the Bluetooth cheatsheet section). There is a succinct guide here: hsmag.cc/N6p2IB. If you are using Raspbian Desktop, it’s a lot easier. Simply click on the Bluetooth logo on the top-right, and follow the instructions to pair your device.

If you find OMXPlayer isn’t outputting any audio, try installing mpg321:

sudo apt install mpg321

And try again:

mpg321 /path/to/audio/file.mp3

But seriously

If your project needs good audio, and the standard 3.5 mm output just isn’t cutting it, then it’s time to look at the wide range of DACs (digital-to-analogue converters) available in HAT format. It’s a crowded market, and the prices vary significantly depending on what you want from your device. Let’s start at the lower end, with major player HiFiBerry’s DAC+ Zero. This tiny HAT adds 192kHz/24-bit playback via two RCA phono ports for £12.50. If you’re serious about your audio, then you can consider the firm’s full HAT format high-resolution DAC+ Pro for £36, or really go for it with the DSP (digital sound processing) version for £67. All of these will require amplification, but the sound quality will rival audio components of a much higher price.

Money no object? The Allo Katana is a monster DAC, and weighs in at £240, but outperforms £1000 equivalents

If money is no object and your project requires the best possible reproduction, then you can consider going full audiophile. There are some amazing high-end HATs out there, but one of the best-performing ones we’ve seen is the PecanPi DAC. Its creator Leonid Ayzenshtat sourced each individual component carefully, always choosing the best-in-class. He even used a separate DAC for each audio channel. The resulting board may make your wallet wince at around £200 for the bare board, but the resulting audio is good enough to be used in professional recording studios. If you’ve restored a gorgeous old radio back to showroom condition, you could do a lot worse than add the board in with a great amp and speaker.

ALSA and PulseAudio

There’s often confusion between these two systems. Raspbian comes pre-installed with ALSA (Advanced Linux Sound Architecture), which is the low-level software that makes sound work. It comes with a range of utilities to control output device, volume, and more. PulseAudio is a software layer that sits on top of ALSA to provide more features, including streaming capabilities. Chances are, if you need to do something a bit more clever than just play audio, you’ll need to install a PulseAudio server.

Bluetooth cheatsheet

If you want to pair a Bluetooth audio device (A2DP) on the command line, it can be a little hairy. Here’s a quick guide:

First-time installation:

sudo apt-get install pulseaudio pulseaudio-module-bluetooth
sudo usermod -G bluetooth -a pi
sudo reboot

Start the PulseAudio server:

pulseaudio --start

Run the Bluetooth utility:

bluetoothctl

Put your speaker into pairing mode. Now, within the utility, run the following commands (pressing Enter after each one):

power on
agent on
scan on

Now wait for the list to populate. When you see your device…
pair <dev>
Where <dev> is the displayed long identifier for your device. You can just type in the first few characters and press Tab to auto-complete. Do the same for the following steps.

trust <dev>
connect <dev>

Wait for the confirmation, then enter:

quit <dev>

Now try to play some audio using aplay (for WAV files) or mpg321 (for mp3). These instructions are adapted from the guide by Actuino at hsmag.cc/N6p2IB.

File types

There are command-line players available for just about every audio format in common use. Generally, MP3 provides the best balance of quality and space, but lower bit-rates result in lower sound quality. WAV is completely uncompressed, but can eat up your SSD card. If you don’t want to compromise on audio quality, try FLAC, which is identical in quality to WAV, but much smaller. To convert between audio types, consider installing FFmpeg, a powerful audio and video processing tool.

HackSpace magazine

This article comes direct from HackSpace magazine issue 28, out now and available in print from your local newsagent, the Raspberry Pi Store in Cambridge, and online from Raspberry Pi Press.

If you love HackSpace magazine as much as we do, why not have a look at the subscription offers available, including the 12-month deal that comes with a free Adafruit Circuit Playground! Subscribers in the USA can now get a 12-month subscription for $60 when joining by the end of March!

And, as always, you can download the free PDF from the Raspberry Pi Press website.

The post How to play sound and make noise with your Raspberry Pi appeared first on Raspberry Pi.


Source: Raspberry Pi – How to play sound and make noise with your Raspberry Pi

Build a Raspberry Pi Zero W Amazon price tracker

Have you ever missed out on a great deal on Amazon because you were completely unaware it existed? Are you interested in a specific item but waiting for it to go on sale? Here’s help: Devscover’s latest video shows you how to create an Amazon price tracker using Raspberry Pi Zero W and Python.

Build An Amazon Price Tracker With Python

Wayne from Devscover shows you how to code a Amazon Price Tracker with Python! Get started with your first Python project. Land a job at a big firm like Google, Facebook, Twitter or even the less well known but equally exciting big retail organisations or Government with Devscover tutorials and tips.

By following their video tutorial, you can set up a notification system on Raspberry Pi Zero W that emails you every time your chosen item’s price drops. Very nice.

Devscover’s tutorial is so detailed that it seems a waste to try and summarise it here. So instead, why not make yourself a cup of tea and sit down with the video? It’s worth the time investment: if you follow the instructions, you’ll end up with a great piece of tech that’ll save you money!

Remember, if you like what you see, subscribe to the Devscover YouTube channel and give them a thumbs-up for making wonderful Raspberry Pi content!

The post Build a Raspberry Pi Zero W Amazon price tracker appeared first on Raspberry Pi.


Source: Raspberry Pi – Build a Raspberry Pi Zero W Amazon price tracker

Build a Raspberry Pi laser scanner

You really don’t need anything too fancy to build this Raspberry Pi laser scanner, and that’s why we think it’s pretty wonderful.

Rasperry Pi 3D Laser Scanner

Cornell University: ECE 5725 Michael Xiao and Thomas Scavella

Building a Raspberry Pi laser scanner

The ingredients you’ll need to build the laser scanner are:

  • Raspberry Pi
  • Raspberry Pi Camera Module v2
  • Stepper motor and driver
  • Line laser
  • Various LEDs, resistors, and wires
  • Button

To complete the build, access to a 3D printer and laser cutter would come in handy. If you don’t have access to such tools, we trust you to think of an alternative housing for the scanner. You’re a maker, you’re imaginative — it’s what you do.

How does the laser scanner work?

The line laser projects a line an object, highlighting a slice of it. The Raspberry Pi Camera Module captures this slice, recording the shape of the laser line on the object’s surface. Then the stepper motor rotates the object. When the object has completed a full rotation and the camera has taken an image of every slice, the Raspberry Pi processes all the images to create one virtual 3D object.

Instructables user mfx2 has written a wonderful tutorial for the project, which also includes all files needed to build and program your own version.

The post Build a Raspberry Pi laser scanner appeared first on Raspberry Pi.


Source: Raspberry Pi – Build a Raspberry Pi laser scanner

3D-printable Raspberry Pi bits and pieces you should totally make

Recently, we’ve seen an awful lot of new designs online for 3D-printable Raspberry Pi cases and add-ons. Here are a few that definitely need your attention.

Turbine RGB Lamp

Described as “a Turbine-fin Lamp with some RGB Neopixels in the middle,” this print from Thingiverse user kryptn would be a rather lovely addition to any desk or bedside table.

NASs…NASi?

These two lovely network-attached storage (NAS) prints will allow you to store your files via your network…it’s all in the name.


While araymbox’s PiNAS takes a more traditional approach to the NAS aesthetic, harrytheb’s UFO NAS casing is a little out of this world.

Tiny Raspberry Pi Zero Case with Antenna

The internet is crowded with Raspberry Pi cases you can print, but few are as eye-catching at this Raspberry Pi Zero case by jwillmer.

IKEA Skadis Shelf

The IKEA Skadis system is becoming more and more popular in workshops, studies, and craft rooms. So why not print this perfectly-sized shelf to fit your Raspberry Pi and official Raspberry Pi case into the system as well?

Raspberry Pi 4 cooling stand

Is this cheating? You can use this file to 3D-print your own version of the Raspberry Pi 4 cooling stand that we’re currently giving away for free on the front of The MagPi magazine.

Share your own

If you’ve designed any 3D-printable Raspberry Pi accessories, share them with us in the comments below!

Bonus content

3D PRINTING INFILL PATTERNS – What, why, and why not! || HackSpace magazine

There’s more than one option when it comes to selecting infill patters for your 3D prints. But what are the differences, and why should you use one over the …

The post 3D-printable Raspberry Pi bits and pieces you should totally make appeared first on Raspberry Pi.


Source: Raspberry Pi – 3D-printable Raspberry Pi bits and pieces you should totally make

How to use an LED with Raspberry Pi

Learn how to use an LED with Raspberry Pi in our latest How to use video on YouTube.

HOW TO USE an LED with Raspberry Pi

Subscribe to our YouTube channel: http://rpf.io/ytsub Help us reach a wider audience by translating our video content: http://rpf.io/yttranslate Buy a Raspberry Pi from one of our Approved Resellers: http://rpf.io/ytproducts Find out more about the #RaspberryPi Foundation: Raspberry Pi http://rpf.io/ytrpi Code Club UK http://rpf.io/ytccuk Code Club International http://rpf.io/ytcci CoderDojo http://rpf.io/ytcd Check out our free online training courses: http://rpf.io/ytfl Find your local Raspberry Jam event: http://rpf.io/ytjam Work through our free online projects: http://rpf.io/ytprojects Do you have a question about your Raspberry Pi?

Using LEDs

LEDs (light-emitting diodes) are incredibly useful in digital making projects. You can use one to indicate whether a script is running or when an action can take place, or as decoration, and for so much more besides.

Blinking an LED with the help of Raspberry Pi has become a rite of passage for new digital makers: it’s the physical equivalent of the ‘hello world’ program! Therefore, it’s the first thing that the participants in our Picademy training, and many young people in physical computing sessions at coding clubs in our networks, learn how to do.

Follow the steps in our latest How to use video to learn how to control an LED with your Raspberry Pi, and go get making.

More Raspberry Pi videos

You can find the How to use YouTube playlist here, and you can subscribe to our channel and never miss a video!

And, while you’re in a subscribe-y mood, also subscribe to the Raspberry Pi Press YouTube channel, the home of all content from The MagPi, HackSpace magazine, WireFrame, Custom PC, and more.

The post How to use an LED with Raspberry Pi appeared first on Raspberry Pi.


Source: Raspberry Pi – How to use an LED with Raspberry Pi

Code a Kung-Fu Master style beat-’em-up | Wireframe #32

Punch and kick your way through a rabble of bad dudes in a simple scrolling beat-’em-up. Mark Vanstone shows you how

Although released to tie in with Jackie Chan’s Spartan X, Kung-Fu Master was originally inspired by the Bruce Lee film, Game of Death.

Kung-Fu Master

Kung-Fu Master hit arcades in 1984. Its side-scrolling action, punching and kicking through an army of knife-throwing goons, helped create the beat-’em-up genre. In fact, its designer, Takashi Nishiyama, would go on to kickstart the Street Fighter series at Capcom, and later start up the Fatal Fury franchise at SNK.

In true eighties arcade style, Kung-Fu Master distils the elements of a chop-socky action film to its essentials. Hero Thomas and his girlfriend are attacked, she’s kidnapped, and Thomas fights his way through successive levels of bad guys to rescue her. The screen scrolls from side to side, and Thomas must use his kicks and punches to get from one side of the level to the other and climb the stairs to the next floor of the building.

Our Kung-Fu Master homage features punches, kicks, and a host of goons to use them on.

Making our brawler

To recreate this classic with Pygame Zero, we’ll need quite a few frames of animation, both for the hero character and the enemies he’ll battle. For a reasonable walk cycle, we’ll need at least six frames in each direction. Any fewer than six won’t look convincing, but more frames can achieve a smoother effect. For this example, I’ve used the 3D package Poser, since it has a handy walk designer which makes generating sequences of animation much easier.

Once we have the animation frames for our characters, including a punch, kick, and any others you want to add, we need a background for the characters to walk along. The image we’re using is 2000×400 pixels, and we start the game by displaying the central part so our hero can walk either way. By detecting arrow key presses, the hero can ‘walk’ one way or the other by moving the background left and right, while cycling through the walk animation frames. Then if we detect a Q key press, we change the action string to kick; if it’s A, it’s punch. Then in our update() function, we use that action to set the Actor’s image to the indicated action frame.

Our enemy Actors will constantly walk towards the centre of the screen, and we can cycle through their walking frames the same way we do with the main hero. To give kicks and punches an effect, we put in collision checks. If the hero strikes while an enemy collides with him, we register a hit. This could be made more precise to require more skill, but once a strike’s registered, we can switch the enemy to a different status that will cause them to fall downwards and off the screen.

This sample is a starting point to demonstrate the basics of the beat-’em-up genre. With the addition of flying daggers, several levels, and a variety of bad guys, you’ll be on your way to creating a Pygame Zero version of this classic game.

The generation game

Because we’re moving the background when our hero walks left and right, we need to make sure we move our enemies with the background, otherwise they’ll look as though they’re sliding in mid-air – this also applies to any other objects that aren’t part of the background. The number of enemies can be governed in several ways: in our code, we just have a random number deciding if a new enemy will appear during each update, but we could use a predefined pattern for the enemy generation to make it a bit less random, or we use a combination of patterns and random numbers.

Here’s Mark’s code snippet, which creates a side-scrolling beat-’em-up in Python. To get it working on your system, you’ll need to install Pygame Zero. And to download the full code, go here.

Get your copy of Wireframe issue 32

You can read more features like this one in Wireframe issue 32, available now at Tesco, WHSmith, all good independent UK newsagents, and the Raspberry Pi Store, Cambridge.

Or you can buy Wireframe directly from Raspberry Pi Press — delivery is available worldwide. And if you’d like a handy digital version of the magazine, you can also download issue 32 for free in PDF format.

Look how lovely and glowy it is.

Make sure to follow Wireframe on Twitter and Facebook for updates and exclusive offers and giveaways. Subscribe on the Wireframe website to save up to 49% compared to newsstand pricing!

The post Code a Kung-Fu Master style beat-’em-up | Wireframe #32 appeared first on Raspberry Pi.


Source: Raspberry Pi – Code a Kung-Fu Master style beat-’em-up | Wireframe #32

Attend our Cambridge Computing Education Research Symposium

Are you an academic, researcher, student, or educator who is interested in computing education research? Then come and join us in Cambridge, UK on 1 April 2020 for discussion and networking at our first-ever research symposium.

Dr Natalie Rusk from the MIT Media Lab is our keynote speaker

Dr Natalie Rusk from the MIT Media Lab is our keynote speaker

Join our symposium

At the Raspberry Pi Foundation, we carry out research that deepens our understanding of how young people learn about computing and digital making and helps to increase the impact of our work and advance the field of computing education.

As part of our research work, we are launching the Cambridge Computing Education Research Symposium, a new one-day symposium hosted jointly by us and the University of Cambridge.

The theme of the symposium is school-level computing education, both formal and non-formal. The symposium will offer an opportunity for researchers and educators to share their work, meet others with similar interests, and build collaborative projects and networks.

University of Cambridge Computer Laboratory

The William Gates Building in Cambridge houses the Department of Computer Science and Technology (Computer Laboratory) and will be the symposium venue

The symposium will take place on 1 April 2020 at the Department of Computer Science and Technology. The day will include a range of talks and a poster session, as well as a keynote speech from Dr Natalie Rusk, Research Scientist at the MIT Media Laboratory and one of the creators of the Scratch programming language.

Registration for the symposium is now open: book your place today!

Pre-symposium workshops and networking

When you register to attend, you’ll also have the chance to sign up for one of two parallel workshops taking place on 31 March 2020 at the Raspberry Pi Foundation office in Cambridge.

Workshop 1 concerns the topic of gender balance in computing, while in workshop 2, we’ll consider what research-in-practice looks like in the computing classroom.

The workshops will draw on the experiences of everyone who is participating, and they’ll provide a forum for innovative ideas and new opportunities for collaboration to emerge.

You’re also invited to join us on the evening of 31 March for an informal networking event over food and drink at the Raspberry Pi Foundation office — a great chance to meet, mingle, and make connections ahead of the symposium day.

Register for the symposium to secure your place at these events! We look forward to meeting you there.

The post Attend our Cambridge Computing Education Research Symposium appeared first on Raspberry Pi.


Source: Raspberry Pi – Attend our Cambridge Computing Education Research Symposium

USA magazine subscriptions offer: 48% off standard prices

Today we’re launching a time-limited special offer on subscriptions to HackSpace magazine and The MagPi magazine for readers in the USA, saving you a whopping 48% compared to standard overseas subscriptions. We want to help as many people as possible get their hands on our fantastic publications.


Starting today, you can subscribe to these magazines for the discounted price of $60 a year – just $5 per issue. Not only will you receive twelve issues direct to your door, but you’ll also receive a free gift and save up to 35% compared with newsstand prices!

You’ll need to be quick – this discounted offer is only running until 31 March 2020.

HackSpace magazine

HackSpace magazine is packed with projects for fixers and tinkerers of all abilities. We’ll teach you new techniques and give you refreshers on familiar ones, from 3D printing, laser cutting, and woodworking to electronics and the Internet of Things. HackSpace magazine will inspire you to dream bigger and build better.

Your $60 subscription will get you twelve issues per year and a free Adafruit Circuit Playground Express, worth $25. Click here to subscribe today!

The MagPi magazine

The MagPi is the official Raspberry Pi magazine. Written by and for the community, it’s packed with Raspberry Pi-themed projects, computing and electronics tutorials, how-to guides, and the latest news and reviews.

Your $60 subscription will get you twelve issues per year and a free Raspberry Pi Zero W with accessories. Click here to subscribe today!

WIN! WIN! WIN!

To help spread the word about this special offer, we’re running a little no-purchase-required giveaway.

Just retweet this tweet with the hashtag #WinARaspberryPiThing, and we’ll pick five of you to win a Raspberry Pi bookazine of your choice, signed by whichever members of the Raspberry Pi team Alex can pull away from the scrum around the coffee machine.

If you don’t have Twitter, you can leave your favourite (family-friendly) knock-knock joke in the blog comments below and we’ll pick two more winners from there too!

The winners can choose any of the following:

We’ll pick winners on 1 April 2020, so you have a month and a bit to share the love!

The post USA magazine subscriptions offer: 48% off standard prices appeared first on Raspberry Pi.


Source: Raspberry Pi – USA magazine subscriptions offer: 48% off standard prices

3D printing infill patterns — what, why, and why not!

How many types of infill pattern have you tried? The latest video from Raspberry Pi Press takes a closer look at 3D printing infill patterns, and why you may want to use a certain pattern over another.

3D PRINTING INFILL PATTERNS – What, why, and why not! || HackSpace magazine

There’s more than one option when it comes to selecting infill patters for your 3D prints. But what are the differences, and why should you use one over the other? #HackSpacemagazine is the monthly magazine for people who love to make things and those who want to learn.

Raspberry Pi Press publishes a variety of magazines and books, and the Raspberry Pi Press YouTube channel covers them all. Subscribe today to keep up to date with all new video releases, and let us know in the video comments what other content you’d like to see.

The post 3D printing infill patterns — what, why, and why not! appeared first on Raspberry Pi.


Source: Raspberry Pi – 3D printing infill patterns — what, why, and why not!

A new Raspbian update

The last major release of Raspbian was the Buster version we launched alongside Raspberry Pi 4 last year. There was a minor release a couple of months later, which was mostly just bug-fixes for the first release (hence no blog post), but today’s release has a few changes that we thought it was worth bringing to your attention.

File manager changes

We previously made some significant changes to the PCmanFM file manager included as part of the Raspberry Pi Desktop; we added a cutdown mode which excludes a lot of the less commonly used functionalities, and we set this as the default mode.

One of the things we removed for this mode is the Places view, an optional view for the left-hand pane of the window which provides direct access to a few specific locations in the file system. We felt that the directory browser was more useful, so we chose to show that instead. But one useful feature of Places is that it displays external devices, such as USB drives, and these are somewhat awkward to find in the file manager otherwise.

So for this release, the Places view has been reinstated, but rather than being a separate switchable view, it is a small panel at the top of the directory browser. This hopefully gives the best of both worlds: easy access to USB drives, and a directory view. You can customise what is shown in the Places view on the Layout page of the file manager Preferences dialogue, or you can turn it off completely if you’d rather just have the directory browser.

PCmanFM file manager on Raspbian

There are a few other small changes to the file manager: there is now a new folder icon on the taskbar, and the expanders in the directory browser (the little triangles next to directory names) are now only shown when a directory has subdirectories.

Finally, the folder and file icons used in the file manager have been replaced with some new, cleaner designs. These are designed to make it more obvious at a glance what sort of file an icon represents, and also to fit better with the slightly flatter GUI appearance we moved to for Buster.

Orca screen reader

One area of the desktop which we have been wanting to improve for some time is accessibility, particularly for those with visual impairments. To this end, we asked the accessibility charity AbilityNet to assess the Raspberry Pi Desktop to see how usable it was for those with disabilities, and where we could make improvements.

They gave us a lot of very helpful feedback, and their number one suggestion was that we needed to make the Orca screen reader work with the desktop.

Orca is an application which uses synthesised speech to read out menus, window titles, button labels, and the like. It’s a standard Linux application, but people who have tried it on Raspberry Pi found that it didn’t actually work with Raspbian. (When I first installed it, all it did was to make slightly alarming growling noises instead of speaking!)

After quite a bit of fiddling and head-scratching, Orca now works as intended. It will read out many of the pre-installed applications, and should work with a lot of other Linux software packages as well.

Unfortunately, there are a few areas where it won’t work. Orca hooks into various user interface toolkits — the software which is used to draw buttons, menus, etc. on the screen. It is fully compatible with the GTK toolkit (which is used for most of the desktop) and Qt (which is used for the VLC media player and the qpdfview PDF viewer). But many applications (such as Thonny, Sonic Pi, and Scratch) are built on toolkits which are not compatible with the screen reader. Also, the current release of Chromium is not compatible with Orca, but the forthcoming version 80 release, which should be available in a few months, will be Orca-compatible. In the meantime, if you want an Orca-compatible browser, you can install Firefox by entering the following into a terminal window:

sudo apt install firefox-esr

(Please note that we do not recommend using Firefox on Raspbian unless you need Orca compatibility, as it is not optimised for video playback on the Pi in the same way as Chromium.)

Orca screen reader settings dialogue

Orca doesn’t have a menu entry — the settings dialog shown above can be opened by holding down the Insert key and then pressing the space bar, or by typing orca -s into a terminal window.

Please note that Orca currently doesn’t work with Bluetooth audio devices, so we recommend using it with either the Pi’s own HDMI output or headphone socket, or with a USB or HAT external audio device.

Orca can either be installed from Recommended Software, in the Universal Access category, or by entering the following into a terminal window:

sudo apt install orca

This is hopefully just the start of making the Raspberry Pi Desktop more accessible for those with disabilities, as we are planning to do more work in this area in the future.

New Scratch blocks

Scratch 3 has added the ability to load a project from the command line at launch (scratch3 filename.sb3).

There are also two new blocks in the Sense HAT extension, ‘display stage’ and ‘display sprite’. The first of these shows the current stage on the SenseHAT LED array; the second shows the current sprite on the LEDs.

Example output of Sense HAT Scratch extension

Thonny improvements

A lot of work has been done on Thonny to improve performance, particularly when debugging. In previous releases, setting breakpoints caused performance to slow down significantly — this was particularly obvious when running PyGame Zero games, where the frame rate was very slow. The new version is substantially faster, as you can see if you set breakpoints in any of…

Code the Classics

…the Python games from Eben’s book Code the Classics – Volume 1, which are now installable from Recommended Software, and can be found in the Games menu.

Example of Mynapod video game

If you want to look at the code for the games, this can be found in /usr/share/code-the-classics.

Volume control / mixer

In previous releases, there was an Audio Device Preferences application in the main menu to enable device-specific settings to be made for external audio devices. This has now been removed; all these settings are now available directly from the volume plugin on the taskbar: with an external device selected as the output or input device, right-click the volume icon and choose the Output Device Settings… or Input Device Settings… option to open the configuration dialog.

Example of Output Device Settings menu of Raspberry Pi Desktop

Screen blanking

The option to disable the timeout which blanks the screen after a few minutes has been added to Raspberry Pi Configuration. To try and reduce clutter in this application, the options from the System tab are now split across two tabs; all display-related options, including screen blanking, are now on the new Display tab.

Example of Raspberry Pi Configuration menu of Raspberry Pi Desktop

We’ve also been able to reinstate the pixel doubling option for Raspberry Pi 4; this was originally implemented in a manner incompatible with the KMS video driver used on Raspberry Pi 4, but we’ve now found a way to make it work with KMS. (The pixel doubling option is designed to make the Raspberry Pi’s screen easier to use for people with visual disabilities — it doubles the size of every pixel, scaling the entire screen by a factor of two.)

We’ve made one minor change to key shortcuts: in previous versions of Raspbian, the combination Ctrl-Alt-Delete launched the task manager. We felt it might be better to be consistent with the behaviour of Windows PCs since the dawn of time, so now Ctrl-Alt-Delete launches the shutdown options dialog. If you want to access the task manager with a key shortcut, you can now do so using Ctrl-Shift-Escape — also consistent with the behaviour of Windows.

There are also numerous other small bug fixes and robustness improvements across the board.

How do I get it?

The new image is available for download from the usual place: our Downloads page.

To update an existing image, use the usual terminal command:

sudo apt update
sudo apt full-upgrade

We hope you like the changes — as ever, all feedback is welcome, so please leave a comment below!

The post A new Raspbian update appeared first on Raspberry Pi.


Source: Raspberry Pi – A new Raspbian update

Cats and lasers and (Raspberry) Pi, OH MY!

Keeping a modern cat entertained requires something more high-tech than a ball of yarn. The MagPi’s Phil King wonders if this is a purr-fect project…

WARNING! LASER EYE! Don’t look into a laser beam, and don’t point a laser beam at a somebody’s head. For more on things you SHOULDN’T do with a laser, visit magpi.cc/lasersafety.

Xander the cat is a much-loved family pet, but as his owners live in a flat, he can get a little bored staying indoors when they’re out at work. Seeking a way to keep his cat entertained, Enzo Calogero came up with an ingenious Raspberry Pi–powered project. “We noticed that he loves to chase a laser light, so we decided to create a device to make laser games for him,” explains Enzo.

The result is the Tri-Lasers for Felines device which, when the cat’s presence is detected by a PIR motion sensor, beams a laser dot around the room for Xander to chase between randomly generated points. Judging by the video on the project’s Hackster tutorial page, he seems to love it.

trilaser

This video is about trilaser

Pan and tilt

The laser’s main movement trajectory is handled by mounting it on a Pan-Tilt HAT, which has vertical and horizontal servo motors. “A pair of coordinates (x, y) is generated randomly,” explains Enzo. “The laser point moves from the current point to a new coordinate, following the segment that connects the two points, at a speed defined by a status variable. Once the new coordinates are reached, we loop back to point one.”

To add extra interest for Xander, its movement is randomised further by switching between three laser diodes to perform micro random movements very quickly. “Switching the active laser among the three allows extremely rapid movements of the laser dot, to create an extra variability of the light trajectories which seems more enjoyable for the cat,” says Enzo.

While the laser point is visible in daylight, it shows up better when there’s less light: “Xander prefers it when the room is completely dark.”

The device’s three laser diodes are set into a 3D-printed triangular holder that sits atop the Pan-Tilt HAT’s acrylic mount — which would normally be used to hold a Camera Module. Enzo also designed and 3D-printed a case for the PIR sensor.

Cat-a-log

In addition to handling laser movement, the Python script saves a log of Xander’s activity: “We check it now and then out for curiosity,” says Enzo. “When Xander was a kitten, he was playing with it very often. Now he is a bit older and much more prone to sleep rather than play, we switch it on when we are out in the evening to keep him busy during our prolonged absence.”

One issue that came up is that, being naturally curious animals, cats are prone to investigate any new objects. “We try to put it as high and unreachable as possible, but cats are extremely skilled,” says Enzo. “So, he was able to reach the device few times. And the best way to save the device from cat attacks is to make it as still as possible, so the cat loses interest.”

Therefore a tilt sensor was added to the device, to cause it to shut down if triggered by an inquisitive Xander, thus reducing the risk of damage.

This isn’t the only feline-focused project from Enzo, who has also built an IoT food scale to monitor when and how much Xander eats, sending the data to a Google Cloud online dashboard. He’s now working on a wheeled robot to track the cat with a camera and perform a few interactions — we wonder what Xander will make of that.

More from The MagPi

The MagPi magazine is available from newsagents in the UK, Barnes & Noble in the US, the Raspberry Pi Store here in Cambridge, and online in the Raspberry Pi Press store.

This month’s issue comes with a free stand for your Raspberry Pi 4. Yay!

A note from Alex regarding cats and lasers

Some cats don’t like lasers. They find it far too upsetting when they can’t catch what it is they’re chasing. If your cat starts to pant while chasing lasers, don’t assume it’s just exhausted. Panting can be a sign of stress in cats, and stressed is something your cat shouldn’t be. Exercise caution when playing with your cat and laser toys, and consult a vet if you’re unsure whether their behaviour is normal.

Signed,

The owner of a cat who doesn’t like laser toys

The post Cats and lasers and (Raspberry) Pi, OH MY! appeared first on Raspberry Pi.


Source: Raspberry Pi – Cats and lasers and (Raspberry) Pi, OH MY!

How to use a servo motor with Raspberry Pi

Learn how to use a servo motor with Raspberry Pi in our latest How to use video on YouTube.

HOW TO USE a servo motor with Raspberry Pi

Subscribe to our YouTube channel: http://rpf.io/ytsub Help us reach a wider audience by translating our video content: http://rpf.io/yttranslate Buy a Raspberry Pi from one of our Approved Resellers: http://rpf.io/ytproducts Find out more about the #RaspberryPi Foundation: Raspberry Pi http://rpf.io/ytrpi Code Club UK http://rpf.io/ytccuk Code Club International http://rpf.io/ytcci CoderDojo http://rpf.io/ytcd Check out our free online training courses: http://rpf.io/ytfl Find your local Raspberry Jam event: http://rpf.io/ytjam Work through our free online projects: http://rpf.io/ytprojects Do you have a question about your Raspberry Pi?

Over the next few months, we’ll be releasing more videos in our How to use series, including guides on the use of LEDs, buzzers, and sensors with your Raspberry Pi.

What other components do you think we should cover? While we can’t make videos for every available component on the market, we’d love to hear what you, our community, believe to be integral to the maker toolkit.

You can find the How to use YouTube playlist here, and you can subscribe to our channel and never miss a video!

And, while you’re in a subscribe-y mood, also subscribe to the Raspberry Pi Press YouTube channel, the home of all content from The MagPi, HackSpace magazine, WireFrame, Custom PC, and more.

The post How to use a servo motor with Raspberry Pi appeared first on Raspberry Pi.


Source: Raspberry Pi – How to use a servo motor with Raspberry Pi

Is upgrade culture out of date?

At Raspberry Pi, we’re interested in all things to do with technology, from building new tools and helping people teach computing, to researching how young people learn to create with technology and thinking about the role tech plays in our lives and society. Today, I’m writing about our habit of replacing devices with newer versions just for the sake of it.

Technology is involved in more of our lives than ever before: most of us carry a computer in our pocket everywhere we go. On the other hand, the length of time for which we use each individual piece of technology has grown very short. This is what’s referred to as upgrade culture, a cycle which sees most of us replacing our most trusted devices every two years with the latest products offered by tech giants like Apple and Samsung.

An illustration of four people using smartphones

How we got to this point is hard to determine, and there does not seem to be a single root cause for upgrade culture. This is why I want to start a conversation about it, so we can challenge our current perspectives and establish fact-based attitudes. I think it’s time that we, as individuals and as a collective, examine our relationship with new technology.

What is the natural lifespan of a device?

Digital technology is still so new that there is really no benchmark for how long digital devices should last. This means that the decision power has by default landed in the hands of device manufacturers and mobile network carriers, and for their profit margins, a two-year lifecycle of devices is beneficial.

Where do you see your role in this process as a consumer? Is it wrong to want to upgrade your phone after two years of constant use? Should phone companies slow their development, and would this hinder innovation? And, if you really need to upgrade, is there a better use for your old device than living in a drawer? These questions defy simple answers, and I want to hear what you think.

How does this affect the environment?

As with all our behaviours as consumers, the impact that upgrade culture has on the environment is an important concern. Environmental issues and climate change aren’t anything new, but they’re currently at the forefront of the global conversation, and for good reason.

Mobile devices are of course made in factories, and the concerns this raises have been covered well in many other places. The same goes for the energy needed to build technology. This energy could, at least in theory, be produced from renewable sources. Here I would like to focus on another aspect of the environmental impact device production has, which relates to the materials necessary to create the tiny components that form our technological best friends.

Some components of your phone cannot be created without extremely rare metals and other elements, such as silicon and lithium. (In fact, there are 83 stable non-radioactive elements in the periodic table, and 70 of them are used in some capacity in your phone.) Upgrade culture means there is high demand for these materials, and deposits are becoming more and more depleted. If you’re hoping there are renewable alternatives, you’ll be disappointed: a study by researchers working at Yale University found that there are currently no alternative materials that are as effective.

Then there’s the issue of how the materials are mined. The market trading these materials is highly competitive, and more often than not manufacturers buy from the companies offer the lowest prices. To maintain their profit margin, these companies have to extract as much material as possible as cheaply as they can. As you can imagine, this leads to mining practices that are less than ethical or environmentally friendly. As many of the mines are located in distant areas of developing countries, these problems may feel remote to you, but they affect a lot of people and are a direct result of the market we are creating by upgrading our devices every two years.

"Two smartphones, blank screen" by Artem Beliaikin is licensed under CC0 1.0

Many of us agree that we need to do what we can to counteract climate change, and that, to achieve anything meaningful, we have to start looking at the way we live our lives. This includes questioning how we use technology. It will be through discussion and opinion gathering that we can start to make more informed decisions — as individuals and as a society.

The obsolescence question

You probably also have that one friend/colleague/family member who swears by their five year old mobile phone and scoffs at the prices of the newest models. These people are often labeled as sticklers who are afraid to join the modern age, but is there another way to see them? The truth is, if you’ve bought a phone in the last five year, then — barring major accidents — it will most likely still function and be just as effective as it was when it came out of the box. So why are so many consumers upgrading to new devices every two years?

"Nextbit Robin Smartphone" by Bhavesh Sondagar is licensed under CC0 1.0

Again there isn’t a single reason, but I think marketing departments should shoulder much of the responsibility. Using marketing strategies, device manufacturers and mobile network carriers purposefully make us see the phones we currently own in a negative light. A common trope of mobile phone adverts is the overwrought comparison of your current device with a newly launched version. Thus, each passing day after a new model is released, our opinion of our current device worsens, even if it’s just on a subconscious level.

This marketing strategy is related to a business practice called planned obsolescence, which sees manufacturers purposefully limit the durability of their products in order to sell more units. An early example of planned obsolescence is the lightbulb, invented at the Edison company: it was relatively simple for the company to create a lightbulb that lasted 2500 hours, but it took years and a coalition of manufacturers to make a version that reliably broke after 1000 hours. We’re all aware that the lightbulb revolutionised many aspects of life, but it turns out it also had a big influence on consumer habits and what we see as acceptable practices of technology companies.

The widening digital divide

The final aspect of the impact of upgrade culture that I want to examine relates to the digital divide. This term describes the societal gap between the people with access to, and competence with, the latest technology, and the people without these privileges. To be able to upgrade, say, your mobile phone to the latest model every two years, you either need a great degree of financial freedom, or you need to tie yourself to a 24-month contract that may not be easily within your means. As a society, we revere the latest technology and hold people with access to it in high regard. What does this say to people who do not have this access?

"DeathtoStock_Creative Community5" by Denis Labrecque is licensed under CC0 1.0

Inadvertently, we are widening the digital divide by placing more value on new technology than is warranted. Innovation is exciting, and commercial success is celebrated — but do you ever stop and ask who really benefits from this? Is your new phone really that much better than the old one, or could it be that you’re mostly just basking in feeling the social rewards of having the newest bit of kit?

What about Raspberry Pi technology?

Obviously, this blog post wouldn’t be complete if we didn’t share our perspective as a technology company as well. So here’s Trading CEO Eben Upton:

On our hardware and software

“Raspberry Pi tries very hard to avoid obsoleting older products. Obviously the latest Raspberry Pi 4 runs much faster than a Raspberry Pi 1 (something like forty times faster), but a Raspbian image we release today will run on the very earliest Raspberry Pi prototypes from the summer of 2011. Cutting customers off from software support after a couple of years is unethical, and bad for business in the long term: fool me once, shame on you; fool me twice, shame on me. The best companies respect their customers’ investment in their platforms, even if that investment happened far in the past.”

“What’s even more unusual about Raspberry Pi is that we aim to keep our products available for a long period of time. So you can’t just run a 2020 software build on a 2014 Raspberry Pi 1B+: you can actually buy a brand-new 1B+ to run it on.”

On the environmental impact of our hardware

“We’re constantly working to reduce the environmental footprint of Raspberry Pi. If you look next to the USB connectors on Raspberry Pi 4, you’ll see a chunky black component. This is the reservoir capacitor, which prevents the 5V rail from drooping too far when a new USB device is plugged in. By using a polymer electrolytic capacitor, from our friends at Panasonic, we’ve been able to avoid the use of tantalum.”

“When we launched the official USB-C power supply for Raspberry Pi 4, one or two people on Twitter asked if we could eliminate the single-use plastic bag which surrounded the cable and plug assembly inside the box. Working with our partners at Kuantech, we found that we could easily do this for the white supplies, but not for the black ones. Why? Because when the box vibrates in transit, the plug scuffs against the case; this is visible on the black plastic, but not on the white.”

Raspberry Pi power supply with scuff marks

Raspberry Pi power supply with scuff mark

“So for now, if you want to eliminate single-use plastic, buy a white supply. In the meantime, we’ll be working to find a way (probably involving cunning origami) to eliminate plastic from the black supply.”

What do you think?

Time for you to discuss!

As I said, I want to hear from you about upgrade culture.

  • When was the last time you upgraded?
  • What were your reasons at the time?
  • Do you think upgrade culture should be addressed by mobile phone manufacturers and providers, or is it caused by our own consumption habits?
  • How might we address upgrade culture? Is it a problem that needs addressing?

Share your thoughts in the comments!

Upgrade culture is one of the topics for which we offer you a discussion forum on our free online course Impact of Technology. For educators, the course also covers how to facilitate classroom discussions about these topics, and a new course run has just begun — sign up today to take part for free!

The Impact of Technology online course is one of many courses developed by us with support from Google.

The post Is upgrade culture out of date? appeared first on Raspberry Pi.


Source: Raspberry Pi – Is upgrade culture out of date?

Make a Spy Hunter-style scrolling road | Wireframe #31

Raspberry Pi’s own Mac Bowley shows you how to make the beginnings of a top-down driving game inspired by 1983’s Spy Hunter.

Spy Hunter, an arcade game from 1983

Spy Hunter was one of the very first games with both driving and shooting.

Spy Hunter

The 1983 arcade classic Spy Hunter put players at the wheel of a fictitious Interceptor vehicle and challenged them to navigate a vertically scrolling road, destroying enemy vehicles.

Here, I’ll show you how you can recreate the game’s scrolling road to use in your own driving games. The road will be created using the Rect class from Pygame, with the road built from stacked rectangles that are each two pixels high.

Making the scrolling road in Python

First, I create two lists; one to hold the pieces of road currently being drawn on screen, and another to hold a queue of pieces that will be added as the road scrolls. To create the scrolling road effect, each of the current pieces of road will need to move down the screen, while a new piece is added to the end of the list at position y = 0.

Pygame can schedule functions, which can then be called at set intervals – meaning I can scroll my road at a set frame rate. The scroll_road function will achieve this. First, I loop over each road piece, and move it down by two pixels. I then remove the first item in the queue list and append it to the end of the road. The Pygame clock is then set to call the function at intervals set by a frame_rate variable: mine is set to 1/60, meaning 60 frames per second.

Our top-down rolling road in Python

Our code snippet provides a solid basis for your own top-down driving game. All you need now are weapons. And a few other cars.

My road can either turn left or right, a random choice made whenever the queue is populated. Whichever way the road turns, it has to start from the same spot as the last piece in my queue. I can grab the last item in a list using -1 as an index and then store the x position; building from here will make sure my road is continuous. I use a buffer of 50 pixels to keep the road from moving off the edge of my screen – each time a turn is made, I check that the road doesn’t go beyond this point.

I want the turn amount to be random, so I’m also setting a minimum turn of 200 pixels. If this amount takes my car closer than the buffer, I’ll instead set the turn amount so that it takes it up to the buffer but no further. I do this for both directions, as well as setting a modifier to apply to my turn amount (-1 to turn left and 1 to turn right), which will save me duplicating my code. I also want to randomly choose how many pieces will be involved in my turn. Each piece is a step in the scroll, so the more pieces, the longer my turn will take. This will make sure I have a good mix of sharp and elongated turns in my road, keeping the player engaged.

Our rolling road Python code

Here’s Mac’s code snippet, which creates a winding road worthy of Spy Hunter in Python. To get it working on your system, you’ll need to install Pygame Zero. And to download the full code, go here.

Speeding up the game

To make things more exciting, the game can also be speeded up by decreasing the frame_rate variable. You could even gradually increase this over time, making the game feel more frantic the further you get.
Another improvement would be to make the turns more curvy, but make sure you’re comfortable with algebra before you do this!

Get your copy of Wireframe issue 31

You can read more features like this one in Wireframe issue 31, available now at Tesco, WHSmith, all good independent UK newsagents, and the Raspberry Pi Store, Cambridge.

Or you can buy Wireframe directly from Raspberry Pi Press — delivery is available worldwide. And if you’d like a handy digital version of the magazine, you can also download issue 31 for free in PDF format.

Make sure to follow Wireframe on Twitter and Facebook for updates and exclusive offers and giveaways. Subscribe on the Wireframe website to save up to 49% compared to newsstand pricing!

The post Make a Spy Hunter-style scrolling road | Wireframe #31 appeared first on Raspberry Pi.


Source: Raspberry Pi – Make a Spy Hunter-style scrolling road | Wireframe #31

Vulkan is coming to Raspberry Pi: first triangle

Following on from our recent announcement that Raspberry Pi 4 is OpenGL ES 3.1 conformant, we have some more news to share on the graphics front. We have started work on a much requested feature: an open-source Vulkan driver!

Vulkan

Standards body Khronos describes Vulkan as “a new generation graphics and compute API that provides high-efficiency, cross-platform access to modern GPUs”. The Vulkan API has been designed to better accommodate modern GPUs and address common performance bottlenecks in OpenGL, providing graphics developers with new means to squeeze the best performance out of the hardware.

First triangle

The “first triangle” image is something of a VideoCore graphics tradition: while I arrived at Broadcom too late to witness the VideoCore III version, I still remember the first time James and Gary were able to get a flawless, single-tile, RGB triangle out of VideoCore IV in simulation. So, without further ado, here’s the VideoCore VI Vulkan version.

First triangle out of Vulkan

Before you get too excited, remember that this is just the start of the development process for Vulkan on Raspberry Pi. While there have been community efforts in the direction of Vulkan support (originally on VideoCore IV) as far back as 2018, Igalia has only been working on this new driver for a few weeks, and we still have a very long development roadmap ahead of us before we can put an actual driver in the hands of our users. So don’t hold your breath, and instead look forward to more news from us and Igalia as they make further development progress.

The post Vulkan is coming to Raspberry Pi: first triangle appeared first on Raspberry Pi.


Source: Raspberry Pi – Vulkan is coming to Raspberry Pi: first triangle

Free Raspberry Pi 4 cooling stand with The MagPi 90!

In issue 88 of The MagPi, we discovered that Raspberry Pi 4 can be kept cooler than usual if placed on its side. This gave us an idea, and thanks to many Top People, it resulted in the small, simple, and very practical Raspberry Pi 4 stand that you will find on the cover of all physical copies of The MagPi 90.

Content Warning

No Description

To complement this gift, we also got heat tester extraordinaire Gareth Halfacree to put the stand and several cooling cases through their paces to see just how well they can keep Raspberry Pi 4 nice and cool.

The stand also has an extra benefit: you can place three Raspberry Pis in it at once! A good idea if you plan to do a little cluster computing with a few Raspberry Pi 4s.

Mirror, mirror, on the wall…

While the Raspberry Pi 4 stand is a pretty big deal all by itself, issue 90 of The MagPi also includes a guide to building the ultimate smart mirror — including a bit of voice control!

While a magic mirror may not show you who the fairest of them all is (I can answer that question for you: it’s me), our guide will definitely show you the easiest way to set up your own magic mirror. It’ll be straightforward, thanks to the complete step-by-step tutorial we’ve put together for you.

Projects and more!

Feeling the urge to make something new with Raspberry Pi? Then take a look at our amazing selection of project showcases, and at a feature of some easy starter projects to help you get inspired. All this, along with our usual selection of reviews, tutorials, and community news, in The MagPi 90!

Get The MagPi 90 today

You can get The MagPi issue 90 online in our store with international delivery available, or from the Raspberry Pi Store in Cambridge and all good newsagents and supermarkets. You can also access The MagPi magazine via our Android and iOS apps.

The stand is available with print copies of the magazine

Don’t forget our amazing subscription offers either, which include a gift of a Raspberry Pi Zero W when you subscribe for twelve months.

And, as with all our Raspberry Pi publications, you can download this issue as a free PDF from our website.

The post Free Raspberry Pi 4 cooling stand with The MagPi 90! appeared first on Raspberry Pi.


Source: Raspberry Pi – Free Raspberry Pi 4 cooling stand with The MagPi 90!

Build your own first-person shooter in Unity

Raspberry Pi Press is back with a new publication: this time, it’s Wireframe’s time to shine, with Build Your Own First-Person Shooter in Unity.

BUILD YOUR OWN first-person shooter game in Unity || Wireframe magazine

Ever fancied creating your own first-person shooter game? Now you can with Wireframe’s brand new, 140-page bookazine, which positively heaves with tutorials and advice from expert video game developers!

Could you build a video game?

We’ve all had that moment of asking ourselves, “I wonder if I could do this?” when playing a video game. Whether as a child racing friends in Mario Kart, or in more recent years with vast open-world masterpieces, if you like games, you’ve probably thought about designing and building your own.

So, why don’t you?

With the latest publication from Wireframe and Raspberry Pi Press, you can learn how to use Unity, free software available to download online, to create your very own first-person shooter. You could build something reminiscent of DOOM, Wolfenstein, and all the other games you tried to convince your parents you were old enough to play when you really weren’t (who knew blurry, pixelated blood could be so terrifying?).

Build Your Own First-Person Shooter in Unity

Build Your Own First-Person Shooter in Unity leads you step-by-step through the process of making the game Zombie Panic – a frenetic battle for survival inside a castle heaving with the undead.

You’ll learn how to set up and use all the free software you’ll need, make enemies that follow and attack the player, create and texture 3D character models, and design levels with locked doors and keys.

You’ll also get tips and advice from experts, allowing you to progress your game making beyond the tutorials in the book.

Get your copy now!

Build Your Own First-Person Shooter in Unity is available now from the Raspberry Pi Press online store with free worldwide shipping, from the Raspberry Pi Store in Cambridge, and as a free download from the Wireframe website.

Wait, a free download?

Yup, you read correctly. Build Your Own First-Person Shooter in Unity can be downloaded for free as a PDF from the Wireframe website. We release free PDF versions of our books and magazines on the day they’re published; it means as many people as possible can get their hands on high-quality, up-to-date information about computing, programming and making.

However, when you buy our publications, you help us produce more great content, and you support the work of the Raspberry Pi Foundation to bring computing and digital making to people all over the world. We offer a variety of subscription options, including some terrific free gifts. And we make sure our publications are printed to feel good in your hands and look good on your bookshelf.

So, buy Build Your Own First-Person Shooter in Unity if you can – thank you, you’re amazing! And if not, grab the free PDF. Whichever you choose, we hope you make an awesome game. Don’t forget to share it with us on our social media channels.

The post Build your own first-person shooter in Unity appeared first on Raspberry Pi.


Source: Raspberry Pi – Build your own first-person shooter in Unity

Our brand-new HackSapce magazine trailer

Our brand-new trailer for HackSpace magazine is very pretty. Here, have a look for yourself.

THIS IS MAKING || Hackspace magazine

HackSpace magazine is the new monthly magazine for people who love to make things and those who want to learn. Grab some duct tape, fire up a microcontroller, ready a 3D printer and hack the world around you!

As we mentioned last week, this month’s HackSpace magazine contains a very cool Raspberry Pi special feature that we know you’ll all love.

HackSpace magazine is available at major newsagents in the UK, at the Raspberry Pi store, Cambridge, at Barnes & Noble in the US, and in our online store.

You can also download the latest issue as a free PDF, so if you’re new to HackSpace, there really is no reason not to give it a go. We know you’re going to love it.

The post Our brand-new HackSapce magazine trailer appeared first on Raspberry Pi.


Source: Raspberry Pi – Our brand-new HackSapce magazine trailer