New keyboards for Portugal, Norway, Sweden, and Denmark

It feels like just yesterday that we released the Raspberry Pi keyboard and hub to the world. Well, it turns out it’s been more than a year, and time really has flown for the next stage of this project, which brings four new language/country options: Portugal, Norway, Sweden, and Denmark. They’re available to buy now from Raspberry Pi Approved Resellers.

Raspberry Pi keyboards

The keyboard and hub has been a great success, with many users adopting our Raspberry Pi red and white colour scheme for their setup. As well as this satisfying uptake of the keyboard on its own, we’ve also sold tens of thousands of Raspberry Pi Desktop Kits which include a keyboard, alongside the official mouse, Beginners Guide and, of course, a Raspberry Pi.

Raspberry Pi official keyboard
If I say so myself, it’s quite a cool-looking desktop setup, with the boxes and cables all colour-coordinated.

We made the black and grey set up for users who own a black and grey Raspberry Pi case, but, with four out of five people choosing the red and white variant, it just goes to show what a bit of company branding can do for business!

We’ve found that the US keyboard is the most popular model, with over half our users choosing that option. As a Brit, I prefer the chunkier Enter key of the UK keyboard.

Close-up photo of UK keyboard Enter key
Easy to find

New variants

There is always a demand to support more users with keyboards to match their country and language so, as a second phase, we are announcing keyboards for the following countries:

  • Portugal
  • Norway
  • Sweden
  • Denmark
Photo: Raspberry Pi Portugal keyboard in red and white
The new European Portuguese variant of our keyboard and hub

These new keyboards are available now in red and white, with black and grey options coming soon. They are just print changes from previously released variants, but the devil proved to be in the detail.

For example, we hoped early on that the Portuguese keyboard would suit users in Brazil too, but we learned that Brazilian and European Portuguese keyboard layouts are quite different. Given the differences between UK and US keyboard layouts, this really shouldn’t have surprised us!

There is a very subtle difference between the Norway and Denmark keyboards. I wonder if anyone can spot it?


We also discovered that a Finnish keyboard layout exists, but I couldn’t identify any differences between it and the Sweden keyboard. While I don’t speak Finnish, I do speak Swedish – an awesome language that everyone should learn – so I came to these investigations with a bit of relevant knowledge. I found that there are very small changes between different manufacturers, but no consistent differences between Finnish and Swedish keyboards, and ultimately I was guided by what Raspberry Pi OS expects as the correct function for these keyboards. I do hope I am right about these two keyboards being the same… I expect I’ll soon find out in the comments!

Photo: Raspberry Pi Sweden keyboard in red and white
Our new Swedish keyboard. If you know of a way in which a Finnish keyboard should differ from this, please tell us in the comments

We know that many users are waiting for a Japan keyboard variant. We hardly ever talk about new products before they are released, but we’re breaking our rule, in this case, to let you know that we hope to have some news about this very soon – so watch this space!

I’d like to give special thanks to Sherman Liu of Gembird for the new key matrix design, and Craig Wightman of Kinneir Dufort for his patience in designing all the key print revisions.

Happy coding, folks!

The post New keyboards for Portugal, Norway, Sweden, and Denmark appeared first on Raspberry Pi.


Source: Raspberry Pi – New keyboards for Portugal, Norway, Sweden, and Denmark

Code Jetpac’s rocket building action | Wireframe #40

Pick up parts of a spaceship, fuel it up, and take off in Mark Vanstone’s Python and Pygame Zero rendition of a ZX Spectrum classic

The original Jetpac, in all its 8-bit ZX Spectrum glory

For ZX Spectrum owners, there was something special about waiting for a game to load, with the sound of zeros and ones screeching from the cassette tape player next to the computer. When the loading screen – an image of an astronaut and Ultimate Play the Game’s logo – appeared, you knew the wait was going to be worthwhile. Created by brothers Chris and Tim Stamper in 1983, Jetpac was one of the first hits for their studio, Ultimate Play the Game. The game features the hapless astronaut Jetman, who must build and fuel a rocket from the parts dotted around the screen, all the while avoiding or shooting swarms of deadly aliens.

This month’s code snippet will provide the mechanics of collecting the ship parts and fuel to get Jetman’s spaceship to take off.  We can use the in-built Pygame Zero Actor objects for all the screen elements and the Actor collision routines to deal with gravity and picking up items. To start, we need to initialise our Actors. We’ll need our Jetman, the ground, some platforms, the three parts of the rocket, some fire for the rocket engines, and a fuel container. The way each Actor behaves will be determined by a set of lists. We have a list for objects with gravity, objects that are drawn each frame, a list of platforms, a list of collision objects, and the list of items that can be picked up.

Jetman jumps inside the rocket and is away. Hurrah!

Our draw() function is straightforward as it loops through the list of items in the draw list and then has a couple of conditional elements being drawn after. The update() function is where all the action happens: we check for keyboard input to move Jetman around, apply gravity to all the items on the gravity list, check for collisions with the platform list, pick up the next item if Jetman is touching it, apply any thrust to Jetman, and move any items that Jetman is holding to move with him. When that’s all done, we can check if refuelling levels have reached the point where Jetman can enter the rocket and blast off.

If you look at the helper functions checkCollisions() and checkTouching(), you’ll see that they use different methods of collision detection, the first being checking for a collision with a specified point so we can detect collisions with the top or bottom of an actor, and the touching collision is a rectangle or bounding box collision, so that if the bounding box of two Actors intersect, a collision is registered. The other helper function applyGravity() makes everything on the gravity list fall downward until the base of the Actor hits something on the collide list.

So that’s about it: assemble a rocket, fill it with fuel, and lift off. The only thing that needs adding is a load of pesky aliens and a way to zap them with a laser gun.

Here’s Mark’s Jetpac code. To get it running on your system, you’ll need to install Pygame Zero. And to download the full code and assets, head here.

Get your copy of Wireframe issue 40

You can read more features like this one in Wireframe issue 40, available directly from Raspberry Pi Press — we deliver worldwide.

And if you’d like a handy digital version of the magazine, you can also download issue 40 for free in PDF format.

Make sure to follow Wireframe on Twitter and Facebook for updates and exclusive offers and giveaways. Subscribe on the Wireframe website to save up to 49% compared to newsstand pricing!

The post Code Jetpac’s rocket building action | Wireframe #40 appeared first on Raspberry Pi.


Source: Raspberry Pi – Code Jetpac’s rocket building action | Wireframe #40

OpenVX API for Raspberry Pi

Raspberry Pi is excited to bring the Khronos OpenVX 1.3 API to our line of single-board computers. Here’s Kiriti Nagesh Gowda, AMD‘s MTS Software Development Engineer, to tell you more.

OpenVX for computer vision

OpenVX™ is an open, royalty-free API standard for cross-platform acceleration of computer vision applications developed by The Khronos Group. The Khronos Group is an open industry consortium of more than 150 leading hardware and software companies creating advanced, royalty-free acceleration standards for 3D graphics, augmented and virtual reality, vision, and machine learning. Khronos standards include Vulkan®, OpenCL™, SYCL™, OpenVX™, NNEF™, and many others.

Now with added Raspberry Pi

The Khronos Group and Raspberry Pi have come together to work on an open-source implementation of OpenVX™ 1.3, which passes the conformance on Raspberry Pi. The open-source implementation passes the Vision, Enhanced Vision, & Neural Net conformance profiles specified in OpenVX 1.3 on Raspberry Pi.

Application developers may always freely use Khronos standards when they are available on the target system. To enable companies to test their products for conformance, Khronos has established an Adopters Program for each standard. This helps to ensure that Khronos standards are consistently implemented by multiple vendors to create a reliable platform for developers. Conformant products also enjoy protection from the Khronos IP Framework, ensuring that Khronos members will not assert their IP essential to the specification against the implementation.

OpenVX enables a performance and power-optimized computer vision processing, especially important in embedded and real-time use cases such as face, body, and gesture tracking, smart video surveillance, advanced driver assistance systems (ADAS), object and scene reconstruction, augmented reality, visual inspection, robotics, and more. The developers can take advantage of using this robust API in their application and know that the application is portable across all the conformant hardware.

Below, we will go over how to build and install the open-source OpenVX 1.3 library on Raspberry Pi 4 Model B. We will run the conformance for the Vision, Enhanced Vision, & Neural Net conformance profiles and create a simple computer vision application to get started with OpenVX on Raspberry Pi.

OpenVX 1.3 implementation for Raspberry Pi

The OpenVX 1.3 implementation is available on GitHub. To build and install the library, follow the instructions below.

Build OpenVX 1.3 on Raspberry Pi

Git clone the project with the recursive flag to get submodules:

[[code]]czo3NjpcImdpdCBjbG9uZSAtLXJlY3Vyc2l2ZSBodHRwczovL2dpdGh1Yi5jb20vS2hyb25vc0dyb3VwL09wZW5WWC1zYW1wbGUtaW17WyYqJl19cGwuZ2l0XCI7e1smKiZdfQ==[[/code]]

Note: The API Documents and Conformance Test Suite are set as submodules in the sample implementation project.

Use the Build.py script to build and install OpenVX 1.3:

[[code]]czoxMDc6XCJjZCBPcGVuVlgtc2FtcGxlLWltcGwvCnB5dGhvbiBCdWlsZC5weSAtLW9zPUxpbnV4IC0tdmVudW0gLS1jb25mPURlYnV7WyYqJl19ZyAtLWNvbmZfdmlzaW9uIC0tZW5oX3Zpc2lvbiAtLWNvbmZfbm5cIjt7WyYqJl19[[/code]]

Build and run the conformance:

[[code]]czo0Mzg6XCJleHBvcnQgT1BFTlZYX0RJUj0kKHB3ZCkvaW5zdGFsbC9MaW51eC94MzIvRGVidWcKZXhwb3J0IFZYX1RFU1RfREFUQV97WyYqJl19UEFUSD0kKHB3ZCkvY3RzL3Rlc3RfZGF0YS8KbWtkaXIgYnVpbGQtY3RzCmNkIGJ1aWxkLWN0cwpjbWFrZSAtRE9QRU5WWF9JTkNMVXtbJiomXX1ERVM9JE9QRU5WWF9ESVIvaW5jbHVkZSAtRE9QRU5WWF9MSUJSQVJJRVM9JE9QRU5WWF9ESVIvYmluL2xpYm9wZW52eC5zb1xcOyRPUHtbJiomXX1FTlZYX0RJUi9iaW4vbGlidnh1LnNvXFw7cHRocmVhZFxcO2RsXFw7bVxcO3J0IC1ET1BFTlZYX0NPTkZPUk1BTkNFX1ZJU0lPTj1PTiAtRHtbJiomXX1PUEVOVlhfVVNFX0VOSEFOQ0VEX1ZJU0lPTj1PTiAtRE9QRU5WWF9DT05GT1JNQU5DRV9ORVVSQUxfTkVUV09SS1M9T04gLi4vY3Rze1smKiZdfS8KY21ha2UgLS1idWlsZCAuCkxEX0xJQlJBUllfUEFUSD0uL2xpYiAuL2Jpbi92eF90ZXN0X2NvbmZvcm1hbmNlXCI7e1smKiZdfQ==[[/code]]

Sample application

Use the open-source samples on GitHub to test the installation.

The post OpenVX API for Raspberry Pi appeared first on Raspberry Pi.


Source: Raspberry Pi – OpenVX API for Raspberry Pi

Volunteer your Raspberry Pi to IBM’s World Community Grid

IBM’s World Community Grid is working with scientists at Scripps Research on computational experiments to help find potential COVID-19 treatments. Anyone with a Raspberry Pi and an internet connection can help.

Why is finding potential treatments for COVID-19 so important?

Scientists all over the globe are working hard to create a vaccine that could help prevent the spread of COVID-19. However, this process is likely to take many months — or possibly even years.

In the meantime, scientists are also searching for potential treatments for the symptoms of COVID-19. A project called OpenPandemics – COVID-19 is one such effort. The project is led by researchers in the Forli Lab at Scripps Research, who are enlisting the help of World Community Grid volunteers.

What is World Community Grid and how does it work? 

World Community Grid is an IBM social responsibility initiative that supports humanitarian scientific research. 

Image text reads: Accelerate research with no investment of time or money. When you become a World Community Grid volunteer, you donate your device's spare computing power to help scientists solve the world's biggest problems in health and sustainability.

As a World Community Grid volunteer, you download a secure software program to your Raspberry Pi, macOS or Windows computer, or Android device. This software program (called BOINC) is used to run World Community Grid projects, and is compatible with the Raspberry Pi OS and most other operating systems. Then, when your device is not using its full power, it automatically runs a simulated experiment in the background that will help predict the effectiveness of a particular chemical compound as a possible treatment for COVID-19. Finally, your device automatically returns the results of the completed simulation and requests the next simulation.

Over the course of the project, volunteers’ devices will run millions of simulations of small molecules interacting with portions of the virus that causes COVID-19. This is a process known as molecular docking, which is the study of how two or more molecules fit together. When a simulated chemical compound fits, or ‘docks’, with a simulation of part of the virus that causes COVID-19, that interaction may point to a potential treatment for the disease.

An image of a calendar with the text: Get results that matter. As a World Community Grid volunteer, your device does research calculations when it's idle, so just by using it as. you do every dat you can help scientists get results in months instead of decades. With your help, they can identify the most important areas to study in the lab, bringing them one step closer to discoveries that save lives and address global problems.

World Community Grid combines the results from your device along with millions of results from other volunteers all over the world and sends them to the Scripps Research team for analysis. While this process doesn’t happen overnight, it accelerates dramatically what would otherwise take many years, or might even be impossible.

OpenPandemics – COVID-19 is the first World Community Grid project to harness the power of Raspberry Pi devices, but the World Community Grid technical team is already working to make other projects available for Raspberry Pi very soon.

Getting ready for future pandemics

Scientists have learned from past outbreaks that pandemics caused by newly emerging pathogens may become more and more common. That’s why OpenPandemics – COVID-19 was designed to be rapidly deployed to fight future diseases, ideally before they reach a critical stage.

A image of a scientist using a microscope. Text reads: Your device could help search for potential treatments for COVID-19. Scientists are using World Community Grid to accelerate the search for treatments to COVIS-19. The tools and techniques the scientists develop to fight COVID-19 could be used in the future by all researchers to help more quickly find treatments for potential pandemics

To help address future pandemics, researchers need access to swift and effective tools that can be deployed very early, as soon as a threatening disease is identified. So, the researchers behind OpenPandemics – COVID-19 are creating a software infrastructure to streamline the process of finding potential treatments for other diseases. And in keeping with World Community Grid’s open data policy, they will make their findings and these tools freely available to the scientific community. 

Join a global community of science supporters

World Community Grid is thrilled to make OpenPandemics – COVID-19 available to everyone who wants to donate computing power from their Raspberry Pi. Every device can play a part in helping the search for COVID-19 treatments. Please join us!

The post Volunteer your Raspberry Pi to IBM’s World Community Grid appeared first on Raspberry Pi.


Source: Raspberry Pi – Volunteer your Raspberry Pi to IBM’s World Community Grid

Be a better Scrabble player with a Raspberry Pi High Quality Camera

One of our fave makers, Wayne from Devscover, got a bit sick of losing at Scrabble (and his girlfriend was likely raging at being stuck in lockdown with a lesser opponent). So he came up with a Raspberry Pi–powered solution!

Using a Raspberry Pi High Quality Camera and a bit of Python, you can quickly figure out the highest-scoring word your available Scrabble tiles allow you to play.

Hardware

  • Raspberry Pi 3B
  • Compatible touchscreen
  • Raspberry Pi High Quality Camera
  • Power supply for the touchscreen and Raspberry Pi
  • Scrabble board

You don’t have to use a Raspberry Pi 3B, but you do need a model that has both display and camera ports. Wayne also chose to use an official Raspberry Pi Touch Display because it can power the computer, but any screen that can talk to your Raspberry Pi should be fine.

Software

Firstly, the build takes a photo of your Scrabble tiles using raspistill.

Next, a Python script processes the image of your tiles and then relays the highest-scoring word you can play to your touchscreen.

The key bit of code here is twl, a Python script that contains every possible word you can play in Scrabble.

From 4.00 minutes into his build video, Wayne walks you through what each bit of code does and how he made it work for this project, including how he installed and used the Scrabble dictionary.

Fellow Scrabble-strugglers have suggested sneaky upgrades in the comments of Wayne’s YouTube video, such having the build relay answers to a more discreet smart watch.

No word yet on how the setup deals with the blank Scrabble tiles; those things are like gold dust.

In case you haven’t met the Raspberry Pi High Quality Camera yet, Wayne also did this brilliant unboxing and tutorial video for our newest piece of hardware.

And for more projects from Devscover, check out this great Amazon price tracker using a Raspberry Pi Zero W, and make sure to subscribe to the channel for more content.

The post Be a better Scrabble player with a Raspberry Pi High Quality Camera appeared first on Raspberry Pi.


Source: Raspberry Pi – Be a better Scrabble player with a Raspberry Pi High Quality Camera

Let’s learn about encryption with Digital Making at Home!

Join us for Digital Making at Home: this week, young people can learn about encryption and e-safety with us! With Digital Making at Home, we invite kids all over the world to code along with us and our new videos every week.

So get ready to decode a secret message with us:

Check out this week’s code-along projects!

And tune in on Wednesday 2pm BST / 9am EDT / 7.30pm IST at rpf.io/home to code along with our live stream session.

PS: If you want to learn how to teach students in your classroom about encryption and cybersecurity, we’ve got the perfect free online courses for you!

The post Let’s learn about encryption with Digital Making at Home! appeared first on Raspberry Pi.


Source: Raspberry Pi – Let’s learn about encryption with Digital Making at Home!

Wes’s wonderful Minecraft user notification display

This Minecraft sign uses a Raspberry Pi to notify you when, and how many of, your friends are logged into your dedicated Minecraft server.

Let’s start by pointing out how wonderfully nostalgic many of Wes ‘Geeksmithing’ Swain’s projects are. From his Raspberry Pi–housing cement Thwomp that plays his favourite Mario games to The NES Project, his NES replica unit with a built-in projector — Wes makes the things we wished for as kids.

The NES Project covered in HackSpace magazine

We honestly wouldn’t be surprised if his next project is a remake of Duckhunt with servo-controlled ducks, or Space Invaders but it’s somehow housed in a flying space invader that shoots back with lasers. Honestly, at this point, we wouldn’t put it past him.

Making the Minecraft friend notification display

In the video, Wes covers the project in two parts. Firstly, he shows off the physical build of making the sign, including laser-cut acrylic front displayed with controllable LED lights, a Raspberry Pi Zero, and the wooden framing.

Secondly, he moves on to the code, in which he uses mcstatus, a Python class created by Minecraft’s Technical Director Nathan Adams that can be used to query servers for information. In this instance, Wes is using mcstatus to check for other players on his group’s dedicated Mincecraft server, but the class can also be used to gather mod information. You can find mcstatus on GitHub.

Each friend is assigned a letter that illuminates if they’re online.

Lucky for Wes, he has the same number of friends on his server as the number of letters in ‘Minecraft’, so for every friend online, he’s programmed the display to illuminate a letter of the Minecraft logo. And while the server is empty, he can also set the display to run through various light displays, including this one, a dedication to the new Minecraft Nether update.

If you’d like to try making this project yourself, you can: Wes goes into great detail in his video, and the code for the project can be found on his GitHub account.

And while we have your attention, be sure to subscribe to Geeksmithing on YouTube and show him some love for such a great project.

The post Wes’s wonderful Minecraft user notification display appeared first on Raspberry Pi.


Source: Raspberry Pi – Wes’s wonderful Minecraft user notification display

Pi Commander | The MagPi 95

Adrien Castel’s idea of converting an old electronic toy into a retro games machine was no flight of fancy, as David Crookes discovers

The 1980s was a golden era for imaginative electronic toys. Children would pester their parents for a Tomytronic 3D or a Nintendo Game & Watch. And they would enviously eye anyone who had a Tomy Turnin’ Turbo Dashboard with its promise of replicating the thrill of driving (albeit without the traffic jams).

All of the buttons, other than the joystick, are original to the toy – as are the seven red LED lights

Two years ago, maker Matt Brailsford turned that amazing toy into a fully working Out Run arcade machine and Adrien Castel was smitten. “I loved the fact that he’d upcycled an old toy and created something that could be enjoyed as a grown-up,” he says. “But I wanted to push the simulation a bit further and I thought a flying sim could do the trick.”

“I didn’t want to modify the look of the toy”

Ideas began flying around Adrien’s mind. “I knew what I wanted to achieve so I made an overall plan in my head,” he recalls. First he found the perfect toy: a battery-powered Sky Fighter F-16 tabletop game made by Dival. He then decided to base his build around a Raspberry Pi 3A+. “It’s the perfect hardware for projects like this because of its flexibility,” Adrien says.

Taking off

The toy needed some work. Its original bright red joystick was missing and Adrien knew he’d have to replace the original screen with a TFT LCD. To do this, he 3D-printed a frame to fit the TFT display and he created a smaller base for the replacement joystick. Adrien also changed the microswitches for greater sensitivity but he didn’t go overboard with the changes.

The games can make use of the full screen. Adrien would have liked a larger screen, but the original ratio oddly lay between 4:3 and 16:9, making a bigger display harder to find

“I knew I would have to adapt some parts for the joystick and for the screen, but I didn’t want to modify the look of the toy,” Adrien explains. “To be honest, modifying the toy would have involved some sanding and painting and I was worried that it would ruin the overall effect of the project if it was badly executed.”

A Raspberry Pi 3A+ sits at the heart of the Pi Commander, alongside a mini audio amplifier, and it’s wired up to components within the toy

As such, a challenge was set. “I had to keep most of the original parts such as throttle levers and LEDs and adapt them to the new build,” he says. “This meant getting them to work together with the system and it also meant using the original PCB, getting rid of the components and re-routing the electronics to plug on the GPIOs.”

There were some enhancements. Adrien soldered a PAM8403 3W class-D audio amplifier to Raspberry Pi and this allowed a basic speaker to replace the original for better sound. But there were some compromises too.

The original PCB was used and the electronics were re-routed. All the components need to work between 3.3 to 5V with the lowest possible amperage while fitting into a tight space

“At first I thought the screen could be bigger than the one I used, but the round shape of the cockpit didn’t give much space to fit a screen larger than four inches.” He also believes the project could be improved with a better joystick: “The one I’ve used is a simple two-button arcade stick with a jet fighter look.”

Flying high

By using the retro gaming OS Recalbox (based on EmulationStation and RetroArch), however, he’s been able to perfect the overall feel. “Recalbox allowed me to create a custom front end that matches the look of a jet fighter,” he explains. It also means the Pi Commander plays shoot-’em-up games alongside open-source simulators like FlightGear (flightgear.org). “It’s a lot of fun.”

Read The MagPi for free!

Find more fantastic projects, tutorials, and reviews in The MagPi #93, out now! You can get The MagPi #95 online at our store, or in print from all good newsagents and supermarkets. You can also access The MagPi magazine via our Android and iOS apps.

Don’t forget our super subscription offers, which include a free gift of a Raspberry Pi Zero W when you subscribe for twelve months.

And, as with all our Raspberry Pi Press publications, you can download the free PDF from our website.

The post Pi Commander | The MagPi 95 appeared first on Raspberry Pi.


Source: Raspberry Pi – Pi Commander | The MagPi 95

How we are helping you with computing teaching methods

One aspect of our work as part of the National Centre for Computing Education (NCCE) is producing free materials for teachers about teaching methods and pedagogy in computing. I am excited to introduce these materials to you here!

Teachers are asking us about teaching methods

Computing was included in the national curriculum in England in 2014, and after this, continued professional development (CPD) initiatives became available to support teachers to feel confident in topics they had not previously studied. Much of the CPD focussed on learning about programming, algorithms, networking, and how computers work.

Instructor explaining corporate software specific to trainees in computer class. Man and women sitting at table, using desktop, pointing at monitor and talking. Training concept

More recently however, I’ve found that increasing numbers of teachers are asking for support around teaching methods, particularly for how to support students who find programming and other aspects of computing difficult. Computing is a relatively new subject, but more and more research results are showing how to best teach it.

We offer CPD with our online courses

As part of the NCCE, we produce lots of free resources to support teachers with developing knowledge and skills in all aspects of computing. The NCCE’s Computing Hubs offer remotely delivered sessions, and we produce interactive, in-depth, free online courses for teachers to take over 3 or 4 weeks. Some of these online courses are about subject knowledge, while others focus on how to teach computing, the area referred to as pedagogical content knowledge*. For example, two of our courses are Programming Pedagogy in Primary Schools and Programming Pedagogy in Secondary Schools. Our pedagogy courses draw on the expertise and experience of many computing teachers working with students right now.

We share best practices in computing pedagogy

But that’s not all! We continually share tried and tested strategies for use in the computing classroom to help teachers, and those training to teach, support students more effectively. We believe that computing is for everyone and as such, we need a variety of possible approaches to teaching each topic up our collective sleeves, to ensure accessibility for all our students.

We develop all of this material in collaboration with in-the-classroom-now, experienced teachers and other experts, also drawing upon the latest computing education research. Our aim is to give you great, practical ideas for how to engage students who may be unmotivated or switched off, and new strategies to help you support students’ understanding of more complex computing concepts.

We support you to do classroom action research

One of the findings from decades of educational research is that teacher action research in the classroom is an extremely effective form of CPD! Teacher action research means reflecting on what the barriers to learning are in your classroom, planning an intervention (often in the form of a specific change to your teaching practice), and then evaluating whether it engenders improvement. Doing this has positive impacts both on your expertise as a teacher and on your students’ learning!

To support you with action research, we’re launching a special programme for classroom action research in computing. This takes the form of an online course, facilitated by experts in the field, lasting over a six-month period. Find out more about this opportunity.

Share your experiences with us

Right now we’re in unusual times, and surviving various combinations of home learning and remote delivery with your classes may be your greatest concern. However you’re getting on, we’d love to hear from you about your classroom practice in computing. Your experience with different ways of teaching computing in the classroom will add to our collective understanding about what works for teaching students. You can share your feedback with us, or get in touch with our pedagogy team at research@teachcomputing.org.

Other ways to learn and stay in touch:


*Back in 1987, Lee Shulman wrote: “Pedagogical content knowledge represents the blending of content and pedagogy into an understanding of how particular topics, problems or issues are organised, represented, and adapted to the diverse interests and abilities of learners, and presented for instruction.”

The post How we are helping you with computing teaching methods appeared first on Raspberry Pi.


Source: Raspberry Pi – How we are helping you with computing teaching methods

Raspberry Pi High Quality Camera powers up homemade microscope

Wow, DIY-Maxwell, wow. This reddit user got their hands on one of our new Raspberry Pi High Quality Cameras and decided to upgrade their homemade microscope with it. The brains of the thing are also provided by a Raspberry Pi.

Key features

  • Raspberry Pi OS
  • 8 MegaPixel CMOS camera (Full HD 30 fps video)
  • Imaging features from several centimetres to several micrometers without changing the lens
  • 6 stepper motors (X, Y, tilt, rotation, magnification, focus)
  • Variable speed control using a joystick controller or keyboard
  • Uniform illumination for imaging reflective surface
  • Modular design: stages and modules can be arranged in any configuration depending on the application

Here’s what a penny looks like under this powerful microscope:

Check out this video from the original reddit post to see the microscope in action.

Bill of materials

Click image to enlarge

The user has put together very detailed, image-led build instructions walking you through how to create the linear actuators, camera setup, rotary stage, illumination, title mechanism, and electronics.

The project uses a program written in Python 3 (MicroscoPy.py) to control the microscope, modify camera settings, and take photos and videos controlled by keyboard input.

Click image to enlarge

Here is a quick visual to show you the exact ports you need for this project on whatever Raspberry Pi you have:

Click image to enlarge

In the comments of the original reddit post, DIY_Maxwell explains that $10 objective lens used in the project limited the Raspberry Pi High Quality Camera’s performance. They predict you can expect even better images with a heavier investment in the lens.

The project is the result of a team at IBM Research–Europe, in Zurich, who develop microfluidic technologies for medical applications, needing to provide high-quality photos and videos of their microfluidic chips.

In a blog for IEEE Spectrum, IBM team member Yuksel Temiz explains: “Taking a photo of a microfluidic chip is not easy. The chips are typically too big to fit into the field of view of a standard microscope, but they have fine features that cannot be resolved using a regular camera. Uniform illumination is also critical because the chips are often made of highly reflective or transparent materials. Looking at publications from other research groups, it’s obvious that this is a common challenge. With this motivation, I devoted some of my free time to designing a multipurpose and compact lab instrument that can take macro photos from almost any angle.”

Here’s the full story about how the Raspberry Pi-powered creation came to be.

And for some extra-credit homework, you can check out this document comparing the performance of the microscope using our Raspberry Pi Camera Module v2 and the High Quality Camera. The key takeaway for those wishing to upgrade their old projects with the newer camera is to remember that it’s heavier and 50% bigger, so you’ll need to tweak your housing to fit it in.

The post Raspberry Pi High Quality Camera powers up homemade microscope appeared first on Raspberry Pi.


Source: Raspberry Pi – Raspberry Pi High Quality Camera powers up homemade microscope

OctoPrint: a baby monitor for your 3D printer

In issue 32 of HackSpace magazine, out now, we talk to Gina Häußge, creator of OctoPrint – it sits on a Raspberry pi and monitors your 3D printer.

Gina Häußge, creator and maintainer of OctoPrint

There’s something enchanting about watching a 3D printer lay down hot plastic. Seeing an object take shape before your eyes is utterly compelling, which is perhaps why we love watching 3D printing time-lapse videos so much.

Despite this, it would be impractical and inefficient to sit and watch every time you sent a print job through. That’s why we should all be grateful for OctoPrint. This free, open-source software monitors your 3D printer for you, keeping you from wasting plastic and ensuring that you can go about your business without fearing for your latest build.
OctoPrint is the creation of Gina Haüßge. We enjoyed a socially distant chat with her about the challenges of running an open-source project, making, and what it’s like to have a small project become huge.

HackSpace: Most people who have used a 3D printer will have heard of OctoPrint, but for the benefit of those who haven’t, what is it?

Gina Haüßge: Somebody once called it a baby monitor for your 3D printer. I really like this description. It’s pretty much a combination of a baby monitor and a remote control, because it allows you to go through any web browser on your network and monitor what your printer is currently up to, how much the current job has progressed. If you have a webcam set up, it can show you the print itself, so you can see that everything is working correctly, it’s still on the bed, and all that.

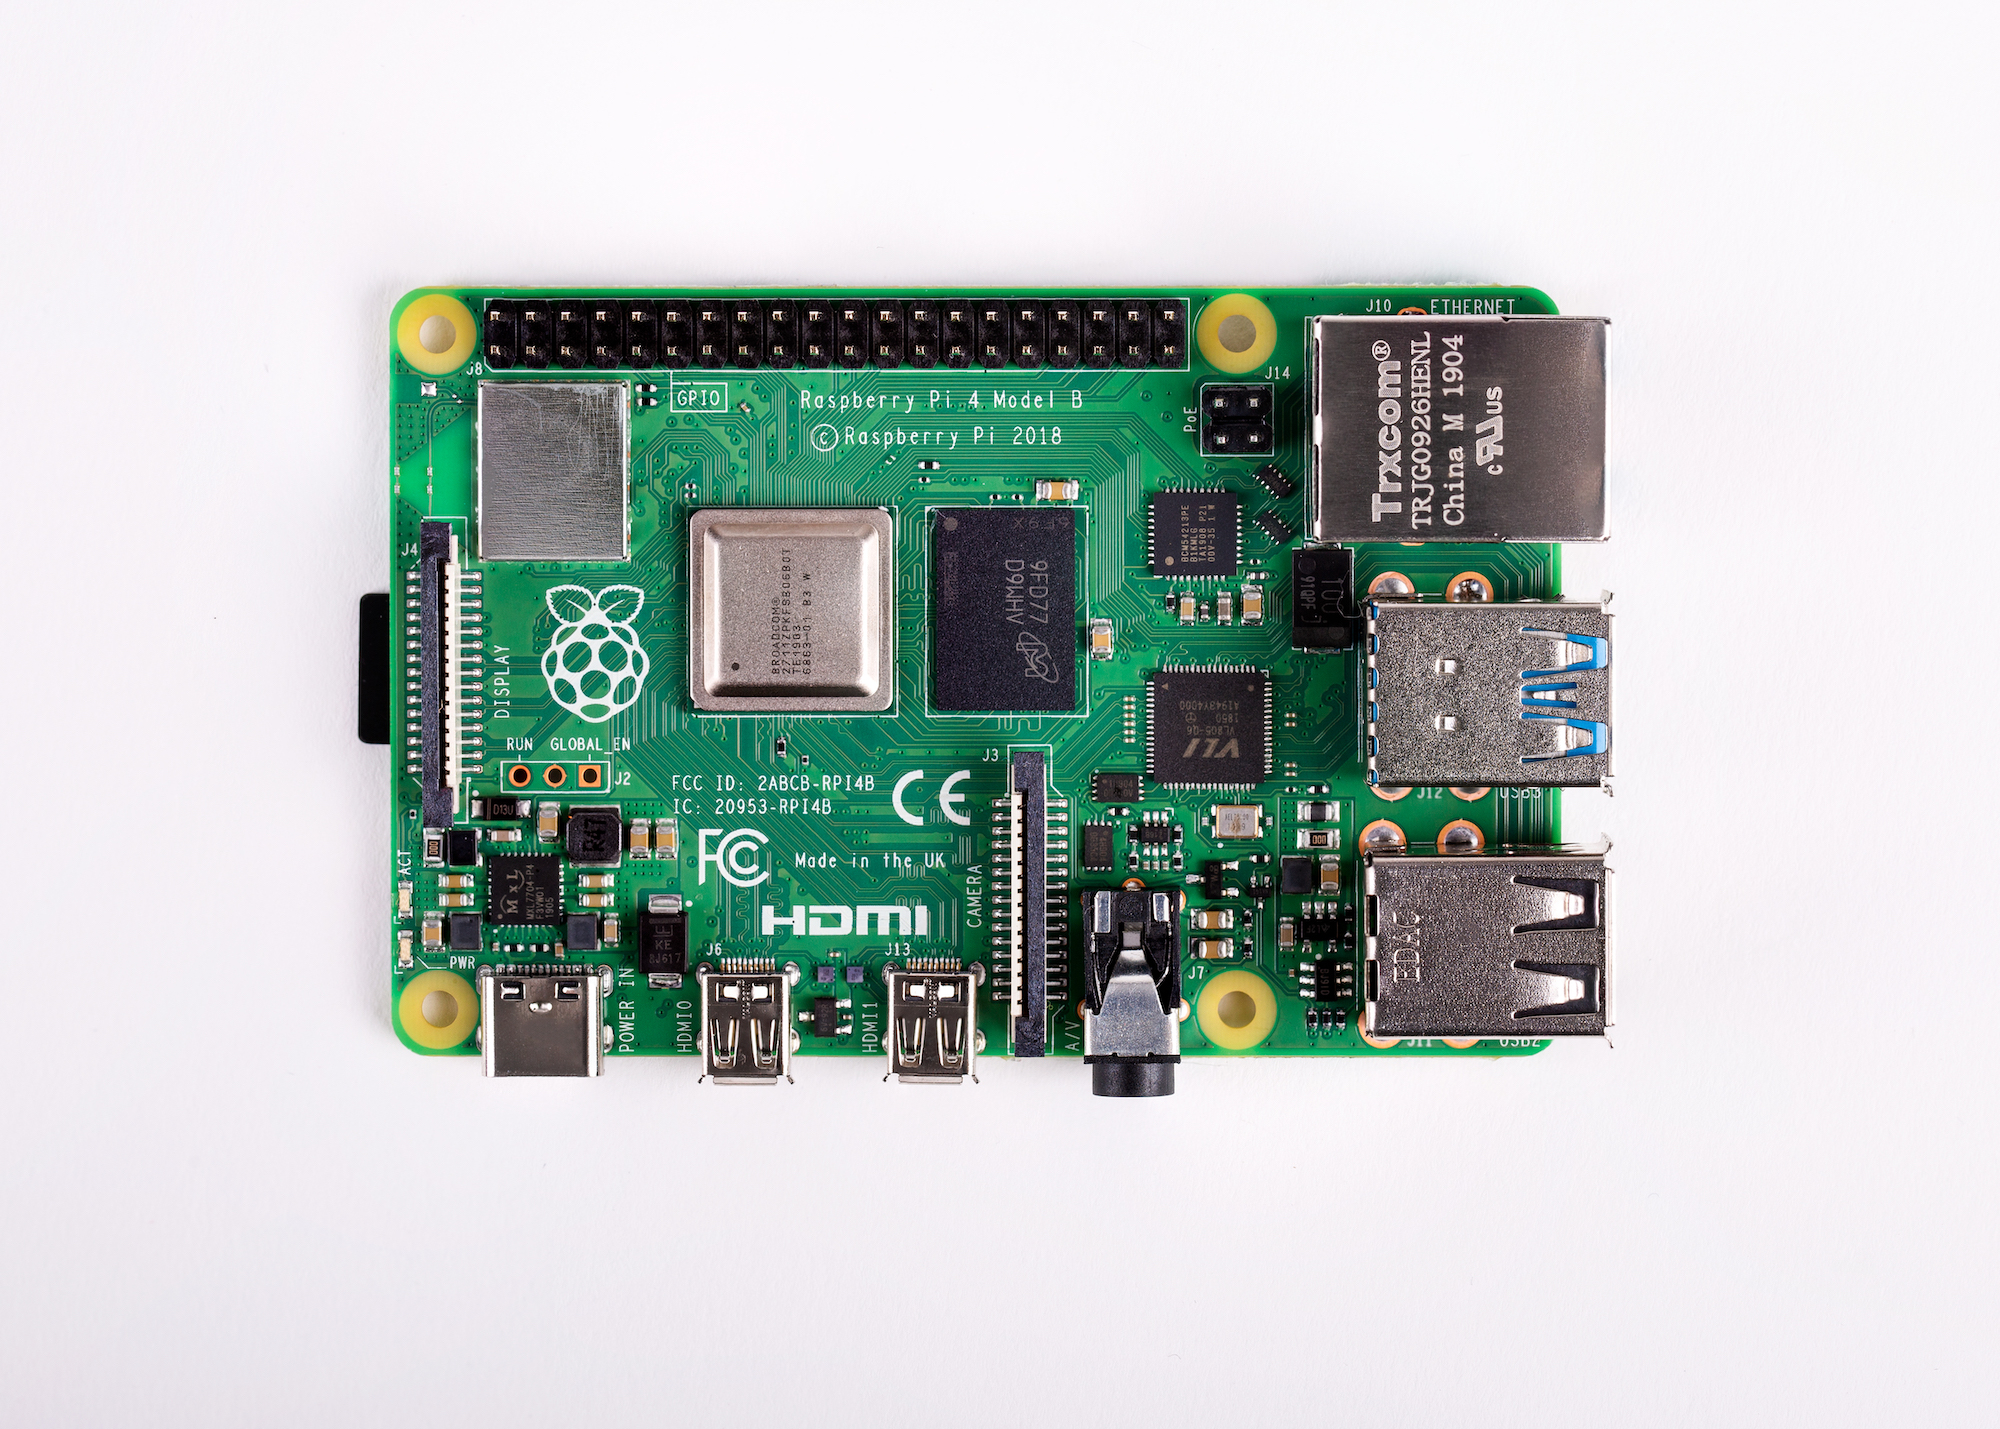
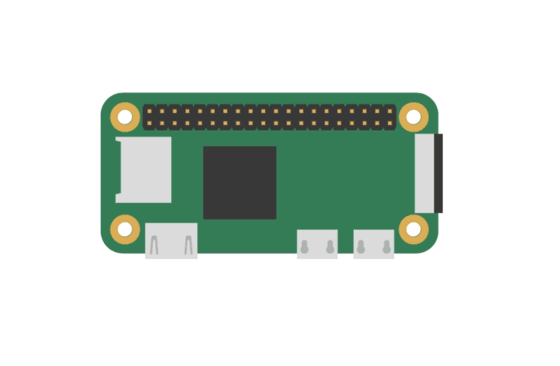
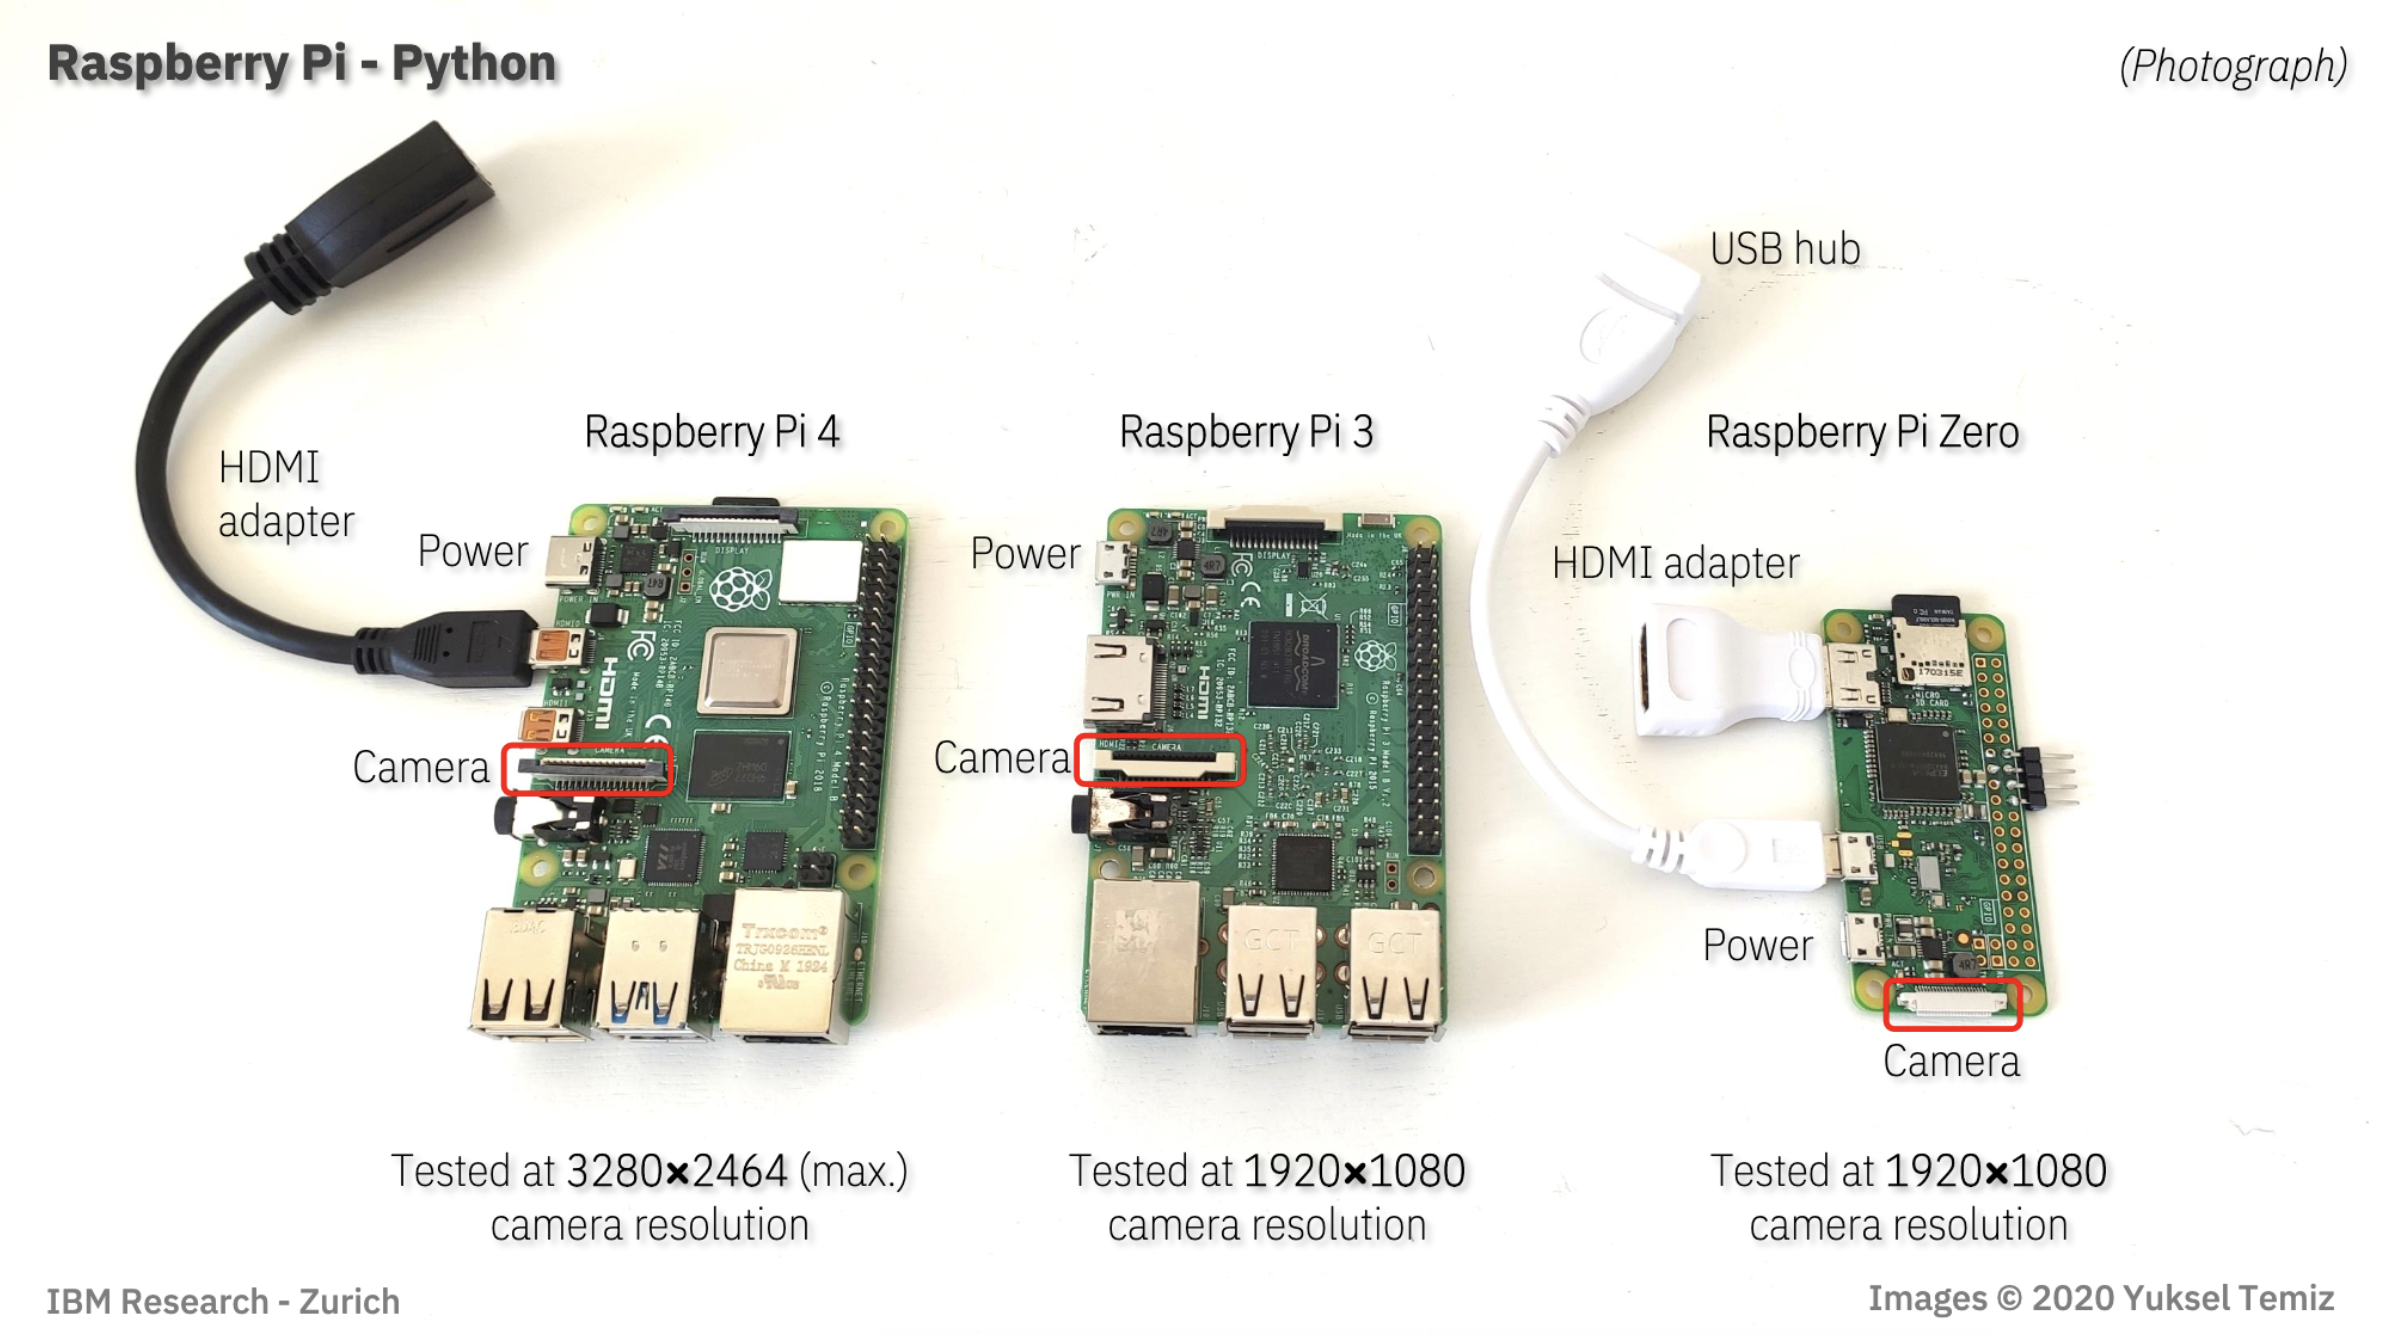
It also offers a plug-in interface so that it can be expanded with various features and functionality, and people have written a ton of integrations with notification systems. And all of this runs on pretty much any system that runs Python. I have to say Python, not MicroPython, the full version. Usually Linux, and the most common use case is to run it on a Raspberry Pi, and this is also how I originally set it out to work.

Most people think it only runs on a Raspberry Pi, but no. It will run on any old laptop that you still have lying around. It’s cross-platform, so you don’t need to buy a Raspberry Pi if you have another machine that will fit the bill.

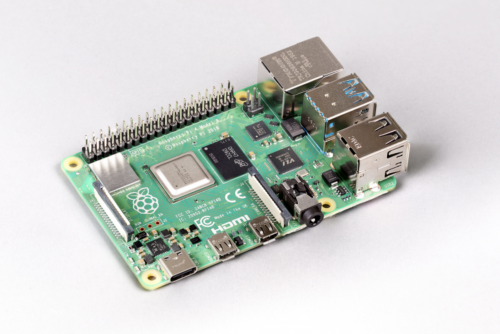
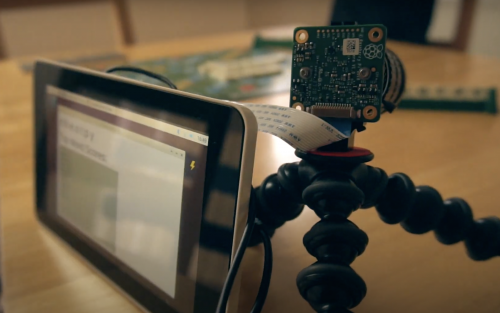
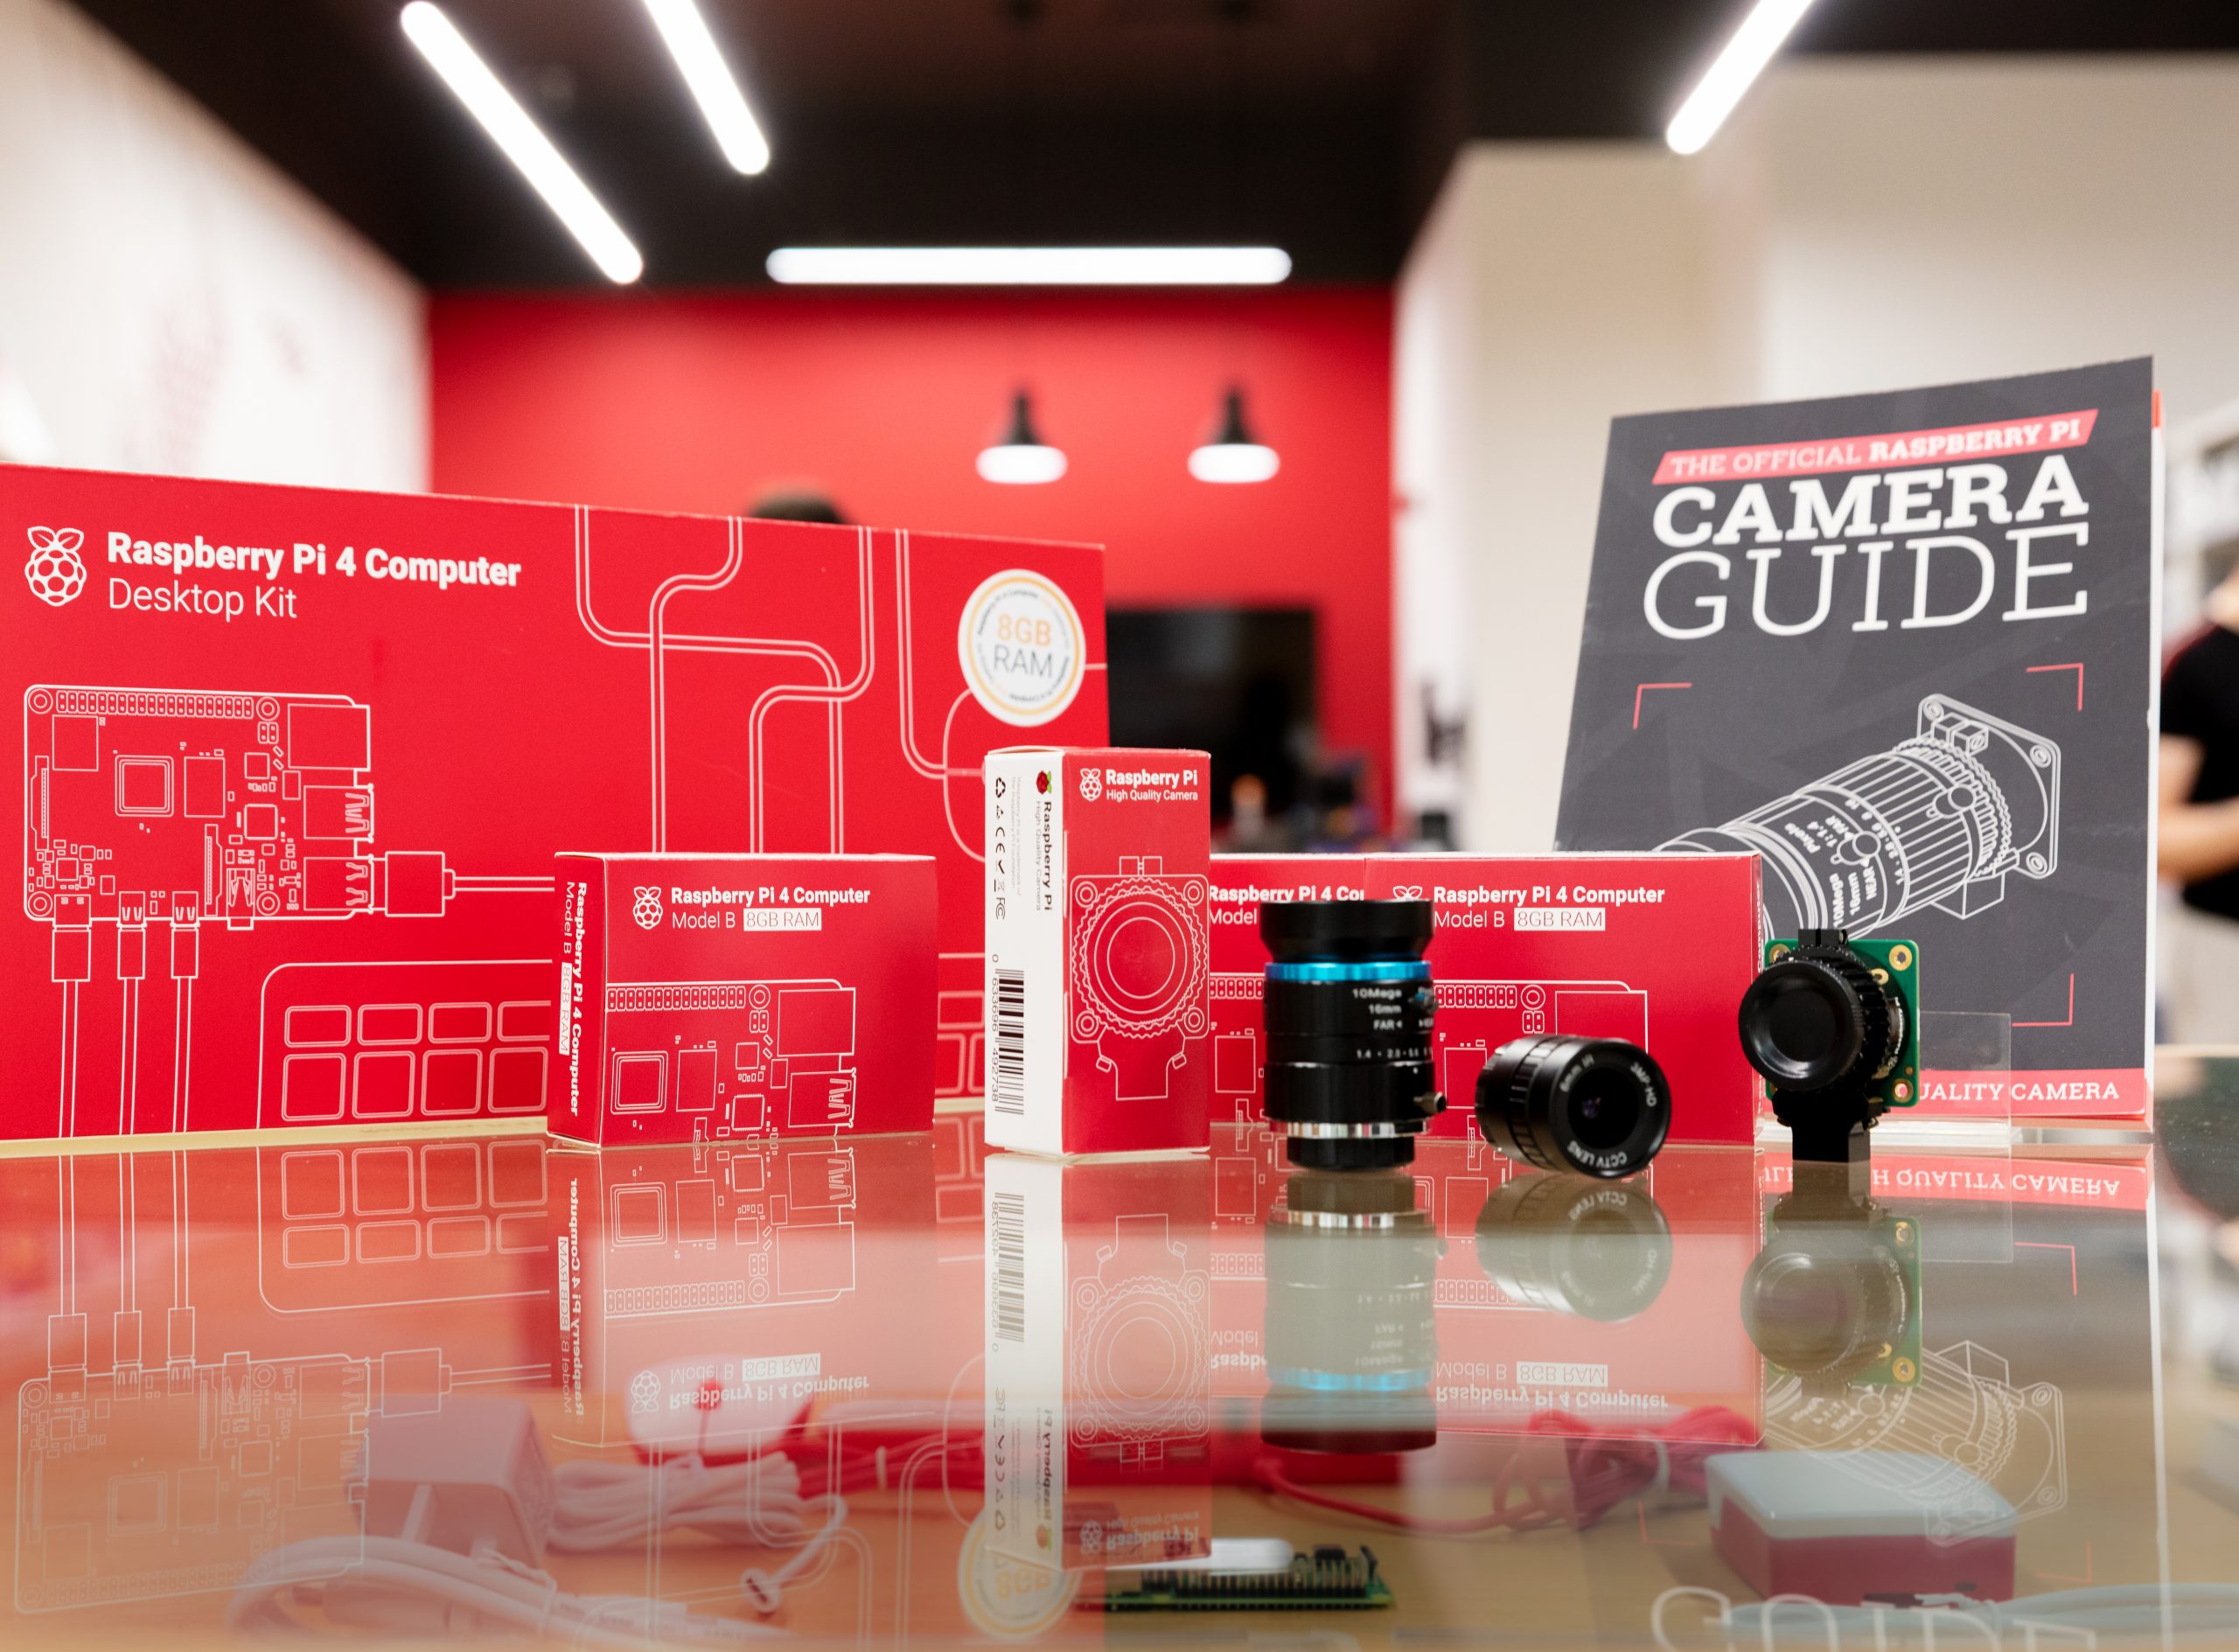
OctoPrint is most commonly run on a Raspberry Pi

HS: How long have you been working on it?

GH: I originally sat down to write it over my Christmas break in 2012, because I had got my first 3D printer back then. It was sitting in my office producing fumes and noise for hours on end, which was annoying when trying to work, or game, or anything else.

I thought there must be a solution involving attaching one of these nifty new Raspberry Pis that had just come out. Someone must have written something, right? I browsed around the internet, realised that the closest thing to what I was looking for treated the printer as a black box – to fire job data at it and hope that it gets it right. That was not what I wanted; I wanted this feedback channel. I wanted to see what was happening; I wanted to monitor the temperatures; I wanted to monitor the job progress.

The very first version back then was a plug-in for Cura, before Cura even supported plug-ins. After my Christmas break, I went, OK, it’s doing everything I wanted it to do; back to work at my normal regular job. And then it exploded. I started getting emails, issue reports, and feature requests from all over the world. ‘Can you make it also do this?’ ‘Hey, I have this other printer with this slightly different firmware that behaves like this; can you adapt it so that it works with this?’. ‘Can you remove it from Cura, and have it so it works standalone?’ Suddenly I had this huge open-source project on my hands. I didn’t do any kind of promotion for it or anything like that. I just posted about it in a Google+ community, of all things, and from there it grew by word of mouth.

A year or so later, I reduced my regular job to 80%, to have one day a week for OctoPrint, but that didn’t suffice either with everything that was going on. Then I had the opportunity to go full-time, sponsored by a single company who also made 3D printers, and they ran out of money in 2016. That was when I turned to crowdfunding, which has been the mode of operation ever since. Around 95% of everything that is done on OctoPrint is run by me, and I work on it full-time now. Since 2014.

A lot of the stuff that I have been adding over the years, for instance, the plug-in system itself, would not have been possible as a pet side project, not with a day job.

HS: What are you working on at the moment?

GH: In March just gone, I released the next big version, to make OctoPrint Python 3-compatible, because at the start of the year Python was deemed end of life, so I had to do something. The problem is that there’s a flourishing plug-in ecosystem written in Python 2, so for now, I’m stuck with having to support both, and trying to motivate the plug-in maintainers to also migrate, which is a ton of fun actually. I wrote a migration guide, tracking in the plug-in repository how many plugs are compatible. Newly registered plug-ins have to be compatible too.

HS: Do you have any idea how many people use OctoPrint?

GH: Nine months, a year ago, I introduced usage tracking. It’s my own bundled plug-in that ships with OctoPrint that does anonymous user tracking through my own platform, so no GDPR issues should arise there. And what this shows me is that, over the course of the last seven days, I saw 66,000 instances, and the last 30 days, I saw 91,000 instances.

But that’s only those who have opted into the usage tracking, which obviously is only a fraction. I have no idea about the fraction – whether the real number is five times, ten times higher, I’ve no way of knowing.

When I did the most recent big update, I got some statistics back from piwheels [a Python package repository]. They saw a spike in repositories that were being pulled from their index, which corresponded to dependencies that the new version of OctoPrint depends on, and the spike that they saw corresponded with the day that I rolled out the new version. Based on that, it looks like there’s probably ten times as many instances out there. I didn’t expect that. So the total number of users could be 700,000, it could be over a million, I have no idea. But based on these piwheels stats, it’s in that ballpark.

HS: And are you seeing a growth in those figures?

GH: Yes. Especially now, with the pandemic going on. If you had asked me three or four months ago, just when the pandemic started, I would have told you more like 60,000 per 30 days. So I saw a significant increase. I also saw a significant usage increase in the last couple of weeks.

I also saw a significant increase in support overheads in the last couple of weeks, which was absolutely insane. It was like everyone and their mother wanted to know something from me, writing me emails, opening tickets and all that, and this influx of people has not stopped yet. At first I thought, well I’ll just go into crunch mode and weather this out, but that didn’t work out. I had to find new ways to cope in order to keep this sustainable.

HS: You can’t have crunch mode for three months!

GH: I mean it’s OK for four weeks or so, but then you start to notice side effects on your own well-being. It’s not a good idea. I’m in for the long haul.

HS: Wanting a feedback channel instead of just firing off commands that work silently makes a lot of sense.

GH: It’s not like a paper printer where you fire and forget, so treating it as a black box, where you don’t get anything back on status and all that, is bound to be trouble. This is a complicated machine where a lot of stuff can go wrong, so it makes sense to have a feedback channel — at least that was my intuition back then, and evidently, a lot of people thought the same.

HS: You must have saved people countless hours and hours of wasted time, filament, and energy.

GH: I’ve also heard that I’ve saved at least one marriage! Someone wrote me an email a couple of years ago thanking me because the person had a new printer in their garage and was constantly monitoring it, sitting in front of it. Apparently the wife and kids were not too thrilled by this. They installed OctoPrint, and since then they’ve been happy again.

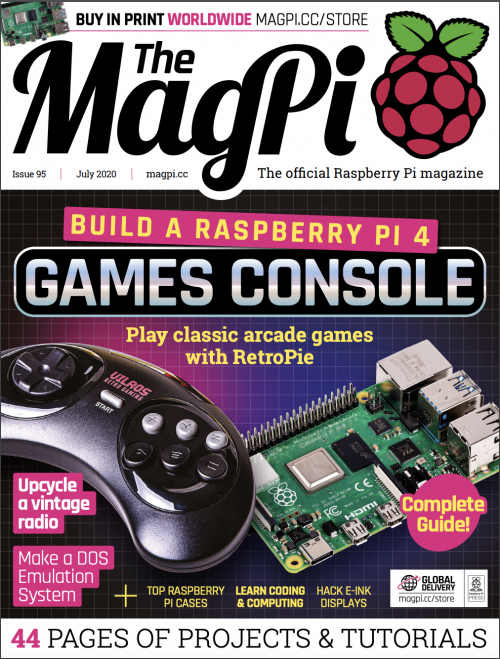
Get HackSpace magazine issue 31 — out today

HackSpace magazine issue 32: on sale now!

You can read the rest of HackSpace magazine’s interview with Gina Häußge in issue 32, out today and available online from the Raspberry Pi Press online store. You can also download issue 32 for free.

The post OctoPrint: a baby monitor for your 3D printer appeared first on Raspberry Pi.


Source: Raspberry Pi – OctoPrint: a baby monitor for your 3D printer

Let’s do virtual sports with Digital Making at Home!

Join us for Digital Making at Home: this week, young people get to make sports games in Scratch! With Digital Making at Home, we invite kids all over the world to code along with us and our new videos every week.

So get ready to exercise your digital making skills with us:

Check out this week’s sporty code-along projects!

And tune in on Wednesday 2pm BST / 9am EDT / 7.30pm IST at rpf.io/home to code along with our live stream session.

The post Let’s do virtual sports with Digital Making at Home! appeared first on Raspberry Pi.


Source: Raspberry Pi – Let’s do virtual sports with Digital Making at Home!

Build an IoT device with Ubuntu Appliance and Raspberry Pi

The new Ubuntu Appliance portfolio provides free images to help you turn your Raspberry Pi into an IoT device: just install them to your SD card and you have all the software you need to make a media server, get started with home automation, and more. Canonical’s Rhys Davies is here to tell us all about it.

We are delighted to announce the new Ubuntu Appliance portfolio. Together with NextCloud, AdGuard, Plex, Mosquitto and openHAB, we have created the first in a new class of Ubuntu derivatives. Ubuntu Appliances are software-defined projects that enable users to download everything they need to turn a Raspberry Pi into a device that does one thing – beautifully.

The Ubuntu Appliance mission is to enable you to build your own secure, self-updating, single-purpose devices. Tell us what you want to see next, or let’s talk about turning your project into the next Ubuntu Appliance in Discourse. For now, we are excited to bring these initial appliances to your attention.

The initial portfolio of five

  • Plex Media Server allows its users to organise and stream their own collection of movies, TV, music, podcasts and more from one place.
  • Mosquitto is a lightweight open source MQTT message broker, for use on all devices from low power single board computers to full-scale industrial grade servers.
  • OpenHAB is a pluggable architecture that allows users to design rules for automating their home, with time- and event-based triggers, scripts, actions, notifications and voice control.
  • AdGuard Home blocks annoying banners, pop-ups and video ads to make web surfing faster, safer and more comfortable.
  • NextCloud is an on-premise content collaboration platform that allows users to host their own private cloud at home or in the office.

How it all works

Head over to the Ubuntu Appliances website, click the appliance you would like, select download, follow the instructions, and away you go. Once you get to this stage, there are links to tutorials and documentation written by the upstream project themselves, so you can get next steps from the horse’s mouth. If you run into any bother let us know with a new topic and we’ll get on it.

But why bother?

The problem we are trying to solve is to do with the fragmentation in IoT. We want to give publishers and developers a platform to get their software in the hands of their users and into their devices. We work with them to securely bundle the OS, their applications and configurations into a single download that is available for anyone to turn a Raspberry Pi into a dedicated device. You can go to the portfolio and download as many of the appliances as you like and start using them today.

How to add your project to the Ubuntu Appliance portfolio

All of this gives a stage and a secure, production-grade base to projects. There are no restrictions on who can make an Ubuntu Appliance; all you need is an application that runs on a Raspberry Pi or another certified board, and to let us know what you’ve got so we can help you over the line. If you need more information, head to our community page where you’ll find the rules and the exact steps to become featured as an Ubuntu Appliance.

Try them out!

All that’s left to say is to try them out. All five of the initial appliances work on Raspberry Pi, so if you have one, you can get started. And if you don’t have one – maybe your Raspberry Pi is still in the post – then you can also ‘try before you Pi’: install the appliance in a virtual machine and see what you think.

The list of appliances is already growing. This launch marks the first five appliances, but we are already working with developers on the next wave and are looking for more. Start with these ones and go to our discourse to tell us what you think.

Thanks for having me, Raspberry Pi <3

The post Build an IoT device with Ubuntu Appliance and Raspberry Pi appeared first on Raspberry Pi.


Source: Raspberry Pi – Build an IoT device with Ubuntu Appliance and Raspberry Pi

The Raspberry Pi Store reopens today

We’re pleased to announce that today, the Raspberry Pi Store in Cambridge re-opens its doors. We have taken care to follow government guidelines to ensure a clean and safe environment for our staff and customers.


What to expect

While we’ve removed all interactive activities, you’ll still be able to experience the versatility of Raspberry Pi via our displays, and our staff will be on hand to talk you through any projects you’d like to know more about.

To make sure everyone can maintain physical distancing, we’re limiting numbers to a maximum of seven customers in the store at a time. We’ve also marked a one-way route around the store to help you shop without squeezing past others.


We have trained all our colleagues in the Raspberry Pi Store team in current health and safety measures, and they’ll be working hard to keep all surfaces sanitised while continuing to offer advice and support to our visitors.

Our newly revised opening times align with those of the Grand Arcade shopping centre, and we’re working closely with centre management to continue to follow updated government guidelines.

Fully stocked

Everything is in stock. From the new 8GB Raspberry Pi 4 and the 8GB Desktop Kit to the High Quality Camera and its companion book, The Official Raspberry Pi Camera Guide, all our recently released products are in stock and ready to go.

We’re also continuing to stock and sell gift cards, third-party products, and in-store exclusives.


How you can help us

If you plan to visit the Raspberry Pi Store, please continue to exercise social distancing by keeping 2m between yourself and others. Please use our free hand sanitiser when you enter the store, and, if you can, wear a face mask to protect both yourself and others.


Come along!

So, if you happen to be in Cambridge, please pop in and say hi… from a distance. And, if you have any further questions, visit the Raspberry Pi Store webpage, where you’ll find our FAQs, directions to the store, and contact details.

The post The Raspberry Pi Store reopens today appeared first on Raspberry Pi.


Source: Raspberry Pi – The Raspberry Pi Store reopens today

Tim Peake is among our fabulous Coolest Projects judges

We are thrilled that five fantastic people will contribute to the Coolest Projects online showcase: Tim Peake, Limor Fried, Mitch Resnick, Hayaatun Sillem, and Eben Upton are going to be our special judges and choose their favourite projects from among all the entries from young tech creators in our global community.

Meet the coolest judges!

Tim Peake is a British ESA astronaut and a passionate advocate for STEM education. Tim played a huge part in the first Astro Pi Challenge in 2015, and he has helped us spread the word about the work of the Raspberry Pi Foundation ever since.

“By taking part in Coolest Projects, young creators get to share their ideas with the world, and their peers. Whether it’s creating something for home, the planet, or for their school or community — it’s a great opportunity to share their hopes and dreams for the future!” — Tim Peake

Limor ‘Ladyada’ Fried is an MIT engineer and the founder and owner of Adafruit, a company that creates hardware and educational resources for anyone interested in digital making. Limor personally selects, tests, and approves all the tools, equipment, and electronics on offer by Adafruit.

Limor Fried at Adafruit Industries

“Coolest Projects is a fantastic opportunity for young people to take part in the world’s leading technology showcase and to celebrate all the hard work and ideas from the community — all from home!” – Limor Fried

Mitch Resnick is Professor of Learning Research at the MIT Media Lab, and his Lifelong Kindergarten research group develops the Scratch programming software and online community! His life’s passion is developing new technologies and activities to engage young people in creative learning experiences.

Mitch Resnick,

Hayaatun Sillem is the CEO of the Royal Academy of Engineering, which brings together the UK’s leading engineers and technologists to promote engineering excellence for the benefit of society. She also has a PhD in cancer research!Hayaatun Sillem, CEO Royal Academy of Engineering

Eben Upton is a founder of the Raspberry Pi Foundation and one of the inventors of the Raspberry Pi computer. As the CEO of Raspberry Pi Trading Ltd, he oversees the company, including the development of all our hardware.

Register a project today!

If a young person you know is making anything with technology — and we mean anything, from robot to smartphone app to video game to Scratch animation to web page about their pet — then we invite them to take part in the Coolest Projects online showcase.

We welcome all works-in-progress and finished projects from anyone aged up to 18!

To find out more and register a project by the 28 June deadline, visit coolestproject.org.

The post Tim Peake is among our fabulous Coolest Projects judges appeared first on Raspberry Pi.


Source: Raspberry Pi – Tim Peake is among our fabulous Coolest Projects judges

Learning with Raspberry Pi — robotics, a Master’s degree, and beyond

Meet Callum Fawcett, who shares his journey from tinkering with the first Raspberry Pi while he was at school, to a Master’s degree in computer science and a real-life job in programming. We also get to see some of the awesome projects he’s made along the way.

I first decided to get a Raspberry Pi at the age of 14. I had already started programming a little bit before and found that I really enjoyed the language Python. At the time the first Raspberry Pi came out, my History teacher told us about them and how they would be a great device to use to learn programming. I decided to ask for one to help me learn more. I didn’t really know what I would use it for or how it would even work, but after a little bit of help at the start, I quickly began making small programs in Python. I remember some of my first programs being very simple dictionary-type programs in which I would match English words to German to help with my German homework.

Learning Linux, C++, and Python

Most of my learning was done through two sources. I learnt Linux and how the terminal worked using online resources such as Stack Overflow. I would have a problem that I needed to solve, look up solutions online, and try out commands that I found. This was perhaps the hardest part of learning how to use a Raspberry Pi, as it was something I had never done before, but it really helped me in later years when I would use Linux more than Windows. For learning programming, I preferred to use books. I had a book for C++ and a book for Python that I would work through. These were game-based books, so many of the fun projects that I did were simple text-based games where you typed in responses to questions.

A family robotics project

The first robot Callum made using a Raspberry Pi

By far the coolest project I did with the Raspberry Pi was to build a small robot (shown above). This was a joint project between myself and my dad. He sorted out the electronics and I programmed the robot. It was a great opportunity to learn about robotics and refine my programming skills. By the end, the robot was capable of moving around by itself, driving into objects, and then reversing and trying a new direction. It was almost like an unintelligent Roomba that couldn’t hoover, but I spent many hours improving small bits and pieces to make it as easy to use as possible. My one wish that I never managed to achieve with my robot was allowing it to map out its surroundings. This was a very ambitious project at the time, since I was still quite inexperienced in programming. The biggest problem with this was calibrating the robot’s turning circle, which was never consistent so it was very hard to have the robot know where in the room it was.

Sense HAT maze game

Another fun project that I worked on used the Sense HAT developed for the Astro Pi computers for use on the International Space Station. Using this, I was able to make a memory maze game (shown below), in which a player is shown a maze for several seconds and then has to navigate that maze from memory by shaking the device. This was my first introduction to using more interactive types of input, and this eventually led to my final-year project, which used these interesting interactions to develop another way of teaching.

Learning programming without formal lessons

I have now just finished my Master’s degree in computer science at the University of Bristol. Before going to university, I had no experience of being taught programming in a formal environment. It was not a taught subject at my secondary school or sixth form. I wanted to get more people at my school interested in this area of study though, which I did by running a coding club for people. I would help others debug their code and discuss interesting problems with them. The reason that I chose to study computer science is largely because of my experiences with Raspberry Pi and other programming I did in my own time during my teenage years. I likely would have studied history if it weren’t for the programming I had done by myself making robots and other games.

Raspberry Pi has continued to play a part in my degree and extra-curricular activities; I used them in two large projects during my time at university and used a similar device in my final project. My robot experience also helped me to enter my university’s ‘Robot Wars’ competition which, though we never won, was a lot of fun.

A tool for learning and a device for industry

Having a Raspberry Pi is always useful during a hackathon, because it’s such a versatile component. Tech like Raspberry Pi will always be useful for beginners to learn the basics of programming and electronics, but these computers are also becoming more and more useful for people with more experience to make fun and useful projects. I could see tech like Raspberry Pi being used in the future to help quickly prototype many types of electronic devices and, as they become more powerful, even being used as an affordable way of controlling many types of robots, which will become more common in the future.

Our guest blogger Callum

Now I am going on to work on programming robot control systems at Ocado Technology. My experiences of robot building during my years before university played a large part in this decision. Already, robots are becoming a huge part of society, and I think they are only going to become more prominent in the future. Automation through robots and artificial intelligence will become one of the most important tools for humanity during the 21st century, and I look forward to being a part of that process. If it weren’t for learning through Raspberry Pi, I certainly wouldn’t be in this position.

Cheers for your story, Callum! Has tinkering with our tiny computer inspired your educational or professional choices? Let us know in the comments below. 

The post Learning with Raspberry Pi — robotics, a Master’s degree, and beyond appeared first on Raspberry Pi.


Source: Raspberry Pi – Learning with Raspberry Pi — robotics, a Master’s degree, and beyond

Raspberry Pi–powered bonsai watering system

Bonsai trees are the most glorious of miniature shrubbery. But caring for them takes seriously green fingers. Luckily, this Raspberry Pi–powered bonsai watering system doesn’t require much to get started. Also, the Reddit user who shared the project is named Lord-of-the-Pis, so, we love.

You will need:

  • Raspberry Pi
  • Submersible water pump
  • Jumper wires

The Pimoroni Explorer HAT Pro isn’t essential to make this project work, it just makes things a whole lot easier by removing the need for a relay. It also comes with a Python library for interfacing with Raspberry Pi. The project uses an I2C connection, so it would also be possible to not use the HAT and instead plug a moisture sensor into an analogue-to-digital converter and then into Raspberry Pi’s GPIO pins.

How was it done?

Lord-of-the-Pis explains: “I used the Pimoroni Explorer HAT Pro in order to make the entire system on a small breadboard on top of  Raspberry Pi. The Explorer HAT has inbuilt analogue inputs over I2C, which I used for the input of the moisture sensor (two wires pushed into the soil as probes). Furthermore, the output GPIO pins on this HAT sink all current to ground when activated so they can be used as a transistor to power the small 5V motor (which was also attached to the 5V power pins on Raspberry Pi).”

Using the HAT also allowed this maker to simply hook the pump up to the GPIO pins and turn these on and off, so there’s no need for an on/off switch.

How does it work?

This project’s code is in Python 3, and you can find it all on GitHub.

The main watering program (plantWater.py) takes input from the moisture sensor, and if the soil moisture level is below a set amount, the bonsai gets watered.

Lord-of-the-Pis built a simple web interface for the project on a  localhost site that’s hosted using Apache. Apache SSI is used to execute the Python scripts. Due to the use of SSI, the index page is called index.shtml.

An image of the website. The Dip and then steadiness of the graph is due to the faulty moisture sensor. The maker has ordered another!

A lot more detail about the hardware and software involved is available in this second reddit post about the project.

Lord-of-the-Pis is now working on a dashboard that plots the soil moisture over time, as well as tracking other things like light intensity, temperature, and humidity.

May no other plant perish due to overwatering on our watch ever again!

The post Raspberry Pi–powered bonsai watering system appeared first on Raspberry Pi.


Source: Raspberry Pi – Raspberry Pi–powered bonsai watering system

Let’s make it 3D with Digital Making at Home!

Join us for Digital Making at Home, where this week, young people get to create all things 3D. With Digital Making at Home, we invite kids all over the world to code along with us and our new videos every week!

So get ready to visit a new digital dimension with us:

Check out this week’s code-along videos!

And tune in on Wednesday at 2pm BST / 9am EDT / 7.30pm IST at rpf.io/home to code along with our live stream session.

The post Let’s make it 3D with Digital Making at Home! appeared first on Raspberry Pi.


Source: Raspberry Pi – Let’s make it 3D with Digital Making at Home!

Mathematics and programming: exploring the links

“In my vision, the child programs the computer and, in doing so, both acquires a sense of mastery over a piece of the most modern and powerful technology and establishes an intimate contact with some of the deepest ideas from science, from mathematics, and from the art of intellectual model building.” – Seymour Papert, Mindstorms: Children, Computers, And Powerful Ideas, 1980

We owe much of what we have learned about children learning to program to Seymour Papert (1928–2016), who not only was a great mathematician and computer scientist, but also an inspirational educationalist. He developed the theoretical approach to learning we now know as constructionism, which purports that learning takes place through building artefacts that have meaning and can be shared with others. Papert, together with others, developed the Logo programming language in 1967 to help children develop concepts in both mathematics and in programming. He believed that programming could give children tangible and concrete experiences to support their acquisition of mathematical concepts. Educational programming languages such as Logo were widely used in both primary and secondary education settings during the 1980s and 90s. Thus for many years the links between mathematics and programming have been evident, and we were very fortunate to be able to explore this topic with our research seminar guest speaker, Professor Dame Celia Hoyles of University College London.

Dame Celia Hoyles

Professor Dame Celia Hoyles

Dame Celia Hoyles is a huge celebrity in the world of mathematical education and programming. As well as authoring literally hundreds of academic papers on mathematics education, including on Logo programming, she has received a number of prestigious awards and honours, and has served as the Chief Advisor to the UK government on mathematics in school. For all these reasons, we were delighted to hear her present at a Raspberry Pi Foundation computing education research seminar.

Mathematics is a subject we all need to understand the basics of — it underpins much of our other learning and empowers us in daily life. Yet some mathematical concepts can seem abstract and teachers have struggled over the years to help children to understand them. Since programming includes the design, building, and debugging of artefacts, it is a great approach for make such abstract concepts come to life. It also enables the development of both computational and mathematical thinking, as Celia described in her talk.

Learning mathematics through Scratch programming

Celia and a team* at University College London developed a curriculum initiative called ScratchMaths to teach carefully selected mathematical concepts through programming (funded by the Education Endowment Foundation in 2014–2018). ScratchMaths is for use in upper primary school (age 9–11) over a two-year period.

In the first year, pupils take three computational thinking modules, and in the second year, they move to three more mathematical thinking modules. All the ScratchMaths materials were designed around a pedagogical framework called the 5Es: explore, envisage, explain, exchange, and bridge. This enables teachers to understand the structure and sequencing of the materials as they use them in the classroom:

  • Explore: Investigate, try things out yourself, debug in reaction to feedback
  • Envisage: Have a goal in mind, predict outcome of program before trying
  • Explain: Explain what you have done, articulate reasons behind your approach to others
  • Exchange: Collaborate & share, try to see a problem from another’s perspective as well as defend your own approach and compare with others
  • bridgE: Make explicit links to the mathematics curriculum

Teachers in the ScratchMaths project participated in professional development (two days per module) to enable them to understand the materials and the pedagogical approach.

At the end of the project, external evaluators measured the childrens’ learning and found a statistically significant increase in computational thinking skills after the first year, but no difference between an intervention group and a control group in the mathematical thinking outcomes in the second year (as measured by the national mathematics tests at that age).

Celia discussed a number of reasons for these findings. She also drew out the positive perspective that children in the trial learned two subjects at the same time without any detriment to their learning of mathematics. Covering two subjects and drawing the links between them without detriment to the core learning is potentially a benefit to schools who need to fit many subjects into their teaching day.

Much more information about the programme and the materials, which are freely available for use, can be found on the ScratchMaths project’s website, and you can also read a research paper describing the project.

As at all our research seminars, participants had many questions for our speaker. Although the project was designed for primary education, where it’s more common to learn subjects together across the curriculum, several questions revolved around the project’s suitability for secondary school. It’s interesting to reflect on how a programme like ScratchMaths might work at secondary level.

Should computing be taught in conjunction or separately?

Teaching programming through mathematics, or vice versa, is established practice in some countries. One example comes from Sweden, where computing and programming is taught across different subject areas, including mathematics: “through teaching pupils should be given opportunities to develop knowledge in using digital tools and programming to explore problems and mathematical concepts, make calculations and to present and interpret data”. In England, conversely, we have a discrete computing curriculum, and an educational system that separates subjects out so that it is often difficult for children to see overlap and contiguity. However, having the focus on computing as a discrete subject gives enormous benefits too, as Celia outlined at the beginning of her talk, and it opens up the potential to give children an in-depth understanding of the whole subject area over their school careers. In an ideal world, perhaps we would teach programming in conjunction with a range of subjects, thus providing the concrete realisation of abstract concepts, while also having discrete computing and computer science in the curriculum.

Woman teacher and female students at a computer

In our current context of a global pandemic, we are continually seeing the importance of computing applications, for example computer modelling and simulation used in the analysis of data. This talk highlighted the importance of learning computing per se, as well as the mathematics one can learn through integrating these two subjects.

Celia is a member of the National Centre of Computing Education (NCCE) Academic Board, made up of academics and experts who support the teaching and learning elements of the NCCE, and we enjoy our continued work with her in this capacity. Through the NCCE, the Raspberry Pi Foundation is reaching thousands of children and educators with free computing resources, online courses, and advanced-level computer science materials. Our networks of Code Clubs and CoderDojos also give children the space and freedom to experiment and play with programming and digital making in a way that is concordant with a constructionist approach.

Next up in our seminar series

If you missed the seminar, you can find Celia’s presentation slides and a recording of her talk on our research seminars page.

In our next seminar on Tuesday 16 June at 17:00–18:00 BST / 12:00–13:00 EDT / 9:00–10:00 PDT / 18:00–19:00 CEST, we’ll welcome Jane Waite, Teaching Fellow at Queen Mary University of London. Jane will be sharing insights about Semantic Waves and unplugged computing. To join the seminar, simply sign up with your name and email address and we’ll email you the link and instructions. If you attended Celia’s seminar, the link remains the same.


*The ScratchMaths team are :

  • Professor Dame Celia Hoyles (Mathematics) & Professor Richard Noss (Mathematics) UCL Knowledge Lab
  • Professor Ivan Kalas, (Computing) Comenius University, Bratislava, Slovakia
  • Dr Laura Benton (Computing) & Piers Saunders, (Mathematics) UCL Knowledge Lab
  • Professor Dave Pratt (Mathematics) UCL Institute of Education

The post Mathematics and programming: exploring the links appeared first on Raspberry Pi.


Source: Raspberry Pi – Mathematics and programming: exploring the links

Kaleidoscopic space art made with Raspberry Pi onboard the ISS

What could be the world’s first interactive art experiment in space is powered by Raspberry Pi!

The experiment, named Pulse/Hydra 3, features a kaleidoscope (as seen in the video) that lights up and starts to rotate after it receives heartbeat data from its ground terminal. This artistic experiment is designed to inspire people back on Earth.

Look closely at the video and you should be able to see small beads floating around in microgravity.

During scheduled events at museum and galleries, participants use a specially designed terminal fitted with a pulse oximeter to measure their pulse rate and blood oxygenation level. These measurements are transmitted in real time to the Pulse/Hydra 3 payload on the ISS, which is activated by the transmission.

Inside the payload, there’s a specially designed ‘microgravity kaleidoscope’. The transmitted data activates the kaleidoscope, and the resulting live images are securely streamed back to the ground terminal. The images are then projected onto large video screens so the whole audience can watch what is happening in orbit. The artistic idea is that both pulse rate and blood oxygenation levels are highly transient physiological characteristics that respond rapidly to conscious and sub-conscious emotional states. Therefore, there is a complex interaction between the participant and the payload, as both react to each other during the experience.

We wouldn’t have been able to achieve things like that on dial-up internet.

Where does it live?

Pulse/Hydra 3 is currently installed aboard the International Space Station (ISS) in the ESA Columbus module. The Columbus laboratory is ESA’s biggest single contribution to the ISS. The 4.5 m diameter cylindrical module of 6.9 m in length is equipped with flexible research facilities and provides accommodation for experiments in the field of multidisciplinary research into material science, fluid physics, and life science.

Artist's cut-away view of the Columbus module elements (image credit: ESA)

Artist’s cut-away view of the Columbus module elements (image credit: ESA)

This payload was launched on 29 June 2018 and it will be completing its two years in orbit soon.

More Raspberry Pi experiments in space

Pulse/Hydra 3 is, you guessed it, the third in a series of experiments run on board the Columbus module. The other two are:

  • Hydra-1, a plant growth experiment.
  • Hydra-2, a methanogenesis experiment exploring gravity’s effect on bacteria.

And Hydra-3 is the interactive art payload you’ve just read about. It lives in the same rack that used to house Hydra-1 and -2. All three run on Raspberry Pi!

Hydra-1, Hydra-2, and Hydra-3, all running on Raspberry Pi

These three payloads are of course great companions to our Astro Pi computers, which allow thousands of young people every year to run their code in space!

Place your bets on the year the first Raspberry Pi shop opens on the Moon…

The post Kaleidoscopic space art made with Raspberry Pi onboard the ISS appeared first on Raspberry Pi.


Source: Raspberry Pi – Kaleidoscopic space art made with Raspberry Pi onboard the ISS