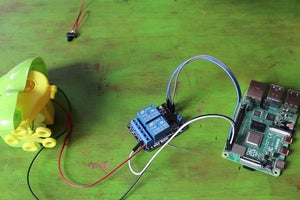
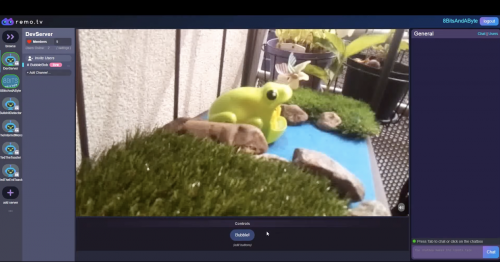
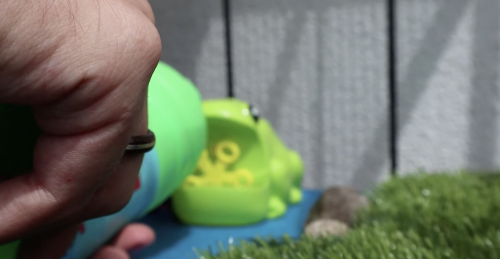
8 Bits and a Byte created this automatic bubble machine, which is powered and controlled by a Raspberry Pi and can be switched on via the internet by fans of robots and/or bubbles.
They chose a froggy-shaped bubble machine, but you can repurpose whichever type you desire; it’s just easier to adapt a model running on two AA batteries.
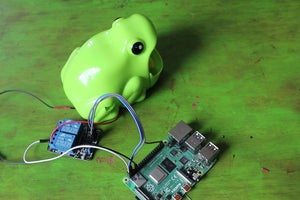
Raspberry Pi connected to the relay module
Before the refurb, 8 Bits and a Byte’s battery-powered bubble machine was controlled by a manual switch, which turned the motor on and off inside the frog. If you wanted to watch the motor make the frog burp out bubbles, you needed to flick this switch yourself.
After dissecting their plastic amphibian friend, 8 Bits and a Byte hooked up its motor to Raspberry Pi using a relay module. They point to this useful walkthrough for help with connecting a relay module to Raspberry Pi’s GPIO pins.
We spied New Orleans–based Raspberry Pi–powered home brewing analysis and were interested in how this project could help other at-home brewers perfect their craft.
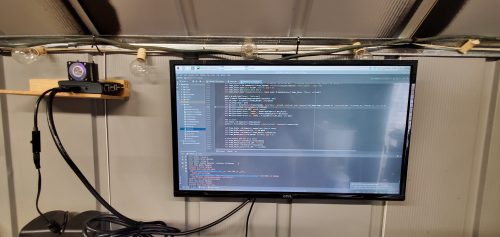
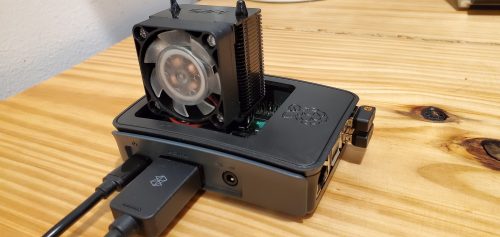
Raspberry Pi in a case with fan, neatly tucked away on a shelf in the Danger Shed
When you’re making beer, you want the yeast to eat up the sugars and leave alcohol behind. To check whether this is happening, you need to be able to track changes in gravity, known as ‘gravity curves’. You also have to do yeast cell counts, and you need to be able to tell when your beer has finished fermenting.
“We wanted a way to skip the paper and pencil and instead input the data directly into the software. Enter the Raspberry Pi!”
Patrick Murphy
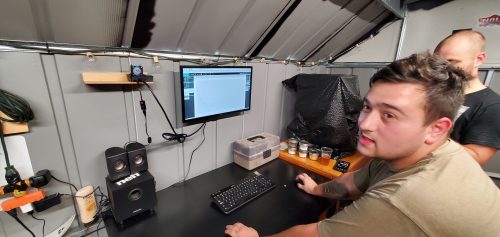
Patrick Murphy and co. created a piece of software called Aleproof which allows you to monitor all of this stuff remotely. But before rolling it out, they needed somewhere to test that it works. Enter the ‘Danger Shed’, where they ran Aleproof on Raspberry Pi.
The Danger Shed benefits from a fancy light-changing fan for the Raspberry Pi
A Raspberry Pi 3 Model B+ spins their Python-based program on Raspberry Pi OS and shares its intel via a mounted monitor.
Here’s what Patrick had to say about what they’re up to in the Danger Shed and why they needed a Raspberry Pi:
The project uses PyCharm to run the Python-based script on the Raspberry Pi OS
Look how neat and out of the way our tiny computer is
“We wanted a way to skip the paper and pencil and instead input the data directly into the software. Enter the Raspberry Pi! The shed is small, hot, has leaks, and is generally a hostile place for a full-size desktop computer. Raspberry Pi solves our problem in multiple ways: it’s small, portable, durable (in a case), and easily cooled. But on top of that, we are able to run the code using PyCharm, enter data throughout the brewing process, and fix bugs all from the shed!”
The Raspberry Pi in its case inc. fan
“The Raspberry Pi made it easy for us to set up our software and run it as a stand-alone brewing software station.”
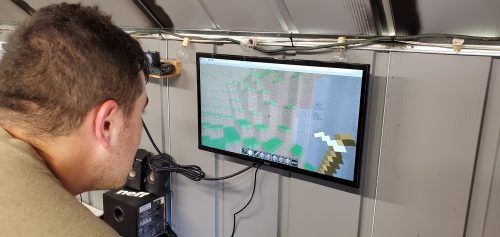
Productivity may have slowed when Patrick, Philip, and John remembered you can play Minecraft on the Raspberry Pi
Join us for Digital Making at Home: this week, young people can recreate classic* video games with us! Through Digital Making at Home, we invite kids all over the world to code along with us and our new videos every week.
So get ready to code some classic retro games with us:
This Saturday morning, our friends Maddie Moate and Greg Foot will be live at The Centre for Computing History for a computing- and retro gaming-inspired episode of their show Let’s Go Live, and you can tune in from 10am to join the fun.
Retro gaming and computer funtimes
Saturday’s show will be a retro feast of vintage video games, and will answer questions such as ‘What is a computer?’ and ‘How do computers work?’. As always, Maddie and Greg have a number of activities planned, including designing pixel art and going on a tech safari! They’re also extremely excited to step inside a giant computer and try to put it back together!
Let’s Go Live
Let’s Go Live is a family science show that Maddie and Greg began on day 1 of lockdown to help with the challenge of homeschooling. Since then, Maddie and Greg have hosted 50 live shows from their ‘spare room studio’ and caught the attention of millions of families across the world who enjoy tuning into their daily dose of fun, facts, and science activities.
After a short break, the two are now back for the summer holidays and plan to make Let’s Go Live bigger and better than ever by bringing you live shows from unique locations across the UK — a new venue each week!
Maddie and Greg will be live on Facebook and YouTube, and we recommend subscribing to Maddie’s channel to ensure you never miss an episode.
We don’t blame you! If you’ve already been following Maddie and Greg on their Let’s Go Live journey throughout lockdown, and you’re looking for more fun online content to entertain you and your family, look no further than the Raspberry Pi Foundation’s Digital Making at Home:
Digital Making at Home
Each week, we share a themed code-along video and host a live stream to inspire families to have fun with coding and digital making at home! Join Christina, Marc, Mr C and their host of special guests as they work their way through our great coding activities. This week, the Digital Making at Home team has been exploring outer space, and they show you how to use Scratch and Python code to race the International Space Station, animate astronauts, and defy gravity.
And our next theme for Digital Making at Home — out tomorrow just when Let’s Go Live finishes — is retro games!
You’ll find all the episodes of Digital Making at Home on our website — new ones are added every Saturday morning. And on the website, you can also tune into our weekly code-along live stream every Wednesday at 2pm BST!
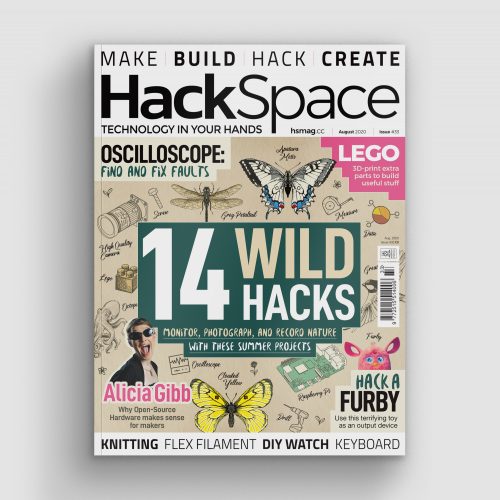
The past few months have given us ample opportunity to stare at the creatures that reside outside. In issue 33 of Hackspace Magazine, out today, Rosie Hattersley looks at ways to track them.
It’s been a remarkable spring and early summer, and not just because many of us have had more time than usual to be able to appreciate our surroundings. The weather has been mild, the skies clear, and pollution levels low. As a result, it ought to be a bumper year for plants and wildlife. Unfortunately, the lockdown limited opportunities for embracing unexpectedly good weather while simultaneously making us more aware of the wildlife on our doorsteps.
“It’s a great time to take a fresh look at the world around us”
If you’re the outdoorsy type who likes to get out and stare intently at feathered friends from the comfort of a large shed on the edge of a lagoon, you may have spent the past few months getting to know suburban birds during your exercise walks, rather than ticking off unusual species. As things finally open up, it’s a great time to take a fresh look at the world around us, and some of the projects focused on the creatures we share it with.
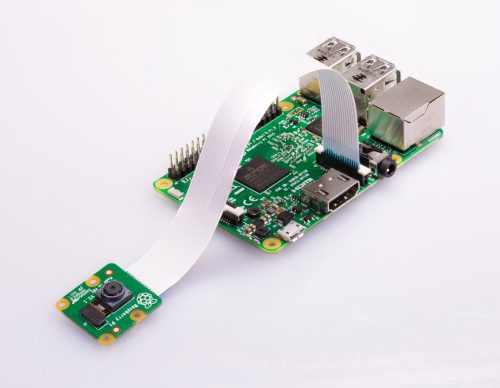
Make your own nature cam
Equipped with a Raspberry Pi connected to a camera and USB power bank, we are able to spy on the wildlife in our garden. The Raspberry Pi Camera Module V2 is a good option here (it’s less intrusive than the newer High Quality Camera, though that would make a superb critter-cam). It’s important not to disturb wildlife with lighting, so use an infrared module, such as the NoIR Camera Module, if you want to snap evening or night-time wildlife activity. Connect the Camera Module to the Camera port on Raspberry Pi using the cable provided, then gently pull up the edges of the port’s plastic clip and insert the ribbon cable. Push the clip back into place and the Camera Module will remain attached. Try our ‘Getting started with the Raspberry Pi Camera Module‘.
A Raspberry Pi plus camera is a great solution for web-enabled snapping
Set up your Raspberry Pi and let it perform any OS updates needed. (The Raspberry Pi Imager tool can help)
You’ll need a keyboard and mouse to set up the Raspberry Pi, but you can disconnect them at the end. Insert the updated microSD card and use a regular power supply to start it up (keep your power bank on charge separately while you set things up). Go through the Raspberry Pi setup, making sure you change the default password (since it will be accessible to anyone), and connect to your wireless network. It helps if you can access this network from the garden.
Turn on the interface for the camera, and enable SSH and VNC so you can access Raspberry Pi OS remotely when it’s sitting out in the garden. To do this, open Menu > Preferences > Raspberry Pi Configuration and click on Interface, then set Camera, SSH, and VNC to Enabled (see this documentation). Click Yes when advised that a reboot is needed.
Next, test the camera. Open a terminal window and enter:
A preview window will appear. After a few moments, it will save an image to the Desktop. Double-click the image.jpg file to open it.
You can use Python to take pictures and shoot video. This is handy if you want to create a time-lapse or video camera. This Raspberry Pi Project guide explains how to control the camera with Python.
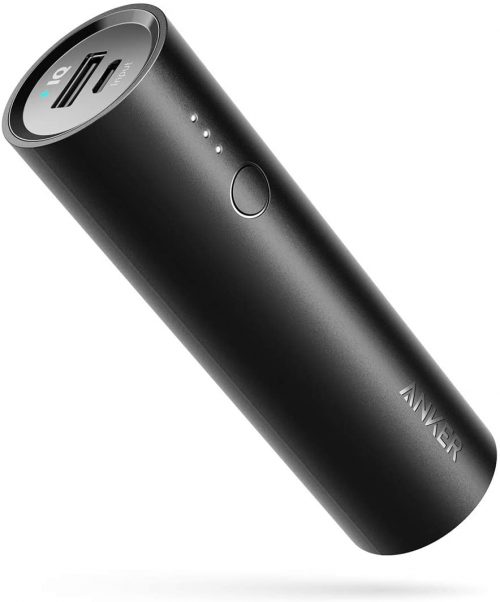
You can use a USB power bank to run your Raspberry Pi wildlife camera
Note that recording video will quickly fill up your storage space and drain the battery. A better idea is to leave the preview running and use VNC to view the camera remotely. A neater option is to hook up your Raspberry Pi to YouTube (as explained in this Raspberry Pi infrared bird-box project).
Open a web page and go to studio.youtube.com. Sign in, or set up a YouTube account. You will need to enable permission to live-stream. This involves providing YouTube with your phone number. Click Settings, Channel, and ‘Feature eligibility’, expand ‘Features that require phone verification’, and click ‘Verify phone number’. Type in your phone number, then enter the code that YouTube sends you as a text message. For security reasons, it will take 24 hours for YouTube to activate this feature on your account.
Get your key and add to terminal
On the left-hand side of the screen you should see a menu with the My Channel option available:
In the middle of the screen you should see the Video Manager option. On the left you should see a Live Streaming option. Look for and select the ‘Stream now BETA’ option.
Scroll down to the bottom of the page and you should see the ENCODER SETUP option.
Here there is a Server URL and a Stream name/key. The key is shown as a line of asterisks, until you click the Reveal button. Keep the key secret and don’t share it online. Copy your Stream Key to a text document (password-protect it, ideally).
Open a terminal window and enter this command (replacing <key goes here> with your own key:
With this running on Raspberry Pi, you can view the stream from your camera on YouTube on any computer. This infrared bird-box project explains more about the command options.
You’ll want this script to execute on startup. Create a file for your startup script and add the aforementioned raspivid stream command to it:
You can see details of scripts running at startup here.
Shut down Raspberry Pi and fit the computer and Camera Module inside a case (if you are using one). Position Raspberry Pi in your garden and power it with the USB power bank. It will connect to your wireless network, and run the YouTube streaming key.
Navigate to your channel on YouTube at any time to see the action taking place in your garden.
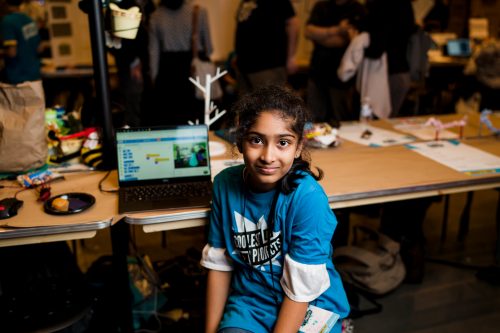
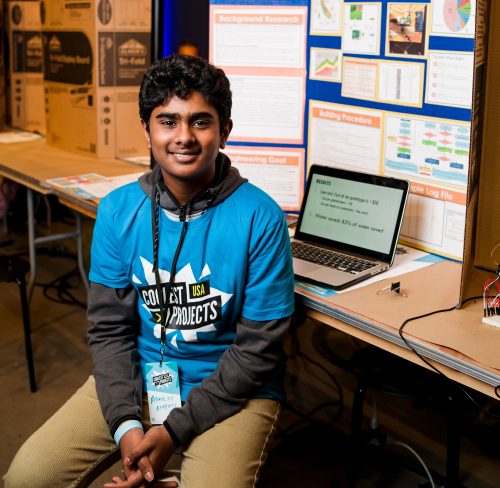
We’re delighted to announce that our special judges — Eben Upton, Hayaatun Sillem, Limor Fried, Mitch Resnick, and Tim Peake — have chosen their favourite projects from the Coolest Projects online showcase!
Young tech creators from 39 countries are part of the showcase, including from Ireland, Australia, Palestine, UK, USA, India, and Indonesia. In total, you’ll find an incredible 560 projects from 775 young creators in the showcase gallery.
Our judges have been amazed and inspired by all the young creators’ projects, and they want to highlight a few as their favourites!
Eben Upton’s favourites
Eben Upton is a founder of our organisation, one of the inventors of the Raspberry Pi computer, and CEO of Raspberry Pi Trading. Watch Eben’s favourites.
Haya: Bobby ‘A Platformer’
Kaushal: Diabetic Retinopathy Detector
Zaahra, Eesa: Easy Sylheti
Mahmoud: Fighting Against Coronavirus
Oisín: MiniGolf In Python
Fiona: TeenBeo
Artash, Arushi: The Masked Scales: The Sonification of the Impact
Hayaatun Sillem’s favourites projects
Dr Hayaatun Sillem is the CEO of the Royal Academy of Engineering, which brings together the UK’s leading engineers and technologists to promote engineering excellence for the benefit of society. Watch Hayaatun’s favourites.
Radu Matei: Agartha Lore. Rebellion
Momoka: AI Trash Can
Kian: Cellular Ecosystem: Life in a Petri Dish
Sama, Sam, Taima, Nouran, Rama: Five Feet Apart
Tucker: Rivers.run
Cyrus: School Student ePortal
Limor ‘Ladyada’ Fried’s favourites
Limor Fried is an MIT-trained engineer and the founder and owner of Adafruit Industries. Watch Limor’s favourites.
Sara, Batool, Rahaf, Nancy: Children Body Language
Lars: Colourbird PicoBello
Alisa, Michelle: Green Coins
Niamh: MineBlower
Marah: My School Website
Raluca: Protect the Planet!
Rhea: The Amazing Photo Filter
Mitch Resnick’s favourites
Mitch Resnick is Professor of Learning Research at the MIT Media Lab, and his Lifelong Kindergarten research group develops and supports the Scratch programming software and online community! Watch Mitch’s favourites.
Tim Peake is a British ESA astronaut who spent 186 days in space on the International Space Station. He’s also a passionate advocate for STEM education. Watch Tim’s favourites.
Abhiy: Burglar Buster
Carlos, Blanca, Mario: El ojo que te observa (The All-seeing Eye)
Zoe: Find It
Oluwadabera Jedidiah: Galaxy
Patrick: Pear Pad – Have Fun with Apps
Hala, Ranwa: Help Me to Learn
Discover over 500 projects
You can explore all the young tech creators’ projects — games, hardware builds, Scratch projects, mobile apps, and more — in our showcase gallery now.
This year’s Coolest Projects online showcase wouldn’t be possible without the support of our Coolest Projects sponsors — thank you!
One of our Approved Resellers in the Netherlands, Daniël from Raspberry Store, shared this Raspberry Pi–powered prayer reminder with us. It’s a useful application one of his customers made using a Raspberry Pi purchased from Daniël’s store.
As a Raspberry Pi Official Reseller, I love to see how customers use Raspberry Pi to create innovative products. Spying on bird nests, streaming audio to several locations, using them as a menu in a restaurant, or in a digital signage-solution… just awesome. But a few weeks ago, a customer showed me a new usage of Raspberry Pi: a prayer clock for mosques.
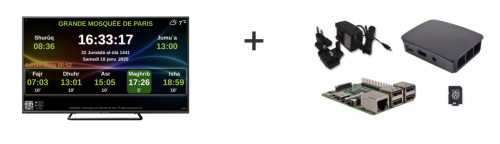
Made by Mawaqit, this is a narrowcasting solution with a Raspberry Pi at its heart and can be used on any browser or smartphone.
Hardware
This project is simple in hardware terms. You just need Raspberry Pi 3 or Raspberry Pi 4, a TV screen, and a HDMI cable.
If you do not have an internet connection, you’ll also need an RTC clock
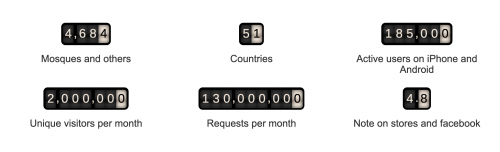
With the HDMI cable, Raspberry Pi can broadcast the clock — plus other useful info like the weather, or a reminder to silence your phone — on a wall in the mosque. Awesome! So simple, and yet I have not seen a solution like this before, despite Mawaqit’s application now being used in 51 countries and over 4609 mosques. And, last I checked, it has more than 185,000 active users!
How to build it
You’ll need to install the pre-configured system image and flash the mawaqit.xz system image onto your Raspberry Pi’s SD card.
There are then two options: connected and offline. If you set yourself up using the connected option, you’ll be able to remotely control the app from your smartphone or any computer and tablet, which will be synchronised across all the screens connected to Raspberry Pi. You can also send messages and announcements. The latest updates from Mawaqit will install automatically.
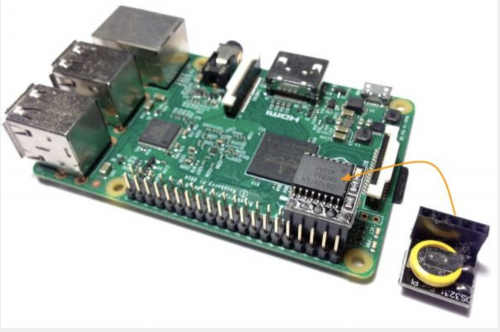
That’s a little RTC on the right
If you need to choose the offline option and you’re not able to use the internet at your mosque, it’s important to equip your Raspberry Pi with RTC, because Raspberry Pi can’t keep time by itself.
All the software, bits of command line code, and step-by-step guidance you’ll need are available on this web page.
The Mawaqit project is free of charge, and the makers actually prohibit harnessing it for any monetary gain. The makers even created an API for you to create your own extentions — how great is that? So, if you want your own prayer clock for in a mosque, school, or just at home, take a look at Mawaqit.net.
Anyone with the language skills please head to YouTube and provide community translations for this walkthrough video
Since lockdown started, I’ve found I often miss video meetings. It’s not intentional, I simply loose track of time. Though my phone is set to remind me of upcoming meetings ten minutes before they begin, I have a habit of trying to fill that time with something productive and before I know it, I have Eben on the phone, fifteen minutes after the meeting’s start, asking where I am.
Fixing the issue using code
Due to this, and because I was interested in playing with the Google API and learning a little more Python, I decided to write a simple application that will get your upcoming events from your Google Calendar and give you notifications as often as you want, visually on screen as well as through sound.
I call it NextEvent
Here’s the video tutorial to show you more:
And here’s the written tutorial too!
Installing NextEvent to your Raspberry Pi
To install NextEvent, open a terminal window (Ctrl-Alt-T) on Raspberry Pi and type:
The dependencies are dateutil (a library for manipulating time and dates), the Google API client libraries, and the gi-cairo library (which is for drawing the GUI).
The next thing you’ll see is NextEvent starting up, and then it’ll open Chromium. It is here that you will give Google permission to share you calendar with the application.
You’ll then need to log into your Google account and give NextEvent access to your calendar. Chromium will tell you when everything is fine and you can close the browser.
Now you can see your next five events along with the time left until each one. When the time gets down to five minutes, the application will turn red and ‘ding’ at you. It’ll ‘ding’ twice at one minute to go, and four times when your meeting is about to start!
In case you want to delve into the code, maybe to create a meeting room ‘now and next’ display, the nextevent.py source contains the GUI and event processing part of NextEvent. You should be able to go here and change the number of lines, the colours, and the notification sounds.
How does it work?
If you’re the sort that likes to know HOW the code works, here’s a follow-up to the tutorial video where I explain exactly that!
Join us for Digital Making at Home: this week, young people can do out-of-this-world coding with our space-themed projects! Through Digital Making at Home, we invite kids all over the world to code along with us and our new videos every week.
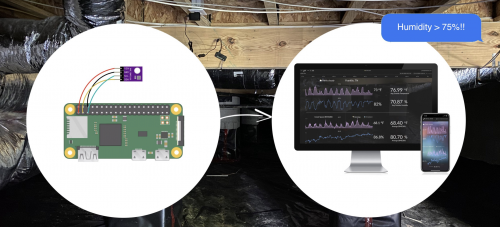
We know crawl spaces are creepy, sweaty, and confining but, hear us out…
You need to keep an eye on the humidity level in your crawl space, as it can seriously affect the whole house’s overall health. It’s ideal to be able to do this remotely (given the creepy, sweaty atmosphere of the space), and a Raspberry Pi allows this.
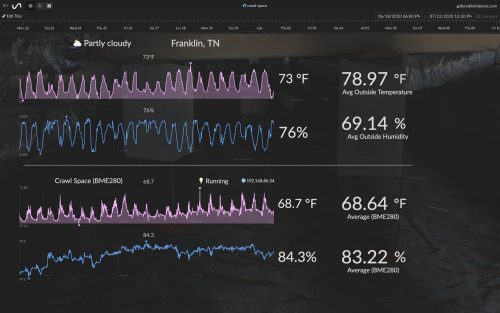
Jamie Bailey took to Medium to share his Raspberry Pi setup that allows him to monitor the humidity of the crawl space in his home from a mobile device and/or laptop. His setup lets you check on the current humidity level and also see the historical data over time. You can also set alarms to be sent to you via text or email whenever the humidity level exceeds a certain threshold.
The hardware you need
Power outlet or extension cord in your crawl space
Raspberry Pi (3 or 4) or Raspberry Pi Zero W (or WH)
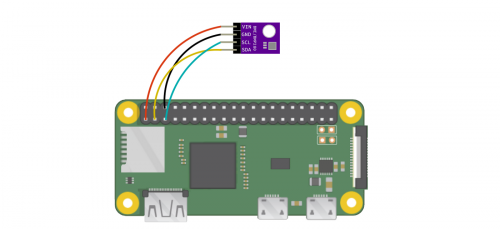
The BME280 sensor has four pins you need to connect to your Raspberry Pi. This will send the humidity data to your Raspberry Pi, which you’ll have already set up to let you know what’s happening remotely.
BME280 VIN pin connects to GPIO pin 1 (3.3V)
BME280 GND pin connects to GPIO pin 6 (GND)
BME280 SCL pin connects to GPIO pin 5 (SCL)
BME280 SDA pin connects to GPIO pin 3 (SDA)
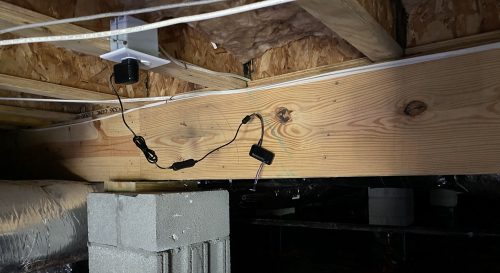
You can see the Raspberry Pi in a black case hanging in the centre against a floor joist.
Once you have all your software sorted and your hardware connected, turn your Raspberry Pi off and take it down to your crawl space (monitor, keyboard, and mouse are no longer necessary). Jamie advises hanging your Raspberry Pi from the floor joists instead of letting it touch the ground, to avoid contact with any water. He put a nail in one of the floor joists and draped the power cord over the nail (see above). Turn your tiny computer on, make sure data starts flowing into your dashboard, and you’ve got yourself remote humidity sensor!
PS We’re English so… is a crawl space the same as an attic or what? Asking for a friend!
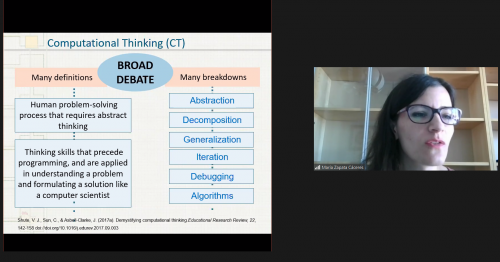
Computational thinking (CT) comprises a set of skills that are fundamental to computing and being taught in more and more schools across the world. There has been much debate about the details of what CT is and how it should be approached in education, particularly for younger students.
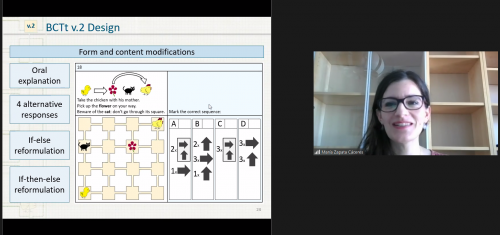
In our research seminar this week, we were joined by María Zapata Cáceres from the Universidad Rey Juan Carlos in Madrid. María shared research she and her colleagues have done around CT. Specifically, she presented work on how we can understand what CT skills young children are developing. Building on existing work on assessing CT, she and her colleagues have developed a reliable test for CT skills that can be used with children as young as 5.
Why do we need to test computational thinking?
Until we can assess something, María argues, we don’t know what children have or haven’t learned or what they are capable of. While testing is often associated with the final stages in learning, in order to teach something well, educators need to understand where their students’ skills are to know what they are aiming for them to learn. With CT being taught in increasing numbers of schools and in many different ways, María argues that it is imperative to be able to test learners on it.
How was the test developed?
One of the key challenges for assessing learning is knowing whether the activities or questions you present to learners are actually testing what you intend them to. To make sure this is the case, assessments go through a process of validation: they are tried out with large groups to ensure that the results they give are valid. María’s and her colleagues’ CT test for beginners is based on a CT test developed by another researcher. That test had been validated, but since it is aimed at 10- to 16-year-olds, María and her colleagues needed to adapt it for younger children and then validate the adapted rest.
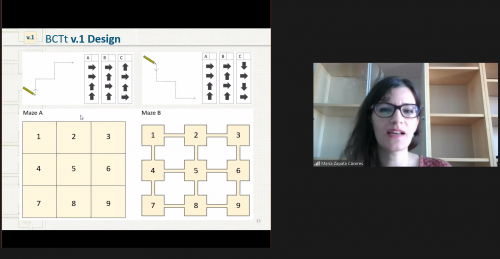
Developing the first version
The new test for beginners consists of 25 questions, each of which has four possible responses, which are to be answered within 40 minutes. The questions are of two types: one that involves using instructions to draw on a canvas, and one that involves moving characters through mazes. Since the test is for younger children, María and her colleagues designed it so it involves as little text as possible to reduce the need for reading; instead the test includes self-explanatory symbols.
Developing a second version based on feedback
To refine the test, the researchers consulted with a group of 45 experts about the difficulty of the questions and the test’s length of the test. The general feedback was very positive.
Drawing on the experts’ feedback, María and her colleagues made some very specific improvements to the test to make it more appropriate for younger children:
The improve test mandates that an verbal explanation be given to children at the start, to make sure they clearly understand how to take the test and don’t have to rely on reading the instructions.
In some areas, the researchers added written explanations where experts had identified that questions contained ambiguity that could cause the children to misinterpret them.
A key improvement was to adapt the grids in the original test to include pathways between each box of the maze. It was found that children could misinterpret the maze, for example as allowing diagonal moves between squares; the added pathways are visual cues that it clear that this is not possible.
Validating the test
After these improvements, the test was validated with 299 primary school students aged 5-12. To assess the differences the improvements might make, the students were given different version of the test. María and her colleagues found that the younger students benefited from the improvements, and the improvements made the test more reliable for testing students’ computational thinking: students made fewer errors due to ambiguity and misinterpretation.
Statistical analysis of the test results showed that the improved version of the test is reliable and can be used with confidence to assess the skills of younger children.
What can you use this test for?
Firstly, the test is a tool for educators who want to assess the skills young people have and develop over time. Secondly, the test is also valuable for researchers. It can be used to perform projects that evaluate the outcomes of different approaches to teaching computational thinking, as well as projects investigating the effectiveness of specific learning resources, because the test can be given to children before and again after they engage with the resources.
Assessment is one of the many tools educators use to shape their teaching and promote the learning of their students, and tools like this CT test developed by María and her colleagues allow us to better understand what children are learning.
Our final seminar of this series takes place Tuesday 28 July before we take a break for the summer. In the session, we will explore gender balance in computing, led by Katharine Childs, who works on the Gender Balance in Computing research project at the Raspberry Pi Foundation. You can find out more and sign up to attend for free on our Computing Education Research Seminars page.
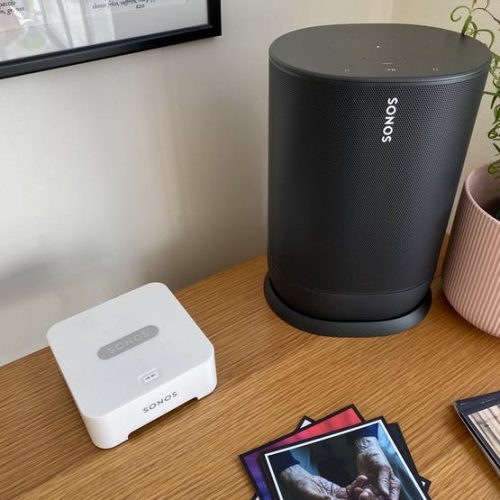
Redditor Mark Hank missed the tactile experience of vinyl records so he removed the insides of an old Sonos Boost to turn it into a Raspberry Pi- and NFC-powered music player. Yes, this really works:
The Sonos Boost was purchased for just £3 on eBay. Mark pulled all the original insides out of it and repurposed it as what they call a ‘vinyl emulator’ to better replicate the experience of playing records than what a simple touchscreen offers.
The Boost now contains a Raspberry Pi 3A+ and an ACR122U NFC reader, and it plays a specific album, playlist, or radio station when you tap a specific NFC tag on it. It’s teamed with Sonos speakers, and NTAG213 NFC tags. The maker recommends you go with the largest tags you can find, as it will improve read performance; they went with these massive ones.
One of the album covers printed onto thick card
The tags are inside printouts mounted on 1mm thick card (those album cover artwork squares getting chucked at the Sonos in the video), and they’re “super cheap” according to the maker.
You’ll need to install the node-sonos-http-api package on your Raspberry Pi; it’s the basis of the whole back-end of the project. The maker provides full instructions on their original post, including on how to get Spotify up and running on your Raspberry Pi.
The whole setup neatened up
Rather than manually typing HTTP requests into a web browser, the maker wanted to automate the process so that the Raspberry Pi does it when presented with certain stimulus (aka when the NFC reader is triggered). They also walk you through this process in their step-by-step instructions.
How the maker hid the mess under the display table
The entire build cost around £50, and the great thing is that it doesn’t need to sit inside an old Sonos Boost if you don’t want it to. The reader works through modest-width wood, so you can mount it under a counter, install it in a ‘now listening’ stand, whatever — it’s really up to you.
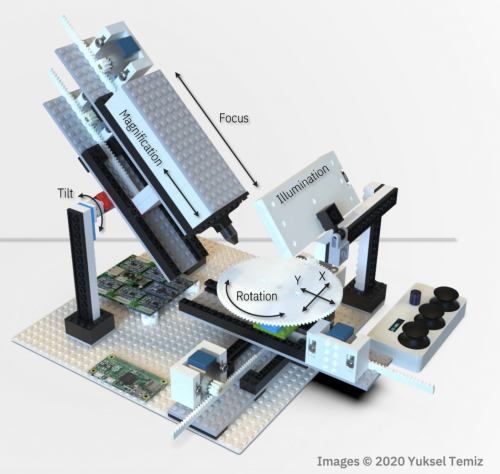
Shot on a Raspberry Pi Camera Module, this stop-motion sequence is made up of 180 photos that took two hours to shoot and another hour to process.
The trick lies in the Camera Module enabling you to change the alpha transparency of the overlay image, which is the previous frame. It’s all explained in the official documentation, but basically, the Camera Module’s preview permits multiple layers to be rendered simultaneously: text, image, etc. Being able to change the transparency from the command line means this maker could see how the next frame (or the object) should be aligned. In 2D animation, this process is called ‘onion skinning’.
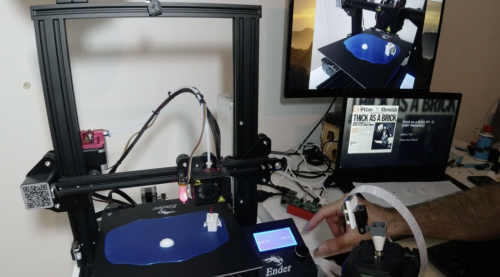
You can see the Raspberry Pi Camera Module on the bottom left in front of Yuksel’s hand
So why the Raspberry Pi Camera Module? Redditor /DIY_Maxwell aka Yuksel Temiz explains: “I make stop-motion animations as a hobby, using either my SLR or phone with a remote shutter. In most cases I didn’t need precision, but some animations like this are very challenging because I need to know the exact position of my object (the boat in this case) in each frame. The Raspberry Pi camera was great because I could overlay the previously captured frame into the live preview, and I could quickly change the transparency of the overlay to see how precise the location and how smooth the motion.”
You can easily make simple, linear stop-motion videos by just capturing your 3D printer while it’s doing its thing. Yuksel created a bolting horse (above) in that way. The boat sequence was more complicated though, because it rotates, and because pieces had to be added and removed.
The official docs are really comprehensive and span basic to advanced skill levels. Yuksel even walks you through getting started with the installation of Raspberry Pi OS.
Yuksel’s Raspberry Pi + Lego microscope
We’ve seen Yuksel’s handiwork before, and this new project was made in part by modifying the code from the open-source microscope (above) they made using Raspberry Pi and LEGO. They’re now planning to make a nice GUI and share the project as an open-source stop-motion animation tool.
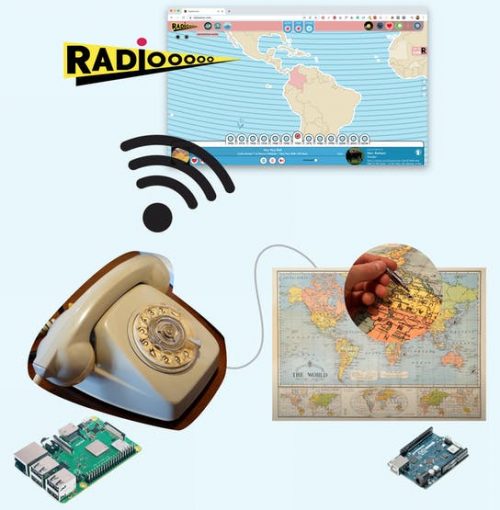
This rotary phone features a built-in Raspberry Pi that communicates with radiooooo.com (a musical time machine) and an Arduino working behind the map to control the selection of the country. Just pick up the phone, choose a country and a decade, and listen to some great music!
How does it work?
The Raspberry Pi:
Plays music through radiooooo.com
Detects when the handset is picked up/put down
Detects the numbers that are dialled in
The Arduino:
Detects which country is selected on the map (via jack connectors)
Sends the info to the Raspberry Pi over serial
We saw this project on hackster.io and loved how maker Caroline Buttet dug into the finer detail of an old-fashioned rotary phone’s pick-up/put-down mechanism, as well as how the phone knows which numbers you’re dialling. She goes into more detail about that aspect in the second build video, above.
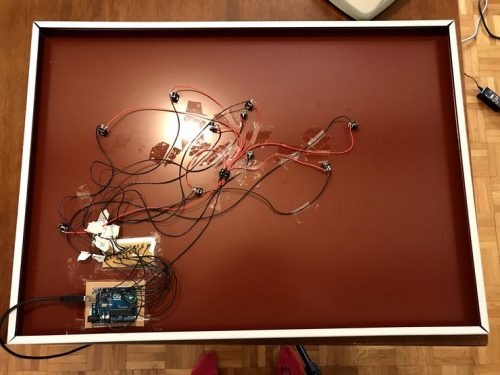
Some countries have a jack pin – this is how you select the music
Other bits you’ll need
As well as a Raspberry Pi 4 and Arduino UNO, you’ll need a world map (obviously) and something to mount it on which can be drilled into. This is because the jack pins you can see in the image above need to poke out of different countries.
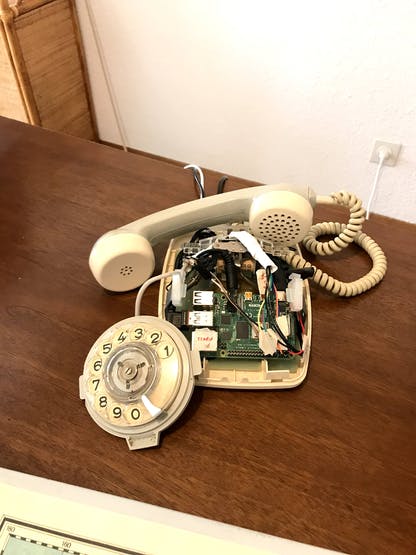
Caroline’s grandma donated the old rotary phone she used for this project. You should be able to pick one up from a second-hand shop or, if you can get a new handset made in the retro style online.
The shopping list for this build also includes: jumper wires; audio/video cable assembly; LED, breadboard; jack socket 3-pin; resistors
A simplified visual representation of how everything works
In her original post, Caroline explains in detail how to connect the rotary phone’s switches to the pins on your Raspberry Pi, how to build in audio sockets on the board you glue your map to, how to run the necessary Python script from the command line, and what a Chrome extension to use to make radiooooo.com work with your Raspberry Pi.
The Raspberry Pi inside the rotary phone
And yes, Caroline is one of those most magical of makers who deposits all the code needed for this build on GitHub!
And here’s the Arduino mounted onto the back of the map, with the audio jacks taped up to the holes drilled into different countries
Join us for Digital Making at Home: this week, young people can learn about using the Sense HAT — or its emulator — with us! With Digital Making at Home, we invite kids all over the world to code along with us and our new videos every week.
We’ve all been able to check on our kitties’ outdoor activities for a while now, thanks to motion-activated cameras. And the internet’s favourite cat flap even live-tweets when it senses paws through the door.
“Did you already make dinner? I stopped on the way home to pick this up for you.”
But what’s eluded us “owners” of felines up until now is the ability to stop our furry companions from bringing home mauled presents we neither want nor asked for.
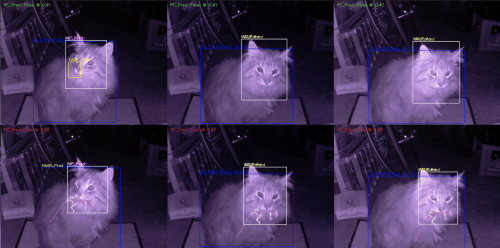
A cat flap bouncer powered by deep learning
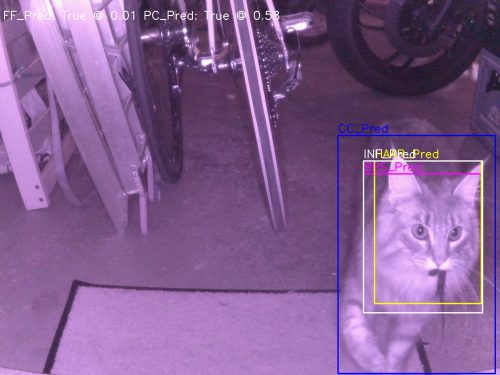
Now this Raspberry Pi–powered machine learning build, shared by reddit user u/eee_bume, can help us out: at its heart, there’s a convolutional neural network cascade that detects whether a cat is trying to enter a cat flap with something in its maw. (No word from the creators on how many half-consumed rodents the makers had to dispose of while training the machine learning model.)
The neural network first detects the whole cat in an image; then it hones in on the cat’s maw. Image classification is performed to detect whether there is anything in or around the maw. If the network thinks the cat is trying to smuggle caught contraband into the house, it’s a “no” from this virtual door bouncer.
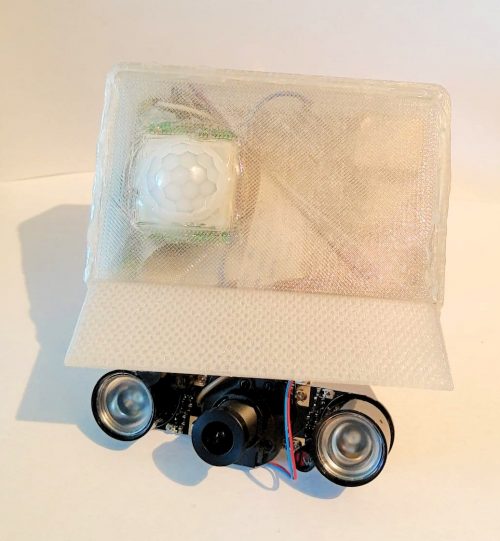
The system runs on Raspberry Pi 4 with an infrared camera at an average detection rate of around 1 FPS. The PC-Val value, representing the certainty of the prey classification => prey/no_prey certainty threshold, is 0.5.
The infrared camera setup, powered by Raspberry Pi
How to get enough training data
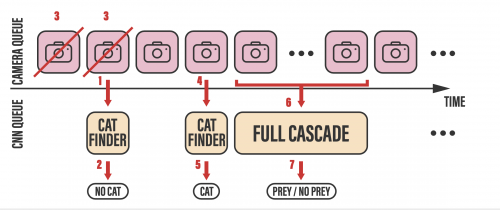
This project formed Nicolas Baumann’s and Michael Ganz’s spring semester thesis at the Swiss Federal Institute of Technology. One of the problems they ran into while trying to train their device is that cats are only expected to enter the cat flap carrying prey 3% of the time, which leads to a largely imbalanced classification problem. It would have taken a loooong time if they had just waited for Nicolas and Michael’s pets to bring home enough decomposing gifts.
The cutest mugshots you ever did see
To get around this, they custom-built a scalable image data gathering network to simplify and maximise the collection of training data. It features multiple distributed Camera Nodes (CN), a centralised main archive, and a custom labeling tool. As a result of the data gathering network, 40GB of training data have been amassed.
What is my cat eating?!
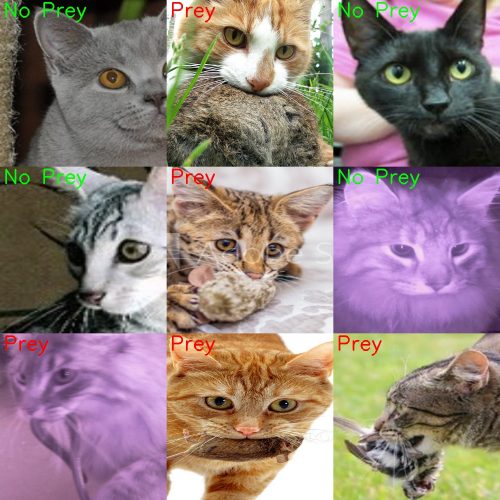
The makers also took the time to train their neural network to classify different types of prey. So far, it recognises mice, lizards, slow-worms, and birds.
“Come ooooon, it’s not even a *whole* mouse, let me in!”
It’s still being tweaked, but at the moment the machine learning model correctly detects when a cat has prey in its mouth 93% of the time. But it still falsely accuses kitties 28% of the time. We’ll leave it to you to decide whether your feline companion will stand for that kind of false positive rate, or whether it’s more than your job’s worth.
The closure of schools has called attention to the digital divide, which sees poorer families struggling or unable to access education*. The coronavirus pandemic didn’t cause this divide, but it has highlighted it and its impact on many people in our society.
As our Foundation CEO Philip outlined back in April, part of our response to the pandemic and social distancing measures is to send free Raspberry Pi computers to students who currently lack the technology to complete their school work at home. Generously funded by the Bloomfield Trust, we have started to distribute Raspberry Pis in the UK.
Who is receiving Raspberry Pis?
Our approach for this initiative is to work with partner charities that help us identify the right recipients for the computers; we want them to go to young people who don’t have a suitable device for completing their schoolwork in their home.
The first partner charity we’ve been working with, whose team has been so patient as we’ve learned together how to do this, are the incredible School Home Support, a youth organisation working to improve school attendance, behaviour, and engagement in learning. With their help, we’ve so far distributed more than 120 Raspberry Pi 4 computers (with 2GB RAM), together with all the peripherals including a screen. School Home Support were also able to secure funding to provide high-speed internet access to the recipients’ home so students can reliably connect to their schools.
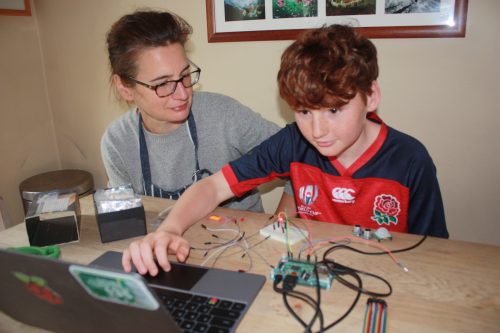
Families receive a Raspberry Pi Desktop Kit and a screen. Our partner charity funds reliable internet access.
How are we helping them set up?
The young people set up their Raspberry Pis themselves, and we have provide detailed instructions to guide them through this process. Most of the families have never used a computer like Raspberry Pi, so they need encouragement and support to get up and running. This is being provided both by the excellent School Home Support practitioners, and by Raspberry Pi team members, who answer questions when recipients get stuck.
“My mum was confused by the setup at first, but having a call to explain it really helped, and now we see how easy it is to set up and use.”
Raspberry Pi recipient
Recipients are already benefiting
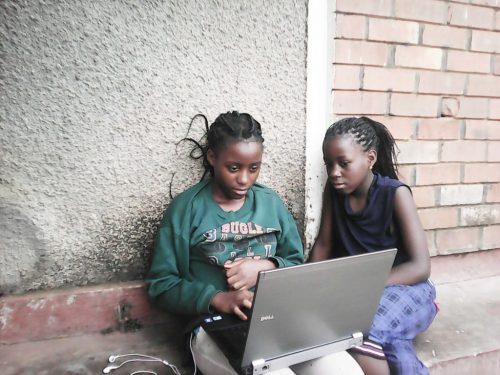
Before receiving these computers, many of the young people only had occasional access to their parents’ phone to find out what school work had been set for them, and to complete it.
“It’s much easier to do my schoolwork now on the bigger screen. I feel like I’m learning more.”
Raspberry Pi recipient
We’re getting feedback that the Raspberry Pis help recipients focus on their work; they now have their own space to work in and more time to complete schoolwork, as they’re no longer rushing to share a device with other family members.
“I don’t always enjoy doing homework, but it’s better now that I have my own computer to do my work.”
Raspberry Pi recipient
Having a Raspberry Pi has increased the students’ motivation, and it has reduced stress — for parents as well as children:
“The Raspberry Pi kit came at a time when I really needed it. Up until that point, T had to do his homework and access the school’s home learning using my phone, which was not very practical at all. This was made worse by the fact that he had to share my phone with his sister, which ended up causing a lot of arguments. He was so pleased to receive a computer he could use. At first he had a lot of fun playing different games on it, and I was surprised about how well he was able to understand and help me set it up. The only negative was that he enjoyed playing games on it a bit too much! I feel relieved that he has his own computer which he can use. It was very stressful and frustrating having to use my mobile phone. There were times when T would be using my phone to do his work and he would be interrupted if I got a phone call, which meant that he would have to log in again, and sometimes would lose his work.”
Parent of a Raspberry Pi recipient
What are we doing next?
It’s wonderful to hear stories like this of how our computers make a difference in people’s lives. We’re still learning lots: while many families have been able to get up and running easily and quickly, others are still overwhelmed because they are unfamiliar with the device. We know we need to do more to build their confidence.
As we’re learning, we’re also talking to our next charity partners in the UK to help us identify more recipients, and to help the recipients get set up on their new Raspberry Pi devices.
If you are part of an organisation that could partner with us to support families in need of access to technology, please email us at stayconnected@raspberrypi.org. Be aware that your organisation would need to fund the families’ internet access.
There’s no question that families have faced disruptions and tough challenges over the last few months. For the parents and carers who’ve been supporting their children with learning at home, it can feel overwhelming, stressful, rewarding — or all three! As many children are still carrying on with learning at home, we are supporting them with extra resources, and parents with support tutorials.
In our last blog post for parents, we talked to you about debugging — finding and fixing errors in code. This week we’re covering the amazing things young people can do and learn with Scratch — it’s not just for beginners!
Getting the most out of Scratch
Scratch is a block-based programming tool that lets you create lots of different projects. It’s often one of the first programming tools children use in primary school. We’ve made a video introduction to Scratch in case you’re less familiar with it.
If your child at home is ready to try more challenging coding tasks, Scratch is still a great tool for them, as they can use it to build some truly epic projects.
In this video, Mark shows you examples from the Scratch community and signposts useful resources that will support you and your children as they develop their confidence in Scratch.
You can find other amazing examples if you explore the Coolest Projects online showcase. Our free annual tech showcase for young people has lots of great Scratch projects: plenty of inspiration for you and your young people at home.
Exploring and learning in the Scratch community
The Scratch community is a great place for young people to safely share their projects with each other all year round, and to like and comment on them. It’s a real treasure trove they can explore to find inspiration and learning opportunities, and for young people who are spending more time at home, it offers a way to connect to peers around the world.
In this video, Katharine shows you how the team behind Scratch keeps the community safe, where you as a parent can find the information you need, and how your child will engage with the community.
Code along with us!
To keep young people entertained and learning, we’re running a Digital Making at Home series. You’ll find new, free code-along videos every Monday, with different themes and projects for all levels of experience. We have lots of Scratch code-alongs on offer! We also live-stream a code-along session every Wednesday at 14:00 BST at rpf.io/home.
We want your feedback
We’ve been asking parents what they’d like to see as part of our initiative to support them and the young people they care for. They’ve sent us some great suggestions so far! If you’d like to share your thoughts too, email us at parents@raspberrypi.org.
Sign up for our bi-weekly emails, tailored to your needs
Sign up now to start receiving free activities suitable to your child’s age and experience level straight to your inbox. And let us know what you as a parent or guardian need help with, and what you’d like more or less of from us.
PS All of our resources are completely free. This is made possible thanks to the generous donations of individuals and organisations. Learn how you can help too!
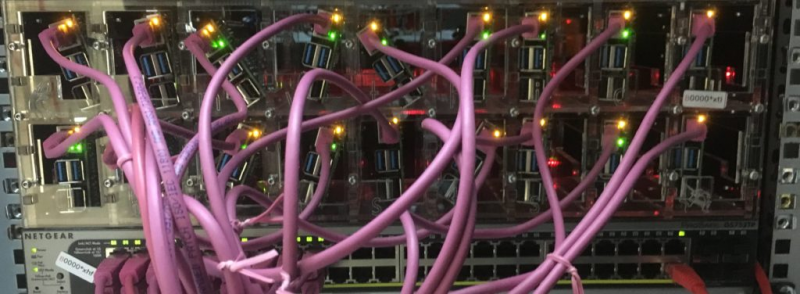
Here’s Mythic Beast’s Pete Stevens to talk about how we run the Raspberry Pi website on Raspberry Pis, and how Mythic Beasts can run your site on Raspberry Pis too!
Rent a Raspberry Pi
In late 2016, Mythic Beasts launched a Raspberry Pi cloud, allowing you to rent a Raspberry Pi 3 as a service.
Raspberry Pi 4 is a much more capable computer, with more than twice the performance and, crucially, four times the memory. We were so excited by it, we bet Eben Upton a beer that we could host the launch site for Raspberry Pi 4 on Raspberry Pi 4. We’d demonstrated that it was just about possible to run a normal day on a cluster of eight Raspberry Pi 3s, but launch day is a bit more exciting — tens of millions rather than a million visitors.
Eben, being a fool supremely confident in the work that his team had done, took the bet and let us. On Thursday 20 June 2019, he dropped off eighteen 4GB RAM Raspberry Pi 4 computers that had previously been used in testing. We set about configuring them to replace all the web servers that run the Raspberry Pi blog.
14× Dynamic Web server (PHP/Apache)
2× Static webserver (Apache, flat files)
2× Memcache (in memory store to accelerate web serving)
We started the build on Friday 21 June. We immediately ran into our first ‘chicken and egg’ problem. The Raspberry Pi web servers are built from Puppet, based (at the time) on Debian Jessie. Raspberry Pi 4’s release OS was a not-yet-released version of Debian Buster, which at the time wasn’t supported by Puppet. In conjunction with Greg Annandale at the Raspberry Pi Foundation, we created a Puppet build that would run on Raspberry Pi 4, updated the configuration from Jessie to Buster (newer Apache/PHP), and did some testing.
The enclosures were built to accommodate a larger PoE HAT, which is why this doesn’t stand up beautifully neatly.
We have pre-built enclosures from our Raspberry Pi 3 cloud. We followed the same approach using Power over Ethernet to provide power and data to each Raspberry Pi 4. This dramatically reduces the cabling and complexity of the setup. Late on Friday 21, just over 24 hours after we started, we moved the hastily constructed Raspberry Pi 4 setup to Sovereign House, a key Mythic Beasts data centre and one of the best-connected buildings in Europe.
Over the course of a few hours, we gradually moved the entire production load from the existing virtual servers to the Raspberry Pi 4 cloud and every page from the blog was being served directly off Raspberry Pi 4. We left it for two days to bed in before the real test: launch day.
The launch was almost perfectly smooth. The Raspberry Pi cluster coped fine with the tens of millions of users. However, the Raspberry Pi cluster and website is fronted by Cloudflare, which provides acceleration for static resources and protects the site from denial of service. Unfortunately, they had a two-hour outage in the middle of the launch thanks to a misconfigured internet optimiser run by a customer of Verizon. So the Raspberry Pi 4 cluster had a long lunch break wondering where all the users had gone.
We ran the website on the Raspberry Pi 4 cluster for over a month before reverting back to the usual virtual server-based environment. We’d proved that RaspberryPi 4 would make an awesome hosting platform.
Commercialising Raspberry Pi 4 as a service
We were already running Raspberry Pi 3 as a service for many customers (e.g. PiWheels, which builds Python packages for Raspberry Pi), and being able spin up Raspberry Pi 3 on demand is incredibly useful.
At launch, Raspberry Pi 4 wasn’t suitable. We rely on network boot in order to be able to remotely re-image Raspberry Pi. SD cards just aren’t very reliable; visiting the data centre for manual intervention on every SD card failure is not only expensive in time, but also means we’d have to maintain physical access to every Raspberry Pi 4 in our cloud. Netboot means that we just build large enclosures of 108 Raspberry Pis and seal them in, as they will never require physical attention. If one fails — and we’ve not yet seen one fail — we can shut it down and take it out of our database.
For Raspberry Pi 4 we had to wait for network booting to be a reality. We had access to beta firmware in November 2019 and built a sample Raspberry Pi 4 network boot setup. We then had to integrate it into our management code, build Raspberry Pi 4–compatible operating system images, and enhance our billing to cope with multiple models and by-the-hour billing. Then we had to do a file server and network upgrade: serving lots of machines with true gigabit needs more ‘oomph’ than the 100Mbps of Raspberry Pi 3. This also all needed to be backward-compatible so as not to break the existing Raspberry Pi 3 users. On 17 June 2020 we launched, and Raspberry Pi 4 is now ready to order in our cloud.
Is it any good?
Yes. Raspberry Pi is twice as fast as the same-sized instances in AWS, for a quarter of the price. Just see for yourself:
What’s your experience of learning to program? Have you given up and thought it just wasn’t for you? This has been the case for many people — and it’s the focus of a lot of research. Now that teaching programming is in the curriculum in many countries around the world, it’s even more important that we understand what we can do to make learning to program accessible and achievable for all students.
What is cognitive load for learners?
In education, one of the problems thought to cause students difficulty with learning anything — not just programming — is cognitive load. Cognitive load, a concept introduced in the 1980s by John Sweller, has received a lot of attention in the last few years. It is based on the idea that our working memory (the part of our memory that processes what we are currently doing) can only deal with a limited amount of information at any one time. For example, you can imagine that when you are just starting to learn to program, there is an awful lot going on in your working memory, and this can make the task of assimilating it all very challenging; selection, loops, arrays, and objects are all tricky concepts that you need to get to grips with. Cognitive load is a stress on a learner’s working memory, reducing their ability to process and learn new information.
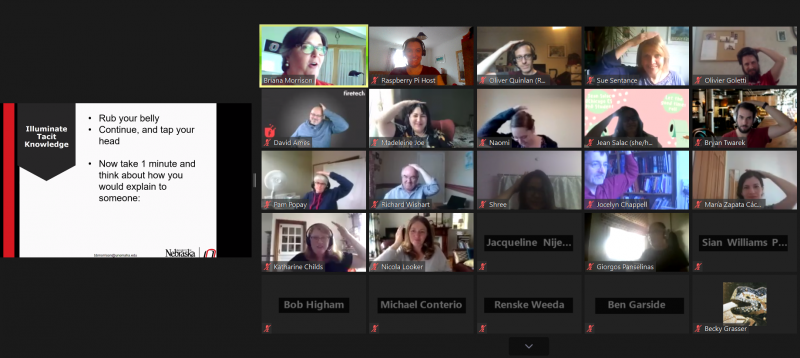
Finding ways of teaching programming that reduce cognitive load is really key for all of us engaged in computing education, so we were delighted to welcome Dr Briana Morrison (University of Nebraska-Omaha) as the speaker at our latest research seminar. Briana’s talk was titled ‘Using subgoal Labels to Reduce Cognitive Load in Introductory Programming’.
The thrust of Briana’s and her colleagues’ research is that, as educators, we can design instructional experiences around computer programming so that they minimise cognitive load. Using worked examples with subgoal labels is one approach that has been shown to help a lot with this.
Subgoal labels help students memorise and generalise
Think back to the way you may have learned mathematics: in maths, worked examples are often used to demonstrate how to solve a problem step by step. The same can be done when teaching programming. For example, if we want to write a loop in Python, the teacher can show us a step-by-step approach using an example, and we can then apply this approach to our own task. Sounds reasonable, right?
What subgoal labels add is that, rather than just calling the steps of the worked example ‘Step 1’, ‘Step 2’, etc., the teacher uses memorable labels. For example, a subgoal label might be ‘define and initialise variables’. Such labels not only help us to remember, but more importantly, they help us to generalise the teacher’s example and grasp how to use it for many other applications.
Subgoal labels help students perform better
In her talk, Briana gave us examples of subgoal labels in use and explained how to write subgoal labels, as well as how to work with subject experts to find the best subgoal labels for a particular programming construct or area of teaching. She also shared with us some very impressive results from her team’s research examining the impact of this teaching approach.
Briana and her colleagues have carried out robust studies comparing students who were taught using subgoals with students who weren’t. The study she discussed in the seminar involved 307 students; students in the group that learned with worked examples containing subgoal labels gave more complete answers to questions, and showed that they could understand the programming constructs at a higher level, than students who learned with worked examples that didn’t contain the subgoal labels. The study also found that the impact of subgoal labels was even more marked for students in at-risk groups (i.e. students at risk of performing badly or of dropping out).
It seems that this teaching approach works really well. The study’s participants were students in introductory computer science classes at university, so it would be interesting to see whether these results can be replicated at school level, where arguably cognitive load is even more of an issue.
Briana’s seminar was very well received, with attendees asking lots of questions about the details of the research and how it could be replicated. Her talk even included some audience participation, which got us all tapping our heads and rubbing our bellies!
Very helpfully, Briana shared a list of resources related to subgoal labels, which you can access via her talk slides on our seminars page.
If you missed the seminar, you can find Briana’s presentation slides on our seminars page, where we’ll also soon upload a recording of her talk.
In our next seminar on Tuesday 14 July at 17:00–18:00 BST / 12:00–13:00 EDT / 9:00–10:00 PDT / 18:00–19:00 CEST, we’ll welcome Maria Zapata, Universidad Rey Juan Carlos, Madrid, who will be talking about computational thinking and how we can assess the computational thinking skills of very young children. To join the seminar, simply sign up with your name and email address and we’ll email you the link and instructions. If you attended Briana’s seminar, the link remains the same.