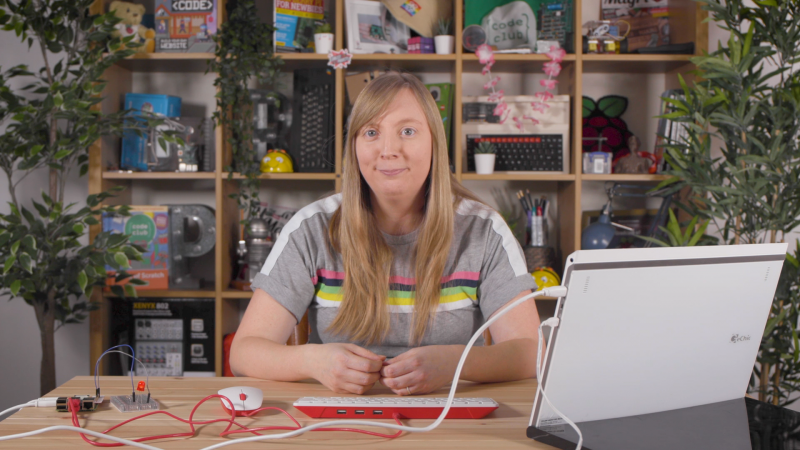
We are delighted to share the news that Carrie Anne Philbin, Raspberry Pi’s Director of Educator Support, has been awarded an MBE for her services to education in the Queen’s Birthday Honours 2020.
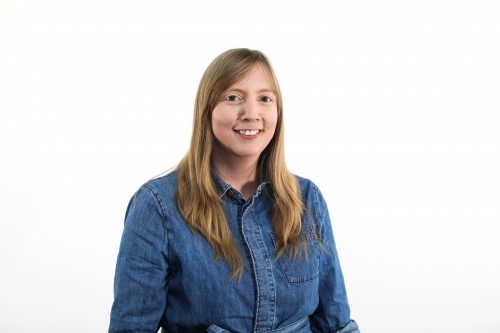
Carrie Anne Philbin, newly minted MBE
Carrie Anne was one of the first employees of the Raspberry Pi Foundation and has helped shape our educational programmes over the past six years. Before joining the Foundation, Carrie Anne was a computing teacher, YouTuber, and author.
She’s also a tireless champion for diversity and inclusion in computing; she co-founded a grassroots movement of computing teachers dedicated to diversity and inclusion, and she has mentored young girls and students from disadvantaged backgrounds. She is a fantastic role model and source of inspiration to her colleagues, educators, and young people.
From history student to computing teacher and YouTuber
As a young girl, Carrie Anne enjoyed arts and crafts and when her dad bought the family a Commodore 64, she loved the graphics she could make on it. She says, “I vividly remember typing in the BASIC commands to create a train that moved on the screen with my dad.” Being able to express her creativity through digital patterns sparked her interest in technology.
After studying history at university, Carrie Anne followed her passion for technology and became an ICT technician at a secondary school, where she also ran several extra-curricular computing clubs for the students. Her school encouraged and supported her to apply for the Graduate Teacher Programme, and she qualified within two years.
Carrie Anne admits that her first experience in a new school as a newly qualified teacher was “pretty terrifying”, and she says her passion for the subject and her sense of humour are what got her through. The students she taught in her classroom still inspire her today.
Showing that computing is for everyone
As well as co-founding CAS #include, a diversity working group for computing teachers, Carrie Anne started the successful YouTube channel Geek Gurl Diaries. Through video interviews with women working in tech and hands-on computer science tutorials, Carrie Anne demonstrates that computing is fun and that it’s great to be a girl who likes computers.
On the back of her own YouTube channel’s success, Carrie Anne was invited to host the Computer Science video series on Crash Course, the extremely popular educational YouTube channel created by Hank and John Green. There, her 40+ videos have received over 2 million views so far.
Discovering the Raspberry Pi Foundation
Carrie Anne says that the Raspberry Pi computer brought her to the Raspberry Pi Foundation, and that she stayed “because of the community and the Foundation’s mission“. She came across the Raspberry Pi while searching for new ways to engage her students in computing, and joined a long waiting list to get her hands on the single-board computer. After her Raspberry Pi finally arrived, she carried it in her handbag to community meetups to learn how other people were using it in education.
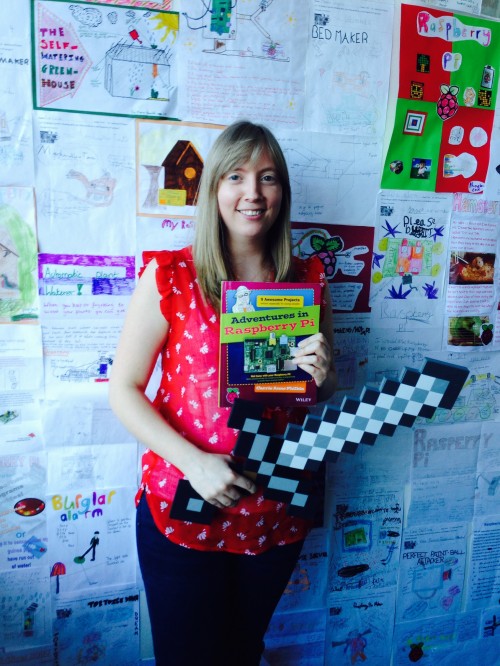
Carrie Anne with her book Adventures in Raspberry Pi
Since joining the Foundation, Carrie Anne has helped to build an incredible team, many of them also former computing teachers. Together they have trained thousands of educators and produced excellent resources that are used by teachers and learners around the world. Most recently, the team created the Teach Computing Curriculum of over 500 hours of free teaching resources for primary and secondary teachers; free online video lessons for students learning at home during the pandemic (in partnership with Oak National Academy); and Isaac Computer Science, a free online learning platform for A level teachers and students.
On what she wants to empower young people to do
Carrie Anne says, “We’re living in an ever-changing world that is facing many challenges right now: climate change, democracy and human rights, oh and a global pandemic. These are issues that young people care about. I’ve witnessed this year after year at our international Coolest Projects technology showcase event for young people, where passionate young creators present the tech solutions they are already building to address today’s and tomorrow’s problems. I believe that equipped with a deeper understanding of technology, young people can change the world for the better, in ways we’ve not even imagined.”
Carrie Anne has already achieved a huge amount in her career, and we honestly believe that she is only just getting started. On behalf of all your colleagues at the Foundation and all the educators and young people whose lives you’ve changed, congratulations Carrie Anne!
Have you perfected your particular combination of ‘eye widening then squinting’ to let people know you’re smiling at them behind your mask? Or do you need help expressing yourself from this text-scrolling creation by Caroline Dunn?
The mask running colourful sample code
What’s it made of?
The main bits of hardware need are a Raspberry Pi 3 or Raspberry Pi 4 or Raspberry Pi Zero W (or a Zero WH with pre-soldered GPIO header if you don’t want to do soldering yourself), and an 8×8 Flexible NeoPixel Matrix with individually addressable LEDs. The latter is a two-dimensional grid of NeoPixels, all controlled via a single microcontroller pin.
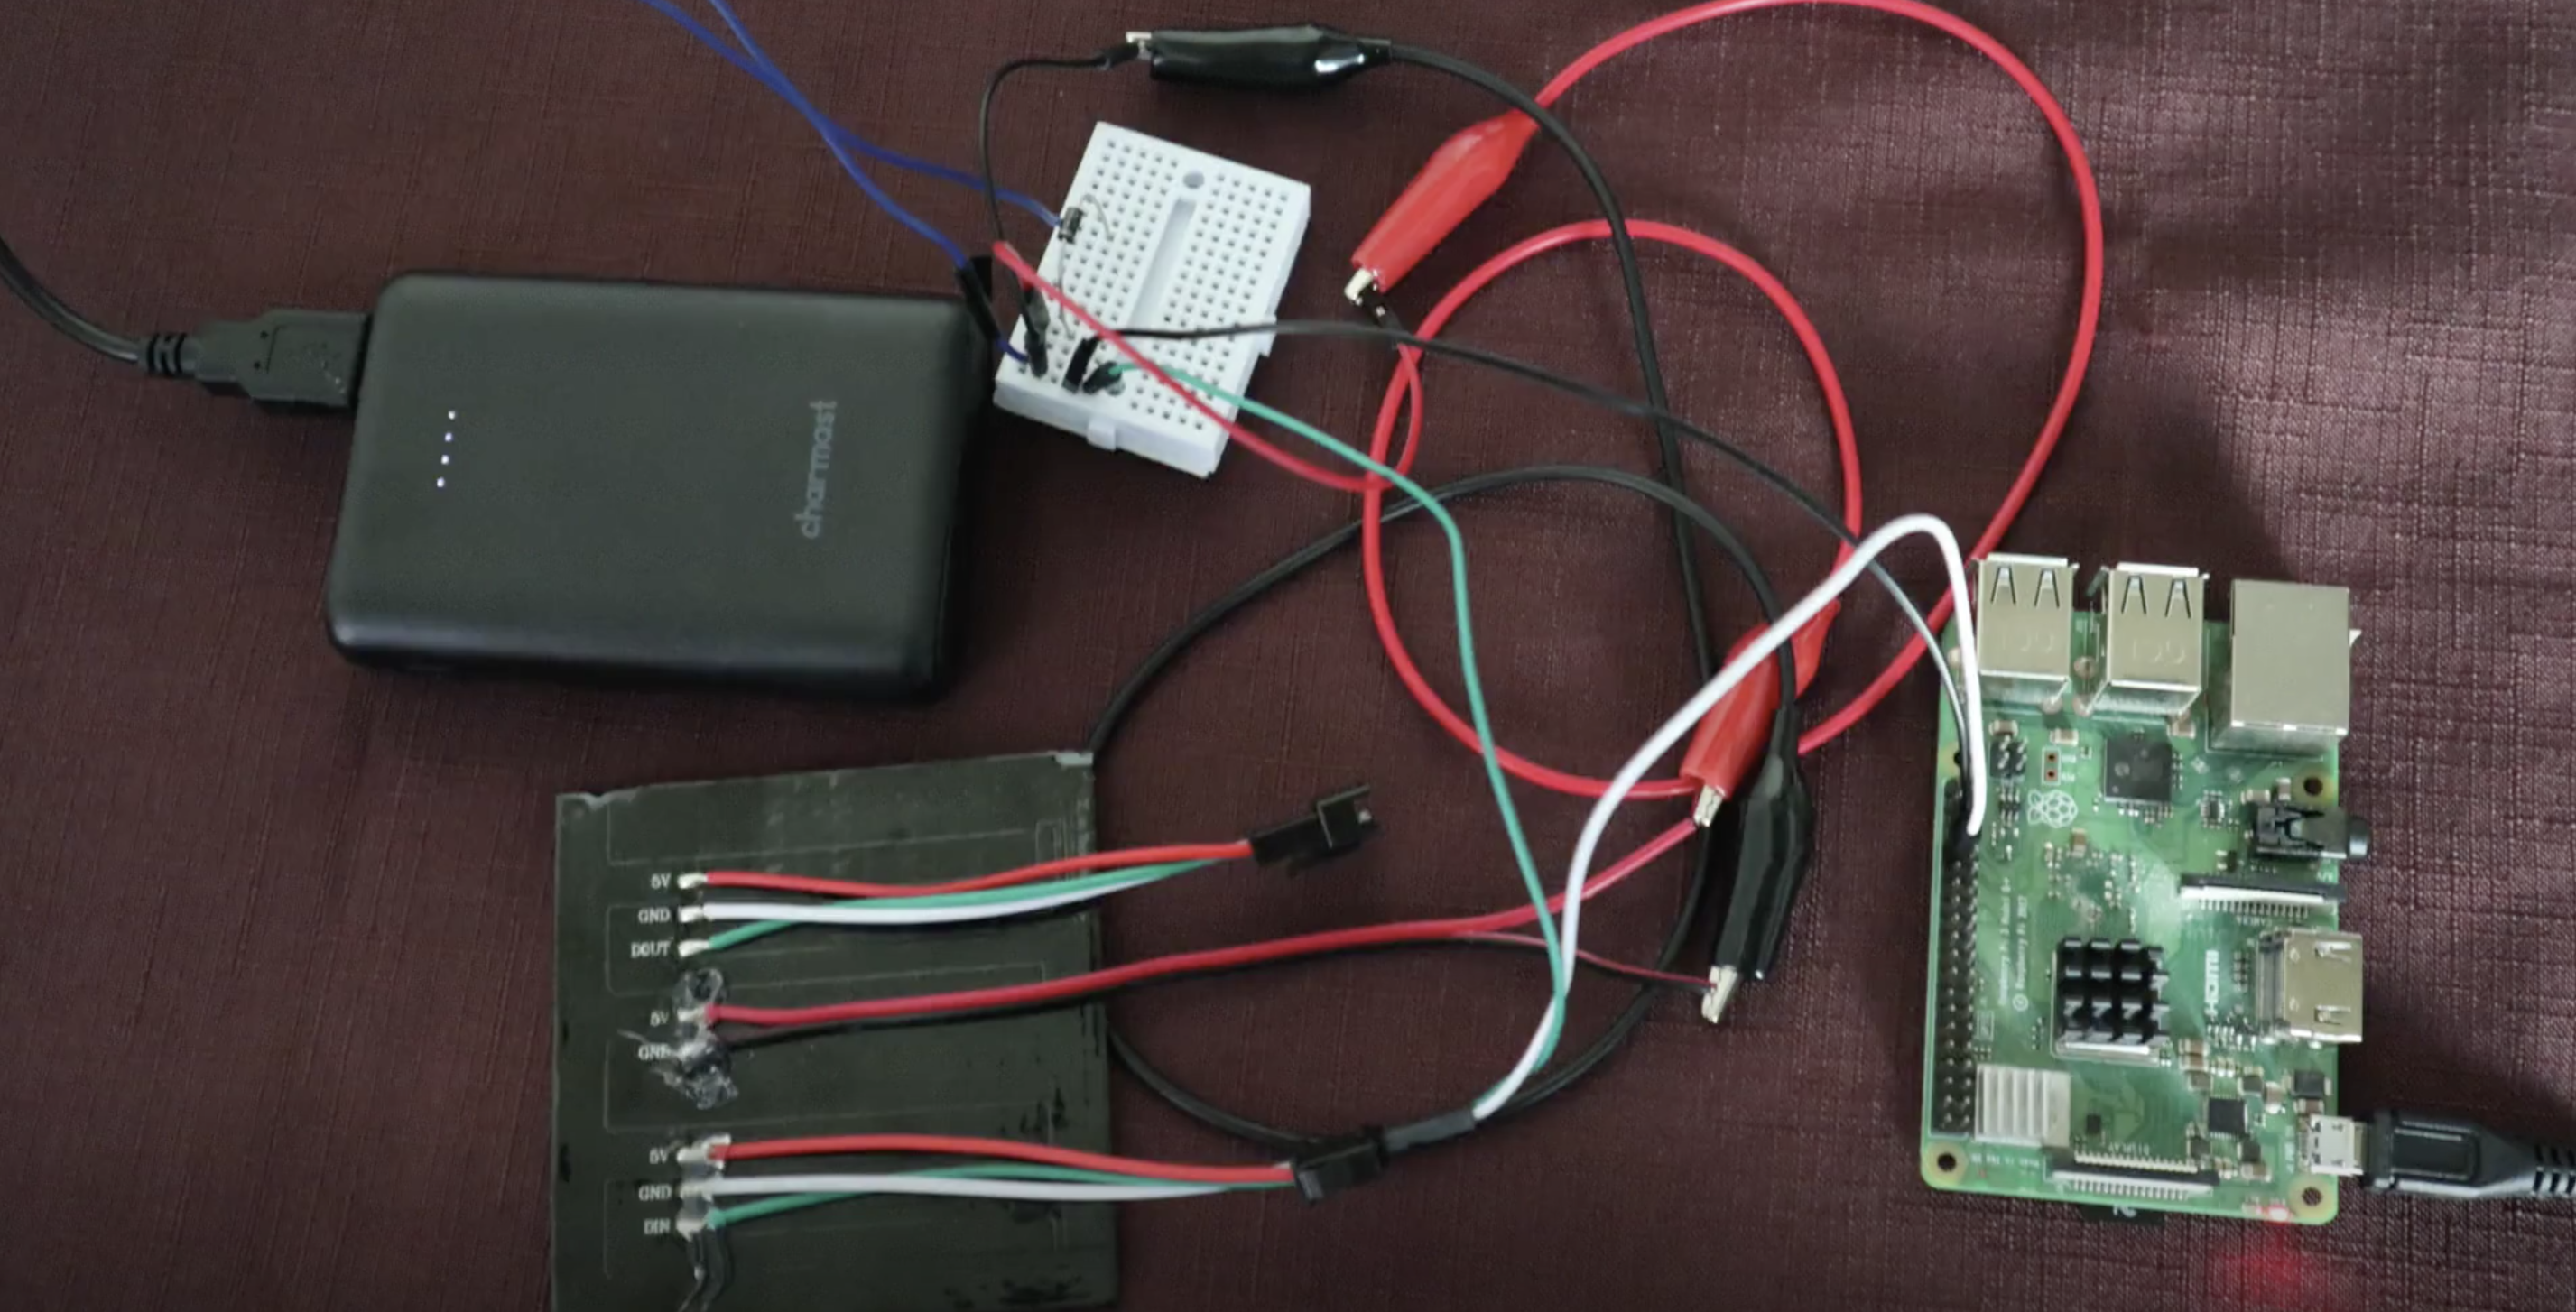
Raspberry Pi and the NeoPixel Matrix (bottom left) getting wired up
The NeoPixel Matrix is attached to a cloth face that which has a second translucent fabric layer. The translucent layer is to sew your Raspberry Pi project to, the cloth layer underneath is a barrier for germs.
You’ll need a separate 5V power source for the NeoPixel Matrix. Caroline used a 5V power bank, which involved some extra fiddling with cutting up and stripping an old USB cable. You may want to go for a purpose-made traditional power supply for ease.
Running the text
To prototype, Caroline connected the Raspberry Pi computer to the NeoPixel Matrix via a breadboard and some jumper wires. At this stage of your own build, you check everything is working by running this sample code from Adafruit, which should get your NeoPixel Matrix lighting up like a rainbow.
The internal website on the left
Once you’ve got your project up and running, you can ditch the breadboard and wires and set up the key script, app.py, to run on boot.
Going mobile
To change the text scrolling across your mask, you use the internal website that’s part of Caroline’s code.
And for a truly mobile solution, you can access the internal website via mobile phone by hooking up your Raspberry Pi using your phone’s hotspot functionality. Then you can alter the scrolling text while you’re out and about.
Caroline wearing the 32×8 version
Caroline also created a version of her project using a 32×8 Neopixel Matrix, which fits on the across the headband of larger plastic face visors.
If you want to make this build for yourself, you’d do well to start with the very nice in-depth walkthrough Caroline created. It’s only three parts; you’ll be fine.
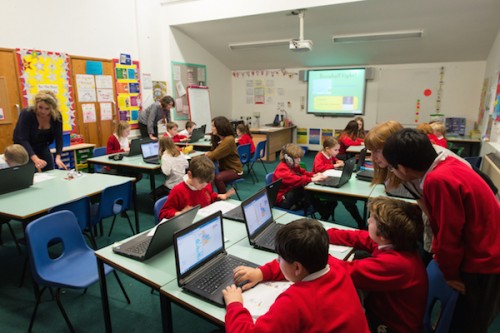
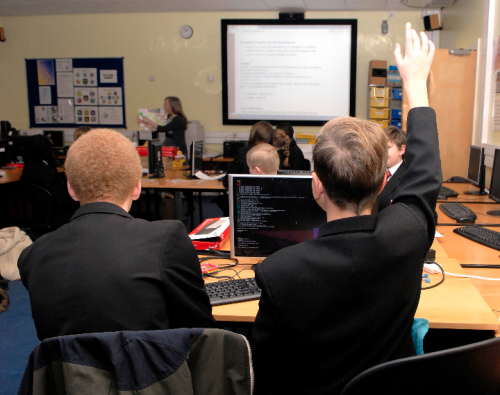
Since 2017 we’ve been training Computing educators in England and around the world through our suite of free online courses on FutureLearn. Thanks to support from Google and the National Centre for Computing Education (NCCE), all of these courses are free for anyone to take, whether you are a teacher or not!
We’re excited that Computer Science educators at all stages in their computing journey have embraced our courses — from teachers just moving into the field to experienced educators looking for a refresher so that they can better support their colleagues.
Hear from two teachers about their experience of training with our courses and how they are benefitting!
Moving from Languages to IT to Computing
Rebecca Connell started out as a Modern Foreign Languages teacher, but now she is Head of Computing at The Cowplain School, a 11–16 secondary school in Hampshire.
Computing teacher Rebecca finds our courses “really useful in building confidence and taking [her] skills further”.
Although she had plenty of experience with Microsoft Office and was happy teaching IT, at first she was daunted by the technical nature of Computing:
“The biggest challenge for me has been the move away from an IT to a Computing curriculum. To say this has been a steep learning curve is an understatement!”
However, Rebecca has worked with our courses to improve her coding knowledge, especially in Python:
“Initially, I undertook some one-day programming courses in Python. Recently, I have found the Raspberry Pi courses to be really useful in building confidence and taking my skills further. So far, I have completed Programming 101 — great for revision and teaching ideas — and am now into Programming 102.”
GCSE Computing is more than just programming, and our courses are helping Rebecca develop the rest of her Computing knowledge too:
“I am now taking some online Raspberry Pi courses on computer systems and networks to firm up my knowledge — my greatest fear is saying something that’s not strictly accurate! These courses have some good ideas to help explain complex concepts to students.”
“I really like the new resources and supporting materials from Raspberry Pi — these have really helped me to look again at our curriculum. They are easy to follow and include everything you need to take students forward, including lesson plans.”
And Rebecca’s not the only one in her department who is benefitting from our courses and resources:
“Our department is supported by an excellent PE teacher who delivers lessons in Years 7, 8, and 9. She has enjoyed completing some of the Raspberry Pi courses to help her to deliver the new curriculum and is also enjoying her learning journey.”
Refreshing and sharing your knowledge
Julie Price, a CAS Master Teacher and NCCE Computer Science Champion, has been “engaging with the NCCE’s Computer Science Accelerator programme, [to] be in a better position to appreciate and help to resolve any issues raised by fellow participants.”
Computer science teacher Julie Price says she is “becoming addicted” to our online courses!
“I have encountered new learning for myself and also expressions of very familiar content which I have found to be seriously impressive and, in some cases, just amazing. I must say that I am becoming addicted to the Raspberry Pi Foundation’s online courses!”
She’s been appreciating the open nature of the courses, as we make all of the materials free to use under the Open Government Licence:
“Already I have made very good use of a wide range of the videos, animations, images, and ideas from the Foundation’s courses.”
With 29 courses to choose from (and more on the way!), from Introduction to Web Development to Robotics with Raspberry Pi, we have something for everyone — whether you’re a complete beginner or an experienced computer science teacher. All of our courses are free to take, so find one that inspires you, and let us support you on your computing journey, along with Google and the NCCE.
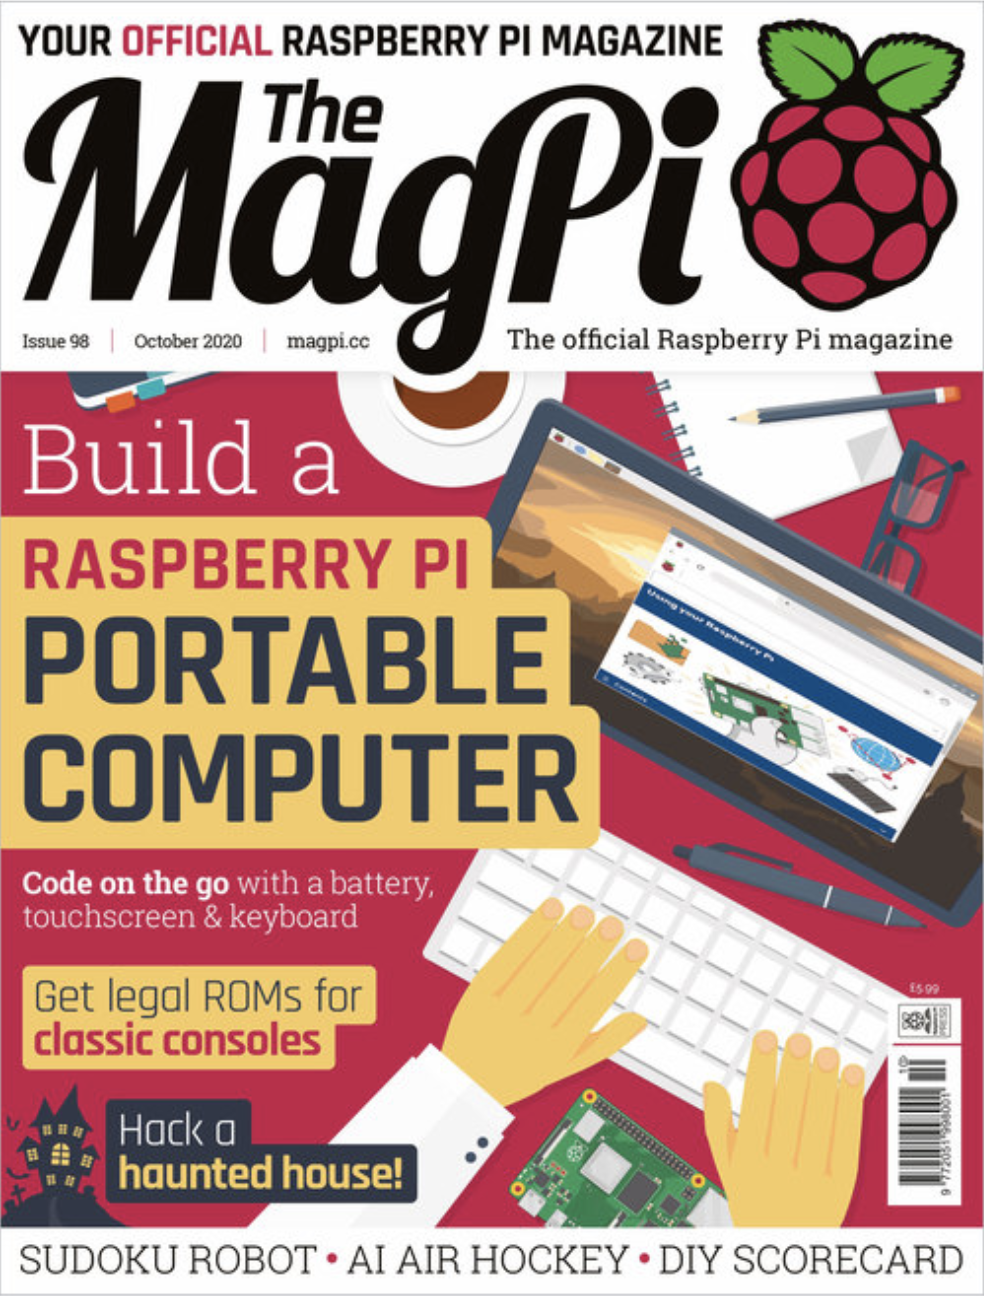
Spookify your home in time for Halloween with Rob Zwetsloot and these terror-ific projects!
We picked four of our favourites from a much longer feature in the latest issue of The MagPi magazine, so make sure you check it out if you need more Haunted House hacks in your life.
Raspberry Pi Haunted House
This project is a bit of a mixture of indoors and outdoors, with a doorbell on the house activating a series of spooky effects like a creaking door, ‘malfunctioning’ porch lights, and finally a big old monster mash in the garage.
MagPi magazine talked to its creator Stewart Watkiss about it a few years ago and he revealed how he used a PiFace HAT to interface with home automation techniques to create the scary show, although it can be made much easier these days thanks to Energenie. Our favourite part, though, is still the Home Alone-esque monster party that caps it off.
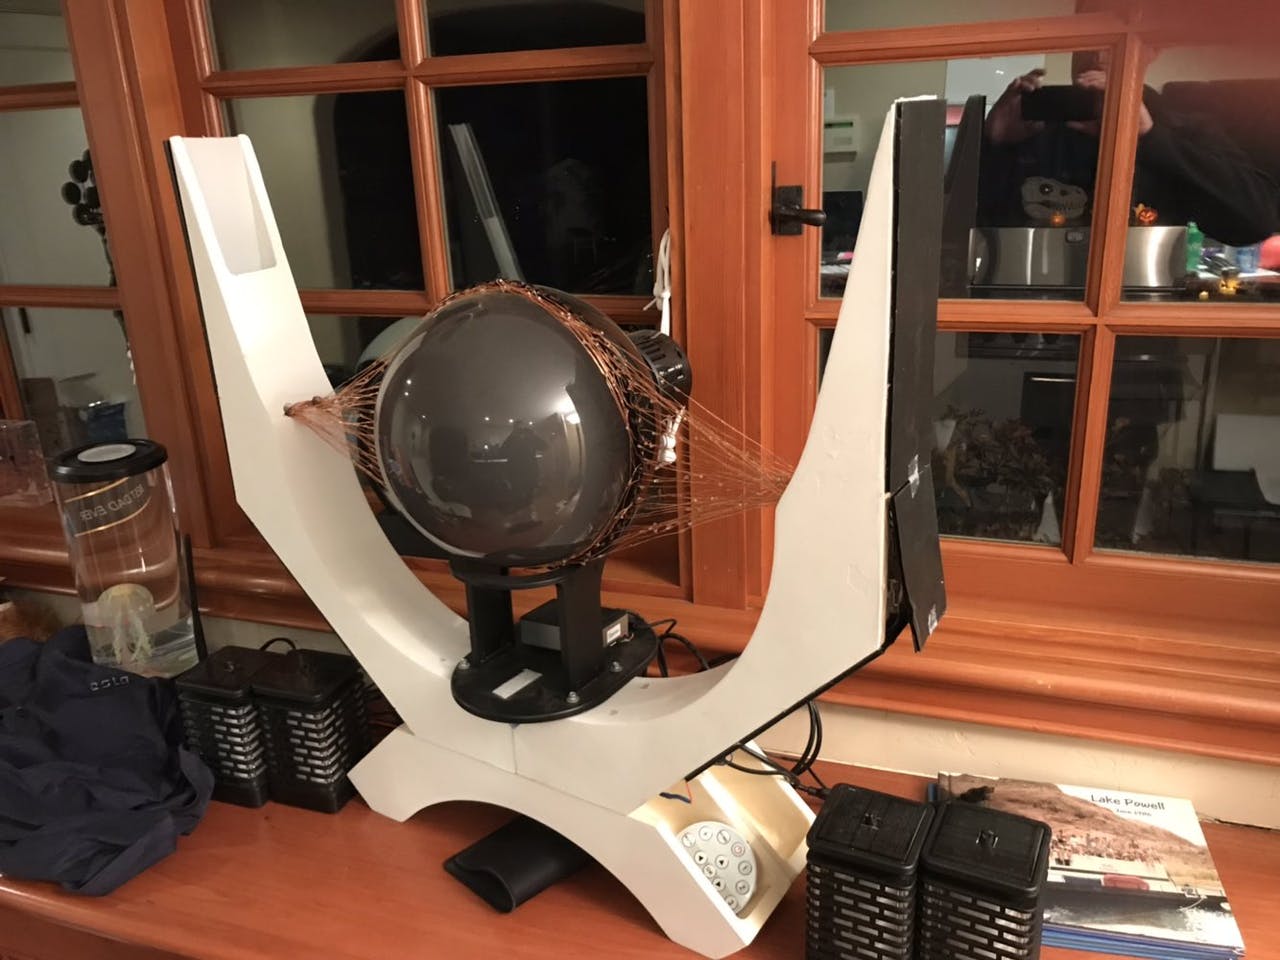
The dreaded dark lord Sauron from Lord of the Rings watched over Middle-earth in the form of a giant flaming eye atop his black tower, Barad-dûr. Mike Christian’s version sits on top of a shed in Saratoga, CA.
Atop the shed with some extra light effects, it looks very scary
It makes use of the Snake Eyes Bonnet from Adafruit, with some code modifications and projecting onto a bigger eye. Throw in some cool lights and copper wires and you get a nice little effect, much like that from the films.
We love the eyes and scary sounds in this version that seem to follow you around
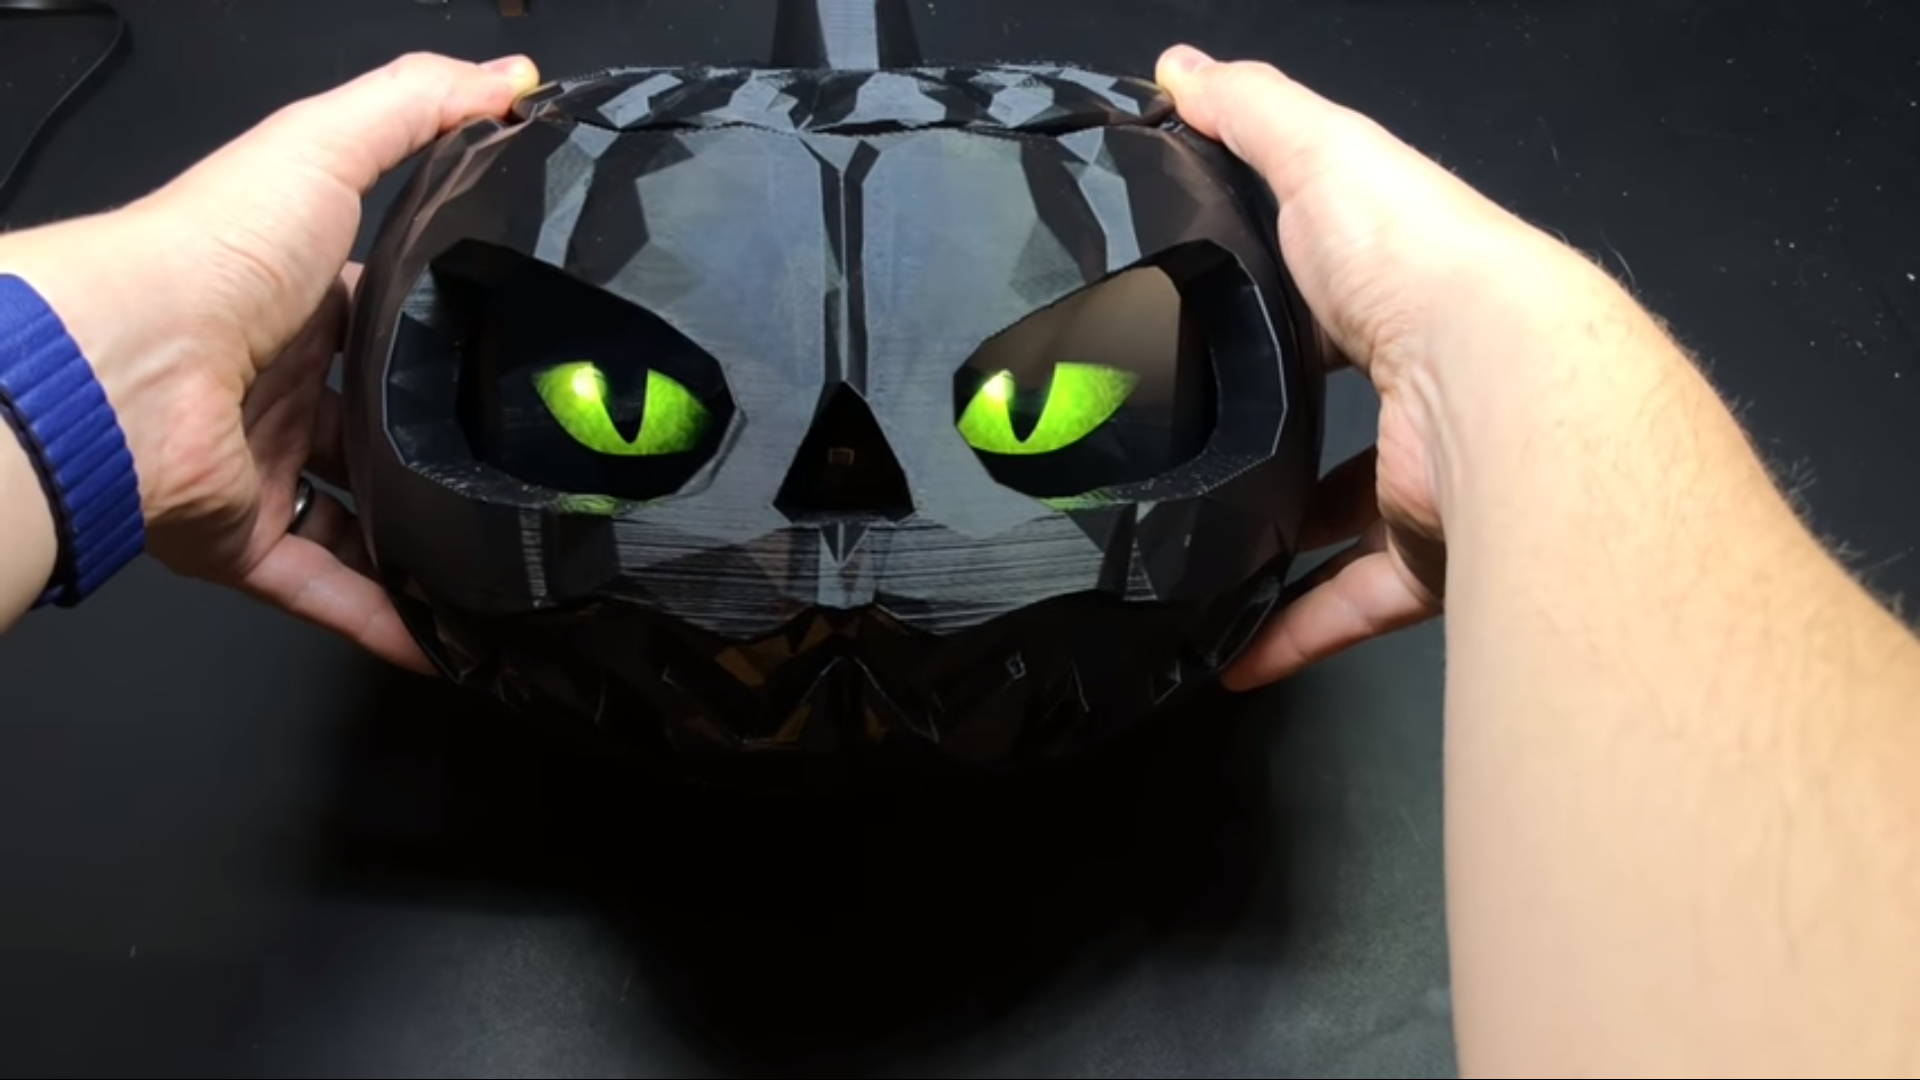
A classic indoor Halloween decoration (and outdoor, according to American movies) is the humble Jack-o’-lantern. While you could carve your own for this kind of project (and we’ve seen many people do so), this version uses a pre-cut, 3D-printed pumpkin.
The original 3D print lit with a single source is still fairly scary
If you want to put one outside as well, we highly recommend you add some waterproofing or put it under a porch of some kind, especially if you live in the UK.
You’re unlikely to trick someone already in your house with a random door that has appeared out of nowhere, but while they’re investigating they’ll get the scare of their life. This door was created as a ‘sequel’ to a Scary Porch, and has a big monitor where a window might be in the door. There’s also an array of air-pistons just behind the door to make it sound like someone is trying to get out.
There are various videos that can play on the door screen, and they’re randomised so any viewers won’t know what to expect. This one also uses relays, so be careful.
This project is the brainchild of the element14 community and you can read more about how it was made here.
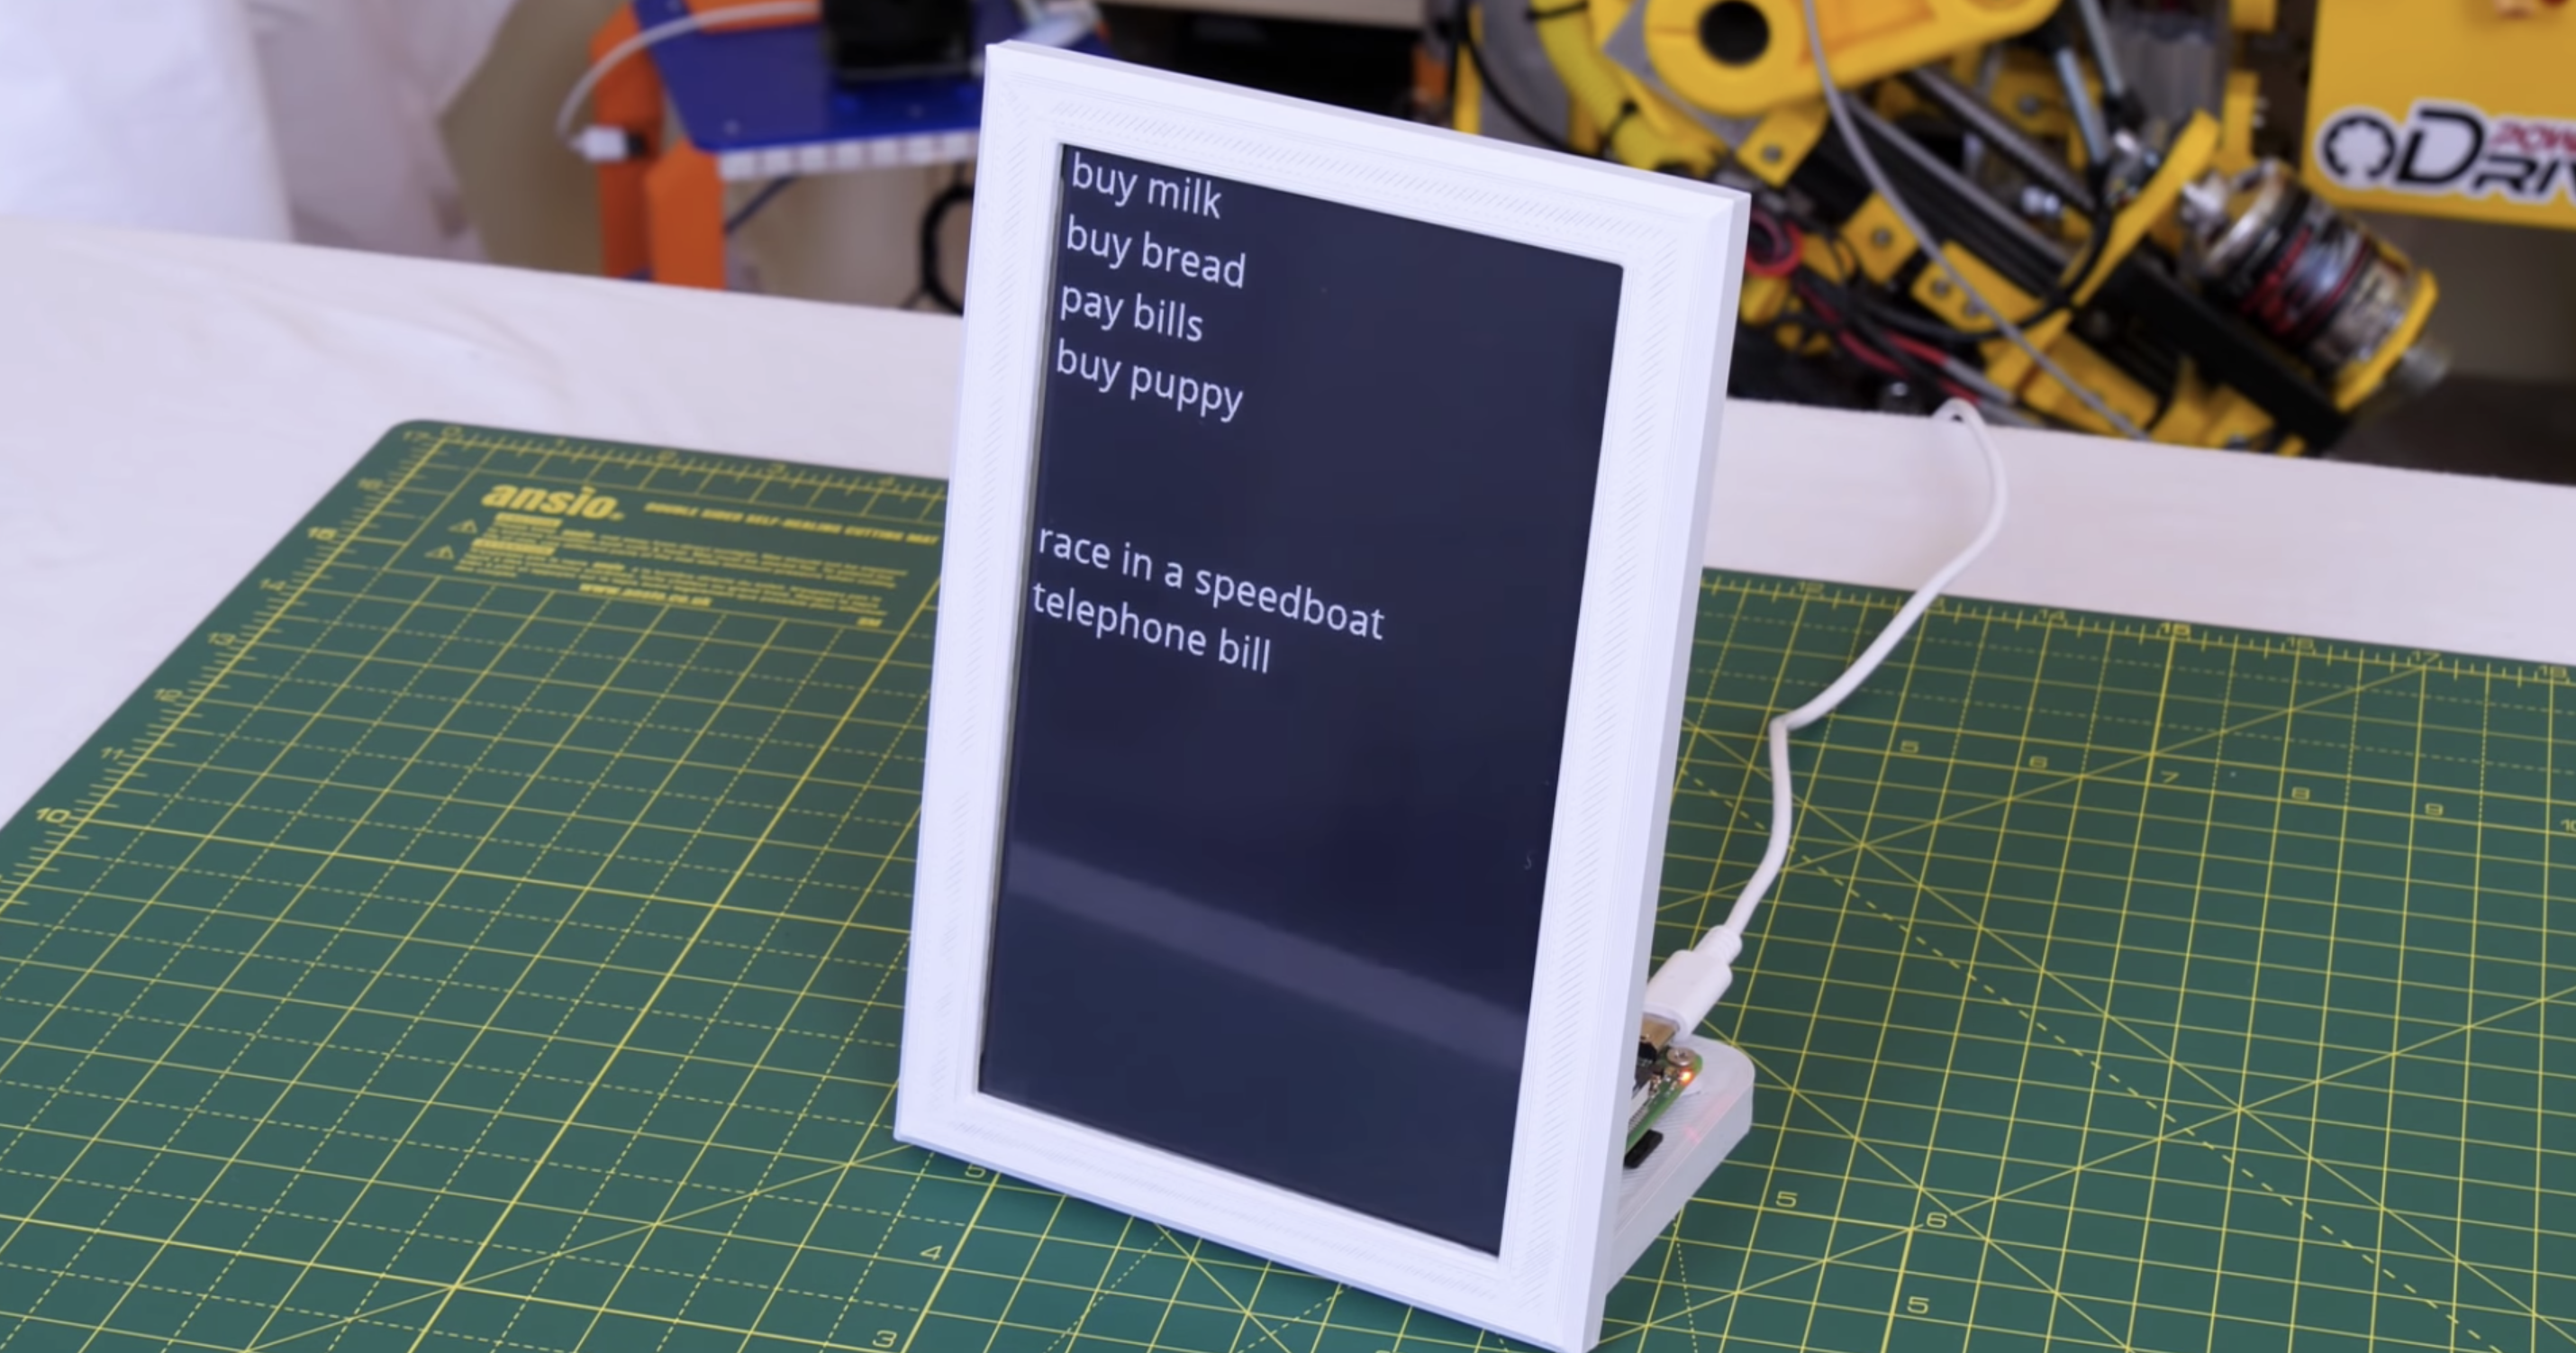
James Bruxton (or @xrobotosuk on Instagram) built an IoT-controlled e-paper message board using Raspberry Pi. Updating it is easy: just edit a Google sheet, and the message board will update with the new data.
Harnessing Google power
This smart message board uses e-paper, which has very low power consumption. Combining this with the Google Docs API (which allows you to write code to read and write to Google Docs) and Raspberry Pi makes it possible to build a message board that polls a Google Sheet and updates whenever there’s new data. This guide helped James write the Google Docs API code.
We’ll do #4 for you, James!
Why e-paper?
James’s original plan was to hook up his Raspberry Pi to a standard monitor and use Google Docs so people could update the display via mobile app. However, a standard monitor consumes a lot of power, due to its backlight, and if you set it to go into sleep mode, people would just walk past it and not see updates to the list unless they remember to wake the device up.
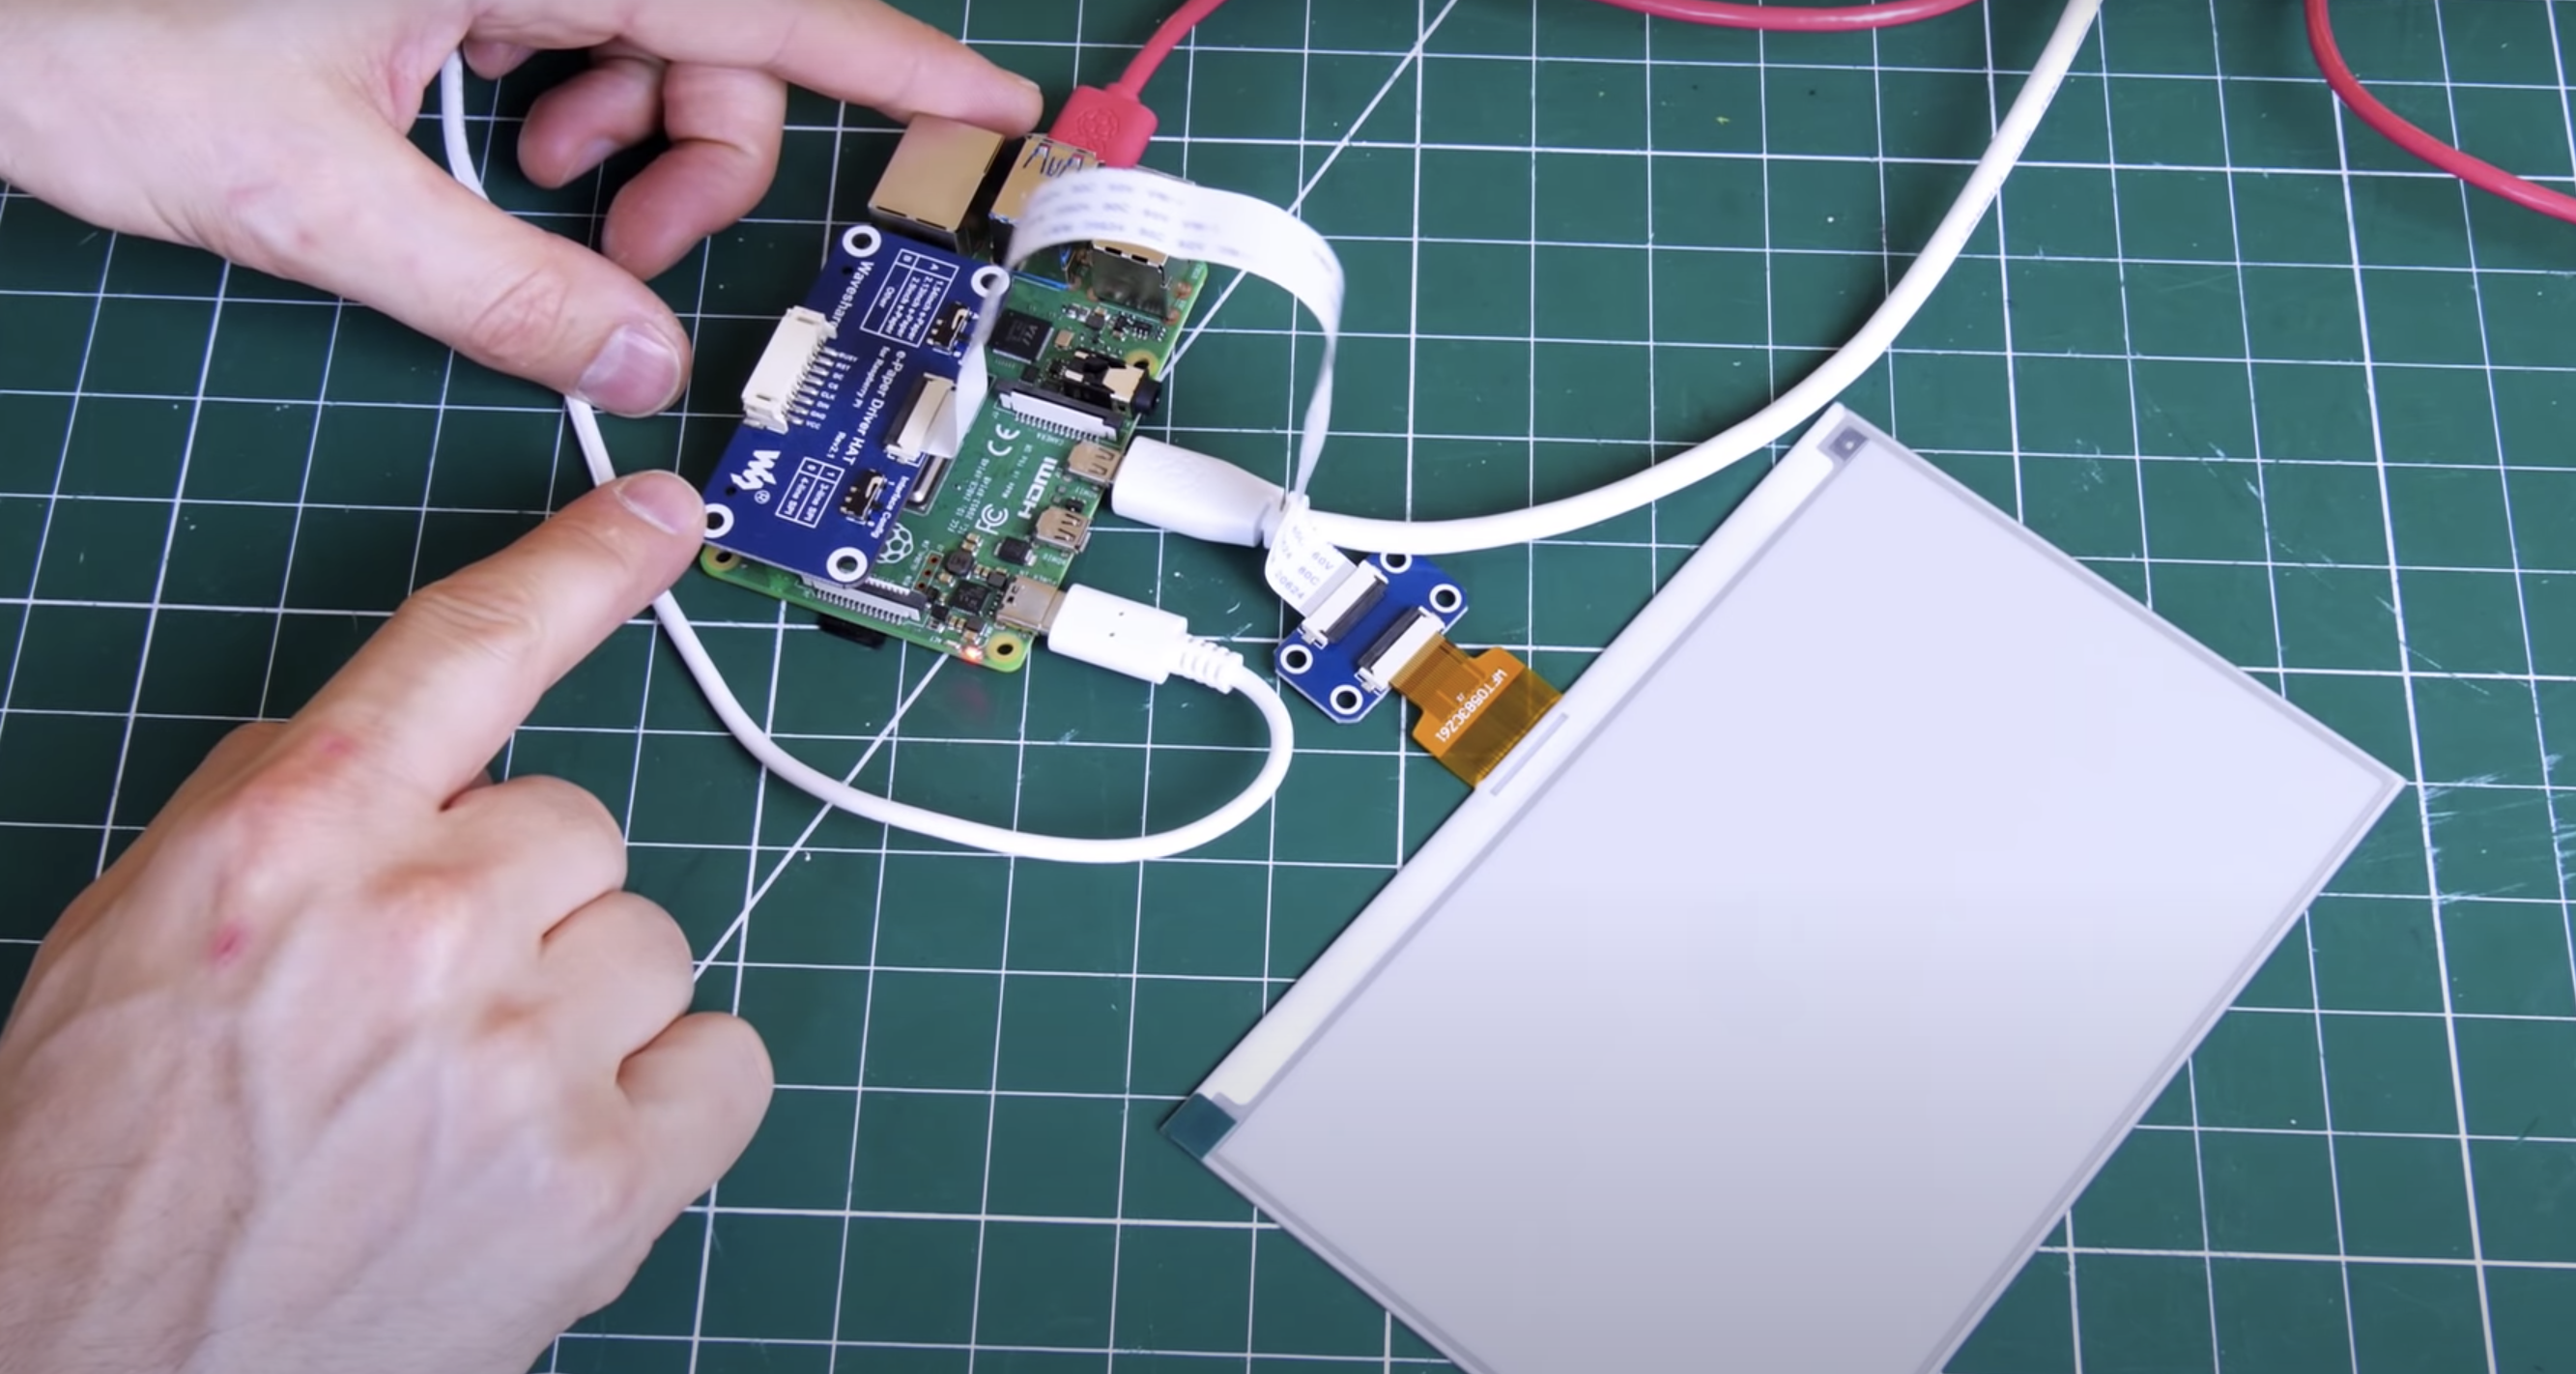
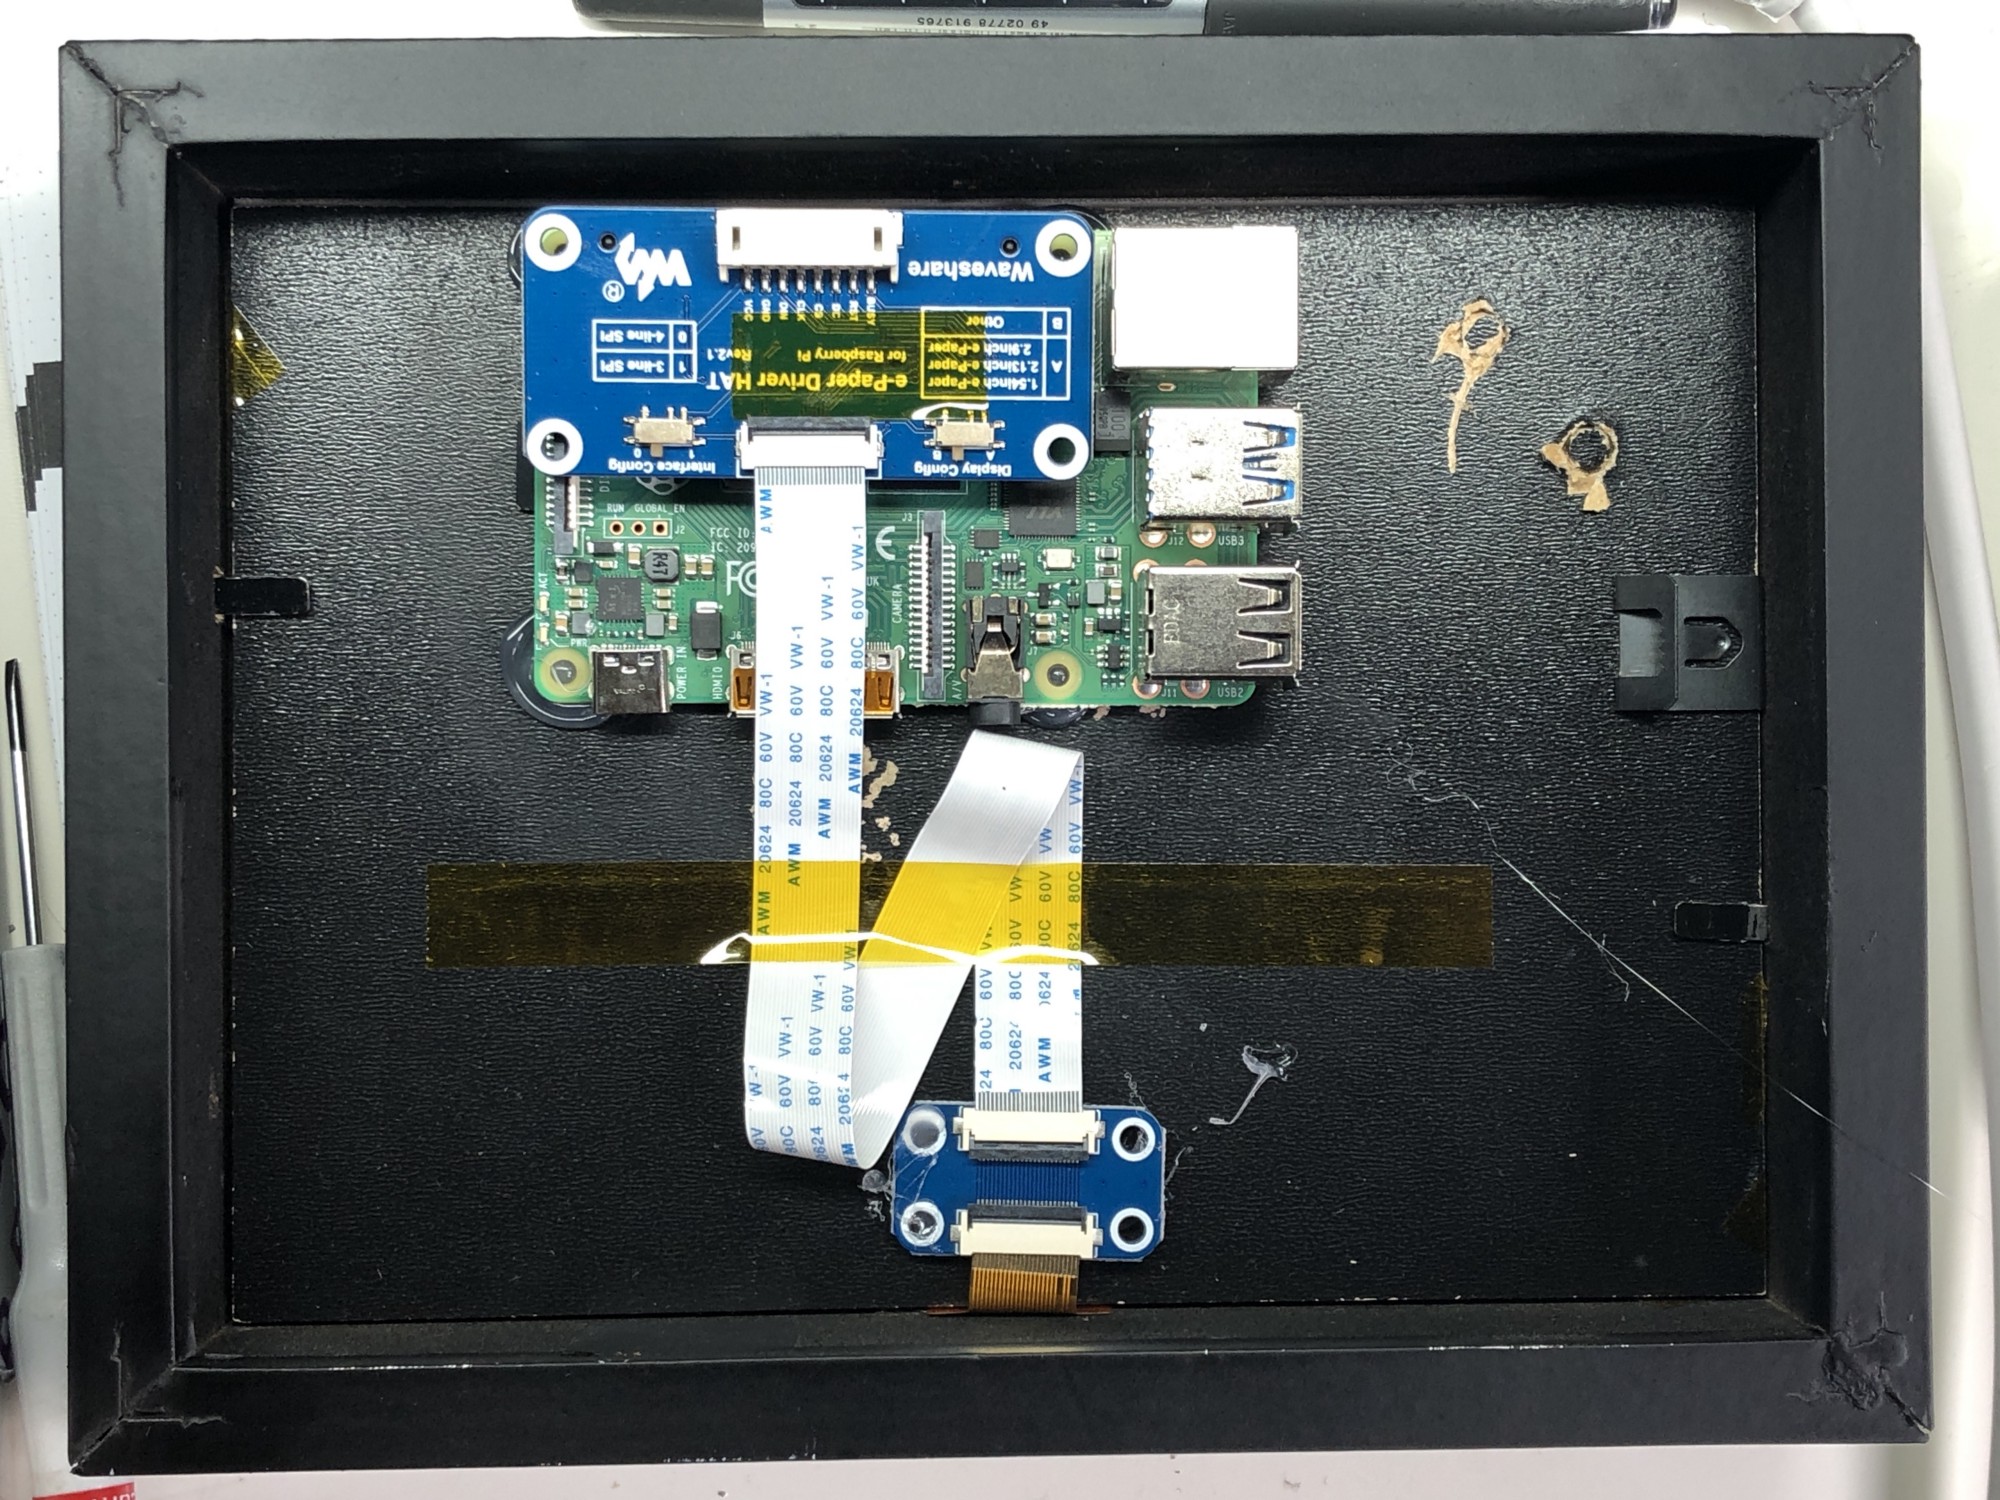
Raspberry Pi wearing its blue e-paper HAT on the left, which connects to the display on the right via a ribbon cable
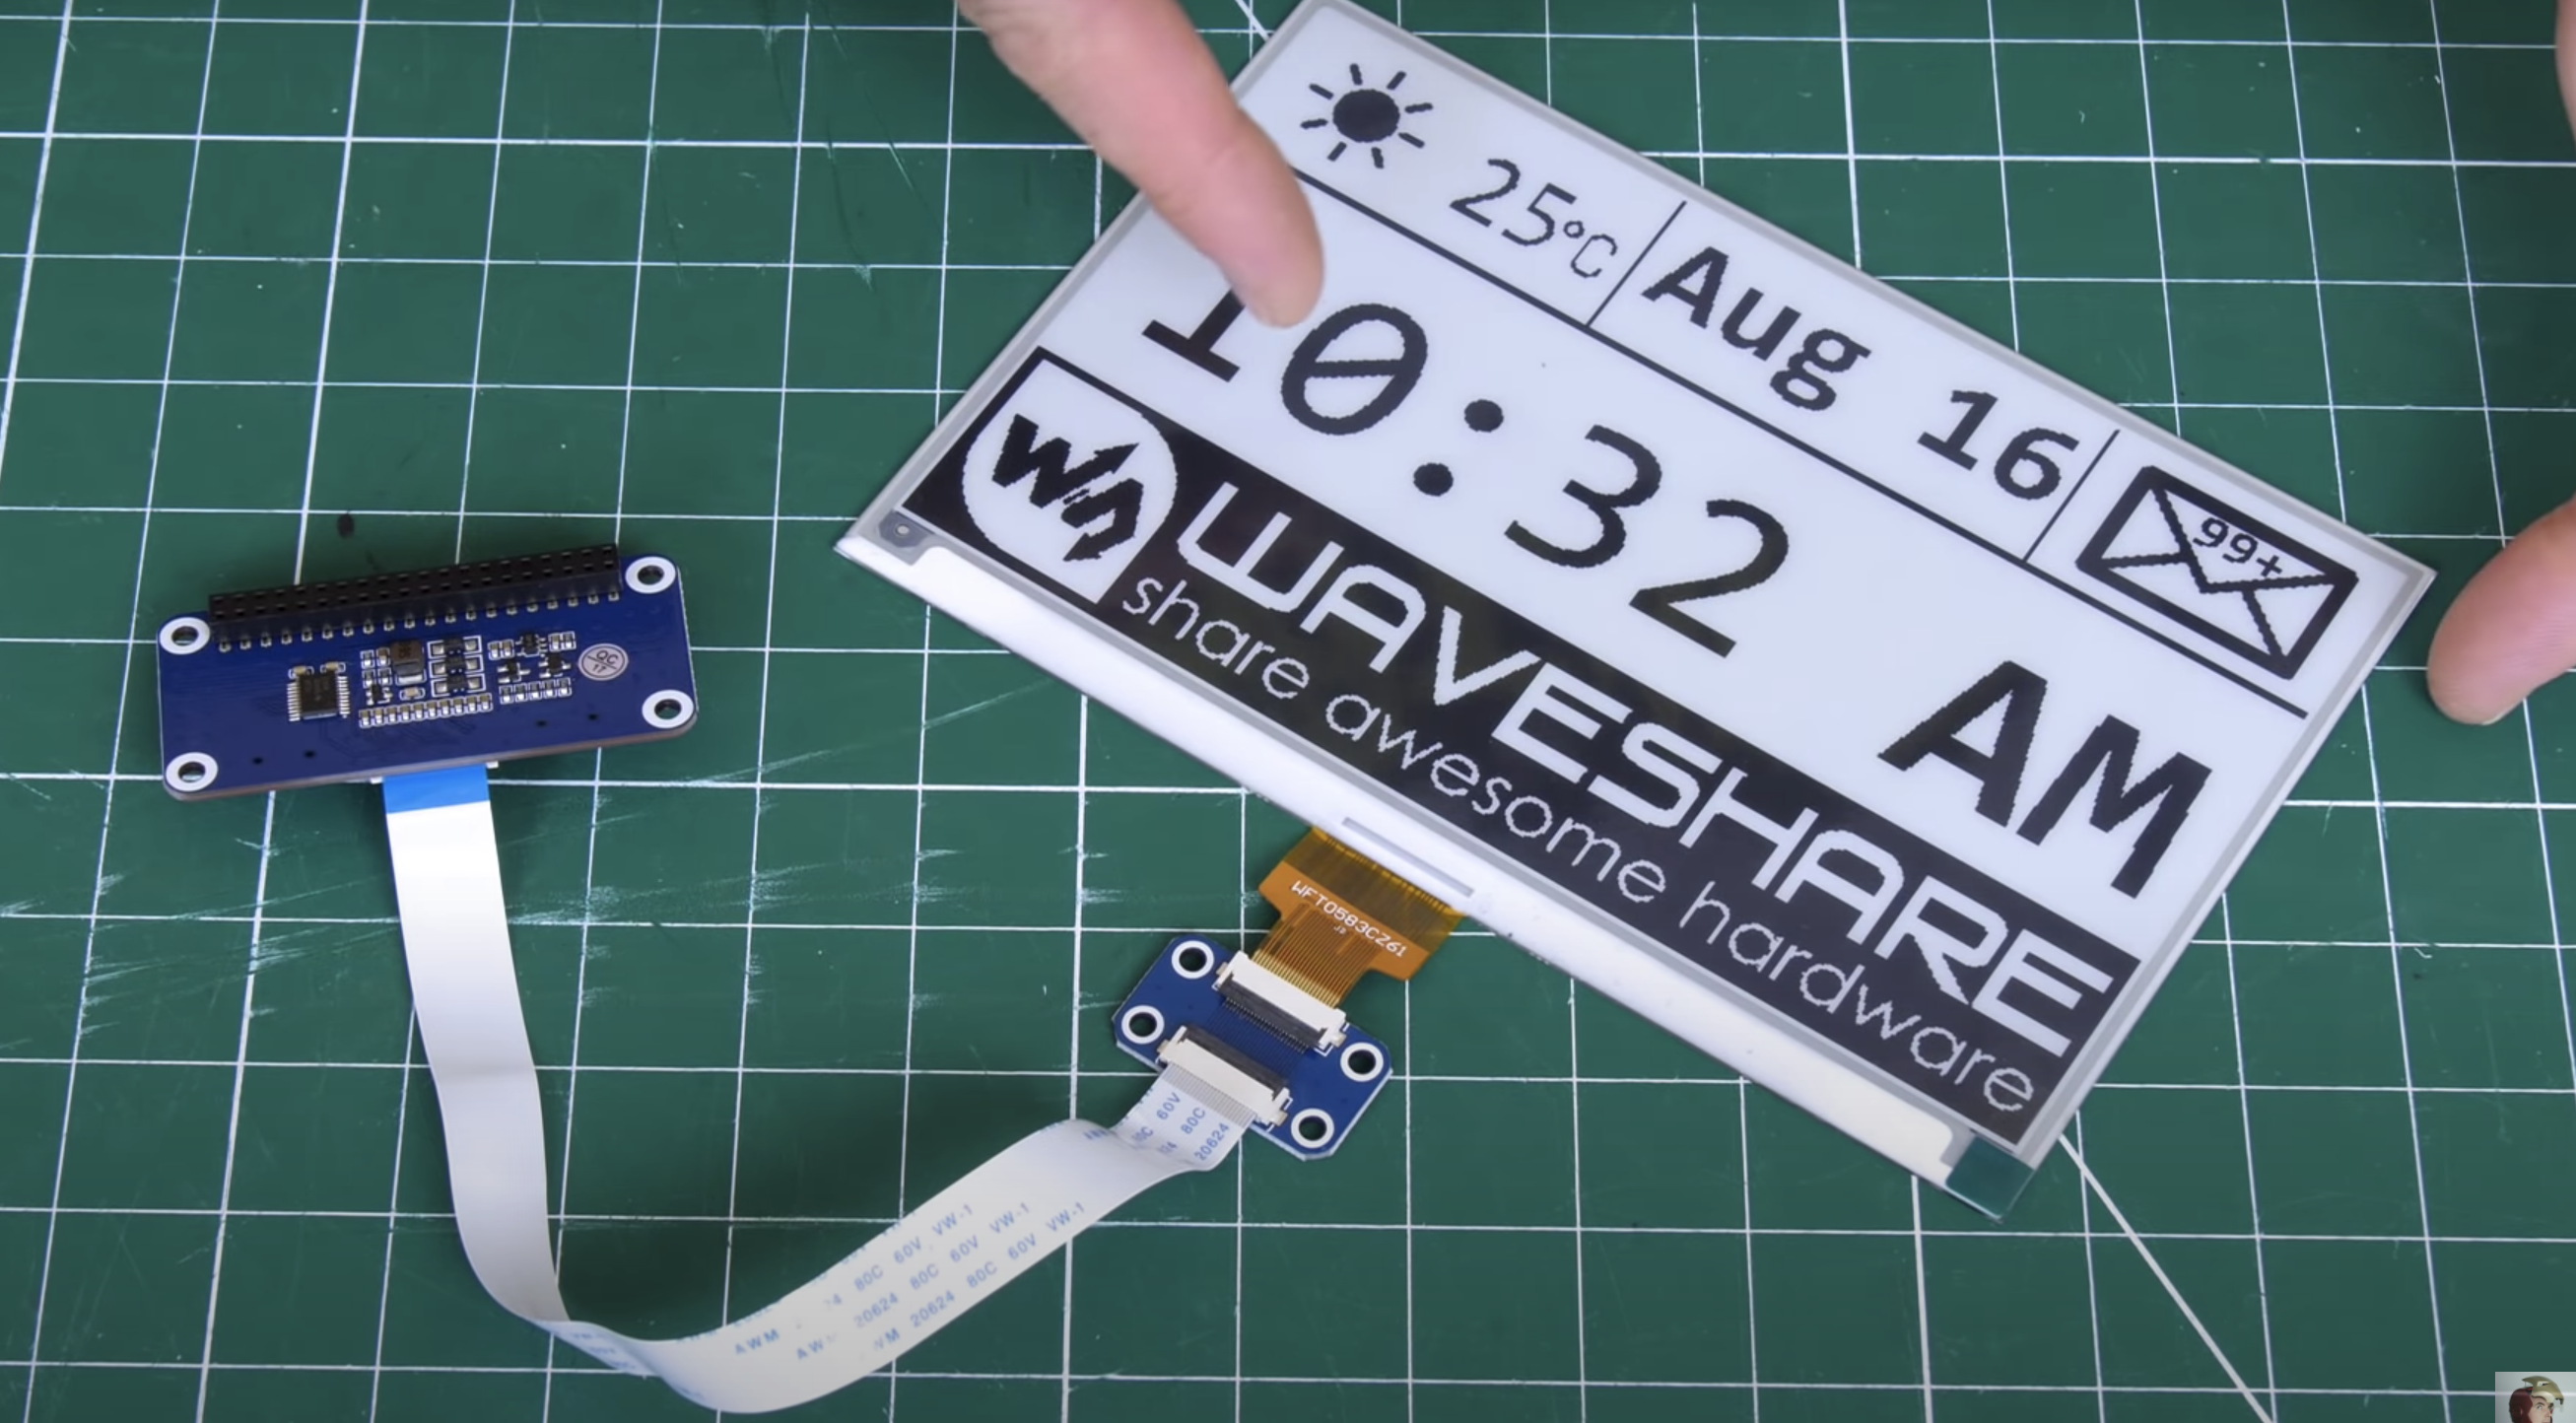
Enter e-paper (the same stuff used for Kindle devices), which only consumes power when it’s updating. Once you’ve got the info you want on the e-paper, you can even disconnect it entirely from your power source and the screen will still display whatever the least update told it to. James’s top tip for your project: go for the smallest e-paper display possible, as those things are expensive. He went with this one, which comes with a HAT for Raspberry Pi and a ribbon cable to connect the two.
The display disconnected from any power and still clearly readable
The HAT has an adaptor for plugging into the Raspberry Pi GPIO pins, and a breakout header for the SPI pins. James found it’s not as simple as enabling the SPI on his Raspberry Pi and the e-paper display springing to life: you need a bit of code to enable the SPI display to act as the main display for the Raspberry Pi. Luckily, the code for this is on the wiki of Waveshare, the producer of HAT and display James used for this project.
Making it pretty
A 3D-printed case, which looks like a classic photo frame but with a hefty in-built stand to hold it up and provide enough space for the Raspberry Pi to sit on, is home to James’s finished smart to-do list. The e-paper is so light and thin it can just be sticky-taped into the frame.
The roomy frame stand
James’s creation is powered by Raspberry Pi 4, but you don’t need that much power, and he’s convinced you’ll be fine with any Raspberry Pi model that has 40 GPIO pins.
If you’re into e-paper stuff but are wedded to your handwritten to-do lists, then why not try building this super slow movie player instead? The blog squad went *nuts* for it when we posted it last month.
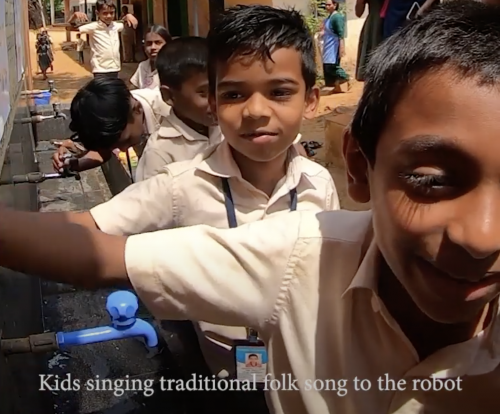
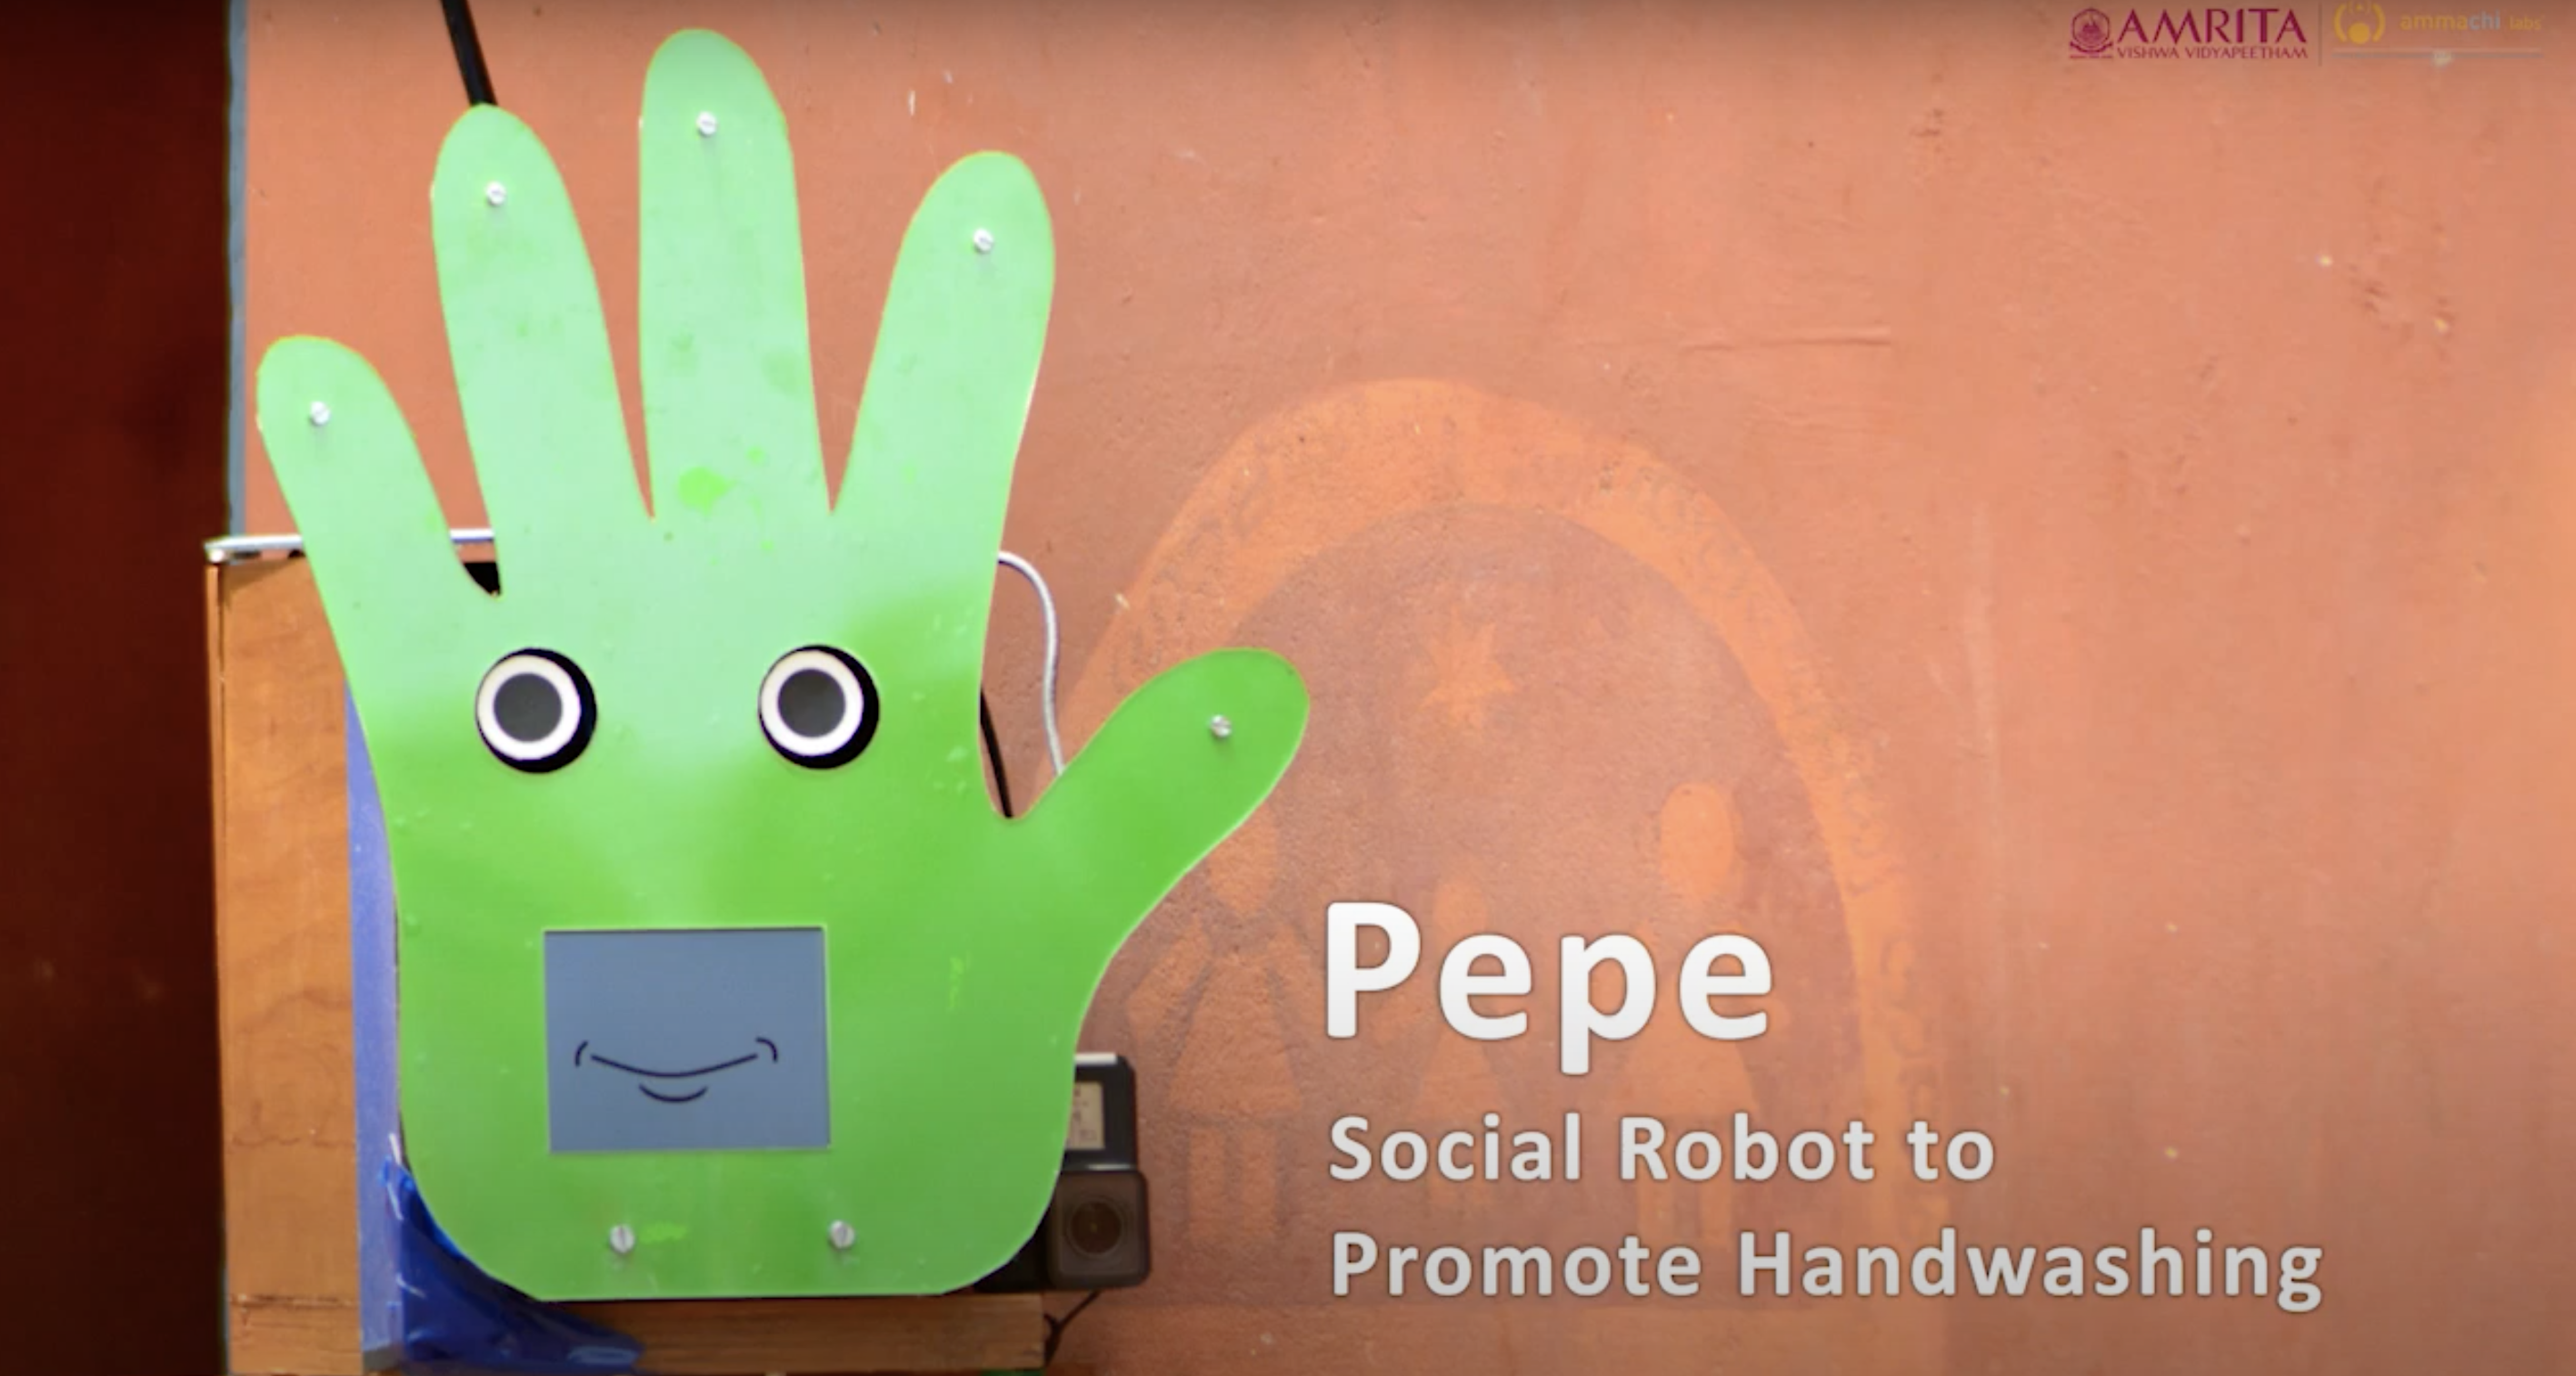
Amol Dwshmukh from the University of Glasgow got in touch with us about a social robot designed to influence young people’s handwashing behaviour, which the design team piloted in a rural school in Kerala, India.
In the pilot study, the hand-shaped Pepe robot motivated a 40% increase in the quality and levels of handwashing. It was designed by AMMACHI Labs and University of Glasgow researchers, with a Raspberry Pi serving as its brain and powering the screens that make up its mouth and eyes.
How does Pepe do it?
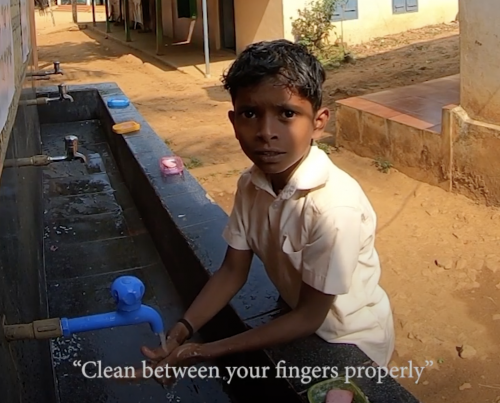
The robot is very easy to attach to the wall next to a handwashing station and automatically detects approaching people. Using AI software, it encourages, monitors, and gives verbal feedback to children on their handwashing, all in a fun and engaging way.
Little boy is thinking: “What the…” then “OK, surrrrre”
Amol thinks the success of the robot was due to its eye movements, as people change their behaviour when they know they are being observed. A screen displaying a graphical mouth also meant the robot could show it was happy when the children washed their hands correctly; positive feedback such as this promotes learning new skills.
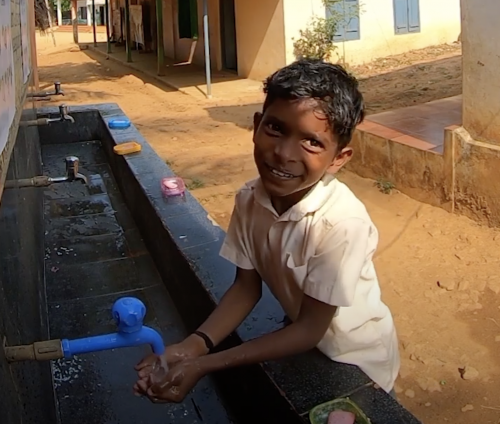
Socialising with Pepe keeps children at the sinks for longer
Amol’s team started work on this idea last year, and they were keen to test the Pepe robot with a group of people who had never been exposed to social robots before. They presented their smiling hand-face hybrid creation at the IEEE International Conference on Robot & Human Interactive Communication (see photo below). And now that hand washing has become more important than ever due to coronavirus, the project is getting mainstream media attention as well.
The team is now planning to improve Pepe’s autonomous intelligence and scale up the intervention across more schools through the Embracing the World network.
More than 90% of the students liked the robot and said they would like to see Pepe again after school vacation.
67% of the respondents thought the robot was male, while 33% thought it was female, mostly attributing to the robot’s voice as the reason
60% said it was younger than them, feeling Pepe was like a younger brother or sister, while 33% thought it was older, and 7% perceived the robot to be of the same age
72% of the students thought Pepe was alive, largely due to its ability to talk
Welcome to October, the month in which spiderwebs become decor and anything vaguely gruesome is considered ‘seasonal’. Such as bats. Bats are in fact cute, furry creatures, but as they are part of the ‘Halloweeny animal’ canon, I have a perfect excuse to sing their praises.
SEE? Baby bats wrapped up cute like baby humans
Tegwyn Twmffat was tasked with doing a bat survey on a derelict building, and they took to DesignSpark to share their Raspberry Pi–powered solution.
UK law protects nesting birds and roosting bats, so before you go knocking buildings down, you need a professional to check that no critters will be harmed in the process.
The acoustic signature of an echo-locating brown long-eared bat
The problem with bats, compared to birds, is they are much harder to spot and have a tendency to hang out in tiny wall cavities. Enter this big ultrasonic microphone.
Raspberry Pi 4 Model B provided the RAM needed for this build
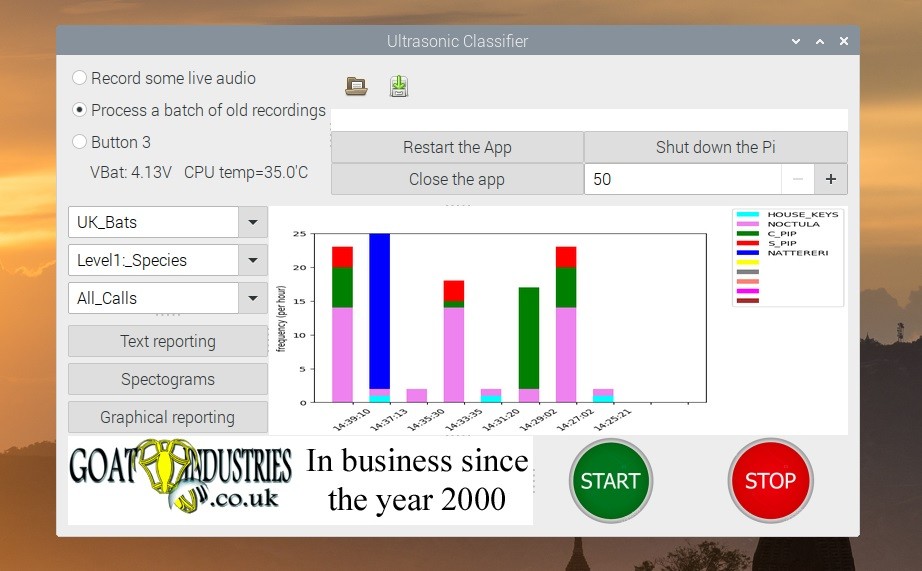
After the building was declared safely empty of bats, Tegwyn decided to keep hold of the expensive microphone (the metal tube in the image above) and have a crack at developing their own auto-classification system to detect which type of bats are about.
How does it work?
The ultrasonic mic picks up the audio data using an STM M0 processor and streams it to Raspberry Pi via USB. Raspberry Pi runs Alsa driver software and uses the bash language to receive the data.
Tegwyn turned to the open-source GTK software to process the audio data
It turns out there are no publicly available audio records of bats, so Tegwyn took to their own back garden and found 6 species to record. And with the help of a few other bat enthusiasts, they cobbled together an audio dataset of 9 of the 17 bat species found in the UK!
More baby bats
Tegwyn’s original post about their project features a 12-step walkthrough, as well as all the code and commands you’ll need to build your own system. And here’s the GitHub repository, where you can check for updates.
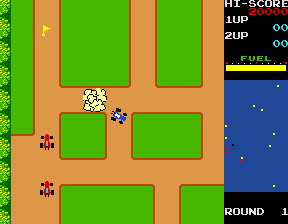
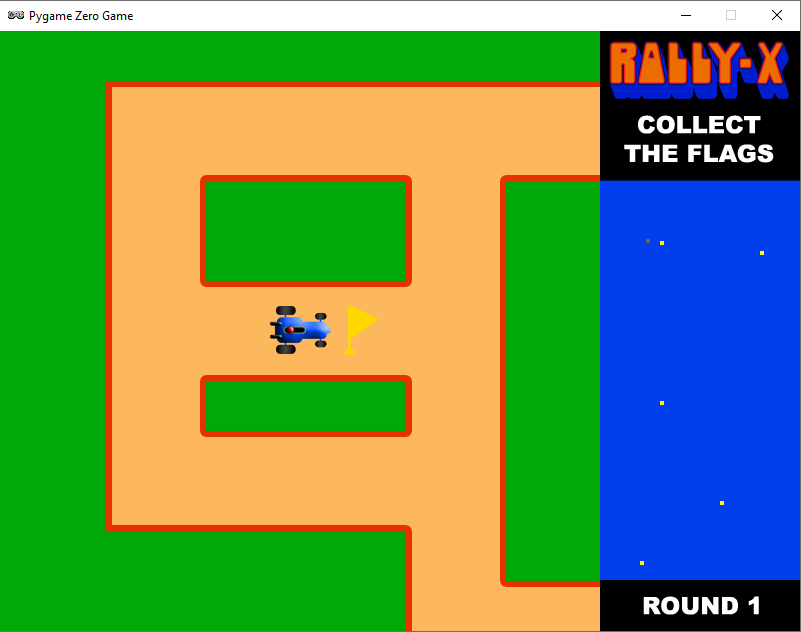
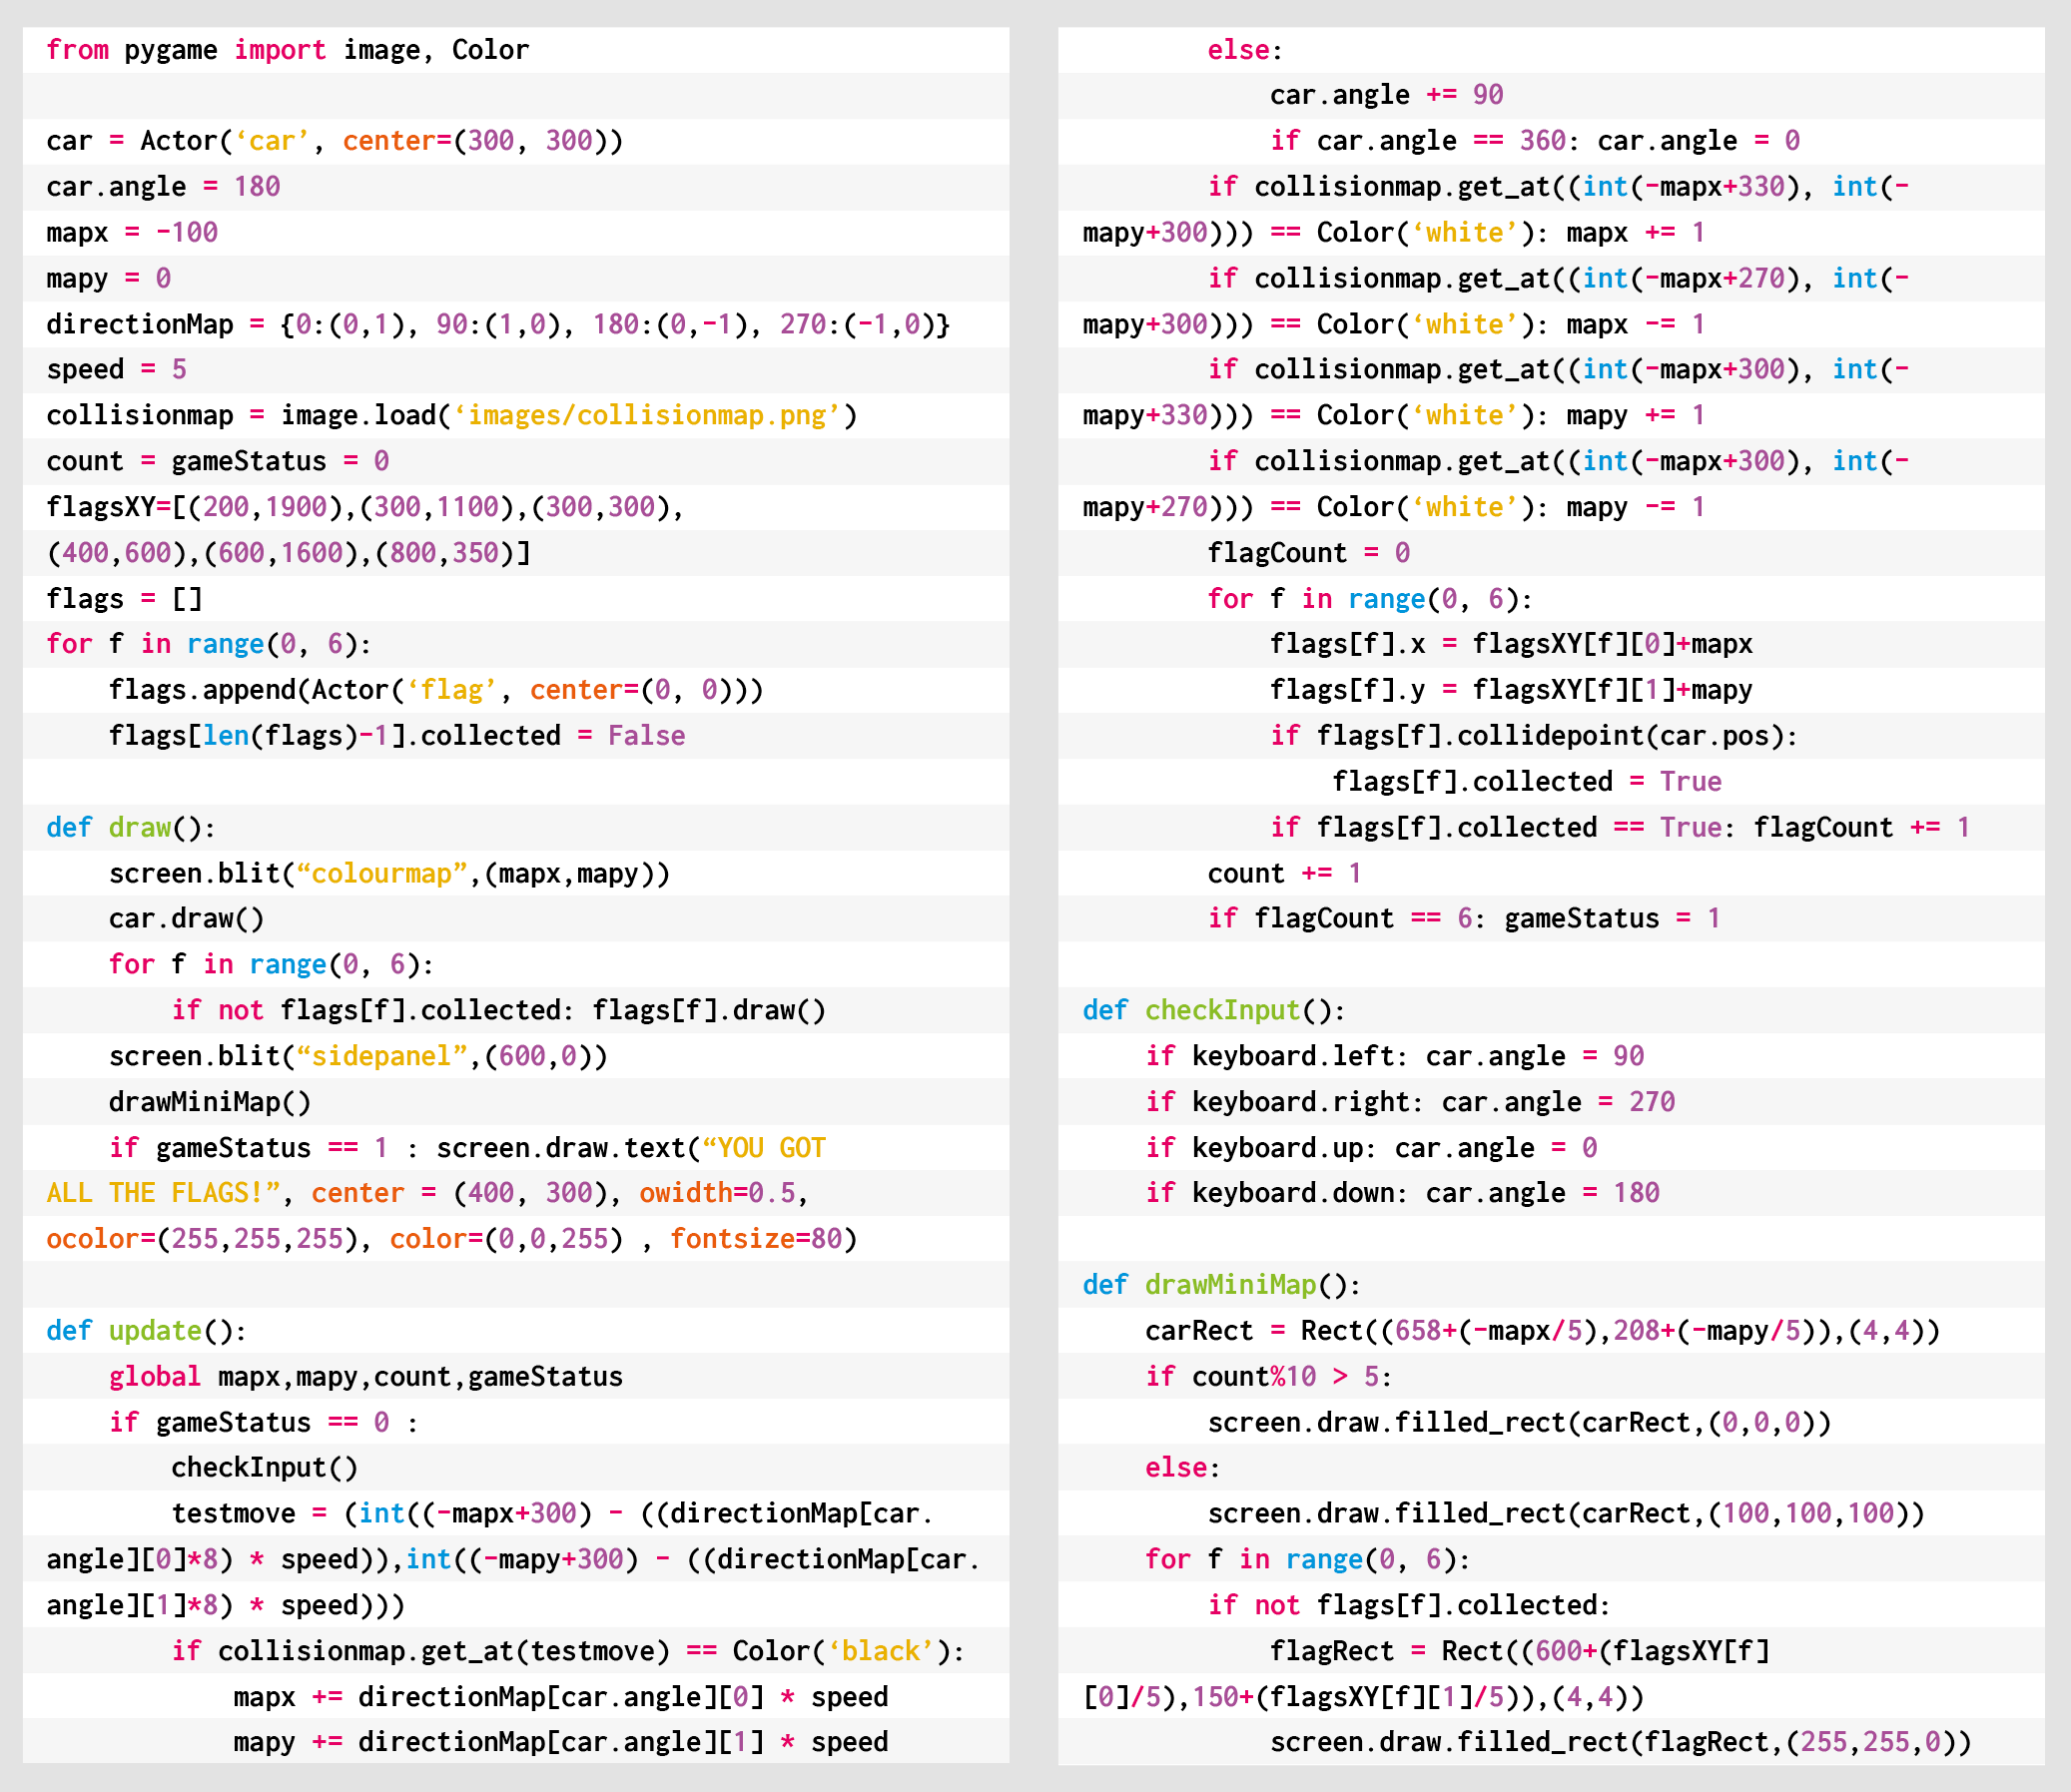
Race around using a mini-map for navigation, just like the arcade classic, Rally-X. Mark Vanstone has the code
In Namco’s original arcade game, the red cars chased the player relentlessly around each level. Note the handy mini-map on the right.
The original Rally-X arcade game blasted onto the market in 1980, at the same time as Pac‑Man and Defender. This was the first year that developer Namco had exported its games outside Japan thanks to the deal it struck with Midway, an American game distributor. The aim of Rally-X is to race a car around a maze, avoiding enemy cars while collecting yellow flags – all before your fuel runs out.
The aspect of Rally-X that we’ll cover here is the mini-map. As the car moves around the maze, its position can be seen relative to the flags on the right of the screen. The main view of the maze only shows a section of the whole map, and scrolls as the car moves, whereas the mini-map shows the whole size of the map but without any of the maze walls – just dots where the car and flags are (and in the original, the enemy cars). In our example, the mini-map is five times smaller than the main map, so it’s easy to work out the calculation to translate large map co‑ordinates to mini-map co-ordinates.
To set up our Rally-X homage in Pygame Zero, we can stick with the default screen size of 800×600. If we use 200 pixels for the side panel, that leaves us with a 600×600 play area. Our player’s car will be drawn in the centre of this area at the co-ordinates 300,300. We can use the in-built rotation of the Actor object by setting the angle property of the car. The maze scrolls depending on which direction the car is pointing, and this can be done by having a lookup table in the form of a dictionary list (directionMap) where we define x and y increments for each angle the car can travel. When the cursor keys are pressed, the car stays central and the map moves.
Roam the maze and collect those flags in our Python homage to Rally-X.
To detect the car hitting a wall, we can use a collision map. This isn’t a particularly memory-efficient way of doing it, but it’s easy to code. We just use a bitmap the same size as the main map which has all the roads as black and all the walls as white. With this map, we can detect if there’s a wall in the direction in which the car’s moving by testing the pixels directly in front of it. If a wall is detected, we rotate the car rather than moving it. If we draw the side panel after the main map, we’ll then be able to see the full layout of the screen with the map scrolling as the car navigates through the maze.
We can add flags as a list of Actor objects. We could make these random, but for the sake of simplicity, our sample code has them defined in a list of x and y co-ordinates. We need to move the flags with the map, so in each update(), we loop through the list and add the same increments to the x and y co‑ordinates as the main map. If the car collides with any flags, we just take them off the list of items to draw by adding a collected variable. Having put all of this in place, we can draw the mini-map, which will show the car and the flags. All we need to do is divide the object co-ordinates by five and add an x and y offset so that the objects appear in the right place on the mini-map.
And those are the basics of Rally-X! All it needs now is a fuel gauge, some enemy cars, and obstacles – but we’ll leave those for you to sort out…
Here’s Mark’s code for a Rally-X-style driving game with mini-map. To get it running on your system, you’ll need to install Pygame Zero. And to download the full code and assets, head here.
Get your copy of Wireframe issue 43
You can read more features like this one in Wireframe issue 43, available directly from Raspberry Pi Press — we deliver worldwide.
And if you’d like a handy digital version of the magazine, you can also download issue 43 for free in PDF format.
Wireframe #43, with the gorgeous Sea of Stars on the cover.
Make sure to follow Wireframe on Twitter and Facebook for updates and exclusive offers and giveaways. Subscribe on the Wireframe website to save up to 49% compared to newsstand pricing!
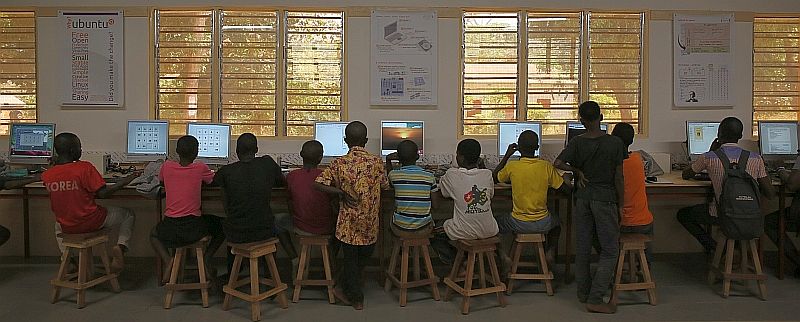
We’ve been following the work of Dominique Laloux since he first got in touch with us in May 2013 ahead of leaving to spend a year in Togo. 75% of teachers in the region where he would be working had never used a computer before 2012, so he saw an opportunity to introduce Raspberry Pi and get some training set up.
We were so pleased to receive another update this year about Dominique and his Togolese team’s work. This has grown to become INITIC, a non-profit organisation that works to install low cost, low power consumption, low maintenance computer rooms in rural schools in Togo. The idea for the acronym came from the organisation’s focus on the INItiation of young people to ICT (TIC in French).
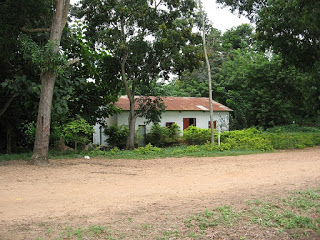
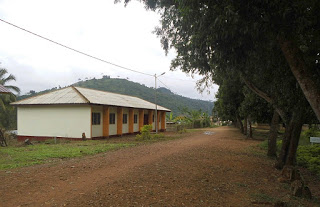
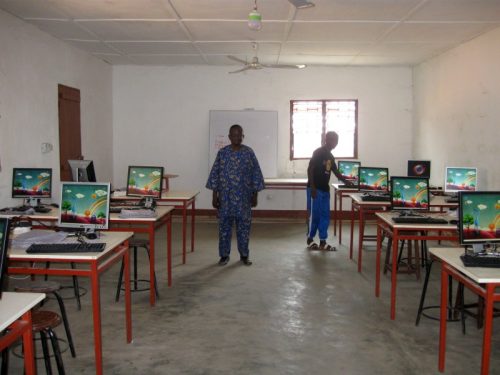
INITIC’s first computer room was installed in Tokpli, Togo, way back in 2012. It was a small room (see the photo on the left below) donated by an agricultural association and renovated by a team of villagers.
The first INTIC room
The new INTIC building
Fast forward to 2018, and INTIC had secured its own building (photo on the right above). It has a dedicated a Raspberry Pi Room, as well as a multipurpose room and another small technical room. Young people from local schools, as well as those in neighbouring villages, have access to the facilities.
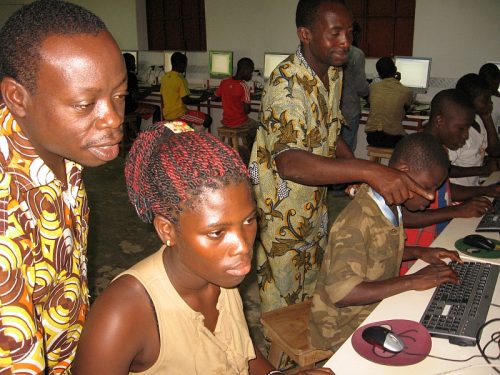
The first ever dedicated Raspberry Pi room at K. Adamé
The first dedicated Raspberry Pi Room in Togo was at the Collège (secondary school) in the town of Kuma Adamé. It was equipped with 21 first-generation Raspberry Pis, which stood up impressively against humid and dusty conditions.
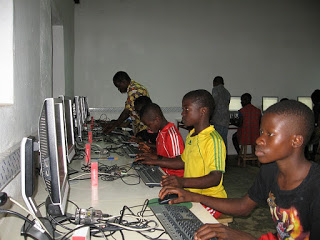
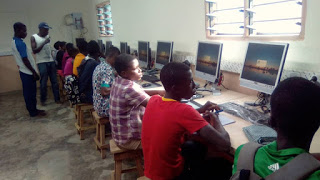
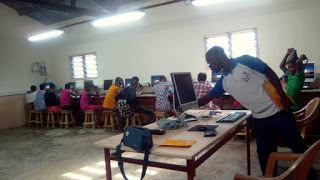
Kpodzi High School’s Raspberry Pi Room
In 2019, Kpodzi High School also got its own Raspberry Pi Room, equipped with 22 Raspberry Pi workstations. Once the projector, laser printer, and scanners are in place, the space will also be used for electronics, Arduino, and programming workshops.
What’s the latest?
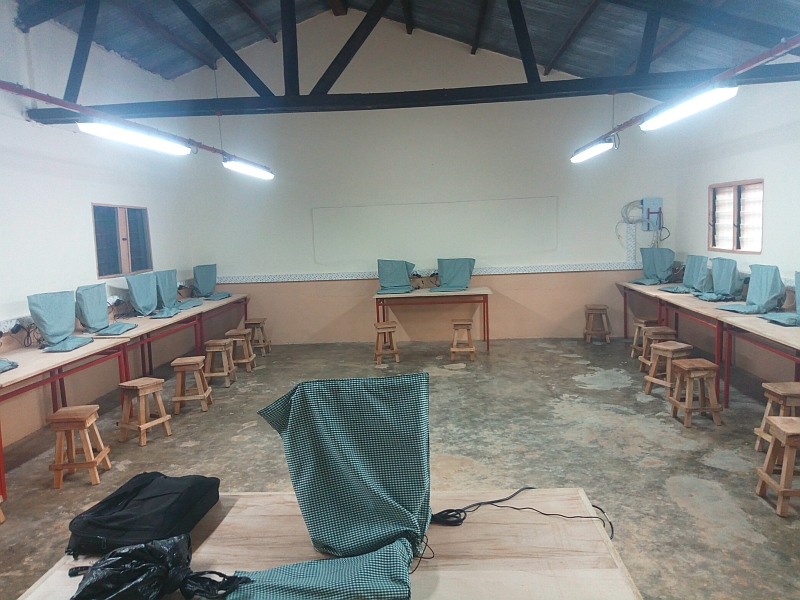
Ready for the unveiling…
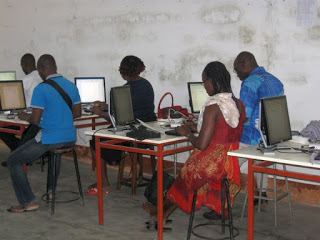
Now we find ourselves in 2020 and INTIC is still growing. Young people in the bountiful, but inaccessible, village of Danyi Dzogbégan now have access to 20 Raspberry Pi workstations (plus one for the teacher). They have been using them for learning since January this year.
The first Raspberry Pi sessions in Danyi Dzogbégan
We can’t wait to see what Dominique and his team have up their sleeve next. You can help INTIC reach more young people in rural Togo by donating computer equipment, by helping teachers get lesson materials together, or through a volunteer stay at one of their facilities. Find out more here.
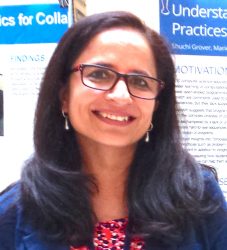
In the brand-new issue of Hello World magazine, Shuchi Grover tells us about the limits of constructionism, the value of formative assessment, and why programming can be a source of both joy and angst.
How much open-ended exploration should there be in computing lessons?
This is a question at the heart of computer science education and one which Shuchi Grover is delicately diplomatic about in the preface to her new book, Computer Science in K-12: An A-to-Z Handbook on Teaching Programming. The book’s chapters are written by 40 teachers and researchers in computing pedagogy, and Grover openly acknowledges the varying views around discovery-based learning among her diverse range of international authors.
“I wonder if I want to wade there,” she laughs. “The act of creating a program is in itself an act of creation. So there is hands-on learning quite naturally in the computer science classroom, and mistakes are made quite naturally. There are some things that are so great about computer science education. It lends itself so easily to being hands-on and to celebrating mistakes; debugging is par for the course, and that’s not the way it is in other subjects. The kids can actually develop some very nice mindsets that they can take to other classrooms.”
Grover is a software engineer by training, turned researcher in computer science education. She holds a PhD in learning sciences and technology design from Stanford University, where she remains a visiting scholar. She explains how the beginning of her research career coincided with the advent of the block-based programming language Scratch, now widely used as an introductory programming language for children.
“Almost two decades ago, I went to Harvard to study for a master’s called technology innovation and education, and it was around that time that I volunteered for robotics workshops at the MIT Media Lab and MIT Museum. Those were pretty transformative for me: I started after-school clubs and facilitated robotics and digital storytelling clubs. In the early 2000s, I was an educational technology consultant, working with teachers on integrating technology. Then Scratch came out, and I started working with teachers on integrating Scratch into languages, arts, and science, all the things that we are doing today.”
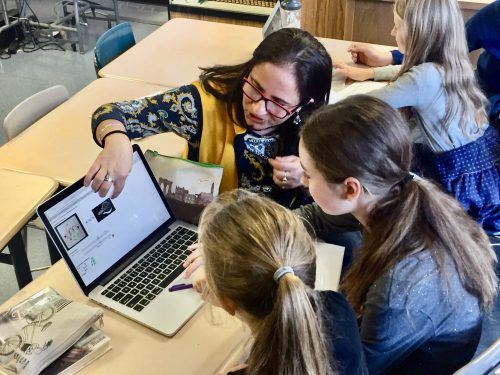
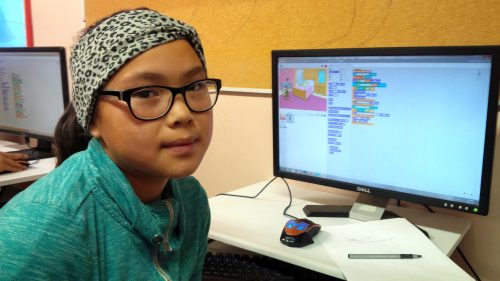
Student Joyce codes in Scratch at her Code Club in Nunavut
Do her formative experiences at MIT, the birthplace of constructionist theory of student-centred, discovery-based learning, lead her to lean one way or another in the tinkering versus direct instruction debate? “The learning in informal spaces is, of course, very interest-driven. There is no measurement. Children are invited to a space to spend some time after school and do whatever they feel like. There would be kids who would be chatting away while a couple of them designed a robot, and then they would hand over the robot to some others and say, ‘OK, now you go ahead and program it,’ and there were some kids who would just like to hang about.
“When it comes to formal education, there needs to be more accountability, you want to do right by every child. You have to be more intentional. I do feel that while tinkering and constructionism was a great way to introduce interest-driven projects for informal learning, and there’s a lot to learn from there and bring to the formal learning context, I don’t think it can only be tinkering.”
“There needs to be more accountability to do right by every child.”
“Everybody knows that engagement is very important for learning — and this is something that we are learning more about: it’s not just interest, it’s also culture, communities, and backgrounds — but all of this is to say that there is a personal element to the learning process and so engagement is necessary, but it’s not a sufficient condition. You have to go beyond engagement, to also make sure that they are also engaging with the concepts. You want at some point for students to engage with the concept in a way that reveals what their misconceptions might be, and then they end up learning and understanding these things more deeply.
“You want a robust foundation — after all, our goal for teaching children anything at school is to build a foundation on which they build their college education and career and anything beyond that. If we take programming as a skill, you want them to have a good understanding of it, and so the personal connections are important, but so is the scaffolding.
“How much scaffolding needs to be done varies from context to context. Even in the same classroom, children may need different levels of scaffolding. It’s a sweet spot; within a classroom a teacher has to juggle so much. And therein lies the challenge of teaching: 30 kids at a time, and every child is different and every child is unique.
“It’s an equity issue. Some children don’t have the prior experience that sets them up to tinker constructively. After all, tinkering is meant to be purposeful exploration. And so it becomes an issue of who are you privileging with the pedagogy.”
She points out that each chapter in her book that comes from a more constructionist viewpoint clearly speaks of the need for scaffolding. And conversely, the chapters that take a more structured approach to computing education include elements of student engagement and children creating their own programs. “Frameworks such as Use-Modify-Create and PRIMM just push that open-ended creation a little farther down, making sure that the initial experiences have more guide rails.”
Approaches to assessment
Grover is a senior research scientist at Looking Glass Ventures, which in 2018 received a National Science Foundation grant to create Edfinity, a tool to enable affordable access to high-quality assessments for schools and universities.
In her book, she argues that asking students to write programs as a means of formative assessment has several pitfalls. It is time-consuming for both students and teachers, scoring is subjective, and it’s difficult to get a picture of how much understanding a student has of their code. Did they get their program to work through trial and error? Did they lift code from another student?
“Formative assessments that give quick feedback are much better. They focus on aspects of the conceptual learning that you want children to have. Multiple-choice questions on code force both the teachers and the children to experience code reading and code comprehension, which are just so important. Just giving children a snippet of code and saying: ‘What does this do? What will be the value of the variable? How many times will this be executed?’ — it goes down to the idea of code tracing and program comprehension.
“Research has also shown that anything you do in a classroom, the children take as a signal. Going back to the constructionist thing, when you foreground personal interest, there’s a different kind of environment in the classroom, where they’re able to have a voice, they have agency. That’s one of the good things about constructionism.
“Formative assessment signals to the student what it is that you’re valuing in the learning process. They don’t always understand what it is that they’re expected to learn in programming. Is the goal creating a program that runs? Or is it something else? And so when you administer these little check-ins, they bring more alignment between a teacher’s goals for the learners and the learners’ understanding of those goals. That alignment is important and it can get lost.”
The title of Grover’s book, which could be thought to imply that computer science education consists solely of teaching students to program, may cause some raised eyebrows.
What about building robots or devices that interact with the world, computing topics like binary, or the societal impacts of technology? “I completely agree with the statement and the belief that computer science is not just about programming. I myself have been a proponent of this. But in this book I wanted to focus on programming for a couple of reasons. Programming is a central part of the computer science curriculum, at least here in the US, and it is also the part that teachers struggle with the most.
“I want to show where children struggle and how to help them.”
“As topics go, programming carries a lot of joy and angst. There is joy in computing, joy when you get it. But when a teacher is encountering this topic for the first time there is a lot of angst, because they themselves may not be understanding things, and they don’t know what it is that the children are not understanding. And there is this entire body of research on novice programming. There are the concepts, the practices, the pedagogies, and the issues of assessment. So I wanted to give the teachers all of that: everything we know about children and programming, the topics to be learnt, where they struggle, how to help them.”
Hello World is our magazine about all things computing education. It is free to download in PDF format, or you can subscribe and we will send you each new issue straight to your home.
In issue 14 of Hello World, we have gathered some inspiring stories to help your learners connect with nature. From counting penguins in Antarctica to orienteering with a GPS twist, great things can happen when young people get creative with technology outdoors. You’ll find all this and more in the new issue!
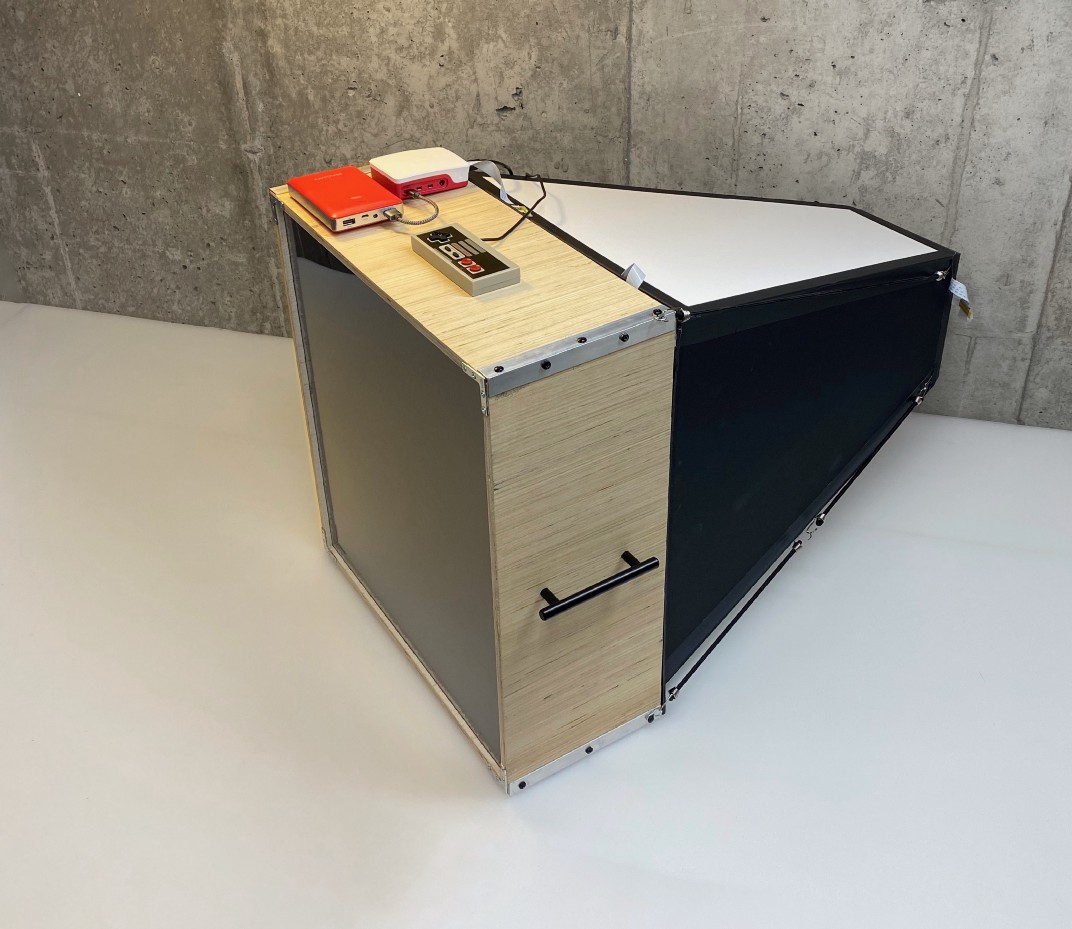
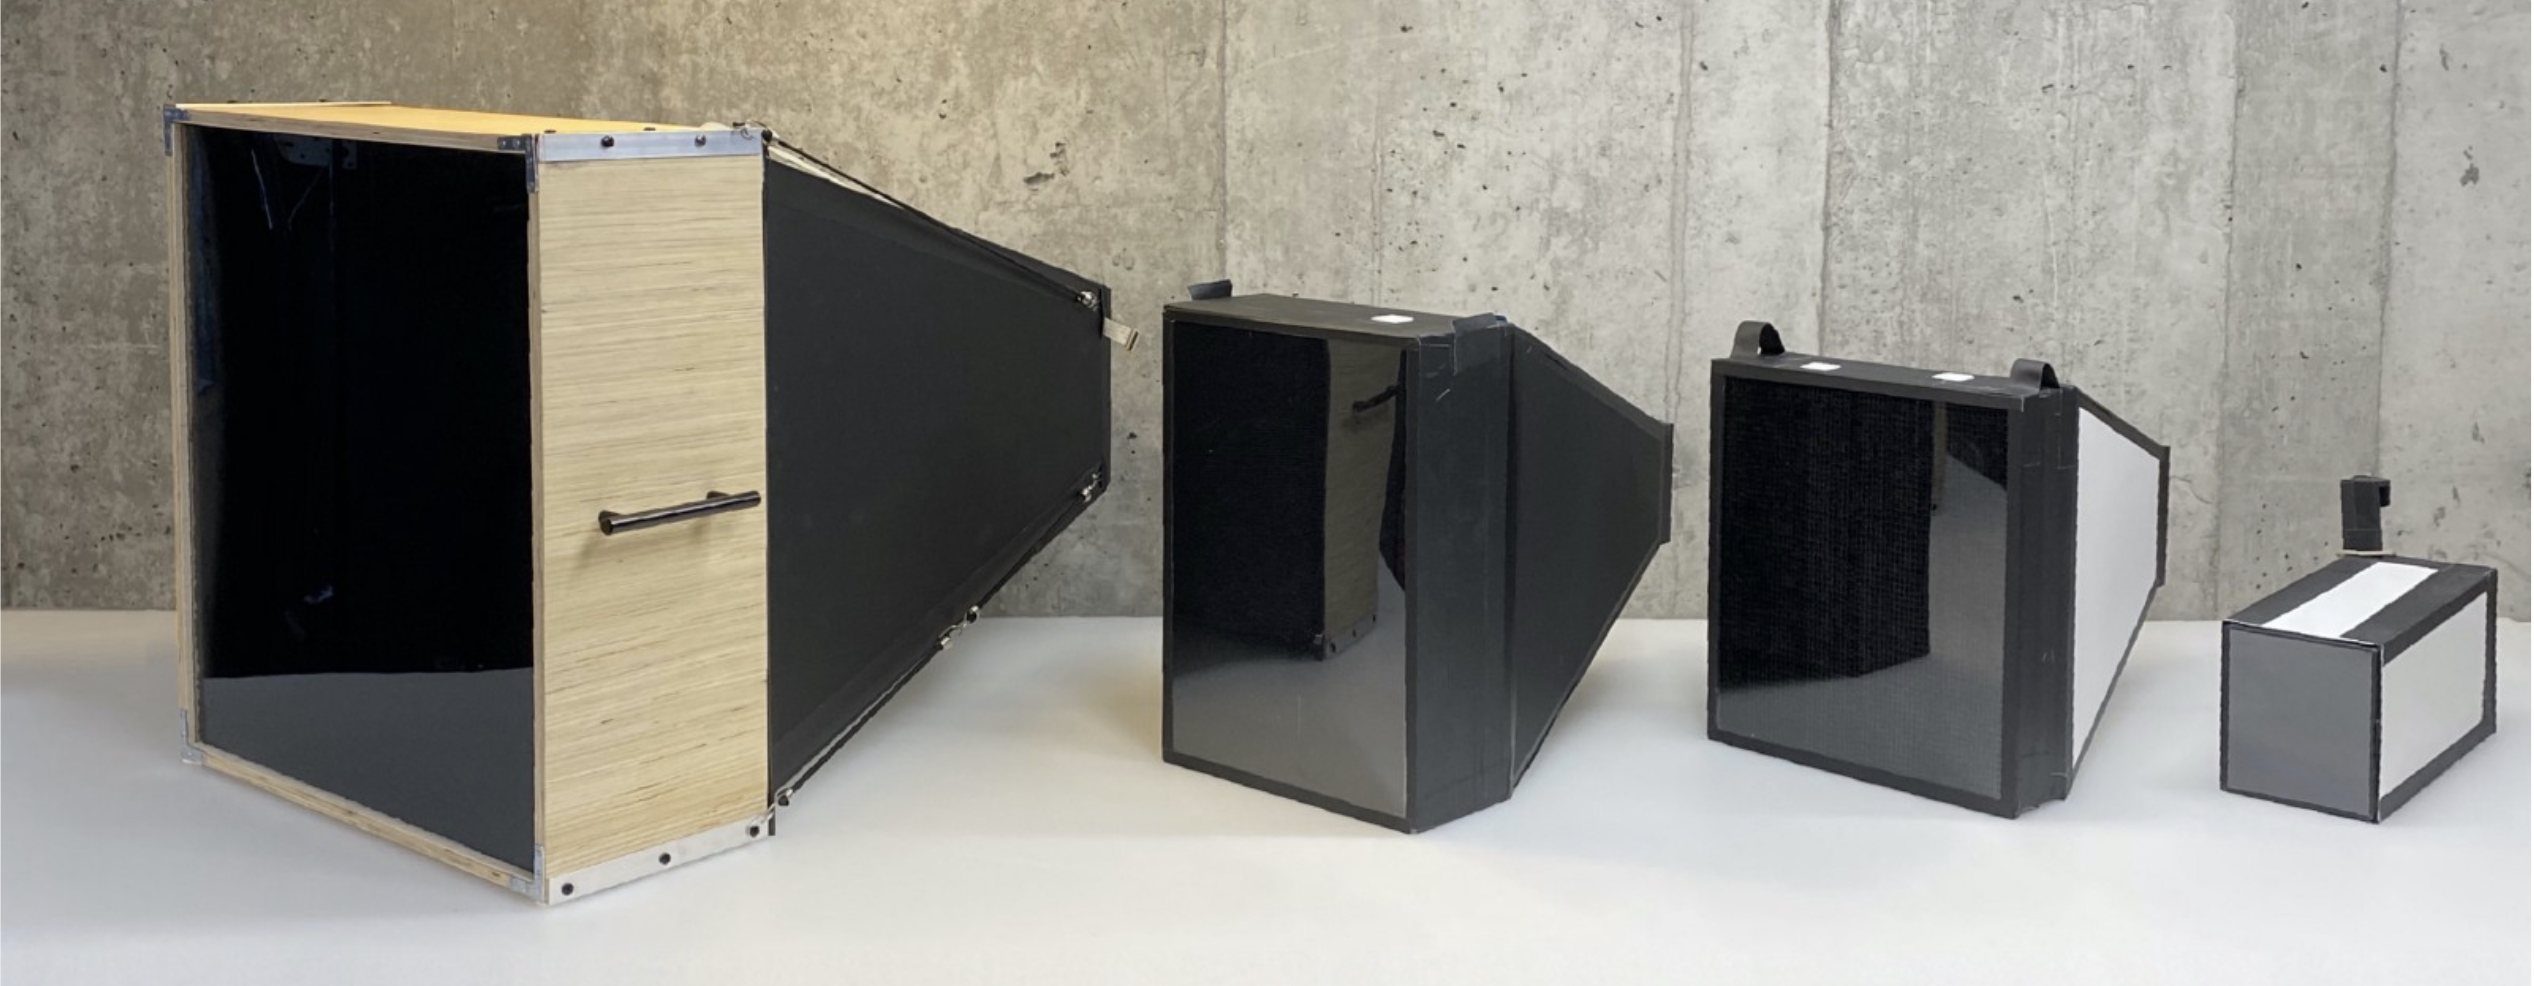
Adrian Hanft is our favourite kind of maker: weird. He’s also the guy who invented the Lego camera, 16 years ago. This time, he spent more than a year creating what he describes as “one of the strangest cameras you may ever hear about.”
What? Looks normal from here. Massive, but normal
What’s with all the straws?
OK, here’s why it’s weird: it takes photos with a Raspberry Pi High Quality Camera through a ‘lens’ of tiny drinking straws packed together. 23,248 straws, to be exact, are inside the wooden box-shaped bit of the machine above. The camera itself sits at the slim end of the black and white part. The Raspberry Pi, power bank, and controller all sit on top of the wooden box full of straws.
Here’s what an image of Yoda looks like, photographed through that many straws:
Mosaic, but make it techy
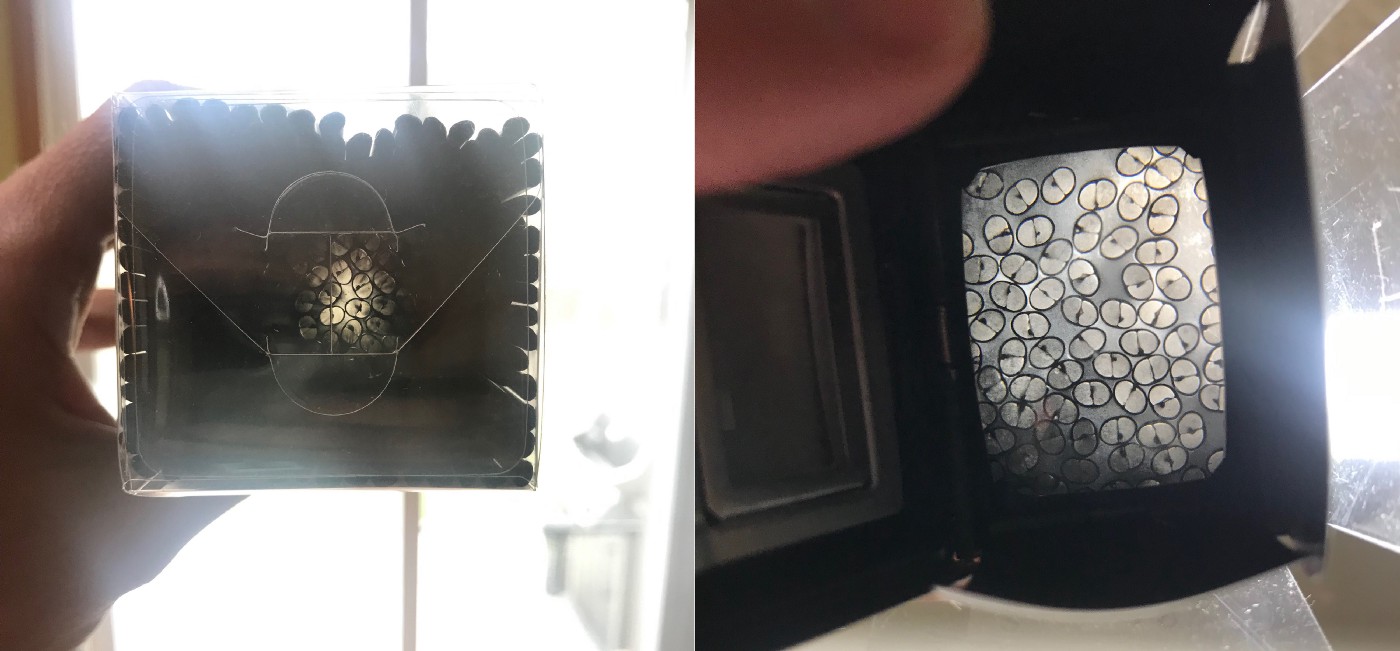
Ground glass lenses
The concept isn’t as easy as it may look. As you can see from the images below, if you hold up a load of straws, you can only see the light through a few of them. Adrian turned to older technology for a solution, taking a viewfinder from an old camera which had ground glass (which ‘collects’ light) on the surface.
Left: looking through straws at light with the naked eye Right: the same straws viewed through a ground glass lens
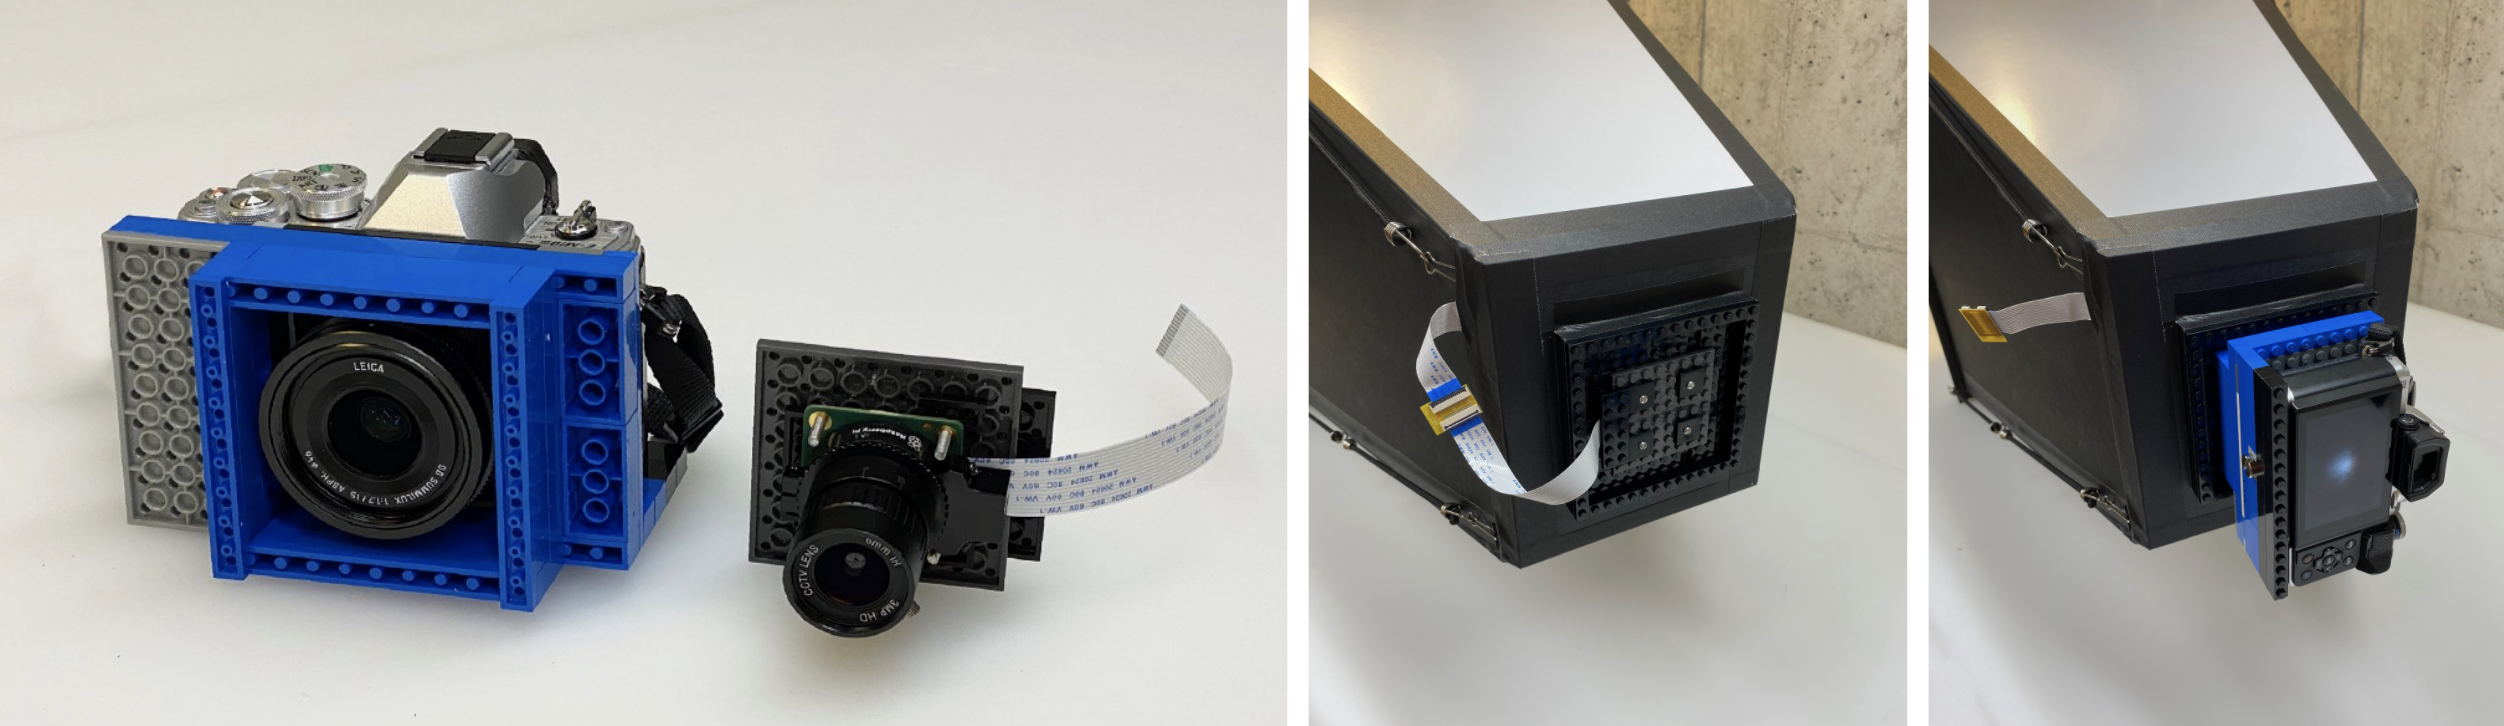
Even though Adrian was completely new to both Raspberry Pi and Python, it only took him a week of evenings and weekends to code the software needed to control the Raspberry Pi High Quality Camera.
Long story short, on the left is the final camera, with all the prototypes queued up behind it
An original Nintendo controller runs the show and connects to the Raspberry Pi with a USB adapter. The buttons are mapped to the functions of Adrian’s software.
A super satisfying time-lapse of the straws being loaded
What does the Nintendo controller do?
In his original post, Adrian explains what all the buttons on the controller do in order to create images:
“The Start button launches a preview of what the camera is seeing. The A button takes a picture. The Up and Down buttons increase or decrease the exposure time by 1 second. The Select button launches a gallery of photos so I can see the last photo I took. The Right and Left buttons cycle between photos in the gallery. I am saving the B button for something else in the future. Maybe I will use it for uploading to Dropbox, I haven’t decided yet.”
Adrian made a Lego mount for the Raspberry Pi camera
The Lego mount makes it easy to switch between cameras and lenses
A mobile phone serves as a wireless display so he can keep an eye on what’s going on. The phone communicates with the Raspberry Pi connected to the camera via a VPN app.
One of the prototypes in action
Follow Adrian on Instagram to keep up with all the photography captured using the final camera, as well as the prototypes that came before it.
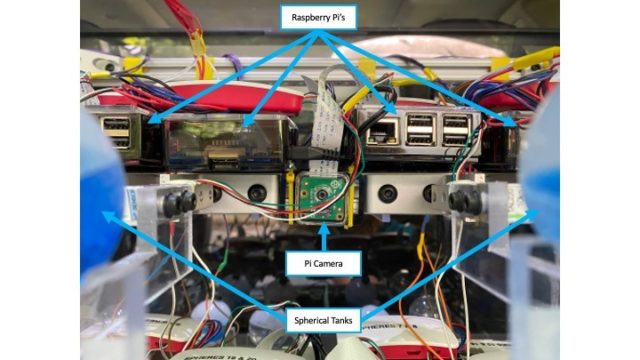
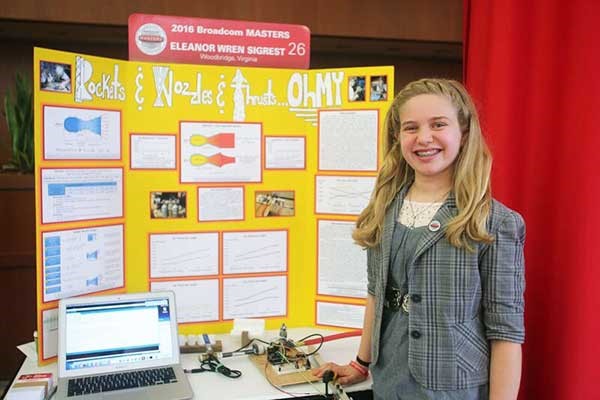
High-school student Eleanor Sigrest successfully crowdfunded her way onto a zero-G flight to test her latest Raspberry Pi-powered project. NASA Goddard engineers peer reviewed Eleanor’s experimental design, which detects unwanted movement (or ‘slosh’) in spacecraft fluid tanks.
The Raspberry Pi-packed setup
The apparatus features an accelerometer to precisely determine the moment of zero gravity, along with 13 Raspberry Pis and 12 Raspberry Pi cameras to capture the slosh movement.
What’s wrong with slosh?
The Broadcom Foundation shared a pretty interesting minute-by-minute report on Eleanor’s first hyperbolic flight and how she got everything working. But, in a nutshell…
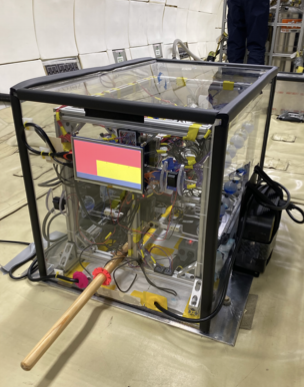
The full apparatus onboard the zero gravity flight
You don’t want the fluid in your space shuttle tanks sloshing around too much. It’s a mission-ending problem. Slosh occurs on take-off and also in microgravity during manoeuvres, so Eleanor devised this novel approach to managing it in place of the costly, heavy subsystems currently used on board space craft.
Eleanor wanted to prove that the fluid inside tanks treated with superhydrophobic and superhydrophilic coatings settled quicker than in uncoated tanks. And she was right: settling times were reduced by 73% in some cases.
At just 13 years old, Eleanor won the Samueli Prize at the 2016 Broadcom MASTERS for her mastery of STEM principles and team leadership during a rigorous week-long competition. High praise came from Paula Golden, President of Broadcom Foundation, who said: “Eleanor is the epitome of a young woman scientist and engineer. She combines insatiable curiosity with courage: two traits that are essential for a leader in these fields.”
Eleanor aged 13 with her award-winning project ‘Rockets & Nozzles & Thrust… Oh My’
That week-long experience also included a Raspberry Pi Challenge, and Eleanor explained: “During the Raspberry Pi Challenge, I learned that sometimes the simplest solutions are the best. I also learned it’s important to try everyone’s ideas because you never know which one might work the best. Sometimes it’s a compromise of different ideas, or a compromise between complicated and simple. The most important thing is to consider them all.”
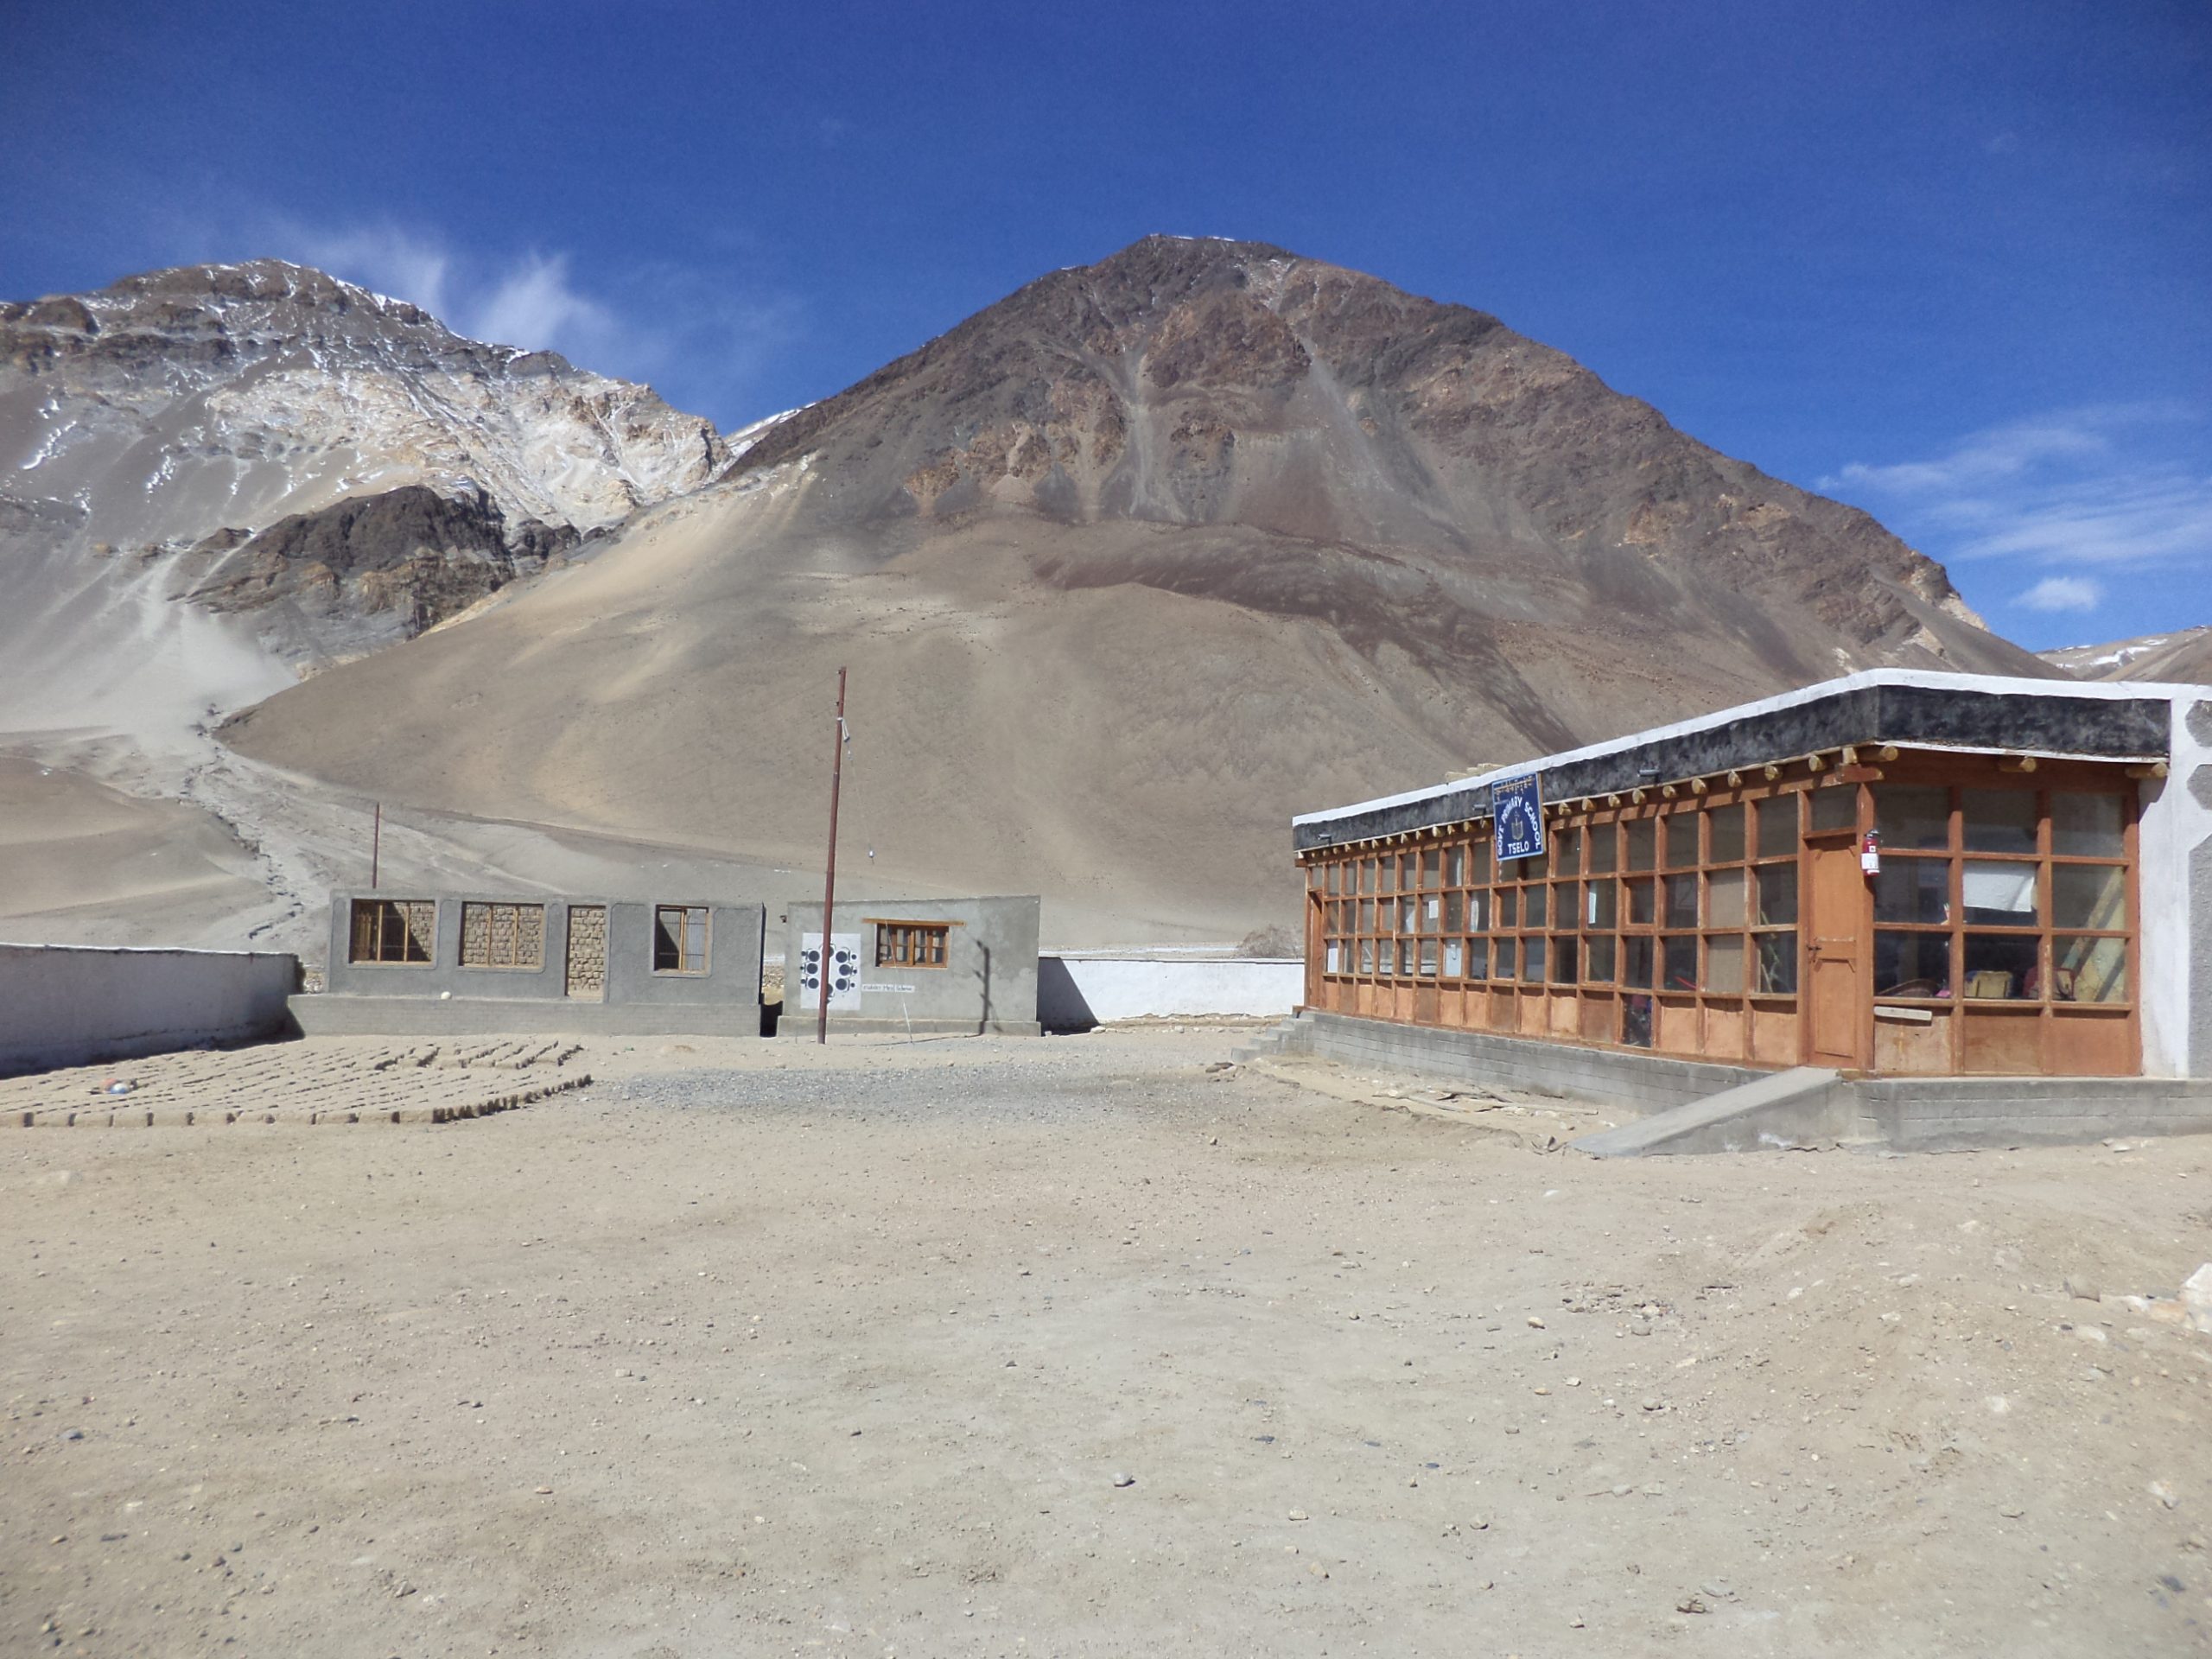
How do you get internet over three miles up the Himalayas? That’s what the 17000 ft Foundation and Sujata Sahu had to figure out. Rob Zwetsloot reports in the latest issue of the MagPi magazine, out now.
Living in more urban areas of the UK, it can be easy to take for granted decent internet and mobile phone signal. In more remote areas of the country, internet can be a bit spotty but it’s nothing compared with living up in a mountain.
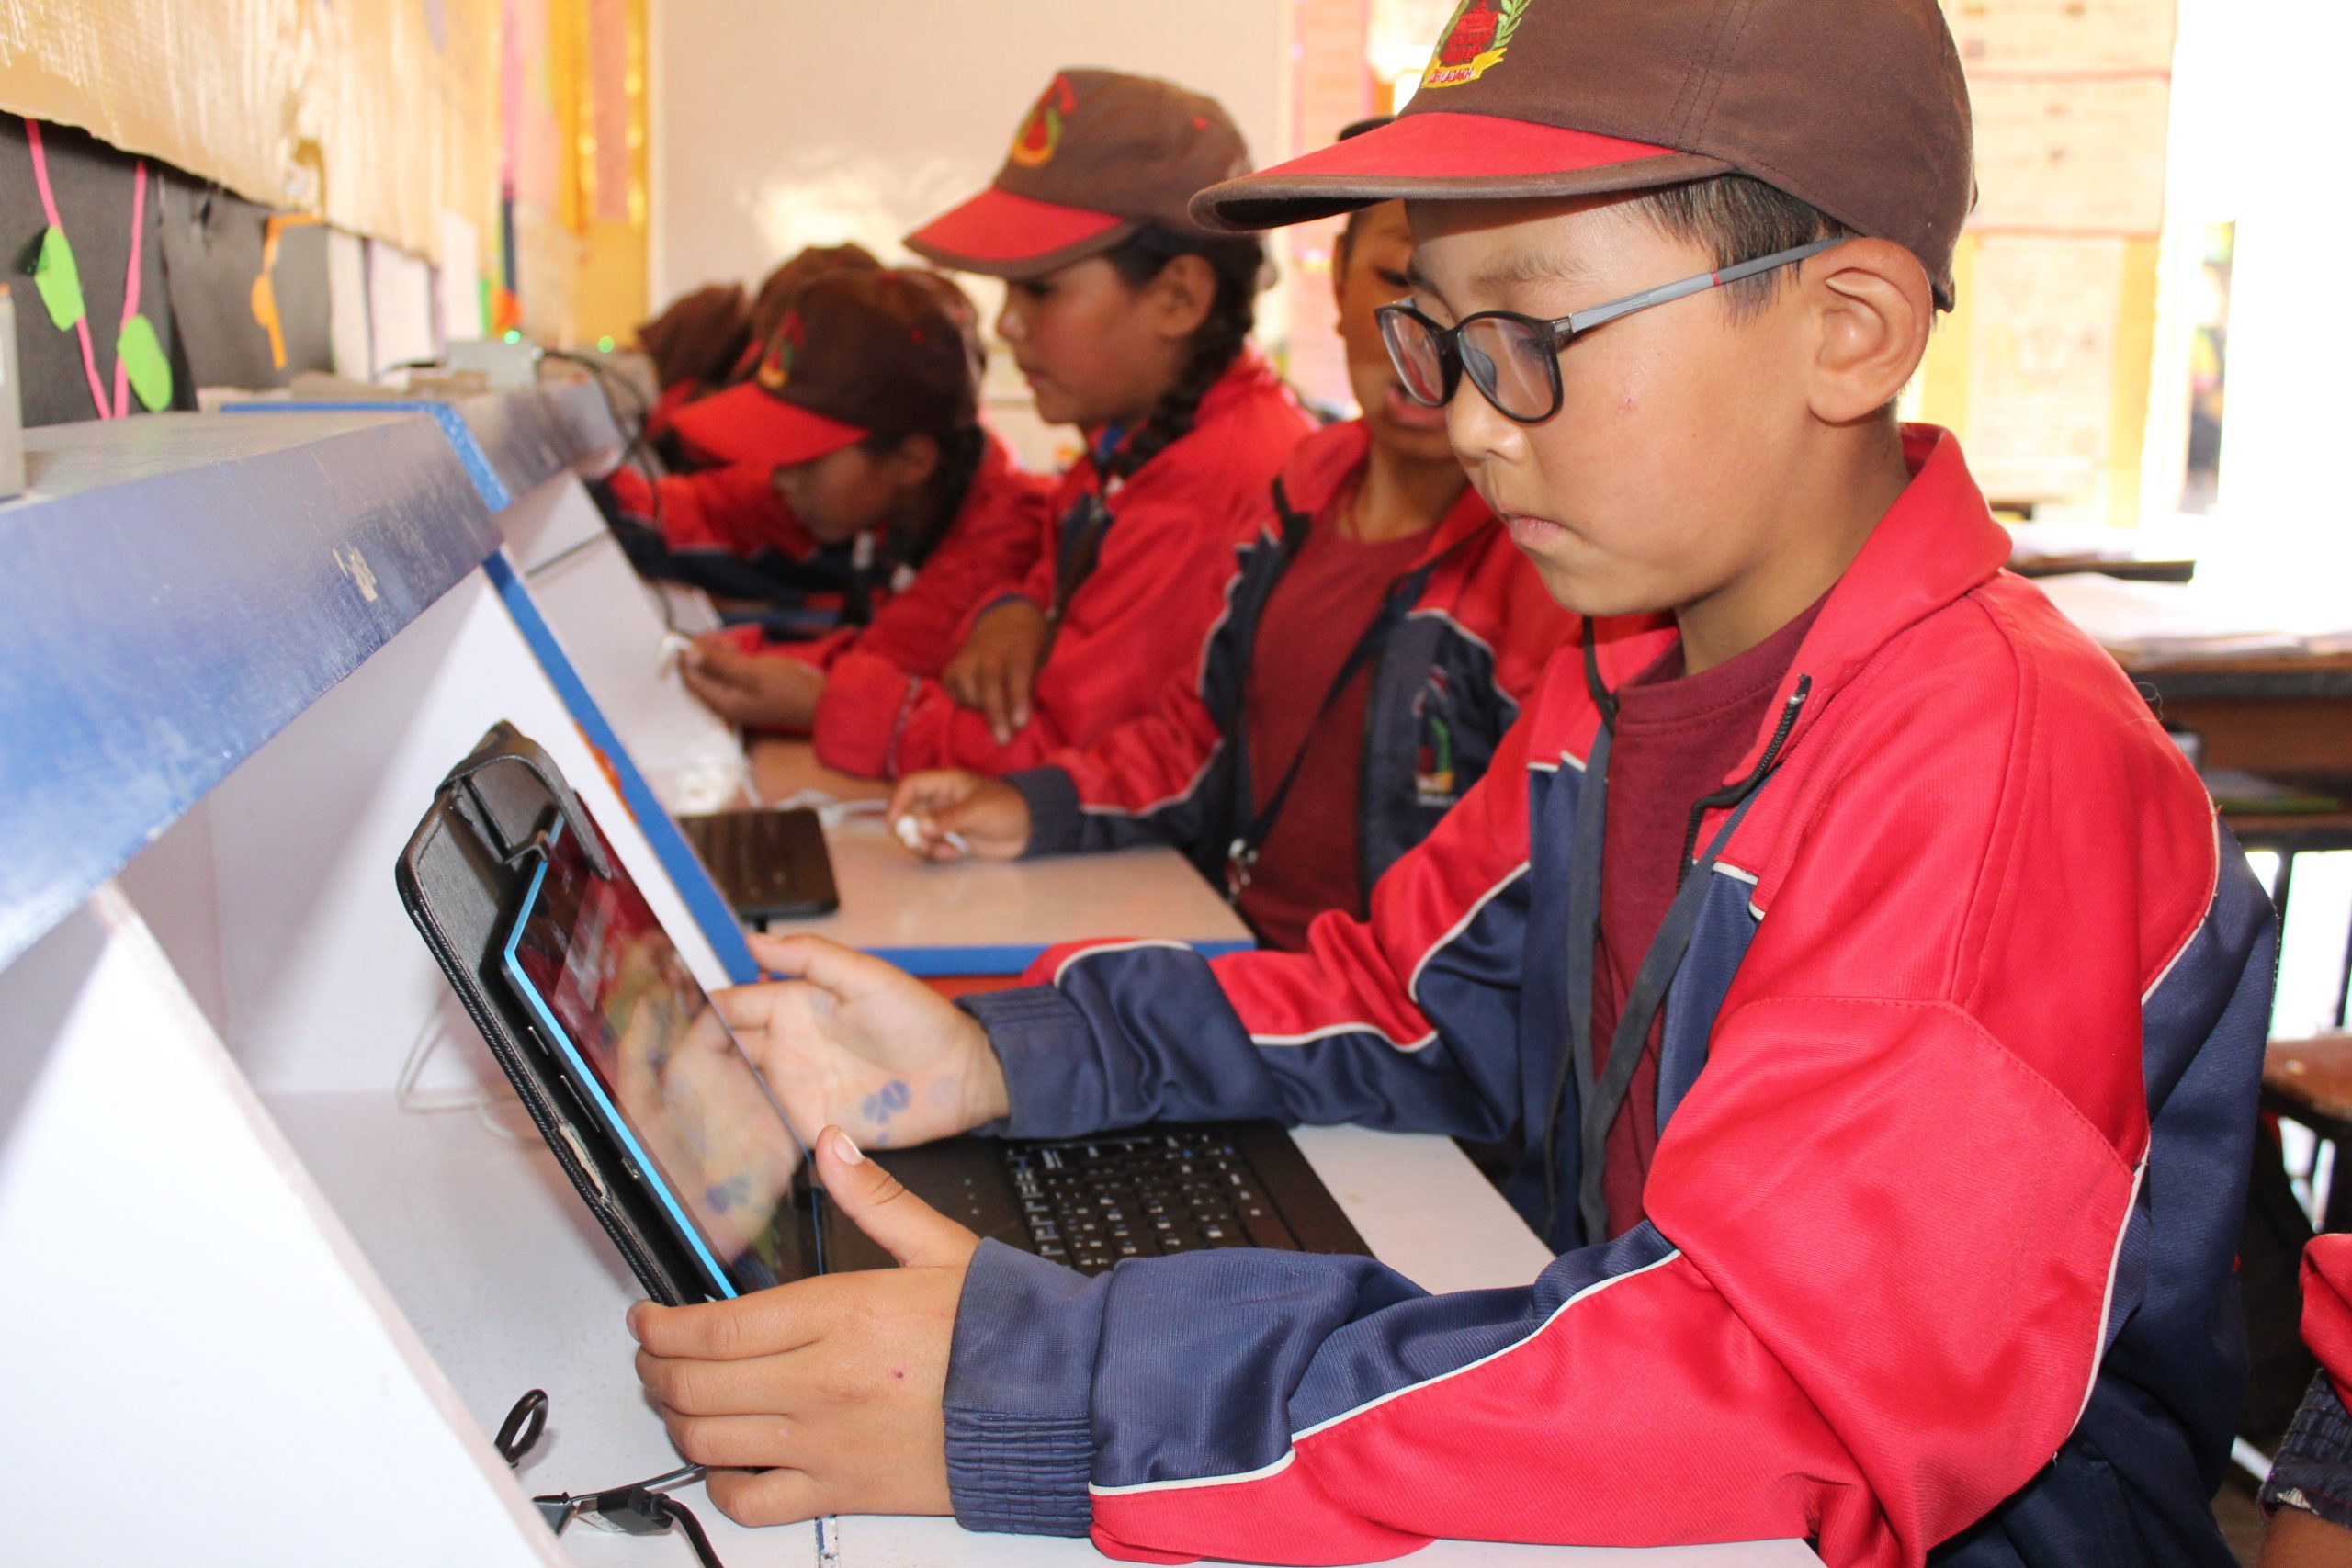
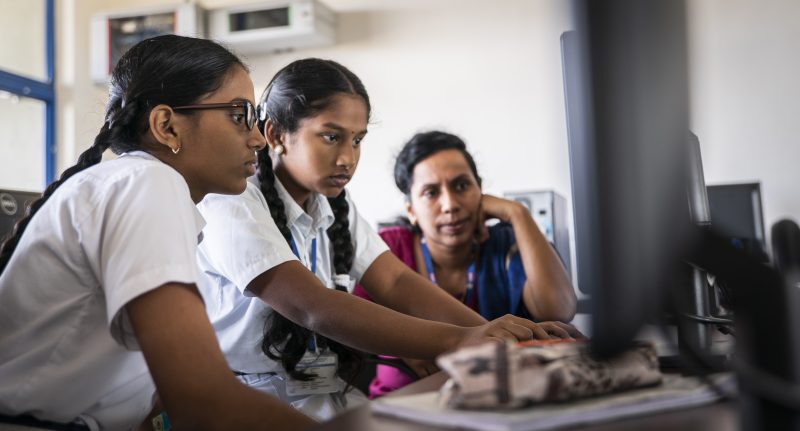
Tablet computers are provided that connect to a Raspberry Pi-powered network
“17000 ft Foundation is a not-for-profit organisation in India, set up to improve the lives of people settled in very remote mountainous hamlets, in areas that are inaccessible and isolated due to reasons of harsh mountainous terrain,” explains its founder, Sujata Sahu. “17000 ft has its roots in high-altitude Ladakh, a region in the desolate cold desert of the Himalayan mountain region of India. Situated in altitudes upwards of 9300 ft and with temperatures dropping to -50°C in inhabited areas, this area is home to indigenous tribal communities settled across hundreds of tiny, scattered hamlets. These villages are remote, isolated, and suffer from bare minimum infrastructure and a centuries-old civilisation unwilling but driven to migrate to faraway cities in search of a better life. Ladakh has a population of just under 300,000 people living across 60,000 km2 of harsh mountain terrain, whose sustenance and growth depends on the infrastructure, resources, and support provided by the government.”
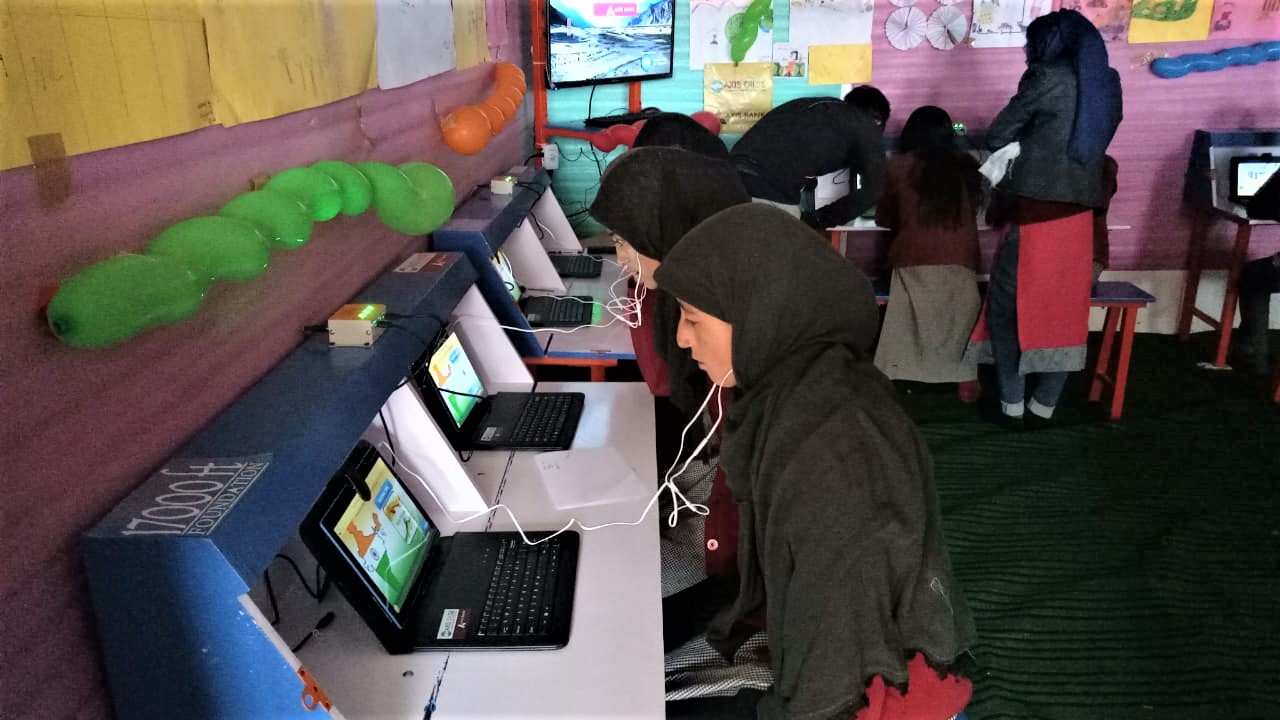
A huge number of students have already benefited from the program
The local governments have built schools. However, they don’t have enough resources or qualified teachers to be truly effective, resulting in a problem with students dropping out or having to be sent off to cities. 17000 ft’s mission is to transform the education in these communities.
High-altitude Raspberry Pi
“The Foundation today works in over 200 remote government schools to upgrade school infrastructure, build the capacity of teachers, provide better resources for learning, thereby improving the quality of education for its children,” says Sujata. “17000 ft Foundation has designed and implemented a unique solar-powered offline digital learning solution called the DigiLab, using Raspberry Pi, which brings the power of digital learning to areas which are truly off-grid and have neither electricity nor mobile connectivity, helping children to learn better, while also enabling the local administration to monitor performance remotely.”
Each school is provided with solar power, Raspberry Pi computers to act as a local internet for the school, and tablets to connect to it. It serves as a ‘last mile connectivity’ from a remote school in the cloud, with an app on a teacher’s phone that will download data when it can and then update the installed Raspberry Pi in their school.
Remote success
“The solution has now been implemented in 120 remote schools of Ladakh and is being considered to be implemented at scale to cover the entire region,” adds Sujata. “It has now run successfully across three winters of Ladakh, withstanding even the harshest of -50°C temperatures with no failure. In the first year of its implementation alone, 5000 students were enrolled, with over 93% being active. The system has now delivered over 60,000 hours of learning to students in remote villages and improved learning outcomes.”
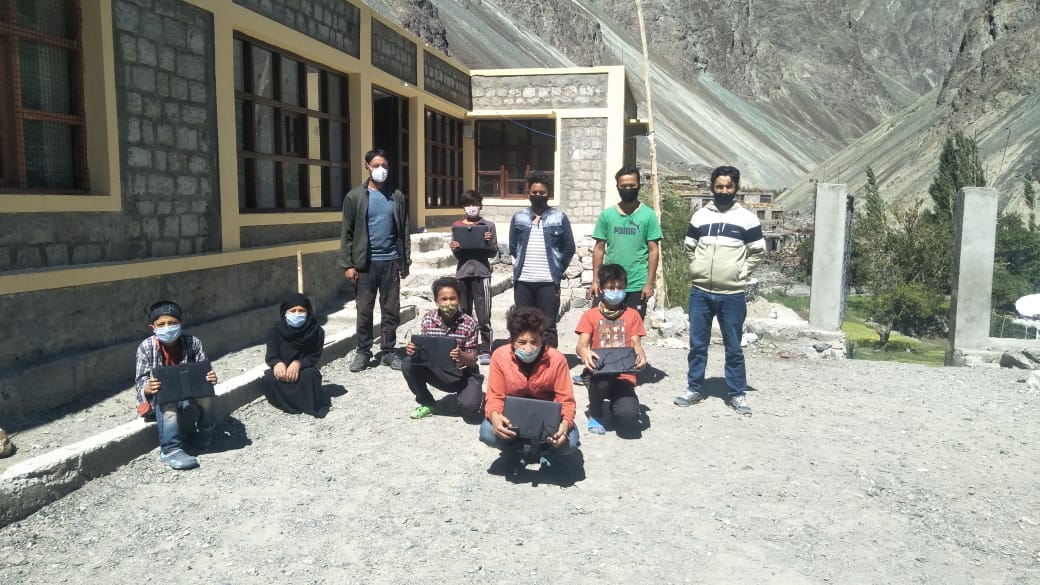
Not all children stay in the villages year round
It’s already helping to change education in the area during the winter. Many villages (and schools) can shut down for up to six months, and families who can’t move away are usually left without a functioning school. 17000 ft has changed this.
“In the winter of 2018 and 2019, for the first time in a few decades, parents and community members from many of these hamlets decided to take advantage of their DigiLabs and opened them up for their children to learn despite the harsh winters and lack of teachers,” Sujata explains. “Parents pooled in to provide basic heating facilities (a Bukhari – a wood- or dung-based stove with a long pipe chimney) to bring in some warmth and scheduled classes for the senior children, allowing them to learn at their own pace, with student data continuing to be recorded in Raspberry Pi and available for the teachers to assess when they got back. The DigiLab Program, which has been made possible due to the presence of the Raspberry Pi Server, has solved a major problem that the Ladakhis have been facing for years!”
Some of the village schools go unused in the winter
How can people help?
Sujata says, “17000 ft Foundation is a non-profit organisation and is dependent on donations and support from individuals and companies alike. This solution was developed by the organisation in a limited budget and was implemented successfully across over a hundred hamlets. Raspberry Pi has been a boon for this project, with its low cost and its computing capabilities which helped create this solution for such a remote area. However, the potential of Raspberry Pi is as yet untapped and the solution still needs upgrades to be able to scale to cover more schools and deliver enhanced functionality within the school. 17000 ft is very eager to help take this to other similar regions and cover more schools in Ladakh that still remain ignored. What we really need is funds and technical support to be able to reach the good of this solution to more children who are still out of the reach of Ed Tech and learning. We welcome contributions of any size to help us in this project.”
For donations from outside India, write to sujata.sahu@17000ft.org. Indian citizens can donate through 17000ft.org/donate.
Learning computing is fun, creative, and exploratory. It also involves understanding some powerful ideas about how computers work and gaining key skills for solving problems using computers. These ideas and skills are collected under the umbrella term ‘computational thinking’.
When we create our online learning projects for young people, we think as much about how to get across these powerful computational thinking concepts as we do about making the projects fun and engaging. To help us do this, we have put together a computational thinking framework, which you can read right now.
What is computational thinking? A brief summary
Computational thinking is a set of ideas and skills that people can use to design systems that can be run on a computer. In our view, computational thinking comprises:
Decomposition
Algorithms
Patterns and generalisations
Abstraction
Evaluation
Data
All of these aspects are underpinned by logical thinking, the foundation of computational thinking.
What does computational thinking look like in practice?
In principle, the processes a computer performs can also be carried out by people. (To demonstrate this, computing educators have created a lot of ‘unplugged’ activities in which learners enact processes like computers do.) However, when we implement processes so that they can be run on a computer, we benefit from the huge processing power that computers can marshall to do certain types of activities.
Computers need instructions that are designed in very particular ways. Computational thinking includes the set of skills we use to design instructions computers can carry out. This skill set represents the ways we can logically approach problem solving; as computers can only solve problems using logical processes, to write programs that run on a computer, we need to use logical thinking approaches. For example, writing a computer program often requires the task the program revolves around to be broken down into smaller tasks that a computer can work through sequentially or in parallel. This approach, called decomposition, can also help people to think more clearly about computing problems: breaking down a problem into its constituent parts helps us understand the problem better.
Understanding computational thinking supports people to take advantage of the way computers work to solve problems. Computers can run processes repeatedly and at amazing speeds. They can perform repetitive tasks that take a long time, or they can monitor states until conditions are met before performing a task. While computers sometimes appear to make decisions, they can only select from a range of pre-defined options. Designing systems that involve repetition and selection is another way of using computational thinking in practice.
Our computational thinking framework
Our team has been thinking about our approach to computational thinking for some time, and we have just published the framework we have developed to help us with this. It sets out the key areas of computational thinking, and then breaks these down into themes and learning objectives, which we build into our online projects and learning resources.
To develop this computational thinking framework, we worked with a group of academics and educators to make sure it is robust and useful for teaching and learning. The framework was also influenced by work from organisations such as Computing At School (CAS) in the UK, and the Computer Science Teachers’ Association (CSTA) in the USA.
We’ve been using the computational thinking framework to help us make sure we are building opportunities to learn about computational thinking into our learning resources. This framework is a first iteration, which we will review and revise based on experience and feedback.
We’re always keen to hear feedback from you in the community about how we shape our learning resources, so do let us know what you think about them and the framework in the comments.
His creation plays films at about two minutes of screen time per 24 hours, taking a little under three months for a 110-minute film. Psycho played in a corner of his dining room for two months. The infamous shower scene lasted a day and a half.
Tom enjoys the opportunity for close study of iconic filmmaking, but you might like this project for the living artwork angle. How cool would this be playing your favourite film onto a plain wall somewhere you can see it throughout the day?
The Raspberry Pi wearing its e-Paper HAT
Four simple steps
Luckily, this is a relatively simple project – no hardcore coding, no soldering required – with just four steps to follow if you’d like to recreate it:
Get the Raspberry Pi working in headless mode without a monitor, so you can upload files and run code
Connect to an e-paper display via an e-paper HAT (see above image; Tom is using this one) and install the driver code on the Raspberry Pi
Use Tom’s code to extract frames from a movie file, resize and dither those frames, display them on the screen, and keep track of progress through the film
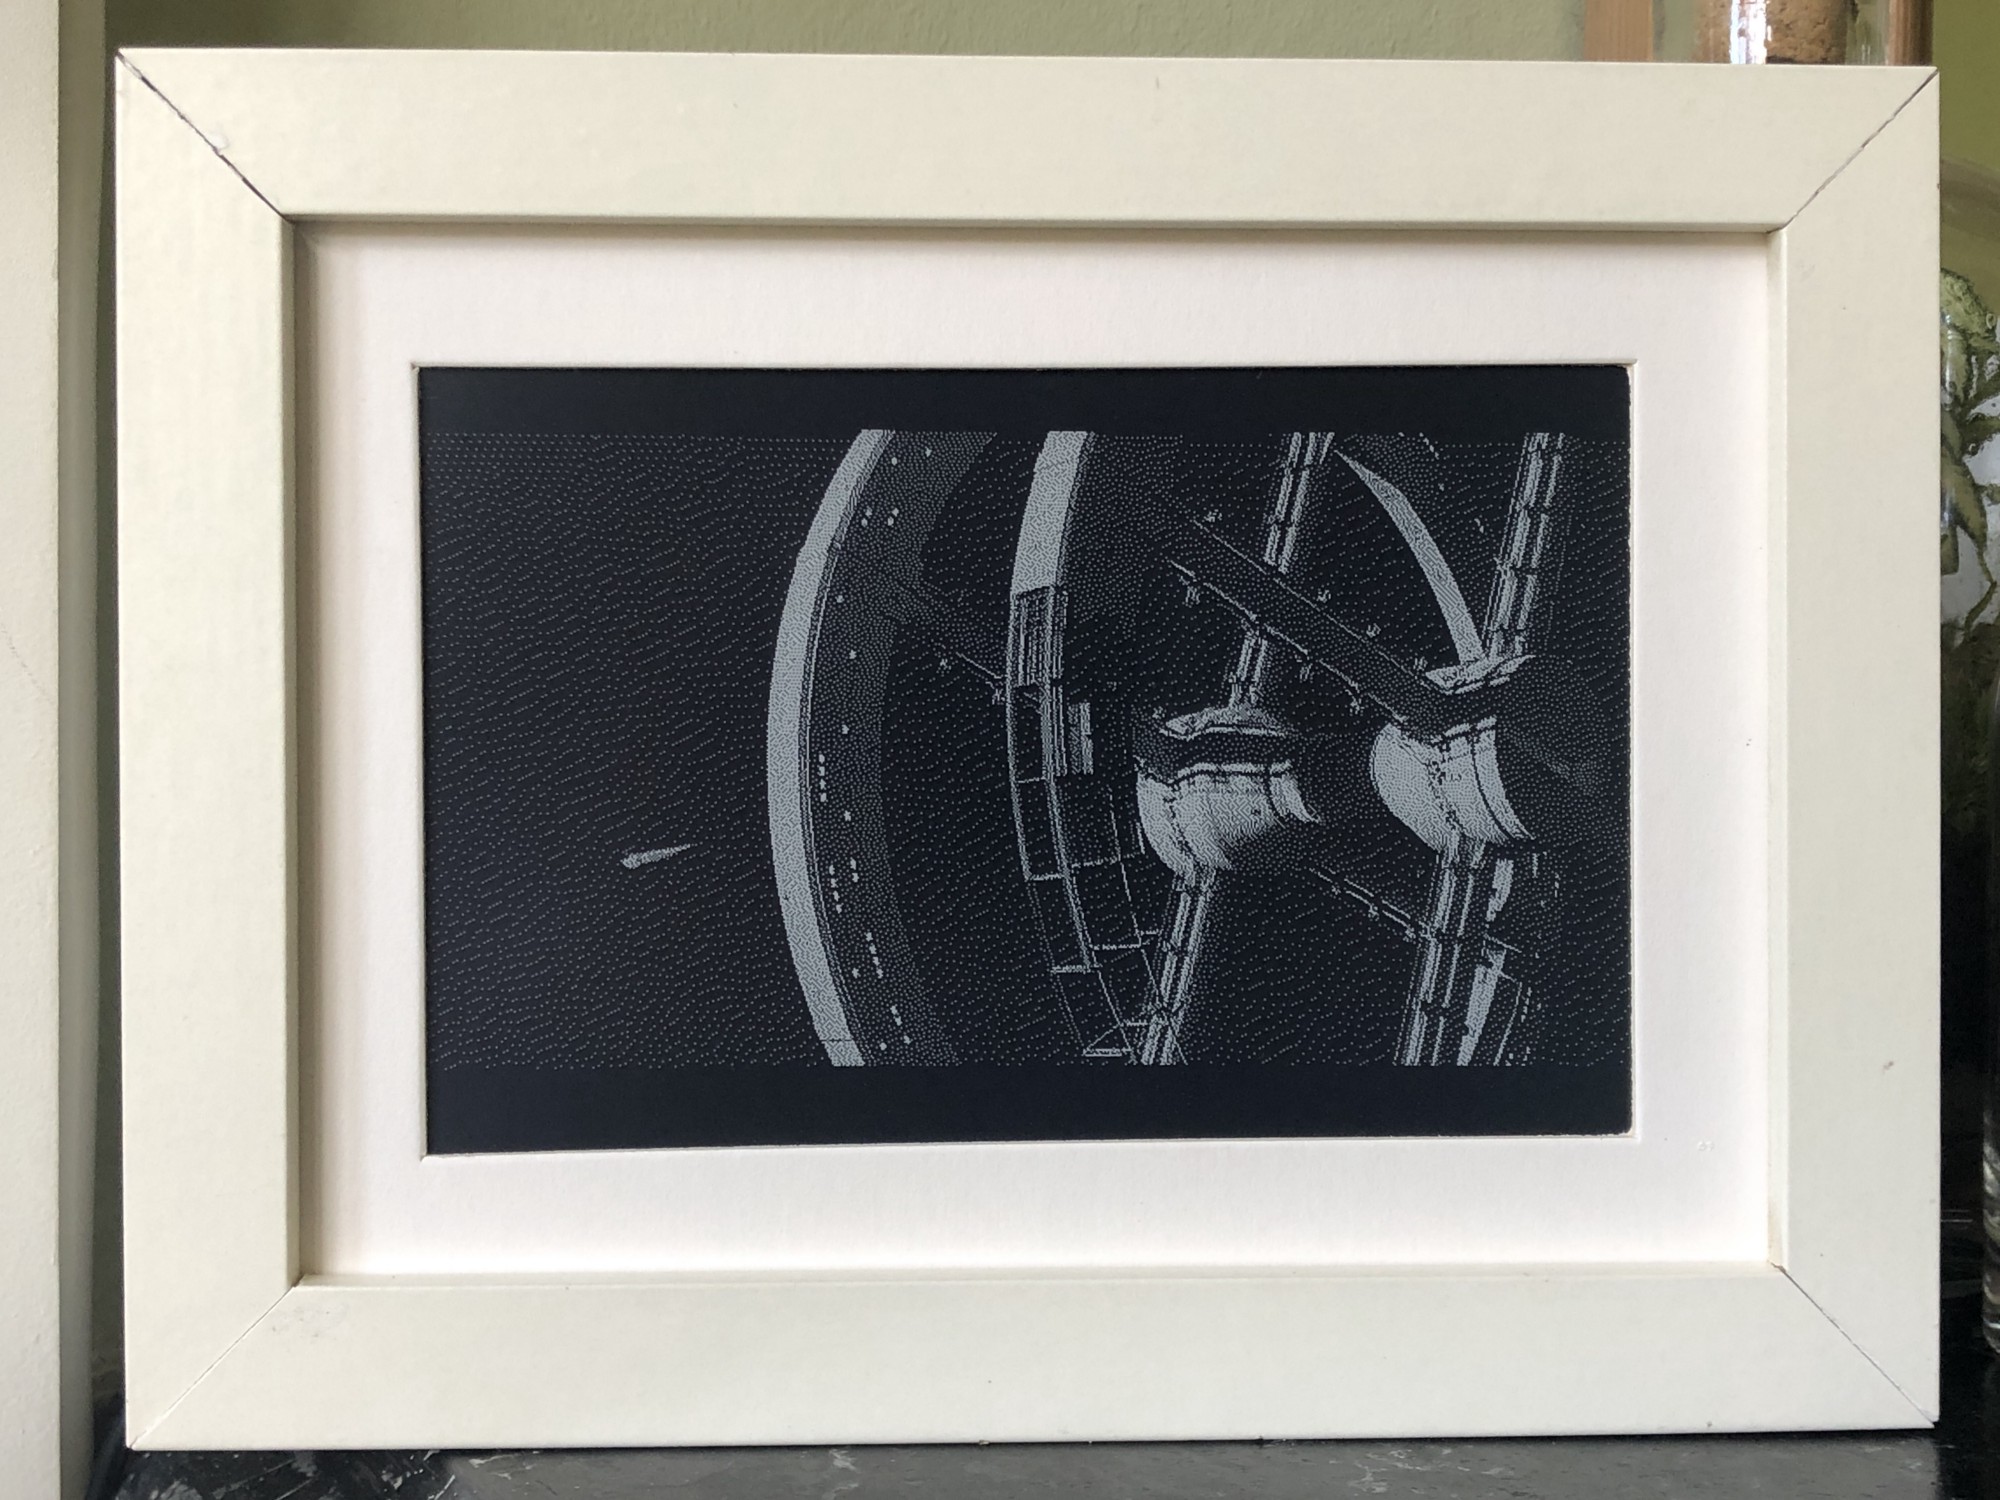
Find some kind of frame to keep it all together (Tom went with a trusty IKEA number)
Living artwork: the Psycho shower scene playing alongside still artwork in Tom’s home
Affordably arty
The entire build cost £120 in total. Tom chose a 2GB Raspberry Pi 4 and a NOOBS 64gb SD Card, which he bought from Pimoroni, one of our approved resellers. NOOBS included almost all the libraries he needed for this project, which made life a lot easier.
His original post is a dream of a comprehensive walkthrough, including all the aforementioned code.
2001: A Space Odyssey would take months to play on Tom’s creation
Head to the comments section with your vote for the creepiest film to watch in ultra slow motion. I came over all peculiar imaging Jaws playing on my living room wall for months. Big bloody mouth opening slooooowly (pales), big bloody teeth clamping down slooooowly (heart palpitations). Yeah, not going to try that. Sorry Tom.
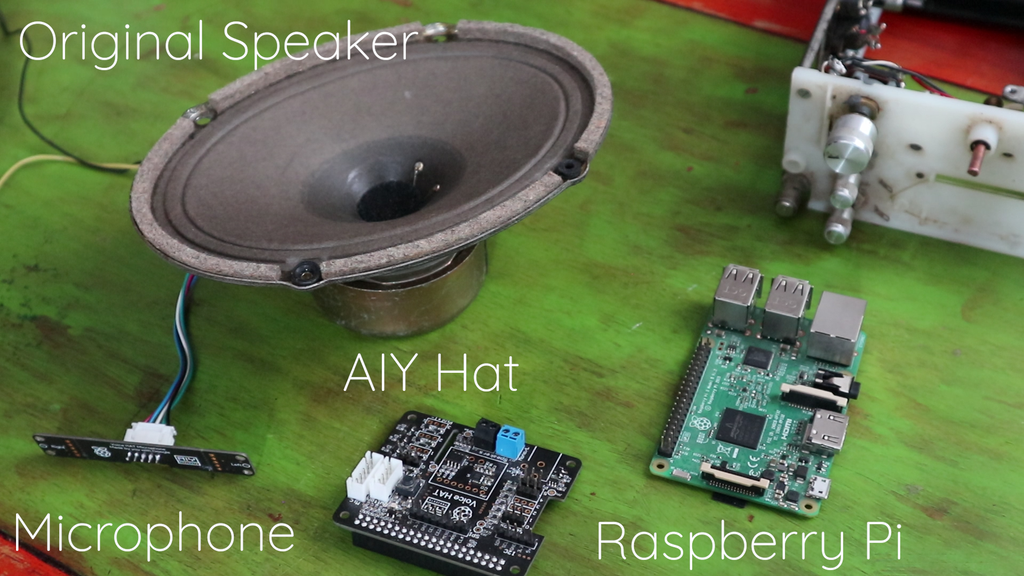
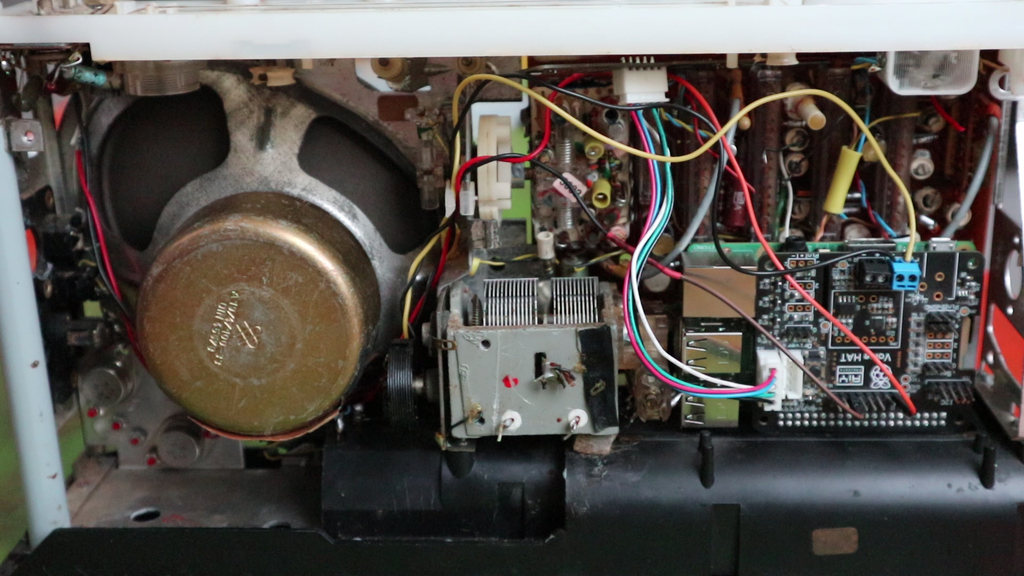
8 Bits and a Byte created this voice-controllable, interactive, storytelling device, hidden inside a 1960s radio for extra aesthetic wonderfulness.
A Raspberry Pi 3B works with an AIY HAT, a microphone, and the device’s original speaker to run chatbot and speech-to-text artificial intelligence.
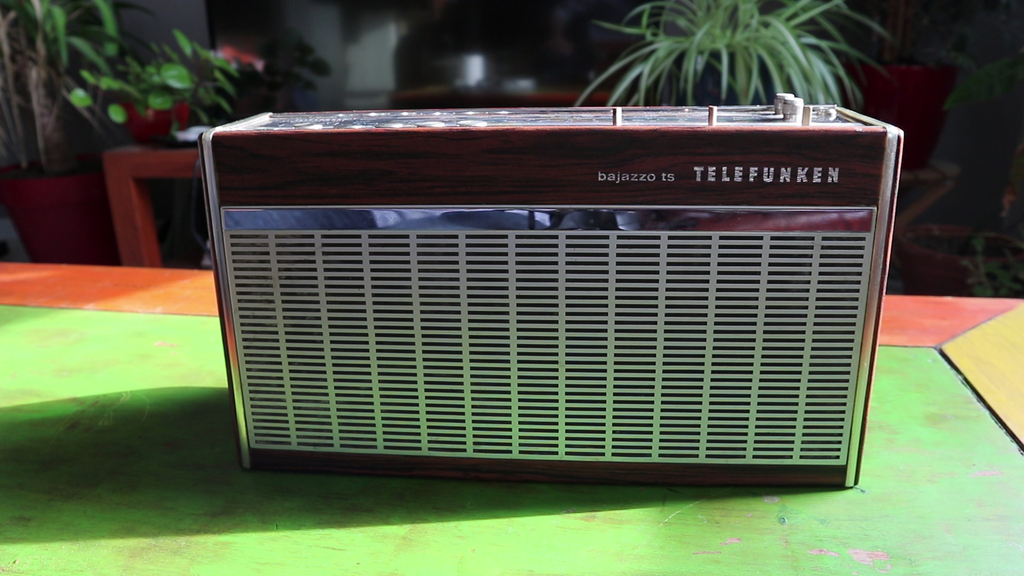
This creature is a Bajazzo TS made by Telefunken some time during the 1960s in West Germany, and this detail inspired the espionage-themed story that 8 Bits and a Byte retrofitted it to tell. Users are intelligence agents whose task is to find the evil Dr Donogood.
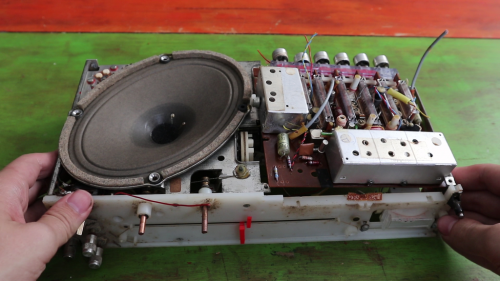
Out with the old electronics
The device works like one of those ‘choose your own adventure’ books, asking you a series of questions and offering you several options. The story unfolds according to the options you choose, and leads you to a choice of endings.
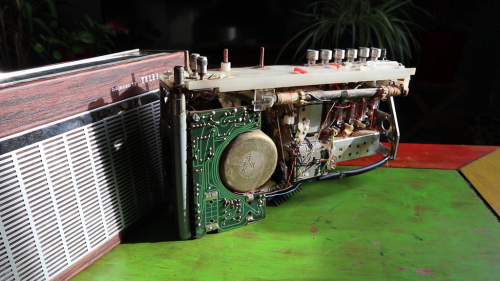
In with the new (Raspberry Pi tucked in the lower right corner)
What’s the story?
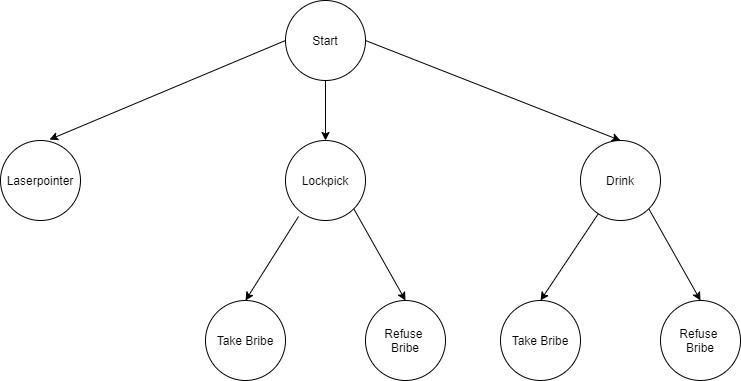
8 Bits and a Byte designed a decision tree to provide a tight story frame, so users can’t go off on question-asking tangents.
When you see the ‘choose your own adventure’ frame set out like this, you can see how easy it is to create something that feels interactive, but really only needs to understand the difference between a few phrases: ‘laser pointer’; ‘lockpick’; ‘drink’; take bribe’, and ‘refuse bribe’.
How does it interact with the user?
Skip to 03mins 30secs to see the storytelling in action
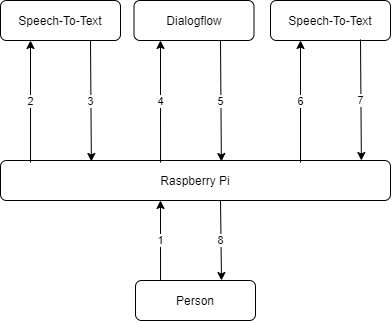
Google Dialogflow is a free natural language understanding platform that makes it easy to design a conversational user interface, which is long-speak for ‘chatbot’.
There are a few steps between the user talking to the radio, and the radio figuring out how to respond. The speech-to-text and chatbot software need to work in tandem. For this project, the data flow runs like so:
1: The microphone detects that someone is speaking and records the audio.
2-3: Google AI (the Speech-To-Text box) processes the audio and extracts the words the user spoke as text.
4-5: The chatbot (GoogleDialogflow) receives this text and matches it with the correct response, which is sent back to the Raspberry Pi.
6-7: Some more artificial intelligence uses this text to generate artificial speech.
8: This audio is played to the user via the speaker.
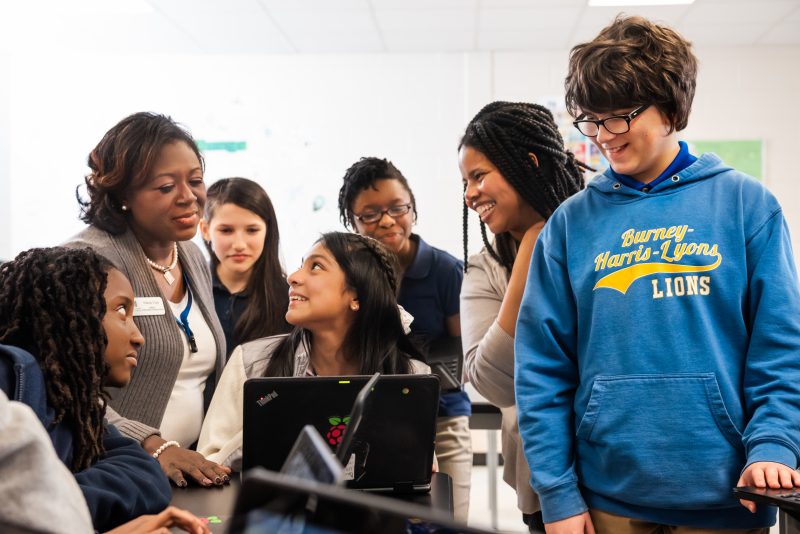
This week, we’re introducing young people around the world to coding GUIs, or graphical user interfaces. Let them tune in this Wednesday at 5.30pm BST / 12.30pm EDT / 10.00pm IST for a fun live stream code-along session with Christina and special guest Martin! They’ll learn about GUIs, can ask us questions, and get to code a painting app.
For beginner coders, we have our Thursday live stream at 3.30pm PDT / 5.30pm CDT / 6.30pm EDT, thanks to support from Infosys Foundation USA! Christina will share more fun Scratch coding for beginners.
Now that school is back in session for many young people, we’ve wrapped up our weekly code-along videos. You and your children can continue coding with us during the live stream, whether you join us live or watch the recorded session on-demand. Thanks to everyone who watched our more than 90 videos and 45 hours of digital making content these past month!
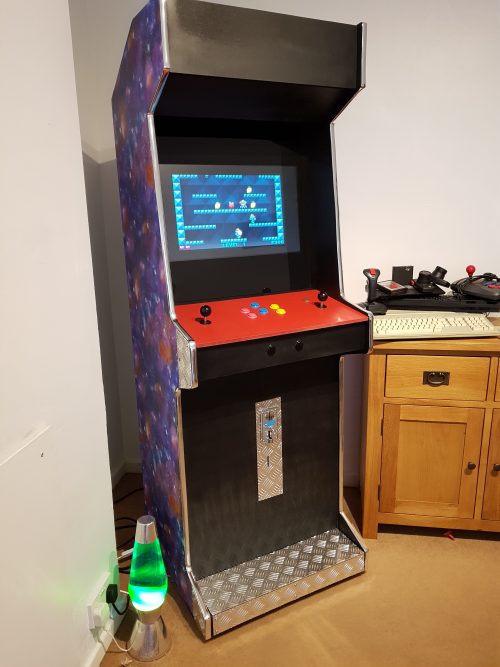
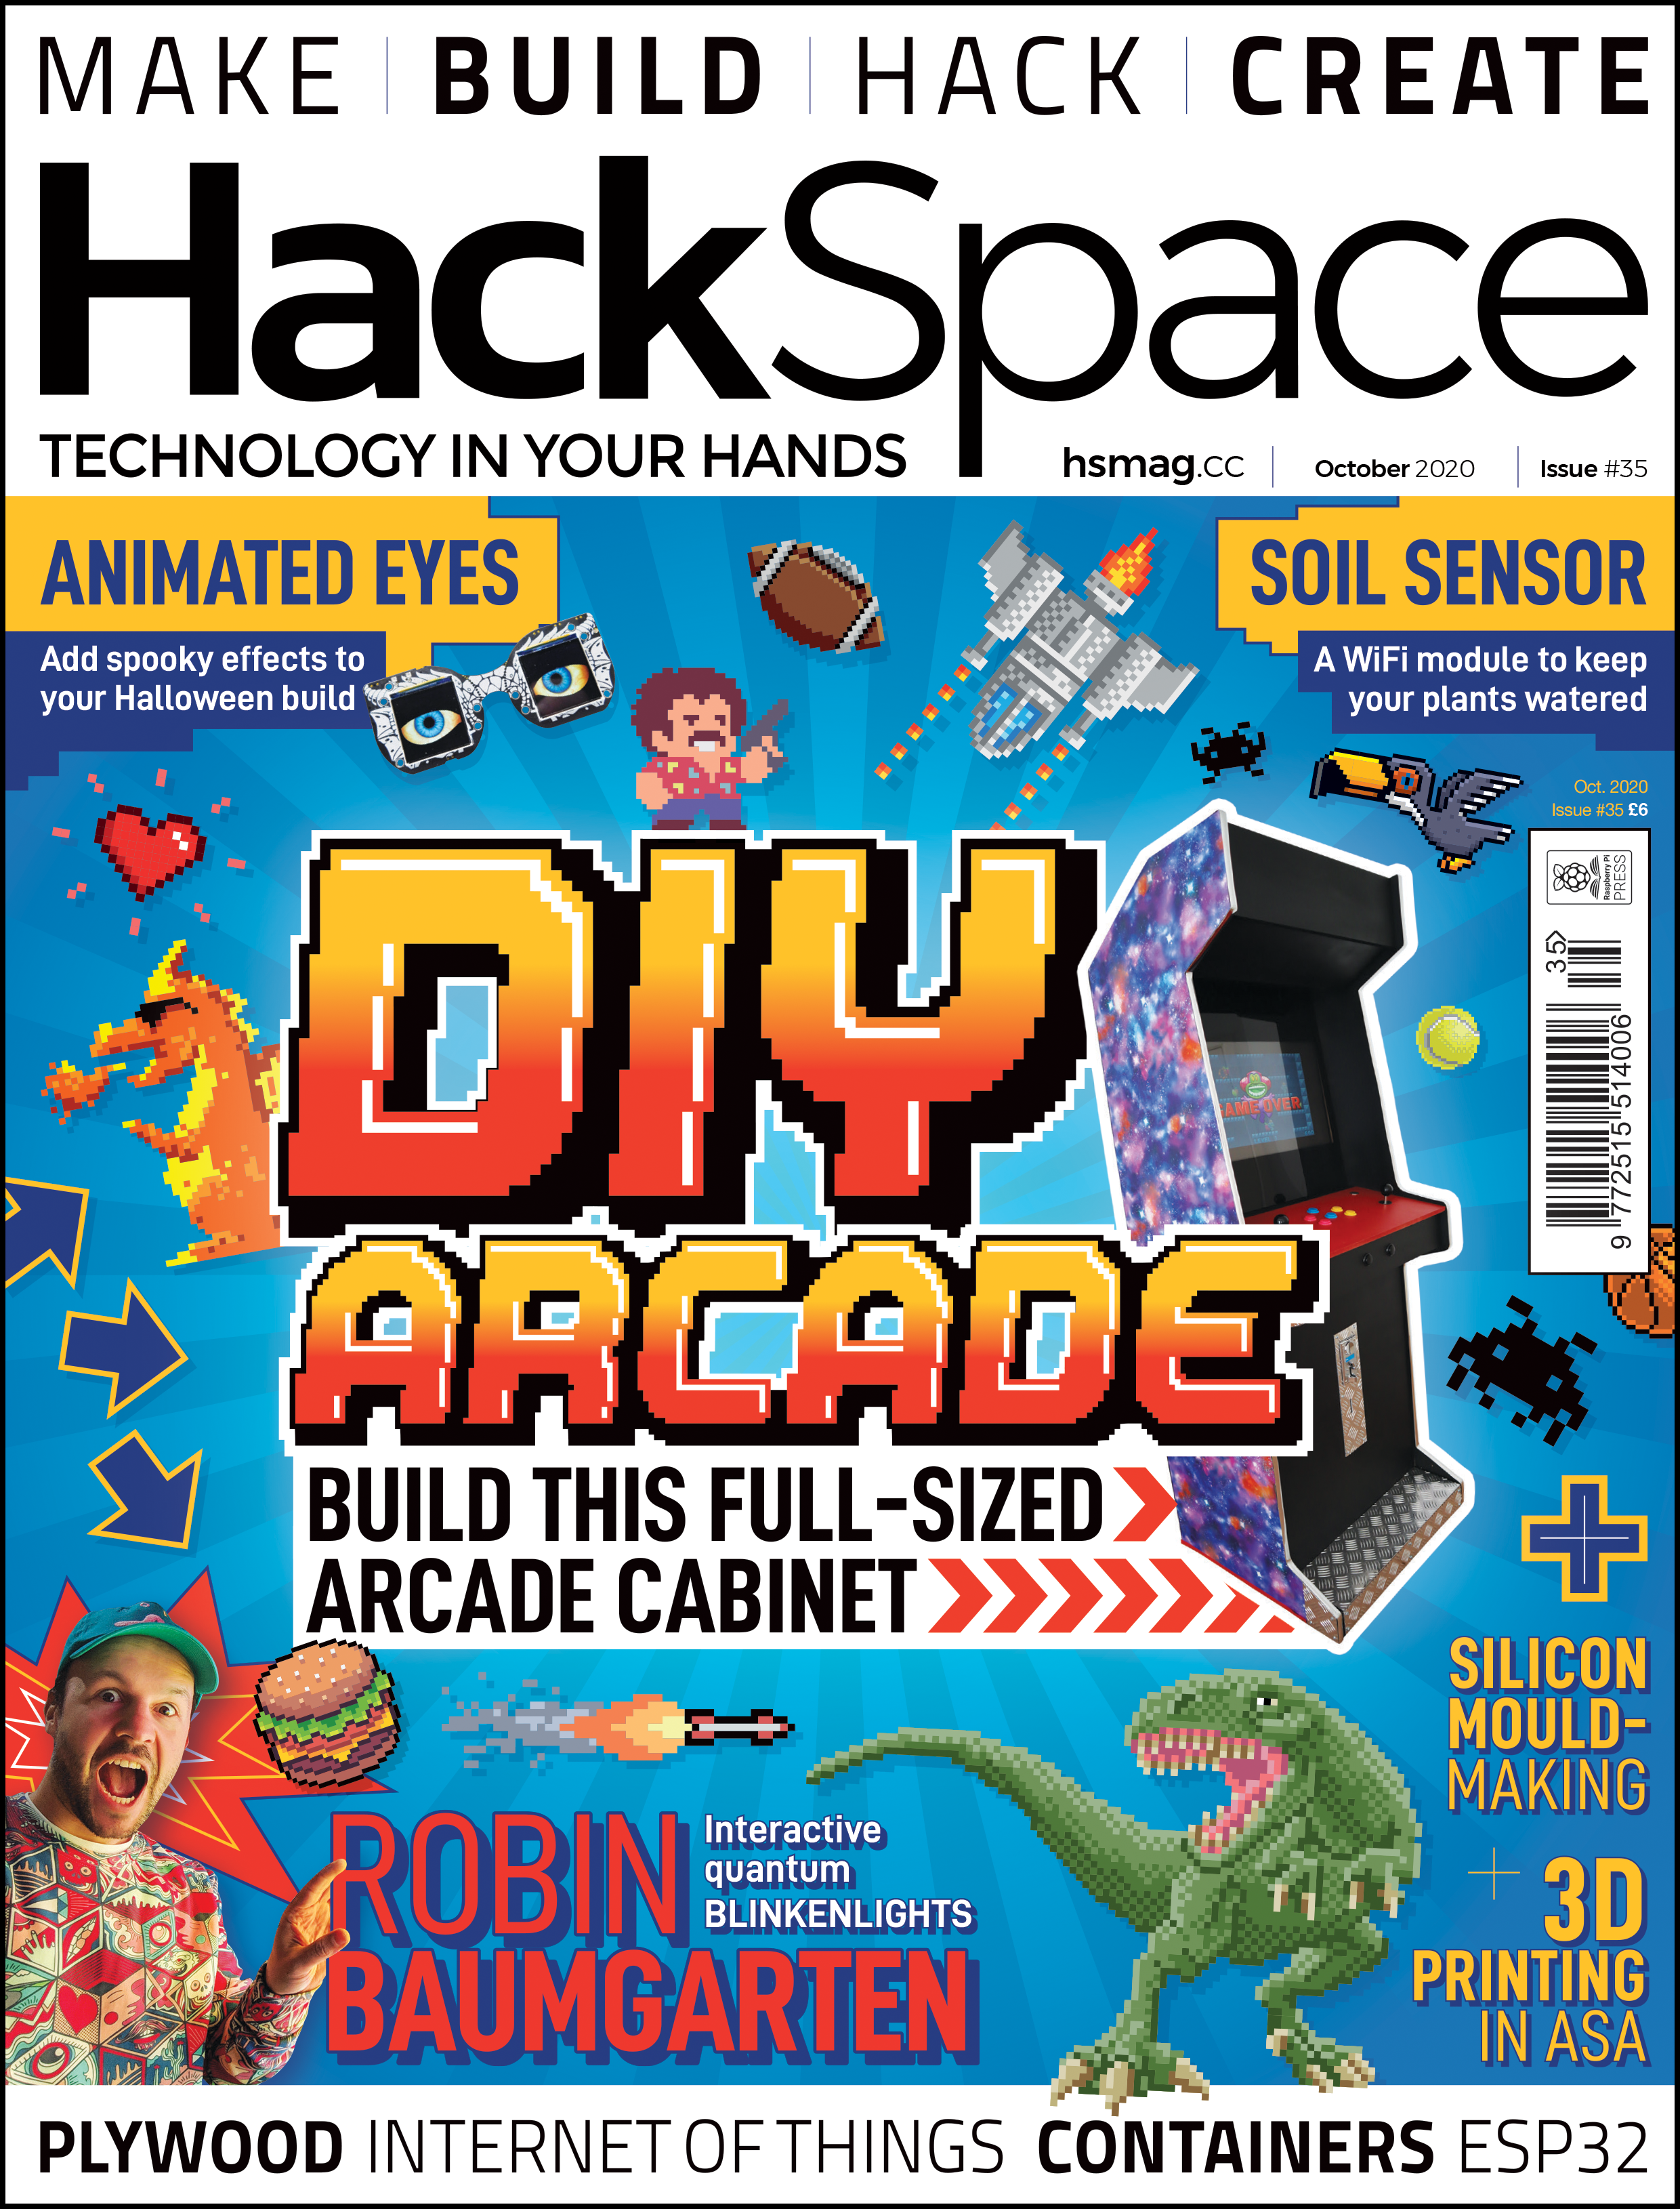
Games consoles might be fast and have great graphics, but they’re no match for the entertainment value of a proper arcade machine. In this month’s issue of Hackspace magazine, you’re invited to relive your misspent youth with this huge build project.
There’s something special about the comforting solidity of a coin-eating video game monolith, and nothing screams retro fun like a full-sized arcade cabinet sitting in the corner of the room. Classic arcade machines can be a serious investment. Costing thousands of pounds and weighing about the same as a giant panda, they’re out of reach for all but the serious collector. Thankfully, you can recreate that retro experience using modern components for a fraction of the price and weight.
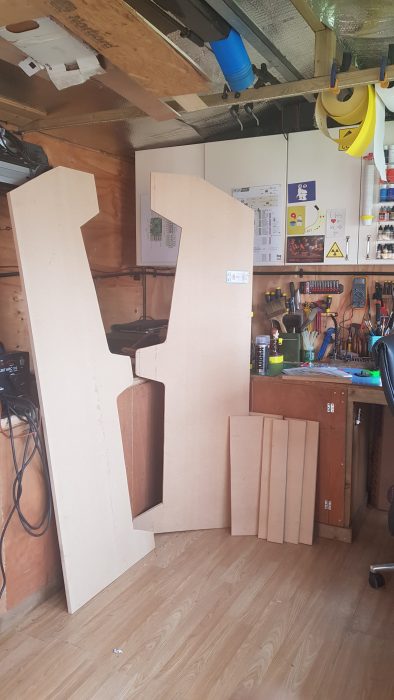
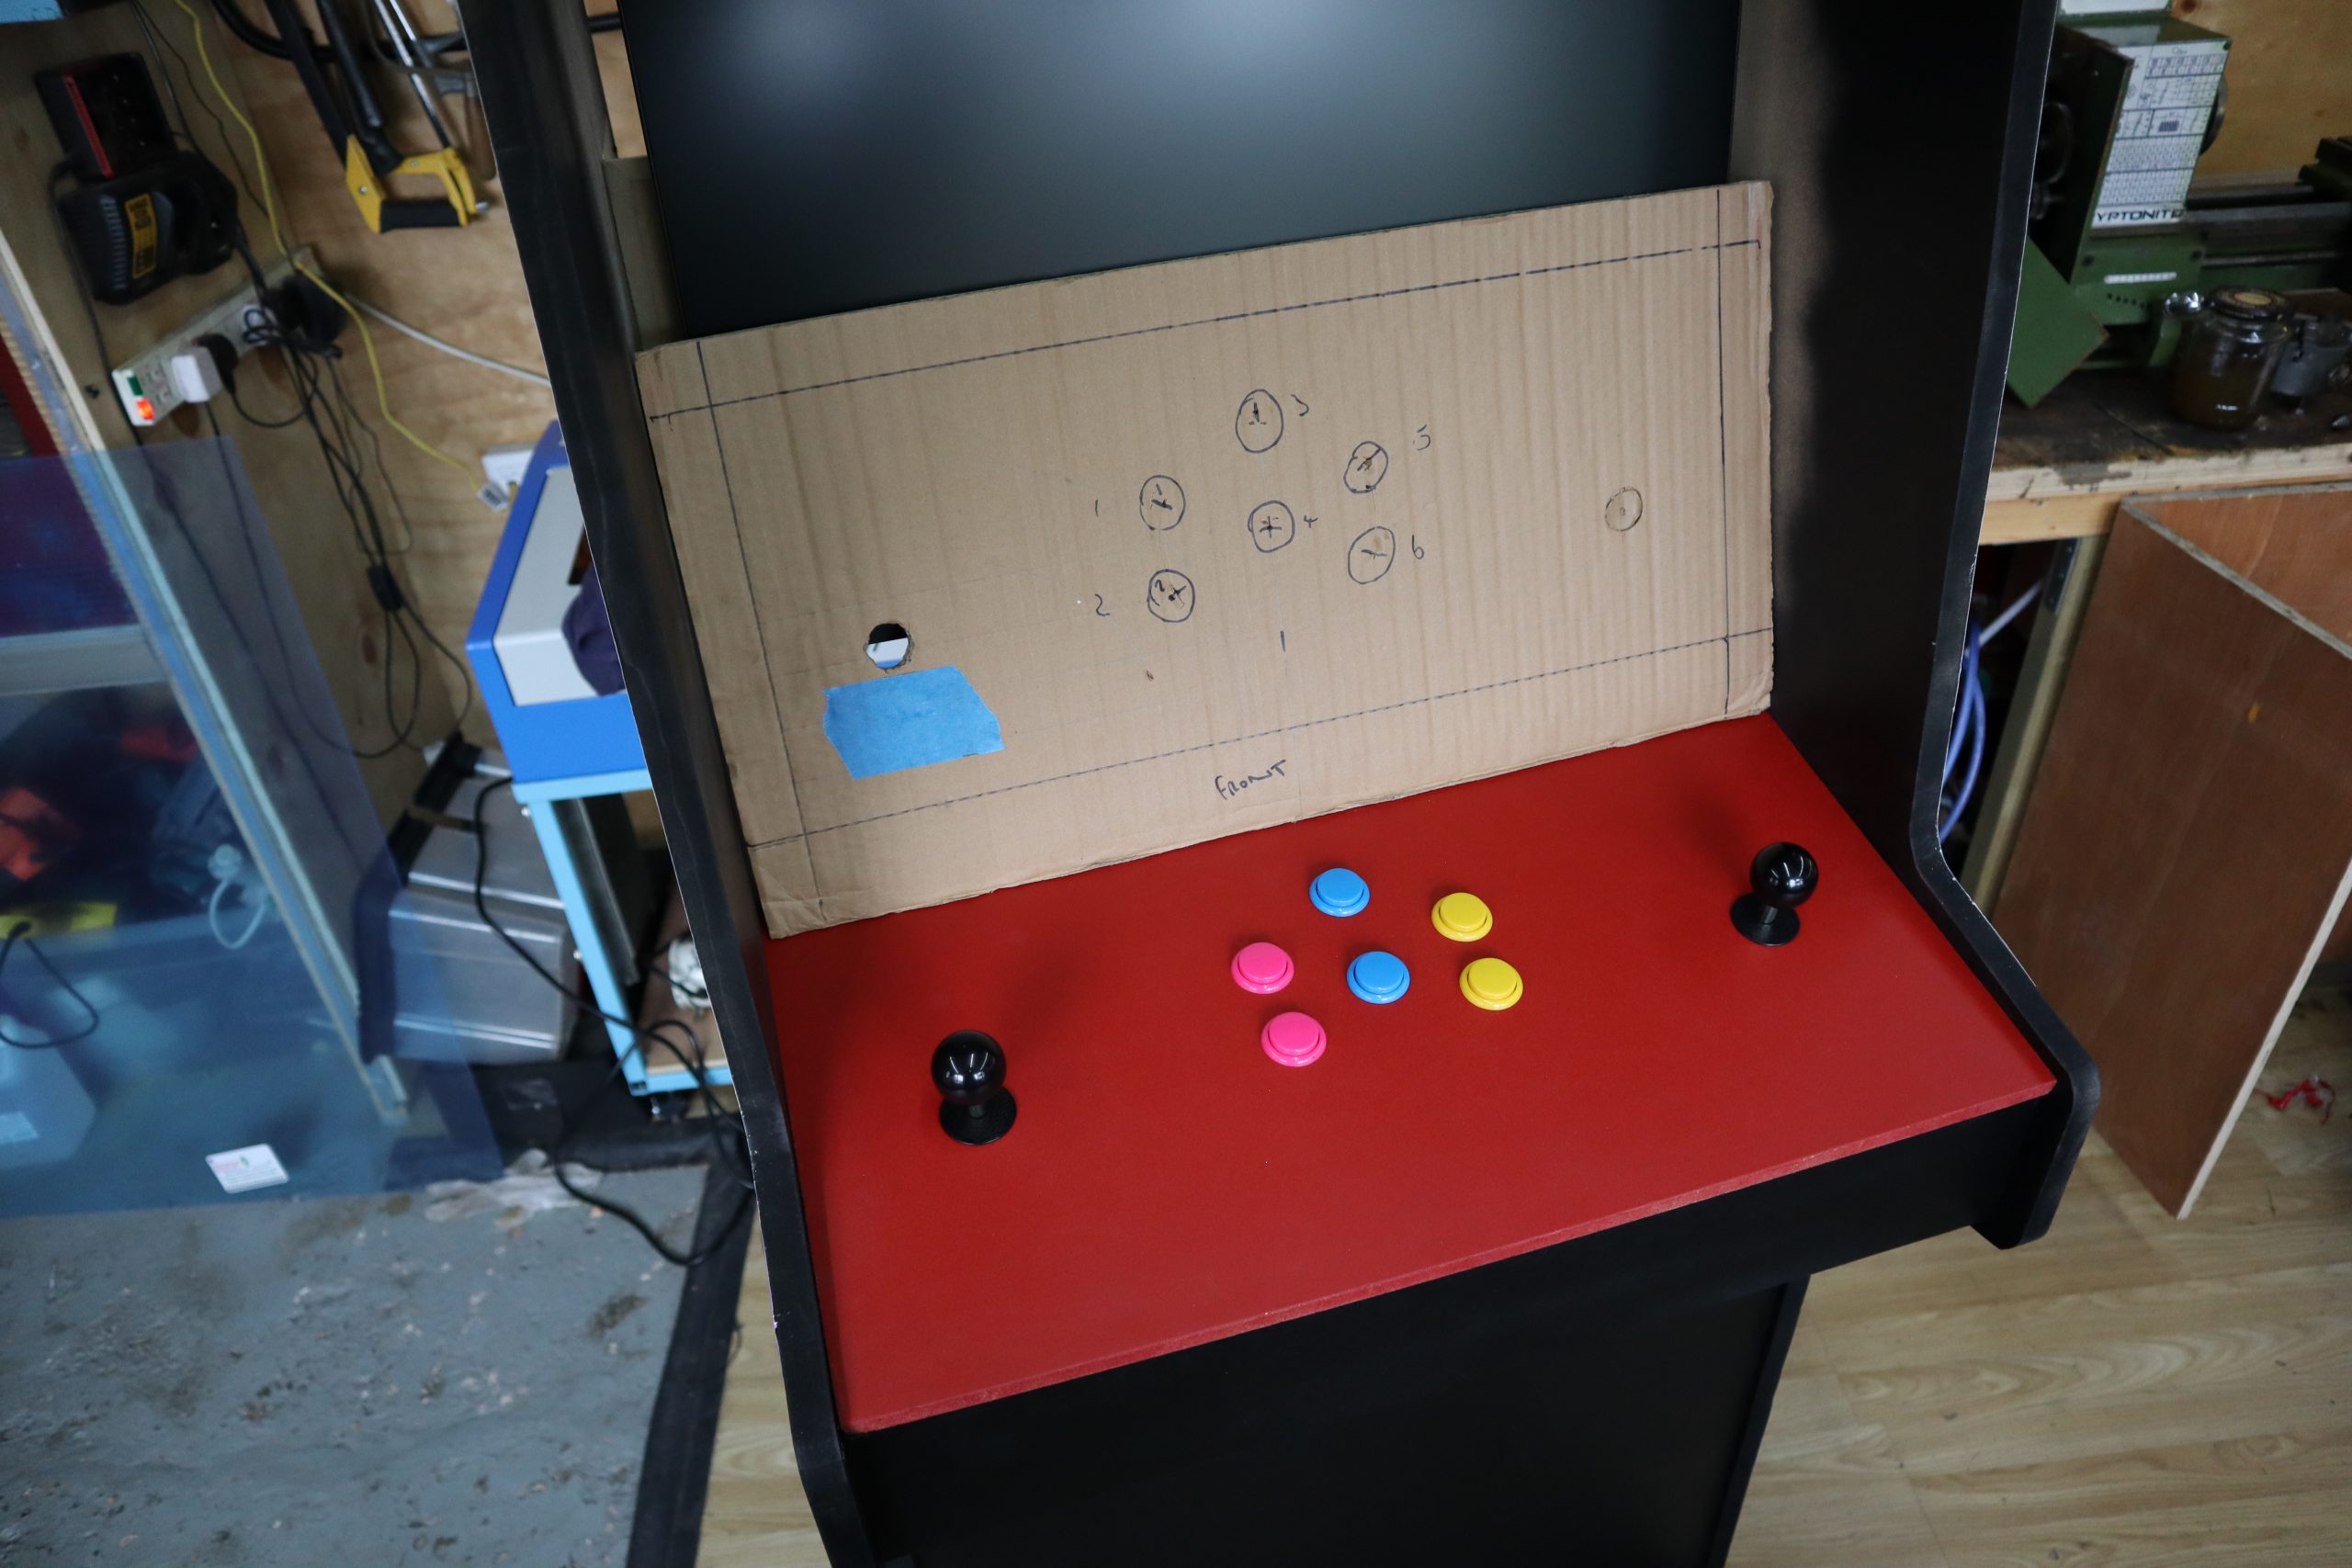
An arcade cabinet is much easier to make than you might expect. It’s essentially a fancy cupboard that holds a monitor, speakers, a computer, a keyboard, and some buttons. You can make your own cabinet using not much more than a couple of sheets of MDF, some clear plastic, and a few cans of spray paint.
If you want a really authentic-looking cabinet, you can find plenty of plans and patterns online. However, most classic cabinets are a bit bigger than you might remember, occupying almost a square metre of floor space. If you scale that down to approximately 60 cm2, you can make an authentic-looking home arcade cabinet that won’t take over the entire room, and can be cut from just two pieces of 8 × 4 (2440 mm × 1220 mm) MDF. You can download our plans, but these are rough plans designed for you to tweak into your own creation. A sheet of 18 mm MDF is ideal for making the body of the cabinet, and 12 mm MDF works well to fill in the front and back panels. You can use thinner sheets of wood to make a lighter cabinet, but you might find it less sturdy and more difficult to screw into.
See – simples
The sides of the machine should be cut from 18 mm MDF, and will be 6 feet high. The sides need to be as close to identical as possible, so mark out the pattern for the side on one piece of 18 mm MDF, and screw the boards together to hold them while you cut. You can avoid marking the sides by placing the screws through the waste areas of the MDF. Keep these offcuts to make internal supports or brackets. You can cut the rest of the pieces of MDF using the project plans as a guide.
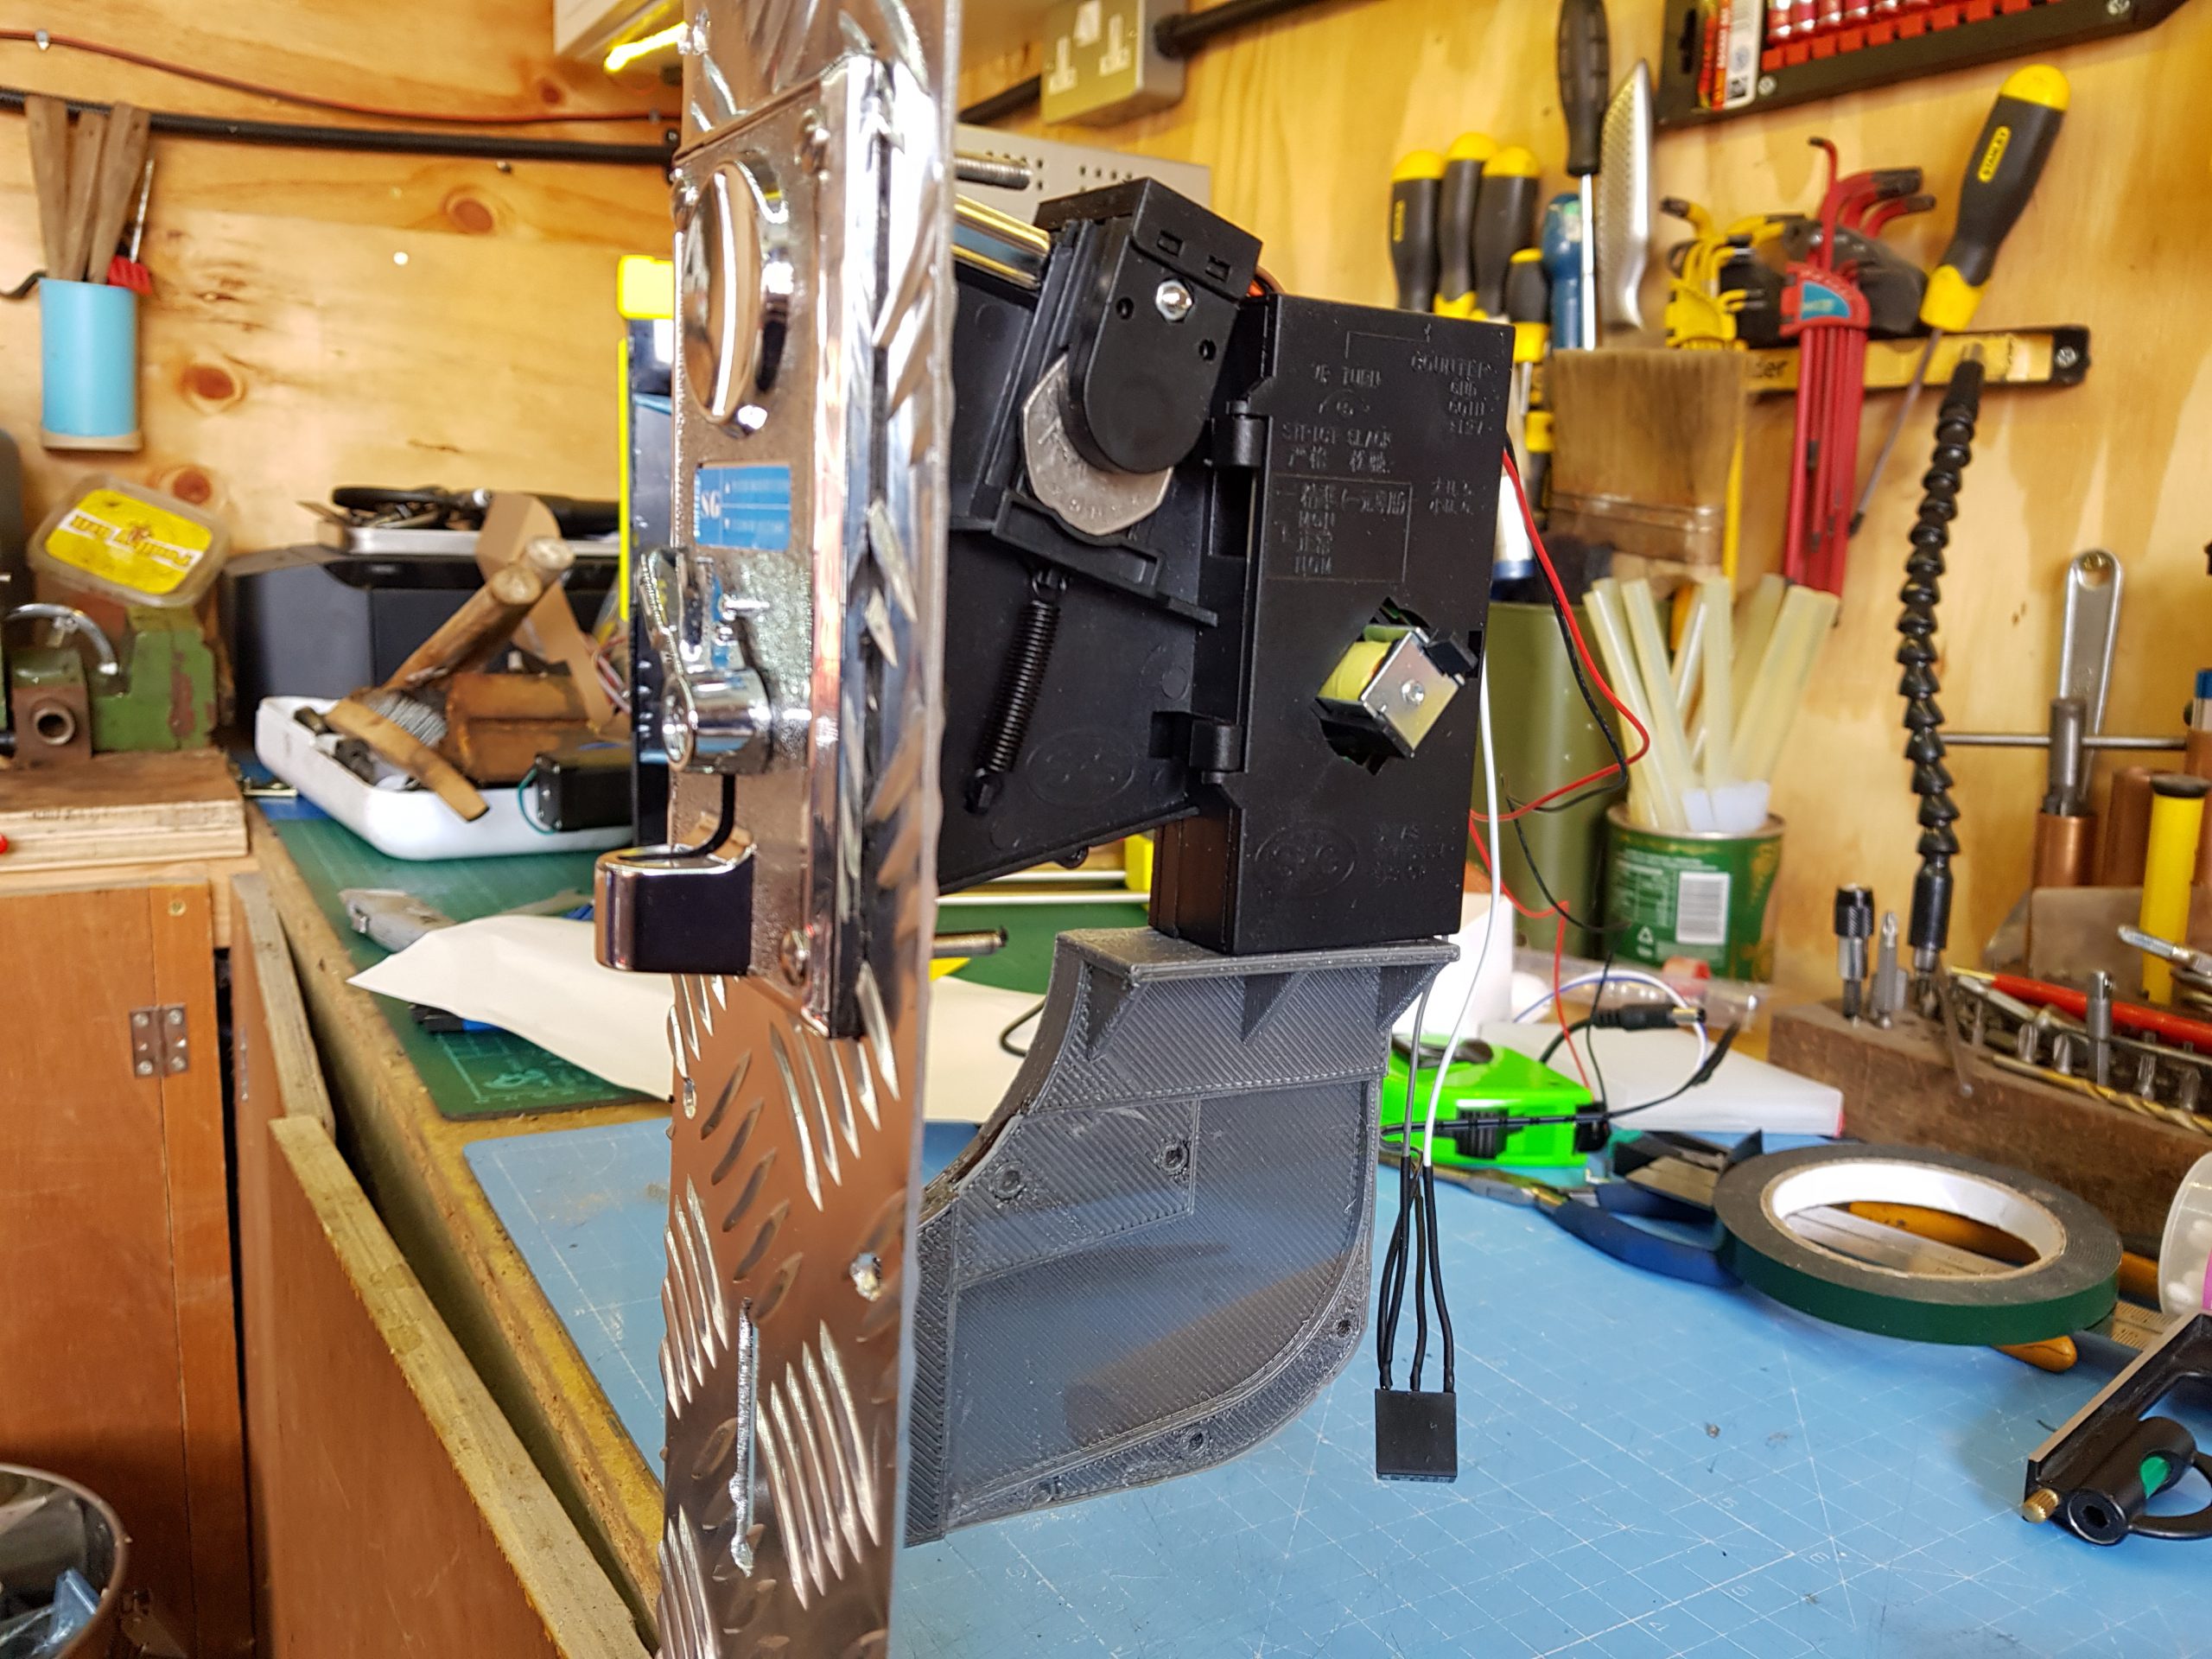
Why not add a coin machine for extra authenticity
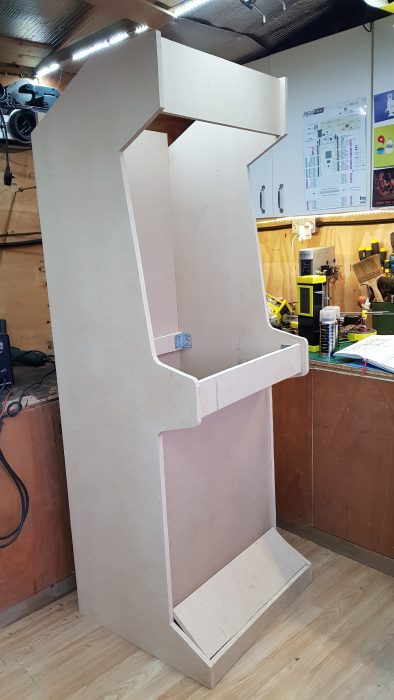
Attach the side pieces to the base, so that the sides hang lower than the base by an inch or two. If you’re more accomplished at woodworking and want to make the strongest cabinet possible, you can use a router to joint and glue the pieces of wood together. This will make the cabinet very slightly narrower and will affect some measurements, but if you follow the old adage to measure twice and cut once, you should be fine. If you don’t want to do this, you can use large angle brackets and screws to hold everything together. The cabinet will still be strong, and you’ll have the added advantage that you can disassemble it in the future if necessary.
Keep attaching the 18 mm MDF pieces, starting with the top piece and the rear brace. Once you have these pieces attached, the cabinet should be sturdy enough to start adding the thinner panels. Insetting the panels by about an inch gives the cabinet that retro look, and also hides any design crimes you might have committed while cutting out the side panels.
The absolute sizing of the cabinet isn’t critical unless you’re trying to make an exact copy of an old machine, so don’t feel too constrained by measuring things down to the millimetre. As long as the cabinet is wide enough to accept your monitor, everything else is moveable and can be adjusted to suit your needs.
Make it shiny
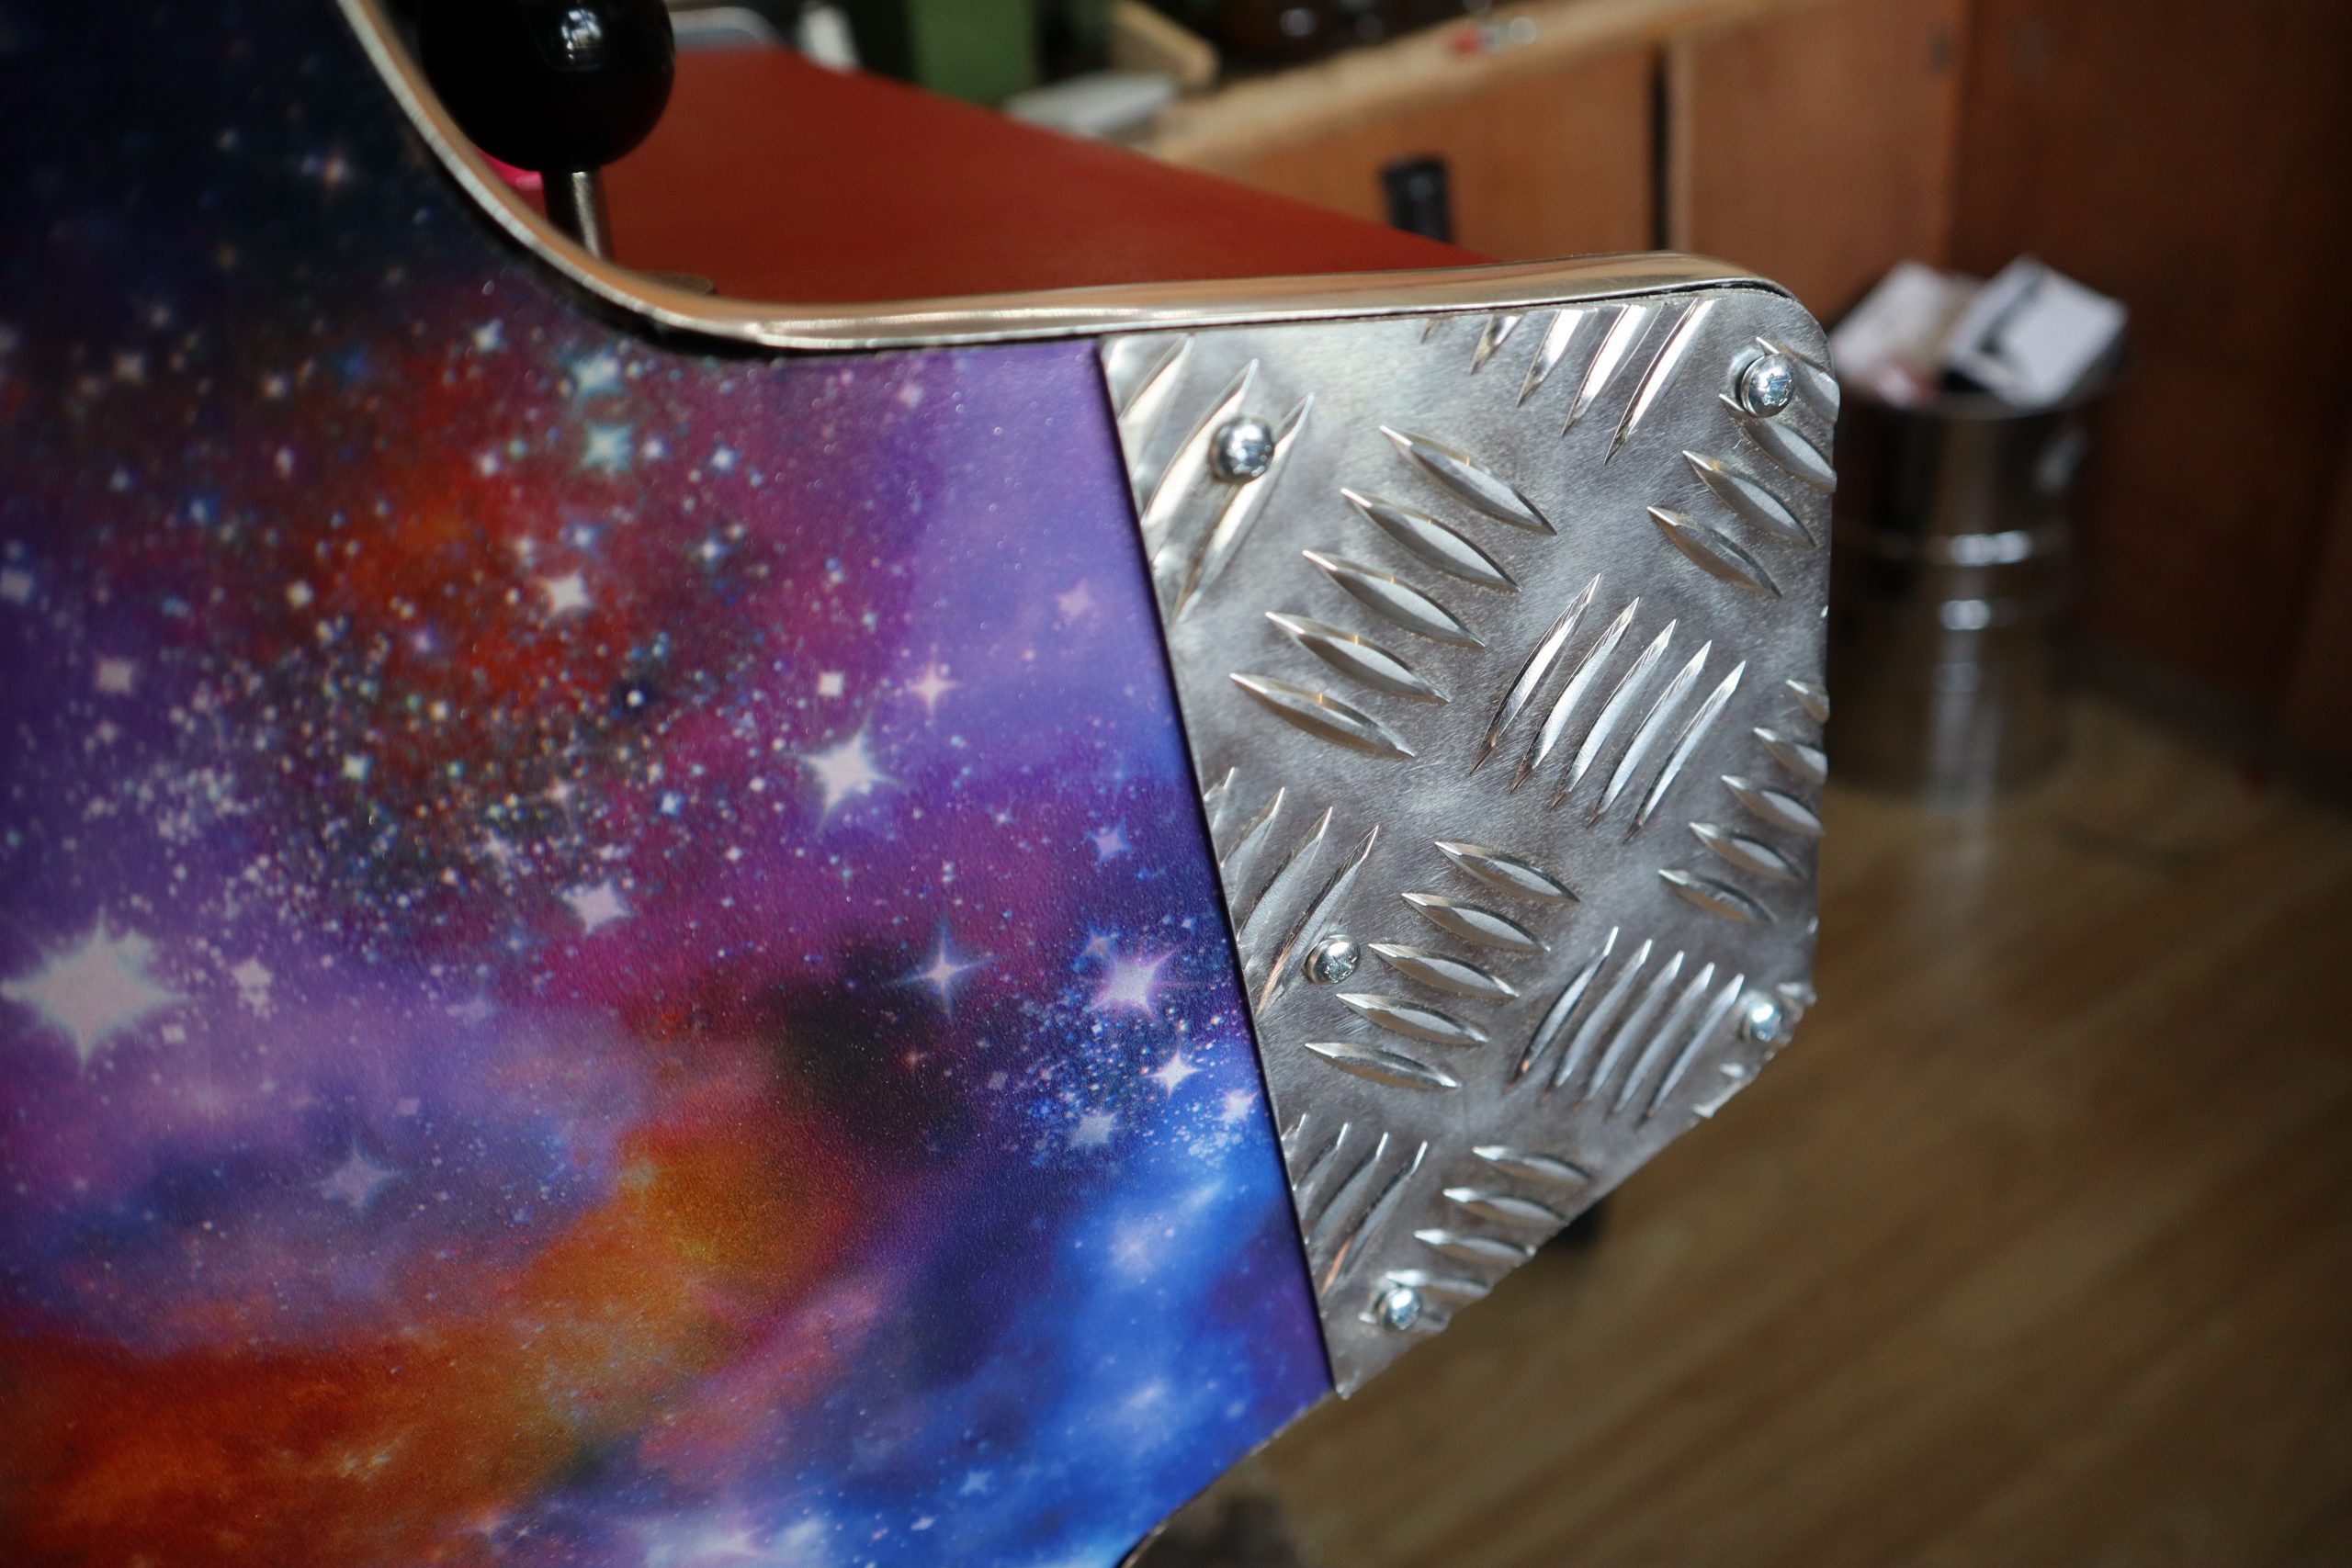
You can move onto decoration once the cabinet woodwork is fitted together. This is mostly down to personal preference, although it’s wise to think about which parts of the case will be touched more often, and whether your colour choices will cause any problems with screen reflection. Matt black is a popular choice for arcade cabinets because it’s non-reflective and any surface imperfections are less noticeable with a matt paint finish.
Aluminium checker plate is a good way of protecting your cabinet from damage, and it can be cut and shaped easily.
Wallpaper or posters make a great choice for decorating the outside of the cabinet, and they are quick to apply. Just be sure to paste all the way up to the edge, and protect any areas that will be handled regularly with aluminium checker plate or plastic sheet. The edges of MDF sheets can be finished with iron-on worktop edging, or with the chrome detailing tape used on cars. You can buy detailing tape in 12 mm and 18 mm widths, which makes it great for finishing edges. The adhesive tape provided with the chrome edging isn’t always very good, so it’s worth investing in some high-strength, double-sided clear vinyl foam tape.
You’ve made your cabinet, but it’s empty at the moment. You’re going to add a Raspberry Pi, monitor, speakers, and a panel for buttons and joysticks. To find out how, you can read the full article in HackSpace magazine 35.
Get HackSpace magazine 35 Out Now!
Each month, HackSpace magazine brings you the best projects, tips, tricks and tutorials from the makersphere. You can get it from the Raspberry Pi Press online store, The Raspberry Pi store in Cambridge, or your local newsagents.
If you subscribe for 12 months, you get an Adafruit Circuit Playground Express , or can choose from one of our other subscription offers, including this amazing limited-time offer of three issues and a book for only £10!
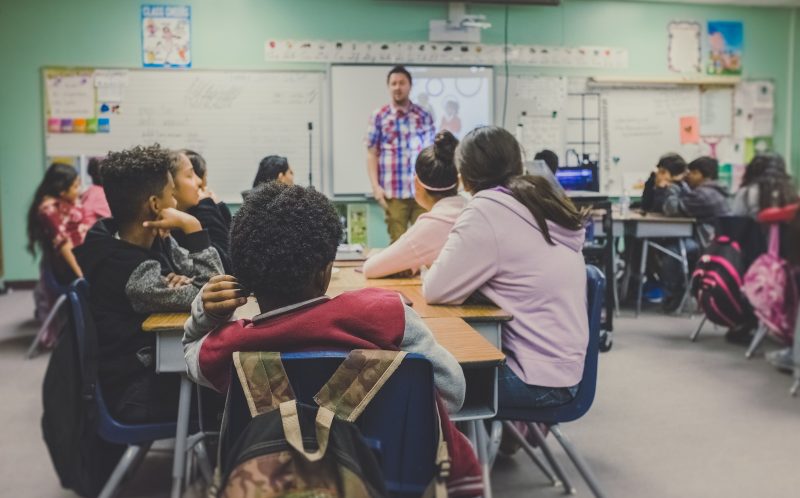
Around the world, formal education systems are bringing computing knowledge to learners. But what exactly is set down in different countries’ computing curricula, and what are classroom educators teaching? This was the topic of the first in the autumn series of our Raspberry Pi research seminars on Tuesday 8 September.
We heard from an international team (Monica McGill , USA; Rebecca Vivian, Australia; Elizabeth Cole, Scotland) who represented a group of researchers also based in England, Malta, Ireland, and Italy. As a researcher working at the Raspberry Pi Foundation, I myself was part of this research group. The group developed METRECC, a comprehensive and validated survey tool that can be used to benchmark and measure developments of the teaching and learning of computing in formal education systems around the world. Monica, Rebecca, and Elizabeth presented how the research group developed and validated the METRECC tool, and shared some findings from their pilot study.
What’s in a curriculum? Developing a survey tool
Those of us who work or have worked in school education use the word ‘curriculum’ frequently, although it’s an example of education terminology that means different things in different contexts, and to different people. Following Porter and Smithson (2001)1, we can distinguish between the intended curriculum and the enacted curriculum:
Intended curriculum: Policy tools as curriculum standards, frameworks, or guidelines that outline the curriculum teachers are expected to deliver.
Enacted curriculum: Actual curricular content in which students engage in the classroom, and adopted pedagogical approaches; for computer science (CS) curricula, this also includes students’ use of technology, physical computing devices, and tools in CS lessons.
To compare the intended and enacted computing curriculum in as many countries as possible, at particular points in time, the research group Monica, Rebecca, Elizabeth, and I were part of developed the METRECC survey tool.
METRECC stands for MEasuring TeacheREnacted Computing Curriculum. The METRECC survey has 11 categories of questions and is designed to be completed by computing teachers within 35–40 minutes. Following best practice in research, which calls for standardised research instruments, the research group ensured that the survey produces valid, reliable results (meaning that it works as intended) before using it to gather data.
Using METRECC in a pilot study
In their pilot study, the research group gathered data from 7 countries. The intended curriculum for each country was determined by examining standards and policies in place for each country/state under consideration. Teachers’ answers in the METRECC survey provided the countries’ enacted curricula. (The complete dataset from the pilot study is publicly available at csedresearch.org, a very useful site for CS education researchers where many surveys are shared.)
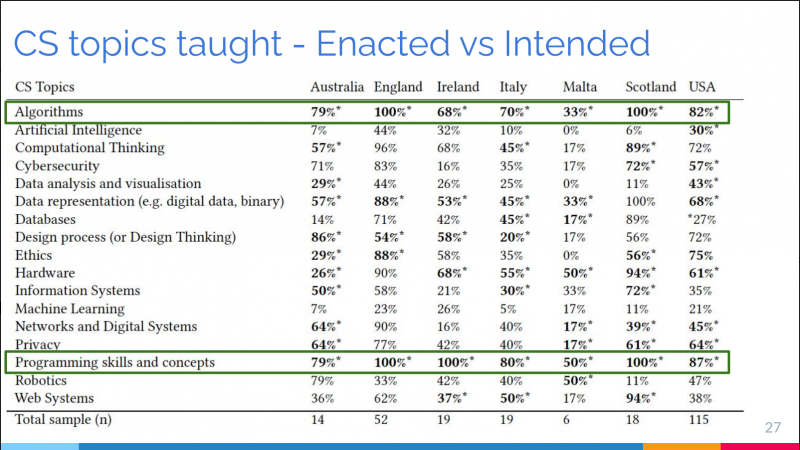
The researchers then mapped the intended to the enacted curricula to find out whether teachers were actually teaching the topics that were prescribed for them. Overall, the results of the mapping showed that there was a good match between intended and enacted curricula. Examples of mismatches include lower numbers of primary school teachers reporting that they taught visual or symbolic programming, even though the topic did appear on their curriculum.
This table shows computer science topic the METRECC tool asks teachers about, and what percentage of respondents in the pilot study stated that they teach these to their students.
Another aspect of the METRECC survey allows to measure teachers’ confidence, self-efficacy, and self-esteem. The results of the pilot study showed a relationship between years of experience and CS self-esteem; in particular, after four years of teaching, teachers started to report high self-esteem in relation to computer science. Moreover, primary teachers reported significantly lower self-esteem than secondary teachers did, and female teachers reported lower self-esteem than male teachers did.
Adapting the survey’s language
The METRECC survey has also been used in South Asia, namely Bangladesh, Nepal, Pakistan, and Sri Lanka (where computing is taught under ICT). Amongst other things, what the researchers learned from that study was that some of the survey questions needed to be adapted to be relevant to these countries. For example, while in the UK we use the word ‘gifted’ to mean ‘high-attaining’, in the South Asian countries involved in the study, to be ‘gifted’ meanshaving special needs.
The study highlighted how important it is to ensure that surveys intended for an international audience use terminology and references that are pertinent to many countries, or that the survey language is adapted in order to make sense in each context it is delivered.
Let’s keep this monitoring of computing education moving forward!
The seminar presentation was well received, and because we now hold our seminars for 90 minutes instead of an hour, we had more time for questions and answers.
My three main take-aways from the seminar were:
1. International collaboration is key
It is very valuable to be able to form international working groups of researchers collaborating on a common project; we have so much to learn from each other. Our Raspberry Pi research seminars attract educators and researchers from many different parts of the world, and we can truly push the field’s understanding forward when we listen to experiences and lessons of people from diverse contexts and cultures.
2. Making research data publicly available
Increasingly, it is expected that research datasets are made available in publicly accessible repositories. While this is becoming the norm in healthcare and scientific, it’s not yet as prevalent in computing education research. It was great to be able to publicly share the dataset from the METRECC pilot study, and we encourage other researchers in this field to do the same.
3. Extending the global scope of this research
Finally, this work is only just beginning. Over the last decade, there has been an increasing move towards teaching aspects of computer science in school in many countries around the world, and being able to measure change and progress is important. Only a handful of countries were involved in the pilot study, and it would be great to see this research extend to more countries, with larger numbers of teachers involved, so that we can really understand the global picture of formal computing education. Budding research students, take heed!
Next up in our seminar series
If you missed the seminar, you can find the presentation slides and a recording of the researchers’ talk on our seminars page.
In our next seminar on Tuesday 6 October at 17:00–18:30 BST / 12:00–13:30 EDT / 9:00–10:30 PT / 18:00–19:30 CEST, we’ll welcome Shuchi Grover, a prominent researcher in the area of computational thinking and formative assessment. The title of Shuchi’s seminar is Assessments to improve student learning in introductory CS classrooms. To join, simply sign up with your name and email address.
Once you’ve signed up, we’ll email you the seminar meeting link and instructions for joining. If you attended this past seminar, the link remains the same.
1. Andrew C. Porter and John L. Smithson. 2001. Defining, Developing and Using Curriculum Indicators. CPRE Research Reports, 12-2001. (2001)
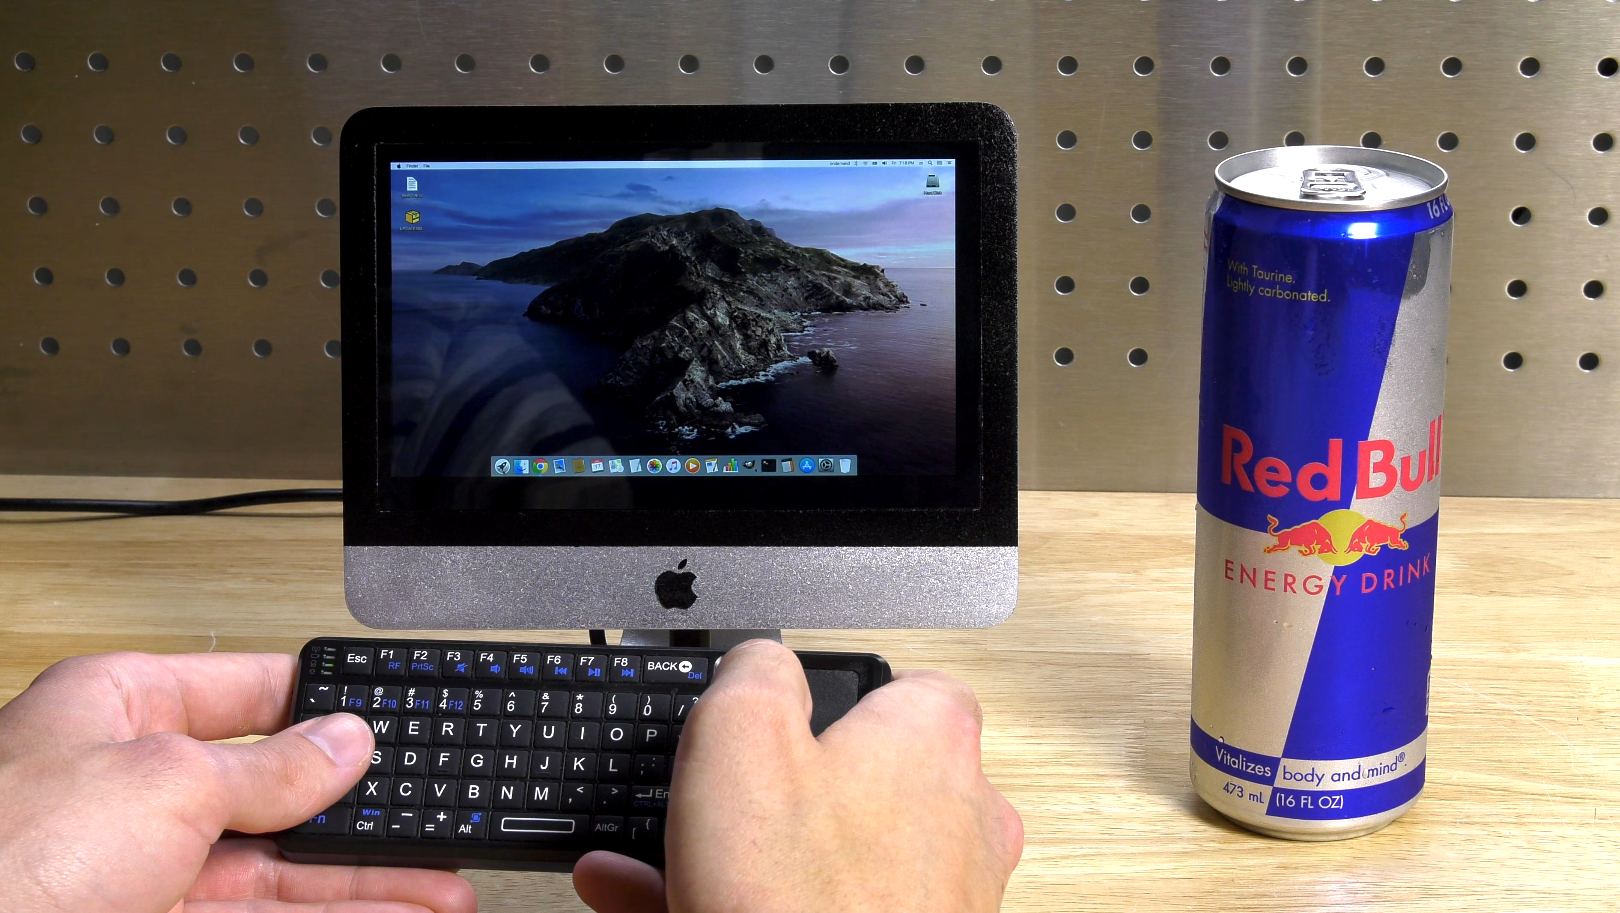
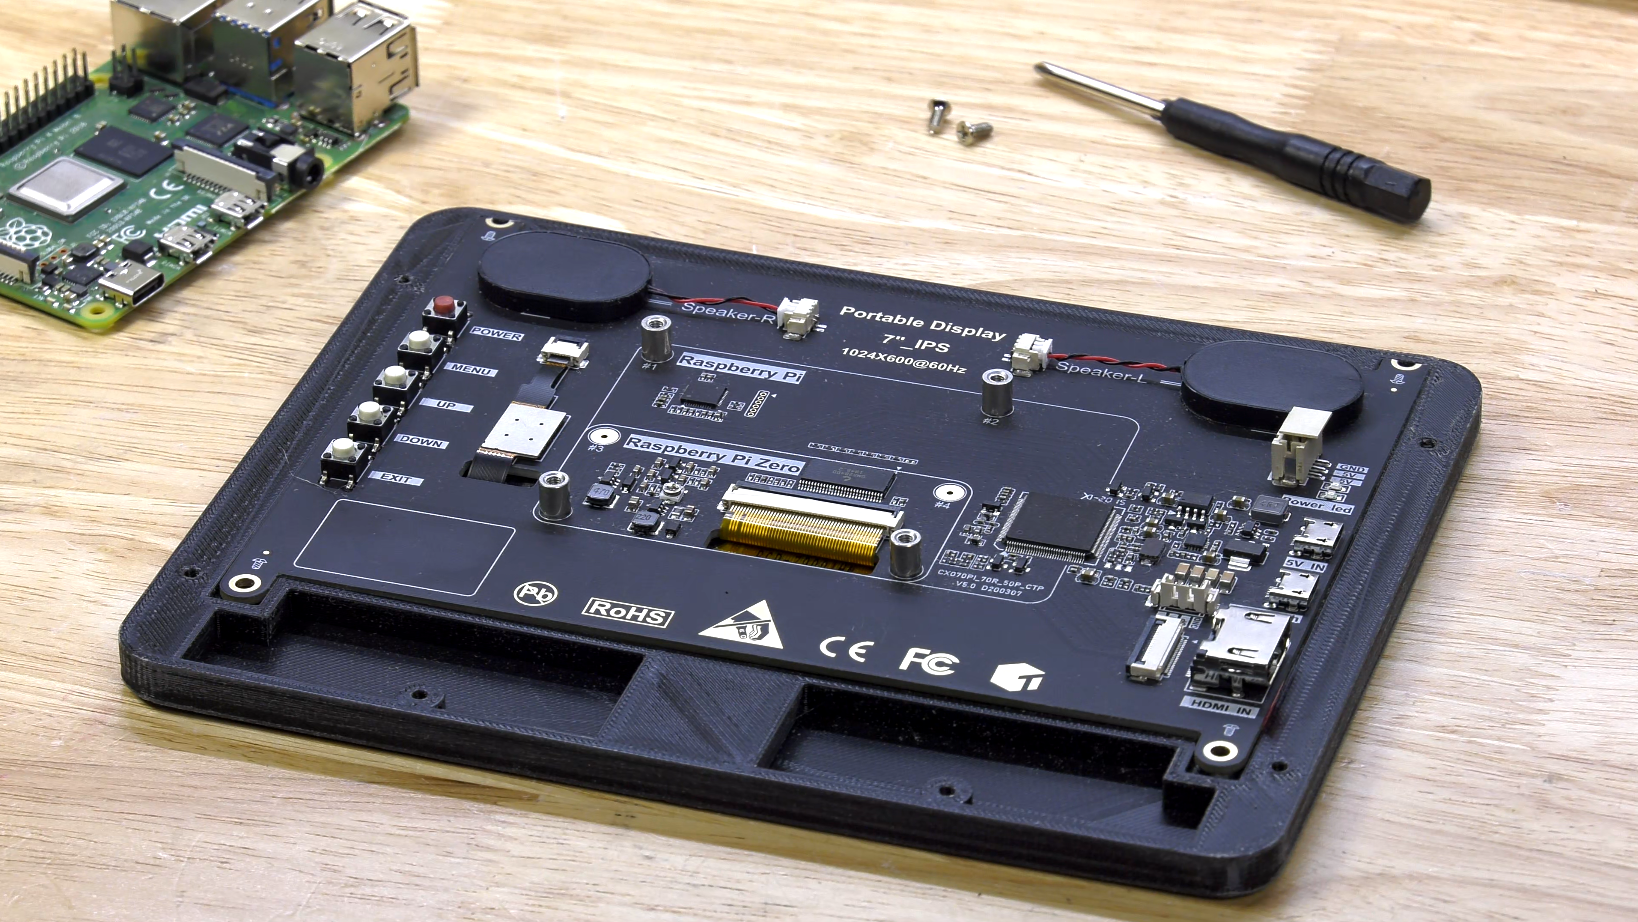
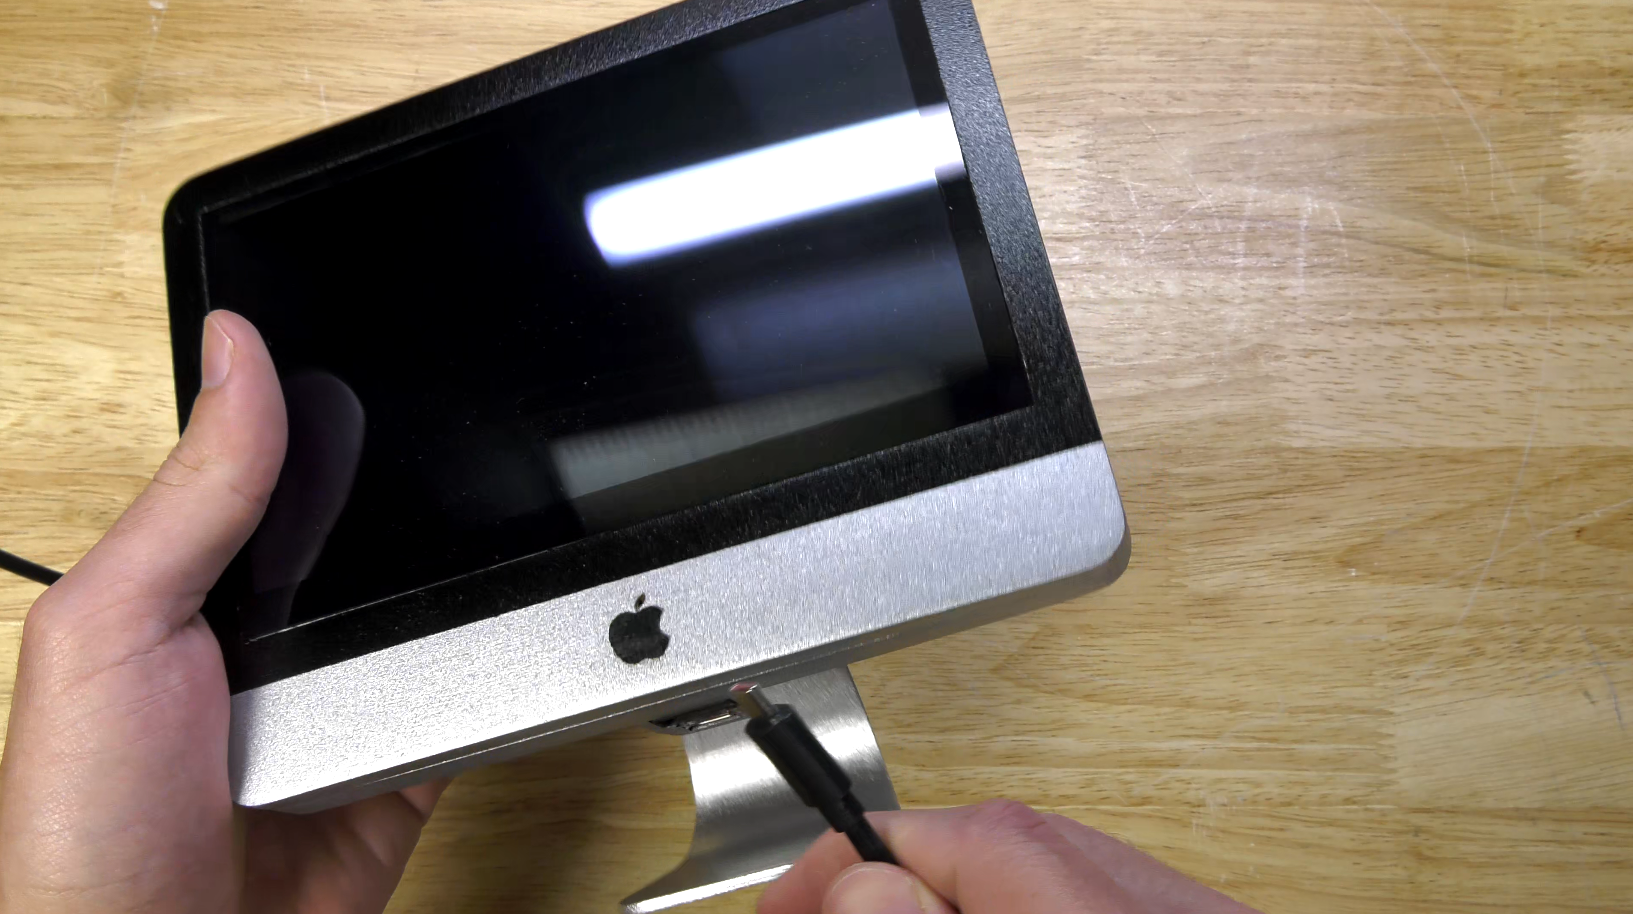
This project goes a step further than most custom-made Raspberry Pi cases: YouTuber Michael Pick hacked a Raspberry Pi 4 and stuffed it inside this Apple lookalike to create the world’s smallest ‘iMac’.
Michael designed and 3D printed this miniature ‘iMac’ with what he calls a “gently modified” Raspberry Pi 4 at the heart. Everything you see is hand-painted and -finished to achieve an authentic, sleek Apple look.
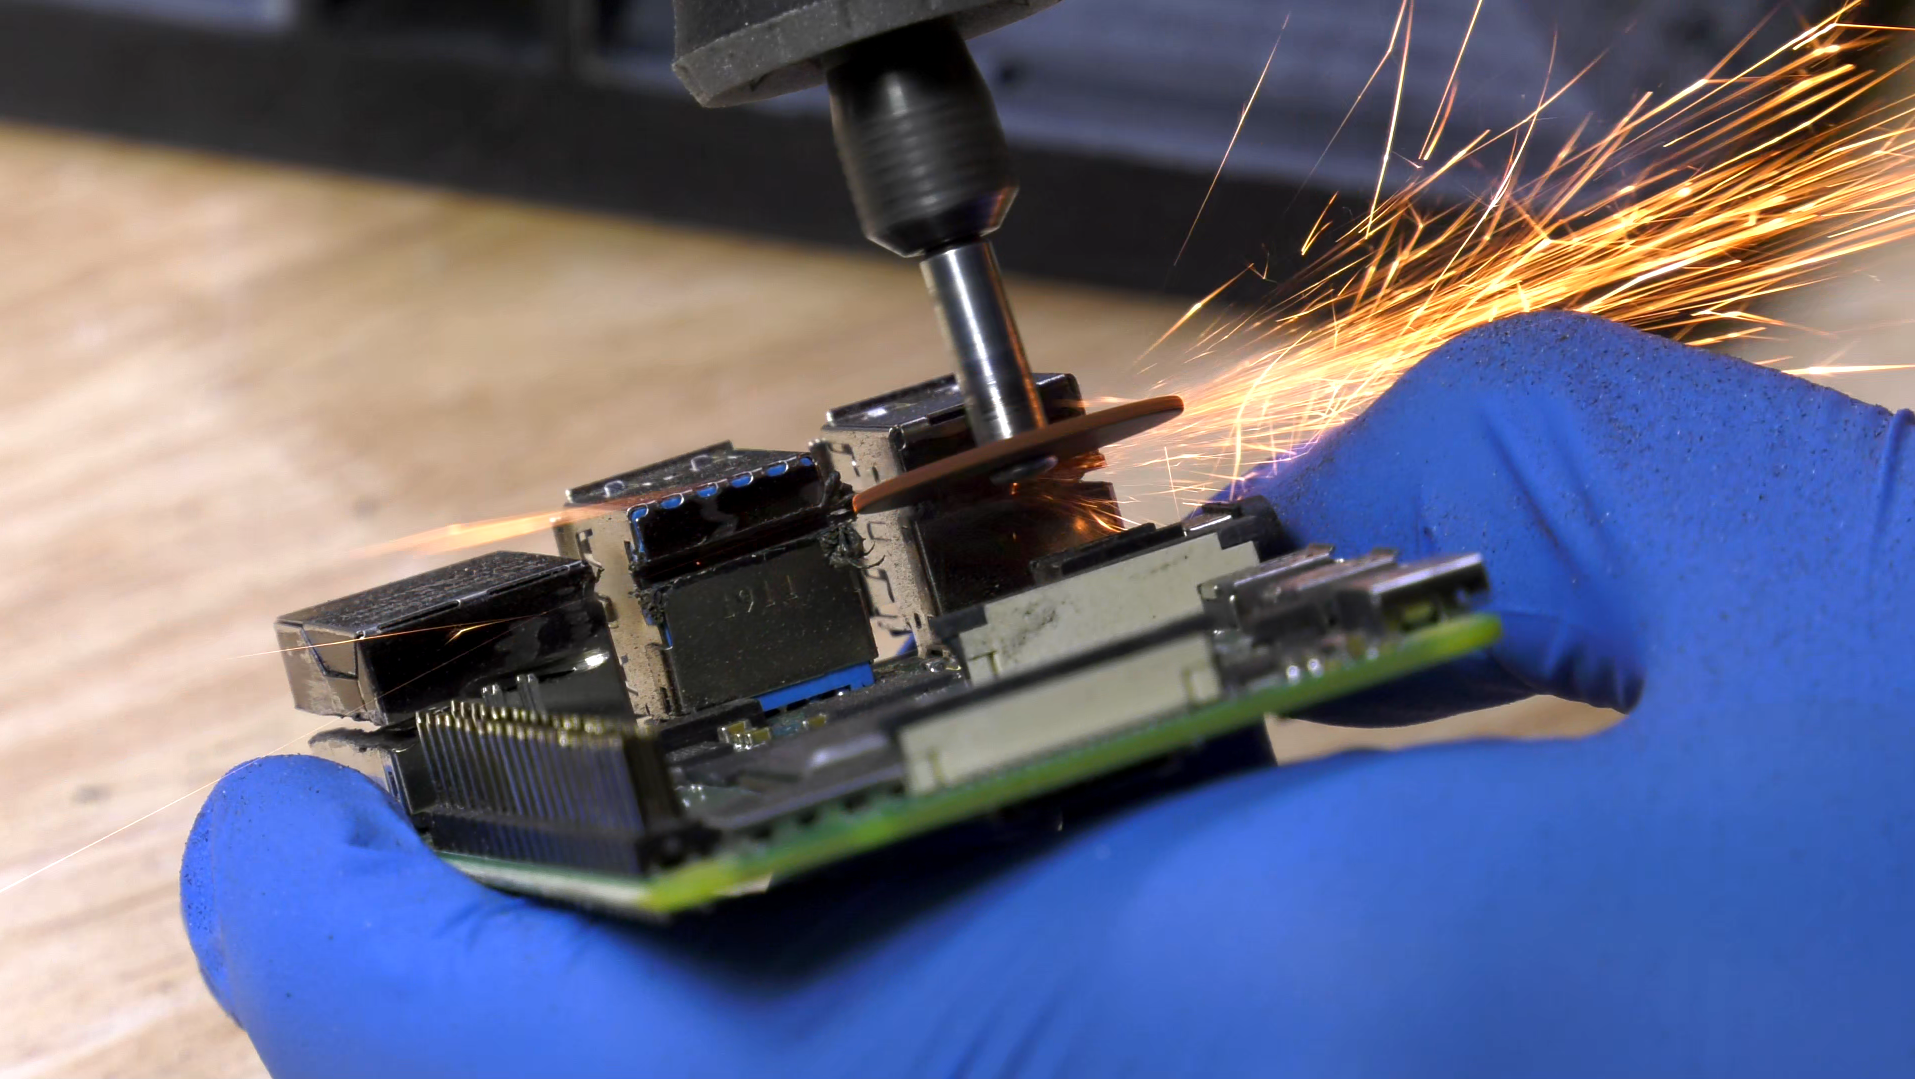
This is “gentle modification” we just mentioned
Even after all that power tool sparking, this miniature device is capable of playing Minecraft at 1000 frames per second. Michael was set on making the finished project as thin as possible, so he had to slice off a couple of his Raspberry Pi’s USB ports and the Ethernet socket to make everything fit inside the tiny, custom-made case. This hacked setup leaves you with Bluetooth and wireless internet connections, which, as Michael explains in the build video, “if you’re a Mac user, that’s all you’re ever going to need.”
We love watching 3D printer footage set to relaxed elevator music
This teeny yet impactful project has even been featured on forbes.com, and that’s where we learned how the tightly packed tech manages to work in such a restricted space:
“A wireless dongle is plugged into one of the remaining USB ports to ensure it’s capable of connecting to a wireless keyboard and mouse, and a low-profile ribbon cable is used to connect the display to the Raspberry Pi. Careful crimping of cables and adapters ensures the mini iMac can be powered from a USB-C extension cable that feeds in under the screen, while the device also includes a single USB 2 port.”
Barry Collins | forbes.com
The maker also told forbes.com that this build was inspired by an iRaspbian software article from tech writer Barry Collins. iRaspbian puts a Mac-like interface — including Dock, Launcher and even the default macOS wallpaper — on top of a Linux distro. We guess Michael just wanted the case to match the content, hey?
Check out Michael’s YouTube channel for more inexplicably cool builds, such as a one billion volt Thor hammer.