How many of you have woken up grumpy from being snored at all night? Or maybe you’re the snorer whose sleep is interrupted by being elbowed in the ribs to get you to stop. Not only does snoring keep your partner awake, it also affects the quality of your own sleep, even though you might not realise it.
A demonstration of the Staley’s project in action
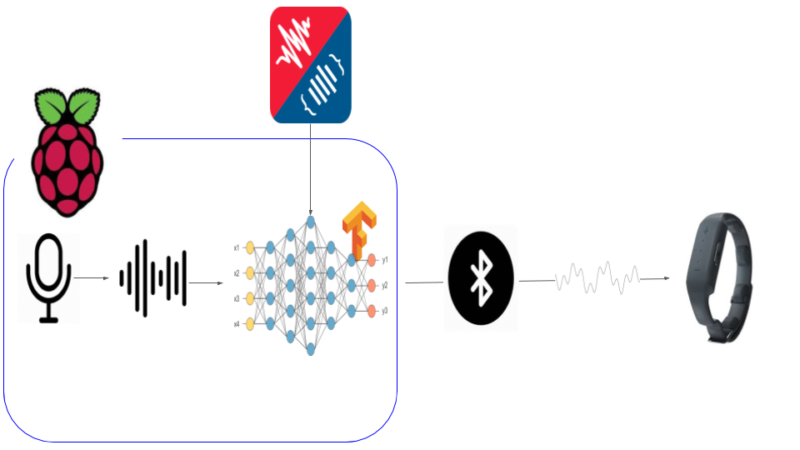
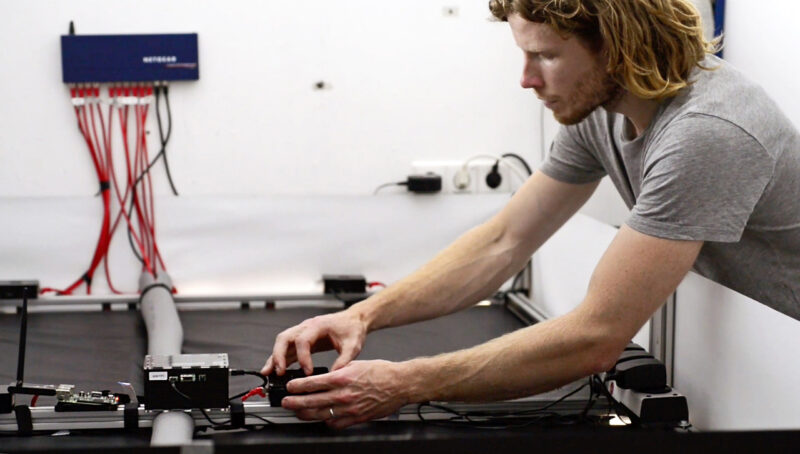
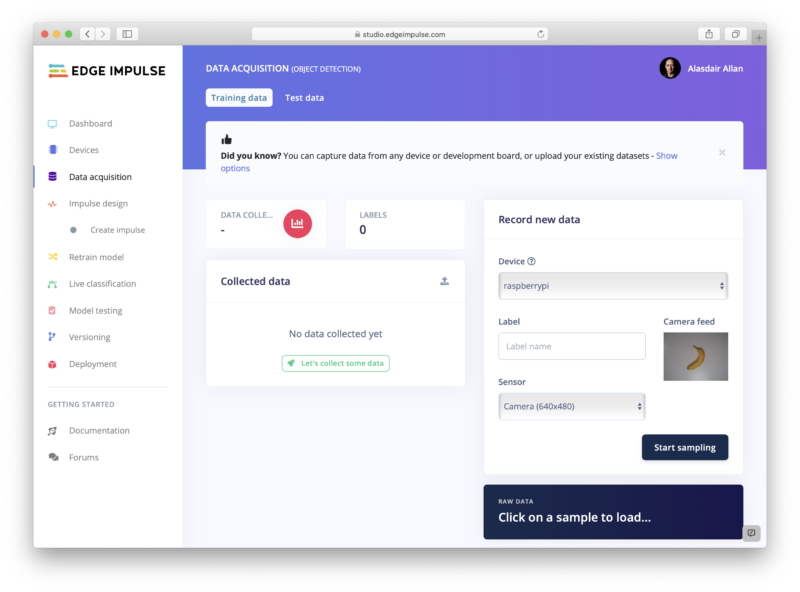
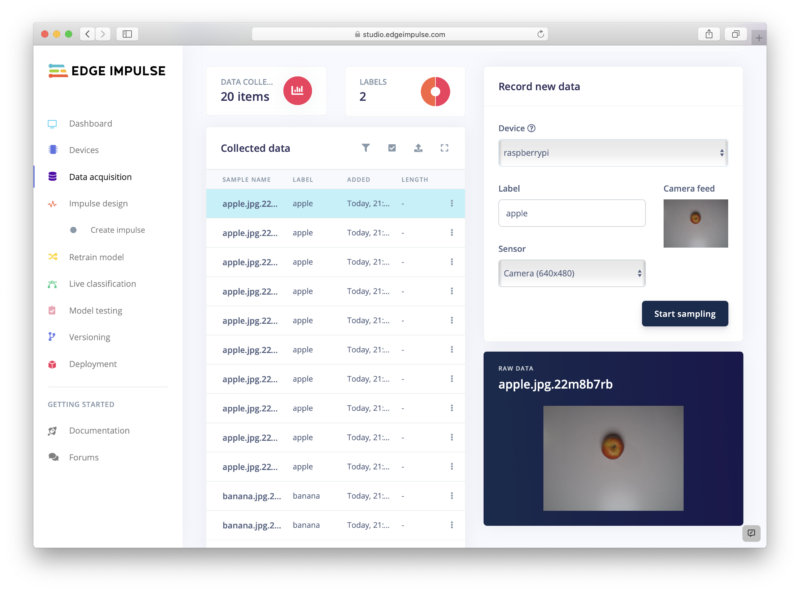
Bryan and Brayden Staley think they’ve come up with a solution: a wearable hearing support device and a Raspberry Pi work together to send the wearer a haptic signal when they start snoring, which soothes them and disrupts the cycle.
Wristwear stops you snoring
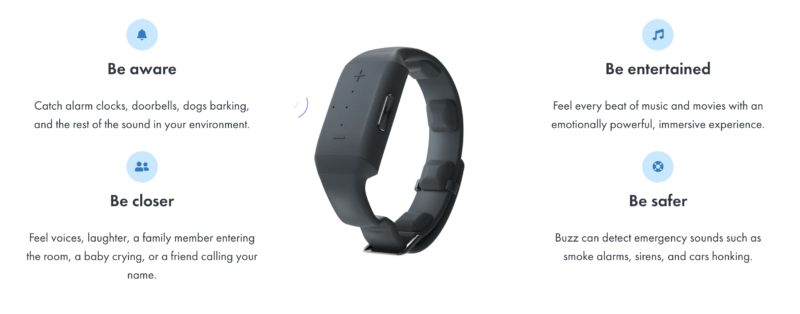
The wearable device that this project hinges on is the Neosensory Buzz. Worn on the wrist, it helps people with hearing difficulties pick up on things like doorbells, alarms, and even their name being called.
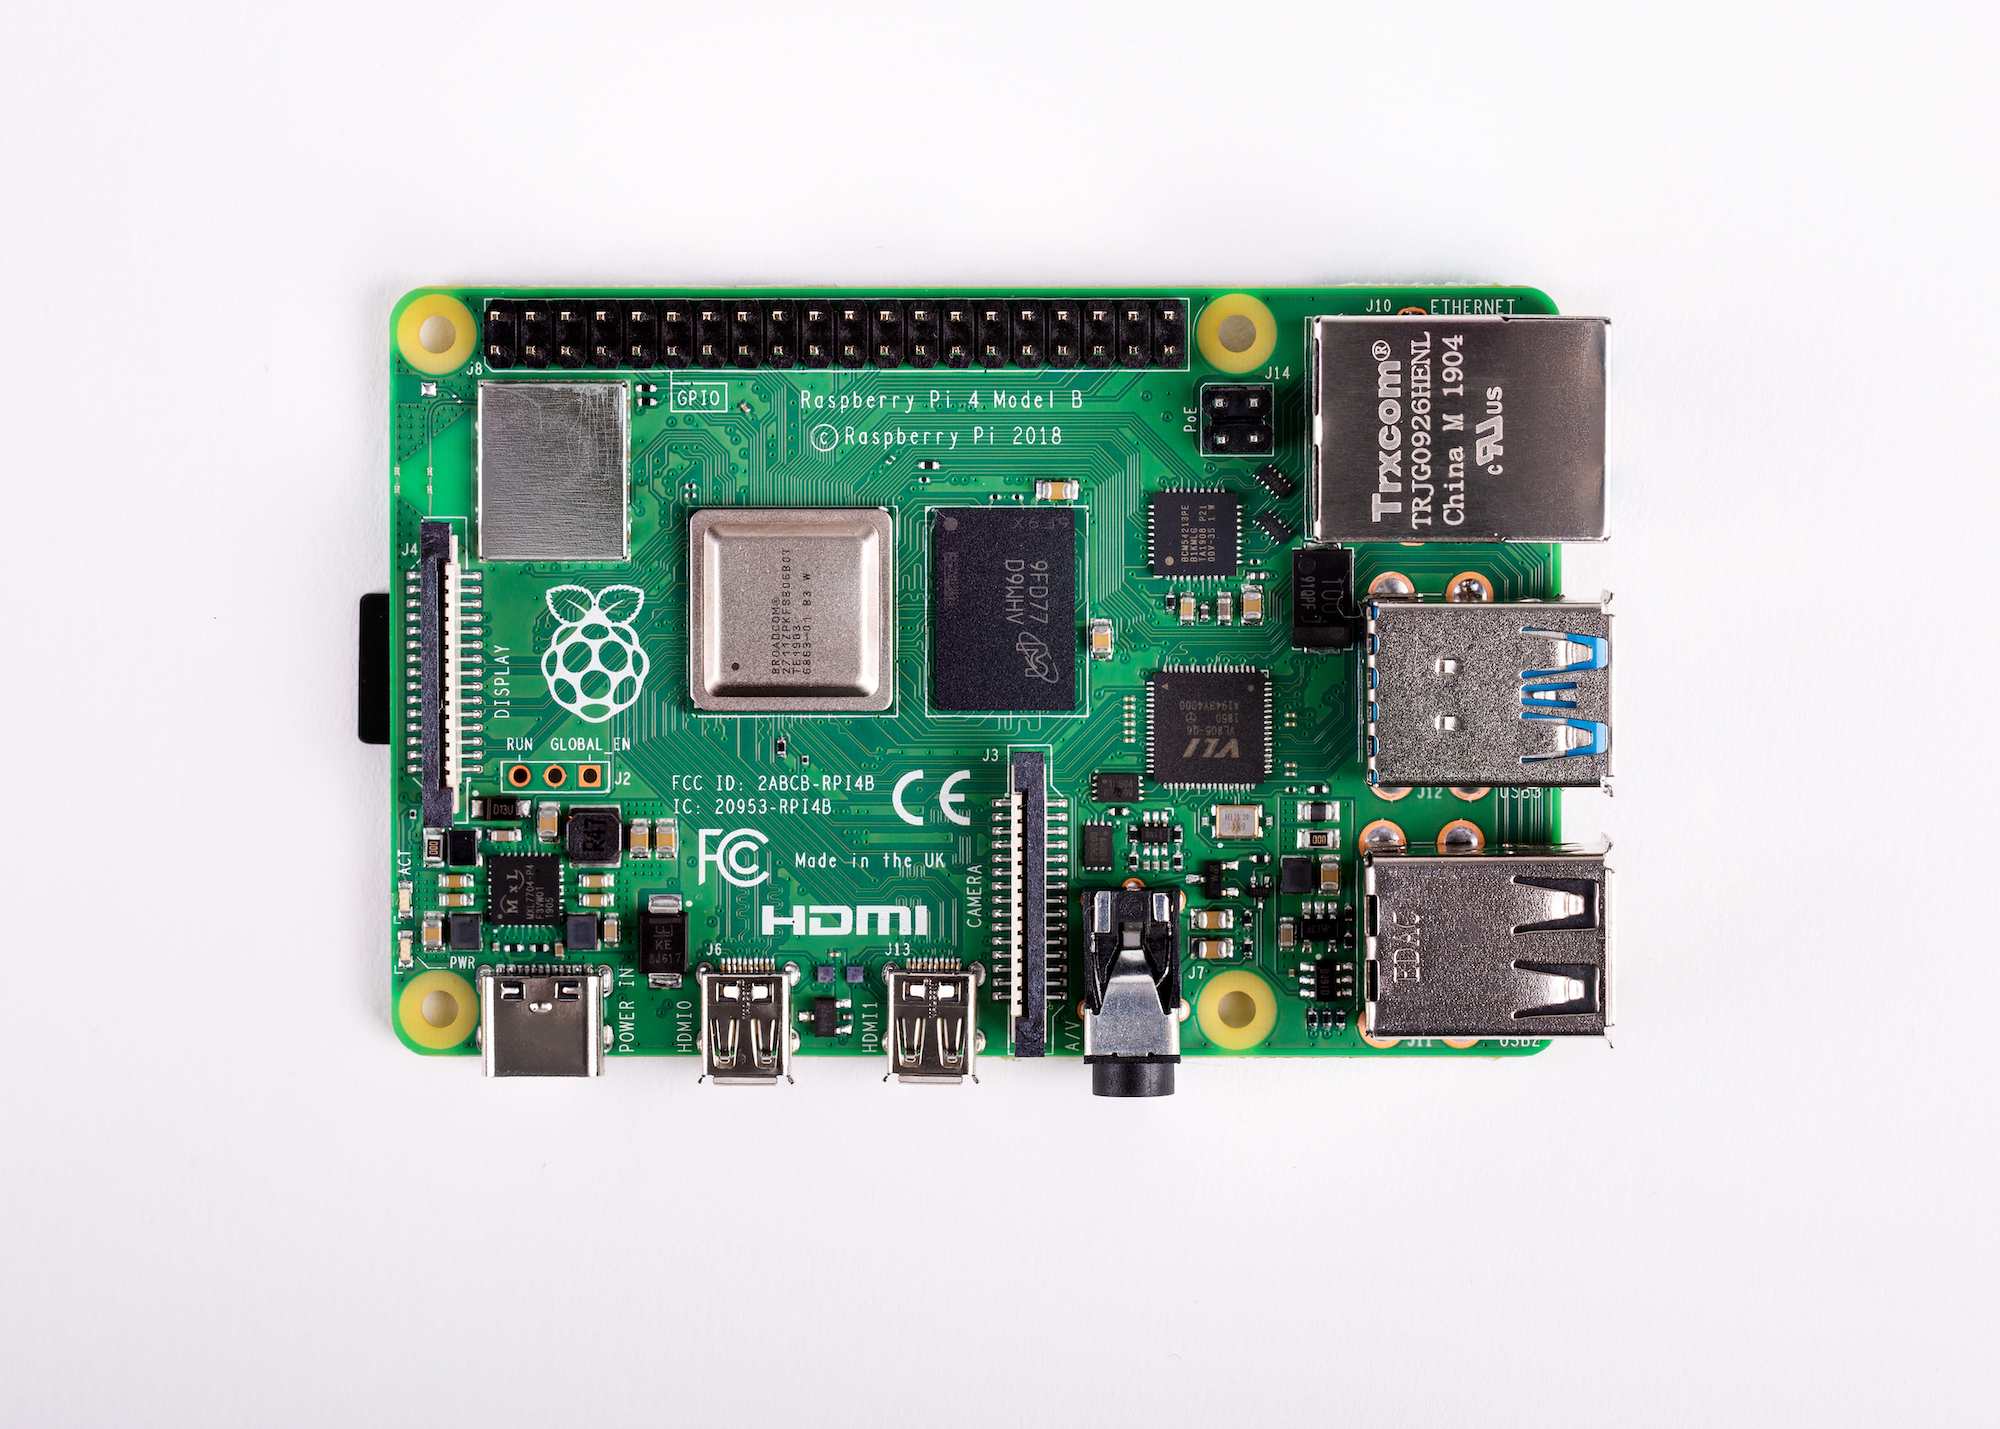
Working alongside the Buzz bracelet is a sound inference base, which consists of a Raspberry Pi 4 Model B and a Seeed ReSpeaker. The sound inference base picks up and classifies audio, and specifically recognises snoring. Once it detects a certain number of snoring events, it sends a sinusoidal signal to the Buzz bracelet, and continues until audio level falls below the snoring threshold.
Raspberry Pi 400 featured on Channel 5’s Gadget Show on Friday. We love being on the telly, and it reminded us to remind you that our smart, portable PC is just the best. Here are five different takes on our complete personal computer, built into a compact keyboard.
Classic retro gaming, new retro-style gaming
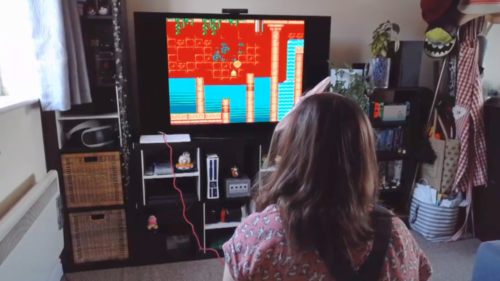
Since 2004 The Gadget Show has been sharing the latest gadget reviews and tech innovations, and now it’s Raspberry Pi 400’s turn in the spotlight. Jordan Erica Webber took it for an emulator gaming spin, and enjoyed some classic ROMs and some new ones.
Ooh, what’s that Jordan Erica Webber is playing?
Her verdict: this is a great way to go about retro gaming.
One of the best things about launching a new product is seeing all the unboxing videos our community makes. And this one by Caroline Dunn was one of our favourites from Raspberry Pi 400 launch day. Caroline liked that this is our most powerful and easy-to-use Raspberry Pi computer yet. In her video she walks you through how simple it is to set up, even for complete beginners.
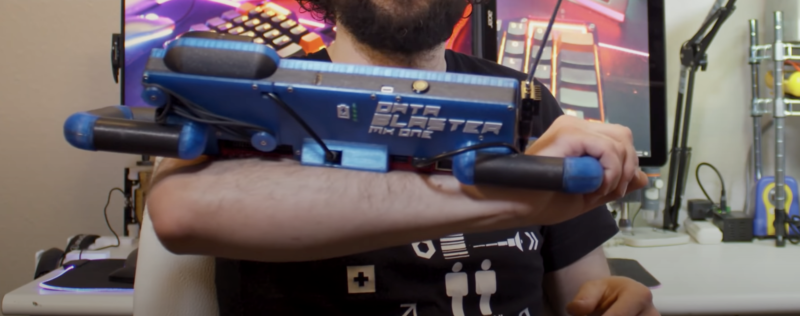
The latest cool project we saw was Zack Freedman’s cyberdeck. The Voidstar Data Blaster is a portable cyberdeck that Zack created to help him stay punk in the suburbs. It’s built entirely around Raspberry Pi 400 and it features lots of cool cyberpunk additions like a wearable display and chunky handles.
Amiga classics
Dan Wood is self-confessed Raspberry Pi addict and also loves retro gaming. So it’s no surprise that he took to his YouTube channel to show you how to play Amiga games on the Raspberry Pi 400. Dan liked the retro-inspired design of our all-in-one machine, and took a trip down memory lane to turn it into the ultimate Commodore Amiga emulator.
Working and learning from home with Raspberry Pi 400
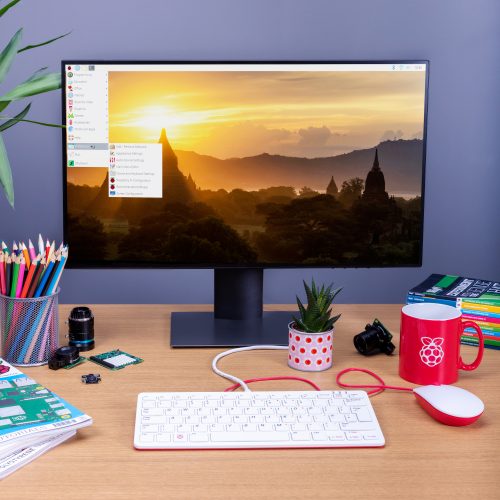
So neat, so unlike my desk
Lots of people use our portable computer to work remotely or access education from home, so we rounded up an FAQ-style bunch of tips and tricks to help you get the most out of it. We cover everything from printing to video conferencing and Google Classroom here.
Oh – and if you’re still wondering what Jordan Erica is playing up there, it’s Morphcat’sBöbl, and you can grab it, and other new-retro ROMs, from itch.io.
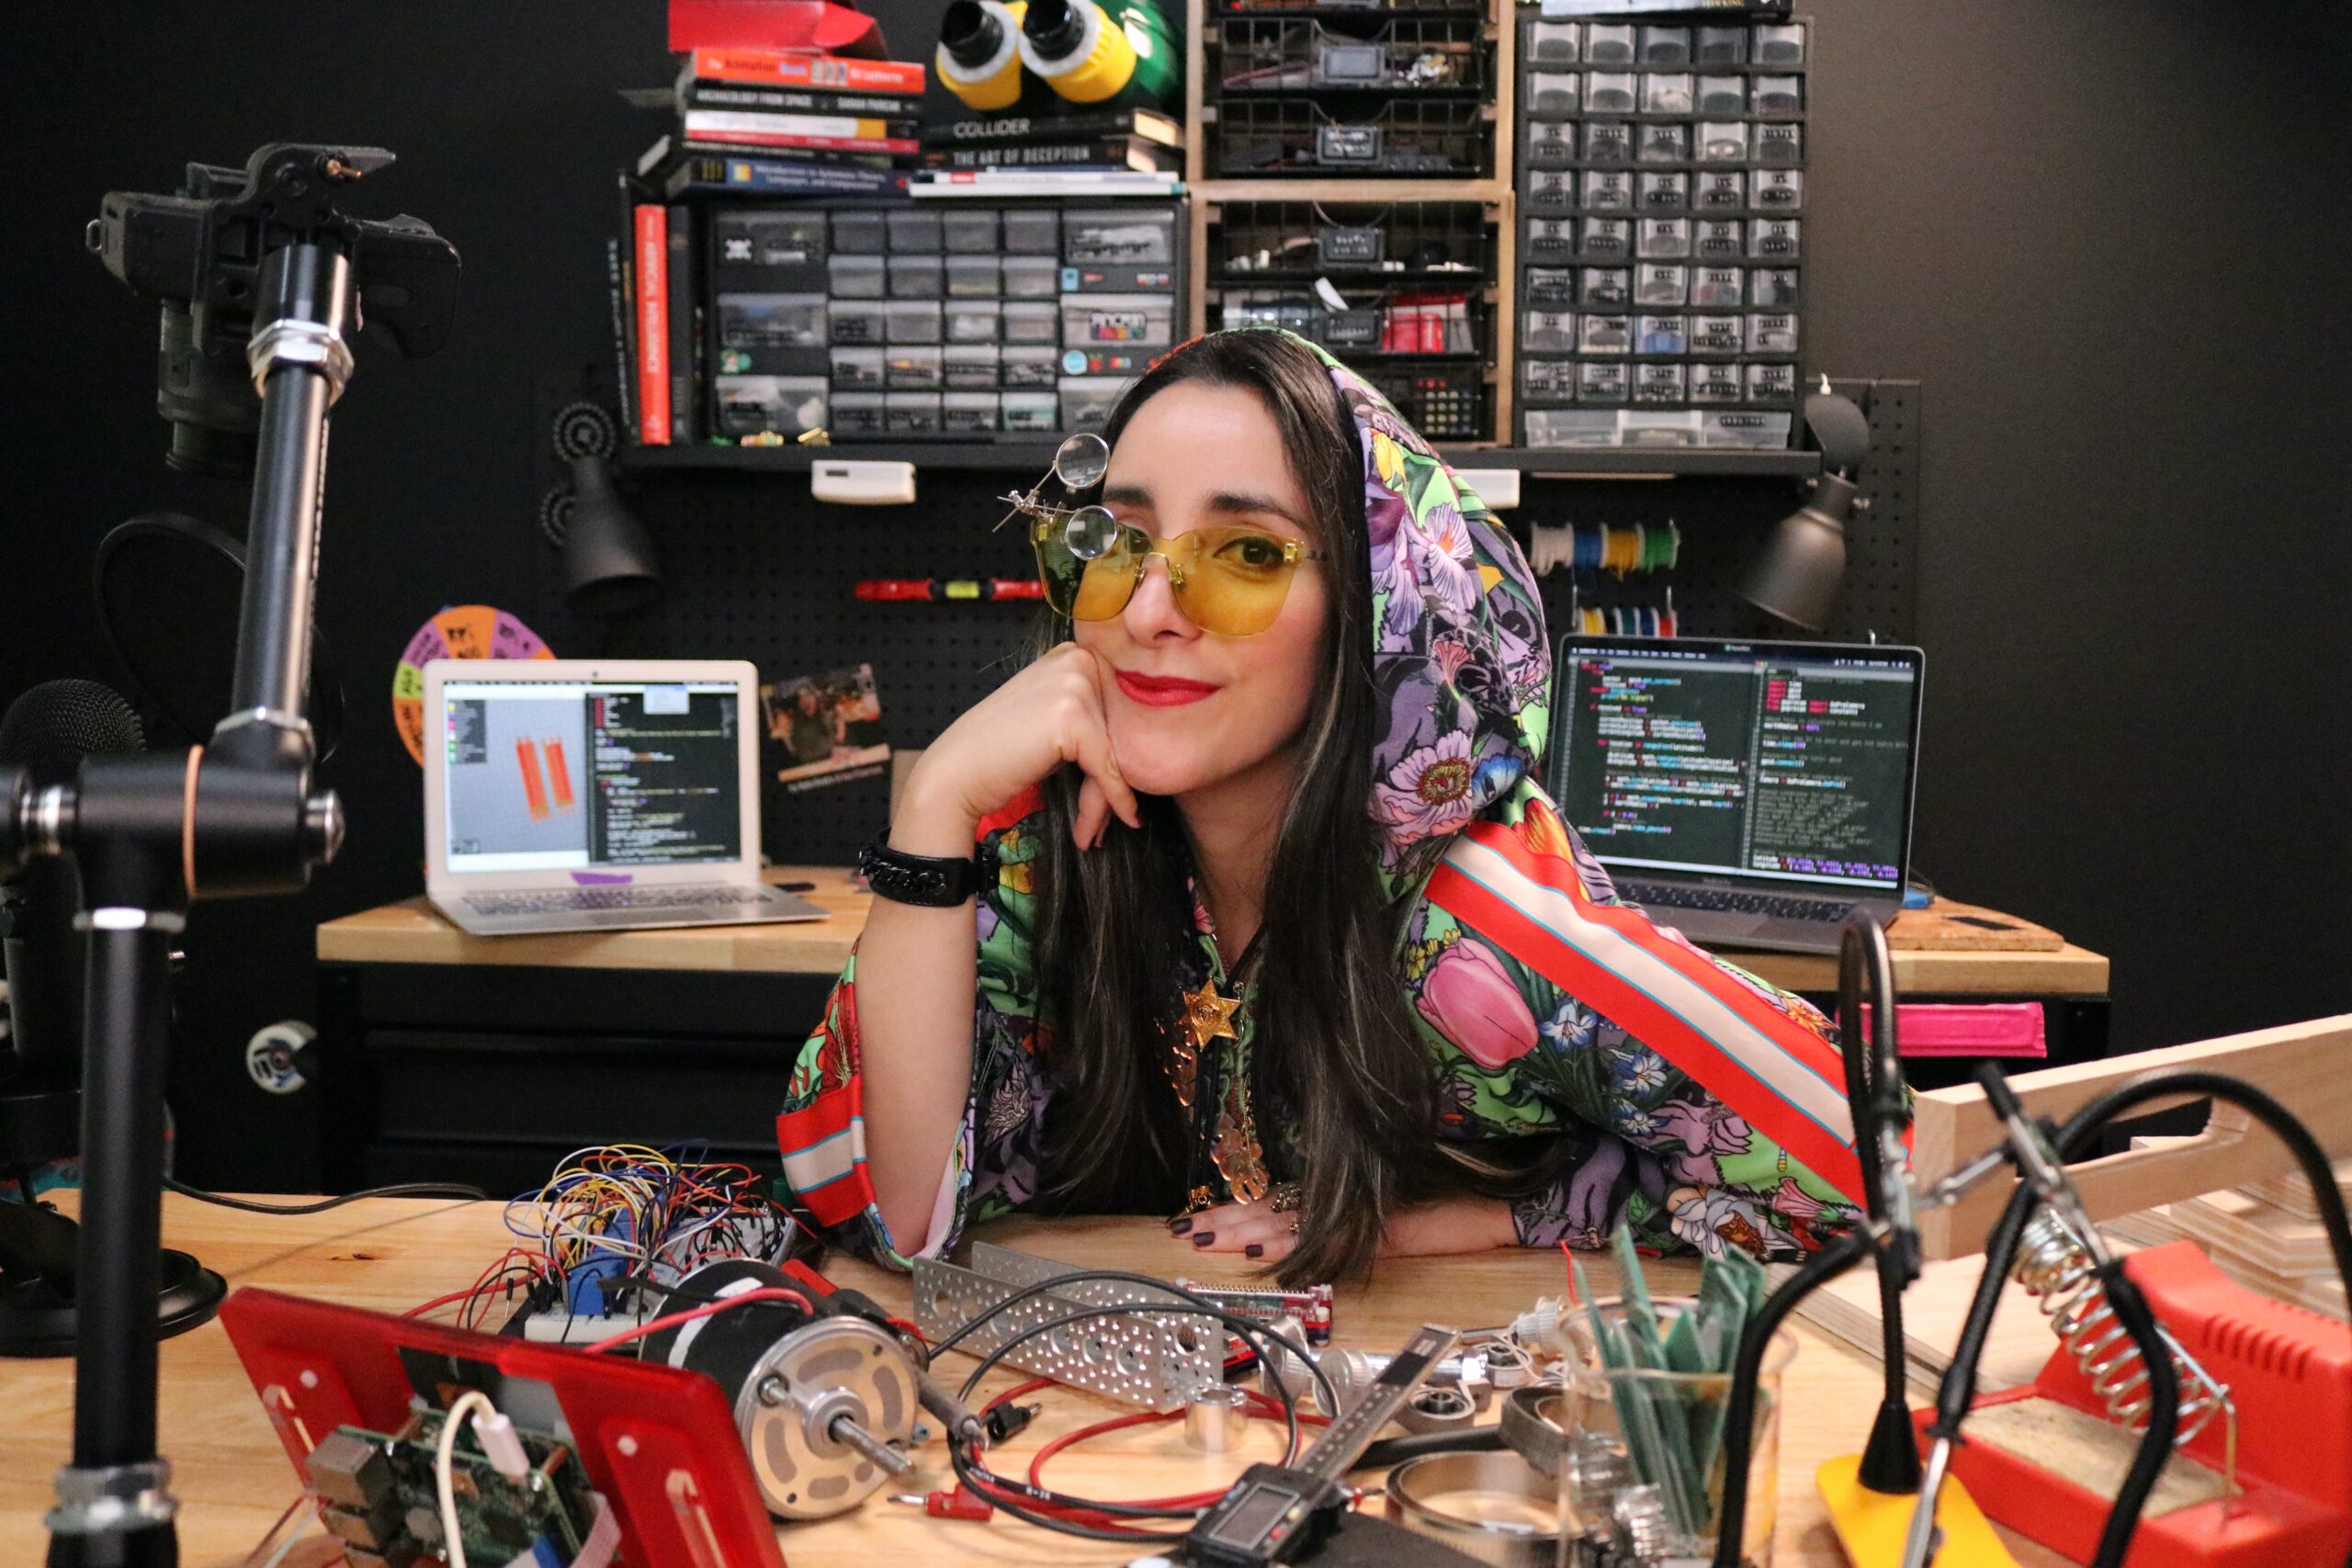
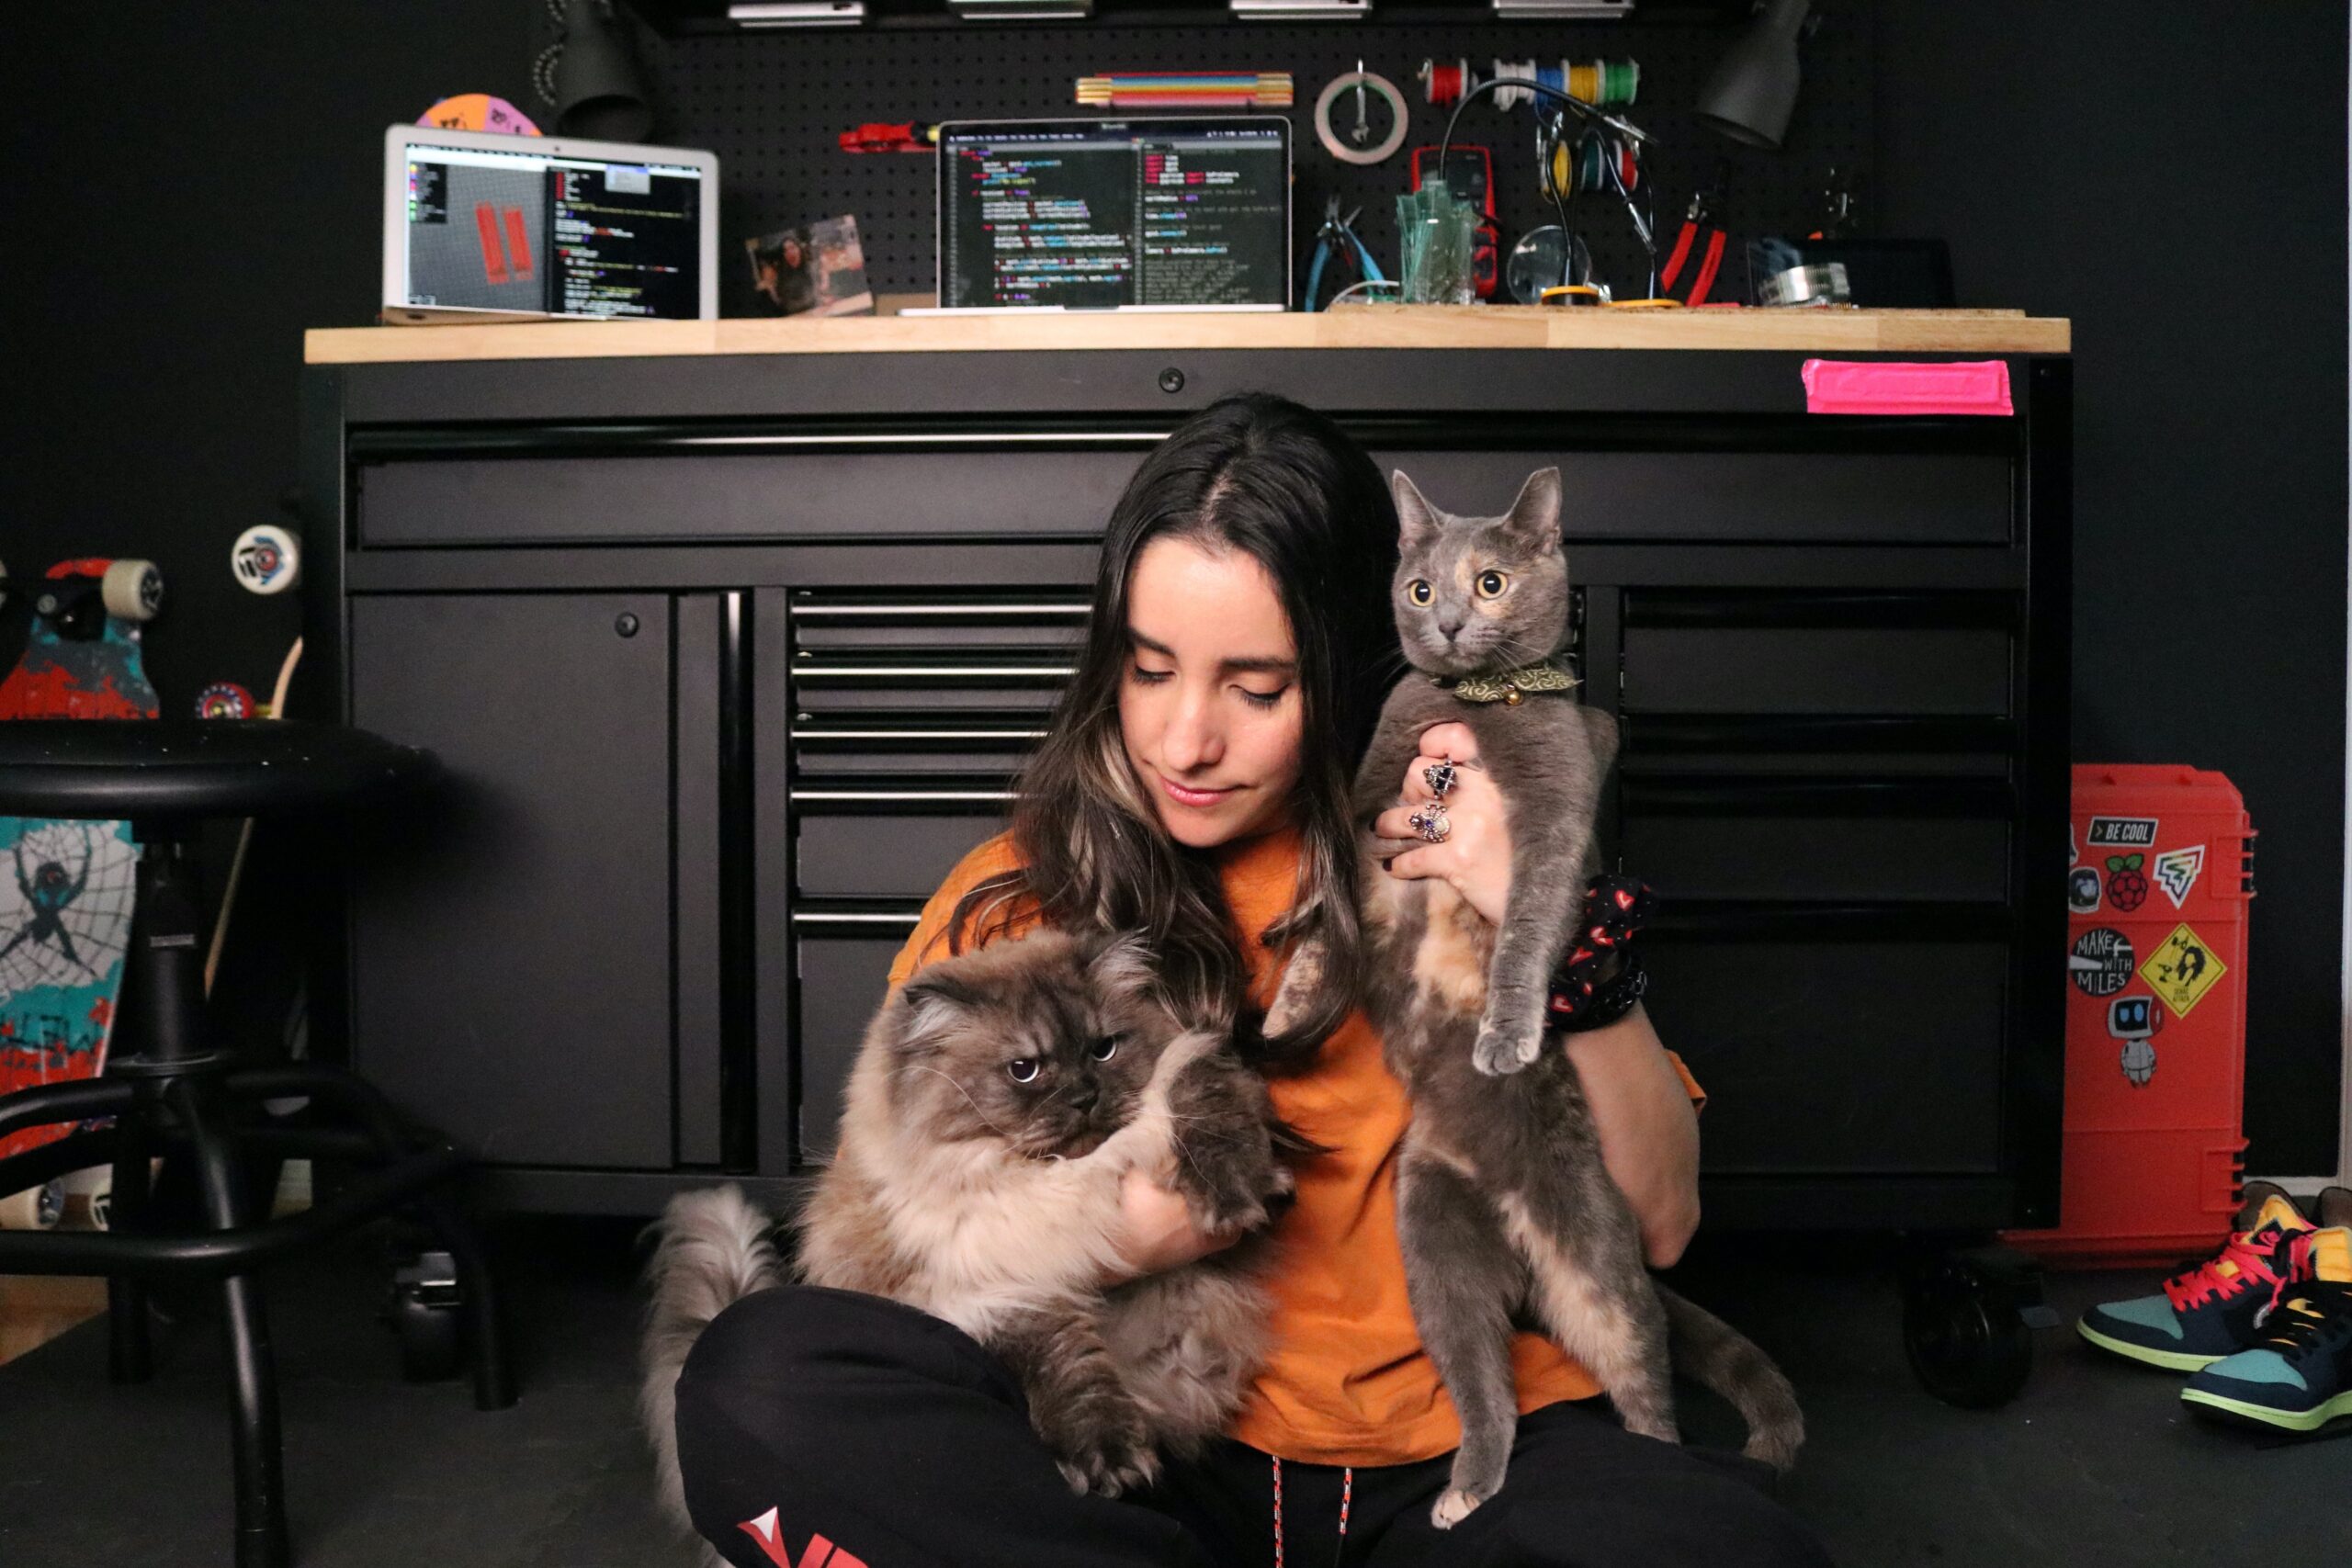
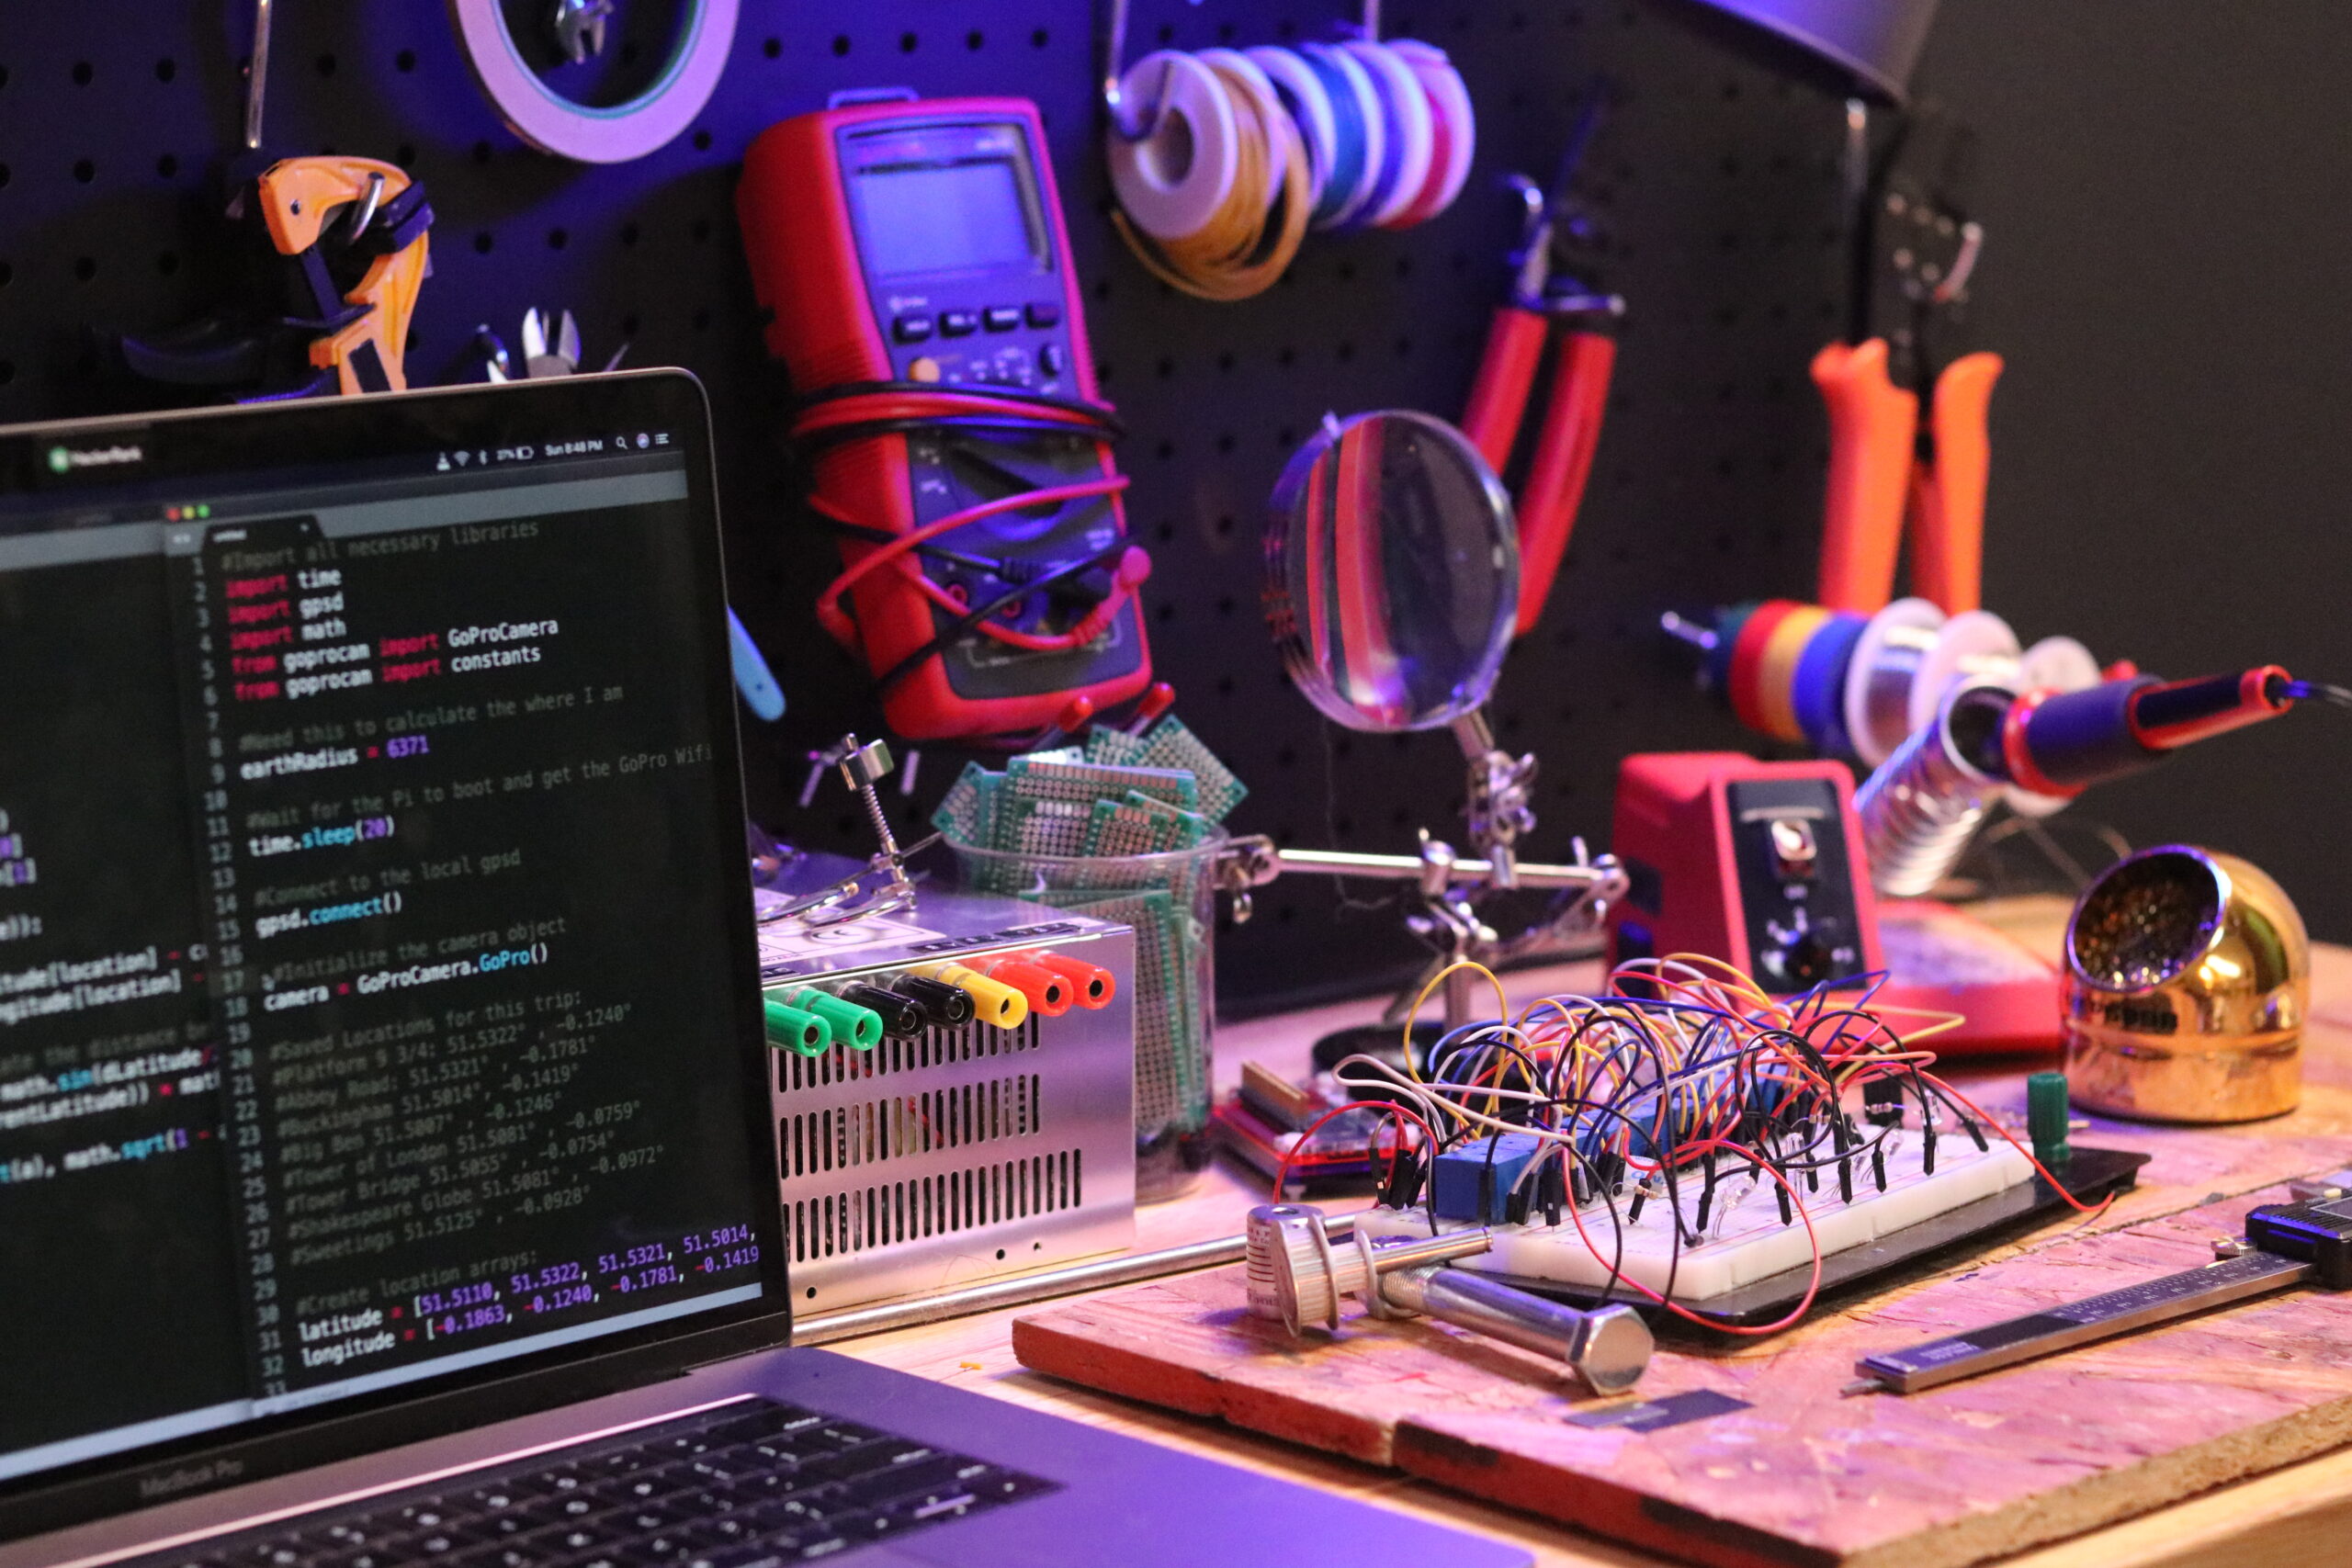
Recently listed as one of Instagram’s Top 7 Women in STEM, software engineer and content creator Estefannie talks to Alex Bate about electronics, her online community, and why she can’t stop giving away free tech in her Instagram Live streams.
Coming from a software background, Estefannie had to learn electronics
Based in Texas, Mexican-born Estefannie graduated summa cum laude from the University of Houston with a degree in computer science and a passion for helping people discover computing.
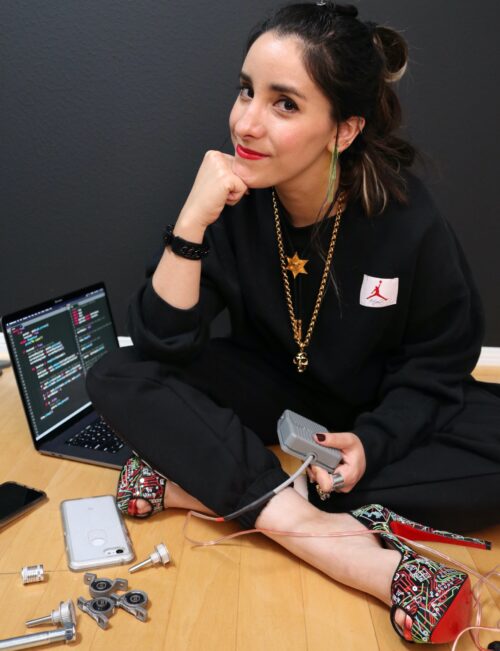
Some years later, with an established career as a software engineer under her belt, Estefannie is best-known for her YouTube and Instagram accounts, Estefannie Explains It All, and can often be found with a soldering iron in one hand, a rescue cat in the other, all while sporting the most fabulous pair of circuit board Louboutin heels and laser-cut lightning bolt earrings. Yes, it’s fair to say that we all want to be Estefannie. But how did she get here?
Rocking her circuit board Louboutin heels and laser-cut lightning bolt earrings
Alex You originally made videos on your channel four years ago to make sure that you’d retained the information that you were learning at the time?
Estefannie Mm-hmm, that’s right.
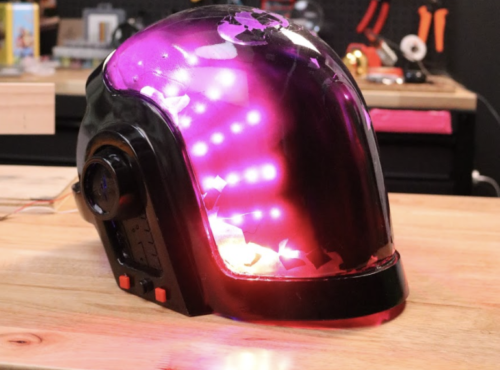
A But why did you decide to move away from the early explainers and start making other types of content, such as your Daft Punk helmet, and running weekly live streams and giveaways? Because I’m assuming that when you were making those early Estefannie Explains It All videos, you didn’t plan on becoming an influencer?
E No. The influencer part? Oh, no. I was studying for an interview with Google and I decided to make explainer videos and put them online because I knew people would correct me if I was wrong. And, if they didn’t, I knew my explanations were correct and I was better prepared for the interview.
The YouTube comments section was the scariest place on earth for me, so that’s why I went for YouTube.Later on, it was close to Halloween, and I was about to have an interview with Microsoft, this time to be a product evangelist. And I knew that IoT, the Internet of Things, was ‘the latest buzzword’, and I already wanted to dabble with that technology. So, I decided I wanted to make an IoT project and put it on my YouTube channel. That way, when the Microsoft interview arrived, I’d also have that video to show.
Halloween happened and I’d made this stupid pumpkin robot thing that wasn’t even IoT, but I put it on YouTube anyway and realised that I’d really liked doing it. I really, really liked it. And that’s when I found out about Simone Giertz and other makers, and this whole world I hadn’t known about. I thought, ‘I really like doing this, so I’m going to keep doing it.’ I didn’t even care about the interview anymore because I had found ‘the thing’, the thing that I wanted to do.
Microsoft actually loved the video and they wanted me to keep doing more of them, but on their platform, and they would own the content, which I didn’t want. So that’s how it transformed from explainers as prep for interviews to wanting to make videos. And the influencer thing happened a little bit differently. It’s a bit more Instagram-my.
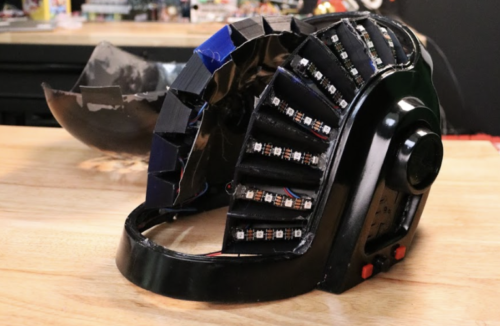
Estefannie’s Daft Punk helmet finished…
…and during the build process
A It’s more personal. You’re creating a brand.
E A brand, yes, I think that’s the key. So the Instagram thing happened for two reasons. The first one was that, before YouTube, I was going to start a business making little video games and mobile apps. And I decided to make it an ‘umbrella’ business so that anything I made could go under there. Because I thought [she laughs], ‘they’re going to go viral and so I need to be prepared legally.’
And while I was doing all of the business stuff, I realised I also need to learn how to do social media, because I need to promote these video games. So I took the time to understand Instagram, follow the people that I thought were interesting or would be doing the same stuff as me. I started out with my personal account as a test and, again, I really liked it. I started seeing people follow me because they were interested in the lifestyle of a software engineer. And I thought it was cool because I would have liked to see how software engineering was as a career before going for it. It was like a window to that world.
A Do you think there’s been a change, though, because your brand was that you were a software engineer? And now you’re not in the same job. You’re a full-time creator now. Do you think that’s affected who follows you and how people interact with you?
E I was very afraid of that when I quit my job. I tried to not talk about it at first. But it didn’t really matter because the people who have followed along, they’ve seen all the changes. And when I quit my job, they congratulated me because I was now able to do this full-time. So it was like the opposite. They were following ‘The Estefannie Experience’, ha ha. For a lot of them, it was like, ‘Oh, that’s another cool path that you can take as an engineer.’
Cats can provide emotional support while debugging
A What was it like to make the leap from software, from something you can control totally to hardware, an area where things can go wrong all the time?
E Oh, well, software can go wrong all the time, too. When I did that first Halloween pumpkin video, I think that really sparked a new interest in me of like, ‘Oh, I should have studied electrical engineering or computer engineering’. Because I am really passionate about the hardware aspect of it. I’d studied a low-level class as part of my computer science degree about gates and how they work. I remember having to draw them out.
And I really liked that class and understanding how electricity goes through those gates. But it didn’t matter because I was there to learn how to do the programming part. With electronics, it was so fun to go back and actually try it, and I was hurting myself, shocking myself, burning myself. It was great; I love it. It was like I was putting everything in my imagination into real, physical things. And I think that helps me. I like seeing things or touching things.
A You’re a big advocate for celebrating failure and learning from failure. You’ve done talks about it at Coolest Projects and Maker Faire, and you talk about it in your videos. In the earthquake simulator you built for Becky Stern, you showed the first way of making it and how it didn’t work, before showing the final project. Do you think it’s important to share failures on YouTube, instead of editing a perfect project build?
E I think so. Yes. It comes from a place within me where, when I wasn’t good at something when I tried it for the first time – I’m a nineties kid, I don’t know if this is anything to do with it – but you try, and you fail, and you just assumed ‘OK, I’m not good at it.’ I’m not supposed to be playing piano, or whatever. That’s how I grew up thinking. And so, when I became an actual engineer, and I say ‘engineer’ because studying computer science is one thing, but to become an engineer is something completely different.
And when I actually became an engineer, that’s when it hit me that you have to really just go for it, stop thinking, stop planning, stop analysing, and just do it and see what happens, and learn from that.So that was a great lesson in life for me, and I want to show people like me that I make mistakes all the time and that I struggle sometimes, or that it takes several steps; it takes several tries to get somewhere. And so I want to show it for those people who feel maybe like they can’t do something because they didn’t do it the first time. I want to show them the human side of engineering.
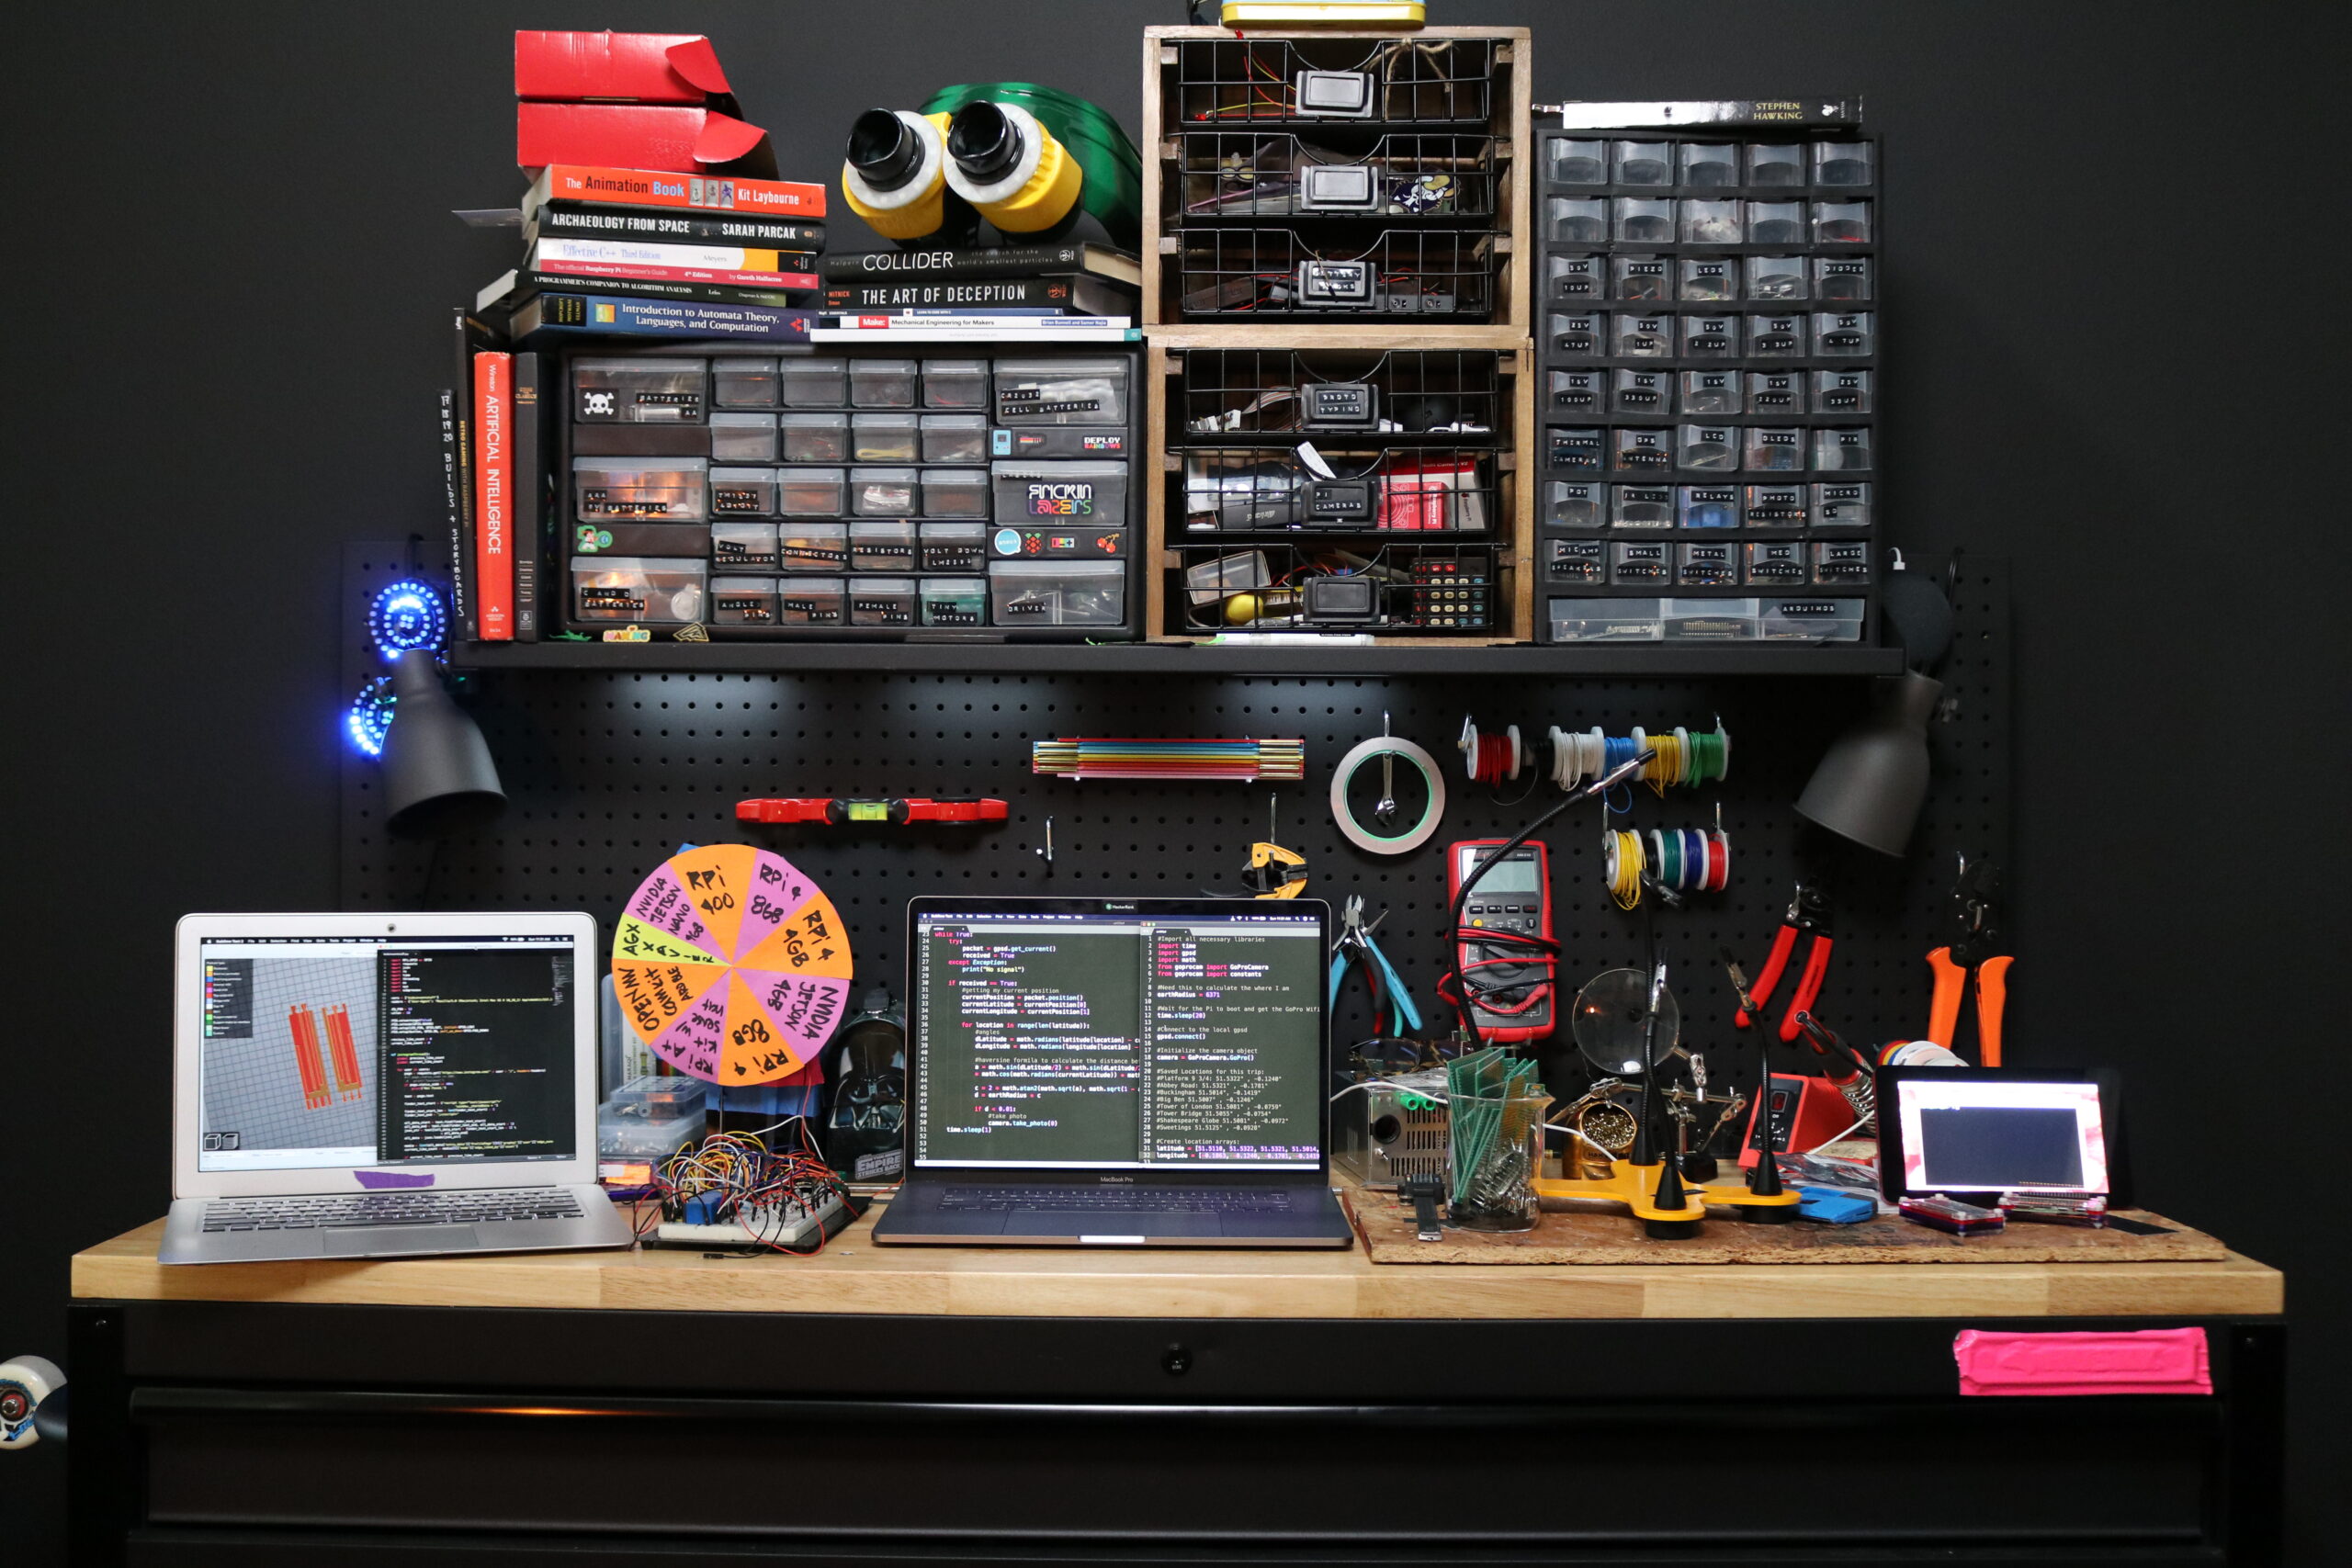
That’s one sweet studio setup
A That’s cool. I liked when you were making the visor for your Daft Punk helmet and it was just a series of Instagram Live videos of you unsuccessfully melting plastic in your oven as you tried to learn how to vacuum-form.
E The plastic melting was so fun, and I learned a lot. I would never do that again, ha ha.
A Of all the projects you’ve made and shared, what has been the thing that you’ve been the proudest of because you managed to overcome an issue?
E I think with most of my projects, I’ve had to overcome something. Except with the Jurassic Park Goggles. Although it was a pain to do, I already knew what I was doing, and that was because of the Daft Punk helmet. I struggled so much with that one that I knew exactly what do to with the goggles.I’ve been working on a smart litter box project for my cats, Teddy and Luna. That one required me to do a lot of woodwork and play with tools that I had never played with before. And so those days terrified me. But, I try to push myself with every project, so they’re all scary.
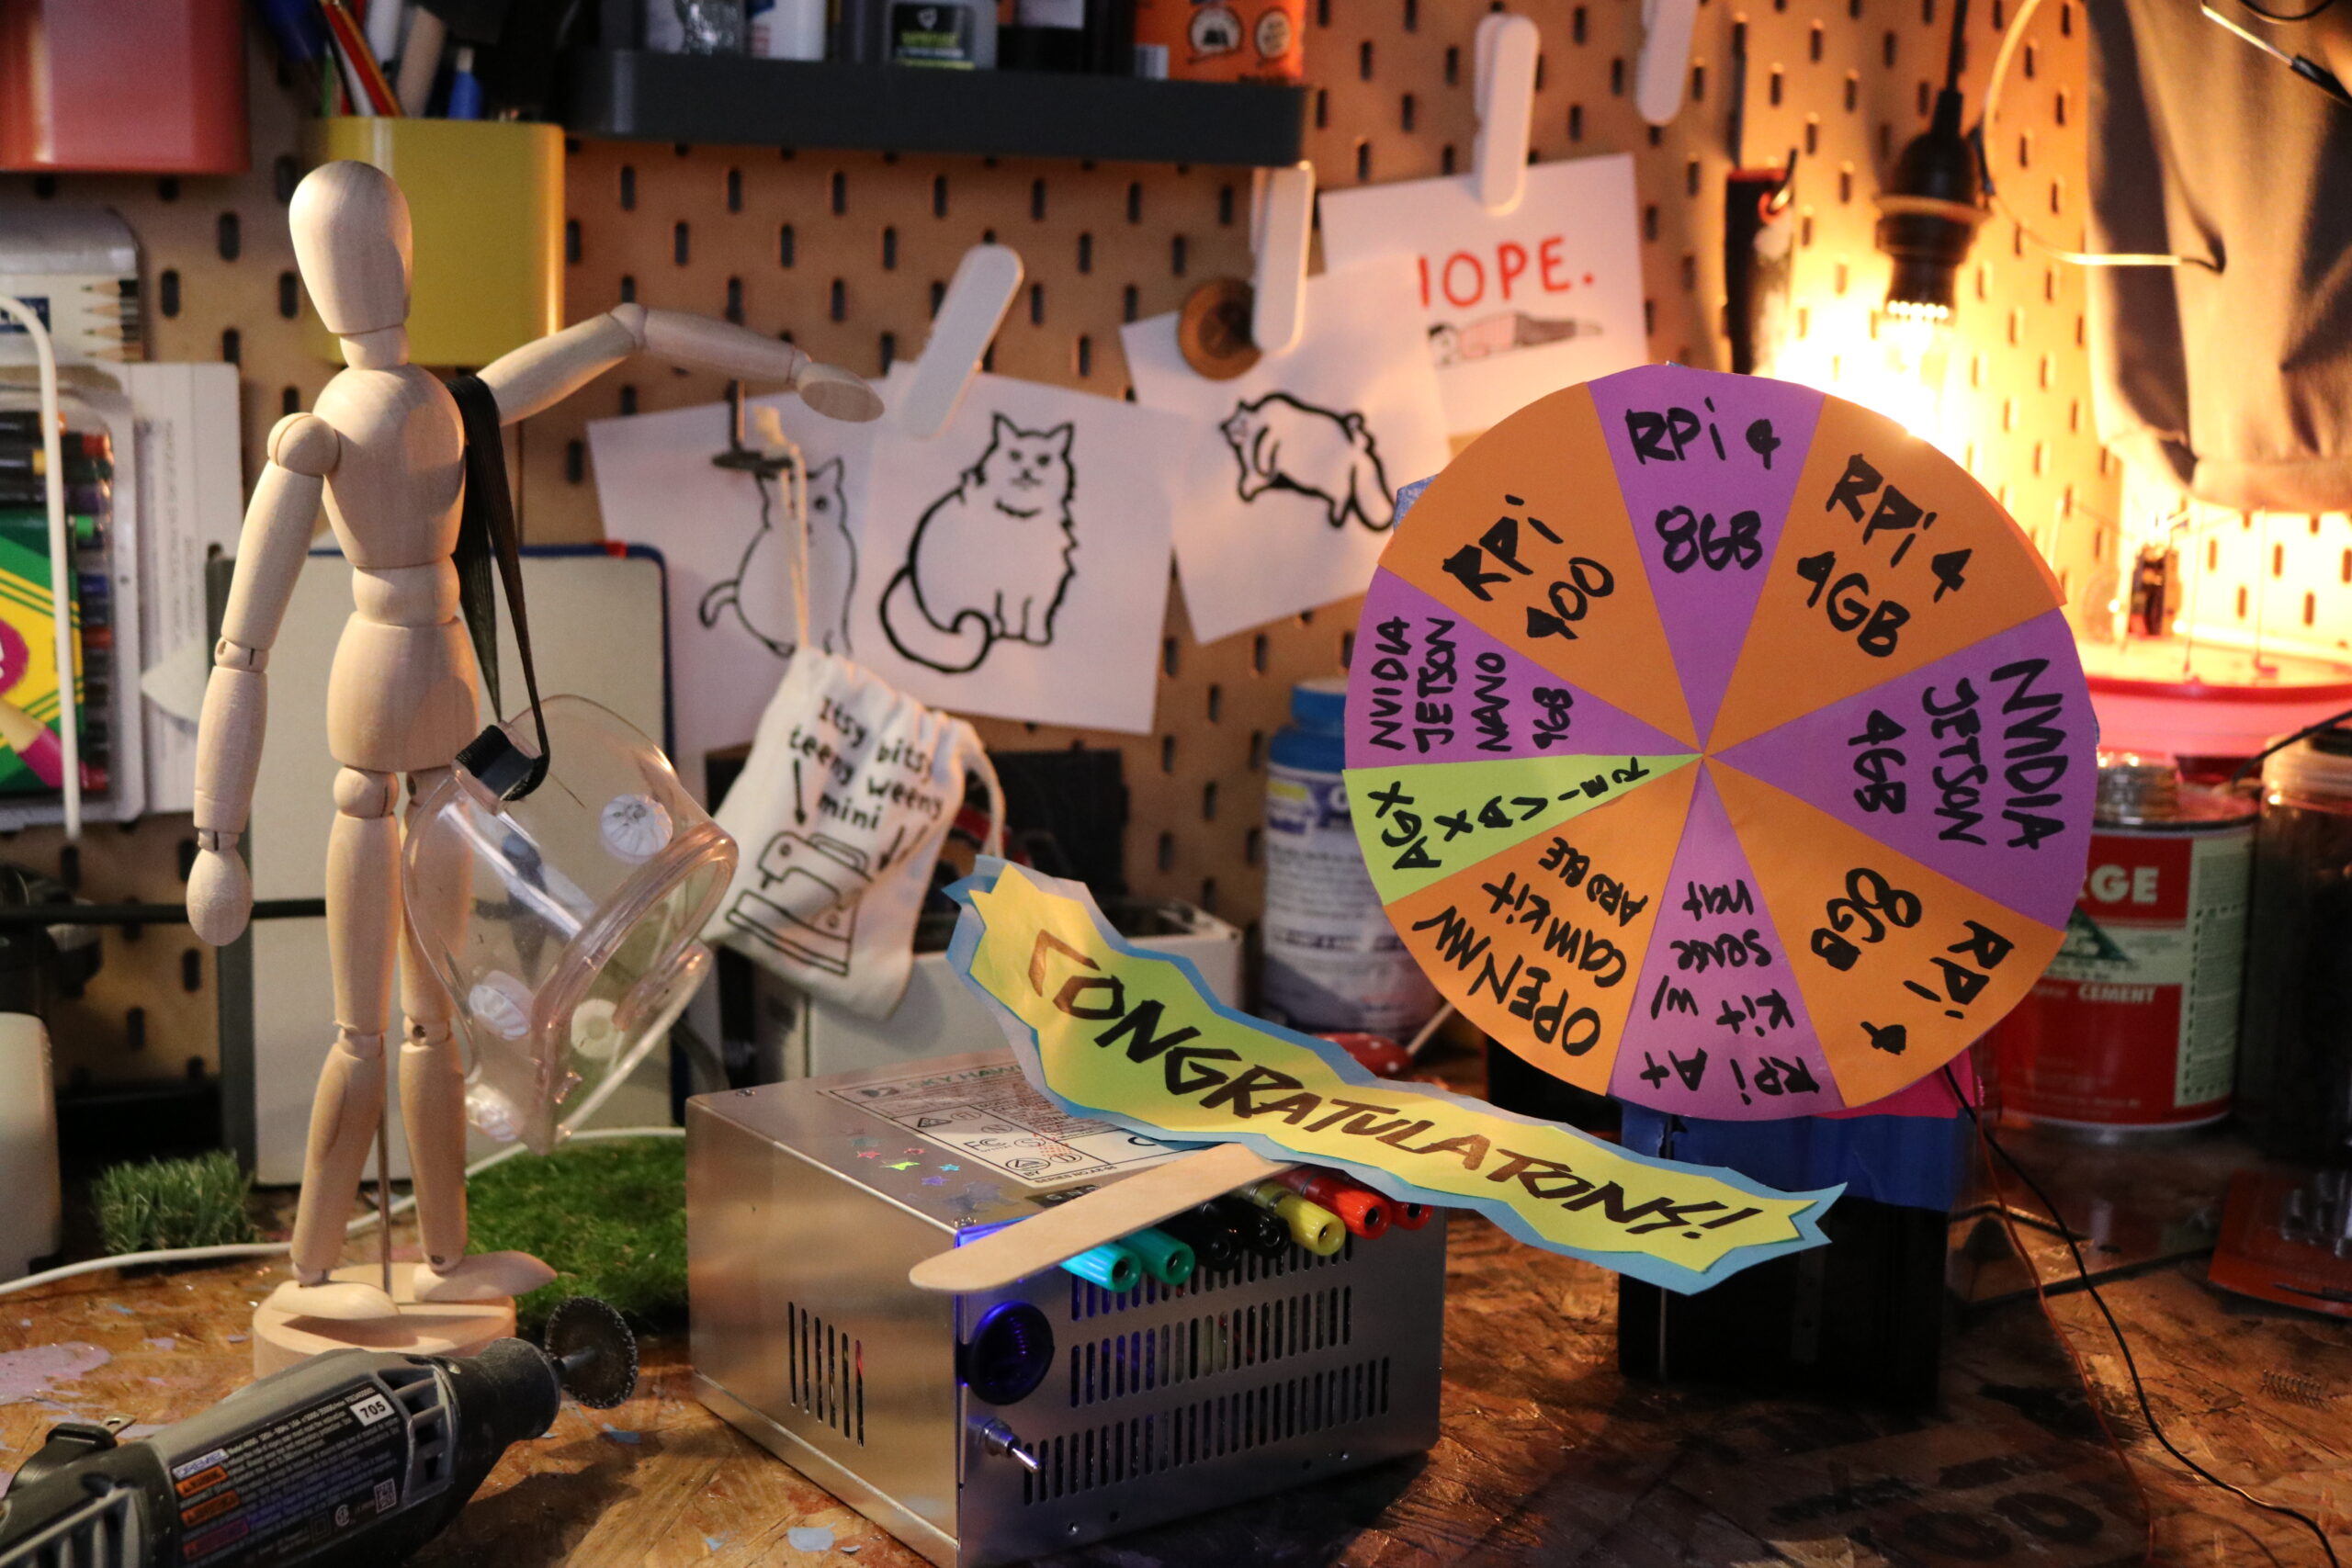
Giveaways are ruled by the random wheel of fate, like Boethius’ Wheel but nicer
A You have projects that you’ve put your blood, sweat, and tears into, that you’ve worked hard on, that you’ve written all the code for. Where do you stand on whether you should give that code away for free? Do you provide it all the time? Do you ever think, ‘no, I’m going to keep this for myself’?
E Oh, I am a true believer in open source. My plan is to continue to give it all away and put it on my website. This morning, I was finishing up a blog post I’m writing about the Daft Punk helmet. A step-by-step on how to do it, because I know people watch the video, but they might not be able to follow it to make their own. So now I’m going ‘here, here’s what I use’. And all those links in the post, Home Depot, etc., all the links I’m using, they’re not even affiliated. I’m making zero dollars out of that post I’ve been working on.
I know lots of the people who want to recreate my projects are kids, and they have no money. This is the type of education I wish I had had when I was younger. If I had known about this stuff, I would have started when I was very young. So, I can’t charge them. I feel, if they have to buy electronics, there’s no way I can charge extra for the schematic and the code. I cannot do that. It’s about being very conscious of who my audience is. I don’t want to stop them from making it. It’s the opposite. That’s why I do giveaways every week on Instagram Live. I want to give them the boards. I want to give them everything so they can do it. I didn’t have any money growing up, and I know the feeling.
I respect people who want to charge for it. I understand. But I’m not in that boat. Even the smart little box that I’m currently working on, someone who I respect very much said, ‘oh, that’s a great idea, why don’t you patent it and manufacture it? There’s a market for it.’ And I know there’s a market for it, but that’s not the point. The point is to show that you can do it. Anything that’s in your imagination, you can build it, you can do it, and here are the steps. Yeah, I want more money, but I think I can get there in different ways, through YouTube ads and sponsorships.
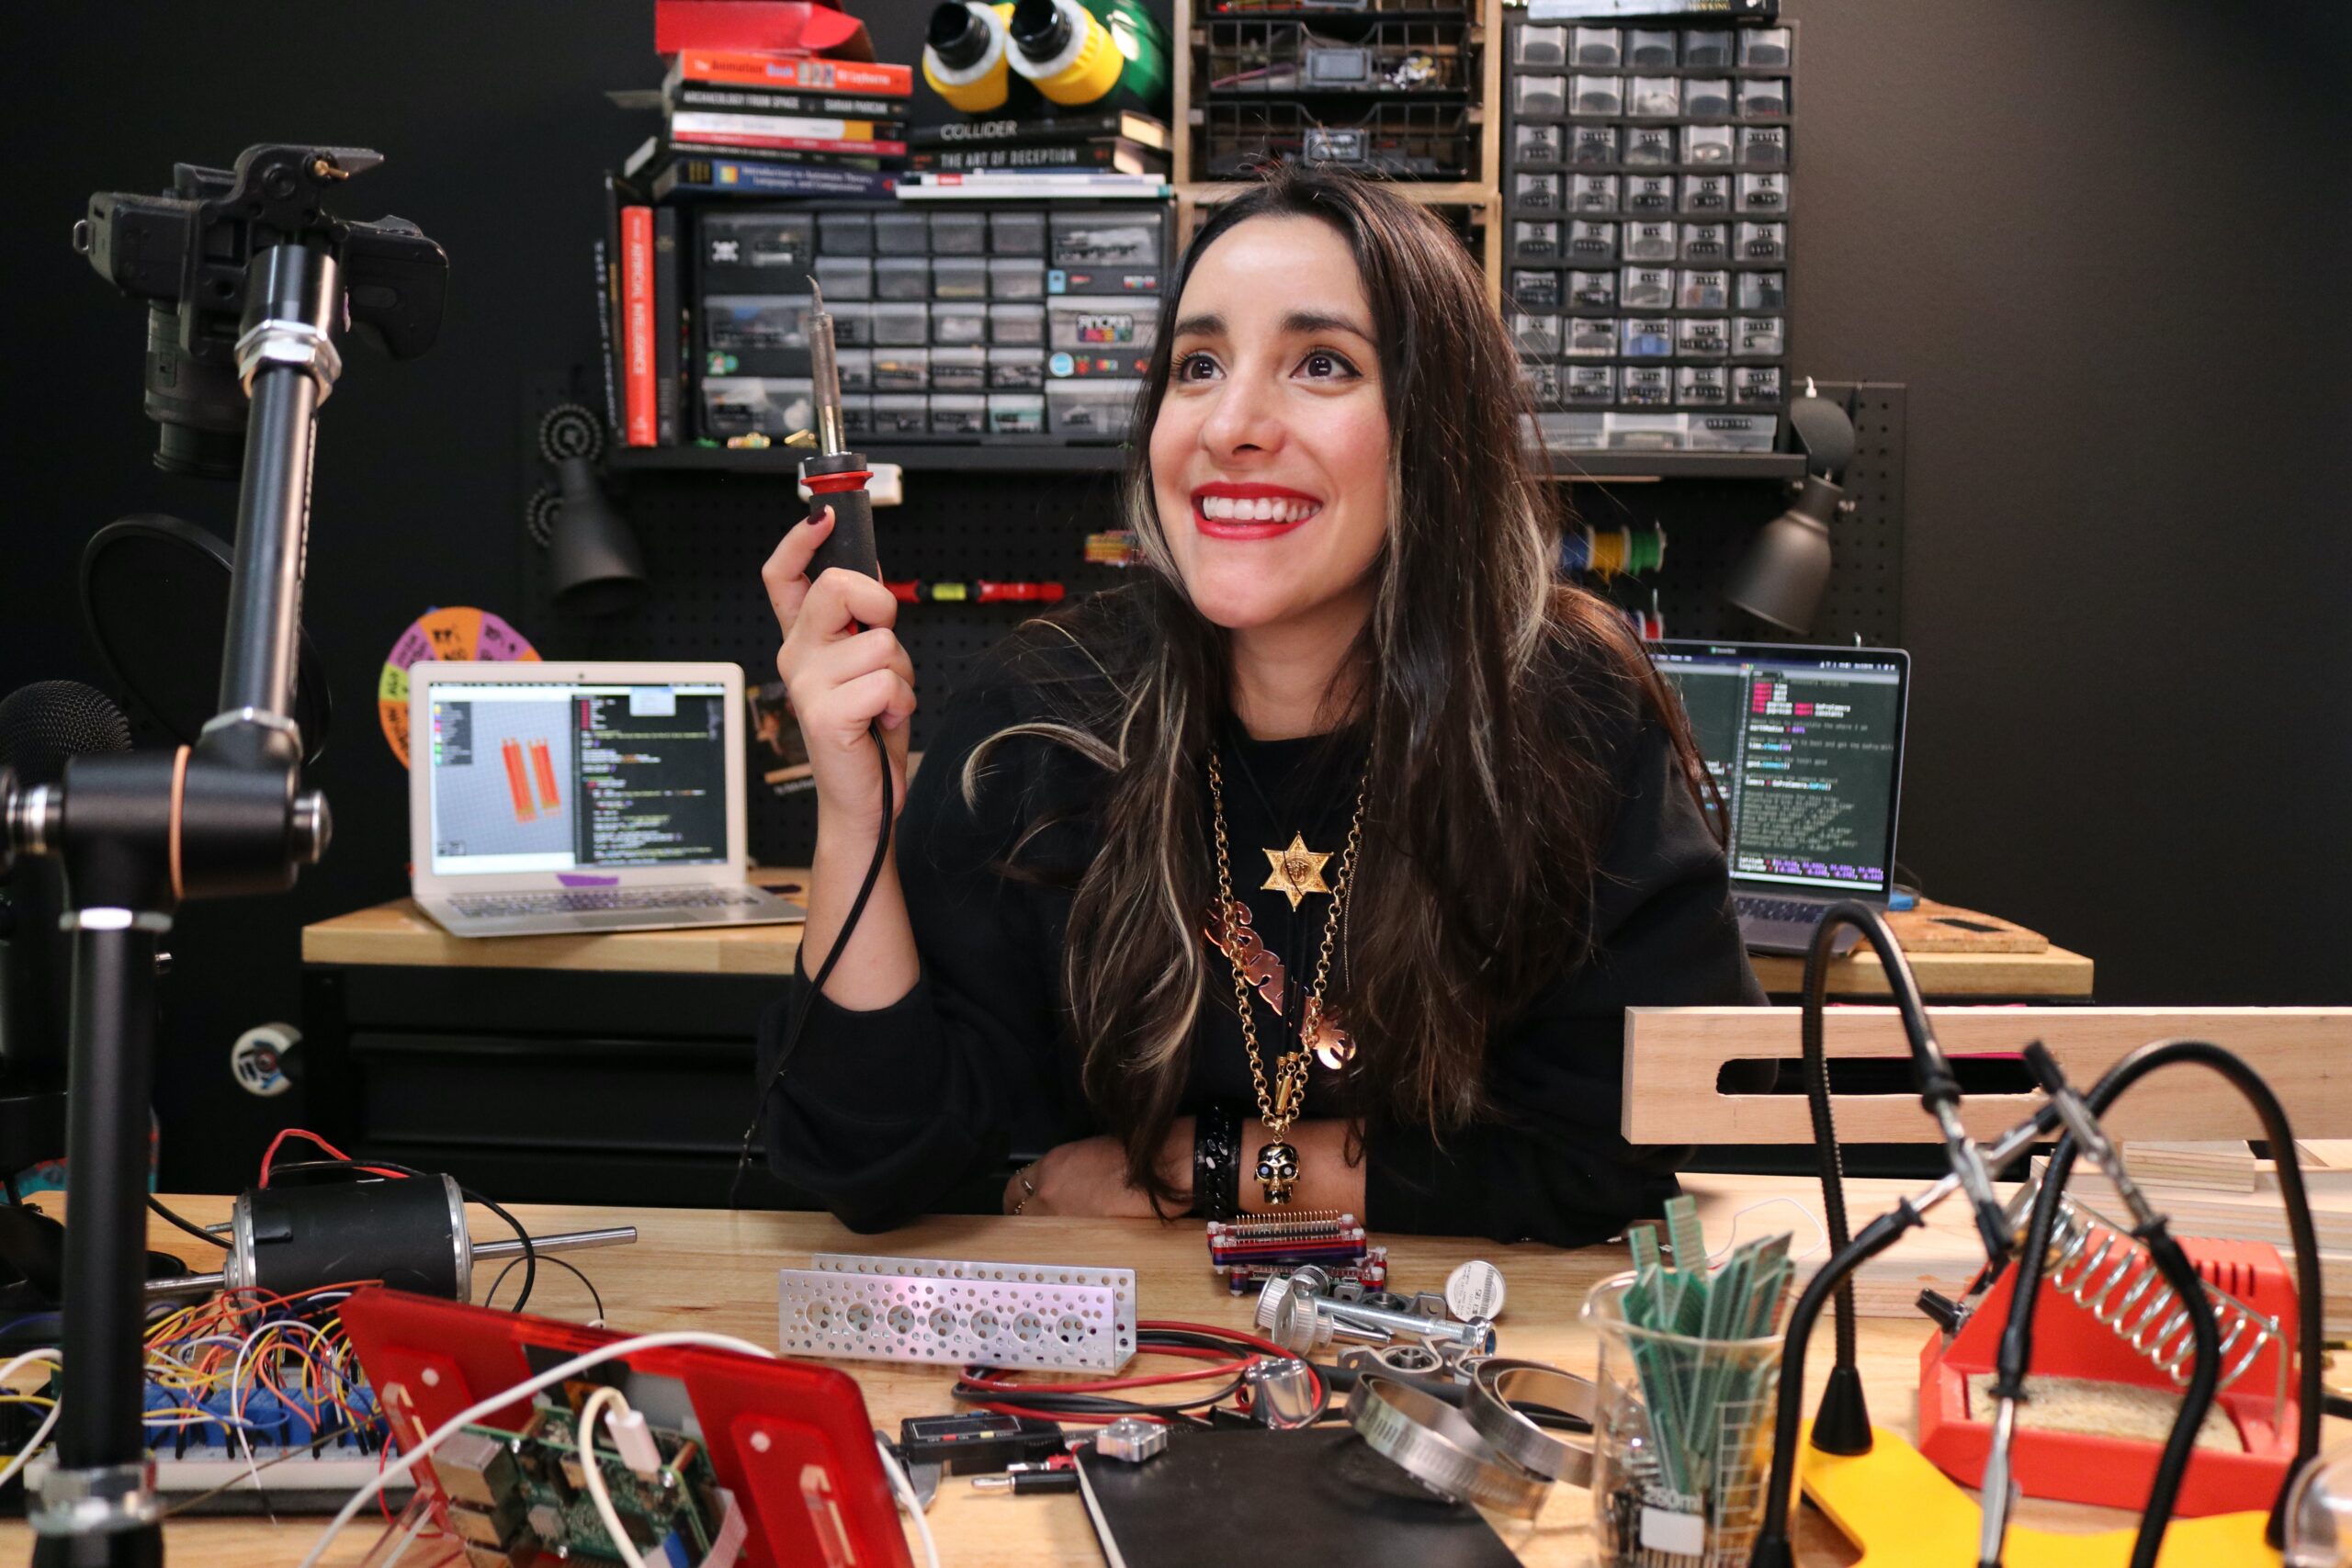
Soldering makes us this happy too
A There are a million different ways to make an LED blink, and none of them is the wrong way, they’re just the comfortable way you find to do it. Do you get backlash when you release your code from people saying, ‘Well, you should have done it this way’?
E I have never received backlash on code and, in fact, I would encourage people not to be scared to publish their code. I know people who say they want to open-source their code but they have to ‘clean it up first’, and they’re scared to publish it. But the whole point of open source is that you put it out there, you know it works, and it’s going to be OK. And it gets better because people will contribute. I’m never afraid of showing code.
A Do you think, when you talk about financial accessibility that that’s one of the reasons that’s holding you back from starting a Patreon? That you’d be putting a financial wall up against people who can’t afford it.
E One hundred percent. I don’t want to add to people’s financial strain. In fact, I am starting my new cryptocurrency so that I can send tokens to people around the world and, kinda like arcade tickets, they can spend them on things.
A How does that work? How can I spend your cryptocurrency?
E OK, so it has zero monetary value. The idea is that instead of giving out imaginary internet points to people in my live streams, they get actual internet points. And they can exchange them back to me for real items. I’ll have a menu of tech – so many points gets you a Pico, or a Raspberry Pi 400, or some other board – and people exchange their internet points for prizes. It helps me see how active someone has been in the live streams so I can say yes, it’s worth the $200 to ship this item to someone in India.
A Ah, I get it. It’s like house points in school.
E This is why it takes me so long to release a video because I’m like, let me do the cryptocurrency and then also that live stream, and then also this video about so and so. I just want to have a voice.
Nice breadboard
A How do you decide what content to make? Is it just about creating content you think your audience will like? Or more about content you think is important for people to know?
E I think I’ve always made videos that I felt were important, but I was always trying to, y’know, ‘play the algorithm’. And that was happening while I was still working and trying to quit my job so, of course, that was a period of my YouTube career where I was trying as much as I could to get views and hop on trends. Not the trends that were just ‘trends’, but trends by people I liked. Back then, I was a big fan of a YouTube baker, so I did a project using her stuff in the hopes she would see it. But I’m not really like that any more. If I see a channel I really like, I’ll try and do a collab, but not just because it would be beneficial for my channel. None of that any more. Just stuff I like.
One piece of advice that a lot of YouTubers have told me – that I’ve decided not to follow – is that you have to stick to one thing so that the audience knows what to expect. The same with Instagram. But I disagree, and I’ve gained more followers by being myself more. I’m Estefannie who also really, really likes crazy fashion. I like make-up and weird earrings, and why should I have to tone that down? Because I’m an engineer? I only post things that I would like. It’s not always me soldering. It’s not always code.
A You create the content you want to see, not the content you think people want to see.
E Yes. That would be easy to play that game, but that’s not what I want to do.
A A lot of content creators would create a separate Instagram account or YouTube channel for their other passion, but all that’s doing is showing that it has two different audiences. I think, especially when you are a woman in tech, if you then separate out the other things that you like, it’s almost like you’re saying, ‘Oh, well, these are two separate things that can’t exist together.’
E Exactly. You’re saying, ‘I go to work. And I’m a scientist, and I look like this. But then I go home, and I look like this’. And it’s not true. There are some creators who have a million YouTube channels, and I don’t understand why because people really like them for who they are. But it’s following the example of how, if you want to do vlogging, you have to have a separate channel, and I don’t think you necessarily have to.
A You are the brand, and people subscribe to you. You love fashion, and I couldn’t see you doing a ‘come shopping with me down Melrose Place’ video because that’s not who you are, but I could totally see you trying to make your own lipstick.
E Oh, yeah. Oh, yeah.
A You would make that video and your audience would love it because it’s you, and you’re doing something you’re passionate about.
E Yeah, I mean, it’s like, the best example for me is Colin Furze. He is who he is. He wears his tie, he’s great. That’s very transparent. That’s him.There’s a maker who influenced the way I dressed for a bit, and I see it on all the other maker women in how they dress. And I didn’t even like those clothes. And when I noticed, and I stopped myself, and I was like, ‘this is not the Estefannie Experience’. It’s the other person experience, and I don’t need to replicate that because that’s not me. And if I want to wear my giant heels, I’ll wear my heels. You have to be yourself.
If people want to be creators, it’s OK to be yourself. And if you’re the only one and you don’t have a team like other creators, that it’s OK to take your time and not do it for the algorithm. That’s my advice. You don’t have to post every week. I mean, you can, but don’t kill yourself. It’s a one-woman show over here. I do my taxes, I do the website, I do the videos. That’s the advice I want to give here. That’s what I want people to take from this interview.
Subscribe to Estefannie on YouTube, and follow her on Instagram. And make sure to take part in her weekly live streams for a chance to win some exclusive Estefannie Internet Points.
Issue 42 of HackSpace magazine is on sale NOW!
Alex spoke to Estefannie for the latest issue of HackSpace magazine. Each month, HackSpace brings you the best projects, tips, tricks and tutorials from the makersphere. You can get it from the Raspberry Pi Press online store or your local newsagents. As always, every issue is free to download from the HackSpace magazine website.
Why pay over the odds when you can build an accurate replica, and have fun doing it?For the latest issue of The MagPi Magazine, Rob Zwetsloot switches off his targeting computer to have a look.
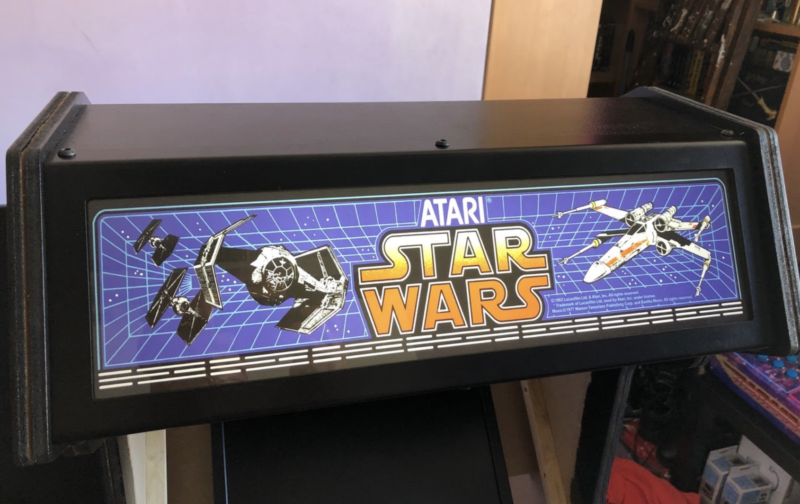
Art had to be rescaled, but it’s been done faithfully
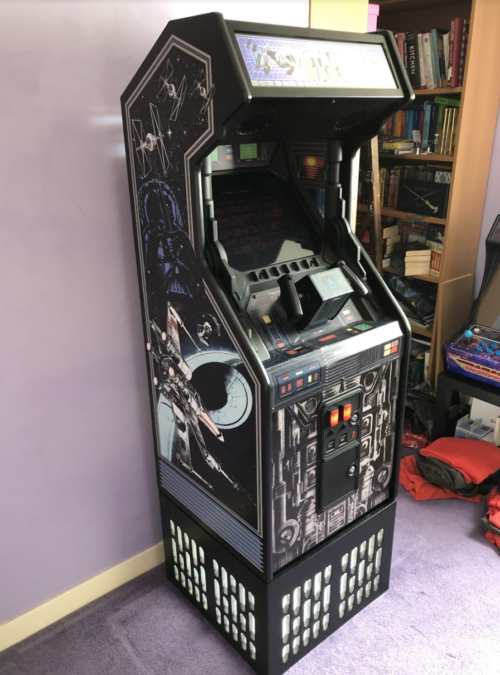
Getting the arcade machine of your dreams gets a little harder every day, especially the older they are. Making one, however, is always possible if you have the right skills and a Raspberry Pi.
“My project was to build a replica, or as close as I could reasonably manage, of the Atari Star Wars arcade cabinet,” James Milroy tells us. “I really wanted to build a cockpit as that’s what I played on in the eighties, but sadly I didn’t have the room to house it, so the compromise was to build a stand-up cabinet instead.”
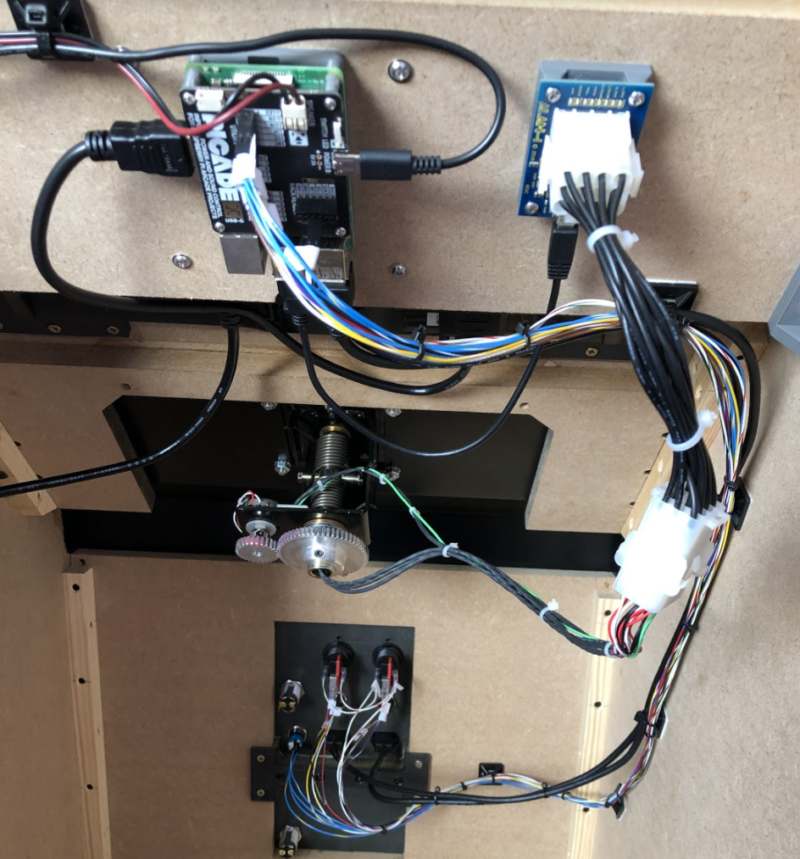
The workings were simple when it came down to it: Raspberry Pi 3B+ with Pimoroni Picade X HAT. This gives us a power switch, audio amp, buttons, and a joystick if necessary. The replica yoke is interfaced with a USB adapter from the same company
Even then, the standard cabinet has a lot of detail, and James really nailed the look of it. Why build it from scratch, though? “Initially, I had toyed with sourcing an original cabinet and restoring it, but soon gave up on that idea after finding it nigh on impossible to source a cabinet here in the UK,” James explains. “Almost all cabinets for sale were located in the USA, so they were out of the question due to the high cost of shipping. Atari only made just over 12,500 cabinets worldwide, so their rarity meant that they commanded top dollar, effectively putting them out of my price range. It was at this point that I decided that if it was going to happen, then I would have to make it myself.”
Making a cabinet is hard enough, but the control system would have to be an original Atari yoke. “The Atari yoke is considered the ‘holy grail’ of controllers and, again, is very hard to find,” James says. “My prayers were answered in October 2018 when a thread on a forum I was subscribed to popped up with a small Utah-based startup aiming to supply replica yokes at a realistic price to the arcade community. I grabbed two of these (one for my friend) and the project was on.”
Good feeling
When it came to actually emulating the game, for James there was only one choice: “My decision to go with a Raspberry Pi was a no-brainer really. I had previously made a bartop cabinet using a Raspberry Pi 3 and RetroPie/EmulationStation which I was really pleased with. So I had a platform that I already had experience with and knew was more than capable of emulating the one game I needed to run. Besides, the simplicity and low cost of the ecosystem for Raspberry Pi far outweighs the extra expense and effort required going down the PC route.”
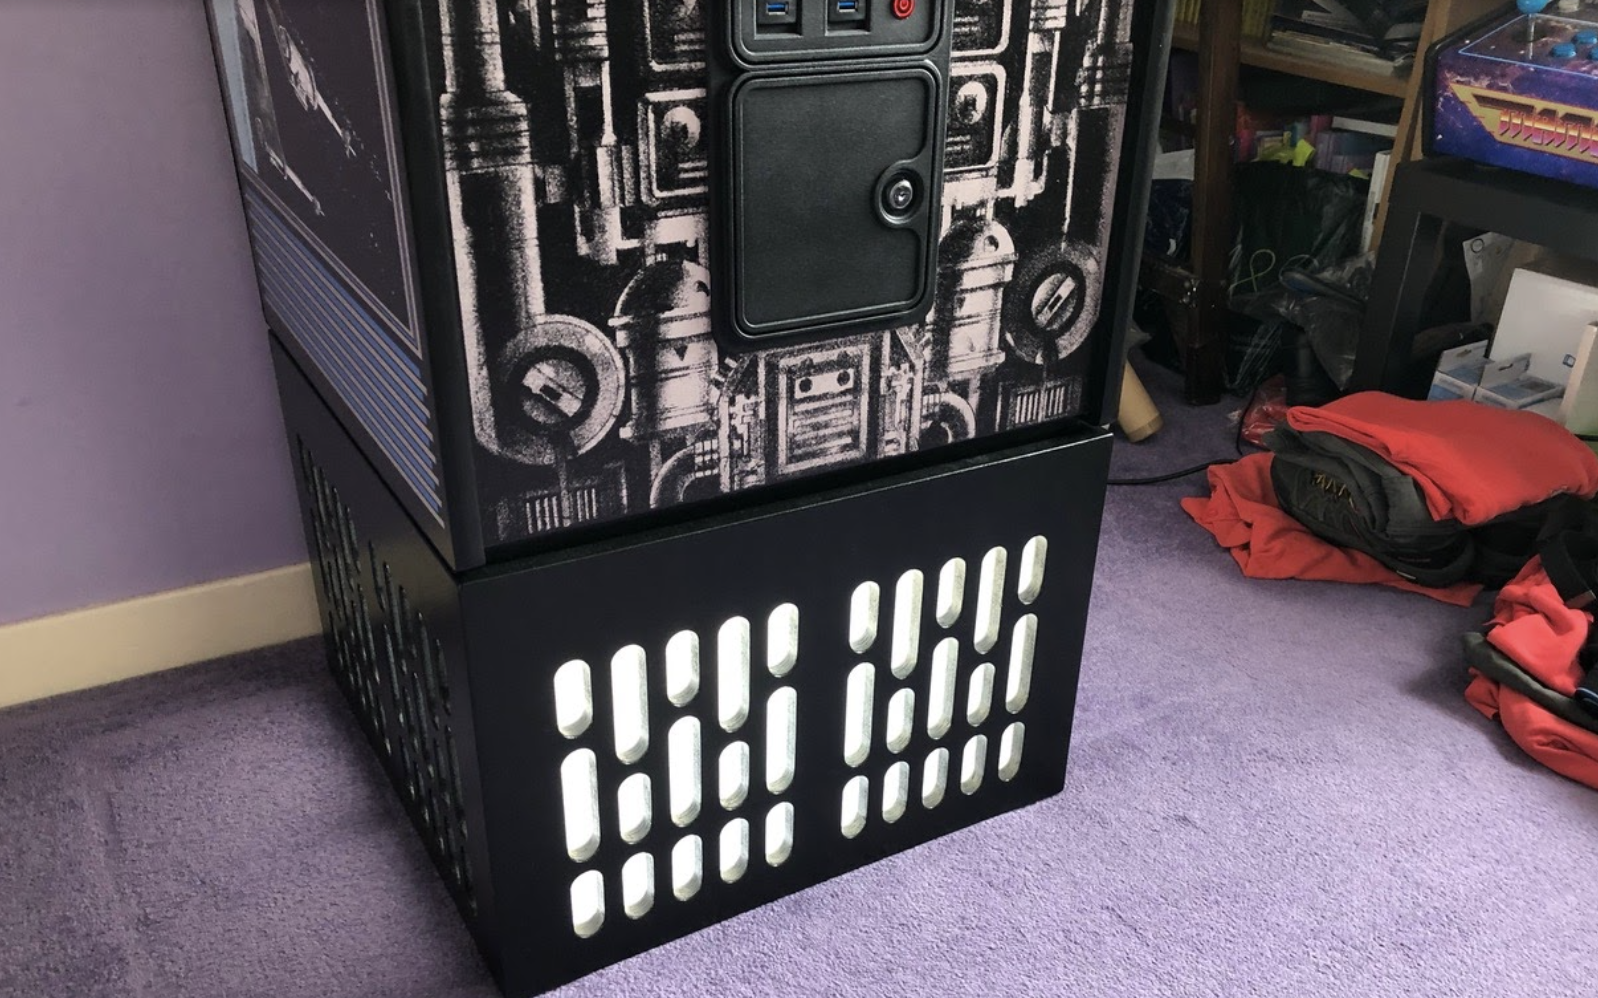
The riser was a custom build by James that emulates lights from the film
With a custom build and emulation, authenticity of the gameplay experience could be a bit off. However, that’s not the case here. “I think that it plays just like the real arcade machine mainly due to the inclusion of the replica yoke controller, and adding your credit by pressing the button on the coin door,” says James. “Ideally a vector monitor or a CRT would go a long way to making it look just like the original, but a reasonable representation is possible on an LCD using shaders and anti-aliasing. Gameplay does seem to get really hard really quick, though; this could be due to an imperfect emulation, but is more likely due to my reactions having dulled somewhat in the last 38 years!”
Always in motion
While the current build is amazing as it is, James does have some ideas to improve it. “Overall, I’m really pleased with the way the cabinet has worked out,” he says. “I will be replacing Raspberry Pi 3B+ with a Raspberry Pi 4 to enable me to run a newer version of MAME which will hopefully offer a better emulation, sort some audio glitching I get with my current setup, and hopefully enable some graphical effects (such as bloom and glow) to make it look more like its running on a CRT.”
Get your copy of The Magpi #105 now!
You can grab the brand-new issue right now online from the Raspberry Pi Press store, or via our app on Android or iOS. You can also pick it up from supermarkets and newsagents, but make sure you do so safely while following all your local guidelines. There’s also a free PDF you can download.
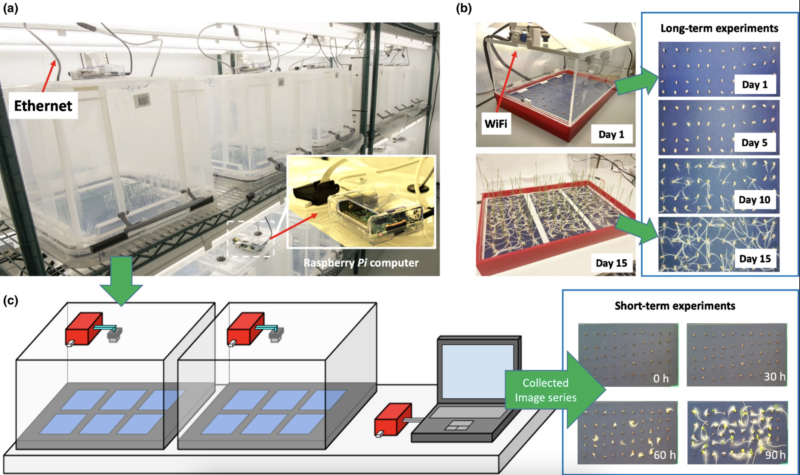
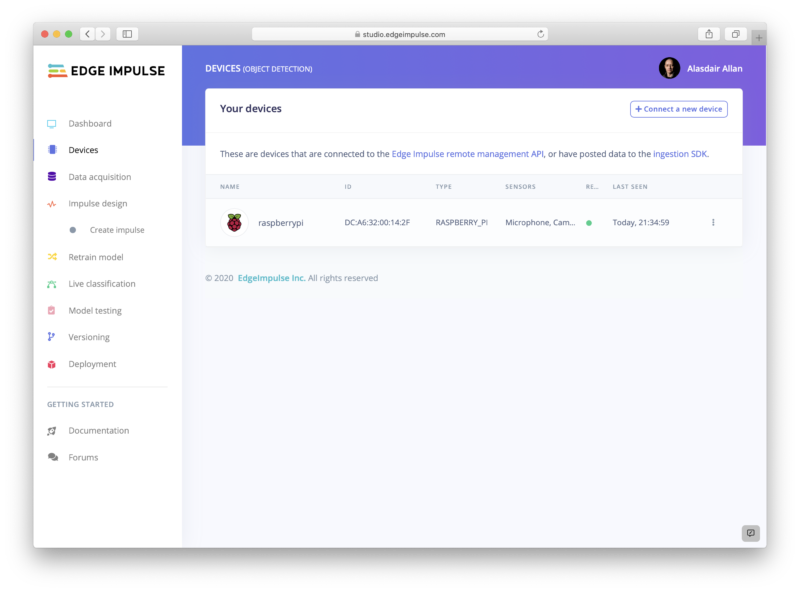
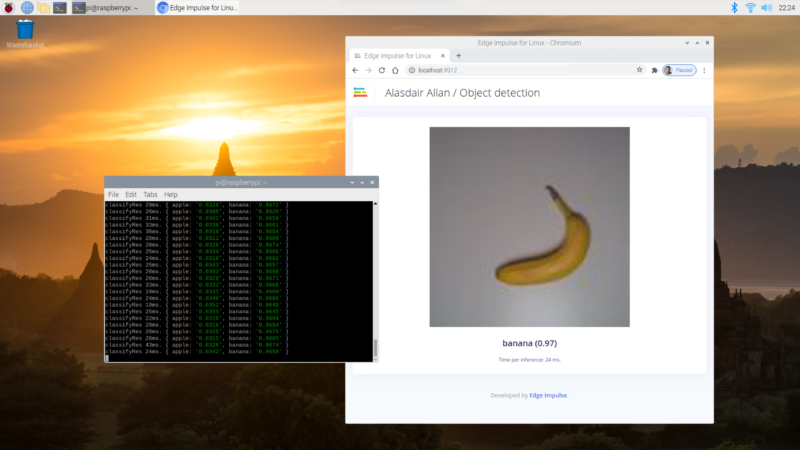
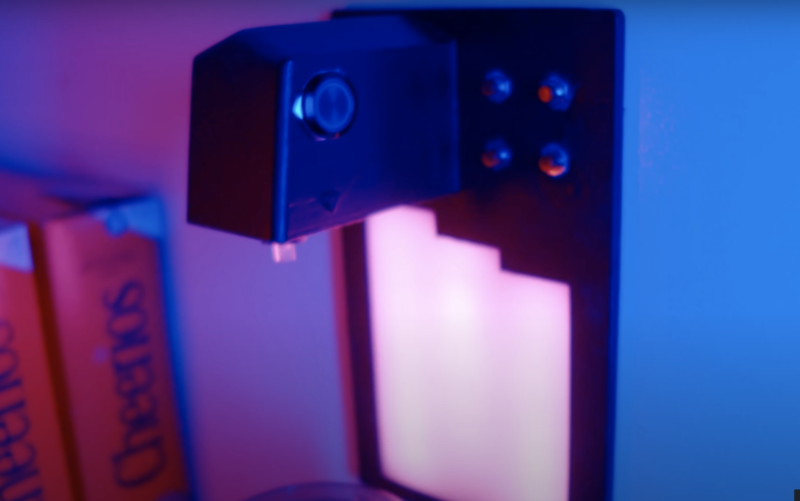
Researchers at the John Innes Centre for plant and microbial science were looking for a cost‐effective phenotyping platform for automated seed imaging. They figured a machine learning-driven image analysis was the quickest way to deliver this essential, yet challenging, aspect of agricultural research. Sounds complicated, but they found that our tiny computers could handle it all.
Two types of SeedGerm hardware with wired and wireless connectivity used for acquiring seed germination image series for different crop species
What is phenotyping?
A phenotype is an organism’s observable characteristics, like growing towards the light, or having a stripy tail, or being one of those people who can make their tongue roll up. An organism’s phenotype is the result of the genetic characteristics it has – its genotype – and the environment in which it lives. For example, a plant’s genotype might mean it can grow quickly and become tall, but if its environment lacks water, it’s likely to have a slow-growing and short phenotype.
Phenotyping means finding out and recording particular aspects of an organism’s phenotype: for example, how fast seeds germinate, or how broad a plant’s leaves are.
Why do seeds need phenotyping?
Phenotyping allows us to guess at a seed’s genotype, based on things we can observe about the seed’s phenotype, such as its size and shape.
We can study which seed phenotypes appear to be linked to desirable crop phenotypes, such as a high germination rate, or the ability to survive in dry conditions; in other words, we can make predictions about which seeds are likely to grow into good crops. And if we have controlled the environment in which we’re doing this research, we can be reasonably confident that these “good” seed phenotypes are mostly due not to variation in environmental conditions, but to properties of the seeds themselves: their genotype.
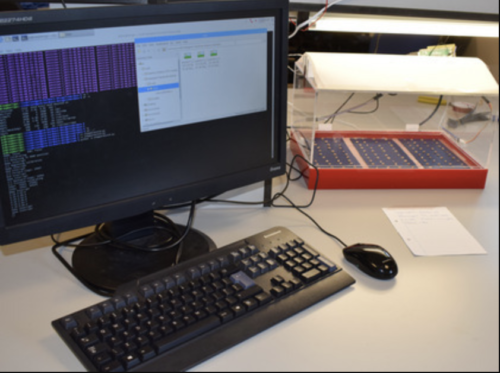
A close up of the incubators, each with Raspberry Pi computers on top, running the show
Growers need seeds that germinate effectively and uniformly to maximise crop productivity, so seed suppliers are interested in making sure their samples meet a certain germination rate.
The phenotypic traits that are used to work out whether seeds are likely to be good for growers are listed in the full research paper. But in general, researchers are looking for things like width, length, roundness, and contour lines in seeds.
How does Raspberry Pi help?
Gathering observations for phenotyping is a difficult and time-consuming process, and in order to capture high‐quality seed imaging continuously, the team needed to design two types of hardware apparatus. Raspberry Pi computers (Raspberry Pi 2 Model B or Raspberry Pi 3 Model B+) power both SeedGerm hardware designs, with a Raspberry Pi camera also providing image data in the lower-cost design.
The open source software at work next to one of the mini seed incubators
The brilliant team behind this project recognised the limitations of current seed imaging approaches, and looked to explore how automating the analysis of seed germination could scale up their work in an affordable way. The SeedGerm system benefits from the cost-effectiveness of Raspberry Pi hardware and the open source software the team chose, and that makes us super happy.
Read the whole research paper, published in New Phytologist, here.
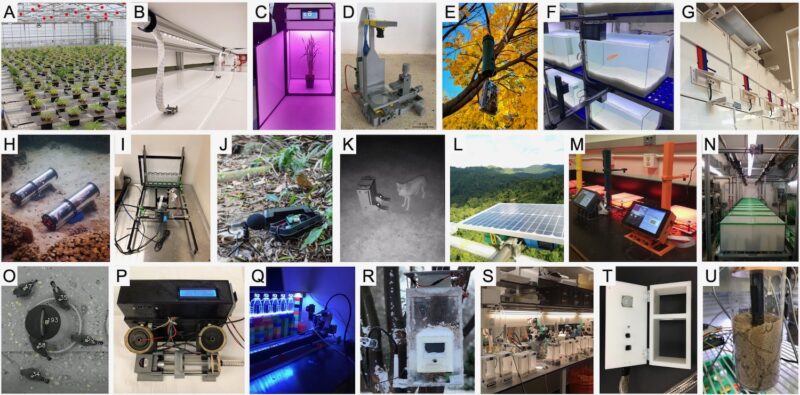
Raspberry Pi in biological sciences
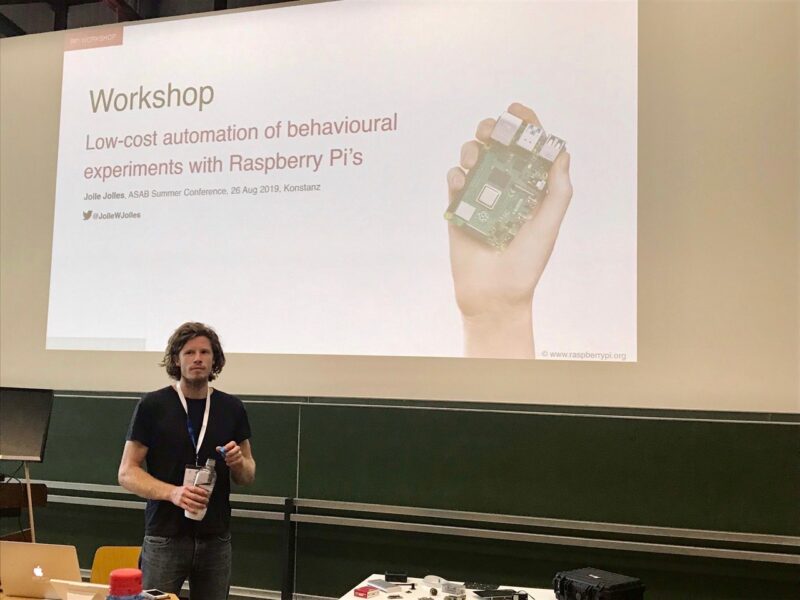
Dr Jolle Jolles, a behavioural ecologist at the Center for Ecological Research and Forestry Applications (CREAF) near Barcelona, Spain, and a passionate Raspberry Pi user, has recently published a detailed review of the uptake of Raspberry Pi in biological sciences. He found that well over a hundred published studies have made use of Raspberry Pi hardware in some way.
Arguably the winner of the standards war around wide area networking protocols for the Internet of Things, LoRaWAN is a low-powered, low-bandwidth, and long-range protocol. Intended to connect battery-powered remote sensors back to the internet via a gateway, on a good day, with a reasonable antenna, you might well get 15km of range from an off-the-shelf LoRa radio. The downside is that the available bandwidth will be measured in bytes, not megabytes, or even kilobytes.
Support for LoRa connectivity for Raspberry Pi Pico was put together by Sandeep Mistry, the author of the Arduino LoRa library, who more recently also gave us Ethernet support for Pico. His library adds LoRa support for Pico and other RP2040-based boards using the Semtech SX1276 radio module. That means that breakouts like Adafruit’s RFM95W board, as well as their LoRa FeatherWing, are fully supported.
LoRaWAN coverage?
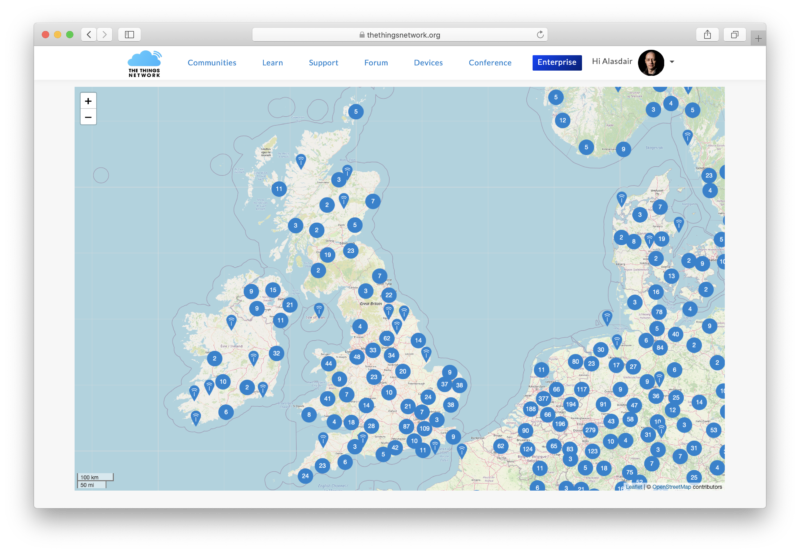
To make use of a LoraWAN-enabled Pico you’re going to need to be in range of a LoRa gateway. Fortunately there is The Things Network, an open-source community LoRaWAN network that has global coverage.
About The Things Network
Depending on where you are located, it’s quite possible that you’re already in coverage. However, if you aren’t, then you needn’t worry too much.
The days when the cost of a LoRaWAN base station was of the order of several thousand dollars are long gone. You can now pick up a LoRa gateway for around £75. Instead of buying one, I actually built my own gateway a couple of years ago. Unsurprisingly, perhaps, it was based around a Raspberry Pi.
Getting the source
If you already have the Raspberry Pi Pico toolchain set up and working, make sure your pico-sdk checkout is up to date, including submodules. If not, you should first set up the C/C++ SDK and then afterwards you need to grab the project from GitHub.
Make sure you have your PICO_SDK_PATH set before before proceeding. For instance, if you’re building things on a Raspberry Pi and you’ve run the pico_setup.sh script, or followed the instructions in our Getting Started guide, you’d point the PICO_SDK_PATH to
Afterwards you are ready to build both the library and the example applications. But before you do that we need to do two other things: configure the cloud infrastructure where our data is going to go, and wire up our LoRa radio board to our Raspberry Pi Pico.
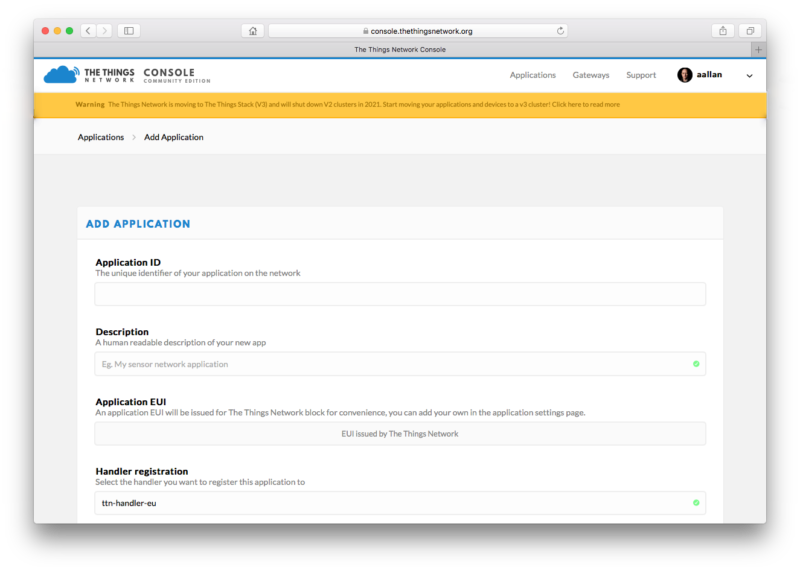
Set up an application
The Things Network is currently migrating from the V2 to V3 stack. Since my home gateway was set up a couple of years ago, I’m still using the V2 software and haven’t migrated yet. I’m therefore going to build a V2-style application. However, if you’re using a public gateway, or building your own gateway, you probably should build a V3-style application. The instructions are similar, and you should be able to make your way through based on what’s written below. Just be aware that there is a separate Network Console for the new V3 stack and things might look a little different.
Migration from TTN V2 to V3
While any LoRa device in range of your new gateway will have its packets received and sent upstream to The Things Network, the data packets will be dropped on the ground unless they have somewhere to go. In other words, The Things Network needs to know where to route the packets your gateway is receiving.
In order to give it this information, we first need to create an application inside The Things Network Console. To do this all you’ll need to do is type in a unique Application ID string — this can be anything — and the console will generate an Application EUI and a default Access Key which we’ll use to register our devices to our application.
Adding an application
Once we’ve registered an application, all we have to do then is register our individual device — or later perhaps many devices — to that application, so that the backend knows where to route packets from that device.
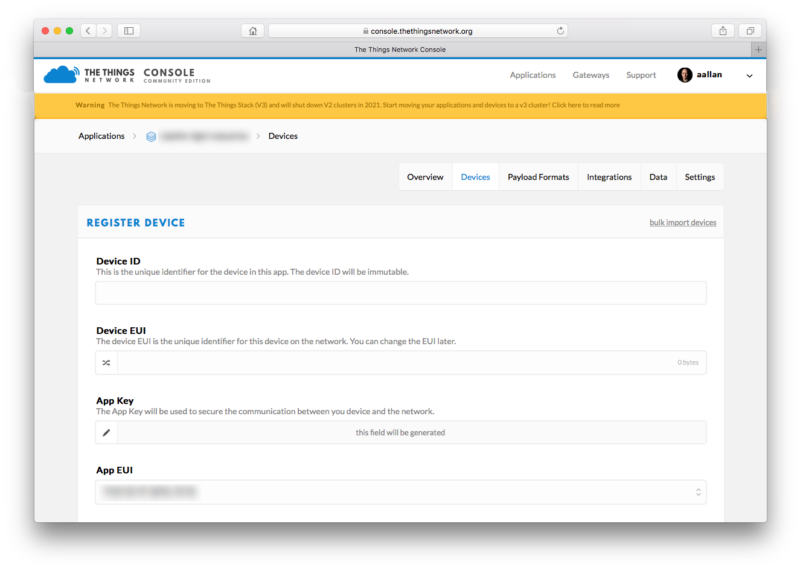
Registering a device
Registering our device can be done from the application’s page in the console.
Registering a device to an application
The Device ID is a human-readable string to identify our remote device. Since RFM9W breakout board from Adafruit ships with a sticker in the same bag as the radio with a unique identifier written on it we can use that to postpend a string to uniquely identify our Pico board, so we end up with something like pico-xy-xy-xy-xy-xy-xy as our Device ID.
We’ll also need to generate a Device EUI2. This is a 64-bit unique identifier. Here again we can use the unique identifier from the sticker, except this time we can just pad it with two leading zeros, 0000XYXYXYXYXYXY, to generate our Device EUI. You could also use pico_get_unique_board_id( ) to generate the Device EUI.
If you take a look at your Device page after registration you’ll need the Application EUI2 and Application Key2 to let your board talk to the LoRa network, or more precisely to let the network correctly route packets from your board to your application.
2 Make a note of your Device EUI, Application EUI, and Application Key.
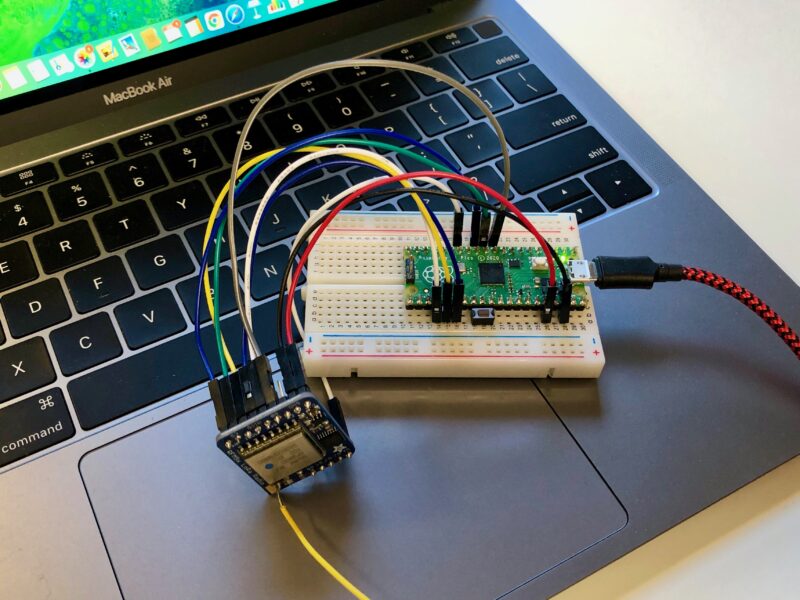
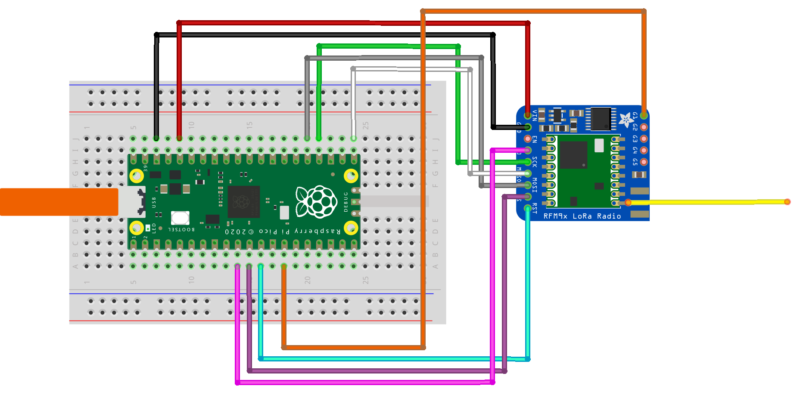
Wiring things up on a breadboard
Now we’ve got our cloud backend set up, the next thing we need to do is connect our Pico to the LoRa breakout board. Unfortunately the RFM95W breakout isn’t really that breadboard-friendly. At least it’s not breadboard-friendly if you need access to the radio’s pins on both sides of the board like we do for this project — in this case the breakout is just a little bit too wide for a standard breadboard.
Fortunately it’s not really that much of a problem, but you will probably need to grab a bunch of male-to-female jumper wires along with your breadboard. Go ahead and wire up the RFM95W module to your Raspberry Pi Pico. The mapping between the pins on the breakout board and your Pico should be as follows:
Pico
RP20401
SX1276 Module
RFM95W Breakout
3V3 (OUT)
—
VCC
VIN
GND
GND
GND
GND
Pin 10
GP7
DIO0
G0
Pin 11
GP8
NSS
CS
Pin 12
GP9
RESET
RST
Pin 14
GP10
DIO1
G1
Pin 21
GP16 (SPI0 RX)
MISO
MISO
Pin 24
GP18 (SPI0 SCK)
SCK
SCK
Pin 25
GP19 (SPI0 TX)
MOSI
MOSI
Mapping between physical pins, RP2040 pins, SX1276 module, and RFM95W breakout
1 These pins are the library default and can be changed in software.
Building and deploying software
Now we have our backend in the cloud set up, and we’ve physically “built” our radio, we can build and deploy our LoRaWAN application. One of the example applications provided by the library will read the temperature from the on-chip sensor on the RP2040 microcontroller
and send it periodically to your Things Network application over the LoRaWAN radio. Go ahead and change directory to the otaa_temperature_led example application in your checkout. This example uses OTAA, so we’ll need the Device EUI, Application EUI, and Application Key we created.
Open the config.h file in your favourite editor and change the REGION, DEVICE_EUI, APP_EUI, and APP_KEY to the values shown in the Network Console. The code is expecting the (default) string format, without spaces between the hexadecimal digits, rather than the byte array representation.
I’m located in the United Kingdom, with my LoRa radio broadcasting at 868MHz, so I’m going to set my region to LORAMAC_REGION_EU868. If you’re in the United States you’re using 915MHz, so need to set your region to LORAMAC_REGION_US915.
Then after you’ve edited the config.h file you can go ahead and build the example applications.
If everything goes well you should have a UF2 file in build/examples/otaa_temperature_led/ called pico_lorawan_otaa_temperature_led.uf2. You can now load this UF2 file onto your Pico in the normal way.
Grab your Raspberry Pi Pico board and a micro USB cable. Plug the cable into your Raspberry Pi or laptop, then press and hold the BOOTSEL button on your Pico while you plug the other end of the micro USB cable into the board. Then release the button after the board is plugged in.
A disk volume called RPI-RP2 should pop up on your desktop. Double-click to open it, and then drag and drop the UF2 file into it. If you’re having problems, see Chapter 4 of our Getting Started guide for more information.
Your Pico is now running your LoRaWAN application, and if you want to you should be able to see some debugging information by opening a USB Serial connection to your Pico. Open a Terminal window and start minicom.
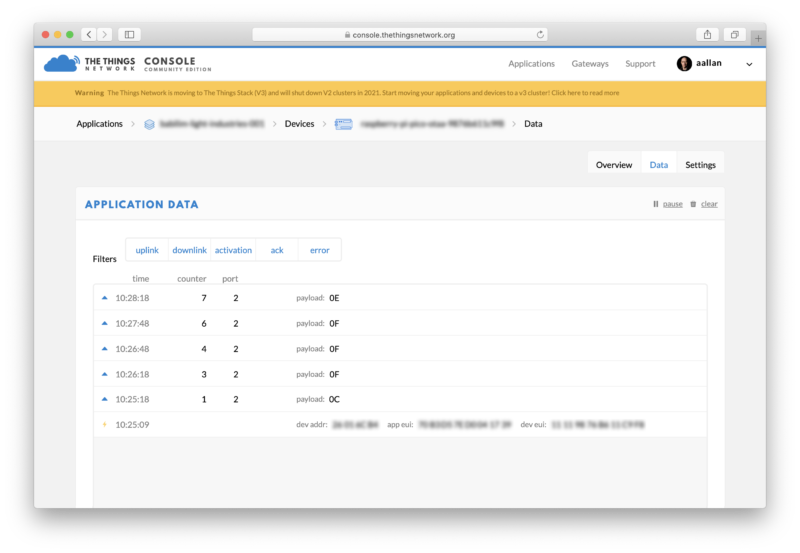
However, you’ll need to turn to the Network console to see the real information. You should see an initial join message, followed by a number of frames. Each frame represents a temperature measurement sent by your Pico via LoRaWAN and the Gateway to The Things Network application.
Data coming via LoRaWAN to The Things Network
The payload value is the temperature measured by the Raspberry Pi Pico’s internal temperature sensor in hexadecimal. It’s a bit outside the scope of this article, but you can now add a decoder and integrations that allow you decode the data from hexadecimal into human-readable data and then, amongst various other options, save it to a database.
Sending commands
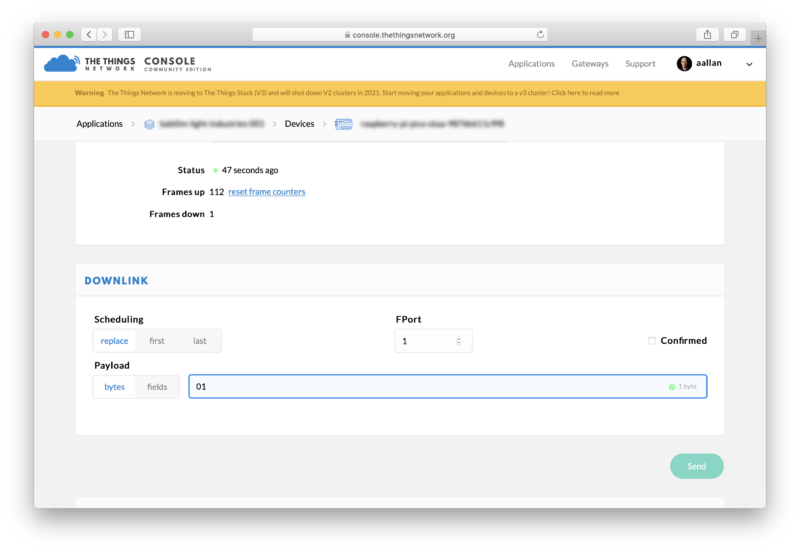
As well as sending temperature data, the example application will also let you toggle the LED on your Raspberry Pi Pico directly from The Things Network console.
Sending data back to your Raspberry Pi Pico via LoRaWAN
Go to the Device page in the Network Console and type “01” into the Downlink Payload box, and hit the “Send” button. Then flip to the Data tab. You should see a “Download scheduled” line, and if you continue to watch you should see the byte downlinked. When that happens the on-board LED on your Raspberry Pi Pico should turn on! Returning to the Network Console and typing “00” into the Payload box will (eventually) turn the Pico’s LED off.
Remember that LoRaWAN is long-range, but low-bandwidth. You shouldn’t expect an instant response to a downlinked command.
Where now?
The OTAA example application is a really nice skeleton for you to build on that will let you take data and send it to the cloud over LoRa, as well as send commands back from the cloud to your LoRa-enabled Pico.
Arm Innovation Coffee – The Things Network
There will be more discussion around the Things Network and a live demo of LoRaWAN from a Raspberry Pi Pico during this week’s Arm Innovation Coffee at 10:00 PDT (18:00 BST) this Thursday (29 April).
Wrapping up
Support for developing for Pico can be found on the Raspberry Pi forums. There is also an (unofficial) Discord server where a lot of people active in the community seem to be hanging out. Feedback on the documentation should be posted as an Issue to the pico-feedback repository on GitHub, or directly to the relevant repository it concerns.
All of the documentation, along with lots of other help and links, can be found on the Getting Started page. If you lose track of where that is in the future, you can always find it from your Pico: to access the page, just press and hold the BOOTSEL button on your Pico, plug it into your laptop or Raspberry Pi, then release the button. Go ahead and open the RPI-RP2 volume, and then click on the INDEX.HTM file.
After a brief hiatus over the Easter period, we are excited to be back with our series of online research seminars focused on diversity and inclusion, where in partnership with the Royal Academy of Engineering, we host researchers from the UK and USA. By diversity, we mean any dimension that can be used to differentiate groups and people from one another. This might be, for example, age, gender, socio-economic status, disability, ethnicity, religion, nationality, or sexuality. The aim of inclusion is to embrace all people irrespective of difference.
This month we welcomed Dr Maya Israel, who heads the Creative Technology Research Lab at the University of Florida. She spoke to us about designing inclusive learning experiences in computer science (CS) that cater for learners with a wide range of educational needs.
Underrepresentation of computer science students with additional needs
Maya introduced her work by explaining that the primary goal of her research is to “increase access to CS education for students with disabilities and others at risk for academic failure”. To illustrate this, she shared some preliminary findings (paper in preparation) from the analysis of data from one US school district.
By designing activities that support students with additional educational needs, we can improve the understanding and proficiency of all of our students.
Her results showed that only around 22–25% of elementary school students with additional needs (including students with learning disabilities, speech or language impairments, emotional disturbances, or learners on the autistic spectrum) accessed CS classes. Even more worryingly, by high school only 5–7% of students with additional needs accessed CS classes (for students on the autistic spectrum the decline in access was less steep, to around 12%).
Maya made the important point that many educators and school leaders may ascribe this lack of representation to students’ disabilities being a barrier to success, rather than to the design of curricula and instruction methods being a barrier to these students accessing and succeeding in CS education.
What barriers to inclusion are there for students with additional needs?
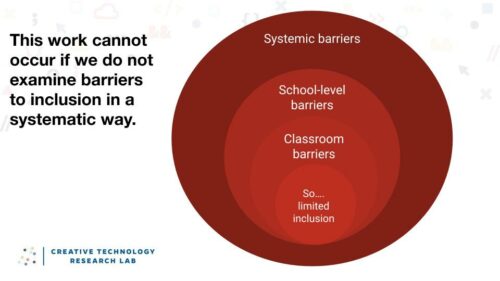
Maya detailed the systems approach she uses in her work to think about external barriers to inclusion in CS education:
At the classroom level — such as teachers’ understanding of learner variability and instructional approaches
At the school level — perhaps CS classes clash with additional classes that the learner requires for extra support with other subjects
At the systemic level — whether the tools and curricula in use are accessible
As an example, Maya pointed out that many of the programming platforms used in CS education are not fully accessible to all learners; each platform has unique accessibility issues.
This is not to say that students with additional needs have no internal barriers to succeeding in CS (these may include difficulties with understanding code, debugging, planning, and dealing with frustration). Maya told us about a study in which the researchers used the Collaborative Computing Observation Instrument (C-COI), which allows analysis of video footage recorded during collaborative programming exercises to identify student challenges and strategies. The study found various strategies for debugging and highlighted a particular need for supporting students in transitioning from a trial-and-error approach to more systematic testing. The C-COI has a lot of potential for understanding student-level barriers to learning, and it will also be able to give insight into the external barriers to inclusion.
Pathways to inclusion
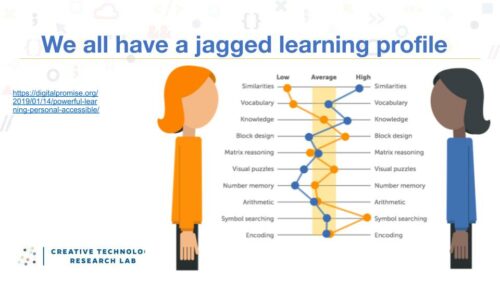
Maya’s work has focused not only on identifying the problems with access, it also aims to develop solutions, which she terms pathways to inclusion. A standard approach to inclusion might involve designing curricula for the ‘average’ learner and then differentiating work for learners with additional needs. What is new and exciting about Maya’s approach is that it is based on the premise that there is no such person as an average learner, and rather that all learners have jagged profiles of strengths and weaknesses that contribute to their level of academic success.
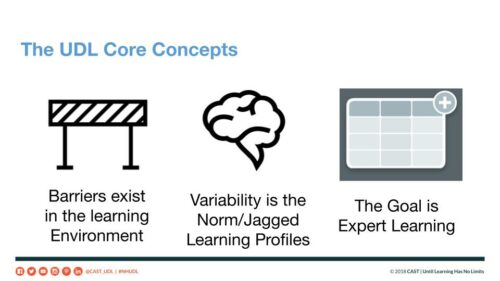
In the seminar, Maya described ways in which CS curricula can be designed to be flexible and take into account the variability of all learners. To do this, she has been using the Universal Design for Learning (UDL) approach, adapting it specifically for CS and testing it in the classroom.
Why is Universal Design for Learning useful?
The UDL approach helps educators anticipate barriers to learning and plan activities to overcome them by focusing on providing different means of engagement, representation, and expression for learners in each lesson. Different types of activities are suggested to address each of these three areas. Maya and her team have adapted the general principles of UDL to a CS-specific context, providing teachers with clear checkpoints to consider when designing computing lessons; you can read more on this in this recent Hello World article.
A practical UDL example Maya shared with us was using a series of scaffolded Scratch projects based on the ‘Use-Modify-Create’ approach. Students begin by playing and remixing code; then they try to debug the same program when it is not working; then they reconstruct code that has been deconstructed for the same program; and then finally, they try to expand the program to make the Scratch sprite do something of their choosing. All four Scratch project versions are available at the same time, so students can toggle between them as they learn. This helps them work more independently by reducing cognitive load and providing a range of scaffolded support.
This example illustrates that, by designing activities that support students with additional educational needs, we can improve the understanding and proficiency of all of our students.
Training teachers to support CS students with additional needs
Maya identified three groups of teachers who can benefit from training in either UDL or in supporting students with additional needs in CS:
Special Education teachers who have knowledge of instructional strategies for students with additional needs but little experience/subject knowledge of computing
Computing teachers who have subject knowledge but little experience of Special Education strategies
Teachers who are new to computing and have little experience of Special Education
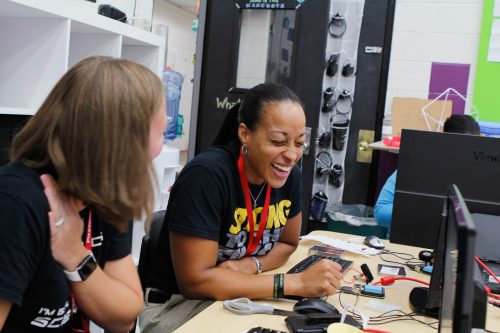
Maya and her team conducted research with all three of these teacher groups, where they provided professional development for the teachers with the aim to understand what elements of the training were most useful and important for teachers’ confidence and practice in supporting students with additional needs in CS. In this research project, they found that for the teachers, a key aspect of the training was having time to identify and discuss the barriers/challenges their students face, as well as potential strategies to overcome these. This process is a core element of the UDL approach, and may be very different to the standard method of planning lessons that teachers are used to.
Having time to identify and discuss the barriers/challenges students face, as well as potential strategies to overcome these, is key for teachers to design accessible curricula.
Another study by Maya’s team showed that an understanding of UDL in the context of CS was a key predictor of teacher confidence in teaching CS to students with additional needs (along with the number years spent teaching CS, and general confidence in teaching CS). Maya therefore believes that focusing on teachers’ understanding of the UDL approach and how they can apply it in CS will be the most important part of their future professional development training.
The next seminar in the diversity and inclusion series will take place on Tuesday 4 May at 17:00–18:30 BST / 12:00–13:30 EDT / 9:00–10:30 PDT / 18:00–19:30 CEST. You’ll hear from Dr Cecily Morrison (Microsoft Research) about her research into computing for learners with visual impairments.
To join this free event, click below and sign up with your name and email address:
Young tech creators from more than 40 countries have already registered to take part in this year’s Coolest Projects online showcase! To help us celebrate this year’s wonderful group of participants, we’re lucky to have brought on board Colin Furze, Melissa Pickering, James Whelton, and Fig O’Reilly as special judges.
“Since the first Coolest Projects in 2012, I’ve been continually inspired seeing thousands of young creators sharing their projects with the world. Building websites, apps, games, and hardware around something they’re passionate about, solving problems they face or just doing something cool, year on year Coolest Projects shows the magic of technology.”
James Whelton
Meet the coolest judges!
Colin Furze is a British YouTube personality, presenter, inventor, and five-time Guinness world record holder from Lincolnshire, England. Colin’s YouTube channel has over 10 million subscribers. Colin left school at 16 to become a plumber, a trade which he pursued until joining the Sky1 TV programme Gadget Geeks. He has used his engineering experience to build many unconventional contraptions, including a homemade hoverbike, a jet-powered bicycle made with pulsejet engines, and the world’s fastest dodgem vehicle for Top Gear. Colin has completed three Star Wars–themed challenges in partnership with eBay: in 2016, he completed a giant AT-AT garden playhouse, followed in 2017 by a full-size Kylo Ren Tie Silencer. In 2019 he completed a moving Landspeeder from Star Wars: A New Hope; the vehicle was auctioned off on eBay, with all of the funds going to BBC Children in Need.
Colin Furze, YouTuber, inventor, and five-time Guinness world record holder
Melissa Pickering is Head of Product at LEGO Education, leading a cross-functional team to design and develop learning through play experiences for kids globally. She has worked in the field of interactive kids’ products for 15 years, from innovating theme parks as a Disney Imagineer to founding an edtech startup. In her six-year LEGO career she has built up and led design teams to innovate LEGO products through digital experiences, with a key focus of using technology to inspire hands-on play.
Melissa Pickering, Head of Product at LEGO Education
Fionnghuala O’Reilly is an Irish-American model, beauty pageant titleholder, and engineer. The 27-year-old recently made history as the first woman of colour to represent Ireland at the international Miss Universe pageant. Since getting her degree in Systems Engineering from the George Washington University, O’Reilly, who goes by Fig, has gone on to become a NASA Datanaut, working within the agency’s Open Innovation programme comprised of engineers and scientists who engage with NASA’s open data to create new thinking, processes and products. Fig has joined the two-time Emmy-nominated science television series Mission Unstoppable as the newest correspondent. She is also the founder and CEO of Reach Productions which is the host of NASA’s Space Apps Challenge in Washington DC. In 2020, Fig was named an Ambassador for Engineers Ireland, Ireland’s leading governing body for professional engineers. Fig is a passionate advocate for women and diversity in STEM subjects.
Fig O’Reilly, beauty pageant titleholder, engineer, and CEO
James Whelton is a coder, entrepreneur, and co-founder of CoderDojo. At 16, James gained worldwide recognition for discovering a hack for the iPod Nano. In response to the lack of opportunities to learn computing at school, he co-founded CoderDojo in 2011, a global community of code clubs for young people where they can learn to build websites, apps and games, and explore technology in an informal, creative, and social environment. James has developed apps and systems with over a million users around the world. He is currently developing an online platform that helps its users achieve their personal goals and build healthier, happier habits and behaviours.
James Whelton, coder, entrepreneur, and co-founder of CoderDojo
Register a project today
These four fabulous people will choose their favourites from among all of this year’s projects — a unique honour that the young tech creator in your life could receive if they take part! We hope this will be a big boost of motivation for them to register their project for the Coolest Projects showcase before the 3 May deadline.
We’ll be announcing the special judges’ favourite projects as part of our big live-streamed Coolest Projects celebration on 8 June!
Everyone up to age 18 can register for Coolest Projects, and we welcome all projects, all experience levels, and all kinds of projects, made with any programming language or any hardware. Through Coolest Projects, young people are able to show the world something they’ve made with tech that they love, and the projects are as diverse as the participants!
You can explore the projects of the young tech creators who’ve already registered if you visit the Coolest Projects online showcase gallery! Which one is your favourite project so far?
Games controllers – like keyboards – are very personal things.What works for one person may not work for another. Why, then, should we all use almost identical off-the-shelf controllers? In the latest issue of HackSpace magazine, we take a look at how to use Raspberry Pi Pico to create a controller that’s just right for you.
Gaming like it’s 1989
We’ll use CircuitPython for this as it has excellent support for USB interfaces. The sort of USB devices that we interact with are called human interface devices (HIDs), and there are standard protocols for common HIDs, including keyboards and mice. This is why, for example, you can plug almost any USB keyboard into almost any computer and it will just work, with no need to install drivers.
We’ll be using the Keyboard type, as that works best with the sorts of games that this author likes to play, but you can use exactly the same technique to simulate a mouse or a gamepad.
Before we get onto this, though, let’s take a look at the buttons and how to wire them up.
We’re going to use eight buttons: four for direction, and four as additional ‘action’ buttons. We’ll connect these between an I/O pin and ground. You can use any I/O pin you like. We’re going to use slightly different ones in two different setups, just because they made sense with the physical layout of the hardware. Let’s take a look at the hardware we’re using. Remember, this is just the hardware we want to use. The whole idea of this is to create a setup that’s right for you, so there’s no need to use the same. Think about how you want to interact with your games and take a look at the available input devices and build what you want.
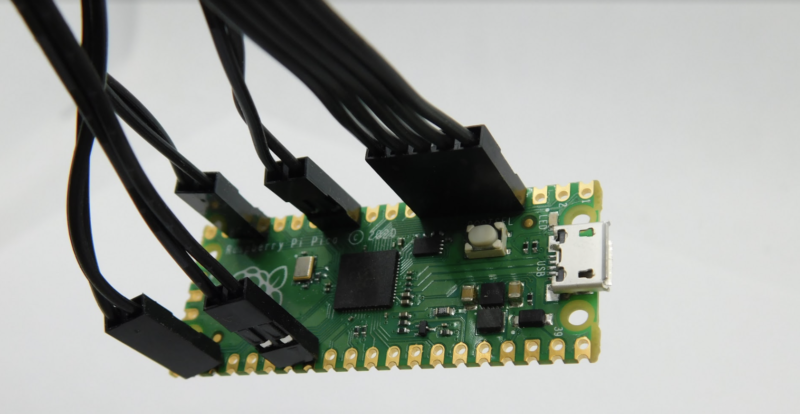
The connectors should just push onto the buttons and joystick
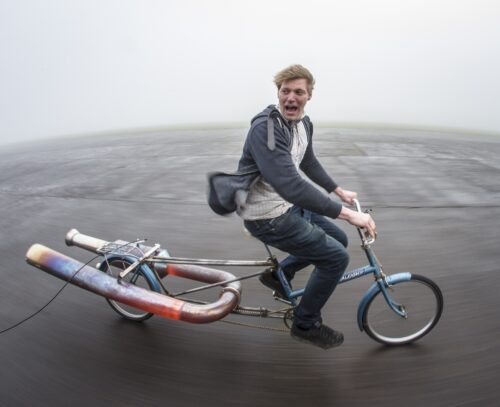
The first setup we’re creating is an Arcade box. This author would really like an arcade machine in his house. However, space limitations mean that this isn’t going to be possible in the near future. The first setup, then, is an attempt to recreate the control setup of an arcade machine, but use it to play games on a laptop rather than a full-sized cabinet.
Arcade controls are quite standard, and you can get them from a range of sources. We used one of Pimoroni’s Arcade Parts sets, which includes a joystick and ten buttons (we only used four of these). The important thing about the joystick you pick is that it’s a button-based joystick and not an analogue one (sometimes called a dual-axis joystick), as the latter won’t work with a keyboard interface. If you want to use an analogue joystick, you’ll need to switch the code around to use a mouse or gamepad as an input device.
You can solder the pin headers straight onto Pico
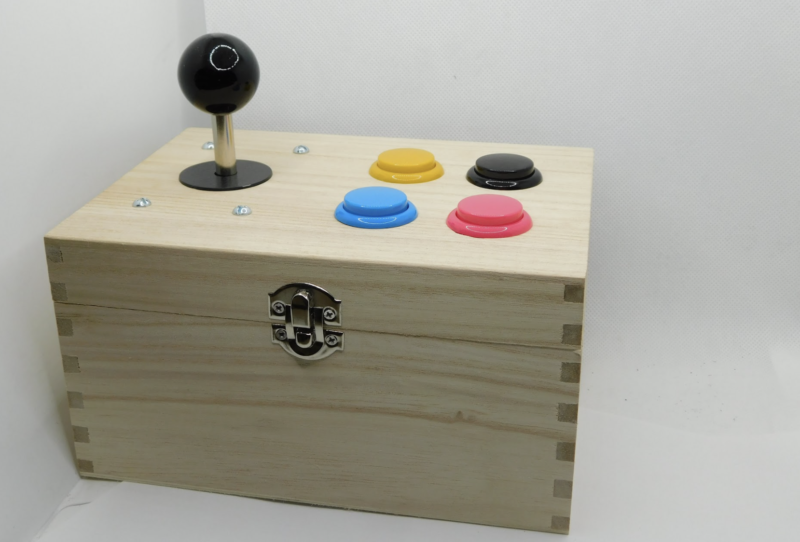
As well as the electronics, you’ll need some way of mounting them. We used a wooden craft box. These are available for about £10 from a range of online or bricks and mortar stores. You can use anything that is strong enough to hold the components.
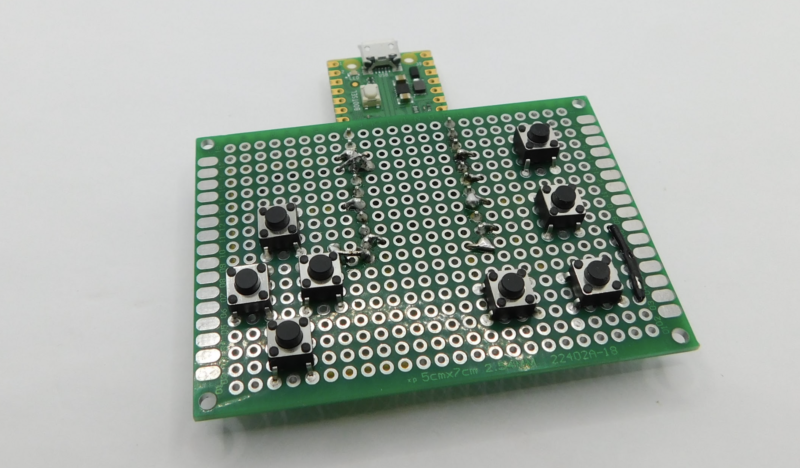
The second setup we’re using is a much simpler button-based system on breadboard-compatible tactile buttons and protoboard. It’s smaller, cheaper, and quicker to put together. The protoboard holds everything together, so there’s nothing extra to add unless you want to. You can personalise it by selecting different-sized buttons, changing the layout, or building a larger chassis around this.
Insert coin to continue
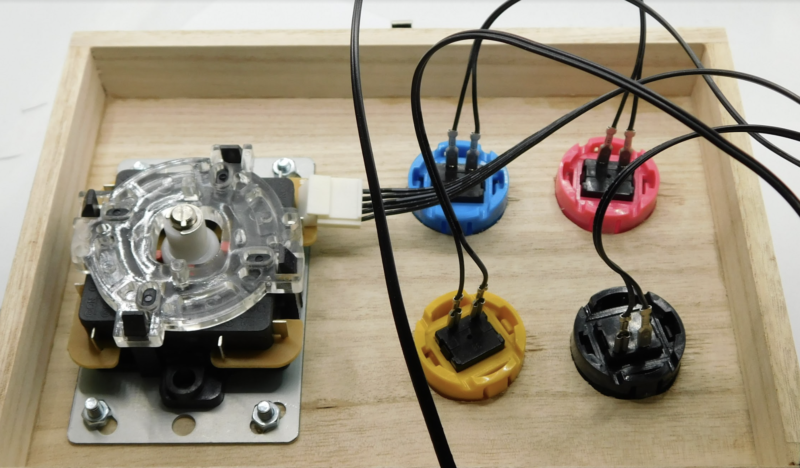
Let’s take a look at the arcade setup first. The joystick has five pins. One is a common ground and the others are up, down, left, and right. When you push the joystick up, a switch closes, linking ground to the up pin. On our joystick the outermost pin is ground, but it’s worth checking on your joystick which pin is which by using a multimeter. Select continuity mode and, if you push the joystick up, you should find a continuous connection between the up pin and ground. A bit of experimentation should confirm which pin is which.
In order to read the pins, we just need to connect the directional output from the joystick to an I/O pin on Pico. We can use one of Pico’s internal pull-up resistors to pull the pin high when the button isn’t pressed. Then, when the button is pressed, it will connect to ground and read low. The joystick should come with a cable that slots onto the joystick. This should have five outputs, and this conveniently slots into the I/O outputs of Pico with a ground on one end.
You can solder the pin headers straight onto Pico
The buttons, similarly, just need to be connected between ground and an I/O pin. These came with cables that pushed onto the button and plugged into adjacent pins. Since Pico has eight grounds available, there are enough that each button can have its own ground, and you don’t have to mess around joining cables together.
Once all the cables are soldered together, it’s just a case of building the chassis. For this, you need five large holes (one for the joystick and four for the buttons). We didn’t have an appropriately sized drill bit and, given how soft the wood on these boxes is, a large drill bit may have split the wood anyway. Instead, we drilled a 20 mm hole and then used a rotary tool with sanding attachment to enlarge the hole until it was the right size. You have to go quite easy with both the drill and the sanding tool to avoid turning everything into shards of broken wood. Four small holes then allow bolts to keep the joystick in place (we used M5 bolts). The buttons just push into place.
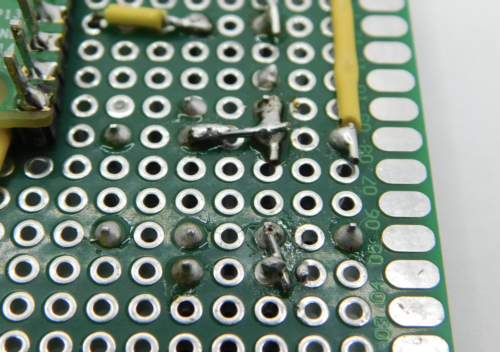
With a combination of small sections of wire and jumpers, you can create whatever pattern of wiring you like on protoboard
The only remaining thing was a 12 mm hole for a micro USB cable to pass through to Pico. If you don’t have a 12 mm drill bit, two overlapping smaller holes may work if you’re careful.
The buttons just push-fit into place, and that’s everything ready to go.
A smaller approach
Our smaller option used protoboard over the back of Pico. Since we didn’t want to block the BOOTSEL button, we only soldered it over part of Pico. However, before soldering it on at all, we soldered the buttons in place.
Tactile switches typically have four connections. Well, really they have two connections, but each connection has two tabs that fit into the protoboard. This means that you have to orientate them correctly. Again, your multimeter’s continuity function will confirm which pins are connected and which are switched.
Protoboard is a PCB that contains lots and lots of holes and nothing else. You solder your components into the holes and then you have to create connections between them.
We placed the buttons in the protoboard in positions we liked before worrying about the wiring. First, we looked to connect one side of each switch to ground. To minimise the wiring, we did this in two groups. We connected one side of each of the direction buttons together and then linked them to ground. Then we did the same to all the action buttons.
There are two ways of connecting things on protoboard. One is to use jumper wire. This works well if the points are more than a couple of holes apart. For holes that are next to each other, or very close, you can bridge them. On some protoboard (which doesn’t have a solder mask), you might simply be able to drag a blob of solder across with your soldering iron so that it joins both holes. On protoboard with solder mask, this doesn’t work quite so well, so you need to add a little strand of wire in a surface-mount position between the two points and solder it in. If you’ve got a pair of tweezers to hold the wire in place while you solder it, it will be much easier.
For longer connections, you’ll need to use jumper wire. Sometimes you’ll be able to poke it through the protoboard and use the leg to join. Other times you’ll have to surface-mount it. This all sounds a bit complicated, but while it can be a bit fiddly, it’s all fairly straightforward once you put solder to iron.
Program it up
Now that we’ve got the hardware ready, let’s code it up. You’ll first need to load CircuitPython onto your Pico. You can download the latest release from circuitpython.org. Press the BOOTSEL button as you plug Pico into your USB port, and then drag and drop the downloaded UF2 file onto the RP2 USB drive that should appear.
We’ll use Mu to program Pico. If you’ve not used CircuitPython before, it’s probably worth having a quick look through the ’getting started’ guide.
The code to run our games controller is:
import board
import digitalio
import gamepad
import time
import usb_hid
from adafruit_hid.keyboard import Keyboard
from adafruit_hid.keycode import Keycode
pad = gamepad.GamePad( digitalio.DigitalInOut(board.GP12), digitalio.DigitalInOut(board.GP14), digitalio.DigitalInOut(board.GP9), digitalio.DigitalInOut(board.GP15), digitalio.DigitalInOut(board.GP16), digitalio.DigitalInOut(board.GP17), digitalio.DigitalInOut(board.GP18), digitalio.DigitalInOut(board.GP20), ) last_pressed = 0 while True: this_pressed = pad.get_pressed() if (this_pressed != last_pressed): for i in range(8): if (this_pressed & 1<<i) and not (last_pressed & 1<<i): kbd.press(keycodes[i]) if (last_pressed & 1<<i) and not (this_pressed & 1<<i): kbd.release(keycodes[i]) last_pressed = this_pressed time.sleep(0.01)
This uses the HID keyboard object (called kbd) to send key press and release events for different key codes depending on what buttons are pressed or released. We’ve used the gamepad module that is for keeping track of up to eight buttons. When you initialise it, it will automatically add pull-up resistors and set the I/O pins to input. Then, it will keep track of what buttons are pressed. When you call get_pressed(), it will return a byte of data where each digit corresponds to an I/O pin. So, the following number (in binary) means that the first and third buttons have been pressed: 00000101. This is a little confusing, because this is the opposite order to how the I/Os are passed when you initialise the GamePad object.
The while loop may look a little unusual as it’s not particularly common to use this sort of binary comparison in Python code, but in essence, it’s just looking at one bit at a time and seeing either: it’s now pressed but wasn’t last time the loop ran (in which case, it’s a new button press and we should send it to the computer), or it isn’t pressed this loop but was the previous loop (in which case, it’s newly released so we can call the release method).
The << operator shifts a value by a number of bits to the left. So, 1<<2 is 100, and 1<<3 is 1000. The & operator is bitwise and so it looks at a binary number and does a logical AND on each bit in turn. Since the right-hand side of the & is all zeros apart from one bit (at a different position depending on the value of i), the result will be dependent on whether the value of this_pressed or last_pressed is 1 or 0 at the position i. When you have an if condition that’s a number, it’s true if the number is anything other than 0. So, (this_pressed & 1<<2) will evaluate to true if there’s a 1 at position 2 in the binary form of this_pressed. In our case, that means if the joystick is pushed left.
You can grab this code from the following link – hsmag.cc/USBKeyboard. Obviously, you will need to update the GPIO values to the correct ones for your setup when you initialise GamePad.
We’ve taken a look at two ways to build a gamepad, but it’s up to you how you want to design yours.
Issue 42 of HackSpace magazine is on sale NOW!
Each month, HackSpace magazine brings you the best projects, tips, tricks and tutorials from the makersphere. You can get it from the Raspberry Pi Press online store or your local newsagents. As always, every issue is free to download from the HackSpace magazine website.
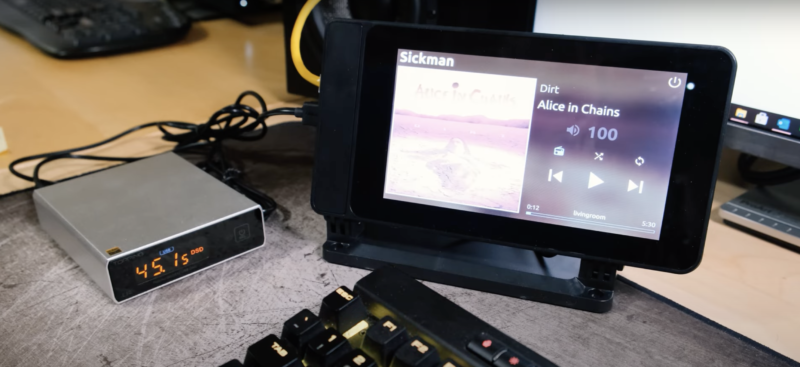
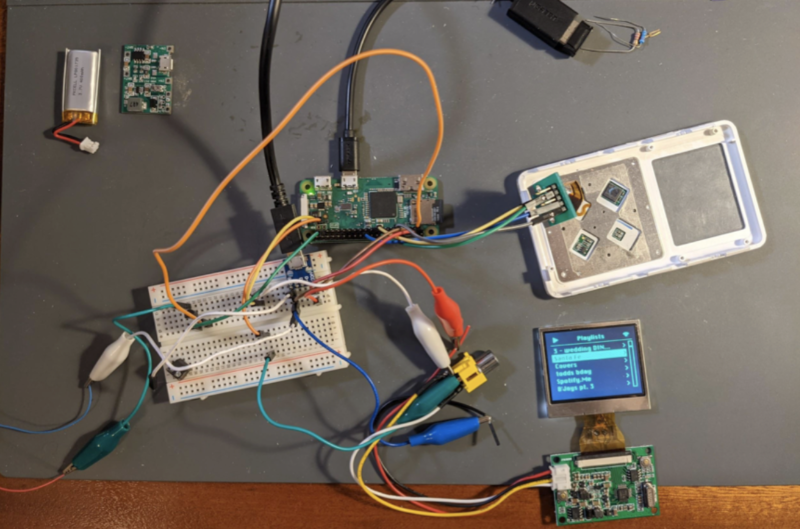
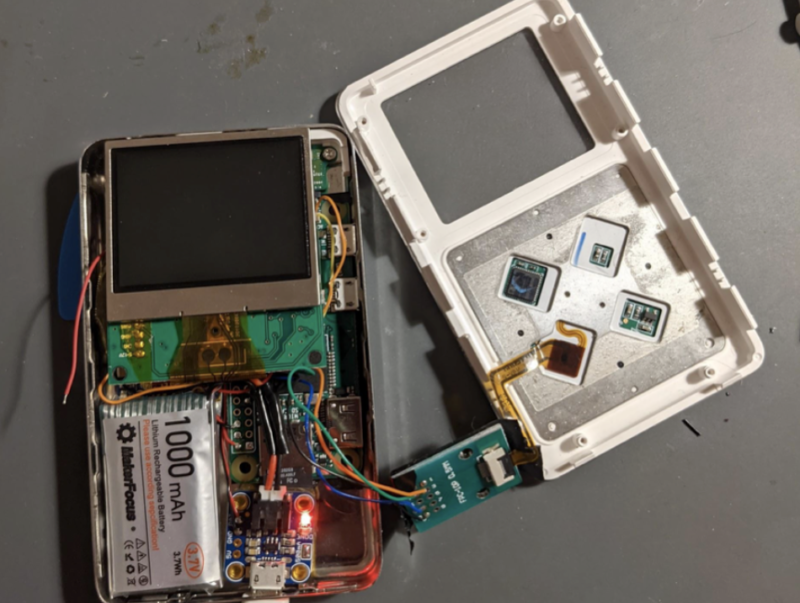
If you liked the look of yesterday’s Raspberry Pi Roon Endpoint Music Streamer but thought: “Hey, you know what would be great? If it had a touchscreen,” then look no further. Home Theater Fanatics has built something using the same RoPieee software, but with the added feature of a screen, for those who need one.
Subscribe to Home Theater Fanatics on YouTube for more great builds like this one
The build cost for this is a little higher than the $150 estimate to recreate yesterday’s project, given the inclusion of a fancier Digital Audio Decoder and the touchscreen itself.
It really is a super user-friendly walkthrough video
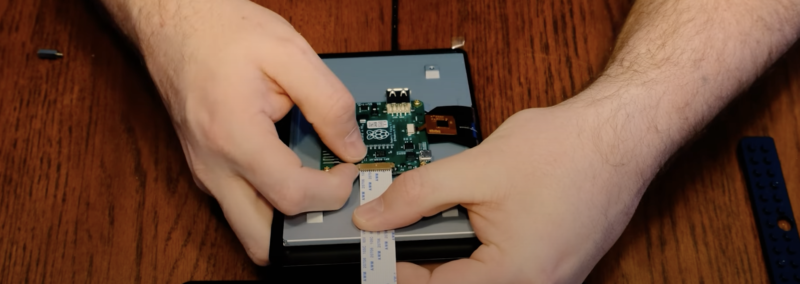
The brilliant Home Theater Fanatics show you how to put all of this together from this point in the build video, before moving on to the software install. They take care to go through all of the basics of the hardware in case you’re not familiar with things like ribbon cables or fans. It’s a really nice bird’s-eye view walkthrough, so beginners aren’t likely to have any problems following along.
See – close-ups of how to connect your ribbon cables and everything
At this point in the build video, Home Theater Fanatics go through the three steps you need to take to get the RoPieee and Roon software sorted out, then connect the DAC. Again, it’s a really clear, comprehensive on-screen walkthrough that beginners can be comfortable with.
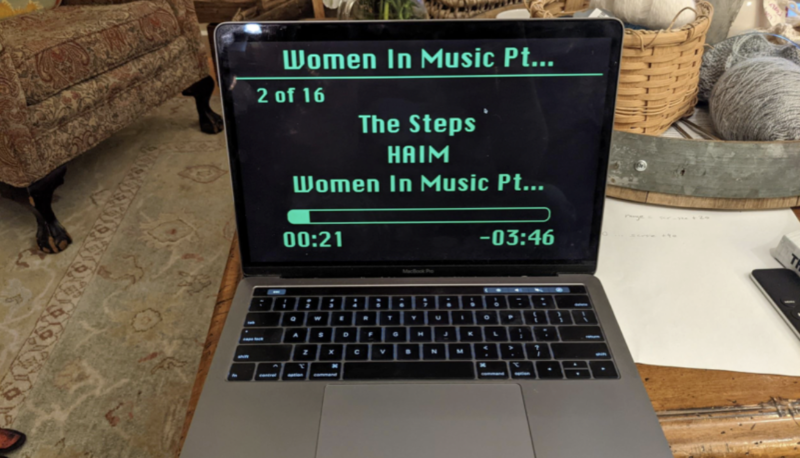
Why do I need a touchscreen music streamer?
Get all your album track info right in your face
Aside from being able to see the attributed artwork for the music you’re currently listening to, this touchscreen solution provides easy song switching during home workouts. It’s also a much snazzier-looking tabletop alternative to a plugged-in phone spouting a Spotify playlist.
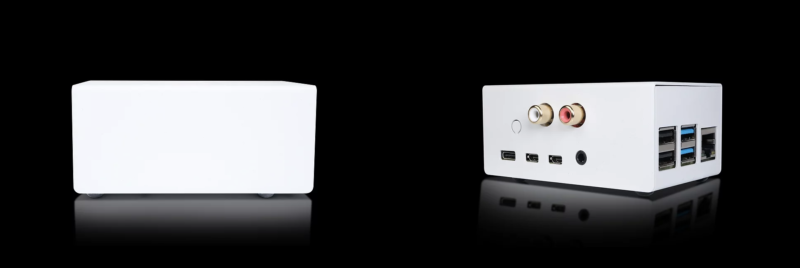
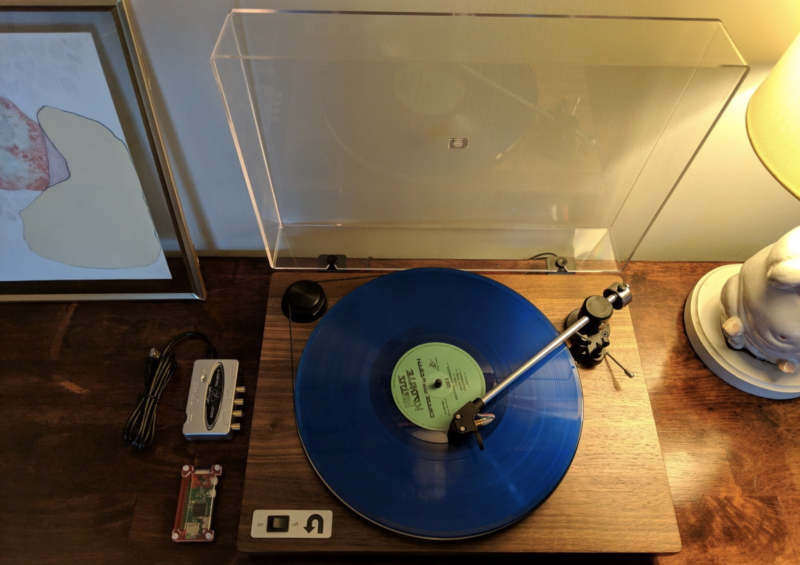
Our friend Mike Perez at Audio Arkitekts is back to show you how to build PiFi, a Raspberry Pi-powered Roon Endpoint Music Streamer. The whole build costs around $150, which is pretty good going for such a sleek-looking Roon-ready end product.
Roon ready
Roon is a platform for all the music in your home, and Roon Core (which works with this build) manages all your music files and streaming content. The idea behind Roon is to bring all your music together, so you don’t have to worry about where it’s stored, what format it’s in, or where you stream it from. You can start a free trial if you’re not already a user.
Fix the HiFiBerry DAC2 Pro into the top of the case with the line output and headphone outputs poking out. A Raspberry Pi 4 Model B is the brains of the operation, and slots nicely onto the HiFiBerry. The HiFiBerry HAT is compatible with all Raspberry Pi models with a 40-pin GPIO connector and just clicks right onto the GPIO pins. It is also directly powered by the Raspberry Pi so, no additional power supply needed.
Raspberry Pi 4 connected to HiFiBerry HAT inside the top half of the case (before the bottom half is screwed on)
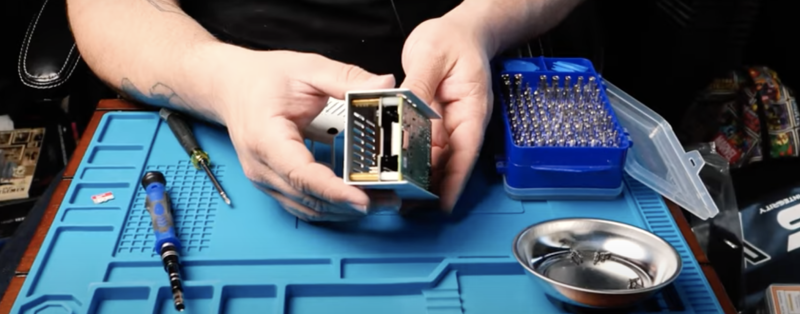
Next, secure the bottom half of the case, making sure all the Raspberry Pi ports line up with the case’s ready-made holes. Mike did the whole thing by hand with just a little help from a screwdriver right at the end.
Software
Download the latest RoPieee image onto your SD card to make it a Roon Ready End Point, then slot it back into your Raspberry Pi. Now you have a good-looking, affordable audio output ready to connect to your Roon Core.
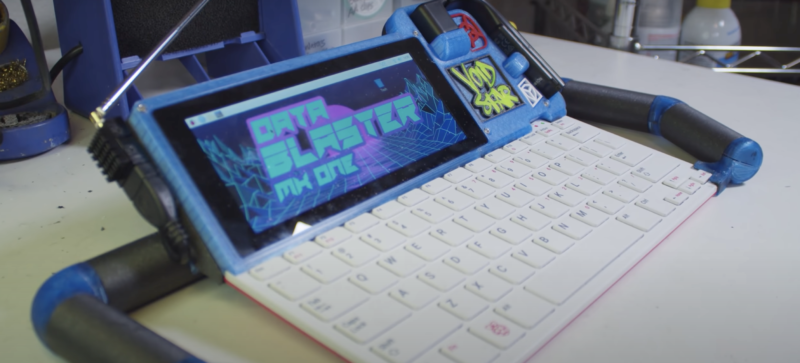
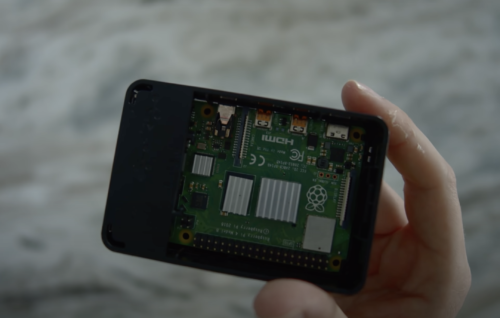
Resisting the desolate consumerism of the suburbs is a serious business for hardware hacker Zack Freedman. Zack transformed a Raspberry Pi 400 into the Voidstar Data Blaster, a portable cyberdeck to fight against becoming a normie.
The suburbs thing is explained at the beginning of Zack’s build video. Subscribe to his YouTube channel.
Hang on, what is a cyberdeck?
Zack explains:
“A data blaster [cyberdeck] is the trademark battlestation of console cowboy antiheroes running nets through cyberspace.”
There’s a whole subreddit devoted to exploring what does and does not make a real-life cyberdeck, so if you were looking for a rabbit hole to go down, knock yourself out.
Punky
How do you turn a Raspberry Pi 400 into a cyberdeck?
Added features to transform a Raspberry Pi 400 into the Voidstar Data Blaster include:
Detachable wearable display
Battery handles
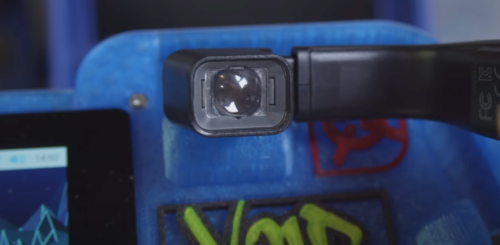
SDR receiver
Antennae
1280×480 touchscreen
Wear your data blaster with pride
Handles make the cyberdeck nice and portable. Console cowboys can also use them to flip the deck up onto their forearm and easily “jack in” to cyberspace.
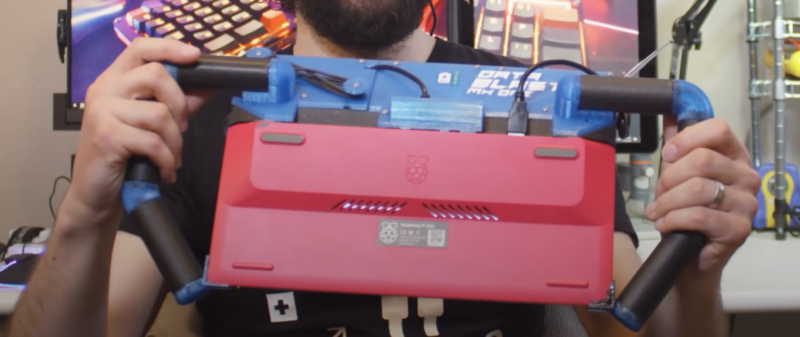
Rules around which keyboard you can use on a legitimate cyberdeck are pretty tight. It can’t be touchscreen (because that means it’s a tablet); however, it can’t fold away on a hinge either (because that makes it a laptop). Enter Raspberry Pi 400, a computer built into a mechanical keyboard about the length of an adult forearm. Perfect.
The head-mounted display tucked into its 3D-printed home on the deck (left) and being worn by Zack (right)
The SDR receiver means that users are cyber snooping-ready, while the head-mounted display provides a cyberpunk design flourish. That display acts as a second screen alongside the mini touchscreen. You can drag anything from the main display into sight on the headgear.
Authentic cyberpunk aesthetic
A lot of trial and error with a 3D printer finally yielded a faceplate that allows the screen and headgear to fit in perfectly. Zack also designed and printed all the flair and logos you see stuck around the cyberdeck. LEDs make the decorative filament fluoresce. Integrated pegs keep all the wiring neat – an inspired practical addition.
The underside of the data blaster
Here are all the STL files if you’d like to create your own cyberdeck. And the design files let you take a closer look at a 3D render of Zack’s creation.
We saved the best bit for last: not only can you play Doom on the Voidstar Data Blaster, you can play it on the wearable display. Stay punk.
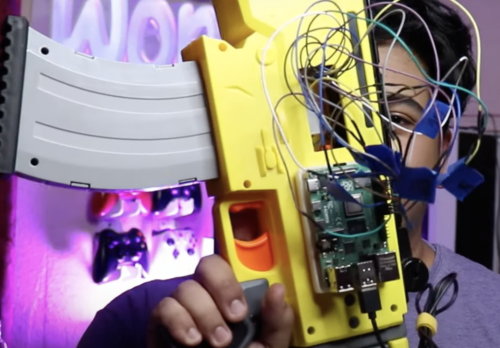
YouTuber Alfredo Sequeida turned a Nerf gun into a controller for playing Call of Duty: Warzone. This is a fun-looking modification project, but some serious coding went into the process.
Head to the 13-minute mark for an in-game demonstration
Trigger happy
Funnily enough, the Nerf gun that Alfredo chose was a special edition Fortnite model. This irked him as a Call of Duty player, but this model had the most potential to accommodate the modifications he knew he wanted.
The screen is an old Android phone which lends its accelerometer to the project
The controller uses the Nerf gun’s original trigger. Alfredo designed extra 3D-printed buttons (white dots on the far right) to let him perform more in-game actions like moving, plating, and jumping.
Software
A Raspberry Pi 4 powers the whole thing, running Python scripts Alfredo wrote for both the Raspberry Pi and his gaming PC. Here’s all the code on GitHub.
Gameplay movement is controlled by getting accelerometer data via the command-line tool ADB logcat from an old Nexus 5 Android phone that’s mounted on the Nerf gun. The data is logged using a custom app Alfredo made on Android Studio.
A Raspberry Pi 4 wired up to all the buttons on the other side of the Nerf gun
Part of the action
The controller’s design makes players feel part of the action as their Call of Duty operator scouts around locations. It’s a much more immersive experience than holding an ordinary game controller in your lap or tapping away at a PC keyboard. Alfredo even plays standing up now his NERF gun controller is in action. He might as well be on a real life Special Ops mission.
The Nerf gun complements the gameplay view that Call of Duty players have
More Call of Duty mod ideas…
So what’s next, Alfredo? We vote you make some modded night vision googles out of an old Viewmaster toy. That’ll totally work, right?
I am 90% sure young Alfredo doesn’t know what a Viewmaster is (even I had to Google it)
Over the last 20 years, researchers and educators have increasingly aimed to develop computing curricula that are culturally responsive and relevant. Designing equitable and authentic learning experiences in computing requires conscious effort to take into account the characteristics of learners and their social environments, in order to address topics that are relevant to a diverse range of students. We previously discussed this topic in a research seminar where the invited speakers shared their work on equity-focused teaching of computer science in relation to race and ethnicity.
Designing equitable and authentic learning experiences in computing requires conscious effort.
Culturally relevant teaching in the classroom demonstrates a teacher’s deliberate and explicit acknowledgment that they value all students and expect all students will excel. Much of the research on this topic stems from the USA. In the UK, it may be that a lack of cultural responsiveness in the computing curriculum is contributing to the underrepresentation of students from some ethnic backgrounds in formal computing qualifications [1] by negatively affecting the way these young people engage with and learn the subject.
Guidelines for creating culturally relevant learning resources for computing
Addressing this issue of underrepresentation is important to us, so we’re making it part of our work on diversity and inclusion in computing education. That’s why we’re delighted to have received an ACM SIGCSE Special Project Award for a project called ‘Developing criteria for K-12 learning resources in computer science that challenge stereotypes and promote diversity’. Our overarching aim for this project, as with all our work at the Raspberry Pi Foundation, is to broaden participation in computing and address the needs of diverse learners. Through this project, we will support computing educators in understanding culturally responsive pedagogy and how to apply it to their own practice. To this end, we’ve set up a working group that will use research into culturally responsive pedagogy to develop a set of guidelines for creating culturally relevant learning resources for computing. Our primary audience for these guidelines are teachers in the UK, but we are confident the project’s results will have value and application all over the world.
There is increasing awareness across all education, and in computing education in particular, that culturally responsive approaches to curriculum and teaching fosters relevancy, interest, and engagement for student learners. This exciting effort brings together computing classroom teachers and education researchers to identify approaches and resources that England’s educators can leverage to enact culturally responsive approaches to teaching computing.
Joanna Goode, Sommerville Knight Professor at the University of Oregon, member of our Special Project working group
What do we mean by culturally relevant resources?
A learning resource obviously has learning objectives, but it is also always set in a particular context, which may or may not be relevant to young people. It may contain images, video, and other media assets in addition to text. Presenting computing stereotypes, for example in the media assets and language used, or situating resources in an unfamiliar context can cause learners to feel that they do not belong in the subject or that it is not relevant to them and their life. On the other hand, providing resources that allow learners to relate what they are learning to issues or tasks that are personally meaningful to them and/or their culture or community can be empowering and engaging for them. For example, a common scenario used to introduce basic algorithm design to young people is making a cup of tea, but tea preparation and drinking may be culturally specific, and even if tea is drunk in a young person’s home, tea preparation may not be an activity they engage in.
Preparing a cup of tea — a scenario often used for introducing learners to algorithm design — can be culturally specific: compare matcha and builder’s tea.
Ensuring that a more diverse group of young people feel like they belong in computing
The expected long-term outcome of this project is to remove significant obstacles to young people’s participation in computing by ensuring that a more diverse group of young people feel represented and like they belong in the subject. The working group we have established consists of seven practising computing teachers from a diverse range of UK schools and a panel of four experts and academics (Lynda Chinaka, Mike Deutsch, Joanna Goode, and Yota Dimitriadi) working with young people and their teachers in the UK, USA, and Canada.
We will support computing educators in understanding culturally responsive pedagogy and how to apply it to their own practice.
Yota Dimitriadi, Associate Professor at the University of Reading and a member of the expert panel, says:“I am delighted to participate in this project that enables conversations and positive action around inclusive and intersectional computing practices. It is more important than ever to enhance a global perspective in our curriculum planning and further our understanding of culturally responsive pedagogies; such an approach can empower all our students and support their skills and understanding of the integral role that computing can play in promoting social justice.”
Such an approach can empower all our students and support their skills and understanding of the integral role that computing can play in promoting social justice.
Yota Dimitriadi, Associate Professor at the University of Reading, member of our Special Project working group
The group has started to meet and discuss the guidelines, and we aim to share early findings and outputs in the summer months. We’re very excited about this project, and we think it is an important starting point for other work. We look forward to updating you in the summer!
[1] Students of Black, non-Chinese Asian, and Mixed ethnicities; Kemp, P.E.J., Berry, M.G., & Wong, B. (2018). The Roehampton Annual Computing Education Report: Data from 2017. University of Roehampton, London.
Over the nine-ish years since the release of our first model, we’ve watched grow a thriving global community of Raspberry Pi enthusiasts, hobbyists, and educators. But did you know that Raspberry Pi is also increasingly used in scientific research?
Some of the scientific applications of Raspberry Pi that Jolle found
Dr Jolle Jolles, a behavioural ecologist at the Center for Ecological Research and Forestry Applications (CREAF) near Barcelona, Spain, and a passionate Raspberry Pi user, has recently published a detailed review of the uptake of Raspberry Pi in biological sciences. He found that well over a hundred published studies have made use of Raspberry Pi hardware in some way.
How can Raspberry Pi help in biological sciences?
The list of applications is almost endless. Here are just a few:
Plant phenotyping (These clever people made a ‘Greenotyper’ with Raspberry Pi)
Smart bird-feeders (we shared this one, which teaches pigeons, on the blog)
High-throughput behavioural recording systems
Autonomous ecosystem monitoring (you can listen to the Borneo rainforest with this project)
Closed-loop virtual reality (there are just too many VR projects using Raspberry Pi to choose from. Here’s a few)
Dr Jolles spreading the good word about our tiny computers
Onwards and upwards
Jolle’s review shows that use of Raspberry Pi is on the up, with more studies documenting the use of Raspberry Pi hardware every year, but he’s keen to see it employed even more widely.
“It is really great to see the broad range of applications that already exist, with Raspberry Pi’s helping biologists in the lab, the field, and in the classroom. However, Raspberry Pi is still not the common research tool that it could be”.
Jolle Jolles
Hard at work
How can I use Raspberry Pi in my research?
To stimulate the uptake of Raspberry Pi and help researchers integrate it into their work, the review paper offers guidelines and recommendations. Jolle also maintains a dedicated website with over 30 tutorials: raspberrypi-guide.github.io
“I believe low-cost micro-computers like the Raspberry Pi are a powerful tool that can help transform and democratize scientific research, and will ultimately help push the boundaries of science.”
‘Pirecorder’ for automating image and video capture
Jolle has also previously published a very handy software package especially with biological scientists in mind. It’s called pirecorder and helps with automated image and video recording using Raspberry Pi. You can check it out here: https://github.com/JolleJolles/pirecorder.
You can keep up with Jolle on Instagram, where he documents all the dreamy outdoor projects he’s working on.
Drop a comment below if you’ve seen an interesting scientific application of Raspberry Pi, at work, on TV, or maybe just in your imagination while you wait to find the time to build it!
We here at Virtual Raspberry Pi Towers are looking forward to our weekends getting warmer, now that we are officially in British Summer Time. But we wanted to make the most of these last Saturdays and Sundays in which we have no choice but to cosy up against the typically British spring weather with a good old-fashioned YouTube rabbit hole.
Here are a few channels we think you’ll like. Some we’ve known about for a while, others are new friends we’ve made over the last year or so, and one is almost brand new so we’re putting you ahead of the curve there. You’re welcome.
Blitz City DIY (aka Liz) is a “DIY-er on a quest to gather and share knowledge” and has already built something cool with our newest baby, Raspberry Pi Pico. Her busy channel features computing, audio, video, coding, and more.
Check out Raspberry Pi Pico in action in this recent video from Blitz City DIY
We love Liz an extra lot because her channel features on entire playlist dedicated to Raspberry Pi Adventures. She also shares a healthy dose of festive content showing you how to Tech the Halls. No, April is NOT too early for Christmas stuff.
Our new friends at Electromaker share tutorials, community projects, and contests where subscribers win hardware and massive cash prizes. Flat cap aficionado Ian Buckley also hosts The Electromaker Show – a weekly roundup of all that’s new and interesting in the maker community.
Electromakers assemble!
You can also swing by the super useful online shop where you can buy everything you need to recreate some of the projects featured. If you’re daunted by shopping for every little bit you need to create something awesome, you can choose one of these electro {maker KITS} and get right to it. We especially like the Lightsaber and Daft Punk-esque helmet kits.
You must have seen an Estefannie Explains It All video by now. But did you know about the weekly livestreams she hosts on Instagram? We know you’ll watch just because she’s cool and sometimes holds her pet cat up to the camera, but you’ll definitely want to tune in to try and win one of her tech giveaways. Some lucky viewers even got their hands on a Raspberry Pi 400.
Fond memories of when Estefannie visited Raspberry Pi Towers
Ruth Amos and Shawn Brown use their channel Kids Invent Stuff to bring kids’ ideas to life by making them into real working inventions. Young people aged 4–11 can submit their ideas or take part in regular invention challenges.
The MagPi Magazine got to know Ruth a little better in a recent interview. And Ruth also features in the 2021 Princesses with Power Tools calendar, as a welding Rapunzel. Go on, you know you want to buy one.
Ellora James
We saved the best (and newest) for last. Ellora James is brand new to YouTube. Her first tutorial showing you how to use Pimoroni’s Grow HAT Mini Kit was posted just three weeks ago, and she added a project update this week.
Ella helps you differentiate between edible pie and Raspberry Pi
We really like her video showing beginners how to set up their first Raspberry Pi. But our favourite is the one above in which she tackles one of the Universe’s big questions.
Raspberry Pi is probably the most affordable way to get started with embedded machine learning. The inferencing performance we see with Raspberry Pi 4 is comparable to or better than some of the new accelerator hardware, but your overall hardware cost is just that much lower.
Raspberry Pi 4 Model B
However, training custom models on Raspberry Pi — or any edge platform, come to that — is still problematic. This is why today’s announcement from Edge Impulse is a big step, and makes machine learning at the edge that much more accessible. With full support for Raspberry Pi, you now have the ability to take data, train against your own data in the cloud on the Edge Impulse platform, and then deploy the newly trained model back to your Raspberry Pi.
Today’s announcement includes new SDKs: for Python, Node.js, Go, and C++. This allows you to integrate machine learning models directly into your own applications. There is also support for object detection, exclusively on the Raspberry Pi; you can train a custom object detection model using camera data taken on your own Raspberry Pi, and then deploy and use this custom model, rather than relying on a pretrained stock image classification model.
Because the importance of bananas to machine learning researchers can not be overstated. To test it out, we’re going to train a very simple model that can tell the difference between a banana🍌 and an apple🍎.
Getting started
If you don’t already have an Edge Impulse account you should open up a browser on your laptop and then create an account, along with a test project. I’m going to to call mine “Object detection”.
Creating a new project in Edge Impulse
We’re going to be building an image classification project, one that can tell the difference between a banana 🍌 and an apple 🍎, but Edge Impulse will also let you build an object detection project, one that will identify multiple objects in an image.
Building an object detection rather than an image classification system? This video is for you!
After creating your project, you should see something like this:
My new object detection project open in Edge Impulse
Now log in to your Raspberry Pi, open up a Terminal window, and type
and log in to your Edge Impulse account. You’ll then be asked to choose a project, and finally to select a microphone and camera to connect to the project. I’ve got a Razer Kiyo connected to my own Raspberry Pi so I’m going to use that.
Raspberry Pi has connected to Edge Impulse
If you still have your project open in a browser you might see a notification telling you that your Raspberry Pi is connected. Otherwise you can click on “Devices” in the left-hand menu for a list of devices connected to that project. You should see an entry for your Raspberry Pi.
The list of devices connected to your project
Taking training data
If you look in your Terminal window on your Raspberry Pi you’ll see a URL that will take you to the “Data acquisition” page of your project. Alternatively you can just click on “Data acquisition” in the left-hand menu.
Getting ready to collect training data
Go ahead and select your Raspberry Pi if it isn’t already selected, and then select the Camera as the sensor. You should see a live thumbnail from your camera appear to the right-hand side. If you want to follow along, position your fruit (I’m starting with with the banana 🍌), add a text label in the “Label” box, and hit the “start sampling” button. This will take and save an image to the cloud. Reposition the banana and take ten images. Then do it all again with the apple 🍎.
Ten labelled images each of the banana 🍌 and the apple 🍎
Since we’re building an incredibly simplistic model, and we’re going to leverage transfer learning, we probably now have enough training data with just these twenty images. So let’s go and create a model.
Creating a model
Click on “Impulse design” in the left-hand menu. Start by clicking on the “Add an input block” box and click on the “Add” button next to the “Images” entry. Next click on the “Add a processing block” box. Then click on the “Add” button next to the “Image” block to add a processing block that will normalise the image data and reduce colour depth. Then click on the “Add a learning block” box and select the “Transfer Learning (images)” block to grab a pretrained model intended for image classification, on which we will perform transfer learning to tune it for our banana 🍌 and apple 🍎 recognition task. You should see the “Output features” block update to show 2 output features. Now hit the “Save Impulse” button.
Our configured Impulse
Next click on the “Images” sub-item under the “Impulse design” menu item, switch to the “Generate features” tab, and then hit the green “Generate features” button.
Generating model features
Finally, click on the “Transfer learning” sub-item under the “Impulse design” menu item, and hit the green “Start training” button at the bottom of the page. Training the model will take some time. Go get some coffee ☕.
A trained model
Testing our model
We can now test our trained model against the world. Click on the “Live classification” entry in the left-hand menu, and then hit then the green “Start sampling” button to take a live picture from your camera.
Live classification to test your model
You might want to go fetch a different banana 🍌, just for testing purposes.
A live test of the model
If you want to do multiple tests, just scroll up and hit the “Start sampling” button again to take another image.
Deploying to your Raspberry Pi
Now we’ve (sort of) tested our model, we can deploy it back to our Raspberry Pi. Go to the Terminal window where the edge-impulse-linux command connecting your Raspberry Pi to Edge Impulse is running, and hit Control-C to stop it. Afterwards we can do a quick evaluation deployment using the edge-impulse-runner command.
This will connect to the Edge Impulse cloud, download your trained model, and start up an application that will take the video stream coming from your camera and look for bananas 🍌 and apples 🍎. The results of the model inferencing will be shown frame by frame in the Terminal window. When the runner application starts up you’ll also see a URL: copy and paste this into a browser, and you’ll see the view from the camera in real time along with the inferencing results.
Deployed model running locally on your Raspberry Pi
Success! We’ve taken our training data and trained a model in the cloud, and we’re now running that model locally on our Raspberry Pi. Because we’re running the model locally, we no longer need network access. No data needs to leave the Raspberry Pi. This is a huge privacy advantage for edge computing compared to cloud-connected devices.
Wrapping up?
While we’re running our model inside Edge Impulse’s “quick look” application, we can deploy the exact same model into our own applications, as today’s announcement includes new SDKs: for Python, Node.js, Go, and C++. These SDKs let us build standalone applications to collect data not just from our camera and microphone, but from other sensors like accelerometers, magnetometers, or anything else you can connect to a Raspberry Pi.
Performance metrics for Edge Impulse are promising, although still somewhat below what we’ve seen using TensorFlow Lite directly on Raspberry Pi 4, for inferencing using similar models. That said, it’s really hard to compare performance across even very similar models as it depends so much on the exact situation you’re in and what data you’re dealing with, so your mileage may vary quite a lot here.
However, the new Edge Impulse announcement offers two very vital things: a cradle-to-grave framework for collecting data and training models then deploying these custom models at the edge, together with a layer of abstraction. Increasingly we’re seeing deep learning eating software as part of a general trend towards increasing abstraction, sometimes termed lithification, in software. Which sounds intimidating, but means that we can all do more, with less effort. Which isn’t a bad thing at all.
Want to connect your retro console to your modern TV? The latest issue of Wireframe magazine has the only guide you need…
“Get a Raspberry Pi. Done.” It’s probably the most frequently recurring comment we get across all videos on the My Life in Gaming YouTube channel, which often revolve around playing classic games on original hardware. Not everyone has held onto their old consoles through the years, so I get it.
PS1Digital on a 4K OLED TV
Software emulation, whether through a PC, Raspberry Pi, or any other device, is easy on your wallet and solid enough to give most people the experience they’re looking for.
But for me, the core of my gaming experience still tends to revolve around the joy I feel in using authentic cartridges and discs. But as you may have noticed, 2021 isn’t 2001, and using pre-HDMI consoles isn’t so easy these days. A standard CRT television is the most direct route to getting a solid experience with vintage consoles.
Standard RCA cables with composite video. A direct HDTV connection is a poor experience
But let’s face it – not everyone is willing to work a CRT into their setup. Plenty of people are content with just plugging the cables that came with their old systems (usually composite) into their HD or 4K TV – and that’s OK! But whether for the blurry looks or the input lag they feel, this simply isn’t good enough for a lot of people.
Down the rabbit hole
“There has to be a better way,” you say as you browse Amazon’s assortment of analogue-to- HDMI converters, HDMI adapters like Wii2HDMI, or HDMI cables for specific consoles by a variety of brands. You might think these are just what you’re looking for, but remember: your TV has its own internal video processor. Just like your TV, they’re going to treat 240p like 480i. Not only is it unnecessary to deinterlace 240p, but doing so actively degrades the experience – motion- adaptive deinterlacing takes time, adding input lag.
RetroTINK-2X MINI (left) and 2X Pro (right). The MINI pairs great with N64
That Sega Saturn HDMI cable is going to deinterlace your gorgeous 240p sprite-based games so hard that they’ll look like some sort of art restoration disaster in motion. The dark secret of these products is that you’re buying something you already own – a basic video processor designed for video, not video games, and the result will likely not be tangibly better than what your TV could do. The only reason to go this route is if you have no analogue inputs and could not possibly invest more than $30.
So what is the better way? The primary purpose of an external video processor is to send a properly handled signal to your TV that won’t trigger its lag-inducing processes and turn your pixels into sludge – basically any progressive resolution other than 240p. Luckily, there are several devices in various price ranges that are designed to do exactly this.
There is lots more to learn!
This is just a tiny snippet of the mammoth feature in Wireframe magazine issue 49. The main feature includes a ‘jargon cheat sheet’ and ‘cable table’ to make sure any level of user can get their retro console working on a modern TV.
If you’re not a Wireframe magazine subscriber, you can download a PDF copy for free. Head to page 50 to get started.
You can read more features like this one in Wireframe issue 49, available directly from Raspberry Pi Press — we deliver worldwide.
YouTuber Chris Courses takes hydration seriously, but all those minutes spent filling up water bottles take a toll. 15 hours per year, to be exact. Chris regularly uses three differently sized water bottles and wanted to build something to fill them all to their exact measurements.
(Polite readers may like to be warned of a couple of bleeped swears and a rude whiteboard drawing a few minutes into this video.)
Hardware
Raspberry Pi
Water filter (Chris uses this one, which you would find in a fridge with a built-in water dispenser)
Solenoid valve (which only opens when an electrical signal is sent to it)
The solenoid valve and Raspberry Pi, which work together to make this project happen
How does the hardware work?
The solenoid valve determines when water can and cannot pass through. Mains water comes in through one tube and passes through the water filter, then the solenoid valve releases water via another tube into the bottle.
See – simples!
What does the Raspberry Pi do?
The Raspberry Pi sends a signal to the solenoid valve telling it to open for a specific amount of time — the length of time it takes to fill a particular water bottle — and to close when that time expires. Chris set this up to start running when he clicks a physical button.
We feel the same way about Raspberry Pi, Chris
Chris also programmed lights to indicate when the dispenser is turned on. This manual coding proved to be the most time-consuming part of the project.
But all the wires look so ugly!
Sleek and discreet
Chris agreed, so he 3D-printed a beautiful enclosure to house what he dubs the ‘Hydrobot 5000’. It’s a sleek black casing that sits pretty in his kitchen on a wall next to the fridge. It took a fair bit of fridge shuffling and electrical mounting to “sit pretty”, however. This Raspberry Pi-powered creation needed to be connected to a water source, so the tubing had to be snaked from Hydrobot 5000, behind appliances, to the kitchen sink.
Check out those disco lights! Nice work, Chris. Follow Chris on YouTube for loads more coding and dev videos.
Recreating Apple’s iconic iPod Classic as a Spotify player may seem like sacrilege but it works surprisingly well, finds Rosie Hattersley. Check out the latest issue of The MagPi magazine (pg 8 – 12) for a tutorial to follow if you’d like to create your own.
Replacement Raspberry Pi parts laying inside an empty iPod case to check they will fit
When the original iPod was launched, the idea of using it to run anything other than iTunes seemed almost blasphemous. The hardware remains a classic, but our loyalties are elsewhere with music services these days. If you still love the iPod but aren’t wedded to Apple Music, Guy Dupont’s Spotify hack makes a lot of sense. “It’s empowering as a consumer to be able to make things work for me – no compromises,” he says. His iPod Classic Spotify player project cost around $130, but you could cut costs with a different streaming option.
“I wanted to explore what Apple’s (amazing) original iPod user experience would feel like in a world where we have instant access to tens of millions of songs. And, frankly, it was really fun to take products from two competitors and make them interact in an unnatural way.”
Guy Dupont
Installing the C-based haptic code on Raspberry Pi Zero, and connecting Raspberry Pi, display, headers, and leads
Guy’s career spans mobile phone app development, software engineering, and time in recording studios in Boston as an audio engineer, so a music tech hack makes sense. He first used Raspberry Pi for its static IP so he could log in remotely to his home network, and later as a means of monitoring his home during a renovation project. Guy likes using Raspberry Pi when planning a specific task because he can “program [it] to do one thing really well… and then I can leave it somewhere forever”, in complete contrast to his day job.
Mighty micro
Guy seems amazed at having created a Spotify streaming client that lives inside, and can be controlled by, an old iPod case from 2004. He even recreated the iPod’s user interface in software, right down to the font. A ten-year-old article about the click wheel provided some invaluable functionality insights and allowed him to write code to control it in C. Guy was also delighted to discover an Adafruit display that’s the right size for the case, doesn’t expose the bezels, and uses composite video input so he could drive it directly from Raspberry Pi’s composite out pins, using just two wires. “If you’re not looking too closely, it’s not immediately obvious that the device was physically modified,” he grins.
All replacement parts mounted in the iPod case
Guy’s retro iPod features a Raspberry Pi Zero W. “I’m not sure there’s another single-board computer this powerful that would have fit in this case, let alone one that’s so affordable and readily available,” he comments. “Raspberry Pi did a miraculous amount of work in this project.” The user interface is a Python app, while Raspberry Pi streams music from Spotify via Raspotify, reads user input from the iPod’s click wheel, and drives a haptic motor – all at once.
Guy managed to use a font for the music library that looks almost exactly the same as Apple’s original
Most of the hardware for the project came from Guy’s local electronics store, which has a good line in Raspberry Pi and Adafruit components. He had a couple of attempts to get the right size of haptic motor, but most things came together fairly easily after a bit of online research. Help, when he needed it, was freely given by the Raspberry Pi community, which Guy describes as “incredible”.
Things just clicked
Guy previously used Raspberry Pi to stream albums around his home
Part of the fun of this project was getting the iPod to run a non-Apple streaming service, so he’d also love to see versions of the iPod project using different media players. You can follow his instructions on GitHub.
Next, Guy intends to add a DAC (digital to analogue converter) for the headphone jack, but Bluetooth works for now, even connecting from inside his jacket pocket, and he plans to get an external USB DAC in time.