I am delighted to announce the launch of raspberrypi.com — a new website dedicated to Raspberry Pi computers and associated technologies. Head on over to find all about our low-cost, high-performance PCs, add-on boards or HATs, microcontrollers, accessories, and much more.
As well as being able to learn about and purchase the full range of hardware products, on the new website you can download our latest software, find detailed technical documentation, connect with the community on the forums, and read the latest news about Raspberry Pi technologies and how they’re being used to change the world.
What’s changing at raspberrypi.org
This website (raspberrypi.org) will continue to be the home for the Raspberry Pi Foundation and all of our educational initiatives to help young people learn about computers and how to create with digital technologies.
When raspberrypi.org was first launched as a WordPress blog in 2011, we were talking about a low-cost, programmable computer that was being designed for education.
Fast-forward a decade, and we are now speaking about an increasingly broad range of technology and education products and services to industry, hobbyists, educators, researchers, and young people. While there is lots of overlap between those communities and their interests, it is becoming increasingly difficult to address everyone’s needs on one website. So this change is really all about making life easier for you.
We will continue to provide lots of links and connections between the two sites to make sure that you can easily find what you’re looking for. As ever, we’d love to hear your feedback in the comments below.
Connect with us on our new social media channels
Alongside the changes to the websites, we’re also launching new social channels that are focused on the Foundation’s educational initiatives. We look forward to seeing you there.
Raspberry Pi is growing our presence in Africa, and we’re keen to talk to businesses and educational organisations in the region to learn and to build partnerships.
Developing partnerships
As part of our investments in the region, I am delighted to join Raspberry Pi as Strategic Partnerships Manager, and initially I will be focusing on Nigeria, Kenya, Ghana, Tanzania, Rwanda, Cameroon, and Uganda. We will prioritise building a network of Raspberry Pi Approved Resellers and developing the right partnerships across industry and the education sector.
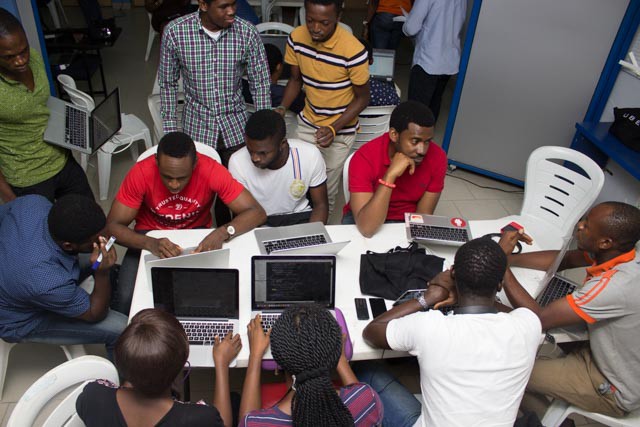
Uber’s First Hackathon in Lagos, Nigeria
Ensuring affordability with Raspberry Pi Approved Resellers
Over the last decade, Raspberry Pi has established a strong presence in the European and North American markets through partnership with our network of excellent Raspberry Pi Approved Resellers, providing access to affordable technology for the home, for business, and for education. Customers in many areas across Asia and the Pacific, too, have a choice of Approved Resellers offering Raspberry Pi products.
So far, our presence in Africa has been through our approved reseller PiShop in South Africa, which also has some commercial operations into other countries in southern Africa. Much of West, East, and North Africa has been underserved, and consumers in these regions have often obtained Raspberry Pi products via e-commerce websites in Europe, North America, and sometimes China. This has meant high costs of shipping products into Africa, which undermines our goal of ensuring affordability and availability across the continent. To address this, we have begun work to provide African customers with easy and reliable access to Raspberry Pi products at an affordable price point.
Supporting technological innovation
Africa has seen an explosion of technological advances in recent years, with investors funding innovative businesses built around technology. The continent is facing challenges ranging from accessibility to uninterrupted energy supplies, climate change, enabling agricultural potential, and building smart cities, and Africa’s mainly young population is meeting them head on.
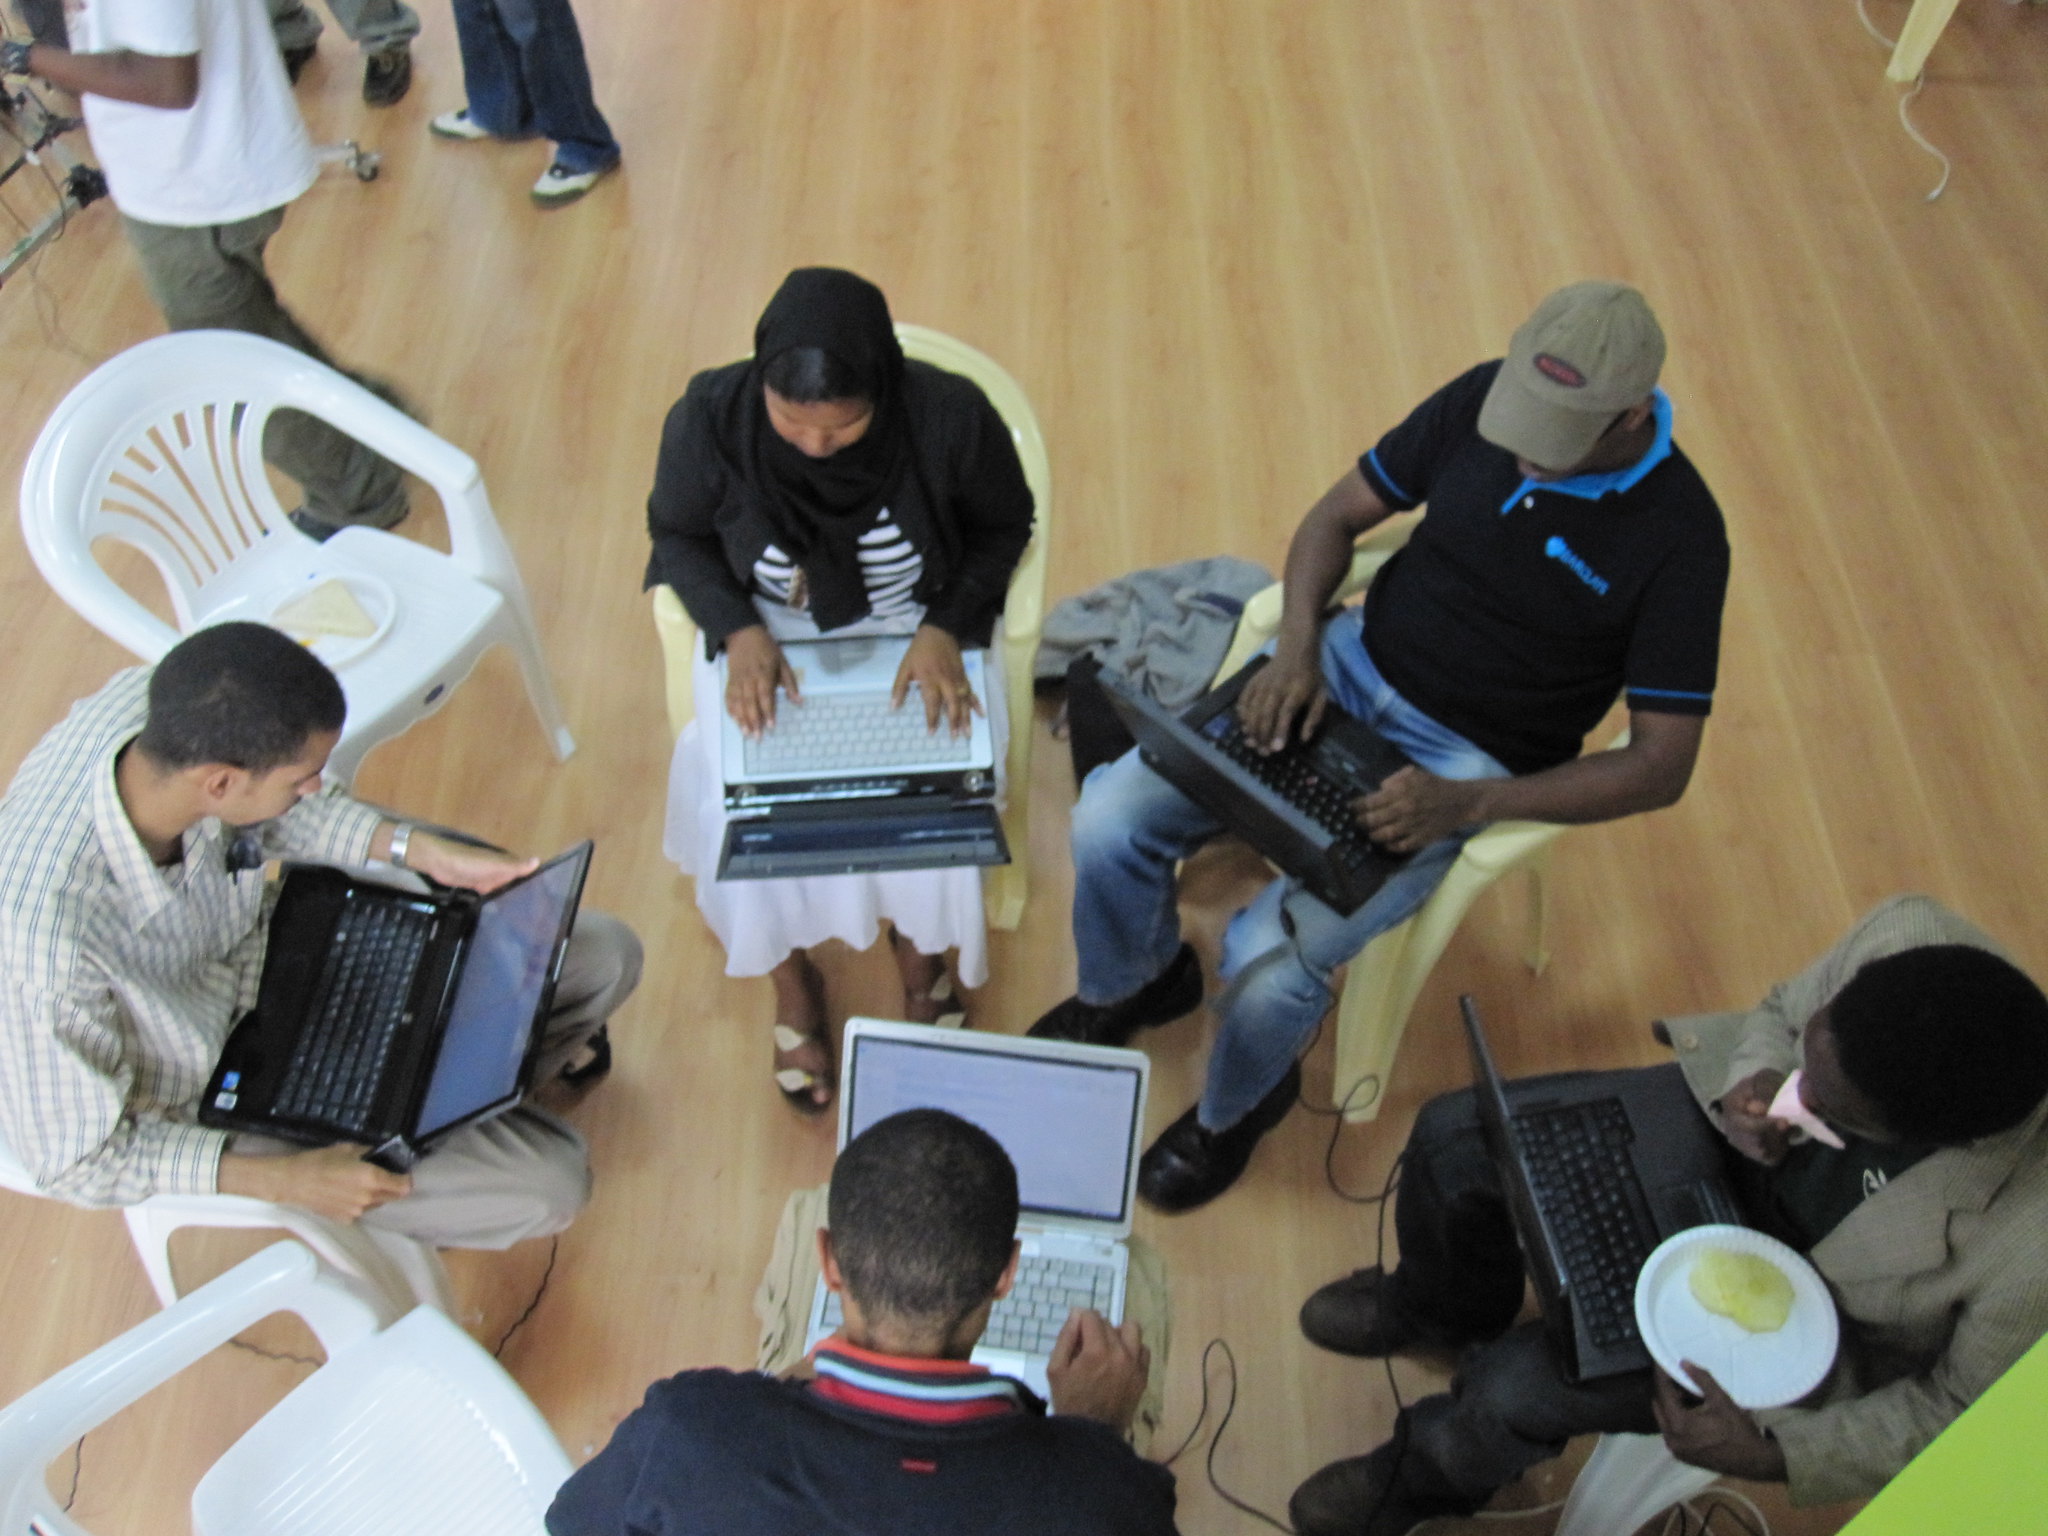
Random Hacks of Kindness, a two-day hackathon. “RHoK Nairobi, Kenya” by Erik (HASH) Hersman / CC BY
While there is no shortage of innovative ideas, there is a real need for the right equipment and tools to support this ecosystem of makers, hobbyists, innovators, and entrepreneurs. Raspberry Pi is poised to close this gap.
Get in touch
Over the next couple of months, we will be planning a tour of our focus countries to visit the leadership of engineering associations and bodies, engaging with engineering student communities and maker spaces on the continent and building strategic alliances to deepen our inroads in the region. As Covid restrictions are eased, we will be visiting several countries on the continent to help us discover how we can best provide products and services that directly impact the region by ensuring access to low-cost, high-quality technology.
Ken Okolo
Could your African retail business meet our high standards for Raspberry Pi Approved Resellers, or could your educational organisation or your enterprise benefit from affordable desktop computers? Do your products require embedded computing power, or could your business grow with low-cost, low-power process monitoring or control? Get in touch with us by emailing: ken.okolo@raspberrypi.com. We’re looking forward to hearing from you.
A portable, affordable Raspberry Pi-powered blood analyser is helping to “establish a robust healthcare ecosystem” in remote parts of India. Samples can be tested in just 30 seconds, and the cost and size of the parts make it an attractive solution for rural and resource-strapped areas.
It is the work of researchers Sangeeta Palekar and Jayu Kalambe from the Department of Electronics Engineering at Shri Ramdeobaba College of Engineering and Management.
(Image credit: Shri Ramdeobaba / College of Engineering And Management)
Tiny computer — massive processing power
Regular blood tests are vital in the tracking and elimination of many diseases, but there is a huge time and monetary cost currently tied to this type of laboratory work.
The researchers’s device measures light absorbance through a blood sample, a common type of analysis, and they harnessed the processing capability of Raspberry Pi 4 Model B to analyse the absorbance data. Their Raspberry Pi-powered solution was found to perform on a par with the kind of expensive lab-based blood test typically used.
Quick and easy
Sangeeta and Jayu’s analyser is not only cheaper to build and maintain than the lab-based version, it also does the job better. Using the lab-based method means that samples from patients in rural areas must be sent away for analysis, with results communicated back to patients at a much later date. In contrast, Sangeeta and Jayu’s device can process blood samples there and then. All you need is an electricity source. Patients get their results immediately, and there is no need to transport delicate samples across rural terrain.
Incorporating an IoT element into their design, which would allow for remote monitoring, is the next step for the researchers. They also intend to develop their invention to allow it to carry out different types of blood analyses.
Read more about the science behind the creation
The full research paper is behind a paywall, but the abstract does a great job succinctly explaining all the science. Sangeeta herself also explains a lot of the magic behind her creation in this interview with IEEE Spectrum.
Raspberry Pi Pico powers this real-time audio spectrogram visualiser using a digital microphone to pick up the sound and an LCD display to show us what those sounds ‘look’ like.
First things first
OK firstly, let’s make sure we know what all of those words mean, because ‘audio spectrogram visualiser’ is a bit of a mouthful:
A ‘spectrogram’ is a visual way of representing signal strength, or “loudness”, of a signal.
The ‘visualiser’ bit comes in when these frequencies are presented as waveforms on the little screen.
And the ‘audio‘ is simply because Sandeep is visualising sounds in this project.
Sadly, Sandeep’s machine can’t tell you why the baby is crying
Perfectly portable sound monitor
This pocket-sized device can be carried around with you and lets you see a visual representation of your surrounding audio environment in real-time. So, if you wander into a peaceful bird reserve or something, the LCD display will show you something very different than if you were in, say, Wembley Stadium during an FA Cup final.
Above, you can see Sandeep’s creation in action in the vicinity of a crying baby.
In the video below, you can see there is a direct correlation between the original audio signal’s amplitude (on the left) and the audio spectrogram’s representation of the signal on the right.
This intelligent arm learns how to move naturally, based on what the wearer is doing, as Phil King discovers in the latest issue of The MagPi, out now.
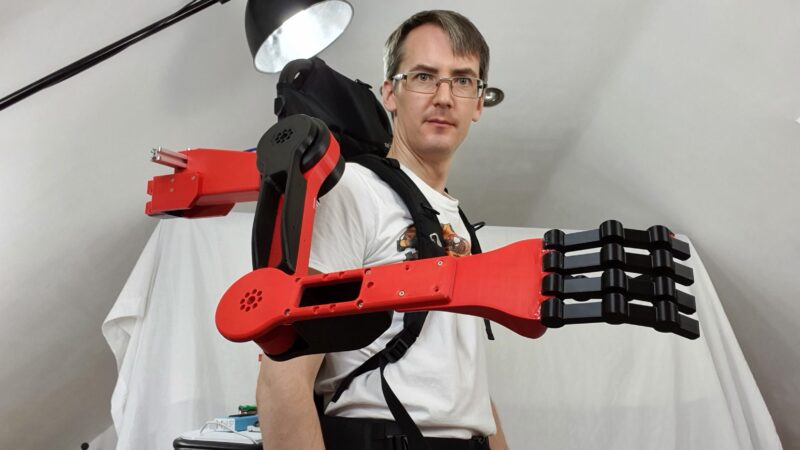
Known for his robotic creations, popular YouTuber James Bruton is also a keen Iron Man cosplayer, and his latest invention would surely impress Tony Stark: an intelligent prosthetic arm that can move naturally and autonomously, depending on the wearer’s body posture and limb movements.
Equipped with three heavy-duty servos, the prosthetic arm moves naturally based on the data from IMU sensors on the wearer’s other limbs
“It’s a project I’ve been thinking about for a while, but I’ve never actually attempted properly,” James tells us. “I thought it would be good to have a work stream of something that could be useful.”
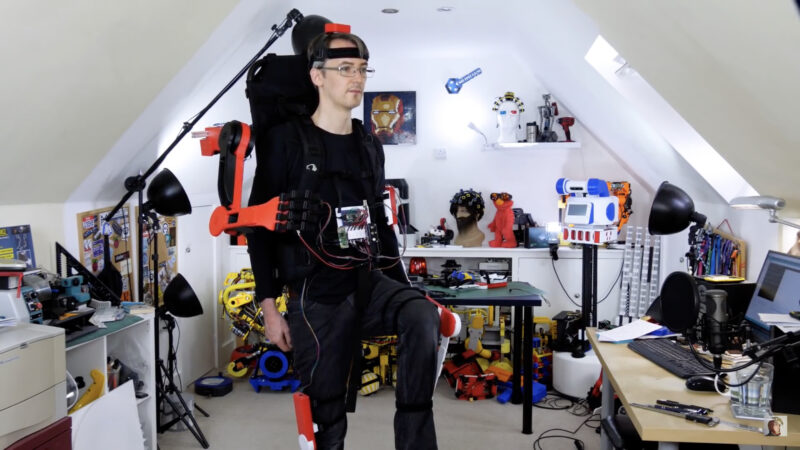
Motion capture suit
To obtain the body movement data on which to base the arm’s movements, James considered using a brain computer, but this would be unreliable without embedding electrodes in his head! So, he instead opted to train it with machine learning.
For this he created a motion capture suit from 3D-printed parts to gather all the data from his body motions: arms, legs, and head. The suit measures joint movements using rotating pieces with magnetic encoders, along with limb and head positions – via a special headband – using MPU-6050 inertial measurement units and Teensy LC boards.
Part of the motion capture suit, the headband is equipped with an IMU to gather movement data
Collected by a Teensy 4.1, this data is then fed into a machine learning model running on the suit’s Raspberry Pi Zero using AOgmaNeo, a lightweight C++ software library designed to run on low-power devices such a microcontrollers.
“AOgmaNeo is a reinforcement machine learning system which learns what all of the data is doing in relation to itself,” James explains. “This means that you can remove any piece of data and, after training, the software will do its best to replace the missing piece with a learned output. In my case, I’m removing the right arm and using the learned output to drive the prosthetic arm, but it could be any limb.”
While James notes that AOgmaNeo is actually meant for reinforcement learning,“in this case we know what the output should be rather than it being unknown and learning through binary reinforcement.”
The motion capture suit comprises 3D-printed parts, each equipped with a magnetic rotary encoder, MPU-6050 IMU, and Teensy LC
To train the model, James used distinctive repeated motions, such as walking, so that the prosthetic arm would later be able to predict what it should do from incoming sensor data. He also spent some time standing still so that the arm would know what to do in that situation.
New model arm
With the machine learning model trained, Raspberry Pi Zero can be put into playback mode to control the backpack-mounted arm’s movements intelligently. It can then duplicate what the wearer’s real right arm was doing during training depending on the positions and movements of other body parts.
So, as he demonstrates in his YouTube video, if James starts walking on the spot, the prosthetic arm swings the opposite way to his left arm as he strides along, and moves forward as raises his left leg. If he stands still, the arm will hang down by his side. The 3D-printed hand was added purely for aesthetic reasons and the fingers don’t move.
James admits that the project is highly experimental and currently an early work in progress. “I’d like to develop this concept further,” he says, “although the current setup is slightly overambitious and impractical. I think the next step will be to have a simpler set of inputs and outputs.”
While he generally publishes his CAD designs and code, the arm “doesn’t work all that well, so I haven’t this time. AOgmaNeo is open-source, though (free for personal use), so you can make something similar if you wished.” What would you do with an extra arm?
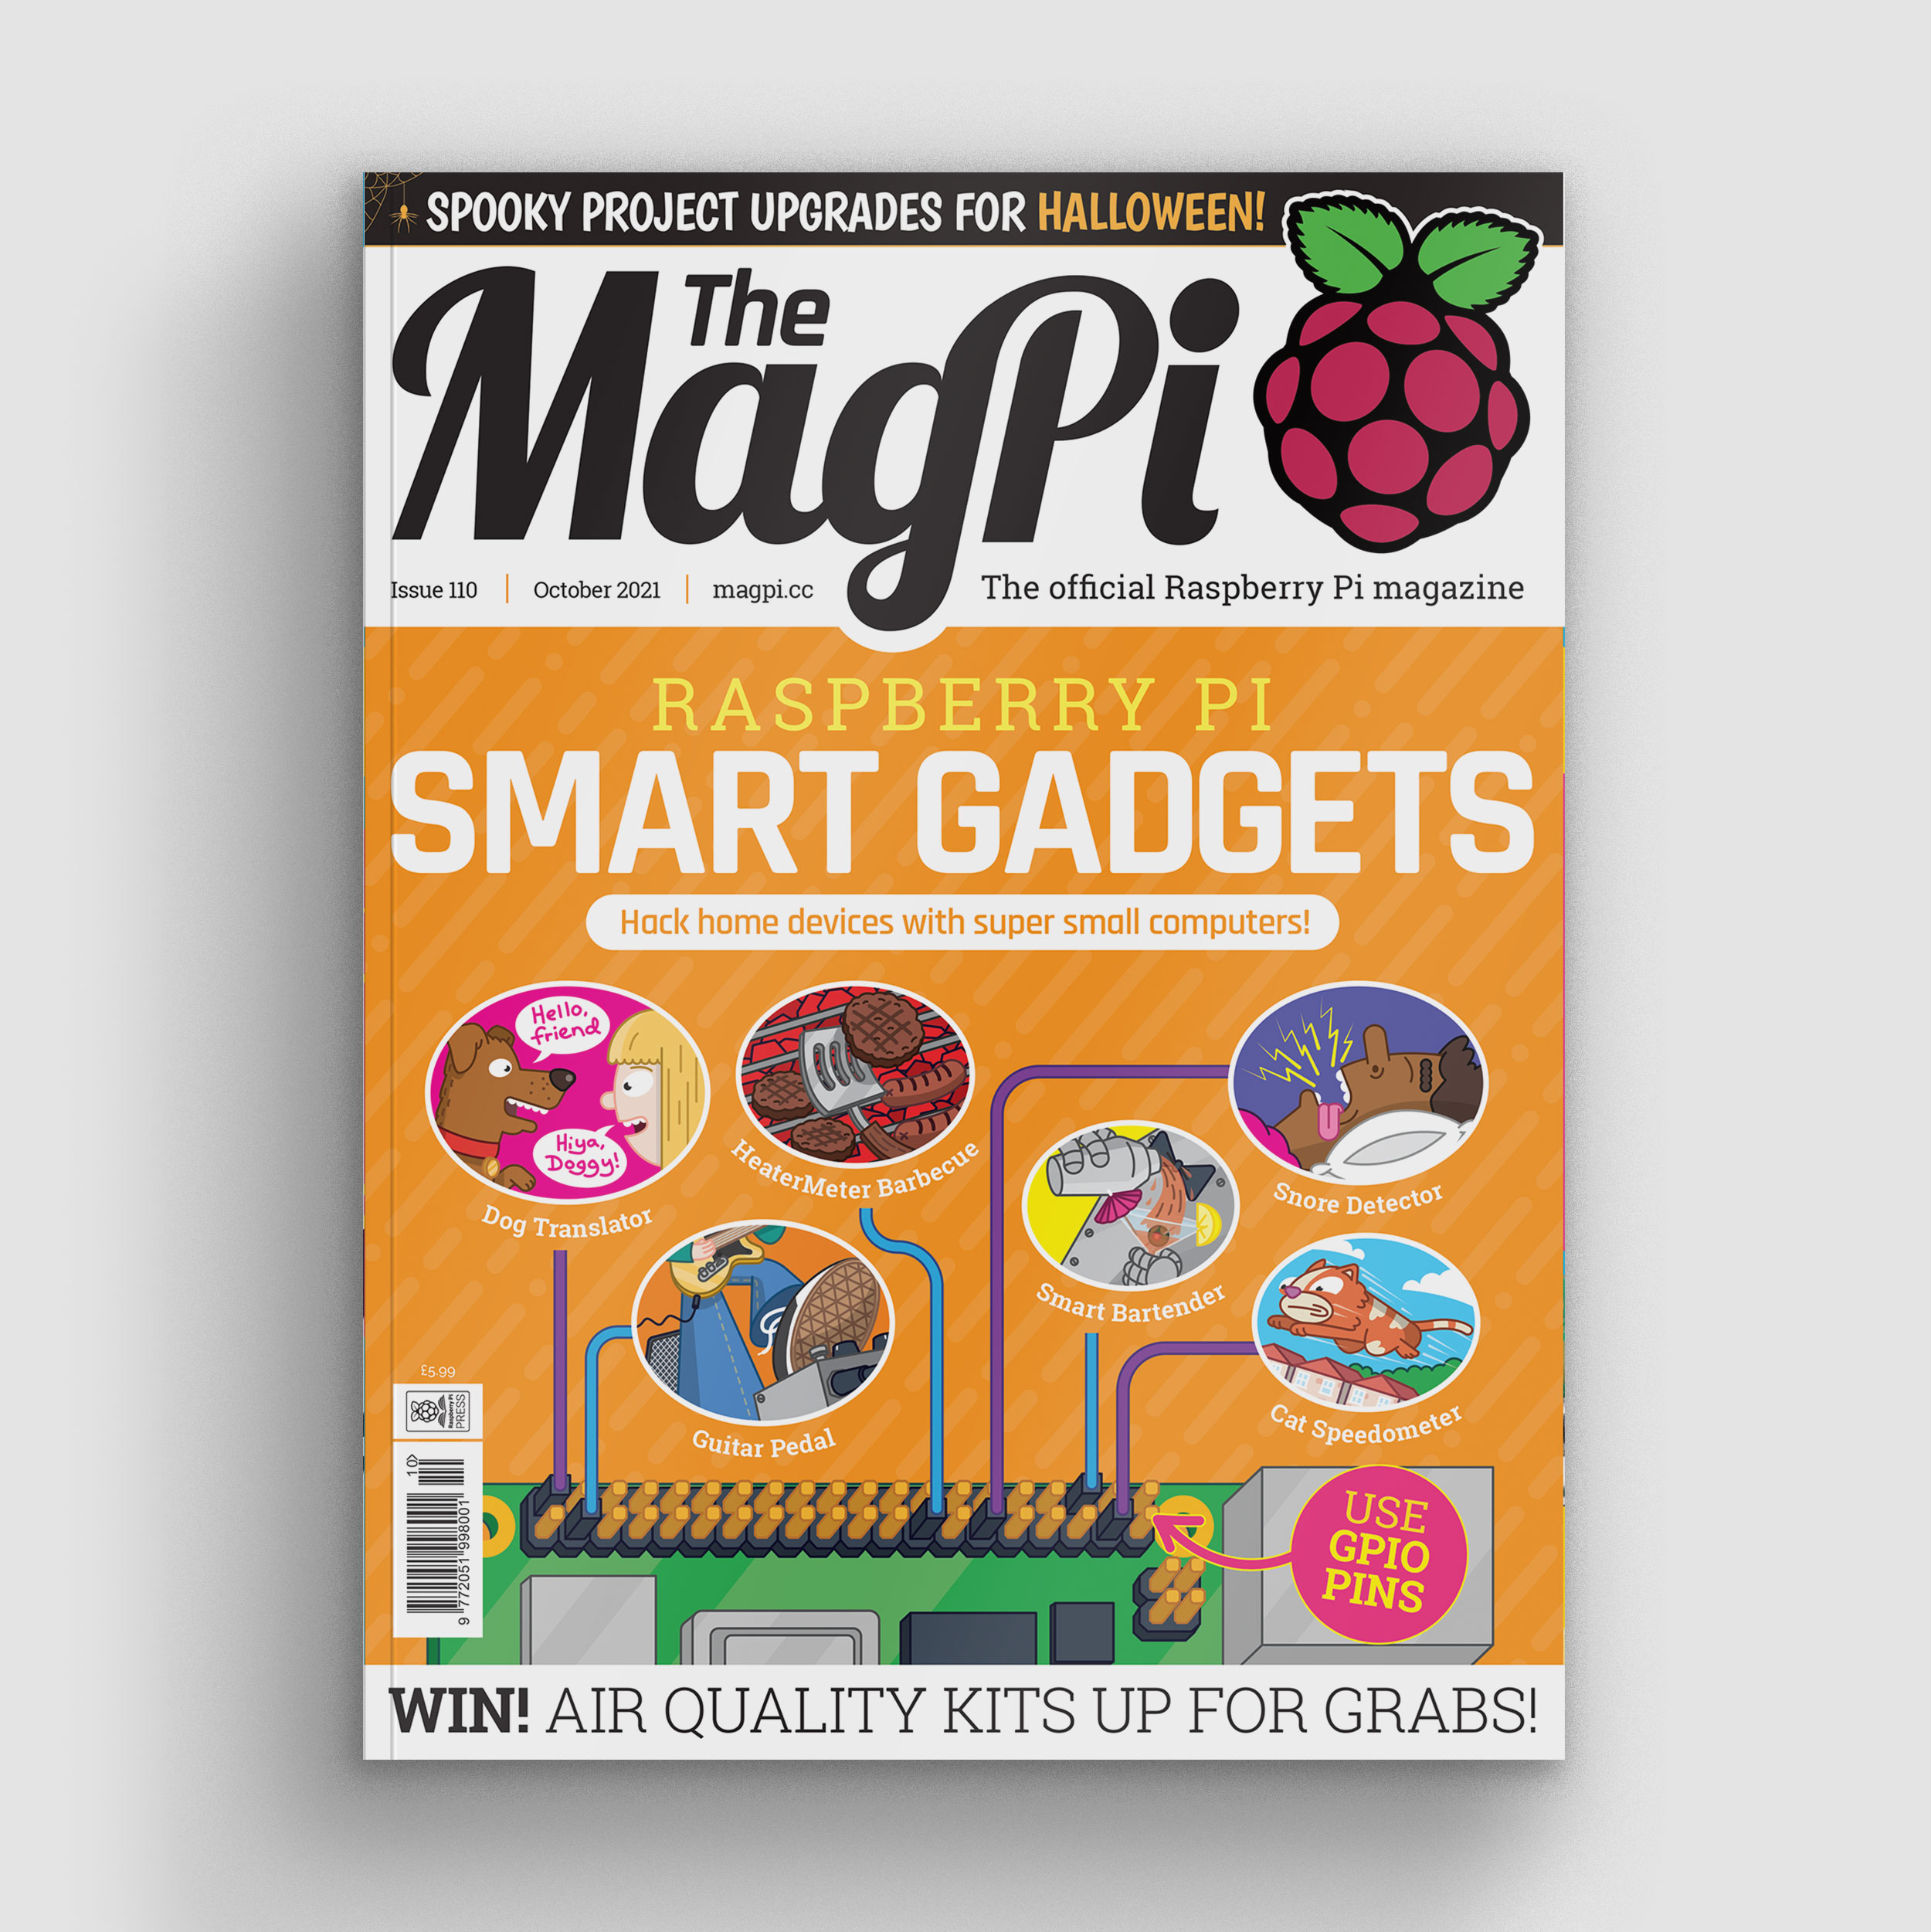
Get The MagPi #110 NOW!
You can grab the brand-new issue right now from the Raspberry Pi Press store, or via our app on Android or iOS. You can also pick it up from supermarkets and newsagents. There’s also a free PDF you can download.
Baltic is a handsome 1962 vintage tugboat that was built in Norway, where she operated until the 1980s. She’s now in English waters, having been registered in Southampton once renovations were complete. After some initial hull restoration work in France she sailed to the western Ligurian coast in Italy, where it took about five years to complete the work. The boat’s original exterior was restored, while the inside was fully refurbished to the standard of a luxury yacht.
You need quite a large crane to do this
But where is the Raspberry Pi?
Ulderico Arcidiaco, who coordinated the digital side of Baltic’s makeover, is the CEO of Sfera Labs, so naturally he turned to Raspberry Pi Compute Module 3+ in the guise of Sfera’s Strato Pi CM Duo for the new digital captain of the vessel.
Strato Pi CM Duo is an industrial server comprising a Raspberry Pi Compute Module 3+ inside a DIN-rail case with a slew of additional features. The MagPi magazine took a good look at them when they launched.
Beats the view from our windows
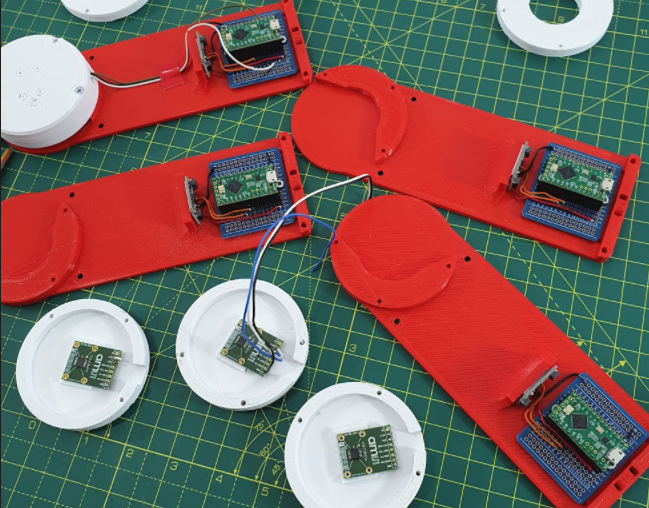
The Strato Pi units are the four with red front panels in the cabinet pictured below. There are four other Raspberry Pi Compute Modules elsewhere onboard. Two are identical to the Strato Pi CM Duos in this photo; another is inside an Iono Pi Max; and there’s a Compute Module 4 inside an Exo Sense Pi down in the galley.
No spaghetti here
Thoroughly modern makeover
Baltic now has fully integrated control of all core and supplementary functions, from power distribution to tanks and pump control, navigation, alarms, fire, lighting, stabilisers, chargers, inverters, battery banks, and video. All powered by Raspberry Pi.
What a beauty
Ulderico says:
“When it was built sixty years ago, not even the wildest science fiction visionary could have imagined she would one day be fully computer controlled, and not by expensive dedicated computer hardware, but by a tiny and inexpensive device that any kid can easily buy and play with to have fun learning.
And, if there is some old-fashioned patriotism in things, the Raspberry Pi on board will surely like the idea of being back under their home British Flag.”
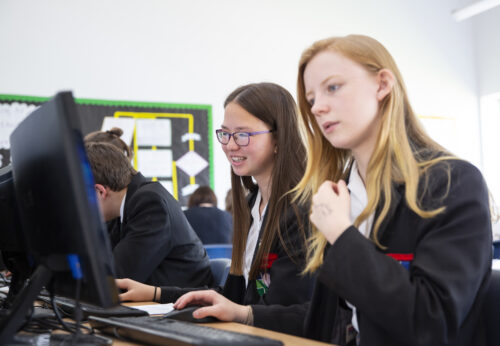
So far in our series of community stories, we’ve collaborated with young people from the UK, India, and Romania who are getting creative with technology to change the world around them.
Our next community story comes from a highly regarded community member who has been connecting young people with opportunities to learn and create with technology throughout her career. A US-based educator with over twenty years of experience, Yolanda Payne shares our mission to put computing and digital making into the hands of people all over the world.
“The biggest reason I’m so invested in technology is because people invested in me.”
Yolanda Payne
Meet Yolanda
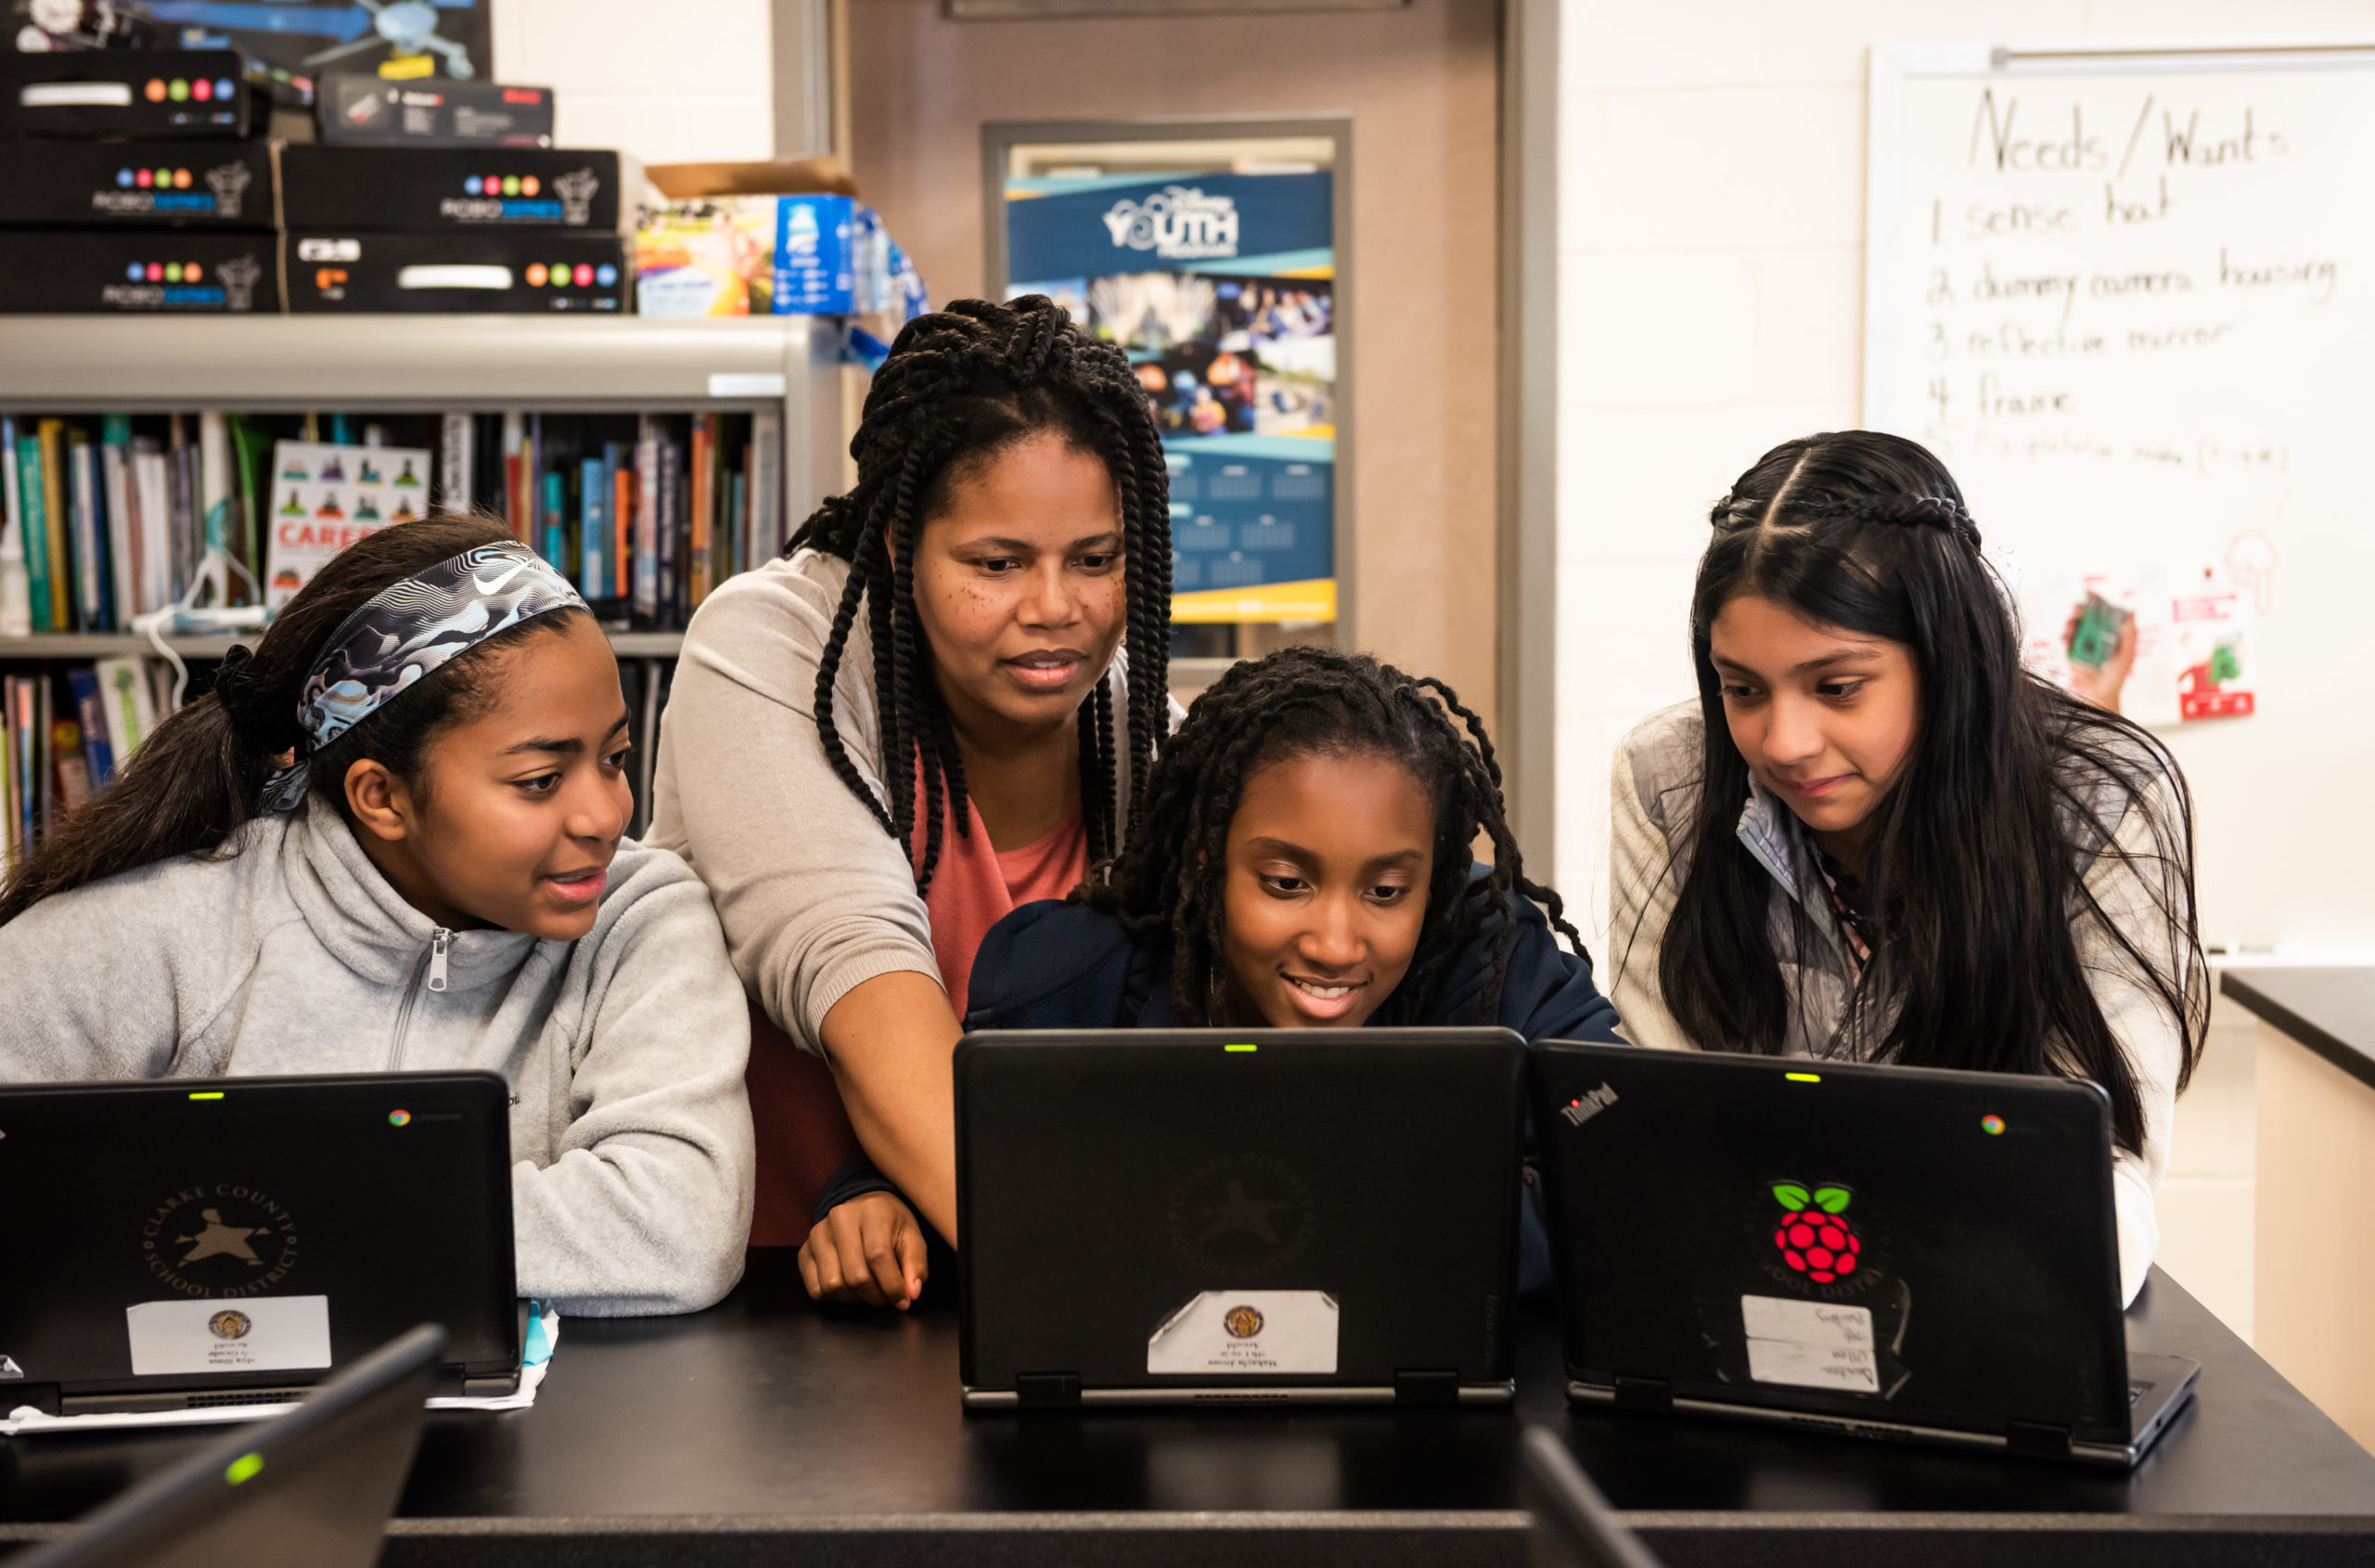
Yolanda Payne is an educator you might recognise from our online courses. Based in Atlanta, Georgia in the USA, she’s passionate about making technology accessible to all and helping young people become technology creators.
Join us in celebrating Yolanda by sharing her story on Twitter, LinkedIn, and Facebook!
Yolanda says, “The biggest reason I’m so invested in technology is because people invested in me. They saw something that I was good at, showed me opportunities, and so in turn, that was my philosophy in teaching.”
Yolanda got her first computer at a young age and was hooked instantly: it opened up many new opportunities and led her to choosing a career in education. She says, “The computer gives me the tools to be an artist, it gives me the tools to create things, and if it does that for me, then just imagine what it will do for kids!”
“If you give a teacher a Raspberry Pi and show them these resources, they’re going to be hooked.”
Yolanda Payne
Yolanda has spent her entire professional life dedicated to education. She gained a bachelor’s degree in Elementary Education from Mississippi University for Women; a master’s degree in Instructional Technology from Mississippi State University; and Educational Specialist degrees from the University of Florida and the University of Georgia in Curriculum and Instruction, and in Language and Literacy.
Throughout her twenty-one years as a classroom teacher and her time running Code Clubs, Yolanda found joy in supporting students who have multiple challenges or complex needs, and in seeing them thrive in the subject of computer science. Yolanda points out, “I worked with both students that were considered to be in special education and students that were gifted. And one of the biggest things that I saw that I don’t think people realise, especially about students in special education: they are used to solving problems. […] You’d be very surprised at how real-life problem-solving skills flow very easily into computer science.”
Yolanda now works as a Research Associate at the Georgia Institute of Technology. We are tremendously thankful for her contributions as an educator and an advocate for technology and young people.
Please join us in celebrating her story by sharing it on Twitter, LinkedIn, and Facebook!
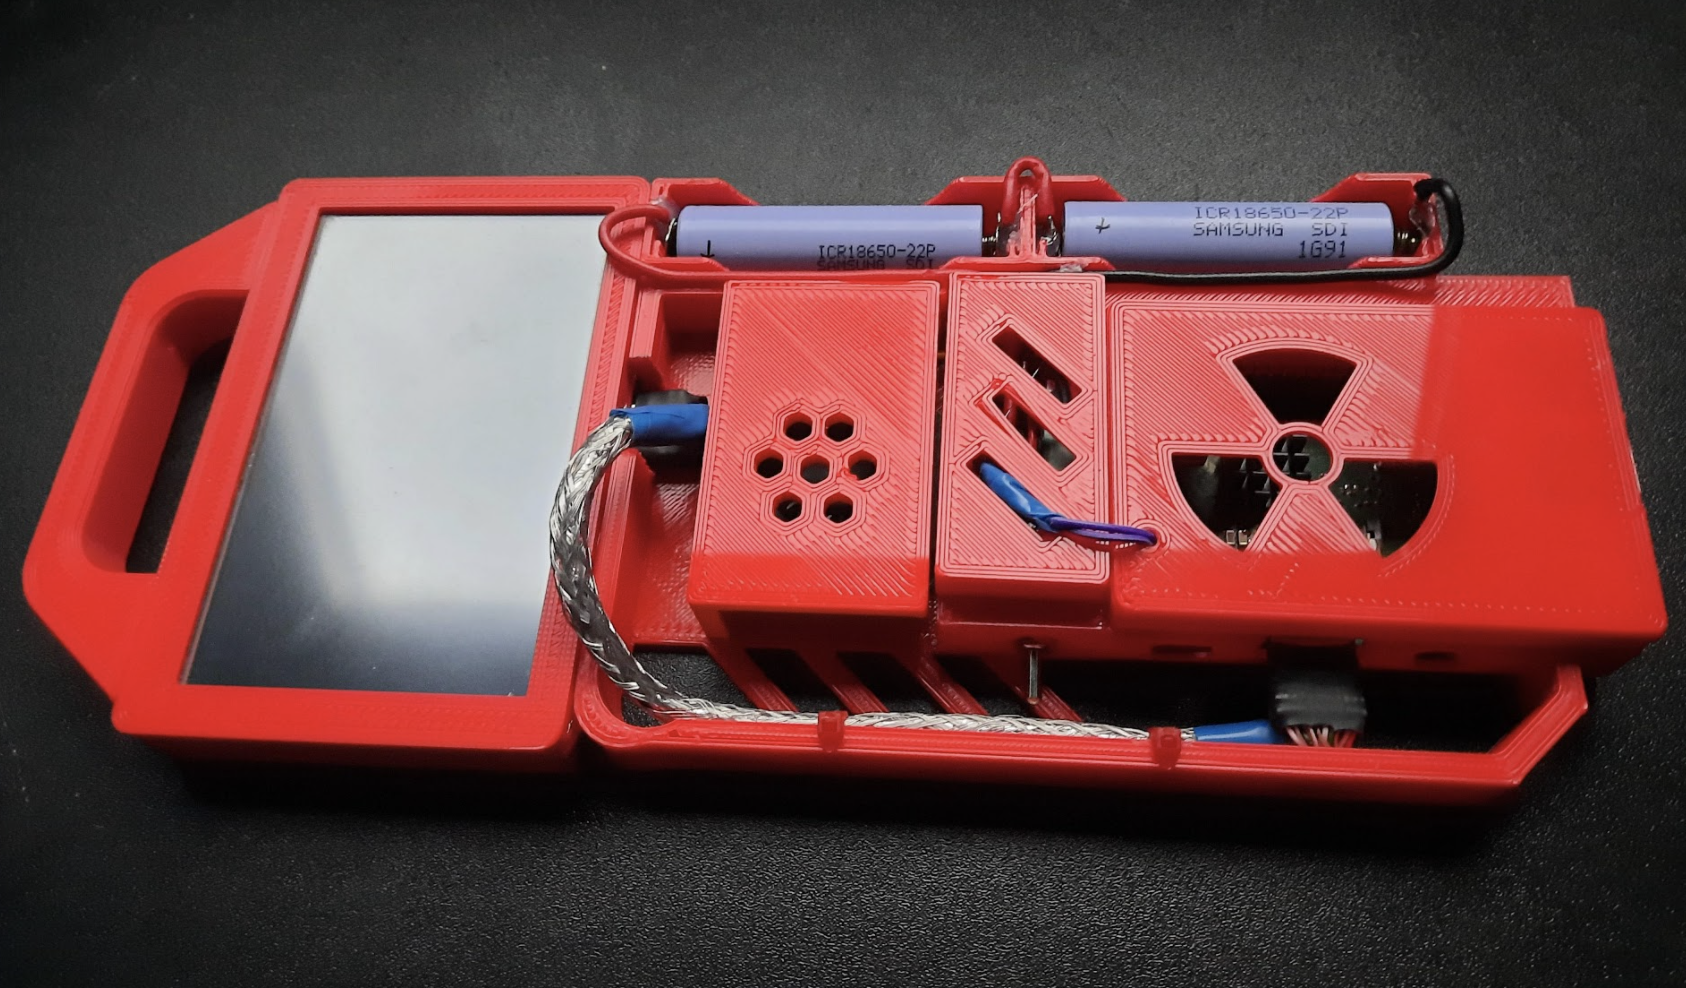
The Sky Vane provides the soundtrack to an immersive sky-driven experience. Just lie down on the grass, gaze up at the sky, and listen to the changing soundscape through the day.
The structure is impressive, but it’s everything inside that little “shroom pod” at the bottom that powers this build
A Raspberry Pi powers the arresting structure in the middle of the circle of comfy skygazing mats in the photo above, and is connected to an array of atmospheric sensors. These sensors detect changes in light, temperature, pressure, and humidity. Then they send real-time data to the Raspberry Pi computer in order to create a dynamic soundtrack.
The Sky Vane’s creators produced a carefully written soundtrack for the experience. Raspberry Pi triggers changes to the number of musical layers, sequences, audio effects processing, and so on, based on the information the sensors read. That’s the “dynamic” bit. A huge gust of wind, for example, leads to a different musical change than the setting sun.
A portable Minirig sound system generates a seriously high-fidelity audio experience that can be heard clearly within a 25-metre radius of The Sky Vane.
Everything hides underneath the dome-shaped “shroom pod”, which in turn sits beneath the big sculpture
Inspiration behind the installation
The Sky Vane is the latest installation from pyka, a collective of experienced designers who create digital artefacts that enable you to explore the world of sound. Commissioned by Tin Shed Theatre Company and Our Living Levels, The Sky Vane’s big debut was at the Big Skies 2021 event in south Wales.
When they were planning this installation, the creators at pyka weren’t sure how it would go down in a post-pandemic world. They’re used to building things that bring people together, but they were mindful of people’s anxiety around shared public activities. This led to a design that promotes quiet contemplation and mindfulness whilst enjoying the freedom of the outdoors. We think it’s lovely.
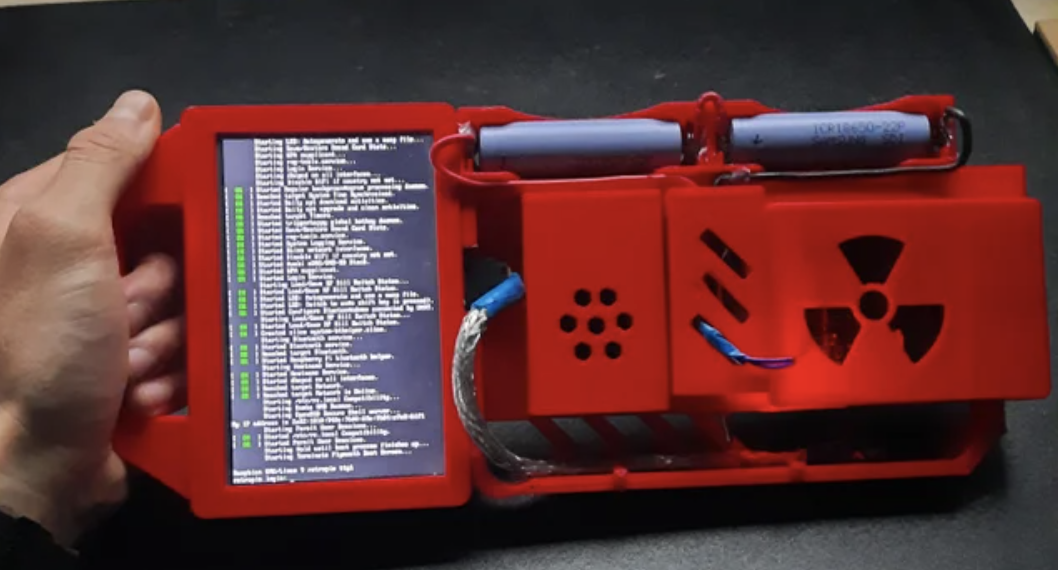
You know we love a good cyberdeck around here, and we think you’ll love this video game emulator fresh from the latest issue of HackSpace magazine, out now.
We’ve only just finished printing a series on building a games cabinet using the RetroPie games emulator on a Raspberry Pi… and now something comes along that makes our plywood, full-size arcade machine look old hat.
This mostly 3D-printed cyberdeck features a 5-inch 800 × 480 touchscreen display, as well as the usual ports available through the Raspberry Pi 3 Model B+ that powers it. Quite how useful the screen’s portrait orientation will be for Sonic The Hedgehog is anyone’s guess, but if you’re playing any sort of top-down shooter, you’re laughing. The maker describes this project as a “video game emulator with some edge” – we think it’s pretty impressive for a project that began as an excuse to learn 3D design.
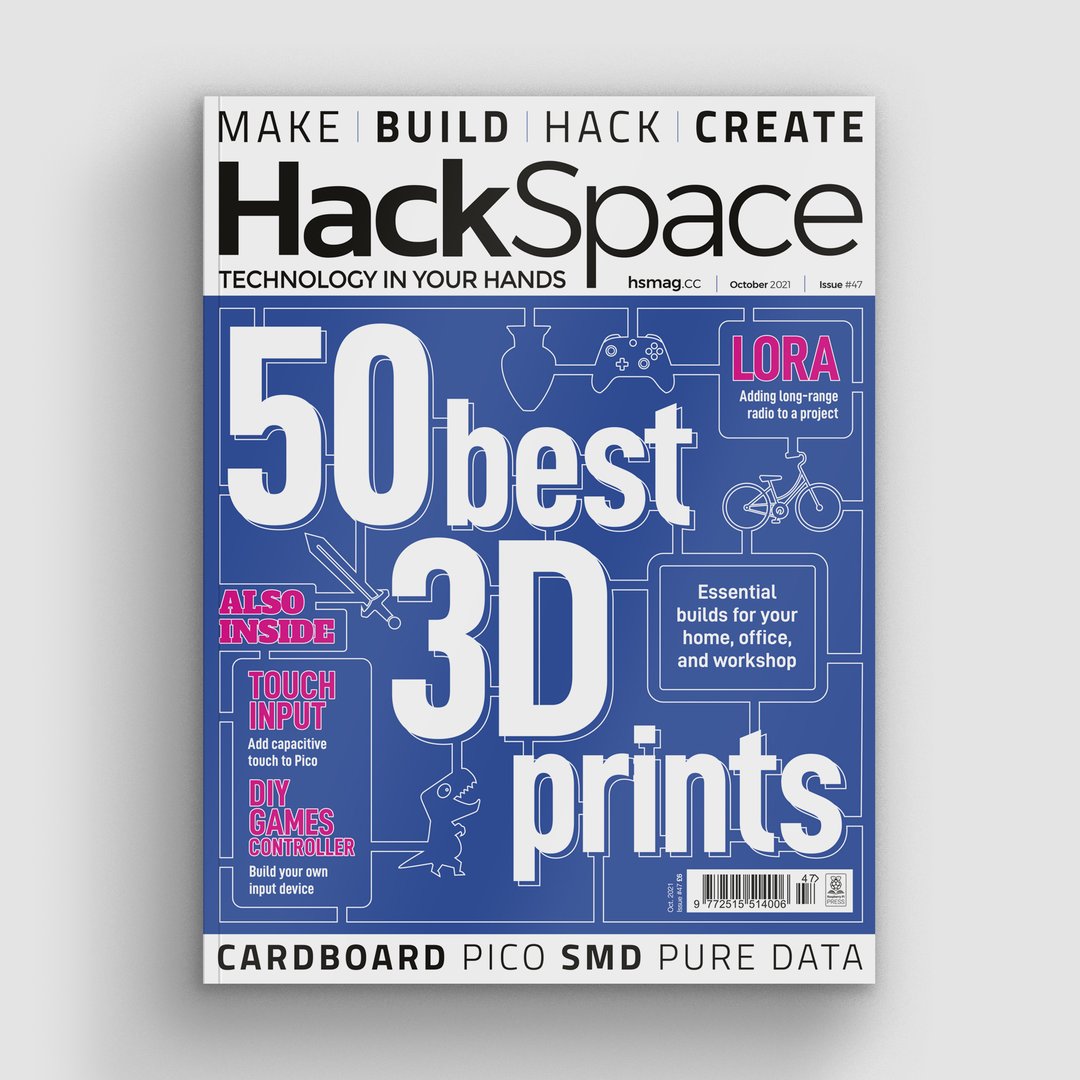
HackSpace magazine issue 47 out NOW!
Each month, HackSpace magazine brings you the best projects, tips, tricks and tutorials from the makersphere. You can get it from the Raspberry Pi Press online store or your local newsagents.
As always, every issue is free to download in PDF format from the HackSpace magazine website.
Get the Official Raspberry Pi Handbook 2022 right now!Over 200 pages of Raspberry Pi projects, tutorials, tips, and reviews.
Hey folks, Rob from The MagPi here. It’s been a while! I hope you’re doing well.
We’ve been on double duty this month. As well as making an amazing new issue of The MagPi (out next week), we’ve also put together a brand new book: the Official Raspberry Pi Handbook 2022, which is on sale now!
Packed with projects
The new Handbook is crammed full of incredible community projects, some of our best build guides, an introduction to Raspberry Pi Pico, and reviews of cool Raspberry Pi kits and accessories – all stuffed into 200 pages. Here are some highlights from the book:
Lunchbox Arcade Game – make lunchtime far more exciting by busting out some Street Fighter II and having someone eat your hadoukens. Make sure to eat between rounds for maximum satisfaction.
We Still Fax – one part escape room, one part performance theatre, this relic of office technology has been hacked with a Raspberry Pi to be the centrepiece of a special show in your own living room.
iPod Classic Spotify Player – using a Raspberry Pi Zero W, this old-school iPod has been upgraded with Spotify access. The interface has even been recreated to work the same way as the old iPod, scroll wheel and all.
Play classic console games legally on Raspberry Pi – there are a surprising number of ways to get legal ROMs for Raspberry Pi-powered consoles, as well as a plethora of modern games made for the older hardware.
Build the ultimate media centre – get TV, movies, games, streaming, music, and more on one incredible Raspberry Pi build. It looks good too, thanks to the excellent case.
Stellina – this automated telescope is powered by Raspberry Pi and connects to a tablet to look at planets and other distant celestial objects.
… And much, much more!
Where can I buy it?
You can grab the Official Raspberry Pi Handbook 2022 from our online store, from our Android and iOS app, and in the real world at some newsagents. It will make an excellent stocking stuffer in a few months time. You can also get the PDF free from our website.
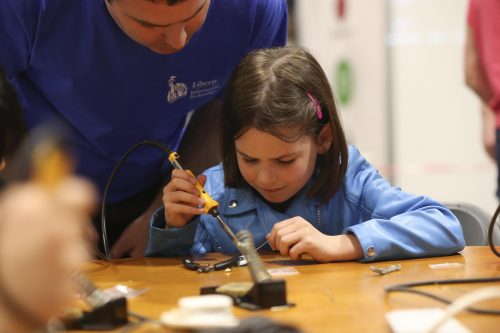
Our mission at the Raspberry Pi Foundation is to help learners get creative with technology and develop the skills and confidence they need to make things that matter to them using code and physical computing. One of the ways in which we do this is by offering learners a catalogue of more than 250 free digital making projects! Some of them have been translated into 30 languages, and they can be used with or without a Raspberry Pi computer.
Over the last 18 months, we’ve been developing an all-new format for these educational projects, designed to better support young people who want to learn coding, whether at home or in a coding club, on their digital making journey.
Our new free learning content for young people who want to create with technology has a 3-2-1 structure (click the image to enlarge)
Supporting learners to become independent tech creators
In the design process of the new project format, we combined:
Leading research
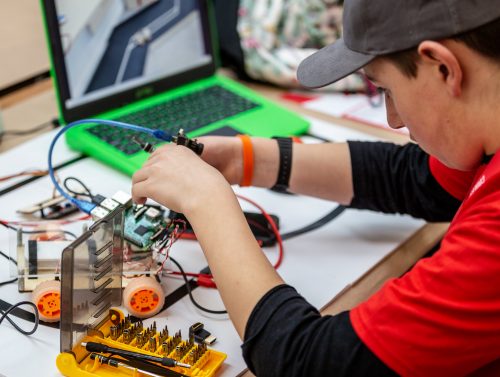
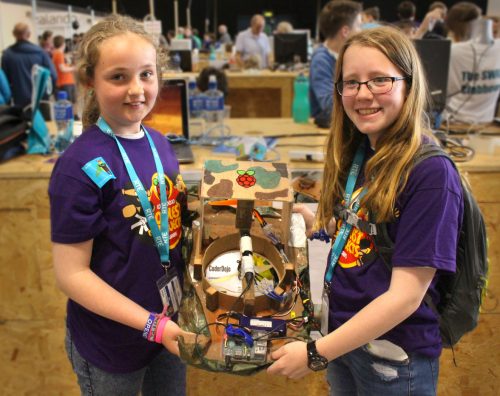
Experience of what works in Code Clubs, CoderDojos, and other Raspberry Pi programmes
Feedback from the community
While designing the new format for our free projects, we found that, as well as support and opportunities to practise while acquiring new skills and knowledge, learners need a learning journey that lets them gradually develop and demonstrate increasing independence.
Therefore, each of our new learning paths is designed to scaffold learners’ success in the early stages, and then lets them build upon this learning by providing them with more open-ended tasks and inspirational ideas that learners can adapt or work from. Each learning path is made up of six projects, and the projects become less structured as learners progress along the path. This allows learners to practise their newly acquired skills and use their creativity and interests to make projects that matter to them. In this way, learners develop more and more independence, and when they reach the final project in the path, they are presented with a simple project brief. By this time they have the skills, practice, and confidence to meet this brief any way they choose!
The new content structure
When a learner is ready to develop a new set of coding skills, they choose one of our new paths to embark on. Each path is made up of three different types of projects in a 3-2-1 structure:
The first three Explore projects introduce learners to a set of skills and knowledge, and provide step-by-step instructions to help learners develop initial confidence. Throughout these projects, learners have lots of opportunity to personalise and tinker with what they’re creating.
The next two Design projects are opportunities for learners to practise the skills they learned in the previous Explore projects, and to express themselves creatively. Learners are guided through creating their own version of a type of project (such as a musical instrument, an interactive pet, or a website to support a local event), and they are given code examples to choose, combine, and customise. No new skills are introduced in these projects, so that learners can focus on practising and on designing and creating a project based on their own preferences and interests.
In the final one Invent project, learners focus on completing a project to meet a project brief for a particular audience. The project brief is written so that they can meet it using the skills they’ve learned by following the path up to this point. Learners are provided with reference material, but are free to decide which skills to use. They need to plan their project and decide on the order to carry out tasks.
As a result of working through a path, learners are empowered to make their own ideas and create solutions to situations they or their communities face, with increased independence. And in order to develop more skills, learners can work through more paths, giving them even more choice about what they create in the future.
More features for an augmented learning experience
We’ve also introduced some new features to add interactivity, choice, and authenticity to each project in a path:
Real-world info box-outs provide interesting and relevant facts about the skills and knowledge being taught.
Design decision points allow learners to make choices about how their project looks and what it does, based on their preferences and interests.
Debugging tips throughout each project give learners guidance for finding and fixing common coding mistakes.
Project reflection steps solidify new knowledge and provide opportunities for mastery by letting learners revisit the important learnings from the project. Common misconceptions are highlighted, and learners are guided to the correct answer.
At the start of each project, learners can interact with example creations from the community, and at the end of a project, they are encouraged to share what they’ve made. Thus, learners can find inspiration in the creations of their peers and receive constructive feedback on their own projects.
An open-ended upgrade step at the end of each project offers inspiration for young people to give them ideas for ways in which they could continue to improve upon their project in the future.
Access the new free learning content now
You can discover our new paths on our projects site right now!
You sit down with your six-string, ready to bash out that new song you recently mastered, but find you’re out of tune. Redditor u/thataintthis (Guyrandy Jean-Gilles) has taken the pain out of tuning your guitar, so those of us lacking this necessary skill can skip the boring bit and get back to playing.
Before you dismiss this project as just a Raspberry Pi Pico-powered guitar tuning box, read on, because when the maker said this is a fully automatic tuner, they meant it.
How does it work?
Guyrandy’s device listens to the sound of a string being plucked and decides which note it needs to be tuned to. Then it automatically turns the tuning keys on the guitar’s headstock just the right amount until it achieves the correct note.
Genius.
If this were a regular tuning box, it would be up to the musician to fiddle with the tuning keys while twanging the string until they hit a note that matches the one being made by the tuning box.
It’s currently hardcoded to do standard tuning, but it could be tweaked to do things like Drop D tuning.
Waiting for that green light
Upgrade suggestions
Commenters were quick to share great ideas to make this build even better. Issues of harmonics were raised, and possible new algorithms to get around it were shared. Another commenter noticed the maker wrote their own code in C and suggested making use of the existing ulab FFT in MicroPython. And a final great idea was training the Raspberry Pi Pico to accept the guitar’s audio output as input and analyse the note that way, rather than using a microphone, which has a less clear sound quality.
These upgrades seemed to pique the maker’s interest. So maybe watch this space for a v2.0 of this project…
Shred, Otto, shred
(Watch out for some spicy language in the comments section of the original reddit post. People got pretty lively when articulating their love for this build.)
Inspiration
This project was inspired by the Roadie automatic tuning device. Roadie is sleek but it costs big cash money. And it strips you of the hours of tinkering fun you get from making your own version.
Between September 2021 and March 2022, we’re partnering with The Alan Turing Institute to host speakers from the UK, Finland, Germany, and the USA presenting a series of free research seminars about AI and data science education for young people. These rapidly developing technologies have a huge and growing impact on our lives, so it’s important for young people to understand them both from a technical and a societal perspective, and for educators to learn how to best support them to gain this understanding.
In our first seminar we were beyond delighted to hear from Dr Mhairi Aitken, Ethics Fellow at The Alan Turing Institute. Mhairi is a sociologist whose research examines social and ethical dimensions of digital innovation, particularly relating to uses of data and AI. You can catch up on her full presentation and the Q&A with her in the video below.
Why we need AI ethics
The increased use of AI in society and industry is bringing some amazing benefits. In healthcare for example, AI can facilitate early diagnosis of life-threatening conditions and provide more accurate surgery through robotics. AI technology is also already being used in housing, financial services, social services, retail, and marketing. Concerns have been raised about the ethical implications of some aspects of these technologies, and Mhairi gave examples of a number of controversies to introduce us to the topic.
“Ethics considers not what we can do but rather what we should do — and what we should not do.”
Mhairi Aitken
One such controversy in England took place during the coronavirus pandemic, when an AI system was used to make decisions about school grades awarded to students. The system’s algorithm drew on grades awarded in previous years to other students of a school to upgrade or downgrade grades given by teachers; this was seen as deeply unfair and raised public consciousness of the real-life impact that AI decision-making systems can have.
An AI system was used in England last year to make decisions about school grades awarded to students — this was seen as deeply unfair.
Another high-profile controversy was caused by biased machine learning-based facial recognition systems and explored in Shalini Kantayya’s documentary Coded Bias. Such facial recognition systems have been shown to be much better at recognising a white male face than a black female one, demonstrating the inequitable impact of the technology.
What should AI be used for?
There is a clear need to consider both the positive and negative impacts of AI in society. Mhairi stressed that using AI effectively and ethically is not just about mitigating negative impacts but also about maximising benefits. She told us that bringing ethics into the discussion means that we start to move on from what AI applications can do to what they should and should not do. To outline how ethics can be applied to AI, Mhairi first outlined four key ethical principles:
Beneficence (do good)
Nonmaleficence (do no harm)
Autonomy
Justice
Mhairi shared a number of concrete questions that ethics raise about new technologies including AI:
How do we ensure the benefits of new technologies are experienced equitably across society?
Do AI systems lead to discriminatory practices and outcomes?
Do new forms of data collection and monitoring threaten individuals’ privacy?
Do new forms of monitoring lead to a Big Brother society?
To what extent are individuals in control of the ways they interact with AI technologies or how these technologies impact their lives?
How can we protect against unjust outcomes, ensuring AI technologies do not exacerbate existing inequalities or reinforce prejudices?
How do we ensure diverse perspectives and interests are reflected in the design, development, and deployment of AI systems?
Who gets to inform AI systems? The kangaroo metaphor
To mitigate negative impacts and maximise benefits of an AI system in practice, it’s crucial to consider the context in which the system is developed and used. Mhairi illustrated this point using the story of an autonomous vehicle, a self-driving car, developed in Sweden in 2017. It had been thoroughly safety-tested in the country, including tests of its ability to recognise wild animals that may cross its path, for example elk and moose. However, when the car was used in Australia, it was not able to recognise kangaroos that hopped into the road! Because the system had not been tested with kangaroos during its development, it did not know what they were. As a result, the self-driving car’s safety and reliability significantly decreased when it was taken out of the context in which it had been developed, jeopardising people and kangaroos.
Mitigating negative impacts and maximising benefits of AI systems requires actively involving the perspectives of groups that may be affected by the system — ‘kangoroos’ in Mhairi’s metaphor.
Mhairi used the kangaroo example as a metaphor to illustrate ethical issues around AI: the creators of an AI system make certain assumptions about what an AI system needs to know and how it needs to operate; these assumptions always reflect the positions, perspectives, and biases of the people and organisations that develop and train the system. Therefore, AI creators need to include metaphorical ‘kangaroos’ in the design and development of an AI system to ensure that their perspectives inform the system. Mhairi highlighted children as an important group of ‘kangaroos’.
AI in children’s lives
AI may have far-reaching consequences in children’s lives, where it’s being used for decision-making around access to resources and support. Mhairi explained the impact that AI systems are already having on young people’s lives through these systems’ deployment in children’s education, in apps that children use, and in children’s lives as consumers.
AI systems are already having an impact on children’s lives.
Children can be taught not only that AI impacts their lives, but also that it can get things wrong and that it reflects human interests and biases. However, Mhairi was keen to emphasise that we need to find out what children know and want to know before we make assumptions about what they should be taught. Moreover, engaging children in discussions about AI is not only about them learning about AI, it’s also about ethical practice: what can people making decisions about AI learn from children by listening to their views and perspectives?
AI research that listens to children
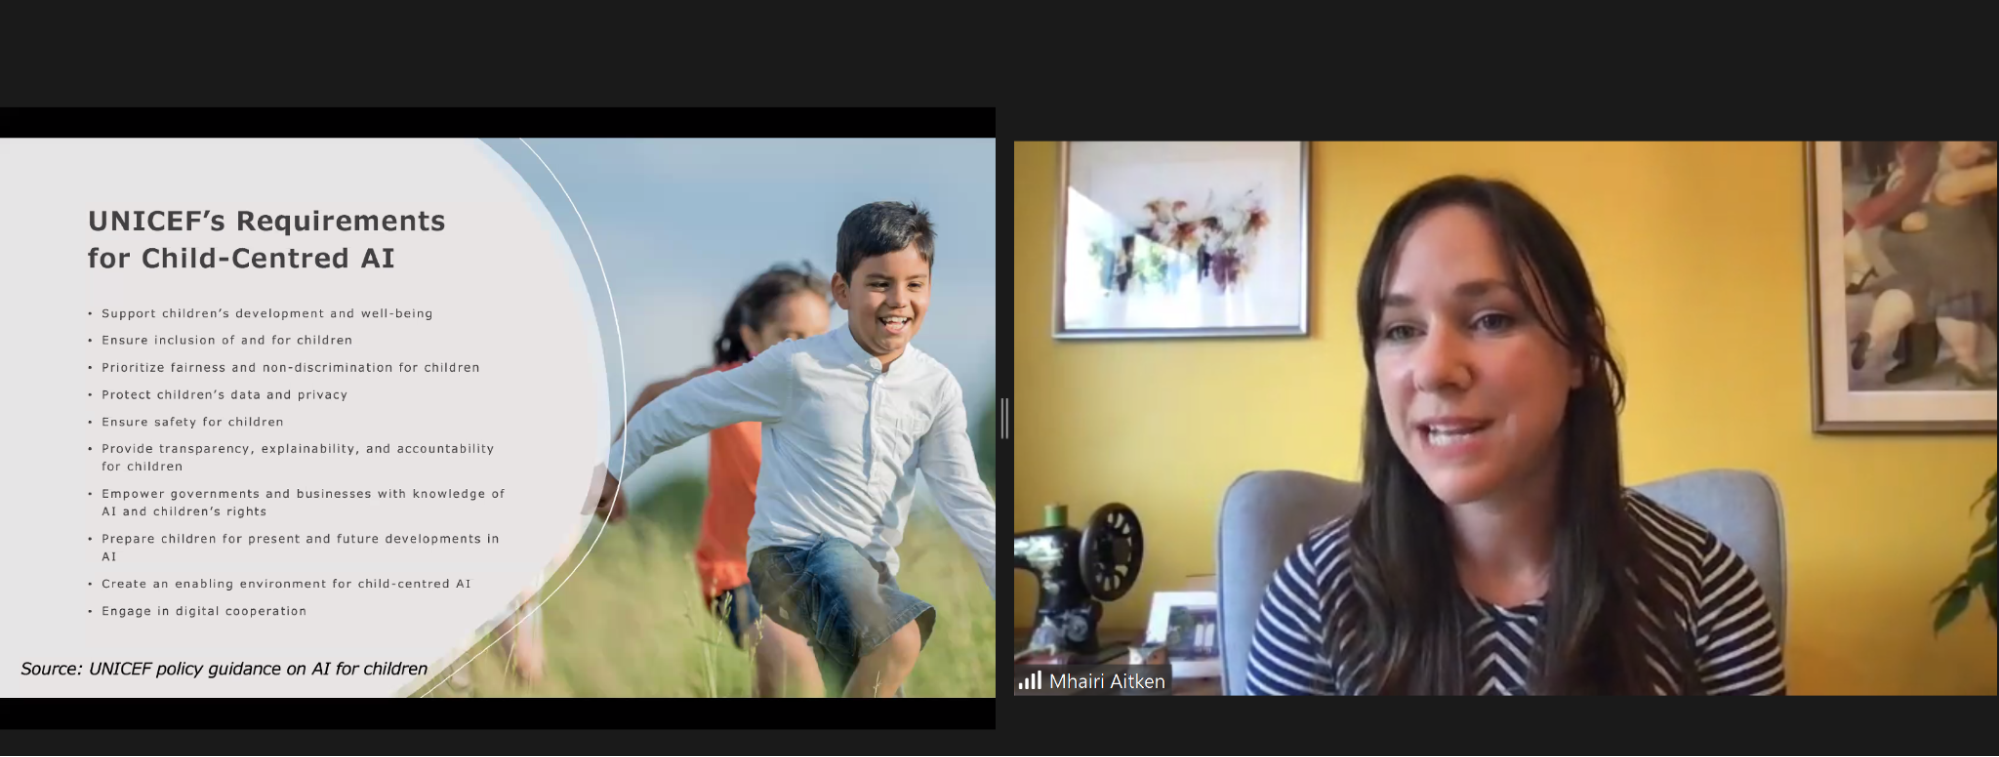
UNICEF, the United Nations Children’s Fund, has expressed concerns about the impact of new AI technologies used on children and young people. They have developed the UNICEF Requirements for Child-Centred AI.
UNICEF’s requirements for child-centred AI, as presented by Mhairi. Click to enlarge.
Together with UNICEF, Mhairi and her colleagues working on the Ethics Theme in the Public Policy Programme at The Alan Turing Institute are engaged in new research to pilot UNICEF’s Child-Centred Requirements for AI, and to examine how these impact public sector uses of AI. A key aspect of this research is to hear from children themselves and to develop approaches to engage children to inform future ethical practices relating to AI in the public sector. The researchers hope to find out how we can best engage children and ensure that their voices are at the heart of the discussion about AI and ethics.
We all learned a tremendous amount from Mhairi and her work on this important topic. After her presentation, we had a lively discussion where many of the participants relayed the conversations they had had about AI ethics and shared their own concerns and experiences and many links to resources. The Q&A with Mhairi is included in the video recording.
What we love about our research seminars is that everyone attending can share their thoughts, and as a result we learn so much from attendees as well as from our speakers!
It’s impossible to cover more than a tiny fraction of the seminar here, so I do urge you to take the time to watch the seminar recording. You can also catch up on our previous seminars through our blogs and videos.
Join our next seminar
We have six more seminars in our free series on AI, machine learning, and data science education, taking place every first Tuesday of the month. At our next seminar on Tuesday 5 October at 17:00–18:30 BST / 12:00–13:30 EDT / 9:00–10:30 PDT / 18:00–19:30 CEST, we will welcome Professor Carsten Schulte, Yannik Fleischer, and Lukas Höper from the University of Paderborn, Germany, who will be presenting on the topic of teaching AI and machine learning (ML) from a data-centric perspective (find out more here). Their talk will raise the questions of whether and how AI and ML should be taught differently from other themes in the computer science curriculum at school.
Sign up now and we’ll send you the link to join on the day of the seminar — don’t forget to put the date in your diary.
It’s an incredibly sad day for the British computing industry.
We’re always going to be very grateful to Sir Clive for being one of the founding fathers of the UK home computing boom that helped so many of us at Raspberry Pi get hooked on programming as kids.
He was someone from whom the business behind Raspberry Pi has drawn great inspiration. He’ll be very sadly missed.
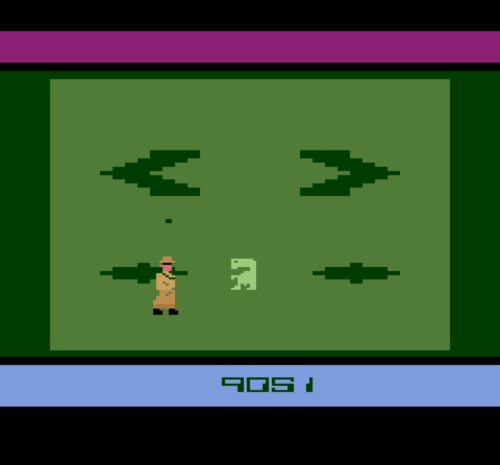
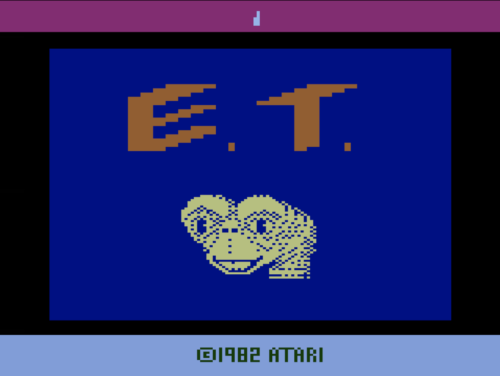
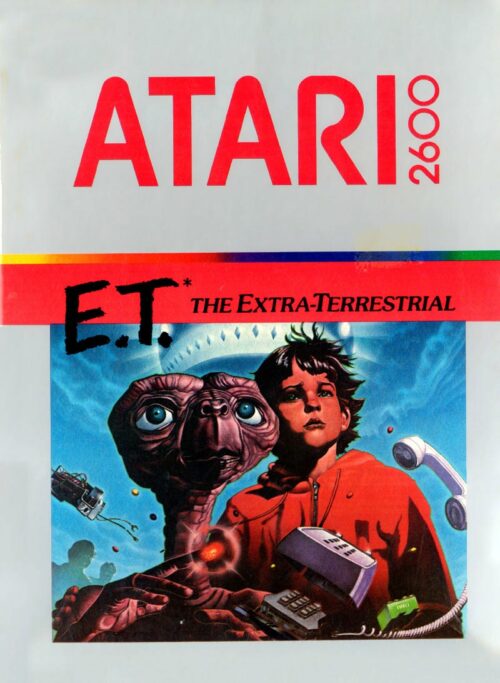
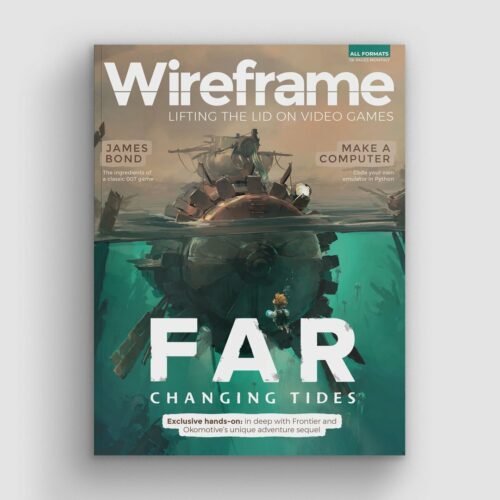
In the latest issue of Wireframe magazine, video game pioneer Howard Scott Warshaw reflects on the calamitous E.T. for the Atari 2600. Could it serve as a useful metaphor for real life?
When Julius Caesar ran into Brutus on the Ides of March so many years ago, it changed his life dramatically. I would say the same thing about my life when I ran into the E.T. project, though in my case, the change wasn’t quite so abrupt… or pointed. People say that my E.T. game was ahead of its time, so much so that it didn’t work for many players in its time. Fair enough. But E.T. is more than that. On many levels, that game has served as a metaphor for life, at least for my life. Let me explain, and perhaps it will sound familiar in yours as well.
There was an aura of promise and anticipation on the advent of the E.T. project – much like the prospect of graduating from college and entering the working world as a computer programming professional. This was super-exciting to me. Once I began the challenge of delivering this game, however, the bloom left the rose (no matter how many times I healed it). Similarly, on my entry into the working world, my excitement was quashed by the unsatisfying nature and demands of typical corporate computing tasks. This is analogous to the experience of E.T. players, having just unwrapped the game. They pop the cartridge in, fire it up, and venture forward with innocent exuberance… only to be crushed by a confusing and unforgiving game world. Perhaps the E.T. game was some sort of unconscious impulse on my part. Was I recreating the disappointment of my first foray into corporate life? Highly unlikely, but the therapist in me just had to ask.
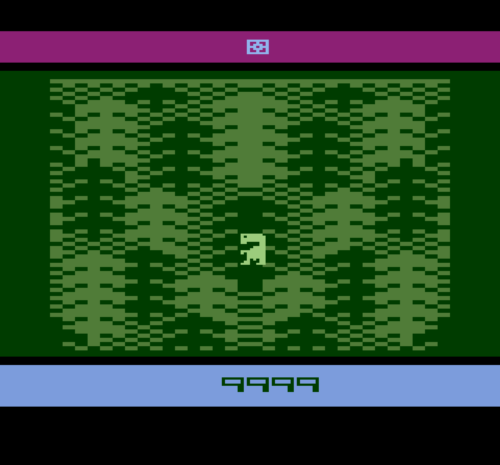
In the E.T. game, I spend a lot of time wandering around and falling into pits. Sometimes I find treasure in those pits. Sometimes I’m just stuck in a pit and I need to dig my way out. That costs energy I could have used on more productive endeavours. There’s also a power-up in the game you can use to find out if there is something worth diving in for. Sadly, there’s no such power-up in life. Figuring out the difference between the treasure and the waste has always been one of my biggest questions, and it’s rarely obvious to me.
One of the treasures you find in the game is the flower. The act of healing it brings benefits and occasional delightful surprises. I was at the bottom of a ‘pit’ in my life when I found the path to becoming a psychotherapist (another act of healing). It helped me climb out and take some big steps toward winning the bigger game.
E.T. is all about the pits, at least it seems so for many who talk about it. And they do so with such derision. Many times I’ve heard the phrase, “E.T. isn’t about the pits. It is the pits!” But are pits really so bad? After all, there are situations in which being stuck in a pit can be an advantage – OK, perhaps not so much in the game. But in life, I find it’s unwise to judge where I am until I see where it takes me. There have been times where major disappointments ended up saving me from a far worse fate had I been granted my original desire. And in more concrete terms, during a hurricane or tornado, there are far worse outcomes than stumbling into a pit. Sometimes when I trip and fall, I wind up dodging a bullet.
Yes, in the game you can wind up wandering aimlessly around, feeling hopeless and without direction (somehow, they didn’t put that on the box). But ultimately, if you persevere (and read the directions), you can create a reasonably satisfying win. After finishing development of the game, there was a long period of waiting before any feedback arrived. Then it came with a vengeance. Of course, that only lasted for decades. My life after Atari seemed a bit of a wasteland for a long time too. Rays of sunlight broke through on occasion, but mostly cloudy skies persisted. Things didn’t improve until I broke free from the world in which I was stuck in order to launch the improbable life I truly wanted.
But it’s not like there were no lingering issues from my E.T. experience. It turns out that ever since the E.T. project, I have a much greater propensity to procrastinate, regularly shorting myself of dev time. I didn’t used to do that before E.T., but I’ve done it quite a bit since. I delay launching a genuine effort, then rush into things and try to do them too quickly. This results in a flurry of motion that doesn’t quite realise the potential of the original concept. More flailing and more failing. It doesn’t mean my idea was poor; it means it was unrefined and didn’t receive sufficient nourishment. On reflection, I see there are both challenges and opportunities at every turn. Pits and treasures. Which of those I emphasise as I move forward is how I construct the life I’m going to have, and I’m doing that all the time.
Pits and treasures, this is much of life. My E.T. game has mostly pits. Truth be known, people like to call them ‘pits’, but I’ve always thought of them as wells: a place to hide, to take repose and to weather out life’s storms. For me, that has been the value of having so many wells. I hope it works for you as well. Try it on. It just might fit like Caesar’s toga. And if it doesn’t, you can say what Brutus said on that fateful day: “At least I took a stab at it.”
Get your copy of Wireframe issue 55
You can read more features like this one in Wireframe issue 54, available directly from Raspberry Pi Press — we deliver worldwide.
And if you’d like a handy digital version of the magazine, you can also download issue 54 for free in PDF format.
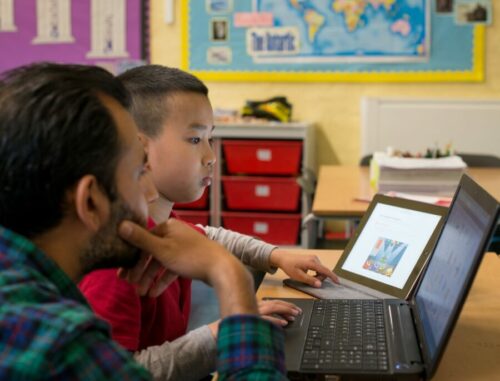
Today we’re announcing two brand-new, fantastic, free online courses for educators in the USA. And to kickstart their learning journey, we are giving qualified US-based educators the chance to get a free Raspberry Pi Pico microcontroller hardware kit. This is all thanks to our partners at Infosys Foundation USA, who are committed to expanding access to computer science and maker education in public schools across the United States.
Bring computer science to your students with the help of our new free online courses.
You can find both new courses on the Pathfinders Online Institute platform, which supports US classroom educators to bring high-quality computer science and maker education content to their kindergarten through 12th grade students. And best of all, the platform is completely free!
Learn how to teach the essentials of programming
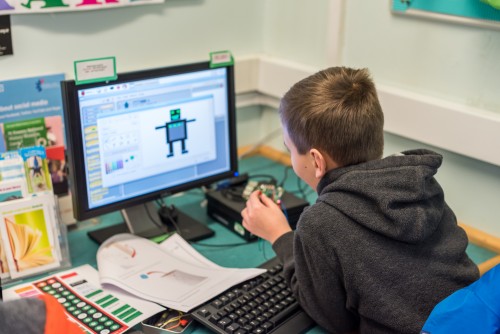
The first course we’ve created for you is called Programming essentials in Scratch. It supports teachers to introduce the essentials of programming to fourth to eighth grade students. The course covers the key concepts of programming, such as variables, selection, and iteration. In addition to learning how to teach programming effectively, teachers will also discover how to inspire their students and help them create music, interactive quizzes, dance animations, and more.
Scratch is a block-based programming language and ideal for teaching key programming concepts.
Discover how to teach physical computing
Our second new course for you is called Design, build, and code a rover with Raspberry Pi Pico. It gives teachers of fourth to eighth grade students everything they need to start teaching physical computing in their classroom. Teachers will develop their students’ knowledge of the subject by using basic circuits, coding a Raspberry Pi Pico microcontroller to work with motors and LEDs, and designing algorithms to navigate a rover through a maze. By the end of the course, teachers will have all the resources they need to inspire students and help them explore practical programming, system design, and prototyping.
Take our free course to learn how to build and code a rover with your students.
Get one of 1,000 free hardware kits
And thanks to the generous support of Infosys Foundation USA, we’re able to provide qualified educators with a FREE kit of materials to participate in the Design, build, and code a rover with Raspberry Pi Pico course. We’re especially excited about this because the kit includes our first-ever microcontroller, Raspberry Pi Pico. This offer is available to 1,000 US-based K–12 public or charter school teachers on a first-come, first-served basis.
To claim your kit, just create a free account on Pathfinders Online Institute and start the course. On the first page of the course, you’ll receive instructions on how to apply for a free kit.
The first 1,000 qualified educators who sign up for Design, build, and code a rover with Raspberry Pi Pico receive all a free hardware kit.
If you’re not a qualified educator, or if you’ve missed out on the opportunity to get the free hardware, we still welcome you to join the course! You can find the materials yourself, or purchase the kit from our partners at PiShop.us.
Thank you to Infosys Foundation USA
All of us at the Raspberry Pi Foundation want to thank the Infosys Foundation USA team for collaborating with us on this new resource and learning opportunity for educators. We appreciate and share their commitment to support computer science and maker education.
We’re super excited to announce that the European Astro Pi Challenge is back for another year of amazing space-based coding adventures.
This time we are delighted to tell you that we’re upgrading the Raspberry Pi computers on the International Space Station (ISS) and adding new hardware to expand the range of experiments that young people can run in space!
What’s new with Astro Pi?
The first Astro Pi units were taken up to the ISS by British ESA astronaut Tim Peake in December 2015 as part of the Principia mission. Since then, 54000 young people from 26 countries have written code that has run on these specially augmented Raspberry Pi computers.
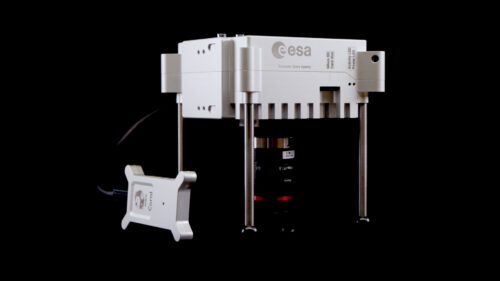
Working with our partners at the European Space Agency, we are now upgrading the Astro Pi units to include:
Raspberry Pi 4 Model B with 8GB RAM
Raspberry Pi High Quality Camera
Google Coral machine learning accelerator
Colour and luminosity sensor
Passive infrared sensor
The augmented Raspberry Pi computers we are sending up to the International Space station, in all their glory
The units will continue to have a gyroscope; an accelerometer; a magnetometer; and humidity, temperature, and pressure sensors.
The little device on the left is the Google Coral machine learning accelerator
The new hardware makes it possible for teams to design new types of experiments. With the Raspberry Pi High Quality Camera they can take sharper, more detailed images, and, for the first time, teams will be able to get full-colour photos of the beauty of Earth from space. This will also enable teams to investigate plant health thanks to the higher-quality optical filter in conjunction with the IR-sensitive camera. Using the Coral machine learning accelerator, teams will also be able to develop machine learning models that allow high-speed, real-time processing.
Getting into space
The Astro Pi units, in their space-ready cases of machined aluminium, will travel to the ISS in December on the SpaceX Dragon Cargo rocket, launching from Kennedy Space Center. Once the resupply vehicle docks with the ISS, the units will be unpacked and set up ready to run Astro Pi participants’ code in 2022.
Getting the units ready for launch has been a significant effort from lots of people. Once we worked with our friends at ESA to agree on the new features and hardware, we commissioned the design of the new case from Jon Wells. Manufacturing was made significantly more challenging by the pandemic, not least because we weren’t able to attend the factory and had to interact over video calls.
ESA astronaut Samantha Cristoforetti aboard the ISS. Credit: ESA
Once we had the case and hardware ready, we could take on the huge battery of tests that are required before any equipment can be used on the ISS. These included the vibration test, to ensure that the Astro Pi units would survive the rigours of the launch; thermal testing, to make sure that units wouldn’t get too hot to touch; and stringent, military-grade electromagnetic emissions and susceptibility tests to guarantee that the Astro Pi computers wouldn’t interfere with any ISS systems, and would not themselves be affected by other equipment that is on board the space station.
Huge thanks to Jon Wells and our collaborators at Airbus, Google, MidOpt, and Shearline Precision Engineering for everything they’ve done to get us to the point where we were able to ship the new Astro Pi units to the Aerospace Logistics Technology Engineering Company (ALTEC) in Italy for final preparations before their launch.
There are two Astro Pi missions for young people to choose from: Mission Zero and Mission Space Lab. Young people can participate in one or both of the missions!
This free initiative is open for young people up to age 19.
Mission Zero
In Mission Zero, young people write a simple Python program that takes a sensor reading and displays a message on the LED screen. This year, participation in Mission Zero also gives young people the opportunity to vote for the names of the two new computers. Mission Zero can be completed in around an hour and is open to anyone aged 7 to 19 years old. Every eligible entry is guaranteed to run on board the ISS and participants will receive an official certificate with the exact time and location of the ISS when their program ran.
Mission Zero opens today and runs until 18 March 2022.
Mission Space Lab is for teams of young people who want to run their own scientific experiments on the Astro Pi units aboard the ISS. It runs over eight months in four phases, from idea registration to data analysis.
Have a look at the winning teams from last year for amazing examples of what teams have investigated in the past. But remember — the new Astro Pi computers offer exciting new ways of investigating life in space and on Earth. We can’t wait to see what ideas participants come up with this year.
To start, Mission Space Lab team mentors just need to send us their team’s experiment idea by 29 October 2021.
You can keep updated with all of the latest Astro Pi news, including the build-up to the rocket launch in December, by following the Astro Pi Twitter account.
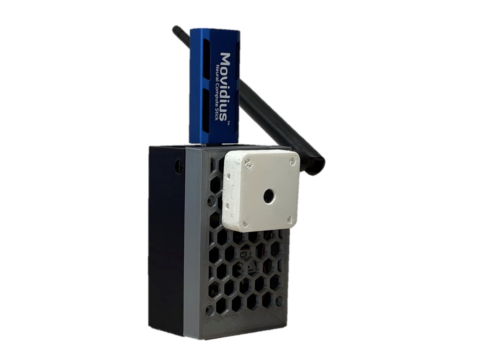
Researchers from the University of Trento have developed a Raspberry Pi-powered device that automatically detects pests in fruit orchards so they can get sorted out before they ruin a huge amount of crop. There’s no need for farmer intervention either, saving their time as well as their harvest.
One of the prototypes used during indoor testing
The researchers devised an embedded system that uses machine learning to process images captured inside pheromone traps. The pheromones lure the potential pests in to have their picture taken.
Hardware
Each trap is built on a custom hardware platform that comprises:
Sony IMX219 image sensor to collect images (chosen because it’s small and low-power)
Intel Neural Compute module for machine learning optimisation
Long-range radio chip for communication
Solar energy-harvesting power system
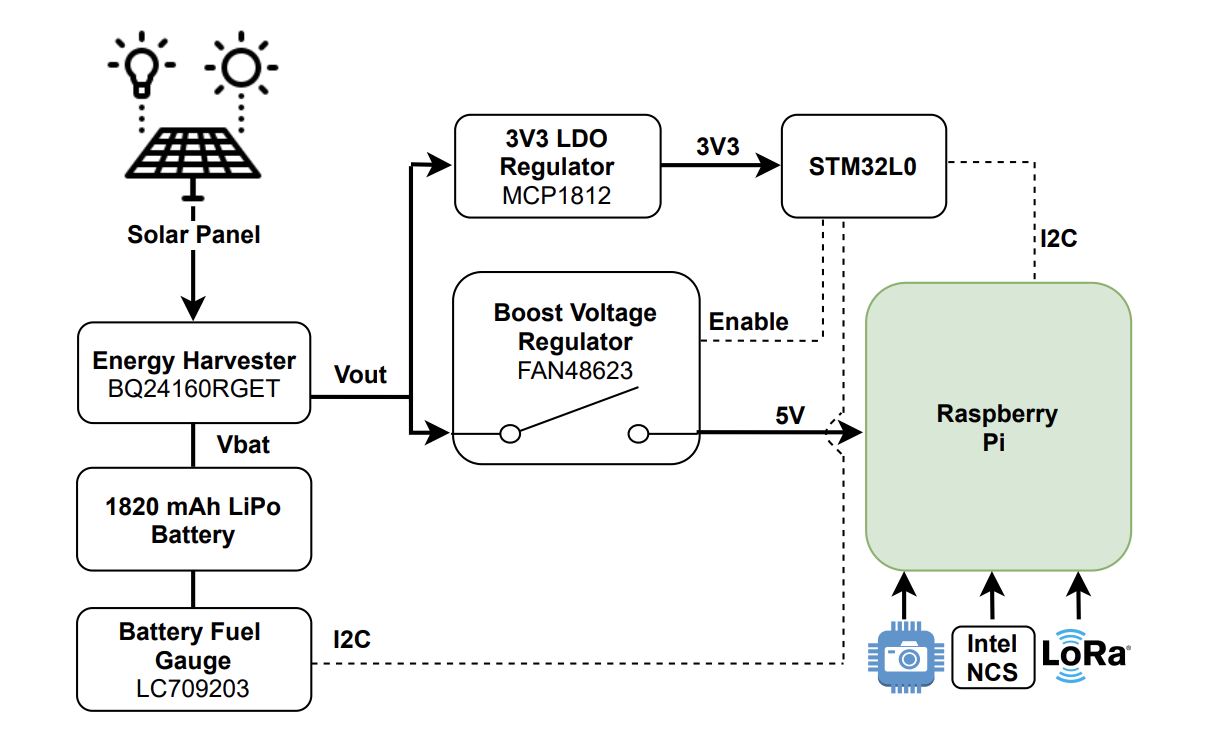
Here’s a diagram showing how all the hardware works together
The research paper mentions that Raspberry Pi 3 was chosen because it offered the best trade-off between computing capability, energy demand, and cost. However, we don’t know which Raspberry Pi 3 they used. But we’re chuffed nonetheless.
How does it work?
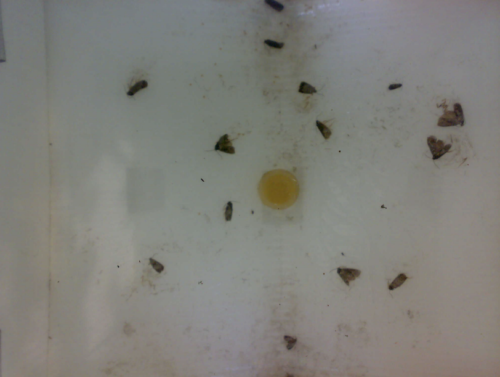
The Raspberry Pi computer manages the sensor, processing the captured images and transmitting them for classification.
Then the Intel Neural Compute Stick is activated to perform the machine learning task. It provides a boost to the project by reducing the inference time, so we can tell more quickly whether a potentially disruptive bug has been caught, or just a friendly bug.
The image on the far left is a photo taken inside a pheromone based trap by the smart camera. The images in the middle and on the right are examples of extracted regions of interest with a single insect
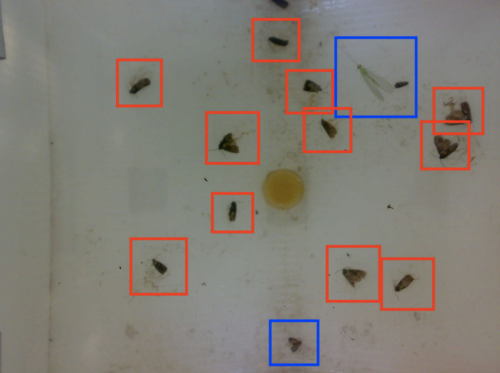
In this case, it’s codling moths we want to watch out for. They are major pests to agricultural crops, mainly fruits, and they’re the reason you end up with apples that look like they’ve been feasted on by hundreds of maggots.
Red boxes = bad codling moths Blue boxes = friendly bugs
When this task is done manually, farmers typically check codling moth traps twice a week. But this automated system checks the pheromone traps twice every day, making it much more likely to detect an infestation before it gets out of hand.
With Intel attempting to get into 3D gaming graphics again, Custom PC’s Ben Hardwidge looks at the time it failed to take on 3dfx in the late 1990s.
Back in the late 1990s, I worked at a computer shop in Derby, where we sold components over the counter, while pointing to a sign that said ‘components are sold on the basis that the customer is competent to fit it themselves’. There were often compatibility issues between components, but there were two cards I’d always try to steer customers away from, as they nearly always came back to the shop, accompanied by a tired, angry face and colourful vocabulary.
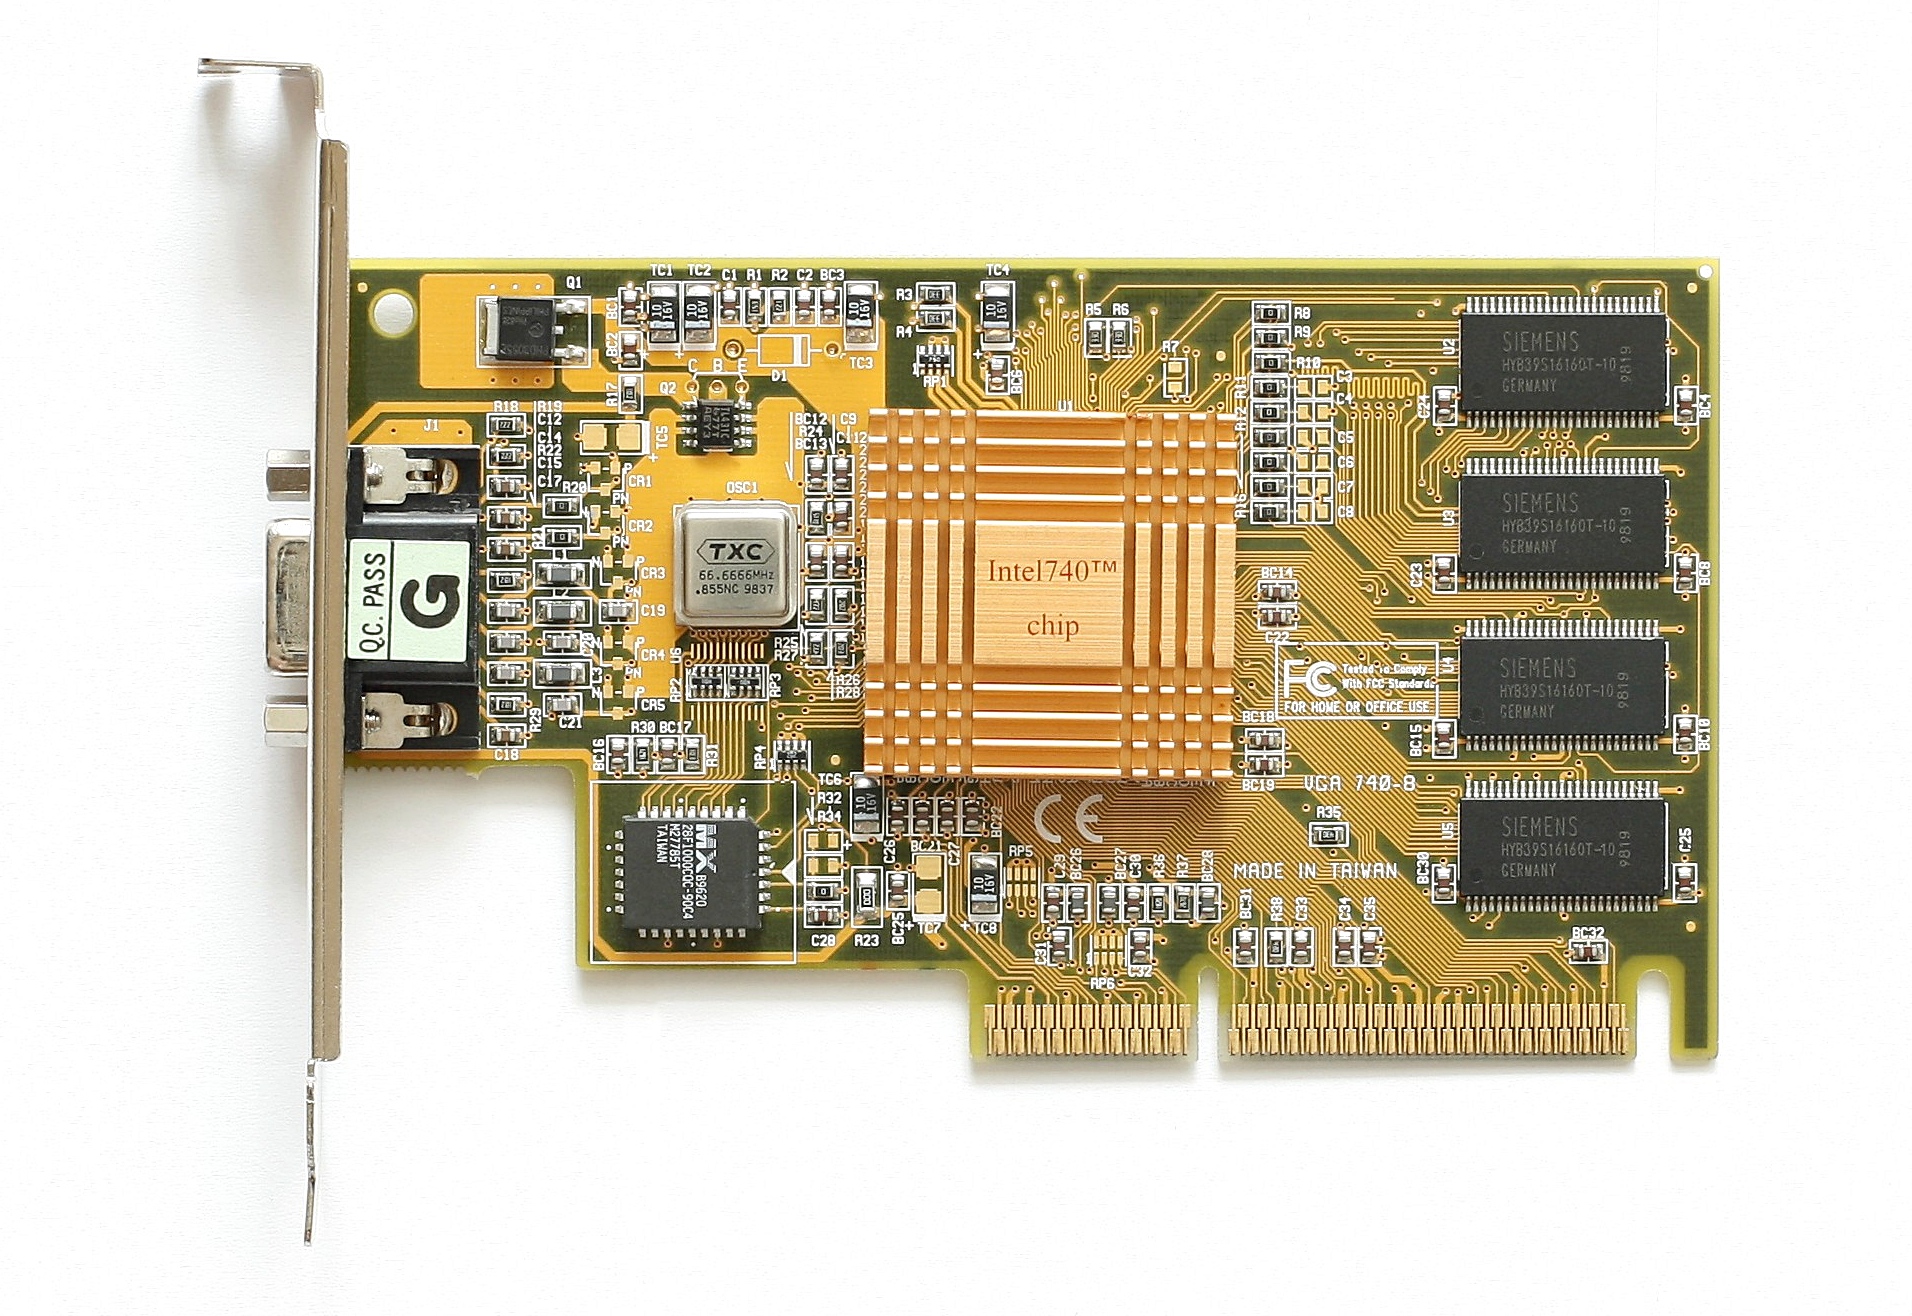
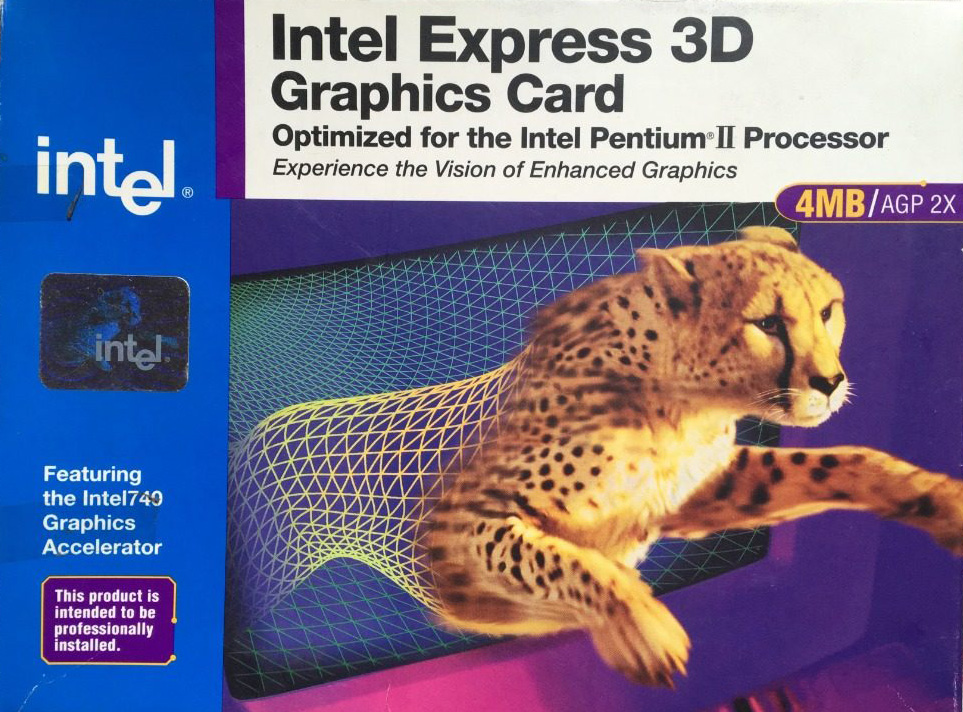
One was a PCI soft modem that required an MMX CPU and refused to cooperate with Freeserve, Dixons’ free ISP that was taking the UK by storm. The other was Express 3D graphics card, based on Intel’s 740 gaming chip.
This was before Nvidia had coined the term ‘GPU’ for its first GeForce cards, which could take the burden of transform and lighting calculations away from the CPU. The CPU was still expected to do a fair bit of work in the 3D pipeline, but you bought a 3D card to speed up the process and make games look much smoother than software rendering.
However, unlike the 3dfx Voodoo and VideoLogic PowerVR cards at the time, which required a 2D card to output to a monitor, the i740 wasn’t a sole 3D card – it could function as a 2D and a 3D card in one unit, and at £30 it was also cheap. You can see why people were drawn to it.
Another factor in its popularity was being made by Intel; thanks to the company’s relentless marketing campaigns, this meant people assumed it would just work without problems. It also used the brand-new Accelerated Graphics Port (AGP) interface, which people often assumed meant it would be faster than the PCI-based 3D accelerator cards.
The problem for us was that people who wanted cheap graphics cards usually also wanted cheap CPUs and motherboards, which meant going for an AMD K6 or Cyrix 6×86 CPU and a non-Intel motherboard chipset. The i740 didn’t like the AGP implementation on non-Intel chipsets very much, and it particularly didn’t like the ALi Aladdin chipset on which our most popular Super Socket 7 motherboards were based.
If you wanted the i740 to run properly, you really needed a Pentium II CPU and Intel 440LX or 440BX motherboard, and they were expensive. Then, once you’d paired your cheap graphics card with your expensive foundation gear, the i740 wasn’t actually that great, with comparably poor performance and still a load of compatibility issues. However, it had some interesting tech and history behind it that’s worth revisiting.
Aerospace beginnings
Intel didn’t have much in the way of graphics tech in the 1990s, but it had spotted a big market for 3D acceleration. The ATX motherboards for its latest Pentium II CPUs also came with an AGP slot, and a 3D AGP graphics card could potentially encourage people to upgrade (more on this later).
With little 3D accelerator expertise in house, Intel teamed up with US aerospace company Lockheed Martin to develop a consumer graphics card. That might seem a bit left field, but Lockheed Martin had acquired a variety of assets through various mergers and takeovers. In 1993, GE Aerospace was sold to Martin Marietta, and in 1995, Martin Marietta merged with Lockheed to form Lockheed Martin.
GE Aerospace was a division of General Electric, and its main business was providing systems and electronic gear to the aerospace and military industries, including simulators. In 1994, it started to branch out, working with Sega to produce the hardware for its Model 2 arcade machines, including 3D graphics tech for texture-mapped polygons and texture filtering. It was used for titles such as Daytona USA and Virtua Fighter 2.
In 1995, Lockheed Martin created a spin-off dedicated to consumer 3D graphics tech called Real3D, mostly using employees from GE Aerospace. Real3D worked with Sega on the 3D graphics hardware in its Model 3 cabinet, which was released in 1996, and then later began working with Intel to produce a consumer 3D graphics card, codenamed ‘Auburn’, which would become the 740.
An AGP showcase?
Intel had clear aims for the i740 when it was released in 1998 – it needed to be cheap and it needed to showcase the new AGP interface featured on the latest Pentium II motherboards. AGP had huge potential.
Although AGP was mainly based on the existing PCI interface, it had a direct connection to the CPU, as opposed to sharing the PCI bus with other cards. This not only freed up bandwidth, but also meant the AGP bus could run at a higher clock speed than the PCI bus.
Real3D’s PCI i740 card was often faster than the AGP equivalent, as it didn’t rely on system memory. Photo credit: vgamuseum.ru
Another one of its benefits was sideband addressing via a dedicated bus, meaning that all the usual address/data lines could be used solely for data throughput rather than both addressing and data functions, with the sideband bus handling address requests.
This massively increased the speed at which an AGP card could read from system memory compared with a PCI card, and meant an AGP card could practically use system memory as well as its on-board memory. You may remember the ‘AGP aperture’ setting in old motherboard BIOS screens – that was the amount of system memory you could allocate to your graphics card.
Most 3D cards didn’t rely on this feature, instead being piled with fast on-board memory to maximise performance, but Intel decided to go all out on it with the i740. The result was a card that only used its on-board memory as a frame buffer, with textures being stored in system memory.
This meant Intel could save money on memory (the cheapest i740 cards only came with 2MB compared to 8MB on the cheapest Voodoo2 cards), while also ensuring the cards required the new AGP interface.
The first problem, of course, was that using system memory and its interface wasn’t anywhere near as fast as using on-board graphics memory. The other problem was that the need for the graphics card to constantly access system memory ended up starving the CPU of memory bandwidth.
That was a big problem at a time when the CPU was still doing a fair bit of the work in the 3D pipeline. The growing use of larger textures in 3D games to improve detail made the situation even worse. What’s more, as I mentioned earlier, the AGP implementations on most Super Socket 7 motherboards just weren’t designed with a card such as the i740 in mind.
It also didn’t help that some board makers (including Real3D under the Starfighter brand) started making PCI versions of the i740 with a bridge chip and more on-board memory, and these cards were usually faster than the AGP equivalents, as they didn’t rely on system memory for texture storage.
Curtains for the i740
What seems bizarre now is that, at the time, I remember a lot of discussion before the launch about how Intel’s work with Real3D was going to result in Intel having a monopoly on 3D graphics, and putting the likes of ATi, 3dfx and VideoLogic out of business.
Intel had access to huge silicon manufacturing facilities, it had a massive research and development budget, and it had the proven expertise of Real3D at its disposal. In reality, the i740 was soon cancelled and almost completely forgotten by the end of 1999.
Custom PC #218 out NOW!
Get your hands on the latest issue of Custom PC at your usual outlet, or online from the Raspberry Pi Press store.
Maker Mellow was inspired by watching the progress of NASA’s Perseverance Mars rover and wanted in on the interplanetary robot scene. Their first idea was to build a scale version of Perseverance, but when their partner stepped in to suggest that starting smaller might be a little easier, Zippy was born.
ProtoTank (a bolt-together modular tank-style robotics platform)
Inside Zippy
Zippy’s basic parts haven’t changed much through its three iterations. You can follow the journey of Zippy 1.0 through 3.0 on Mellow’s website. You’ll see that some additional hardware was required when Mellow made some improvements.
Baby Zippy
The first version of Mellow’s mini Mars rover was just a motor on a 3D-printed body, controlled by plugging in wires to the battery. But Mellow was desperate to level up their robot and build something that could be controlled by an Xbox controller. They reached that goal with Zippy 2.0 and can drive the mini Mars rover remotely via Bluetooth. However, the range is quite tight, so slow runners need not apply for the job of pilot.
Zippy 3.0 comes complete with a DJI Osmo Action camera to capture its adventures.
Baby Zippy 1.0 playing on the carpet
What surfaces can Zippy ride on?
Our favourite part of Mellow’s original project post is the list rating how good Zippy is at navigating various types of terrain (some of which are showcased in the video up top):
Sand – NO it gets stuck in the wheels
Big rocks – NO the robot is too low to the ground and gets stuck
Pebbles – with determination
Grass – only very short grass
Human bodies – surprisingly well
Carpets – Zippy loves carpets
Flat terrain – definitely
Zippy 2.0 out on the road
Here’s all the code you need to build your own mini Mars rover.
Follow the real thing on Mars
Keep up with NASA’s Perseverance Mars rover on Twitter. Perseverance spent its summer drilling into rocks, and has photos to prove it.