Tech CEOs Suddenly Love Blaming AI For Mass Job Cuts

An anonymous reader quotes a report from the BBC: Sweeping job cuts at Big Tech companies have become an annual tradition. How executives explain those decisions, however, has changed. Out are buzzwords like efficiency, over-hiring, and too many management layers. Today, all explanations stem from artificial intelligence (AI). In recent weeks, giants including Google, Amazon, Meta, as well as smaller firms such as Pinterest and Atlassian, have all announced or warned of plans to shrink their workforce, pointing to developments in AI that they say are allowing their firms to do more with fewer people. […] But explaining cuts by pointing to advances in AI sounds better than citing cost pressures or a desire to please shareholders, says tech investor Terrence Rohan, who has had a seat on many company boards. “Pointing to AI makes a better blog post,” Rohan says. “Or it at least doesn’t make you seem as much the bad guy who just wants to cut people for cost-effectiveness.”

That does not mean there is no substance behind the words, Rohan added. Some of the companies he’s backing are using code that is 25% to 75% AI-generated. That is a sign of the real threat that AI tools for writing code represent to jobs such as software developer, computer engineer and programmer, posts once considered a near-guarantee of highly paid, stable careers. “Some of it is that the narrative is changing, some of it is that we really are starting to see step changes in productivity,” Anne Hoecker, a partner at Bain who leads the consultancy’s technology practice, says of the recent job cuts. “Leaders more recently are seeing these tools are good enough that you really can do the same amount of work with fundamentally less people.”

There is another way that AI is driving job cuts — and it has nothing to do with the technical abilities of coding tools and chatbots. Amazon, Meta, Google and Microsoft are collectively planning to pour $650 billion into AI in the coming year. As executives hunt for ways to try to ease investor shock at those costs, many are landing on payroll, typically tech firms’ single biggest expense. […] Although the expense of, for example, 30,000 corporate Amazon employees is dwarfed by that company’s AI spending plans, firms of this size will now take any opportunity to cut costs, Rohan says. “They’re playing a game of inches,” Rohan says of cuts at Big Tech firms. “If you can even slightly tune the machine, that is helpful.” Hoecker says cutting jobs also signals to stock market investors worried about the “real and huge” cost of AI development that executives are not blithely writing blank cheques. “It shows some discipline,” says Hoecker. “Maybe laying off people isn’t going to make much of a dent in that bill, but by creating a little bit of cashflow, it helps.”


Read more of this story at Slashdot.

How to Play Retro Games on Your Modern Phone or TV

We may earn a commission from links on this page.

One of my favorite ways to spend my free time is watching old movies. I love catching up on classics on my big OLED screen, and delving into the history of a medium I love. Unfortunately, it’s harder to do that with video games. While pulling up an old movie is usually as easy as finding it on streaming or renting it digitally, old video games are split across a number of different consoles, and you can’t always count on rereleases to make them accessible on modern systems.

Luckily, there are still options for those who go looking for them. You can hunt down a vintage system and hook it up to your modern screen using an adapter, yes, but you can also use the power of modern devices to “emulate” these games in virtual environments, often with improvements—and if you do it right, it’s all perfectly legal.

What is video game emulation?

Emulation is a massive rabbit hole, and can get about as deep as you want it to be. I’ve been using it for decades, and I’m still learning new things. But there are some basics you should know that will help you get started, including how it works, its legal status, the drawbacks of not playing on real hardware, and the benefits it offers beyond simple convenience.

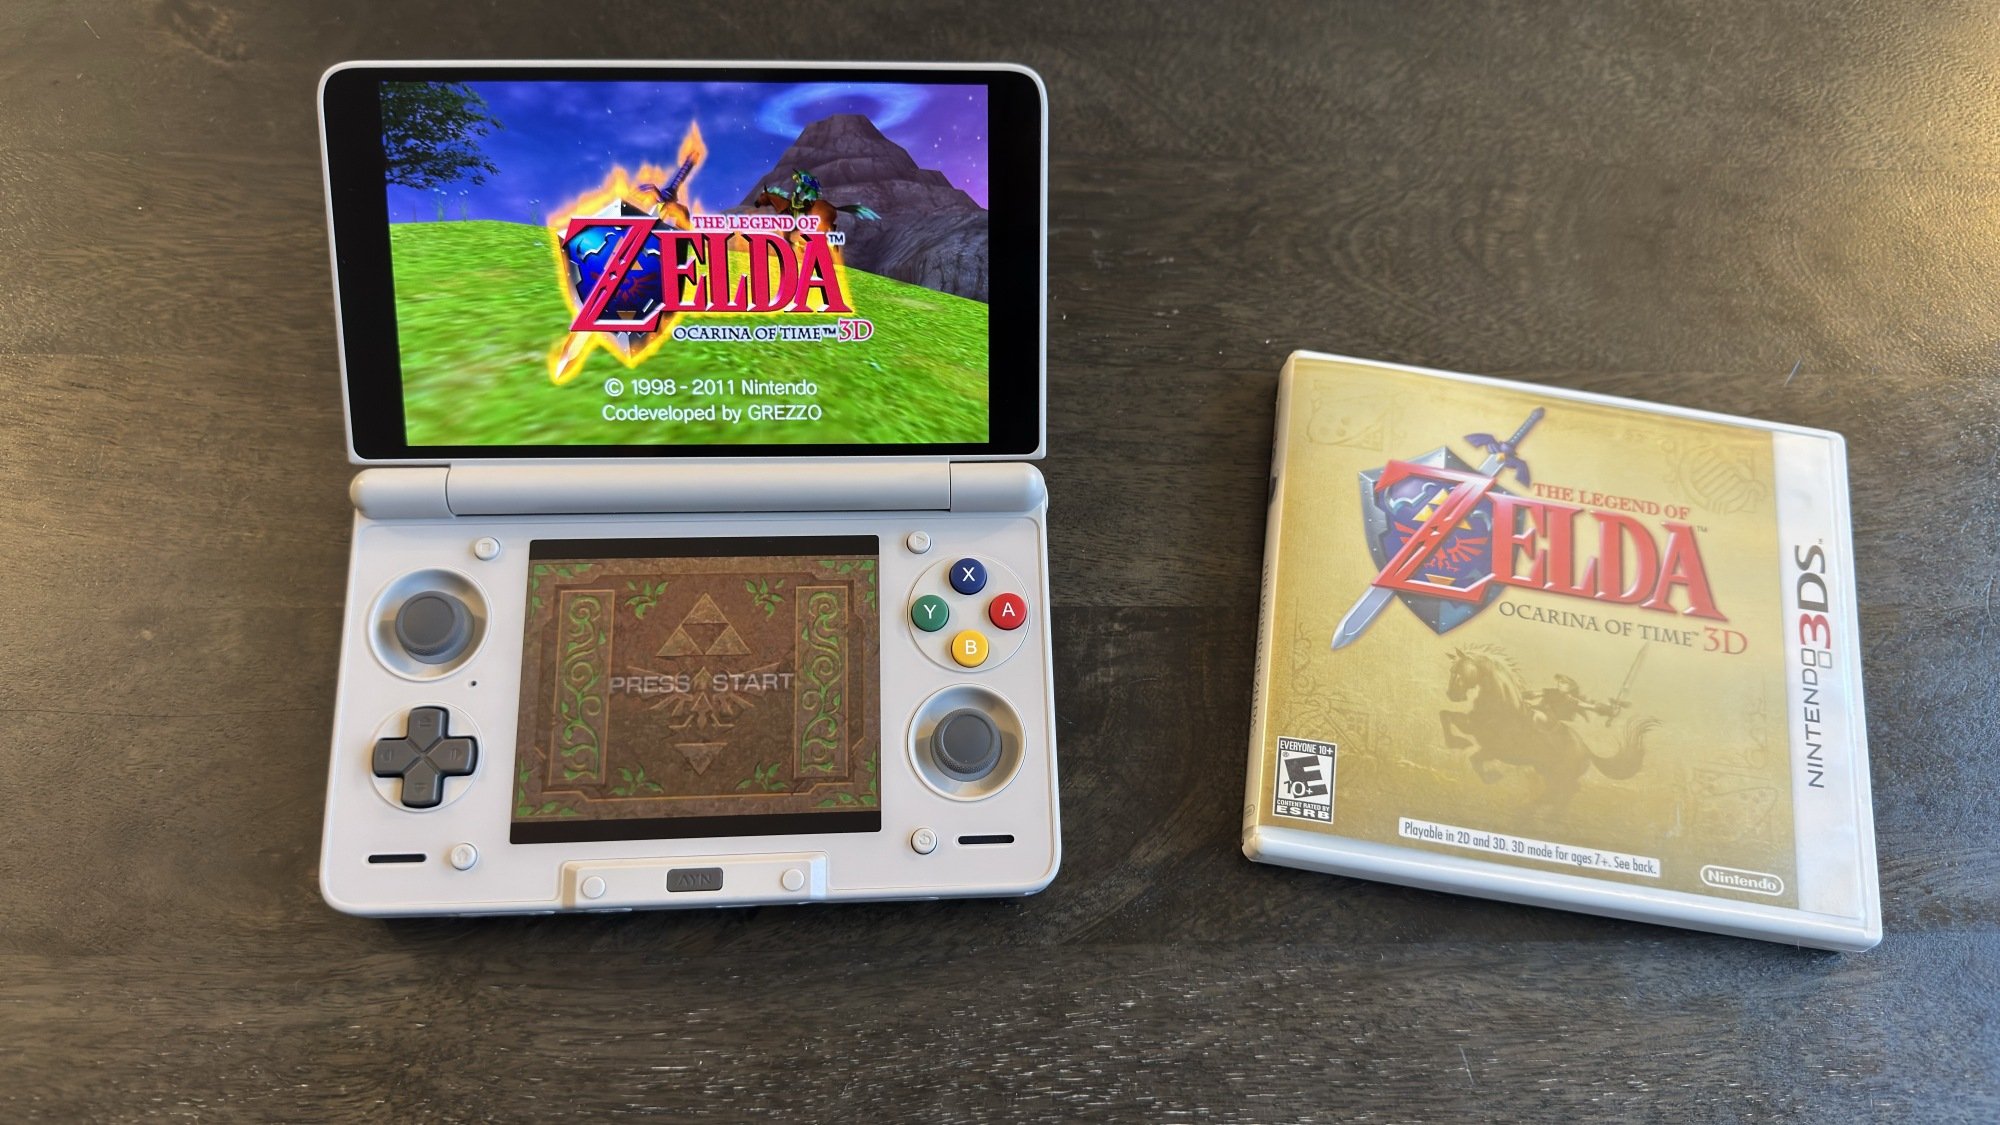
Ocarina of Time 3D running on AYN Thor via emulation

Credit: Michelle Ehrhardt

Essentially, emulation uses the power of modern machines to brute force virtual environments that are close enough to real hardware that files designed for it think they’re running on the real deal, and will boot up like they are. Usually, this means emulators won’t come out until one or two generations after a console’s official release, but there are now emulators for everything from the Nintendo Entertainment System to the Nintendo Switch (which runs on older hardware than you might think).

Granted, you might expect Nintendo’s not too happy about that, but the kicker is that there’s not a lot the company can do about it (aside from trying its best to scare emulator developers). A court case from way back in the day ruled that, so long as emulators don’t distribute copyrighted software, they’re allowed to write their own code that mimics official hardware all they want. That means you’ll need to provide your own games for your emulators, and in some cases BIOS (or operating system) files. To stay on the right side of the law, most emulator guides won’t tell you how to go about that, but there’s at least one method that’s totally fair game. 

It turns out that U.S. law allows you to make your own backup copies of games you own, so long as you don’t distribute them. With that, there are plenty of legal devices that will help you rip your game files from your own cartridges and discs, some of which I cover here. Some emulators are even so advanced that they’ll play your real discs if you simply put them in your PC’s disc drive.

Still, even if everything’s above board, there are a few drawbacks to emulating rather than playing on real hardware. The biggest issue you’ll notice is with accuracy, as some games might have graphics or audio bugs. Input lag is also a common complaint, as emulators often need extra time to register your button presses, since they need to both read them and feed them through your software. Finally, some games might not even run on emulators at all, especially ones with unusual requirements. The original Xbox, for instance, is notoriously difficult to emulate.

On the flip side, though, there are benefits to emulating that real hardware can’t replicate, and they mostly come from the extra power of your modern device. Emulated games can often run smoother than on real hardware, hitting higher frame rates. You’re also usually able to render your games at higher resolutions than originally intended, basically playing them in HD. And most importantly for difficult games or flexible play sessions, you can use save states, which allow you to quickly save your current place in a game to a file, and reload it on demand. This, in turn, allows you to save your game whenever, outside of whatever save system is built into it. It’s perfect if you only have a few minutes to play, or if you’re about to fight a difficult boss in a punishing retro game and don’t want to replay the whole level if you mess up (no judgment here). Because save states essentially take your emulator back in time, they can introduce instability, so it’s advised to use them in addition to more traditional saves, rather than as a full-on replacement for them. Emulators for more modern, difficult-to-run HD systems also may not support save states.

Still, those are enough improvements that I often prefer playing retro games through emulation, even if I have real hardware available to me. And while some of those enhancements are available on official emulation—Nintendo Switch Online has save states, for instance—not all of them are. I haven’t even gotten into widescreen hacks, which lets you play old 3D games in a more modern aspect ratio without stretching the video, or HD texture packs yet. Benefits like these are why, if you’re willing to put in a little elbow grease, unofficial emulators are well worth trying out.

What you need to start emulating

The fans who develop emulators are crafty, and they’ve had plenty of time to refine their work, so most modern devices are able to emulate retro games to some degree. It’s become a running joke that Doom will play on just about anything, including a pregnancy test. But from a realistic point of view, there are a few things you’ll probably want on hand before you get started.

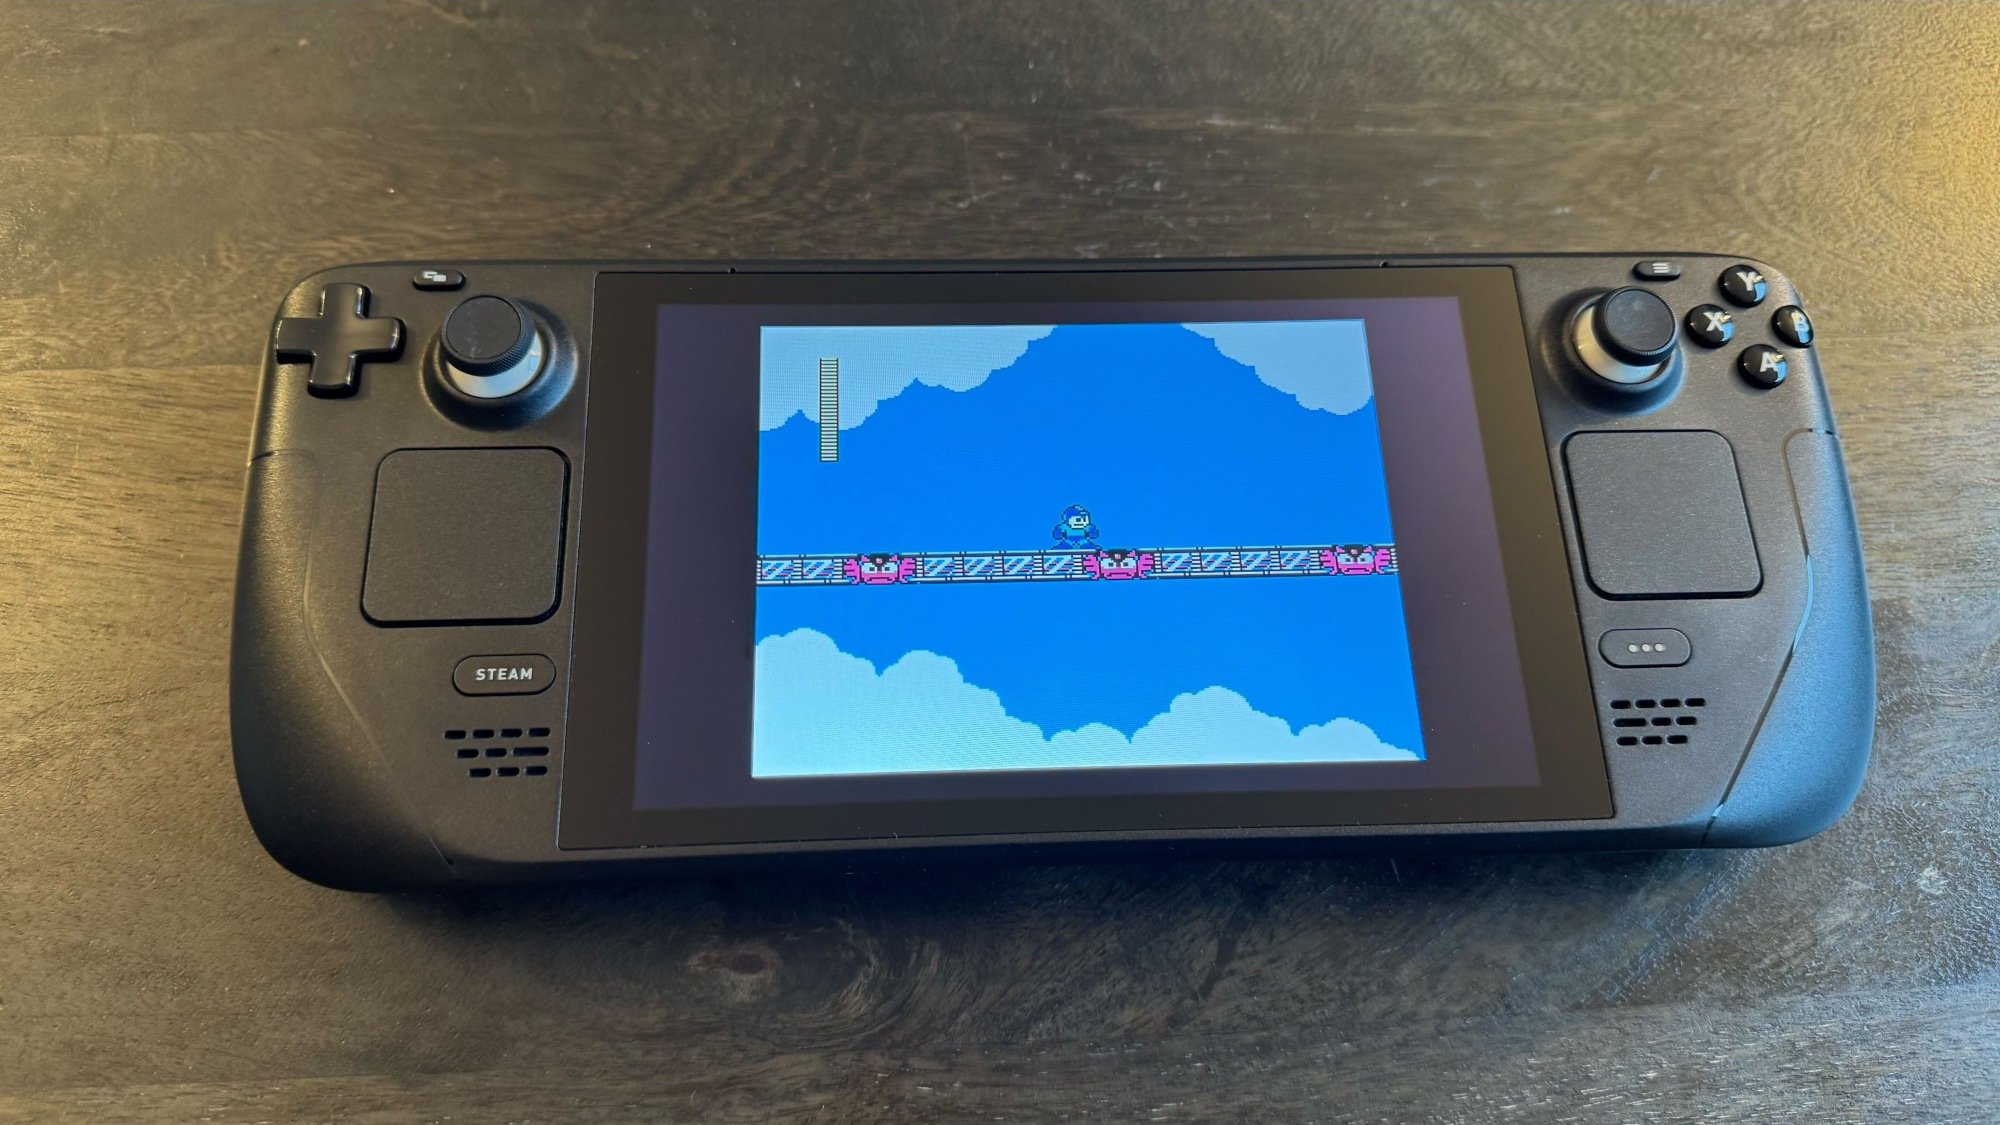
'Mega Man 2' running on the Steam Deck

Credit: Michelle Ehrhardt

If you’re playing on a laptop or a desktop computer hooked up to a monitor, you’ll probably want a controller. Most emulators will support mouse and keyboard controls if you truly can’t get one, but using a controller will help a lot with the old school console experience. Aside from that, though, you might be all set. I have a desktop PC that’s pushing 10 years old at this point, and it’s still able to emulate games through the PS2 and GameCube era at full speed, while upscaling them. Beyond that is when emulation tends to get a bit more demanding, but for retro games, you probably won’t need to upgrade your machine.

If you want to play on a TV, though, you could have a bit more of a shopping list in store for you. In addition to a controller, you’ll also need some type of computer to emulate your games with, and while you can drag a laptop or desktop PC into your living room, it’s often not the most convenient solution. Instead, I suggest getting either a docked Steam Deck or a Raspberry Pi. 

The former’s a bit pricier, and has had stock issues during the RAM crisis, but it’s also compact, plenty powerful when it comes to emulation, easy to output to a TV via a dock, and can play PC games natively, too. With the right Steam Deck emulation setup, you can essentially turn it into your own homebrew Nintendo Switch, but for all your consoles.

The latter, meanwhile, is far cheaper (although its price has also been inflated by the RAM crisis) and smaller, but will take a bit of knowhow to set up and can struggle when emulating systems released after the PS1. Your best bet if you choose to go this route is probably to buy a Raspberry Pi kit, as these will come with a case, cables, storage, and often a fan to get you started. You can also sometimes find these cheaper than a Raspberry Pi motherboard on its own.

But again, the world is your oyster when it comes to which devices you want to emulate with. It’s possible to emulate on a streaming stick or box, too. Generally, if a device has a motherboard and can display a video signal, people will usually find a way to game on it. To wit, you should look into emulating on mobile devices, too. These days, it’s possible to both emulate on an iPhone and on Android, and there is a whole slew of handheld gaming consoles that essentially build controllers into phone hardware running Android to give you an experience similar to a DS or PSP. These can be a great way to play portably, whether using touch controls, a Bluetooth controller, or built-in controls. And if you get a USB-C dock, you can then connect these devices to the big screen to play on them when you get home. You can even get a cheap handheld that runs Linux, for a similar experience to a Raspberry Pi while on the go. Read on here for more details about portable emulation.

Which emulators to get, and how to set them up

Now, it’s time to actually install your emulators, of which you have many choices. I’ve compiled a list of the apps you’ll probably be using to emulate your games, depending on the platforms you’re interested in, before going into how to get them:

  • Retroarch: An app with multiple emulator “cores” in it, that can run games from most systems up through the PS1 era, including the Super Nintendo and Sega Genesis.

  • Duckstation: A standalone app for emulating PS1, with enhanced stability and graphics features compared to Retroarch.

  • Mupen64Plus: A standalone app for emulating Nintendo 64, with enhanced stability and graphics features compared to Retroarch.

  • Flycast: A standalone Sega Dreamcast emulator with support for upscaled graphics and widescreen hacks.

  • MelonDS: A standalone Nintendo DS emulator with community-driven forks that can run on two separate displays for a more authentic experience.

  • Azahar: A standalone Nintendo 3DS emulator with community-driven forks that can run on two separate displays for a more authentic experience. Supports custom graphics drivers on mobile.

  • PPSSPP: A standalone PSP emulator with a highly themed user interface reminiscent of the original console.

  • Dolphin: A standalone GameCube and Wii emulator with high stability, support for custom mobile graphics drivers and upscaled graphics, and the ability to use motion controls. Usually preferable to emulating PS2 or Xbox, if playing a multi-platform game.

  • PCSX2: A standalone PS2 emulator with support for upscaled graphics. Best used for PS2 exclusives. Not available on mobile.

  • NetherSX2: A standalone PS2 emulator for mobile. Many of the same features as Dolphin, but lower stability, and no motion control or custom driver support.

  • Cemu: A standalone Wii U emulator with support for custom mobile graphics drivers and upscaled graphics. No save state support. Requires a high-end machine.

  • RPCS3: A standalone PS3 emulator with support for upscaled graphics, custom mobile graphics drivers, and save states. Requires a high-end machine.

  • Eden: A standalone Nintendo Switch emulator with support for upscaled graphics and custom graphics drivers on mobile. No save state support. Requires a high-end machine.

Phew, that’s a lot. On the plus side, most of these emulators are available for Windows, Mac, Linux, and Android, although iOS users have a bit less to pick from, as Apple restrictions on certain programming techniques mean higher-end devices like GameCube and beyond are difficult to run on its phones. On the plus side, iOS does have access to some potentially more convenient options for older systems, like Delta, which comes with cute touchscreen control overlays built-in.

Now, you could install these apps one-by-one, point them at your game files (which you’ll usually be guided through as part of setup), and play your games by booting up the specific emulator you want and picking the game you want to play from a list. But not only is that slow and inconvenient, it’s not as pretty and is less like using an actual retro console. To solve that problem, we have installers and frontends.

Emulator installers

In this case, installers are programs that will help you set up all your emulators in one fell swoop, or will sort your games into collections by system or genre for you, and will boot you into the appropriate emulator when you select a game.

For installers, you have a few options. My favorite is Emudeck, which despite being named after the Steam Deck, will run you through a simple setup wizard that will install any emulator you could possibly want, whether you’re on steamOS, Linux, or Windows. There’s also an Android version in the works, and you can get early access to it if you subscribe to the development team’s Patreon.

Alternatively, there’s Retrodeck. This is a Linux-only tool, but some users prefer it to Emudeck thanks to more fluid hotkey settings and a less bug-prone (but potentially slower) update process. Nicedeck is another alternative that aims to hit a middle-ground between Emudeck and Retrodeck, and conveniently is the only one of these options that also works for Mac.

As someone who just manually installed a bunch of Android emulators one-by-one, I would highly recommend using an installer to automate the process instead—´specially because many Android emulators need to be sideloaded, something that is about to get harder starting next year. An installer will also usually help you set up configurations like individual desired aspect ratio and upscaling settings for each system you want to play, too, which will save you some tedious trips to each individual emulator’s settings menu.

But just because your emulators are installed doesn’t mean we’re done yet. Instead of having to bounce from emulator app to emulator app and scroll through what can often be ugly built-in menus, let’s put all your games in one convenient, easy-on-the-eyes place.

Emulator frontends

A frontend is an app that will sort your games by system, or by custom collections you set up, like genre. You’ll choose a game from one of its many lists, and the frontend will tell the appropriate emulator app to boot up the game. Then, when you’re done gaming, your emulator will take you back to your frontend. It’s a much more intuitive and console-like experience, and people have created plenty of themes to make them look just as nice as official console menus. Many frontends even come with “scrapers” built in, so they can fetch and display box art next to your games.

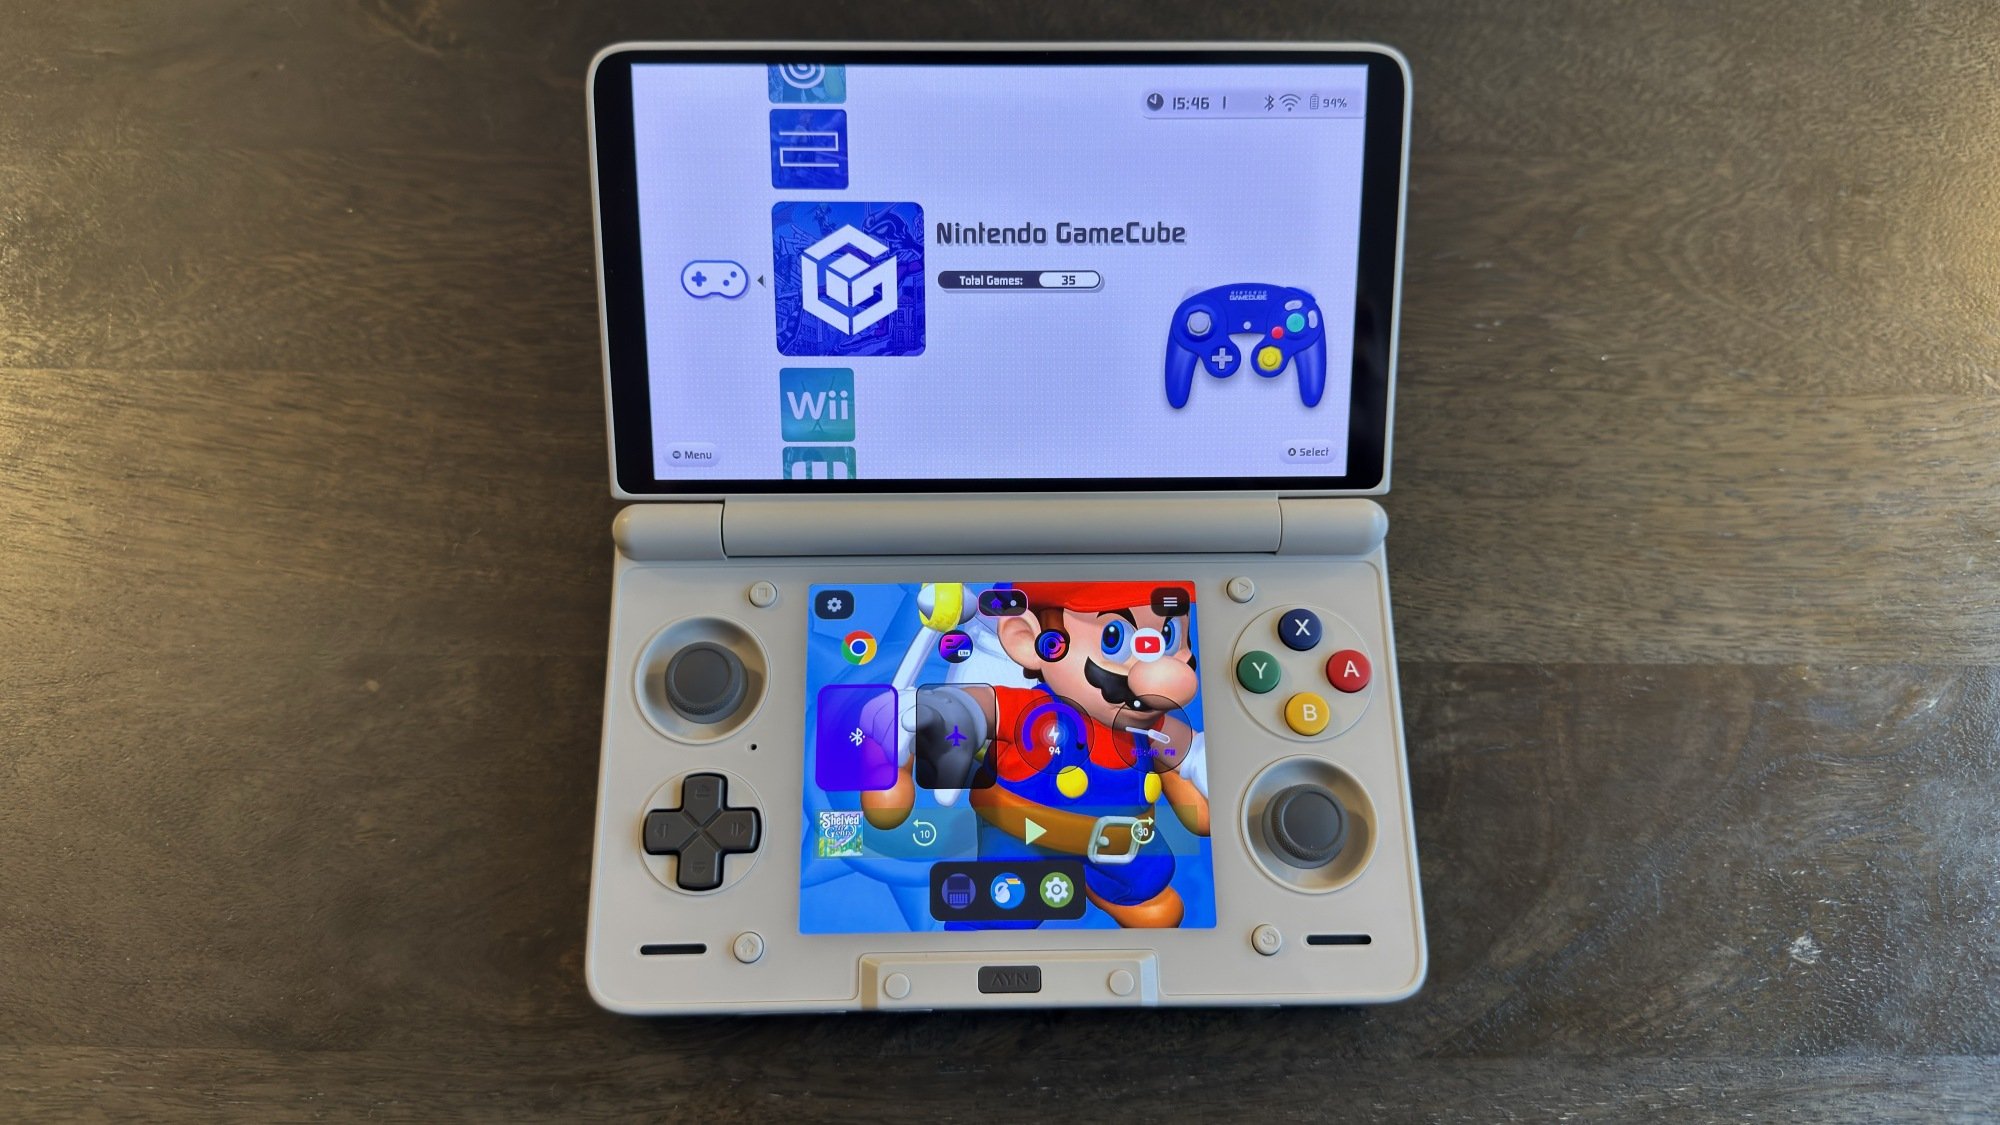
ES-DE running on AYN Thor

Credit: Michelle Ehrhardt

The most common and robust choice here is ES-DE, or Emulation Station Desktop Edition. It’s what I use personally, and comes packaged with installers like Emudeck and Retrodeck. It has the most configuration options available for it, but can be a bit slow to boot. Also, while it’s free on Windows, Mac, and Linux, a small one-time Patreon donation is required to get the app for Android.

ES-DE alternatives on desktop are rare, but options like LaunchBox may be preferable for some users. Other frontend apps are more common on Android, as ES-DE took some time to come to Android, and some users prefer a more playful interface while on mobile. Popular free options include Daijisho and Beacon, although I’m particularly interested in Cocoon, which is modeled after the Nintendo 3DS menu and has built-in dual screen support.

Another option, if all of this sounds like too much setup, is to use Batocera. This is a Linux install that essentially packages largely pre-configured emulators for a wide variety of systems alongside a customized version of Emulation Station. Basically, you install it on your compatible device and boot into it separate from your main operating system, so everything lives in its own confined home. While that means it’s a bit limited, it’s also mostly plug-and-play. It’s also possible to run Batocera off a USB stick or SD card, if you don’t want to install it onto your device’s internal storage.

How to choose and install emulators and frontends for different systems and devices could be a whole series of articles on its own, but the community is welcoming, and is doing its best to make emulation easy and available to as many people as possible. The above programs should be enough to get you started, but if you have additional questions, experts like Retro Game Corps and subreddits like r/emulation are always there to help you out.

How to make your games look old school (or HD)

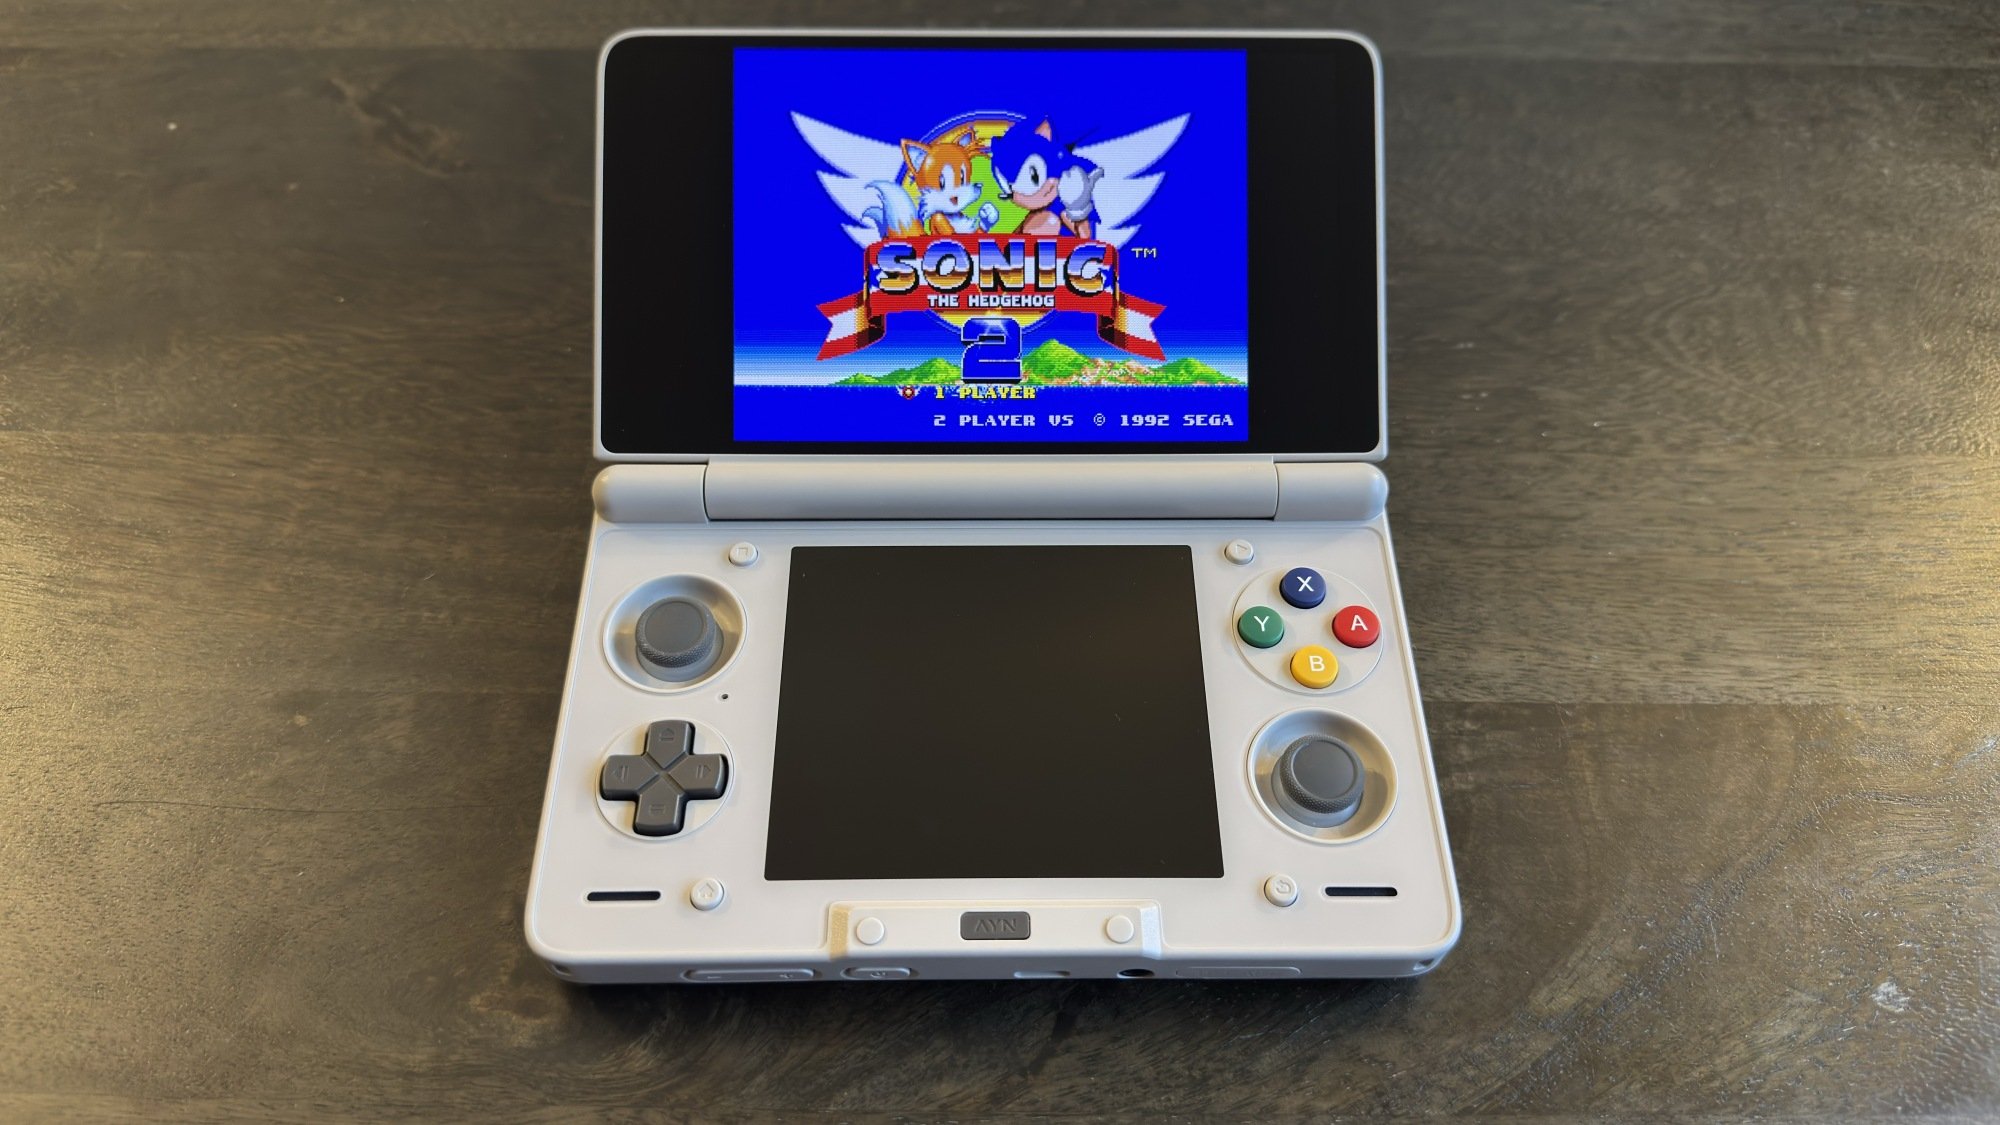
'Sonic the Hedgehog 2' running with a CRT filter

Credit: Michelle Ehrhardt

When emulating a game, you have three options: You can go with the raw emulation output, which will by default usually mimic a console’s native resolution but might not look fully accurate depending on the screen you’re playing on; you can upscale the resolution for a more HD image, and can even apply fanmade texture packs to make individual games look even crisper; or, you can turn on a CRT filter to try to get a more retro feel, as well as help pixel art or low polygon models look a bit smoother. Frankly, this is another area where it’s possible to go on for days. You can mix and match different options from these approaches to your heart’s content, and Retroarch alone has hundreds of filter and shader options built-in (options do differ from emulator to emulator).

Improving the look of 3D emulated games

For 3D games, the idea is to try to get a more modern experience. Widescreen hacks are a good place to start. These extend the aspect ratio to 16:9, then apply tweaks to the emulation so that the screen renders more of the play environment instead of simply stretching the default 4:3 image. It doesn’t work for every game, and can break the design in others (Resident Evil has very purposeful camera angles), but it’s often worth trying, especially in games where situational awareness is helpful, like platformers.

HD Texture packs, meanwhile, help clear up low-resolution HUDs or 2D assets (which are still quite prevalent in 3D retro games) that won’t be covered by upscaling. These need to be developed on a per-game basis, so you’ll need to search for them, but a popular example is Henriko Magnifico’s 4K Zelda texture packs. Personally, I do think these can sometimes interfere with a developer’s intended art style too much, but some people swear by them. 

Improving the look of 2D emulated games

For 2D games, I like to try to make my game look like it’s playing on an old-school TV, and that’s not just for flavor. Pixel art was designed with CRT televisions in mind, which would smooth and blur harsh edges together to make pixels look more hand drawn (here’s a good example). You lose that effect if you just use raw emulation footage on a modern television, but you can mostly get it back with the right filters.

This is far from a solved issue, but so far, my favorite option is the zfast-crt.slangp shader in Retroarch (found in the Quick Menu under Shaders). This is a subtle effect that feels far more accurate to me than the CRT filters often included in official retro game collections, and it’ll work on any device that runs Retroarch. What’s great is that, because this is included with Retroarch, it’ll also work for any system that Retroarch supports, which includes most retro consoles you would play 2D games on.

But CRTs provided an additional benefit beyond making pixel art look nice. Because of the way they scan in their images, they’re highly resistant to motion blur. If you have a device with a 120Hz screen, you can mimic this using a technique called black frame insertion. This technique inserts a single black frame into every other frame of your video output, breaking up the image and helping your eyes reset. While this will slow down your gameplay on a standard 60Hz screen, a 120Hz screen will let you use black frame insertion while still getting 60 fps gameplay. This is built into a toggle in Retroarch’s default Settings > Video > Synchronization page, but to be honest, I find this implementation comes with some pretty intense flickering.

Instead, I prefer the crt-beam-simulator.slangp shader developed by the folks over at Blur Busters, which has a more subtle effect that looks more like the old school TVs I remember from back in the day. Getting this running in Retroarch takes a few extra steps, but luckily, Retro Game Corps has a great video walking through it, including how to tweak it to your liking and combine it with the zfast-crt.slangp if you’d like.

With tools like these, it’s clear that the appetite for playing games from older consoles isn’t going anywhere anytime soon, even if it’s harder than pulling up an old movie on Netflix. Whether you’re on PC, Mac, a Steam Deck, or mobile, you’ve got plenty of options already, even as hardware costs rise. From where I’m sitting, the frontier for retro gaming looks bright.

Sony Significantly Increasing PS5 Console Price Again

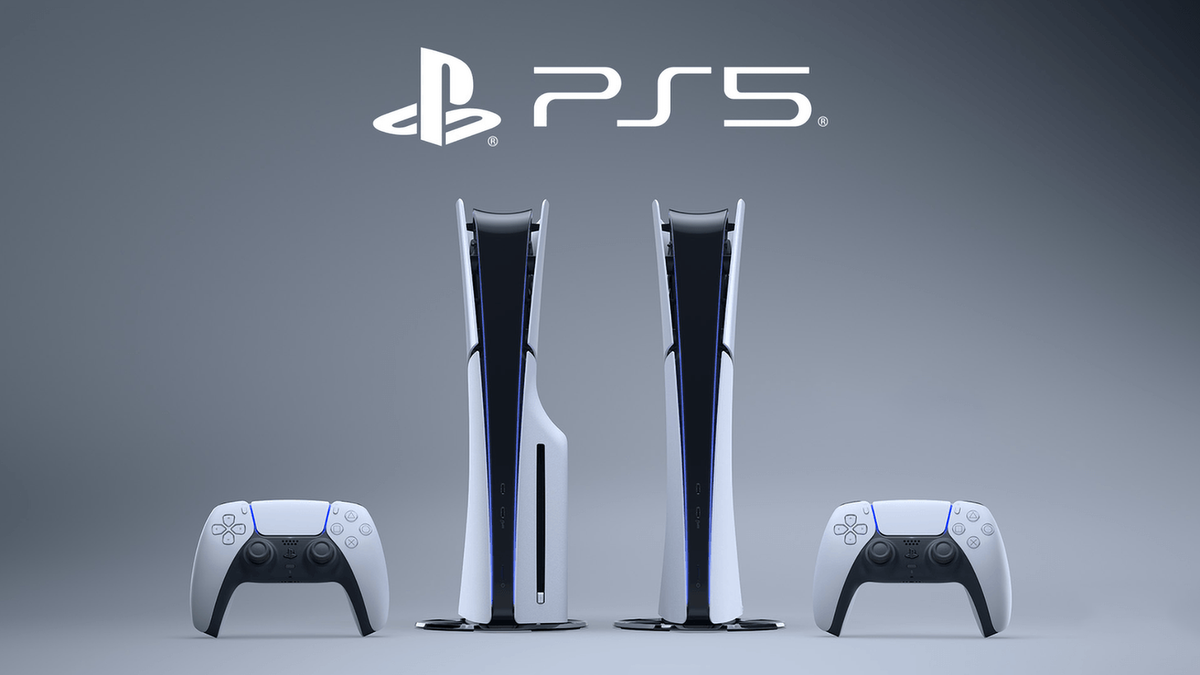
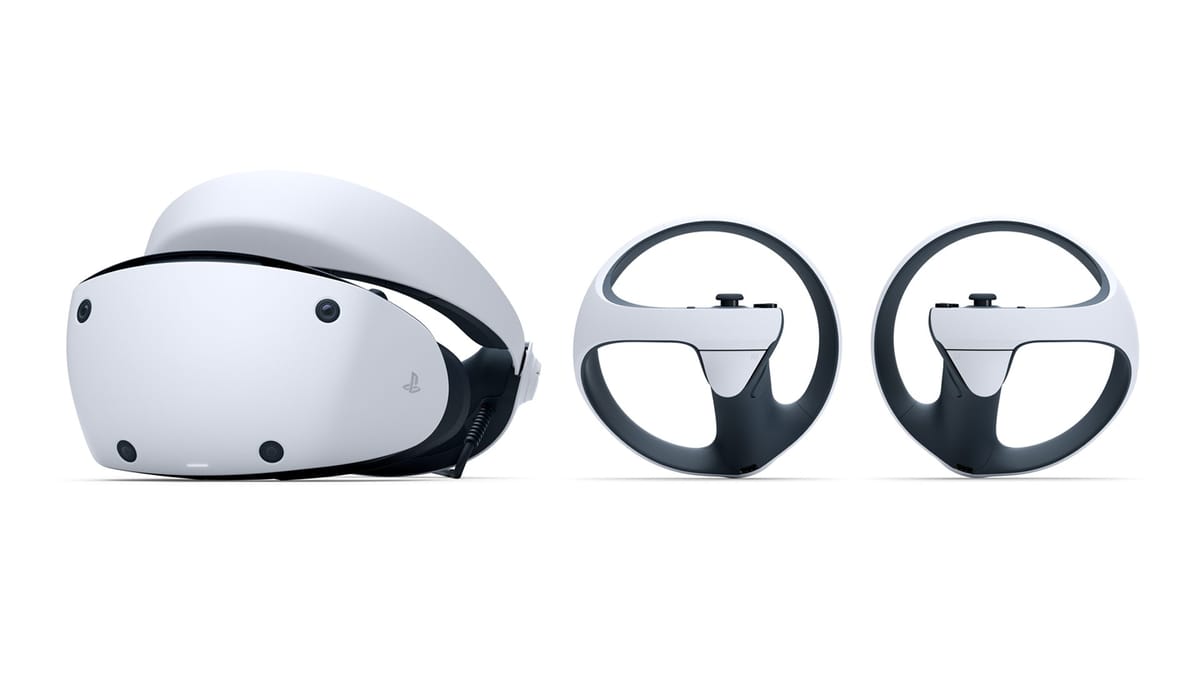
Sony is again increasing the price of PS5 and PS5 Pro, bringing the buy-in price for a full PlayStation VR2 system up to $1000, higher than it was at the headset’s launch.

The following price increases will take effect on Thursday:

  • PS5 Digital Edition: $500 –> $600
  • PS5: $550 –> $650
  • PS5 Pro: $750 –> $900

This is the second time in less than a year that Sony has increased the price of its consoles, required to power the PlayStation VR2 headset if you don’t own a gaming PC, or if you want to access PS VR2’s exclusive titles.

The price hike will take place globally, with all regions seeing similar increases.

Sony Increases PS5 Console Prices In The US
From tomorrow, the Digital Edition will be $500, the version with a disc drive $550, and the PS5 Pro $750.
UploadVRDavid Heaney

Sony ascribes the new price hikes to “continued pressures in the global economic landscape”, without giving a more specific reason. It’s likely driven by the global memory shortage caused by AI datacenter buildouts, as well as factors like trade tariffs and war-related disruption to Qatar’s export of helium, an essential element for semiconductor manufacturing.

It’s the first time in gaming history that a mainstream console has gotten significantly more expensive over time rather than less. The PS5 Digital Edition launched almost six years ago at $400, yet will now cost $200 more.

That more than offsets the $150 price cut the PlayStation VR2 headset saw last year, meaning the minimum total cost of a PS VR2 system with a PS5 console is now $1000, up from $950 at the headset’s launch.

PlayStation VR2’s Price Has Now Been Cut To $400
The price of PlayStation VR2 has now been cut to $400, following the announcement last week, and this includes Horizon Call of the Mountain.
UploadVRDavid Heaney

Of course, Sony isn’t uniquely affected by worsening global macroeconomic conditions. Last month Valve announced that it needs to “revisit” its “exact shipping schedule and pricing” for Steam Frame and Steam Machine, though the company said its goal is still to ship in the first half of this year.

The situation will likely also affect Meta’s plans. While The Wall Street Journal reported last year that Meta was targeting $1000 for its next headset, that seems increasingly unlikely.

$4,000 Audio Cable Versus $7 Amazon Basics Test Reveals What You Suspected

$4,000 Audio Cable Versus $7 Amazon Basics Test Reveals What You Suspected
A recent blind test confirms that the only thing a $4,000 boutique audio cable transmits more effectively than a $7 Amazon Basics cord is a massive amount of cash from your bank account to the manufacturer’s pockets. The guilty party in this case is Kimber Kable, although brands like Monster and Audio Quest have been on the naughty list as

Open-Source RadeonSI+Rusticl Nearing Formal OpenCL 3.0 Conformance

The open-source RadeonSI Gallium3D driver with Rusticl for modern Rust-based OpenCL is nearing formal OpenCL 3.0 conformance with all necessary OpenCL test cases passing. Making this all the more interesting is that this is the first modern AMD graphics hardware in a decade likely to see formal recognition for OpenCL conformance with AMD having not submitted any of their own OpenCL conformance results since 2015…

Embrace Filming on Analog Video in 2026

We may earn a commission from links on this page.

Cameras are more than just tools for taking photos and videos—they shape the way we think of the past. The distinct look of each major camera format defines its era: The murky colors of a vintage Polaroid picture are as era-defining as the stiffly posed portraiture of the late 1800s. And there are few things that will bring you right back to the 1980s and ’90s than the fuzzy, low-resolution warmth of something filmed on video tape.

I think that’s why some people are so drawn to picking up old 30- or 40-year-old camcorders, even in 2026: You can record a modern scene using one of them today—perhaps someone using a smartphone—and when playing it back, it will look like they’re straight out of 1994.

I grew up with such a camcorder, a Canon ES50, which my family used for filming home movies, and I used for making my own short “films.” My childhood was immortalized in this format, and in a way, their look defines how I picture the ’90s. While that camcorder was sold or given away sometime over the years, my brother recently gifted me another one, and in puttering around with it, I’ve feel like I’ve been traveling through time.  

Whether you also have a similar experience, or you’re curious about older video recording formats and want to dive in to actually putting images down on tape, it’s surprisingly easy to pick up one of these old camcorders and get recording, even in 2026.

There are a lot of camcorder formats to explore

While you can certainly pick up a working camcorder off eBay easily enough, you’ll need to know what format that camcorder records to before getting started. If you don’t buy the proper medium (i.e. tape), you won’t get very far. There are a ton of camcorder formats in this world, but here are the major ones you’ll likely encounter:

  • VHS: If you lived through the VHS era, you’re very familiar with this format. These camcorders use the same sized tapes you used to rent from Blockbuster, which makes them pretty convenient (by 1990s’ standards, anyway): If you have a VHS camcorder, a blank VHS tape, and a VCR, you can easily shoot and watch back your footage right away. These camcorders, however, are huge. Anyone looking for a more compact camera should consider the other formats on this list.

  • VHS-C: This is the same principle as VHS, only in a compact form (hence the C). In fact, because this is still VHS, you can play VHS-C tapes in a VCR, but you need an adapter to do so. (The tech behind this is actually very cool.)

  • S-VHS (and S-VHS-C): These are the successors to VHS and VHS-C, offering higher-quality video in the same form factor.

  • 8mm: These tapes are suspiciously similar in size to standard VHS-C, but with a key difference. As you might guess from the name, these are not VHS, which means you can’t play them back on a VCR. You won’t notice too much of a difference in quality though.

  • Hi8: This is the “upgraded” 8mm format. They’re the same size, but record in higher-quality video.

  • Mini DV: Again, these tapes are similar in size to other mini formats, but with a huge discrepancy: they’re actually digital, not analog. Where all the previous tape standards record magnetically to tape, Mini DV records the information as bytes, the same as it would to a hard drive. That means you can reproduce Mini DV tapes without losing any detail, but you also lose some of the analog charm.

Where to buy camcorders, tapes, and accessories in 2026

Camcorders are not hard to buy in 2026. In fact, you can buy new 4K models—but that’s not why we’re here. If you’re looking for a camcorder from the ’80s or ’90s, eBay is your friend. There are tons of listings for different brands and formats, many for reasonable prices. The camcorder I grew up with is easy enough to find: As of this writing, there’s on listed for $78.50 without a battery or charger, and one with the battery for $99.99. If you have a specific camcorder in mind, you might need to make some concessions: say, buying the camcorder by itself, then hunting down specific accessories that go with it. On the other hand, you might have better luck searching by format: When I searched eBay for VHS-C camcorders, for example, I found this JVC option with all the essential parts for $49.99.

Finding accessories shouldn’t be a problem either, depending on the part and the camera model. I recently needed a proprietary cable to connect a family member’s camcorder to a TV, and by searching the camcorder model number and the part, was able to find one for sale online fairly quickly. If you have a VHS or VHS-C camcorder, you’re going to need a VCR and an adapter. The adapters are easy and cheap to pick up, while VCRs range in price. Take some time looking for a VCR: You’ll want one that seems functional and clean, so as to not damage your tapes. In short, if it was popular, someone is likely selling it somewhere, which is good, because a camera without all the right accessories is just a museum piece.

When it comes to the tapes themselves, it’s the same story. I would have assumed buying formats from more than 30 years ago would be a challenge, but even Walmart still sells 8mm tapes. My recommendation is to search Google Shopping for the tape format you need, and compare prices and listing across reputable outlets. (Though, again, eBay might be your best bet.) You don’t actually need tapes to use retro-style camcorders, since you can buy add-on devices that let you capture footage directly to an SD card—but given I’m writing about the appeal of retro tech, I’m going to assume you want to record on tape.

And as with all retro tech, you might find what you’re looking for at secondhand stores and garage sales. People might have camcorders, accessories, and tapes in their attics ready to be sold on their front lawns; similarly, Goodwill might have camcorders in the mix with their other used technology. If you are looking for something specific, stick to the internet, but if you’re just looking to get started with any old equipment, the hunt can be part of the fun.

How to actually watch your camcorder recordings in 2026

This next two sections are perhaps the trickiest parts of camcorder ownership in 2026. It’s not hard to find a camcorder, and it’s surprisingly uncomplicated to pick up tapes. Even recording isn’t all that challenging. But actually watching this footage, and, god forbid, saving it somewhere else? These analog formats were not designed for our digital future.

That said, it’s perfectly possible, so long as you’re prepared. As I mentioned above, VHS shooters will have the easiest time here, assuming all parts are in order: You can pop your VHS tapes into a VCR connected to a TV, and you’re good to go. VHS-C shooters will have a similarly simple experience, but you’ll need that adapter.

But other formats are not compatible with a VCR. In fact, for many camcorder options, your only choice is to play back your footage on the camcorder itself. That doesn’t mean you need to watch on its tiny screen or viewfinder (though you can, of course); instead, you can simply connect the camcorder directly to your TV. This will vary based on the camcorder model, but most will have some type of cable designed to plug into an output port on the camcorder and connect to the composite ports on your TV.

No matter how you connect your tapes to the TV, you may have another hurdle here. If you have an older TV, there’s no problem, but newer TVs don’t always have the red, white, and yellow composite ports you need. My 2017 LG TV, for example, does not. As such, I had to buy this adapter in order to connect any type of composite input to my TV—including my 8mm camcorder. As with many of the suggestions here, you’ll need to find your TV’s make and model to find the right adapter, but once everything’s hooked up, you’re good to go.

Preserving your tapes (and creating digital backups)

We live in a digital world, and vintage cameras (apart from DV models) are analog. As much fun as it is to watch retro footage directly on a TV, you’ll likely want to convert your tapes to something you can watch on your phone or computer. Perhaps the simplest—if the priciest—option is to send your tapes out to a service to convert them for you. These services take recordings of virtually any format—from 8mm tape to 8mm film—and send them back to you as digital files. That way, you don’t have to worry about doing any of the work yourself.

While that might work for some, there are two reasons I’m not a huge fan of this option. First, it isn’t really an option if you frequently shoot new footage, since you’ll need to continuously send these companies your tapes and wait for them to get back to you. They’re really set up for families sending in all their old home videos at once, which is my second gripe: I really don’t trust another company (or the mail) to handle my family’s irreplaceable home videos.

In any case, it isn’t quite as challenging as it sounds to get footages from your tapes onto your computer to do whatever you want with them, but it will take some elbow grease—and what’s involved may vary based on your camcorder and setup. YouTuber Audrie Storme has a great walkthrough for the process, which should apply to most situations you’ll run into. In summary, you’ll need:

Once you’re connected, you’re ready to record for posterity. Since these are tapes, that means letting the footage roll in real time. So sit back, relax, and watch your “modern” ’90s-style clips unspool.

Oh, and one final piece of advice: If your tapes have the option, make sure to flip the switch from “Rec” to “Save.” That way, you won’t accidentally record over any of your footage.

[$] Rust’s next-generation trait solver

Rust’s compiler team has been working on a long-term project to

rewrite the trait solver
— the part of the compiler that determines which
concrete function should be called when a programmer uses a trait method that is
implemented for multiple types. The rewrite is intended to simplify
future changes to the trait system, fix a handful of tricky soundness bugs, and
provide faster compile times. It’s also nearly finished, with a relatively
small number of remaining blocking bugs.

Intel FRED Appears Ready To Enable By Default With Linux 7.1

Last week I ran benchmarks quantify the performance benefit to Intel FRED for Flexible Return and Event Delivery initially found with the new Core Ultra Series 3 “Panther Lake” processors and also for upcoming Nova Lake and Diamond Rapids CPUs. The FRED performance impact was very beneficial across a variety of workloads but rather strangely was not enabled by default. Mere hours after publishing that article, an Intel engineer posted a patch to enable FRED by default. Now this week that patch appears all-set for merging with the upcoming Linux 7.1 merge window…

April Pink Moon 2026: First Full Moon Of Spring Gets Ready To Peak

April Pink Moon 2026: First Full Moon Of Spring Gets Ready To Peak
As the spring air turns crisp, the evening of April 1 will host the first major celestial event of the season. On Wednesday, the Pink Moon will reach peak illumination at 10:12 p.m. EDT, serving as a traditional herald of the changing seasons.

Despite its name, the Pink Moon doesn’t actually have a rose-colored hue. Instead, the title originates

Windows PCs Crash 3x More Often Than Macs If This Study Is Accurate

Windows PCs Crash 3x More Often Than Macs If This Study Is Accurate
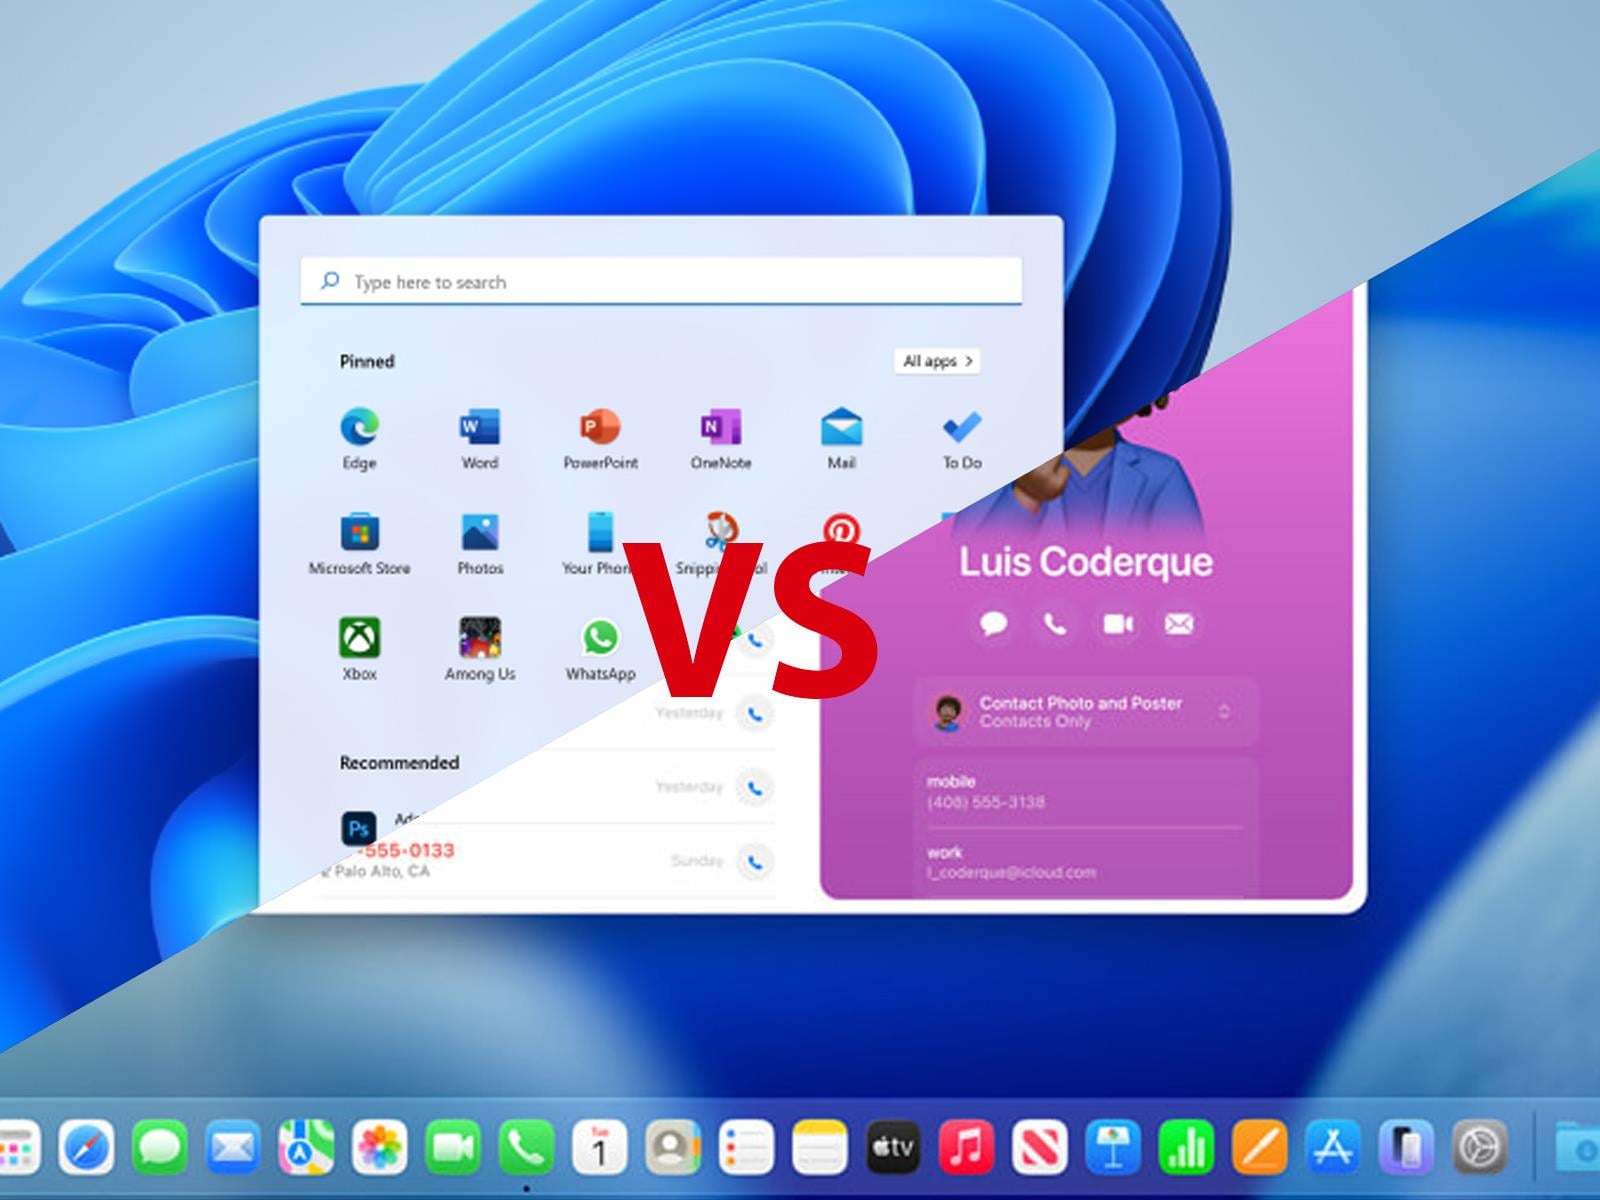
A new study focusing on shadow AI, security gaps, and device instability has found that systems running macOS are far more stable than PCs with Windows installed, resulting in significantly fewer application crashes and being less prone to freezing, among other so-called “micro-frictions” that can cause a cause a productivity gap in the enterprise.

Legendary Tales: Dawn of History Review – A Rich Dungeon-Crawling Expansion

Shadowdropped last week, the Dawn of History DLC of Legendary Tales has arrived to PC VR and PlayStation VR2 with a slew of new content.

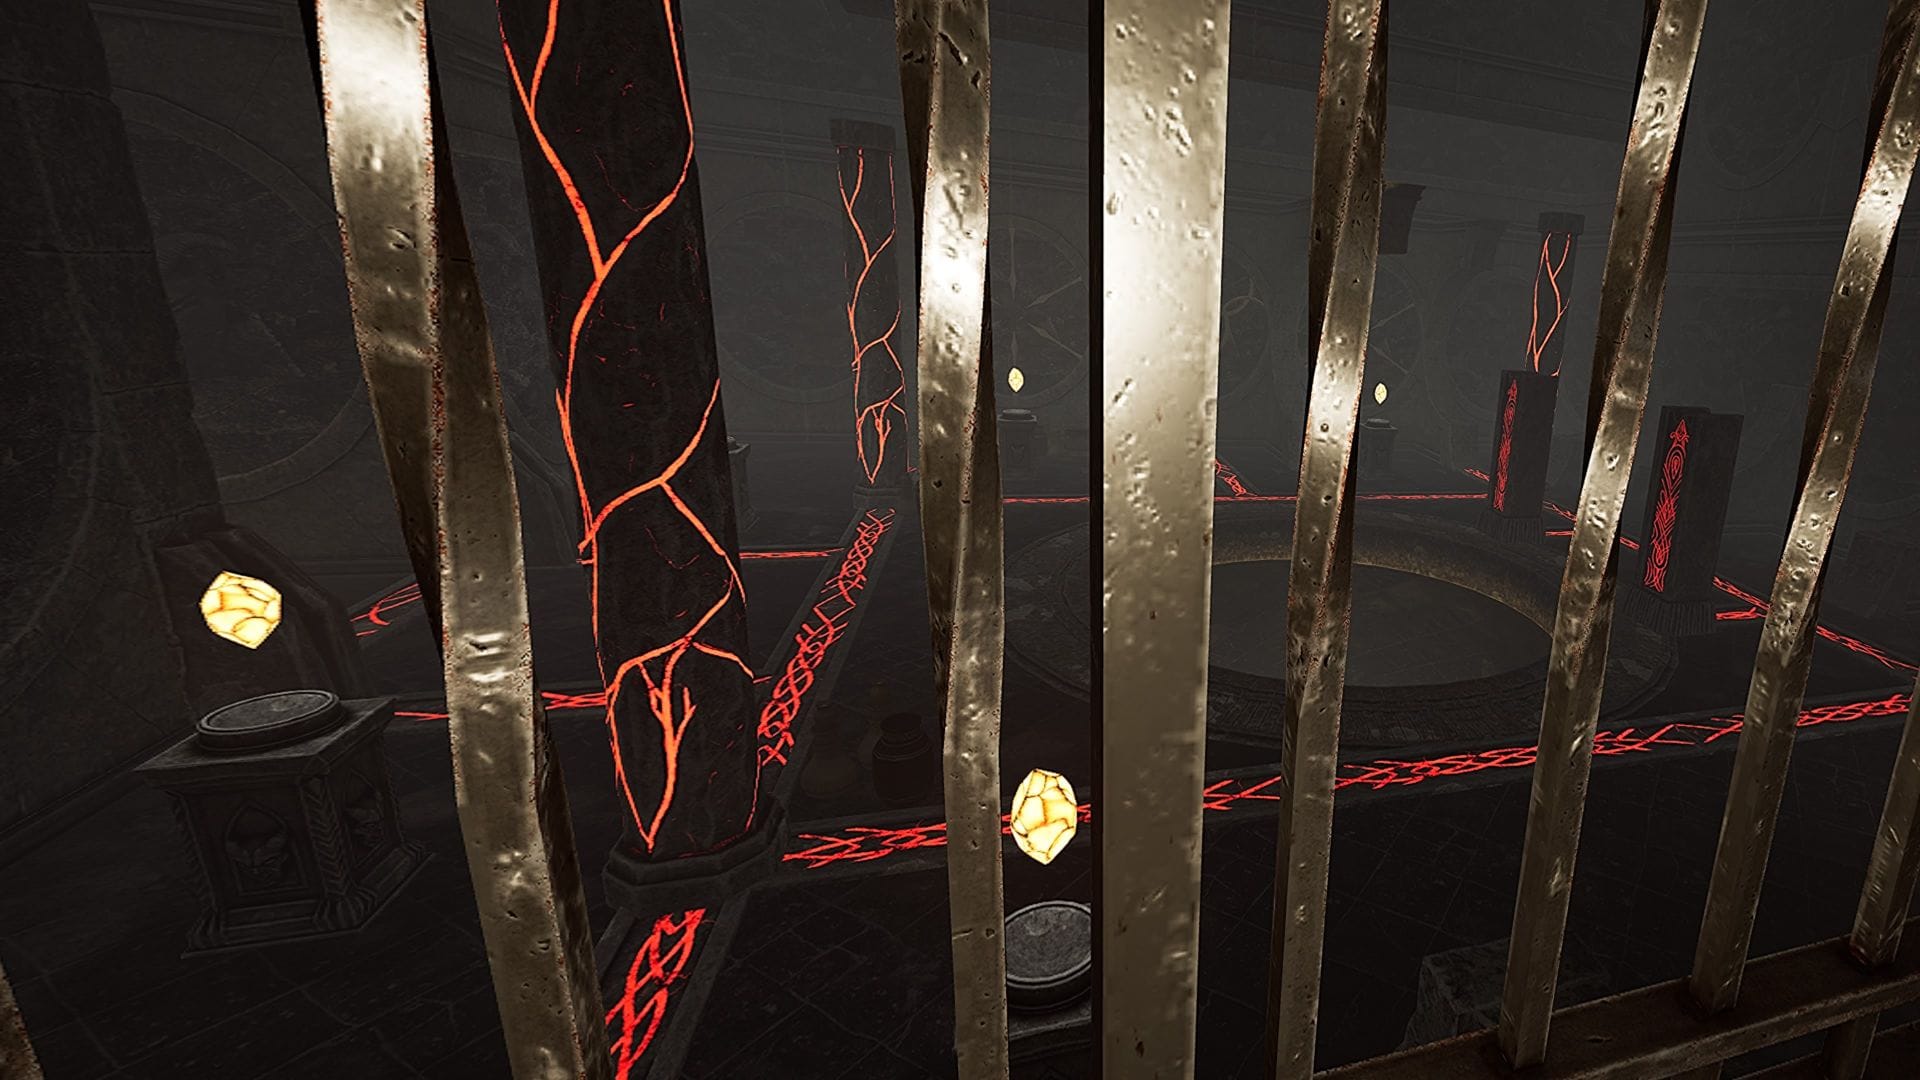
Legendary Tales is, first and foremost, a classic dungeon crawler in virtual reality. Its obtuse RPG systems and nonexistent story mean, as our less-than-enthused reviewer wrote, “you have to grit your teeth to enjoy it all.” Fortunately, the reception to feedback from developer Urban Wolf Games means that Dawn of History, its first full-fledged expansion, addresses many of the issues of that first outing. Delivering an incredibly robust variety of builds, friendlier onboarding, and dangerous areas to explore, this DLC fundamentally changes the game for the better.

The Facts

What is it?: An expansion to Legendary Tales, a VR dungeon crawler.
Platforms: Steam and PlayStation VR2 (Reviewed on PS VR2)
Release Date: Out now
Developer/Publisher: Urban Wolf Games Inc.
Price: $19.99 (Base game: $39.99)

The narrative serves as an excuse for players to hack and slash their way through underground mazes. An alarmed goblin has arrived in the town, your hub area, explaining that trouble is brewing in the depths of a cathedral’s ruins. The game smartly stays out of its own way by adding simple but clear objectives in your quest to face the darkness below: destroy a magic crystal, eliminate ten enemies in a certain area, break a cursed tablet.

0:00

/0:45

A gameplay video of my tank and a mage fighting skeletons.

What is clearly impressive from the get-go is how expansive these areas are. Depending on how effective you are at clearing each enemy-filled room, each level could take about one to two hours. Although not fundamentally changing the objective of the quests, the level layout changes per player; I found out as I played what I thought would be the exact same maps in multiplayer. While this is mostly an aesthetic choice, it adds to the replayability.

Dawn of History is sinisterly playful in the way these levels are presented. The starting areas might be straightforward, with the familiar skeletons and new hellraiders assaulting you as you explore for loot. Soon you will find that it is in fact riddled with traps. Buzzsaws hanging from ceilings will end your journey short if you are not careful. Mimics, or fake chests, will bite the hand of greedy adventurers. At one point, I was in front of three doors to choose from, two of which were deadly traps as well.

Commonly criticized in the original release, there is still no map to speak of. As expected, this resulted in getting lost in these mazes often. Thankfully, this is circumvented by using wisps that show the correct path called “Guide Spirits,” found by breaking wooden boxes or vases. Advancing each floor by falling down further into the caves signals the increase in danger.

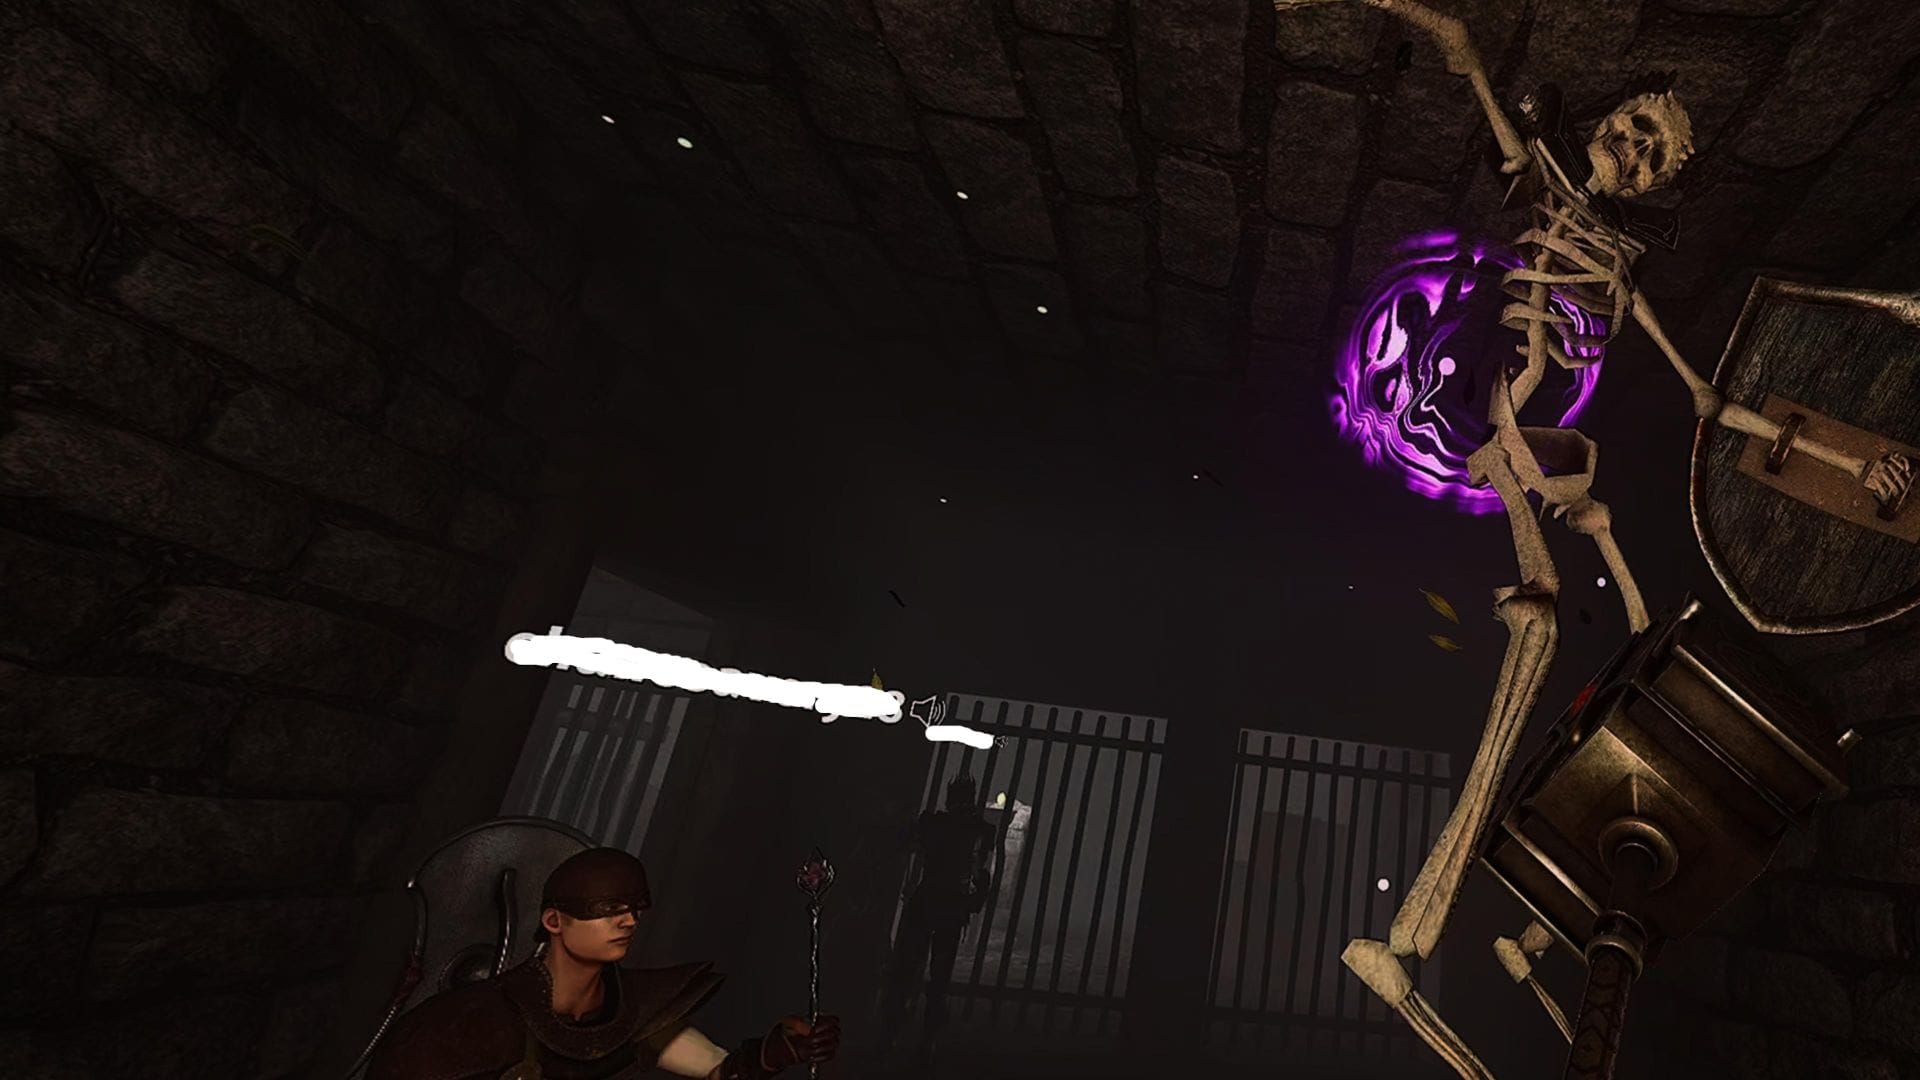
A skeleton being levitated by a mage’s legendary wand, ready to be pummelled.

An approachable design choice, Dawn of History can be accessed in two ways: through a quest in town with your longtime character or by simply creating a level 50 character ready for the action from the main menu. This allows returning players who would want to play the fresh content to easily get there. Not only that, but it also gives players 100 thousand gold to flexibly customize and try their hand at the various builds on deck.

Quite clearly made for veterans of the game—there are no difficulty settings—I found it better to play with others. Luckily granted a legendary hammer by a crystal spawning random weapons bought in the main hub, I decided to go for a tank build, focusing mainly on blunt strength and vitality. This worked surprisingly well when I ventured with a powerful mage who had a legendary wand in turn. Its special skill to levitate powerful enemies while I beat them like a piñata meant we had a type of fun I did not know this otherwise gritty game had.

Our collaboration worked in more ways than one. He could enchant my hammer to cause frost elemental damage, enhancing each hit. With his divine build, he was able to heal and revive me. It is clear Legendary Tales harkens back to the days of olden RPGs such as EverQuest or Tibia, where the synergy between builds instilled a winning formula. Playable online with up to four players, I can definitely imagine a group of seasoned warriors with two tanks, an archer, and a mage obliterating everything in their way.

Preset builds are saved from the menu to face every scenario depending on what is required. This makes respeccing, or changing your character stats, quick and easy. Swinging your arms around for extended periods is tiring, so to be able to change your skill tree and ability points from warrior to mage is useful. Its physics-based combat allows for precision parries that sometimes stun the enemy, which the punch build, famous among the community, can make short work of.

The deeper you go into the underground, the harder it gets.

This helps plenty since Dawn of History is not messing around. There is only one boss in this expansion, and he is at the end of the four available dungeons. Teleporting on a whim behind players’ backs, every player needs to be at the top of their game to be able to defeat him. To even reach it, there are so-called Champions found randomly in every level. Boasting a greater health pool, these swift subbosses require great effort to be defeated with no casualties.

Comfort

There are a few options to increase accessibility. Smooth or Snap turning is available, and so is changing the dominant hand. There is calibration for playing either sitting or standing. No teleport option exists.

On PlayStation VR2, eye-tracking can be turned on or off. Legendary Tales is a very physically demanding game, so that should be taken into account when playing as well.

The last but most important improvement that I noticed compared to the base game was the improved tutorials. Everything needs to be done manually, so even though it enhances the immersion, it used to be confusing. From creating potions with alchemy to grinding sharp weapons, it all requires an exact gesture that the game now implements a short video and written explanation for. The novel Seal system that buffs weapons is comfortably applied because of it.

Legendary Tales: Dawn of History – Final Verdict

Legendary Tales was a solid dark fantasy akin to Dark Souls, but it failed in many aspects to be crowned a true classic RPG in VR. The hostile onboarding, the flimsy hitboxes, the lack of reliable multiplayer. Two years on, Dawn of History course corrects to offer one of the richest role-playing experiences on the medium. With new and revamped systems, it can now be recognized as a best-in-class dungeon crawler. The frankly baffling amount of builds alone makes for an equally cutthroat and entertaining sandbox to create your own legendary tale.


UploadVR uses a 5-Star rating system for our game reviews – you can read a breakdown of each star rating in our review guidelines.

How to Build a Music Library That You Actually Own

We may earn a commission from links on this page.

It’s ridiculous that the pace of my day can be ruined by the realization that a beloved song is no longer on the streaming platform I pay for. As someone who vividly remembers cassette tapes, CDs, and hoarding hard drives full of MP3s, it’s a reminder of what we traded in when we said “yes” to streaming services years ago.

I’ve been working on my Warped Tour playlist for the summer, but I keep running into a ton of licensing holes and grayed-out deep cuts. The gaps are everywhere, and it’s harshing the vibe. It’s another harrowing reminder that I merely rent whatever Spotify offers in its music library. That’s why I started building my music library from scratch again. Here’s how to find, buy, and own music in a world that has gone purely streaming.

The best places to buy MP3s

Buying and owning MP3s depends entirely on the type of music you like. If you’re into mainstream mega hits or your favorite grungy band is on a big label, you can look to the major players to buy music: Apple and Amazon. Apple’s iTunes Store (it’s still called that!) remains one of the most robust among the “available everywhere” sect. It’s also easy to buy high-quality 256 kbps AAC files, which are technically more efficient than regular MP3s and offer CD-like sound quality without being massive files. Just make sure you’re purchasing the music through the purple iTunes icon and not the red one. Amazon’s MP3s are DRM-free, usually 256 kbps, and you can usually find what you need there, even some more obscure offerings.

If you’re hoping to own digital and physical media, Amazon offers AutoRip. When you buy a physical CD or vinyl marked with the AutoRip logo, Amazon adds the digital version to your cloud library for free. You can stream these purchases through the Amazon Music app without needing a monthly subscription. Apple also lets you stream your iTunes purchases directly within the Apple Music app. Even if you don’t pay for the monthly streaming service, you can dig into your legacy library and stream what you own within the platform.

7digital is greatly heralded as a long-standing hidden gem of the MP3-buying world. The service itself is a backend provider for other global music services, which is why they have so much access to music licenses. It’s a British company, so if you listen to more international artists, this is a viable solution, as Amazon and Apple’s offerings can be region-locked. 7digital also allows you to choose between MP3 and high-resolution FLAC files at checkout.

All three of these services have been around long enough to have a legacy of longevity. If you lose your digital files, Amazon, Apple, and 7digital will let you re-download them through your account.

How to buy music directly from artists

a screenshot of bandcamp
Bandcamp remains the defacto standard for buying music directly from an artist.
Credit: Screenshot by Florence Ion/Lifehacker

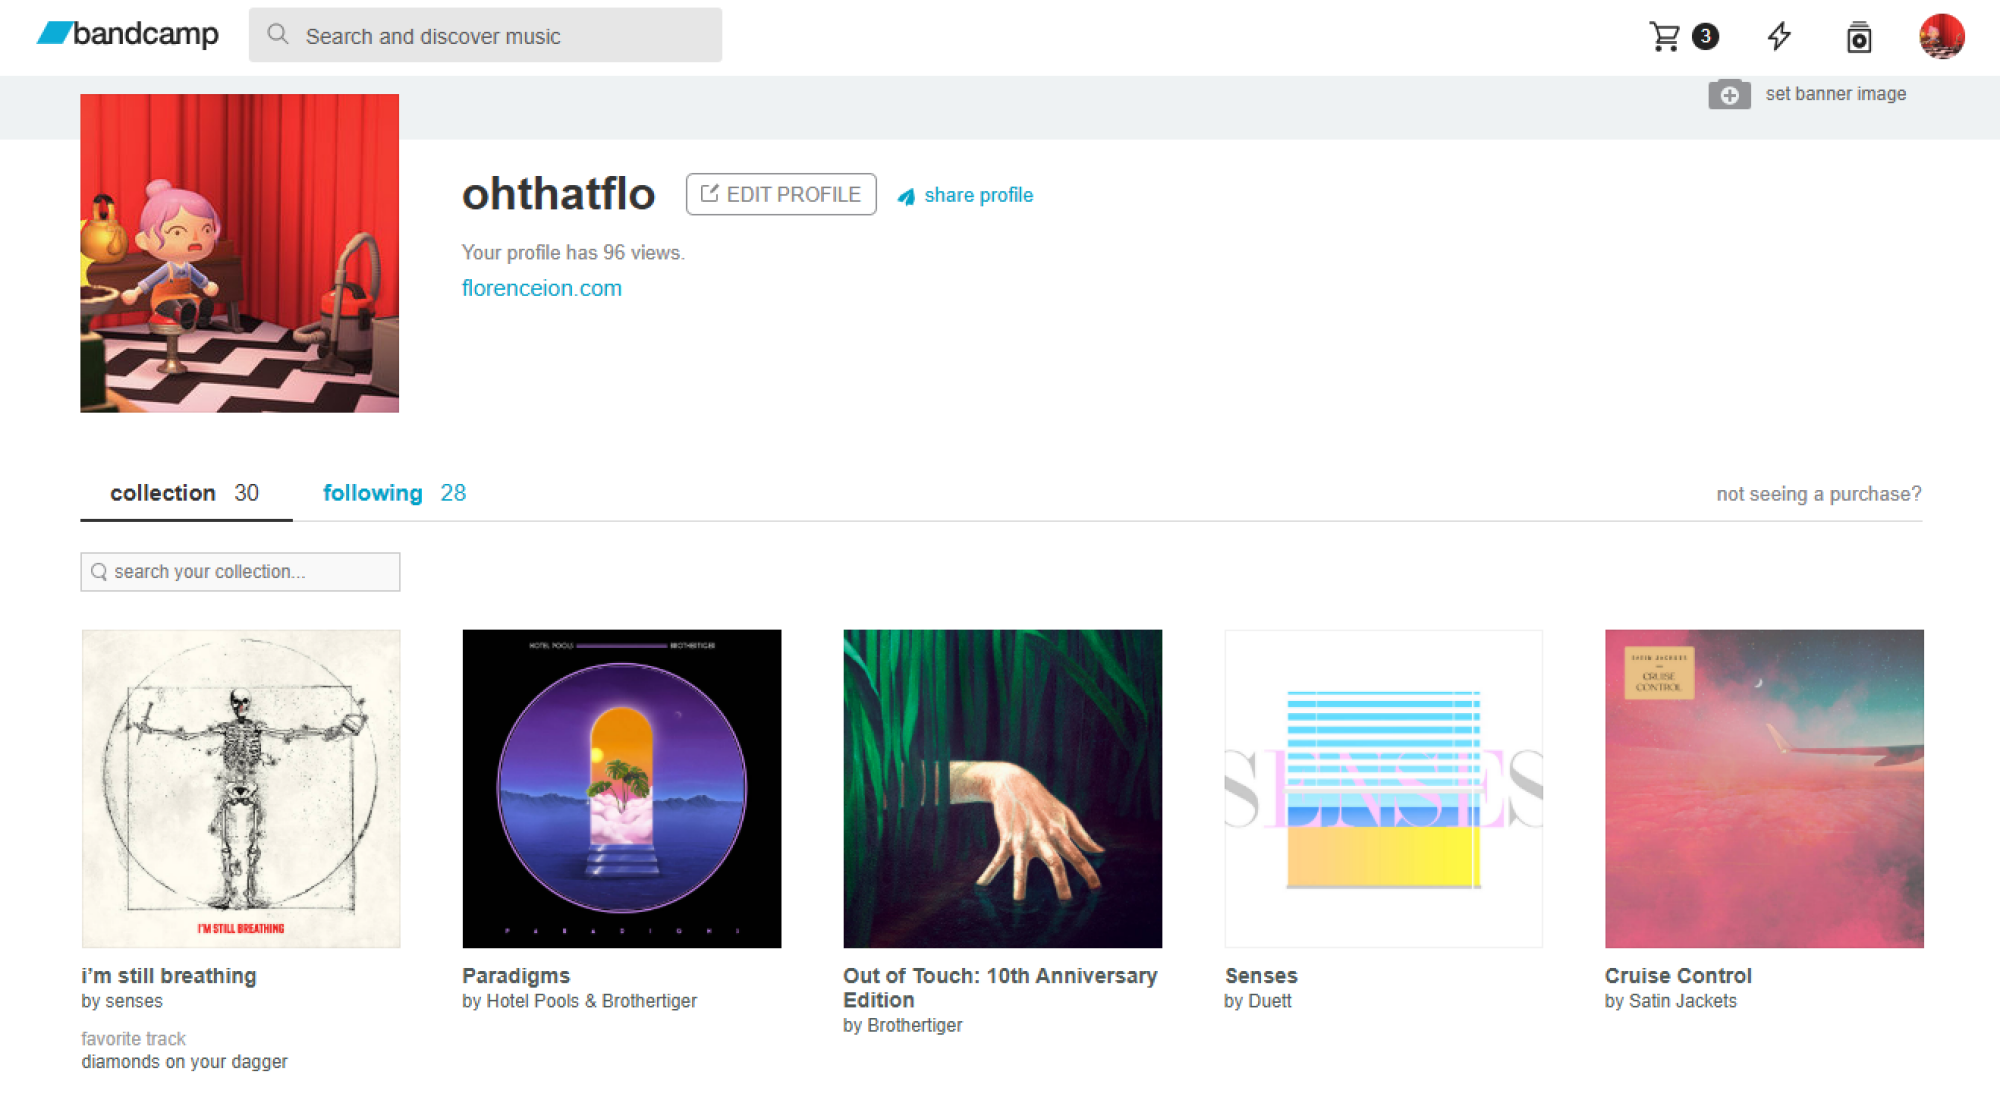
If you’re buying digital music to support the band or artist you love directly, try Bandcamp before you go anywhere else. It’s one of the few music marketplaces where you can choose your flavor of file—MP3, FLAC, or WAV, in some cases—within a single transaction. Sometimes there is even merch and physical media, like LPs and CDs, that you can add to the cart. Bands like the site because it doesn’t take a huge cut of what you’re paying the artist for an album. The Bandcamp app also acts like a cloud locker for everything you’ve bought on the platform, so if you get a hankering for music you don’t have on you, you can access it through the mobile app.

Some bands and artists get around their labels by using platforms like Patreon or Substack to distribute music files directly to a monthly “fan club.” Others lean into their labels by using direct-to-consumer online shops, like Polyvinyl, which notoriously prioritizes a 50/50 profit-sharing model with their artists. The digital store also features high-res, DRM-free files, ensuring the artist gets a fair share while you get a file you actually own.

Where to buy higher quality digital music

Even if you aren’t trading your Apple AirPods for a dedicated DAC (Digital-to-analog converter) and a pair of serious headphones, you may want to own even higher quality digital music, beyond 256Kbs. You’ll want to seek 24-bit/192kHz FLAC files, which aren’t available in mainstream digital music stores.

A screenshot of hte Qobuz website
Qobuz is a global streaming service that also lets you buy high-res tracks.
Credit: Screenshot by Florence Ion/Lifehacker

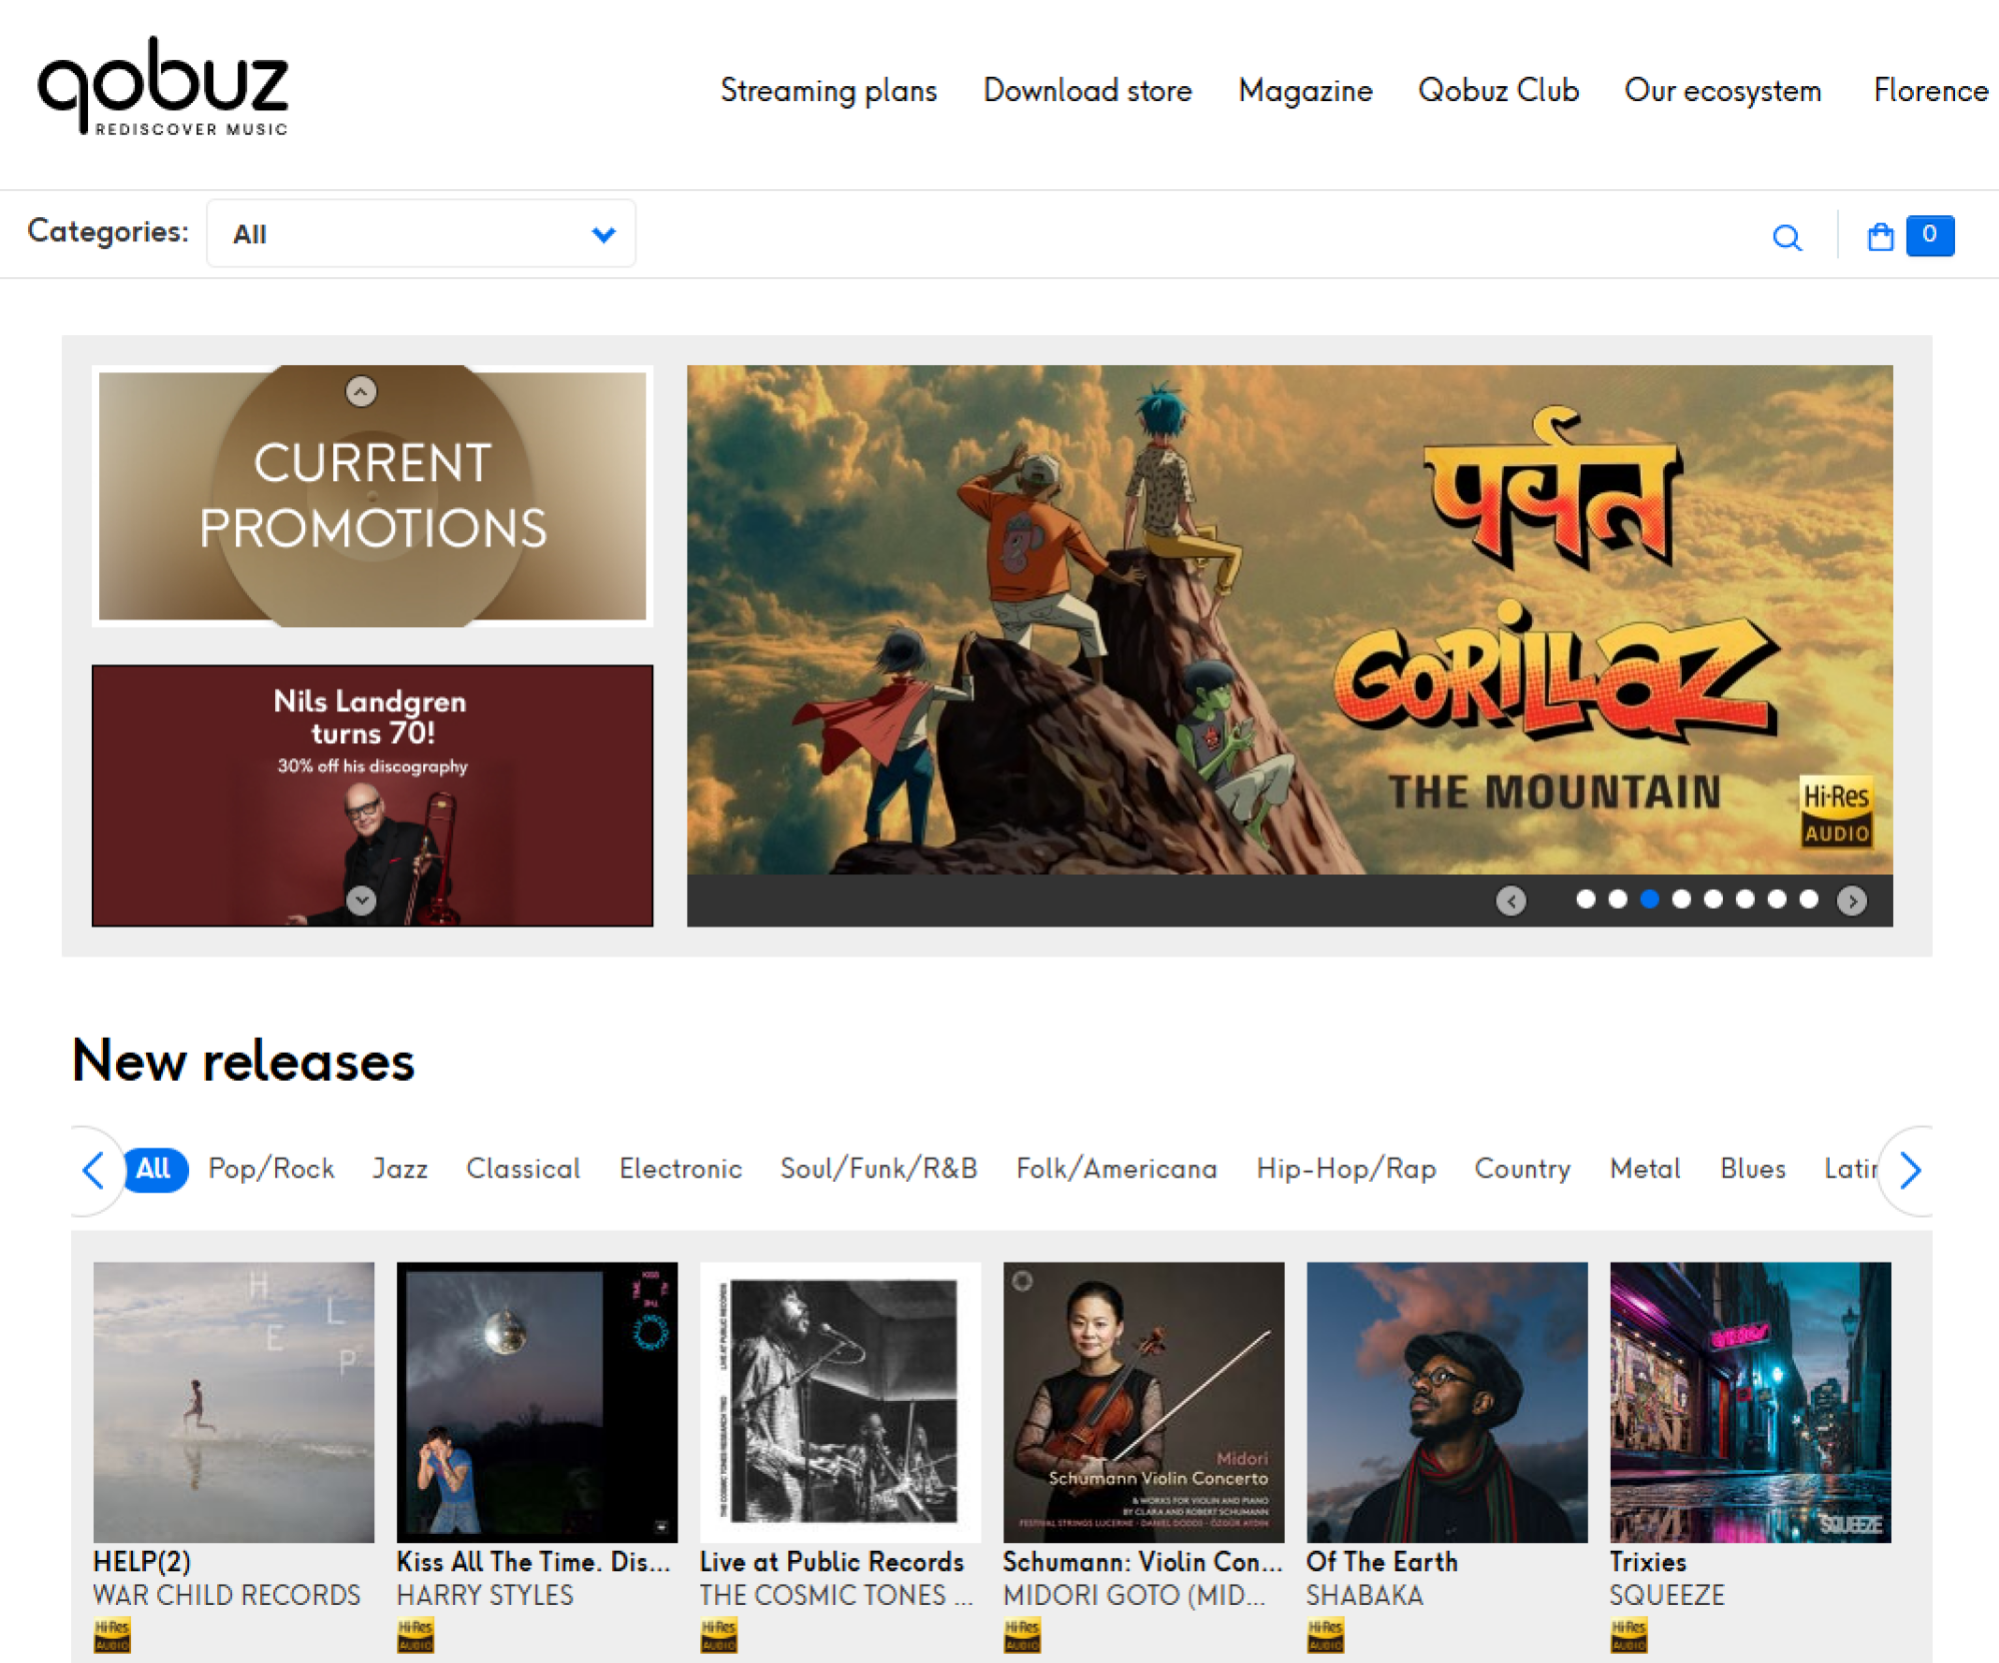
Qobuz is a global favorite for buying high-res tracks, and it’s one of the easiest to use. You can buy what you want in the browser and then use one of the companion desktop apps to batch-download files. Qobuz even offers a streaming subscription that gives you massive discounts on future high-res albums and EPs you purchase. It’s a good deal if you’re actually planning to collect MP3s, and the streaming ability lets you preview an album before you commit.

Other popular services include HDtracks, which has been around since 2008. Founded by a pair of audio engineers, the site specializes in definitive masters. It’s a good choice if you have a more classical or legacy rock taste in music, as 24-bit remasters are usually available to own. Bleep is another service geared toward electronic and alternative music lovers, while Boomkat serves the more experimental and underground niche.

How to RIP your own CDs

Part of the fun of getting back into digital music is remembering that another way to collect it—and really solidify your ownership—is to go to your local record store or second-hand market for CDs. Yes, CDs, the compact discs that somehow endure even though the players aren’t even standard in cars anymore.

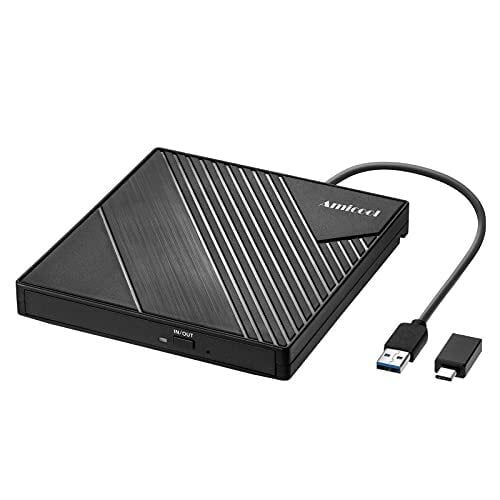
Since most modern laptops and computers no longer ship with optical drives in favor of slim, svelte designs, you will need a simple external CD/DVD drive that connects via USB-C or another method. Brands like Asus and LG still make these combination drives. They’re easy to buy and aren’t too pricey.

Next, you’ll need ripping software. For Mac users, the Apple Music app features the same built-in ripper that shipped with iTunes all those years ago, and it’s still a viable option. If you want something more robust, there’s X Lossless Decoder. It’s simple, handles album art and track names quite nicely, and is a good idea if you’re a stickler for metadata.

If you’re willing to spend a little money, dBpoweramp costs about $40 and works for both Mac and PC. Users like it because it pulls track information from multiple databases simultaneously to ensure metadata is solid.

Windows users also have a plethora of options. Exact Audio Copy is one of the more popular free ripping suites. It cross-references global metadata to ensure you’re grabbing audio that sounds like the original, though it does have a learning curve. I use Express RIP CD Ripper because I paid for a license long ago (around $40). It’s fairly plain and works fine on most of the albums I recover from Goodwill. However, it doesn’t handle compilations very well. I’m still working through a couple of albums in Mp3tag to get them to display the correct song titles.

One major thing to keep in mind if you decide to become CD-obsessed: Always rip to a lossless format like FLAC (Windows) or ALAC (Mac). You can convert a high-quality file into a smaller MP3 later. But you can never expand an MP3 back into the full-fidelity sound of the original CD.

How to stream your musical library now that you own it

Now that you own your own digital music, you’ll likely want to play back those files away from the tethers of your home computer. If you’ve got a centralized storage solution at home and you want to connect your library to the internet, Plexamp lets you create your own private streaming service. You can log in to it from anywhere in the world with the mobile app and stream the files you own in high resolution.

If you don’t want to deal with home servers and want to carry your music with you, apps like Prism on iOS and Symfonium on Android are primed for power users. Prism connects to cloud services like Plex and iCloud and features an Apple-worthy interface, while Symfonium supports almost every music format and even lets you cast to other devices. You could also invest in a dedicated mp3 player, either an off-brand one or a revived old favorite, to carry your music with you.

Finally, keep the 3-2-1 rule of file ownership in mind when managing your music collection: If the song doesn’t exist in three places, it doesn’t exist at all. There should be one copy on your main computer or home server, one on an external backup drive, and one in the cloud or physically stored on a bookshelf. Yes, it’s maintenance work, but the trade-off is that you own what you listen to.

Bloxer Is A VR Fitness Take On Tetris

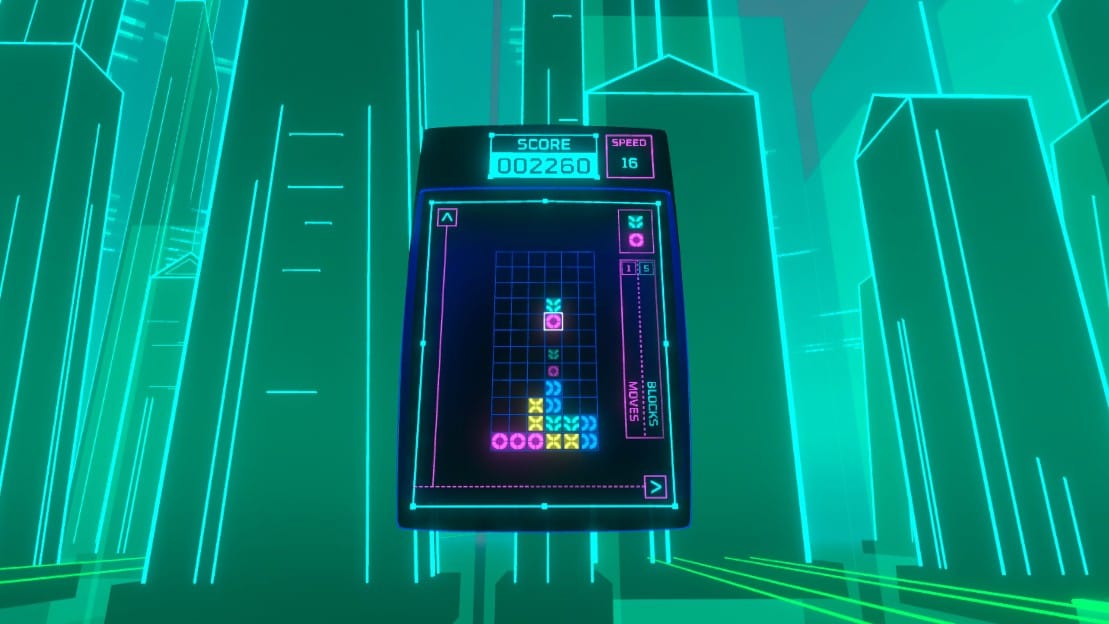
Bloxer is a VR fitness take on Tetris that combines the classic block-lining gameplay with boxing.

It’s developed by Incuvo Inc, the studio behind titles like Pirates VR: Jolly Roger, TRACKED: Shoot to Survive, and VR versions of such existing games as Green Hell and Bulletstorm.

As the description above suggests, Bloxer’s core gameplay is immediately familiar to anyone who’s ever played Tetris or its many clones: colored blocks fall down across a vertical field, and you have to arrange them into matching rows in order to clear up room for more blocks and prevent the screen from being filled. The twist, of course, is how you go about moving those falling blocks: by punching a robot control box in front of you.

Hit the block to move the blocks.

Blocks are moved left and right by performing hooks, uppercuts rotate them, and punching down makes them fall faster once you’ve got the position right. There is also an alternate control scheme that has you jab with your left and right hands to move the blocks and perform hooks to rotate them, but I mainly just stuck with the default setting. Just like in regular Tetris, games can get increasingly frantic as the falling speed increases, with the added element of punching making gameplay feel more like a genuine workout as the game goes on.

There are two single-player modes: Endless, where the game keeps going until the blocks reach the top, and Time Attack, in which you try to build up a High Score before the clock runs out. You can check your scores and compare them with those of other players around the world from the menu screen.

Users can also compete online in 9-player matches to see who can rack up a high enough score. In addition to all the usual punches and combos, players can sabotage their opponents by placing “Garbage Blocks” on their field, hindering their ability to avoid a game over. Players can also counterattack, adding another layer of strategy to the fast-paced action.

0:00

/0:20

Not quite the same as you remember…

If you want to take a break, there is a VR hub outside the main game filled with physical objects to pick up and minigames like a punching speedbag, a basketball net, whack-a-mole, and even dart guns. These have nothing really to do with the primary game, but they are a fun distraction nonetheless. It’s a pleasant surprise just how much detail and effort went into something like this, when a simple menu screen would have sufficed.

Bloxer’s visual and audio presentation is decisively retro, with neon colors and a synthesized announcer voice that fits the idea of this being an updated version of the Tetris games that have been a staple of arcades and other platforms since the 1980s. You can also hear the control box react in pain when it’s being hit, which is a cute novelty.

For the most part, Bloxer is a solid, motion-controlled take on the classic Tetris formula that most gamers are already familiar with, with the added element of punching to move or rotate the falling blocks making it as much of a physical challenge as it is a mental one. Fitness-focused players might find some use for Bloxer in their next VR workout, and there is plenty of nostalgic charm for people of any age.

Views Of Debut At The BBC Proms In Apple Immersive Video

You can now attend Debut at the BBC Proms in Apple Immersive for free on the Apple Vision Pro.

The 35-minute performance takes you through multiple perspectives, from various points on stage with pianist Lukas Sternath and the BBC Symphony Orchestra, led by Sakari Oramo, to sitting among the audience inside the Royal Albert Hall in London.

What Is Apple Immersive Video?

The Apple Immersive Video format is 180° stereoscopic 3D video with 4K×4K per-eye resolution, 90FPS, high dynamic range (HDR), and spatial audio. It’s typically served with higher bitrate than many other immersive video platforms.

We highly praised Apple Immersive Video in our Vision Pro review. It’s not possible to cast or record Apple Immersive Video though, so you’ll have to take our word for it unless you have access to a Vision Pro.

Close Premium Access

The opening moments place you backstage as a narrator introduces the experience and you hear some commentary from Sternath as he walks to his performance. He doesn’t speak directly to you or to anyone in the scene, but with his back to you as he’s walking it’s still clear that it is him and it complements the narrator in setting the scene. Despite some slightly speedy camera movement that carries you forward as you follow Sternath, I found this introduction enjoyable because of the story that was starting, and interesting access to be able to feel what it’s like to enter a show from a performer’s view.

But then, the story ended. I would have liked to spend more time ahead of the performance to understand the compelling stories behind it. The focus shifted to the experience for the rest of the immersive video. I would not expect a narration to interrupt a performance, but this is where elements like views that increase my connection to Sternath, Oramo, members of the BBC Symphony Orchestra or a shared experience with the audience could have worked harder.

Edits that Compete with the Performance

Debut at the BBC Proms places visitors in multiple views throughout the performance. The beautiful resolution of each shot helps create a sense of presence within the 180-degree view. You can see details in the sheet music through to the shine of Sternath’s shoes. At the end of the performance, you can even see the sparkle in his eyes which creates a deeper sense of connection to the moment.

The experience frequently shifts between positions on stage and in the concert hall – From multiple points at the front of the stage where you are up close with Sternath, Oramo and several symphony members who are within the frame, to behind the orchestra facing the audience, to several points at different levels as if you were a part of the crowd.

While the views themselves are interesting, the frequency and speed of the edits often end up competing with the performance. Just as you begin to take something in, you’re moved again. Returning briefly to the same positions doesn’t help either, as it takes a moment to reorient before being pulled away once more. Over time, it starts to feel less like a continuous presence within the space and more like being moved between camera placements. That becomes even more apparent when you can spot other cameras in certain shots, including a camera operator near the front of the stage, which helps explain some of the unnatural horizontal movement experienced moments earlier. I appreciated the different views but not the frequency of the changes.

Audio That Sounds Beautiful but Feels Disjointed

The Spatial Audio enhances the experience and it of course sounds beautiful throughout. But it also remains consistent no matter where you’re placed. Whether near the piano, behind the orchestra, or further back with the audience, my ear didn’t pick up a meaningful change in how it behaved.

That consistency keeps things stable, but it also makes the experience feel disjointed. The visuals shift frequently, but the audio does not follow those changes. I closed my eyes at one point just to focus on it, and that contrast became even clearer.

Being able to stay in one position for an extended period of time to hear how it changes from that perspective would add more to the experience.


Apple Immersive presents a rich opportunity to give visitors access to experiences that would otherwise be out of reach. The strongest ones go beyond impressive views and create a sense of presence, with a clear sense of who you are in the experience, strong storytelling, and a feeling of agency even when you’re not in control of where you move.

This year’s Xbox Games Showcase is set for June 7

Microsoft has confirmed exactly when this year’s Xbox Games Showcase will take place. It will air at the usual time, 1PM ET on the Sunday (June 7) of Summer Game Fest weekend. In recent years, the company has offered a deeper dive into one particular game straight after the showcase, and it’s sticking to that format this time with a closer look at Gears of War: E-Day.

The showcase and Gears of War: E-Day Direct will be available in more than 40 languages, including American Sign Language and British Sign Language. A stream with English audio descriptions will be available as well. You can watch it on several of Xbox’s various social channels, including YouTube, Twitch and Facebook.

This is typically Xbox’s biggest showcase of the year. It will be the first Xbox Games Showcase with Asha Sharma at the helm of Microsoft’s gaming division. Perhaps we’ll hear some more details on the next Xbox (aka Project Helix), which is confirmed to be a system that will run PC games — much like the upcoming Steam Machine.

Along with more details about a brand-new Gears of War game, it seems likely that we’ll learn the release date for Fable during the Xbox Games Showcase. That game is slated to arrive this fall.

We don’t yet have exact release dates for Minecraft Dungeons 2 or Halo: Campaign Evolved, a remake of the first Halo game’s campaign. Those are scheduled to debut this year as well, so they seem like prime candidates for showcase appearances. Microsoft also has Clockwork Revolution, State of Decay 3, OD (from Kojima Productions) and something new from Toys for Bob in the hopper.

In addition, Microsoft is promising the return of Xbox FanFest, an in-person fan event, to help mark the brand’s 25th anniversary. Sharma confirmed this will take place in Los Angeles, where all of the Summer Game Fest events are going down. “This year’s experience will include a look back at the last 25 years, alongside a forward view of what’s next,” according to an Xbox Wire blog post.

This article originally appeared on Engadget at https://www.engadget.com/gaming/xbox/this-years-xbox-games-showcase-is-set-for-june-7-134942027.html?src=rss

An Immersive Perspective of Artistic Masterpieces in Apple Vision Pro

There’s a sense of luxury in having virtual private access to artistic masterpieces and historical artifacts. It’s elevated by the visual fidelity of Apple Vision Pro and Museas’ thoughtful options to engage with them.

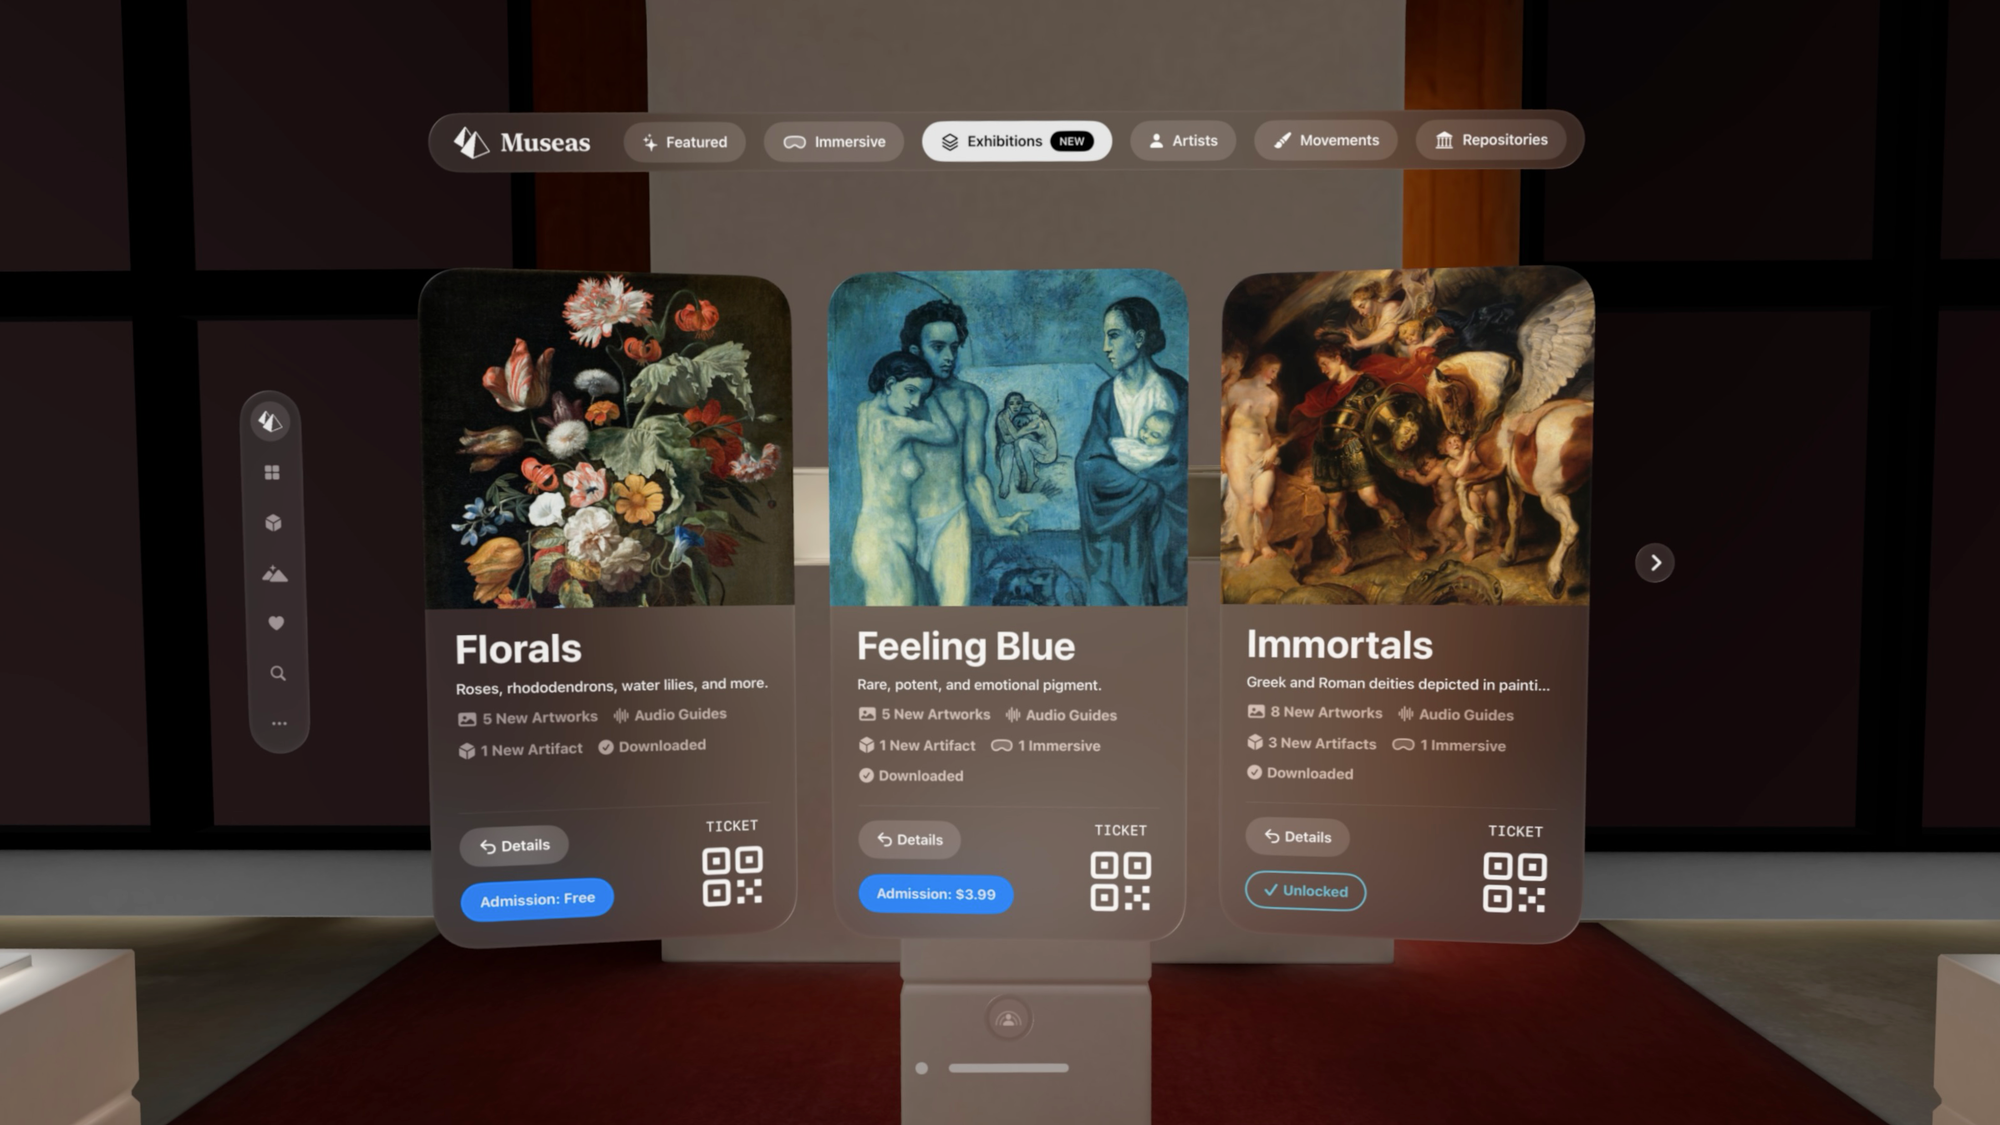
With ongoing updates, Version 3.0 of Museas adds support for the widgets system introduced in visionOS 26, letting you virtually place selected priceless art around your home, along with new exhibitions, environments and ways to explore the works. The exhibitions and environments can also be downloaded and stored for off-line use.

Whether you enjoy galleries and museums or not, Museas offers a way to experience art, artifacts, and their stories that made me feel more connected to them, even after seeing some of the works in person before. While nothing compares to viewing the real thing in person with its historical significance and detail in a shared space, this offers something different. It’s complementary because of how close you can get to each work and how free you are to explore and spend as much time as you like, with an optional audio guide adding context along the way, all without lineups, glass cases, travel, or in some cases any ticket at all.

Exploring and Experiencing the Art

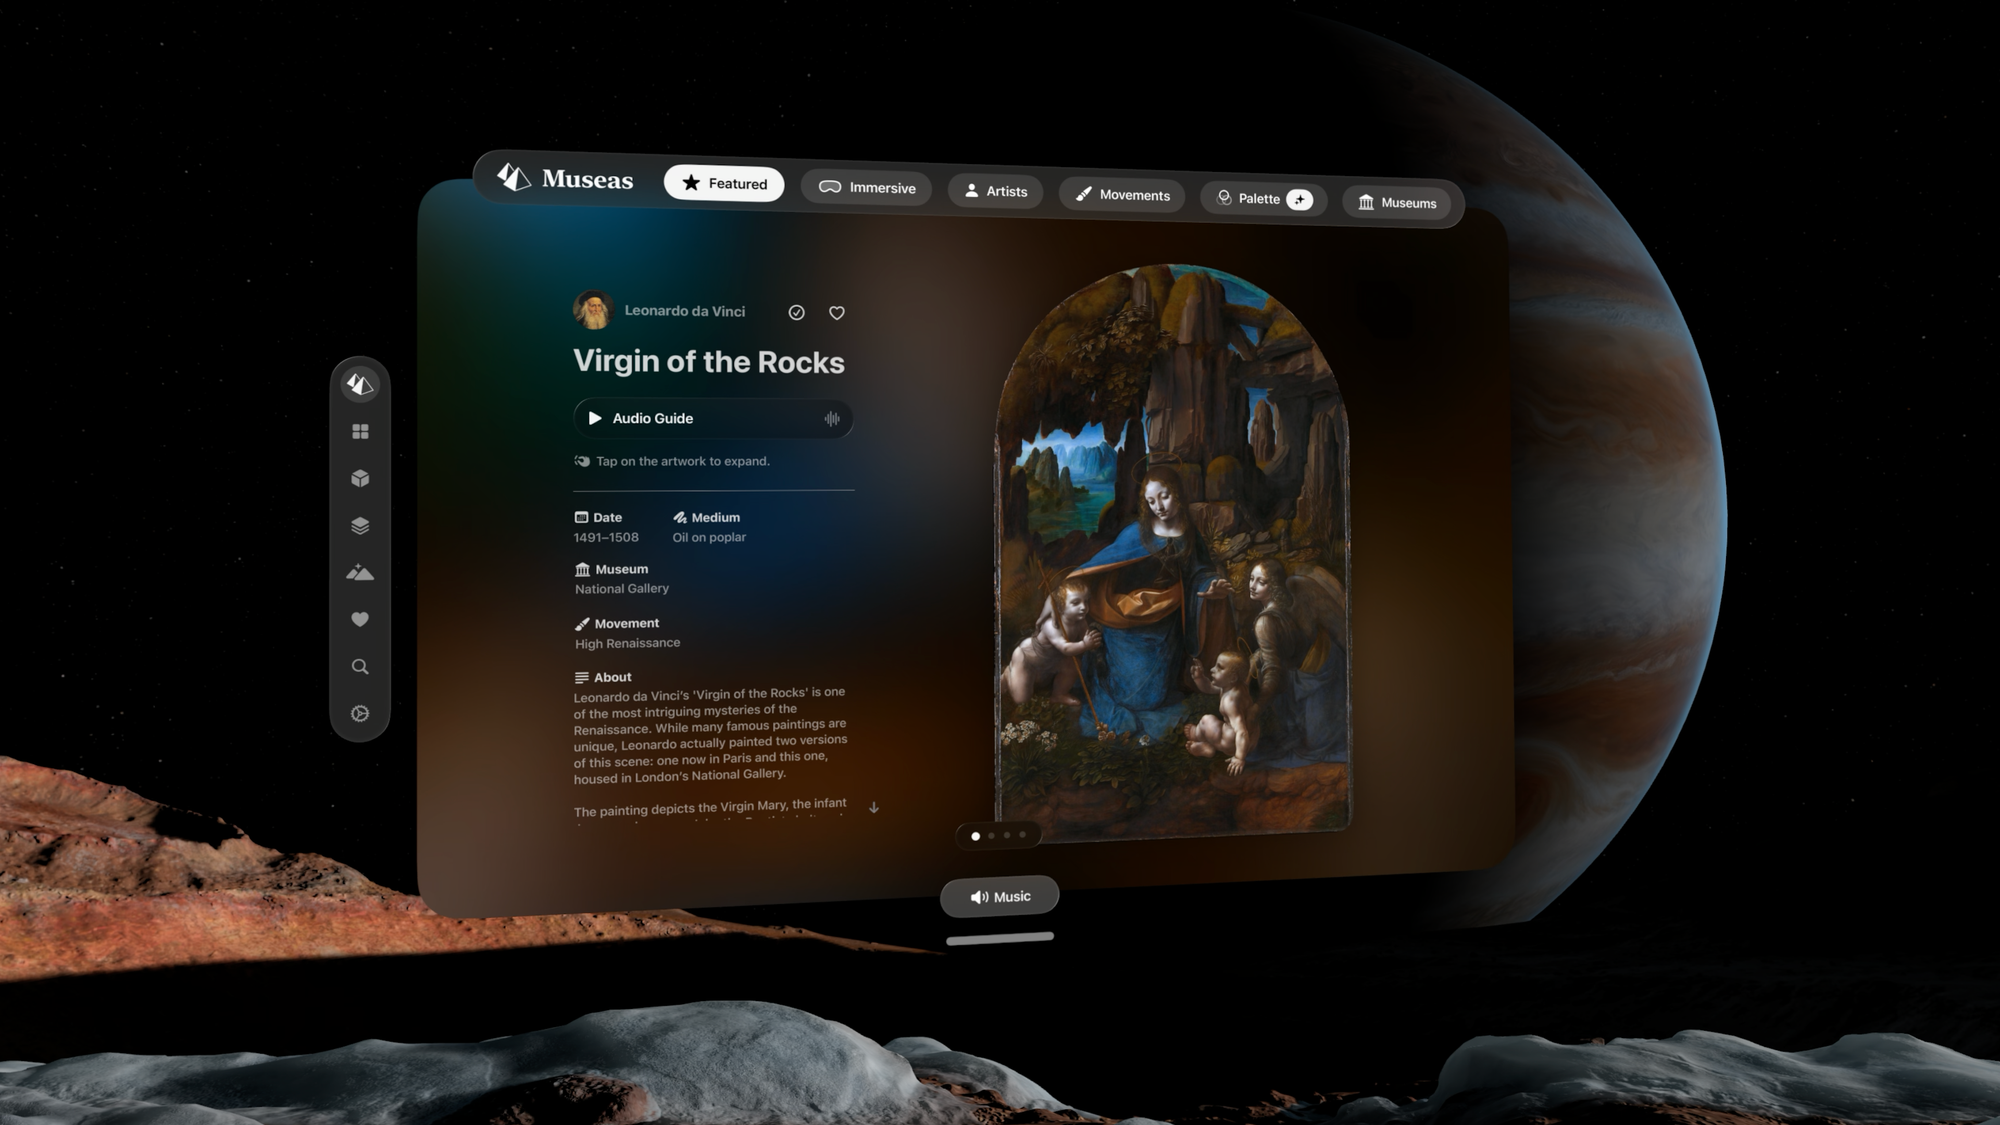
Museas offers multiple ways to explore the art itself. You can move through works by artist, movement, institution, or even color palette, following what naturally draws your attention rather than a fixed path. The options feel considered, supporting curiosity instead of directing it, while also drawing attention to different aspects of the story behind each work.

As you spend time with a piece, you can choose how much context to bring in. An optional audio guide can speak through background on the work, either automatically or when you’re ready. Additional details reveal information like its origin, time period, and where it’s currently held. Curated music can also accompany your exploration.

There is no barrier or risk of a security intervention preventing you from getting as close to the work as you’d like. You can move in to examine brushstrokes, fine details, and even elements like written marks or subtle textures, along with the techniques used by the artist to create realism and light. You can intuitively expand the work to reveal details that would be difficult, if not impossible, to access in a gallery setting.

The way you experience the art is also up to your preference at the moment. The immersive view option available for some works places you within a somewhat matching immersive environment instead of your living room (or wherever you are experiencing Museas) but not within the painting itself. If you prefer being fully immersed in an environment while viewing any of the art, there are some selections to choose from although they will not necessarily pair perfectly. I prefer seeing the art in my living room as the details I can view on the Apple Vision Pro appear to match the details of my reality surrounding it, supporting the illusion that the experience is actually authentic. Several paintings currently offer spatial view options but those seem to only be for select portraits at the moment. This option adds an interesting depth to the art that makes the subjects feel slightly more alive as if captured with an iPhone Spatial Photo. Toggling between this and the standard view, however, showcases the mastery of the original works that already create illusions of depth without the magic of technology.

Picking Up What You Normally Can’t Touch

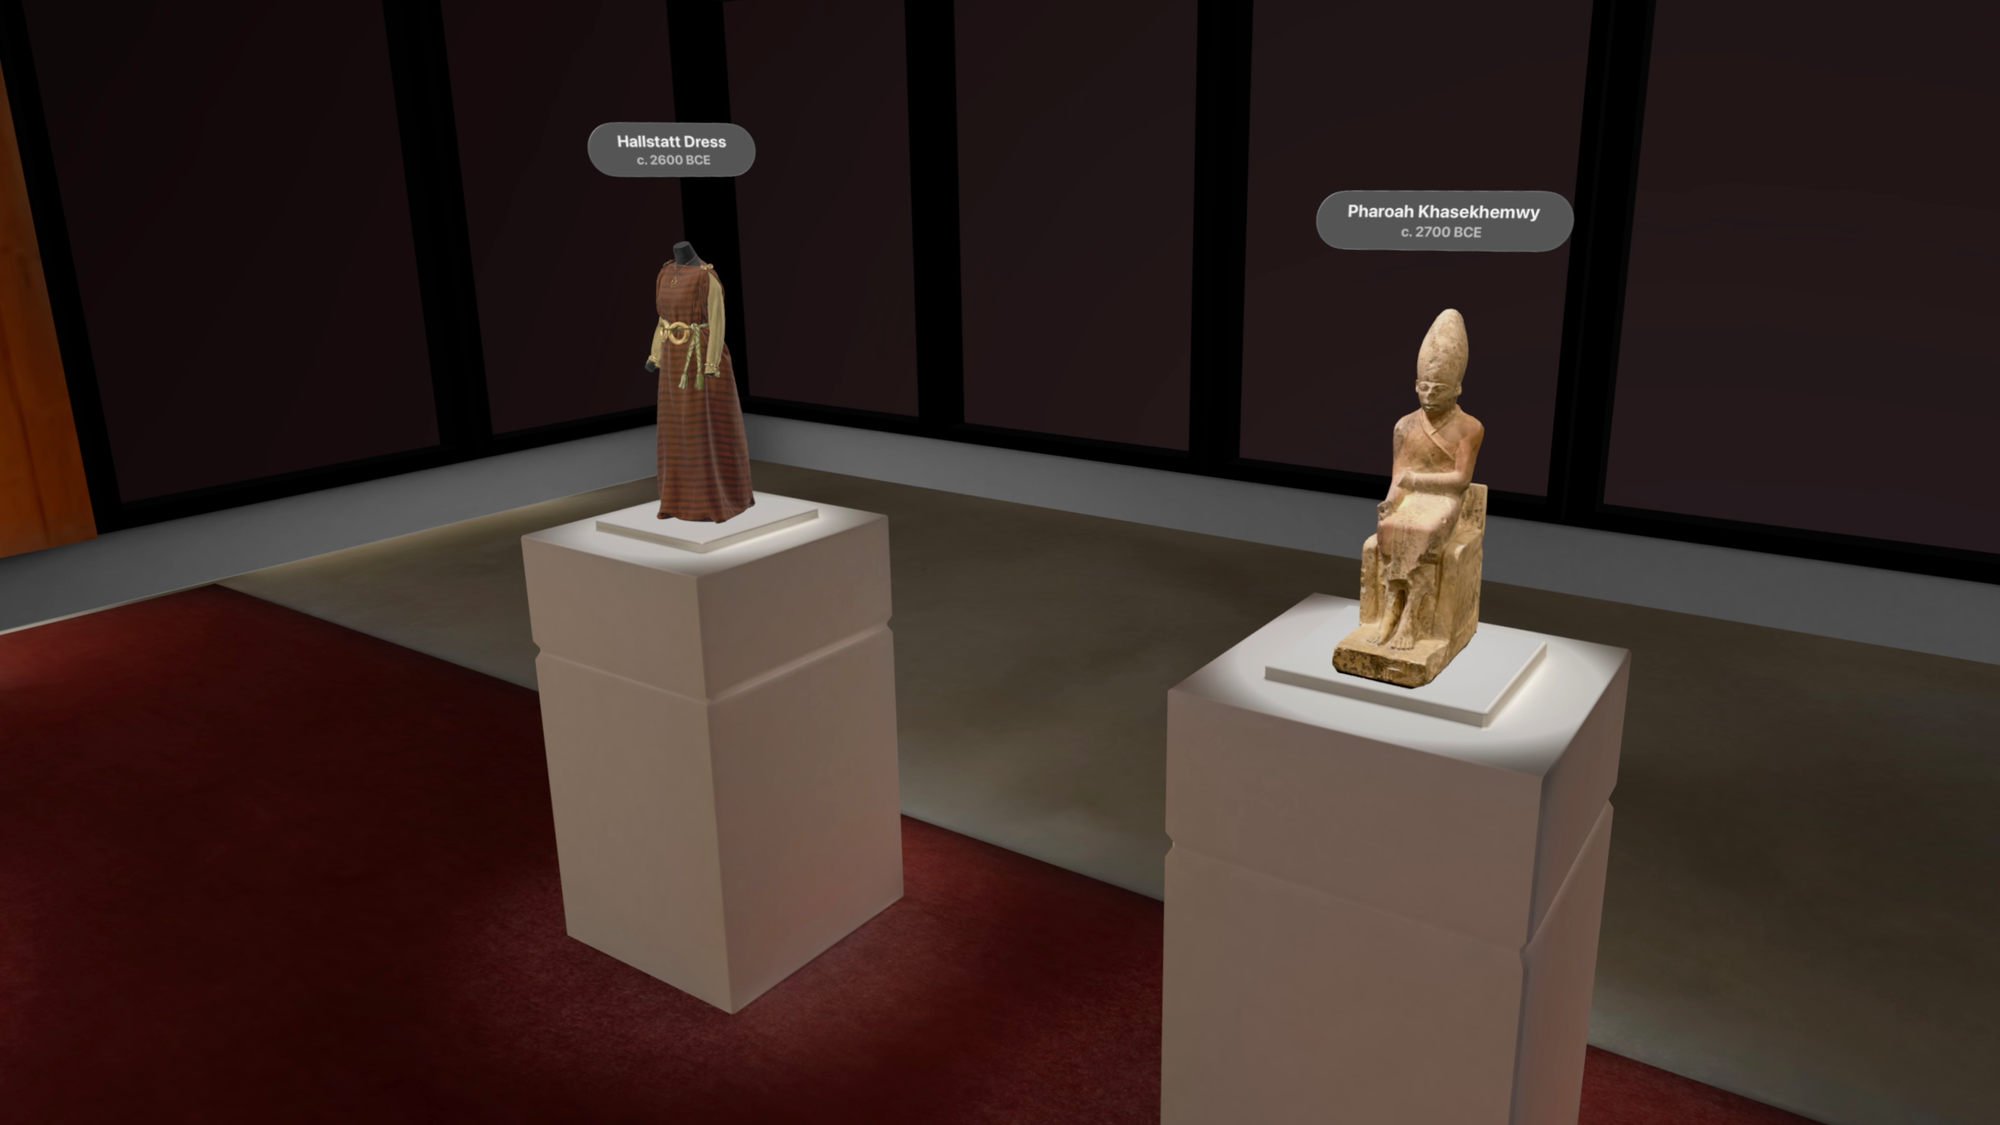
The app also includes high resolution digital reconstructions of ancient artifacts in 3D. The surface detail is so clear that I could almost feel the textures.

Sculptures and objects appear in your space as fully formed 3D pieces that you can scroll through and select for closer inspection and to learn their story. They rotate, can be picked up and even expanded. However, the objects do not stay locked in a size that you may prefer, and unlike the artworks, these artifacts aren’t yet integrated into widgets, which leaves room for how they might be experienced next.

Bringing Masterpieces Home without Spending Millions

Thanks to Museas, my condo decor now includes several priceless works, without spending a dime or pulling off a heist.

Placing artworks directly into your space as visionOS widgets lets them remain there even when the app is closed, adding an ongoing sense of presence and experience with the art of your choice. You’re not navigating an app to view your favorites. You’re simply spending time with the work between other moments in your Apple Vision Pro. Seeing the art in your own environment creates a sense of familiarity, and as you move around, you naturally view it from different vantage points, expanding your perspective of it.

Having these works persist in your space also acts as a subtle reminder to return, whether to revisit what’s already there or explore more within Museas, including both the free works and paid exhibitions. That’s a benefit of visionOS widgets both for users and developers.

Free Access and Paid Exhibitions

Museas includes a substantial amount of content for free, with additional exhibitions available through paid admission currently ranging from $5.99 USD to $8.99 USD. These group together a small number of artworks, artifacts, audio guides and sometimes immersive art. While the cost is lower than typical in-person exhibition tickets, so is the number of works included although you’re able to get much access to them. A bundled or loyalty-style offering over time could be beneficial as the catalogue continues to expand across institutions.

Exhibitions can be downloaded for offline use, and selected works can be saved as widgets in your space, extending their presence beyond the app. As more content is added, it continues to build on a format that gives you more access, time and freedom to engage with priceless art and artifacts in ways that aren’t possible otherwise.