Meta Is Going All In on Community Notes

More social platforms are increasingly axing third-party fact checking as a control against misinformation in favor of user-generated notes on existing content. Last month, Mark Zuckerberg announced plans to cut fact-checking programs on Meta platforms—Facebook, Instagram, and Threads—and replace them with Community Notes, which add corrections and context to posts that are “confusing or potentially misleading.”

A similar feature launched on Twitter in January 2021 as the Birdwatch program, which was rebranded as Community Notes and expanded after Elon Musk acquired the platform in 2022. Community Notes exist in lieu of the ability to report misleading content on X. Musk has both praised the feature as “awesome” and said he is “working to fix” it. X users can still apply to contribute their own notes.

YouTube has also tested a community notes feature that allows users to add context to videos on the platform. Those who meet eligibility criteria can sign up for the program’s waitlist in the YouTube mobile app (under Profile > Settings > General > Help inform viewers).

When Community Notes are submitted on Meta’s platforms by approved contributors, other approved contributors have to agree that the context is helpful before the note is actually published on a post (though the threshold for what constitutes a “helpful” note isn’t clear). According to Meta’s FAQ, Community Notes will be phased in and visible to users across its apps “over the next few months.”

How to sign up to write Meta Community Notes

As of this writing, Meta has a waitlist for users to be notified once the Community Notes beta launches. You can join the waitlist via Facebook, Instagram, or Threads. Only U.S.-based users are eligible, and you must be over 18, have an account that is older than 6 months and in good standing, and have either a verified phone number or two-factor authentication set up on your account.

You Can Finally Set a Passcode to Lock Your Garmin Watch

We may earn a commission from links on this page.

Garmin is introducing a feature to many of its watches that Apple Watch users have been able to enjoy for a while. That’s a device passcode, so you can lock your data when your watch isn’t on your wrist. The feature will be rolling out to Fenix, Forerunner, Venu, and Vivoactive users, or you can get it right now with the beta program. 

How the Garmin device passcode works

In the old setup—what you have right now if you aren’t on the beta program—devices that have a “wallet” feature will ask you to set up a passcode to use the wallet. Then, when you tap your watch to use Garmin Pay at a store checkout, you’ll have to enter a four-digit code. 

The new update adds the ability to lock your entire watch, not just the wallet. Here’s how to turn it on: 

  1. Enroll in the beta program (more about that below)

  2. Go into your Settings menu

  3. Select System

  4. Under Passcode, you’ll have the option for “On” or “Wallet only.” Select “On” if you want to have to enter the passcode each time you put your watch on.

What you can and can’t do with a Garmin passcode

With the passcode enabled, you’ll have to punch in your code when you put your watch on, but otherwise things will work as usual—for you. 

For someone who doesn’t know the code, they can pick up the watch and look at it, but most things beyond the watch face will be locked behind the passcode. To a stranger who doesn’t know the code, here’s what is still available:

  • The watch face is visible as usual

  • The light button works to turn the watch face or light on and off

  • If an activity was running when you took the watch off, it will remain running

  • You can still answer a phone call

  • The flashlight and emergency assistance shortcuts still work

And here is what is not: 

  • The glances (data you reach by scrolling down from the watch face) are locked

  • The settings menu is locked

  • The activity menu is locked, so you can’t start a new activity

  • The shortcuts menu (hold the top left button on a Forerunner) only contains five options: power off, lock device, turn the touchscreen on or off, flashlight, and emergency assistance. 

  • Everything else that might be on that menu, like your wallet, timers, find my phone, etc.—all are missing.

Which Garmin watches are getting the device passcode feature?

Garmin says that the following watches are getting the device passcode feature, so long as you are enrolled in the beta, you have the latest beta software installed, and you have the most recent version of the Garmin Connect app: 

  • Enduro 3

  • Fenix 8 (AMOLED or Solar) and Fenix E

  • Forerunner 165, 255, 265, 955, and 965, and their variations (including S and Music)

  • Venu 3 and 3S

  • Vivoactive 5

How to enable the beta to get the passcode feature

If you like getting new Garmin features, I’d recommend signing up for the beta. I haven’t found things to be buggy, although that’s always a risk with any beta program. 

Garmin’s instructions for enrolling in the beta program are here. Basically, you’ll use your Garmin Connect app to select your device, then tap Join Beta Software Program, and agree to the terms. 

Within an hour, you should be able to install the latest software. To check for an update at any time, go into the Settings menu on your device, then System, Software Updates, and Check for Updates.

Google Is Ditching SMS Code Verification, and That’s a Good Thing

Two-factor authentication (2FA) is a fantastic security measure, but not all 2FA is created equal. SMS-based 2FA is by far the least secure authentication option, and yet, far too many companies use this method as default. Hackers know this, which is why they target users’ 2FA codes to commit fraud and steal access to Google accounts. All that said, any 2FA is better than no 2FA, so it’s worth tolerating SMS-based authentication if it’s the only 2FA option offered.

Now, however, the winds are changing: Google is the latest company looking to switch from SMS codes to an alternative method. As reported by Forbes, the company is planning to shift from SMS codes to QR codes. This is a good thing, even if it changes how you sign into your Google Account.

SMS 2FA isn’t secure enough

It’s surprisingly easy to get hold of an SMS code. If someone steals your smartphone, for example, they’ll be able to access all of the SMS codes it receives. But scammers don’t need physical access to intercept your SMS codes. In fact, they can do this while sitting in another part of the globe.

Scammers can trick carriers into taking over your phone’s SIM card. From here, they can disable your SIM card, and transfer all the services over to their own, so they can remotely access all SMS codes sent to your number. If your bank account is protected by SMS-based 2FA, for instance, they’ll receive the code on their own device, authenticate themselves, and break into your account. Some scammers are even engaging in a practice know as traffic pumping, where they fool organizations into sending a large number of SMS messages to numbers the scammers own. They make a profit from those messages, while the rest of us deal with a deluge of spam. By moving away from SMS-based 2FA, Google hopes to limit this scam.

Instead of relying on SMS-based authentication, I’ve recommended using a dedicated authenticator app, or the password-less Passkeys system that Google itself is pushing quite a bit. When using an authenticator app, the code generates every 30 seconds on a secure service that is controlled by you, not by carriers. Authenticator apps themselves require biometric authentication, and can be password protected as well, which adds an extra layer of security. You can use a physical key for maximum authentication security, but a properly setup authenticator app will be plenty secure.

If you’re game to ditch passwords altogether, passkeys are even more secure. Passkeys are cryptographically generated keys for each login, and they are unique to the device or passwords app. A passkey generated for Google, on your Mac, never leaves the device. Even if someone gets their hands on the key file, it can’t be hacked as it’s encrypted.

Google is shifting default 2FA to QR codes

Passkeys are the future, but in the meantime, Google is shifting to QR codes as the default verification method for phone numbers.

When users log in on a new device, they’ll be prompted with a QR code that they can scan using their smartphone to authenticate. Using a QR code for verification stops phishing attacks, as there’s no code to share. And because the QR code scanning is happening in person, between two devices in proximity, there are no carrier codes involved, or online servers.

There’s no timeline for this yet, as all that Google has said is to “look for more from us on this in the near future.” As the feature rolls out, I’ll detail those steps here.

Windows Is Testing a New Feature That Makes Sharing Files Much Easier

Microsoft is testing a new way to make sharing files a lot easier. In a beta version of Windows 11, the company has released a temporary shelf that appears when you drag files to the top of the screen. You can use this to drop files directly to the apps you use the most, such as Outlook or WhatsApp. Additionally, the company is also testing an improved version of Windows Search on CoPilot+ PCs to help you find photos in the cloud, and two new layouts for the Start menu. All of these features are a part of the Windows Insider program, but they’re available in different channels of this program. Here are some details about each new feature and how you can try it if you want to get it ahead of the release to the general public.

The drag tray to make sharing easier

Perhaps the most exciting among the new updates, the drag tray is a way to make sharing simpler on Windows 11. When you drag a file to the top of the screen, a hidden drag tray reveals itself and you’ll see a few apps listed there. You can drag the file into any app to share it quickly. There’s also a More button to send it to apps not listed in the tray. If you drag a file to the More button, it’ll open the Windows share menu to help you send it to other apps. While sharing has been fairly easy on computers for a long time, this drag tray is great for dumping files into apps that you use frequently.

New views for the Start menu

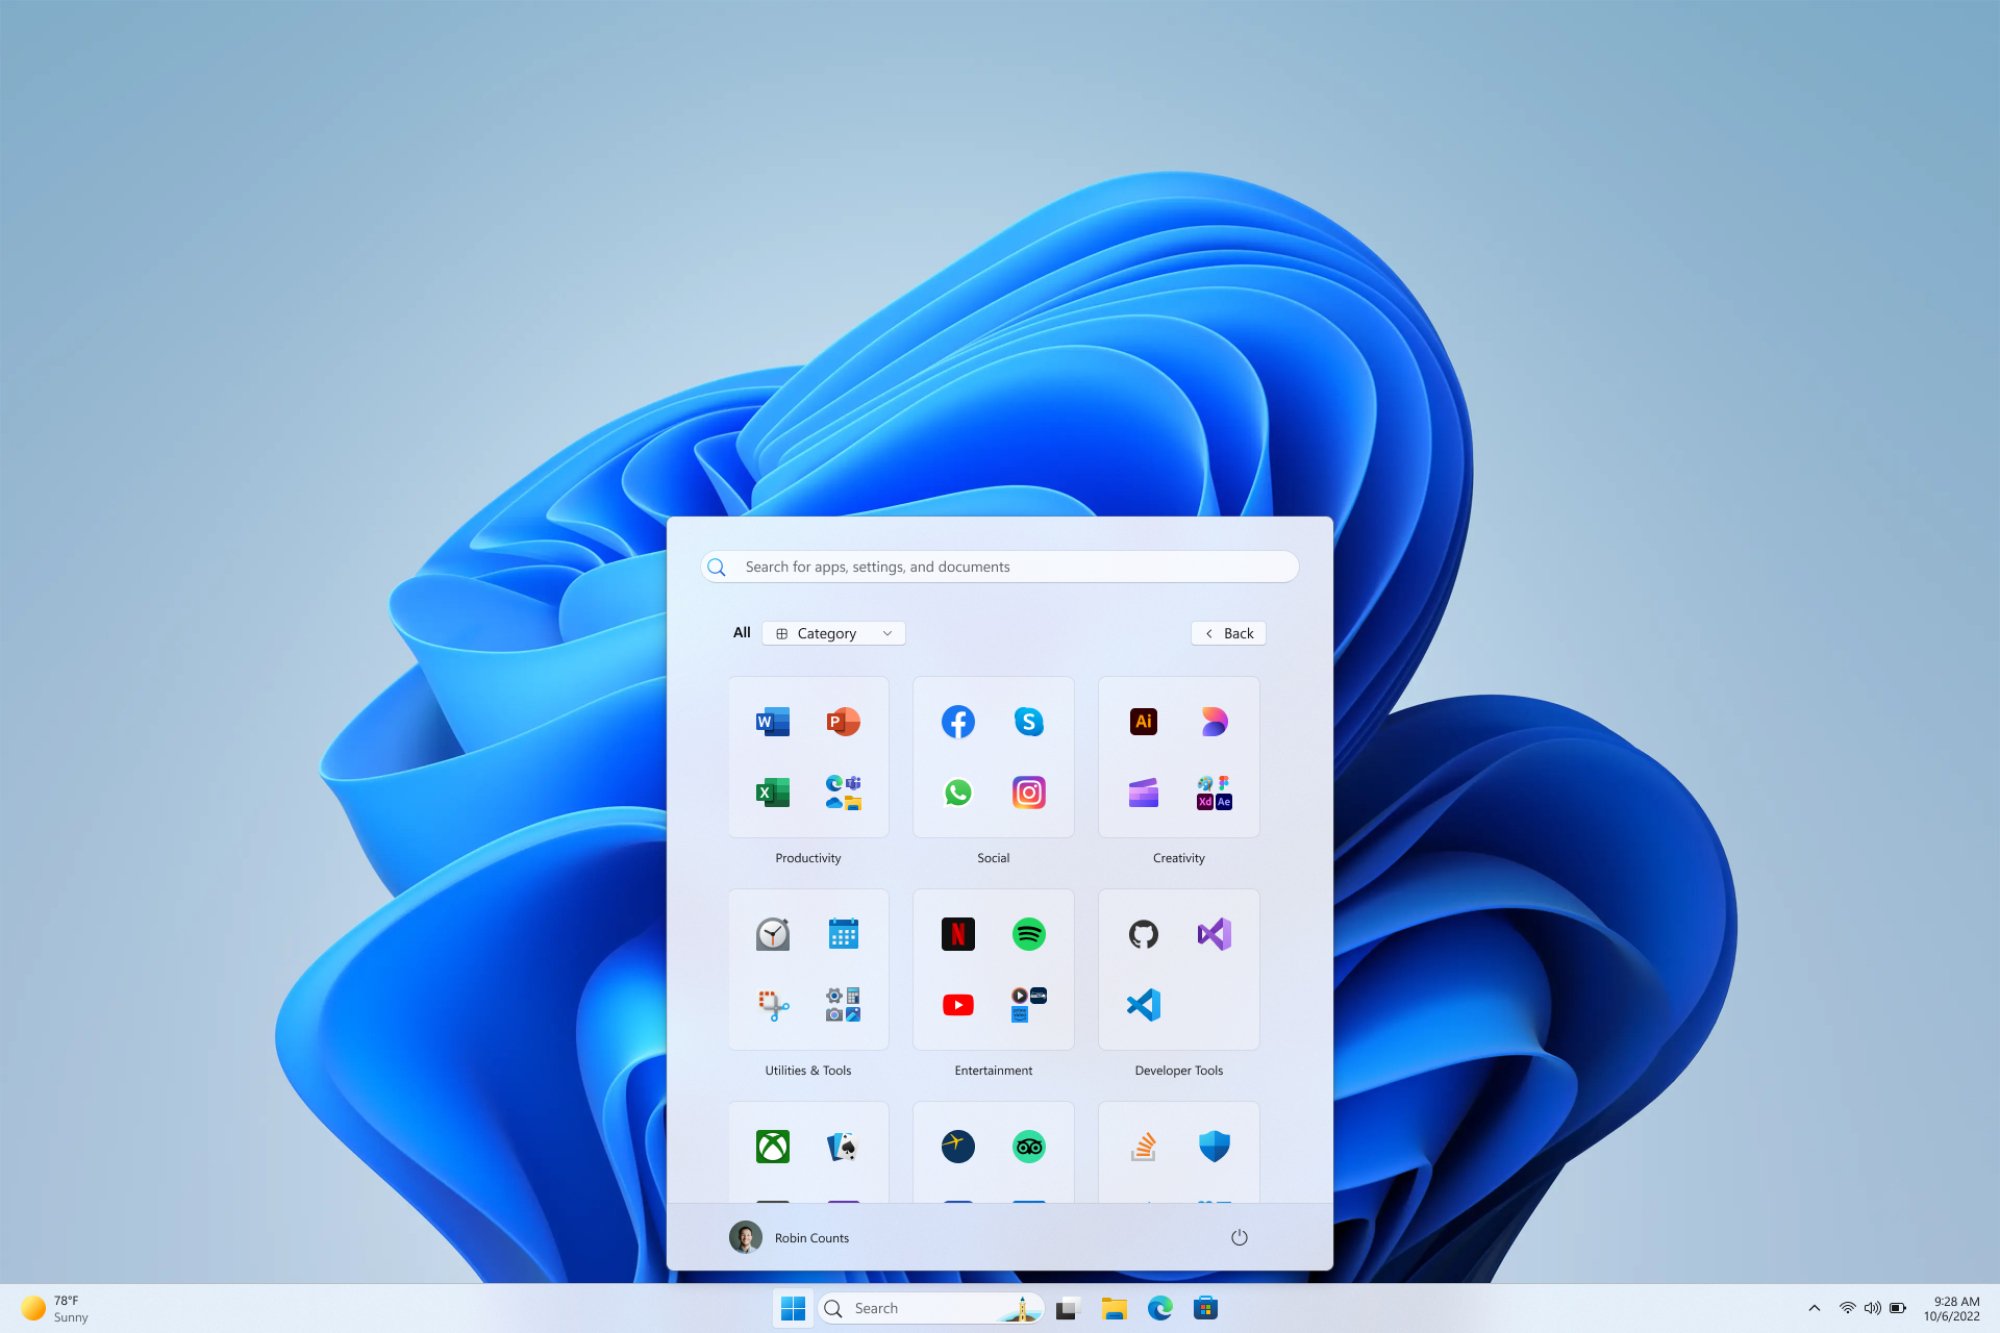
The category view in Windows 11's Start menu.

Credit: Microsoft

The Start menu is the hub for everything you want to launch on your PC and it’s now getting two additional views—name grid and category. The name grid lists all apps in an alphabetical order and groups them by alphabet, whereas the category view looks a lot like app folders on your smartphone. The category view groups apps by type and creates multiple folders to let you see more apps in one go. Both these views are available in the All page of the start menu if you’re a part of the correct Windows Insider beta. 

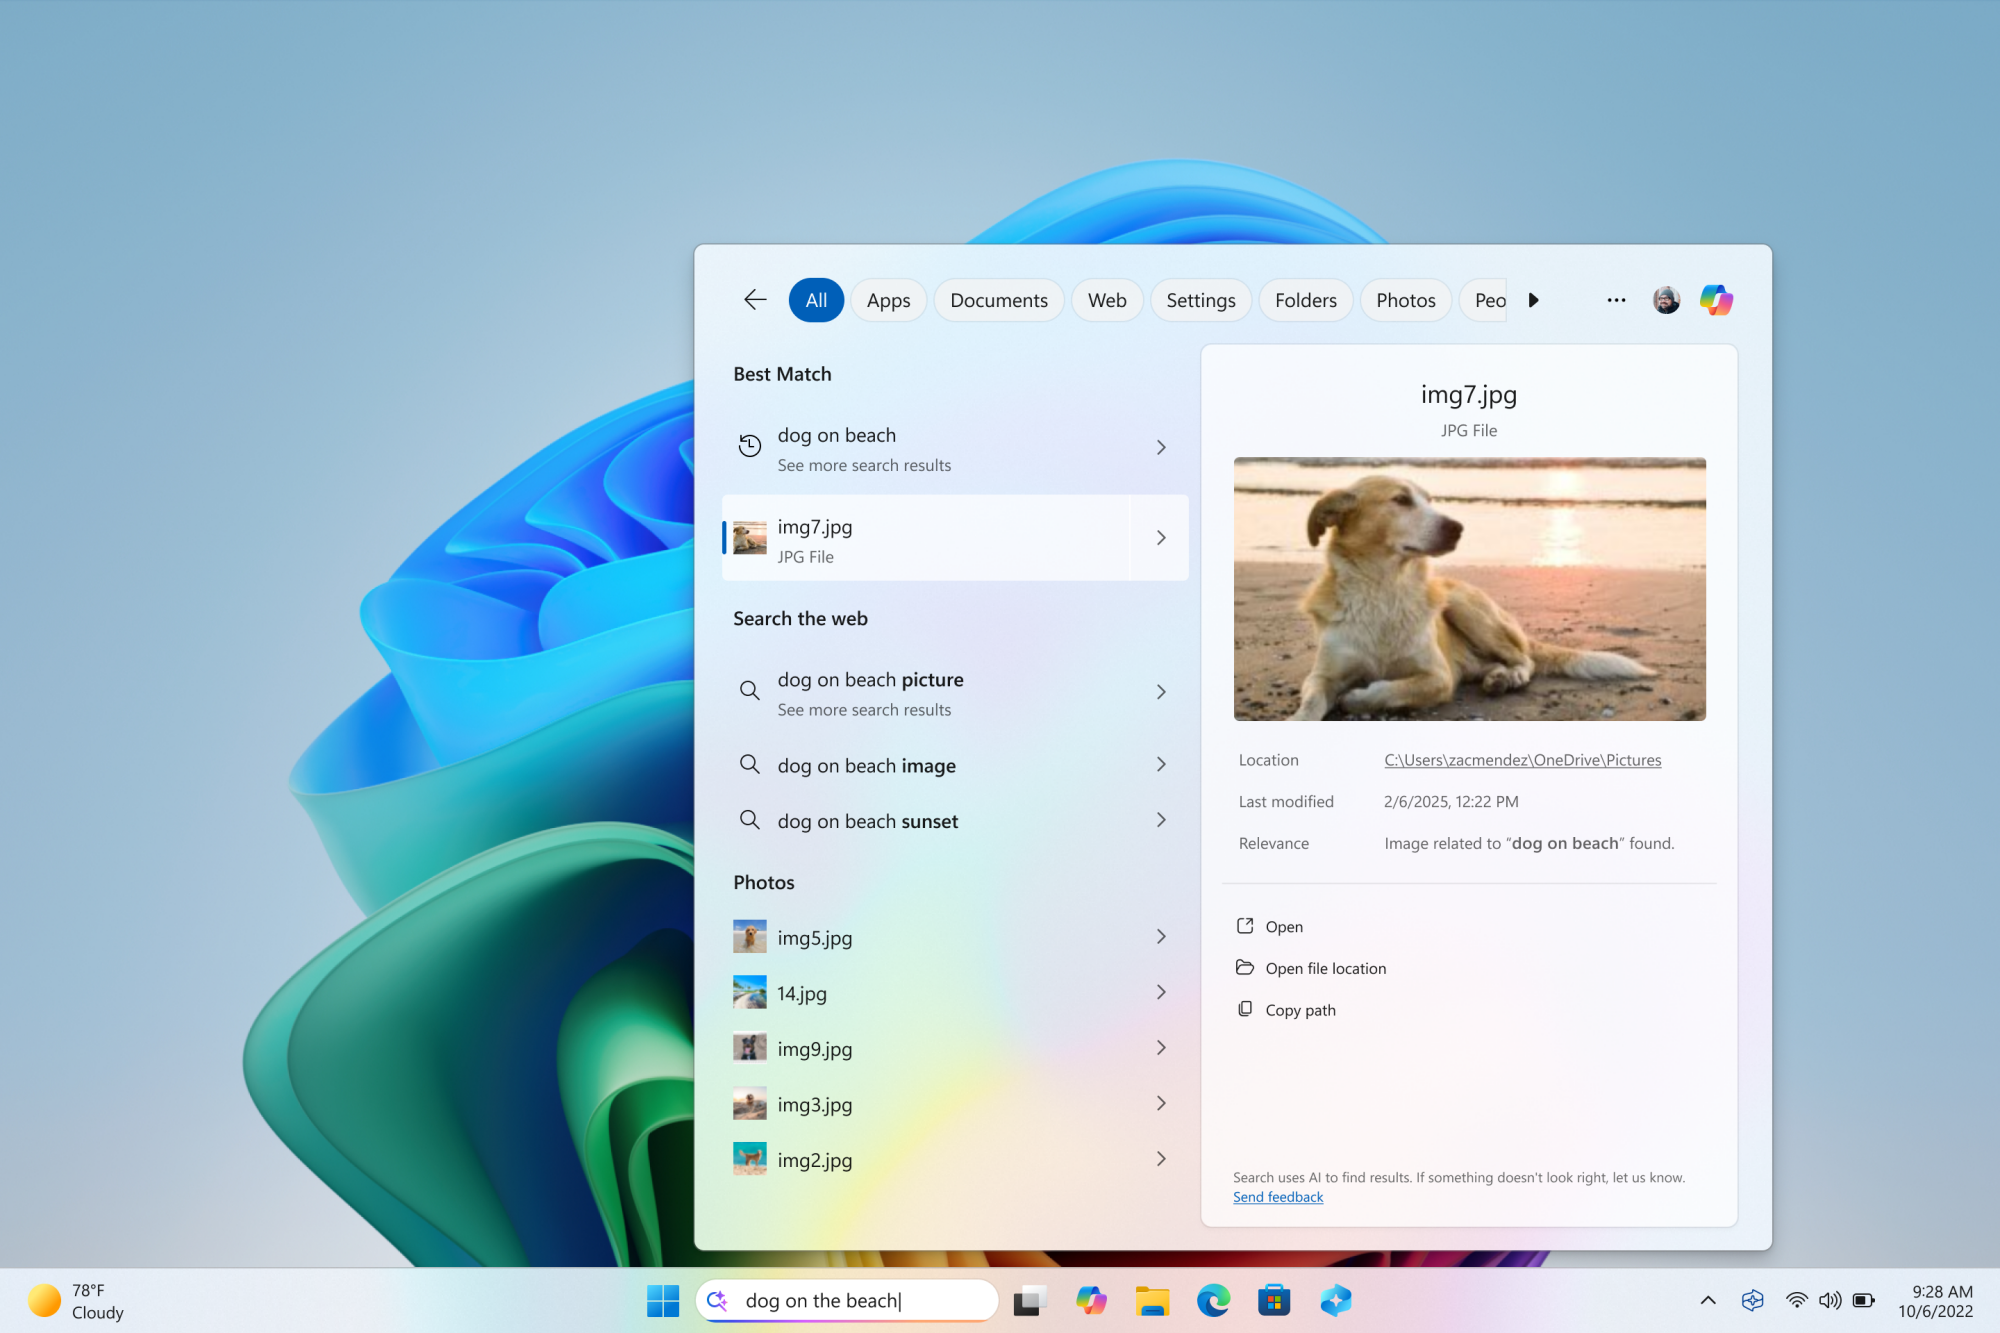
The Start menu in Windows 11 with search results. The right pane shows a picture of a dog in golden light.

Credit: Microsoft

For Copilot+ PCs, Microsoft is testing a version of Windows Search that lets you find photos stored on the cloud. You can type a search term and the results will try to find the photo based on your description, even if the photo is named IMG0012.JPG. At the moment this is supported for personal OneDrive accounts, as long as you’re signed in and connected to the internet. This feature is not supported for work or school OneDrive accounts. Microsoft says third-party cloud storage providers will be able to add support for this search feature, which is great if you don’t use OneDrive.

How to try these new Windows features

To try these new features, you need to sign up for the Windows Insider program and ensure that you have the right hardware and are on the correct beta version. Unfortunately, it’s not as simple as jumping to the beta version and looking for the feature, but this is what you can do for now. On your Windows 11 PC, go to the Microsoft website and click the Register button to sign up for Windows Insider. Then, go to Settings > Windows Update > Windows Insider Program on your PC and follow the on-screen prompts to join the program.

Be aware that this program involves installing beta software on your PC, which can lead to issues such as data loss, crashing software, or even a PC stuck at the boot screen. Ensure that you’ve backed up your Windows PC before you attempt to join the Windows Insider Program. Once you’re on the beta, you can try the drag tray feature and the new Start menu views by selecting the beta channel and updating to Windows 11 Insider Preview Build 22635.4950 (KB5052078). This isn’t available to those who are receiving beta updates based on Windows 11’s 24H2 build as of now, but it’s expected to be on that channel soon. If you decided not to update to this cycle and opted to receive beta updates on the previous beta channel, then you’ll be able to try those two features right away. 

As for the enhanced search, it’s available to those who have a Copilot+ PC running Windows 11 Insider Preview Build 26120.3291 (KB5052080). Microsoft currently labels this as an optional update and will change it to a recommended one later this year. Even if you’re on the right update channel, you may have to wait a while to get the enhanced Windows Search working as Microsoft is rolling it out gradually. This update channel also includes improvements to Windows Recall, the controversial feature that records everything you do on your PC, and adds a new Trim tool to let you edit screen recordings using the Snipping Tool in Windows 11.

10 of the Most Ridiculous Fees (and How to Avoid Paying Them)

Processing fees. Service fees. Hidden fees. It feels like most companies and services these days have found countless ways to sneakily squeeze money out of me. Even when it’s only a few dollars here and there, it’s the principle of the thing: Why am I being charged in the first place? What can I do to circumvent these fees and save my hard-earned money? Here are some of the most common fees that have been infuriating me lately, and what you can do to avoid paying them.

Concert “service” fees

If you’ve tried to buy a concert ticket in recent history, you’ve been slapped with a shocking string of processing, commission, or transaction fees. From secondary sellers like StubHub and Vivid Seats, to primary sellers like Ticketmaster, AXS, and SeatGeek, these fees are built into the modern business model of ticketing live events. Of course, that doesn’t mean we have to sit back and take it. Ticketmaster in particular has been hit with multiple class-action lawsuits for the company’s lack of transparency.

How to avoid them: First, check out discount and no-fee ticket sites like TickPick or Goldstar.com. Unfortunately, there’s only one guaranteed way to avoid concert service fees: Contact the box office to look into about buying your tickets in person. Sure, it’s old school (and might prove tricky for in-demand shows), but it’s a surefire way to avoid the “convenience” fee that comes with online transactions.

Airbnb fees

Next to the cost of concert tickets, Airbnb has gained notoriety for its bullshit fees. I’ve found the growing consensus is that Airbnb simply isn’t worth its exorbitant service fees. I’ll never forget a few years back, there was a viral tweet with a screenshot of a $99/night listing that ended up totaling $413.95 for two nights after fees and taxes were added at checkout.

How to avoid them: After you find a listing on Airbnb, try searching for the property description on other sites for offerings that don’t come with Airbnb’s fees. You can also reach out to the host directly and see if they would be interested in conducting business outside of Airbnb in order to avoid fees. For instance, you could arrange to book the property for just one night through Airbnb, and pay for additional nights in person. There’s certainly some risk involved here, but considering how much of a cut Airbnb takes from hosts, you might be able to strike a win-win deal.

Seat selection and airline fees

Of all the bullshit airline fees these days, “seat selection” might be the shadiest. Paying an additional $20 for my seat? Isn’t that what the ticket is paying for in the first place? During the booking process, it’s not always clear that the seat selection fee is completely avoidable.

How to avoid them: When the option pops up to select a seat on your flight, simply skip past this screen. The skip button may be hidden, but it’s there. The airline will automatically assign you a seat for no extra charge. If where you sit is still a concern for you, you can request specific seats if you politely ask the gate agent when you arrive at the airport. For more information, here’s our guide to avoiding seat selection fees.

ATM fees

When you need cash fast, ATM fees are tough to avoid. It’s utter crap to be charged three dollars to access my own money, but, alas, the big banks don’t seem to be listening to my ramblings.

How to avoid them: Ideally you can find an ATM owned by the bank you use so it doesn’t cost you to withdraw your money. Otherwise, consider moving your money to a bank that refunds these fees. Another tactic is to take steps to have fee-free cash on hand by using the cash back option when you grocery shop. Personally, I always take out a ten or a twenty on top of my groceries, and I rarely have to resort to finding an ATM when I need cash.

Car dealership fees

If there’s someone you can trust to be honest and no-bullshit, it’s a car salesman, right? From advertising fees, delivery fees, undercoating fees—it’s easy to get lost in all the additional charges that get tacked on at a car dealership.

How to avoid them: When you buy a new car, you’ll be able to see a factory invoice. Any charges listed there are, unfortunately, legitimate. However, if the dealership charges you a fee that doesn’t appear on the factory invoice, you can avoid paying it. Getting rid of these fees is often as simple as asking the dealer to strike them. Somehow, questioning their legitimacy seems to make them all but disappear.

Gym initiation fees

When you join a new gym, your first bill might come with an “initiation fee.” This sucks, and you should try to get out of it.

How to avoid them: Similar to our tip with the car dealership, you should simply ask the gym to waive the fee. Bonus points if you express doubts about your membership, or even make it a condition of signing up for a yearly membership. The gym wants to keep you as a customer, so they’ll be more likely to waive one fee in order to hold on to you.

Credit reports

Make a habit of checking your free credit score from sites like Credit Karma or Experian. What you shouldn’t make a habit of is paying a fee for a credit report literally ever, since this likely means you’re falling for a scam.

How to avoid them: Head to AnnualCreditReport.com and check your credit health for free. Some banks and credit card companies also offer free credit reports as part of having an account with them.

Overdraft fees

Overdraft protection” sounds like a positive thing to stop you from taking out more money than you have in your account. However, when the bank offers overdraft protection, they charge quite the fee for it. You accidentally overdrawing your account by a few cents could turn into an outrageous $50 charge.

How to avoid them: An alternative to your bank’s overdraft protection is to link your savings account to your checking account. This way, any overdrafts get pulled from your own funds. If this isn’t possible at your bank, at least set up low-balance alerts so you avoid overdrafts altogether.

Bank statement fees

A paper bank statement can come with a wild $2 or $3 monthly fee. Those dollars add up, and for no reason other than, what, receiving mail?

How to avoid them: Go paperless. It’s as simple as checking a box in your account settings. Good for the environment, and good for your wallet.

Online shipping fees

As much as I’d like to support in-person brick and mortar stores, sometimes Amazon one-day shipping is the only option I have. And with shipping costs these days, I know I’m guilty of buying more products just to qualify for free shipping—the classic “spend to save” trap.

How to avoid them: Always consolidate orders to avoid multiple shipping charges. Compare shipping rates across multiple retailers before purchasing, and sign up for free shipping programs like Amazon Prime or Walmart+. Plus, you can go for good old-fashioned store pickup options when available.

I Air Fried Some Cheap Doughnuts and They Were Sensational

Weeks ago, my partner suggested I develop a recipe for doughnuts made in the air fryer. I tried to explain to him how deep fried doughnuts are always better than baked ones, adding, “unless you wanna throw some Entenmann’s in there.” I laughed, and then shook my head, because I had sealed my own fate.

Once it occurred to me, I absolutely needed to test the idea. I bought a variety pack of Entenmann’s doughnuts (including chocolate glazed, powdery crumb nubbins, and classic glazed). I fearfully placed one of each into the basket of my air fryer and pressed Start.

I experienced a range of emotions during the next seven minutes, pinging from worry, to hope, to, finally, disbelief: Yes, I’m happy to report that air-fried cheap doughnuts are absolutely sensational.

Three doughnuts in an air fryer basket.

Credit: Allie Chanthorn Reinmann

The process changes the doughnuts appearance, especially the glazed ones. The sugar coating partially melts, exposing the crumb texture of the doughnut beneath. Everything else is uphill from there: Each air fried doughnut was a textural delight—their dry, homogeneous, bread-y consistency transformed into a crunchy exterior with a chewy, caramelized crust. The interior crumb changed too: Instead of a dense, cake-y texture, the crumb opens up a bit (presumably from expanding in the heat) and has an airy feel.

The flavor is also improved. All of the existing elements you enjoy in packaged doughnuts are concentrated and enhanced. Normally these doughnuts are one-note sweets, but after air frying, you’ll notice how buttery they are, taste notes of vanilla, and even detect hints of salt. 

Two Entenmann's doughnuts, one air-fried, side by side on a plate.

Credit: Allie Chanthorn Reinmann

It makes logical sense—the heat melts and caramelizes some of the sugars, moisture evaporates, and the doughnut’s surface browns a bit due to the Maillard reaction, creating new, complex flavors. But some flavors, I can’t explain. Why does an air-fried chocolate glazed doughnut taste completely like Fruity Pebbles? You must air fry a chocolate glazed, if only to experience this unexpected transformation.

How to air fry cheap doughnuts

I wouldn’t air fry specialty bakery doughnuts that cost $5 a pop, because that’s silly. Focus on improving the factory-made doughnuts. To air fry your own cheap doughnuts at home, simply pop the treats into an air fryer set to 350°F on the “air fry” setting for five to seven minutes. Make sure you air fry them on the included metal grate, as some of the sugars from the glaze will drip off and you don’t want them to get too moist.

When they’re done heating, use metal tongs or a fish spatula to remove them from the grate and place them to cool on a wire rack for about five minutes. Feel free to give them a light sprinkle of flaky salt. They’ll feel really soft and breakable at first, but after cooling, the sugars will recrystallize and the doughnuts will be crispy…and incredible. 

This Keyboard Case Is Finally Available for Android

Clicks, the iPhone keyboard accessory that went viral during CES 2024, is now coming to multiple Android phones—Google Pixel 9, Pixel 9 Pro, Samsung Galaxy S25, and the Moto Razr+ (2024). Clicks adds a physical QWERTY keyboard to your smartphone, and also functions as a case for your device. Up until now, Clicks was available exclusively for all iPhone 15 and 16 devices, as well as the iPhone 14 Pro and 14 Pro Max.

When the first iPhone launched, it sounded a death knell for smartphones with physical keyboards, as the world moved to bar-shaped phones with big screens. Touchscreen typing is good enough for most people, but Clicks is betting on the fact that content creators, vloggers, and people who value productivity may find it easier to type on a physical keyboard. I know for a fact that I make far fewer typos on my MacBook than I do on my iPhone, but the downside with Clicks is that it adds a lot of heft to your phone. It changes the weight distribution of your phone, and some people may find it harder to use their phones since it will feel more top-heavy.

Clicks says Android users can customize typing settings on their device using a companion app, such as changing the function of shortcut buttons. Each Clicks case has a few shortcut buttons that vary by device, but a search button appears on all variants of the keyboard. The company says the keys have metal dome switches that provide tactile feedback and that the keys are backlit, so you don’t need to switch back to the on-screen keyboard whenever you lose light.

Since the keyboard is below the screen, you can use your phone’s entire display all the time. That’s a perk, especially for apps that benefit from added screen real estate, but it does make your phone bulky enough that it may not easily fit in your pocket or purse. That said, you don’t need to remove the case to charge your phone, since Clicks supports USB-C passthrough charging. For Pixel 9 and 9 Pro, Clicks supports wireless charging, too.

A close-up view of two keyboards by Clicks. One is blue and the other is yellow.

Credit: Clicks

On Pixel 9 and 9 Pro, Click is available in two colors: Surge (yellow) and Onyx (black). The company says it expects to start shipping these cases by late April. For the Motorola Razr+ (2024), the color options are Electric (blue) and Onyx, and the case is expected to ship late May. Finally, for the Galaxy S25, the color variants are Pinot (a reddish brown) and Onyx, and shipping is expected in June. Pre-orders for all Android variants of the keyboard accessory open today on the company’s website at an introductory price of $99. That price is valid until March 21. If you order after that, the final price is $139.

Five Ways to Warm Up Before You Lift Weights

Lifting is about as simple as an exercise gets: You pick the thing up, and you put the thing down. But that doesn’t mean you’re going to walk into the gym and just pick the thing up. A proper warmup can help you to be ready for your lifting, so let’s talk about how to build your best lifting warmup routine.

Why a warmup is important (and when it may not be)

First, let’s talk about why we warm up. People often talk about warmups as if they will magically prevent injury, or that skipping one will result in some other disaster. That’s not necessarily true. They also won’t really do much for your chances of suffering from soreness (or not) after the workout, either. If you feel comfortable walking straight from the front door to the squat rack, you don’t need to add a warmup.

You will probably benefit from a warmup if any of these are true of your lifting workouts:

  • You feel achy or creaky at the beginning of workouts.

  • The first few sets always feel heavier than they should.

  • You have trouble getting into positions that you need for the workout (like the bottom of a squat).

  • You do exercises that get you breathing hard, like circuit training or anything where you’re rushing to complete reps to a timer.

A warmup can address one or all of those concerns, preparing you for the job of lifting. Your muscles will work better when they’re warm (like, literally at a higher temperature). You’ll also want to be ready to move in all of the ways that the lift requires. If your ankles are stiff, for example, getting them moving will help them to be able to flex more during your squat.

If you’re worried about your warmup taking forever, good news—you only need to include the parts of the warmup that you, personally need to benefit from. Two people might warm up in completely different ways for the same workout. So let’s talk about the different components of a warmup, and how to know which ones you need.

Cardio warms you up and gets you ready for work

Before lifting, a lot of folks like to hop on the treadmill or rower for five to 10 minutes, or perhaps do some jumping jacks. A cardio warmup like one of these offers a few benefits:

  • It physically warms up your muscles,

  • It gets at least some of your muscles and joints moving.

  • It gets your energy systems (enzymes, etc) into the groove of supplying extra power to your muscles.

Remember how, when you run, the first mile (or the first 10 minutes or so) feels sluggish? That’s because your body is ramping up those energy systems so you can use them more efficiently during the rest of your workout. If your lifting workout keeps your heart rate high—like a Crossfit-style WOD—this cardio warmup is essential for making the rest of the workout not suck.

If you’re just going to be lifting at your own pace, cardio isn’t essential, but the warmth and movement may still help you feel better and serve as a mental and physical introduction to the work you’re about to do.

Mobility work gets you ready to reach specific positions

We’re not (just) talking about stretching here. If you want to work on your flexibility by doing long, deep static stretches, that’s best saved for after the workout. As you’re getting ready to lift, you may want to instead do some mobility work.

Mobility, in this context, means being able to move in the ways that your workout requires. If you’re going to do some squats, and your calves and ankles tend to be stiff, and this stiffness prevents you from getting as deep into the squat as you’d like, then you should spend some time before doing your squats working on your ankle mobility. (We have some specific suggestions for that here.)

Apply this same principle to whatever exercise you’re planning. If you have a hard time arching your back in the bench press, do some upper back mobility work first (I like to lie on my back on top of a foam roller). If you’re going to do snatches or overhead squats, you may want to do some shoulder stretches. Stretching before a workout can give you a temporary boost to your flexibility that lasts through the workout.

This stage is where foam rolling and dynamic stretching can come in. Foam rolling can help loosen up a muscle, like a little massage. And dynamic stretches are warmup movements that take your joints through whatever range of motion you will be asking them to do later. Google “mobility work for ___” and you’ll get plenty of ideas.

Ultimately, what you use in this section of the warmup should be whatever will best help you to be successful later in the workout. Experiment with adding moves in or taking them out.

“Activation” exercises prepare your muscles

Sometimes it’s nice to do an exercise that uses whatever muscles you’ll be using in the main workout, but with lighter weights or even via a totally different movement. For example, banded glute bridges could help you get ready for a workout where the focus is squats or hip thrusts.

To be totally clear, you don’t need to “activate” muscles to be able to use them later, even though purveyors of booty bands will try to convince you this is an essential step. These exercises just give your muscles a preview of what they’ll be doing in the main event, and can help you get through your warmup sets of the main lift (see below) a bit more quickly. For more on what activation exercises are really doing, see my explainer.

Technique drills help you perfect your skills

If you’re doing a lift that requires precise technique, you may want to practice drills that help with that specific lift. For example, before I do snatches, I like to do drills with just the bar: maybe some hang snatches, or overhead squats, or tall snatches. Again, select exercises for this stage based on what technique work you need to practice. Goblet squats may be a good primer for barbell squats, for example.

Your warmup sets with the empty bar or lighter weights

This step is essential if you’re doing a heavy lift. Let’s say you’re going to do squats at 200 pounds today. Just because you’ve warmed up with cardio or mobility doesn’t mean you’re ready to load 200 pounds on the bar and go for it. Instead, you’ll do some squats with the empty bar, and then maybe with 95 pounds, 135 pounds, 155 pounds, and 185 pounds.

While the other warmup components we discussed are negotiable, most lifting coaches would agree that these warmup sets with the bar are mandatory. They can often even replace most of the above steps, because if you do enough warmup sets, you’ll be getting your body warm, moving through the necessary motions, activating your muscles, and practicing the technique of the lift you’re about to do.

Start by doing a set of the same number of reps you will do for your working sets, or more. So if you’re going to do five reps at 200 pounds, start with a set of 5–10 reps with only a bar. Then add some weight, and then add some more, and then some more, until you get to the target weight for your first working set of the day. The exact jumps in weight aren’t important so long as you have several stops on your way to the working set for the day.

How to customize your warmup

I like to think about warming up for lifting as combining my warmup sets (as described in the section above) plus whatever I need that my warmup sets don’t adequately cover.

So if you feel like you need more mobility work than warmup sets alone will give you, you might walk in the gym, do five minutes on the treadmill to warm up your legs, and then do some foam rolling and ankle stretches before you start squatting. You haven’t done any technique or activation work, but that’s fine if you don’t feel you need it.

Or if your mobility is fine but you’re planning on doing a circuit-style workout and you hate that you’re always getting out of breath between lifts, you might benefit from a more thorough cardio warmup to make sure you’re ready for the fast pace of the workout.

It’s fine for your warmup to be different for each workout, or for it to change over time. Older athletes often find they need more warmup time than they did when they were younger, and we all might need more of a warmup in cold weather than when it’s hot out. Figure out what makes sense for you, and build your warmup accordingly.

My Favorite Amazon Deal of the Day: Apple AirTag Four-Pack

We may earn a commission from links on this page. Deal pricing and availability subject to change after time of publication.

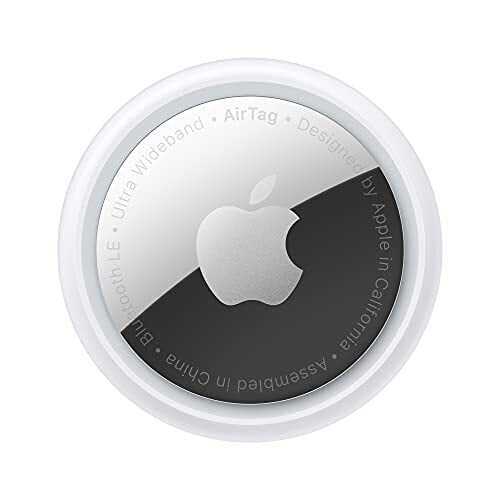
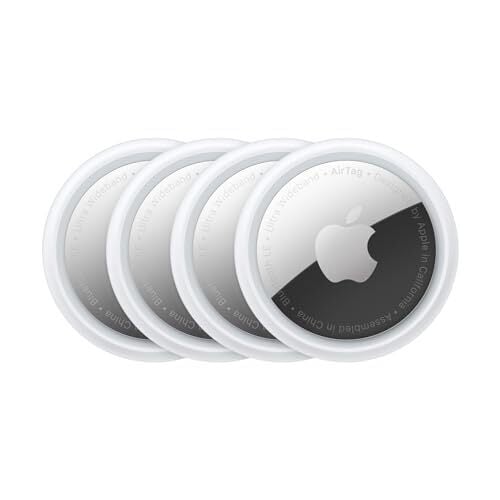
These days, you don’t need to be a spy to have tracking devices. If you’re an Apple user, AirTags use Find My to track anything that you can put these devices on. Right now, Amazon has the four-pack for $67.99 (originally $99)—a new record-low price according to price-tracking tools—likely because the AirTag 2 release date is approaching. If four is too many, you can also get a single AirTag on sale for $22.99 (originally $29).

AirTags are mostly marketed for purses, keys, and travel bags (airlines are adopting their use now), but there are examples of people using them much more creatively (someone on this Reddit post used it on their dog collar and trained it to come back whenever they pressed the “play sound” feature). The AirTag works with Apple’s network of iOS devices to create a Bluetooth tracker. Essentially, every person with an iPhone (or iPad) is part of this iOS network, and as long as one of these people gets within Bluetooth range of your AirTag, it will show up as the last location on your Find My app.

As you can see on PCMag’s “excellent” review of the AirTag, the Find My app has a screen that points you in the direction of your AirTag like a compass, including the distance it is from you. There is also an option to play a sound—which is perfect for locating, say, a remote that’s buried under the couch.

Once the AirTag is more than 30 feet from your phone, the network of iOS users will kick in. When the AirTag is closer than 30 feet, it uses your own Bluetooth. There are security measures in place set by Apple, including end-to-end encryption, so that nobody (not even Apple), knows where your AirTag is except for you. The batteries last about a year and are replaceable. There is also no monthly charge for these, unlike competitors like Tile or Chipolo for Android users.

Seven Clever Ways You Should Be Using Your Smart Lights

We may earn a commission from links on this page.

Smart lights were there at the beginning of the smart home tech revolution, and over the years, these clever bulbs and LED strips have gradually evolved to offer more by way of both features and form factors—so much so that you might not be aware of everything you can do with smart lights, even if you’ve been using them for years.

If your own smart light setup is mostly limited to switching your bedside lamp off with a voice command, controlling them remotely from your phone, or perhaps changing up the colors or adding an automation or two, then you’re not taking advantage of everything these lights can do for you. These are some of the best smart light tricks you can try.

Sync your lights with your TV

Having your smart lights change color and flash in time to action happening on your television can really add to the experience of watching movies and shows—and a number of smart light manufacturers now offer the necessary kit and apps to easily make this happen.

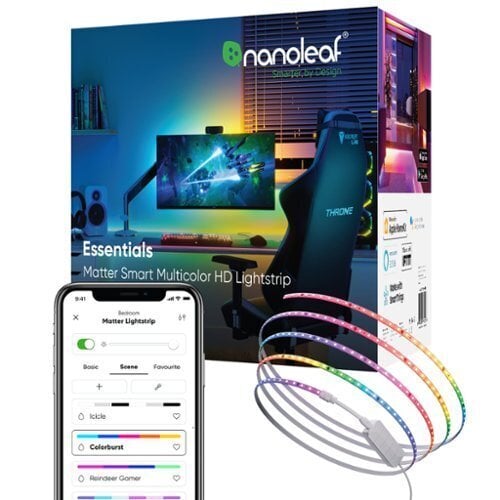
For Philips Hue lights, for example, you need either a syncing box or a native app, depending on your TV model. It’s also something you can do with Nanoleaf lights, via a system called Screen Mirror that uses a small camera to see what’s on your television.

Set up random schedules

One of the ways that smart lights can be useful when you’re away from home is giving potential robbers the idea that you haven’t gone away at all. You can almost always control your smart lights remotely, as long as your home wifi is still running.

If you don’t want to have to remember to turn your lights on at home every evening while you’re at the beach or in the mountains, Philips Hue has a randomize timings setting available when you set up an automation, which will automatically vary when the lights turn on each day.

Philips Hue app
You can randomize timings in the Philips Hue app.
Credit: Lifehacker

Get notifications via your lights

Add some third-party services to the mix and the list of possibilities grows even more. IFTTT (If This Then That), for example, can set up routines based on specific triggers that lead to specific actions—and smart light brands including Philips Hue and Lifx support the protocol.

Because IFTTT can plug into a variety of social media, mobile, and app systems, you can have events on these platforms trigger a flash or a change in color for your lights. One idea would be to turn a desk lamp blue when the weather forecast is predicting rain.

Group your lights into scenes

You can do even more with your smart lights by grouping them together and setting specific scenes you can switch between. Most platforms let you do this fairly easily, so all the lights in a certain room can be managed together, and changed over time.

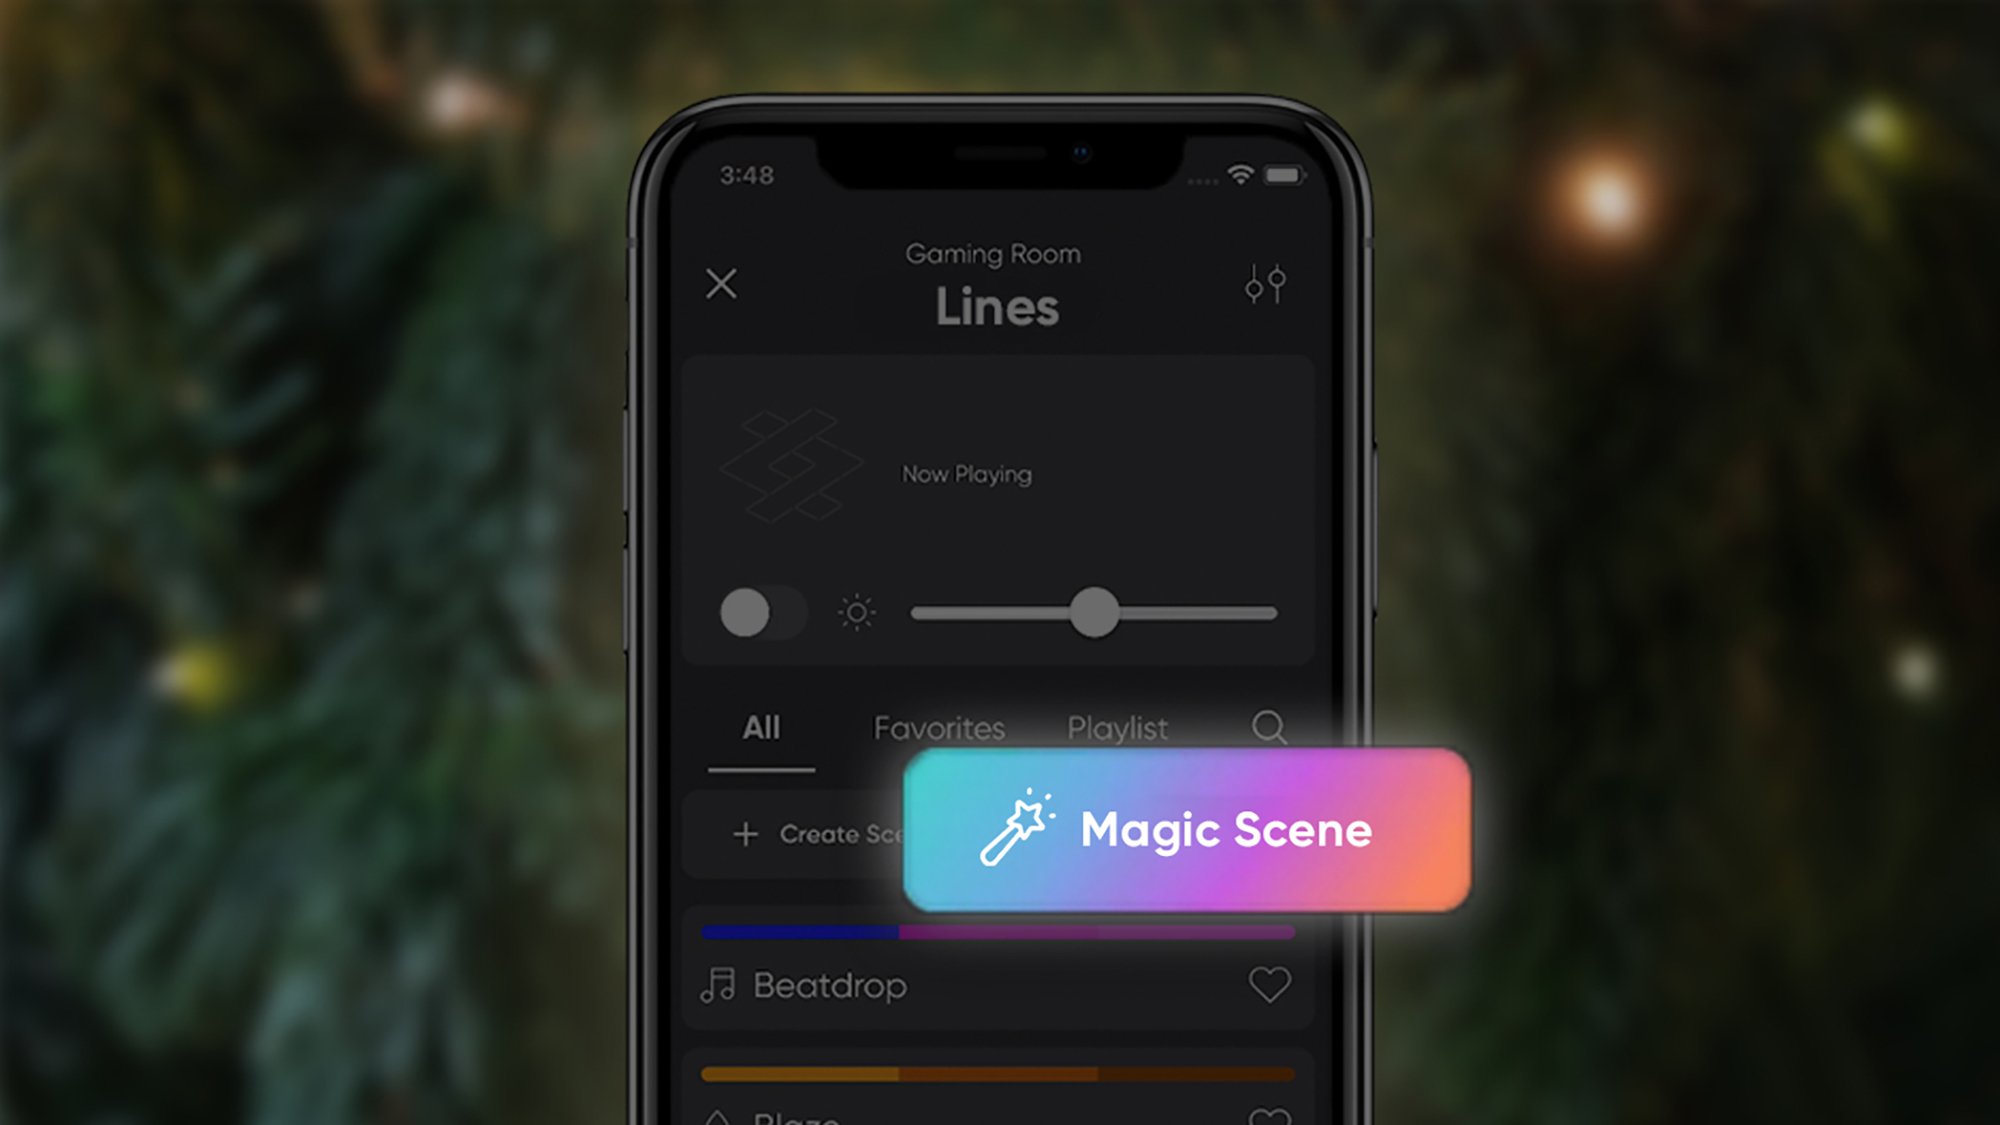
You could set up scenes for early morning or late at night, for example, or for movie nights or for studying—the Nanoleaf app can even creates scenes for you based on a keyword or two. Check inside your smart light companion app to see what you’ve got available, or explore your customization options.

Wake up with a “sunrise”

Ease yourself more gently into the day by having your smart lights turn on gradually in the mornings, mimicking an actual sunrise. You could even use this trick to replace your alarm clock.

This works for a wide variety of smart lights, and some can even sync the feature to your local sunrise times. You can use this with any smart light connected to Google Home, for example, by saying “hey Google, wake my lights at…” and adding a time to Google Assistant.

Nanoleaf Magic Scenes
The Nanoleaf app can create Magic Scenes for you.
Credit: Nanoleaf

Add a motion sensor

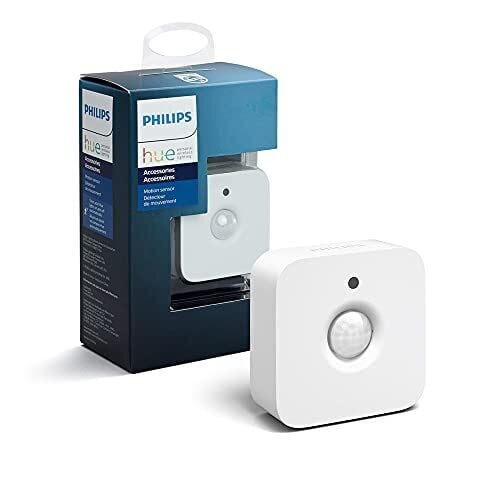
Combine a compatible smart motion sensor with your smart lights and you don’t even need to go to the trouble of tapping on your phone or speaking out a voice command to activate your smart lights—they’ll come on as soon as there’s movement in a room.

A few smart light platforms offer this functionality, including Philips Hue. You’re able to set the brightness of the lights—so you’re not suddenly dazzled as you stumble to the bathroom, for example—and you can have the lights turn off after a certain time as well.

Set up automated routines

Your smart lights are even more useful when you combine them with other devices. For example, you can set the lights to dim as a chill out mix begins to play on your smart speaker at a certain time of night. Or you can set your lights and smart thermostat to all turn off together when you leave the house.

These tricks are known as routines or automations, and you can set them up in Google Home (via the Automations tab), in the Amazon Alexa app (via More > Routines), and in other smart home hub platforms (including Samsung SmartThings and Apple Homekit).

The Brane X Is a Portable (but Pricey) Smart Speaker With Incredible Bass

We may earn a commission from links on this page.

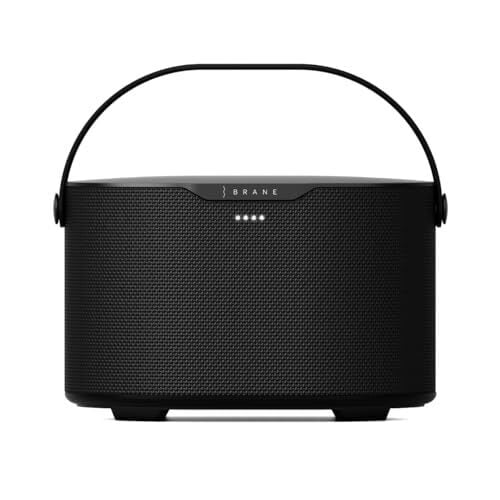
Before this review, I had never heard of Brane, but now, it’s all I want to hear when I play my music. The Brane X is many things, but cheap isn’t one of them. But for $499, you get a multi-use premium speaker that can handle itself underwater, has Alexa voice assistant, connects through wifi for better audio, has the best bass of any wifi speaker, and can be used as a soundbar and subwoofer combo. The Brane X is a great wifi speaker for someone who values bass, would like to take their speaker outdoors, and needs a soundbar and subwoofer combo for their home theater. However, it isn’t perfect and at its price, it competes with the best. The Sonos Move 2 is slightly cheaper, offers a replaceable battery with 24 hours of juice, and better treble and mids (but nowhere near the same range or bass power fo the Brane X).

Brane reached out to me to review the Brane X and sent me the speaker for my honest thoughts, which is exactly what you’ll get in this review.

Brane X speaker pros, cons, and specs

Pros

  • Best-in-class bass and sub-bass for smart speakers

  • Wifi streaming over Spotify and AirPlay 2

  • Compact and portable

  • Powerful 98dB stereo speaker

  • IP57 dust and waterproof

  • Doubles as a soundbar and subwoofer combo in one with an AUX connection

  • Companion app with EQ

Cons

  • Expensive

  • Upper registers sound compressed at max volume when using Bluetooth

  • No Chromecast support

  • No speakerphone function

  • Some features make a whirring noise

  • No USB-C charging (only DC)

Specs

  • Battery Life: About six hours of battery at a moderately high volume (about 12 hours at a moderate level, according to Brane).

  • Connectivity: Wifi supports 802.11a/b/g/n/ac standards, Bluetooth version 5.1, streaming services compatible with AirPlay 2, Spotify Connect, and Amazon Alexa.

  • Inputs: Auxiliary input 3.5 mm jack for wired connections.

  • App: Brane companion app for fine-tuning bass, customizing EQ settings, managing speaker groups, and adjusting various settings.

  • Drivers: One 6.5″ by 9″ Repel-Attract-Driver (RAD) subwoofer, two 2.5″ midrange drivers, two 0.75″ dome tweeters.

  • Power Output: Four Class-D digital amplifiers delivering a combined output of over 200 watts (98dB).

  • Water Resistance: Rated IP57, making it fully waterproof and dust-protected.

  • Size: 6.1 inches x 9.3 inches x 7 inches (H × W × D)

  • Weight: 7.7 lbs

First impressions of the Brane X speaker

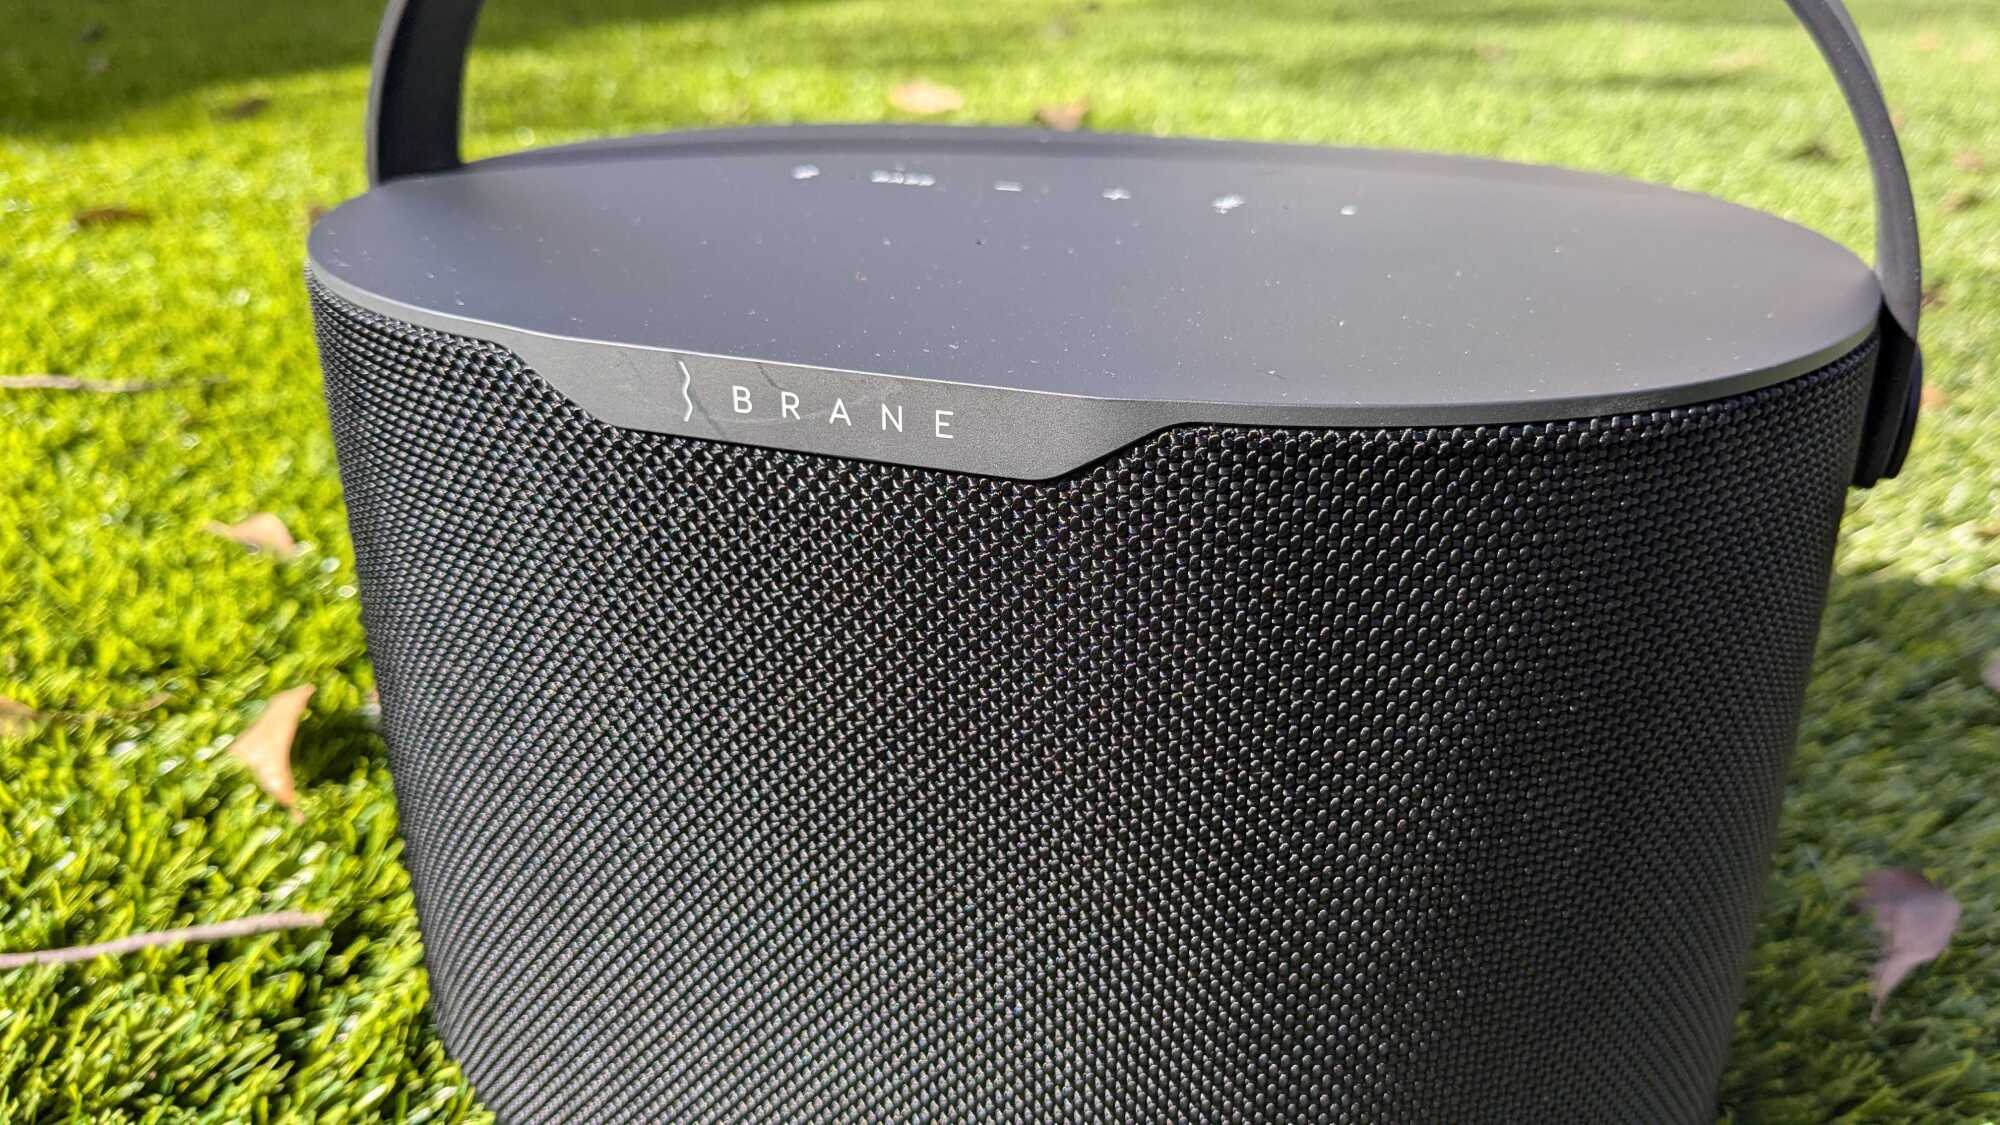
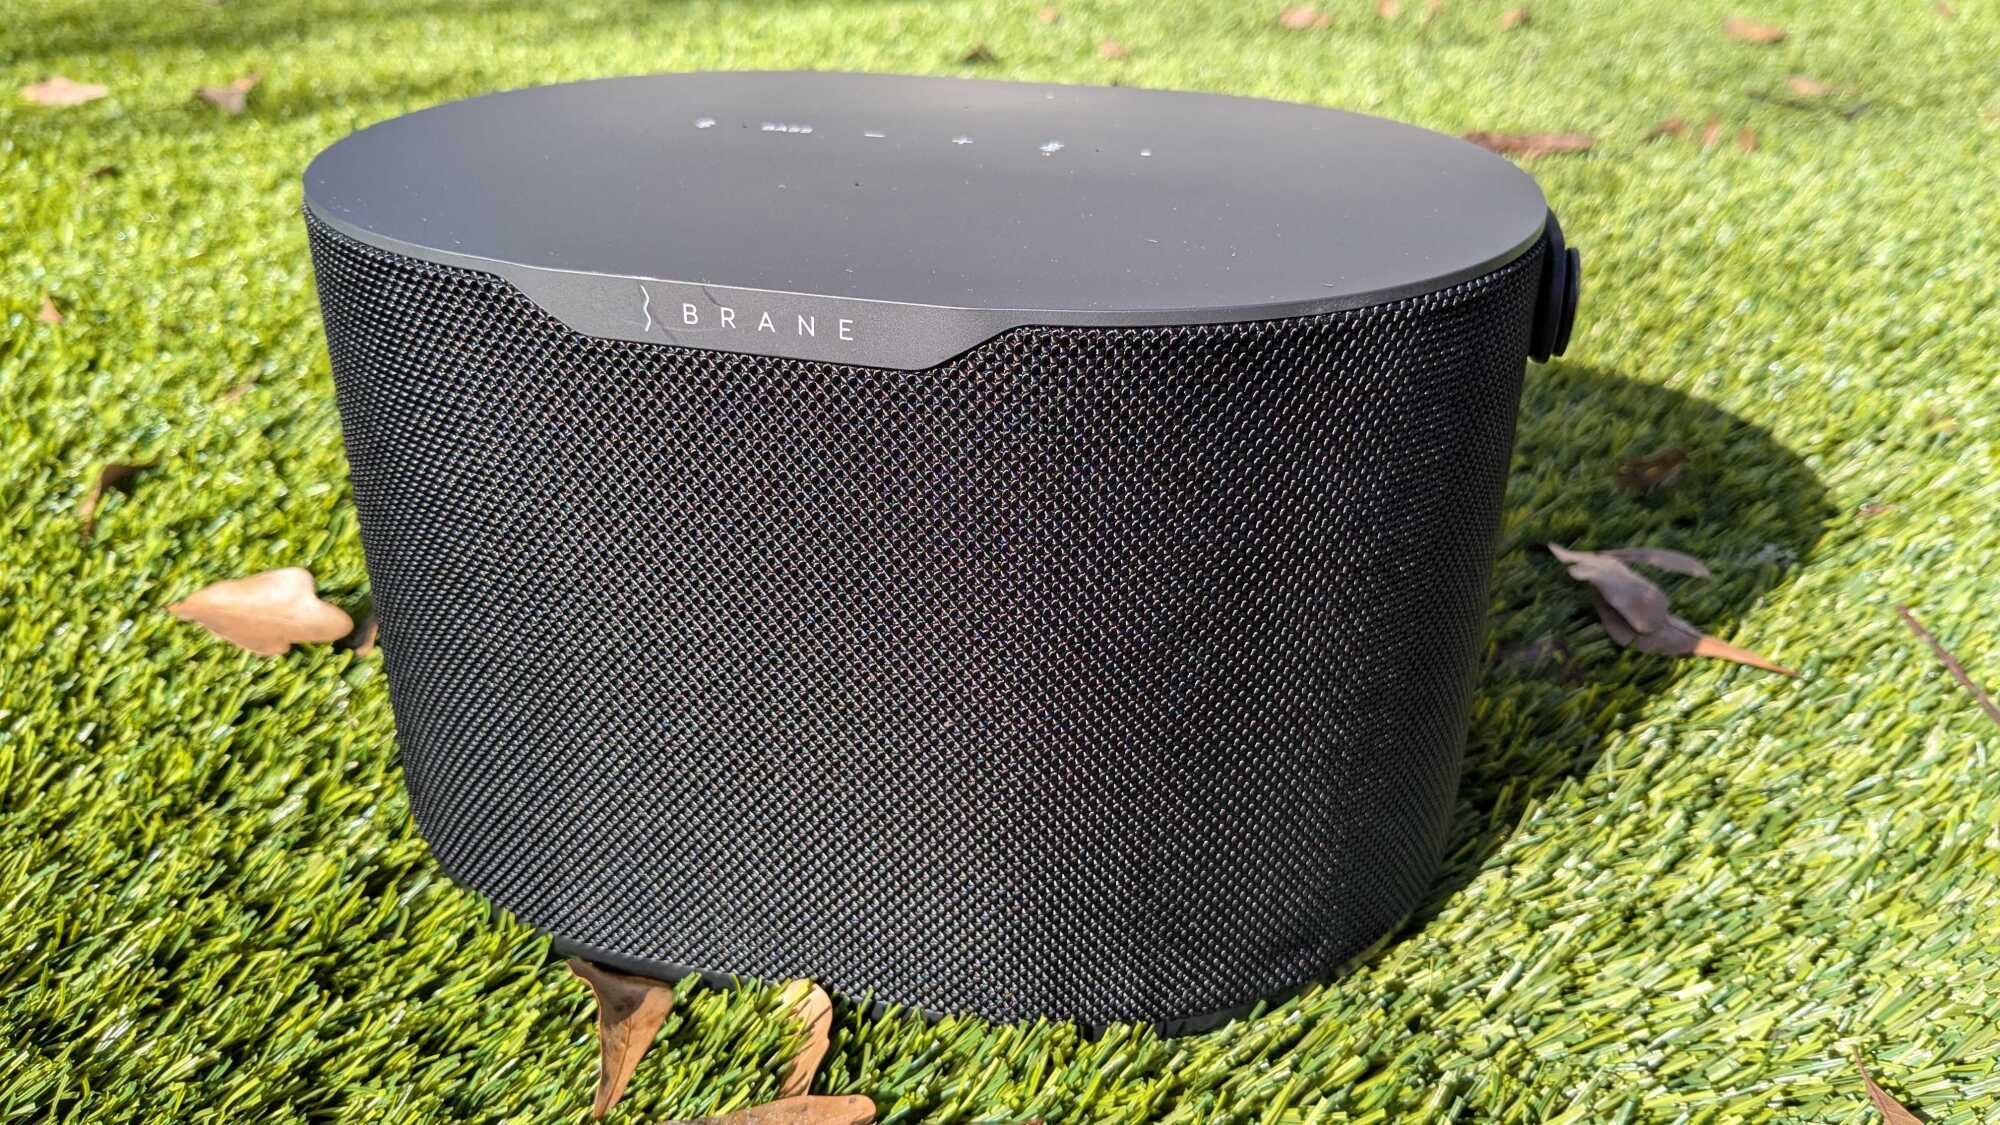
A close up of the Brane X.

Credit: Daniel Oropeza

I have to be honest: First impressions of the Brane X weren’t good. Turning it on wasn’t intuitive, since the power button doesn’t provide any feedback that I pressed it properly. The same can be said about the media controls on top, but I’ll get more into those details later. There is also a weird whirring sound that the speaker makes once you turn it on that made me think my speaker was defective (it goes away after a few seconds). The sound is actually an air pump equalizing the air pressure inside the speaker, which is a patent technology that Brane called Repel-Attract-Driver (RAD). RAD is what makes this speaker unique, giving it the best bass range output I’ve heard on any speaker. Try this frequency range test on your wifi or Bluetooth speaker and see how it performs. The Brane X didn’t just play through the whole range but vibrated my entire office with its powerful bass. And because of that, I’m willing to put up with the humming sound it makes when it’s turned on.

Design

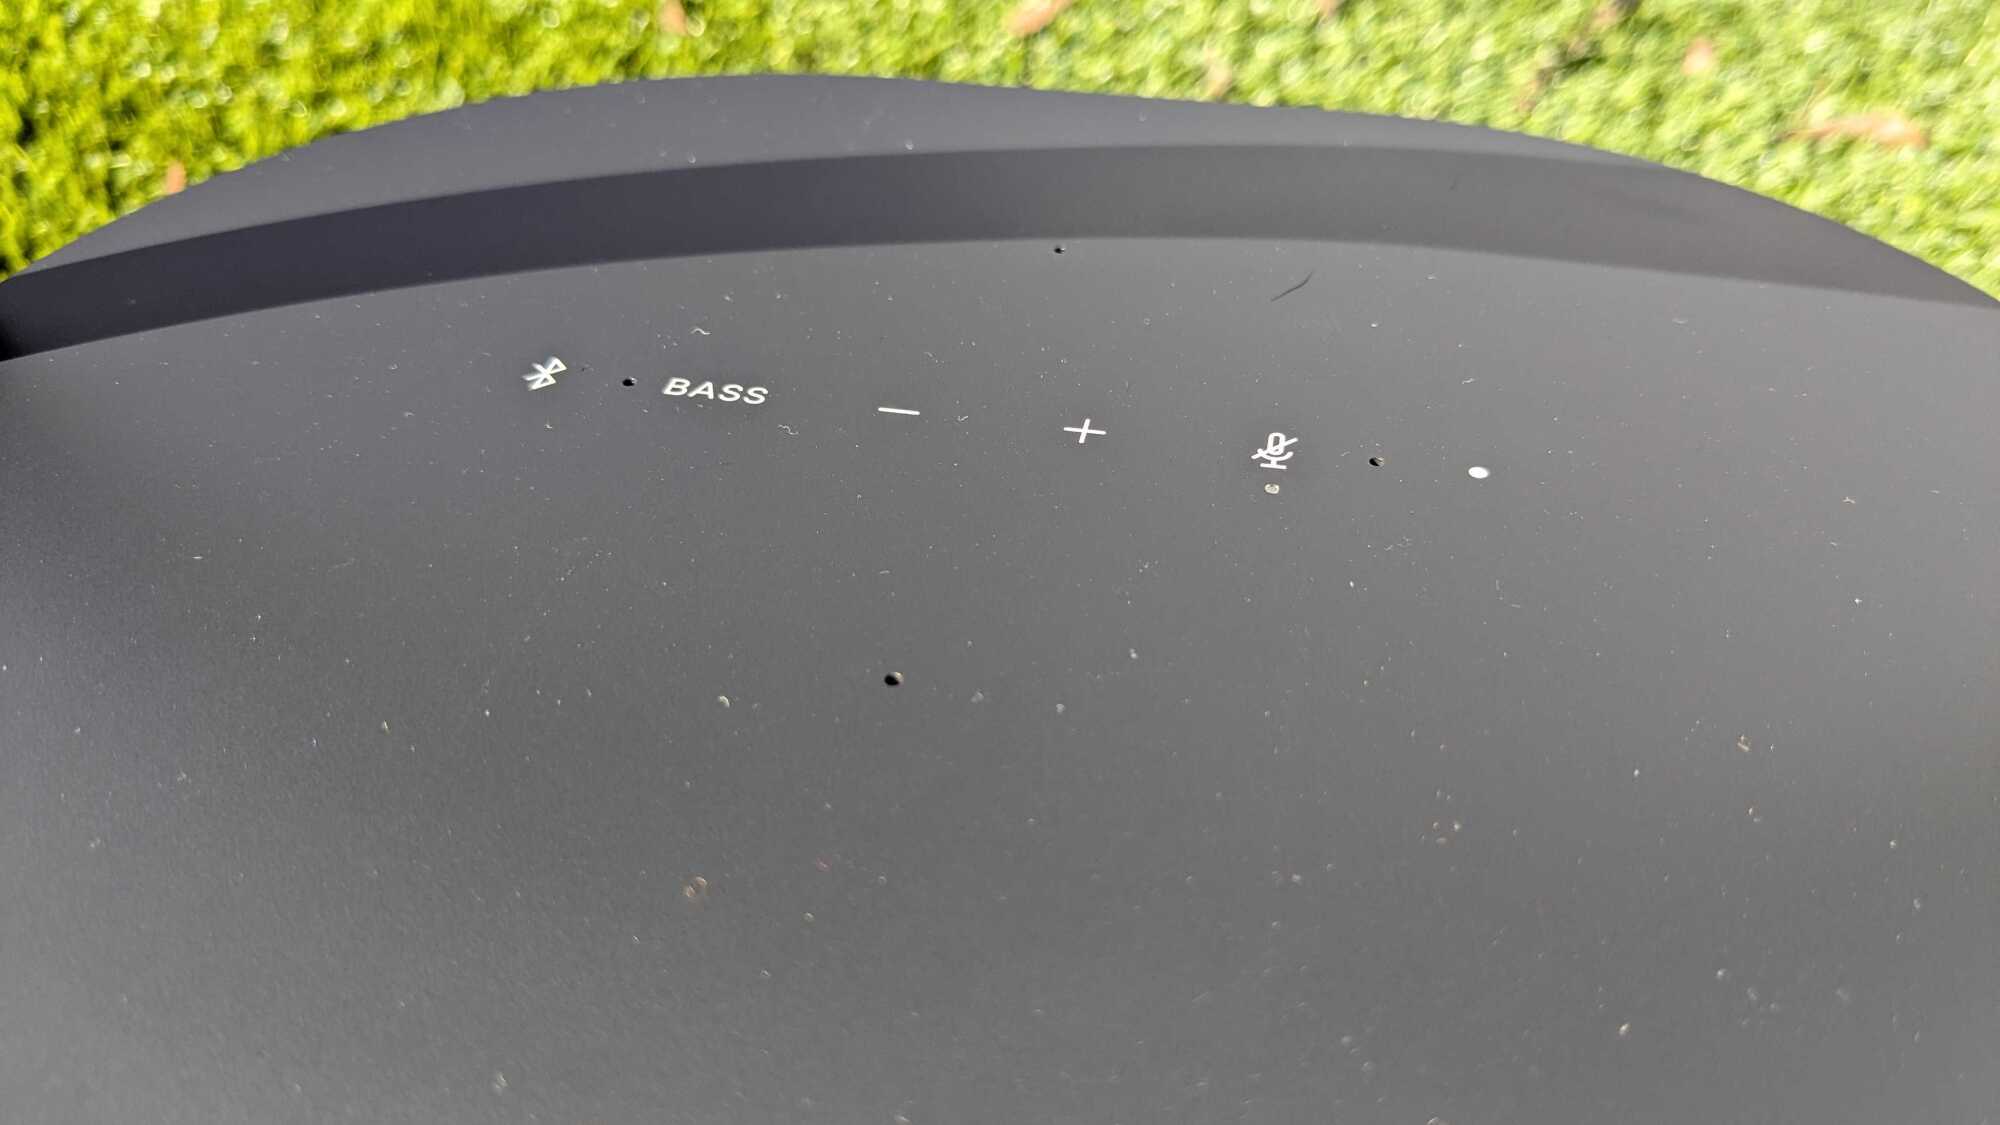
The touch controls on top of the Brane X.
The Brane X uses touch controls for media.
Credit: Daniel Oropeza

The design is, well, boring. All black is a safe option and with no color variations, it leaves me wanting to fill it with stickers to give it some personality. But that leads to my next issue: touch controls. To control the speaker you have a few options on top of the speaker, none of which provide haptic feedback. And since their touch controls, you don’t really know if your command when though unless you hear the speaker. There is also no play/pause button, so I can only control it with my phone (or Alexa if using it to play music).

Considering this is also an outdoor speaker with an IP57 rating that can be completely submerged underwater, physical buttons could’ve come in handy. The handle on the top is useful considering the speaker almost weighs eight pounds.

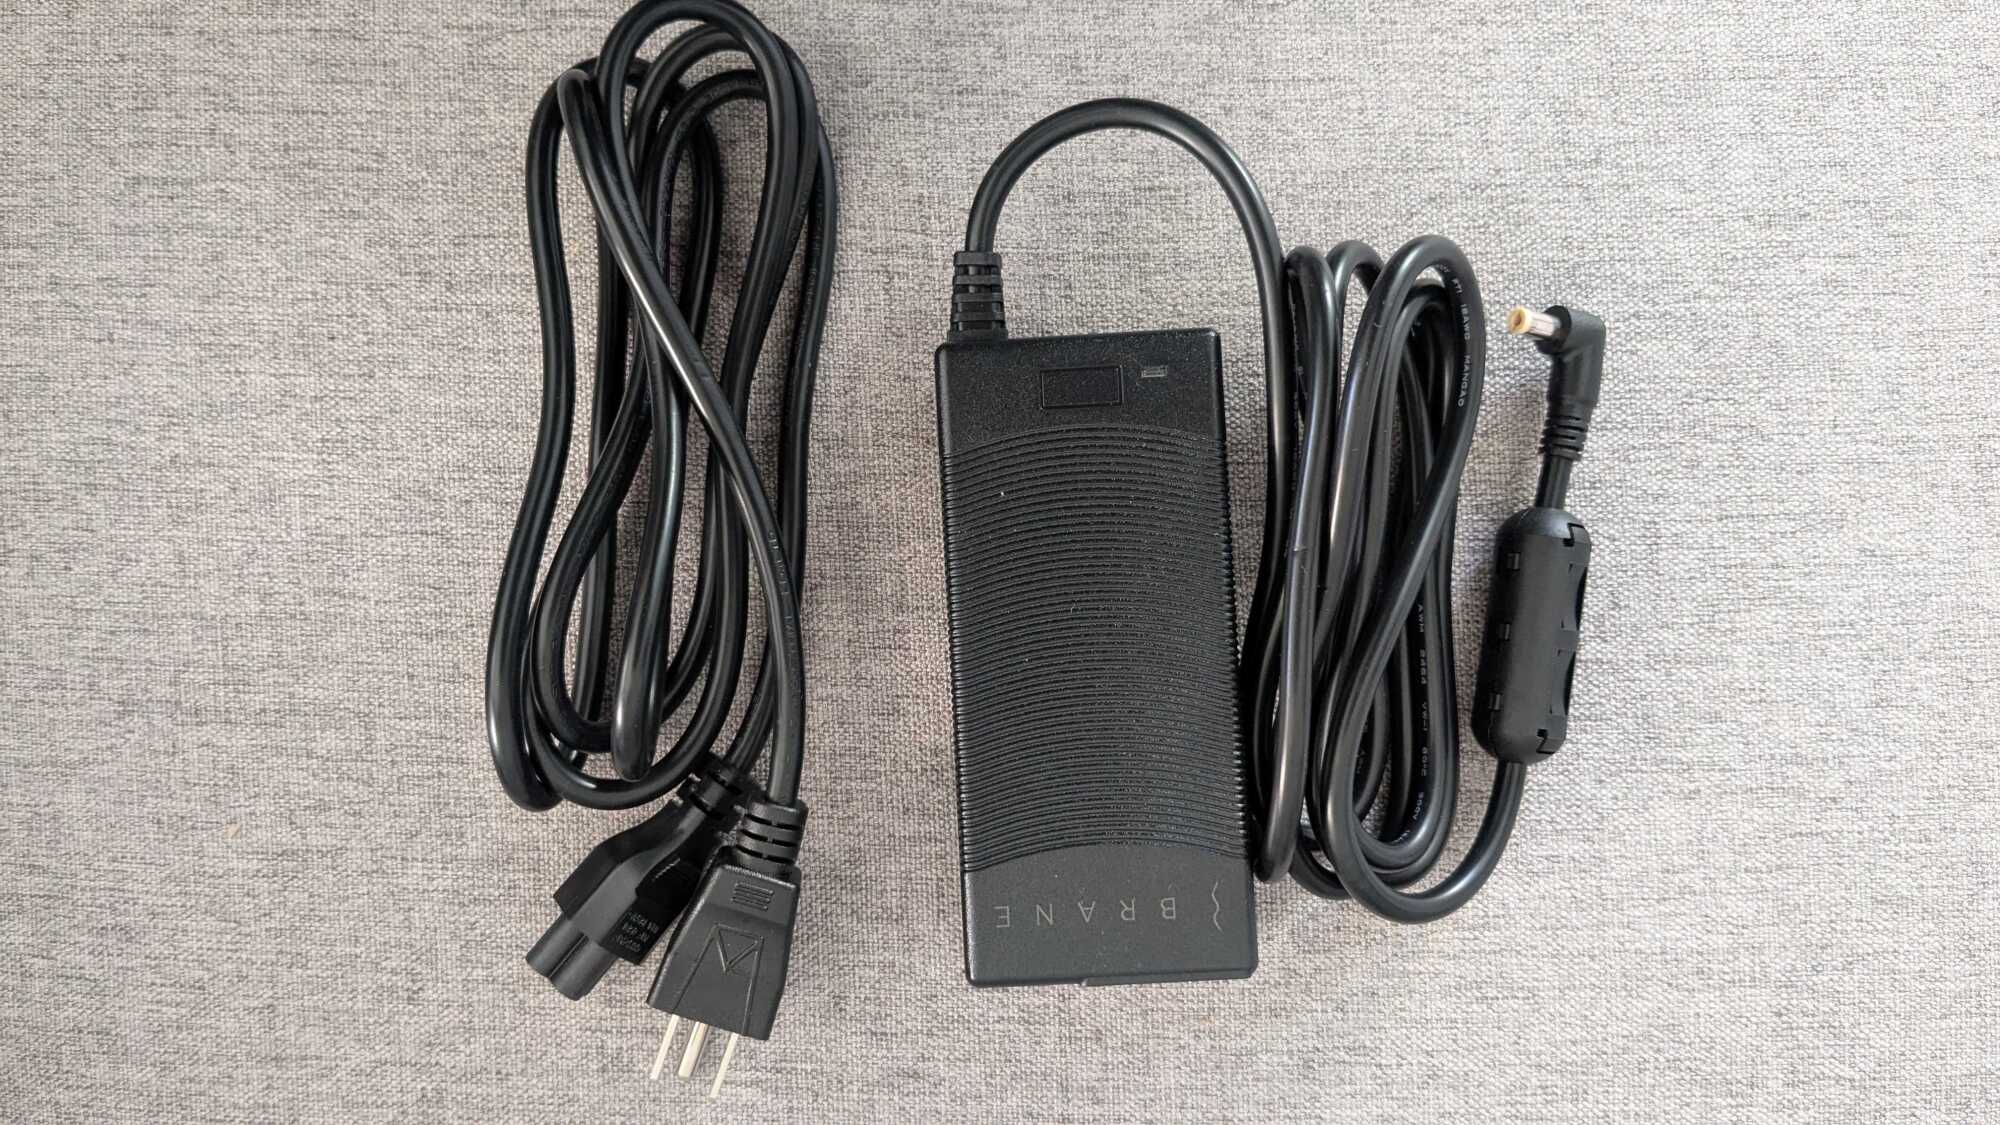
The Brane X charger.
The Brane X charger is DC, so no USB-C.
Credit: Daniel Oropeza

The charger is DC, so no USB-C for fast universal charging, unfortunately. The battery is marketed as 20 hours of battery life at a moderate volume, but I only got around six hours of juice at around 75% volume (which to be fair, is very loud indoors unless you’re having a house party). It’ll take about three hours to fully charge it once it is drained.

Sound

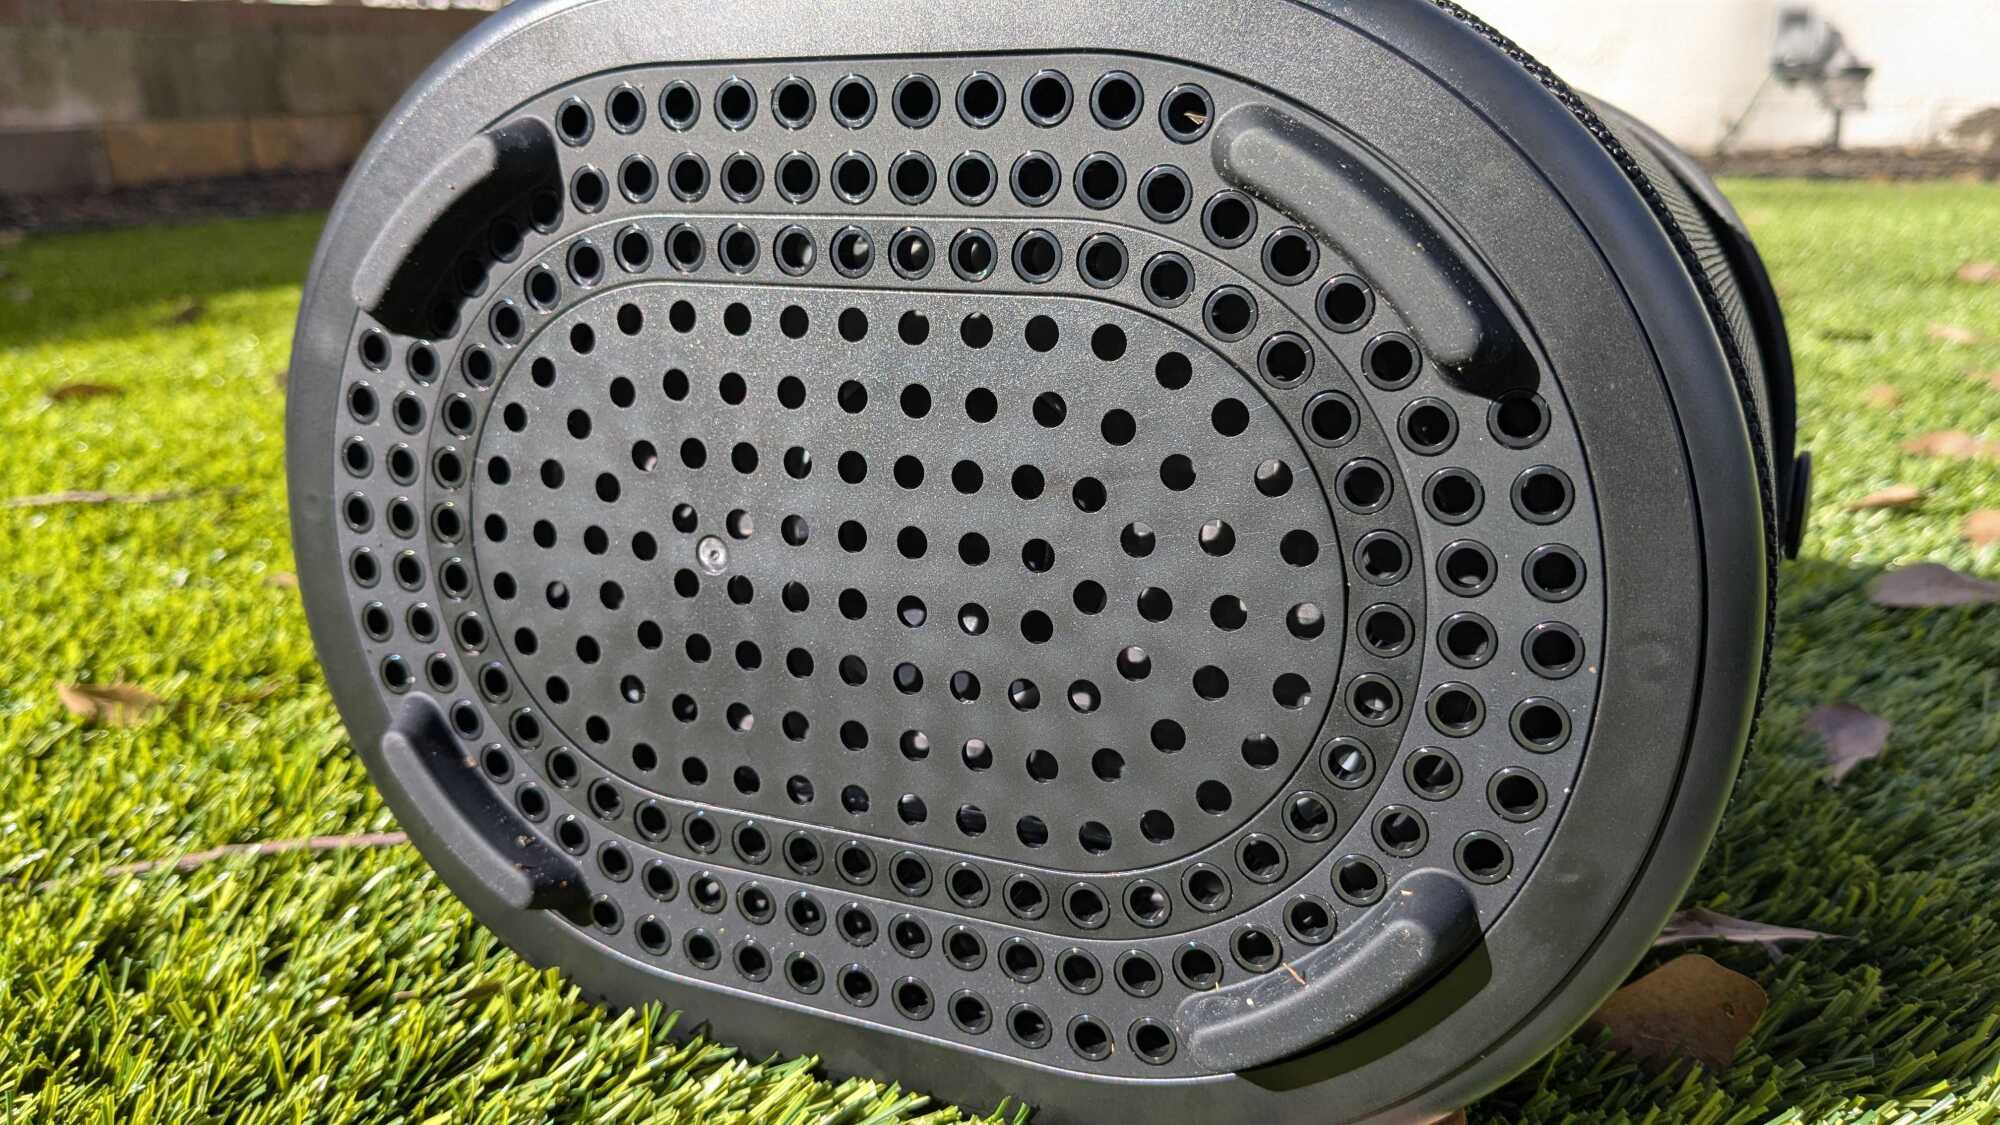
How the Brane X looks from the bottom.

Credit: Daniel Oropeza

The sound is where the Brane X blows away the competition and really shines, especially if you love bass (and I do). As I explained earlier, the RAD technology really pumps out incredible power out of this small speaker. Considering this is less than 10% the size of JBL’s PartyBox Stage 320 (my favorite party speaker), it’s impressive that it nearly matches its 240 W of output power (the Brane X gets to 200 W), only about a 2dB difference in volume to my favorite party speaker. I will caveat that this isn’t a party speaker, and you can really hear it struggle on upper registers when getting it to its max volume.

Unless I’m blasting the Brane X, though, the sound quality is pristine. Because the frequency range of the bass is so wide, you can really hear and feel the lower registers, giving it a full sound without needing to get too loud. It makes for a fun sound that is distinctive to the Brane X. I listened to MONACO by Bad Bunny and could hear the sub-bass parts of the bass clearly. The sensation of feeling the bass at this level usually means blasting the music on regular speakers or headphones, but the Brane X manages to provide that feeling without scaring my neighbors.

Features of the Brane X speaker

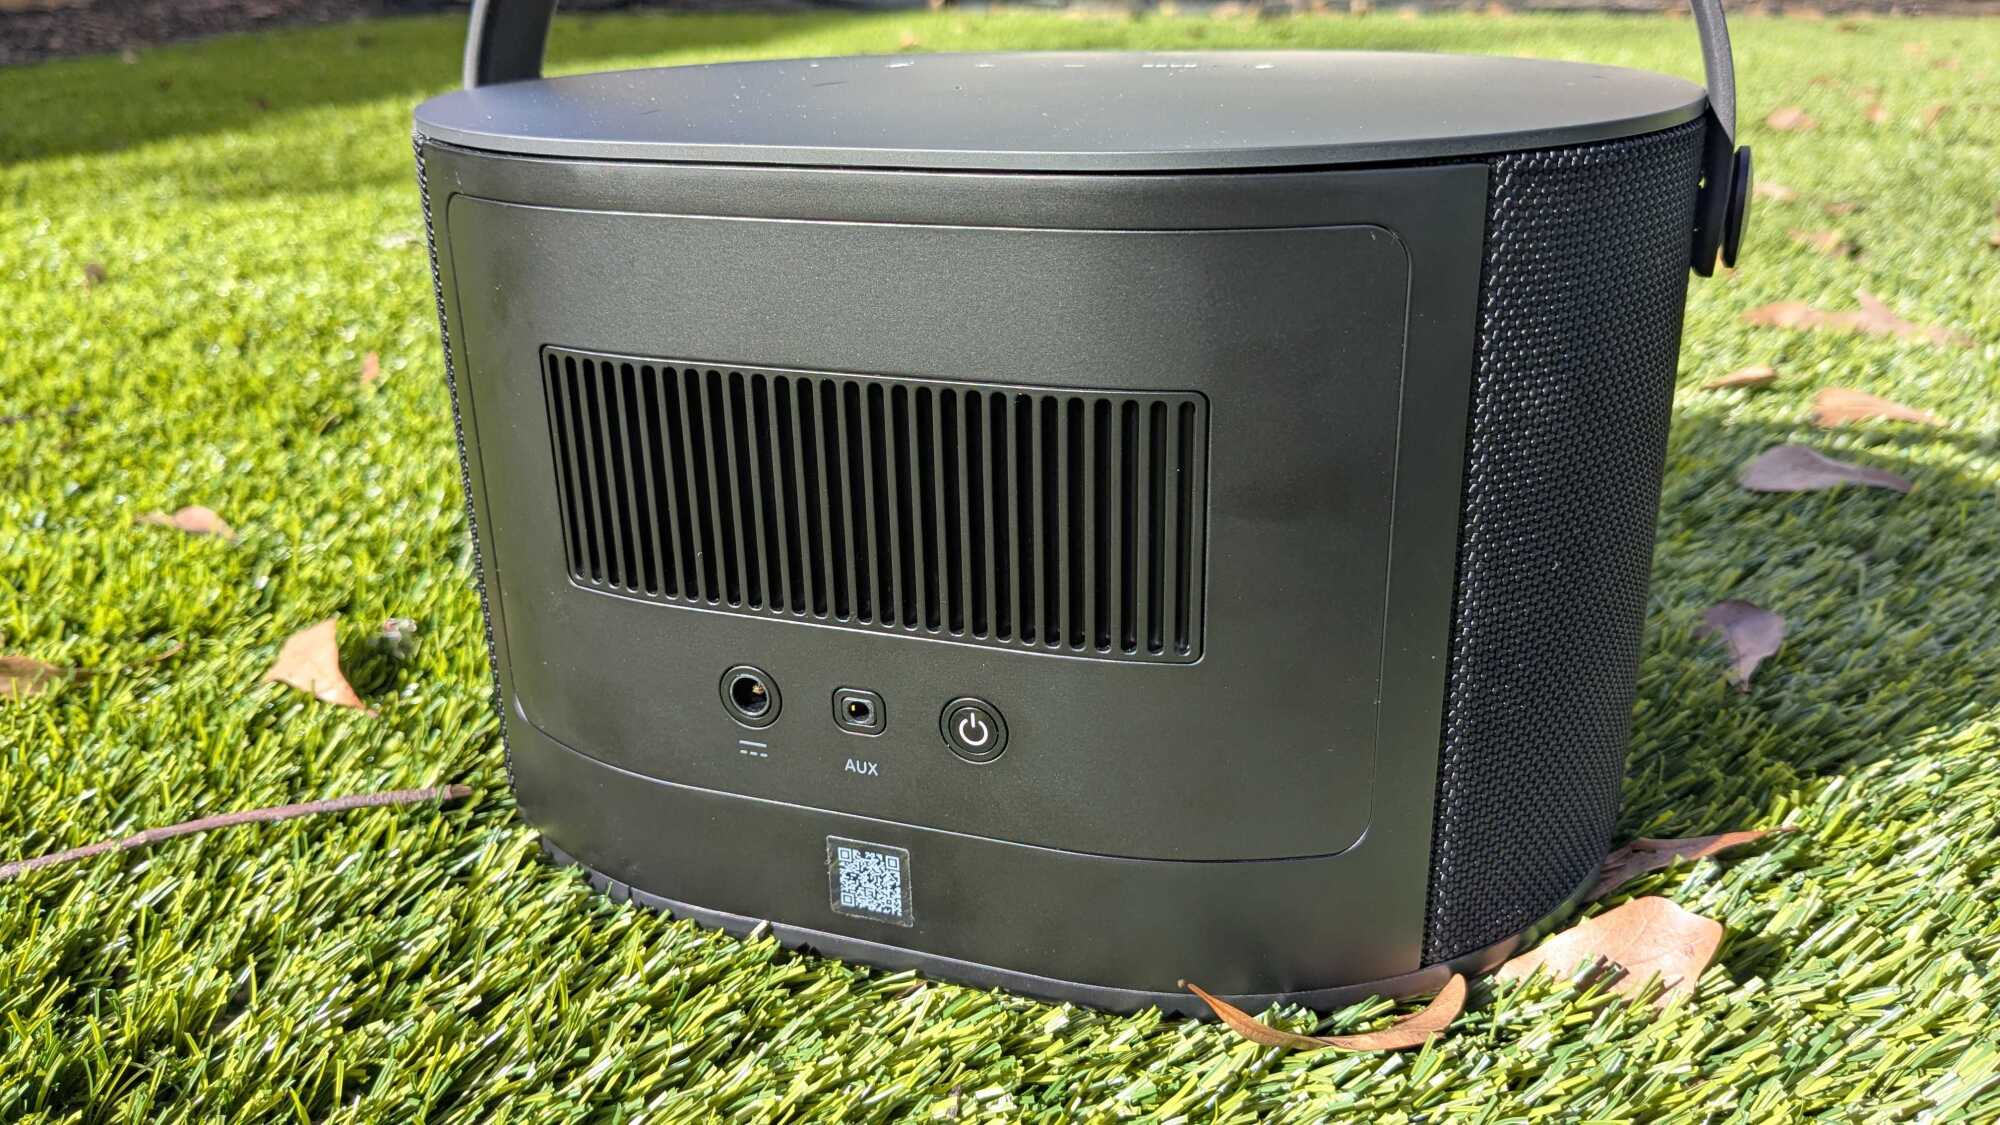
How the Brane X looks from the back.

Credit: Daniel Oropeza

The Brane X is a wifi speaker first, meaning it performs better than Bluetooth speakers in terms of connectivity with a wider range, better sound quality by streaming higher bitrate audio, and other features. Instead of connecting to the speaker over Bluetooth, you can play music directly into it through Spotify Connect, so you’ll get a better connection and sound quality. You can also connect via AirPlay 2 and Amazon Alexa. The Amazon smart assistant performs as well as any Alexa device.

The Brane app

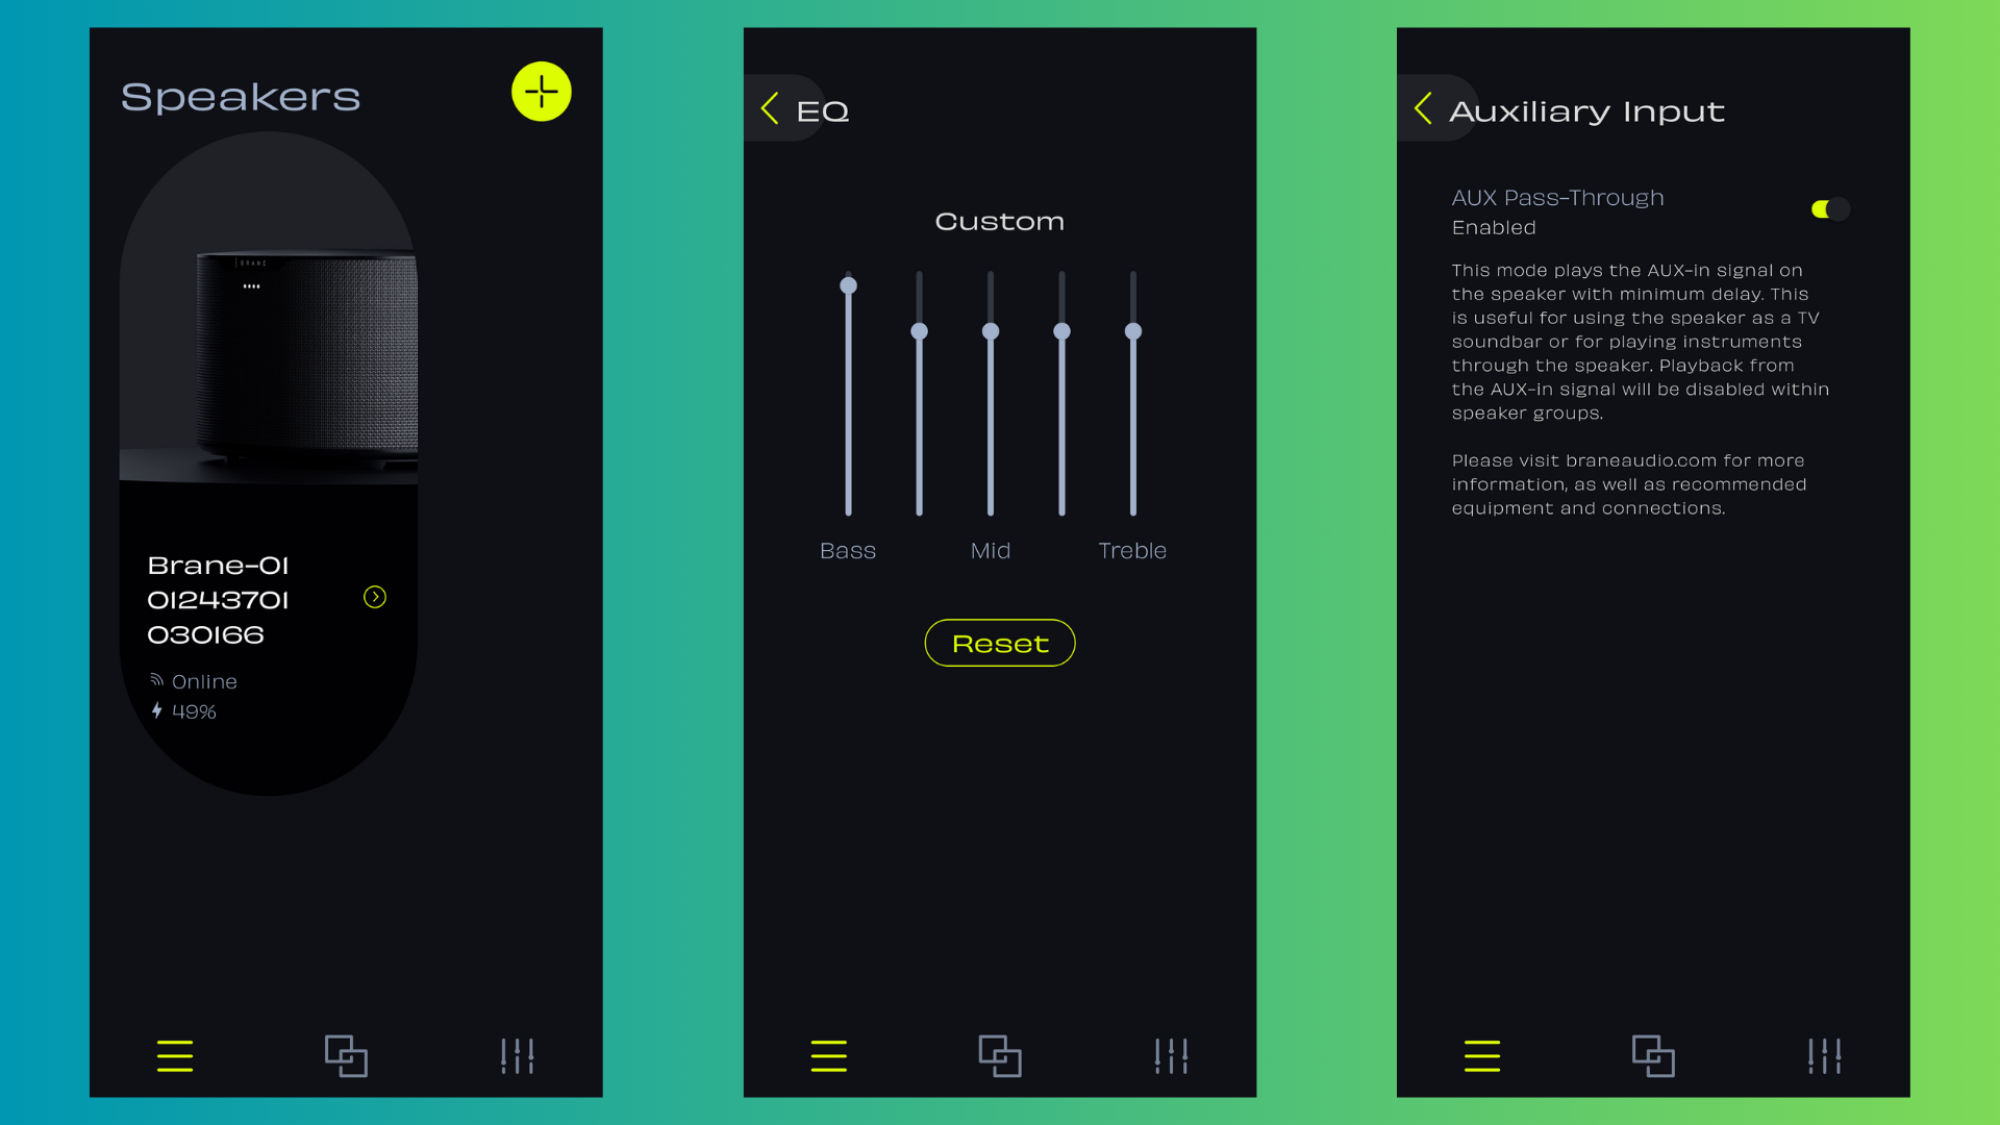
Three screenshots of the Brane app.
Left: Main screen. Middle: EQ. Right: The AUX Pass-Through feature to minimize delay with the TV.
Credit: Daniel Oropeza

My experience with the companion app was like most speaker apps: It does its simple job well, but it can disconnect on occasion and can be slow at times. The main things I used the app were to check the battery life, mess with the EQ (you get a five-band equalizer) which adjusts your changes in real time, and setting the AUX Pass-Through feature when setting it up as a soundbar. The app gives you the option to link up groups if you have more than one Brane X speaker. As I only have one speaker, I wasn’t able to try this feature.

The Brane X as an outdoor speaker

The Brane X outdoors on a soccer court.

Credit: Daniel Oropeza

As I do with all of my outdoor speakers, I took it out to the court while hosting my Street FC soccer games. We played five on five on a hockey rink with walls, so the sound bounces off to give it a “surround” feel. Even then, the Brane X struggles to fill the court completely. This is by far the smallest speaker I’ve ever taken to my games, however, and I’m comparing the sound decibels to party speakers, which is an unfair comparison. The fact that the Brane X is even a contender here speaks volumes to its versatility. With that said, the audio did sound compressed at maximum volumes sometimes. Since it’s a Bluetooth connection outdoors instead of wifi, the compression sound is more noticeable at max volume (it’ll sound better indoors with a wifi connection). The Brane X comes with an IP57 rating, making it fully waterproof and dust-protected—great for an outdoor speaker.

The Brane X as a soundbar

The Brane X as a sub woofer and soundbar.
The Brane X doubles as a soundbar and sub woofer combo with an AUX cable.
Credit: Daniel Oropeza

If you want to use the speaker as a soundbar, you’ll need an AUX cable (at least the end that connects to the speaker needs to be AUX). I wish the Brane X had Google Chromecast support so it could connect wirelessly to my smart TV, but you can’t have everything in life. You can still connect it with Bluetooth, but you won’t be able to use the AUX Pass-Though feature on the app to get rid of the sound delay (the delay is not bad, but sticklers will notice it). You won’t get eARC sound quality, but the speaker itself has a subwoofer, so the sound is surprisingly good as a soundbar and subwoofer combo.

I decided to re-watch Dune to hear how well the Brane X performed as a soundbar and subwoofer combo and compared it to the speaker system on my TCL QM7 TV, which has a subwoofer speaker on the back. The Brane X really brought Dune to life compared to the television speakers. I could feel every thud of the thumpers as they hit the sand when calling the worms. The soundtrack and vibrations of the explosions really put the excellent broad frequency range the Brane X has to use. The speaker is able to handle the dynamic audio you want from a soundbar, hearing whispers and feeling explosions.

Bottom line

The Brane X on my backyard with the handle down.

Credit: Daniel Oropeza

The Brane X is a powerful wifi speaker with a subwoofer that gives it an incredible range in the sub-bass frequencies. It’s the best wifi and smart speaker for bass lovers. With Spotify and AirPlay 2, most people’s needs for music will be met. Its small compact size also makes it a great portable and outdoor speaker, with a waterproof IP57 rating and up to 12 hours of battery life. It can get very loud with a maximum of 98 dBs, and it doubles as a soundbar and subwoofer combo, making it great for watching movies. However, all that versatility comes at a high price of $499. If you’re looking to blast the Brane X at max volume, know that playing over Bluetooth will lead to some compression being noticeable. There is no speakerphone option despite its many microphones, and you’ll need to depend on the DC charger, which isn’t ideal for portable speakers.

The Brane X is ideal for someone looking for a wifi speaker that can do a bit of everything. A one-stop speaker that you can take to the beach, use as a soundbar, fill your living room for a party, or take on a whim to your next adventure. It definitely rivals the Sonos Move 2, and would recommend it to anyone who isn’t in the Sonos ecosystem already and/or loves to feel bass in their life.

Photoshop Is Officially Available on iPhone

“Photoshop” is synonymous with image editing, and for good reason. The app is an industry standard, and has been for over 30 years. But while Photoshop has been available on computers and tablets for some time now, those looking to edit images on their smartphones have had to make due with alternative programs—or simply stick to their other devices instead.

That changes today. As of Tuesday, Feb. 25, Photoshop is officially on iPhone. You can go to the App Store, search “Photoshop,” and see not just the usual alternatives—like Lightroom, Canva, and Facetune—but the real deal, too. Plus, the app itself is free, in addition to a number of “core imaging and design tools.” According to the company, that includes the following, free of charge:

  • Selections, layers and masks

  • Tap Select tool

  • Spot Healing Brush

  • Adobe Firefly AI features, like Generative Fill and Generative Expand

  • Integration with Adobe Express, Adobe Fresco, and Adobe Lightroom

  • Access to “hundreds of thousands” of free Adobe Stock assets

photoshop layer tools

Credit: Adobe

The company showed off a number of edit examples one might use the app for: using a masking tool to copy a subject from one image and paste it to another; using a “quick select brush” to isolate parts of an image from the final product; layering multiple images over one another to create a dramatic but realistic assortment of items around the subject; changing the color of one element of an image, while preserving the rest; and selecting objects to quickly remove them from the scene.

Of course, Adobe is also pushing its AI features, as well—namely, Generative Fill. In one demo, a rep wants to insert an island onto an image of an ocean. They use the lasso tool to highlight where in the image they want that island to be, then use Generative Fill to create a grassy piece of land with AI. In another, Generative Fill is used to remove a background, replacing it with the sky seen in a different part of the image.

Obviously, if you have previous Photoshop experience, you should be quite familiar with the tools and features of this version of the app. However, it may take you a moment to get your bearings: Based on press images and videos, this is definitely a mobile app, meaning its UI looks like many other image editing apps you might have used before. As such, it might take some trial and error before you understand where all of your usual options and features are. But based on what I see, this is the typical Photoshop experience—just distilled into mobile form.

There are more features (if you pay for them)

While Photoshop and its “core” features are free to download and use on iPhone, there are more features and perks if you choose to pay. Adobe now has a “Photoshop Mobile and Web plan” for customers who want more on the iOS, iPadOS, and web versions of the app. That includes:

  • Access to Photoshop on the web

  • Expanded access to Firefly-powered AI tools, like Generate Similar and Reference Image

  • Access to over 20,000 fonts (or import your own)

  • Object Select for precise selections

  • Magic Wand for targeted adjustments

  • Remove Tool

  • Clone Stamp

  • Content-Aware Fill

  • Advanced blend modes for styling your image

  • “Lighten” and “Darken” to lighten or darken different parts of an image

This plan costs $7.99 per month, or $69.99 per year. If you already pay for Photoshop, you now have all of these perks included in your plan.

What People Are Getting Wrong This Week: The Gold at Fort Knox

We may earn a commission from links on this page.

Last week during an interview on Air Force One, a reporter asked Donald Trump whether Elon Musk was planning to cut the Pentagon’s budget when he’s finished with the National Park Service and other departments. Trump responded that Musk will instead be looking at Fort Knox.

I’m assuming there was a uncomfortably long pause before the reporter asked why. “To make sure the gold is there,” Trump responded.

Whether the gold is actually at Fort Knox is a question Musk had posed a few days previously in this post on X:

This has led many to believe that something happened to the gold at Fort Knox. No one knows exactly what happened, but something. Those people are (probably) wrong.

Of course the gold is still at Fort Knox

The most likely (and boring) Fort Knox scenario: all 147.3 million ounces of U.S. gold are sitting there, waiting for you to dive in like Scrooge McDuck. All the bars, half of the U.S. total gold reserves, are safe in a heavily guarded, secretive vault on a Kentucky military installation, just as they’ve been since the 1940s. According to Treasury Secretary Scott Bessent, there is an audit of Fort Knox every year and that “all the gold is present and accounted for.”

“The only gold removed has been very small quantities used to test the purity of gold during regularly scheduled audits. Except for these samples, no gold has been transferred to or from the Depository for many years,” confirms the U.S. Mint.

But isn’t that exactly what the U.S. Mint would say? Maybe someone has been stealing all the gold, or the government has been secretly selling the people’s bullion for years! Yeah, probably not.

Conspiracy theories about Fort Knox

Musk and Trump are not saying anything new—murmurs of “the gold is not really there” have been common among conspiracy theorists since the 1940s, soon after construction was completed on The United States Bullion Depository and the gold was shipped from the coasts to the heartland to protect it from theoretical invaders.

Here are only some of the conspiracy theories about Fort Knox:

  • 1952: The Daughters of the American Revolution allege that the gold has been stolen from Fort Knox. President Truman invites them to inspect the vault but they decline.

  • 1973: Dr. Peter Beter (his actual name) published The Conspiracy Against the Dollar: The Spirit of the New Imperialism, a book that contends “powerful Americans have secretly permitted $20 billion worth of gold to be removed from Ft. Knox. According to Beter, they took it out through a secret tunnel in the vault.

  • 2009: Online cranks assert that Fort Knox’s gold bars were replaced with tungsten-filled forgeries so the real gold could be sold by the Clinton administration.

  • 2010: Ron Paul questions whether there is gold at Fort Knox.

  • Unknown: There are aliens there.

These conspiracy theories spring from a weird mix of monetary policy disagreements that date back to the 1800s, hucksters trying to get people to invest in gold schemes, and the questions some people have about anything secret that “the government doesn’t want you to know.” Like everything else, the internet gives people time and space to spread and modernize ideas, but the Trump/Musk quotes are just warmed-over bullshit. And this isn’t even the golden age of Fort Knox conspiracy theories. That was during the 1970s, when fear about our nation’s gold was so pervasive, the Treasury Department had a brief moment of transparency.

That time the press was allowed into Fort Knox

It’s not on many people’s shelves in 2025, but Dr. Peter Beter’s (again, really his name) The Conspiracy Against the Dollar was influential enough in the early 1970s that tabloids picked up on his claims, and soon members of Congress were getting calls from constituents, calling for proof that the Fort Knox gold reserves were still there. So in 1974, the Treasure Department sighed and said, “fine,” then invited members of Congress and the press to visit Fort Knox to see for themselves. This was the first time anyone other than treasury employees had been allowed inside the vault since a limited audit was conducted in 1953.

A handful of congresspeople and about 120 members of the media were escorted behind 20-ton steel doors and shown the gold bars. They picked them up. Weighed them. They even got to see the secret tunnel, an escape hatch that ends in the building, a failsafe for anyone accidentally locked in the vault.

The press took pictures and shot film of all of it:

Even the most skeptical congresspeople who toured the vault basically concluded “looks like the gold’s there,” and so, it seems, did most Americans. But for diehard conspiracy theorists (and dummies) no amount of evidence is enough. Some derided the visit as a “show audit” that proved nothing, and others concocted “the bars are filled with tungsten” theories because even if people saw it and took pictures, it’s still not true.

Trump’s Treasury Secretary’s 2017 visit to Fort Knox

Treasury Secretary Scott Bessent recently has said he would arrange an inspection for any senator who is interested in seeing the vaults. Steven Mnuchin, Trump’s first treasury secretary, had a similar policy. In 2017, Mnuchin, Mitch McConnell, and other officials visited Fort Knox to review the bullion. Their visit included a viewing of the total eclipse as an added bonus. What good timing.

Here’s Mitch McConnell with gold bars. Adorable!

Mitch McConnell at Fort Knox

Credit: US Treasury Department

Apparently you can sign your name when you visit Fort Knox, as Mnuchin does here.

Steven Mnuchin at Fort Knox

Credit: US Treasury Department

The exact purpose of Mnuchin and company’s Fort Knox outing isn’t clear, but I’m sure they were conducting important governmental business, not just sightseeing, and if they had noticed any missing bars, they would have alerted the proper authorities.

Documents, crowns, and lots of narcotics: strange things stored at Fort Knox

While the gold seems to be there, alien bodies are (probably) not stored at Fort Knox, but that doesn’t mean we don’t put weird things down there sometimes.

Back in the 1940s, with World War II ravaging Europe, the U.S. government moved the signed original Constitution of the United States, Declaration of Independence, Articles of Confederation, Lincoln’s Second Inaugural Address, and drafts of Lincoln’s Gettysburg Address into the vault for safe-keeping. The vault was used to store the Crown of St. Stephen, until we sent it back to Hungary in 1978.

Until recently, Fort Knox was home to the U.S.’s strategic reserves of pain-killers: At one time, 68,269 pounds of opium and morphine were stored in the vault—that’s a lot of narcotics! It isn’t stored there any longer, and where it went is not public. Why don’t you look into that, Elon Musk?

Still in the vault are ten 1933 Double Eagle gold coins, a 1974-D aluminum cent, and twelve gold (22-karat) Sacagawea dollar coins that flew on the Space Shuttle Columbia in 1999.

Does the gold in Fort Knox even matter?

It’s cool that we have a great huge Smaug-sized treasure trove in the U.S., but does it do us any good? The gold bars stored in Fort Knox have been gathering dust since the early 1940s, and we don’t do anything with them and they don’t affect anything tangible. Our money hasn’t been directly tied to gold since the 1930s (or 1970s; it’s complicated) so in a sense it doesn’t matter whether all the bars are filled with tungsten. The piles of gold serve mainly as a symbolic representation of our nation’s wealth and stability—gold is very shiny, after all. Consider this: Fort Knox’s gold is worth $435 billion, total. The U.S. nation debt is $36.22 trillion. So even if we were to sell it all tomorrow, it would be a drop in the bucket. Like the cash hidden under the nation’s blanket, Fort Knox gold is our “if things get really bad, we still have this.” It’s the money in the banana stand. If Elon Musk opens the vault doors and does find nothing there, I hope he’s smart enough to keep it to himself.

This Outdoor-Friendly JBL Speaker Is $90 Right Now

We may earn a commission from links on this page. Deal pricing and availability subject to change after time of publication.

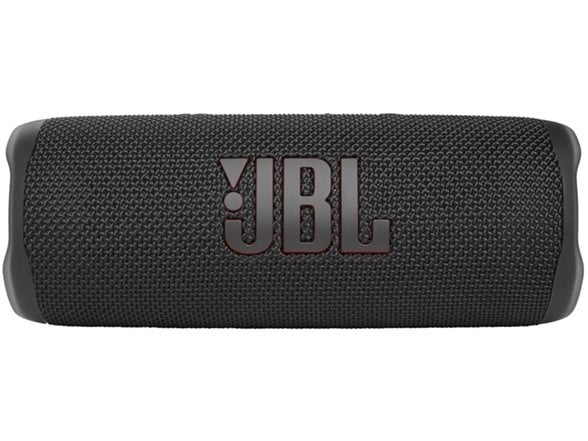
The JBL Flip 6 is currently $89.95 on Woot (and will remain so for the next four days or until stocks last)—$40 off its usual $129.95 price tag, and if you’re a Prime member, you also get free standard shipping (otherwise, it’s $6). It’s available in black, white, teal, gray, and green, giving you a decent range of options to match your vibe. The design is classic JBL—cylindrical, durable, and built to be tossed into a bag without worry. Its passive radiators on both ends let you feel the bass in your hands (earning itself a place in PCMag’s “Best Outdoor Speakers for 2025” roundup). Just don’t expect a true subwoofer experience; it’s still a compact speaker, after all.

Inside, the Flip 6 packs a 20-watt woofer and a 10-watt tweeter, covering a frequency range of 63Hz to 20kHz. It connects via Bluetooth 5.1 and supports AAC and SBC Bluetooth codecs, but not AptX, so audiophiles looking for higher-quality streaming may want to look elsewhere. The top panel houses volume and playback controls, though the multi-function button weirdly only lets you skip forward—not back. JBL’s PartyBoost feature is also here, letting you link multiple compatible JBL speakers for a bigger sound. Battery life is estimated at around 12 hours, but that depends on how loud you like your music. Crank it up, and you’ll burn through that charge much faster. There’s no speakerphone function or aux input, which might be a dealbreaker if you like having wired options.

Durability is where the Flip 6 shines—with an IP67 rating, it’s fully dust-proof and waterproof, meaning it can survive a pool dunk and even float (though don’t expect Bluetooth to work well underwater). It also comes with a 90-day Woot Limited Warranty for added peace of mind. JBL’s companion app gives you access to customizable three-band EQ and PartyBoost controls, though the app itself is pretty barebones. Sound-wise, the Flip 6 delivers impressive low-end depth, and at moderate volumes, the bass is strong without distortion. Push it too high, though, and its digital signal processing (DSP) kicks in, thinning out the lows, according to this PCMag review. If you considering alternatives, the Sony SRS-XB23 might be worth checking out at around $95.

Note: This item can’t be delivered to Alaska, Hawaii, and PO Box addresses.

I Tried Yope, Gen Z’s New Favorite Photo-Sharing App

We may earn a commission from links on this page.

I am always down to try a new social app (a face I have made so, so clear), especially when it involves sharing photos. And the trendy photo-sharing app of the the moment is Yope (available on iOS and Android). Launched in September 2024, it currently has 2.2 million monthly active users and 800,000 daily active users, many of whom are in the investor-coveted Gen Z demographic.

I am not a part of Gen Z, but as of today, I am one of the millions of people who used the app this month. It’s fun and all, but I’m not sure I’ll make it into that 800,000+ cohort of daily users. Here’s why, and what you need to know about Yope.

So, what’s Yope?

The easiest way to describe Yope is to say it’s kind of like a private Instagram crossed with a group chat. (I have never understood the appeal of having a private Instagram account, so I likewise don’t see the appeal of posting to an app designed to hide your content from the majority of users, but that’s me.) You can create and name groups, add friends to them, and then post your pictures to those groups. And that’s basically it. The pics create a stream that anyone in the small group can look at, and you can choose to have them appear on your lock screen. It that sense, it reminds me of Locket, an app I tested out three years ago that also sent your photos to your friends’ lock screens.

The problem for me was a lack of friends to put into a group. I synced my contacts right away, but out of 1,500 people on my phone, exactly zero of them were already on the app, signaling that all the hype around this being big for Gen Z might be true—though I definitely have some Gen-Z cousins saved in my phone, and none of them had it either.

To put the app through its paces, I had to send my referral link to a bunch of my friends and plead with them to download it, which they are sick of doing, given I am cajoling them into a new app every other week or so as it is. Only one, my lovely friend Danielle, agreed to it. This, at least, allowed me to create my first group.

I named it “pals” and Dani and I spent some time uploading pictures to the stream. It was cool for a few minutes, but with just two people, it got old quickly. It honestly wasn’t too different from how we used to use Snapchat, ages ago: Here’s a picture of what I’m looking at. There’s a picture of your face. OK, here’s one of my face.

You can respond to a photo without sending a photo, so the stream also functions as a basic chat. You can send real-time photos or pics from your camera roll, but that’s about it.

Is Yope worth downloading?

Yope on iOS
Yope is easy to use, but this is basically all it does.
Credit: Yope/Lindsey Ellefson

I’ve read a lot of discourse over the past few years about how the pendulum is swinging away from a cultural desire to post for the masses, and back to a compulsion to post for and interact with more tight-knit groups. Instead of tweeting or posting to a public Instagram, a lot of people do seem to enjoy being in small, interest-specific Discord or Telegram channels, in a way reminiscent of an earlier internet era that required one to seek out chatrooms to find like-minded people.

Personally, I am not one who desires a more curated online interactive experience, so I don’t really Vibe with Yope. Even if a lot of my friends were using it, I’d prefer to see everything in a jumble than sift through curated group feeds. But maybe that sounds good to you.

Yope positives:

  • Account setup is easy

  • The contact-syncing function is seamless (provided you have contacts who actually use the app)

  • There aren’t any filters, and there’s minimal risk your photos will be seen by anyone you don’t want to see them, unless your friends screenshot and share them (taking a screenshot does not trigger a notification to the group)

  • The lock screen function works well and updates immediately

  • There lack of features means it doesn’t feel overwhelming; all you can do is post photos into your group stream

  • It’s free

Yope negatives:

  • It gets a little boring if you don’t have a lot of people to share photos with

  • It’s yet another photo-sharing app to add to the list of ones you already have, each of which probably already includes the same group of friends you’d be sharing with on Yope

The bottom line: Nope

I personally won’t keep using Yope, at least not the way I used the similar BeReal for a long stretch in the summer of 2022. That doesn’t mean it won’t continue to gain traction with users who actually want an app that mixes Instagram with a group chat. It seems to have enough momentum to drum up investor capital, which could result in increased visibility and attract more users. Someone you know might even be using it by next month, even if you’re older than 27.

How to Install the iOS 18.4 Developer Beta

Last week, Apple launched their developer beta for iOS 18.4. The update brings fresh changes to iOS, including Priority Notifications, a new Genmoji button, and additional supported languages.

While it may be some time before iOS 18.4 is launched to all iPhone users, those curious to try out the new features can do so by installing the beta. However, doing so may cause some issues, so proceed with caution.

How to install the iOS 18.4 developer beta

It’s worth mentioning that there is some risk involved in installing a developer beta. The software can be unstable, as it is currently in testing and designed mainly for developers to make sure their apps are compatible with the latest iOS update. There are also likely bugs and glitches in this developer beta, which Apple is still working on fixing ahead of the public rollout. Those bugs can lead to data loss if you don’t properly back up your device before installing the beta. If you have a idea of what you’re doing and still want to try the new features, then go forth and have fun with the beta. However, it may not be a great idea to install the beta on your main iPhone.

As mentioned, you should back up your iPhone before installing the iOS 18.4 beta on your iPhone. I recommend backing up with your Mac or PC using Finder or iTunes. While you can use iCloud to back up your iPhone, this can be tricky with betas: If your iPhone backs up to iCloud while running iOS 18.4, you won’t be able to retrieve the data should you need to downgrade to the public iOS version. Backing up to your computer helps to ensure all your data from your iPhone stays intact.

Next, you’ll need to enroll your Apple ID in Apple’s developer program. To do so, first head to the Apple Developer site, then select Enroll. Log in to your Apple ID, fill out your information, and agree to Apple’s terms and conditions. While Apple has made it free to access developer betas, if you want to publish apps to the App Store, you’ll still need to pay Apple’s $99 yearly fee for full access to their developer program.

Once you’ve backed up your iPhone and enrolled your Apple ID, you’re ready to install the new developer beta. To install the beta, open Settings > General > Software Update. Below Automatic Updates, you should see an option for Beta Updates. Choose iOS 18.4 Developer Beta, then hit Back. Let iOS load for a moment, and you’ll see an option to Download and Install the beta.

How to Clean Your Smartwatch Without Ruining It

We may earn a commission from links on this page.

I wear my Apple Watch continuously, only removing to to charge it or when I’m showering. I wear it to sleep and to work out, under heavy sweatshirts, on the beach—basically anywhere and everywhere.

As you can imagine, the device gets dirty. But as you might also imagine, I have no interest in cleaning my expensive smartwatch in a way that might damage it. Here are the two methods I use to clean my fitness tracker without harming it—plus some other things to keep in mind when cleaning yours.

Before doing any kind of cleaning, remove your watch band to make it easier to access all of its crevices. It’s also a good idea to power it off; even if it’s waterproof, cleaning can result in unintended button presses.

Smartwatch cleaning method #1: Soap and water

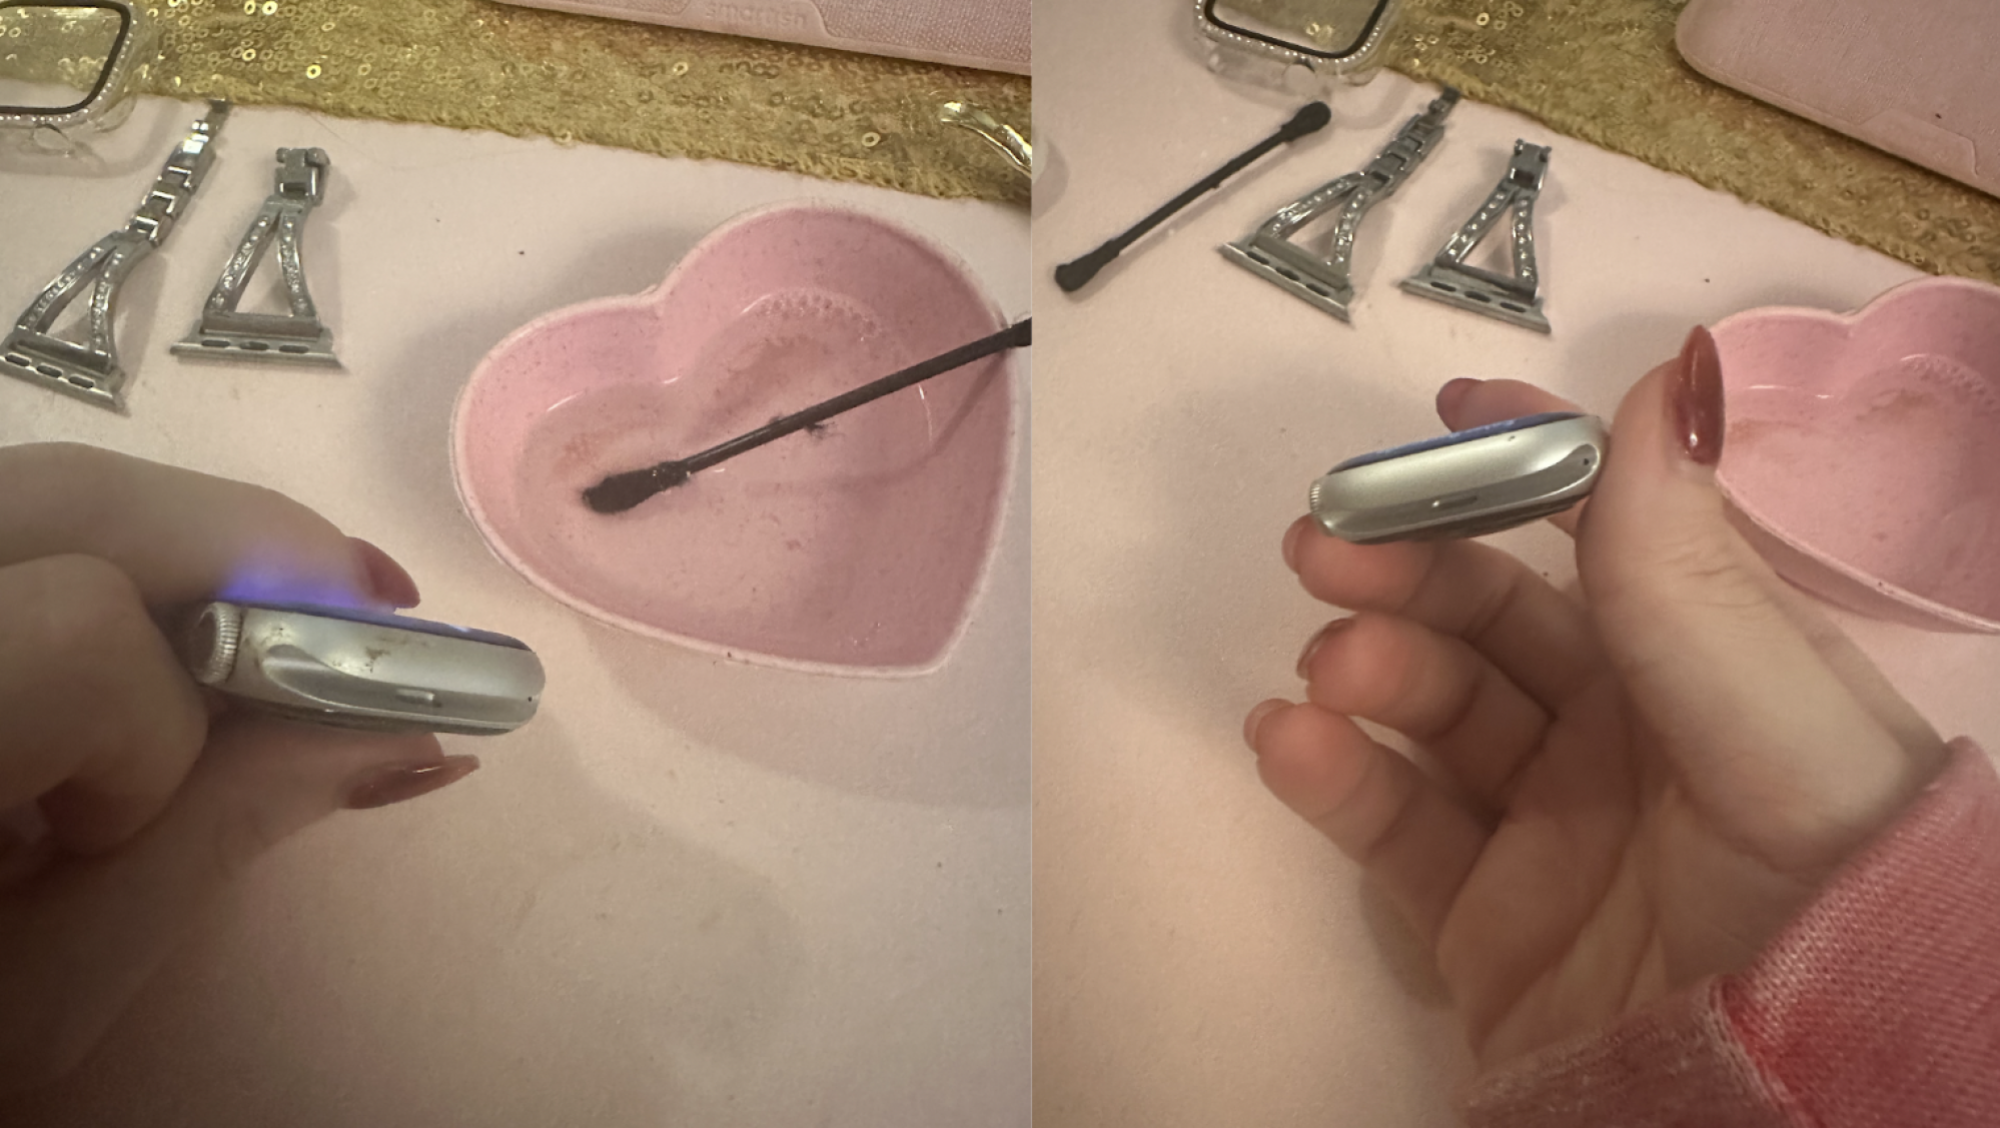
Though the device is high tech, the simplest cleaning method isn’t at all: You can use water and a drop of mild soap to help scrub away any dirt or grime. If you’re confident the device is waterproof, you can actually dunk it in a bowl full of warm water and a drop or two of dish or hand soap. If it’s not, or you’d rather not risk it, you can also use a q-tip or soft cloth dipped in a soapy mixture. (I prefer the q-tip because it’s easier to get in and around the buttons and the crevices where the band connects to the device.)

Smart watch cleaning method #2: Isopropyl alcohol

Soap and water works fine for me when it comes to general cleaning, but from time to time, I like to use 70% isopropyl alcohol to remove oils or more serious grime. Again, I use a fresh q-tip and focus my attention on the face of the watch as well as the sensor underneath. To the extent possible, I avoid scrubbing around holes or buttons with the wet end. Instead, I use the dry end to dislodge any dirt in those areas.

Even if your watch is extremely dirty, use soap and water first. The alcohol should only be dabbed quickly on the exterior, then left to air dry. Those little alcohol pads can come in handy here.

Cleaning Apple Watch
Before and after some soap and water followed by isopropyl alcohol.
Credit: Lindsey Ellefson

Different companies recommend different cleaning techniques

I use the methods above to keep my Apple Watch clean, and they’re pretty broadly applicable across other devices. However, some brands get more specific about what you should or shouldn’t do to clean their watches. Google Pixel users, for instance, are advised by the company not to use anything but fresh water on a damp cloth to rub the Pixel down, while Withings and Samsung recommend the same.

Why? As Samsung advises, “Do not use soap, cleaning agents, abrasive materials and compressed air when cleaning your Galaxy Watch and do not clean it with the external heat sources. Doing so may damage the Galaxy Watch. Skin irritation may be caused by soap, detergents hand sanitizers, or cleaning agents left on the Galaxy Watch.” Considering the watch is waterproof, it seems the warning about skin irritation is more relevant, but as long as you rinse it well, it shouldn’t be a problem.

Spend some time reading the specific information related to your own device, but if it’s really dirty, consider some tech cleaning wipes. The way I see it, you’re not introducing any more soap and water than you would be if you, say, took a shower or washed your dishes while wearing the watch.

Other things to keep in mind when cleaning a smart watch

If you have visible gunk in the tiny holes on your watch, gently (very gently!) try to dislodge it with a soft toothbrush or blow on it at an angle. If that doesn’t work, wipe gently with a dry cloth. There really aren’t any holes big enough on an Apple Watch to cause problems, but if your device has some, be careful not to push the icky stuff further inside.

Get in the habit of running a damp cloth over your watch after a sweaty workout or before you put it on the charger to stop it from getting quite so dirty before you next clean it. Allow it to dry before you power it back on, charge it, or wear it.

You should also clean your watch band regularly, but how you do that will depend on what it’s made of. Most of mine are fabric, so they go in the washing machine, but rubber or silicone ones can be cleaned with soap and water or disinfectant. If it’s leather, wipe it with a dry cloth, then use a drop of gentle soap (like hand soap) on a damp cloth to rub any messy spots. Use a clean, damp cloth to wipe away any soap residue and let the leather air dry, then hit it with some leather conditioner.  

Yes, You Can Freeze Coconut Milk

Most of my adolescent free time was spent in the kitchen making Thai food with my mom. She was firm in the practice of using up every last bit of an ingredient. If there was any leftover coconut milk, it went in the fridge and we used it for random stuff (coffee, cereal, rice) until it was done within a day or two. It never went in the freezer because it would become a disgusting, curdled mess upon defrosting.

I’ve previously addressed what a person should do with a leftover half-can of coconut milk before it spoils, but it turns out I’ve been thinking about the conundrum all wrong. My entire life, I believed freezing it was not an option. But it is. Yes, you can (and you should) freeze your leftover coconut milk. 

I wasn’t wrong in thinking it looks like hell when it’s defrosted—gritty and broken, like cottage cheese gone wrong—but it’s not actually ruined. What my mom and I didn’t know at the time is that thawed coconut milk can be perfectly rejuvenated with a little heat. Those clumps and clusters are merely ice crystals and coagulated fat, and heat melts them both.

I came across this important truth from one of my most trusted Thai food sources, Hot Thai Kitchen on Instagram. (In case you were wondering, when I shared this revelation with my mom, she acted like she’d known about it this whole time. Parents.)

How to freeze coconut milk

Any coconut milk that you don’t plan on using in the next five days or so can be frozen. First, I like to pour the contents of the can out into a freezer-friendly bag or container. (I put the bag in a measuring cup so I don’t have to hold it open.) If you opt for a container, it might be worthwhile to separate the milk into smaller portion sizes for easier thawing.

A zip-top bag full of coconut milk in a measuring cup.

Credit: Allie Chanthorn Reinmann

If you’re using a freezer-safe zip top bag, squeeze out as much air as possible and seal the top. Lay it flat on a small metal baking sheet and put the whole thing in the freezer. Freezing it flat allows the milk to freeze faster, and it will be easier to break into portions later. Flat objects also stack more easily, so you can your optimize freezer space. 

How to thaw frozen coconut milk

When you’re ready to use frozen coconut milk, remove it from the freezer and bend the icy plank to break it up into chunks while it’s still in the bag. Pour as much of the frozen coconut milk as you want into a pot or a microwave-safe measuring cup. Heat the milk over low heat, or on 15 to 30-second blasts in the microwave until it melts and it returns to its normal smooth and silky consistency. 

Alternatively, you can just drop the frozen chunks directly into the food you’re cooking. For example, if I’m putting together a curry dish, I can add the frozen pieces of milk just as I’d normally add liquid coconut milk. It’ll take an extra minute or two to warm up and incorporate, but then you can proceed as usual.

I’ve used coconut milk after it’s been frozen for a few weeks and detected no texture problems or decline in the taste. According to Medical News Today, most milks (both dairy and non-dairy) can be frozen for up to three months. That should be plenty of time to make another batch of Thai curry spaghetti and meatballs

10 Ways You’re Damaging Your House Without Realizing It

Maintaining a home is expensive, with many financial advisors recommending you set aside around 2% of its purchase price for upkeep each year. That cost is well worth it, as it prevents small problems from becoming bigger ones, and keeps your home in good shape so you can actually enjoy living there.

It’s reasonable to assume that if you’re doing at least the bare minimum home maintenance tasks, you can rest easier. But even if you repair stuff as needed and do all the recommended annual checks and upkeep, you might still be damaging your house in a myriad of ways. That’s because many things homeowners without thinking about it can actually damage a house over the long term.

Doing these 10 things occasionally likely isn’t a big deal, but over time and with repetition, they can contribute to some major headaches.

Using too many bath bombs

If you soothe the stress of home ownership with a nice hot bath spiced up by a fizzing, colorful bath bomb, you may be slowly ruining your home’s plumbing. Bath bombs typically contain stuff like citric acid, cream of tartar, Epsom salts, and baking soda, not to mention scented oils, glitter, or other decorations intended to give your bath a whimsical or romantic vibe. Over time, all that stuff can easily congeal in your pipes, or get caught on existing clogs, making them worse. A bath bomb once in a while won’t cause much trouble, but if you have a regular habit, you’re risking paying a plumber a lot of money sooner rather than later.

Using chemical drain cleaners

If you have a clogged drain and you turn to a chemical drain cleaner to open it up, you’re probably not going to destroy your house in the process. But if you have frequent clogged drains that you use drain cleaner to clear, you’re not only putting a band-aid on a bigger problem (why are your drains always clogged?) you’re probably damaging your pipes. Most of the drain cleaners you buy in a store are either caustic or oxidizing, and both release heat as part of the process of turning clogged material into something more easily dissolved and cleared away. That heat can soften PVC pipes and warp metal pipes over time. If your drains are always clogged and slow, it’s probably better to call a plumber and implement some basic drain maintenance steps.

Putting your appliances in the wrong spot

Just about every appliance in your home, from the refrigerator to the television, generates heat as a byproduct. If you place an appliance or two near your home’s thermostat, this can have a real negative impact on two things: Your heating or cooling bills, and your HVAC’s lifespan. That’s because the heat from the appliance will fool the thermostat into thinking your home is hotter than it actually is, causing the air conditioning to run more in the summer and the heat to run less in the winter. With the former scenario, your HVAC system will suffer more wear and tear, leading to a shorter lifespan, more repair bills, and more frequent replacement costs. In the latter scenario, you’ll find yourself turning the heat up to compensate, leading to a similar situation.

Painting over brick

If you’ve got exposed brick in the interior of your home that you’ve painted, congratulations: You may have just lit the fuse on an expensive home repair bomb. Brick is a porous material, and it needs to “breathe” properly. Paint can seal the brick, trapping moisture within, which can lead to deterioration of the brick, mold growth, peeling paint, and spalling. The problem is worse when it’s an exterior brick wall, but even a totally interior wall can be slowly destroyed if improperly painted.

If you must paint that wall, prepare the surface carefully and use a paint designed for masonry work. Then keep an eye on it. Inspect it regularly for bubbling, peeling, and brick dust—all evidence that moisture is doing your walls dirty.

Painting over rot

Speaking of paint, it’s important to note that it’s not magic. If you notice that wood in your home’s interior or exterior is suffering a bit of rot, cleaning it up and painting over it will absolutely not arrest the progression. It will, in fact, make things worse as the paint traps moisture, likely accelerating the process of rot that is eating your house alive—plus, that trapped moisture will cause the paint to bubble and peel soon enough anyway. Even if the rot you’ve discovered is minor, you have to figure out where the moisture is coming from and address that, then repair or replace the wood as needed before painting.

Flushing wipes down the toilet

It’s a weird fact of late-stage capitalism that items clearly marked “flushable” on their packaging are often not flushable at all. Neither is a long list of stuff that seems like it should be flushable, like food (which can persist a long time in your pipes, forming cement-like clogs) or kitty litter, including the clumping kind. If you’ve been flushing “flushable” wipes down the toilet, you’re on a countdown to plumbing disaster.

Using the wrong cleaners

Cleaning your house requires time, elbow grease, and the right cleaning products—which is more important than you think. Vinegar can be an effective cleaner, to the point where it’s suggested for just about any cleaning job. But vinegar is a weak acid, and as such it can damage surfaces like natural stone, television and monitor screens, hardwood flooring, and wood furniture. It can also do a lot of damage to washing machines and dishwashers if you toss it in to freshen things up, because the vinegar will weaken the rubber seals inside those appliances over time. Similarly, bleach is a powerful cleaning agent—but it’s powerful it can actually corrode metal surfaces (like those on your kitchen appliances) and natural stone. If you’re cleaning your house with vinegar and bleach regularly, you’re basically slowly dissolving big parts of it over time.

And if you’re using a steam cleaner on wood or laminate floors, you’re probably slowly ruining them, too. Unlike a spilled liquid, steam is pushed under pressure into the tiny seams in your floor, infiltrating the wood and making it swell-resulting in permanent and irreversible damage.

Not sweeping enough

Even if you’re not steaming your floors, you might be ruining them by not doing something: Sweeping (or vacuuming) regularly. As in, daily. Even if the floors look superficially clean, dirt that’s invisible to you is busily destroying your floors. It gets pushed into the tiny cracks and seams, dulling the finish and discoloring the floor. And the tiny particles of dirt and debris act like sandpaper, and as you walk around you’re grinding that stuff into the floor, creating scratches. When you do sweep, notice how much stuff you’re cleaning off a floor that didn’t look dirty to the naked eye, and realize that you’re scraping that stuff along your floors all the time.

Planting climbing vines

If you think a vine enveloping your house is charming, think again: Creeping and climbing plants that grow up and over homes are eating those homes bit by bit. They trap moisture and open up cracks in your home’s exterior that allow that moisture to infiltrate, their weight can damage siding and other exterior cladding, they offer shelter to damaging insects and small animals—they can even tear stuff off your house, like gutters and downspouts.

Misusing your garbage disposal

Garbage disposals are garbage (if you ask me, anyway), but if you have one, you probably use it. And if you use it, you might be setting yourself up for a big repair bill in the future because people seem to believe that garbage disposals are magical bags of holding that simply make anything disappear. The list of stuff that will wind up clogging your pipes and/or septic system includes most fats, oils, and grease (including stuff like peanut butter or heavy cream), egg shells (or any kind of shell, actually), vegetable peels, and corn husks. The list is so long you might wonder what even is the point of a garbage disposal, anyway, and you would not be wrong.

The Hisense Party Rocker Speaker Is Just $150 Right Now

We may earn a commission from links on this page. Deal pricing and availability subject to change after time of publication.

Party speakers hold a special place in my heart. I love hosting people and music, so I’m always on the lookout for the next best thing, which at the moment, it’s the JBL PartyBox Stage 320. But not everyone has over $500 to spend on a party speaker. If you’re looking for a budget option that still has great features and packs a punch, consider Hisense’s HP100 Party Rocker Speaker, currently $149.99 (originally $299.95) on Woot, the lowest price it has been according to price-tracking tools.

Remember Woot only ships to the 48 contiguous states in the U.S. If you have Amazon Prime, you get free shipping; otherwise, it’ll be $6 to ship.

The HP100 has been around since 2022, but it was ahead of its time when it comes to features for party speakers. It has a waterproof IPX4 rating, a 15-hour battery (with no lights and 50% volume), a two-channel system so you get stereo sound, and features to set it up for karaoke.

One of the most important things for a party speaker is its output power. The HP100 has 300W of output power, which beats the PartyBox Stage 320’s 240W, meaning it can get loud and not sound edgy (of course, the quality of your media also plays a role). You’ll also be limited to Bluetooth 5.0, so your range, codec support, and other features will be affected (the JBL has Bluetooth 5.4).

The HP100 has a microphone and guitar in port, so you can set up karaoke and control those inputs with the speaker. The control panel on the top has a wireless charging pad for supported phones, a slot to place phones so they’re propped up, a battery indicator, controls for playing FM radio, light controls, and other physical buttons.

The HP100 is a respectable speaker in 2025, just don’t expect any fancy features like an app companion and everything that comes with that. However, this is a great opportunity at just $150 for a quality party speaker.