Zwift version 1.99 begins its phased rollout today. This is a minor update containing mostly bug fixes. Read on for details…
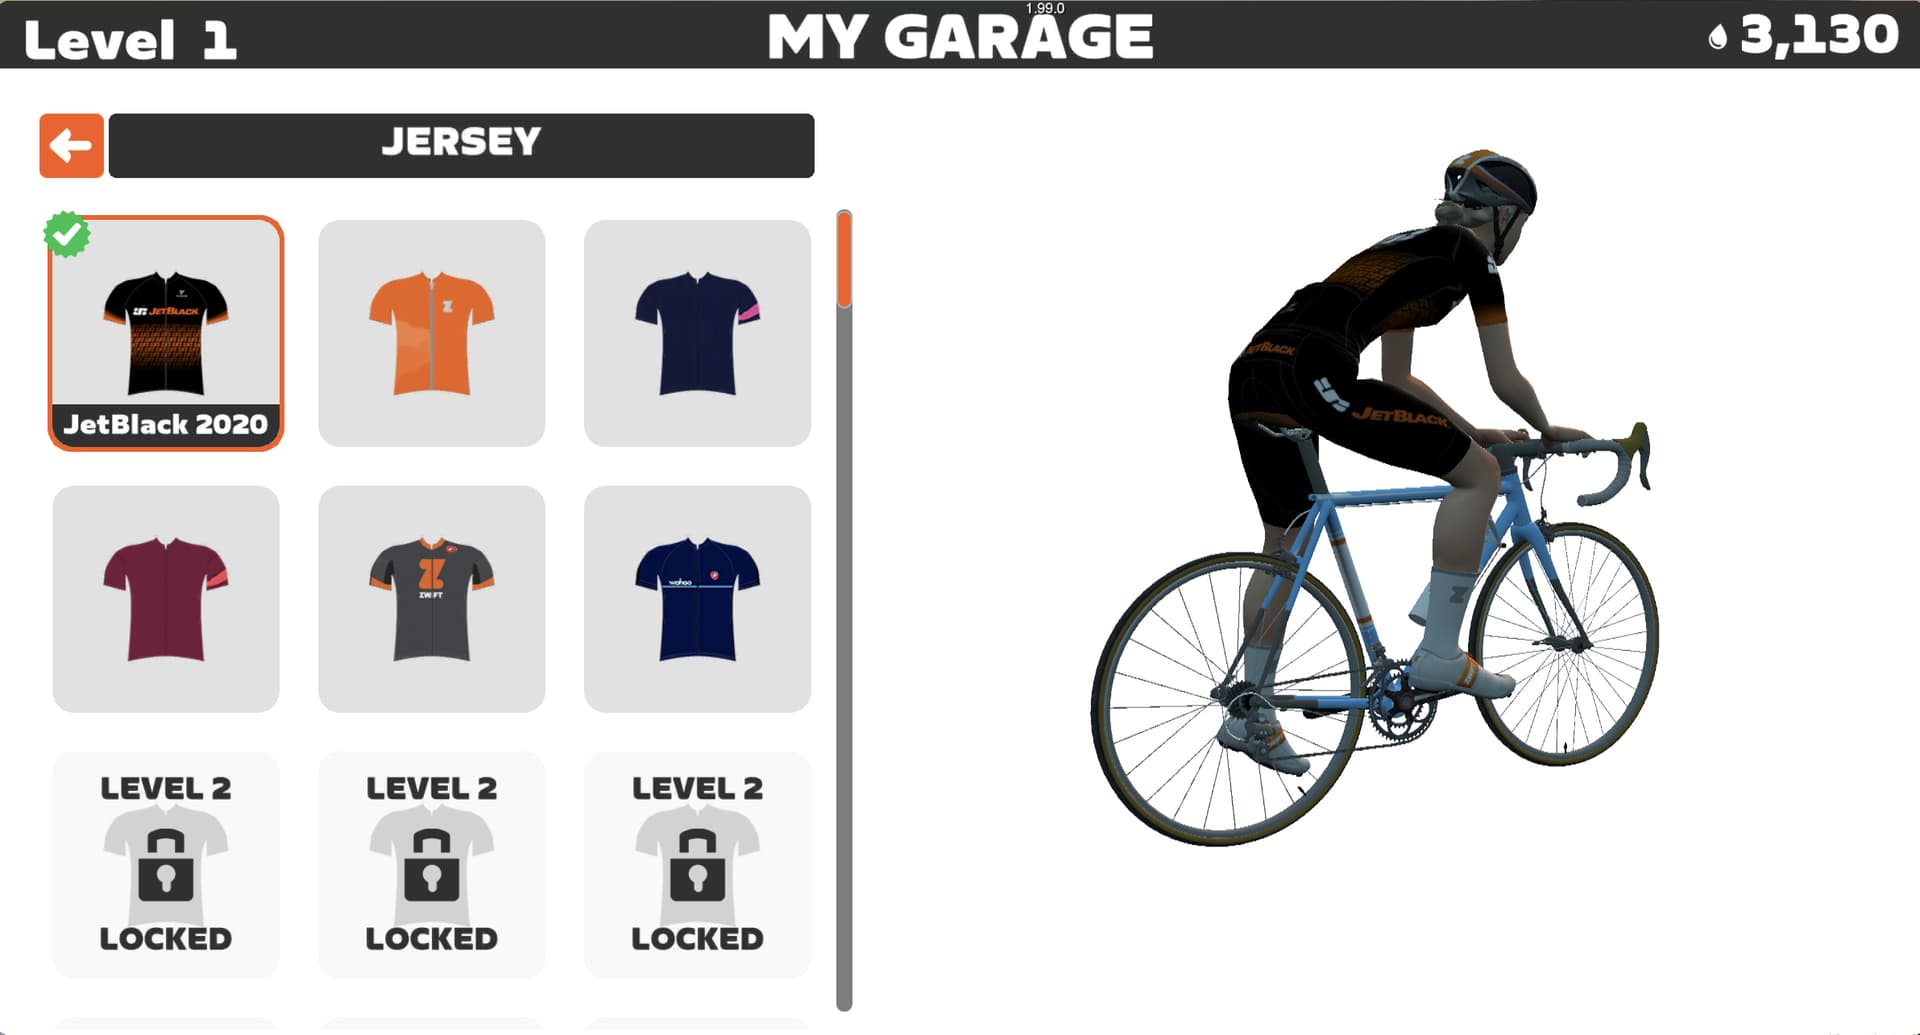
JetBlack Kit Automatic Unlock
Zwifters can now unlock the JetBlack cycling kit by riding with any JetBlack trainer – just connect to the trainer in the Pairing screen and enjoy your ride!
(Note: most trainer manufacturers have an automatic kit unlock in Zwift. Read more here.)
Release Notes
Zwift provided notes on additional tweaks and bug fixes in this update:
Improved connection reliability for trainers paired via Wi-Fi.
Fixed an issue that could potentially cause duplicate devices to appear in the Pairing screen when using the Wahoo Kickr Core 2 as a sensor hub.
Fixed an issue that could cause virtual shifting to be unavailable for Zwifters using the new Zwift Click if they had previously disabled virtual shifting for Zwift Play controllers.
Improved the appearance of some pedestrians in Paris.
Windows: Fixed a crash that could occur when exiting Zwift with devices connected via ANT+.
Discuss this update in Zwift’s forum > (link coming soon)
Questions or Comments?
If you spotted any other changes or bugs in the update, please comment below!
Giant’s latest Reign Advanced E+ enduro eMTB is cut from the same cloth as so many other gravity-focused ebikes on the market.
While that’s no bad thing – after all, we expect long-travel eMTBs to handle gnarly terrain and certain elements will be shared across all bikes – some will argue it’s not exactly pushing the boundaries of our sport.
The slack, long and low geometry, plenty of travel and robust frame design could be transposed onto any critically acclaimed eMTB on the market.
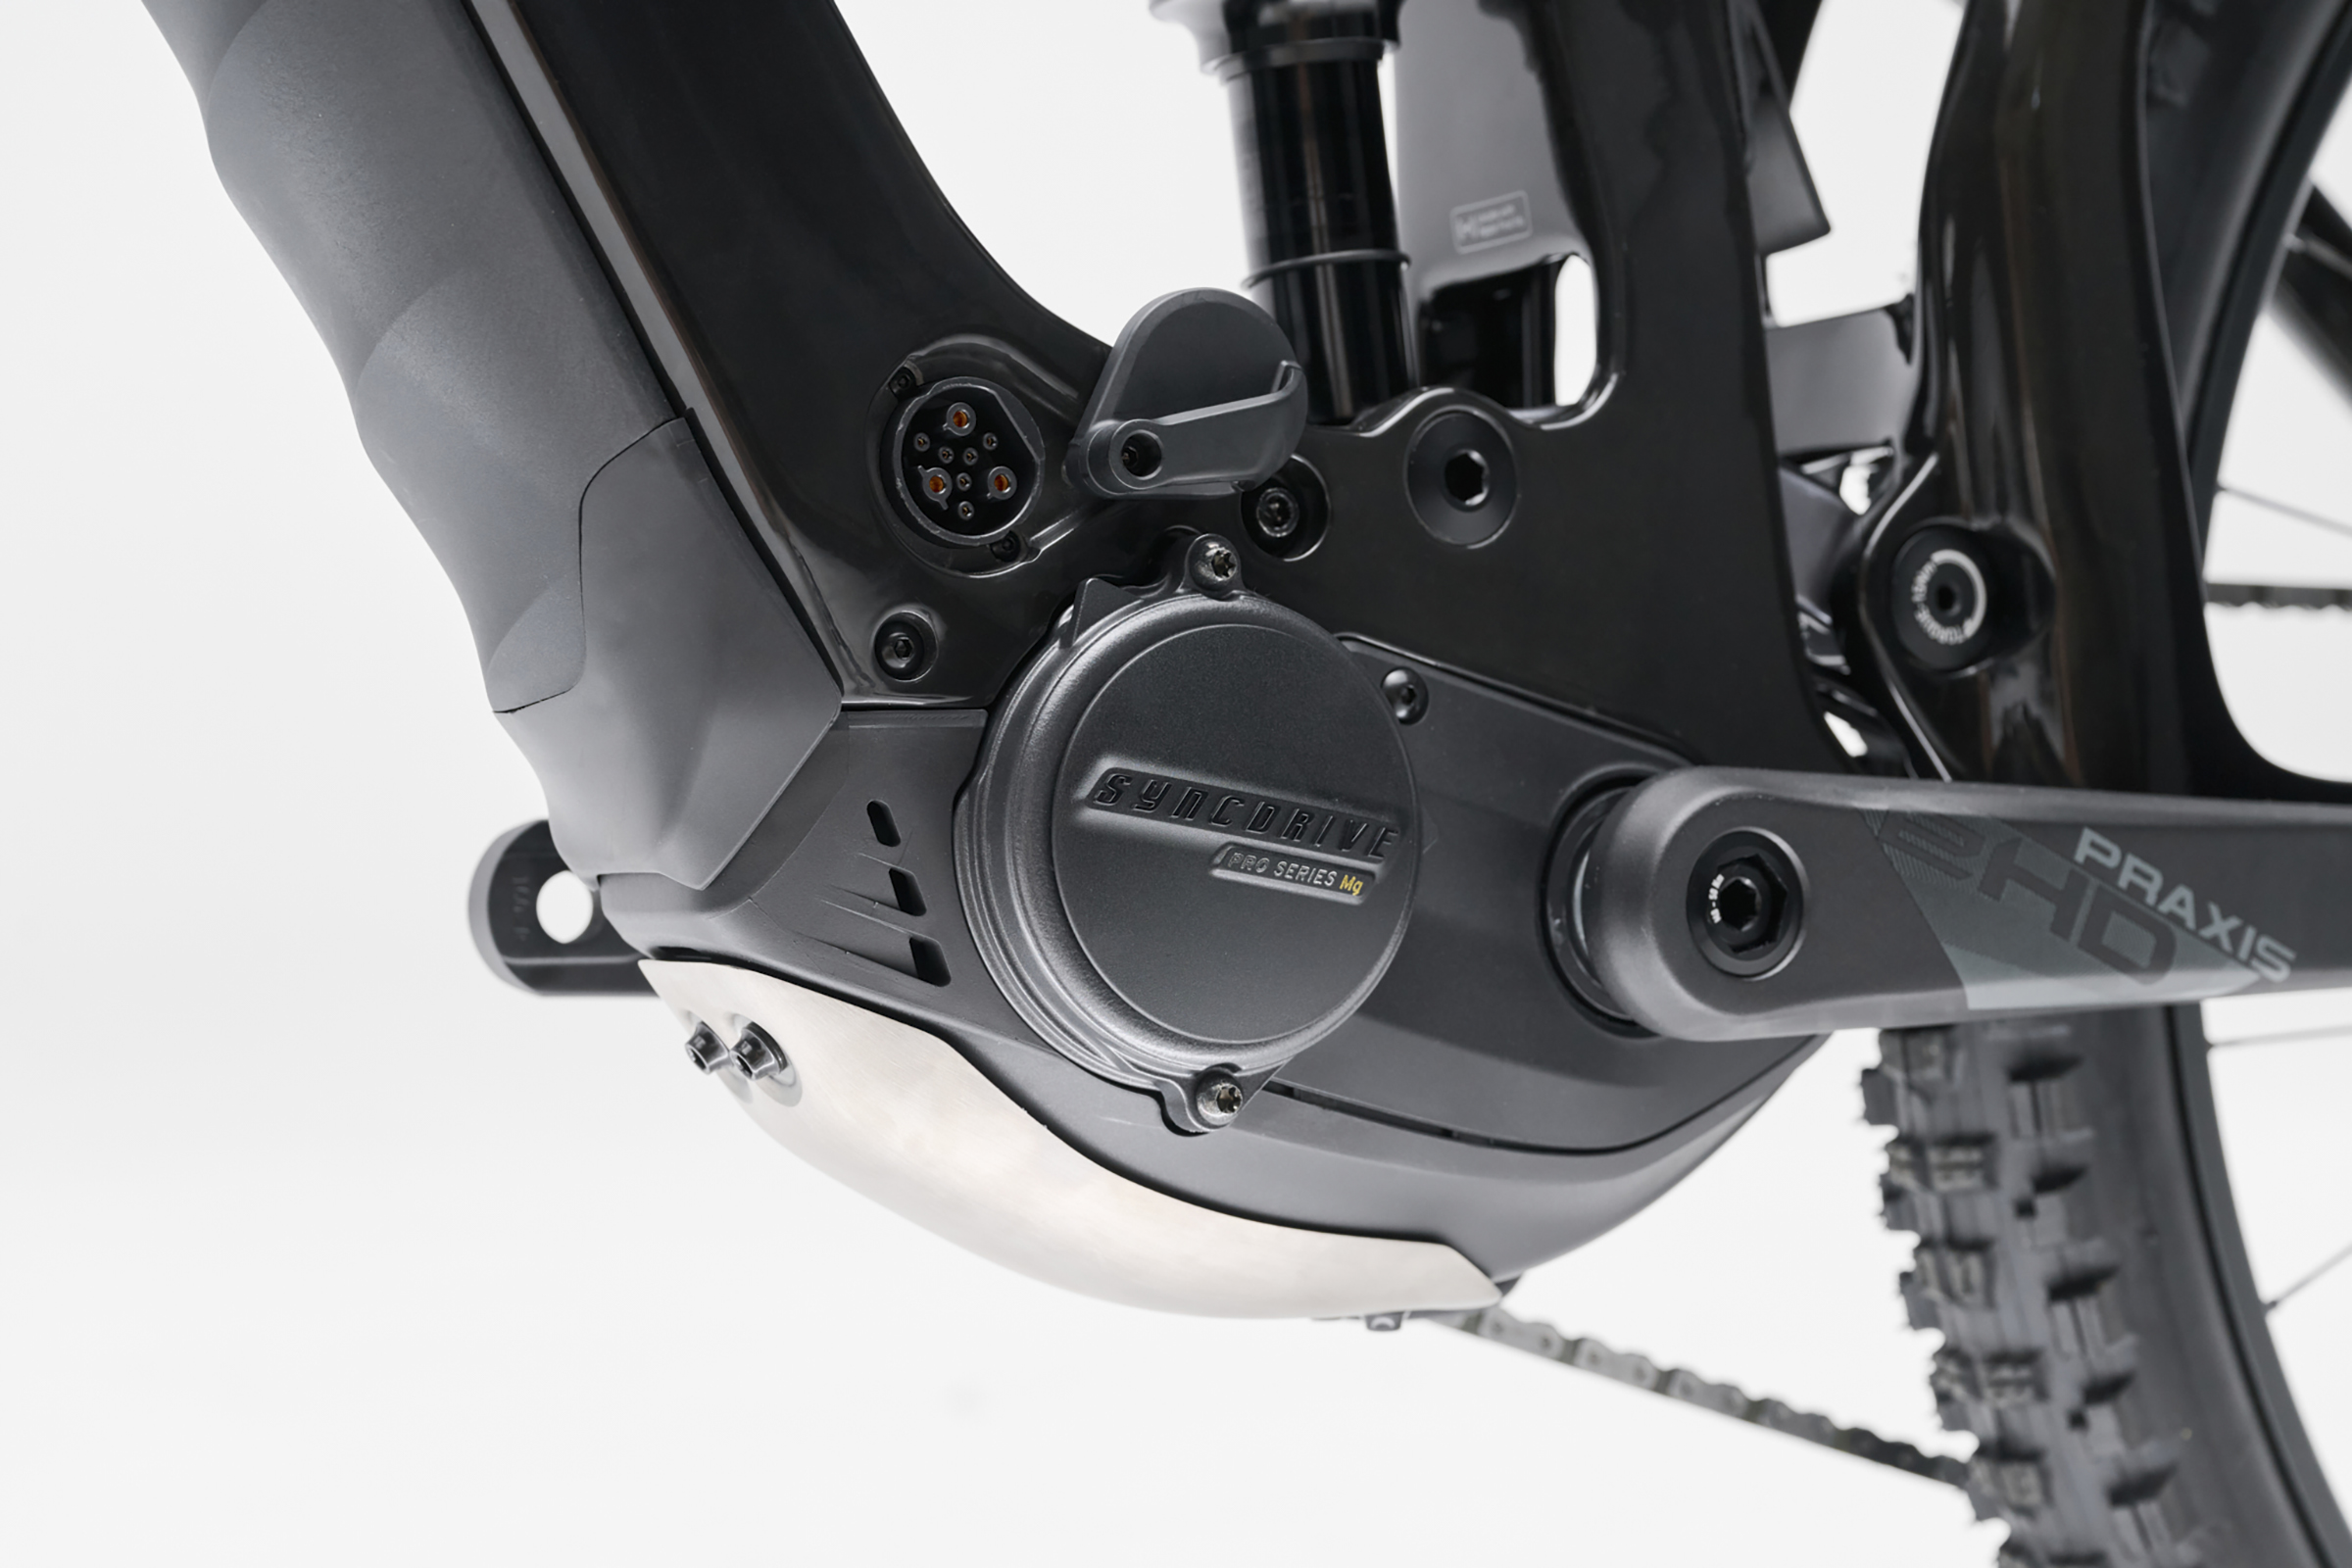
Its aesthetics are typical of swathes of other bikes – for good reason – and the SyncDrive Pro 3 motor – which has 90Nm of torque and 800W of peak power –isn’t exactly winning the arms race of more, more, more.
The Yamaha-made SyncDrive Pro motor is claimed to output 90Nm of sustained torque. Giant Bikes
On the face of it, it feels as though innovation has stalled.
But look beyond the standard must-haves and the Giant packs in some incredibly well-considered details that stand out and show brands are still innovating, but not always in the most obvious places.
Hiding beneath the Giant’s rather generic surface is a bike that looks capable of being a resounding success.
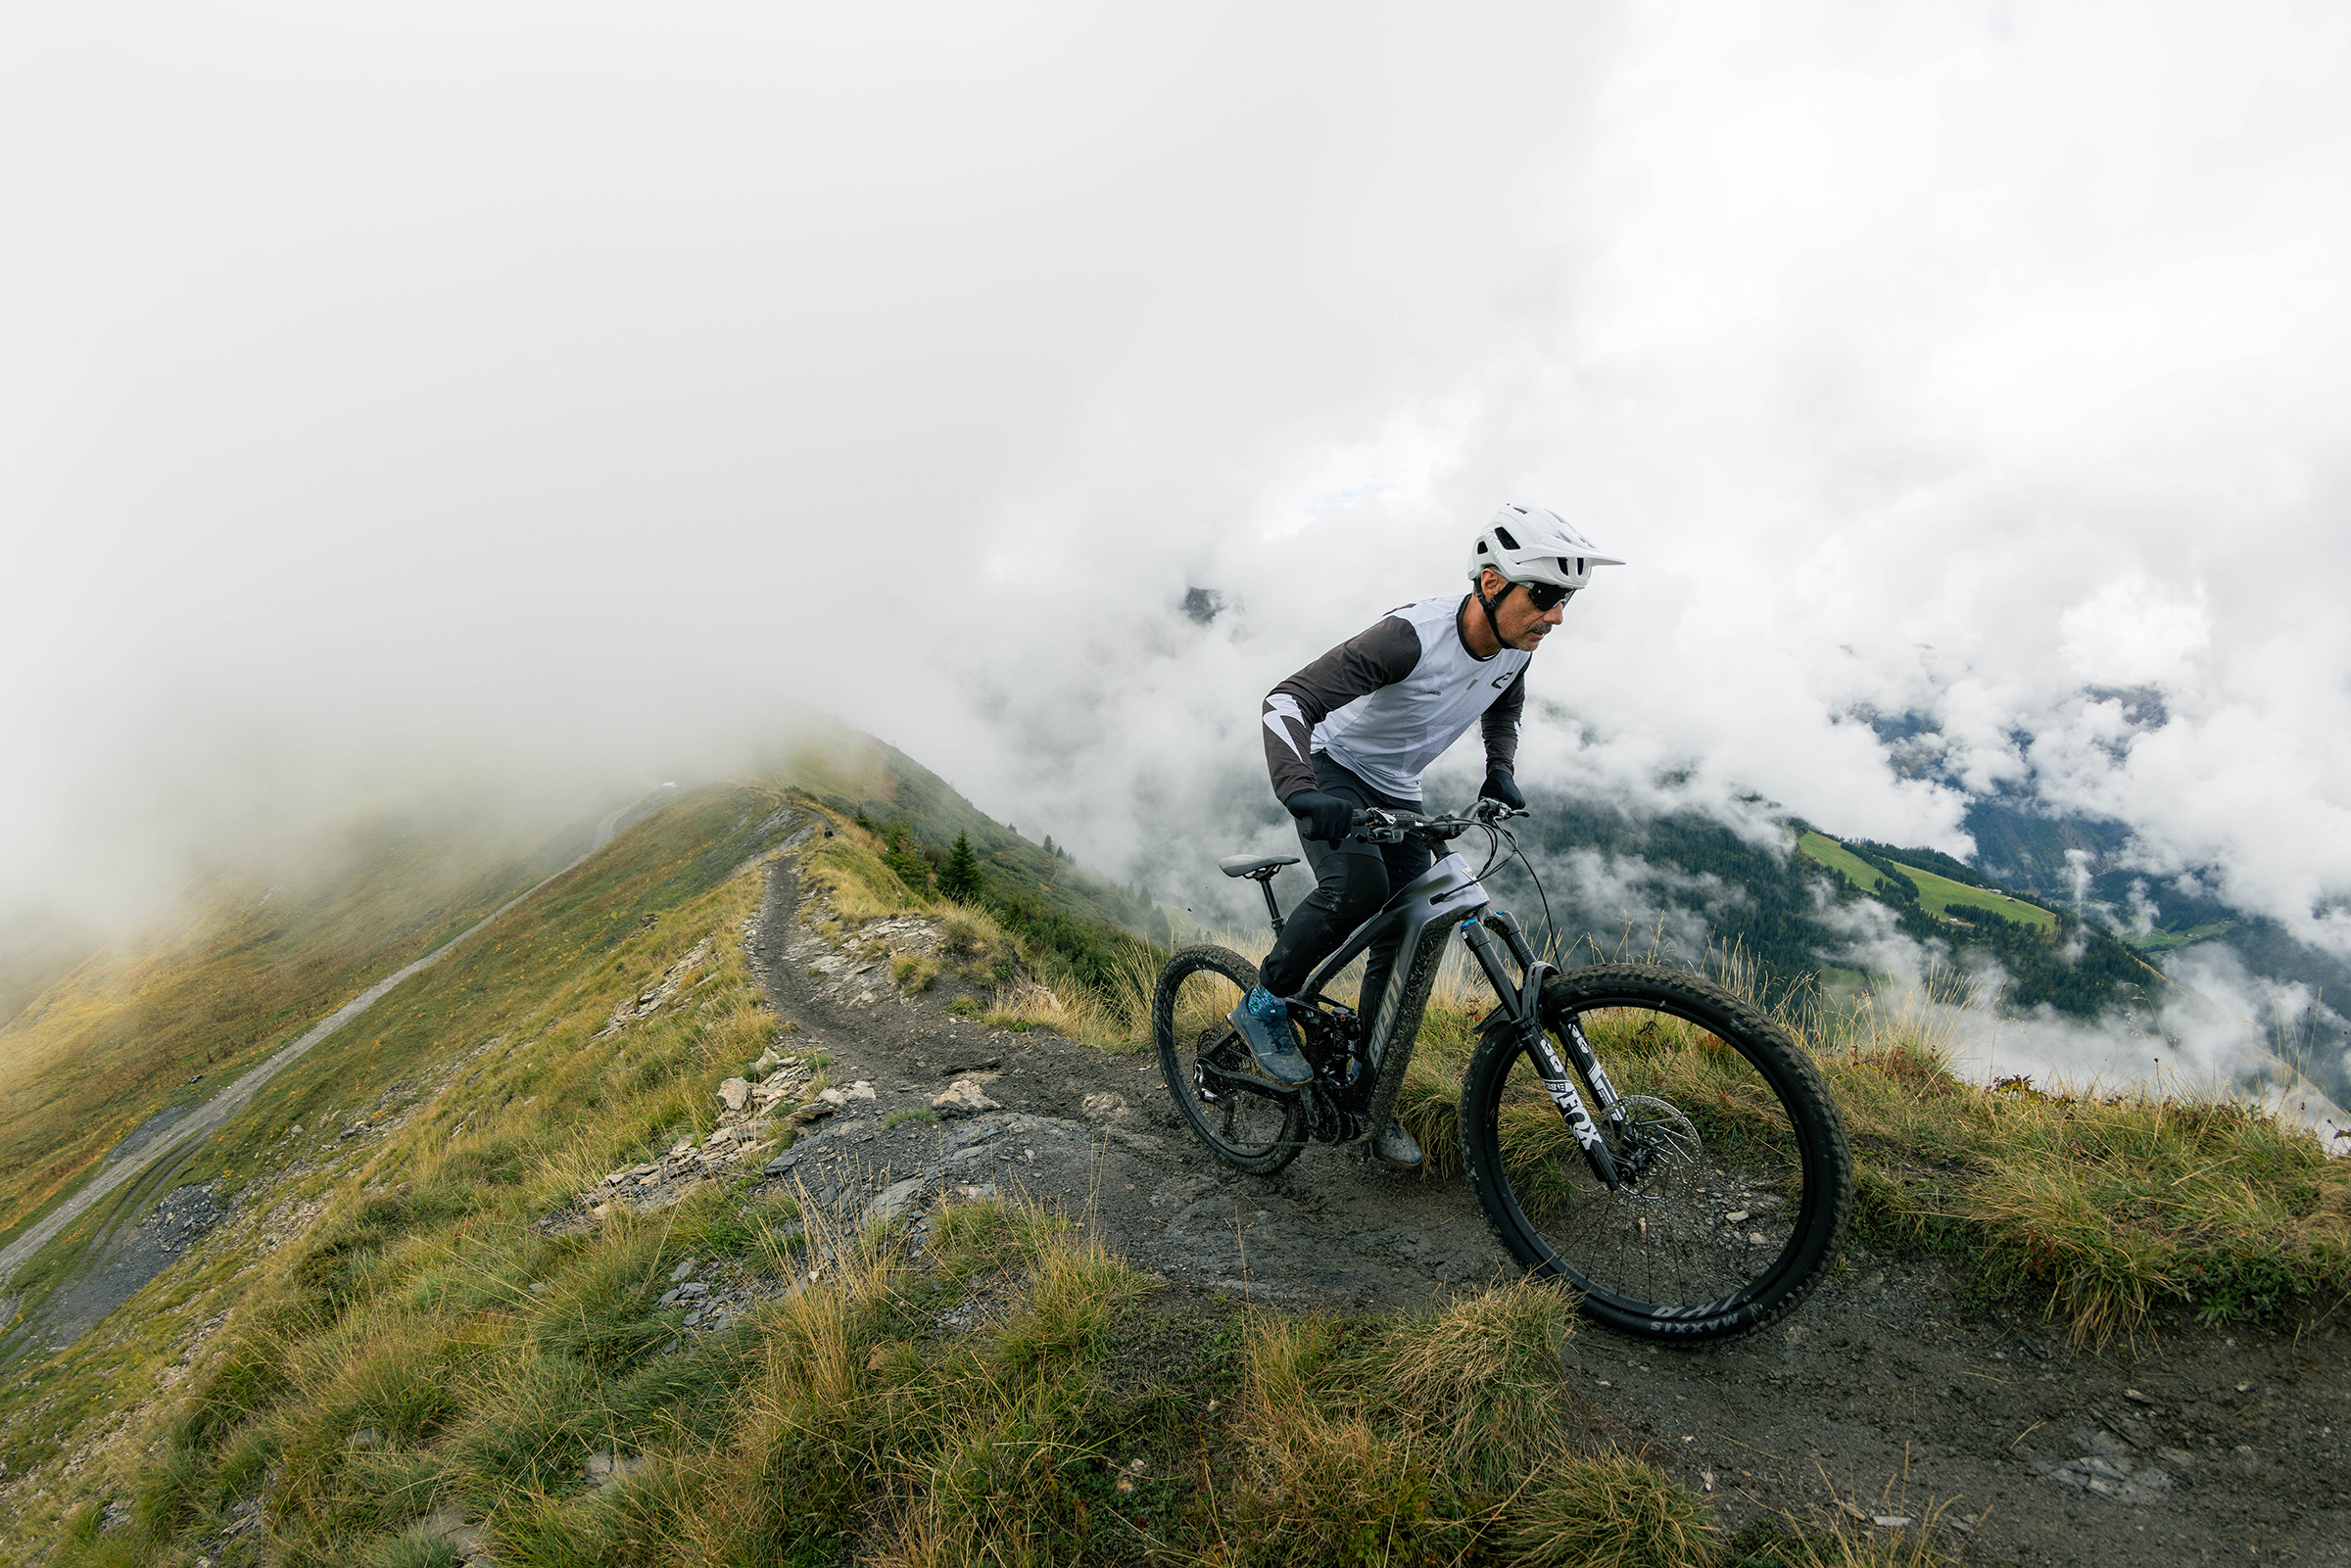
The Reign Advanced E+ is designed to descend harder than any eMTB on the market. Giant Bikes
I am being unfair in suggesting the Advanced E+ doesn’t appear to break the mould. Well, yes, I probably am.
Beyond the foundations you’d expect to find on any good bike, the new Reign Advanced E+ has quite a lot of really cool tech.
Torque is up to 90Nm, but according to Giant, this isn’t the latest motor’s peak output, it’s how much it can sustain.
Most other manufacturers’ claims relate to the motor’s peak figures rather than constant output, potentially nudging the Giant ahead.
Thanks to the battery and motor’s 48-volt architecture – up from 36 volts previously – it means amperages can be lowered, by 30 per cent according to Giant, for the same power demands.
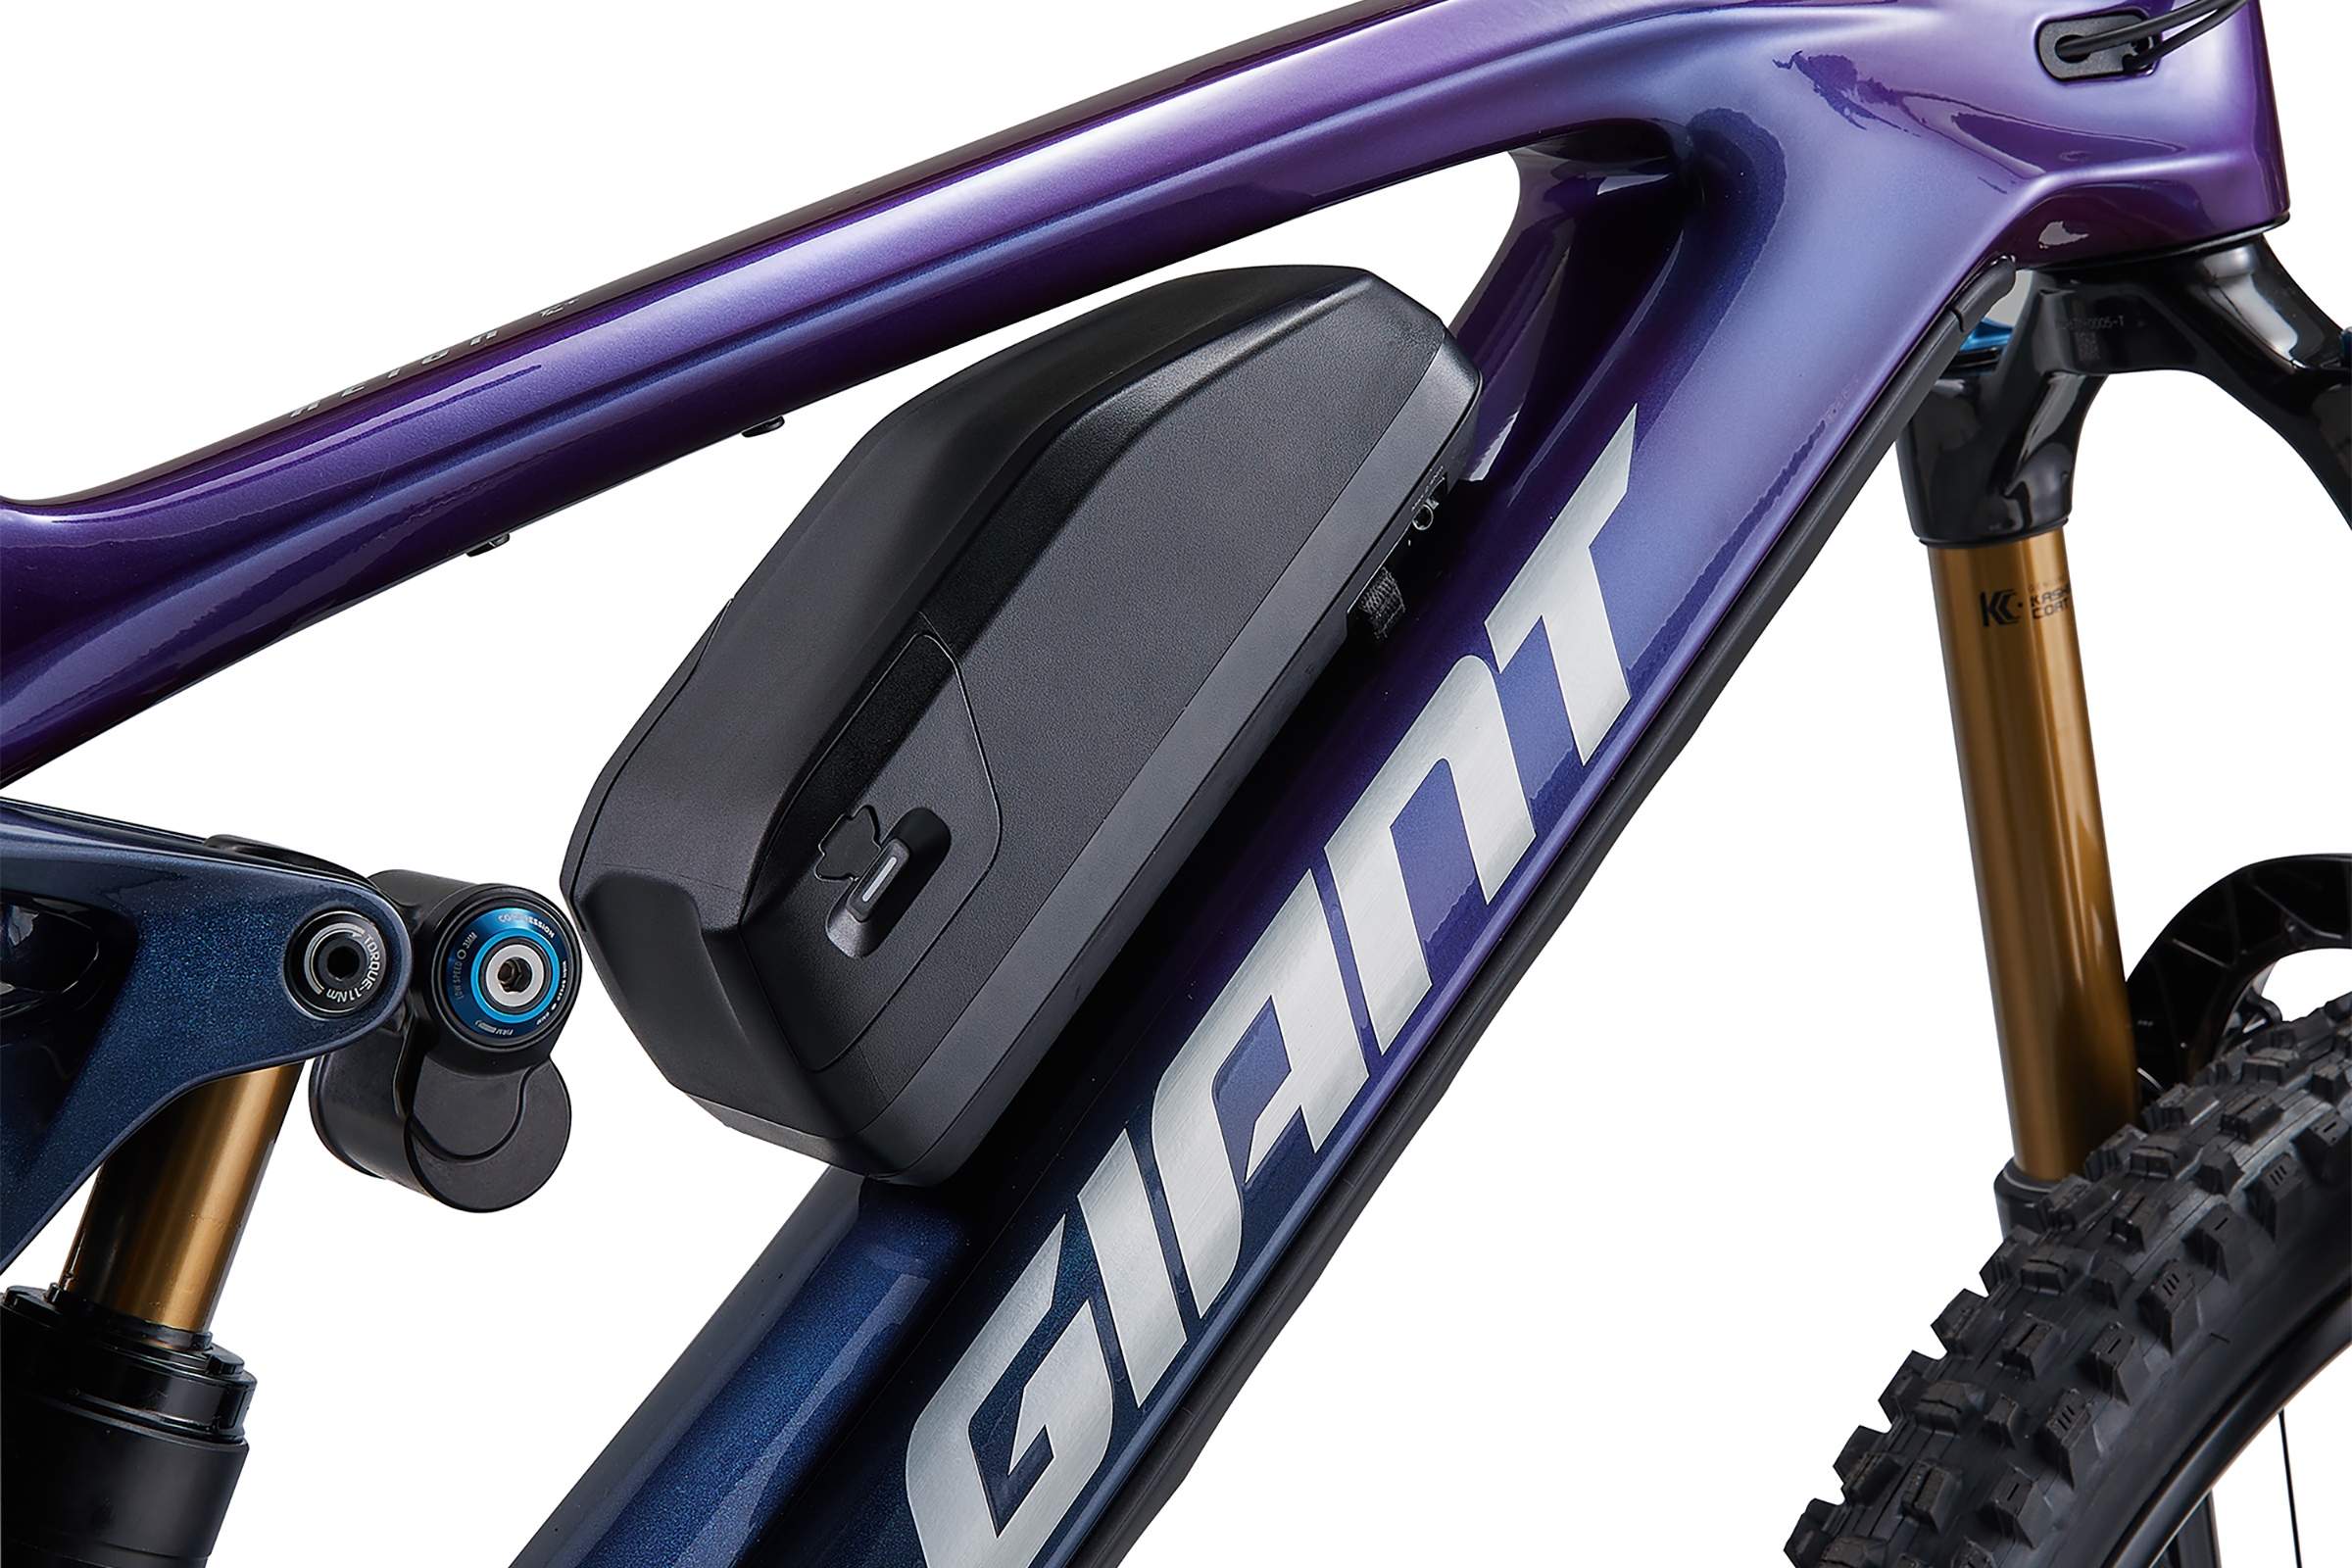
This equates to less heat build-up and stress placed on the motor and battery; the in-built 560Wh battery is claimed to last up to 2,300 charge cycles, which is more than “any other [eMTB] on the market,” Giant says.
There’s an external 280Wh range extender, that’ll be shipped with all Reign Advance E+ bikes in the UK and Ireland, upping total capacity to 840Wh. This will have to be bought separately in other markets, however.
Even more integration
The RideControl Go Lux display is integrated into the bike’s top tube. Giant Bikes
There’s a new integrated top tube display – one that all ebikes are now expected to have – dubbed RideControl Go Lux, which shows key ride data.
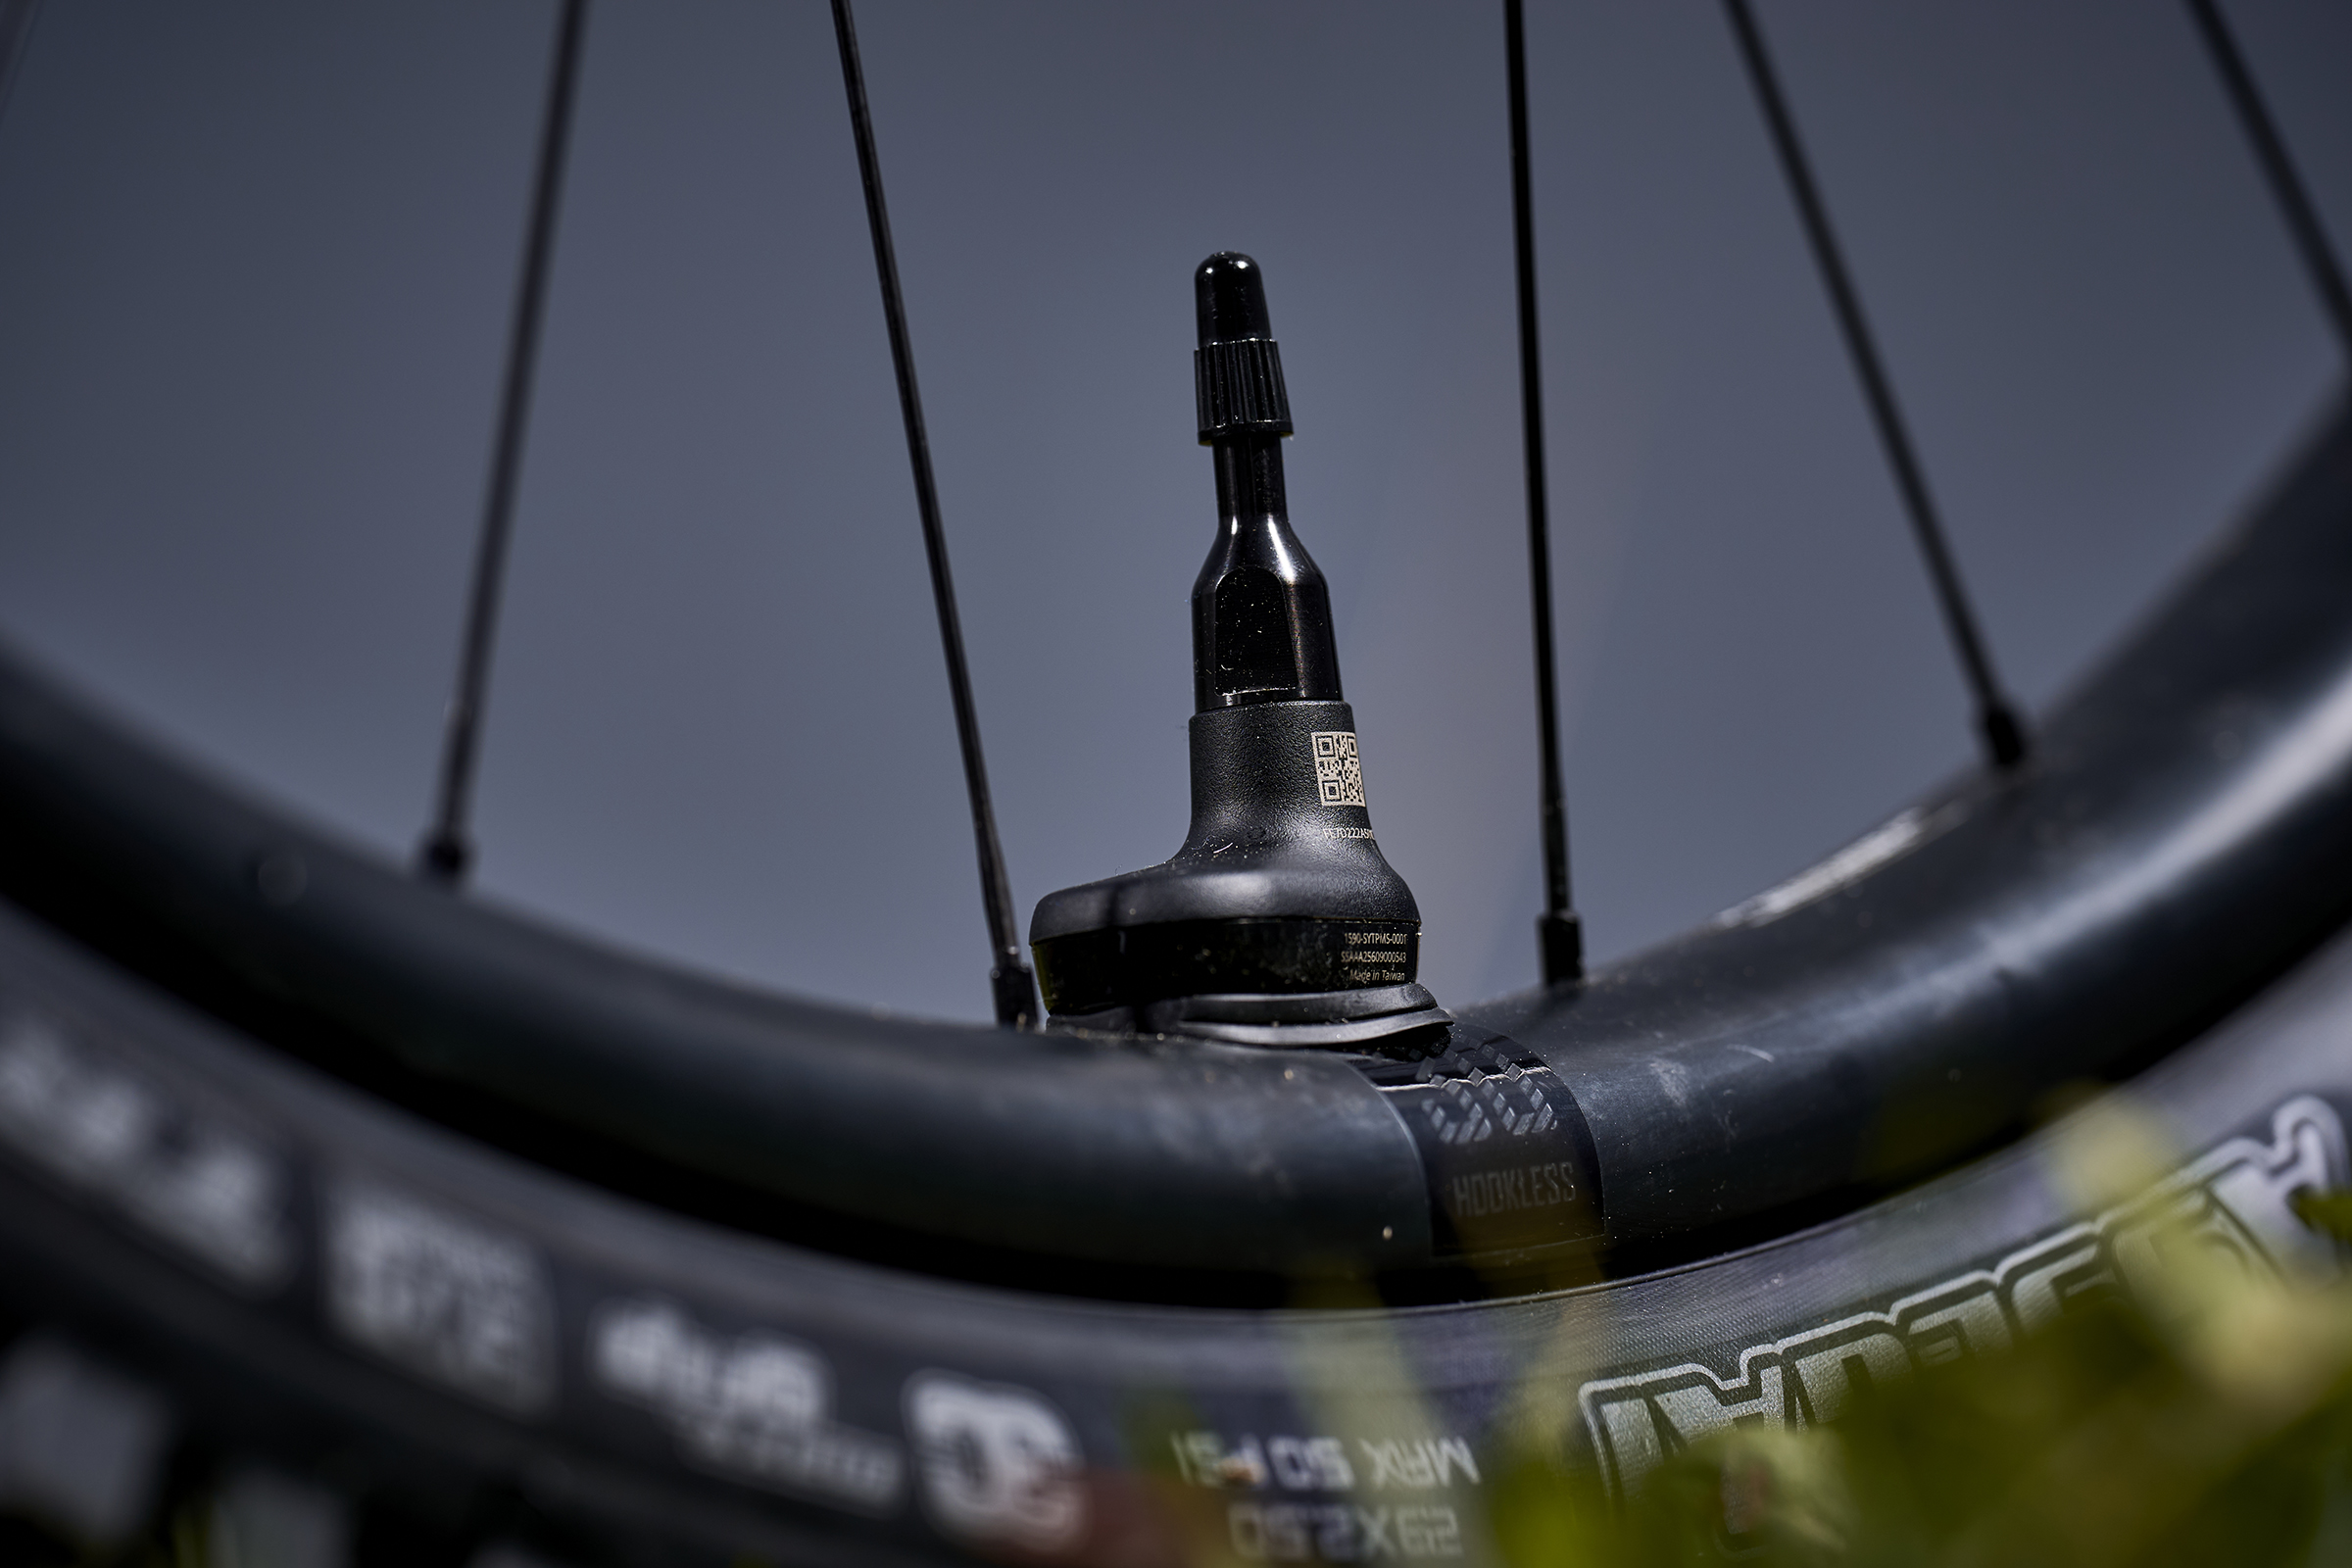
Boosting that onboard, integrated information screen with even more stats are Giant’s Tyre Pressure Management System (TPMS) valves.
Named the Aegis Tyre Checker, these battery-powered valves – that are compatible with both inner tubes and tubeless setups – connect automatically to the Go Lux display to keep tabs on your tyres’ pressures in real-time.
The Aegis tyre pressure monitor connects directly to the bike’s onboard display. Giant Bikes
While Quark’s TyreWiz has offered this for a while via a smartphone, it’s the first time a TPMS has been integrated into an eMTB.
it’s a neat idea and looks to be well executed.
The next step would be doing the same for the front and rear dampers – whether that’s via Fox’s Live Valve protocol or RockShox’s Flight Attendant – to boost the integration of important and useful information.
Anti-theft measures
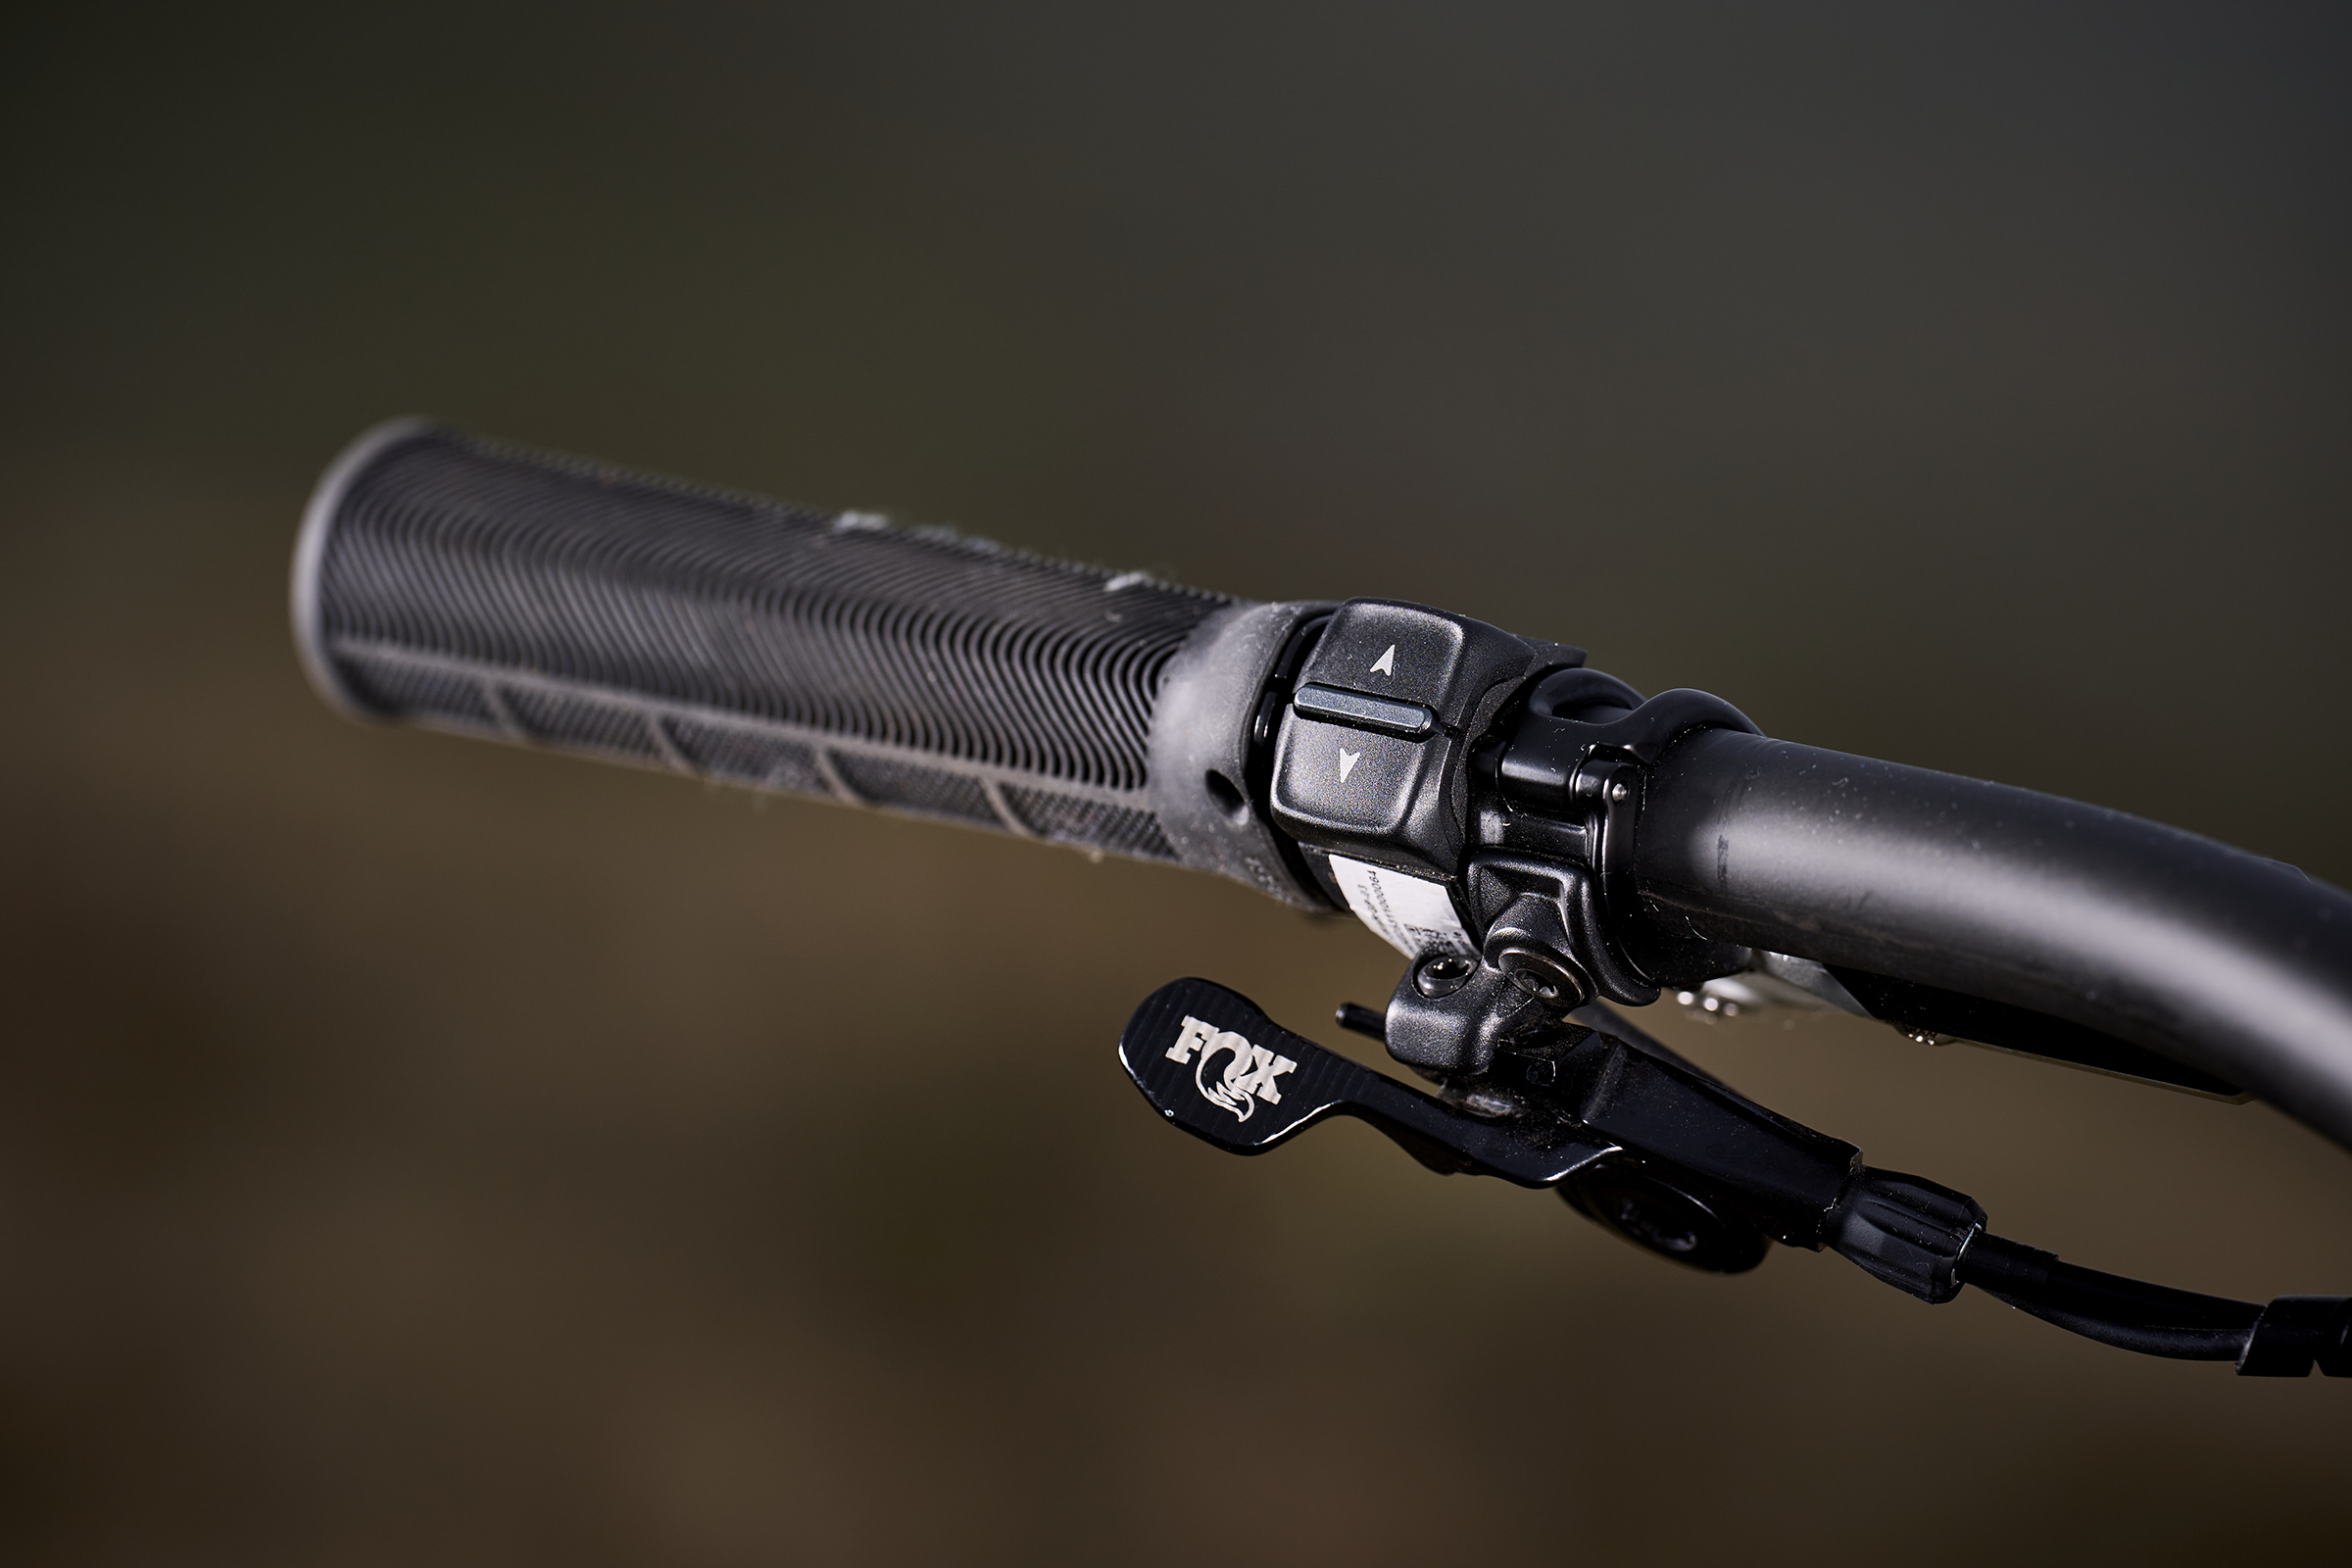
It’s got a new mode controller. Giant Bikes
A lot of ebikes now support remote deactivation or bricking via their smartphone app, and Giant’s new Reign is no exception.
Giant’s Aegis E-Lock disables motor support when activated, and sounds an integrated alarm if the bike is moved. Importantly, it also integrates with Apple’s Find My network.
Instead of having to buy a separate AirTag and attach it to the bike, the Reign’s onboard battery powers an AirTag-like Bluetooth transmitter that pings its location to compatible iPhones.
The bike then appears on Apple’s Find My network, so you can always track its whereabouts without having to worry about charging up or hiding a dedicated AirTag.
This isn’t unique to Giant, however.
Specialized, VanMoof and Velotric also offer Apple Find My network compatibility, and Bosch has its own system with a similar setup.
Still, it’s a neat feature that shouldn’t be overlooked.
Lots of little things add up
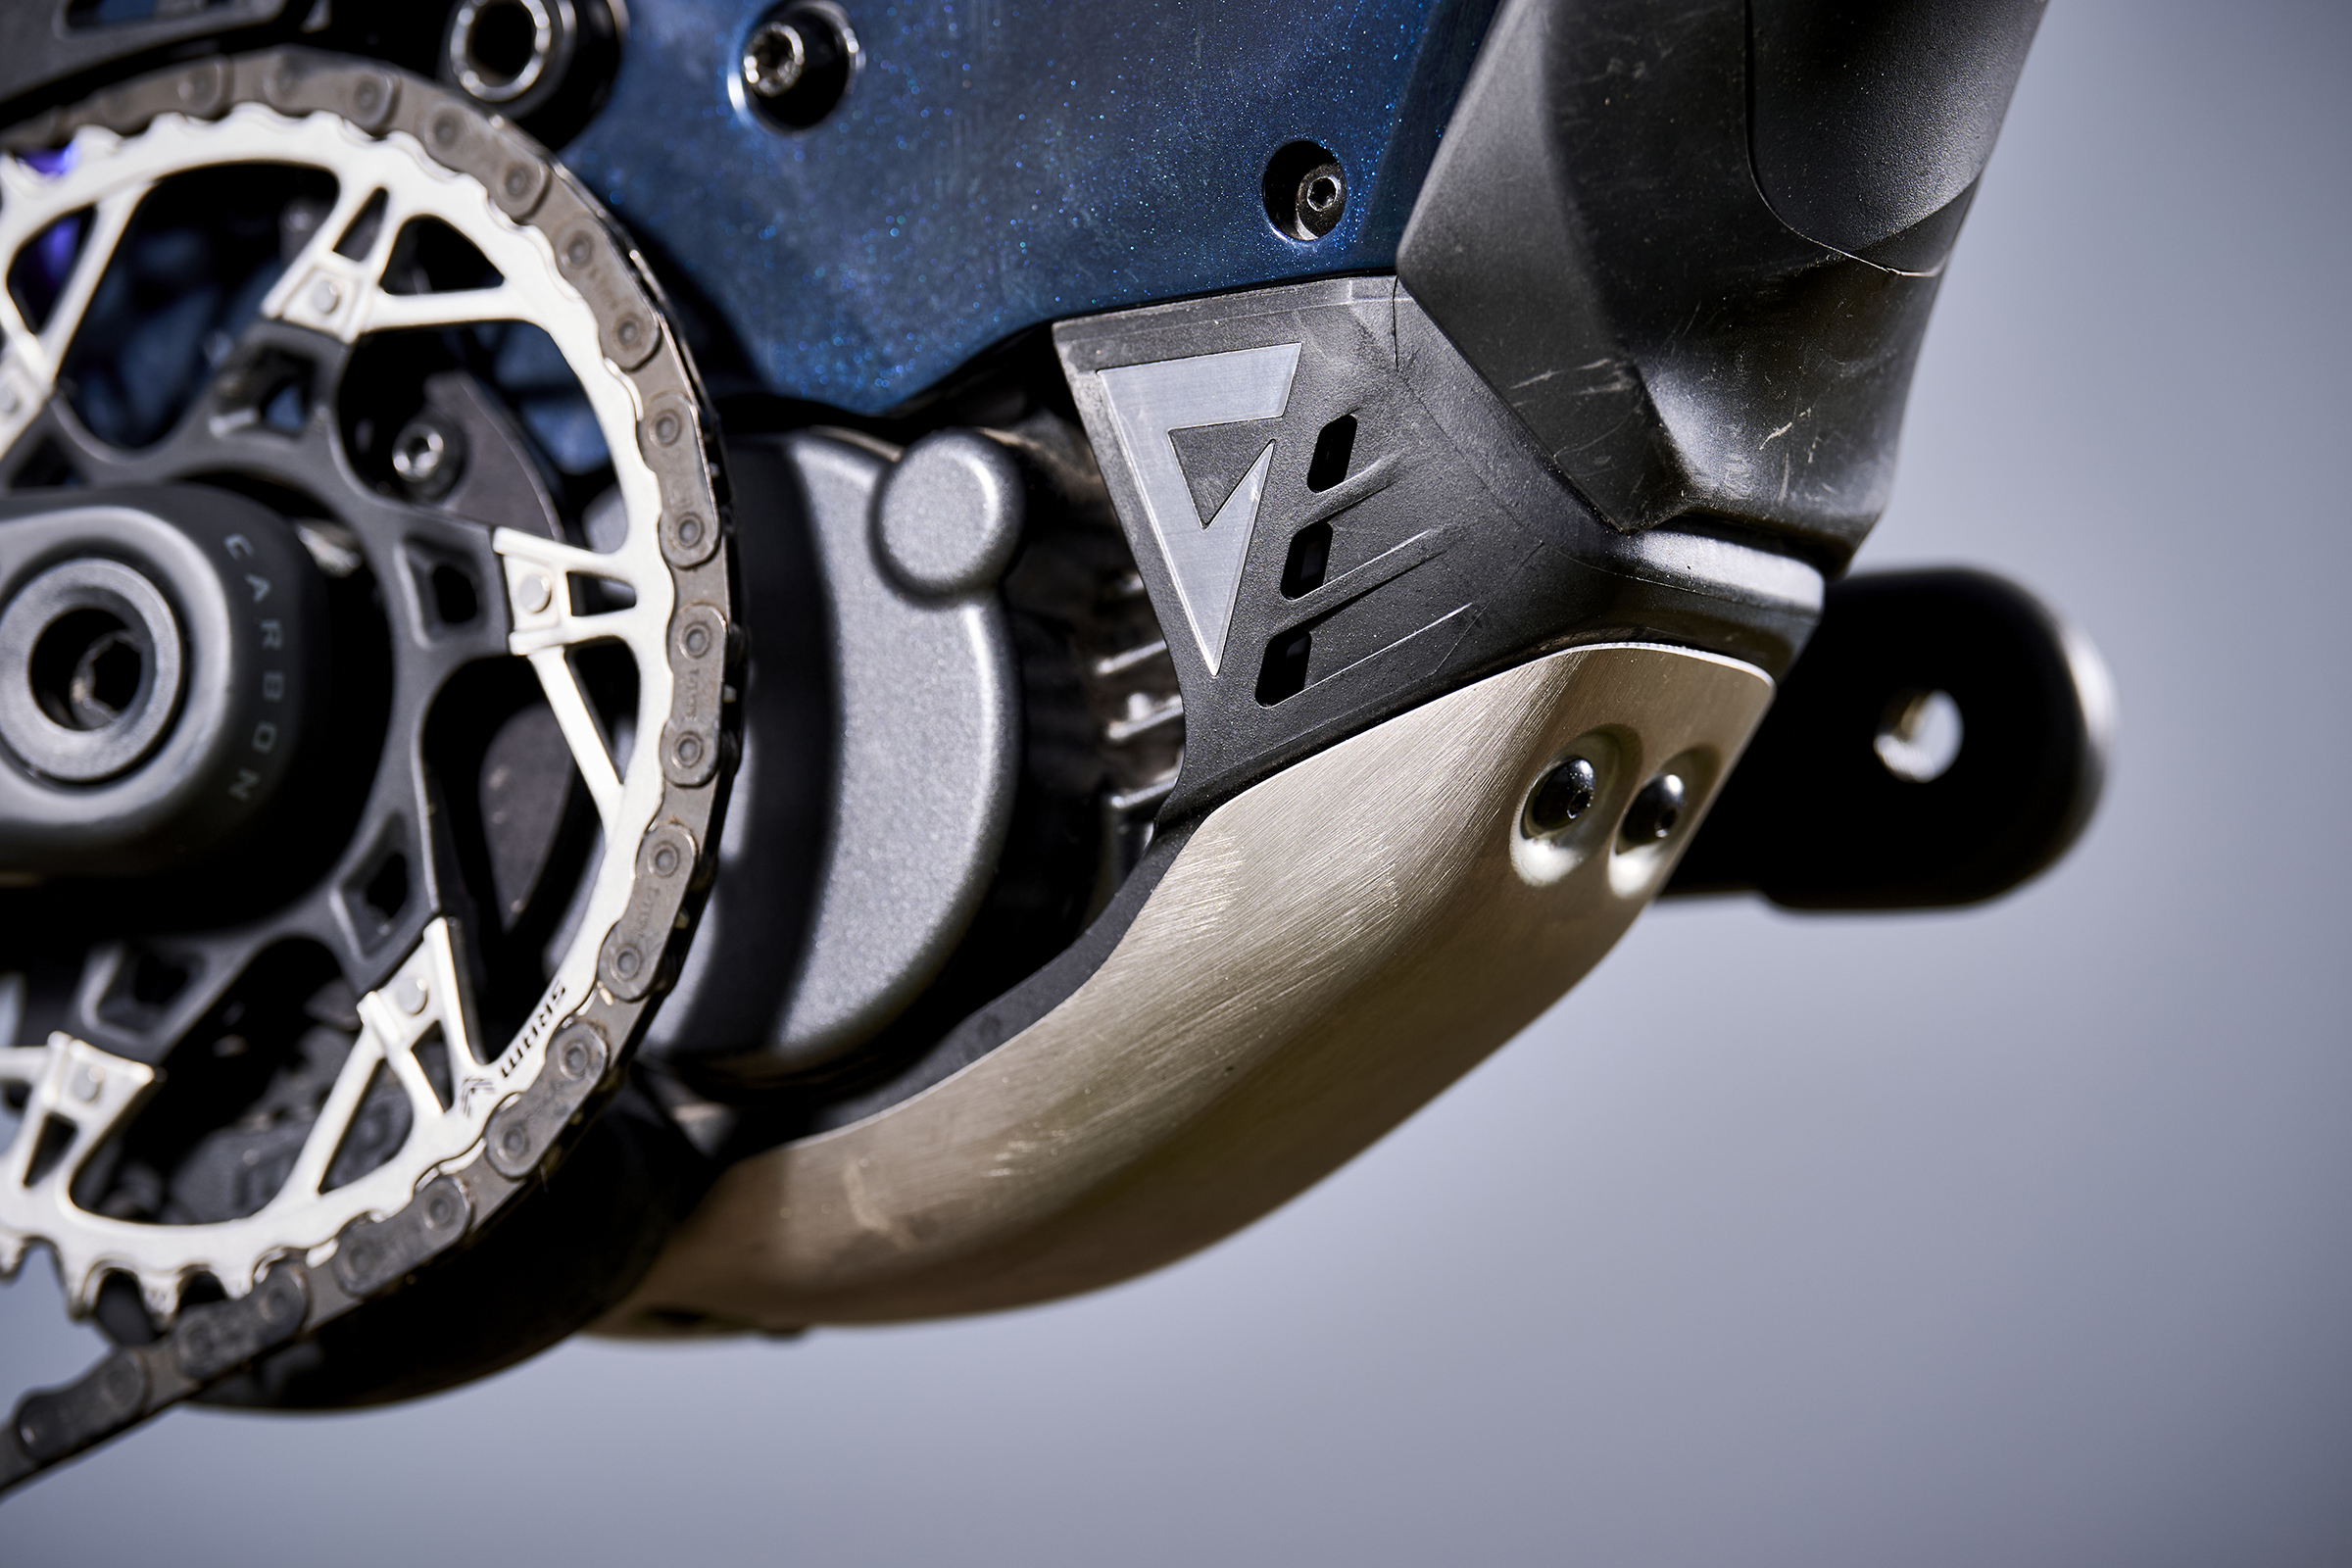
The underslung bash guard is made from titanium. Giant Bikes
Its chain device, bash guard and under-frame protection are also quite fancy.
With the low-slung belly most eMTBs have – the Giant being no exception – the chainring and motor are particularly prone to being walloped on the ground on drops and crests thanks to reduced breakover angles.
Giant has looked to mitigate this potentially motor-damaging occurrence from causing any harm.
Along with a large, slippery stronger-than-aluminium titanium under-frame plate that protects the motor’s casing, the bike’s chain device and chainring bash guard are loaded with tech.
This bash guard is suspended by elastomers where it bolts to the motor, which are designed to cushion the relatively vulnerable electronic components from excessive shocks during floor, rock or root strikes.
Improving the longevity of your eMTB’s most costly components is a good thing, and Giant’s solution to a common problem is commendable.
There’s more
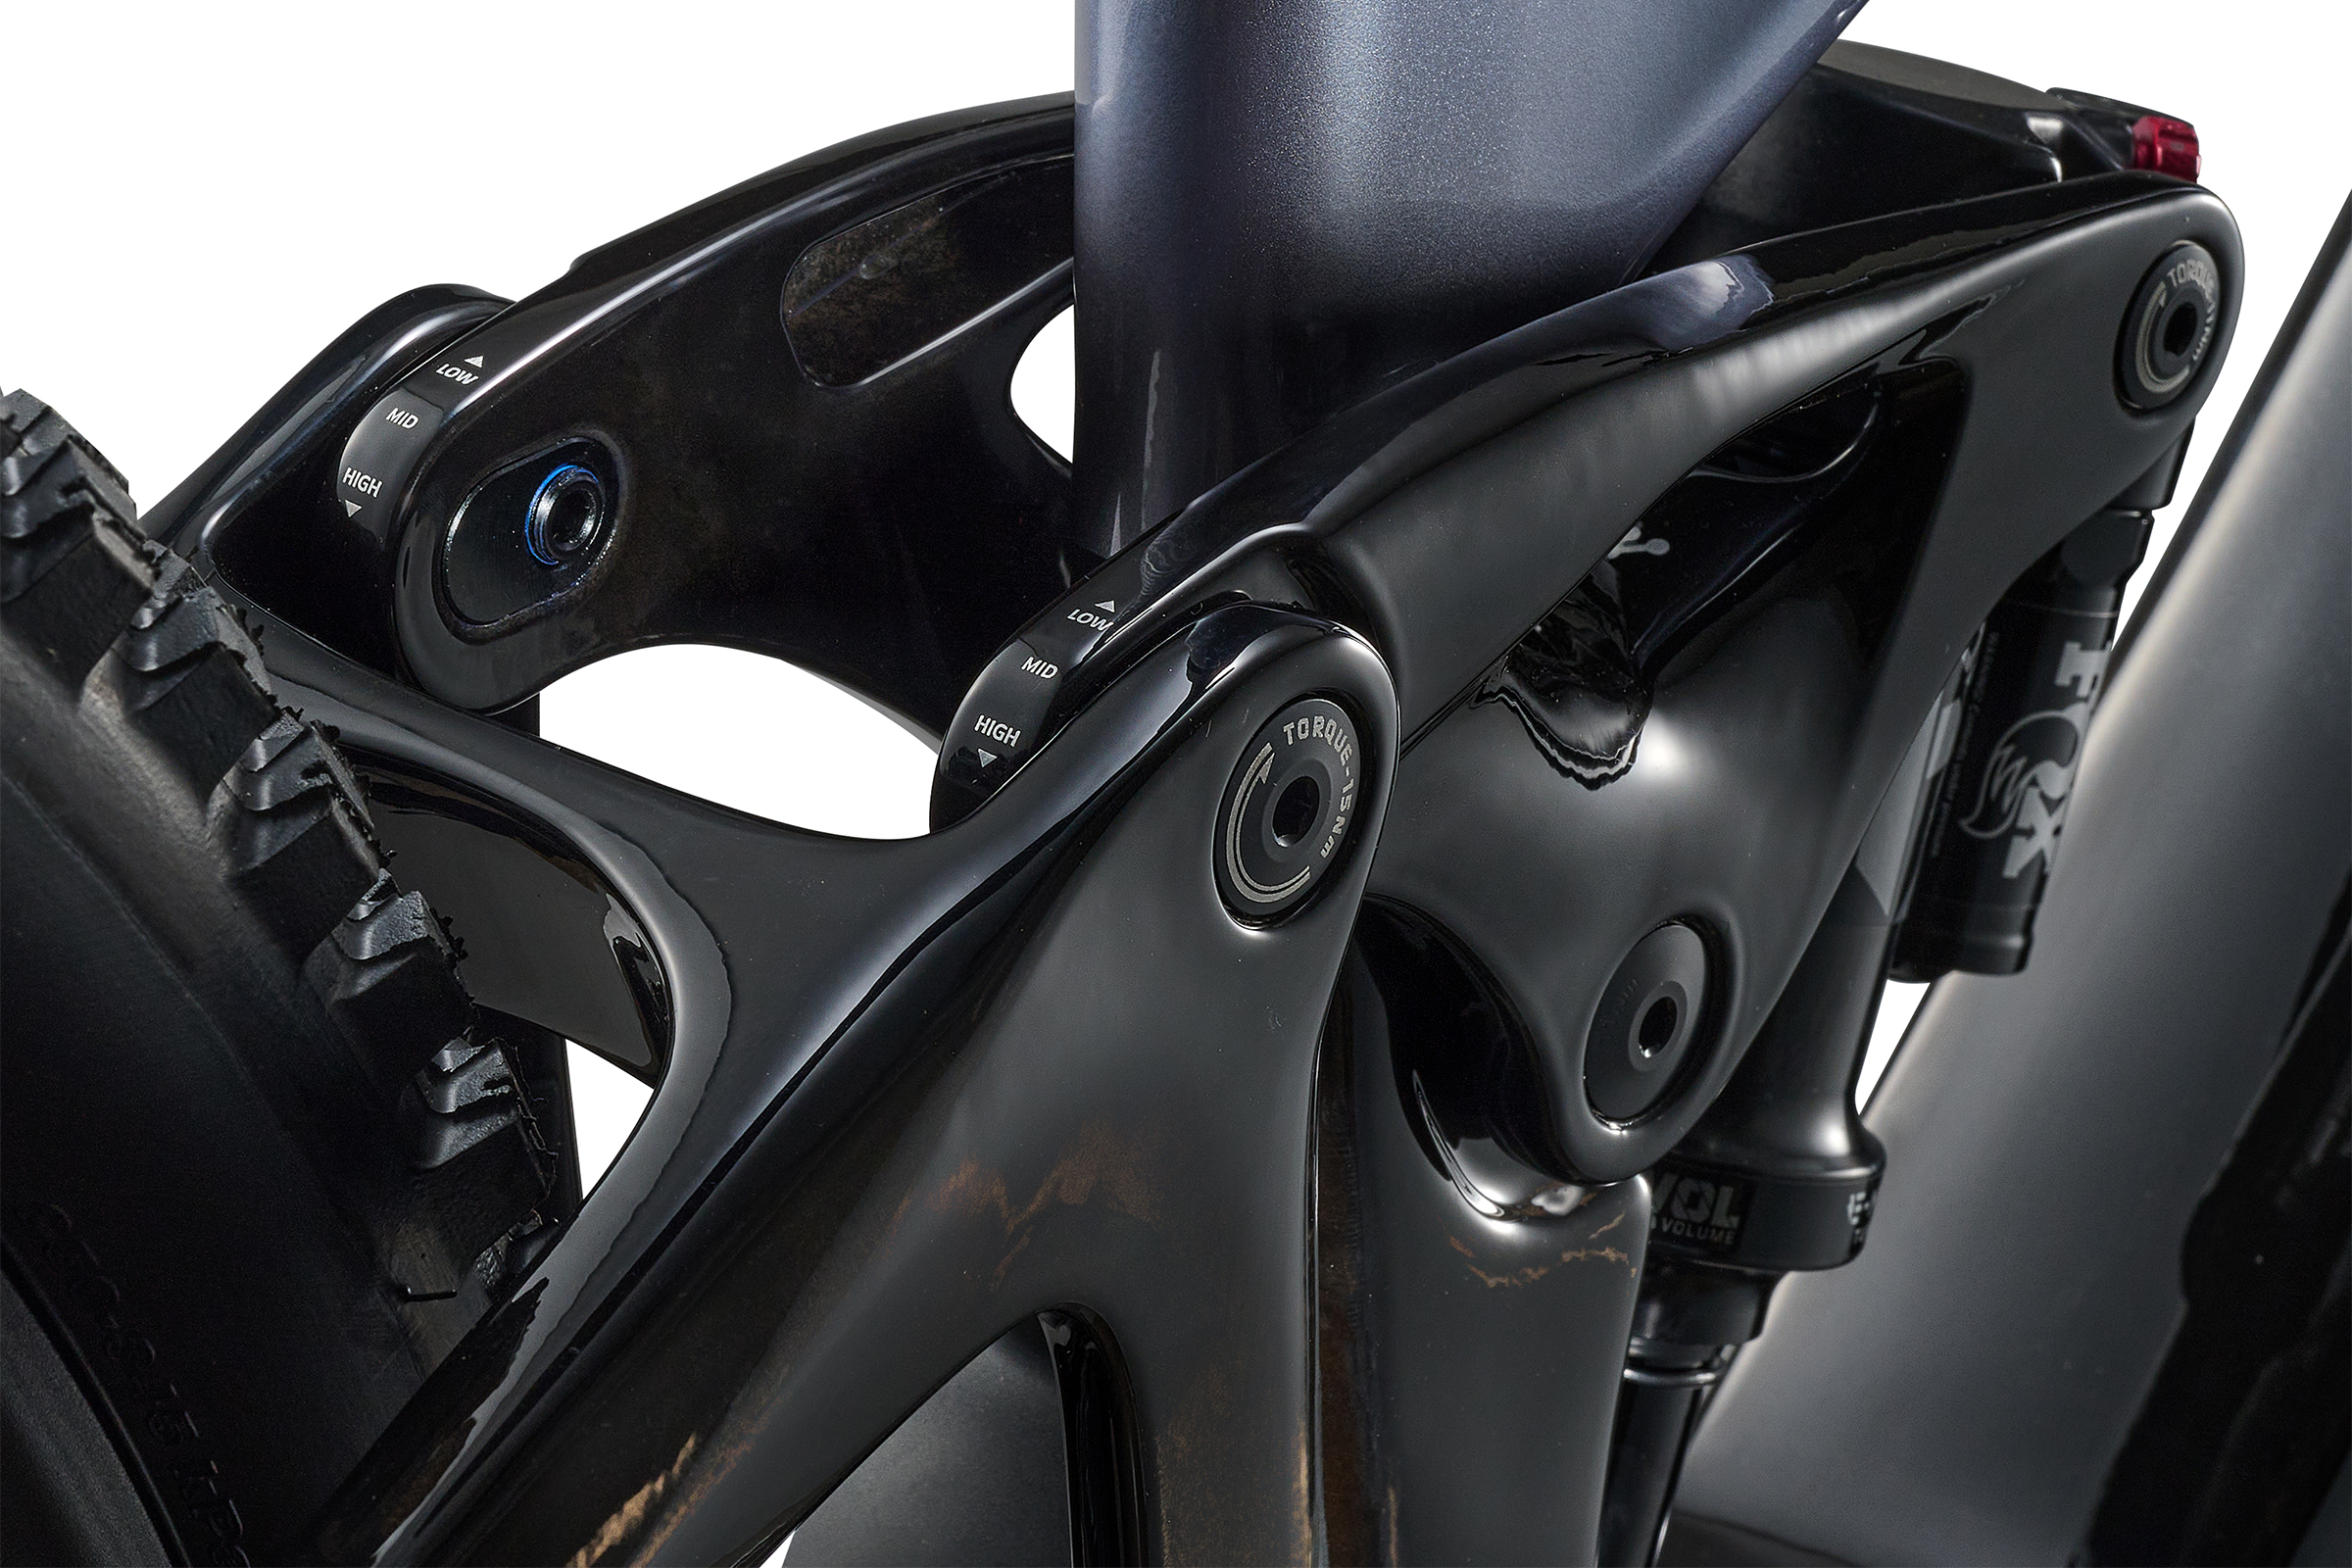
There’s a three-position geometry-adjusting flip chip in the rocker link. Giant Bikes
The Reign’s geometry figures hit the sweet spot across its four-size range.
Reach numbers start at 430mm and lift to 510mm, and chainstays are 450mm across the board.
Elsewhere, there’s a gravity-friendly 63.5-degree head tube angle and steep, comfortable 77-degree seat tube angle.
But Giant has gone further than most with adjustability.
Not only is there a three-position flip chip in the upper Maestro rocker link with low, mid and high settings, there’s also a reach-adjusting headset cup with three positions.
Thanks to a -5mm cup, a neutral cup and a +5mm cup, the bike’s figures are enormously customisable depending on your needs.
A compelling purchase?
The range extender has a 280Wh capacity and it comes with the bike in the UK and Ireland. Giant Bikes
The new Reign Advanced E+ is – on the face of it – just a bit boring and really highlights significant convergence across the market.
It’s a full-powered, long-travel ebike with about the same torque, Watts, suspension kinematics and geometry as every other similar bike out there from a host of other brands.
And with a 22.7kg (medium) claimed weight, it’s also par for the course given the relatively small 560Wh onboard battery.
However, dig a little deeper and there are glimmers of technical brilliance; the integration, electronics, protection and geometry adjustment, along with a solid warranty, mean the Reign Advance E+ could edge ahead of the competition.
The most affordable model in the range – the Reign Advanced E+ 2 – costs £6,499. The next one up – the E+ 1 – is £7,499, and the most expensive E+ 0 costs £9,999, but each gets the same fundamental battery, motor, protection and frame tech only with a slightly different spec list.
In a sea of copycats, all costing roughly the same amount, the Giant Reign Advanced E+ looks like a compelling purchase.
Rapha and EF Pro Cycling have announced they are parting ways after seven years, bringing one of cycling’s most distinctive partnerships to an end.
Since 2019, the collaboration has “disrupted” the world of cycling, according to EF Pro Cycling founder and CEO Jonathan Vaughters, with the alternative racing calendar and headline-grabbing jerseys, including the famous duck.
“We made some noise, and brought new people into our sport along the way. To me, that is the hallmark of a successful partnership,” says Vaughters.
Beyond the WorldTour
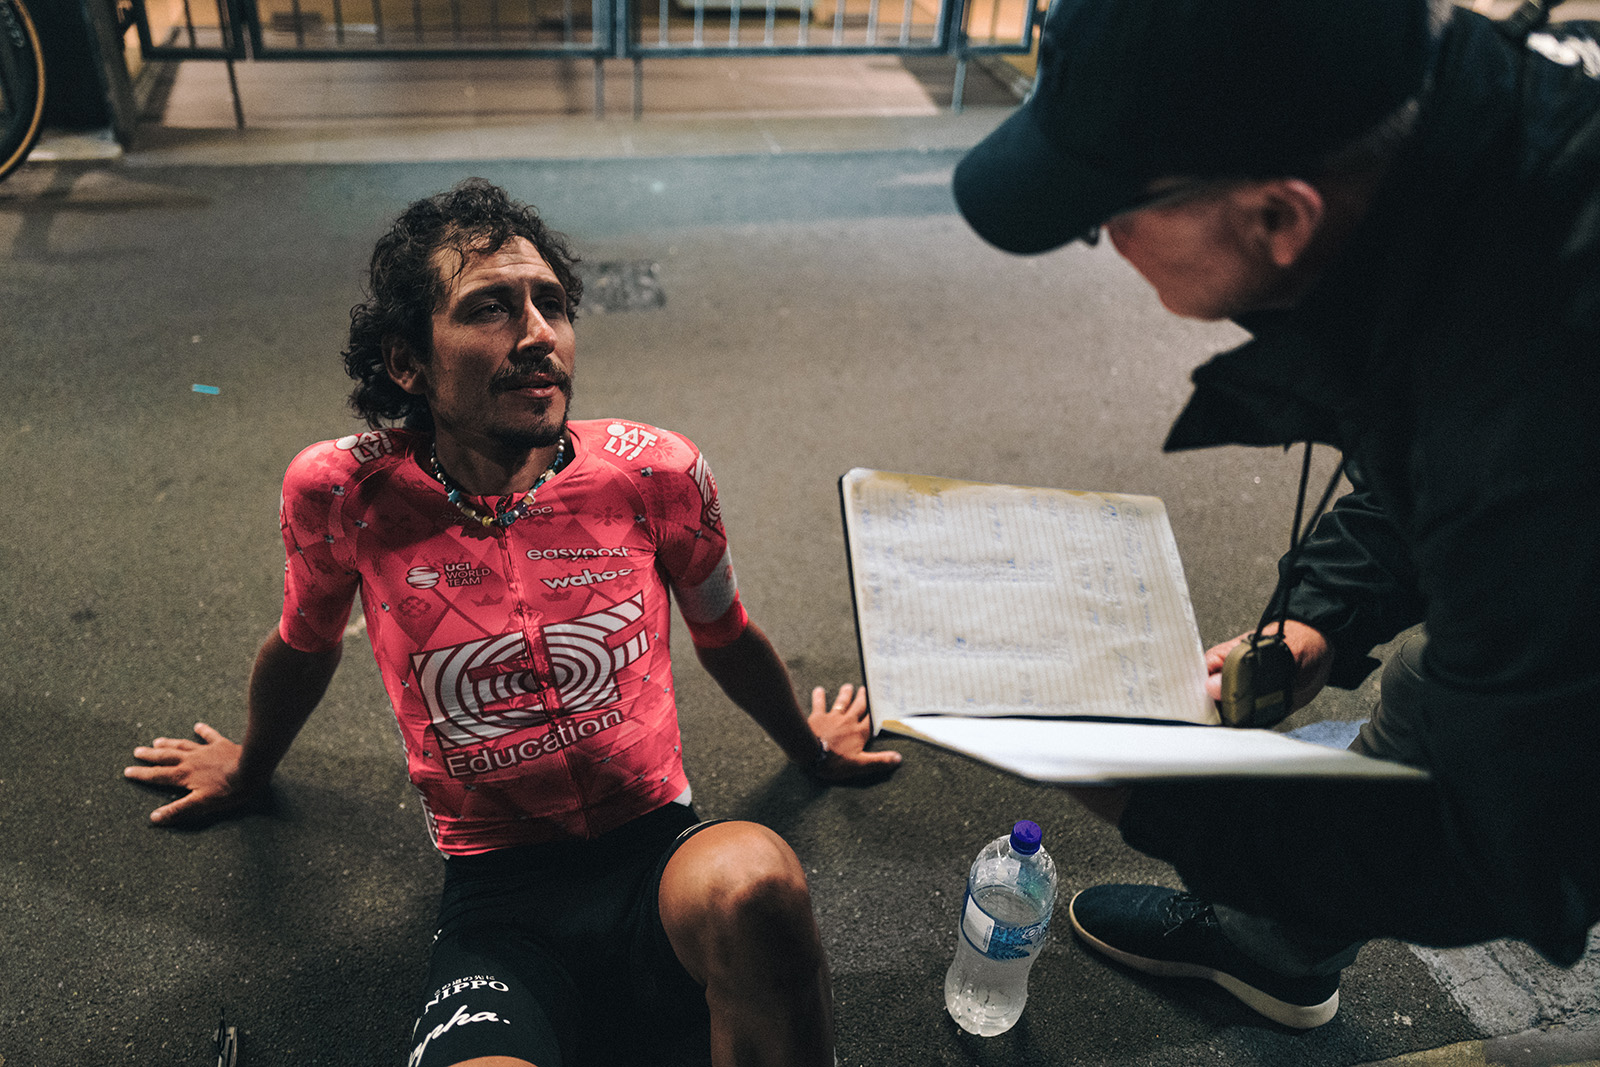
Lachlan Morton in Rapha/EF kit after his Auckland to Wellington record attempt. Dan King / Rapha
Rapha and EF Pro Cycling moved beyond the typical WorldTour events, with the team’s athletes taking on races such as Unbound Gravel and the Leadville Trail 100 MTB.
Much of the partnership’s success outside WorldTour races is down to one athlete in particular, Lachlan Morton.
The Australian has taken on many challenges since the partnership began, which were captured in the Gone Racing documentary series between 2019 and 2022.
This year, Morton set a new record from Auckland to Wellington in New Zealand. The feat was documented in a film that Rapha later issued an apology over because it neglected to mention one of the previous record holders.
Kit collaborations
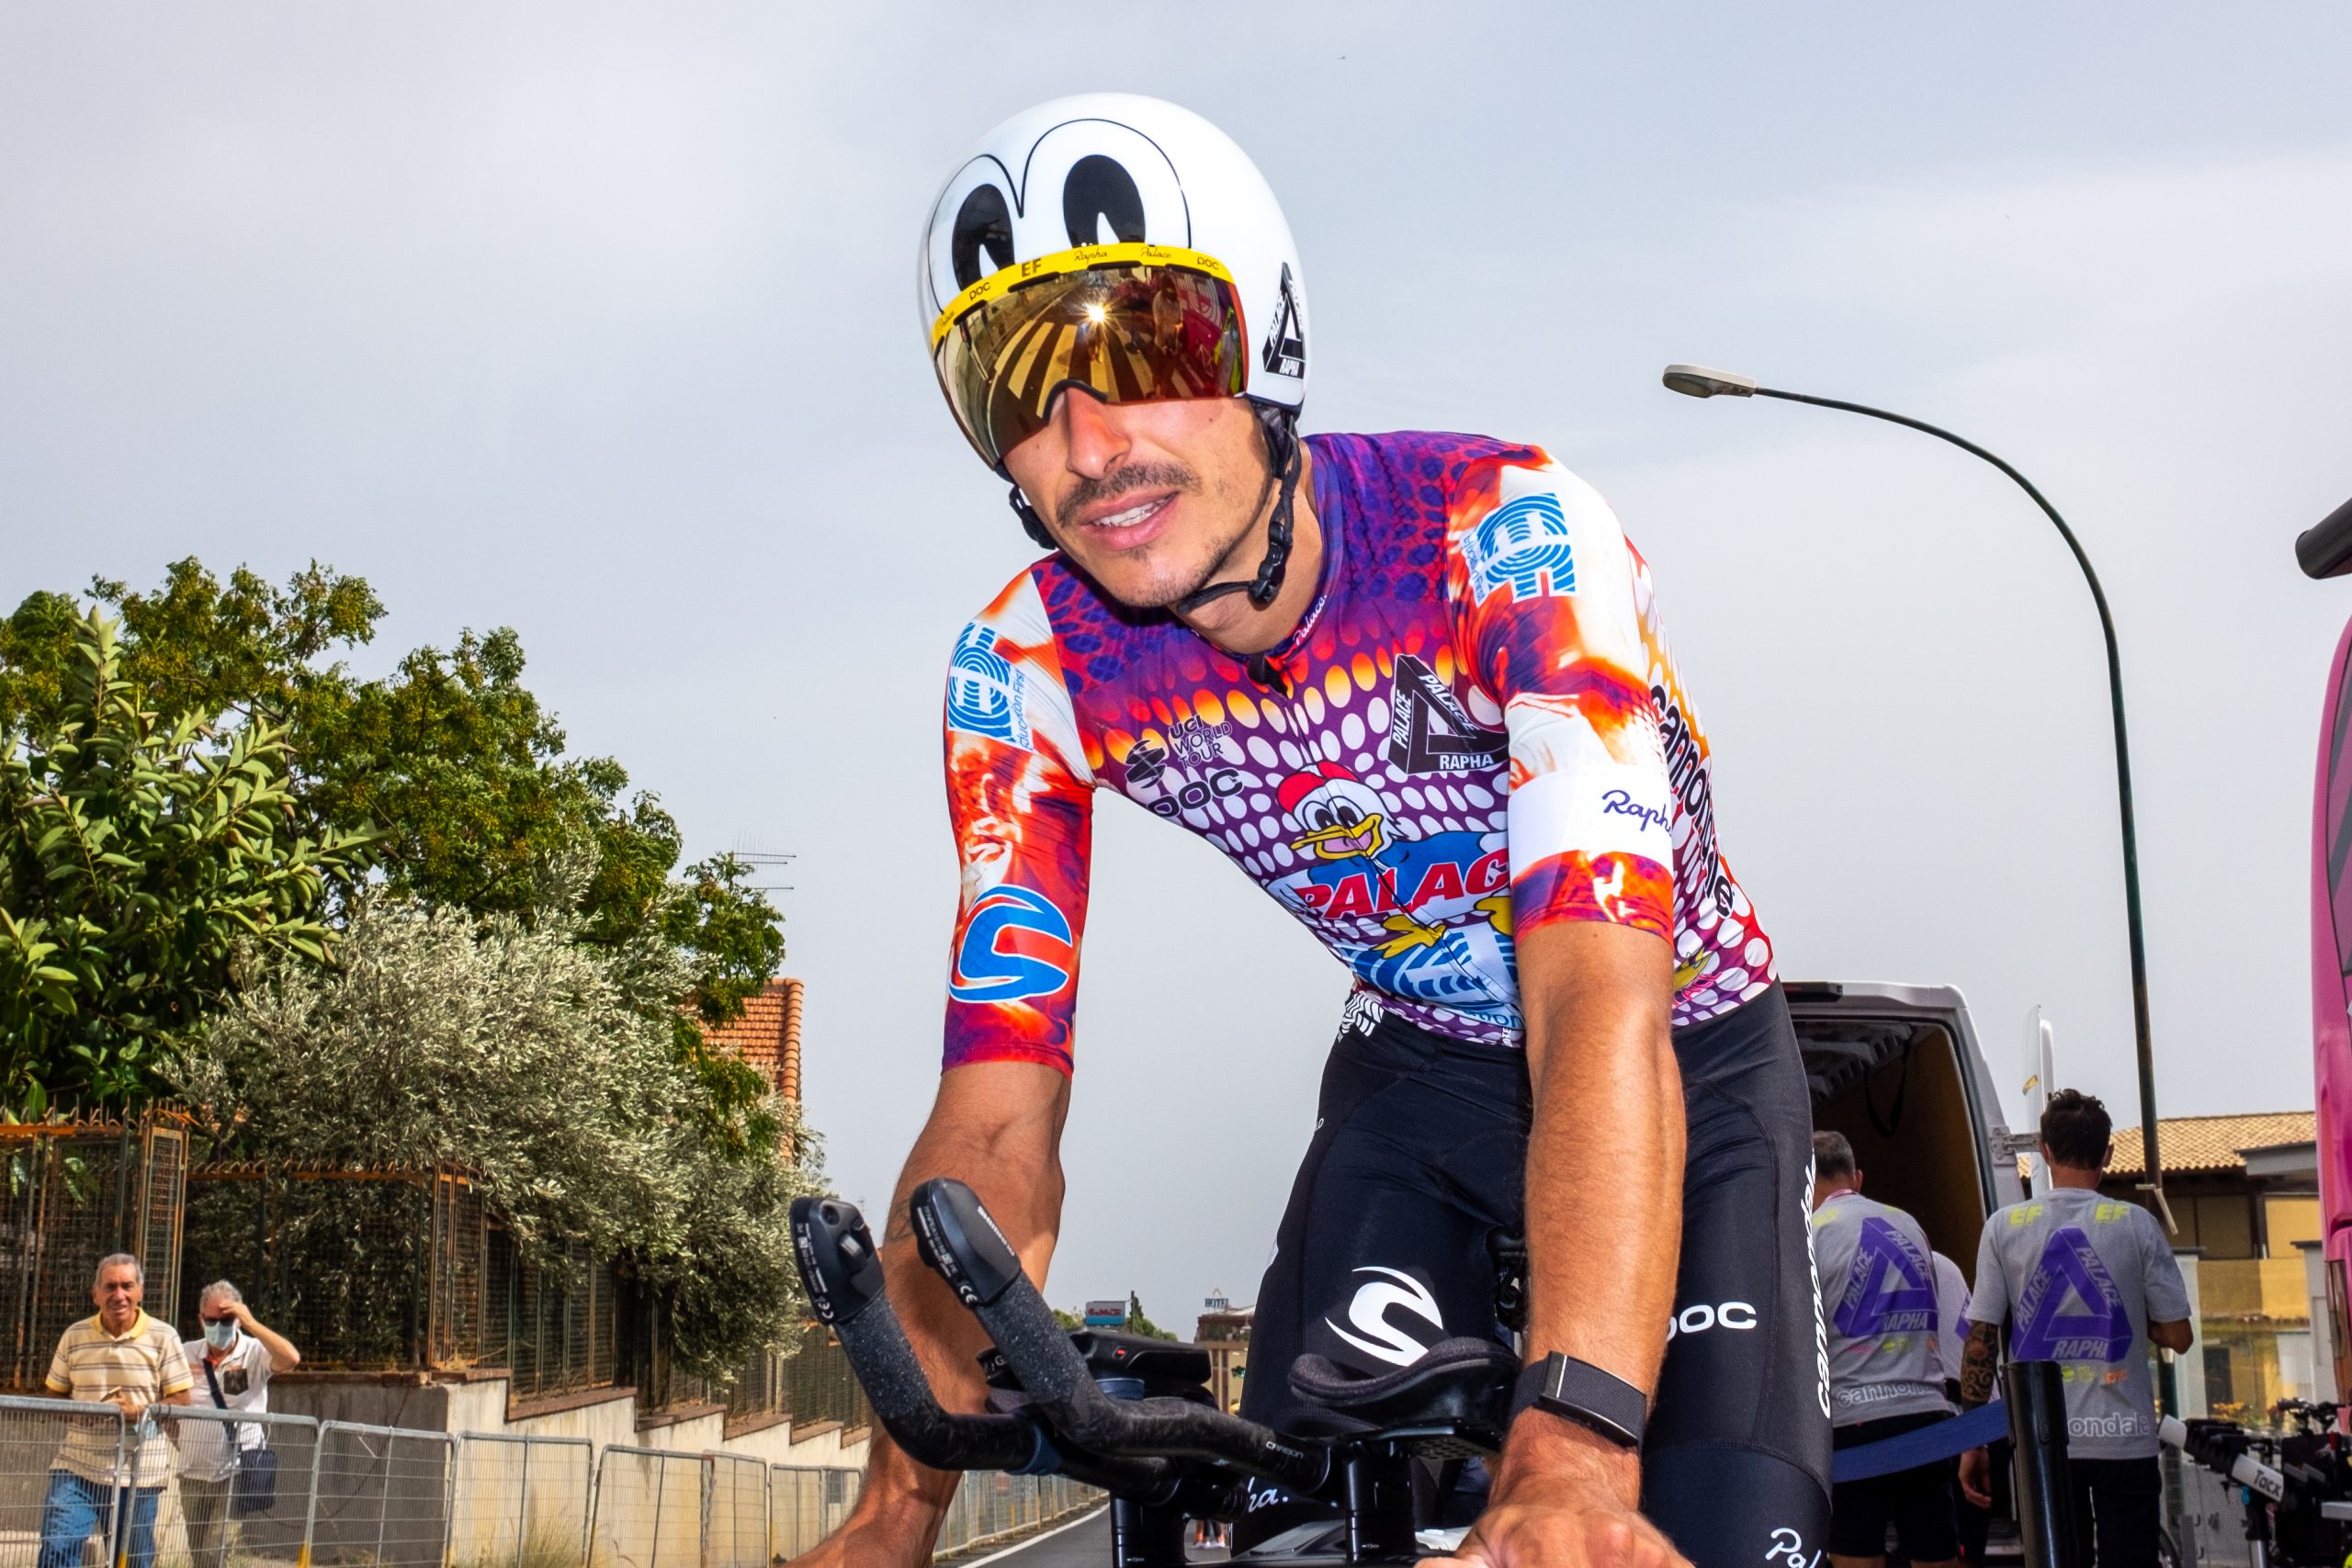
Rapha and EF Pro Cycling collaborated with Palace to create a bold aesthetic. Rapha
The partnership made EF Pro Cycling one of the sport’s most recognisable teams through its bold kit designs, particularly at the Giro d’Italia, where the team had to ride in special kit so its typical pink didn’t clash with the leader’s jersey.
While there were often interesting designs for the Giro d’Italia – including a kit that used excess fabric and another one that celebrated people from different nations – the most eye-catching was the 2020 kit designed in collaboration with the skateboarding brand Palace.
The kit grabbed people’s attention thanks to its psychedelic patterns and one cap-wearing duck, which also informed the design of the team’s time-trial helmets.
EF Education–Oatley’s Magdeleine Vallieres won the women’s world championships road race this year. Dario Belingheri / Getty Images
Although EF Pro Cycling and Rapha made a name for themselves through off-beat challenges and loud kit, the partnership has still seen success in professional road races.
The team has secured stage victories at all three Grand Tours, as well as wins at the Tour of Flanders and Paris–Roubaix Femmes.
EF Pro Cycling has had notable success in 2025. Magdeleine Vallieres recently won the women’s world championships road race in Kigali, Rwanda, while Ben Healy finished third in the men’s race.
This year, Healy became the first Irishman to wear the yellow jersey at the Tour de France since Stephen Roche in 1987, and finished the race in ninth position overall.
So what’s next for Rapha and EF Pro Cycling?
Ben Healy wearing the yellow jersey at the 2025 Tour de France. Loic Venance / Getty Images
The end of the partnership means Rapha is leaving the WorldTour for the time being, according to the brand’s CEO, Fran Millar.
“EF Pro Cycling has a unique spirit which we will always respect and champion. But we have made the decision to broaden our horizons and increase our impact across other, progressive areas of elite and participation cycling. This does not mark the end of our support for the world’s most talented and charismatic riders. The next chapter begins now,” says Millar.
Vaughters says: “It’s an exciting time to be at EF Pro Cycling and we can’t wait to keep building on one of our most successful seasons to date.”
EF Pro cycling is yet to confirm who its next kit sponsor will be, and the team had not responded to BikeRadar’s request for comment at the time of publishing.
One final limited-edition collection
In keeping with their partnership, Rapha and EF Pro Cycling haven’t missed the opportunity to release a limited-edition kit collection to mark their parting of ways.
Available to Rapha RCC members from Thursday 9 October and to the general public from Friday 10 October, there will be three designs available.
The Crashed the Party kit uses the signature pink colour and is described as a fusion of the “best-loved” Rapha and EF Pro Cycling kit designs.
The Changed the Game jersey marks some of the team’s biggest victories, and the Back to Blackout design “closes the loop on the partnership, echoing the original blackout jersey worn by the first Rapha and EF Pro Cycling team in Australia, 2019”.
I take a swig of beer as my eyes adapt to the darkness. My ears are still adjusting to the pounding four-to-the-floor beats pulsing from the speakers.
Had I spawned here without any prior knowledge, I’d wager I was at a DIY electronic-music festival or some sort of illicit cycling-themed hilltop rave – I certainly wouldn’t guess I was at a Wednesday evening club ride.
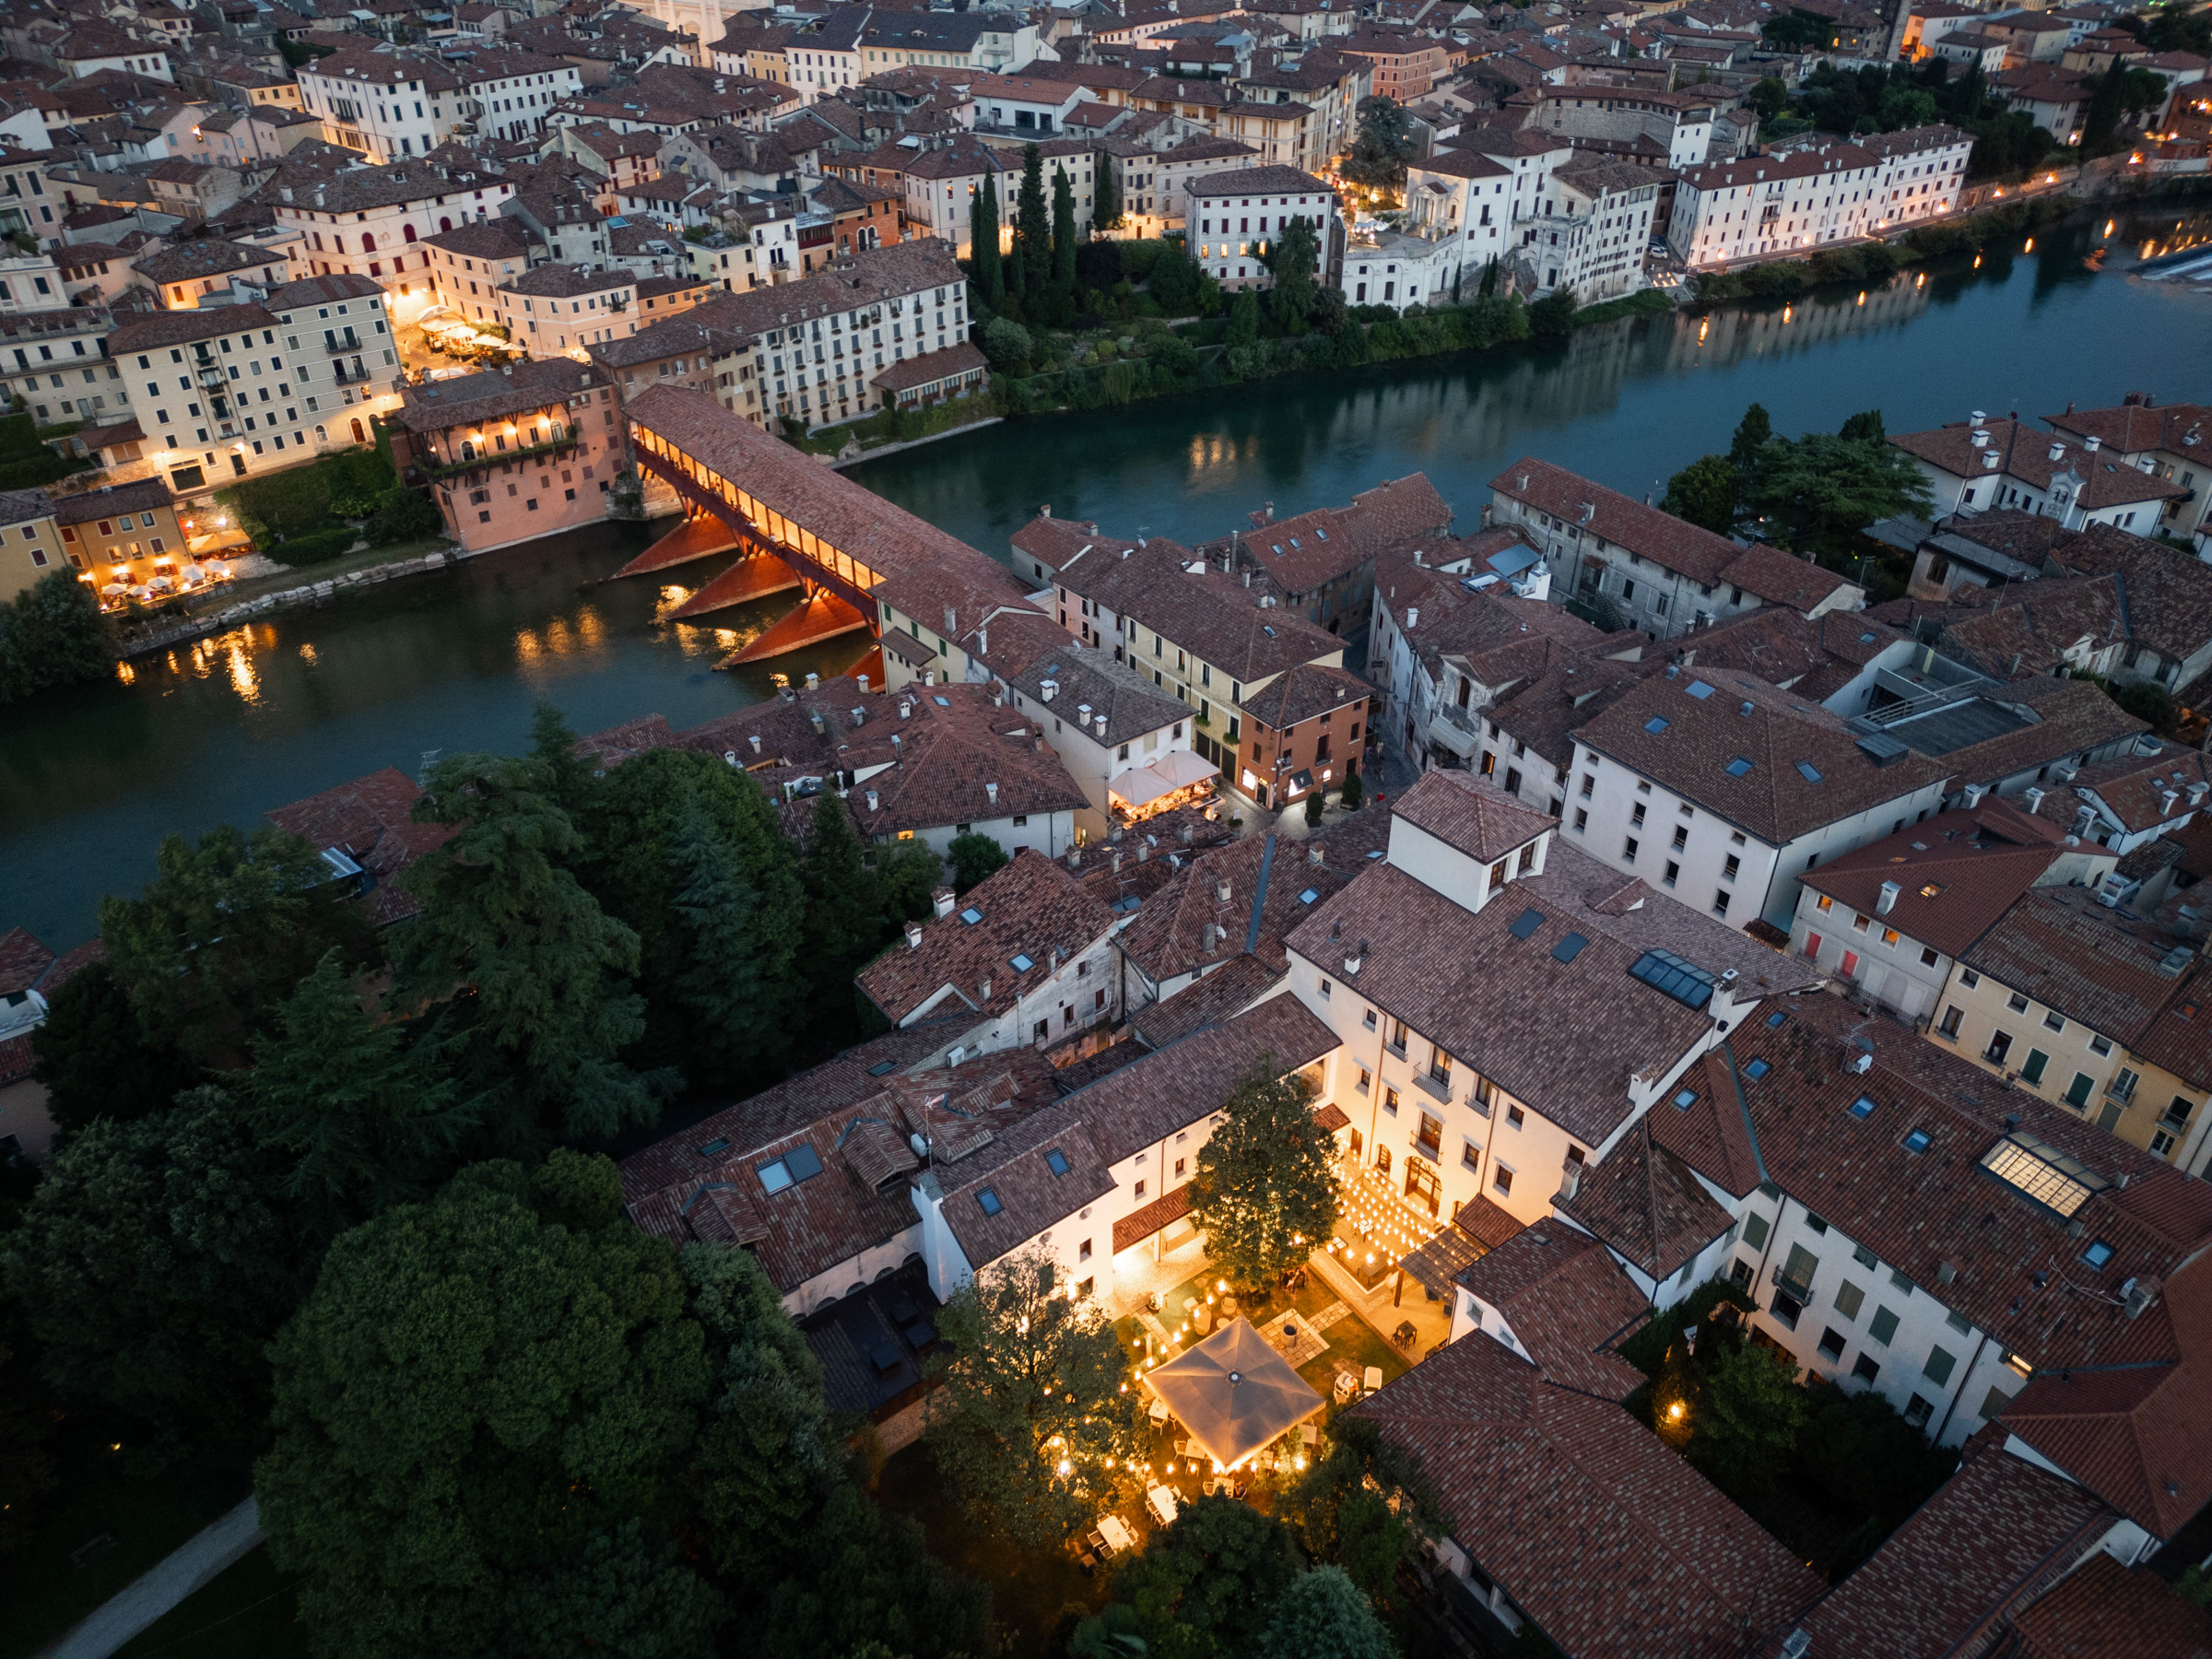
But Basso, as I’m about to find out over the next few days, takes great pride in doing things differently.
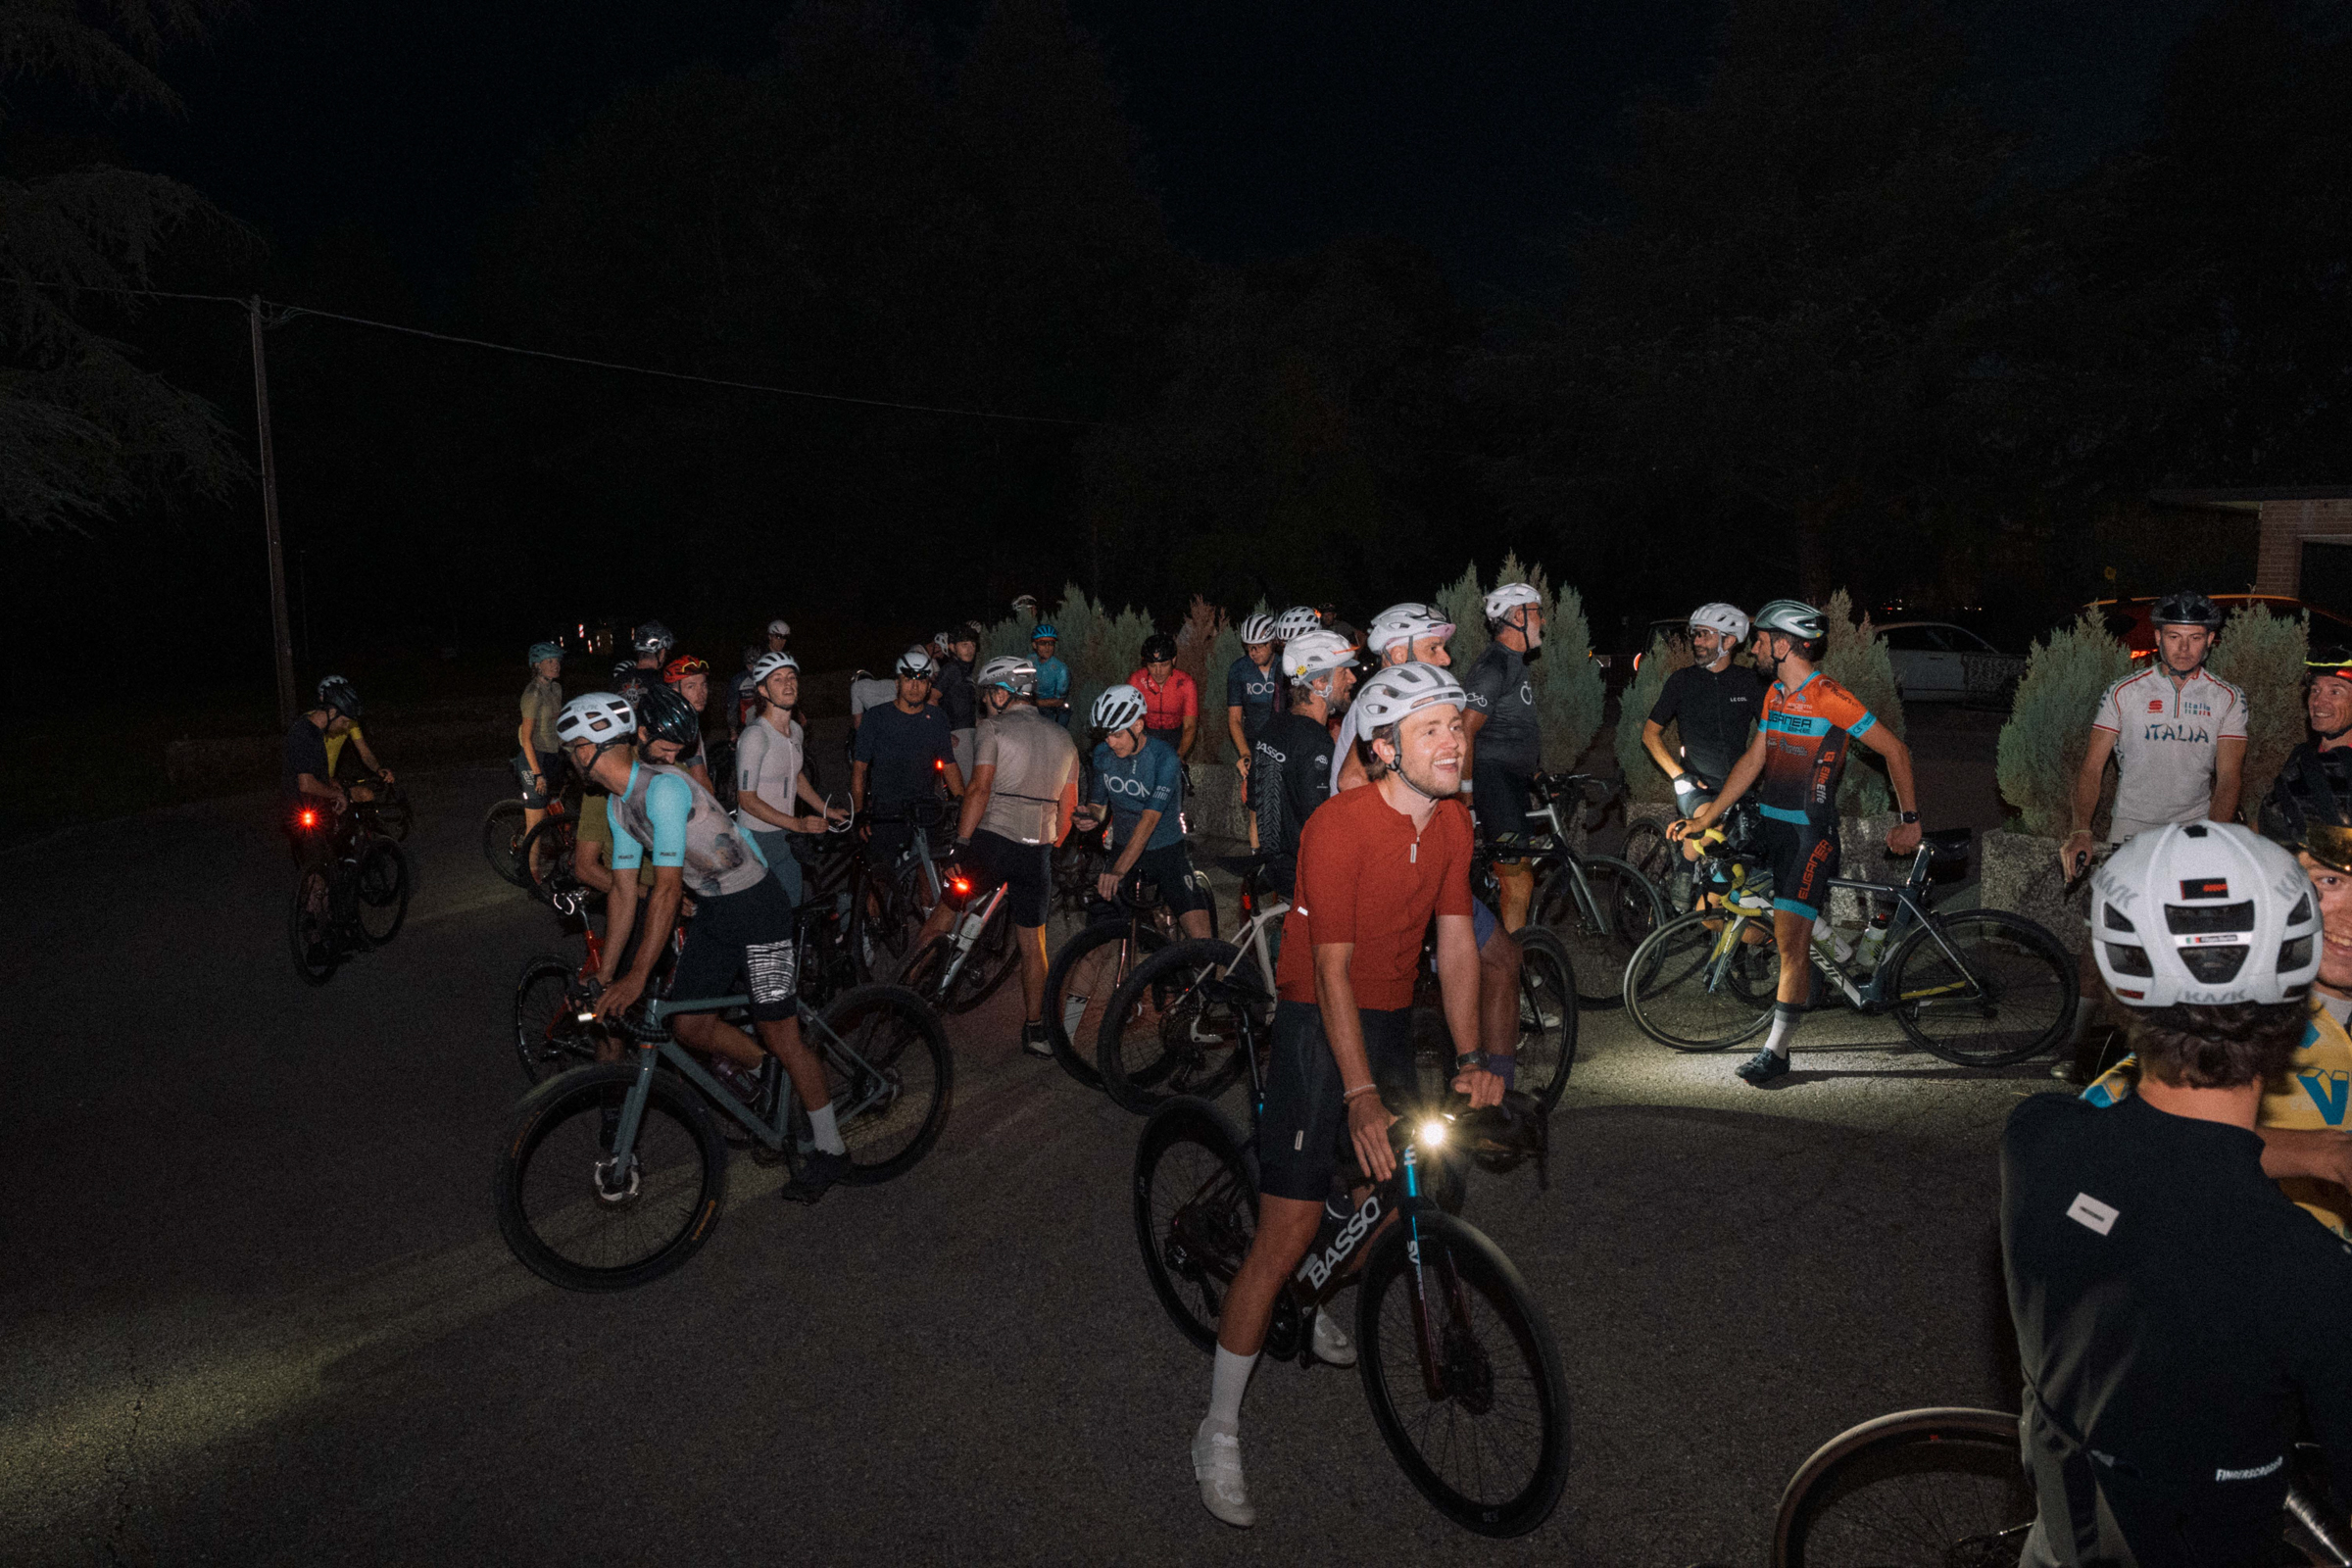
We’re at the summit of a short, steep stretch of road just above Bassano del Grappa, Italy, waiting for the weekly ‘Carbo Ride’ peloton to complete a timed mid-course hill climb.
I’d wager your club ride doesn’t look like this. Basso
Basso flags flutter in the evening breeze. To my left, marketing and product manager Leonardo Basso leans against his Instagrammable company-branded Land Rover Defender, squinting into the night.
“Here they come!” he exclaims as the first riders rip through the darkness in a blur of red and white light.
Participants congregate at the top – many straddling Basso bikes – chatting and comparing segment times.
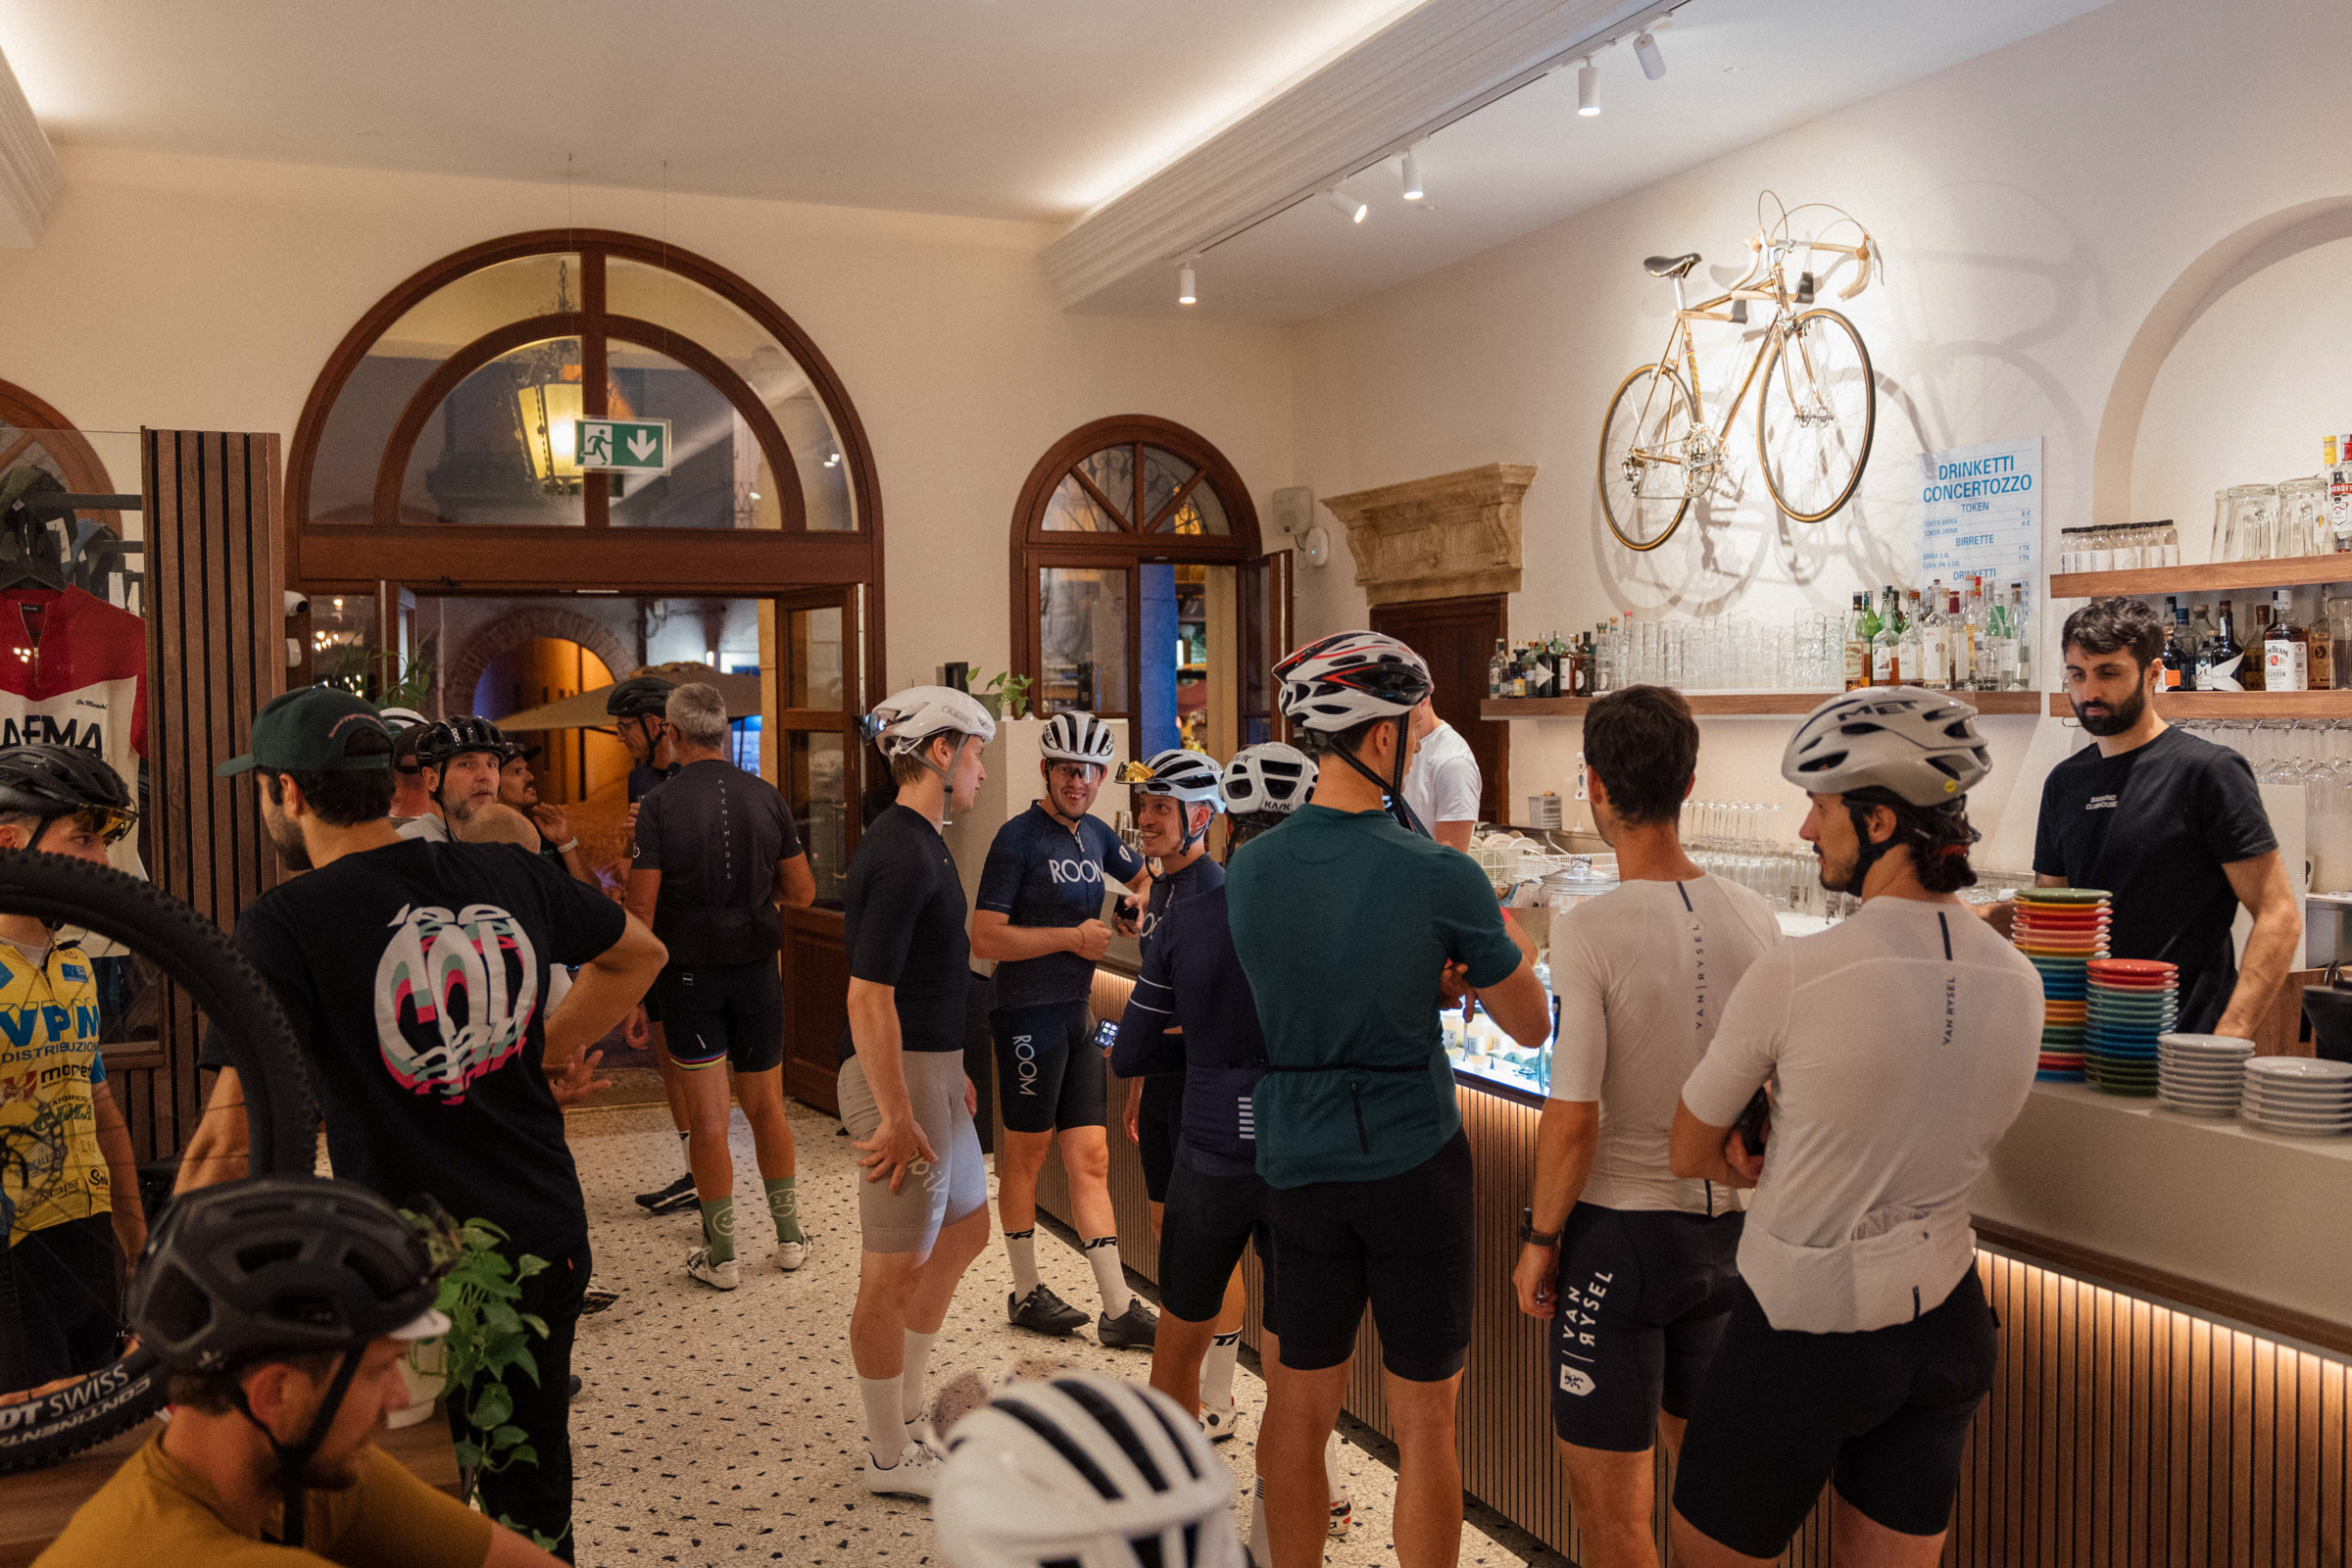
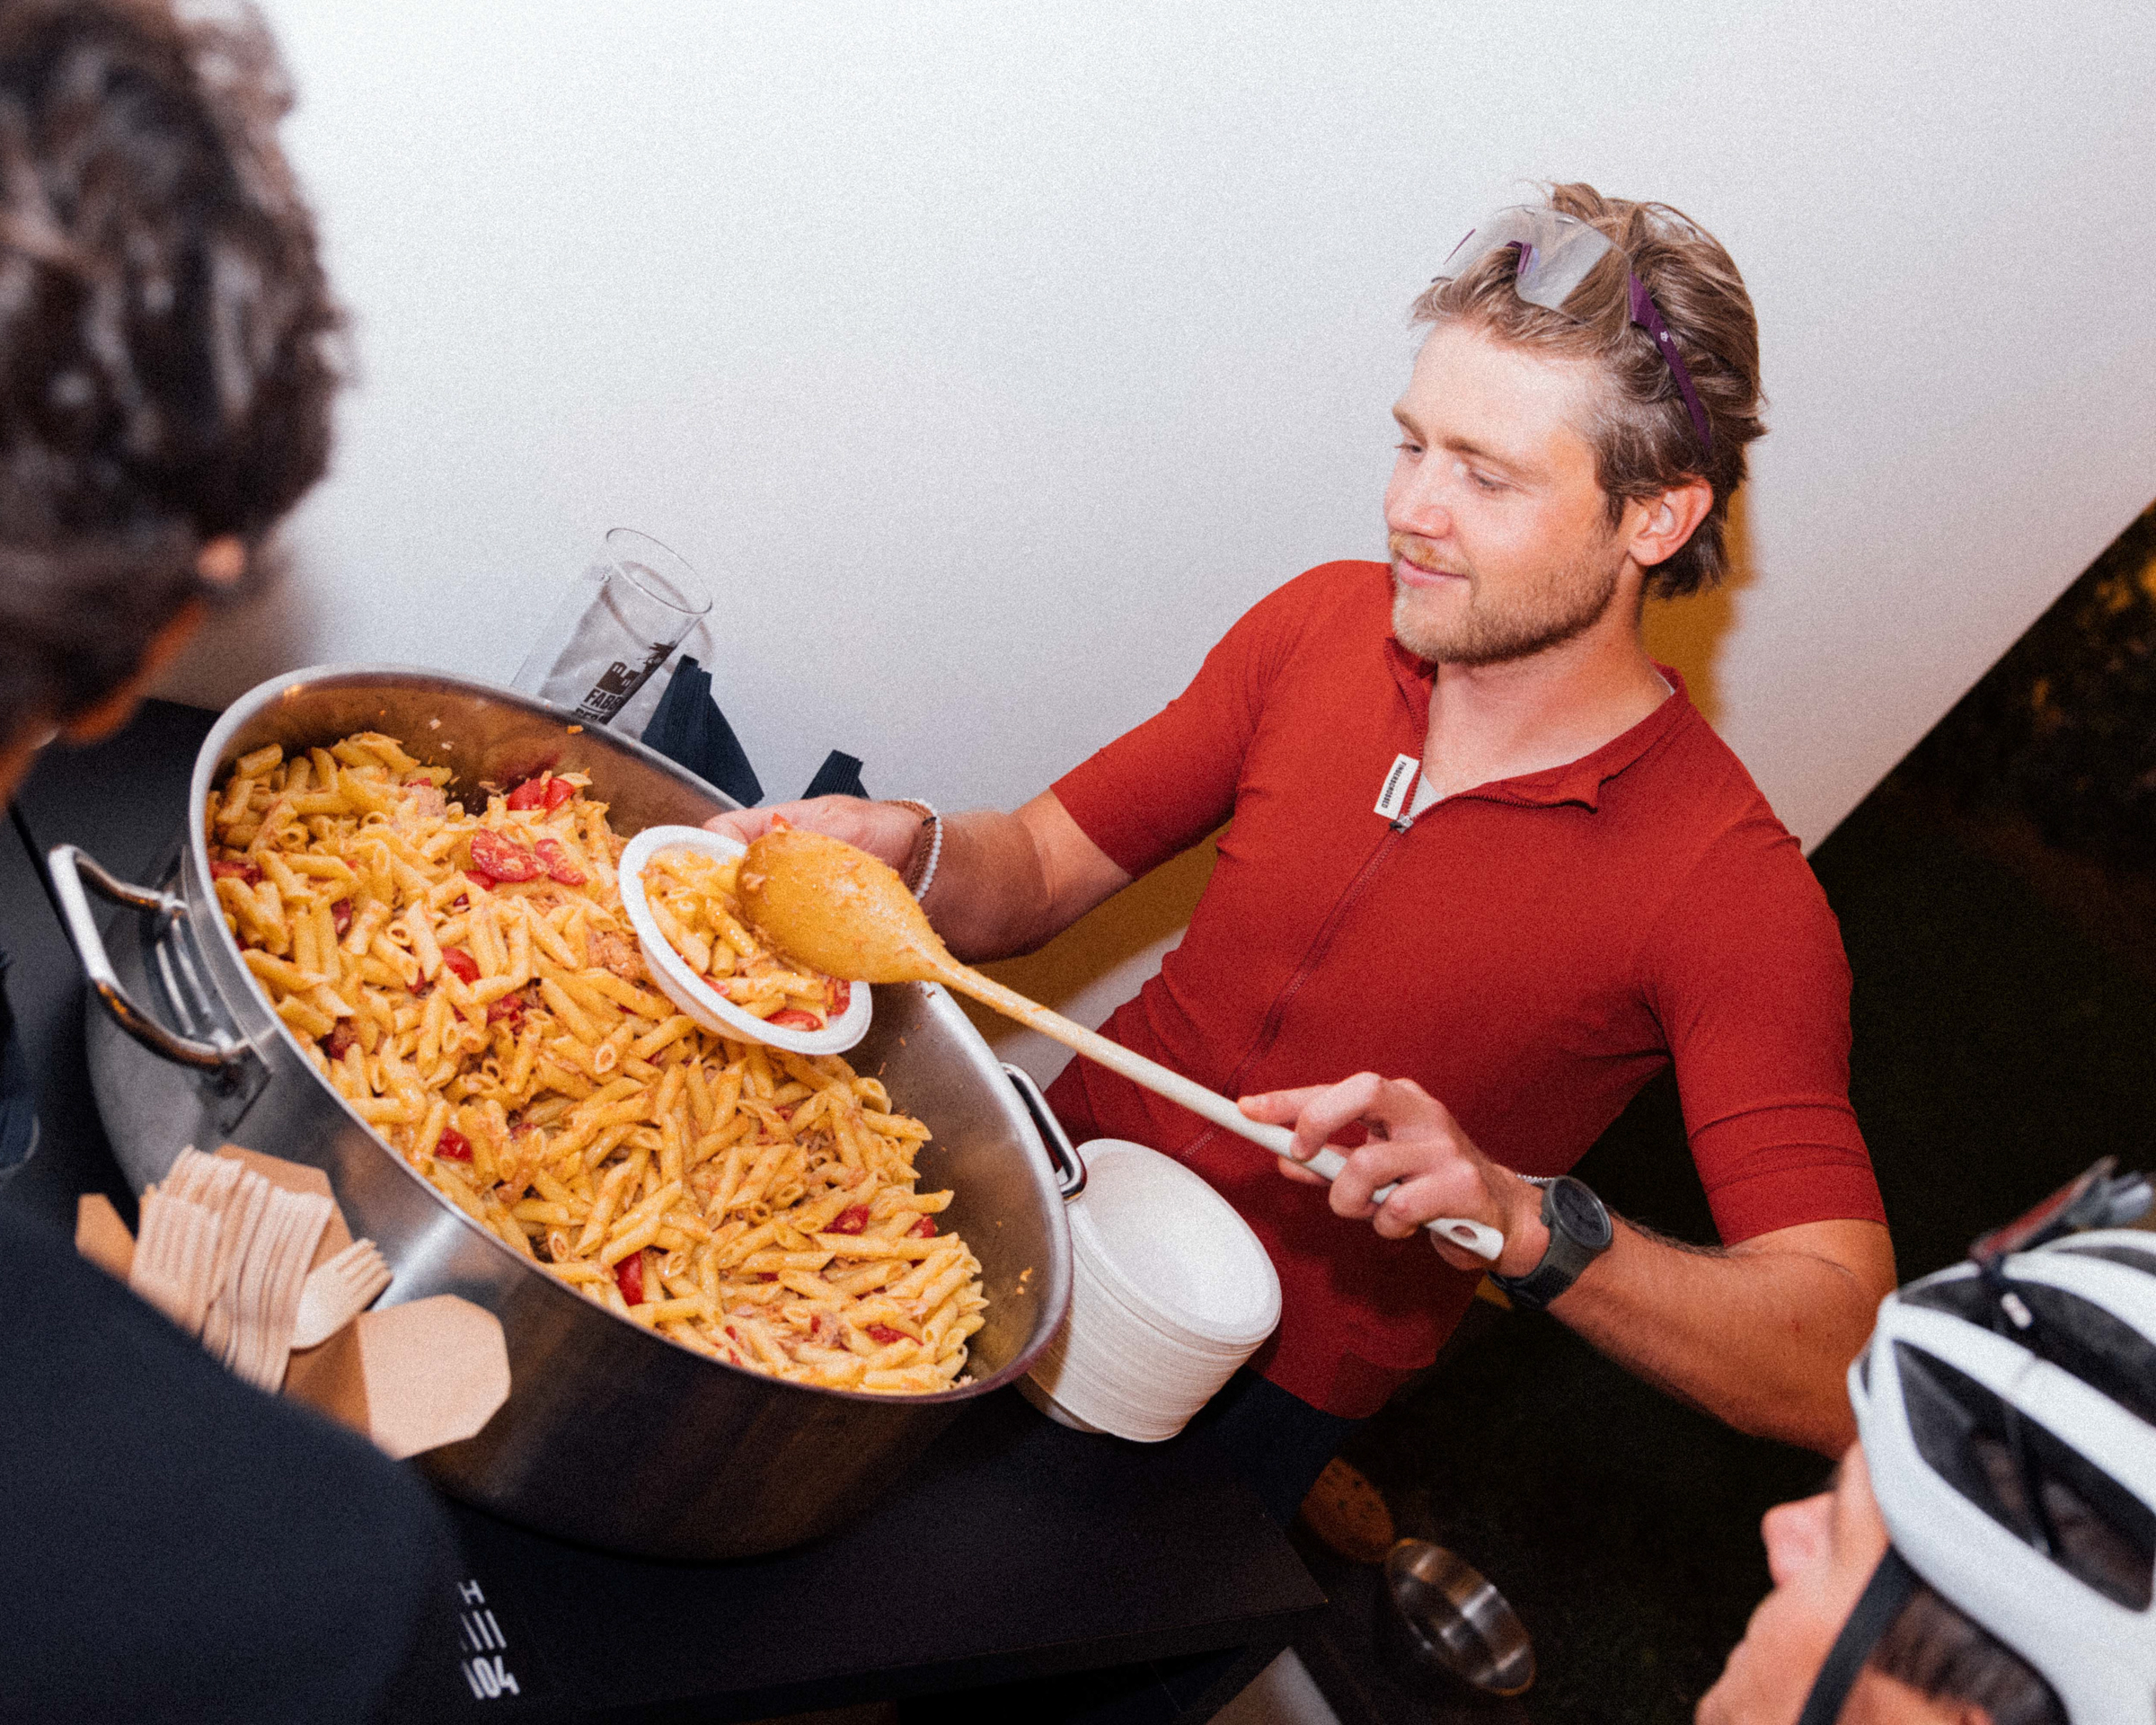
After this, it’s just a short cruise back into town for the hard-earned pay-off: refreshments and free pasta at Basso’s bustling community hub, Bassano Club House. It’s a fitting introduction, both to the brand and the town that fostered it.
Basso’s Club House is the heart of the brand’s community Basso
Basso was born in Bassano almost 50 years ago, but unlike most brands, which outsource production to Asia as they grow bigger, Basso has doubled down on keeping operations local.
After a short but restful night’s sleep in one of the Club House’s five rooms (the Italians don’t do early nights), I meet CEO Alessandro Basso to find out more.
As we drive the 10 minutes to the brand’s HQ, he talks me through the local riding in detail.
“There are lots of routes that go to Venice, to the seaside, to the beach,” he explains as we speed through emerald-green Italian countryside. “But Bassano is really the gateway to the mountains. When you go north, you have Monte Grappa and Asiago. Behind that, you can ride the Alps. Left and right, it’s all the wine country – smaller hills, rolling terrain. I mean, you don’t want a two-hour climb every day, do you?”
Crucially, Bassano and the surrounding areas have a bit of everything.
MTB trails, gravel tracks, iconic Giro d’Italia climbs – this makes it the ideal setting for a local brand developing and testing new bikes.
“There’s a big variety,” Alessandro agrees. “From a brand perspective, you can do everything from your doorstep when it comes to testing. There’s one particular MTB loop we use for this purpose. It’s a minute away from the office.”
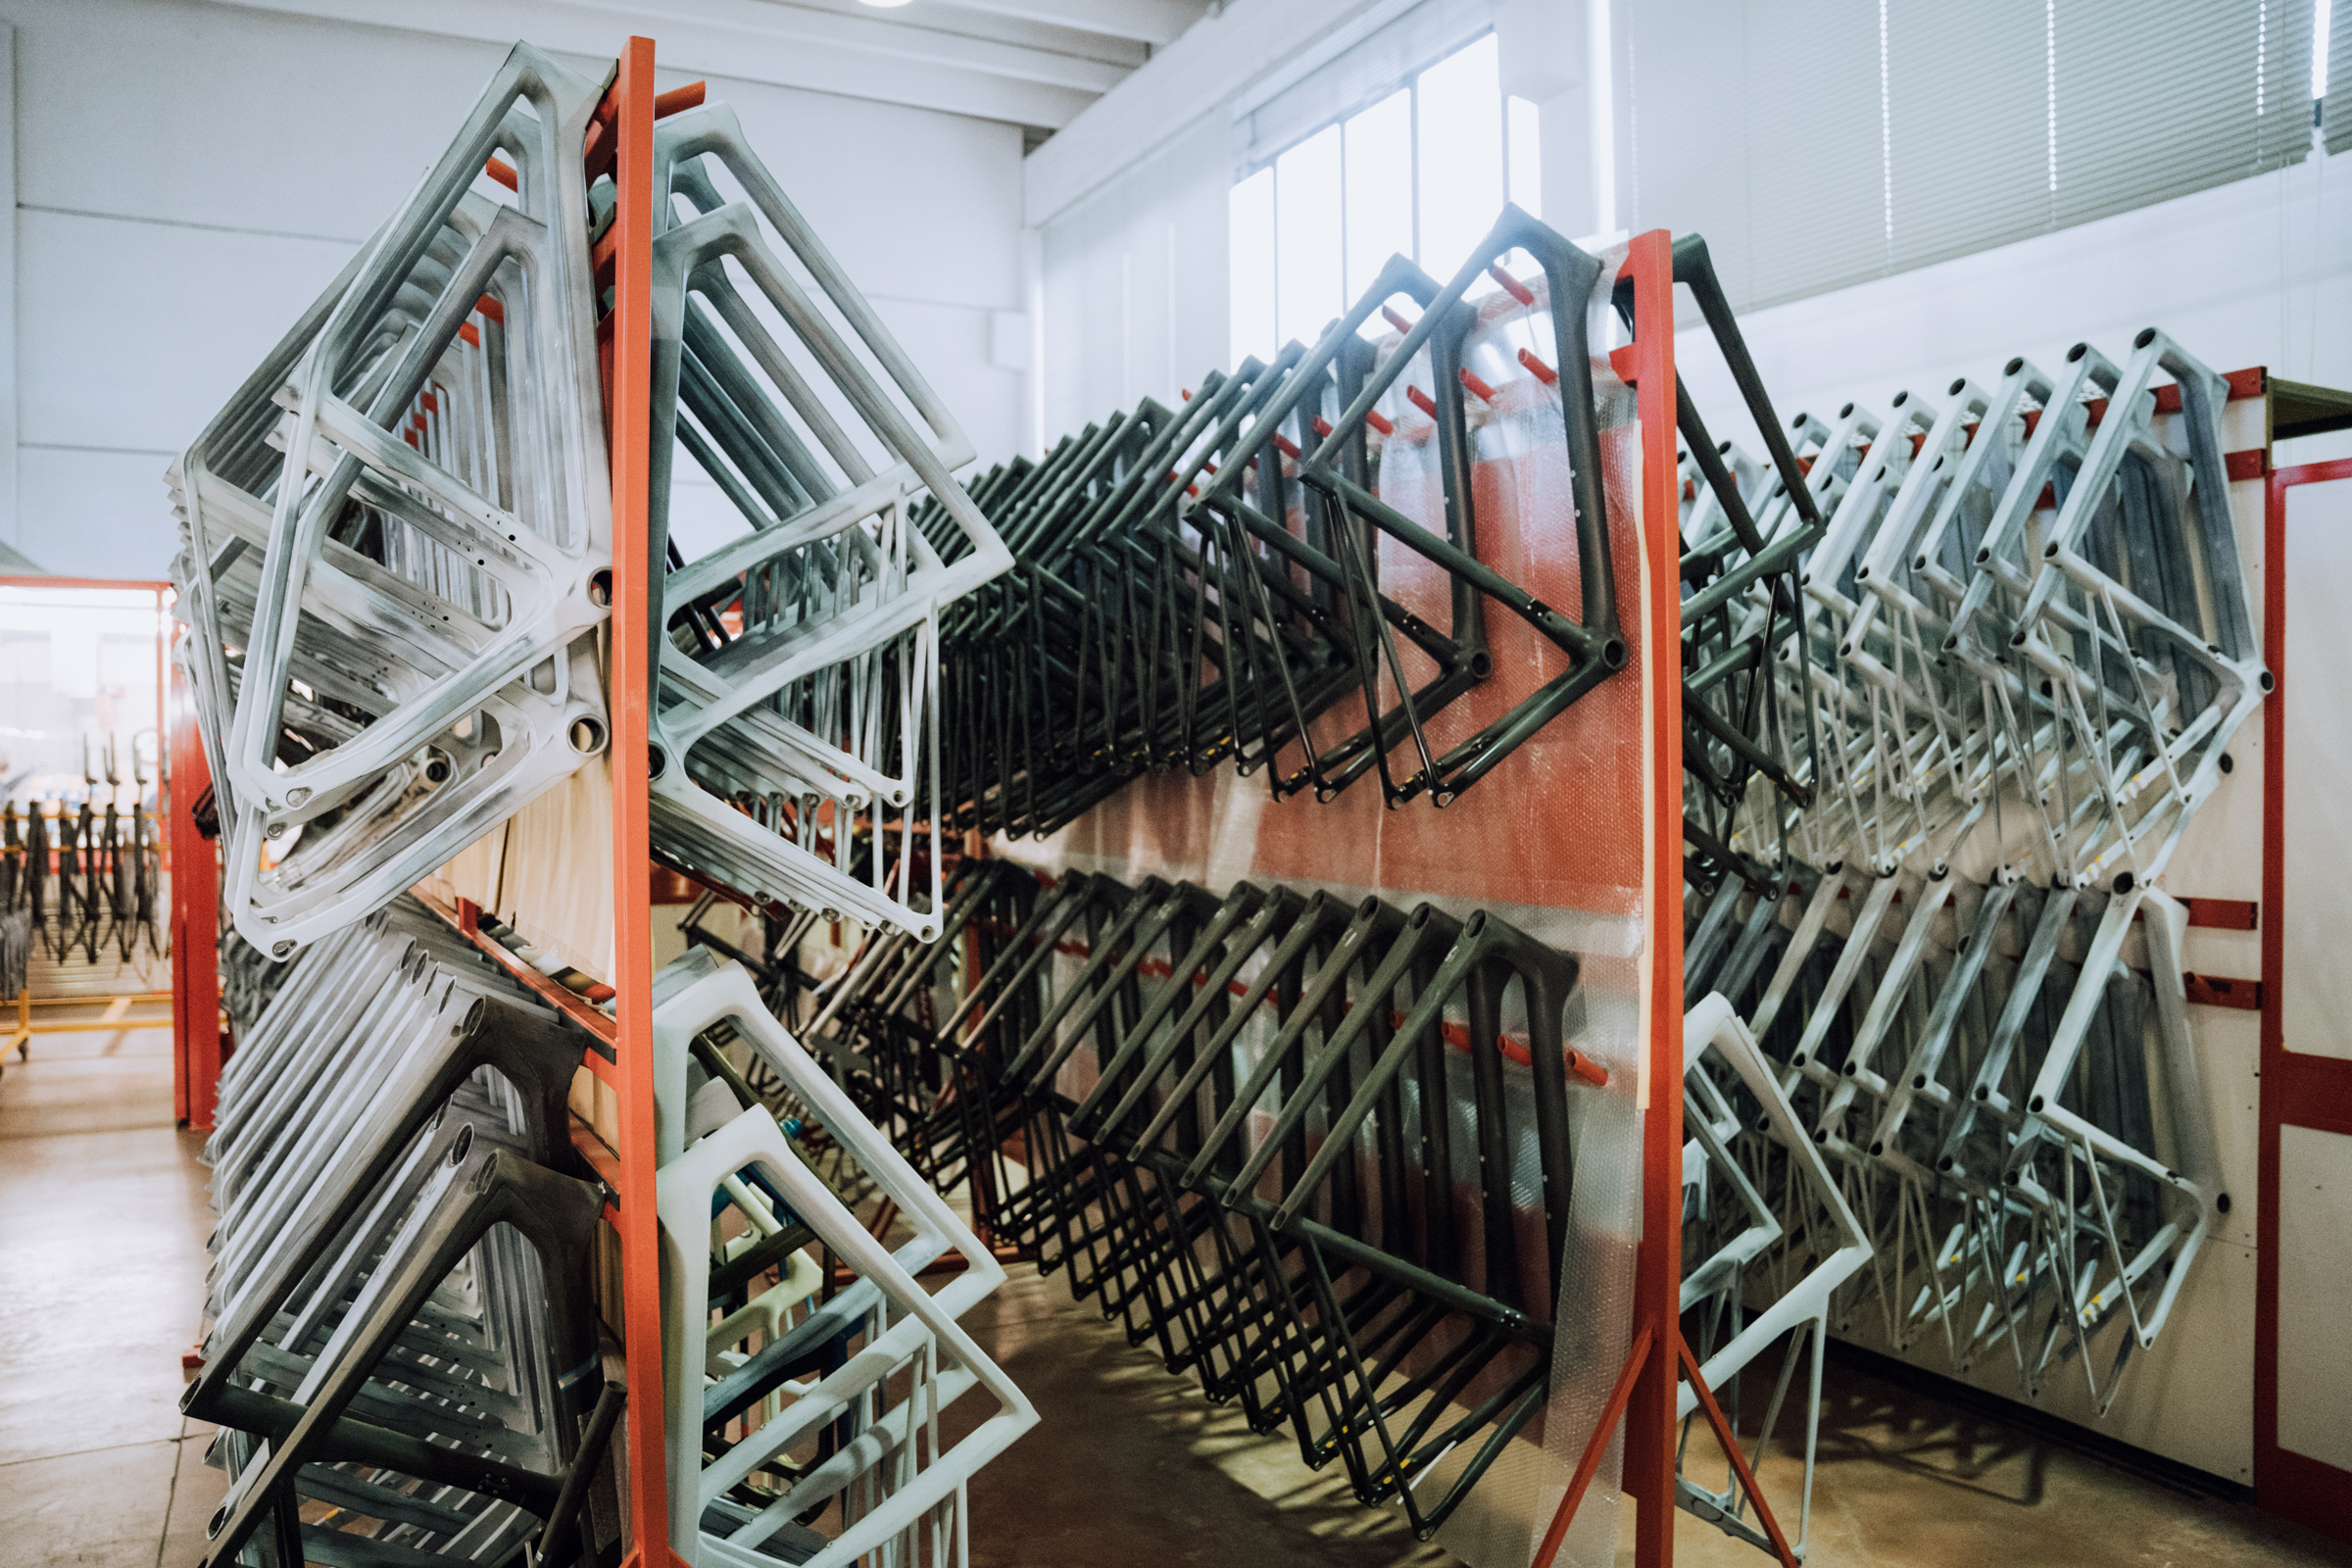
For Basso, building bikes in Italy is about more than heritage. Basso
For Alessandro, building in Bassano is less about the perceived prestige of the ‘Made in Italy’ label and more about quality assurance.
“Made in Italy is important,” he explains. “But the most important thing is that we manage the whole supply chain of our bicycles. This way, we know exactly who put their hands on each and every product.
“We know what time of the day it was, what the temperature was like, even the level of humidity. We know everything. This gives us complete control over the quality of every single bike we make, no matter what.”
Nerve centre
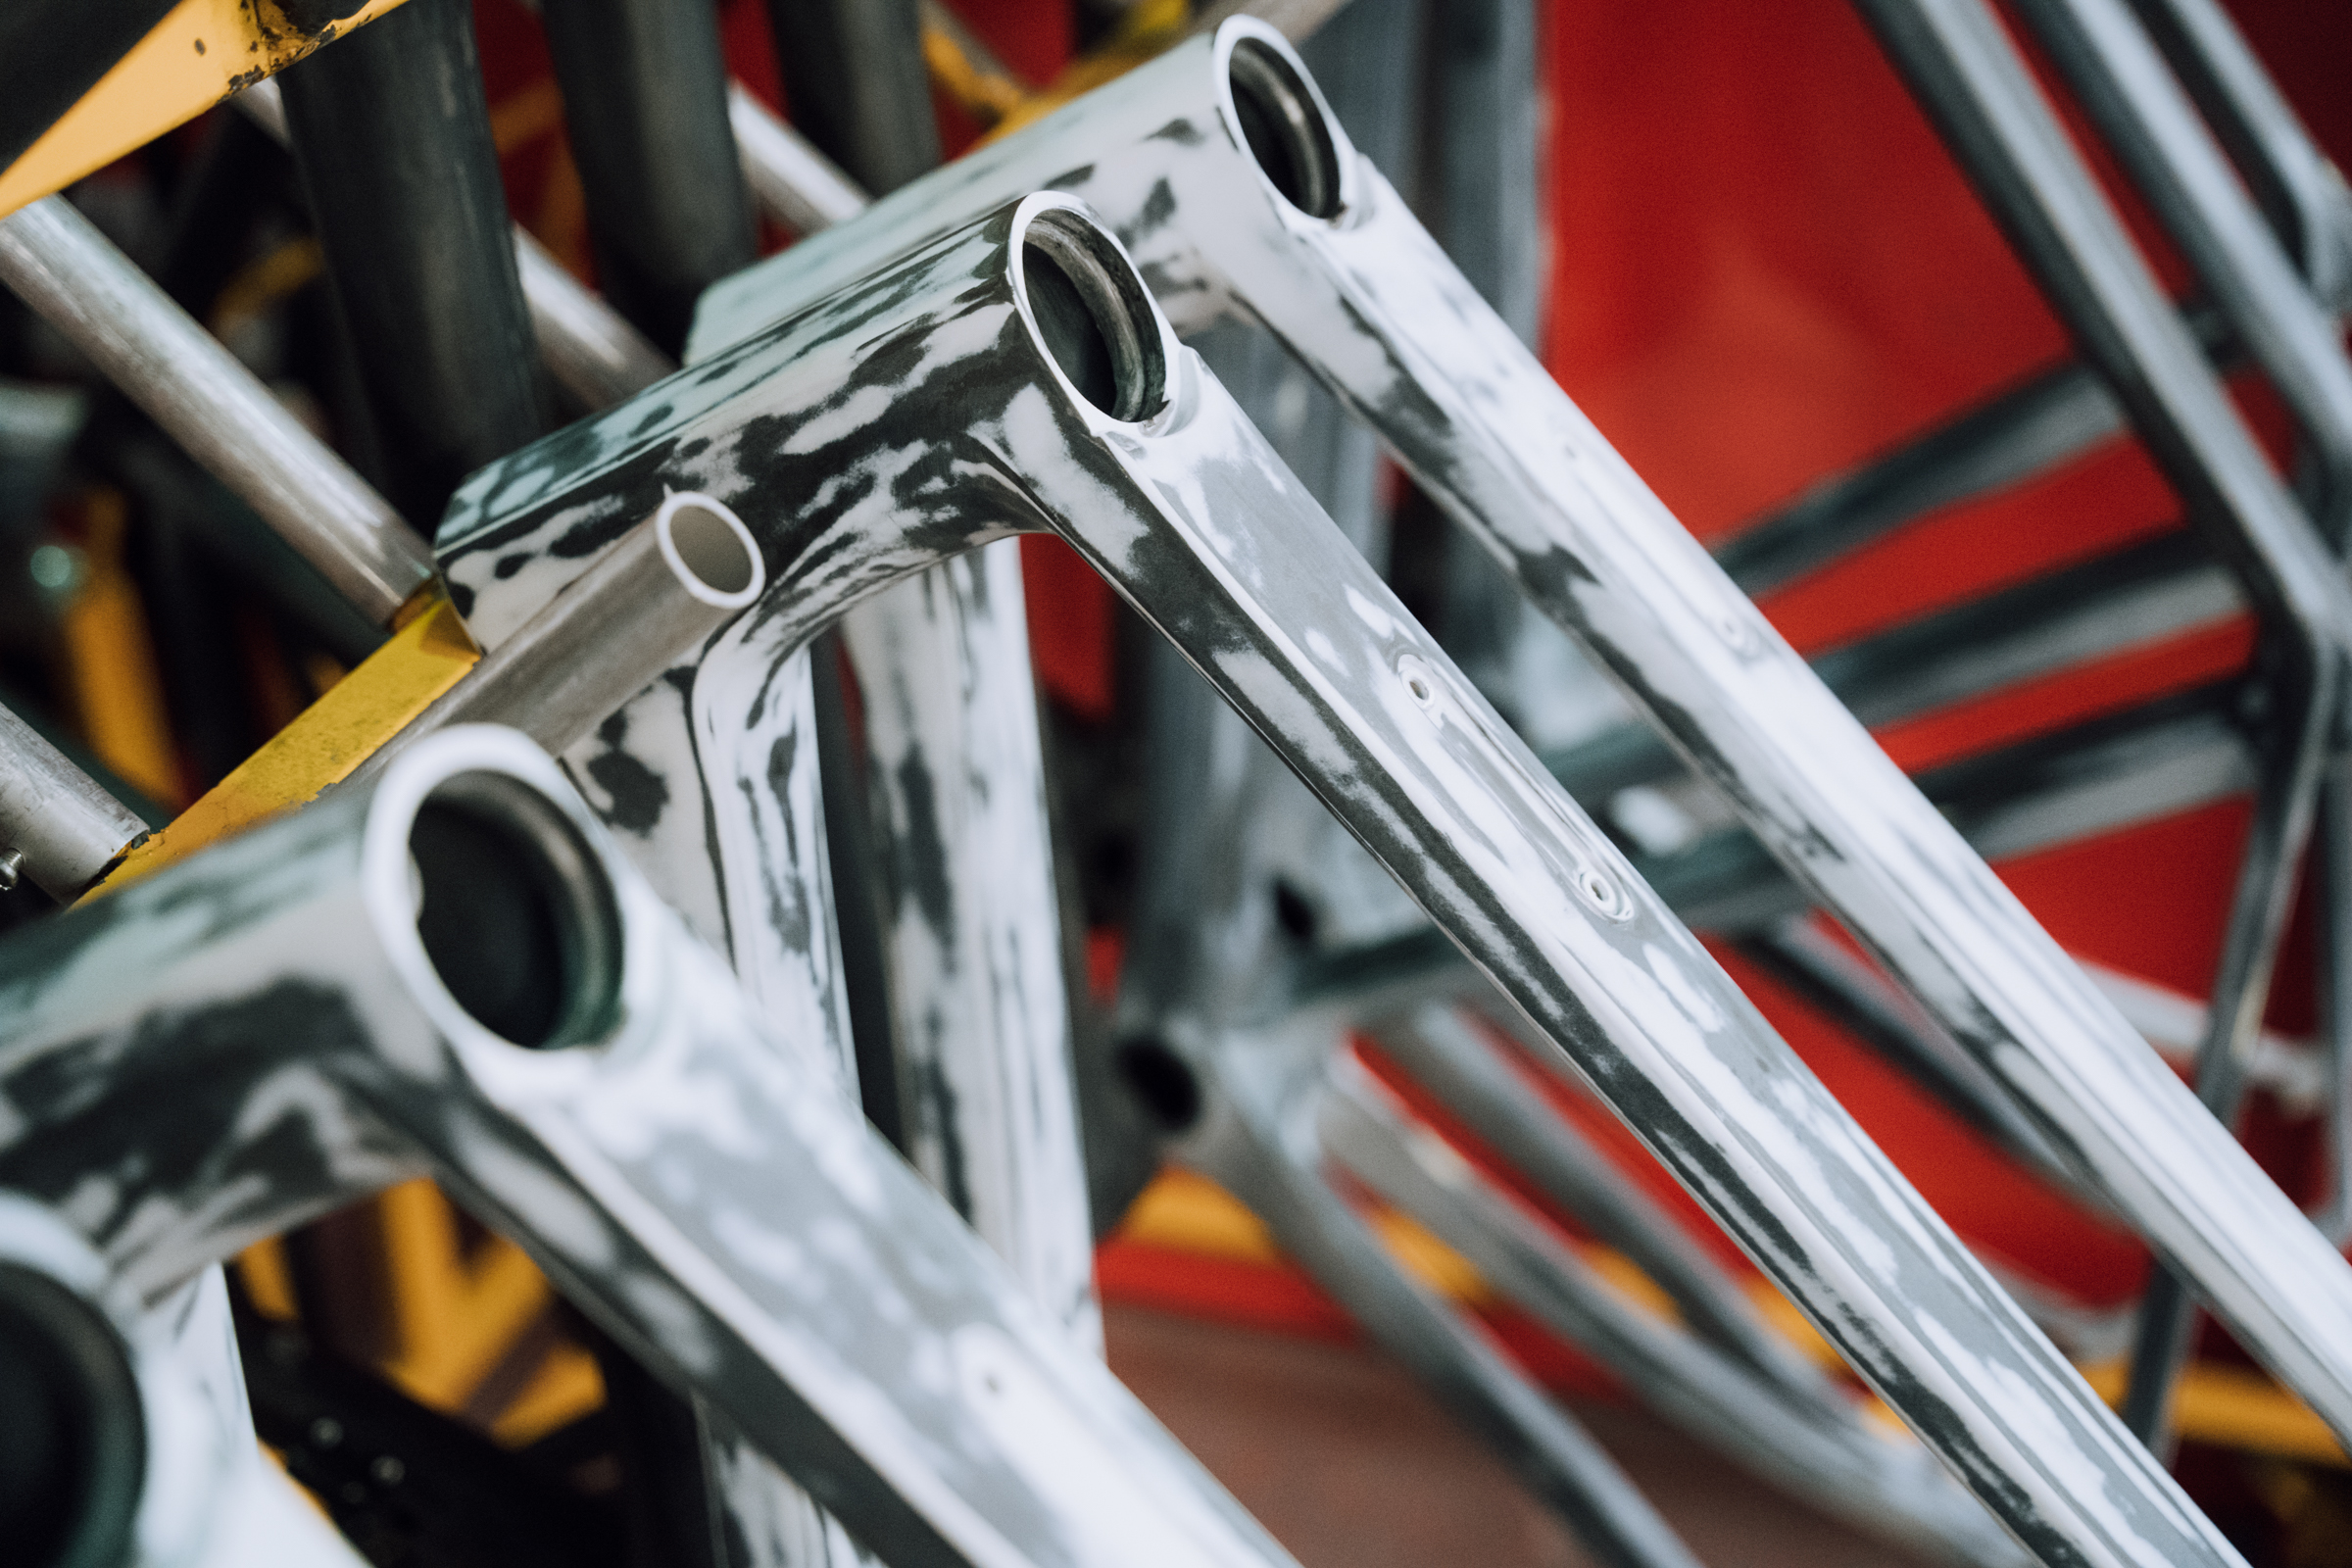
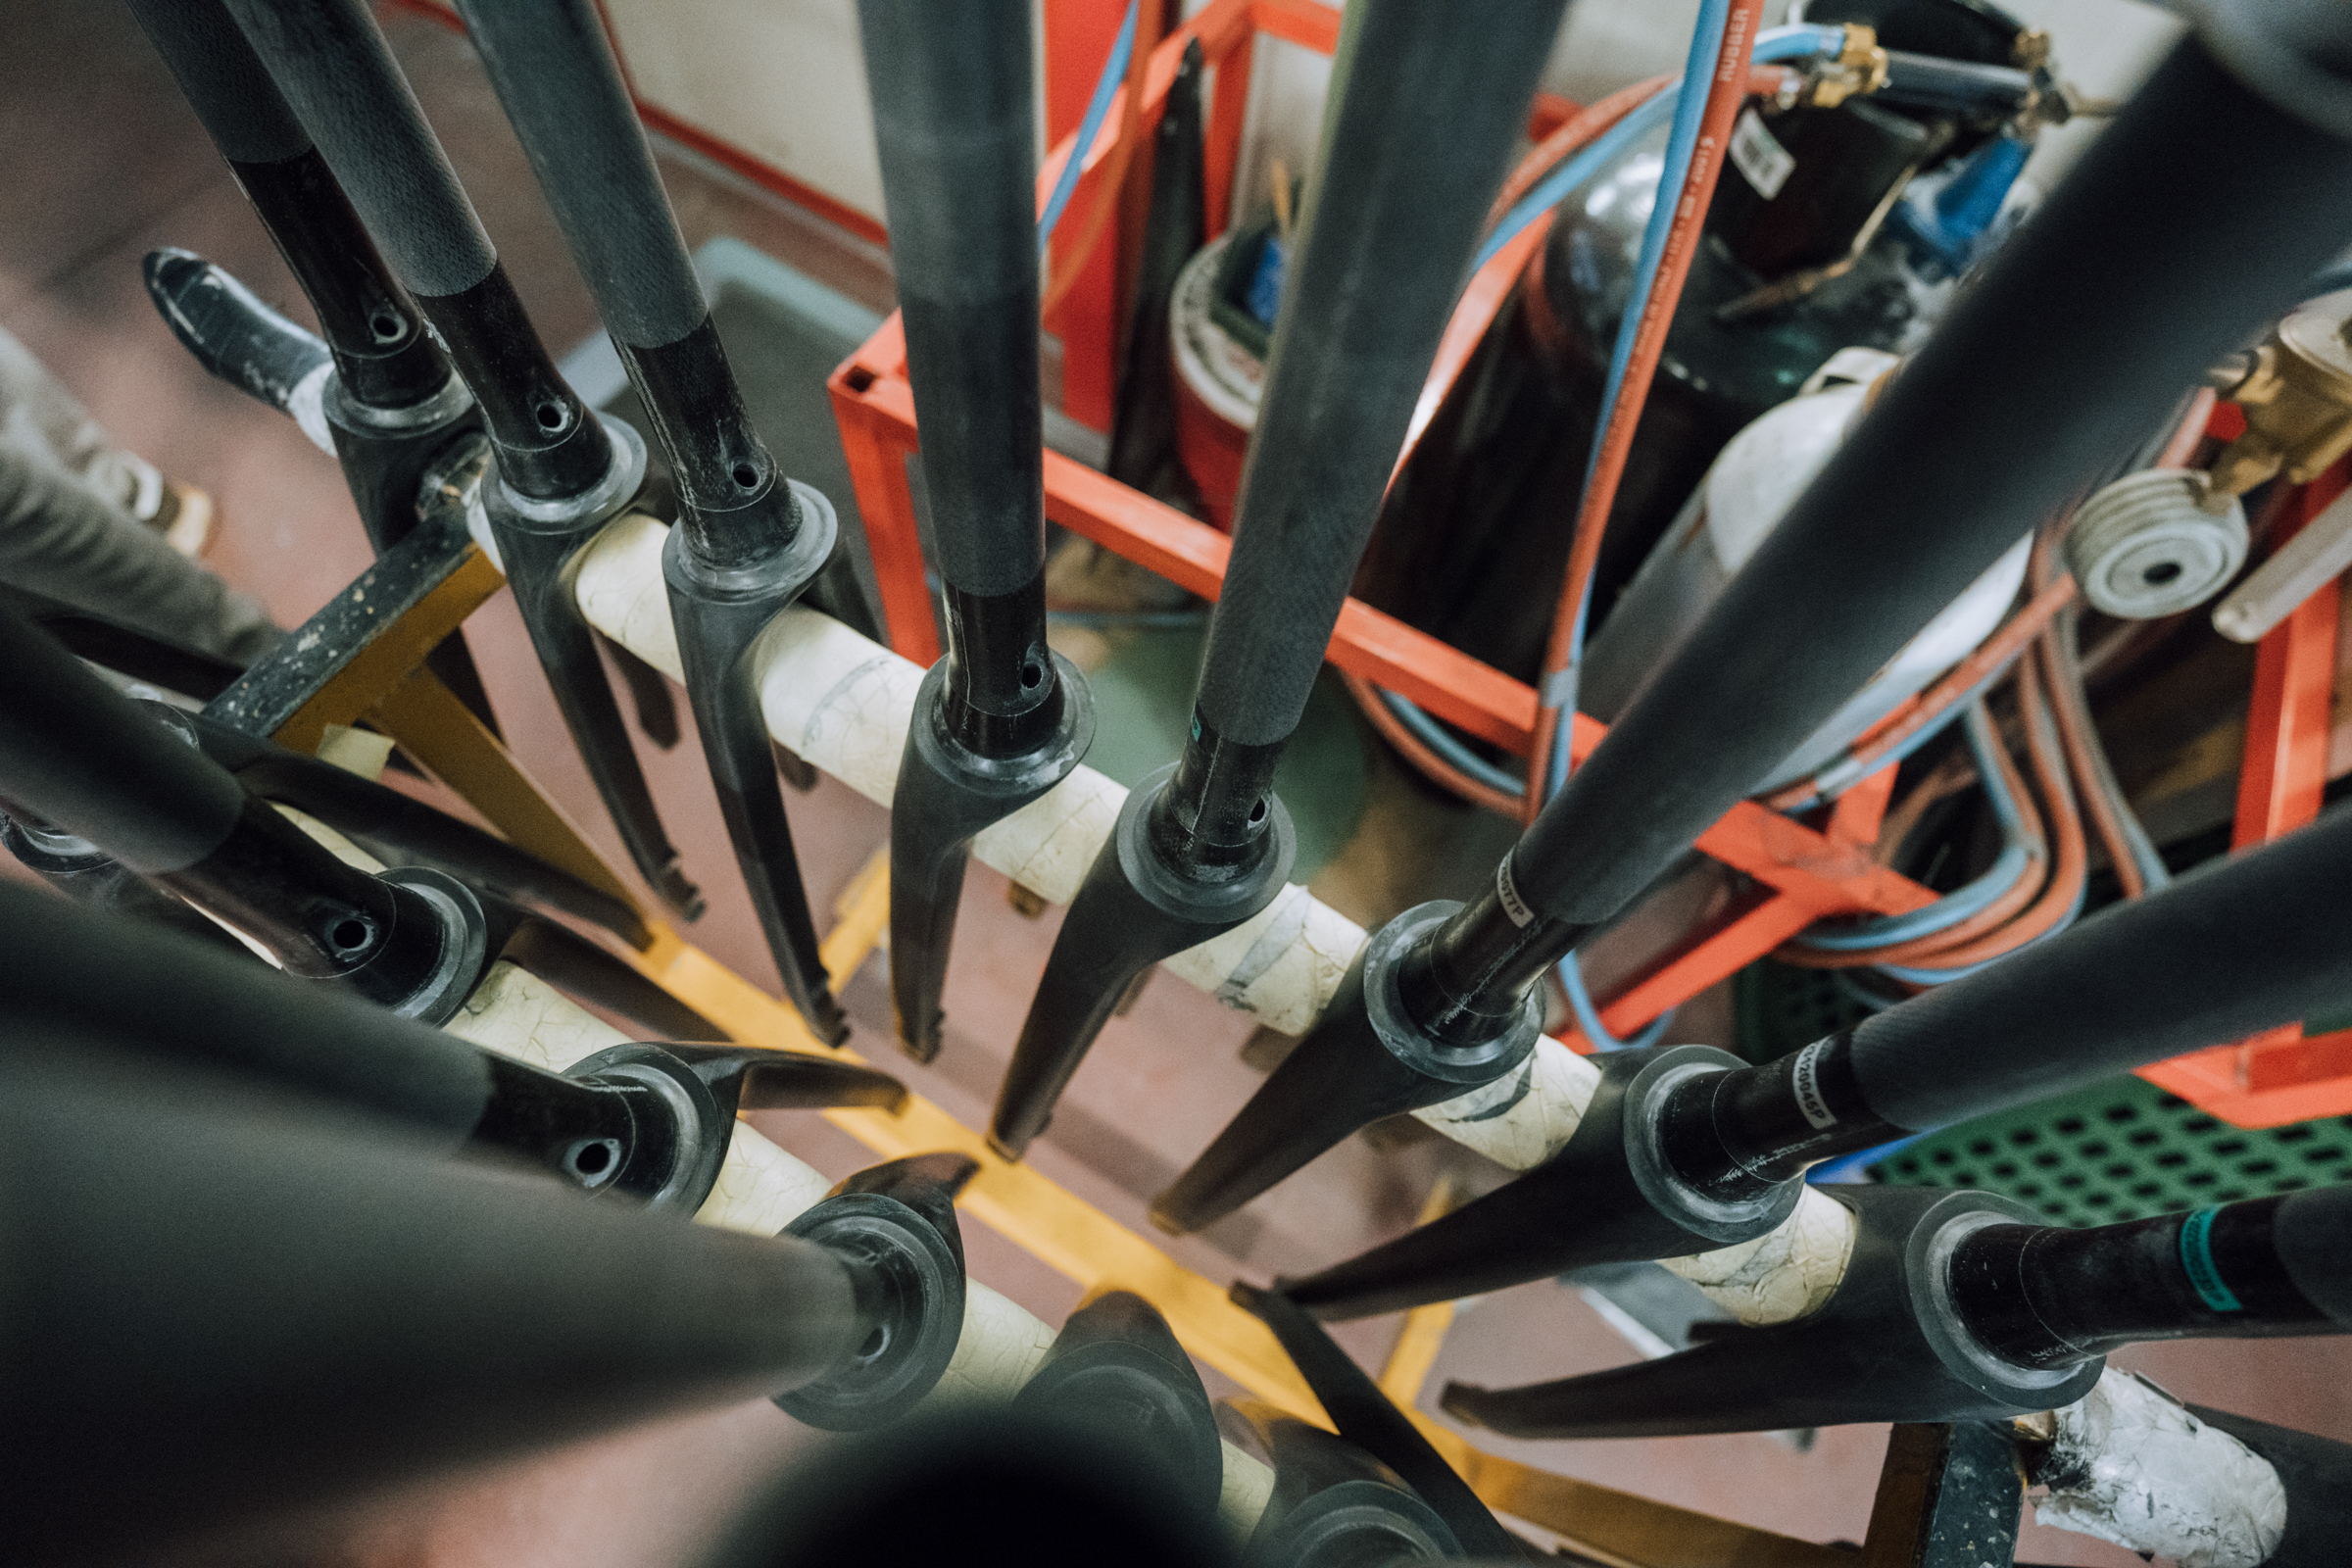
Basso is proud to keep its production close to home Basso
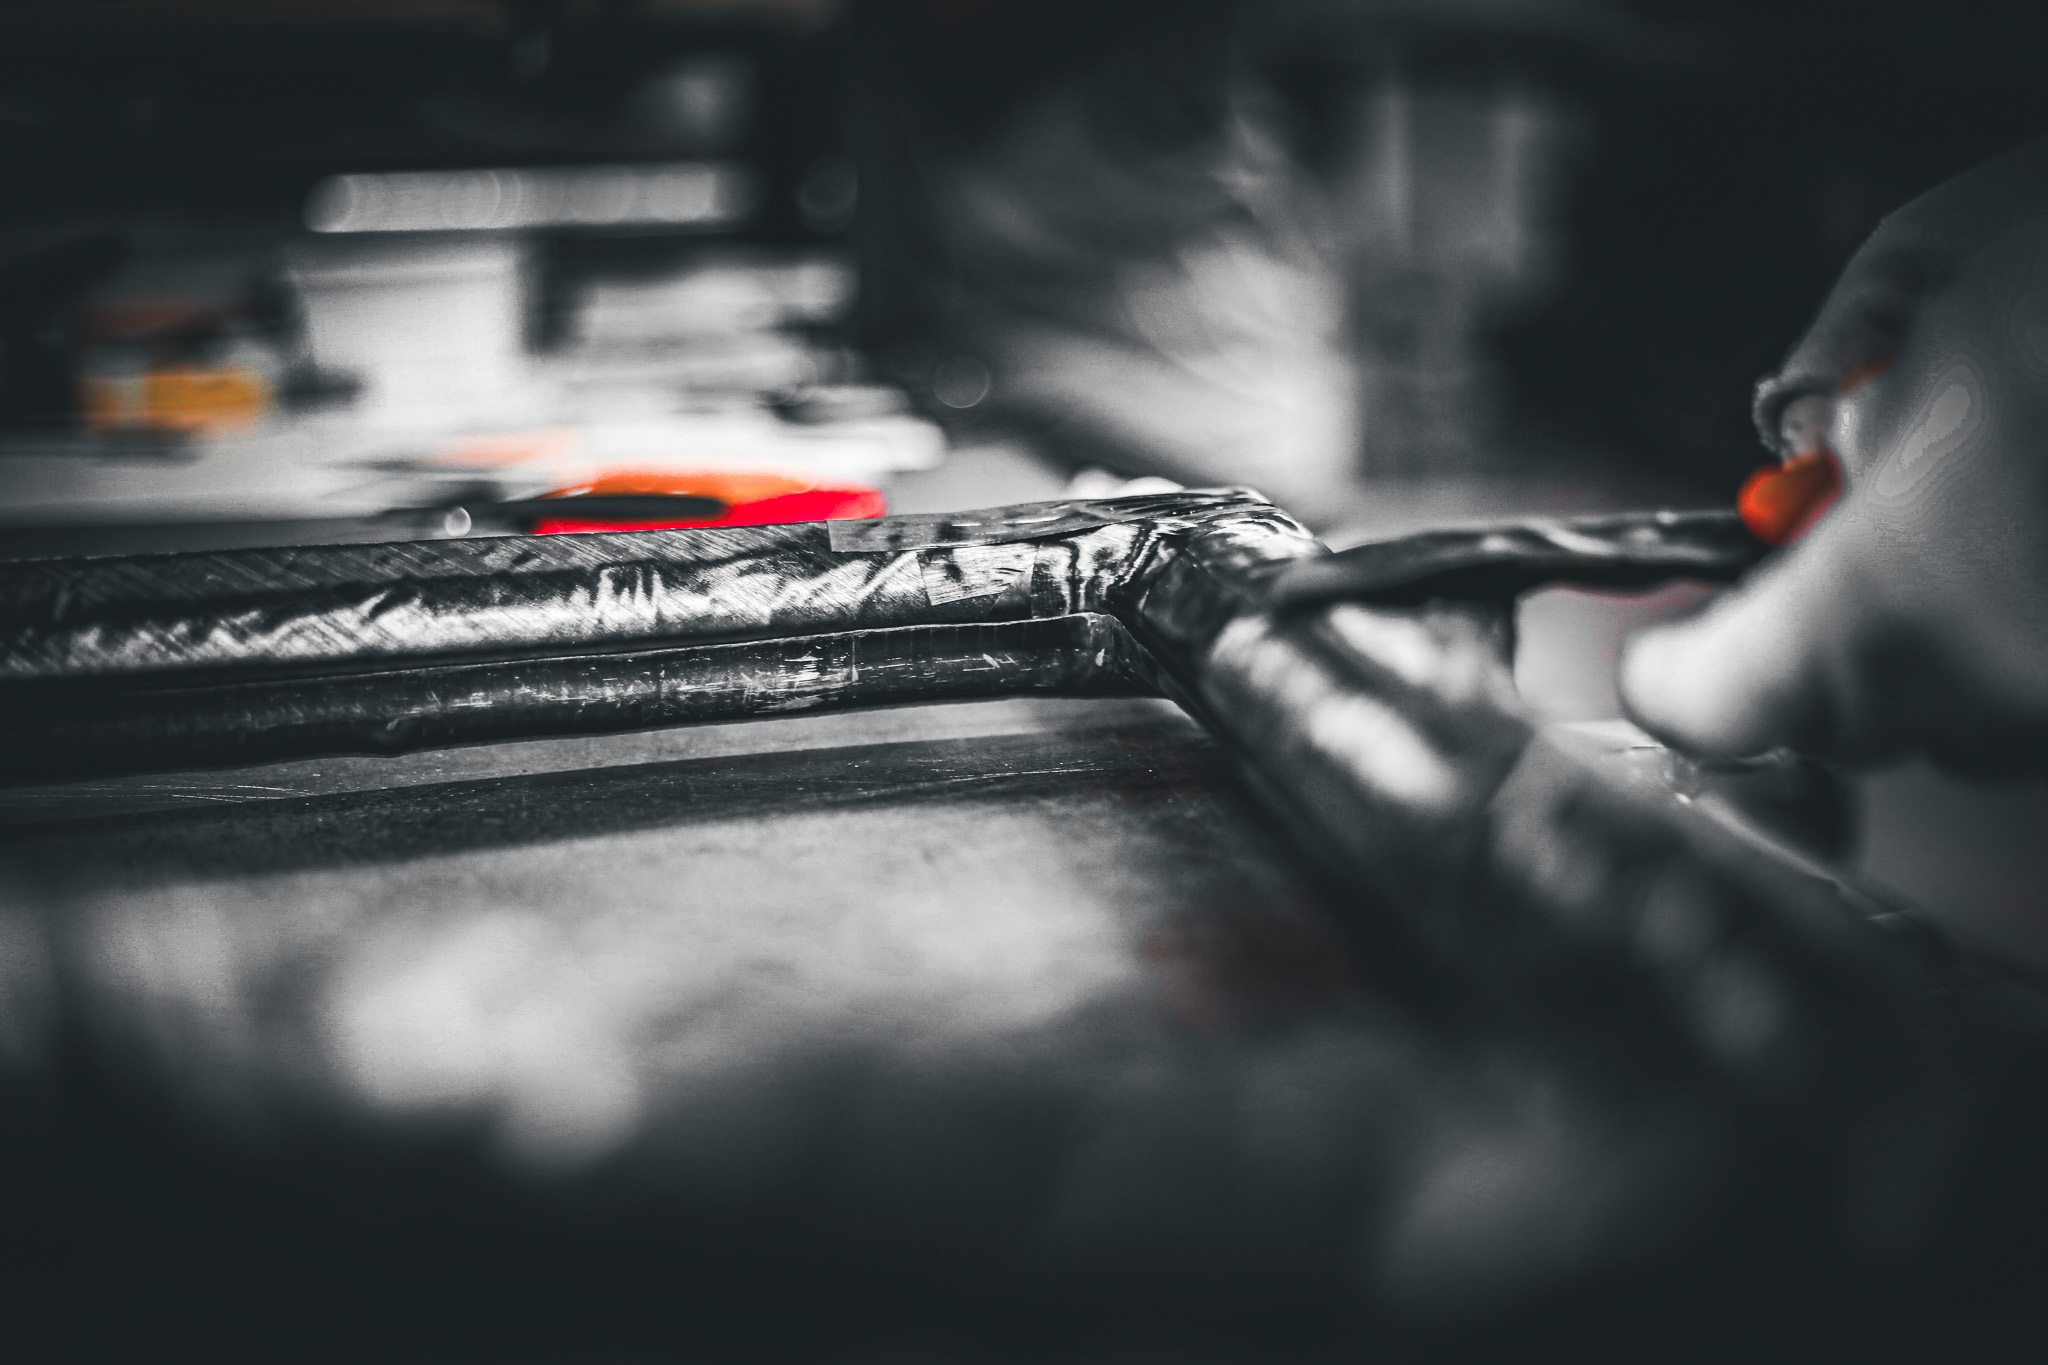
We pull up outside Basso’s head office and step inside. The brand already does everything locally, including carbon-fibre manufacture and painting. But the ultimate goal is to have everything housed under one roof.
To achieve this, Alessandro is in the process of expanding the facility I’m standing in right now.
There’s already a brand-new warehouse, where bikes are assembled on the production line before being carefully boxed up to be shipped all over the world.
“This one’s going to Canada,” Alessandro tells me, inspecting the shipping notes of one package. “And these are going to one of our distributors in Germany,” he says, scanning another.
“Each frame produced here is assigned a unique code,” Alessandro explains. “This allows it to be tracked through every stage of the production and pre-assembly process. It means we have complete traceability from start to finish.”
Past the towering stacks of boxes and rows of mechanics tinkering away lies a cavernous expanse of empty space. This, Alessandro tells me, will soon be home to Basso’s in-house carbon-fibre production unit, testing facility and paint room. “Like I said,” he reiterates, “the entire process from start to finish.”
The patriarch
Basso is still closely involved in the operations of his eponymous brand. Basso
To understand the Basso brothers’ vision for the future of the brand, it first helps to understand their father and company founder, Alcide Basso.
When he founded the brand in 1977, it was just him – a teenager in a garage with some tubes and a few tools. But even then, the focus on quality and attention to detail was there.
I meet Alcide in the Bassano Club House. Like me, he’s fresh from Basso HQ, where he can still be found on an almost daily basis.
When he’s not consulting on matters regarding the business, you might even catch him in the workshop, where he still builds the occasional Basso Viper frame – the only classic steel bicycle left in the company’s range.
Basso remains true to its original Italian manufacturing. Basso
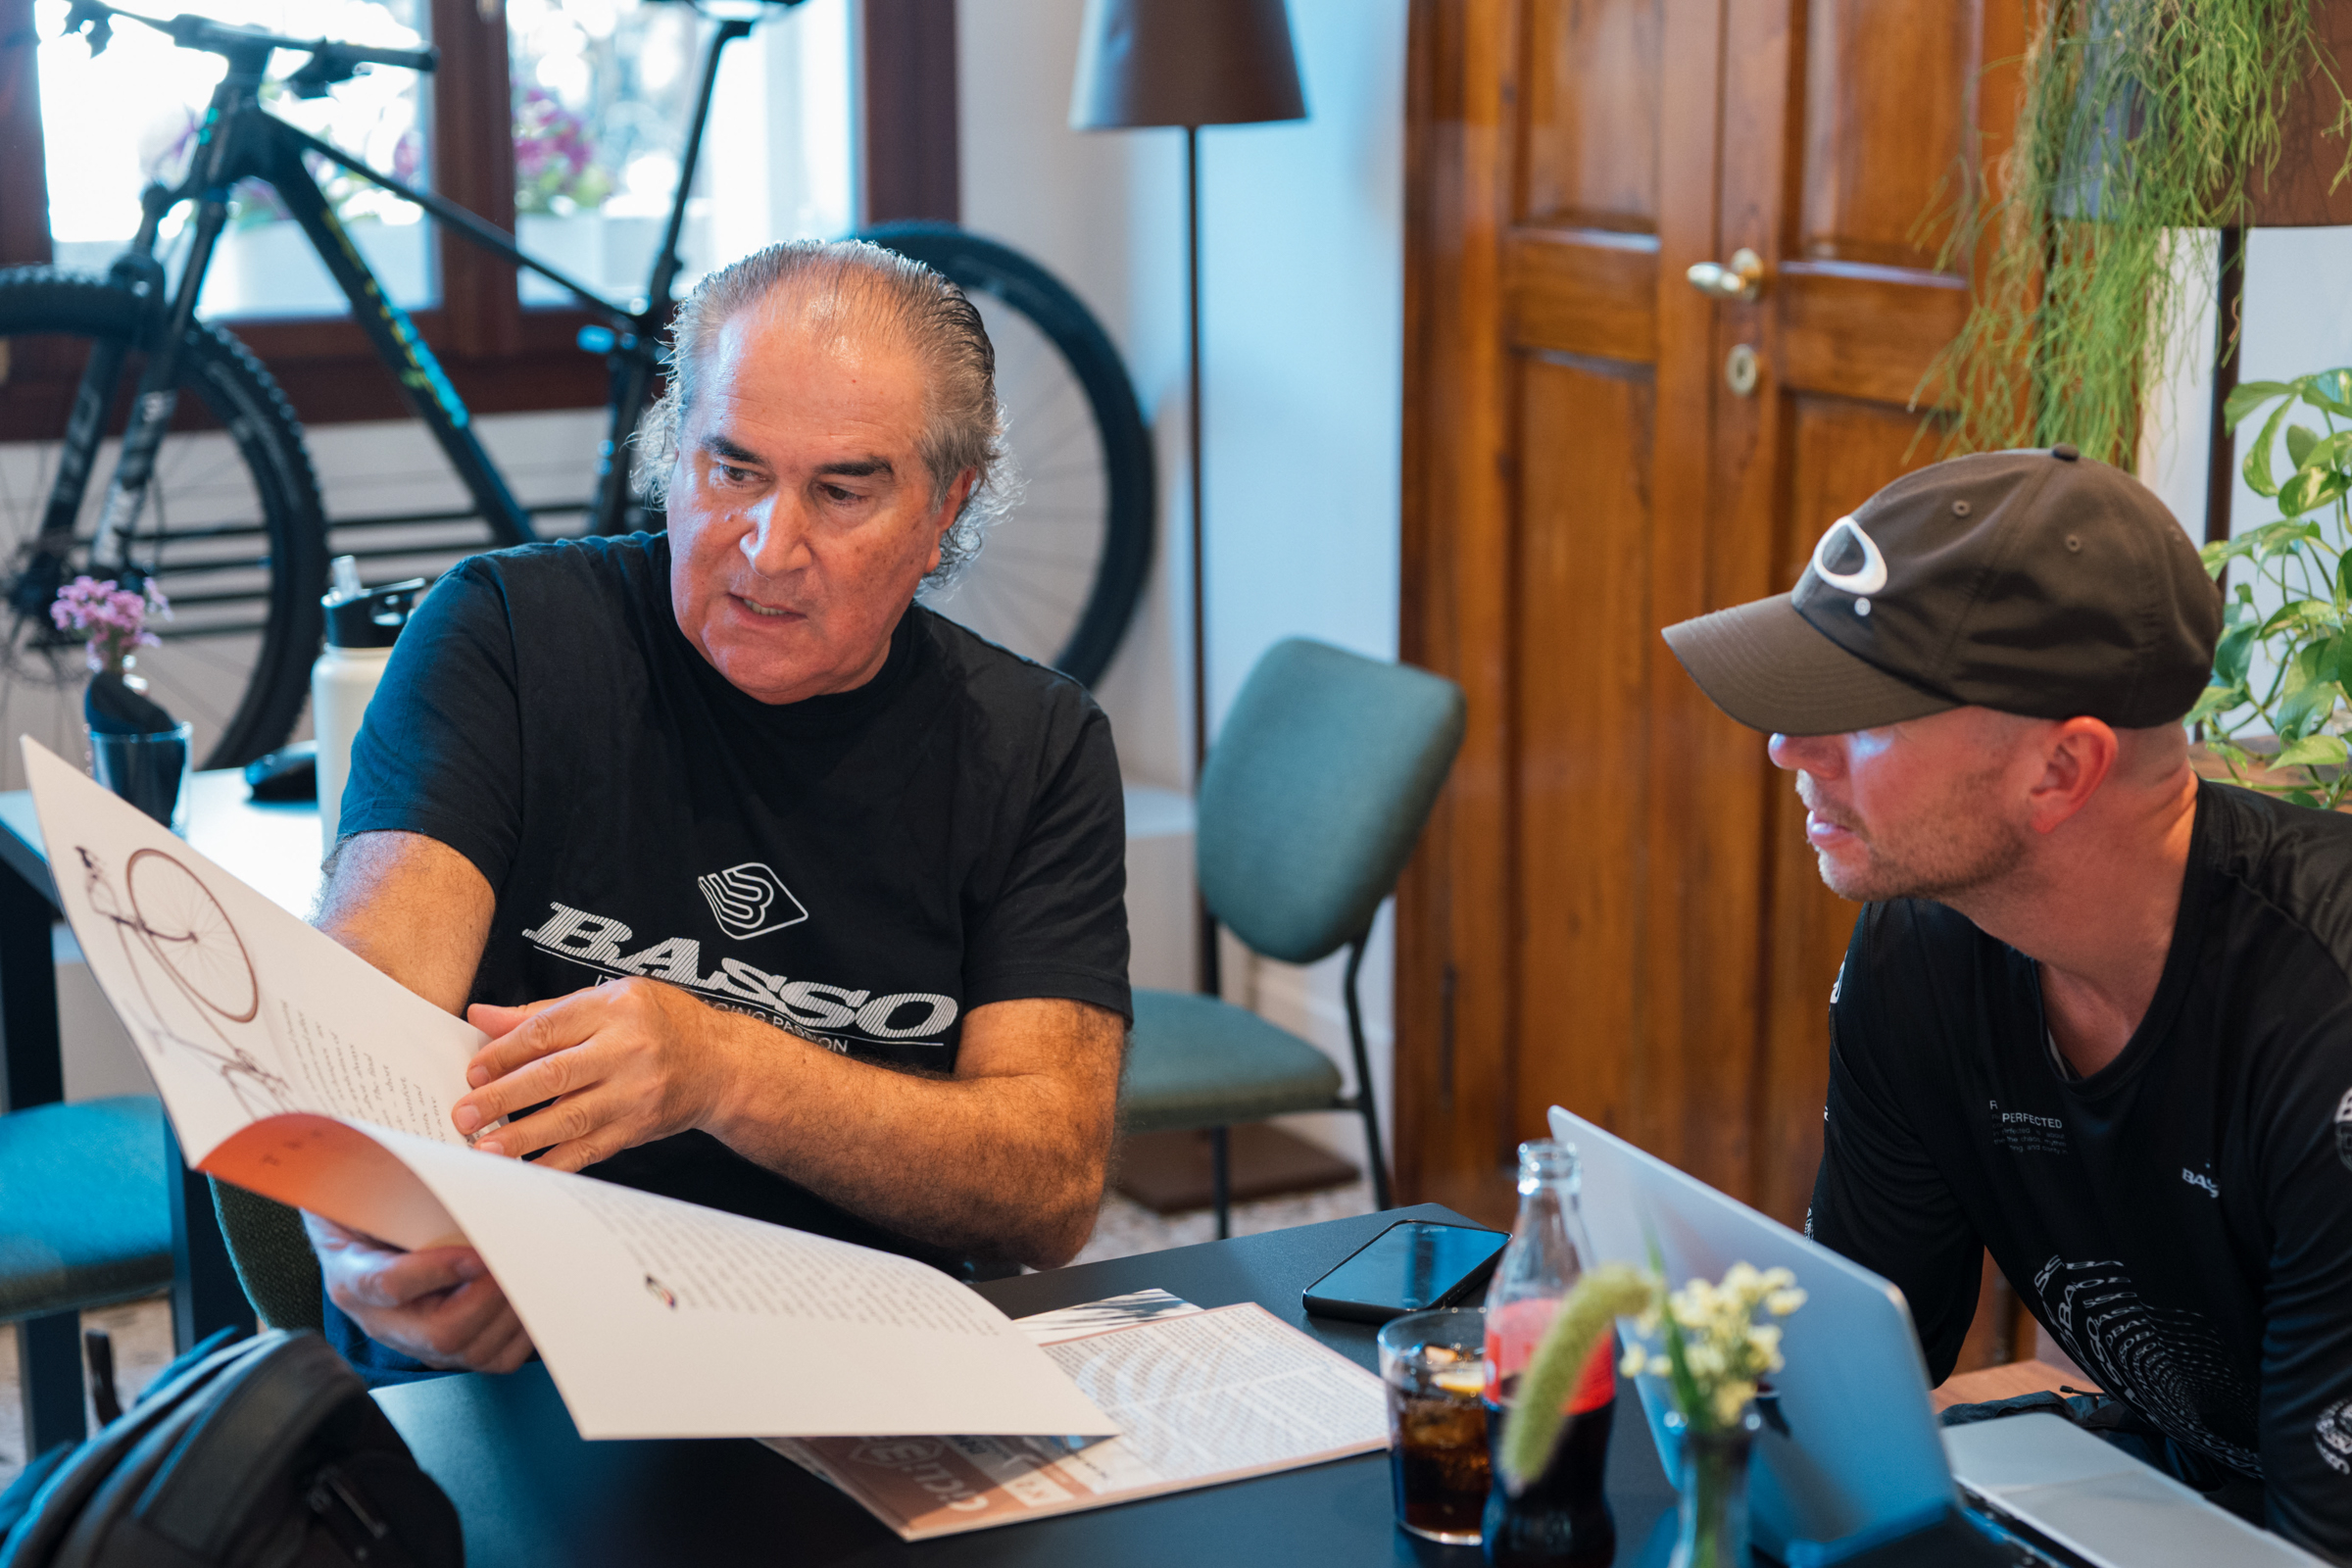
I’ve spent the afternoon carefully preparing a set of questions for Alcide, but within seconds of him pulling up a chair and ordering a drink, it becomes apparent that this is going to be more of a strap-in-for-the-ride type of interview.
“This is the bible!” Alcide proclaims as he proudly flicks through a carefully preserved copy of the first-ever Basso catalogue.
He stops at a page filled with complex diagrams detailing his own personal research into how different tube thicknesses react to varying levels of heat.
“I wasn’t an engineer. I learned by making mistakes. I studied the materials, the welding, the microstructure. I had to understand what happened when you changed the thickness or temperature. That was the foundation of Basso – that’s what set us apart from the other Italian brands.”
Bicycles are in Alcide’s blood. His brother, Marino, was a world champion road racer, and he remembers growing up surrounded by cycling paraphernalia.
“I liked working with the mechanical side of things, so when I was 18, I began welding frames.”
A meeting with Harry Hall changed the trajectory of the brand for good. Basso
Business was slow at first, but Alcide remembers the sale that started it all in 1978 – Harry Hall Cycles in Manchester.
Alcide met the man himself at Milano Bike Show, and before he knew what was happening, Hall had taken it upon himself to visit Alcide’s garage in Bassano and watch a Basso frame being built. A week later, Alcide received an order for 35 bicycles.
“It’s just me! I can’t possibly make that many bicycles! But he told me he would wait for them, and he did.”
A distribution agreement with two key German suppliers kicked off the brand’s growth – and the rest, as they say, is history. Basso
That order helped take Basso to the next level, but it was when Alcide travelled to Germany to visit his other brother at university that things really kicked off.
He knew there were plenty of high-end automotive marques headquartered nearby in Stuttgart. If German consumers appreciated a well-engineered car, perhaps they would also value a well-engineered bicycle.
So, Alcide embarked on a full-blown German sales mission armed with his catalogue and a frame, determined to speak with anyone and everyone who might be interested.
Eventually, it paid off when two colossal German sporting goods suppliers, Brügelmann and Stier, took an interest.
“We expanded operations, and after eight years, we were selling 5,000 frames a year in the UK and Germany alone,” Alcide says.
Core values continue
Basso remains family owned, and is proud of its roots in its hometown. Basso
No matter how big Basso gets, Alcide’s core values remain central. “Basso is a unique company,” he says. “Almost 50 years as a family business. Many other Italian companies have stopped or been sold to investors – we are still here.
“Now it is the second generation – my sons and my daughter – but the most important thing we transfer is attention to detail. Growth is one thing, but controlling quality alongside it is harder. We don’t just want to make more, more, more. We want to make better. That is why we control every detail ourselves.”
‘You can’t ride fast if you’re not comfortable’
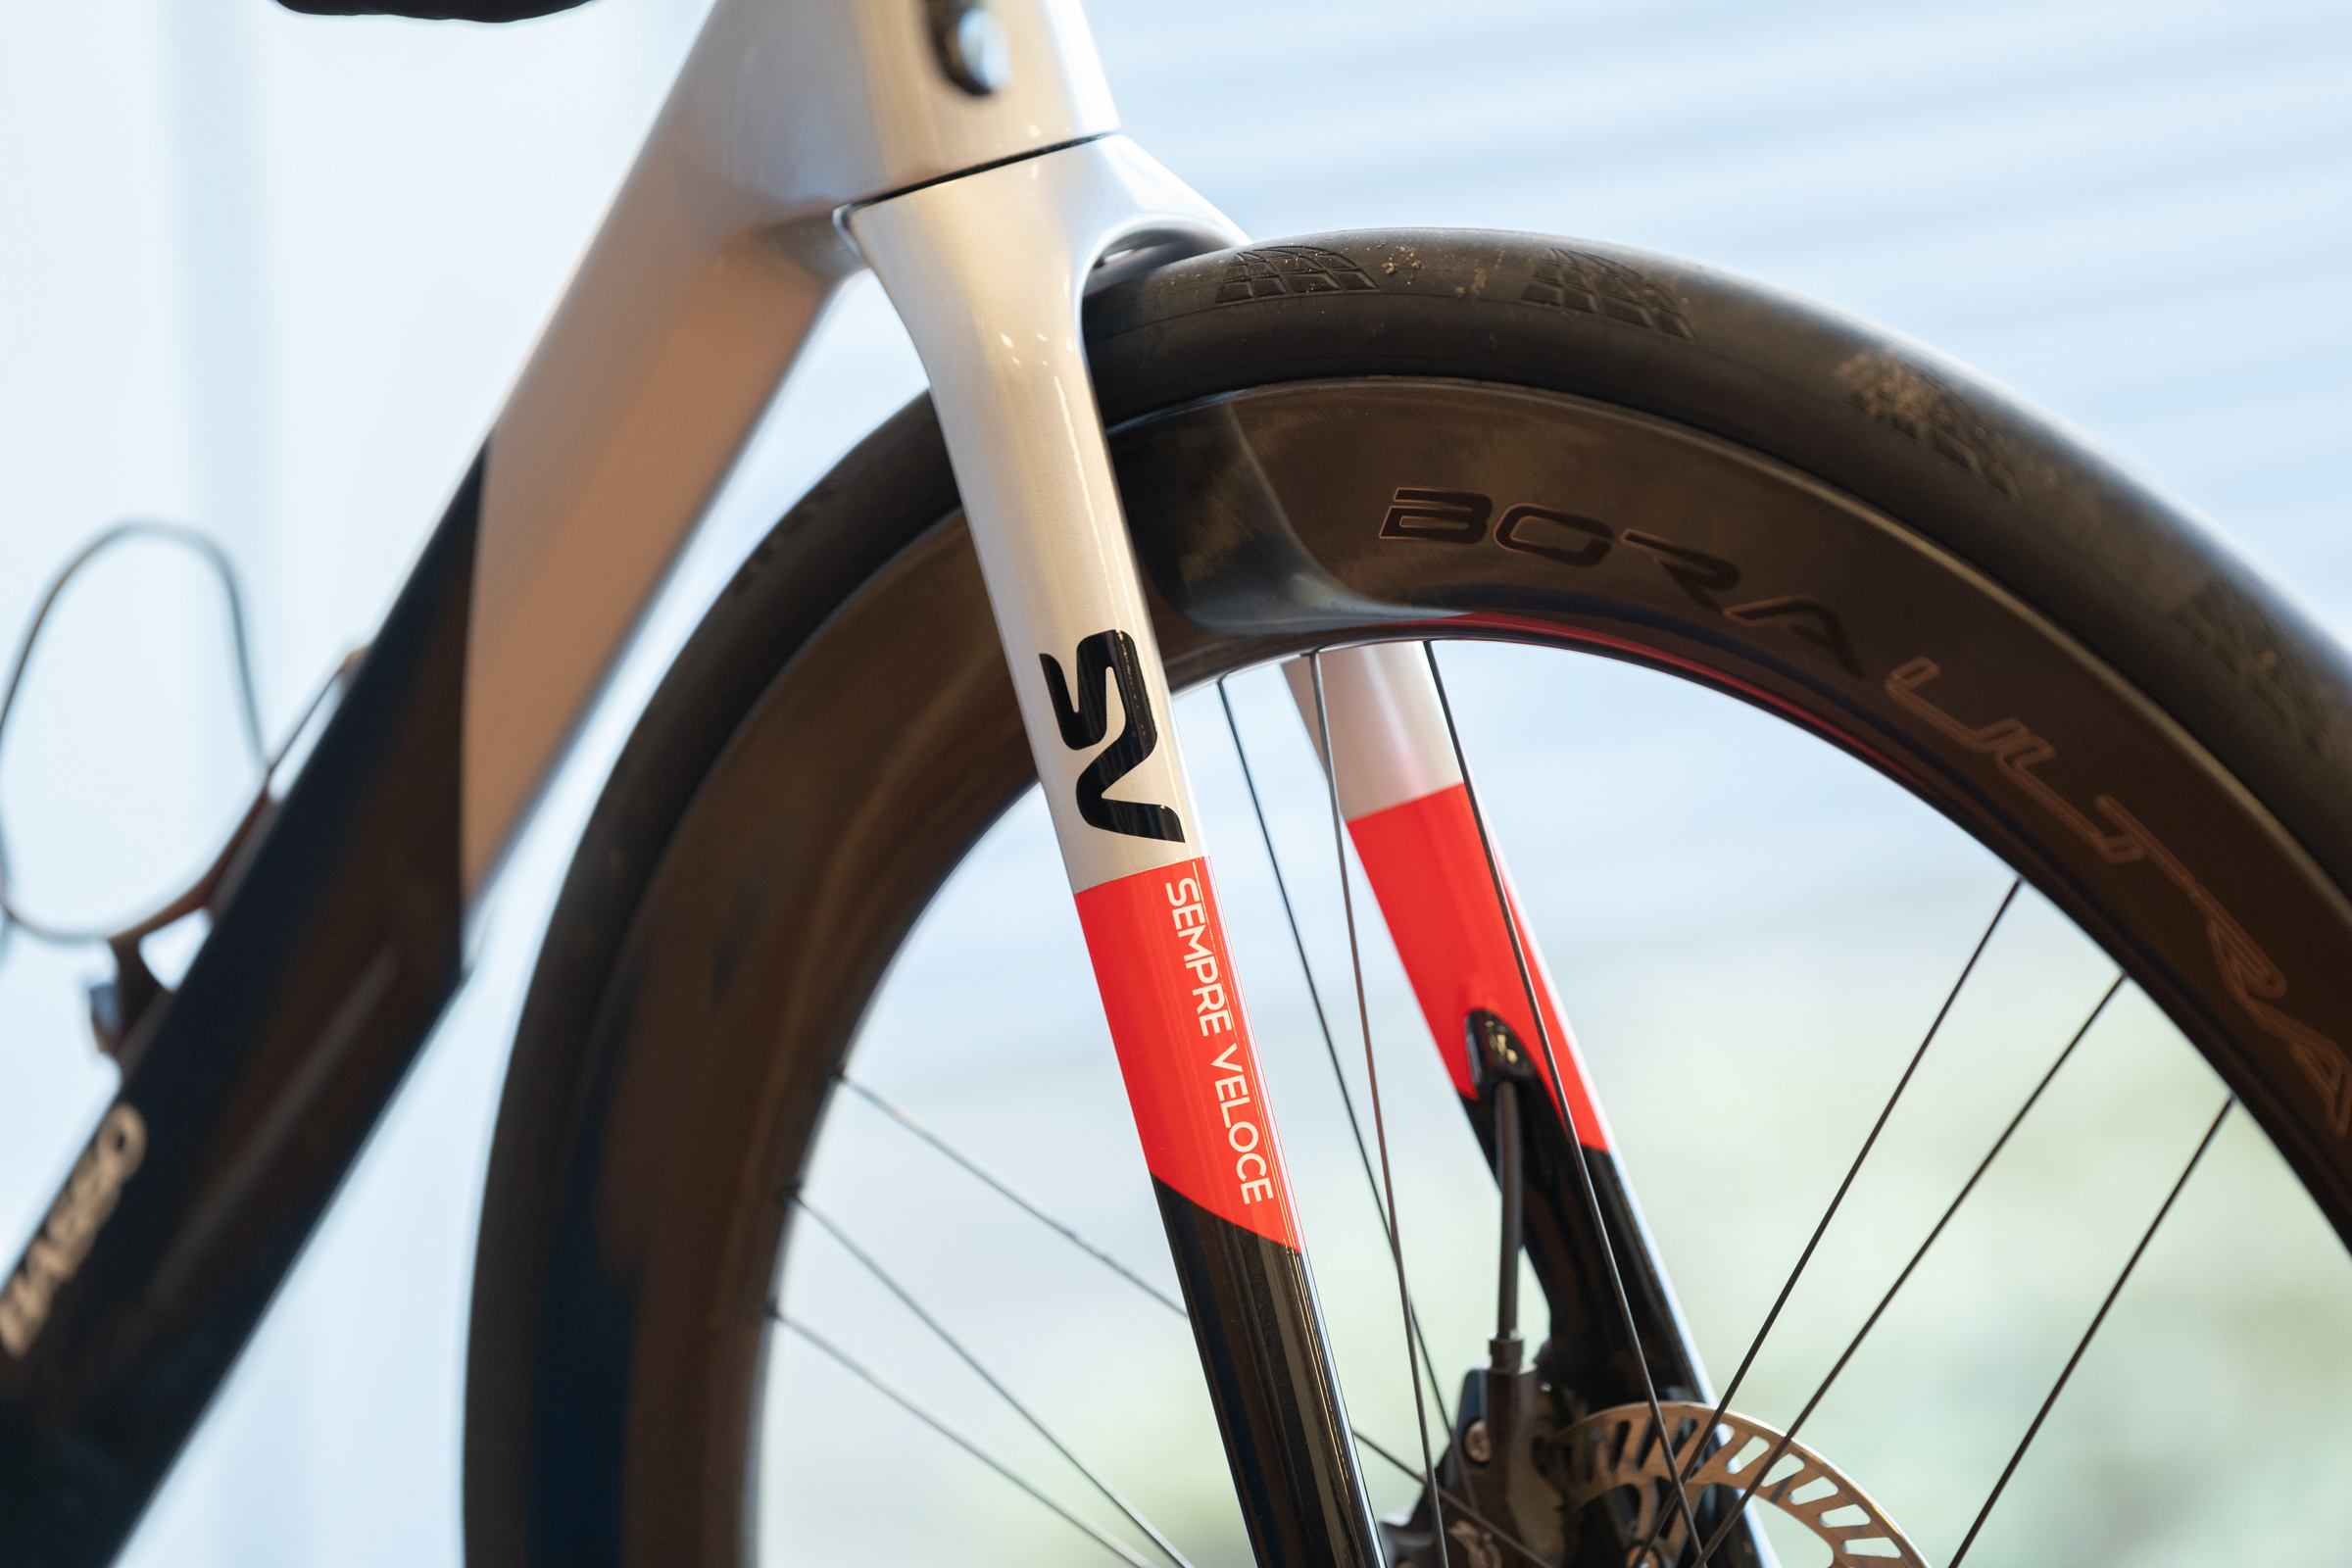
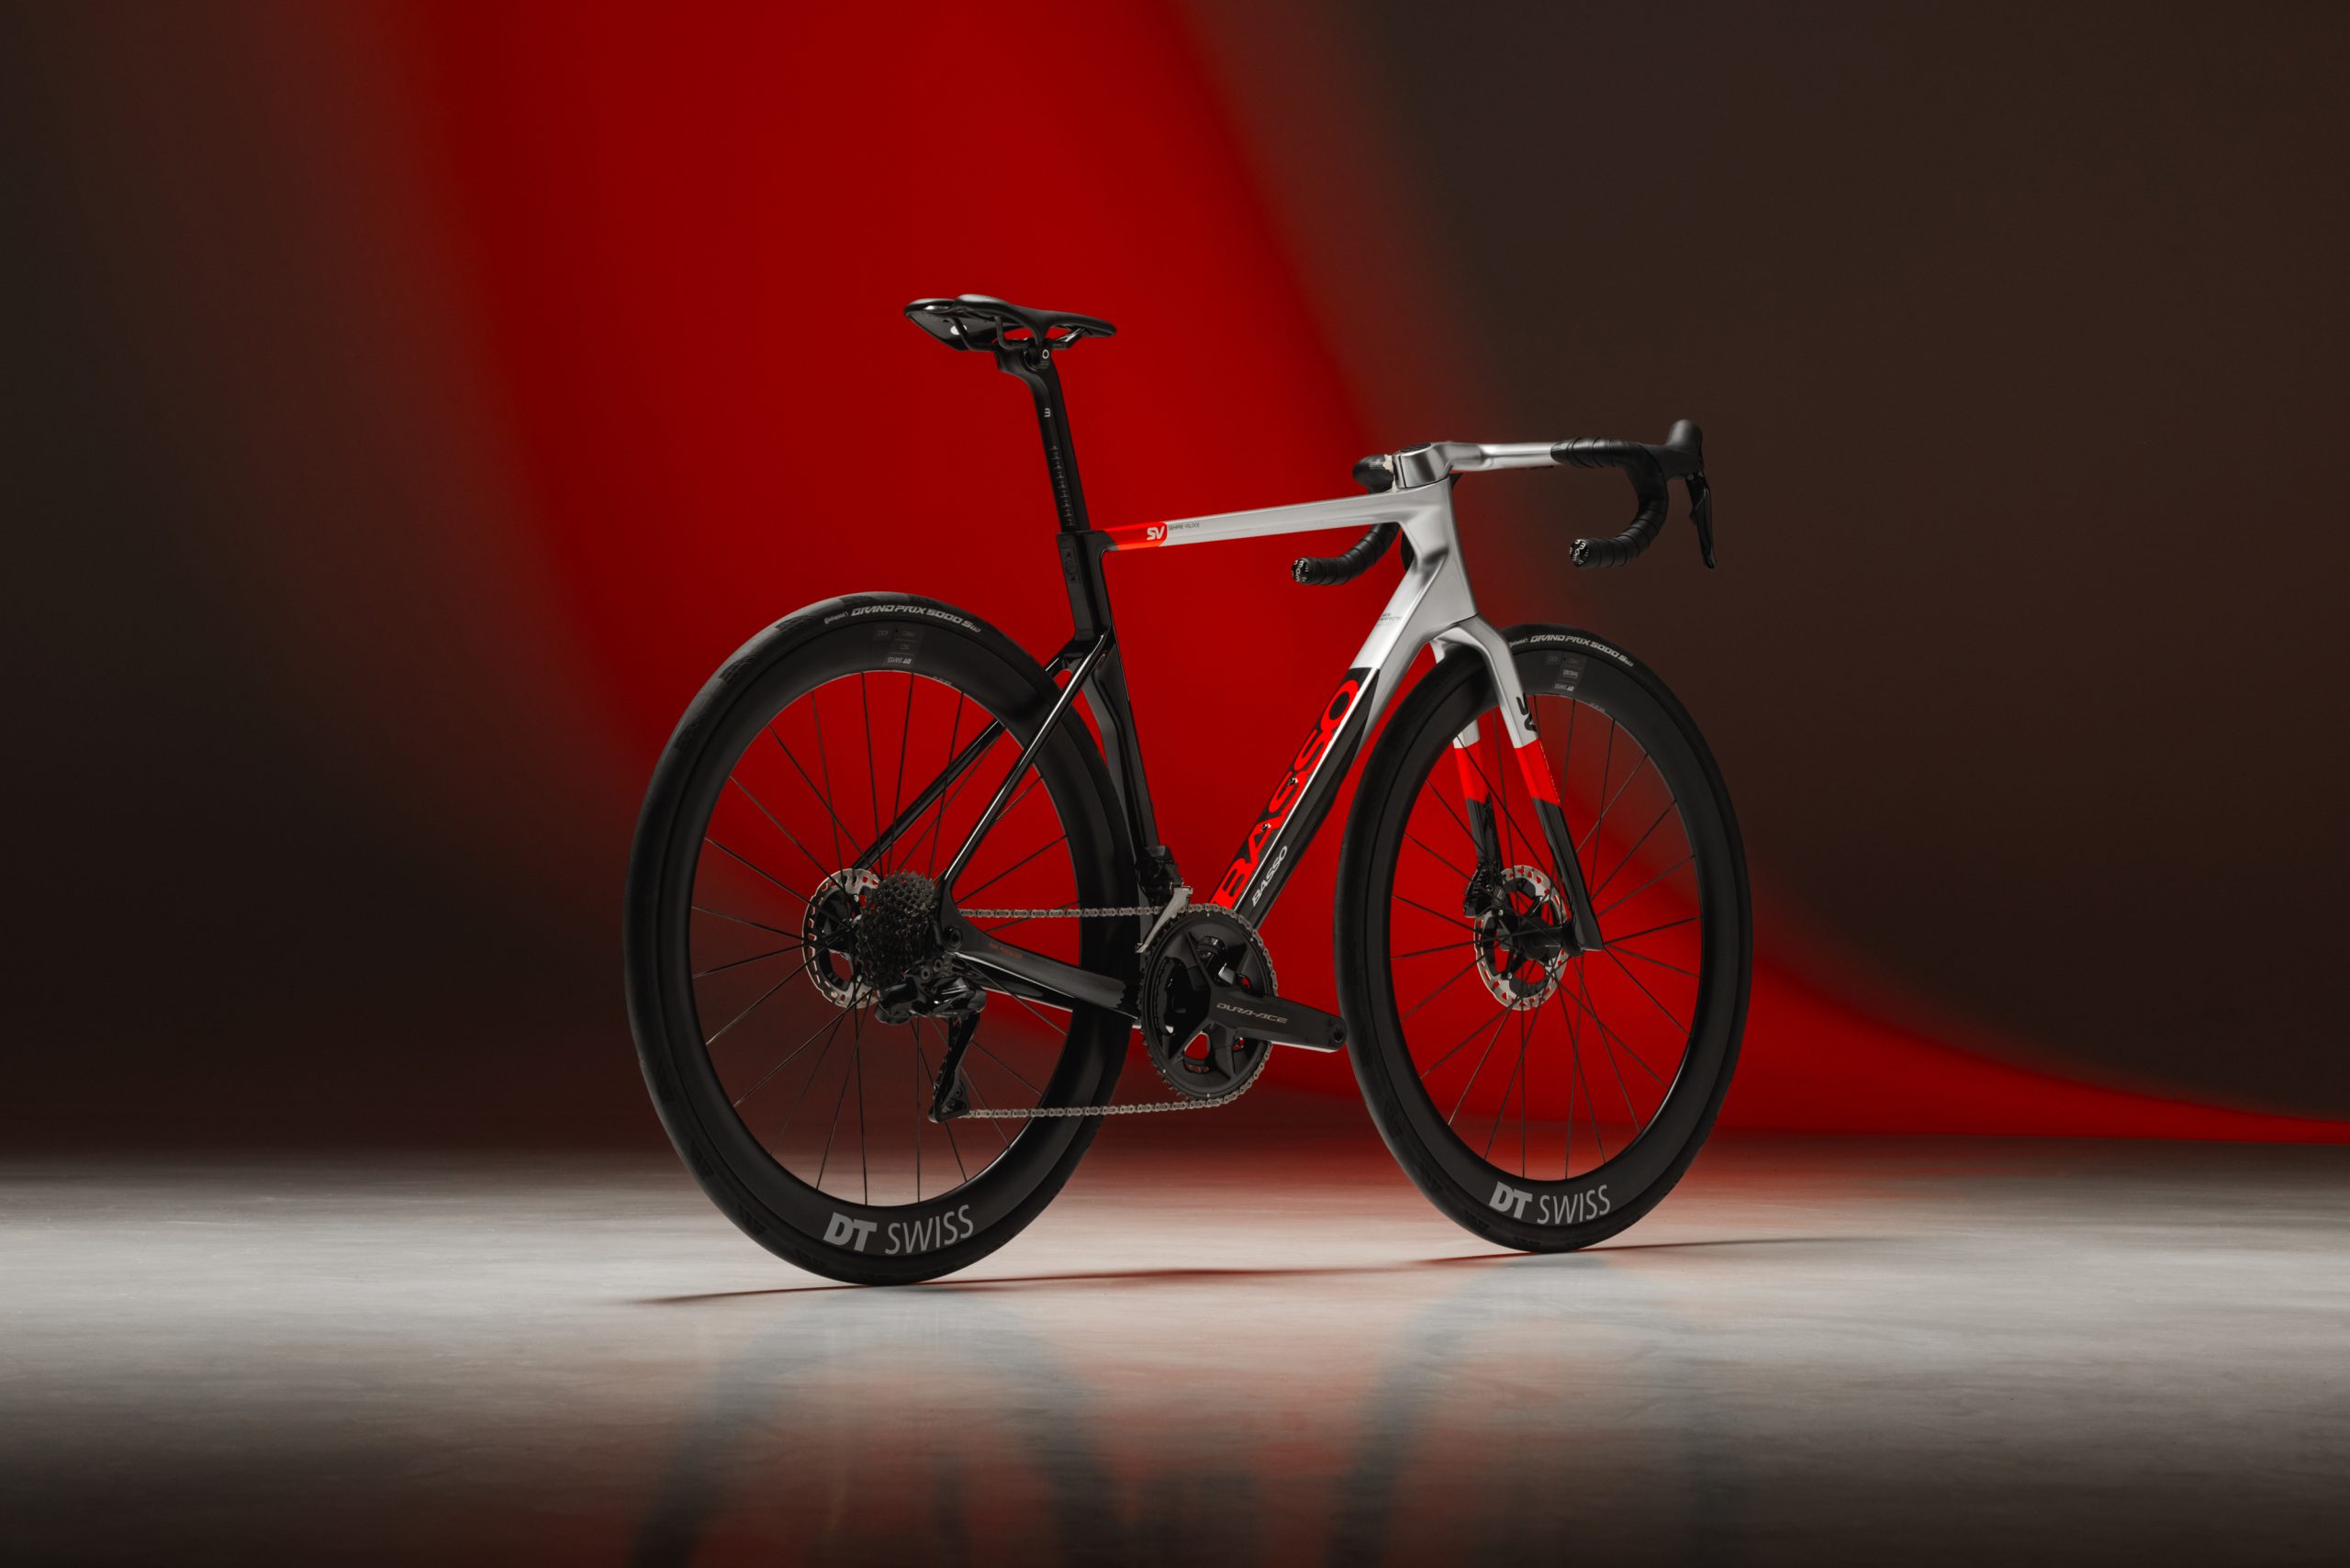
The SV is Basso’s newest road bike. Basso
Basso has evolved with the times, without losing sight of its founding principles. The same is true of its bikes.
The brand’s latest creation, the SV, is a prime example, fusing cutting-edge technology with a methodical approach to geometry, speed and comfort.
After wrapping up with Alcide in the Club House, I’ve got about five minutes to throw some kit on and take one out for an evening spin with his other son, Leonardo.
The SV is a stunning bike – and comfortable. Basso
As we cruise out of Bassano and into the rolling hills to the west, Leonardo gives me the lowdown on the bike I’m riding.
“With high-end road bikes, you usually had two options – a bike designed for the pros, or an all-road bike,” he explains. “The middle ground wasn’t really developed. That’s where the SV comes in.
“We tried to understand who is buying these very expensive pro-level bikes. Naturally, most are not professional racers. So, the focus with Sempre Veloce was simple – you can’t ride fast if you’re not comfortable on the bike. We call the concept ‘performance comfort.’”
This is the first Basso road bike with a significantly sloping top tube.
The stack is higher, the reach a little shorter, the tyre clearance a generous 35mm, and the wheelbase slightly longer, which gives more stability without losing responsiveness.
As someone who rides a slammed road bike at home, my spine is grateful for the more practical geometry, but aesthetically, it still looks like a real race weapon.
Angular lines, raw-carbon finish, narrow bars – proof that ‘comfortable’ isn’t always a synonym for ‘boring’.
Community matters
The Bassano Club House is the heart of the brand. Basso
As we coast back into town, I can see the famous Bassano del Grappa nightlife beginning to bloom. Under the warm glow of streetlights, Bassano Club House and its neighbouring bars are all bustling with activity. We grab the two remaining seats outside and order ourselves a well-earned beer.
We’re not the only people who’ve popped in for a post-ride pint. The tables out front are occupied in equal parts by casual diners and sweat-streaked cyclists, helmet straps dangling freely. Inside, cleats clatter across tiled floors, and various Basso bikes hang resplendent on the walls.
“People can come, they can stay here, they can hire a bike,” Leonardo says. “We also have a workshop, a kitchen and a retail space too.”
It’s a living extension of the Basso brand and a place for Bassano’s cycling community to come together.
From Alcide’s garage in 1977 to the bustling Bassano Club House today, Basso has always been about more than bicycles.
The frames may be lighter, faster and more advanced, but the spirit is unchanged: a family business rooted in its hometown, fuelled by community, and driven forward by the firm belief that the best bikes are built close to home.
Israel–Premier Tech has confirmed it will undergo a full rebrand, changing its name and its national identity.
“With steadfast commitment to our riders, staff, and valued partners, the decision has been made to rename and rebrand the team, moving away from its current Israeli identity,” the team said in a statement released on Monday.
The team’s co-founder, Sylvan Adams, will also step back from his day-to-day involvement and will no longer speak on behalf of the team.
The decision follows a period of mounting pressure on the team. Israel–Premier Tech was the target of massive protests throughout this year’s Vuelta a España, which saw several stages cut short, and organisers of the protests described the team as engaging in “sportswashing”.
Organisers of the Giro dell’Emilia pulled Israel–Premier Tech from the race over the weekend and the team then abandoned its plans to race the Italian classics this week due to safety concerns.
Factor bikes also threatened to withdraw support from the team, with the brand’s founder Rob Gitelis stating: “Without a name change, without a flag change, we won’t continue.”
The team’s title sponsor, Premier Tech, also demanded the team drop ‘Israel’ from its name and adopt a new identity and brand image.
Less than a week after Strava’s lawsuit against Garmin was revealed, it has come to light that Suunto is also suing the company.
Filed in a Texas court on 22 September, Suunto’s case accuses Garmin of infringing five patents related to measuring a user’s respiratory rate, antenna design, watch casing and tracking golf shots.
The complaint alleges that many Garmin smartwatches incorporate the patented technologies without permission, including the Marq, Fenix, Epix, Instinct, Venu and Forerunner models.
Suunto is seeking damages and potentially a permanent injunction to block sales of the Garmin devices that use the features.
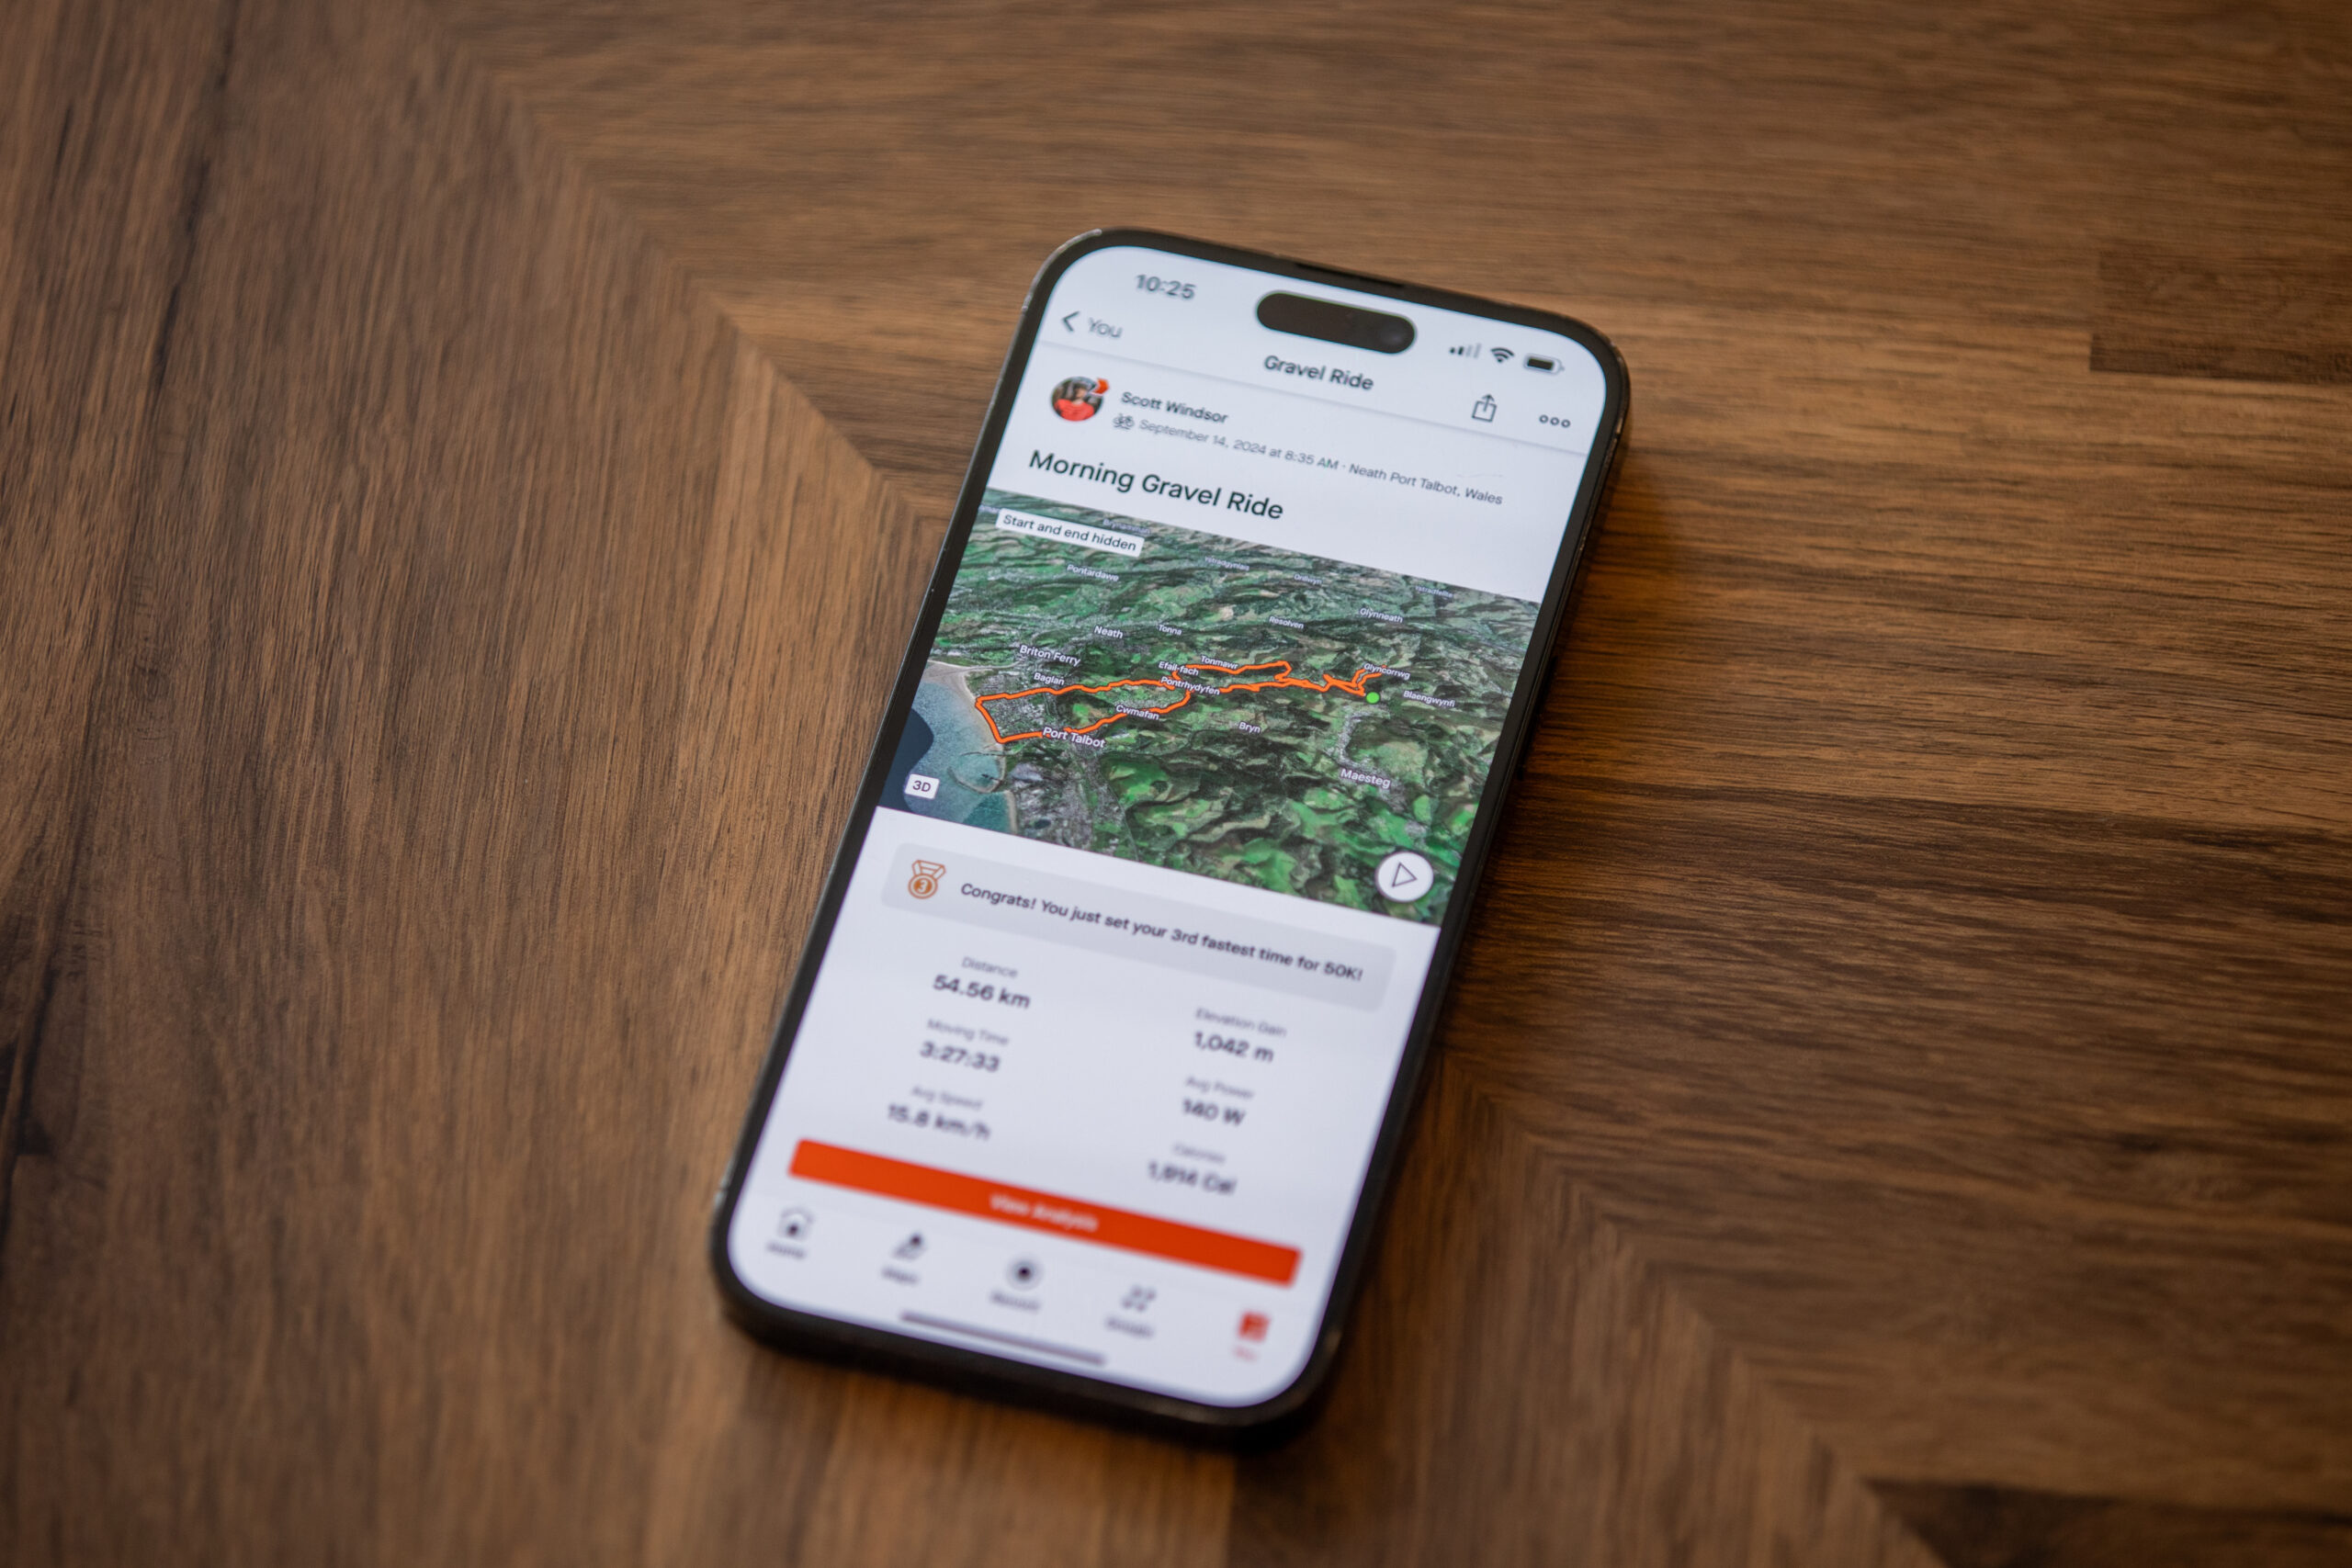
Strava’s lawsuit against Garmin also covers patent infringements. Scott Windsor / Our Media
Suunto, a Finnish smartwatch and tech company, is not alone in suing Garmin, with its filing appearing soon after Strava’s complaint against the GPS giant.
Like Suunto, Strava is also pursuing legal action against Garmin over patent infringements.
Filed in a Colorado court on 30 September, Strava’s case alleges that Garmin violated the terms of a 2015 agreement between the two companies by offering Garmin-branded segments and leaderboards.
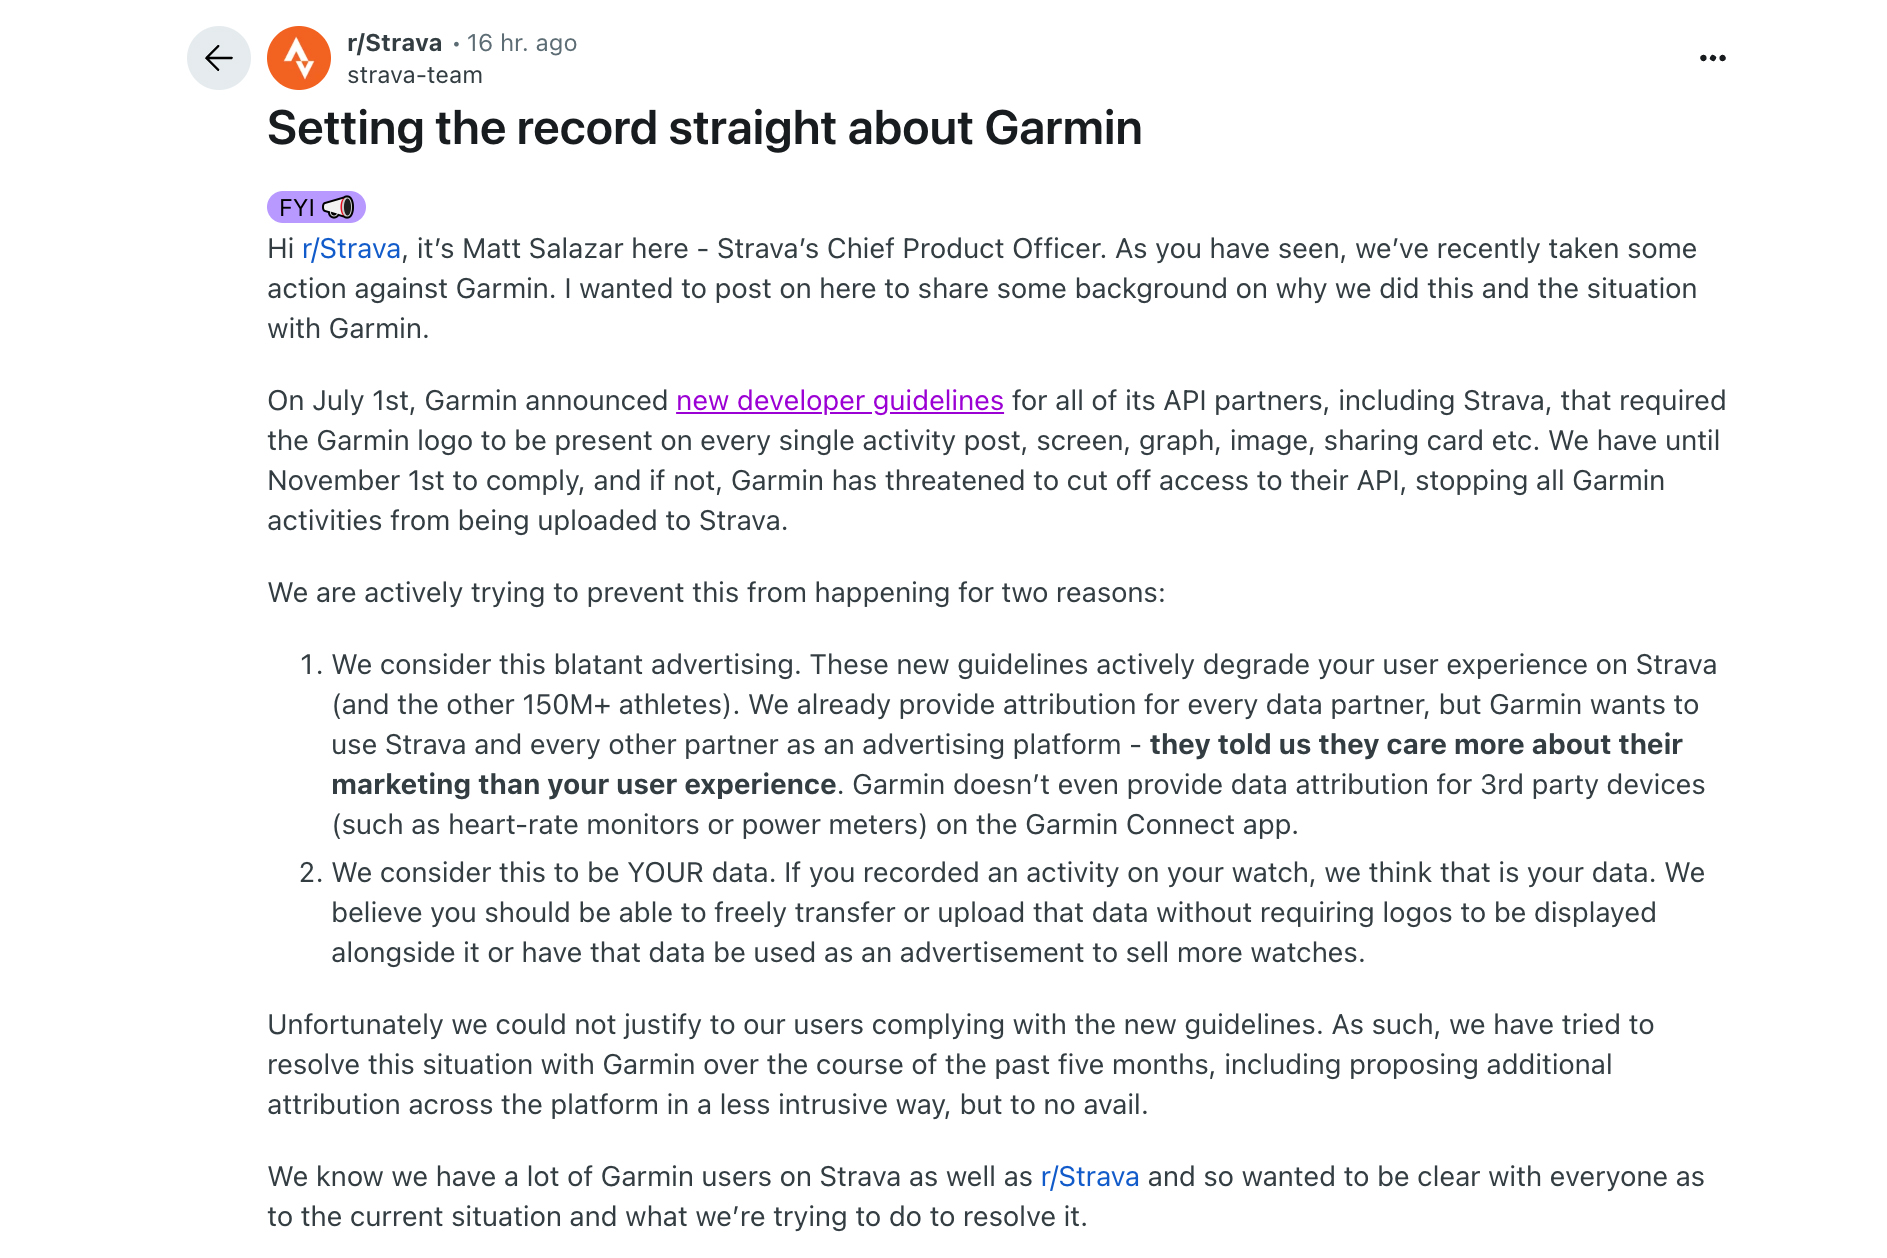
However, Strava’s chief product officer, Matt Salazar, offered a different explanation for the legal action in a Reddit post. He said the primary reason behind Strava’s litigation was a set of “new developer guidelines for all of its API partners”.
Salazar wrote that the dispute arose from Garmin’s new API guidelines announced in July that require “the Garmin logo to be present on every single activity post, screen, graph, image, sharing card etc”.
“We have until November 1st to comply, and if not, Garmin has threatened to cut off access to their API, stopping all Garmin activities from being uploaded to Strava,” Salazar said.
The British Transport Police’s decision not to investigate certain bike thefts at train stations “will hit the lowest income groups the hardest”, according to Sophie Gordon, campaigns manager at Cycling UK.
Last week, the British Transport Police (BTP) said it will not investigate bike thefts at train stations where the bicycle has been left for more than two hours, and CCTV footage will not be reviewed outside of this time frame. The BTP also said the theft of any bike worth less than £200 will not be investigated and that robberies on trains should only be reported if the passenger knows which carriage they were in.
“The decision not to investigate bike theft when cycles have been left for longer than two hours will hit the lowest income groups the hardest,” Cycling UK’s Sophie Gordon said.
“These are often working people who might not be able to afford a car and are relying on bikes and public transport to get to work. If you’re on shift or at work, you will inevitably be away longer than a couple of hours,” she added.
Cycling UK found that cycling for commuting made up 29 per cent of all cycle journeys in 2023.
Last year, it was revealed that 49 per cent of Brits couldn’t afford a new bike, with a quarter saying it would take them six months to save for one. The Walk Wheel Trust, formerly Sustrans, also found that almost 2 million people want to cycle but are priced out due to the initial cost of a bicycle and accessories.
More than 14,000 bikes were stolen from outside train stations between 2021 and 2023. A freedom of information request revealed bicycle thefts from outside stations increased by 39 per cent from 2022 to 2023.
An estimated 1.33 million cycle journeys were recorded by Transport for London in 2024, but critics have said bike thefts will discourage people from cycling in the capital.
“We know that people who have their bike stolen quite often don’t go back to cycling,” the London Cycling Campaign’s Simon Munk told the BBC.
“Everyone understands that more cycling, more walking, fewer people in cars is a good thing for London [and] for the planet – for everyone,” he added.
Gordon said: “Bike theft is not a petty crime but has serious social consequences and the police need to take it seriously – to have your means of getting around stolen can be devastating.
“By partnering with cycle trade, planners and other groups, the police could find ways to prevent cycle theft, seeing as that’s more effective than enforcement, but it’s not acceptable for the police to say they will be doing less to investigate theft, when they should be doing more.”
BTP said that these crimes are unlikely ever to be solved. “The more time our officers spend reviewing CCTV footage for these offences, the less time they have available for patrolling railway stations and trains, investigating crimes which cause the most harm and providing a visible presence across the network,” a BTP spokesperson told the BBC.
“We will continue to apply a test of proportionality when determining investigation – looking at factors such as timeframes, witnesses, the availability of CCTV, the impact on the victim or whether there is a realistic prospect of a successful outcome.
“Any offence which is not investigated will still provide us with valuable intelligence, used to direct our patrols and operations.”
Merida is implementing various measures to improve its labour practices, following the blockade on Giant Bicycles by the US due to allegations of forced labour.
In a statement released today, Merida says it complies with Taiwan’s labour laws, but it has emphasised its commitment to “internationally recognised labour standards”.
Merida says it will implement a zero-fee recruitment policy for migrant workers effective from 1 October. In Taiwan, labour laws allow brokers to charge fees to migrant workers, but this can lead to debt bondage, which is an indicator of forced labour. Now, Merida will not allow brokers to charge fees to new migrant workers.
Furthermore, Merida says no migrant workers will have to pay monthly service fees to brokers, and any such costs will be covered by Merida.
“In addition, we are in the process of creating a reimbursement plan to compensate migrant workers for their earlier recruitment costs. Our goal is to complete the reimbursement by October 25, 2025,” Merida says.
“We will work with our recruitment partners to make sure these standards are upheld and will continue to monitor them to ensure this is the case. Employee welfare is further supported through routine check-ups and ongoing feedback mechanisms, including anonymous mailboxes and satisfaction surveys, to drive continuous improvement,” Merida told BikeRadar.
The ban is the first of its kind on a Taiwanese manufacturer and Giant is now taking steps to resolve the embargo. It has formally engaged with CBP through its US legal counsel and will arrange an official meeting in the near future.
Giant said it is “firmly committed to upholding human rights and labour protections. Since January 2025, we have fully implemented a Zero Recruitment Fee Policy, under which all recruitment, agency, and government-related fees for newly hired migrant workers are fully covered by the company. By the end of 2024, we completed upgrades to employee housing, providing a safer and more comfortable living environment.”
The investigative journalist Peter Bengtsen uncovered the labour conditions in Taiwan’s bicycle industry after he and his team conducted more than 200 interviews with migrant workers between 2022 and 2025.
“The risk of debt bondage is the rule, not the exception, for migrants employed in Taiwan’s bicycle and other industries,” Bengtsen told BikeRadar.
“For decades, workers hired from abroad have paid exorbitant fees to home-country recruiters and Taiwanese labour brokers for jobs and services. As a result, workers borrow significantly from banks and money lenders, often at excessive interest rates, and thereby risk debt bondage while working in Taiwan to pay off loans,” he added.
US legislation allows authorities to stop imports at the border if forced labour is suspected.
Last year, the EU passed legislation that, from 2027, will allow authorities to prohibit the sale, import and export of goods made using forced labour.
This weekend’s big events are… well… Zwift’s Big Weekend events. But we’re also featuring two long group rides, a community-organized fondo race series, and a ride for a cause. Check them all out below!
Zwift’s Big Weekend
Celebrity Leaders Popular Banded
It’s Zwift’s birthday celebration this weekend, since the platform turns 11 years old this fall – and Zwift is holding a series of events with celebrity leaders to celebrate! Each ride is on a different route with different leaders, but they’re all 45-minute banded rides.
Here’s a fun and unique event concept – a weekly series of “medio fondos” featuring age-based groupings. Team Foudre is organizing this series, and it appears that the first four events, held on four consecutive weekends in October, serve as a sort of “pre-series,” where your best two results count towards the overall. (See event description for details.)
The series kicks off this weekend with a race on Big Foot Hills in Watopia (69.9km, 714m).
Join Team Vegan in a ride on World Animal Day, a day that “unites the animal welfare movement, mobilizing it into a global force to make the world a better place for all animals.”
This is a 60-minute banded ride on Wandering Flats, so as long as you pedal, you’ll stay with the group.
The USMeS Team holds a 100km ride every Saturday, but on the first Saturday of the month it’s a 100 mile event. This month they’re riding on London’s PRL Full (173.8km, 2628m).
If you’ve been wanting to knock this route out, this is a great way to do it… because long rides are always better with friends!
Rider leader will pace at 2.2 w/kg average, but all paces are welcome.
We’ve featured this event many times in the past, as it’s always well-attended and well-led at paces that helps everyone stay together. Experienced leaders and sweepers do their best to keep the groups together so everyone can work together to knock out a long ride!
This week’s ride has two pace category options: a D pace of 1.7-2.2 W/kg, or a C pace of 2.5-2.8 W/kg. Both groups will ride 3 laps of Watopia’s Triple Flat Loops for a total length of 104.2km and 476 meters of climbing.
We choose each weekend’s Notable Events based on a variety of factors including:
Is the event unique/innovative in some way?
Are celebrities (pro riders, etc) attending/leading?
Are signup counts already high, meaning the event is extra-popular?
Does the ride include desirable unlocks or prizes?
Does the event appeal to ladies on Zwift? (We like to support this under-represented group!)
Is it for a good cause?
Is it just plain crazy (extra long races, world record attempts, etc)?
Is it a long-running, popular weekly event with a dedicated leader who deserves a shout out?
In the end, we want to call attention to events that are extra-special and therefore extra-appealing to Zwifters. If you think your event qualifies, comment below with a link/details and we may just include it in an upcoming post!
British Transport Police says it will not investigate bike thefts at train stations where the bicycle has been left for more than two hours.
This means most bike thefts will not be investigated, and CCTV footage will not be reviewed after the two-hour timeframe, according to the BBC.
“The more time our officers spend reviewing CCTV… the less time they have available for patrolling railway stations and trains, investigating crimes which cause the most harm,” the BTP said.
In a list of crimes the BTP won’t investigate, it said any bike worth less than £200 will not be investigated. The BTP also said thefts on trains should only be reported if the passenger knows the carriage the bike was in.
A BTP spokesperson told the BBC that it knows bike thefts are upsetting, inconvenient and potentially costly, but “there can often be limited opportunity for investigation”.
The spokesperson said: “Our experience tells us at an early stage that there are some crimes that are unlikely to ever be solved – such as those without a clear estimate of time or location for the incident or if there is a lack of CCTV or witnesses.
“The more time our officers spend reviewing CCTV footage for these offences, the less time they have available for patrolling railway stations and trains, investigating crimes which cause the most harm and providing a visible presence across the network.
“We will continue to apply a test of proportionality when determining investigation – looking at factors such as timeframes, witnesses, the availability of CCTV, the impact on the victim or whether there is a realistic prospect of a successful outcome.
“Any offence which is not investigated will still provide us with valuable intelligence, used to direct our patrols and operations.”
More than 14,000 bicycles were stolen from outside train stations between 2021 and 2023. The number of bikes reported stolen from outside stations was up 39 per cent from 2022 to 2023.
The London Cycling Campaign’s Tom Fyans told the BBC: “A lack of secure cycle parking at stations and next to no action against thieves leaves London way behind the Netherlands where nearly half of trips to stations are by bike.
“Many victims of theft in the capital just stop cycling – if we want to reduce car trips in London and encourage cycling we have to redouble enforcement against cycle theft.”
Following yesterday’s news that it had filed a lawsuit against Garmin, Strava has sought to explain the reasons behind the action.
In a post on Reddit, Strava’s chief product officer, Matt Salazar, said the primary reason behind its litigation was a set of “new developer guidelines for all of its API partners”, which Strava took issue with.
Curiously, this appears to be unrelated to the claims in Strava’s lawsuit that Garmin has infringed on two of its patents.
According to Salazar, Garmin’s new guidelines were announced on 1 July 2025 and would require Strava, and other platforms using Garmin’s API, to integrate a Garmin logo “on every single activity post, screen, graph, image, sharing card, etc”.
Strava’s chief product officer, Matt Salazar, took to Reddit yesterday to explain the brand’s actions. Reddit
For context, an API or ‘Application Programming Interface’ is a tool that enables different pieces of software to connect with one another and share features, data or functions. In the case of Garmin and Strava, Garmin’s API is what enables activity data to be automatically shared to Strava after it’s uploaded to Garmin’s Connect app.
Entities using Garmin’s API have, Salazar claims, until 1 November 2025 to comply with the updated guidelines, or else “Garmin has threatened to cut off access to their API, stopping all Garmin activities from being uploaded to Strava”.
Salazar says Strava does not wish to comply with the new guidelines because it feels that including Garmin’s logo would amount to “blatant advertising” that would “actively degrade your user experience on Strava (and the other 150M+ athletes)”.
Strava, Salazar says, “already provides attribution for every data partner”, but sees the inclusion of logos as a step too far: “they told us they care more about their marketing than your user experience”.
Salazar also suggests this is unfair because “Garmin doesn’t even provide data attribution for third-party devices (such as heart-rate monitors or power meters) on the Garmin Connect app”.
Continuing on this theme, Salazar says: “If you recorded an activity on your watch, we think that is your data.
“We believe you should be able to freely transfer or upload that data without requiring logos to be displayed alongside it or have that data be used as an advertisement to sell more watches.”
As a result, Salazar says Strava “could not justify to our users complying with the new [Garmin API] guidelines”.
He claims Strava has “tried to resolve this situation with Garmin over the course of the past five months, including proposing additional attribution across the platform in a less intrusive way, but to no avail”.
Garmin’s current API guidelines suggest using its logo is optional. Garmin
It’s notable, though, that Garmin’s current API guidelines suggest that although “a Garmin [device model] attribution” is mandatory, the inclusion of its logo is not.
Platforms should “list the Garmin attribution in all expanded views or subscreens. For multi-entry displays, you can apply the attribution globally – such as in a header – or per entry. Screenshots, printouts and reports must retain visible Garmin attribution”.
It continues: “The attribution can include the Garmin tag logo followed by the device model or simply be listed in appropriately sized text: ‘Garmin [device model].’.”
The guidelines then provide a number of illustrative examples with and without the Garmin logo included.
When contacted, Garmin told BikeRadar that it “doesn’t comment on pending litigation.”.
BikeRadar has contacted Strava for comment and will update this article if we receive a response.
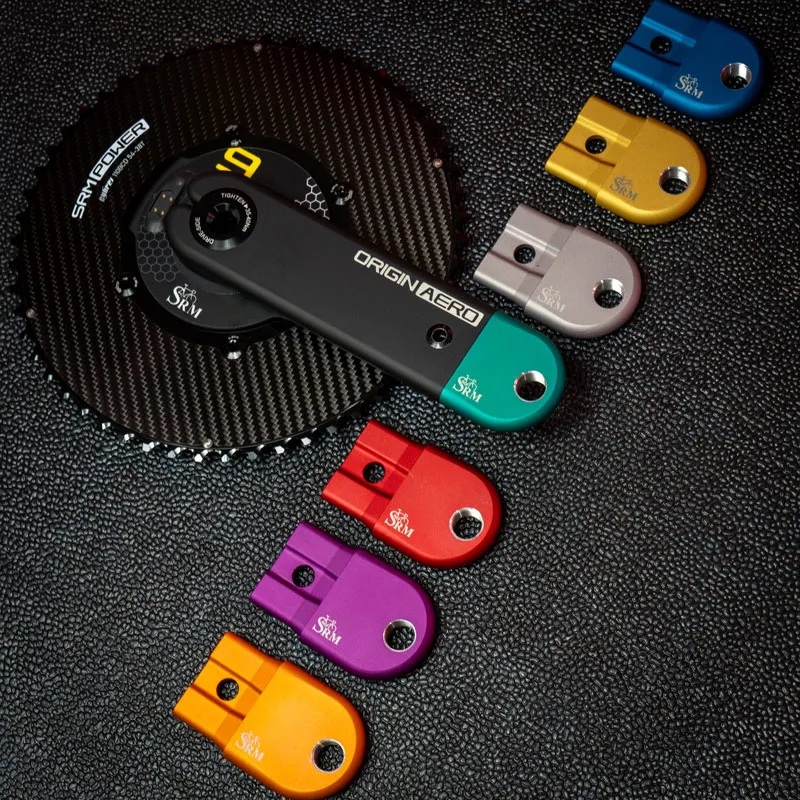
Power meter specialist SRM has launched a pair of crank arms for its Origin modular power meter system with swappable crank tips, enabling you to experiment with different crank lengths without needing to buy a whole new crankset or power meter.
The new SRM Origin Aero Aluminium cranks include seven crank tips, each anodised in a different colour. The crank tips bolt to the crank arms and enable you to alter the crank length in 2.5mm increments from 160mm up to 175mm.
SRM says the Original Aero Aluminium is its narrowest crankset to date, with the wide, flat crank designed to offer low drag and high pedalling efficiency.
The Origin Aero cranks come with a range of crank tips to vary their length.
The SRM Origin Aero cranks’ Q-Factor of 144mm for road bike use is also notable because it’s significantly narrower than that of standard cranksets. Shimano road cranks have a Q-Factor of 148mm, for example, which rises to 151mm for GRX gravel cranksets and as much as 176mm for its MTB cranksets. The 140mm crank Q-Factor is more typical for track bikes.
Pros have been steadily decreasing their crank length over the past few years. Jonas Vingegaard, for example, was riding with 160mm cranks on his Cervélo S5, when we checked his bike out at the start of the 2025 Tour de France. We’d spotted him experimenting with 150mm cranks earlier in the season.
Tadej Pogačar, meanwhile, typically rides 165mm cranks.
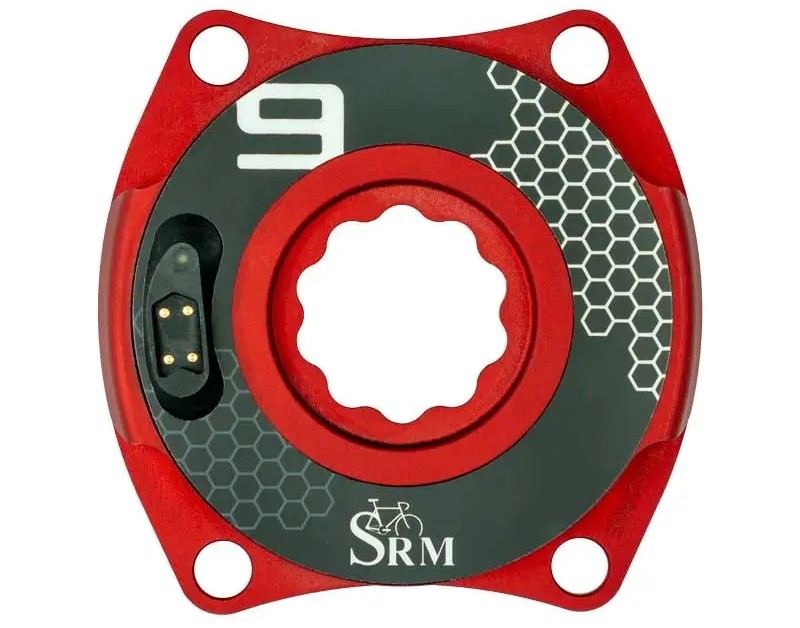
The crank arms fix to SRM’s power meter spider. You also need to factor in the price of the chainrings and bottom bracket.
The SRM Origin Aero Aluminium crank arms work with SRM’s Origin modular power meter, which can be used with a range of SRM crank designs. The Aero Aluminium is the newest option – and, at €2,015, the most expensive.
Factor in the €1,210 price of the power meter spider (available in five colours to match at least some of your crank tips), plus up to €336 for the Carbon-Ti chainring option, and you’re looking at around €3,561 for the complete setup, without a bottom bracket spindle.
After that, experimenting with your crank length is free, though.
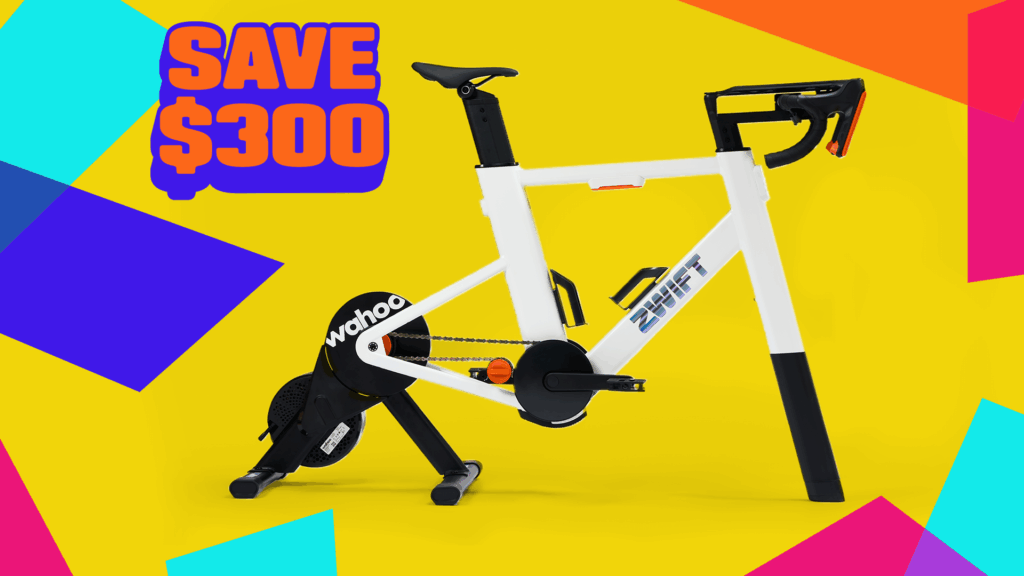
Zwift just launched the second piece of their Zwift’s Big Weekend event: an unprecedented hardware sale! This is the biggest discount we’ve ever seen on the full Zwift Ride setup, which now includes Wahoo’s latest trainer, the feature-packed KICKR CORE 2.
With a price well below other smart bikes, the Zwift Ride is already the best deal around for anyone looking for a turnkey Zwift setup. But this weekend, riders can pick up the Zwift Ride + Wahoo KICKR CORE 2 package for just $999.99/€999.99/£999.99. That’s a huge discount off the regular price, especially for Zwifters in the US:
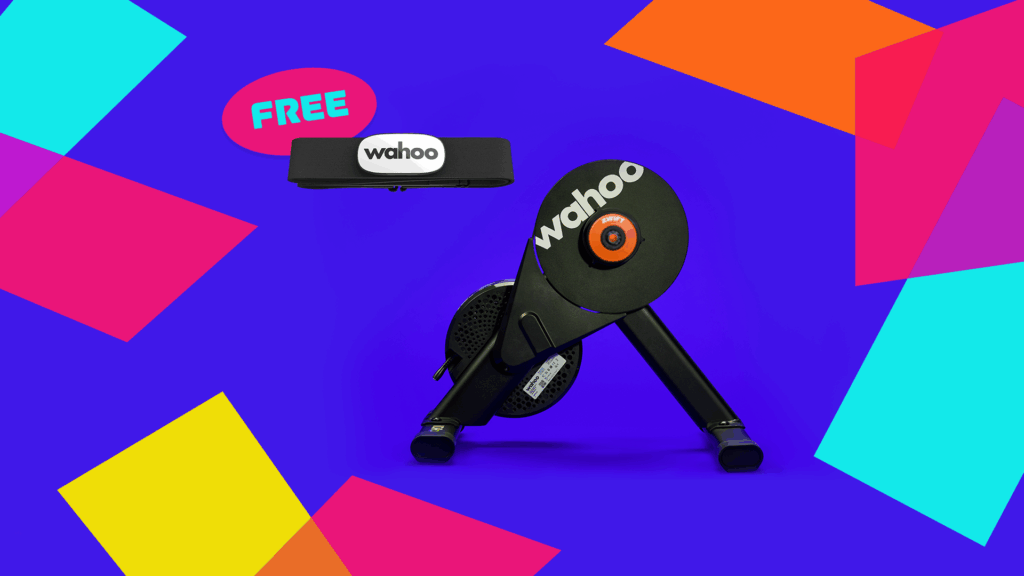
If you aren’t looking for a full Zwift Ride setup, but would love a trainer upgrade, Zwift is running a second promo on the new Wahoo KICKR CORE 2. This trainer, released less than a month ago, improves on the highly popular KICKR CORE by adding Wi-Fi connectivity, race mode, Bluetooth bridging, and more.
Purchase the CORE 2 from Zwift and you’ll get a free Wahoo TRACKR Heart Rate Monitor ($99.99/€89.99/£79.99 retail) thrown in!
Note: Zwift says, “During checkout the TRACKR will appear as a free add-on option,” so be sure to add it to your cart during the checkout process.
A final note: Zwift links in this post (and throughout this site) are affiliate links, so when you shop through these links, Zwift Insider is paid a small affiliate commission from Zwift. Thanks in advance for your support!
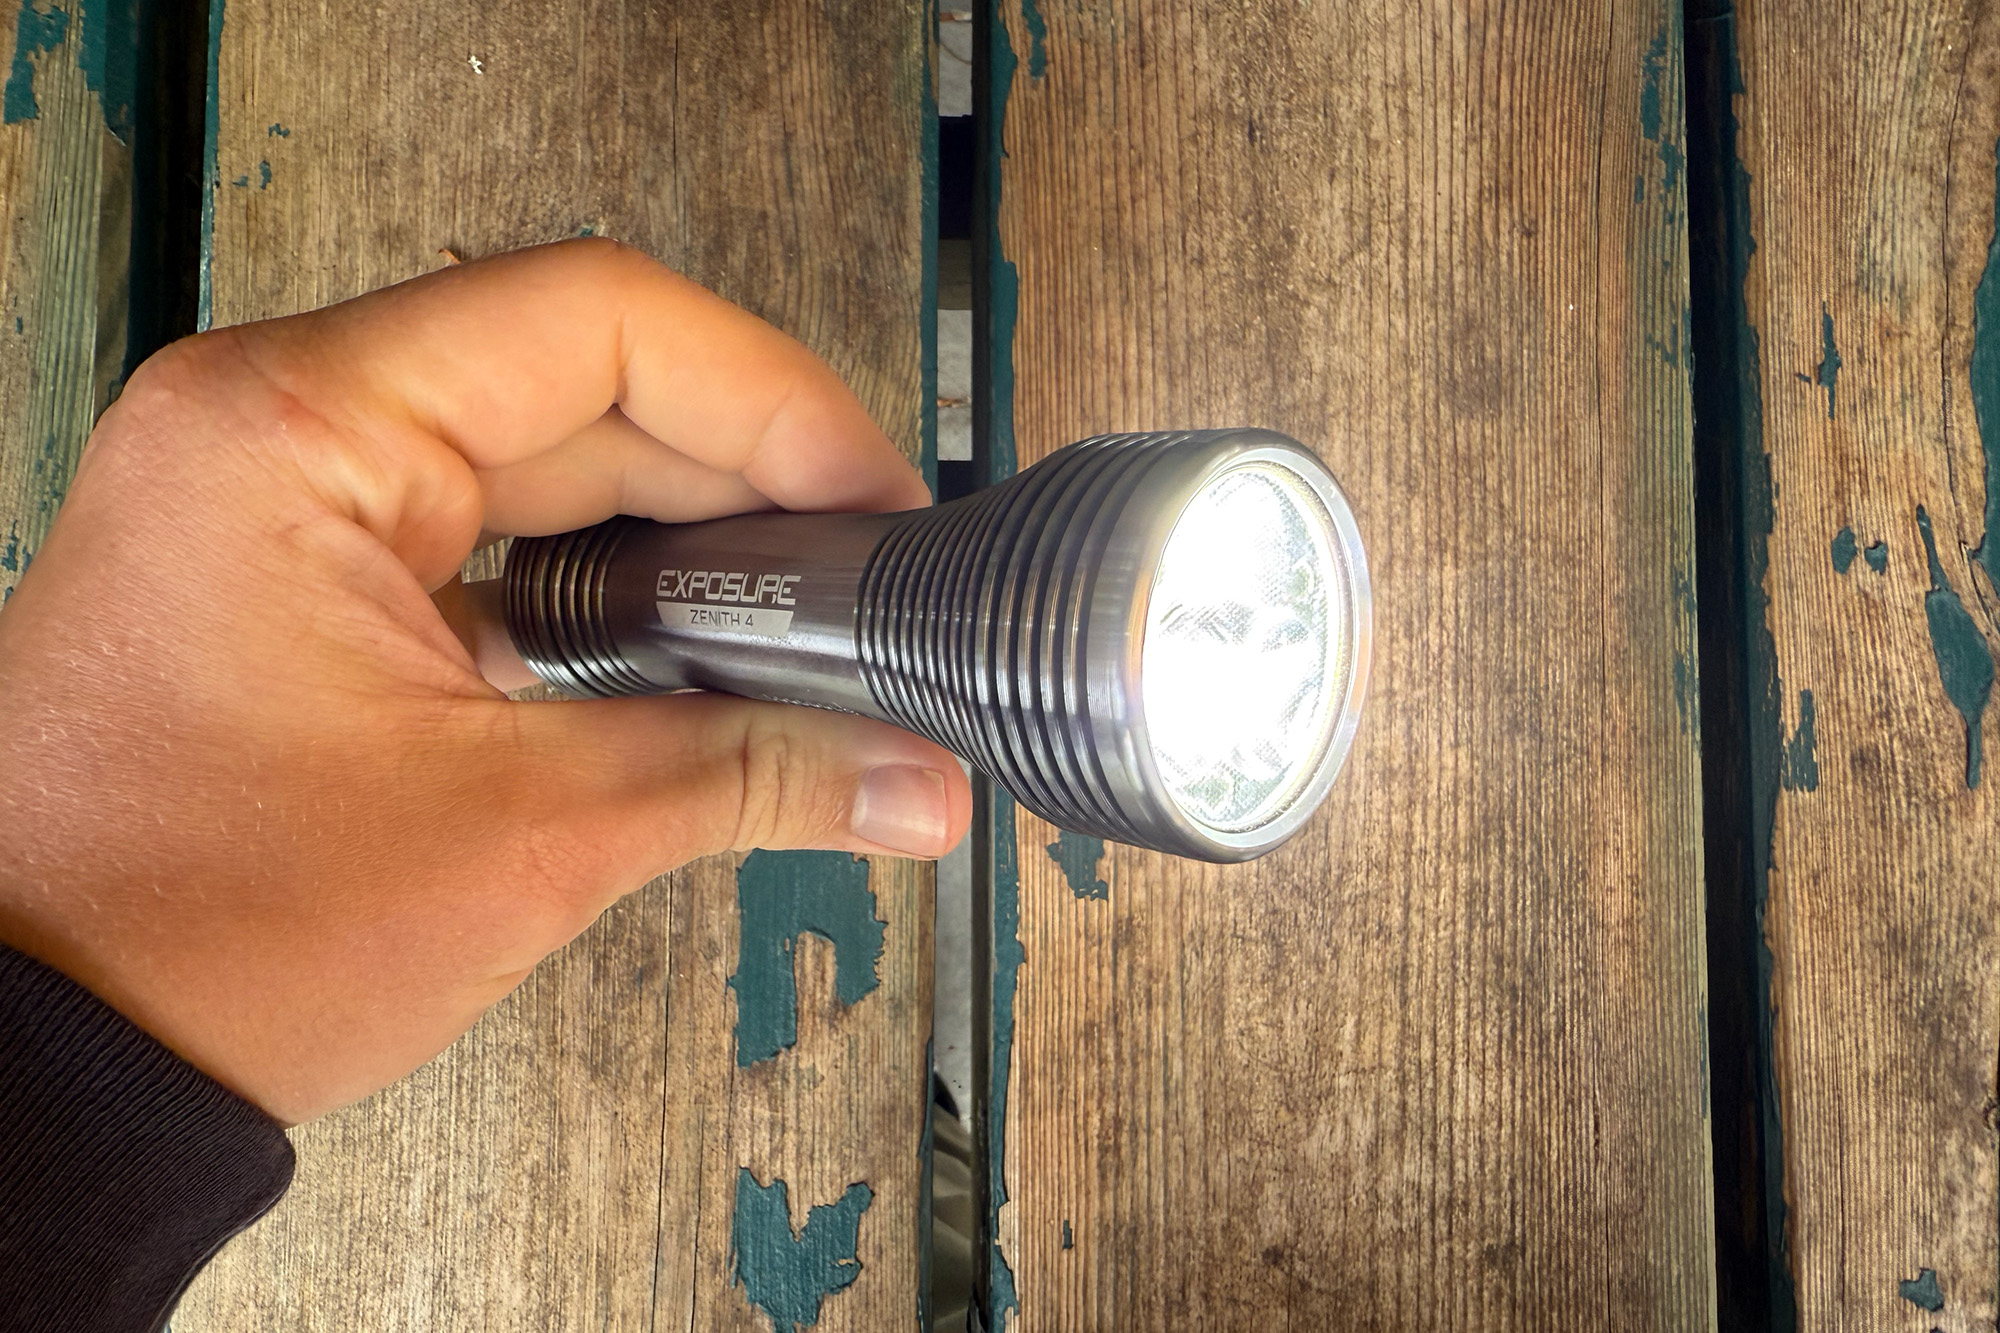
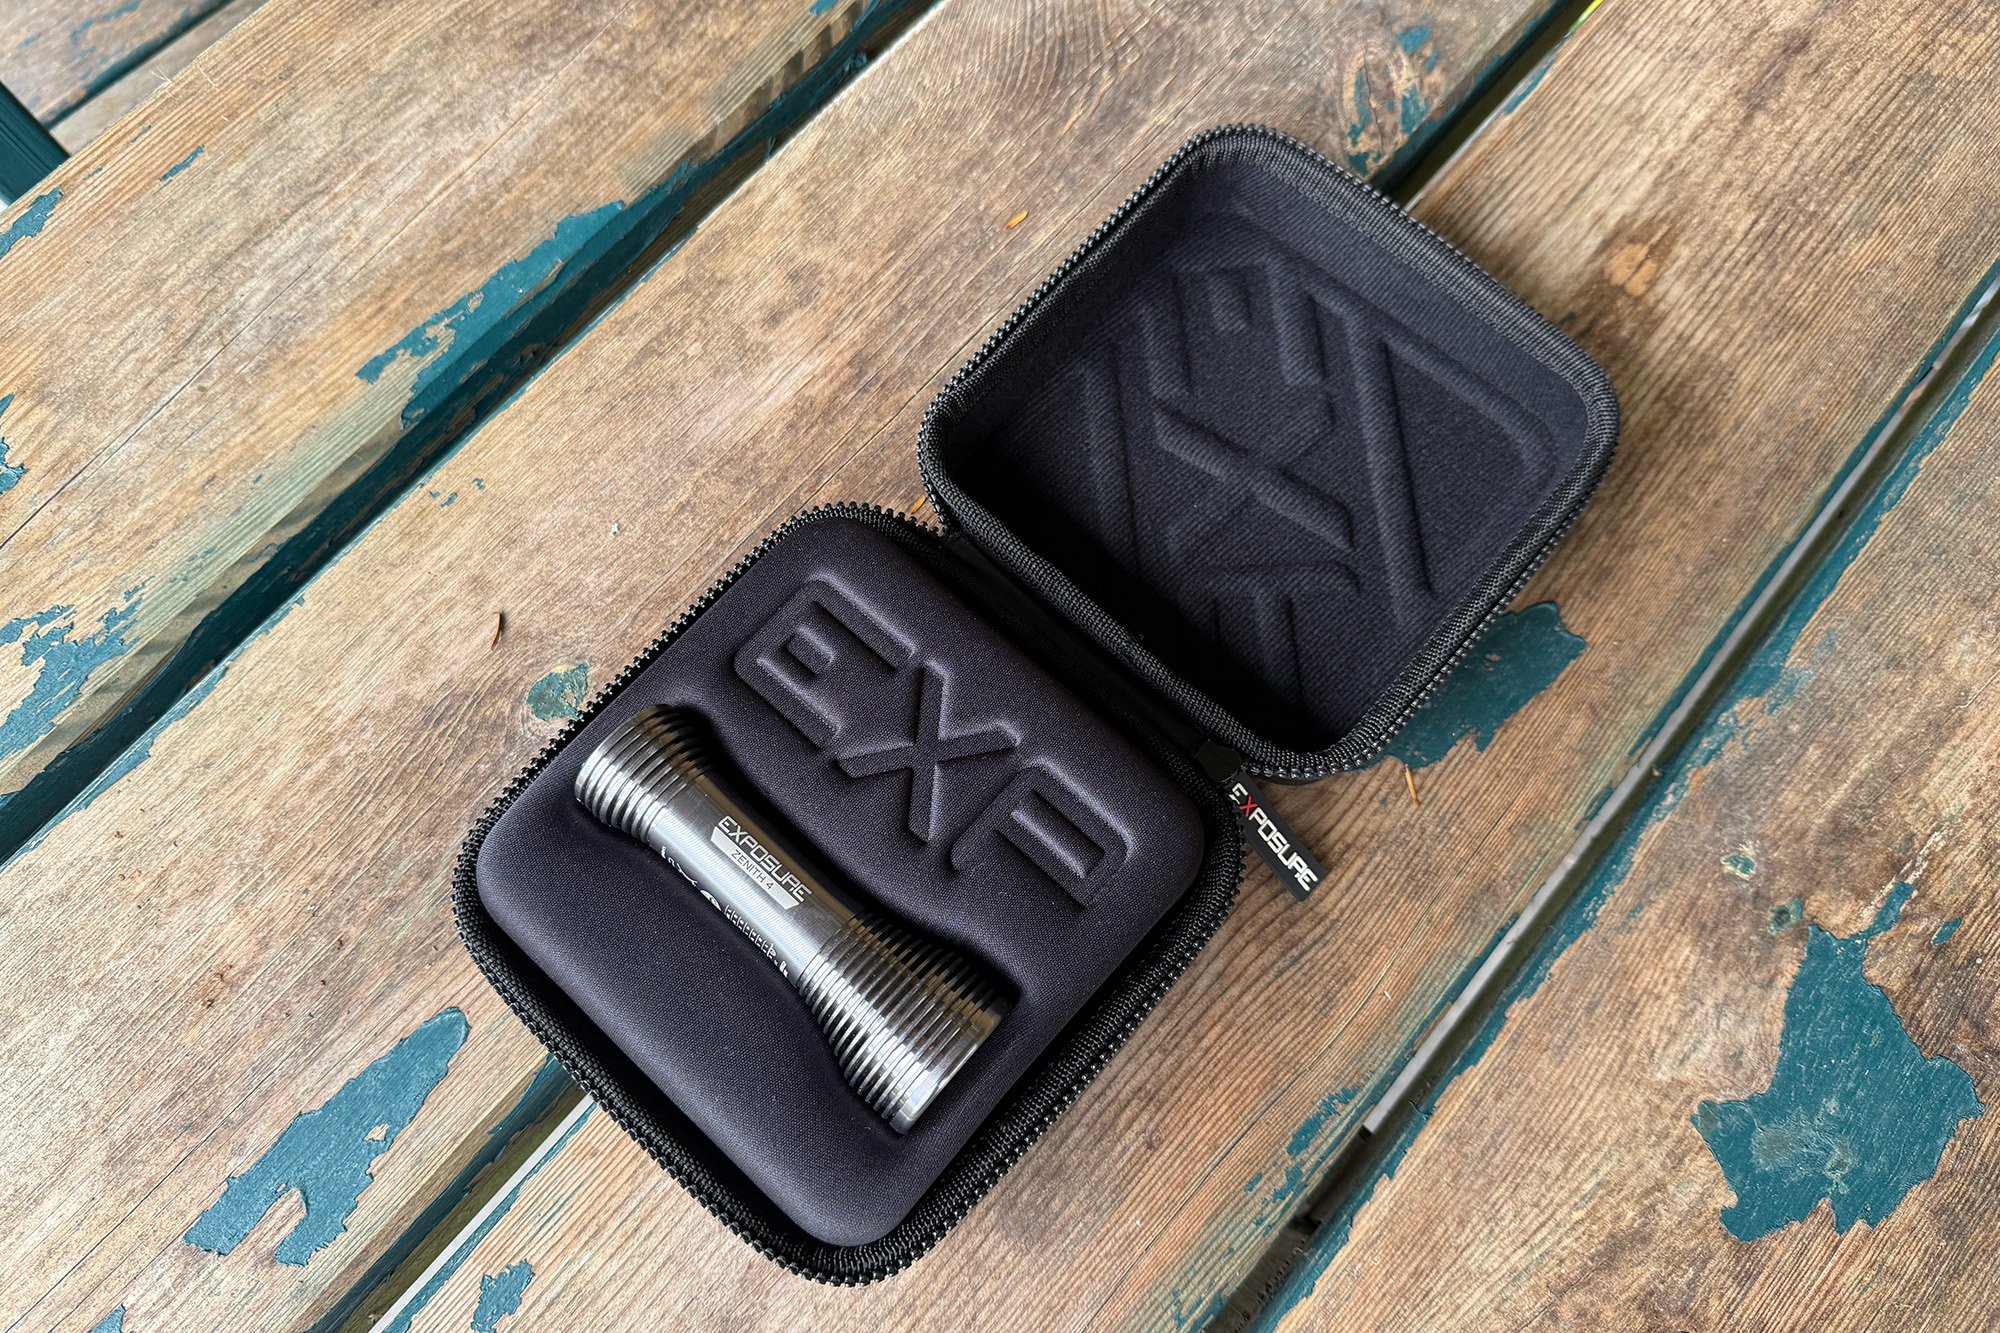
Exposure’s Zenith is the brand’s most powerful helmet-mounted light, and this new MK4 version incorporates many features fans have been demanding for years.
Exposure says this has reduced charging time by 66 per cent, meaning you can charge the light to full in a claimed 2 hours and 45 minutes.
The mountain bike light is also brighter than ever before, with the brand bumping the maximum lumen output to 2,360.
In a world of ever-more-expensive kit, Exposure has managed to add all of these features while reducing the retail price of the light from the previous generation to £280 / $305 from £295 / $345.
While that’s not cheap, Exposure products have a good reputation for quality and often score well in our group tests.
I’ve had the opportunity to use the light a little since receiving it, so I’ll include some impressions throughout this first look.
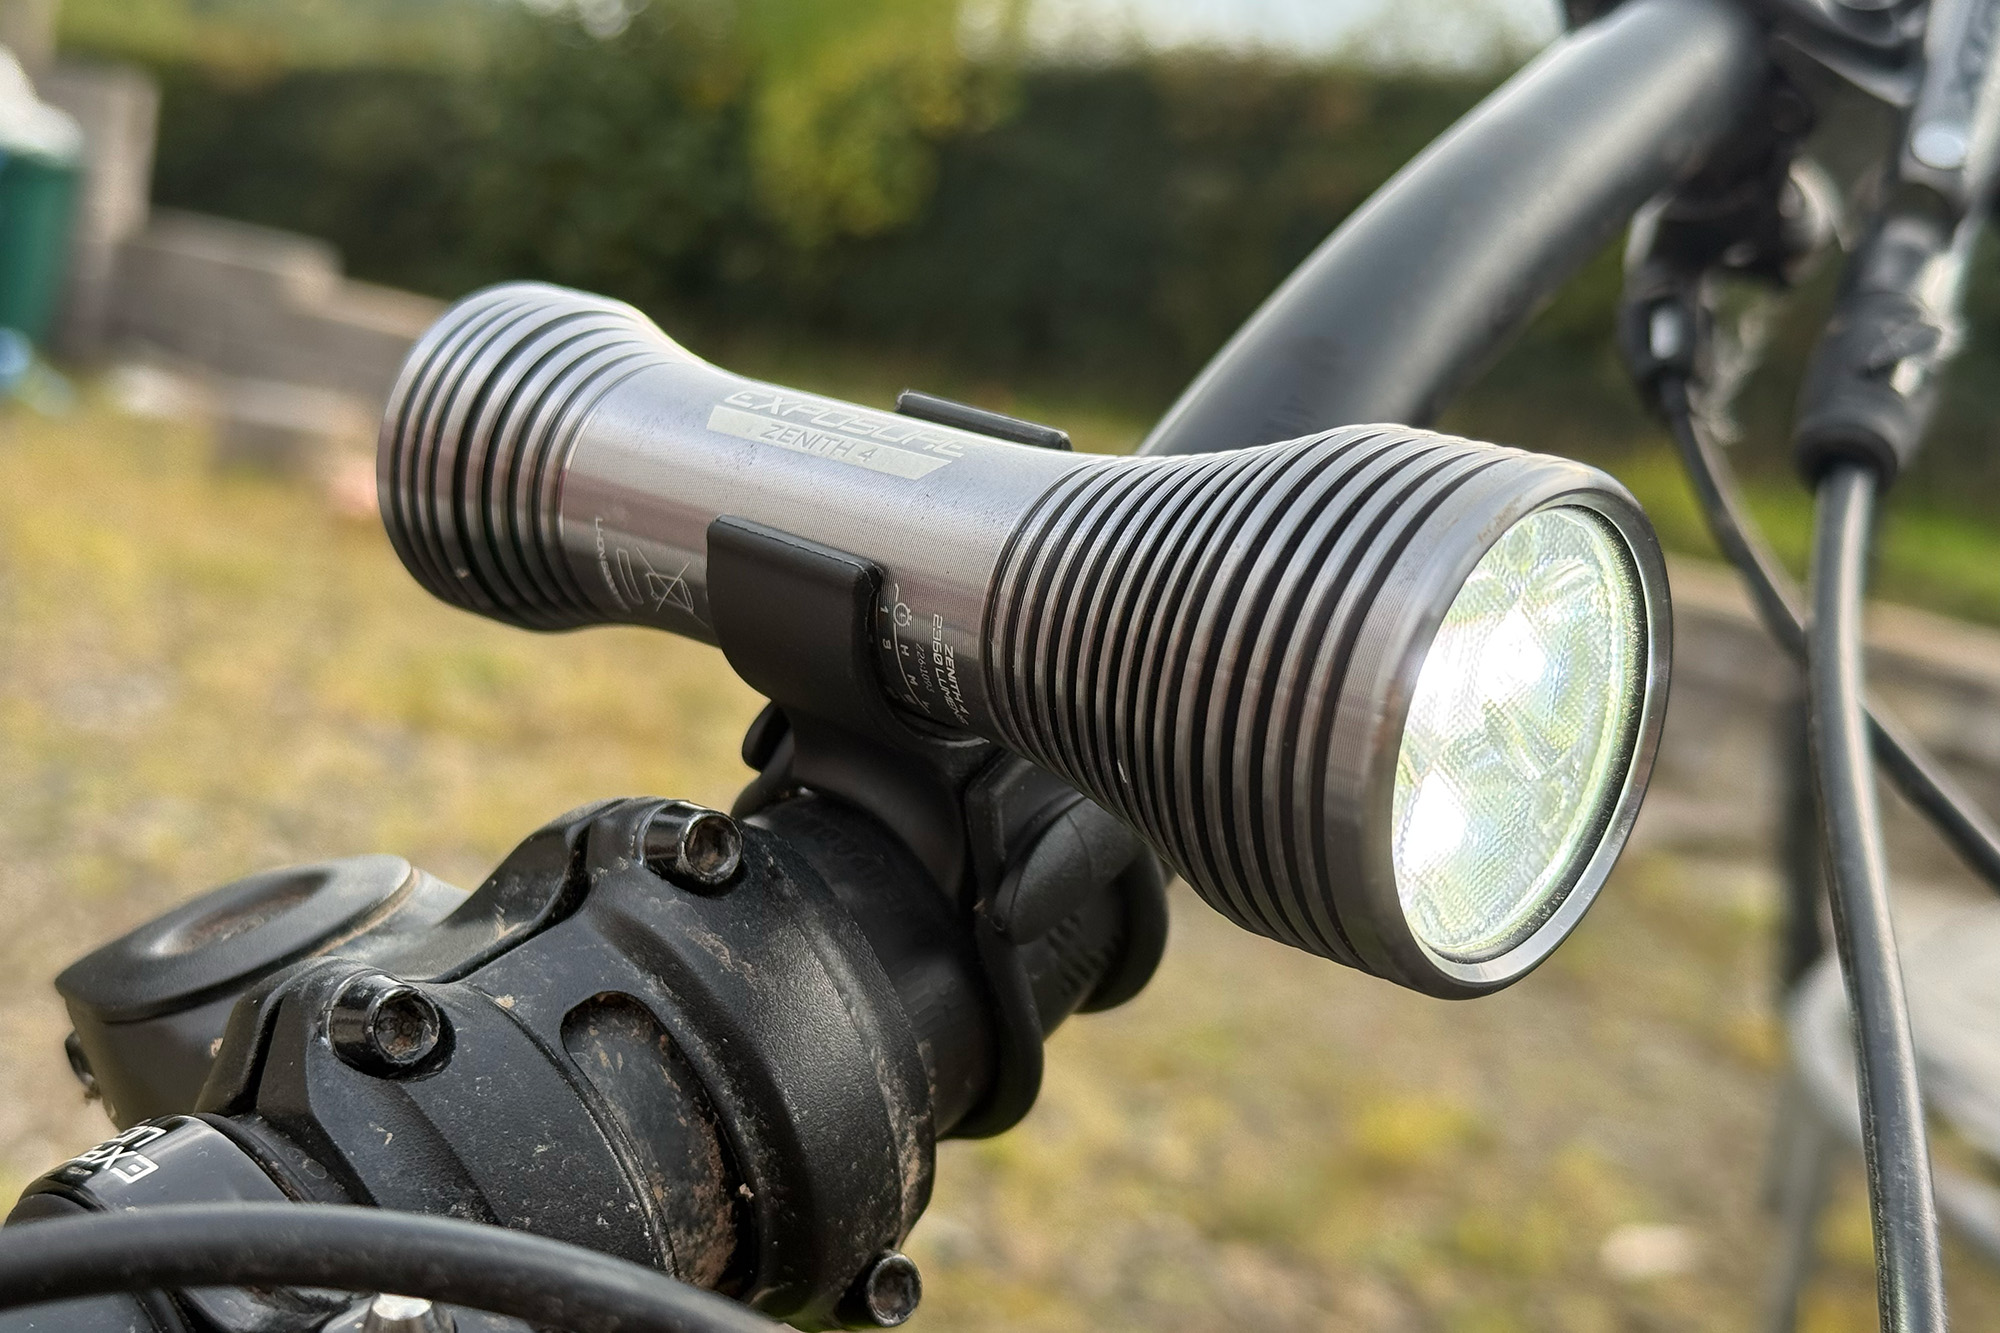
The light measures 120mm in length. Nick Clark / Our Media
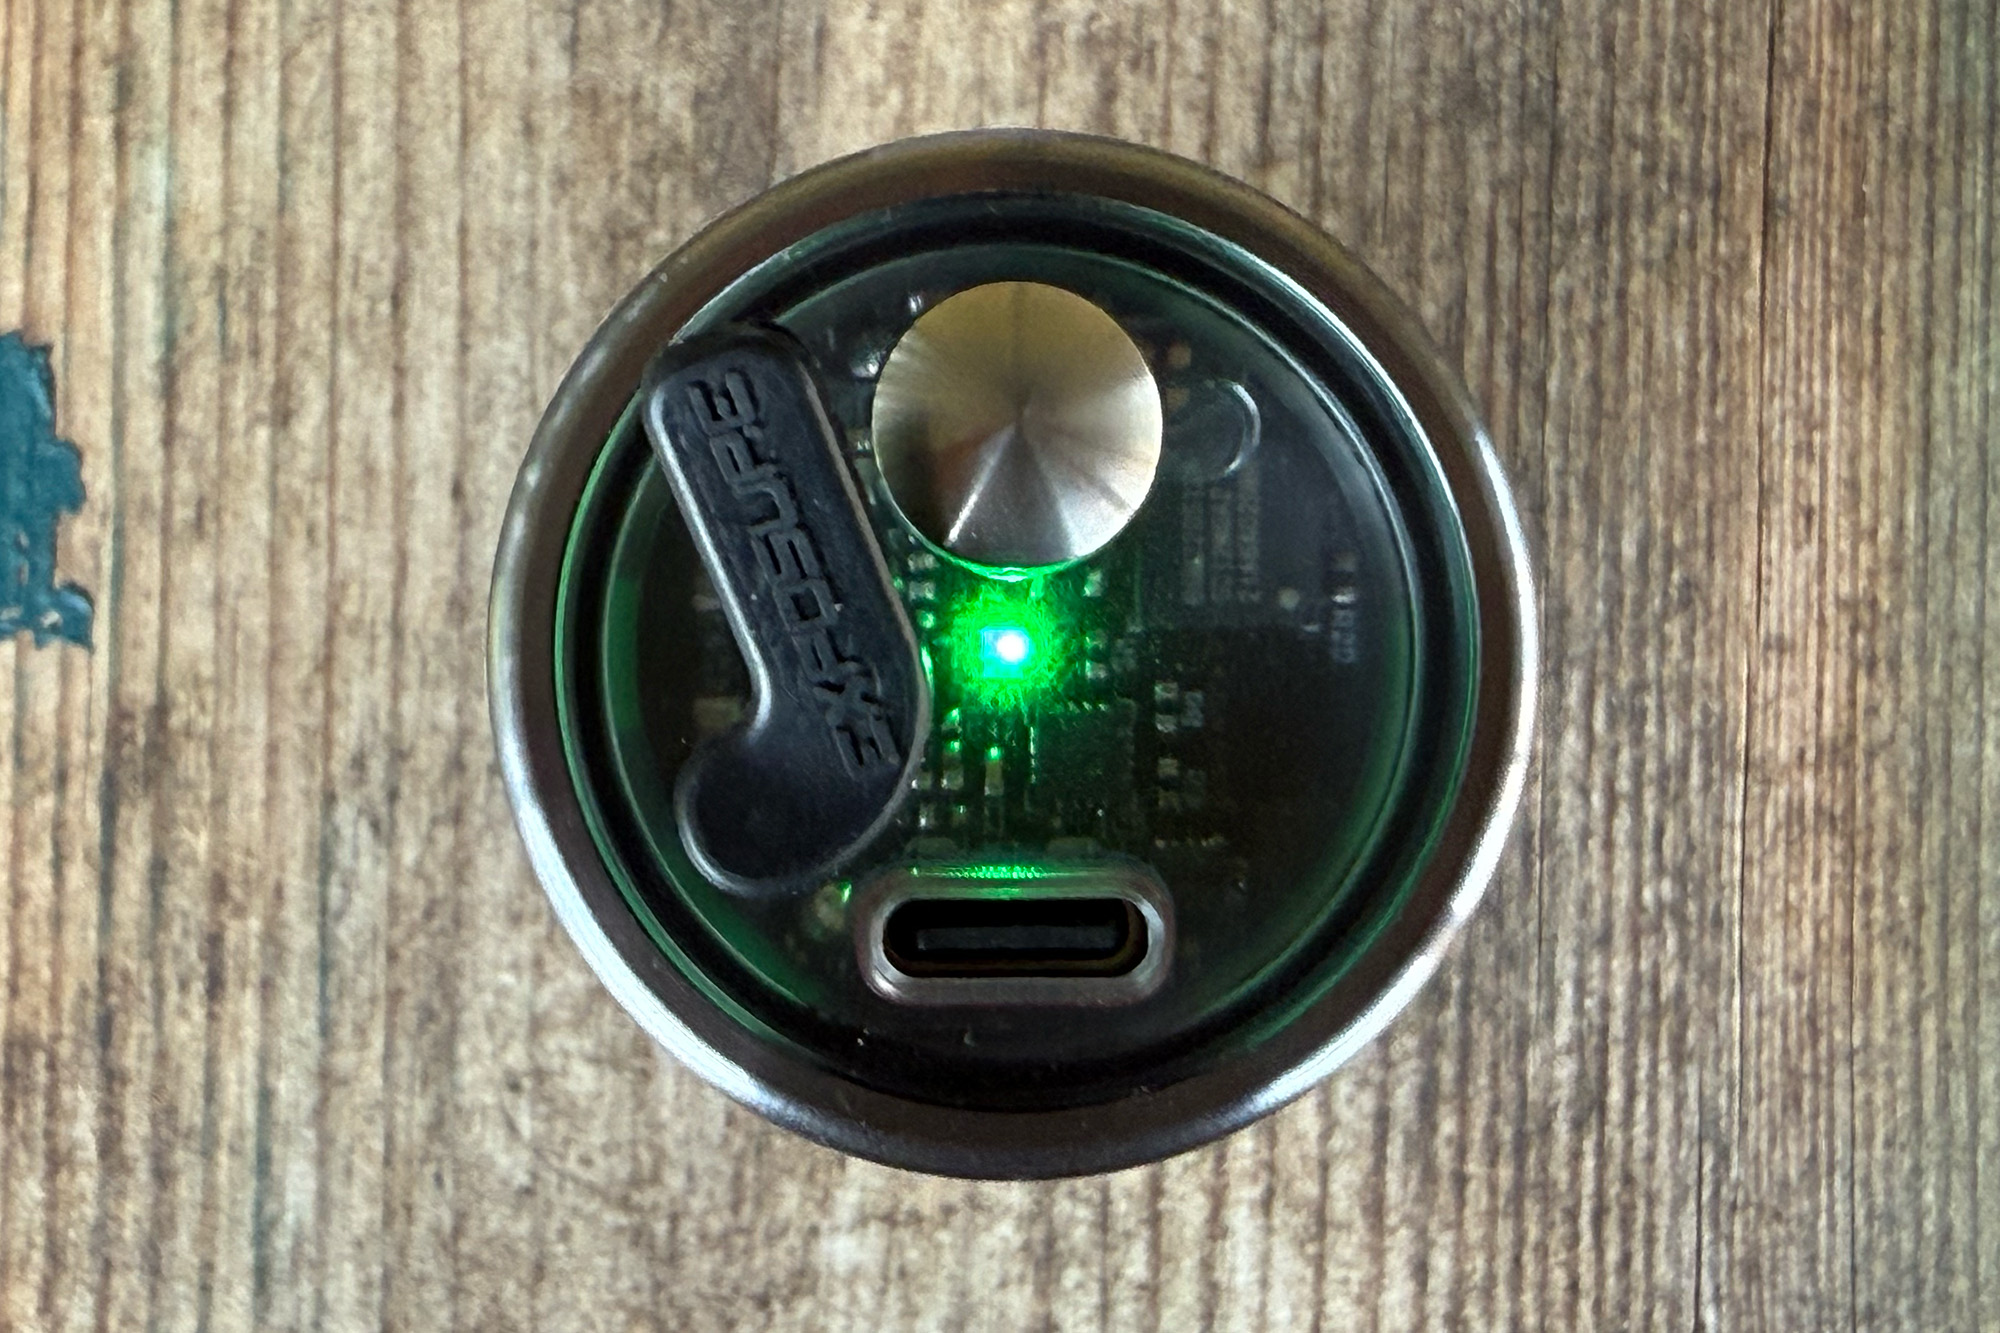
The British brand has finally updated the charge port for its lights, with the DC port being substituted for a USB-C.
Not only does this improve charging speed, but it also means scrambling around for a charging cable should be easier when an impromptu after-work ride is mentioned in the group chat.
While the plastic port feels flimsy, it does do its job. Nick Clark / Our Media
The port is covered by a small plastic tab, which, while it works to keep dust out, doesn’t feel like the most robust solution.
Despite this, Exposure says the Zenith MK4 is IP67-rated, meaning those nighttime showers shouldn’t have you riding home in the dark.
Exposure has given the Zenith MK4 a 6,000mAh Li-Ion battery, which it says will last up to 36 hours.
The Zenith MK4 also gets Exposure’s Tap technology, which enables you to switch between power levels by tapping the entire device rather than searching for a button on the rear.
The light attaches to the helmet and bar mount via a clip. Nick Clark / Our Media
While this makes it easier to switch the light between modes and makes you more conservative with your power, I’m not sure it’s much more intuitive than clicking the button on the back of the light. If you thud your head on an overhanging tree, you can quickly be riding in less light than you expected.
There are three sensitivity modes to limit this, but I’m yet to be convinced of this feature.
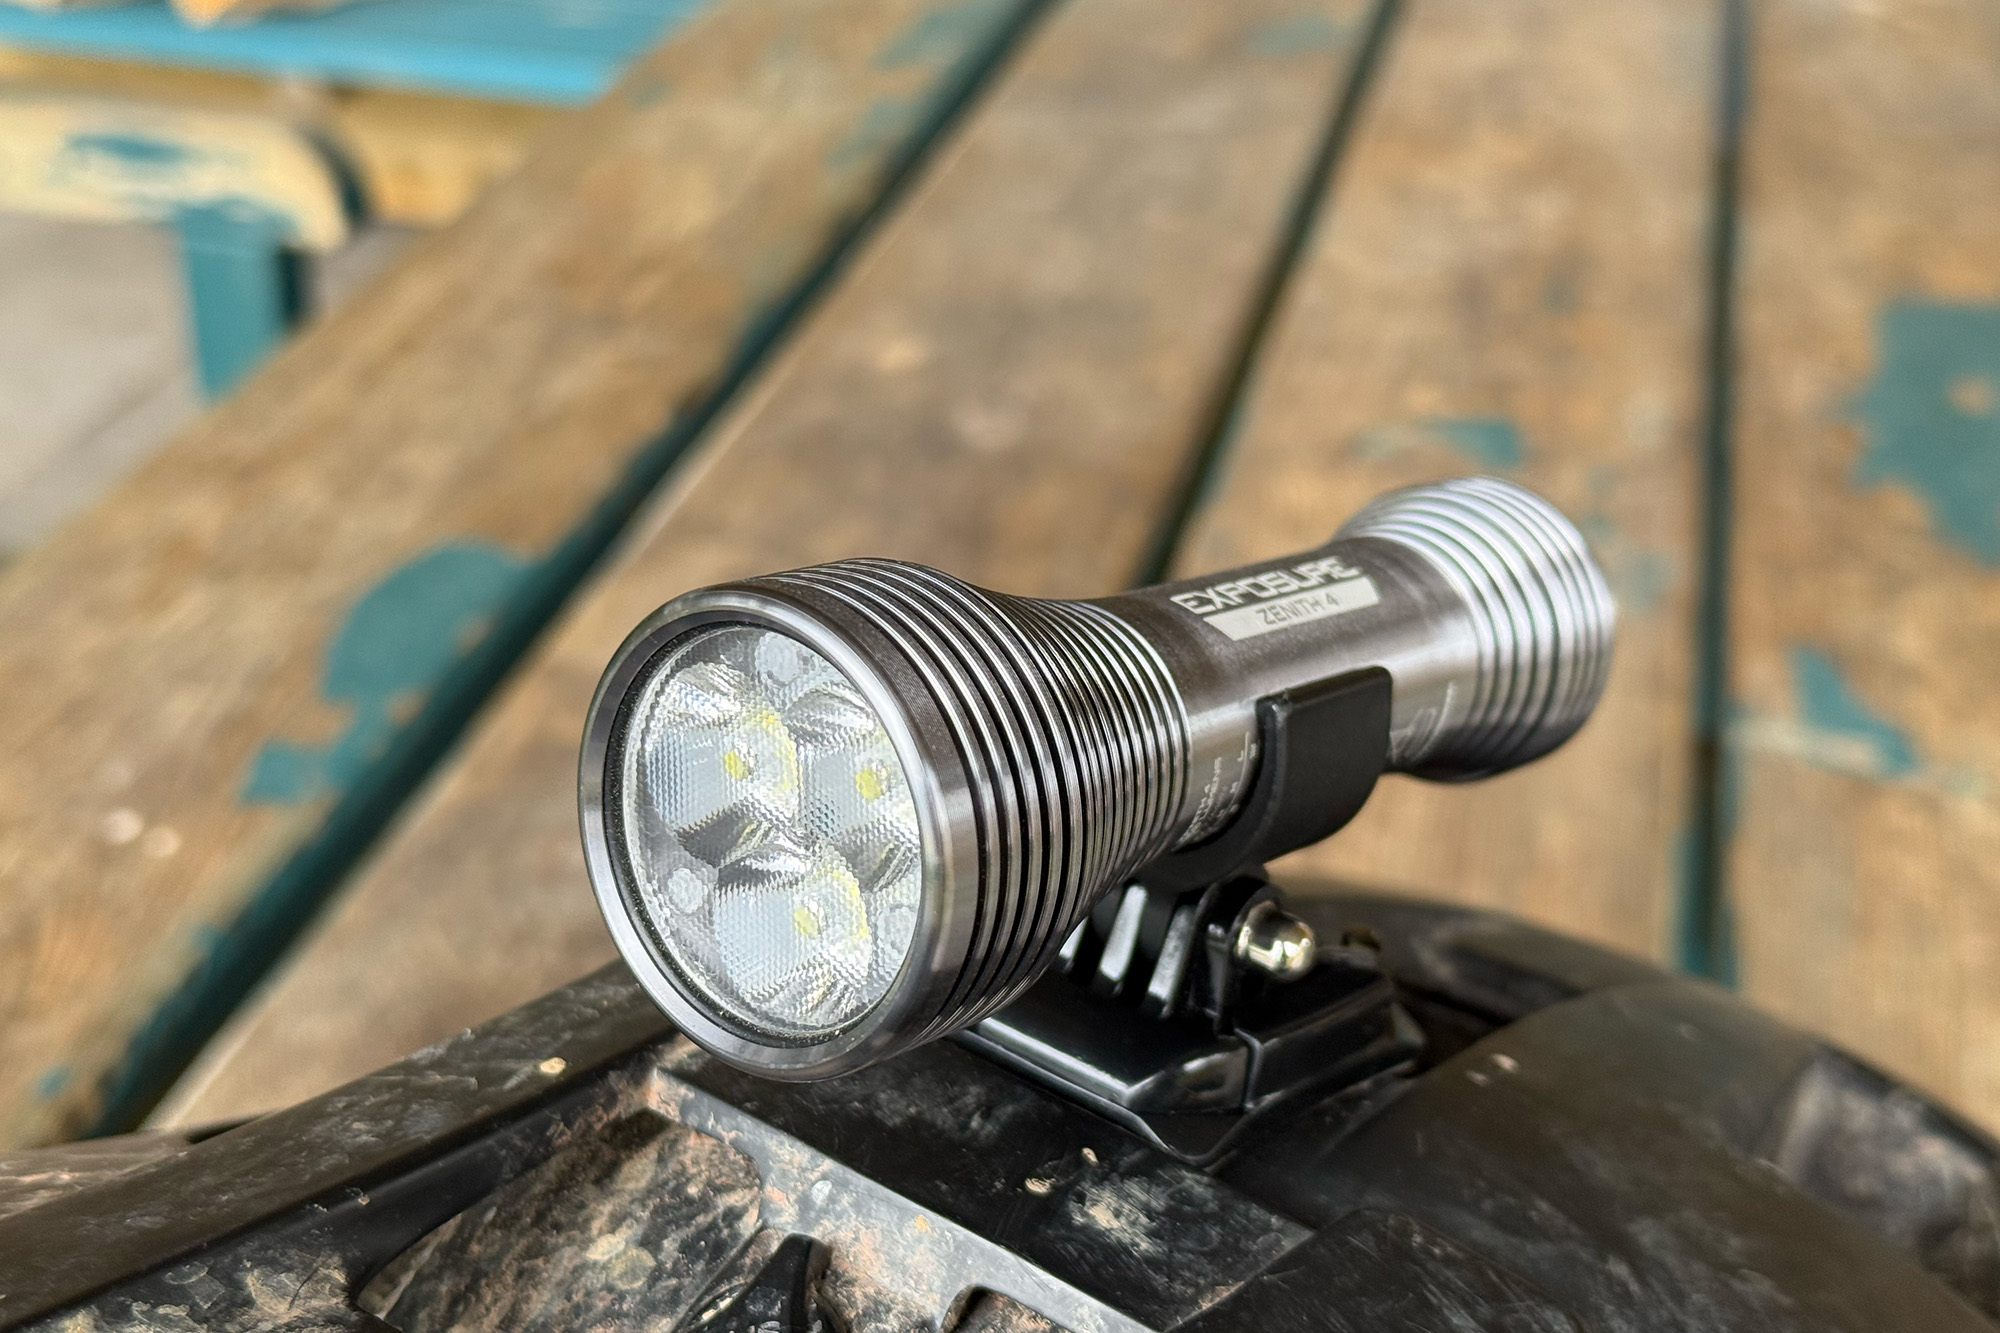
The light has three White XPL2 LEDs in the front, which shine up to 2,360 lumens down the trail.
I’ve mostly been using the Zenith MK4 in this setting, and it provides a good spread of light, with decent contrast for obstacles.
With 2,360 lumens, the Zenith MK4 should be bright enough to navigate by. Nick Clark / Our Media
Having used lights with a more focused beam in the past, this feels better for spotlighting features such as the lips of jumps and drops.
The Zenith’s white light feels less taxing on the eyes than others and helps with depth perception.
The plush case keeps the light safe and easy to store. Nick Clark / Our Media
In the box, Exposure supplies a helmet mount and bar mount for the light, meaning it could have a dual purpose in your life. I’d consider using it for road riding in a lower-brightness mode.
Having smashed my face up too many times on a mountain bike, I’ve opted for the GoPro-style adhesive sticker mount on my helmet, which has performed really well for my nighttime enduro rides.
Exposure also provides a lanyard for the light, which keeps it attached to your helmet should you knock it out of the mount.
Looking to put together the ultimate Zwift setup for the long winter months ahead? One way many Zwifters have upgraded the feel and aesthetics of their pain cave is through vibrant LED lighting setups. In this week’s top video, watch as one Zwifter walks through his installation of hexagon LED lighting in his pain cave.
We’re also featuring videos about home gym upgrades, climbing Alpe du Zwift in under 50 minutes, beginner indoor cycling setups, and Zwift racing for IRONMAN training.
Zwift Shed Upgrades | Hexagon Light Install
In an attempt to improve the lighting and aesthetics of his cycling shed, Max from The Watt Life shares how he installed hexagon lighting in his shed.
Planning My New Home Gym
Watch as Ryan Condon shares his plans to fully convert his garage into a home gym.
If You Want to Climb Alpe du Zwift in Under 50 Minutes, Do This!
After lots of hard and consistent training, Adam from Road to A recently completed Alpe du Zwift in under 50 minutes. In this video, he shares tips and tricks that helped him achieve this goal.
Is Indoor Cycling Beginner Friendly? We Gave A Smart Trainer To A Beginner To Find Out
If you’re interested in getting started with indoor cycling, but don’t want to worry about all the technical bits, fear not! In this video, watch as Cycling Weekly sets up the Elite Rivo with an indoor cycling beginner.
Using A Zwift Race as Part of My IRONMAN Training | Live Stats + Zwift Bike
Watch as Parker Kerth tackles a Zwift race as part of his prep for an upcoming IRONMAN. Can he take the win?
Got a Great Zwift Video?
Share the link below and we may feature it in an upcoming post!
Strava has filed a lawsuit against Garmin over two key features, Segments and heatmaps, and demanded that Garmin stops selling many of its devices.
The lawsuit was filed on 30 September in the US District Court for the District of Colorado and Strava claims Garmin is infringing patents, as first reported by DC Rainmaker.
Strava’s Segment patent was filed in 2011 and granted in 2015. The patent effectively covers GPS segments with time-based performance comparisons. Garmin introduced its own Segments in 2014 on its Edge 1000 bike computer, and expanded the feature to its other devices over the remainder of the year.
Garmin then collaborated with Strava to bring Strava Live Segments to Garmin devices under a Master Cooperation Agreement (MCA).
As part of the MCA, Garmin agreed not to show Garmin and Strava Segments at the same time. Now, Strava claims in its lawsuit that Garmin expanded beyond the MCA agreement’s scope, studying the Strava implementation and using it as a blueprint to build a competing system.
The second part of the lawsuit relates to heatmap display. Strava cites two patents, which cover generating a map that shows where other users work out based on activity data. These patents were filed in 2014 and 2016.
But, as DC Rainmaker explains, Garmin had heatmap functionality in 2013. “Garmin’s lawyers will easily argue this patent shouldn’t have been granted and get it invalidated,” claims DC Rainmaker.
As a result of these patent infringements, Strava claims it “has suffered damages, including lost revenue and business opportunities, erosion of competitive differentiation and network effects, harm to goodwill, and unjust gains to Garmin.”
Strava’s lawsuit says it provided Garmin with written notice of infringement in June and July of this year, which followed disagreements between the two companies.
Last year, Strava introduced API changes that disrupted third-party apps, such as Garmin. Garmin was critical of how Strava handled data attribution and used Garmin data (from Garmin users who upload activities to Strava) for AI training.
Strava’s lawsuit asks for a permanent injunction to stop Garmin selling devices that include Segments or heatmap functionality, which would cover most of Garmin’s smartwatches and Edge bike computers.
Strava told DC Rainmaker that it does not intend to disrupt the ability of Garmin users to sync data with Strava and it hopes “Garmin values our shared users in the same way”.


 Zwift’s Big Weekend
 Celebrity Leaders
  La Cyclo MedioFondo Foudre