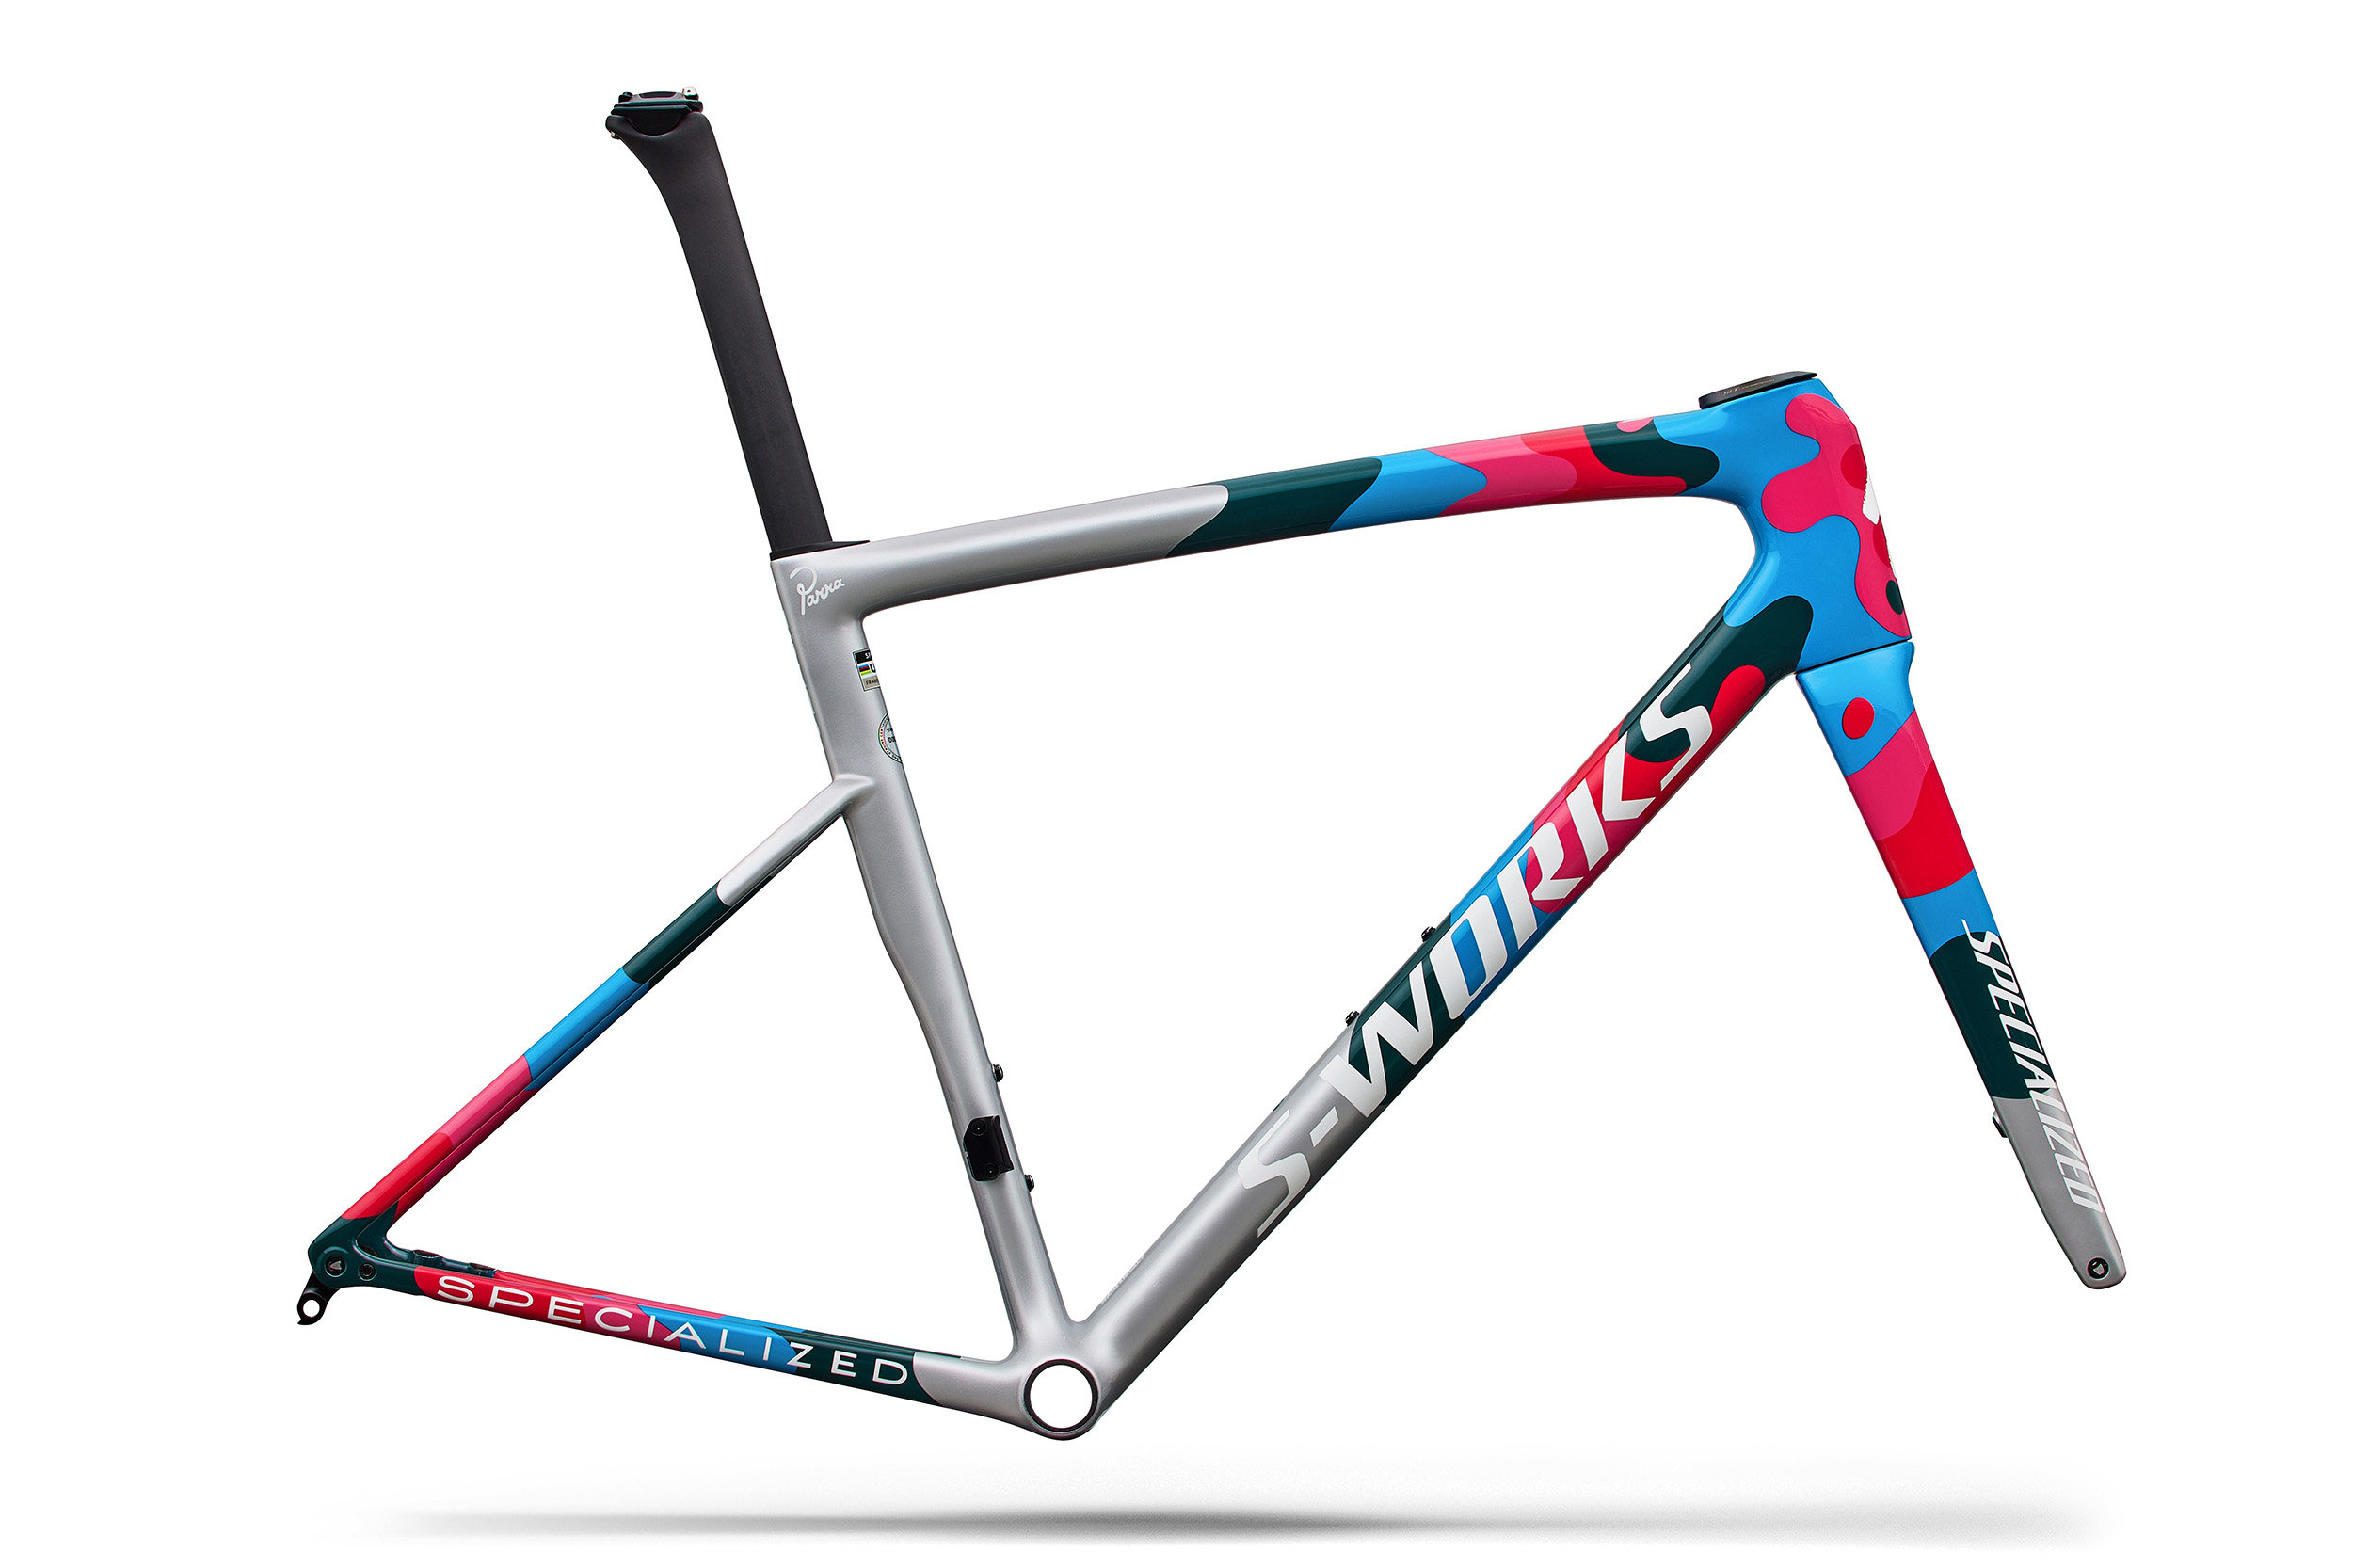
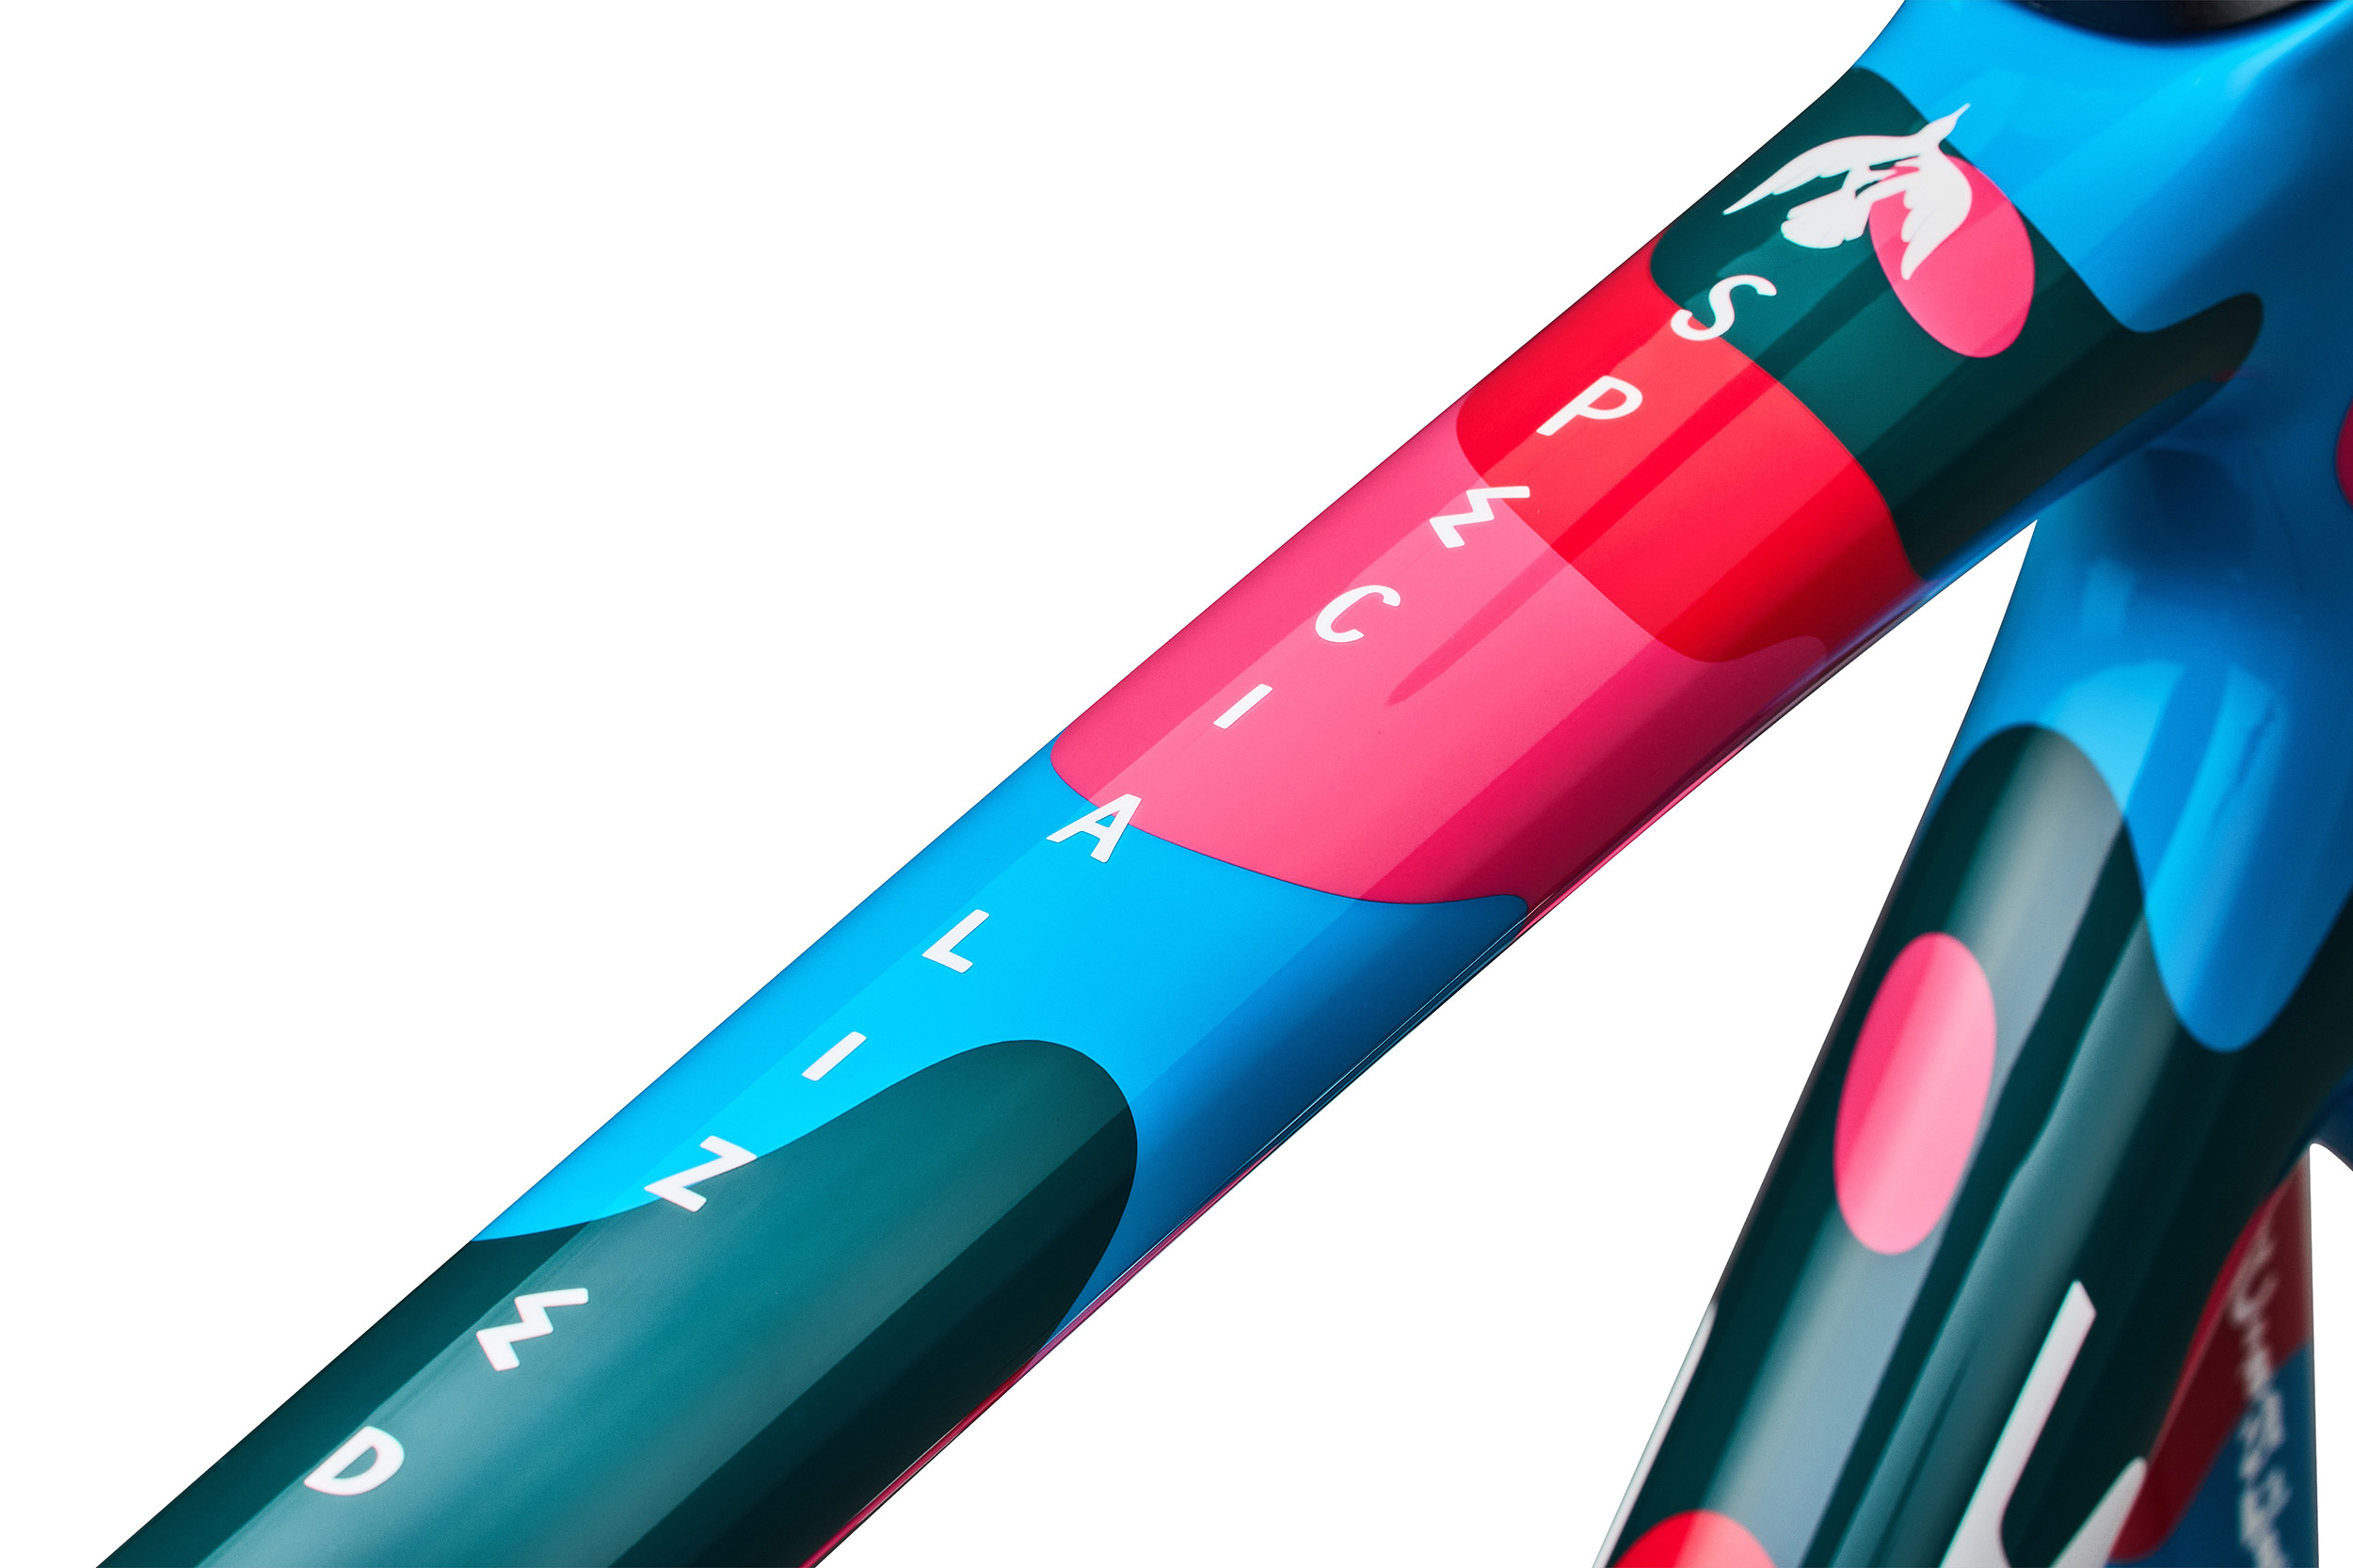
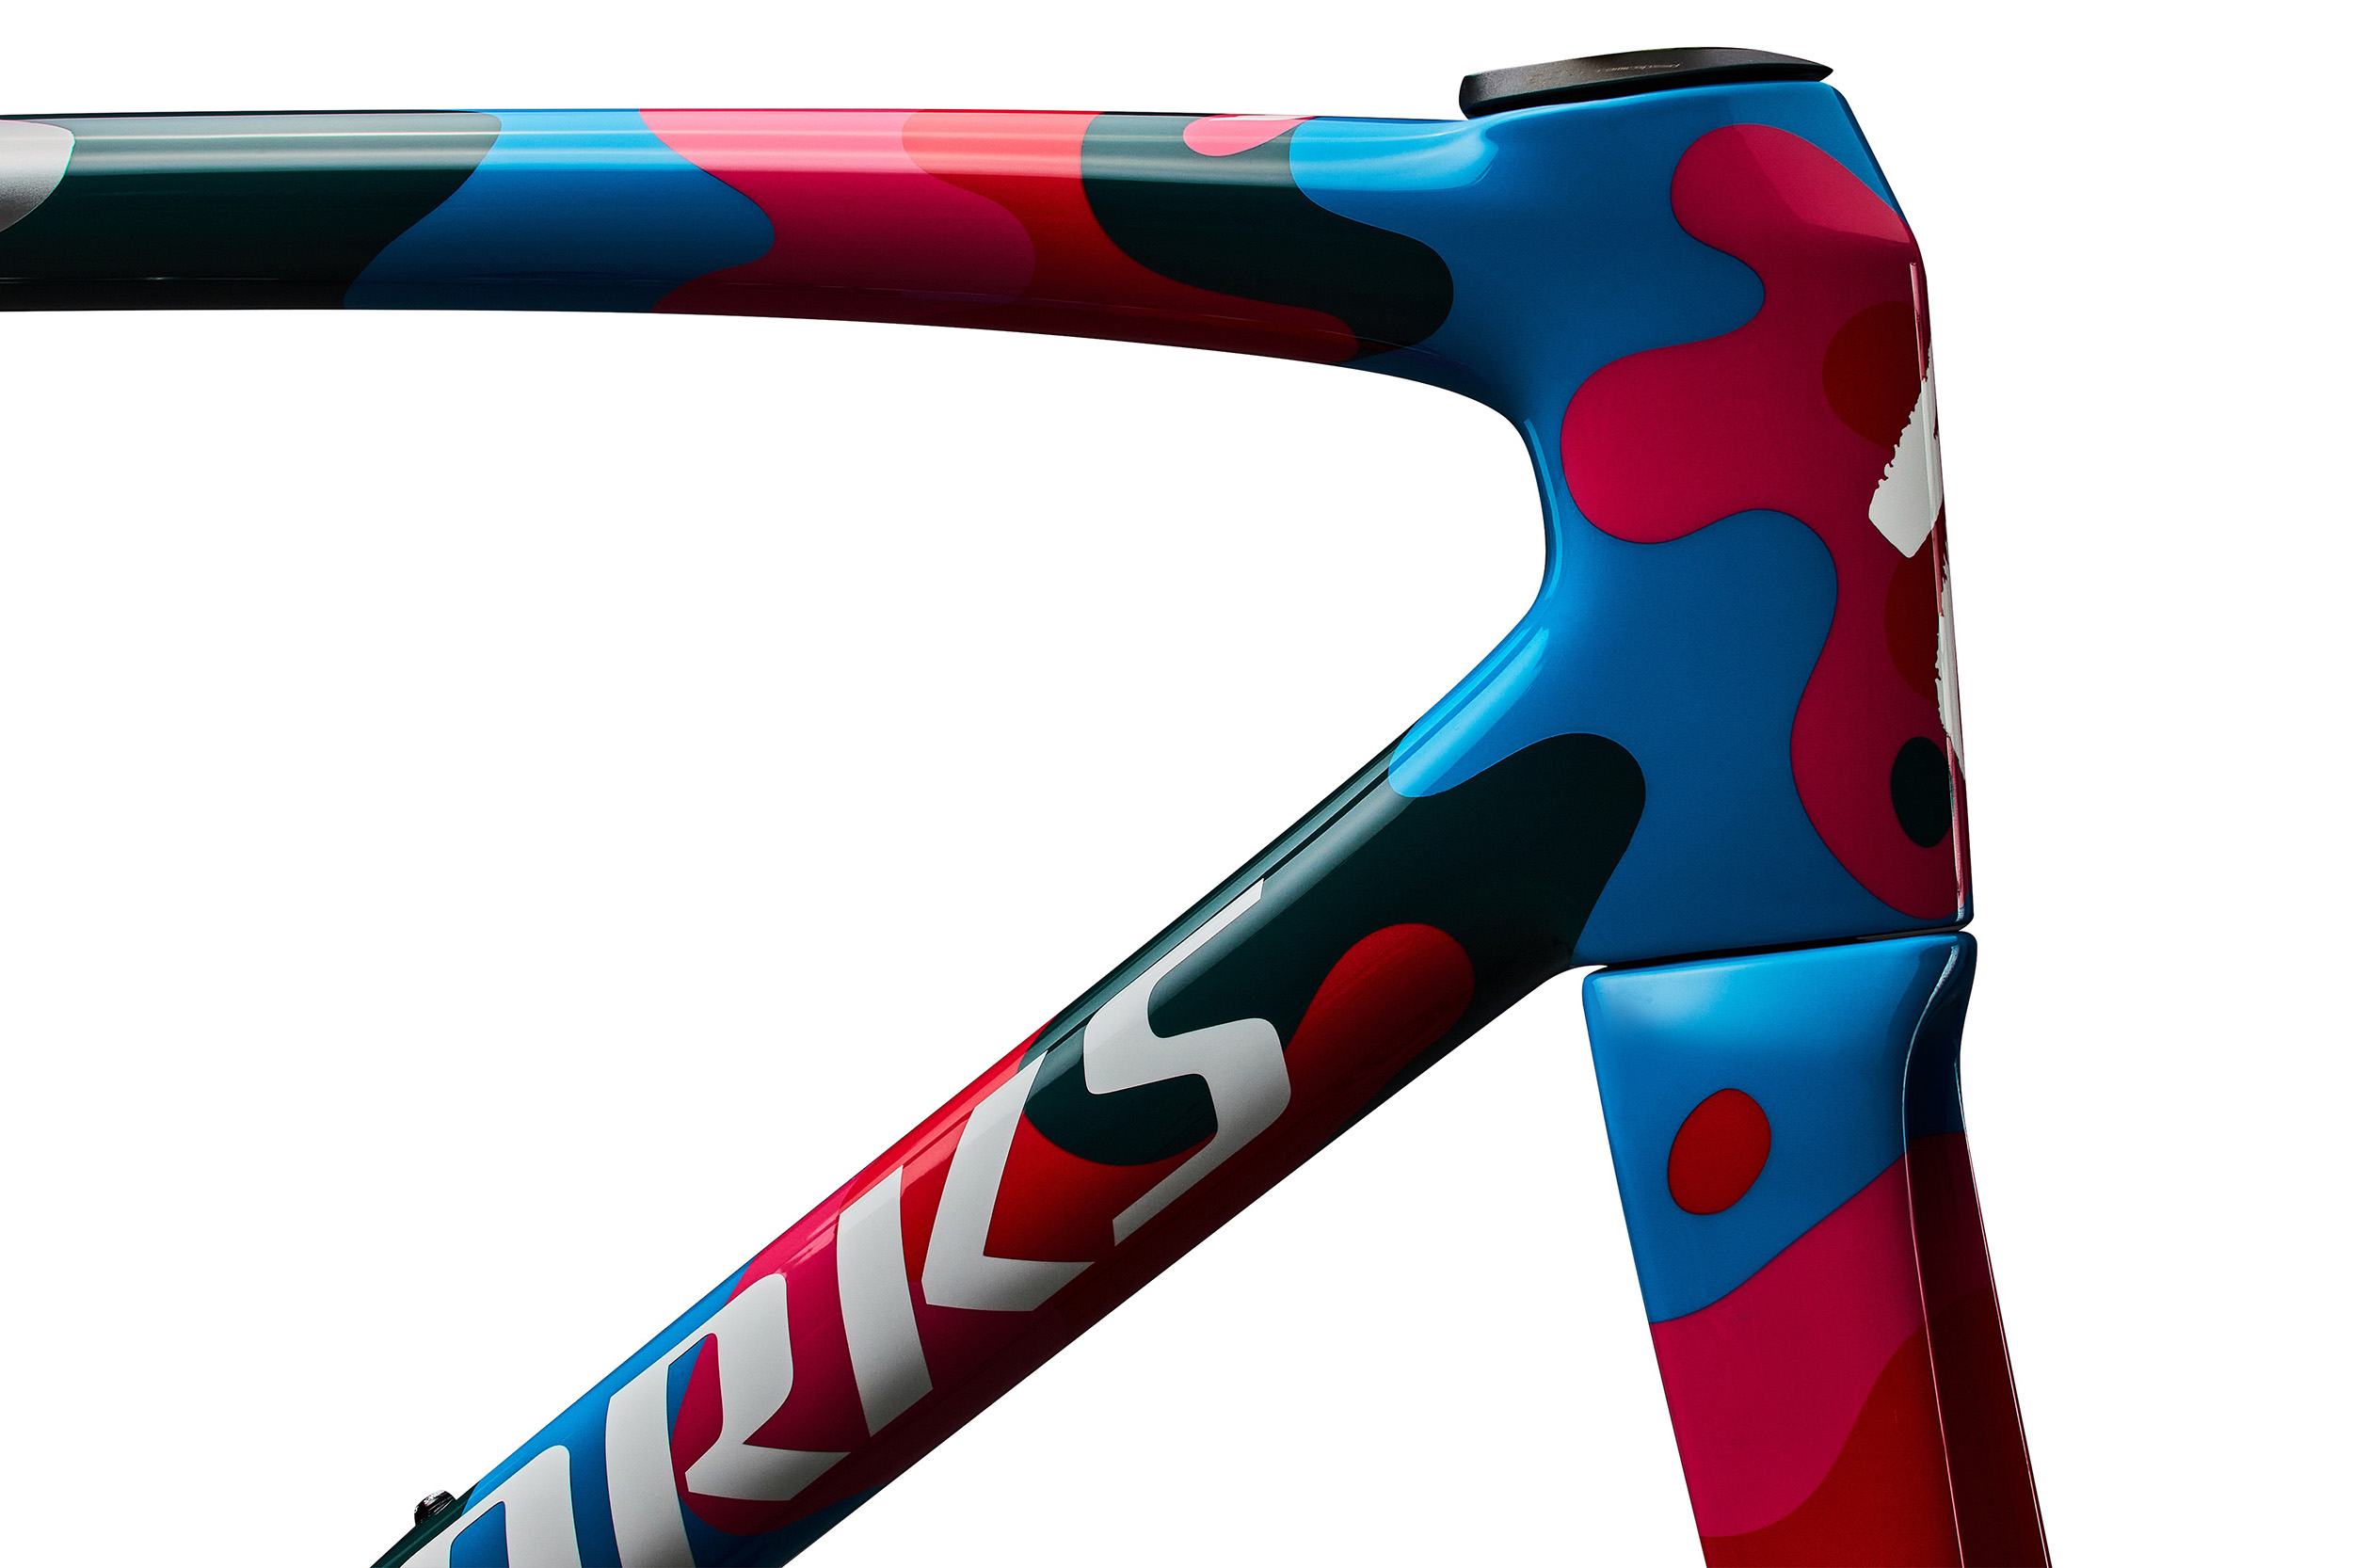
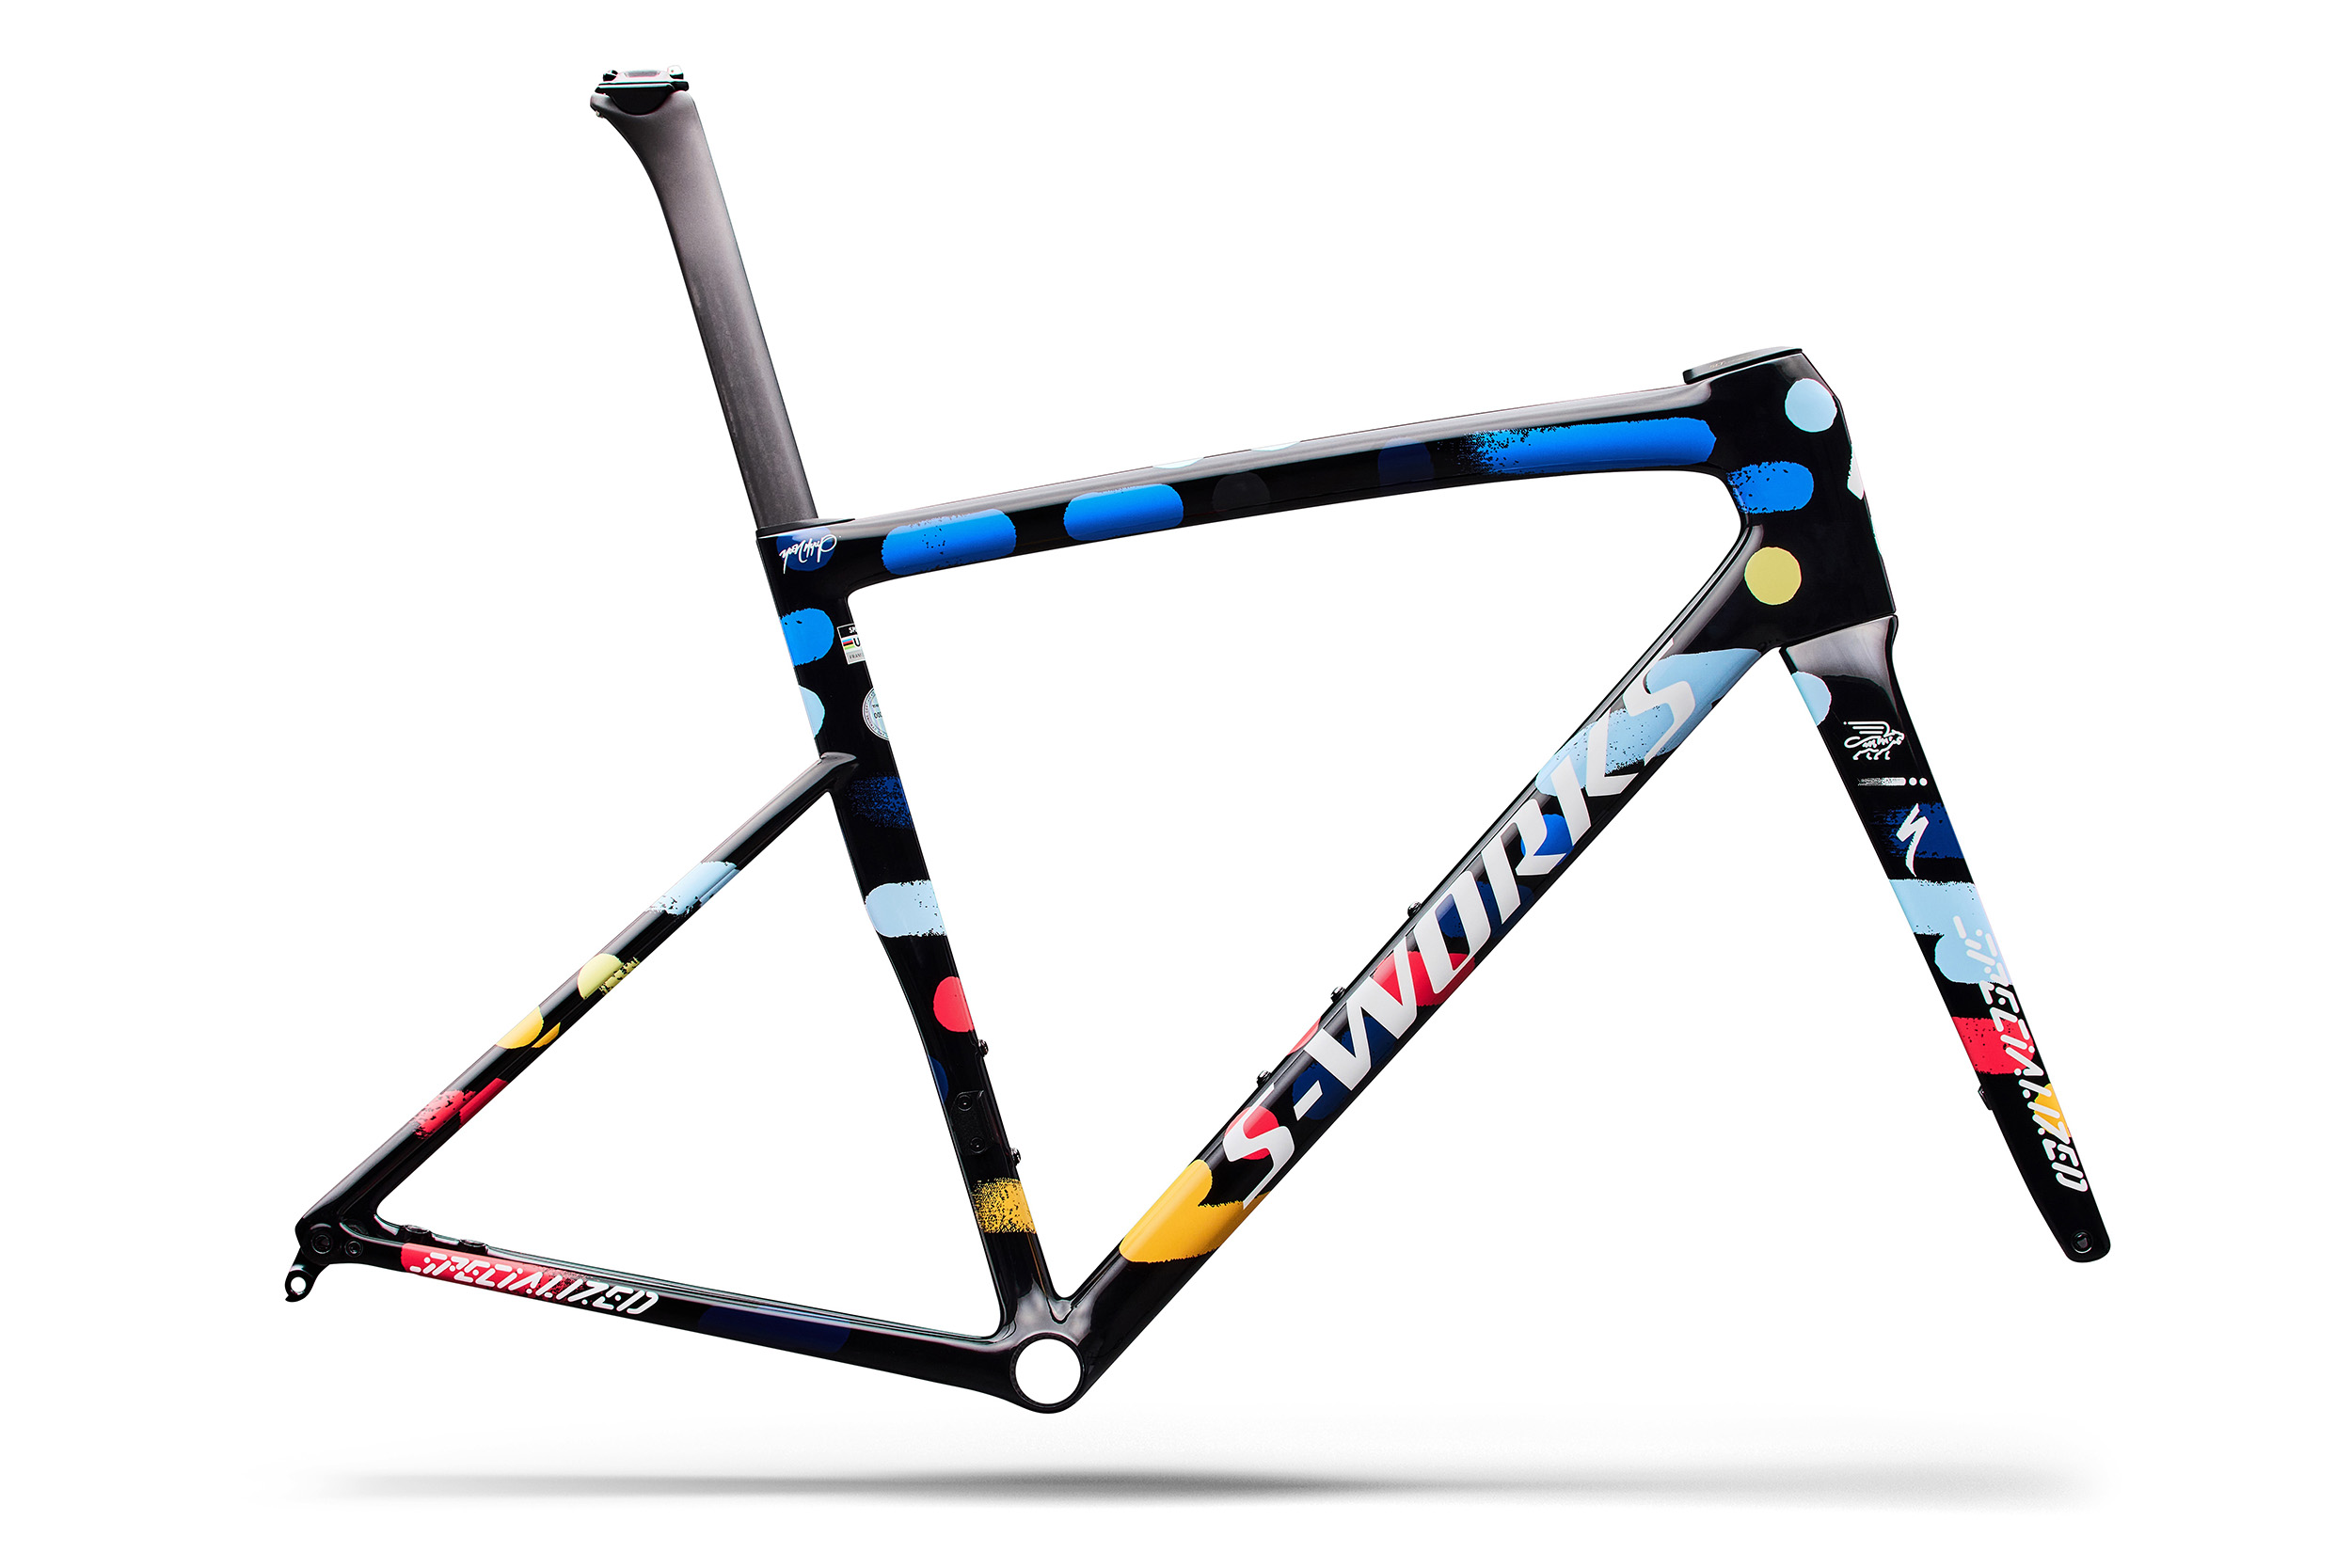
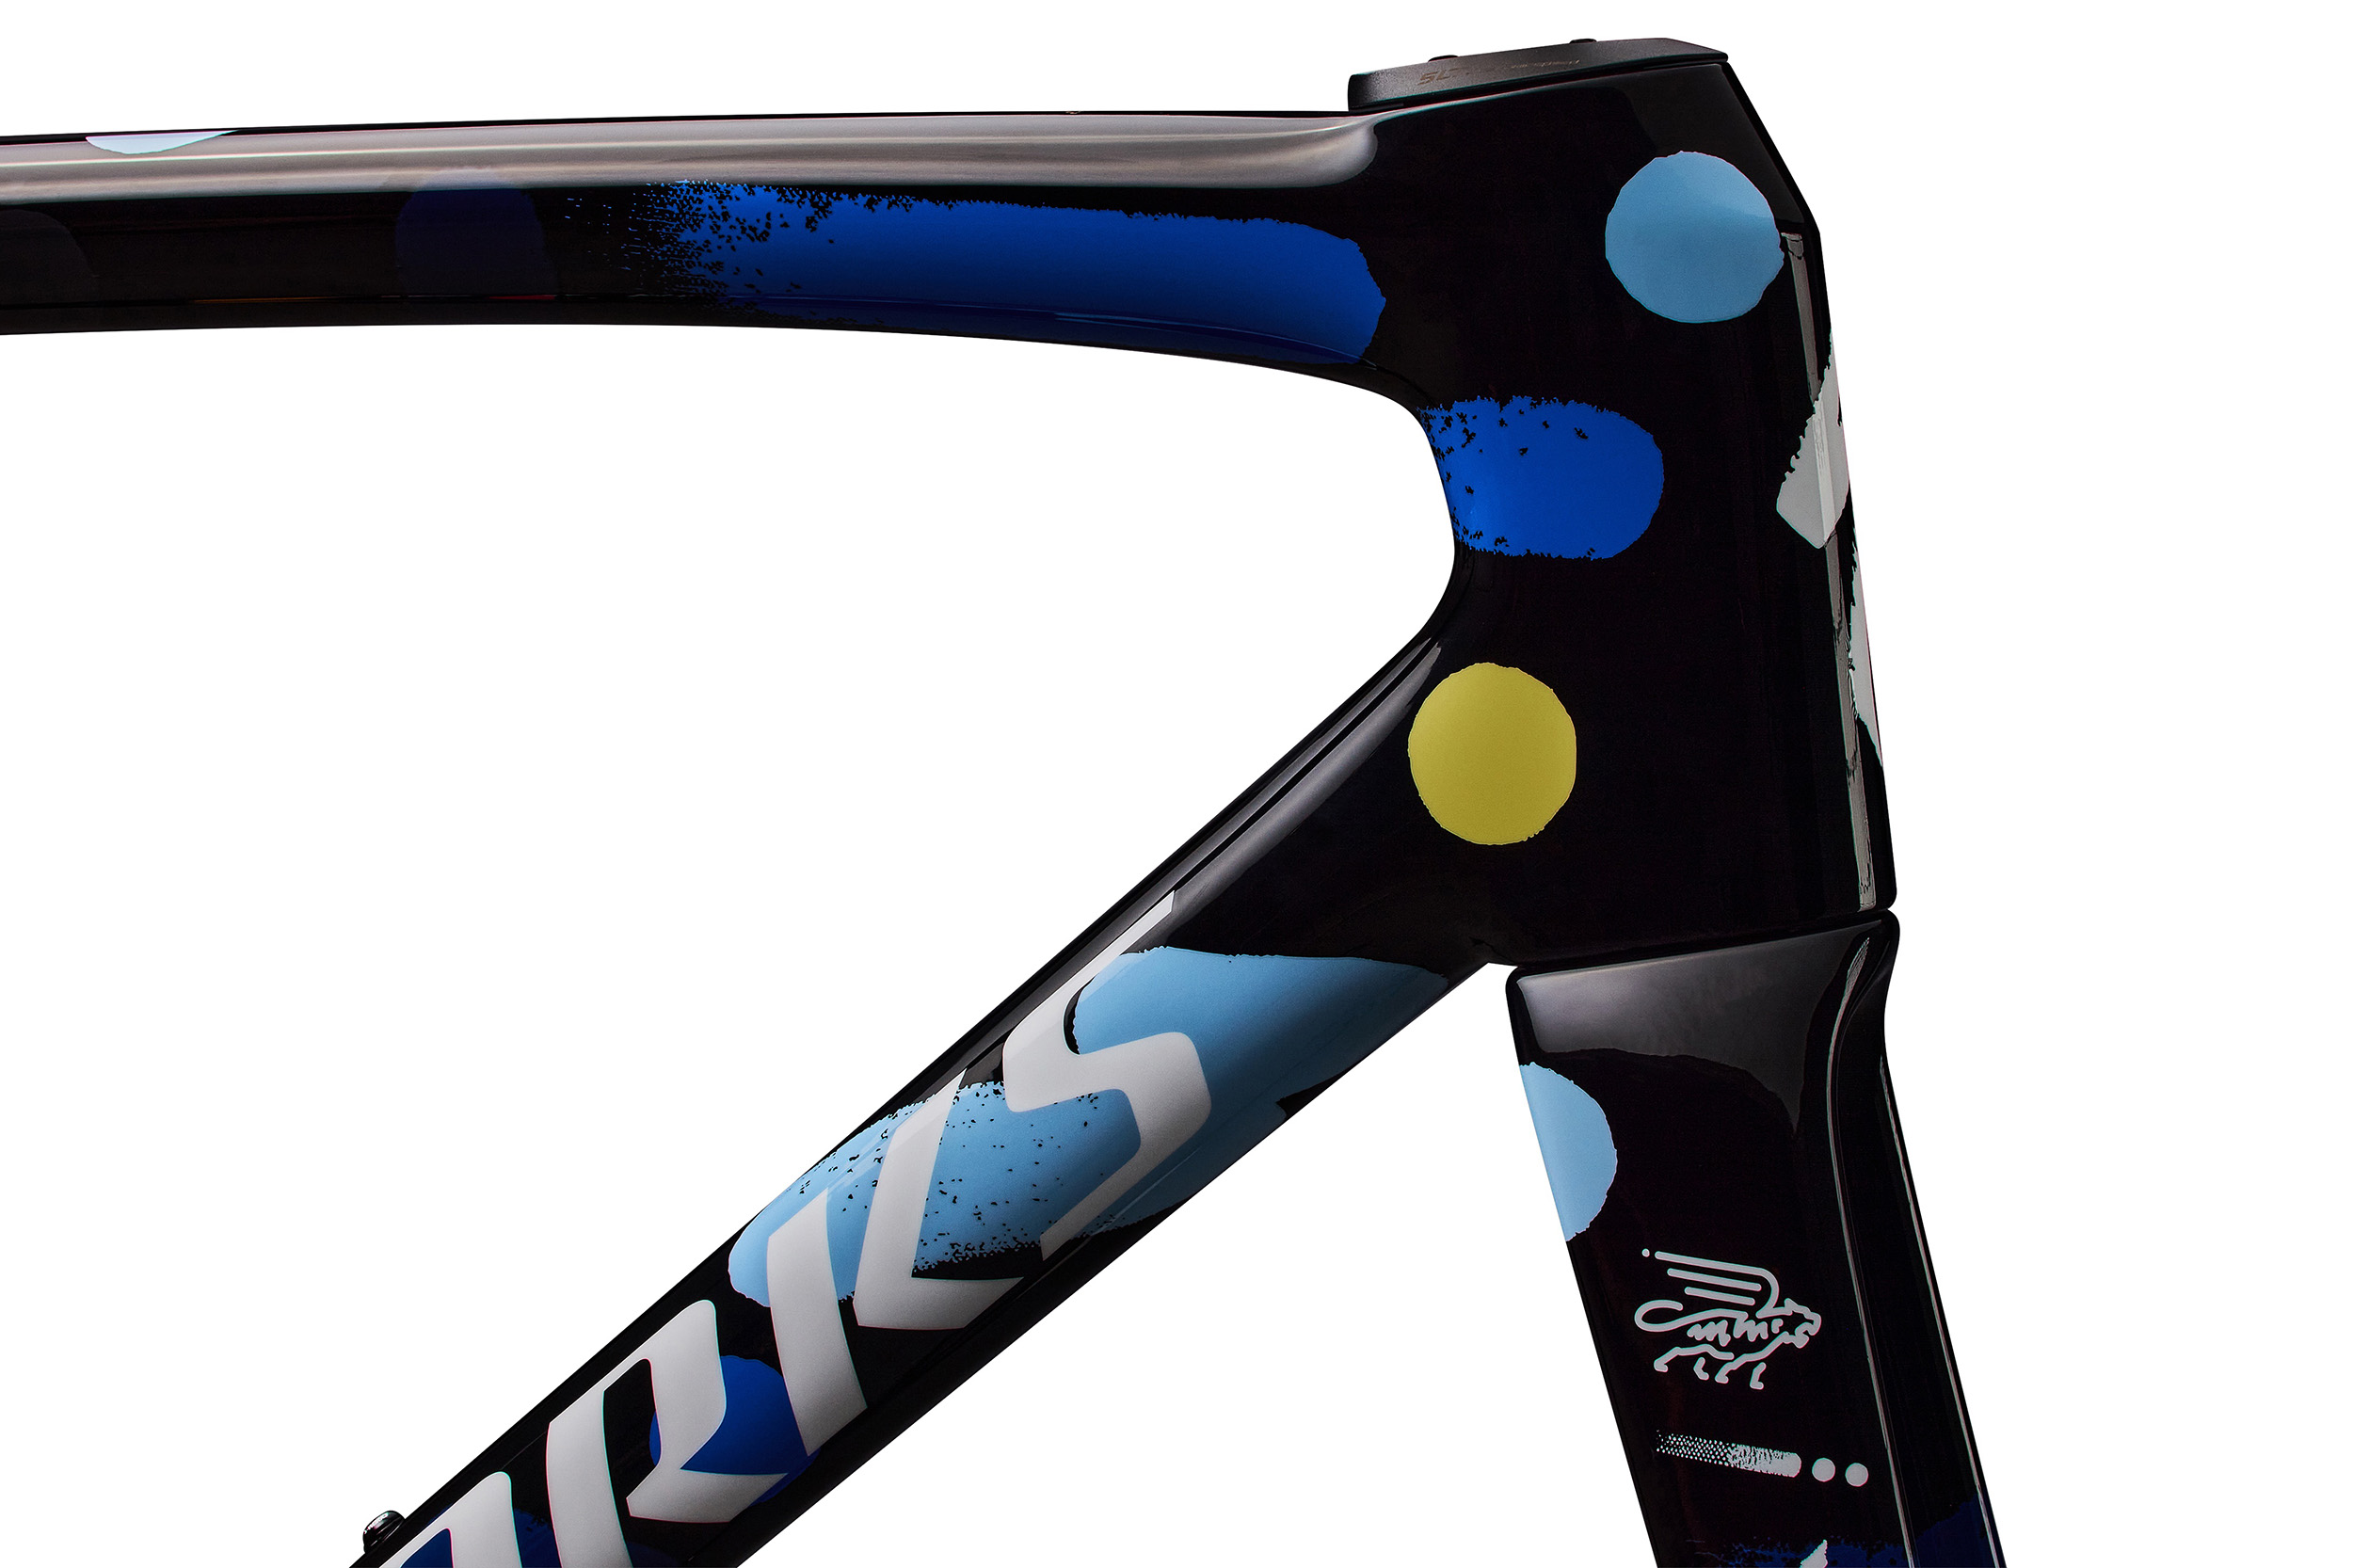
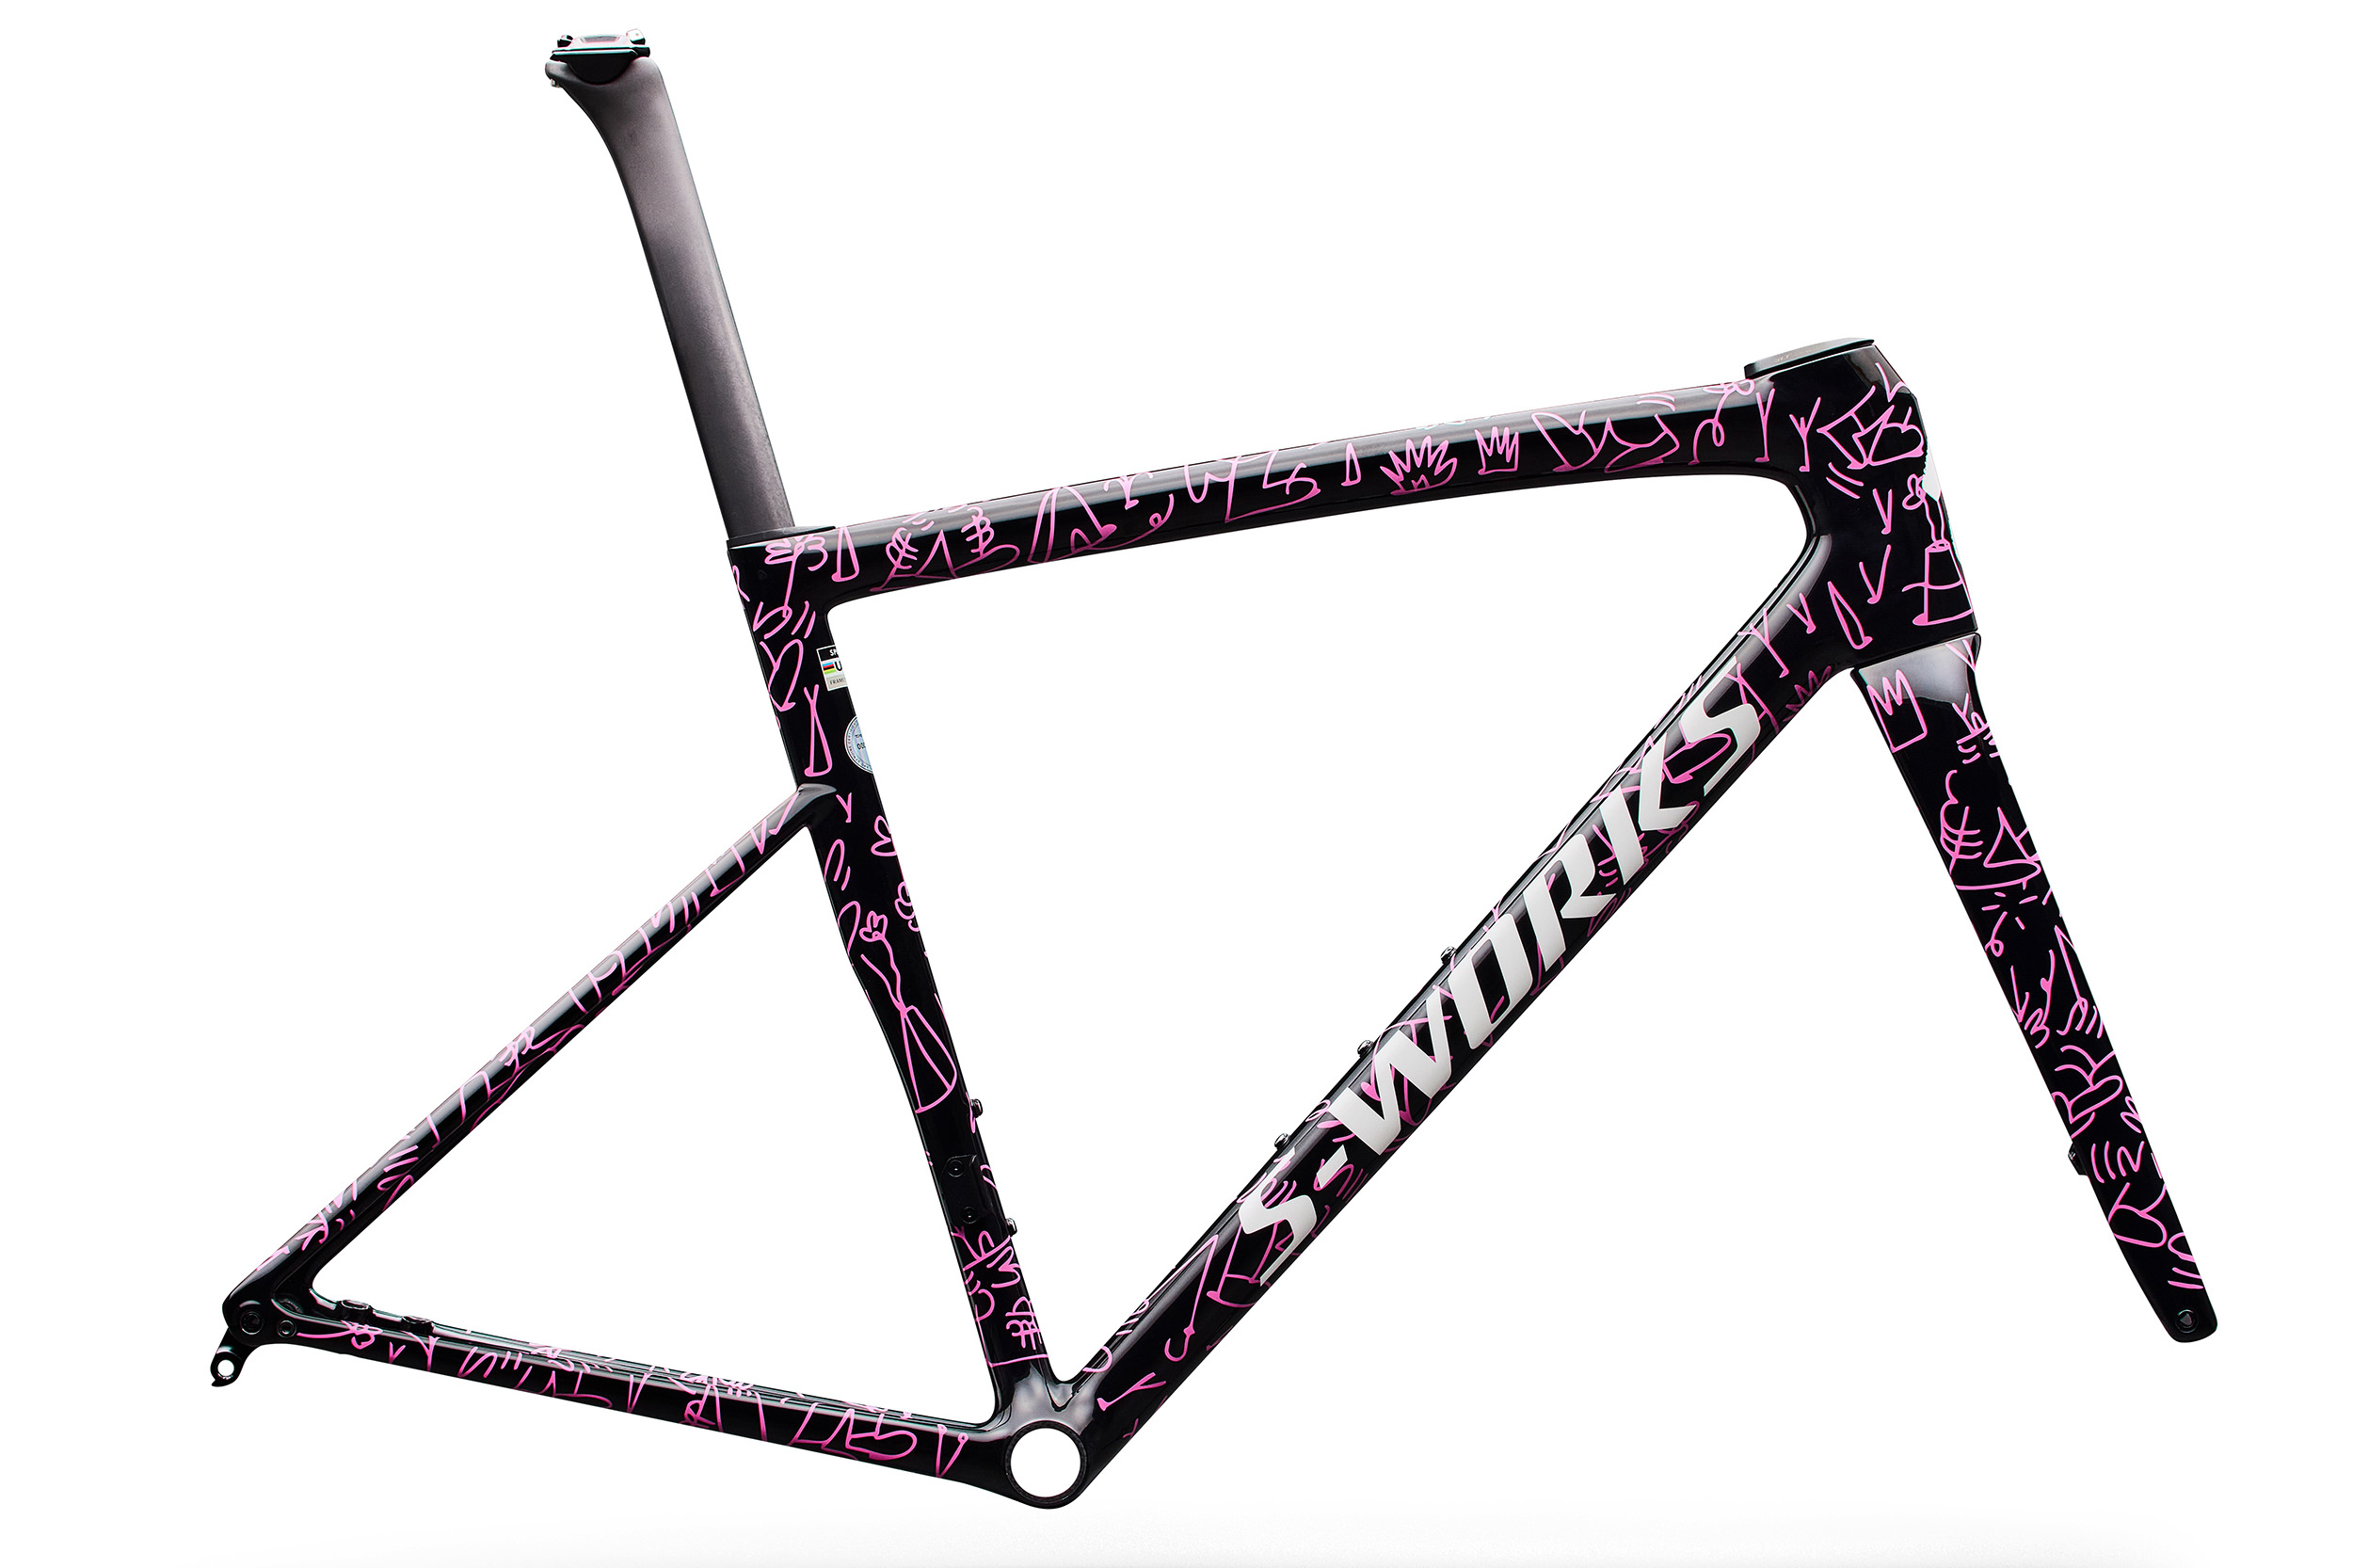
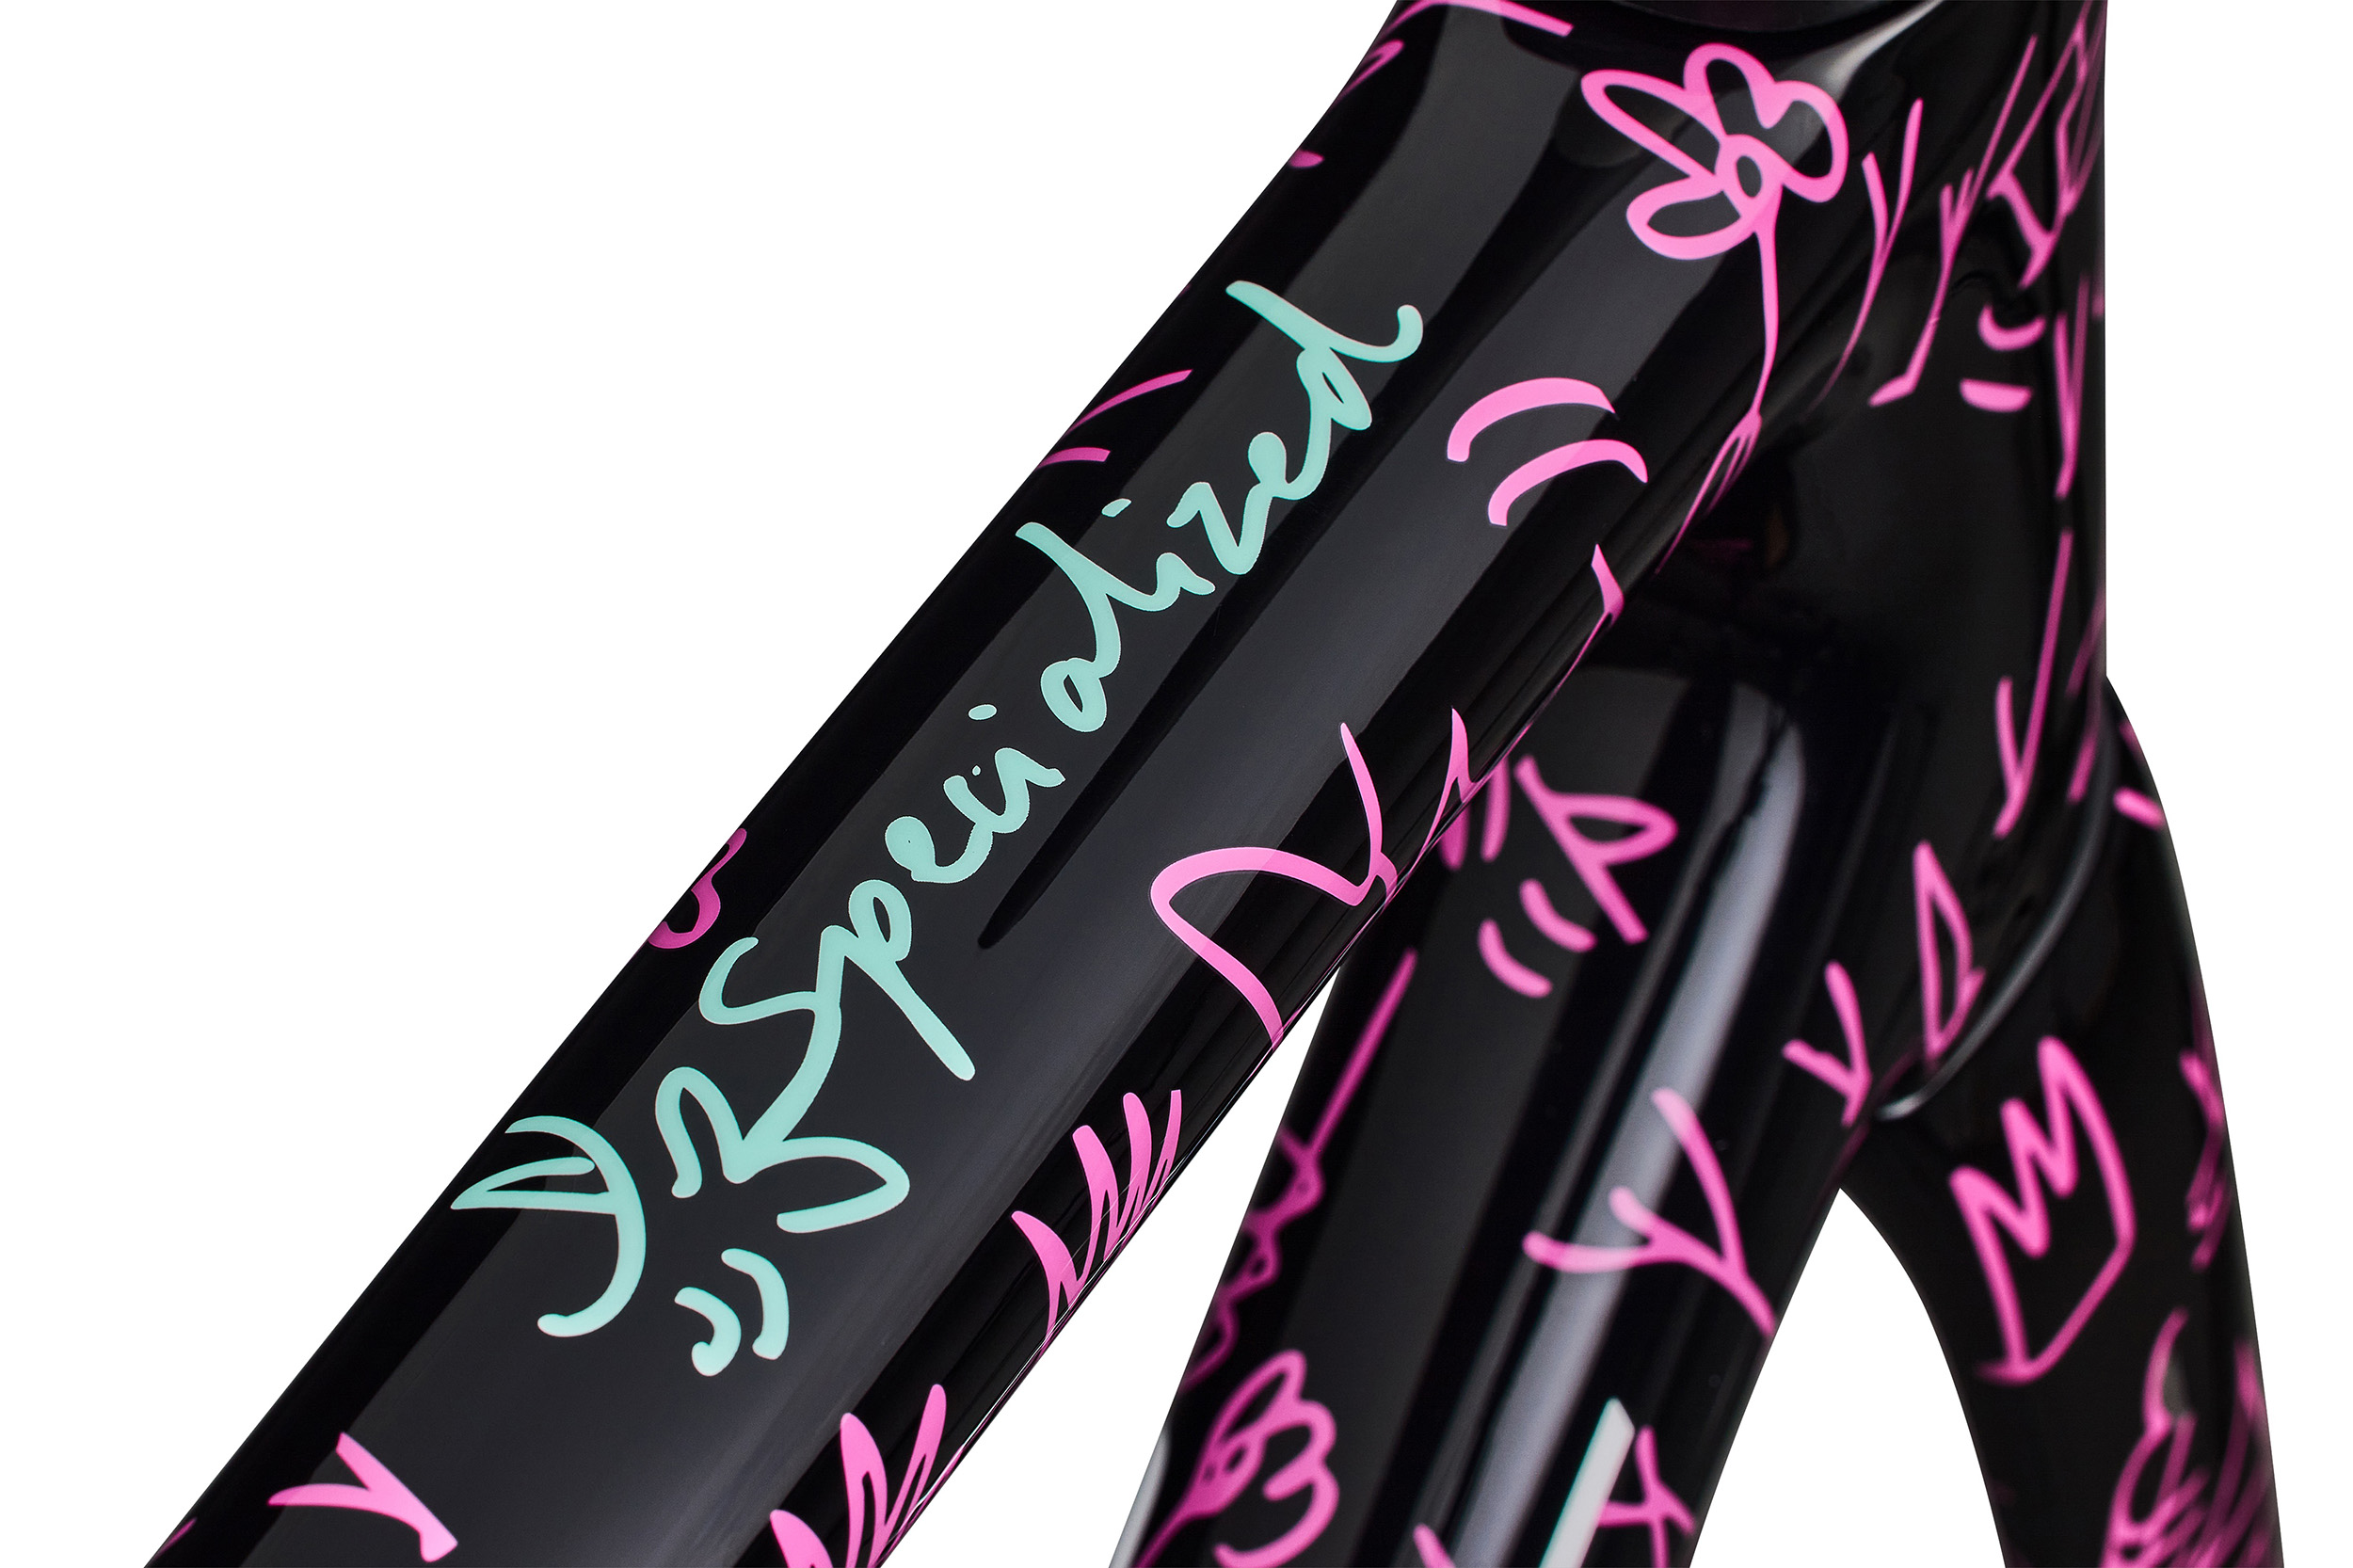
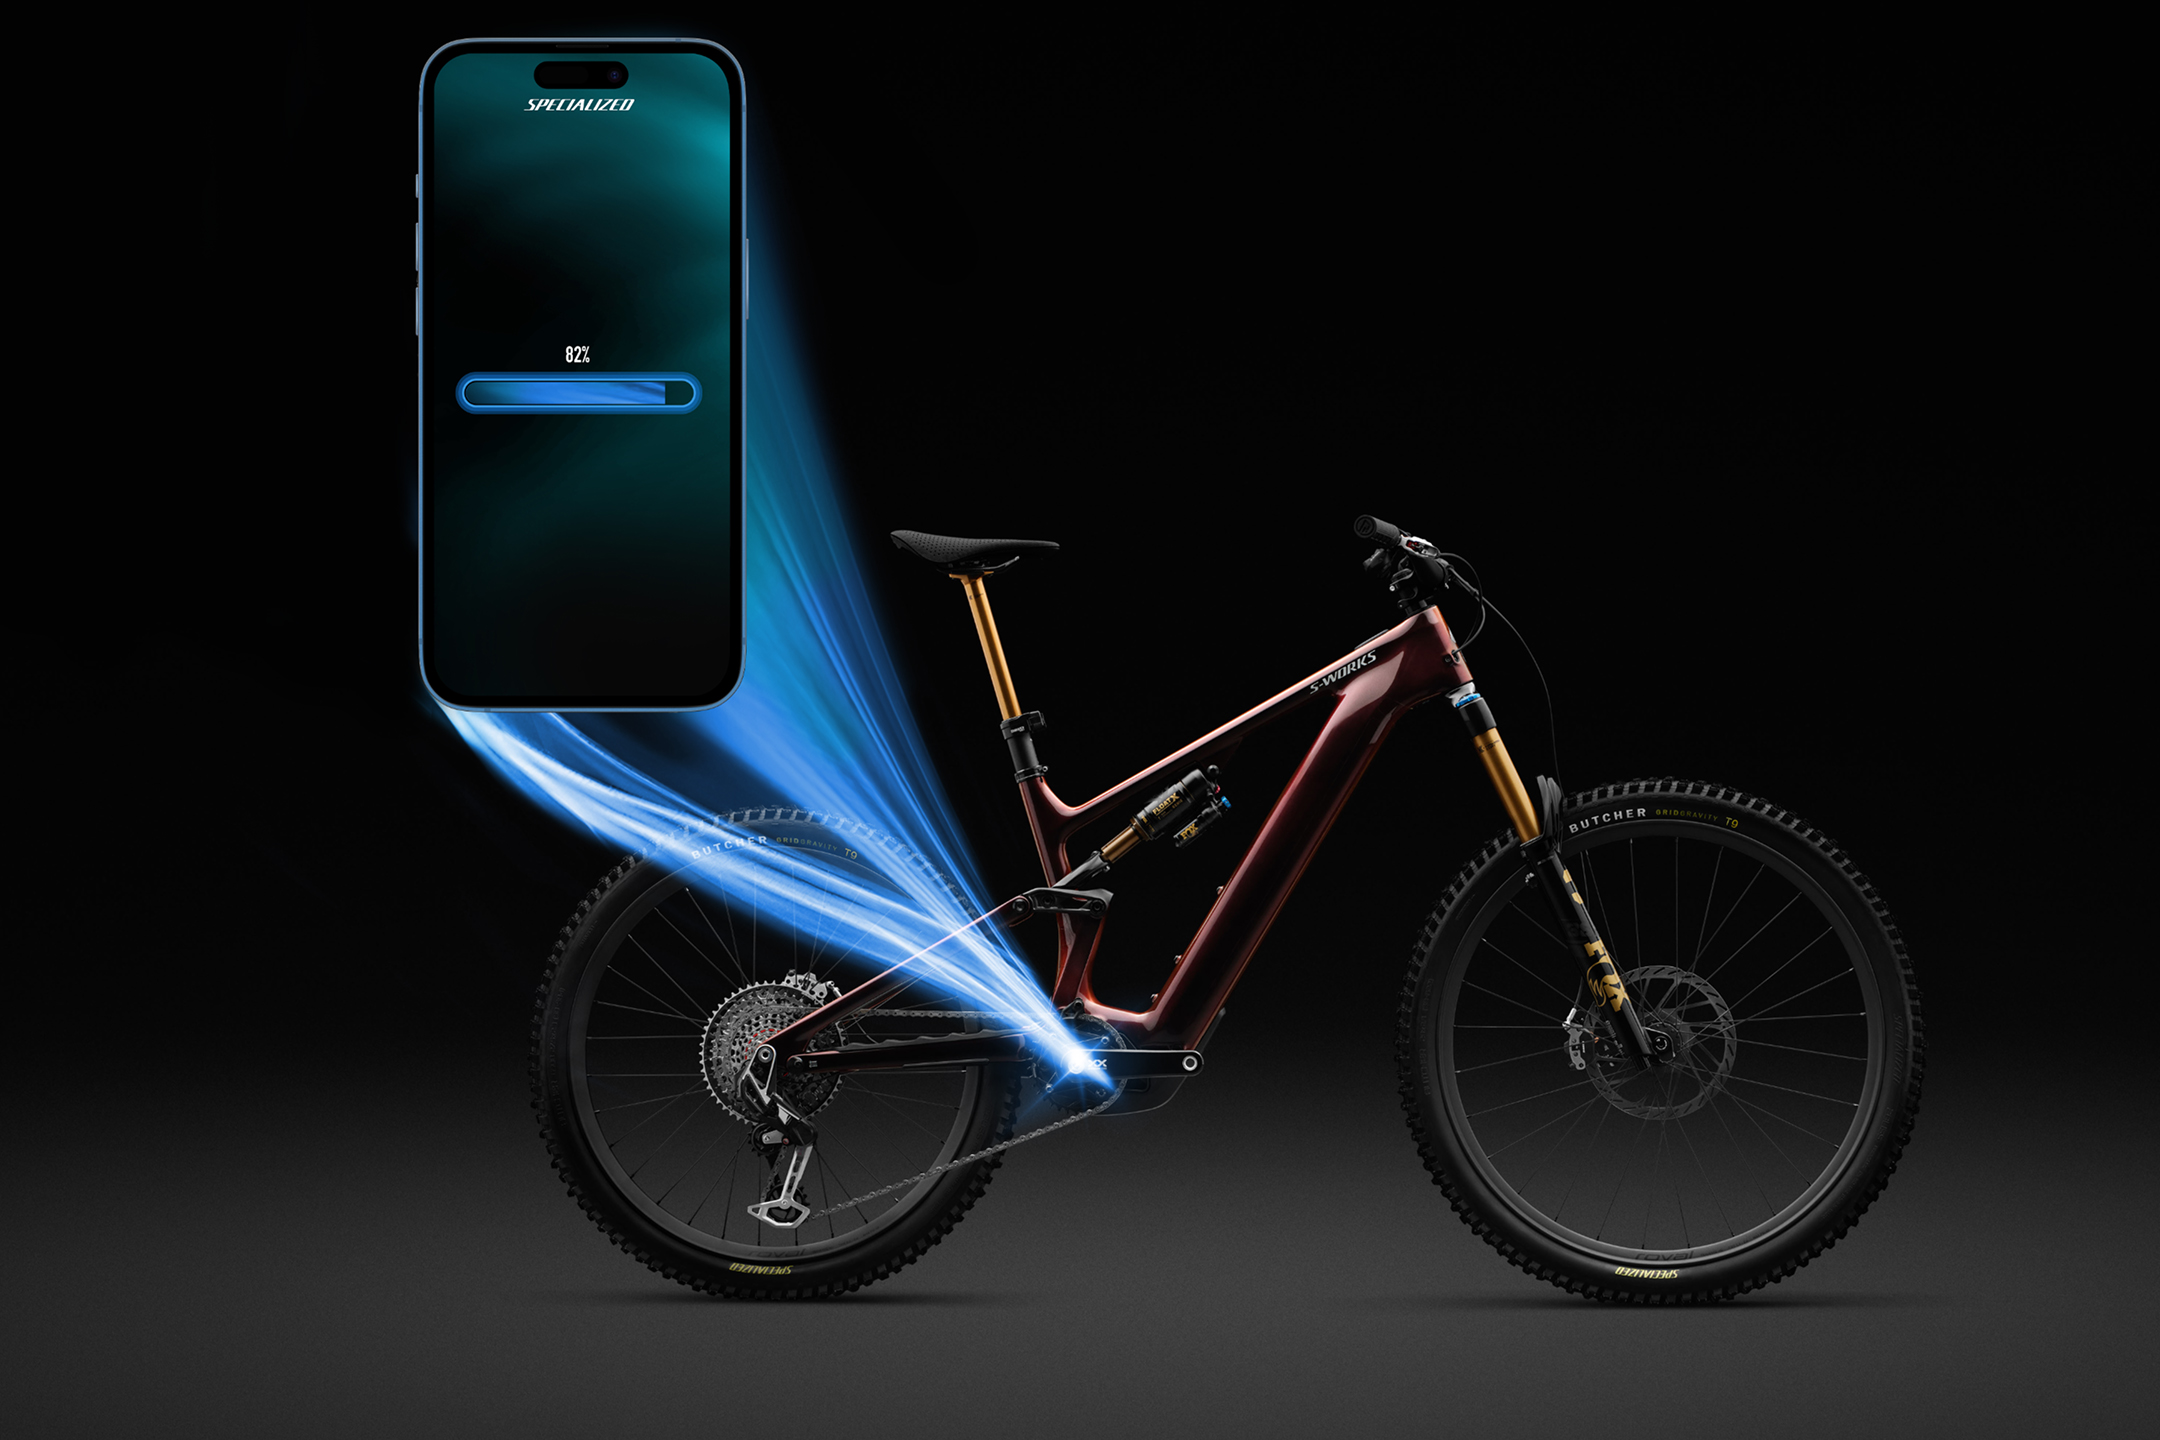
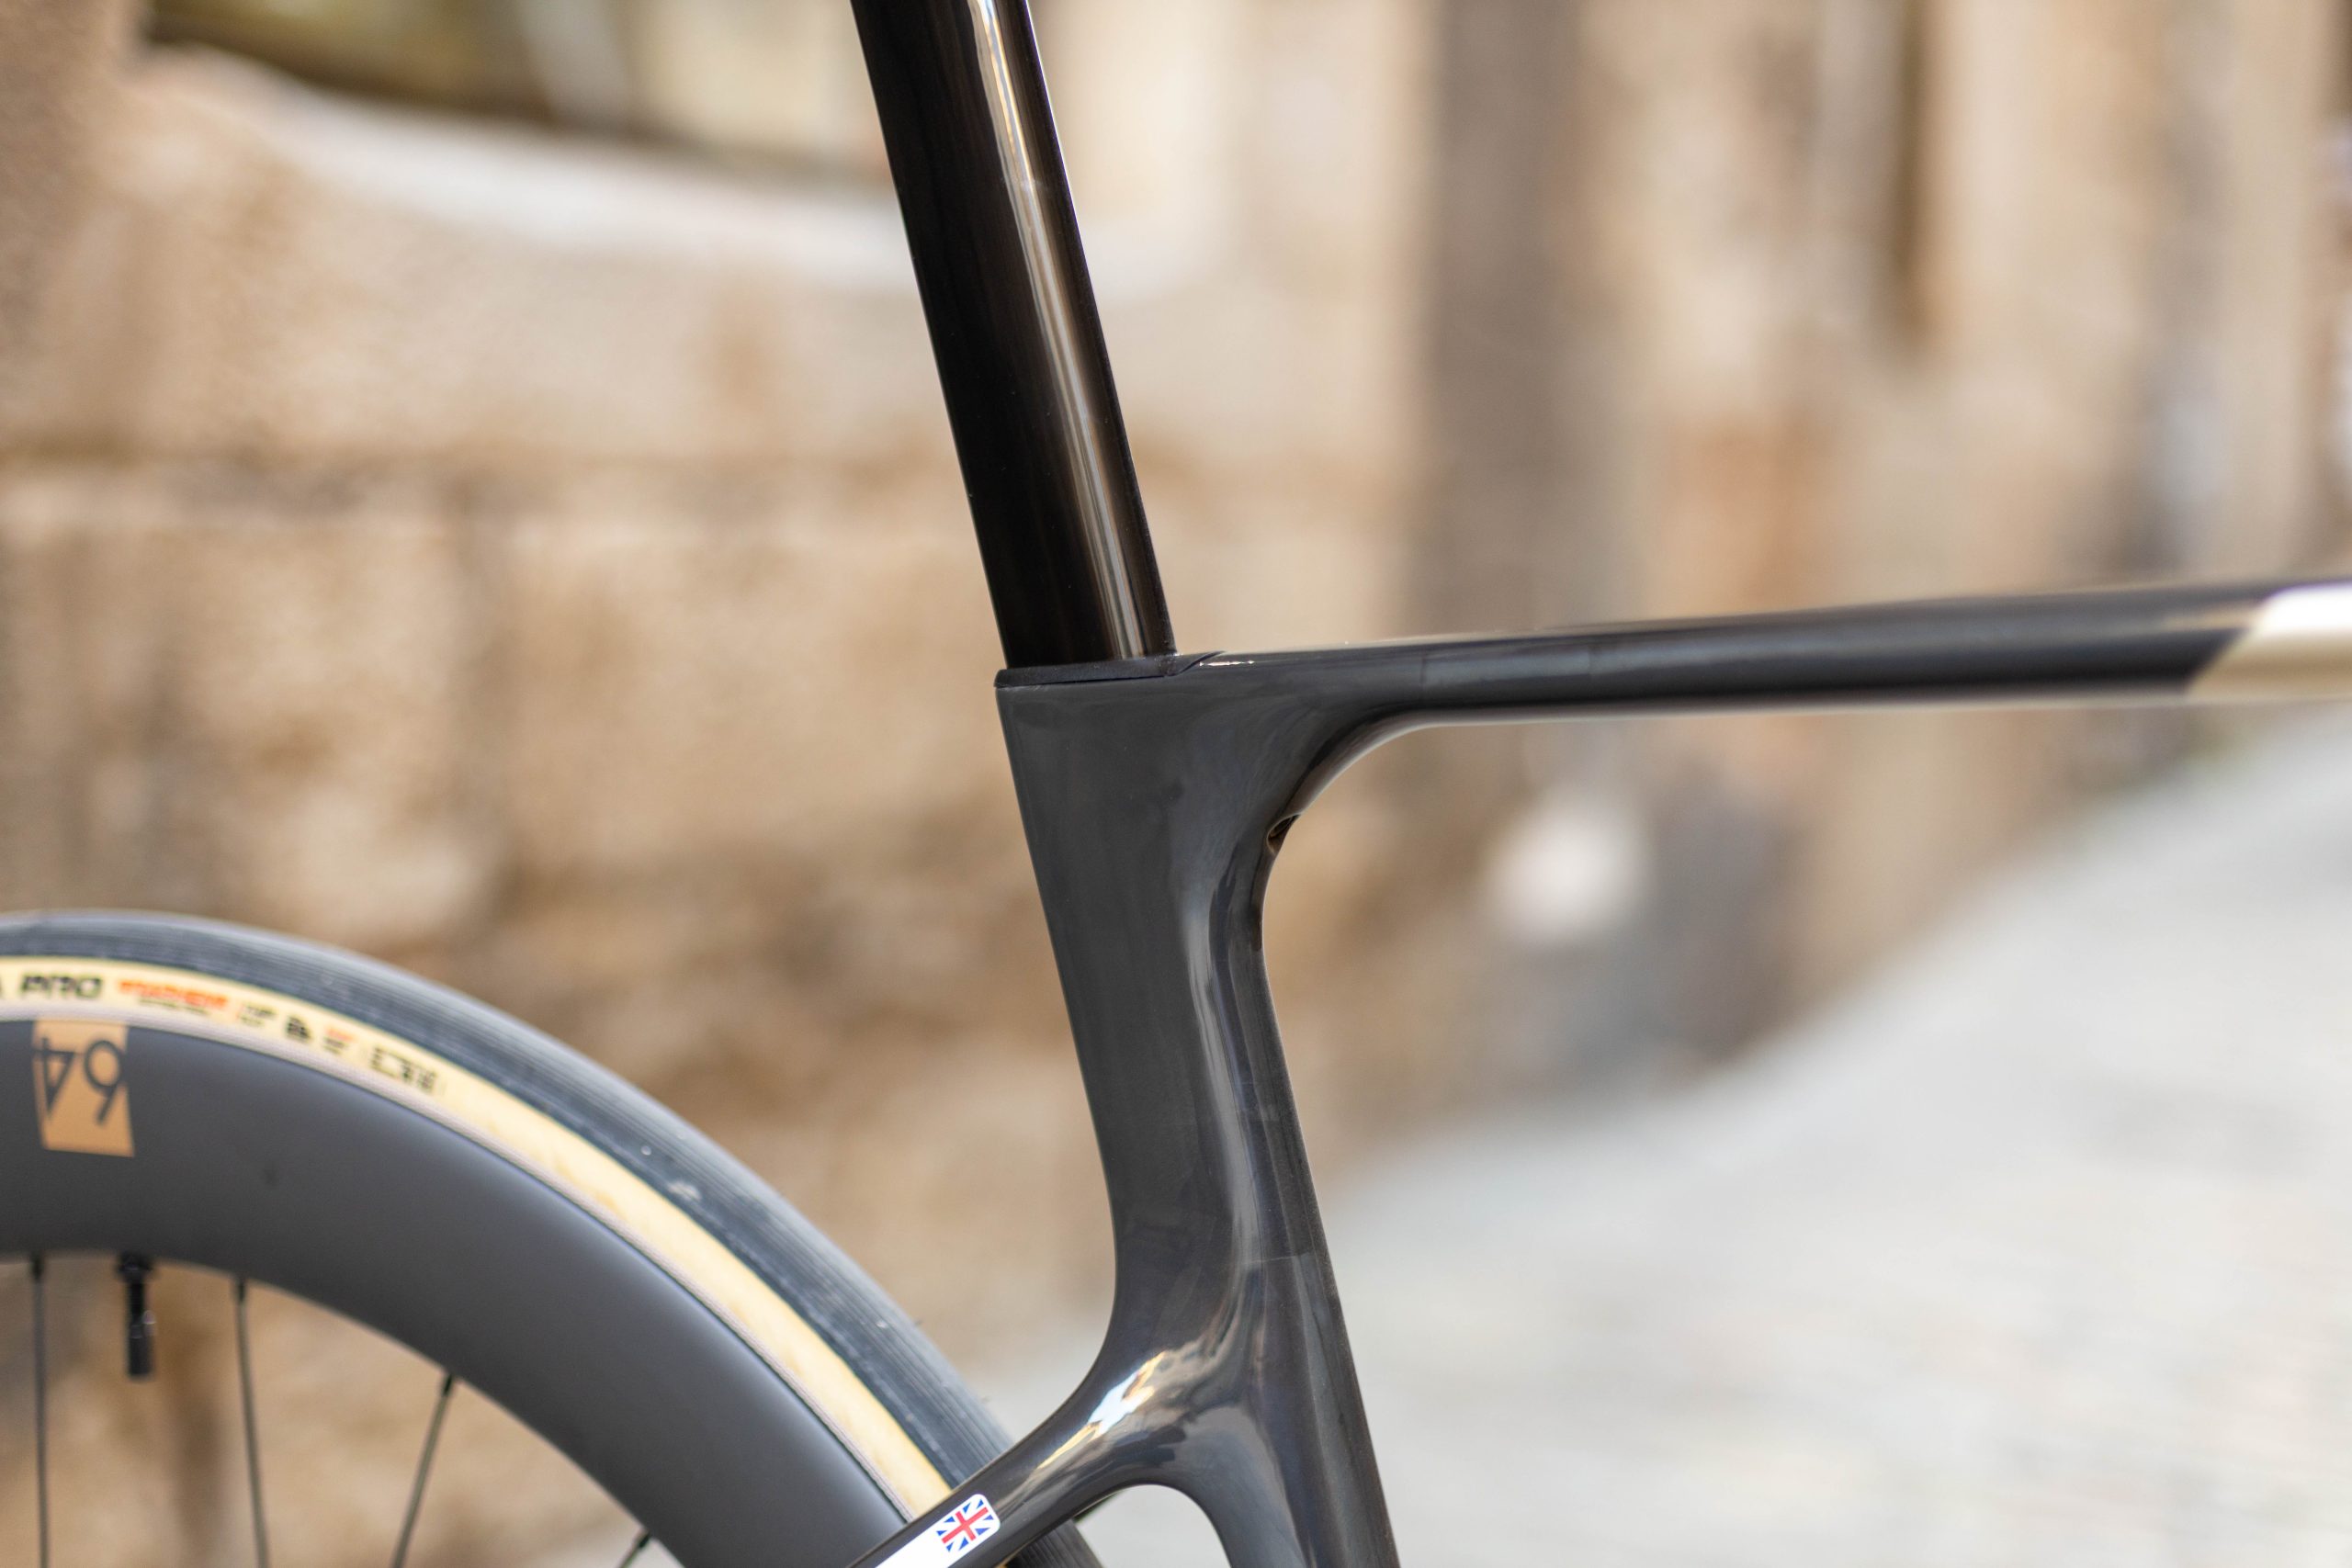
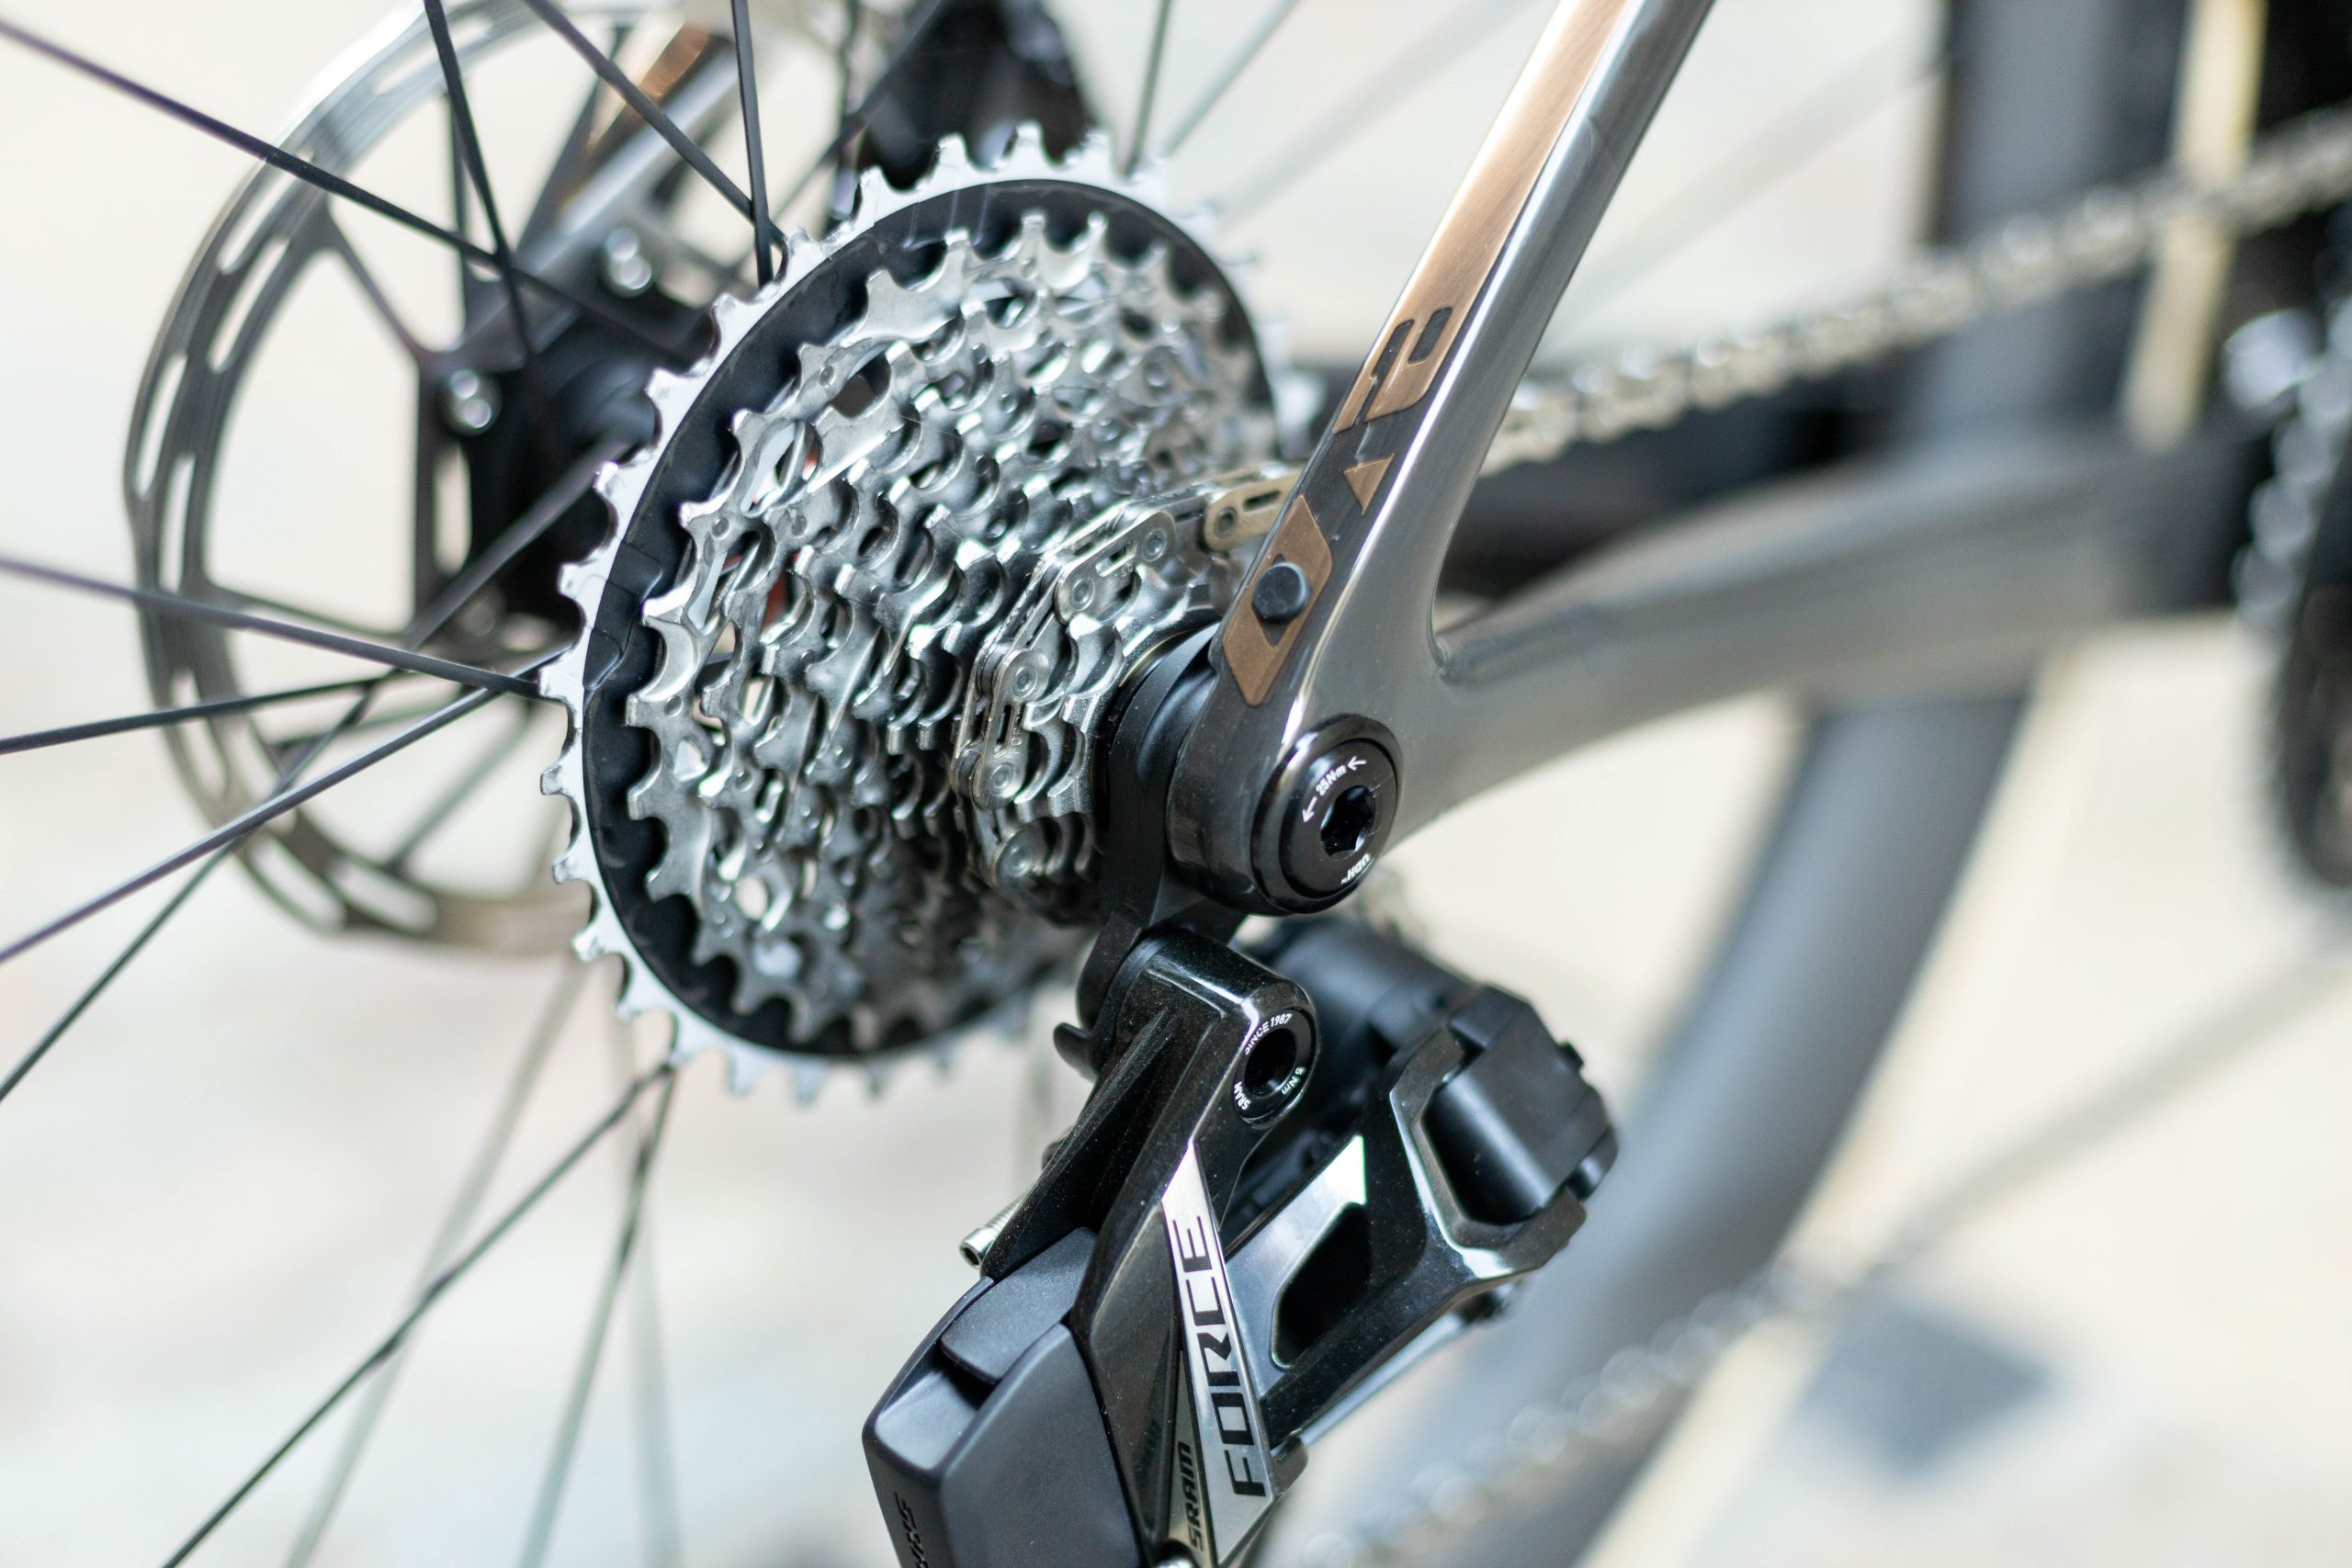
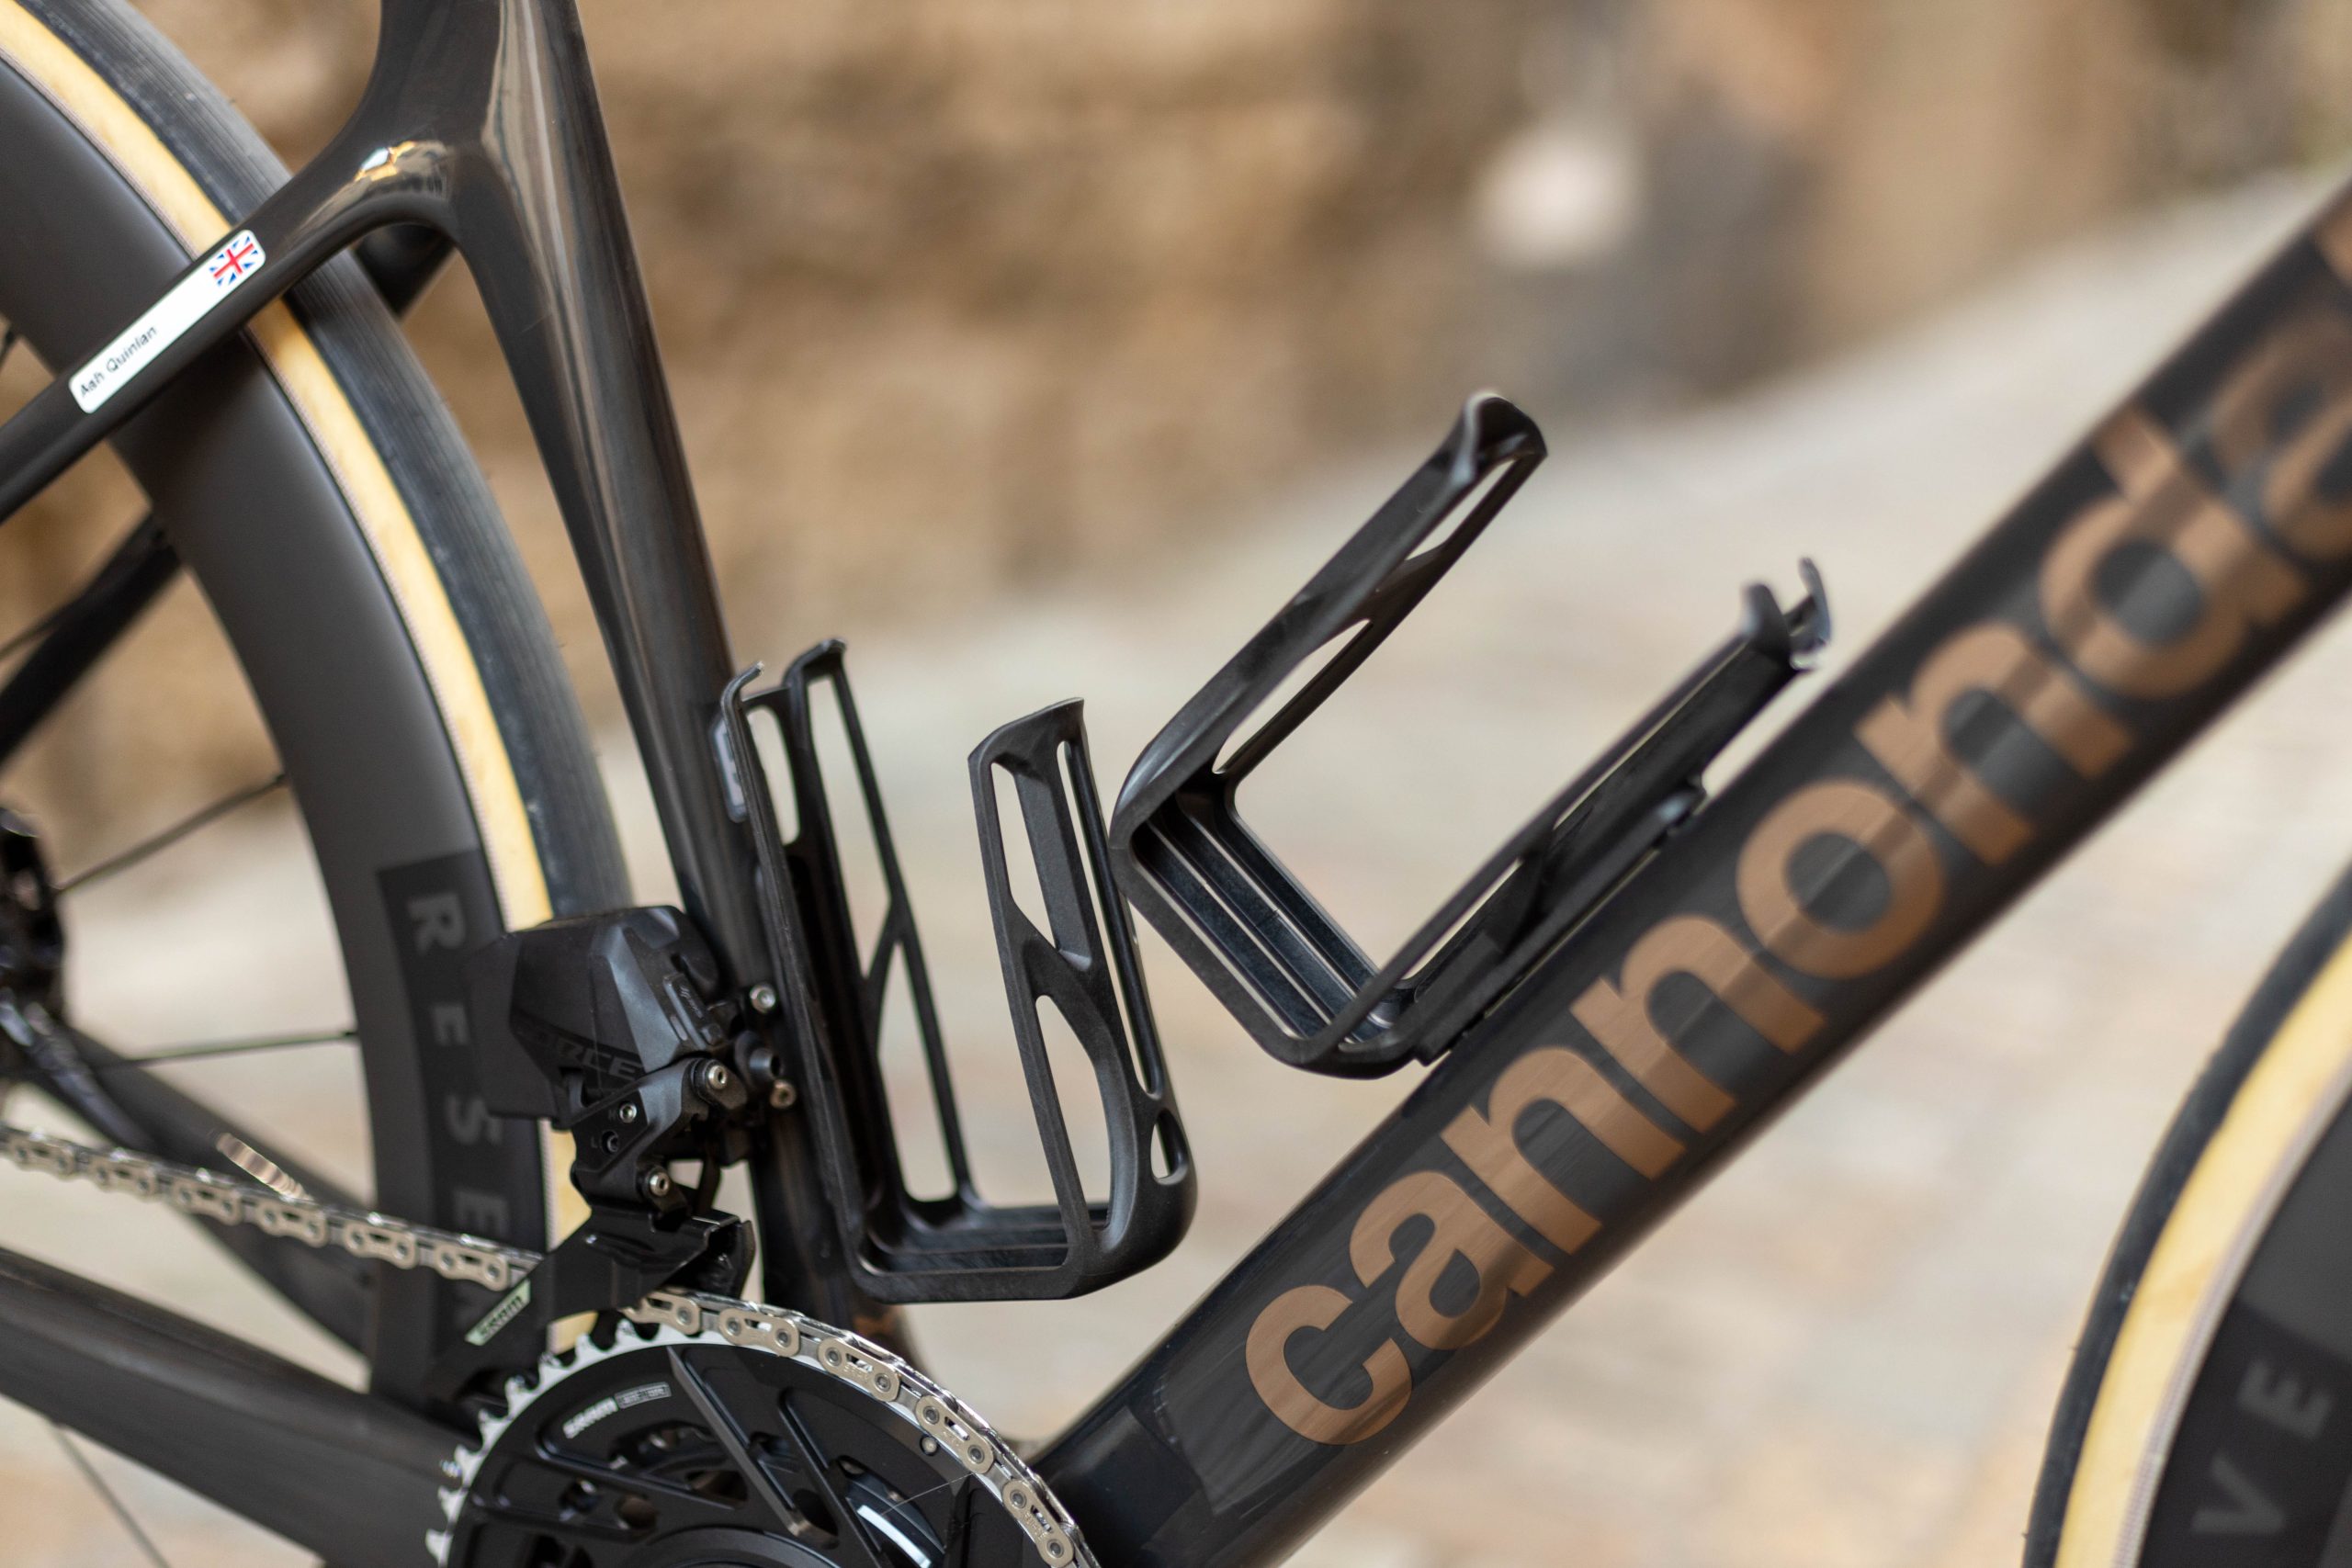
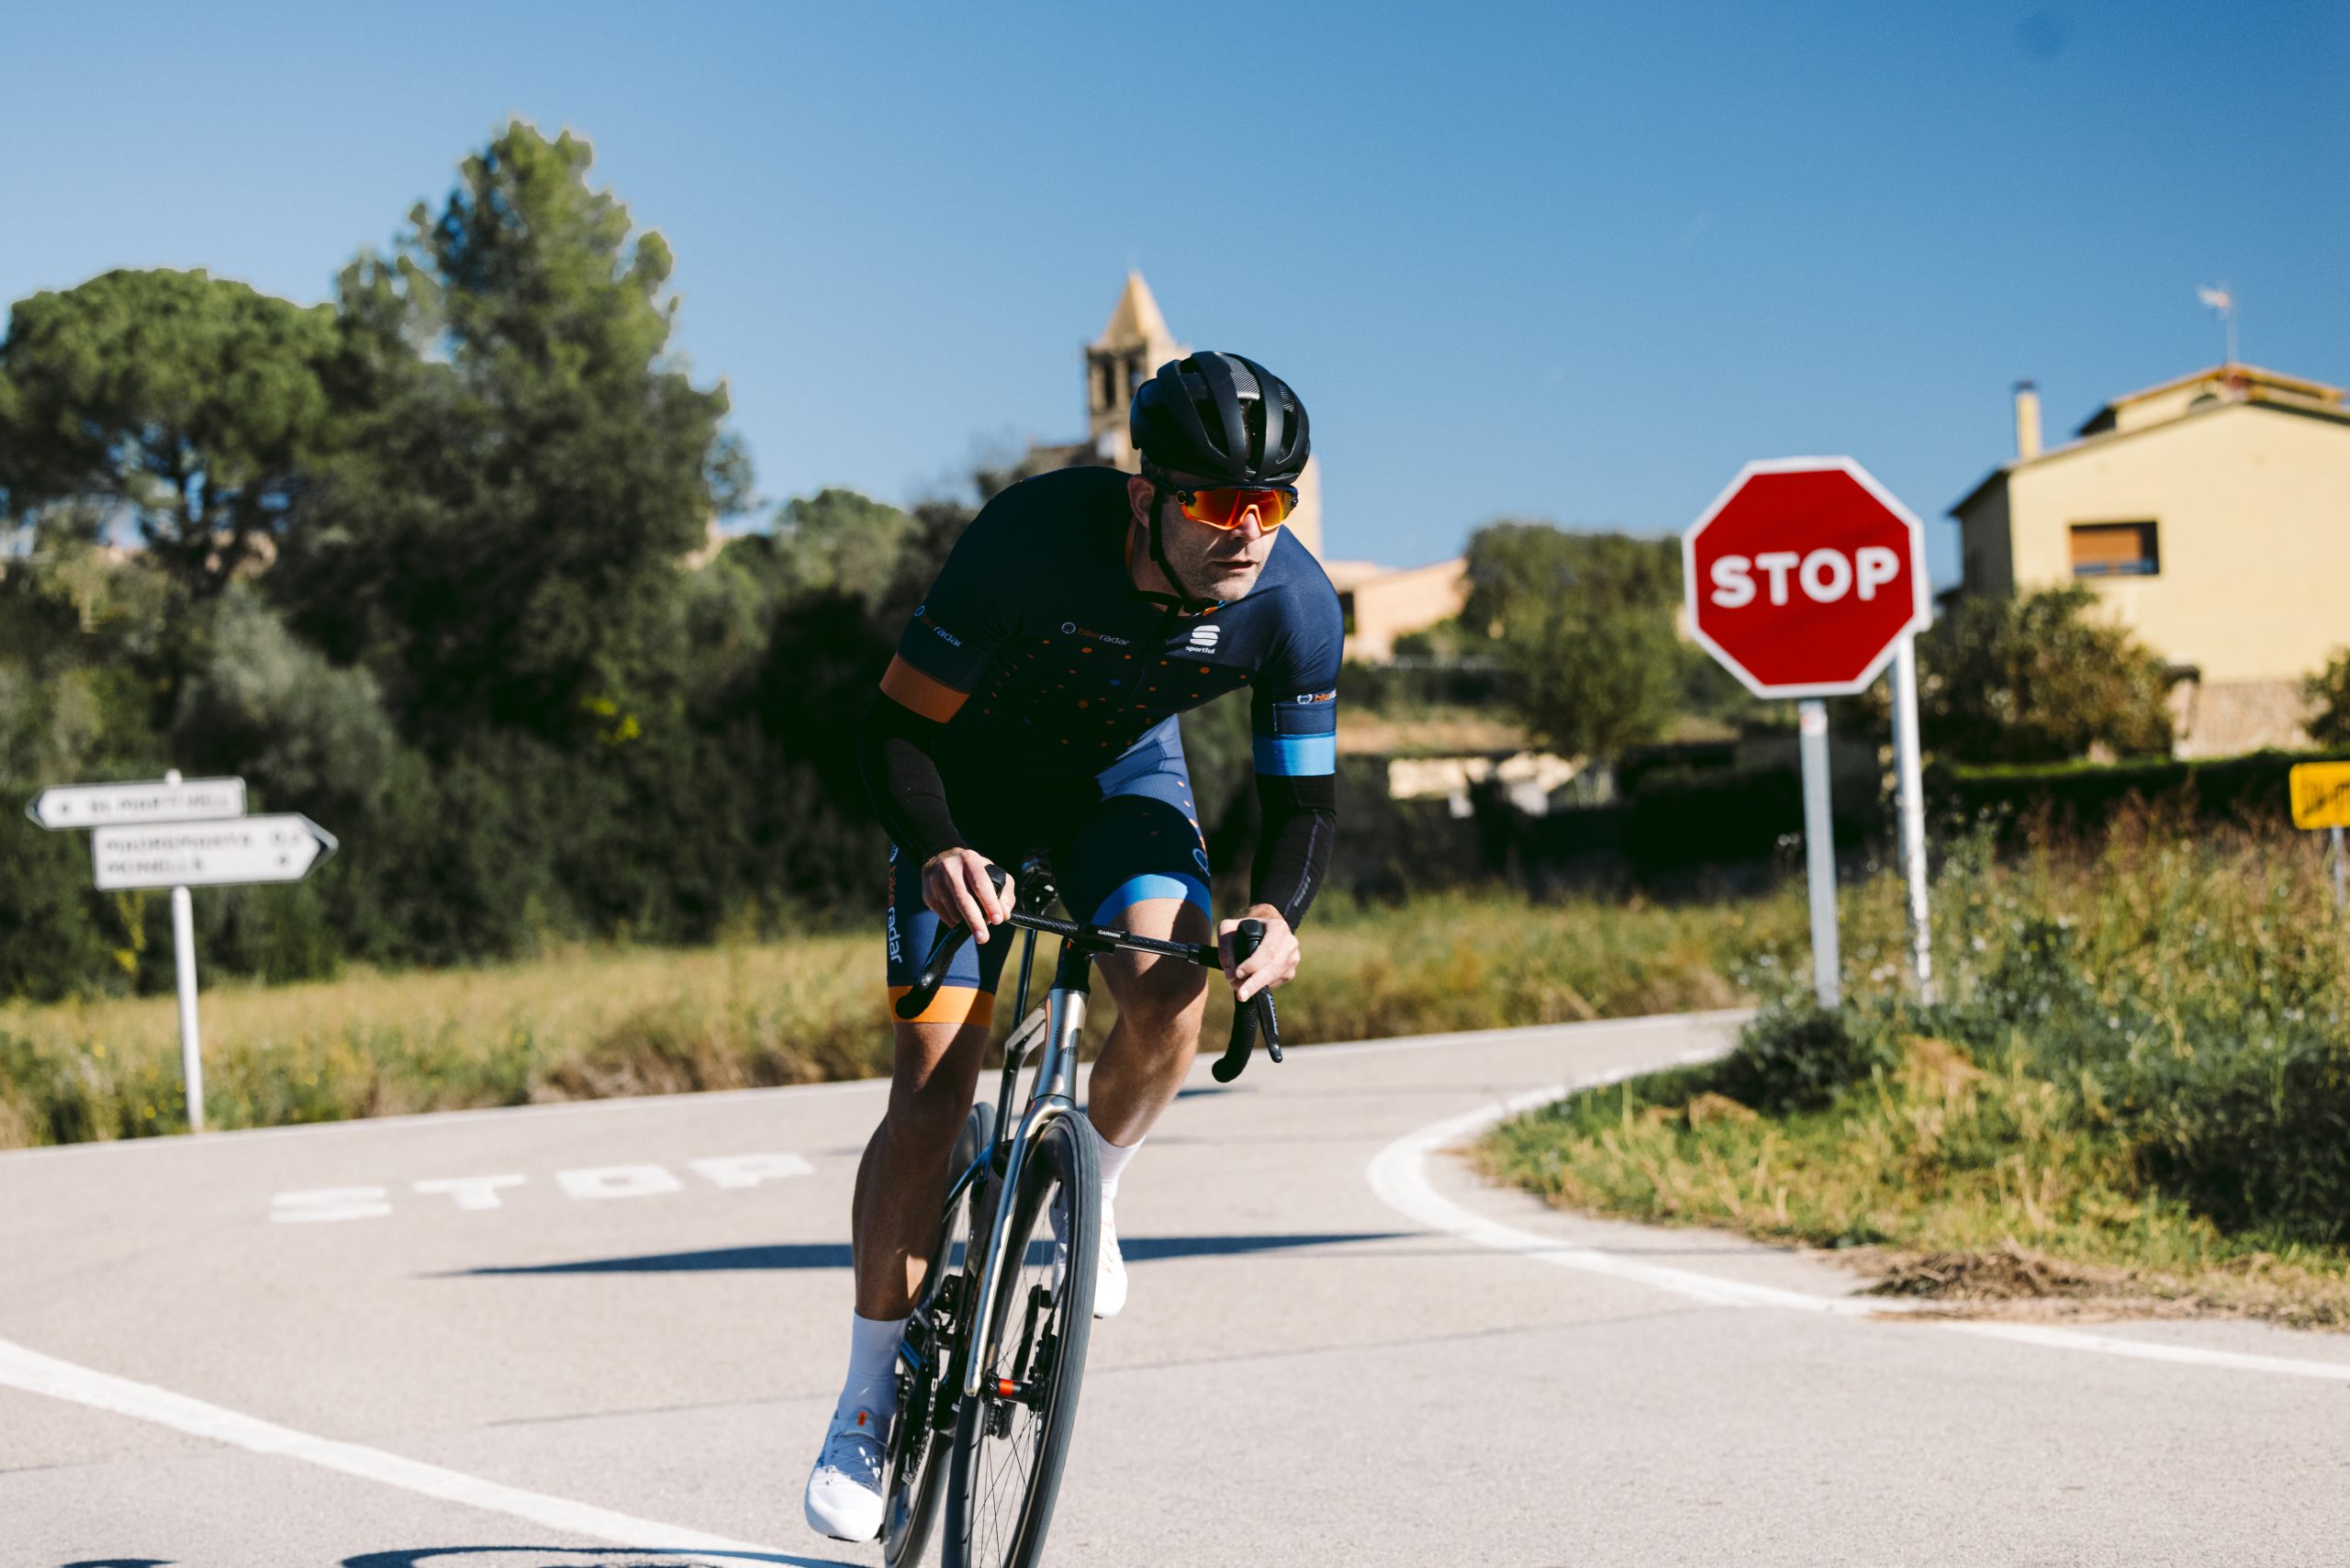
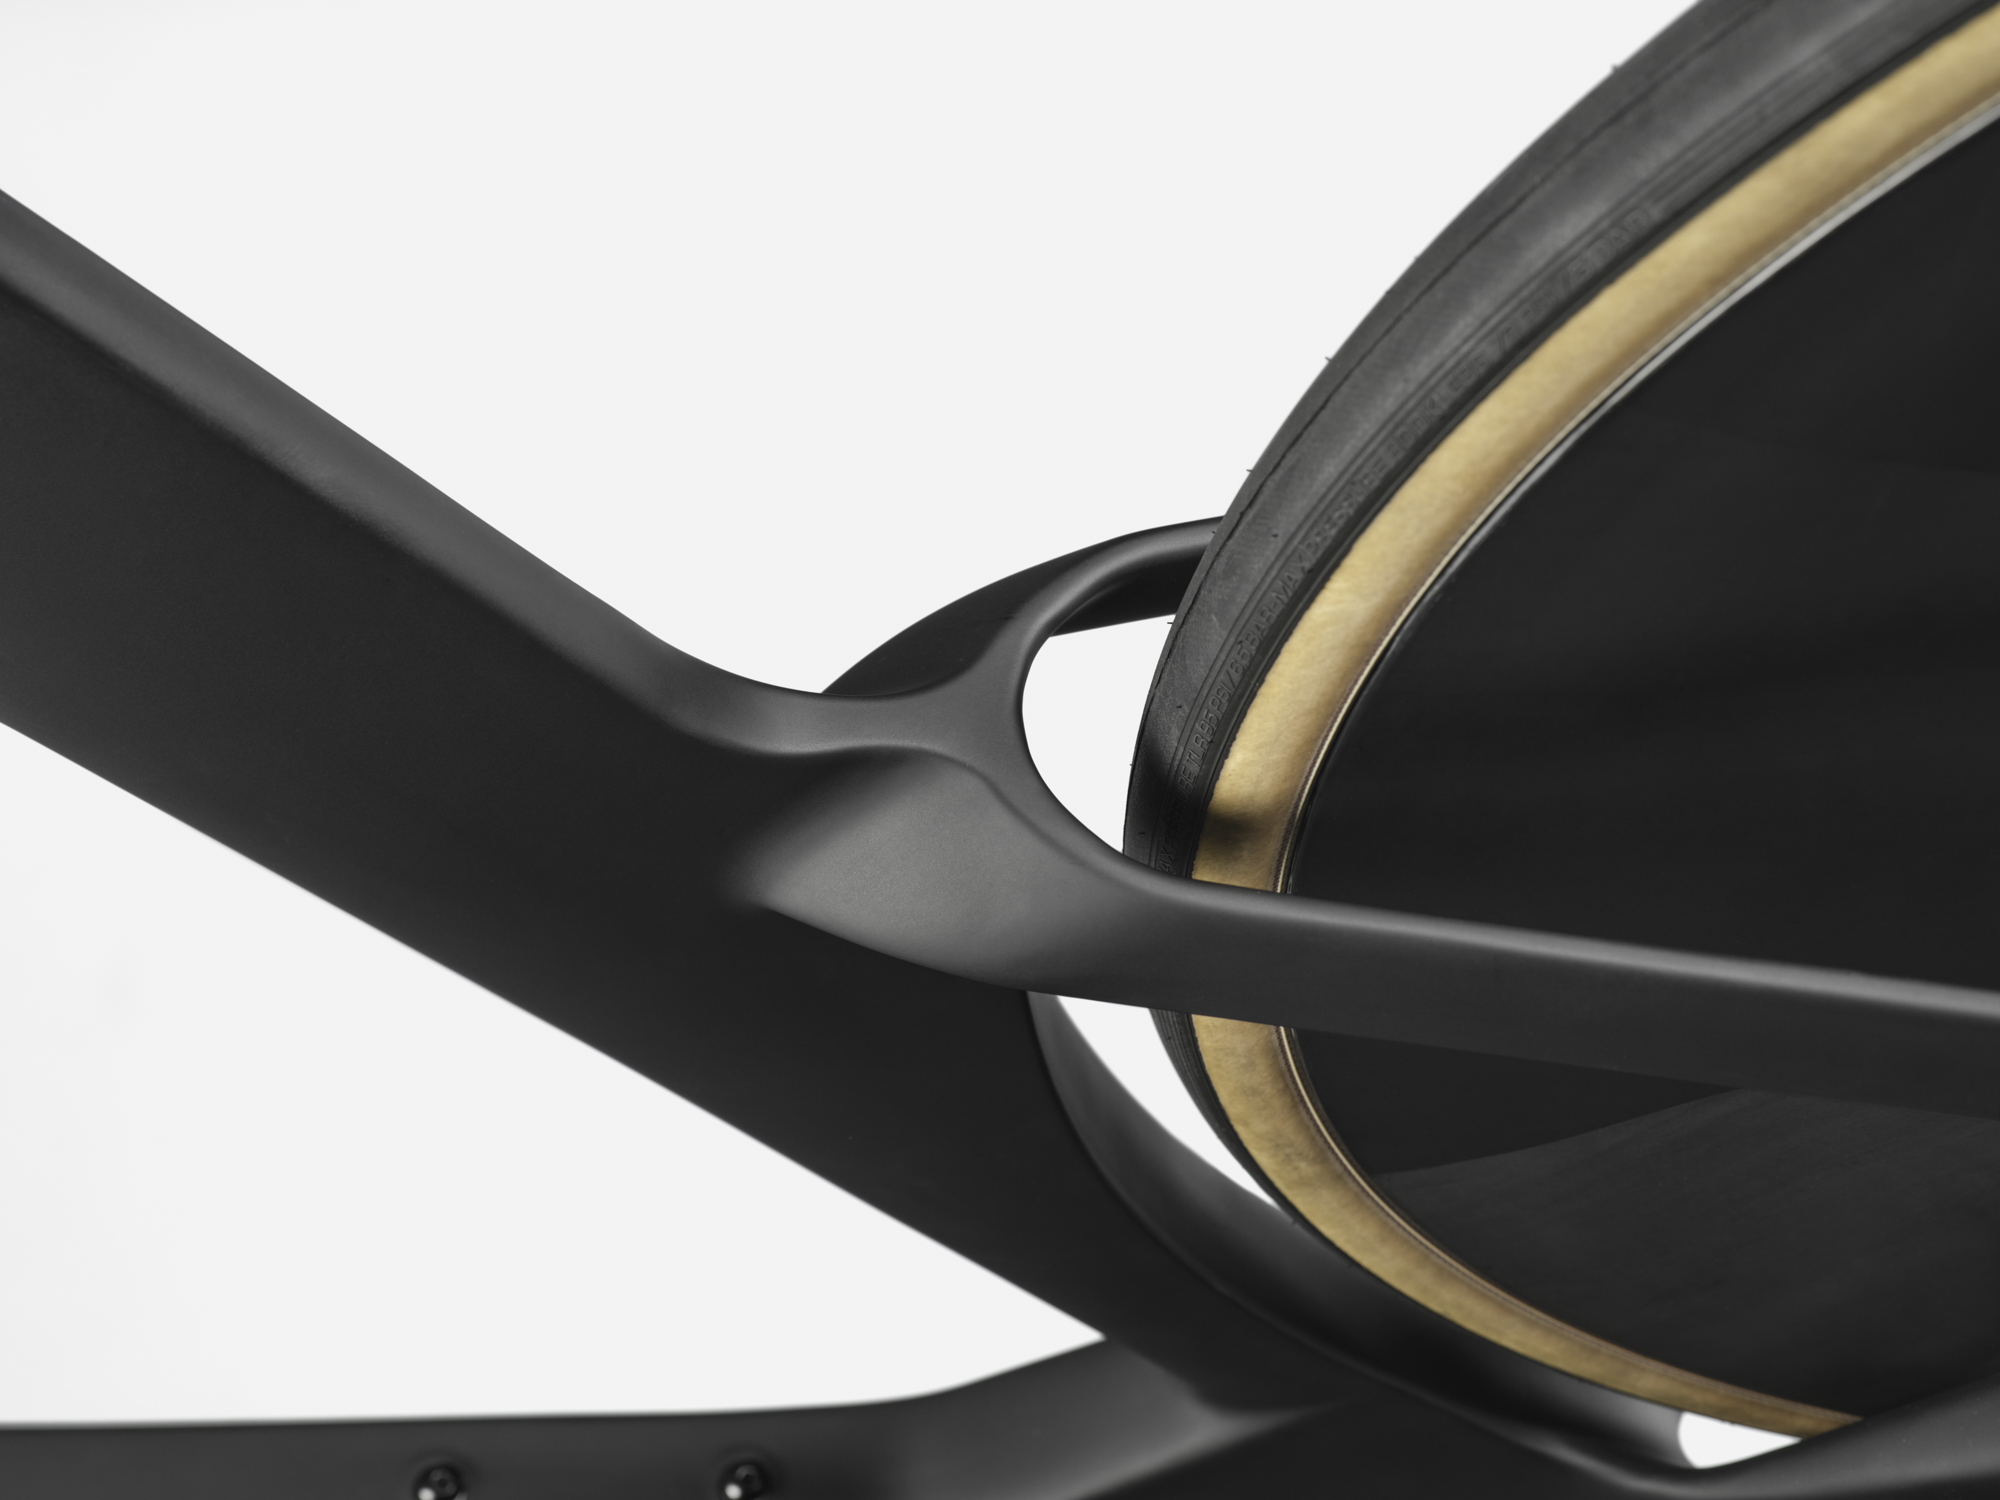
London-based bespoke bikemaker Quirk Cycles has announced two new limited-edition framesets, a Founder’s Batch of its latest Mamtor road bike, limited to 25 frames, and the Manchester to London Collector’s Edition of only five frames.
The new framesets are the first fruit of the investment made in Quirk in November 2025 by Simon Mottram, founder of Rapha. Mottram was a lead investor in Quirk’s latest £0.5m funding round, which it said was targeted at transforming the bikemaker into a global cycling brand.
Quirk claims the steel Mamtor is “a modern road bike developed with the restraint, precision, and depth of thinking that have defined Quirk for over a decade”.
The M2L Collector’s Edition is made of titanium, with design input from Mottram, and comes with a bespoke set of Tailfin bags to match.
Scalable batch manufacture
The Mamtor Founder’s Edition framesets will be made with stock geometry in small batches in Hackney, London.
While Quirk has previously specialised in bespoke builds, the Mamtor will be produced in small batches with stock geometry. The brand says full design and manufacturing oversight will be retained in London, with production in Hackney. It says the Founder’s Batch introduces scalable processes to its manufacturing.
The Mamtor Founder’s Edition is made of Columbus Lite steel tubing and includes Quirk’s own 3D-printed stainless steel dropouts, head tube and seat cluster.
The Mamtor has clearance for 40mm tyres, making it capable on a range of surfaces.
It’s a bike that has the clearances for all-road duties and can fit 40mm tyres, or 30mm with mudguards. There’s a T47 bottom bracket shell and compatibility with electronic groupsets only.
The small-batch approach mirrors other bike makers, including Mason, whose frames are batch-made in Italy.
Argonaut, based in Oregon, mixes bespoke-geometry custom bike manufacture with stock-geometry builds of its carbon framesets, including the Supernaut RM3 and GR3, a similar approach to Quirk.
The frame is made from Columbus steel tubing, with 3D-printed parts including the dropouts and head tube.
Buyers of the Mamtor Founder’s Batch will get an individually numbered frameset with a polished stainless steel head badge, alongside what Quirk calls “build notes explaining the design thinking”.
They’ll also receive an invitation to a private workshop ride and evening in London.
The Founder’s Edition of the Mamtor will run to 25 individually numbered framesets.
Quirk says the Founder’s Edition spec will be a one-off, with orders closing on 31 March. Lead time from order is 16 weeks.
The Mamtor Founder’s Edition is priced at £4,999 for the frameset with fork, stem and spacers and painted in Quirk’s Creighton Brown. The bike can also be bought as a frame kit, priced at £5,699, and a rolling chassis. Complete builds are also available on request.
Manchester 2 London Collector’s Edition
Only five M2L Collector’s Edition frames are scheduled to be made and will come with custom Tailfin bags.
The M2L Collector’s Edition frameset will be even more rarified, with only five frames scheduled to be made in Quirk’s London atelier, with input from Mottram.
Quirk claims the frame prioritises long-distance comfort, while maintaining ride quality and low weight.
The ENVE InRoute stem is hand-painted and complete with encouraging messages.
Made of Columbus Hyperion titanium, with a 3D-printed titanium seatpost and ENVE carbon fork and hand-painted ENVE bar and stem, the bike is completed with a custom Tailfin top tube and half-frame bags.
According to Mottram: “Having ridden M2L ten times, I know what I’m looking for in a bike that will carry me 350km in a day. With custom Tailfin bags and a classic finish, this is the perfect bike for riding M2L and it should last me a lifetime.”
The Rapha logo on the seat tube highlights Mottram’s involvement.
Quirk quotes a lead time of 13 weeks for the M2L Collector’s Edition frame, so if ordered now it should be ready just in time for Rapha’s Manchester to London bike ride, which is scheduled for 28 June this year.
The M2L Collector’s Edition frameset is priced at £9,250, with £875 of the purchase price donated to the Ambitious About Autism charity.
BMC has launched the fourth generation of its Timemachine time trial bike, which takes a radical approach to the stance of the fork legs and seatstays.
The new Timemachine gets BMC’s Mpc suffix, short for Masterpiece, and signifying that the frameset is built to its highest standards. The main frame is made in one piece and unpainted to keep the weight low.
BMC says the redesign was in response to a request from its sponsored Tudor Pro Cycling team for 3% overall drag reduction, including the bike and rider. It claims to have bettered this with a 3.7% improvement. For a rider delivering 450 watts, it says this would equate to riding at 55.7km/h rather than 55km/h.
Tuned for faster ride speeds and lower wind yaw angles
BMC says it has outdone Tudor Pro Cycling’s request for a 3% reduction in drag. BMC
BMC has worked closely with Tudor’s innovation team to develop and test the bike in the wind tunnel and with real-world riding.
“Our Innovation team was able to complement the extensive expertise of BMC by bringing specific knowledge in aerodynamics, computational fluid dynamics, parametric design, testing methodologies, and real-world validation,” says Kurt Bergin-Taylor, head of innovation at Tudor Pro Cycling.
BMC says average speeds in pro-level time trials are now approaching 60km/h, while its 2023 Speedmachine was aero optimised for speeds closer to 45km/h, so there was a need for a radical rethink to achieve Tudor’s goal.
BMC worked closely with Tudor Pro Cycling’s pros and its innovation team to develop the new bike.
On the other hand, at such high speeds, the yaw component of drag is less significant than at lower speeds, so BMC has tuned its drag calculation to weight drag at lower yaw angles that are closer to those experienced by a track bike.
It points out that a time trial frameset accounts for only 6% of the total system drag, so to achieve Tudor’s target via the bike alone, the frameset’s drag would need to be reduced by around 50% to 3.8% of the total.
Of the total drag figure, 78% is claimed to result from the rider and the final 16% from the components.
Stymied by the UCI
BMC made a rideable alloy prototype to fine-tune the bike’s design.
BMC’s Impec lab used rapid prototyping to help it design and test the various components of the new frame. Rather than the usual 3D-printed plastic mock-up, it developed an alloy prototype rig, itself 3D-printed, that could be adjusted but was still strong enough to ride, enabling it to meet the target launch for the start of the 2026 racing season.
The prototype was taken to the wind tunnel three times between December 2024 and August 2025 to prove the design. This was followed by testing in the velodrome across multiple frame sizes with four Tudor Pro Cycling riders, including Stefan Küng.
The initial design delivered a 4.1% improvement, but new rules imposed by the UCI for the 2026 season meant it needed to be remodelled to make it UCI-compliant, by meeting the 120mm fork-leg stance regulation, which almost caught out the Factor One.
The wide fork legs and seatstays are reminiscent of Team GB’s Hope track bike.
The UCI hasn’t (yet) stipulated a maximum seatstay width, so on the new Timemachine these are wider still, mirroring the design of British Cycling’s Hope track bike. BMC says this reduces turbulence generated in the wake from the rider’s legs.
Other aero features include a tilted front brake caliper mount and even SpeedFin tails to the rear dropouts to reduce drag around the cassette and brakes.
The new Timemachine is claimed to “deliver exceptional stability and handling”, and make bike fit easier, which is a necessity because there are only two frame sizes available. There’s compatibility with Profile Design’s Aeria dual riser extensions, too.
The frame is designed to future-proof it for developments in time-trial tech. BMC
At the same time, BMC has looked to future-proof the frameset with the flexibility to use 1x or 2x groupsets, oversize chainrings (something else the UCI has its eye on regulating), chain catchers and tyres up to 30mm wide.
The new Timemachine Mpc will sit alongside the Speedmachine 01 and Trackmachine 01 in BMC’s catalogue. BMC says it’s designed purely for the needs of Tudor Pro Cycling.
Despite its pro-only billing, UCI rules stipulate that equipment used in competition must be available to purchase, so the Timemachine Mpc frameset is duly available for public sale in sizes S and ML only, albeit in limited volumes, priced at €18,999 / $21,299.
We’ve got a nice blend of events chosen this weekend, headlined by Zwift Games (of course) but also including a memorial/charity ride, an epic Uber Pretzel event, a chase race for the ladies, and a banded ride on a brand-new route. Pick your party!
Zwift Games, Stage 1
Popular Route Badge Unlocks
The Zwift Games are underway, with race 1 being held on Kaze Kicker (17.3km, 140m) this week! I raced it earlier this week – read how it went here.
These are the most popular races happening on Zwift right now, so if you’re looking for some healthy competition, check ’em out! You’ll also get to experience new routes and earn some fun unlocks.
Join the BMTR and friends as they approach the one-year anniversary of teammate Michael Lander’s untimely passing at the age of 56 due to previously undiagnosed heart issues.
This BMTR Cares event is fundraising in partnership with Michael’s sister, Rebecca Lander, for Sports Cardiology Toronto, a cause that perfectly reflects Michael’s passion for ultra-endurance sport and helps protect other athletes and families from the same devastating loss.
The ride is on Watopia’s Accelerate to Elevate (43.5km, 1158m), and everyone will stop for a moment of silence just past the Alpe’s 7th bend, where Michael’s memorial is written on the tarmac. Rebecca (Bex) will be there as well.
Ladies, hop into this chase race and experience what makes this format special! Categories begin in staggered order, with slower groups starting first. The goal? Work together with your category, and if you get caught by a faster group from behind, try to hold on to the finish!
This ride has a lot to love. It’s banded, so riders of all abilities can stay together as long as they keep pedaling. It’s on the new Three Step Sisters route (38.1km, 587m), which launched to host the final stage of Zwift Games 2026.
Finish this ride to recon the Games’ Queen Stage, or to check this route off your list and earn the badge!
We choose each weekend’s Notable Events based on a variety of factors including:
Is the event unique/innovative in some way?
Are celebrities (pro riders, etc) attending/leading?
Are signup counts already high, meaning the event is extra-popular?
Does the ride include desirable unlocks or prizes?
Does the event appeal to ladies on Zwift? (We like to support this under-represented group!)
Is it for a good cause?
Is it just plain crazy (extra long races, world record attempts, etc)?
Is it a long-running, popular weekly event with a dedicated leader who deserves a shout out?
In the end, we want to call attention to events that are extra-special and therefore extra-appealing to Zwifters. If you think your event qualifies, comment below with a link/details and we may just include it in an upcoming post!
The Union Cycliste Internationale (UCI) wants to define a clear framework and appropriate standards to enable the development and integration of airbags into cycling.
This is part of an initiative by cycling’s international governing body to develop protective equipment for riders in the men’s and women’s peloton, with the aim of improving safety in the event of a crash. It will also consider how to integrate airbags into cycling clothing and identify ways certain textiles can strengthen protection.
Safety has been a persistent issue in professional road cycling over the last few years. In 2023, the UCI announced the creation of SafeR, a new independent entity dedicated to improving cycling safety that was a direct response to “the trend of increasing incidents occurring in men’s and women’s professional road cycling”.
The UCI has investigated several ways to improve safety, such as the controversial plan to limit the maximum gear ratio riders can use in mass-start races and the introduction of GPS trackers.
Airbags in cycling have become a hot topic. BikeRadar revealed in January that Team Picnic PostNL will use Aerobag’s wearable airbag in training and that the company was already in talks with the UCI concerning its use.
Aerobag’s Quinton van Loggerenberg told BikeRadar the idea for an airbag for cyclists came after the death of the young Belgian rider Bjorg Lambrecht in 2019.
“[When] Bjorg Lambrecht crashed and died, we decided that there had to be a better way of sending riders down the road,” van Loggerenberg said. “You can’t send them down the road in [just] Lycra at 70km/h.”
Now the UCI says it is already “in contact with several players in the sector” and it wants to broaden the initiative “to the greatest number possible of manufacturers and institutes working on the development of airbags and technical apparel for cyclists”.
The governing body says it is “essential” to bring together the relevant parties to analyse the relevance of this equipment across disciplines, develop a regulatory framework and “encourage coherent development of protective equipment that meets the needs of riders and teams, and is in line with the industrial realities faced by manufacturers”.
The UCI invites all relevant parties to express their interest by 15 March.
“A broad consultation, in the form of working groups for each of the topics, will then be organised during 2026 with the parties who respond to this call as well as independent experts,” the UCI said.
Zwift’s Fitness Metrics, initially released in April of 2025, help to answer common questions from endurance athletes: “How am I doing? Can I train more? Should I train less? What’s my potential?”
But if you’re new to riding or running, these metrics may be a bit confusing. So we’re here to help!
If you aren’t sure how to use Zwift’s Fitness Metrics, or what they’re even telling you, read on…
Riders: It Starts with FTP
As a cyclist, if you want your Training Score to be accurate in Zwift, you must have your FTP (functional threshold power) value set accurately in your profile.
What is “FTP”? It is the wattage you can stay below and sustain for longer durations, while going above it causes fatigue to set in very quickly. Most riders, if they put in a steady but maximal effort on fresh legs, can hold their FTP for 40-60 minutes.
Your Training Score is directly based on the Stress Points accumulated with each ride, and Stress Points are calculated from your FTP (see below).
So if your FTP isn’t accurate, your Stress Points won’t be, either, which means your Training Score won’t be accurate.
FTP is also used to calculate power targets in ERG workouts – for example, a VO2 interval may have you ride at 110% of FTP for 4-minute intervals. So you’ll want an accurate FTP value if you’re doing structured workouts on Zwift as well.
Zwift will automatically estimate your FTP based on your power bests as you ride or race in the game. But if you want a more accurate FTP value, I recommend taking an FTP test.
Once your FTP is set accurately, the Stress Points (SP) calculated for each ride will be accurate. SP is just a Zwifty name for TSS, an industry-standard metric developed by TrainingPeaks that combines both time and intensity into one number indicating how much stress a particular workout puts on your body.
You don’t need to know how SP are calculated to use them, although this post has the formula if you’re curious. To give you some idea of typical SP ranges, an easy 1-hour recovery ride may be around 40-50 SP, while a 1-hour race will be closer to 90-100 SP, and a 3-hour endurance ride may be more like 150-180 SP.
If you’re syncing outdoor rides to Zwift, but don’t have a power meter on your outdoor bike, Zwift will do its best to estimate your SP for the ride, much like Strava estimates your power even on rides without power data. If you want your training metrics to be truly dialed in, though, maybe it’s time to get a power meter on your outdoor bike?
I recommend the Favero Assioma pedals. They’re the most respected in the industry, more affordable than most, and easy to install (unlike crank or spider-based power meters).
Zwift uses industry-standard algorithms to compute SP for runs:
If your run includes heart rate data, this is used to calculate the SP for that activity based on the hrTSS formula.
If an outdoor run lacks heart rate data, Zwift uses the RPE (Rate of Perceived Exertion) from that activity as synced from Garmin or Wahoo to estimate SP using the method shown here.
For Zwift activities without heart rate data, SP is calculated with a default RPE of 5 using the method shown here.
Seeing SP in Zwift
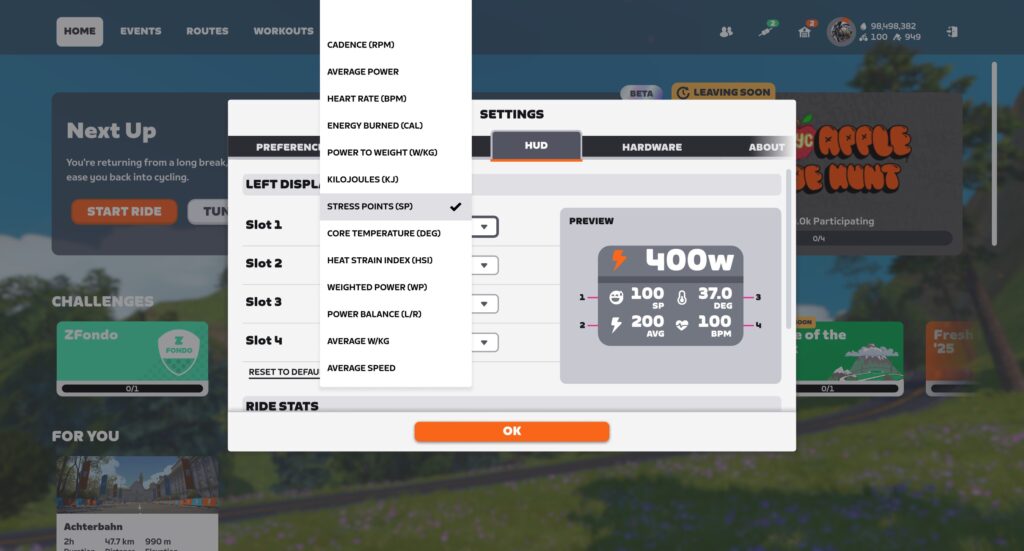
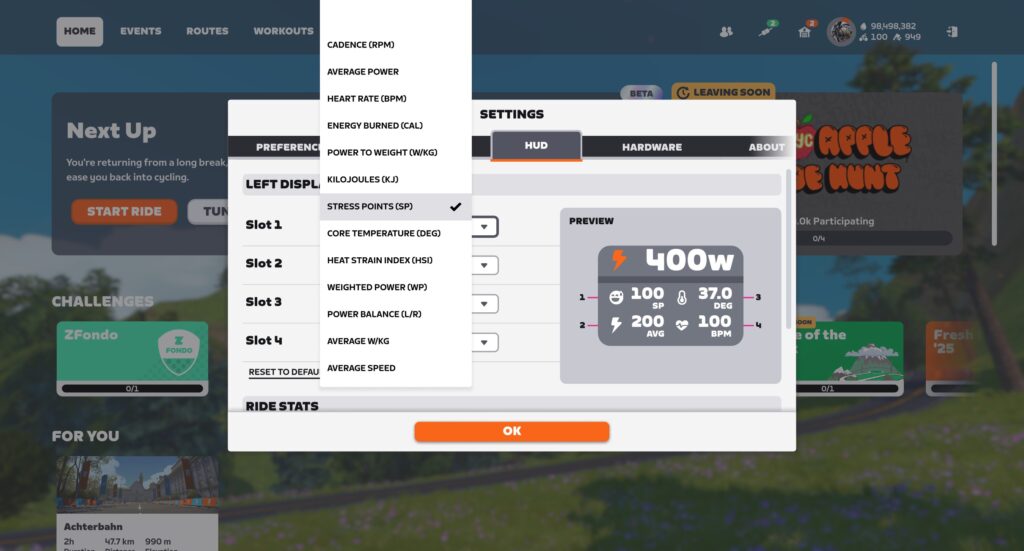
You can show SP in real-time in Zwift’s HUD by selecting it for one of the display metrics via Menu>Settings>HUD:
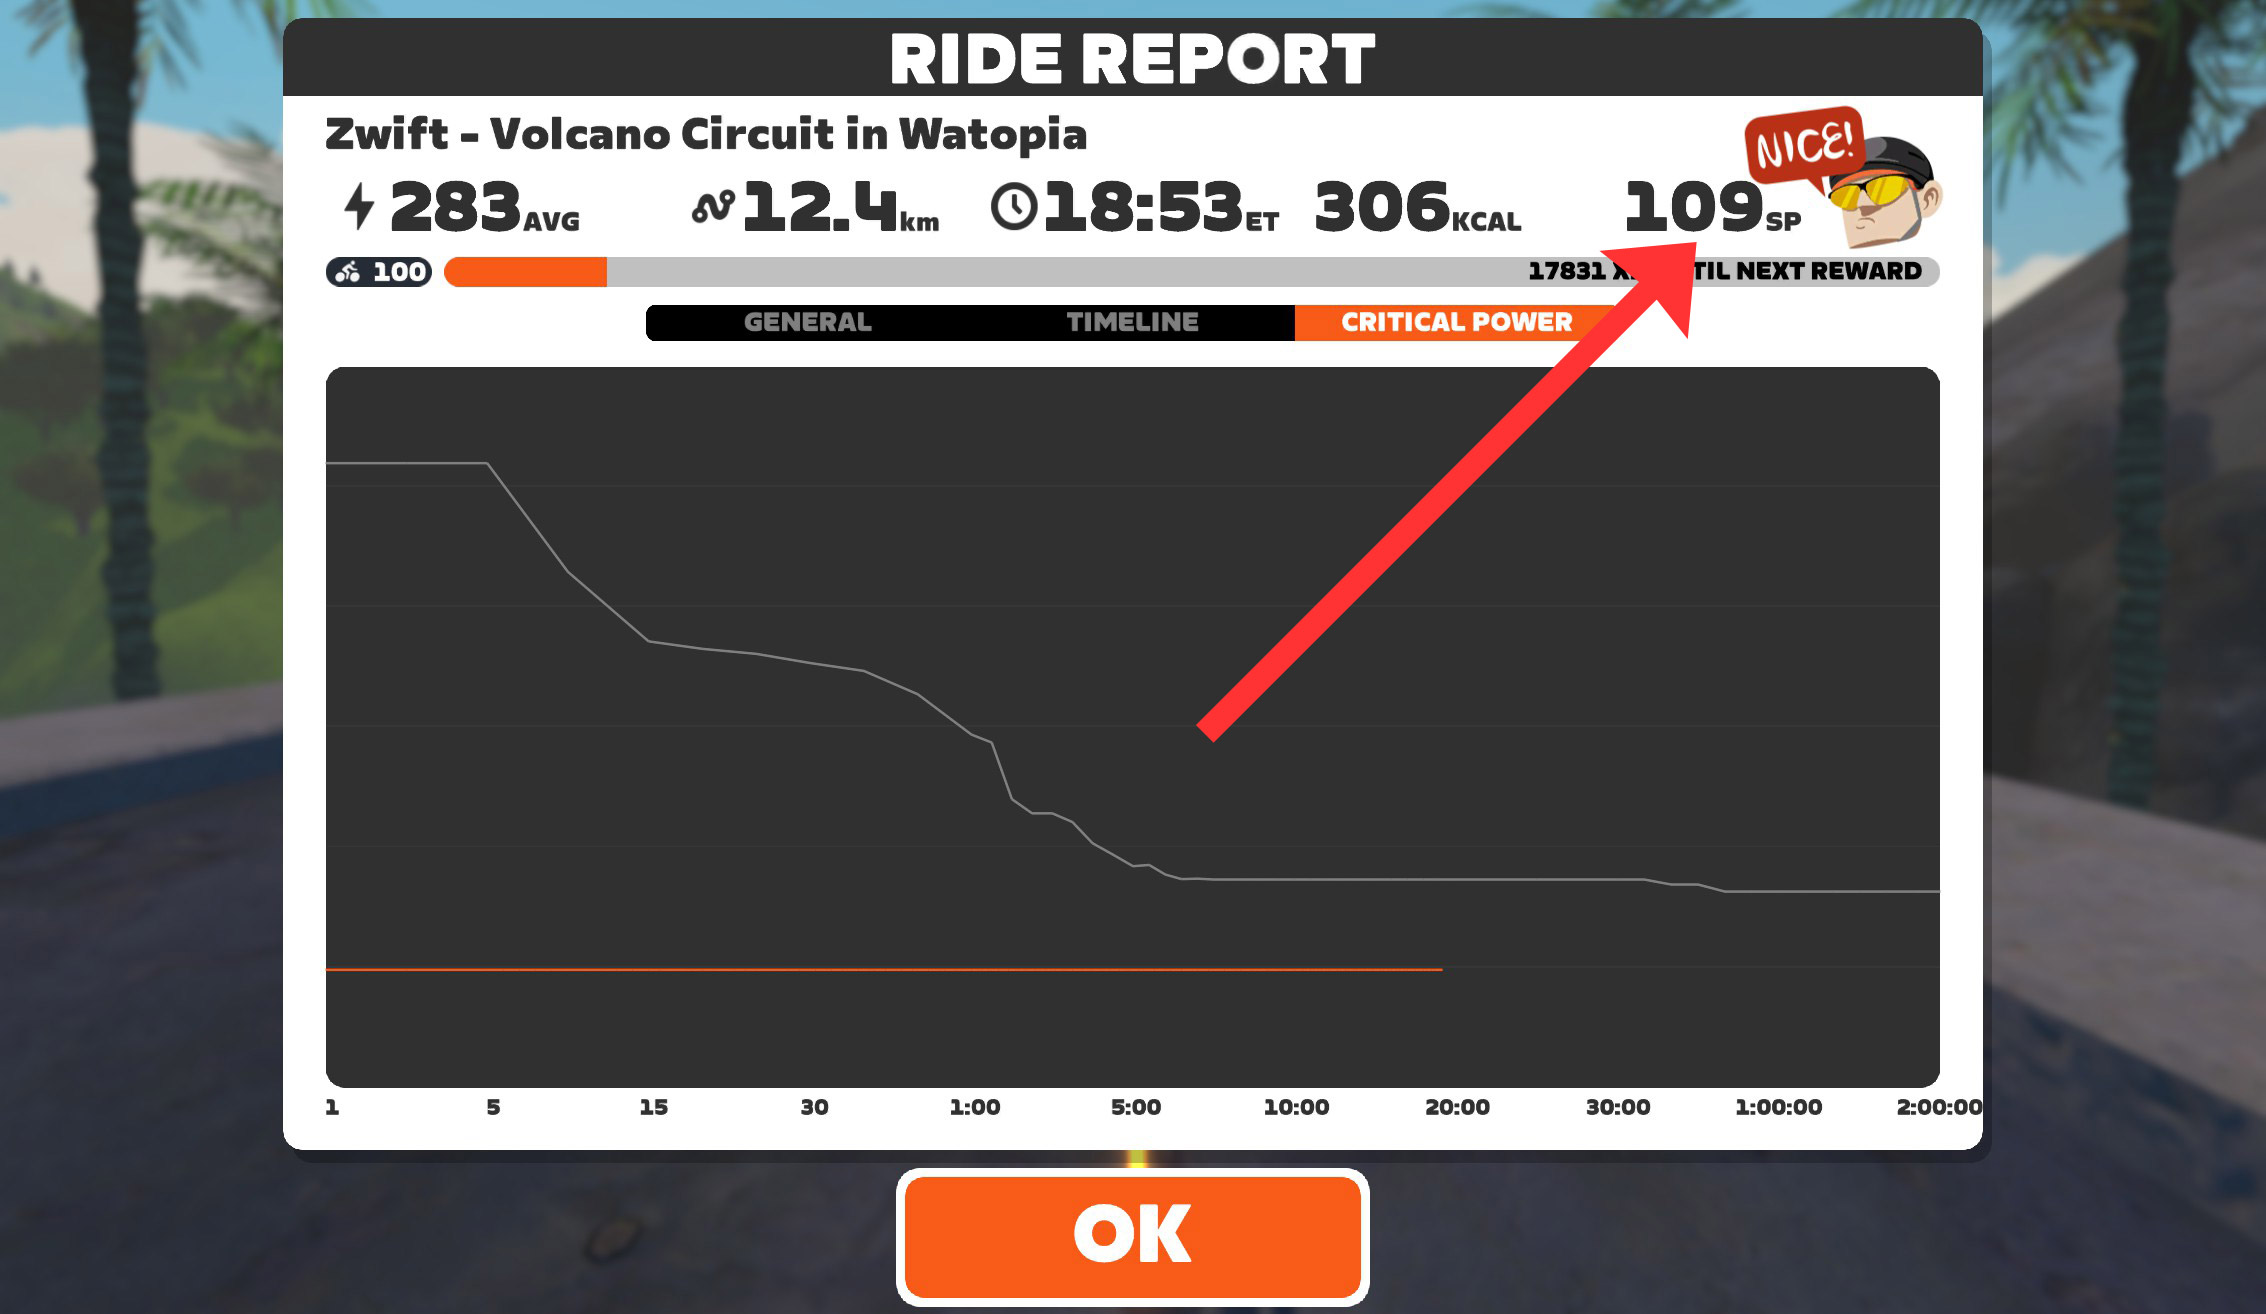
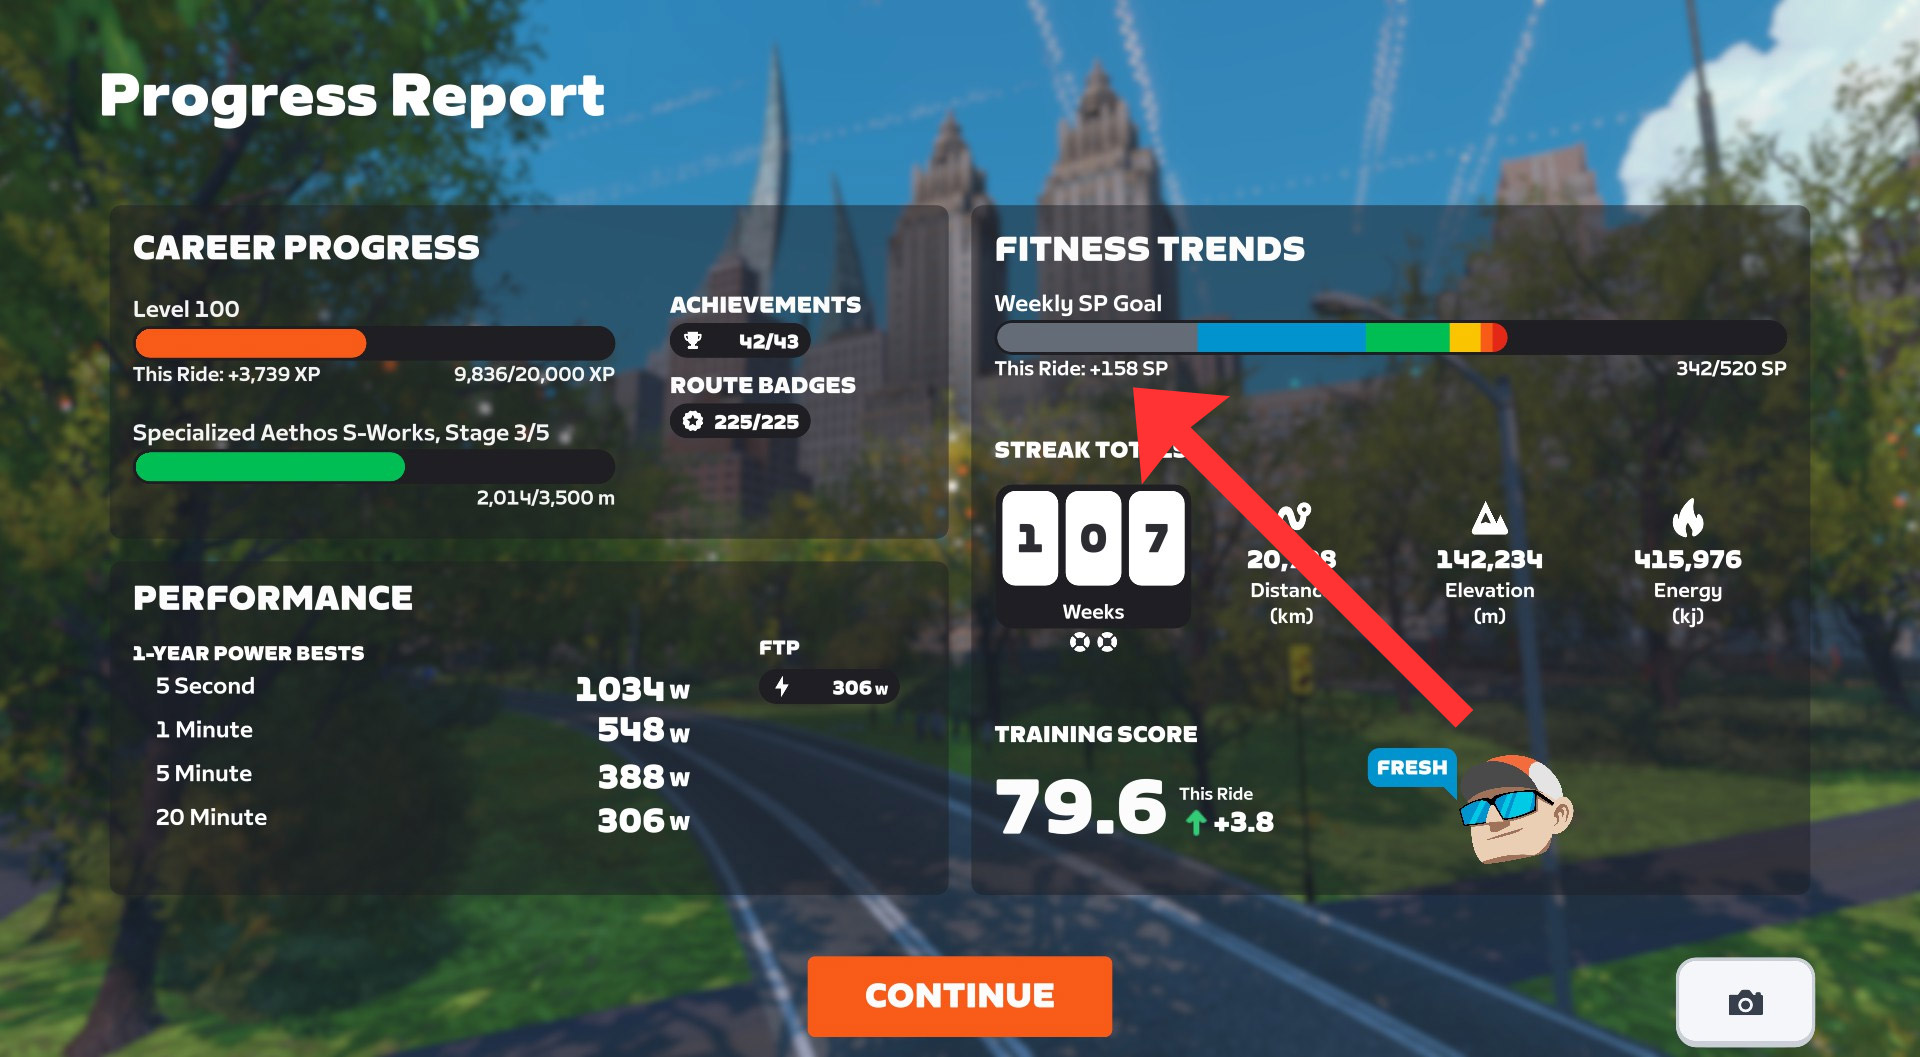
SP are also shown on the Ride/Run Report when completing an activity, and on the Progress Report screen if you’ve set a fitness goal based on SP:
Syncing Outdoor Activities
If you do any outdoor riding or running (and most of us do), you’ll want to get that data into Zwift’s system. Otherwise, your Fitness Metrics won’t be accurate, since they won’t include your outdoor efforts!
You’ll need to record your outdoor session on a device such as a bike computer (aka “head unit”), smart watch, or even your phone. I’m partial to Wahoo’s bike computers, but Zwift supports importing outdoor rides from Garmin, Wahoo, and Hammerhead accounts.
Your Training Score in Zwift is the 42-day exponentially weighted moving average of your training load. What does that mean in simple terms? It means your Training Score is an average of your daily SP, weighted so recent sessions affect the score more than older ones. Note that “Training Score” is more often called “Fitness” in other apps, or “Chronic Training Load/CTL” in TrainingPeaks.
This comment from ZI reader R. Chung (yes, thatChung) unpacks how Training Score is calculated: “The ‘42-day exponentially weighted moving average’ (and the 7-day version) don’t mean they’re an average over the previous 42 days. That’s a common misconception. It means the exponential decay rate is 1/42 days = 2.38% per day (and the 7-day decay rate is 1/7 = 14.28% per day). The 2.38% decay rate means about three-eighths of the TSS from a ride is still around after 42 days, not zero.”
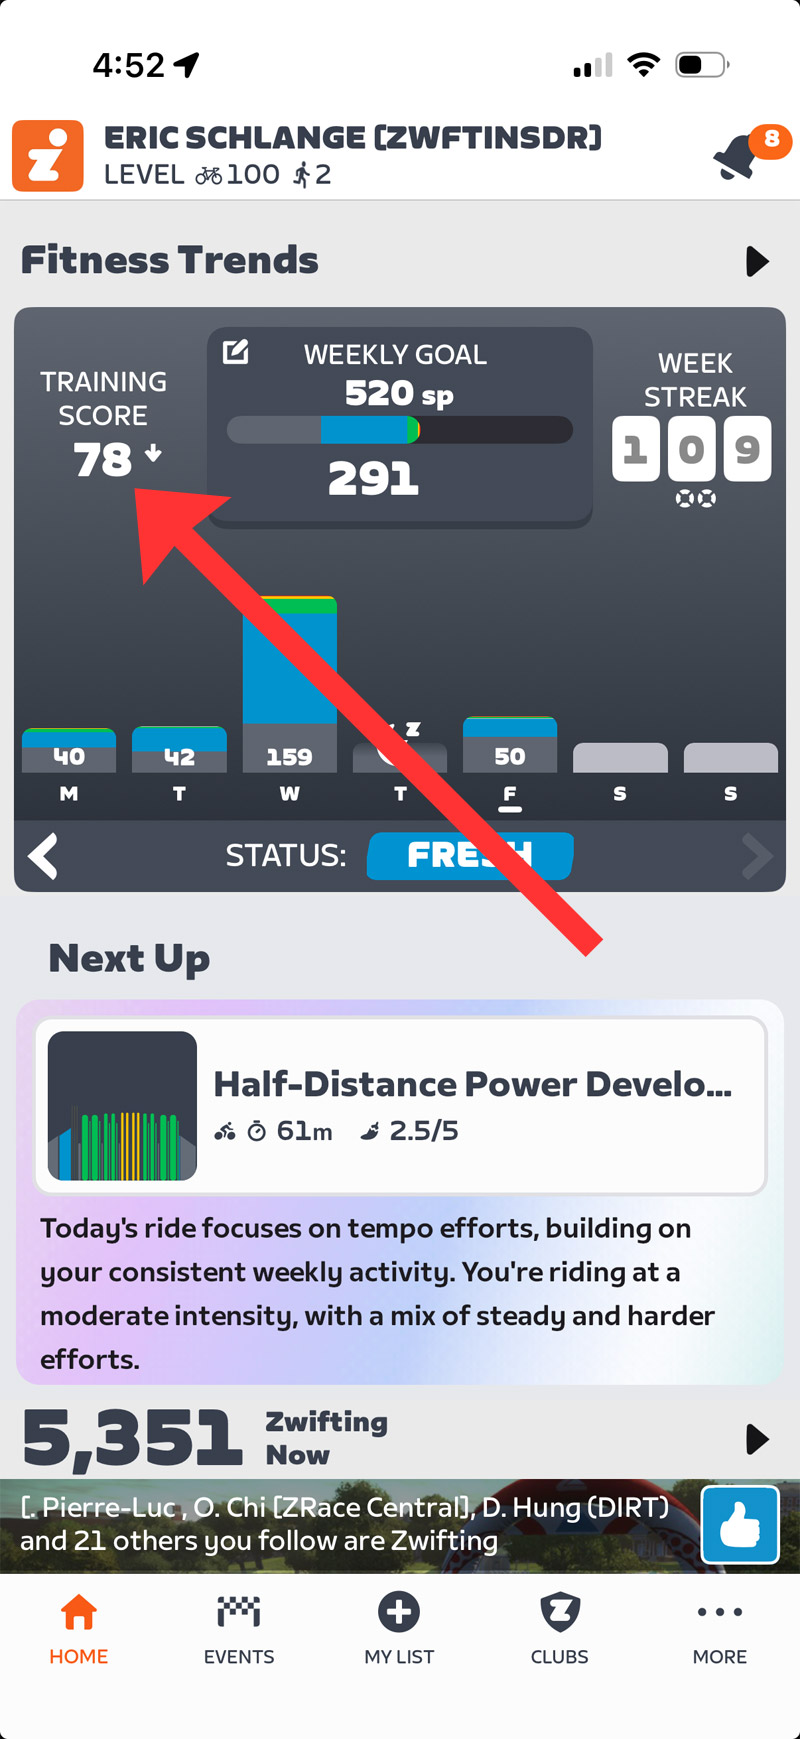
You can see your current Training Score in the Companion app at the top-left of the Fitness Trends box:
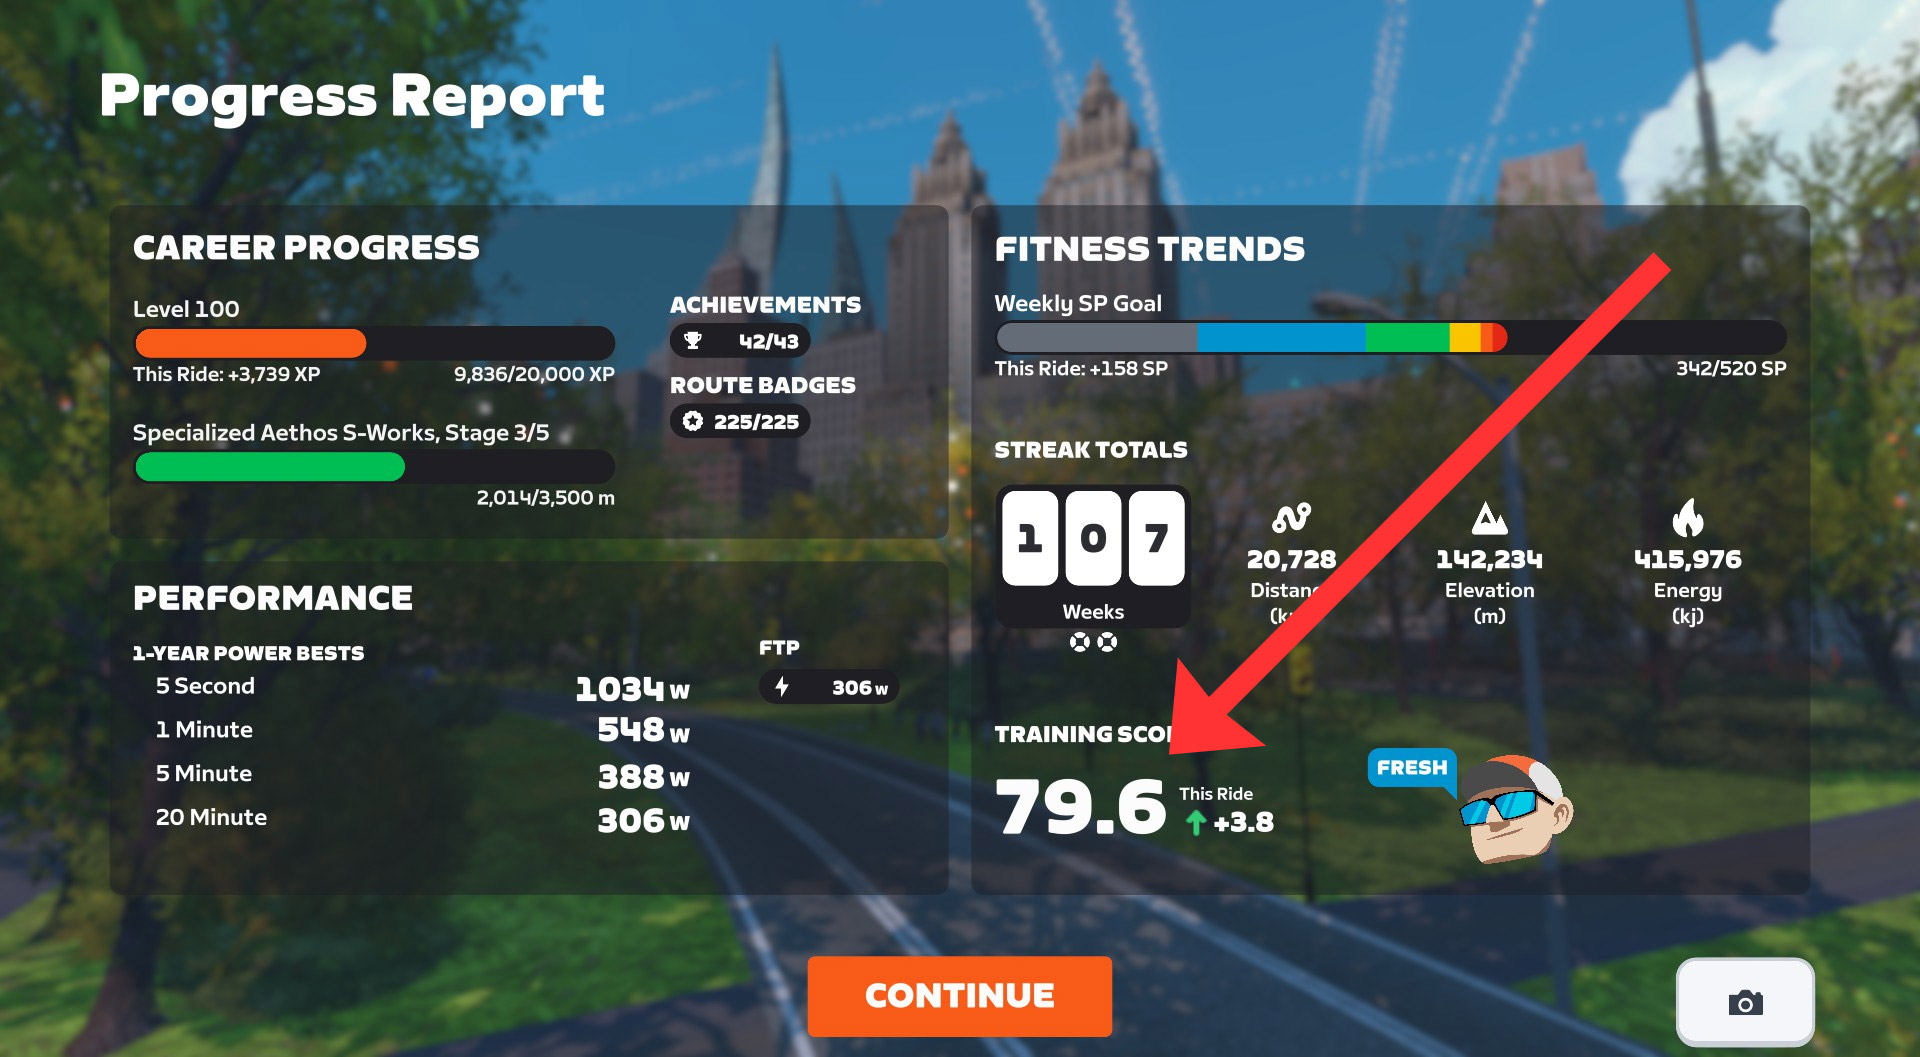
It is also shown on the Progress Report screen, along with a value showing how much your session changed the score:
Training Status
Your Training Status is also displayed in the Companion app and Progress Report. It will place you in one of the following categories:
Overreaching: avoid staying here long, or you may become over-trained
Productive: gaining fitness
Fresh: fit and ready to race
Detraining: losing fitness
Ready: new to training, not enough data to categorize you
Zwift Training Status is based on a metric that other apps call “Form” or “Freshness”. This is calculated as your current Training Score minus your current Fatigue. (Fatigue is calculated similarly to Training Score, except it’s only a 7-day exponentially weighted moving average of your training load instead of 42-day.)
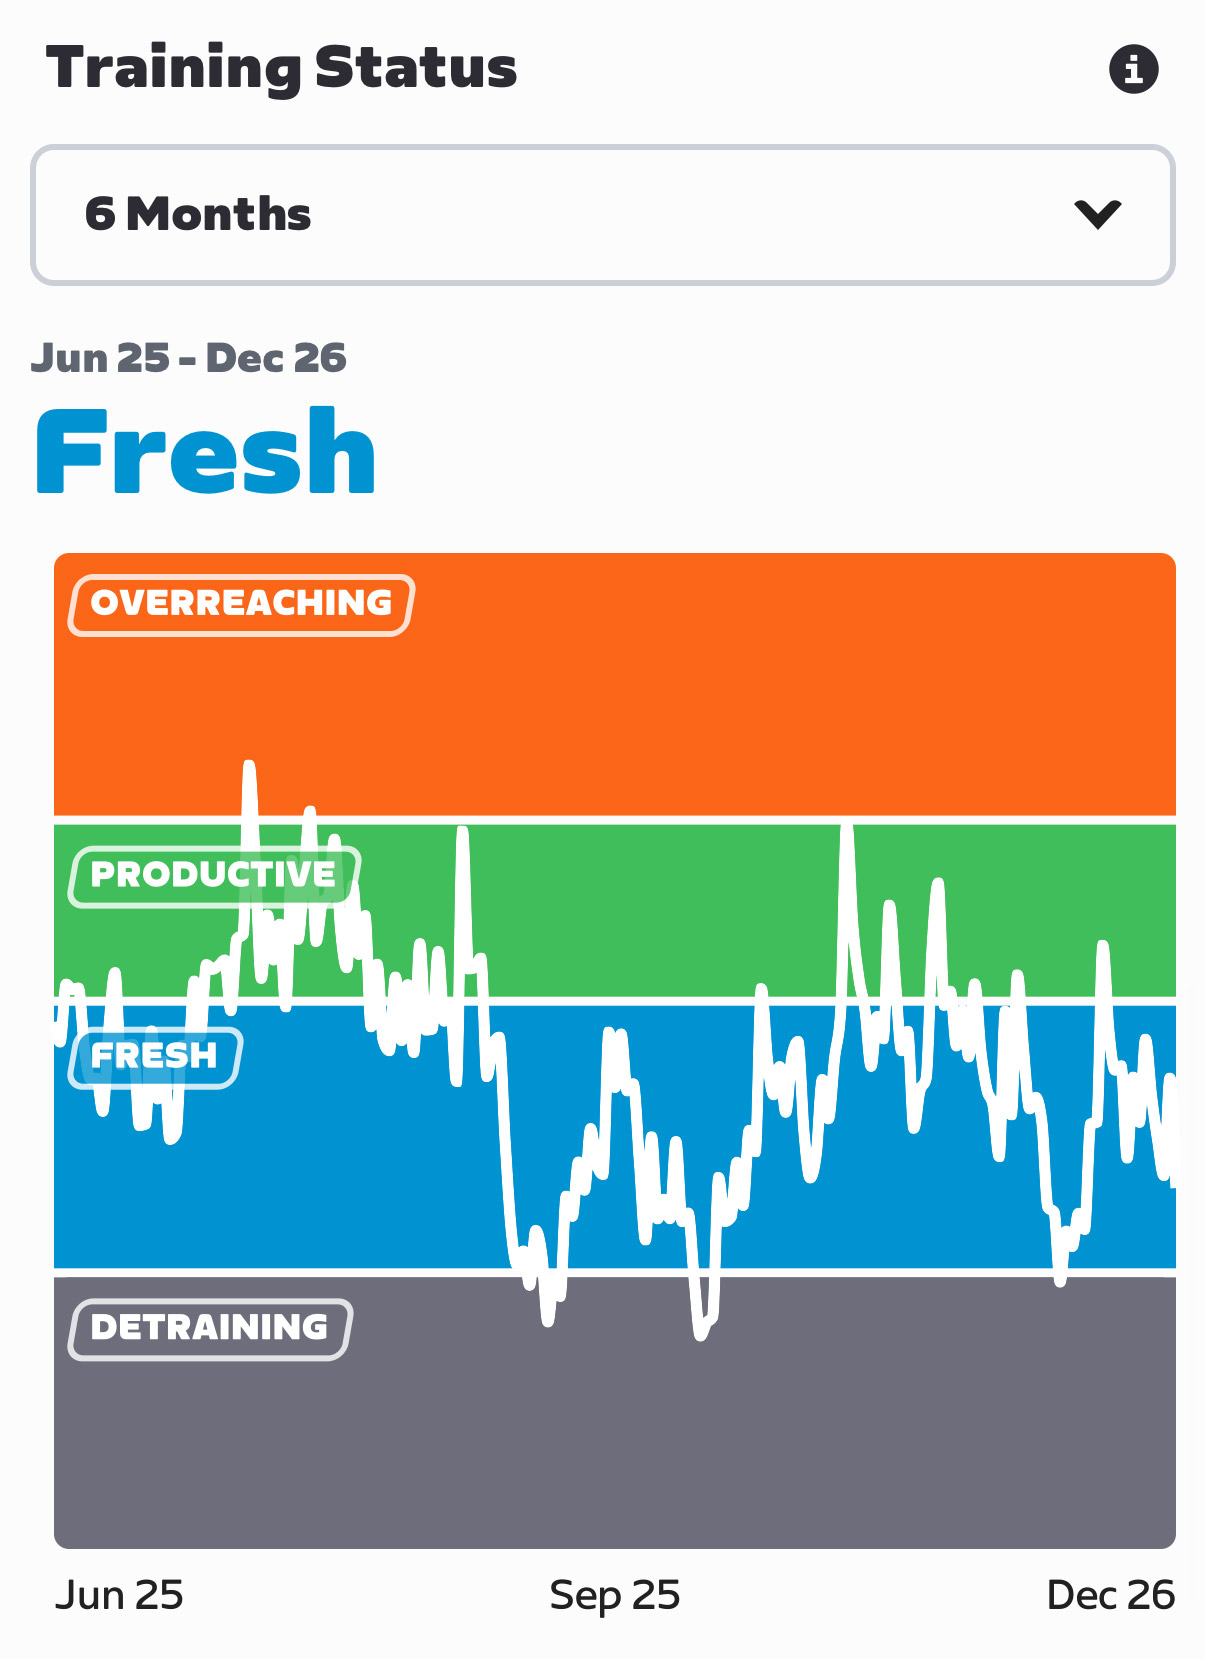
Since Zwift likes to keep metrics simple, they don’t display this Form/Freshness value. Instead, they simply chart it in the Companion app under “Fitness Trends”, so you can see where you’re trending:
How To Use It
So that’s how all of Zwift’s Fitness Metrics work. But how do you actually use them?
In some ways, that’s a very individual question, and thus impossible for me to answer. A qualified coach could look at your data and give you some really helpful insights, though!
But there are some general principles, and some obvious use cases, which apply to just about everyone.
First: it’s worth mentioning that your Zwift Training Status is not an indicator of how well you may feel on a given day. If you’re anything like me, Zwift may often say you’re “fresh,” but your legs disagree! That’s OK. Training Status summarizes overall Training Stress Balance (TSB), giving a sort of zoomed-out view of your current freshness, which may not match how you feel on the day.
If your Training Status is “Overreaching”, you’ll want to ease up soon. The great Joe Friel says, “…if you spend much time here you will create great fatigue and are flirting with extreme overreaching that would likely become overtraining if continued for too long.” Typically, you’ll automatically ease up training at this phase, because the body simply can’t keep overreaching. But be careful if you find yourself here.
Zwift’s Fitness Metrics are just a Zwifty (that is, simpler and more colorful) version of the commonly-used Performance Management Chart seen in coaching plans on TrainingPeaks and other platforms. These charts show the detailed results of periodized training plans, where athletes typically go through sections of training in the “productive” zone, take a recovery week to enter the “fresh zone,” then start another block of training. Often, these training plans are structured with a target event in mind, and athletes will taper their training in the week or two leading up to it.
You may not have a coach or the expertise to structure a full training plan, but you can use Zwift’s Fitness Metrics to help determine an effective training load for your situation. The metrics won’t tell you which workout to do each day, but they’ll help you manage your overall training load. And that’s half of the battle! While it’s good to know which specific workouts will help you most, so much of endurance training is about building up a training load. Getting on the bike. Running the planned distance. Putting in the work. Consistency.
So put in the effort to get into the productive zone, then take a week off after 3-4 productive weeks. And if you get into overreaching, don’t panic. But also, don’t keep digging that hole deeper!
Those are just a few tips and thoughts, but training management is a huge topic with plenty of rabbit holes. So I’ll leave it here for now.
What’s Next?
Lastly, it’s worth mentioning that these metrics are just one part of the more robust training platform Zwift is building. You can see the pieces coming together: first, third-party workout syncing brought all the big training plan providers to the table. Then revamped automatic FTP detection made it easier to set your power zones. Next, Zwift added outdoor rides and began computing training metrics. Then run activities were added to the mix!
To what end? We don’t know for sure, but Zwift recently released Personalized Recommendations, and there’s much, much more that could be done in this space…
Questions or Comments?
Did this post help you better understand and utilize Zwift’s Fitness Metrics? Still got questions? Comments? Share below!
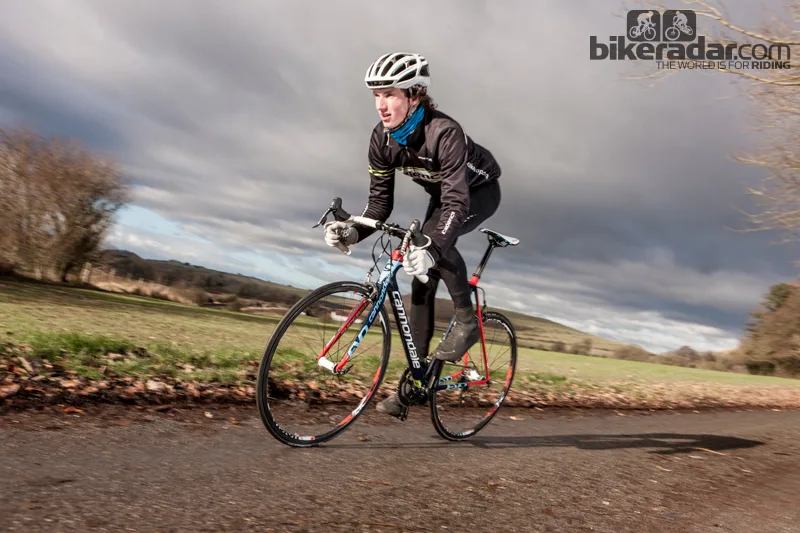
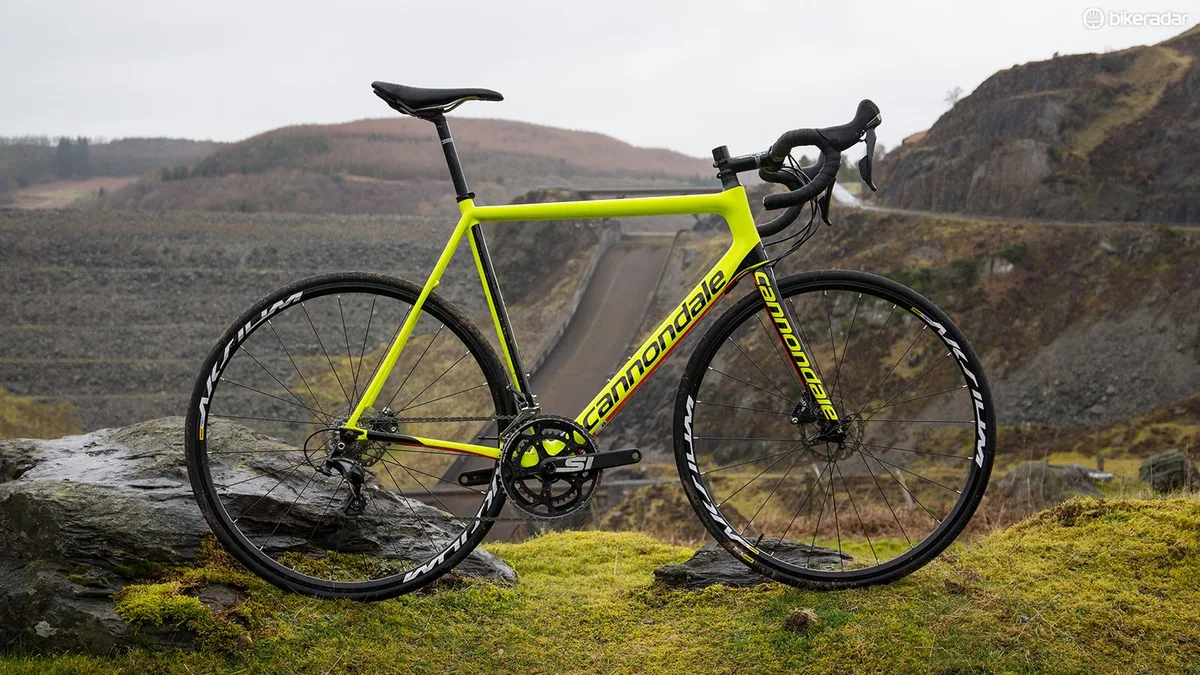
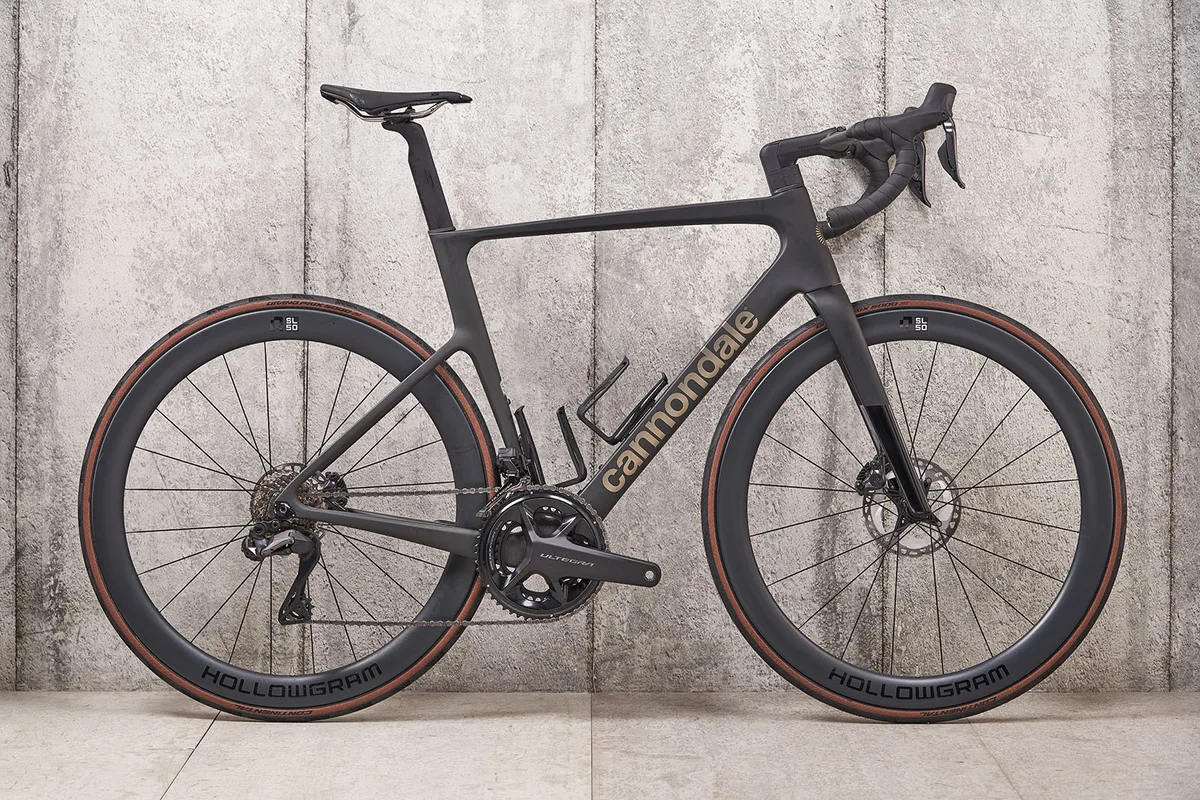
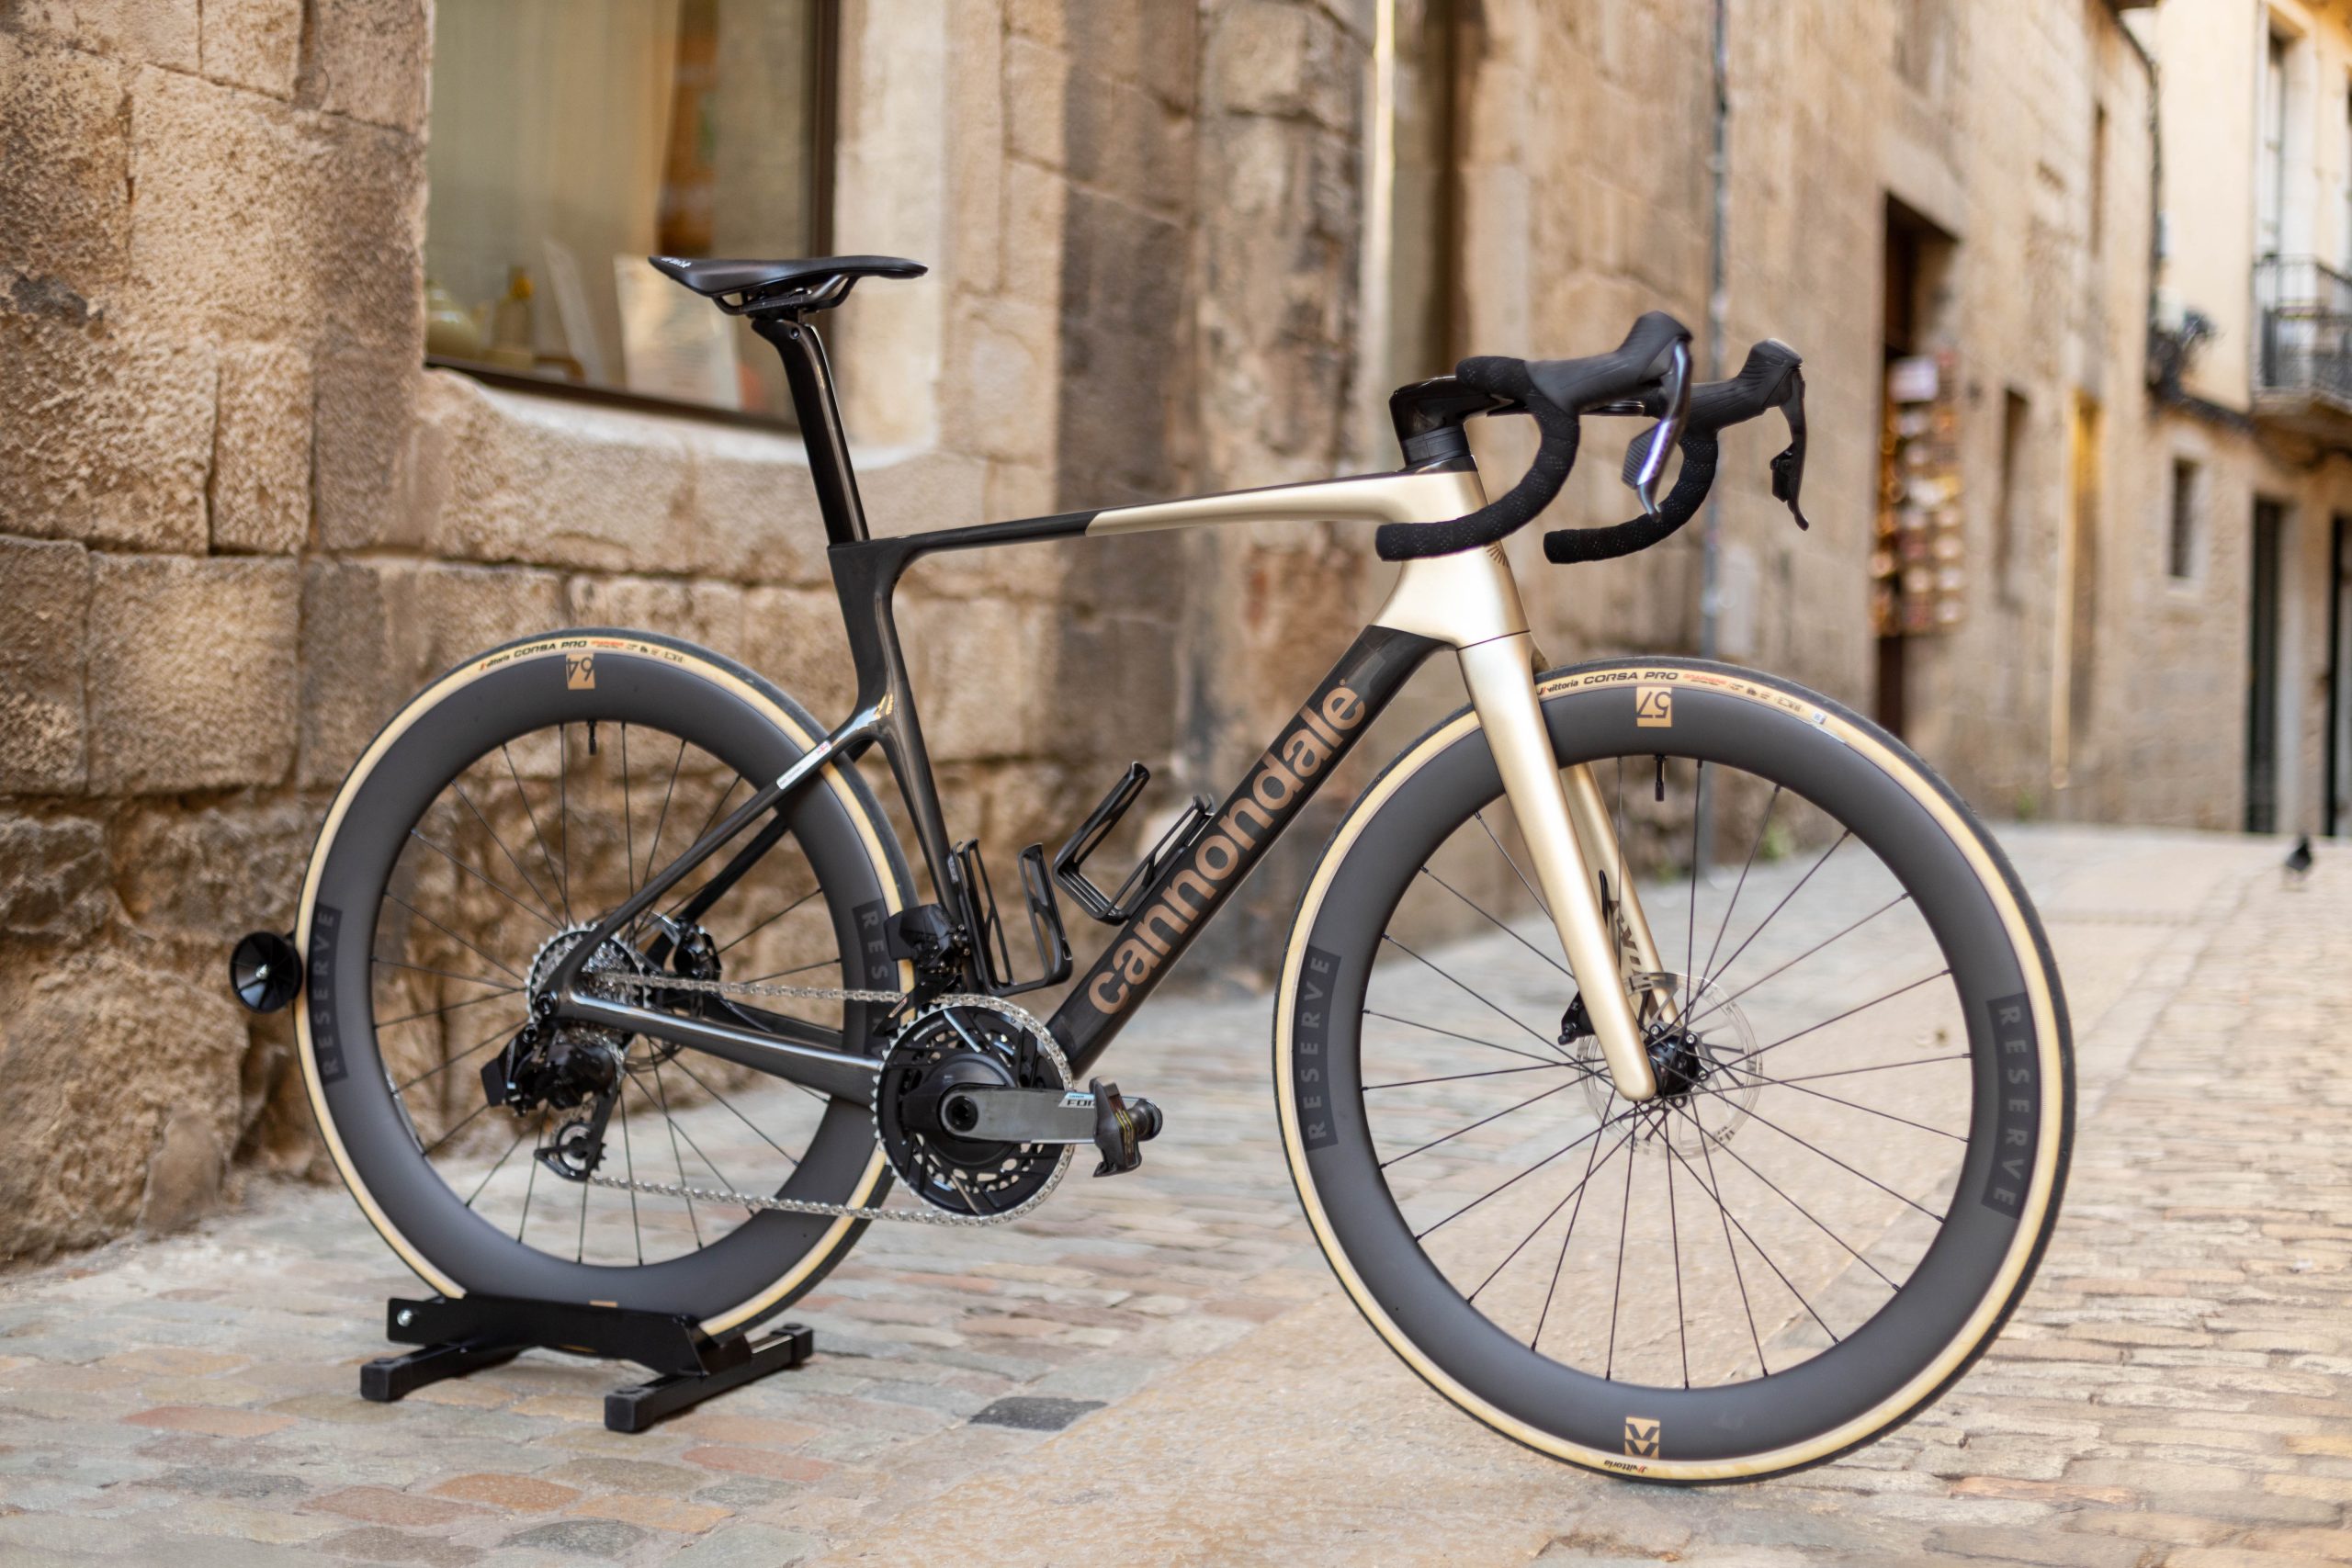
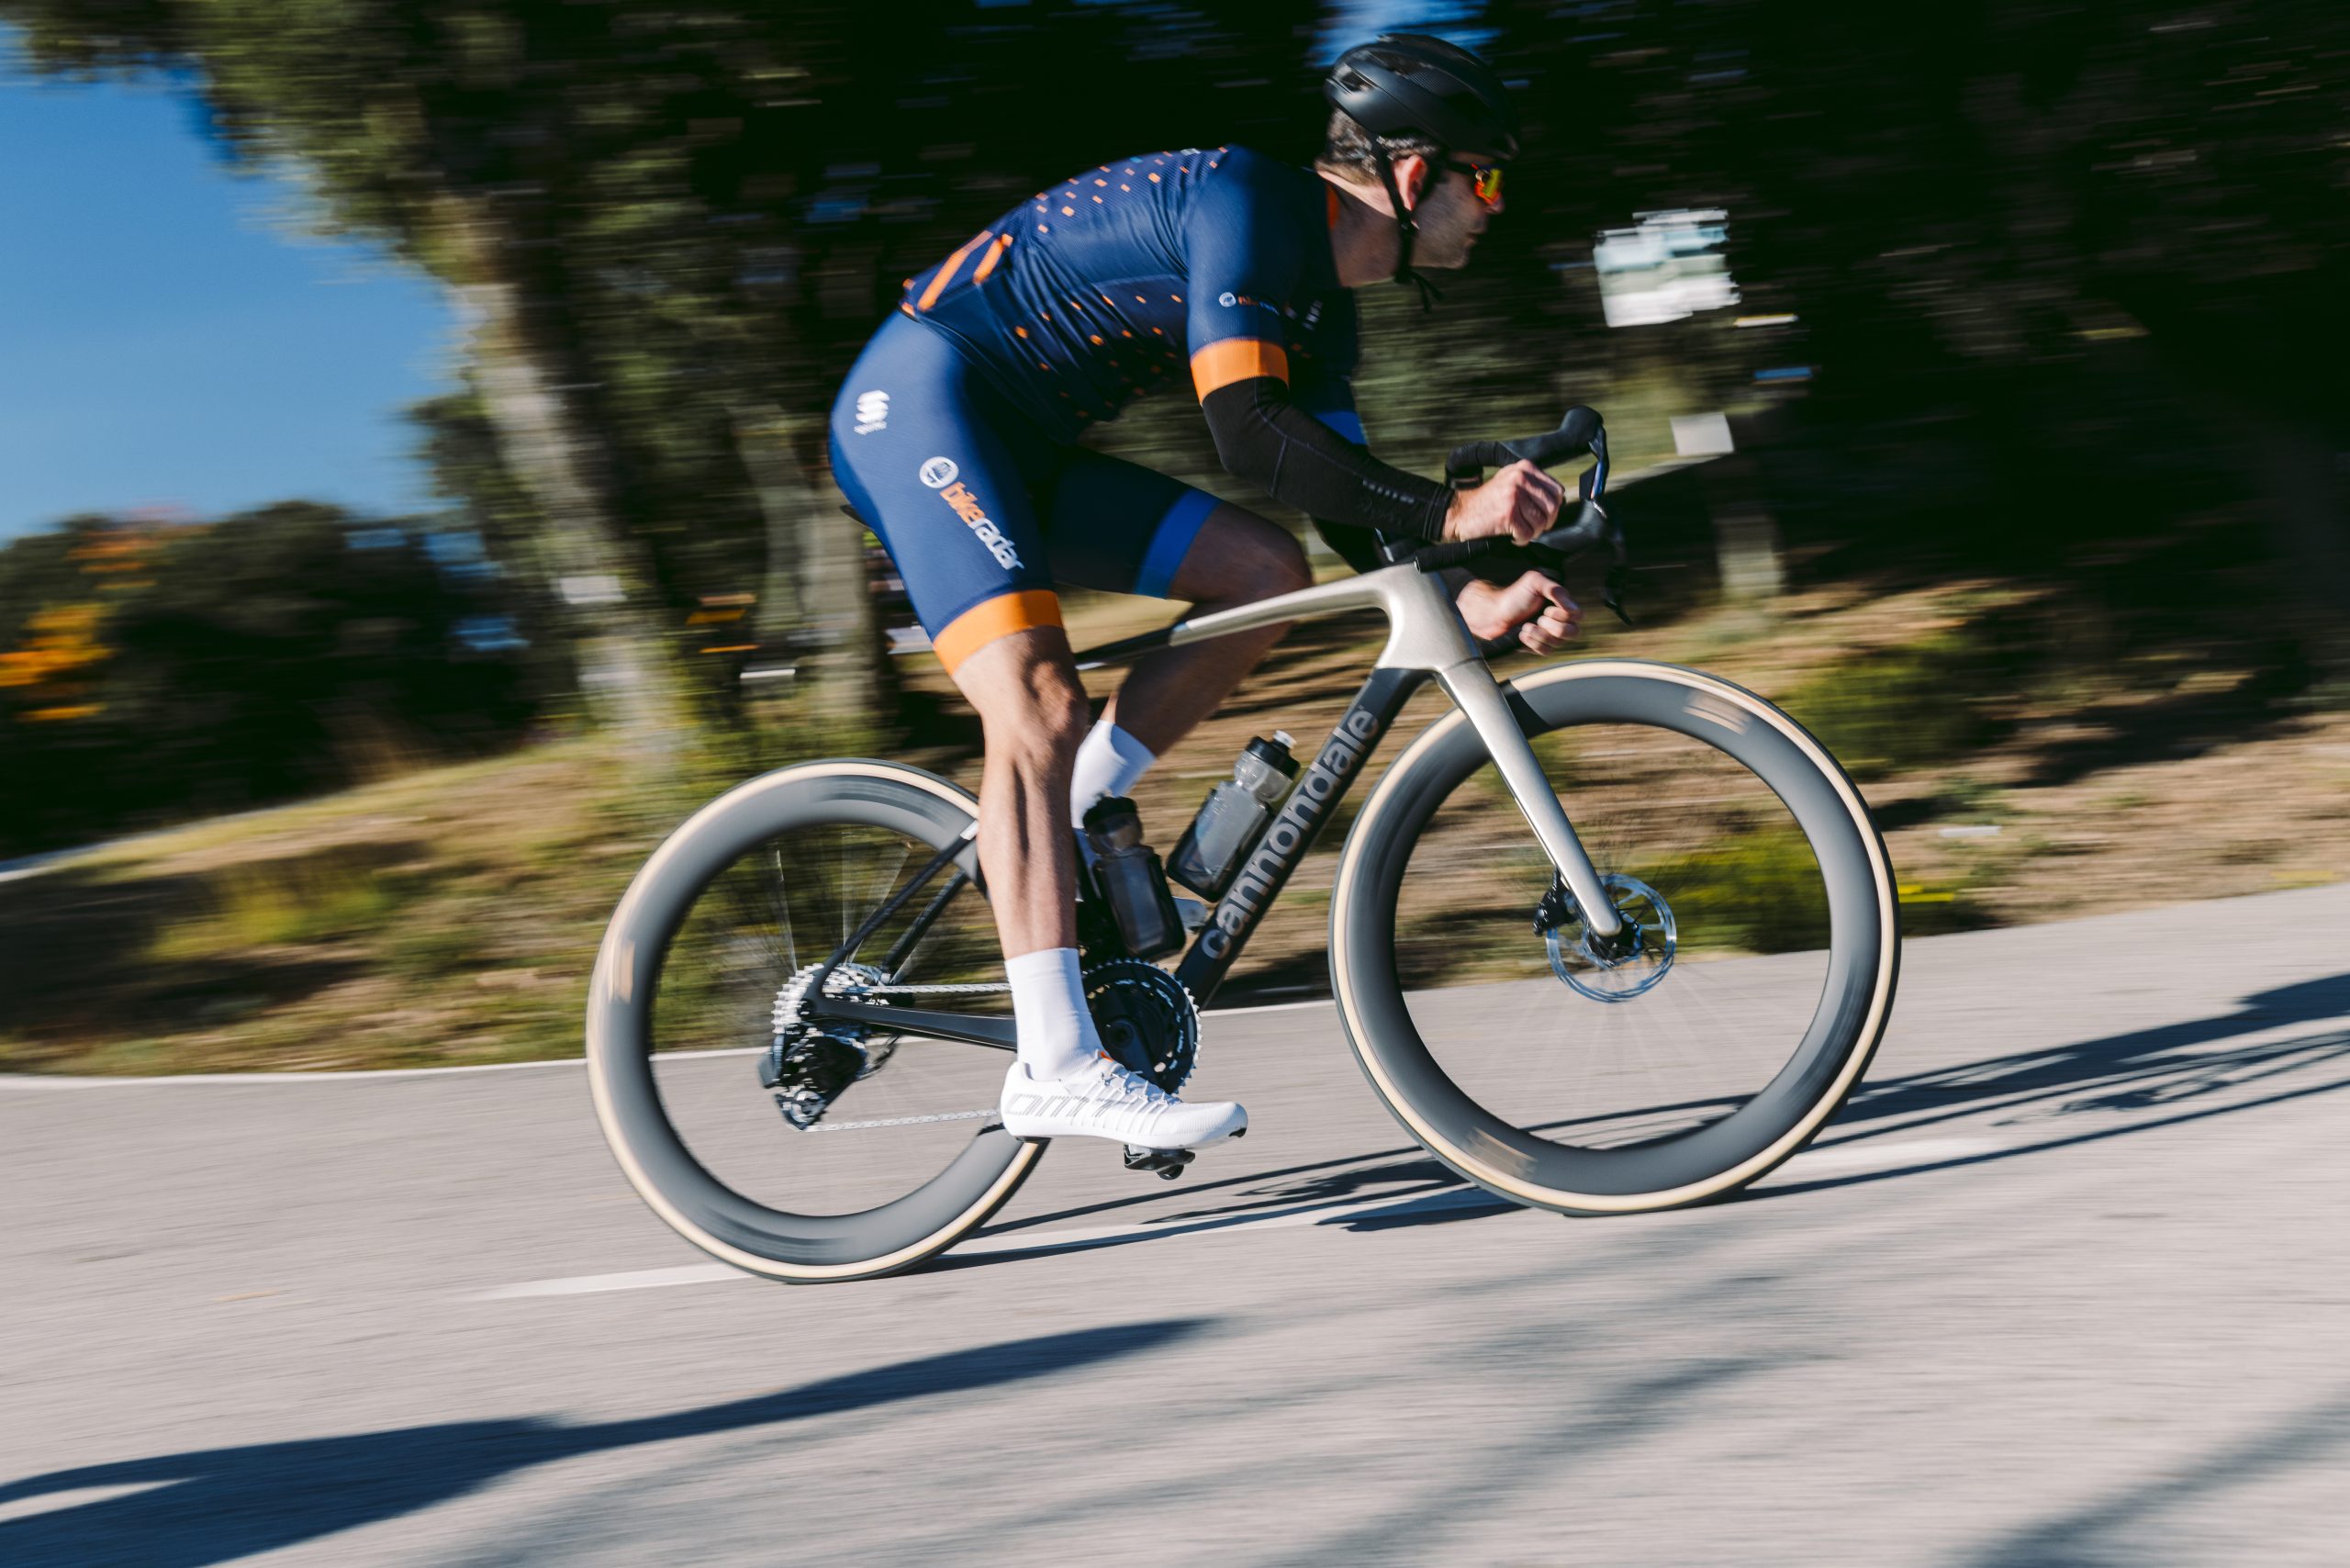
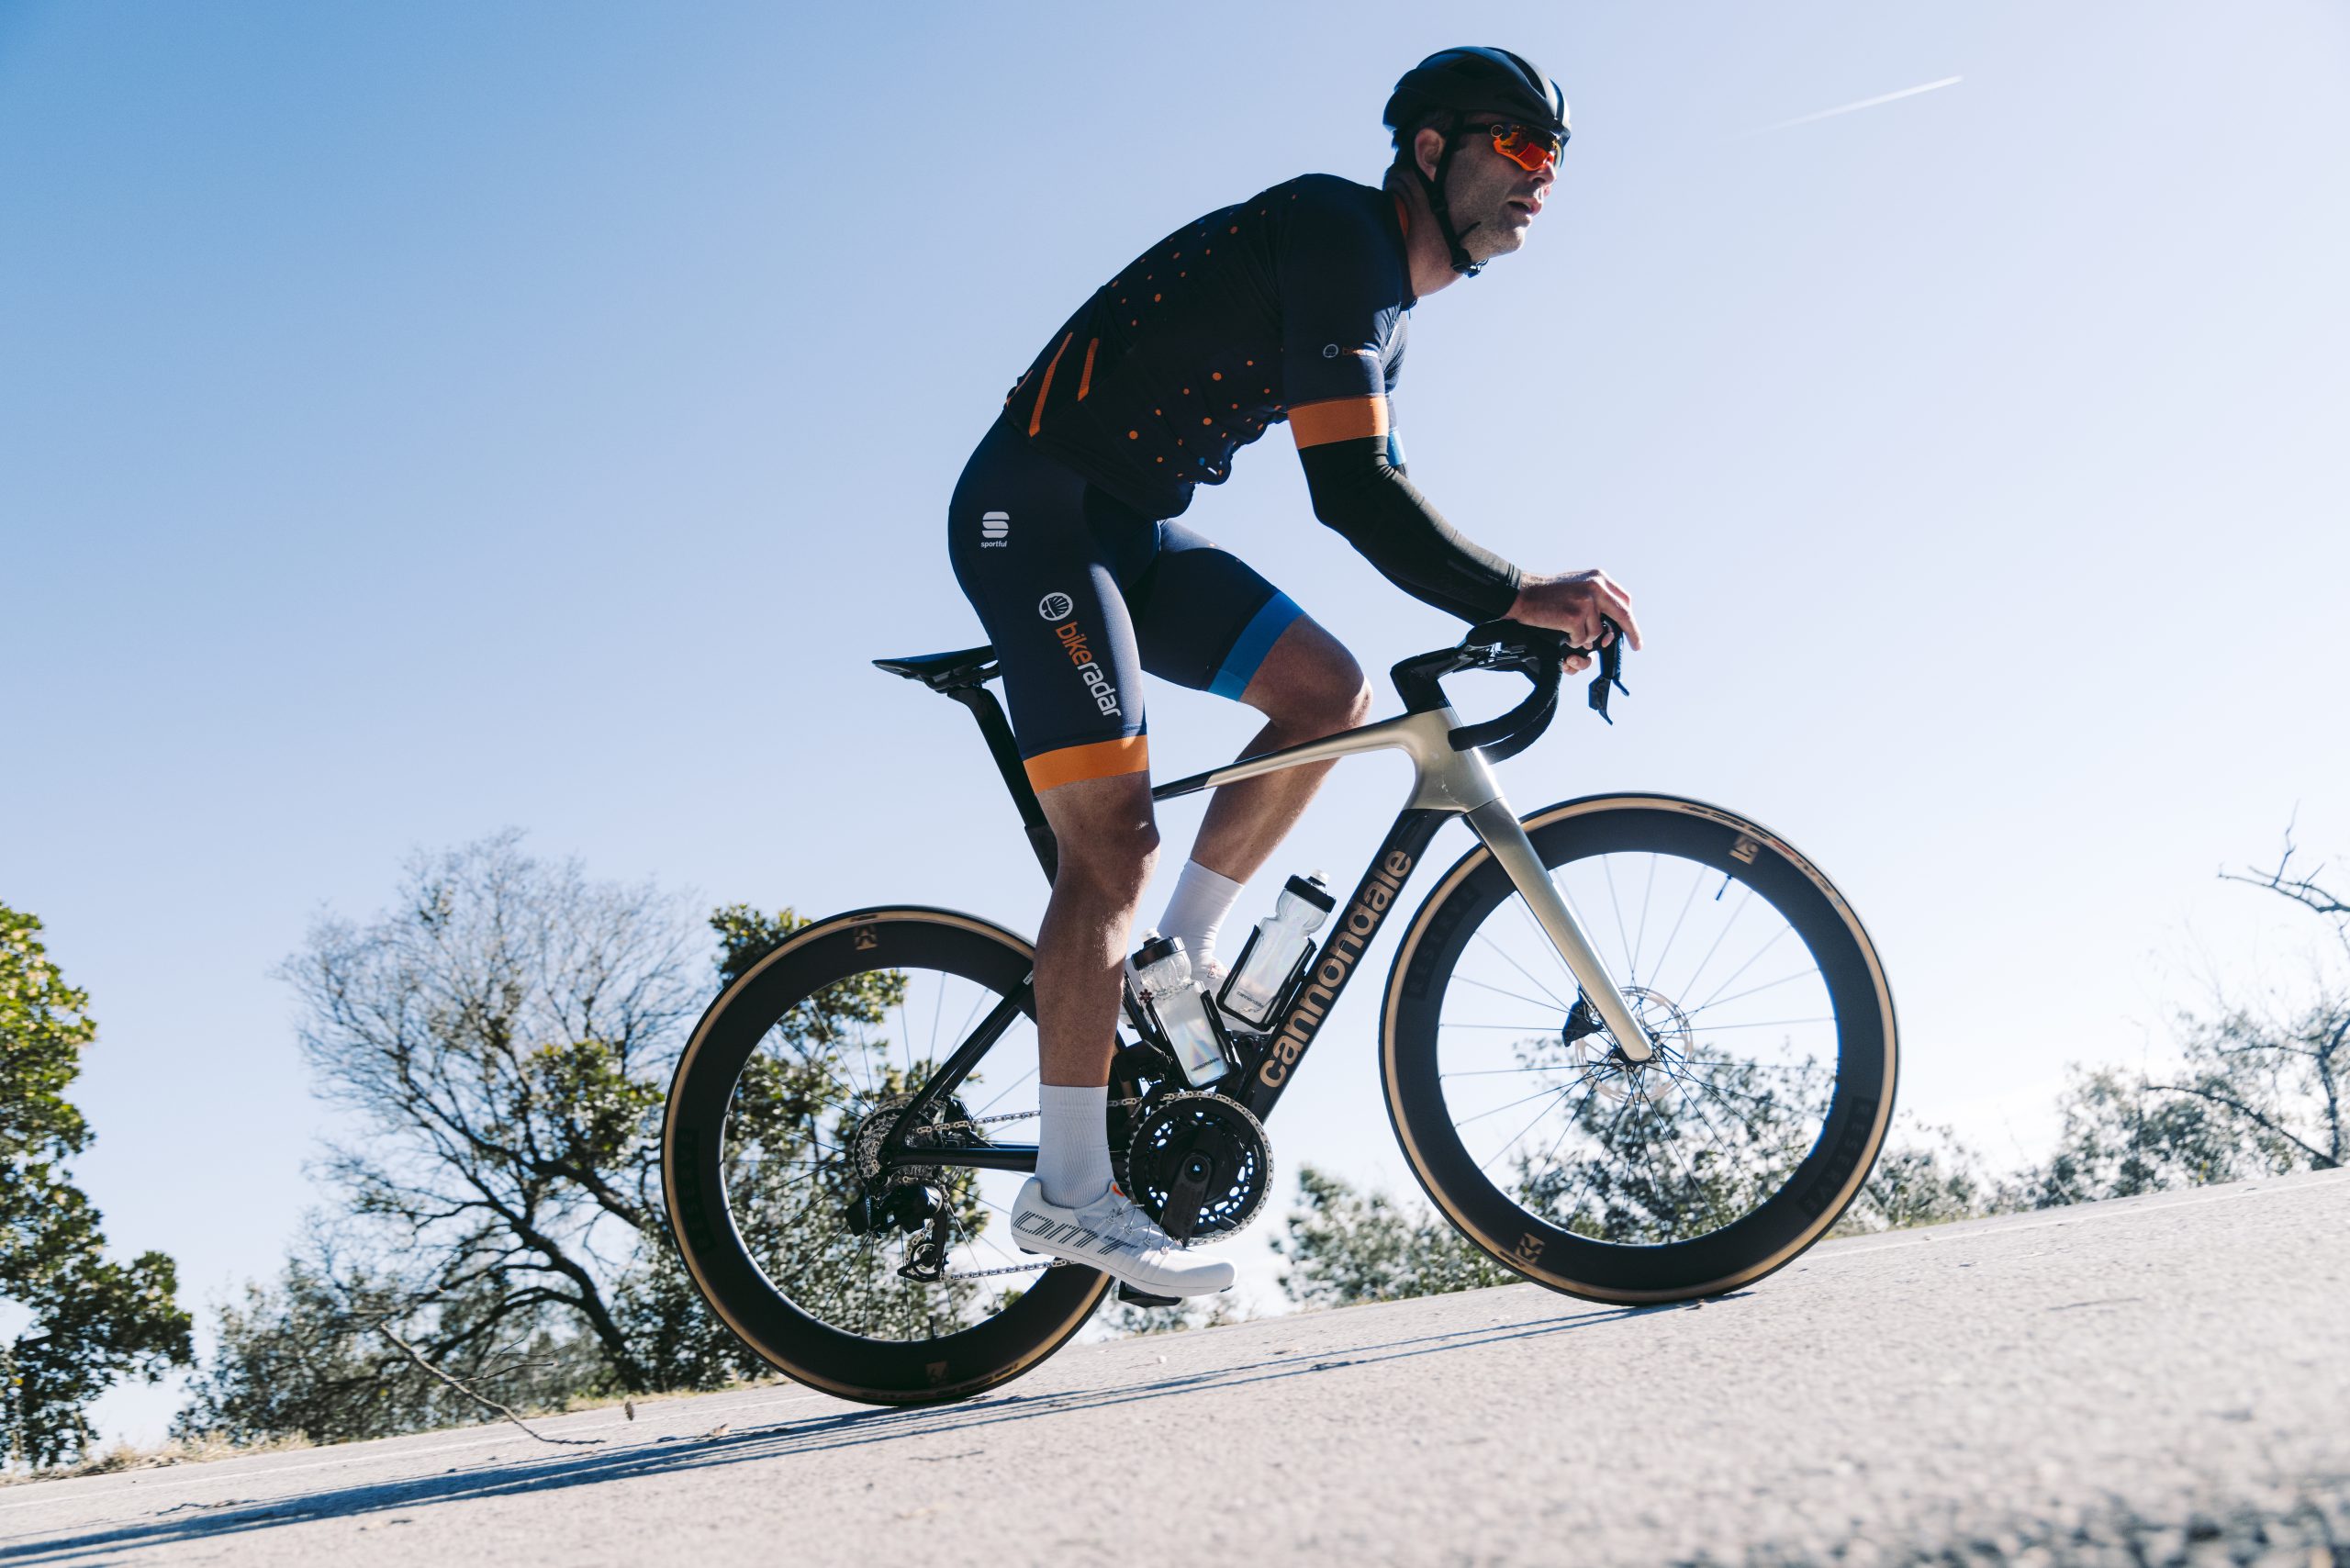
The Cannondale SuperSix is one of the most iconic race bikes of the last two decades, carrying the likes of Ivan Basso, Peter Sagan, Vincenzo Nibali and, more recently, Ben Healy to countless victories.
The latest version, released earlier this week, marks the fifth generation of the bike, which like Porsche’s 911, clings to the concept of evolution rather than revolution.
To mark the release of the new bike, we’ve looked back at the incremental changes Cannondale has made to the SuperSix through its generations to see how modern road bikes have evolved.
Because BikeRadar is as old as the Cannondale SuperSix, launched in 2007, we have detailed reviews of the bikes, so be sure to check them out for some nostalgia.
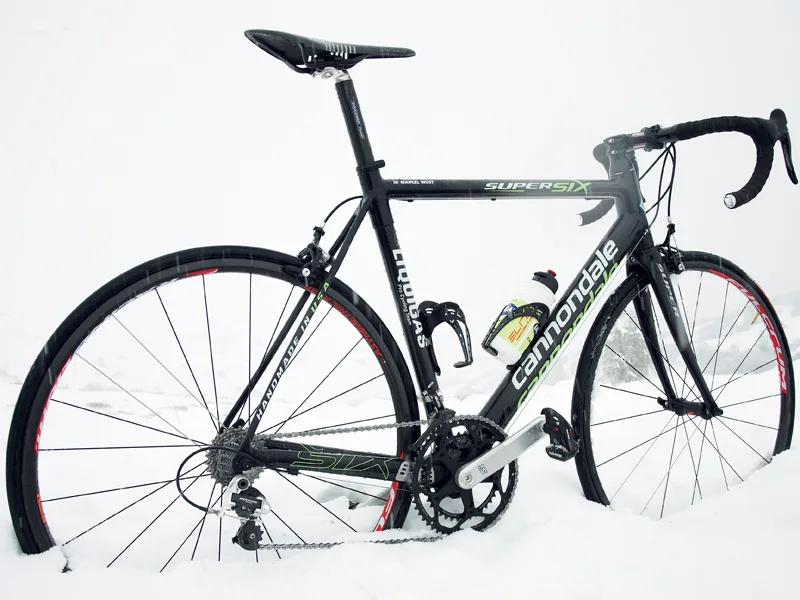
The first-generation SuperSix was handmade in the USA. Marcel Wurst / Our Media
When the first SuperSix was released in 2007, it was Cannondale’s first full carbon fibre bike.
The bike replaced the SystemSix, a hybrid aluminium/carbon road bike succeeding the CAAD models, with the name later revived for Cannondale’s aero offering.
Cannondale claimed a weight of 1,050g for a fully painted 56cm frame, and opted not to show the carbon weave through the lacquer like many bikes of the time.
The brand built the bottom bracket and chainstay unit as one piece to increase stiffness.
Hourglass seatstays with small diameters were used for compliance and to reduce road buzz.
The 340g fork was shaped for forgiveness and featured carbon wheel dropouts.
For its first shot at full carbon fibre, the brand impressed our tester at the time – 14-time Grand Tour stage winner Marcel Wurst – with its combination of power transfer, stiffness, comfort and handling.
The SuperSix was used by Team Liquigas from 2008, with Basso securing the Giro d’Italia and Nibali winning the Vuelta a España in 2010 onboard the bike.
For the second generation, Cannondale changed the name to the SuperSix EVO. Our Media
When the second-generation SuperSix launched, Cannondale made sure to let riders know it was an evolution, adding the EVO suffix, which has stuck ever since.
The new frame weighed in at a claimed 695g for a size 56cm, with industry-renowned carbon engineer Peter Denk leading the bike’s design.
Weight was saved via an updated carbon-moulding technique, with the carbon fibre material laid up around an EPS core.
Instead of making the bottom bracket and chainstay unit as one piece, this time the rear triangle of chainstays and seatstays were moulded as one piece.
Cannondale chose to incorporate the dropouts into this piece, giving it a continuous fibre structure that enabled carbon fibres to be used for increased stiffness, while allowing for some vertical compliance to provide a smoother ride.
This model represented the first time Cannondale offered two options for the SuperSix – a standard model and a Hi-Mod version that used a higher-modulus carbon fibre layup.
The Hi-Mod variant was a challenger for the lightest frame in the world when it launched.
We gave it a rare 5-star rating when we reviewed the bike in 2013, praising its acceleration, effortless climbing and all-day comfort.
The SuperSix EVO continued to be used by the Liquigas-Cannondale team in 2012, with Sagan claiming the points jersey in its first outing at the Tour de France.
Cannondale was slow to put disc brakes on its race bike. Ben Healy/ Our Media
Cannondale finally gave the SuperSix disc brakes for the first time in 2016.
While a rim-brake option remained for weight-weenie racers, the new disc-brake bikes helped cement the tech into the mainstream.
The new SuperSix adopted the wider 73mm BB30a standard, with the wider shell enabling asymmetric stays, which lead to a beefier non-driveside for increased efficiency.
This was unwelcome by some, as a proprietary design, and with many press-fit bikes struggling at the time due to small manufacturing defects – this was something Cannondale would backtrack on with later generations.
Stiffness was also increased by an hourglass-shaped head tube and a carbon layup.
Truncated aero profiles were used for the tubes, giving the 2016 SuperSix an aero advantage over the previous bike, although there was a weight penalty, with the rim-brake frame weighing in at 777g.
The disc-brake version featured a similar geometry and build, but required a full redesign and new moulding for every part of the frame and fork.
This led to the weight being slightly higher, at 829g for the frame and 360g for the fork.
Cannondale only adopted the 12mm thru-axle standard on the front, while the rear remained a standard quick-release.
We gave the disc-brake bike 4.5 stars when we tested it in 2017, declaring it one of the best race machines around with much-improved braking.
The SuperSix EVO got an aero overhaul for the fourth generation. Russell Burton / Our Media
The silhouette of the SuperSix remained largely unchanged until 2019, when Cannondale gave the bike drop seatstays and significantly more aero tubing.
Cannondale used deep aerofoil shapes, with many of them employing Kammtail principles to stay within the rule constraints of the time.
The bike was still available with rim brakes, although disc-brake dominance was well underway.
Cannondale addressed the quick-release axles on the disc-brake variant, giving the bike its Speed Release thru-axles.
Weight also continued to climb, with Cannondale claiming 866g for a 56cm frame, combined with a 389g fork for the Hi-Mod frameset.
The bike became a better all-rounder despite other brands’ aero offerings. Russell Burton / Our Media
These gains were offset by the aero advantage, said to have reduced drag by over 30 per cent compared to the previous model.
This generation won our Bike of the Year title in 2020 with a 5-star review from Warren Rossiter, who was impressed by the bike’s sublime handling and superb comfort.
The SuperSix EVO became more refined in this generation. David Caudrey / Our Media
The SuperSix EVO saw some subtle changes for 2023, sharing a similar frame shape to the previous model.
While this was an all-new bike, the geometry, head tube and bottom-bracket stiffness, and compliance through the rear end, were carried over.
Hence, we’ve added the V2 suffix to this bike.
It marked a farewell to a standard Cannondale helped introduce, with the brand waving goodbye to press-fit bottom brackets in favour of a threaded BSA/ISO bottom bracket.
The bike debuted the Delta steerer tube, a triangular-shaped steerer that enabled it to greatly reduce the head-tube sizing of the EVO, while still allowing for fully integrated cable routing.
Cannondale also refined the seat-tube design in the name of aerodynamics, while repositioning the Di2 battery to the bottom of the down tube.
The brand moved away from its Speed Release axles, instead using the Syntace thru-axle standard, which helped reduce the bike’s weight.
Lab71 sits at the top end of Cannondale’s line-up, similar to Specialized’s S-Works. Andy Lloyd / Our Media
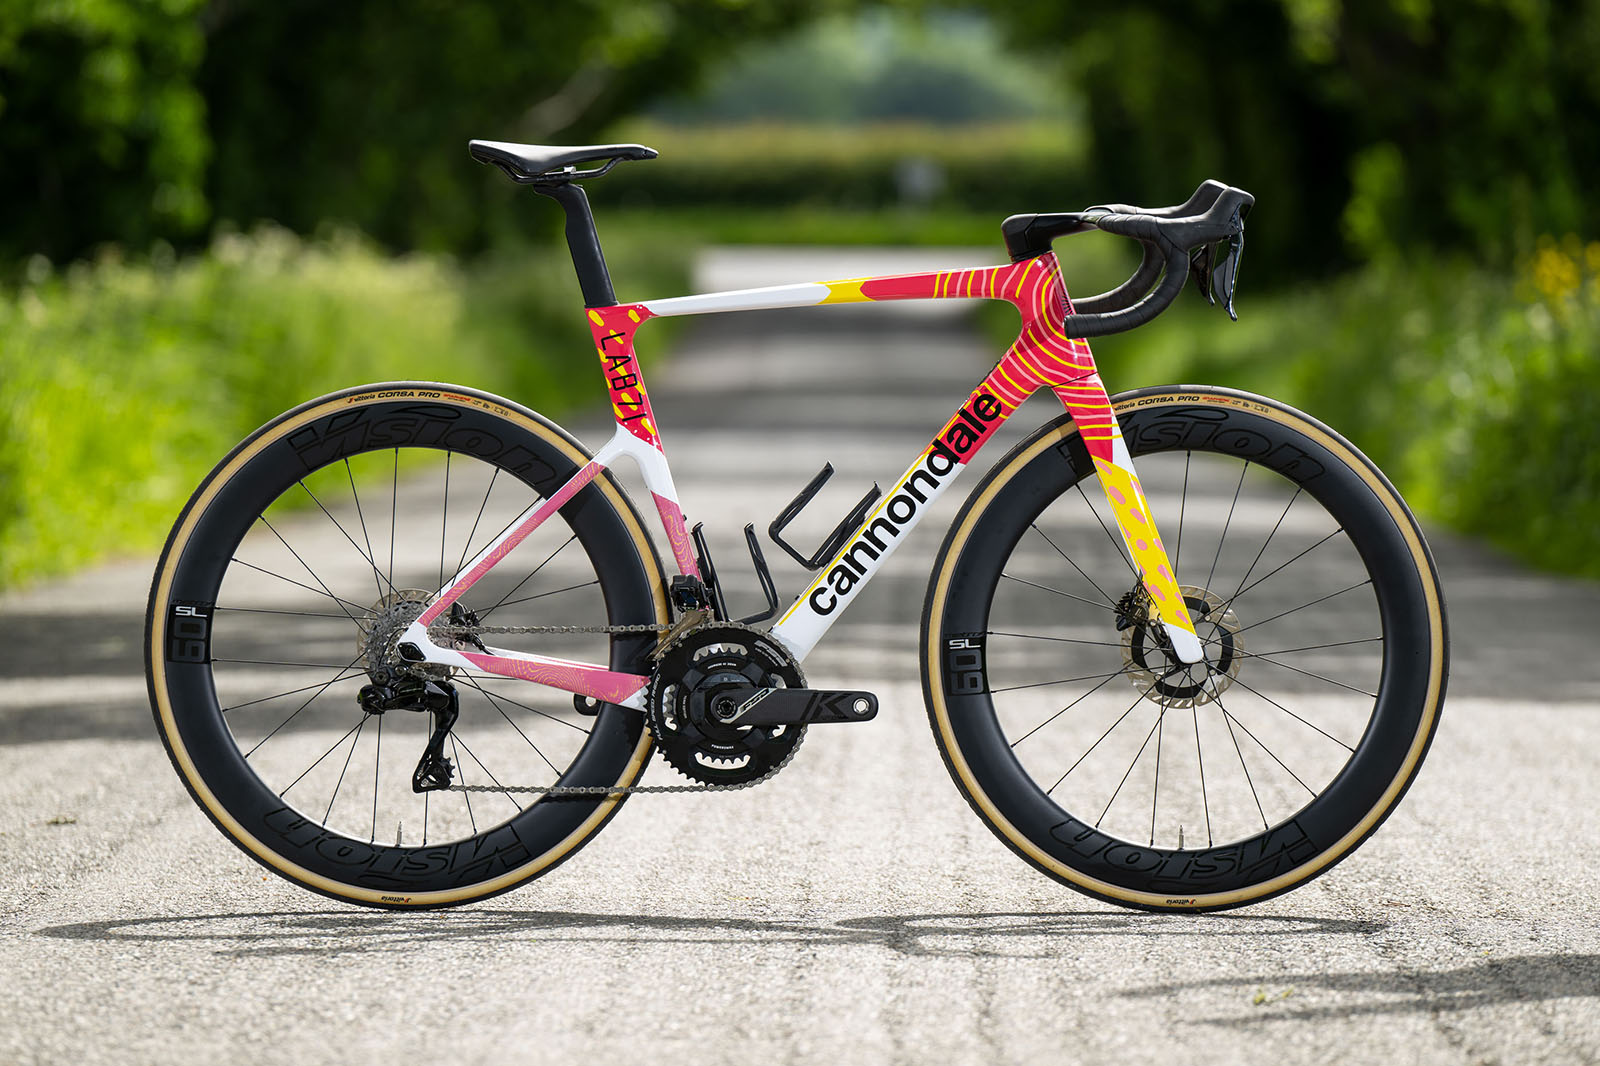
Cannondale introduced the Lab71 edition during this generation, with that frame weighing in at 770g for a size 56cm.
The Hi-Mod and carbon bikes weren’t exactly heavyweights, with the Hi-Mod frame weighing in at 810g, and the standard carbon model 930g.
We were once again impressed by this SuperSix generation when we tested it, with Ashley Quinlan giving the bike 4.5 stars, naming it one of the best all-round race bikes at the time.
The new bike continues to evolve, showing incremental changes. Ashley Quinlan / Our Media
The latest SuperSix EVO was released earlier this week, with incremental changes made to the bike’s geometry and weight.
Cannondale has given the bike a more aggressive geometry, reducing the stack by 10mm.
The bike has also had some weight shaved from the previous generation, weighing in at 728g for the Lab71 frame and 410g for the fork, in a size 56cm.
The brand says this saving comes from an improved carbon manufacturing process to help cut excess material.
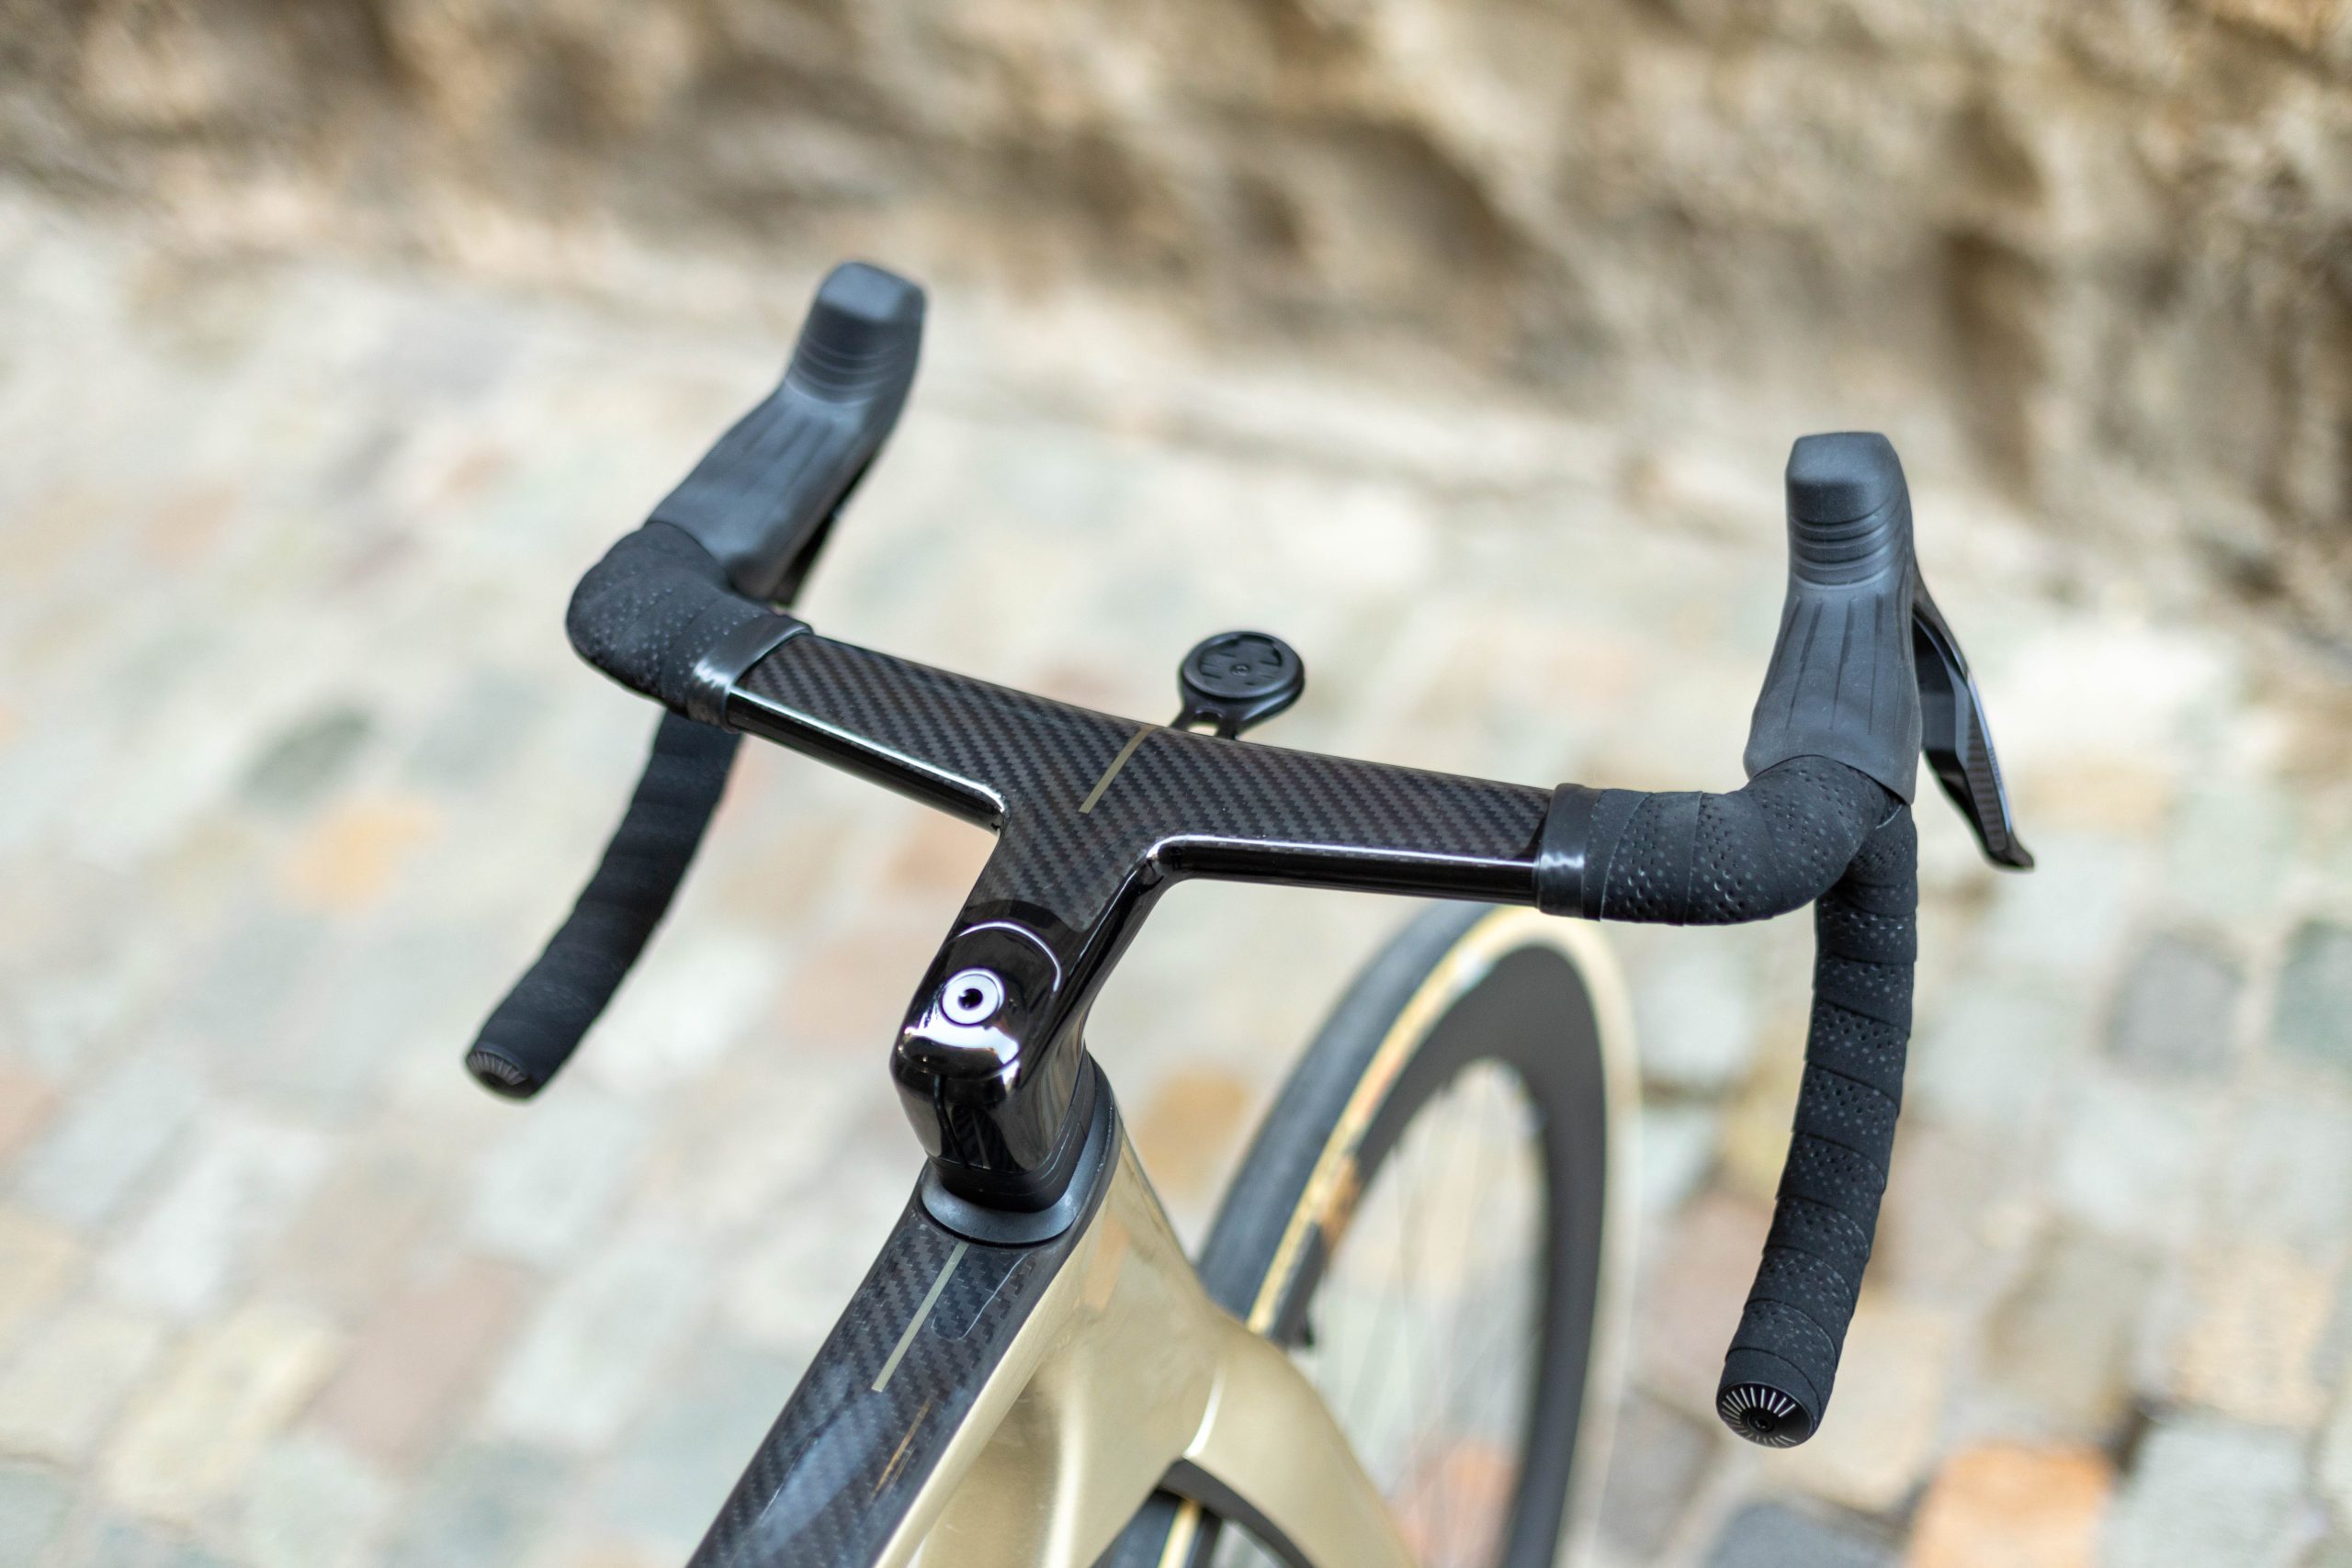
Integrated cockpits look futuristic compared to the first generation. Ashley Quinlan / Our Media
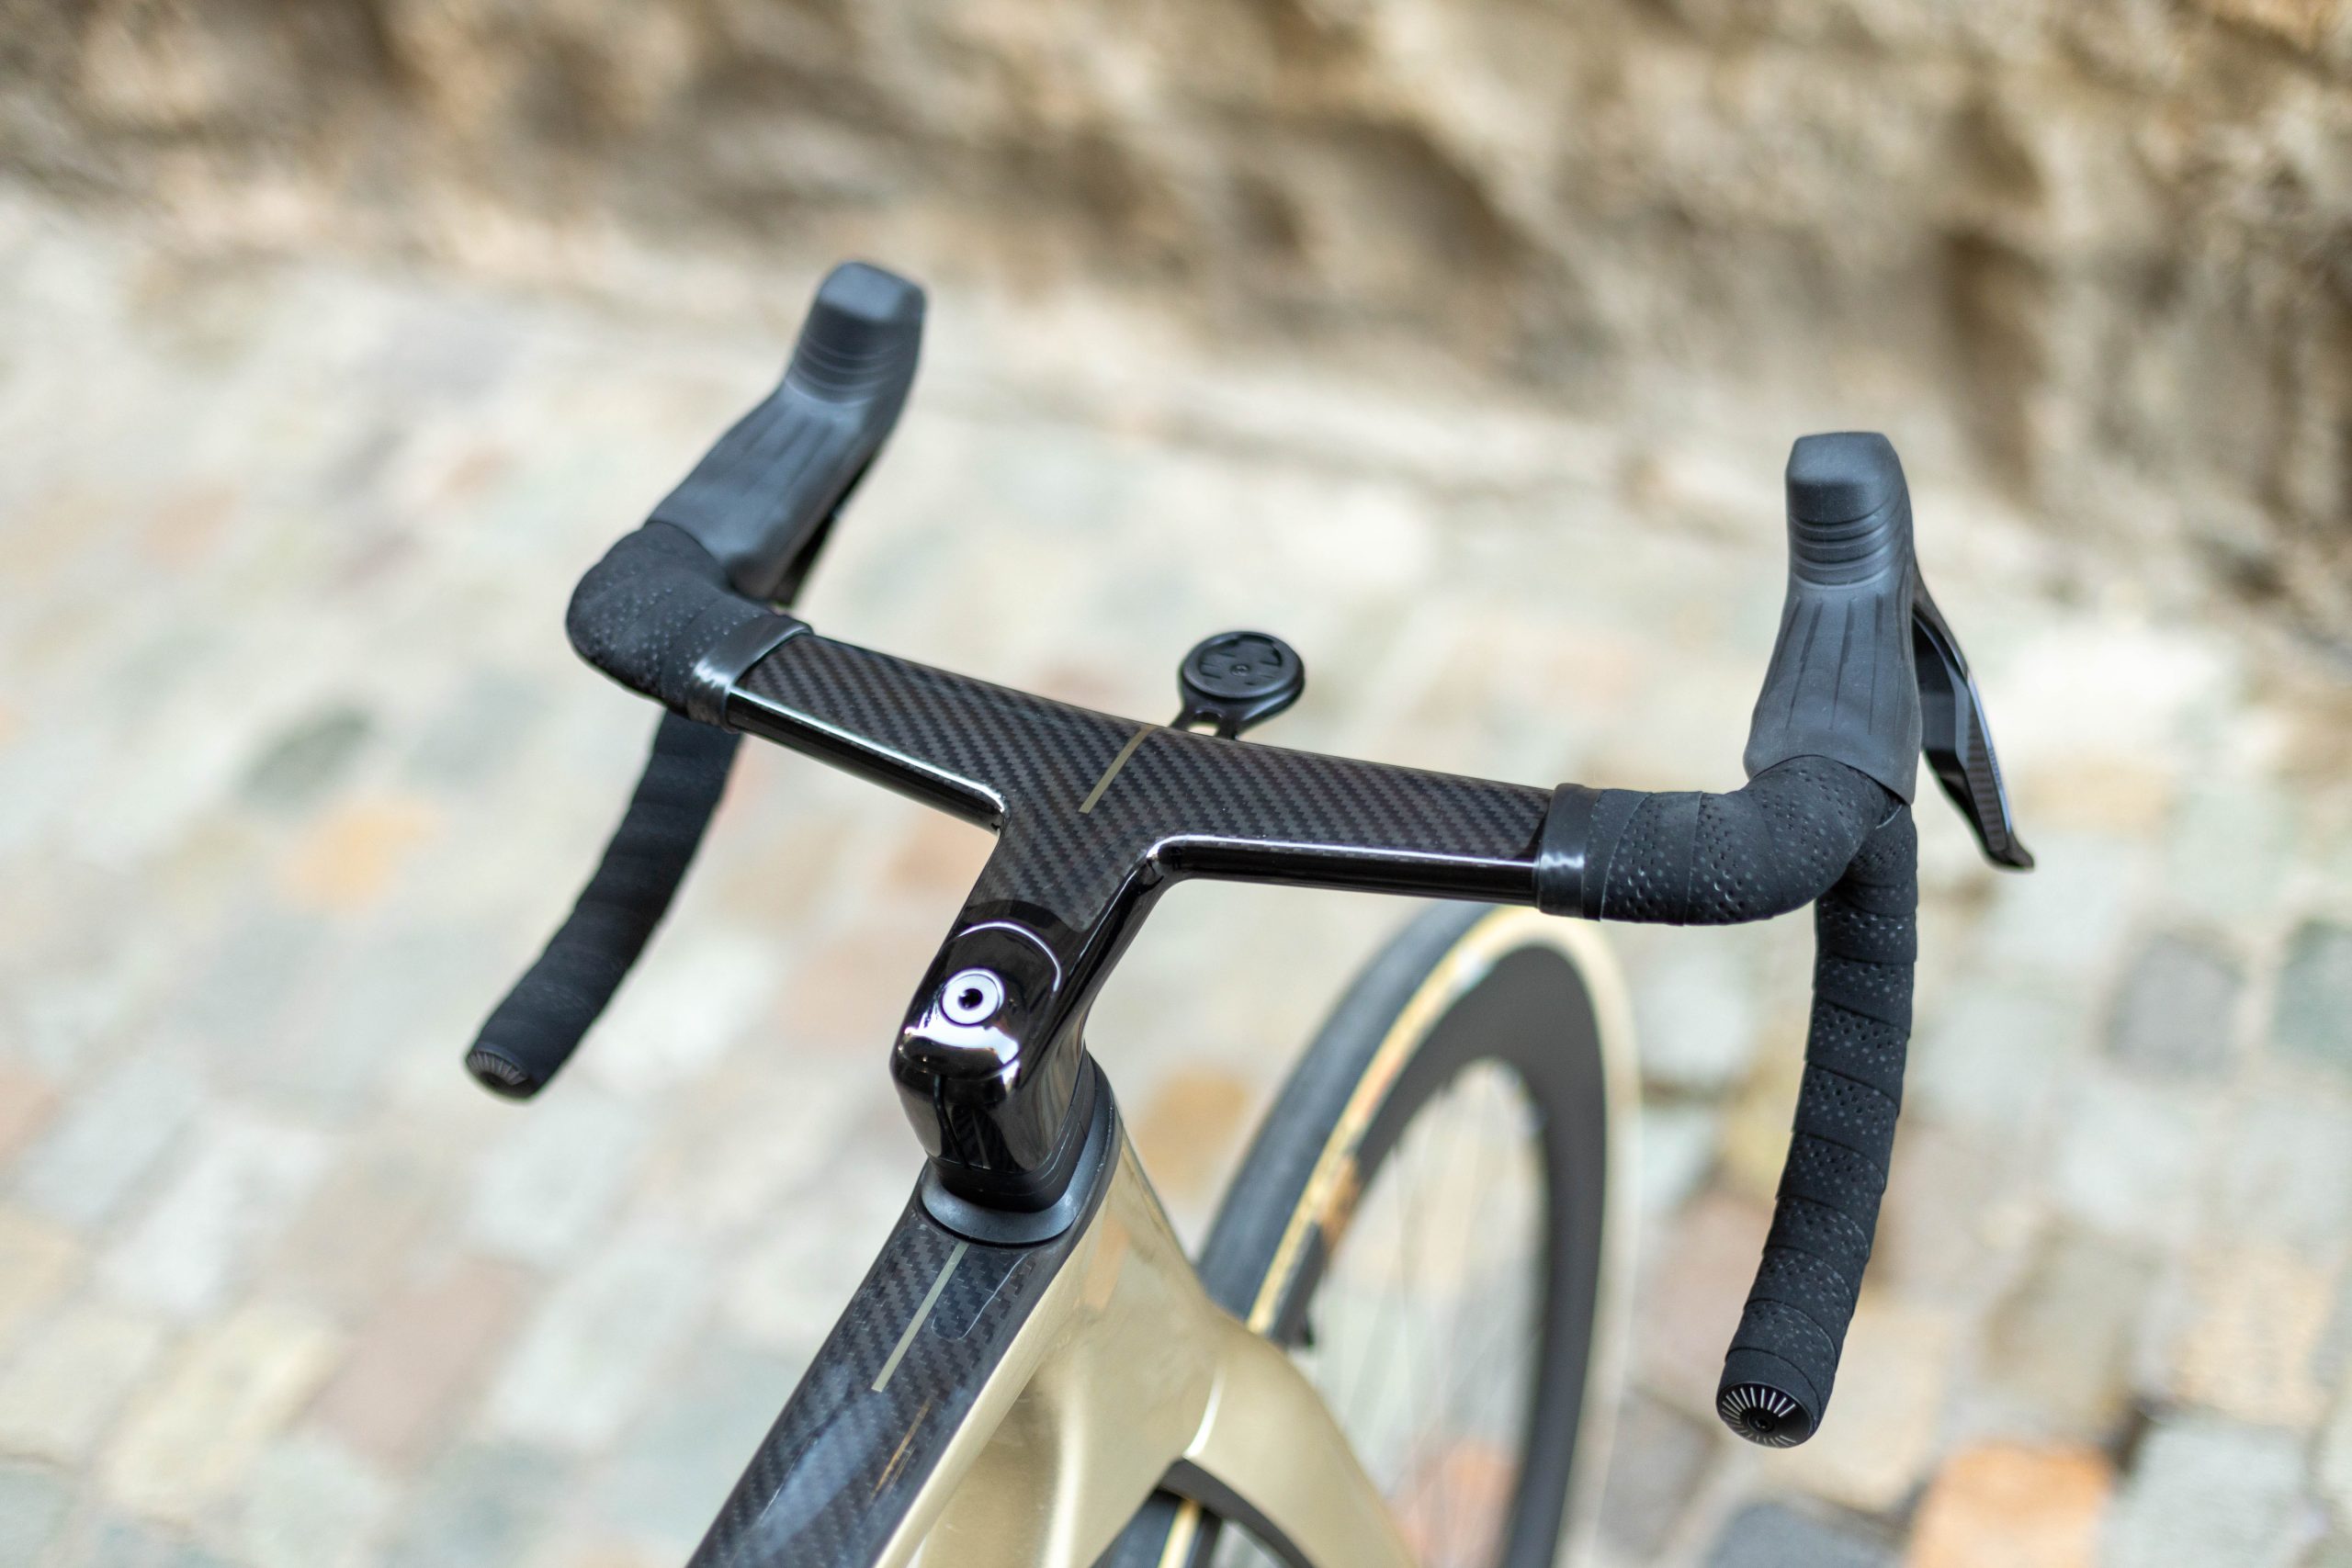
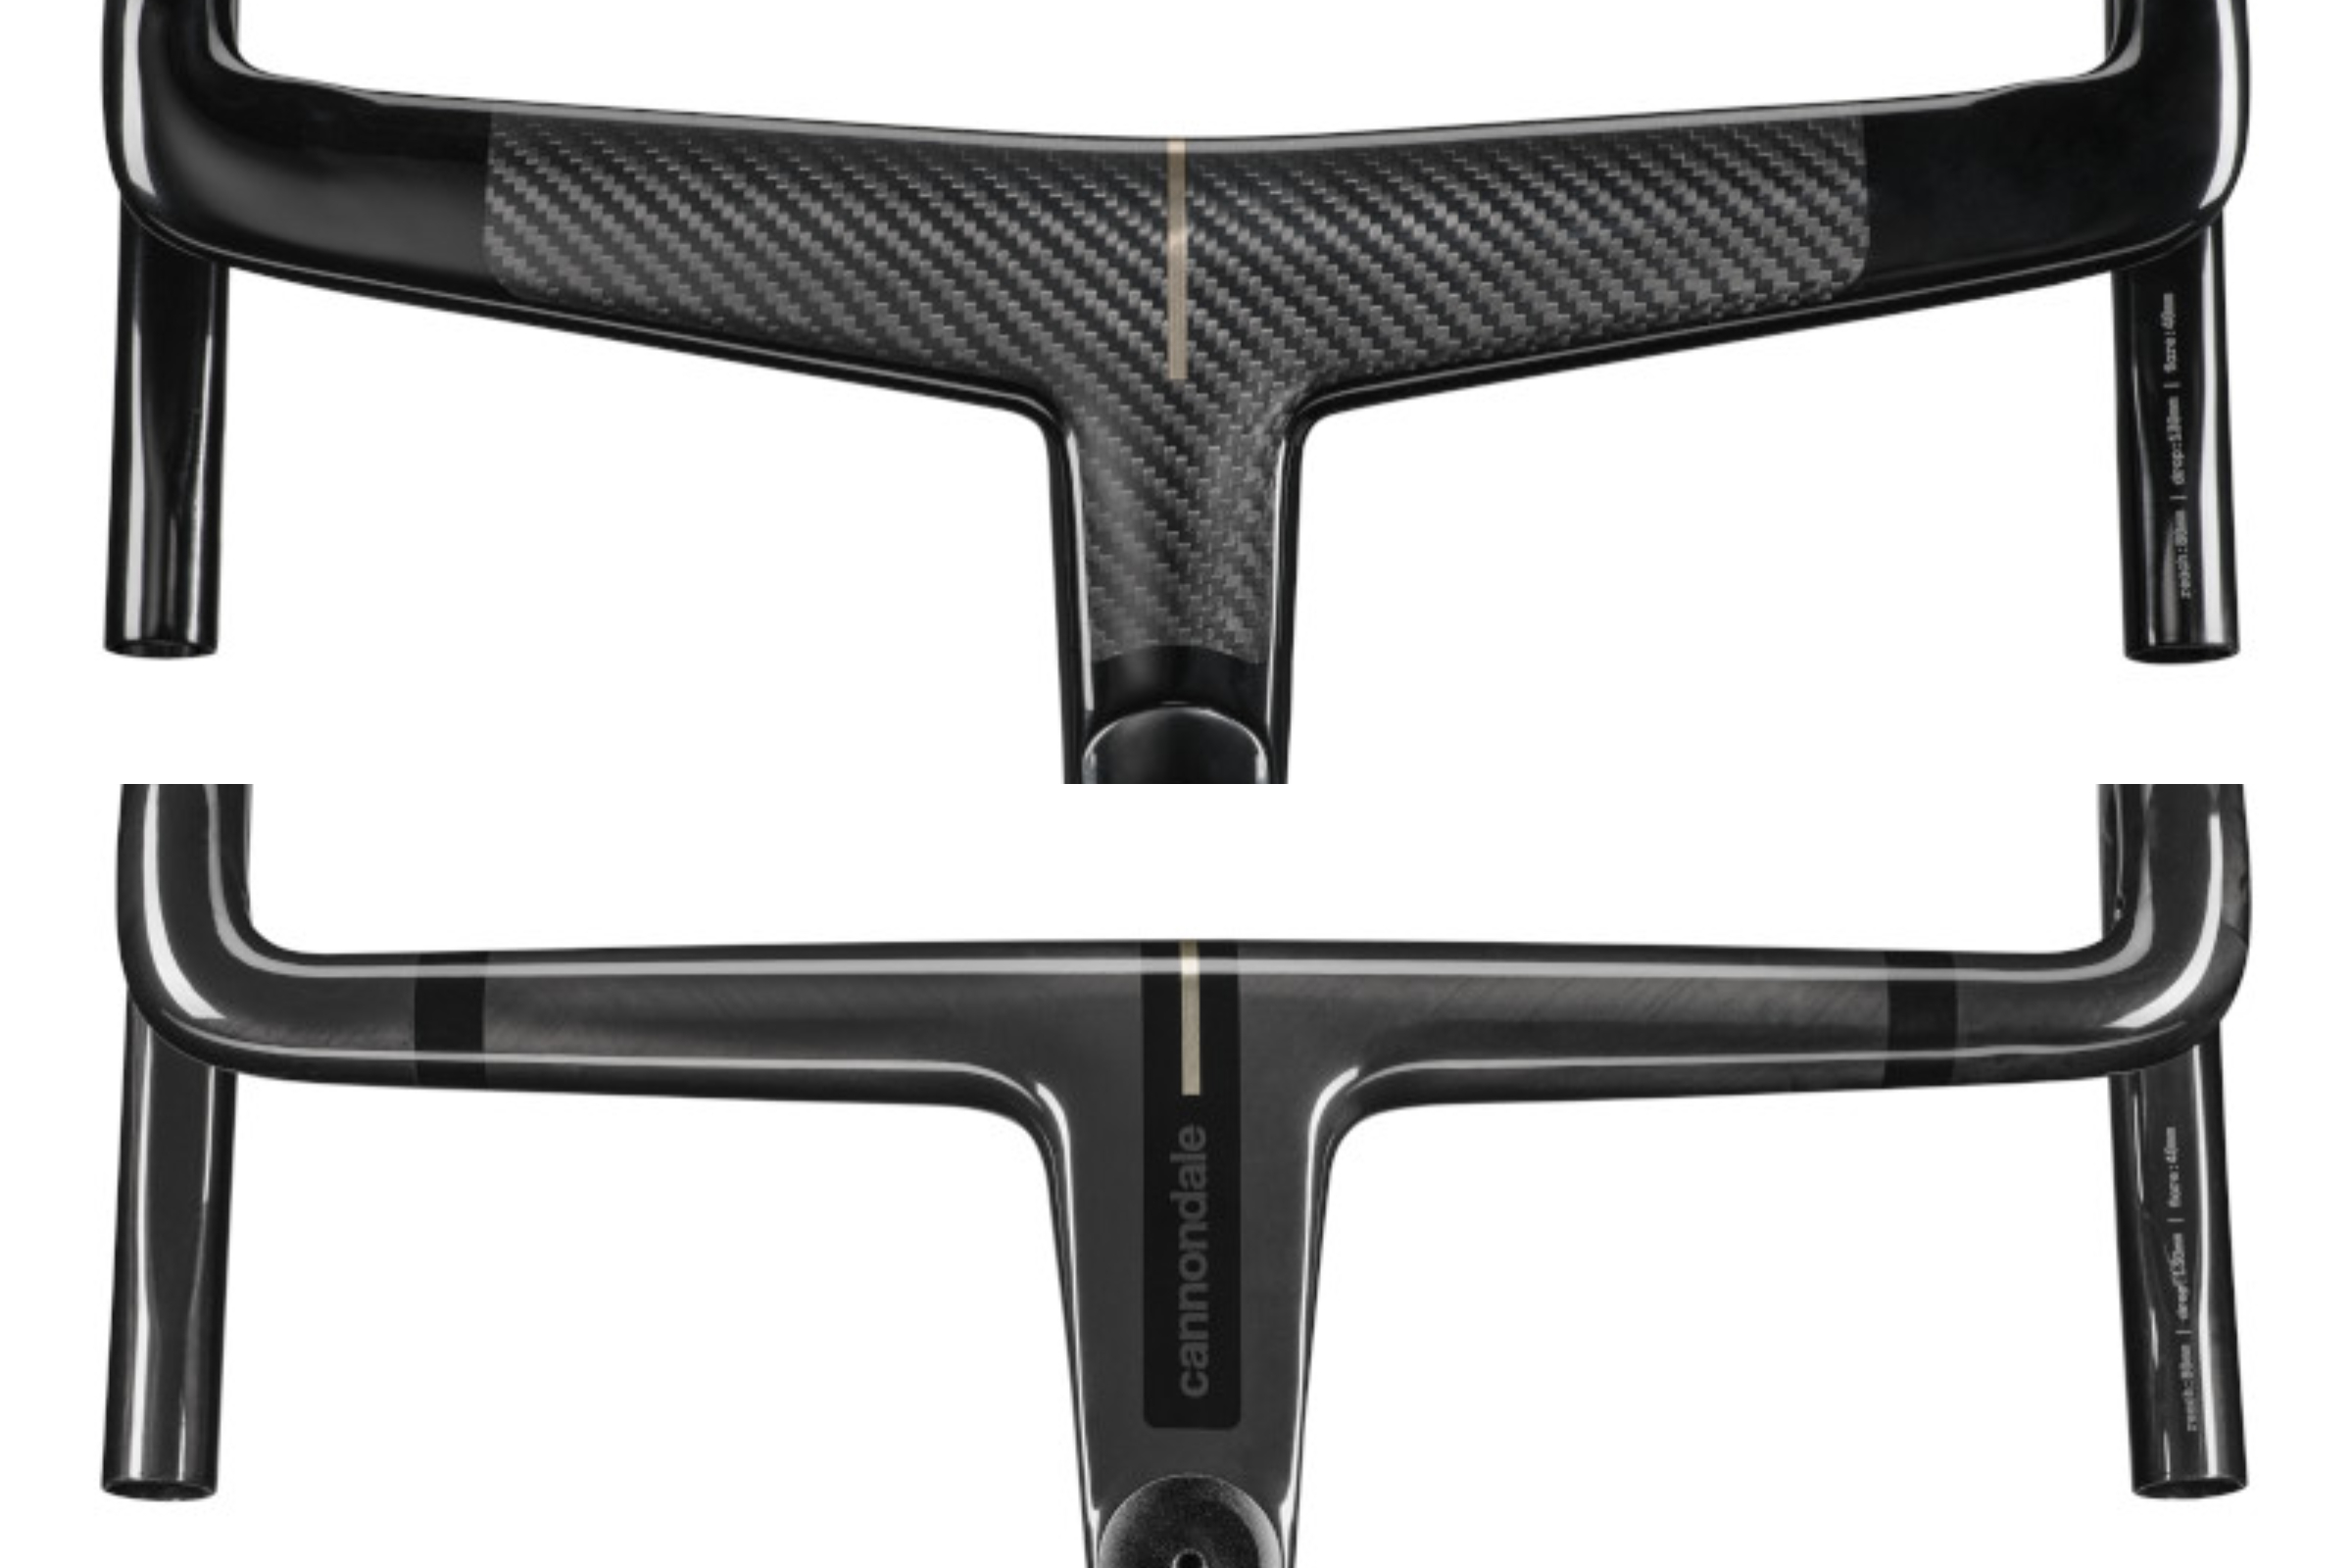
Two new top-tier cockpits have been designed for the 2026 bike, with the SystemBar Road and the SystemBar SL offering an aerodynamic solution and a lightweight option.
Swedish bike customiser Dangerholm has worked his magic to create this new Scott Scale RC Aero. It’s his latest work on Scott’s XC MTB range to adapt it to gravel riding, and this time he’s added a dose of aerodynamics into the mix.
Dangerholm says the aero concept isn’t aimed at being faster than a standard gravel race bike on smooth gravel, but to maintain performance on rougher surfaces, where a gravel bike with 40mm tyres would start to struggle.
Previous Dangerholm customisations have included December 2025’s Scott Spark HMX Gravel Project, a full-suspension gravel bike with 110mm travel, a custom one-piece cockpit and 52mm-wide, 70mm-deep aero rims.
Then there’s the Scott Scale RC SL, a drop-bar bike with a host of custom carbon from Darimo, a RockShox suspension fork and a 7.19kg claimed weight.
At the heart of the Dangerholm Scott Scale RC Aero’s design is Scott’s Scale Gravel RC, a rigid-fork, flat-bar variant of its Scale XC mountain bike. Dangerholm usually rides a size L, but sized down to an M to accommodate the drop bar and make the reach shorter.
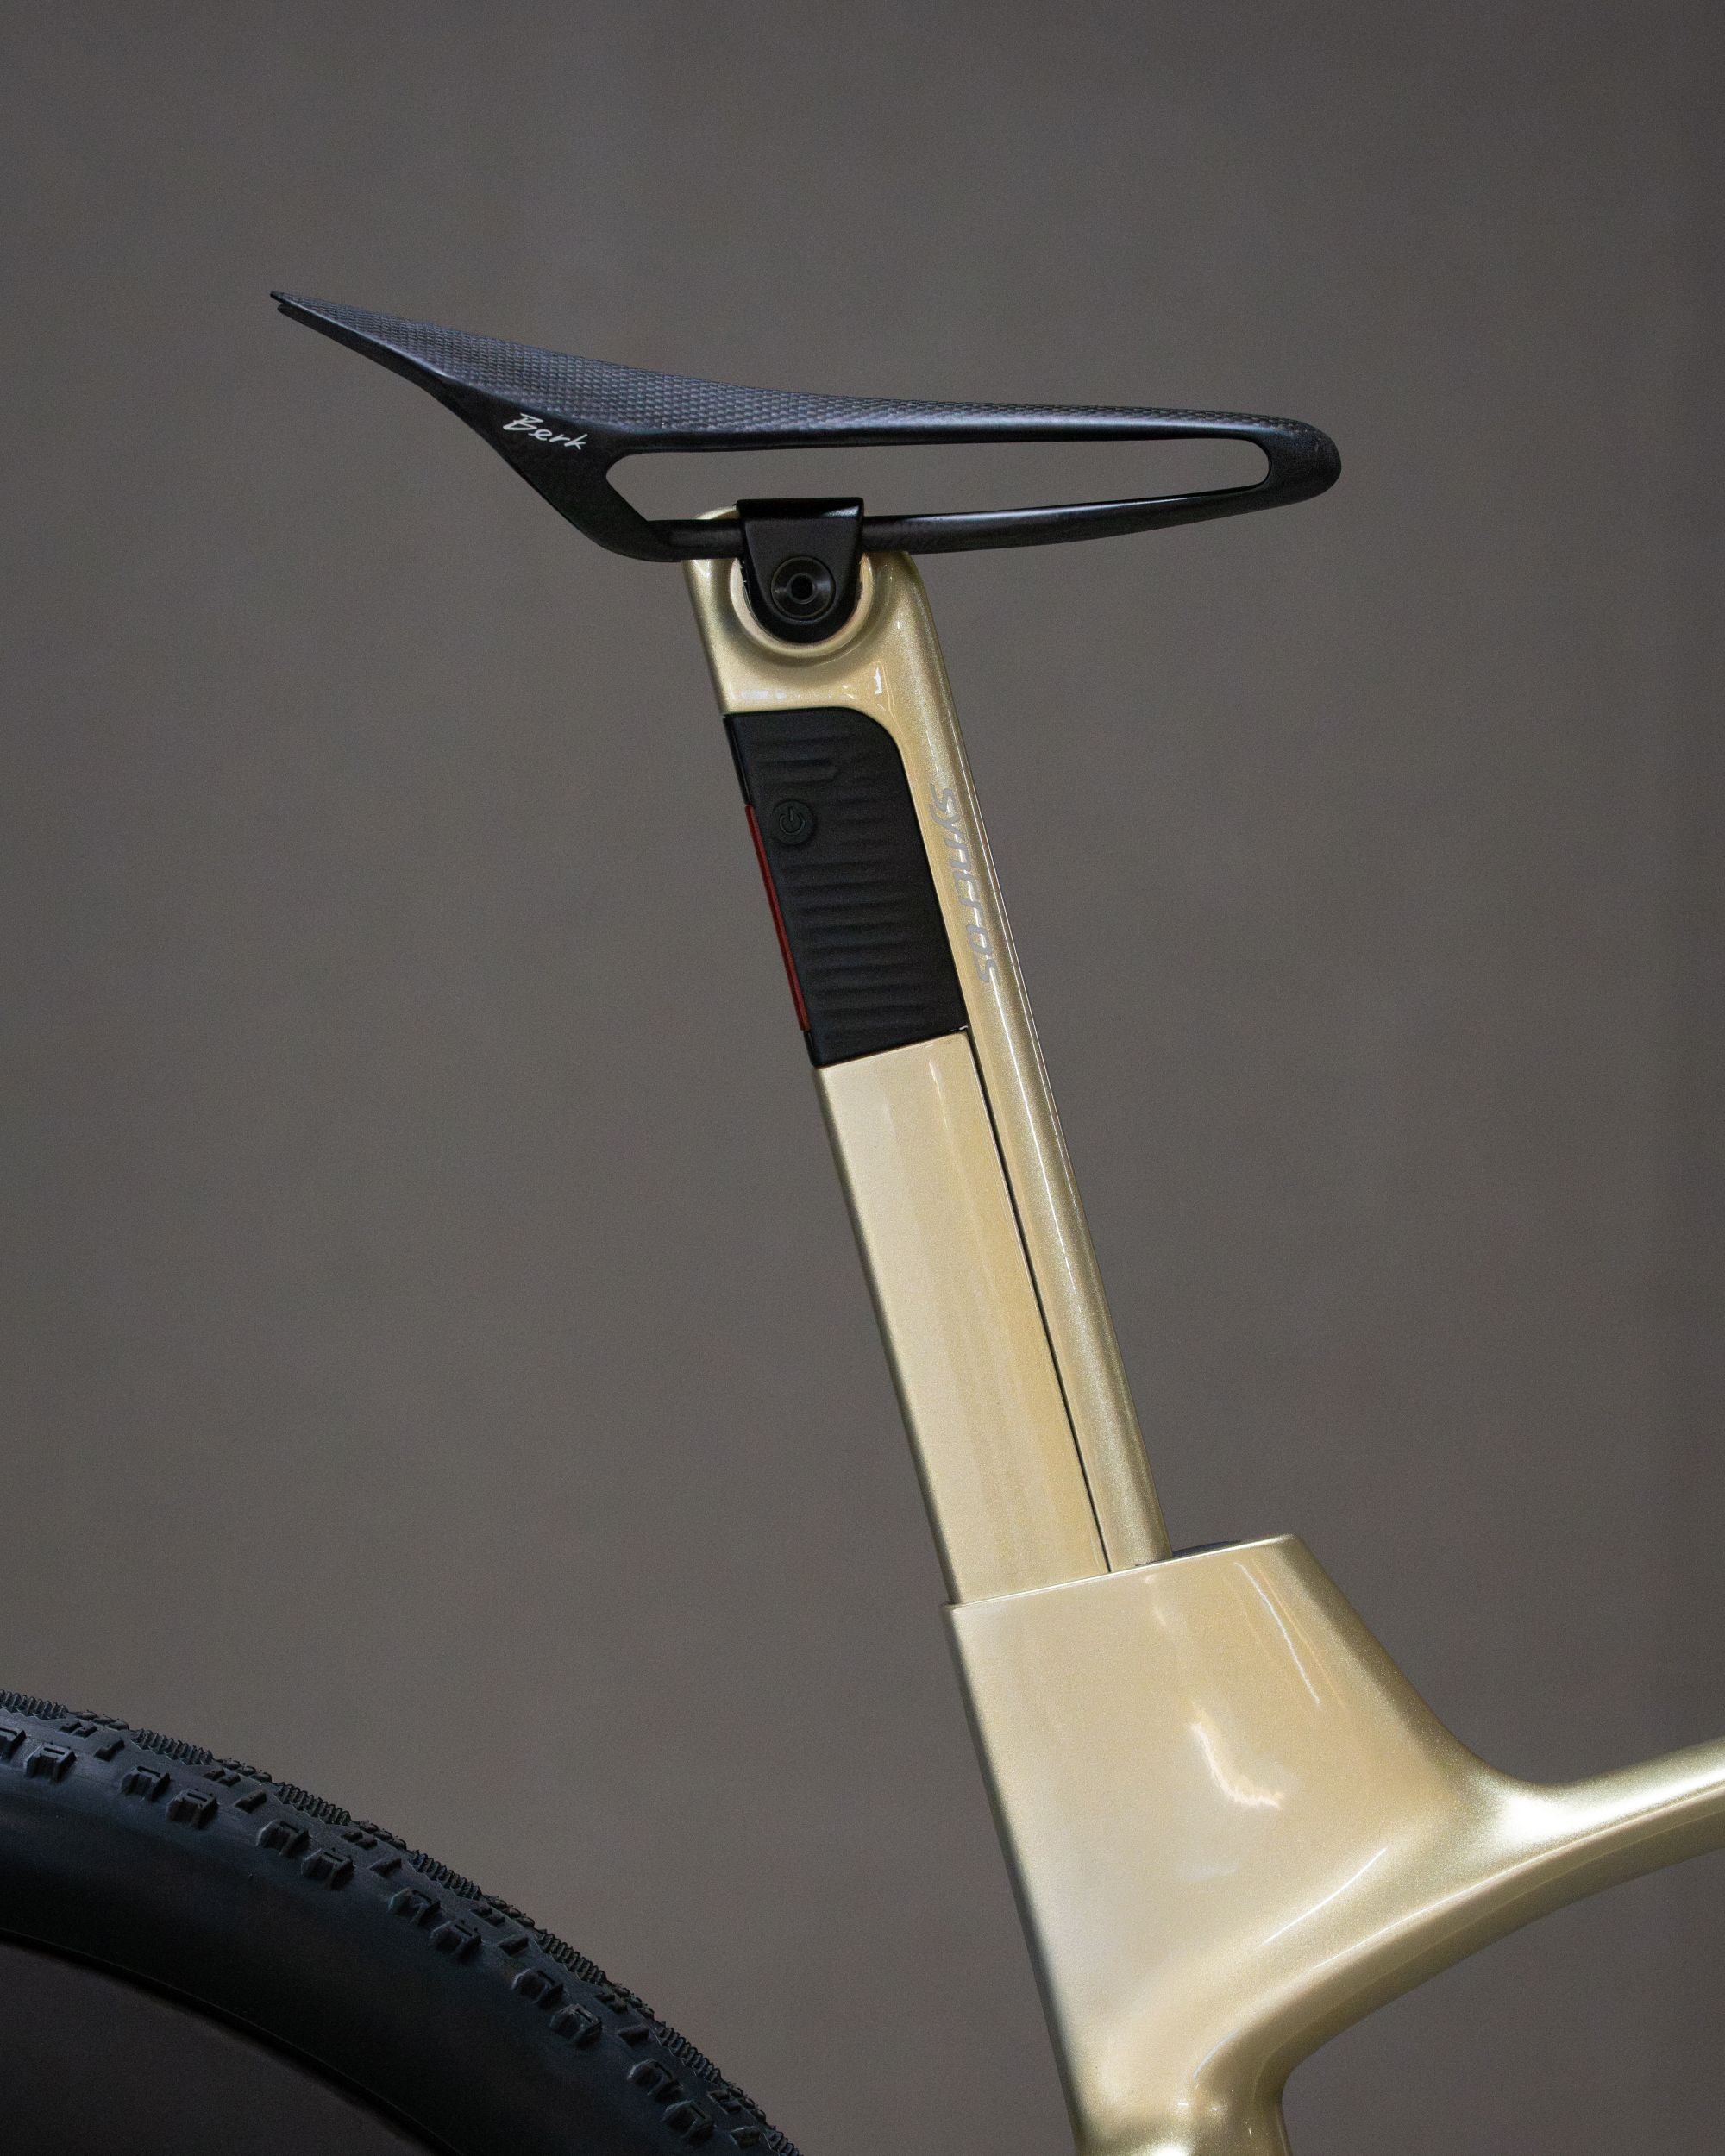
The seatpost and seat tube cluster were recovered from a crashed Scott Foil RC aero road bike. Scott
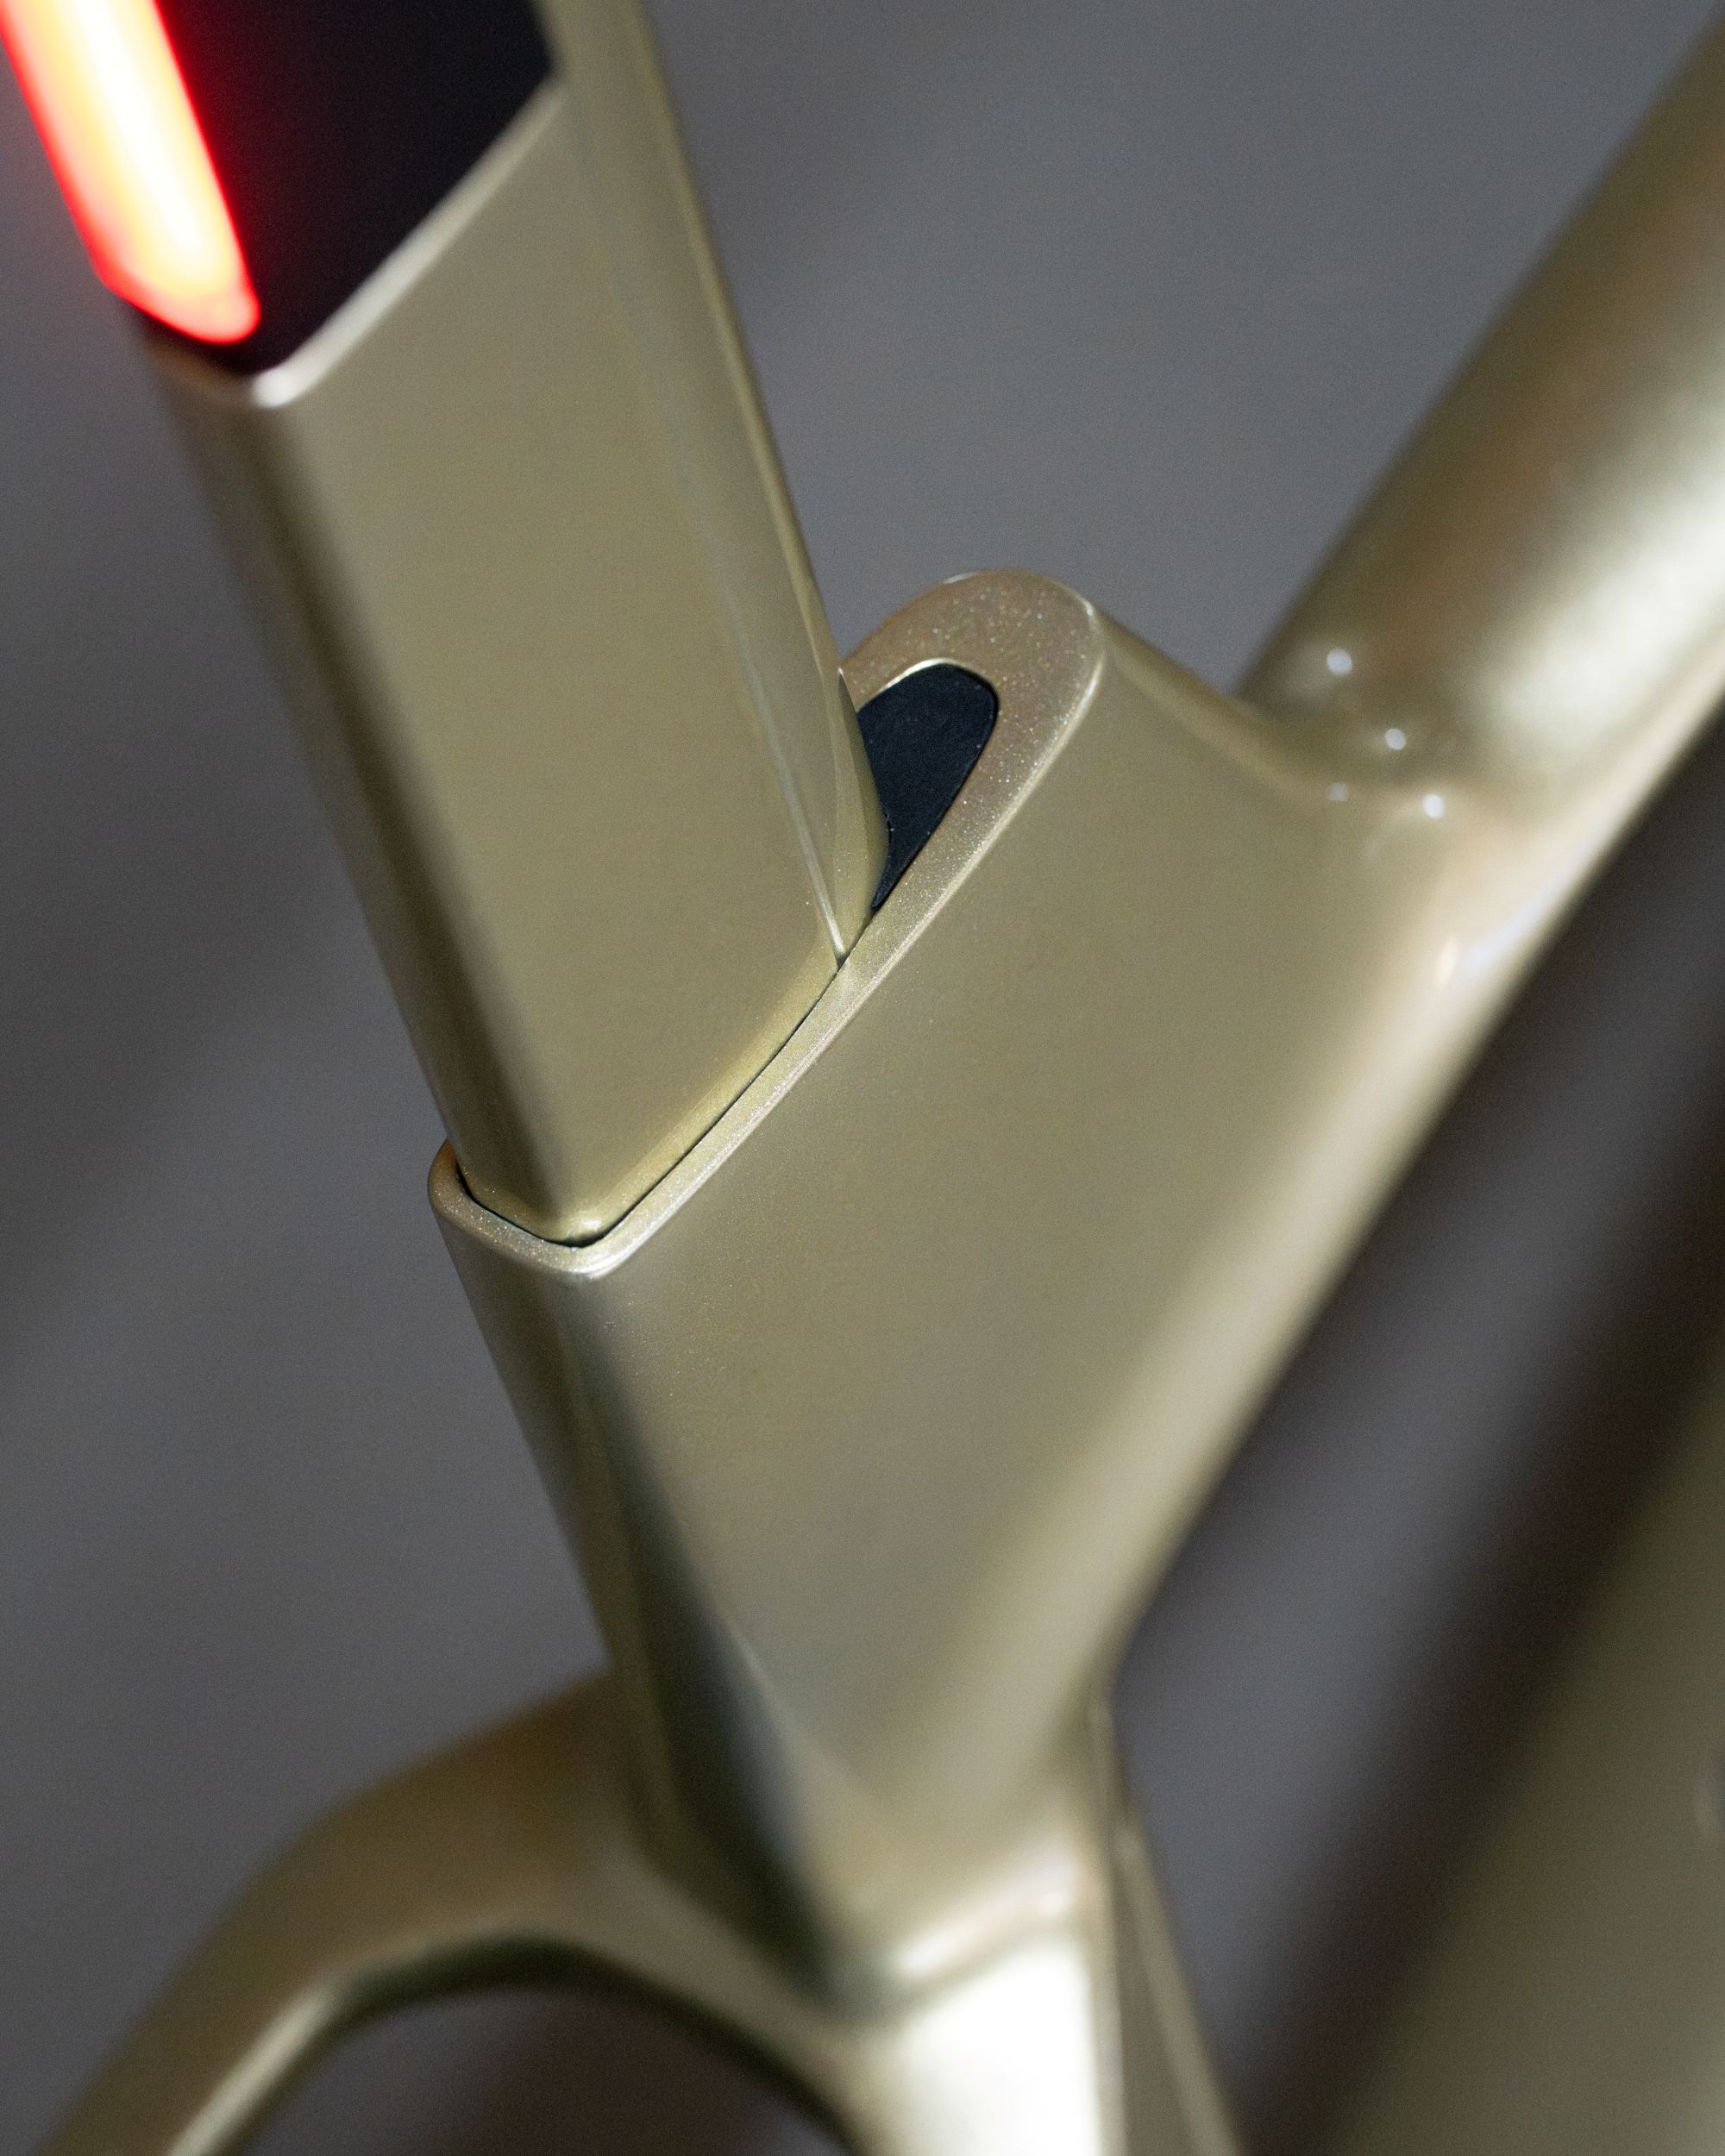
Dangerholm has raided Scott’s road bike parts bin, swapping to a seatpost from a crashed Scott Foil RC aero road bike and the seat cluster to fit it.
This involved cutting up a box-fresh Scale frame and hoping the section of the Foil RC frame would fit, which it did, wrapped with plenty of carbon fibre to hold it in place.
More cut-and-wrap was done on the Scale’s driveside chainstay, enabling Dangerholm to fit a larger 46-tooth chainring to the concept bike, followed by a lot of sanding down to smooth out the frame surface.
The fork leg mounting points were also removed to up the aero.
Bling bits
A Berk Lupina Monocoque saddle sits atop the Foil RC seatpost. Scott
Once the frame and fork were painted, it was time to bolt on lots of fancy aero parts, starting with that aero seatpost from the Foil RC with its built-in light, topped with a 99g Berk Lupina Monocoque saddle.
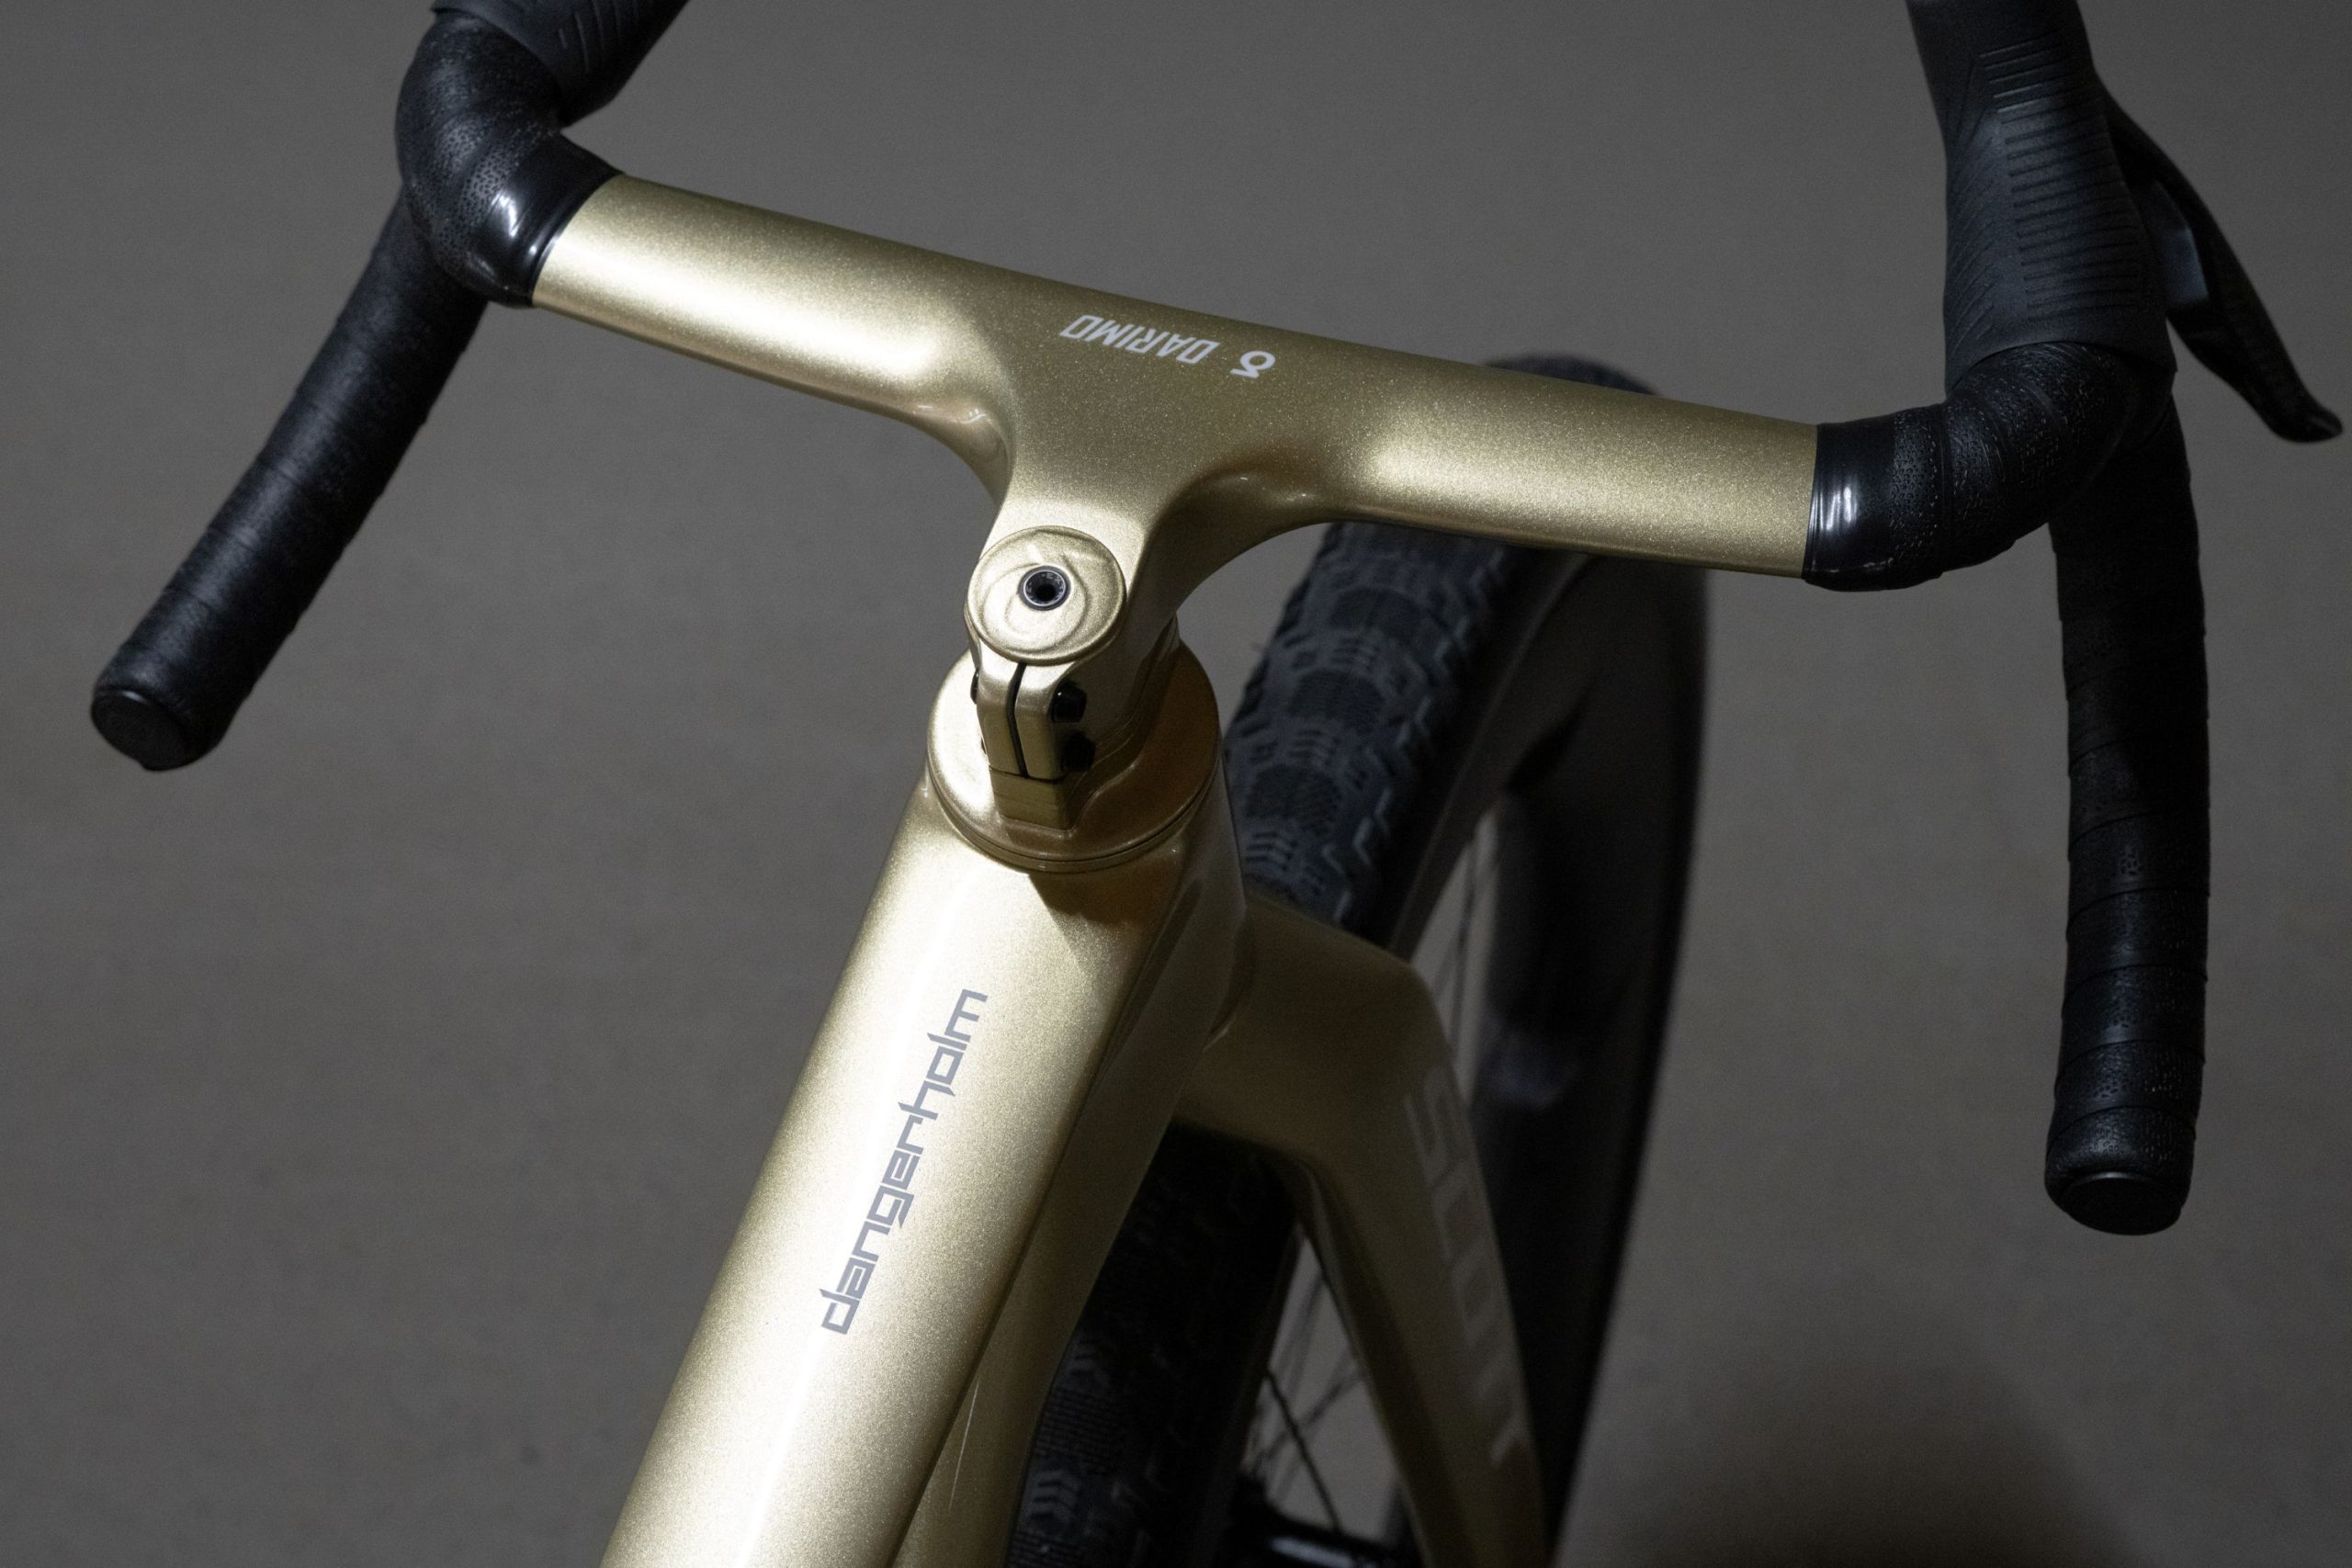
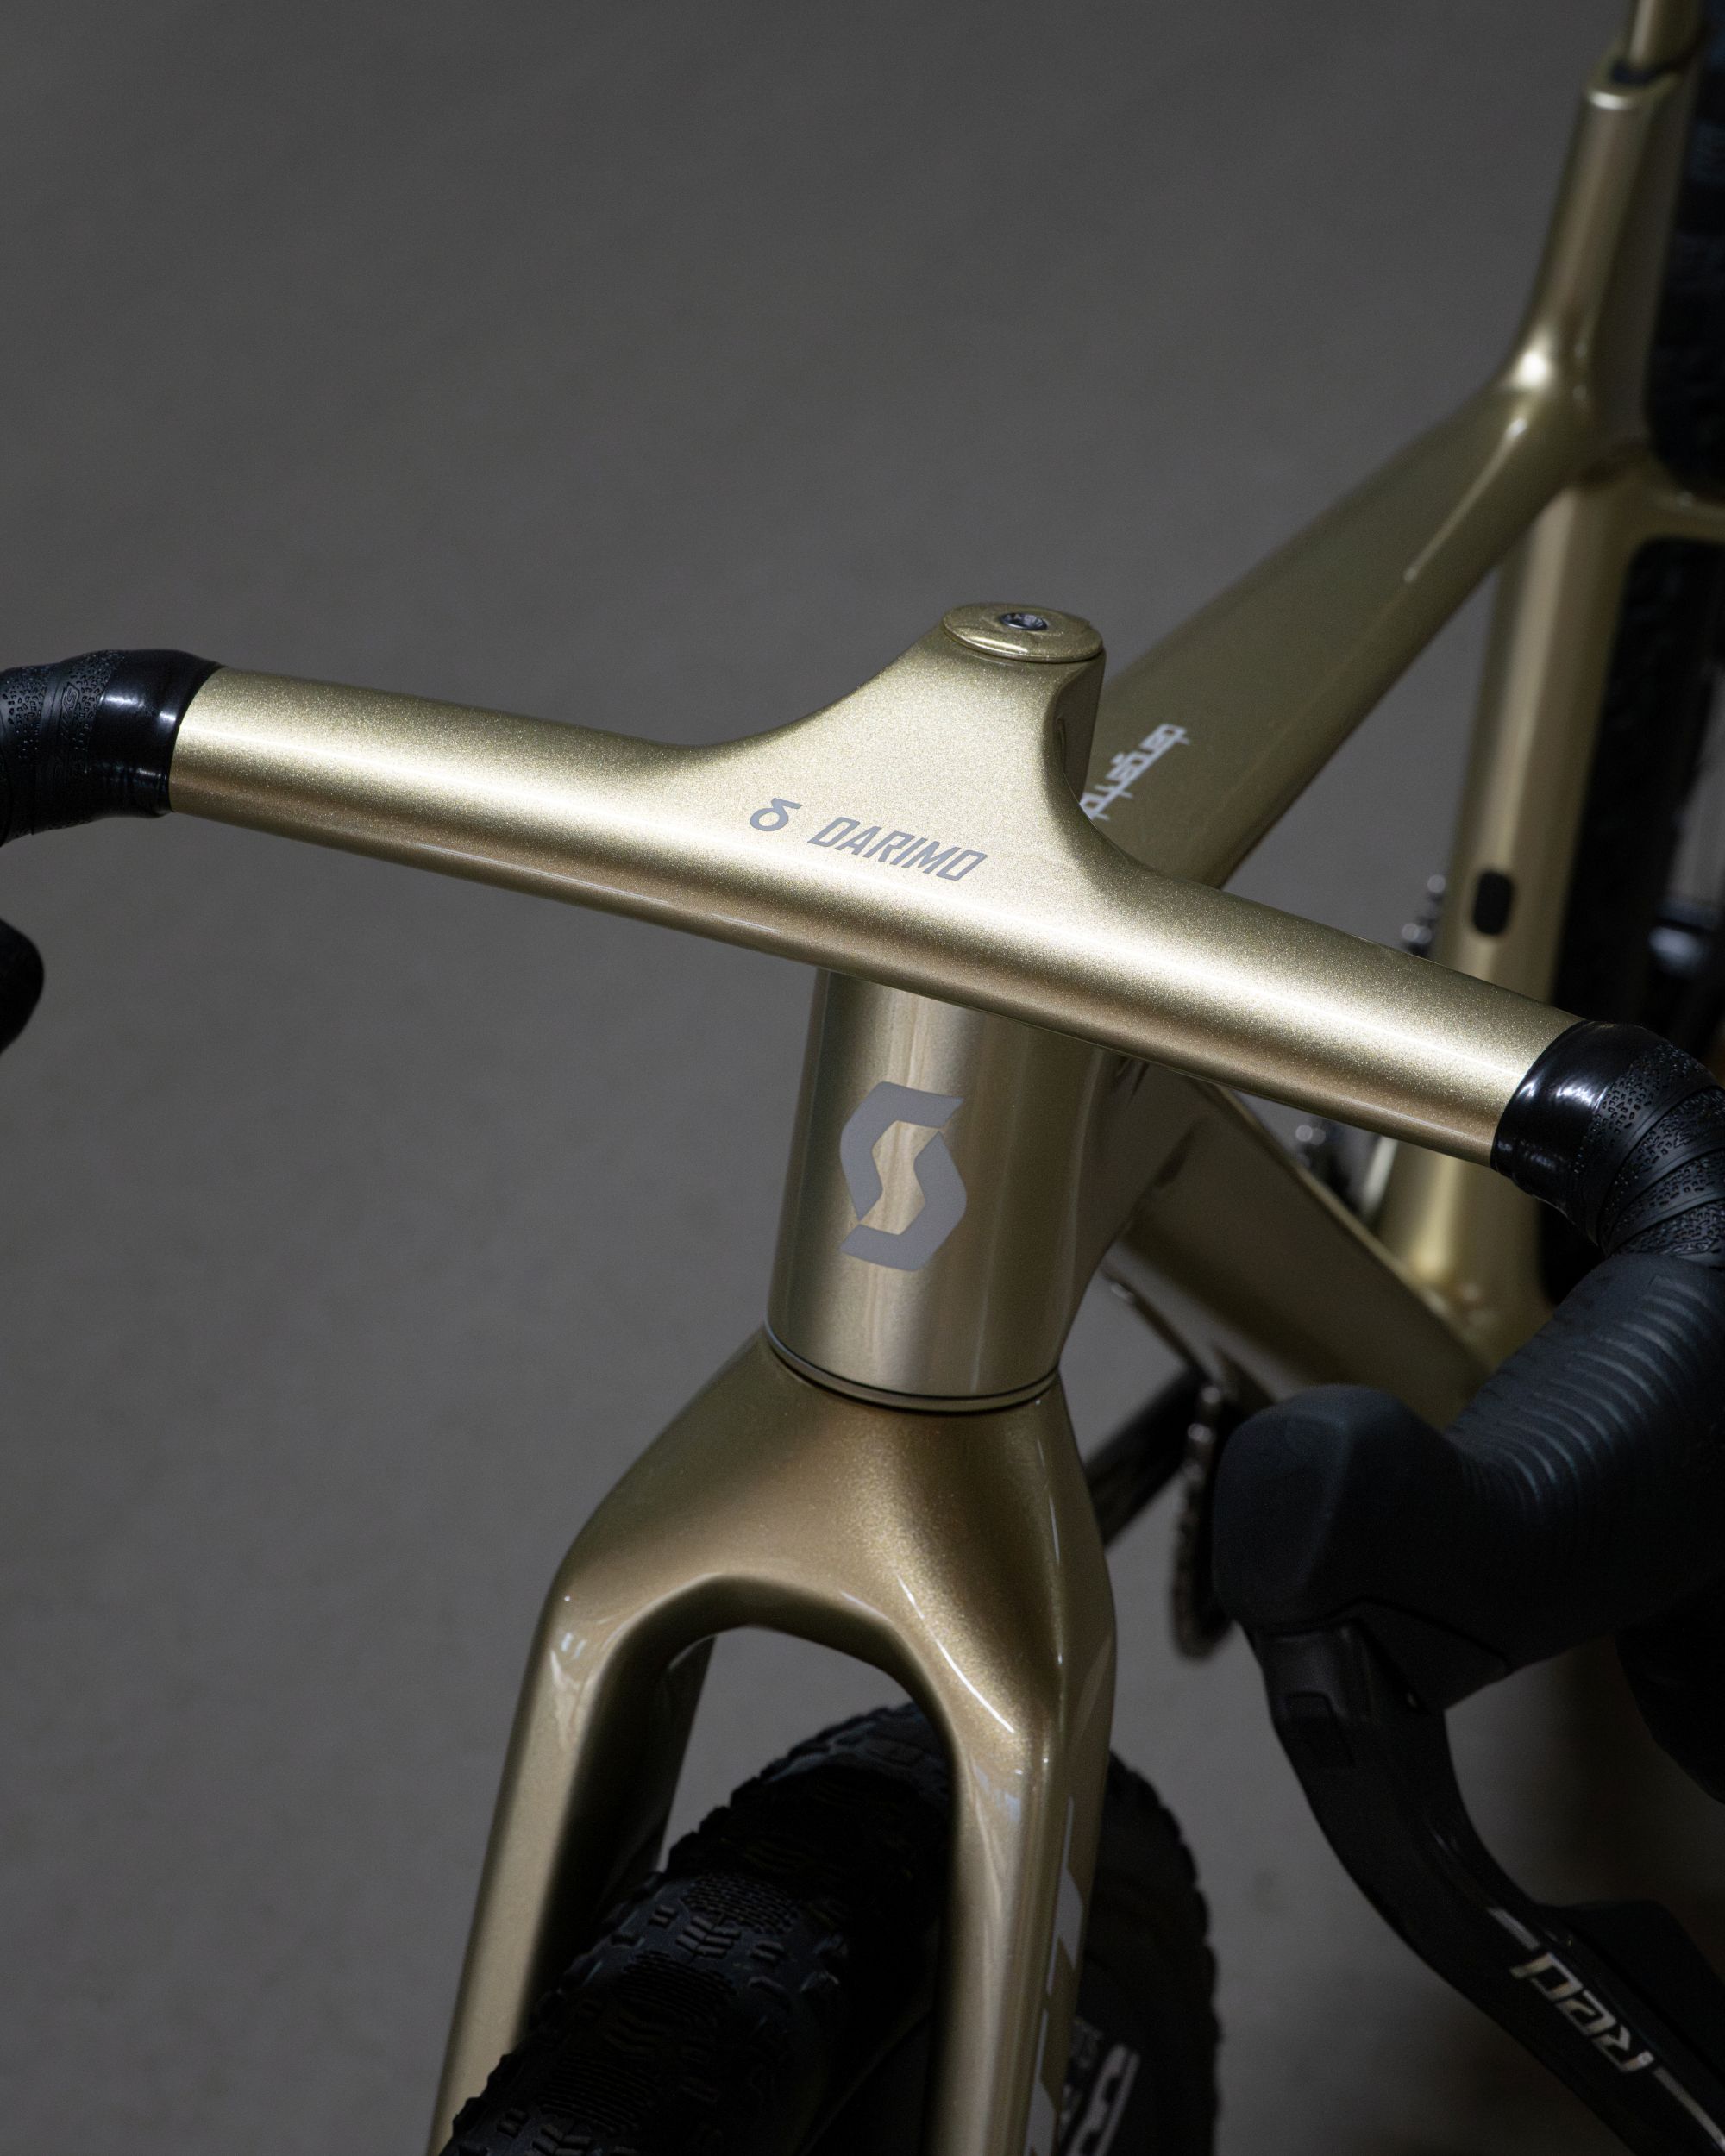
The cockpit is a custom Darimo with a shorter reach, narrower tops and a steeper negative angle. Scott
As with Dangerholm’s Scott Scale RC SL, there’s a cockpit from Spanish super-light component maker Darimo. It’s a custom Nexum Drag Gravel with a shorter 80mm length and 380mm width to suit the Scale frame’s longer reach. The slacker head tube angle of the Scale frame required a unique -12-degree stem angle.
There’s also a set of custom headset hardware to fit the bar to the frame.
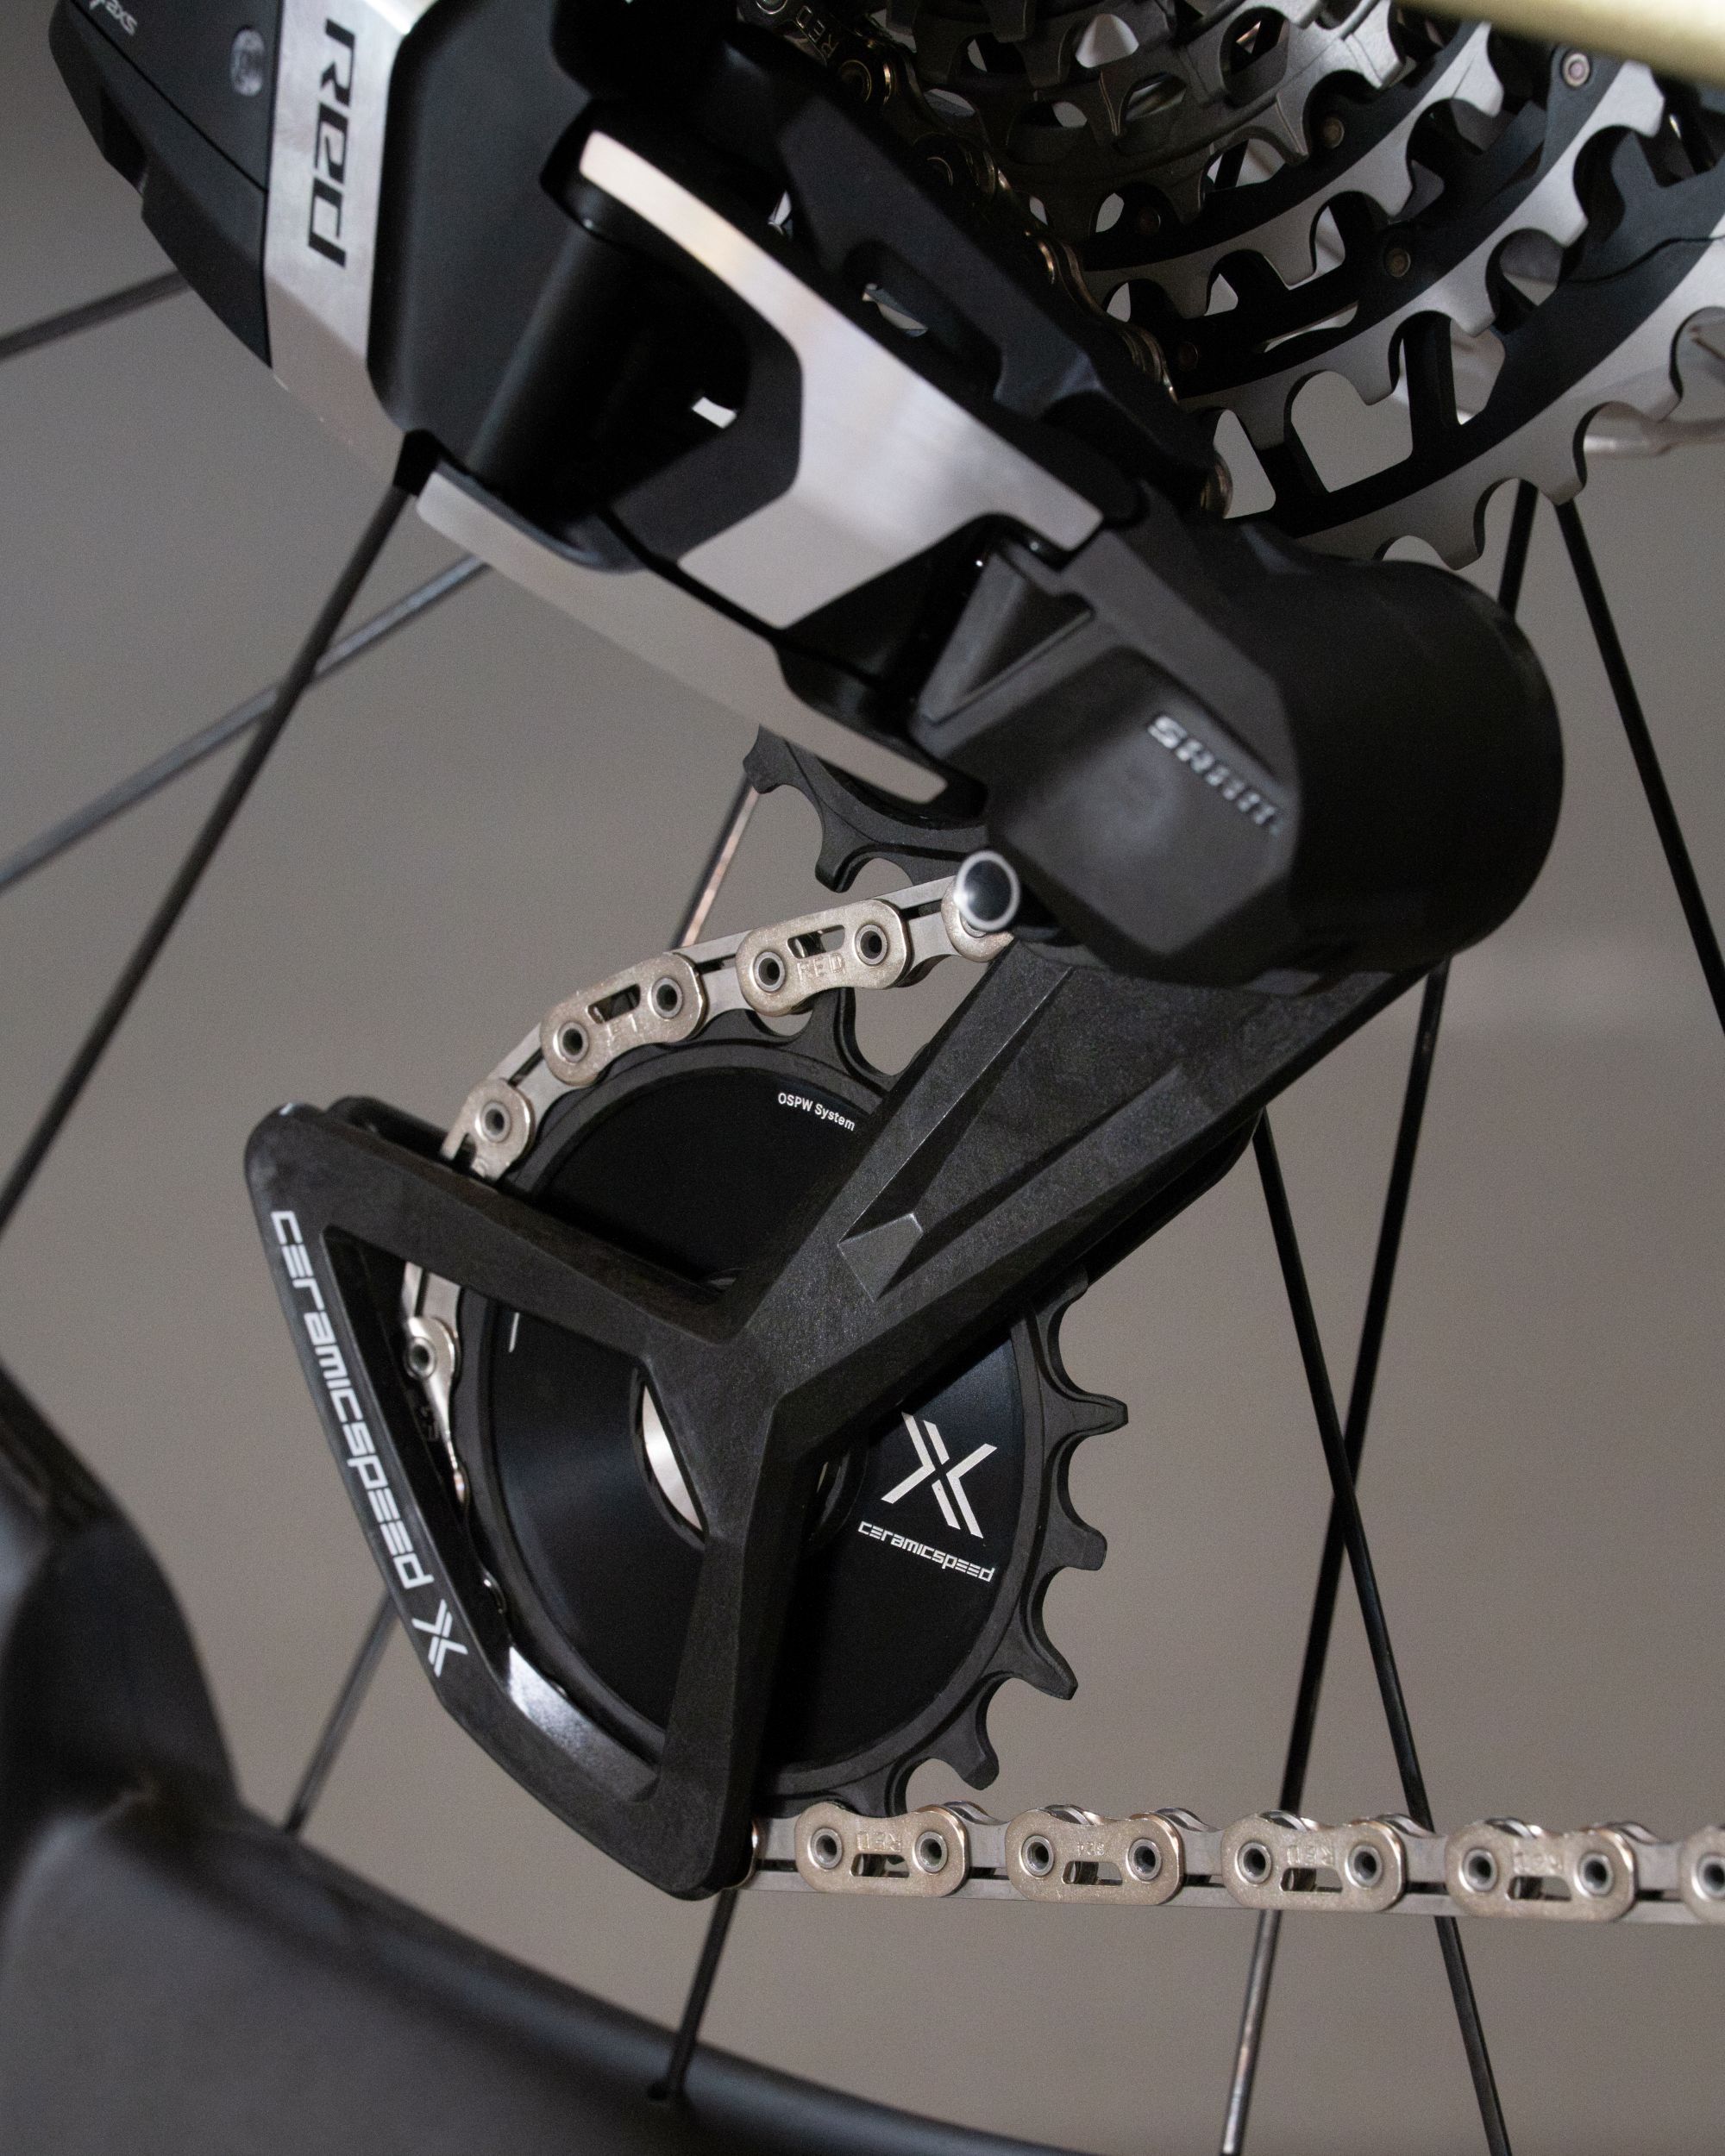
The Red XPLR AXS rear derailleur is fitted with a CeramicSpeed OSPW system. Scott
Further fancy hardware comes in the form of a SRAM Red XPLR AXS rear derailleur with CeramicSpeed OSPW X Alpha jockey wheels, along with a Red XPLR 13-speed 10-46t cassette and Red chain.
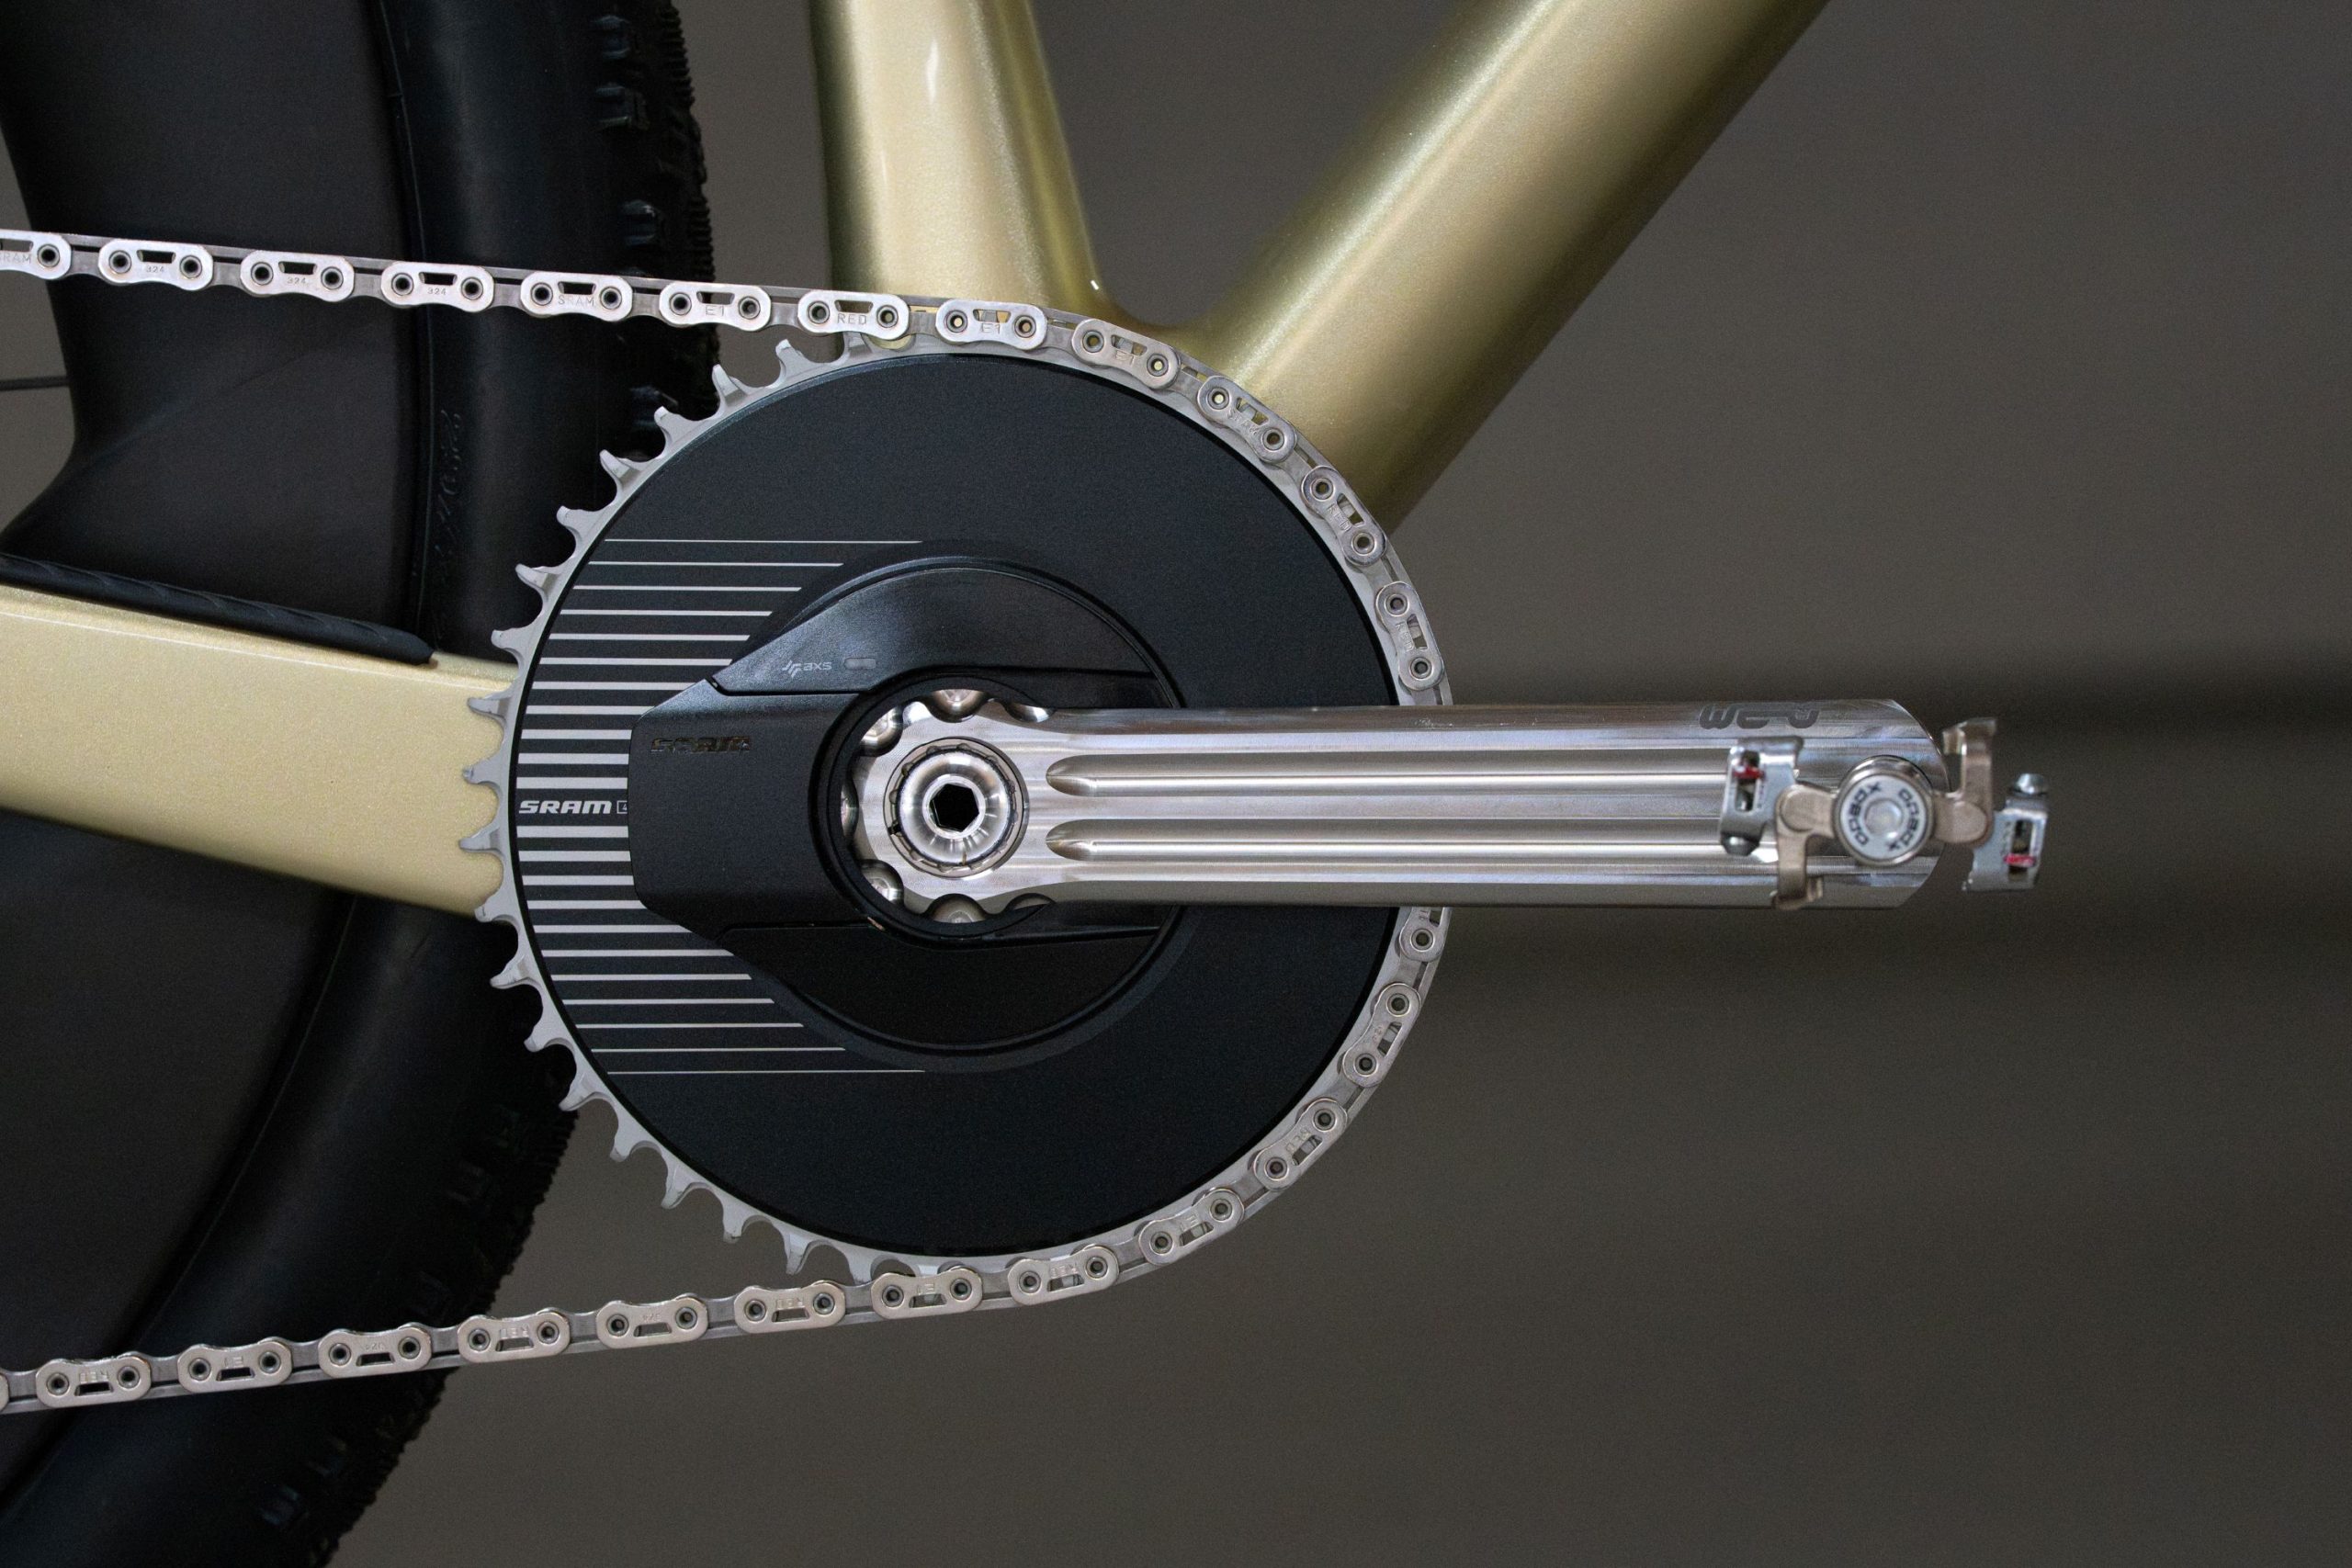
The Wert cranks are fitted with a 44t SRAM Red power meter chainring. Scott
That’s paired with a Wert StW-M titanium crankset with hollow crank arms and a 314g weight. The one-off axle sits in CeramicSpeed Alpha bearings and is a little wider than usual, adding 3.5mm to the offset and enabling Dangerholm to fit a 44t Red Aero chainring with a power meter.
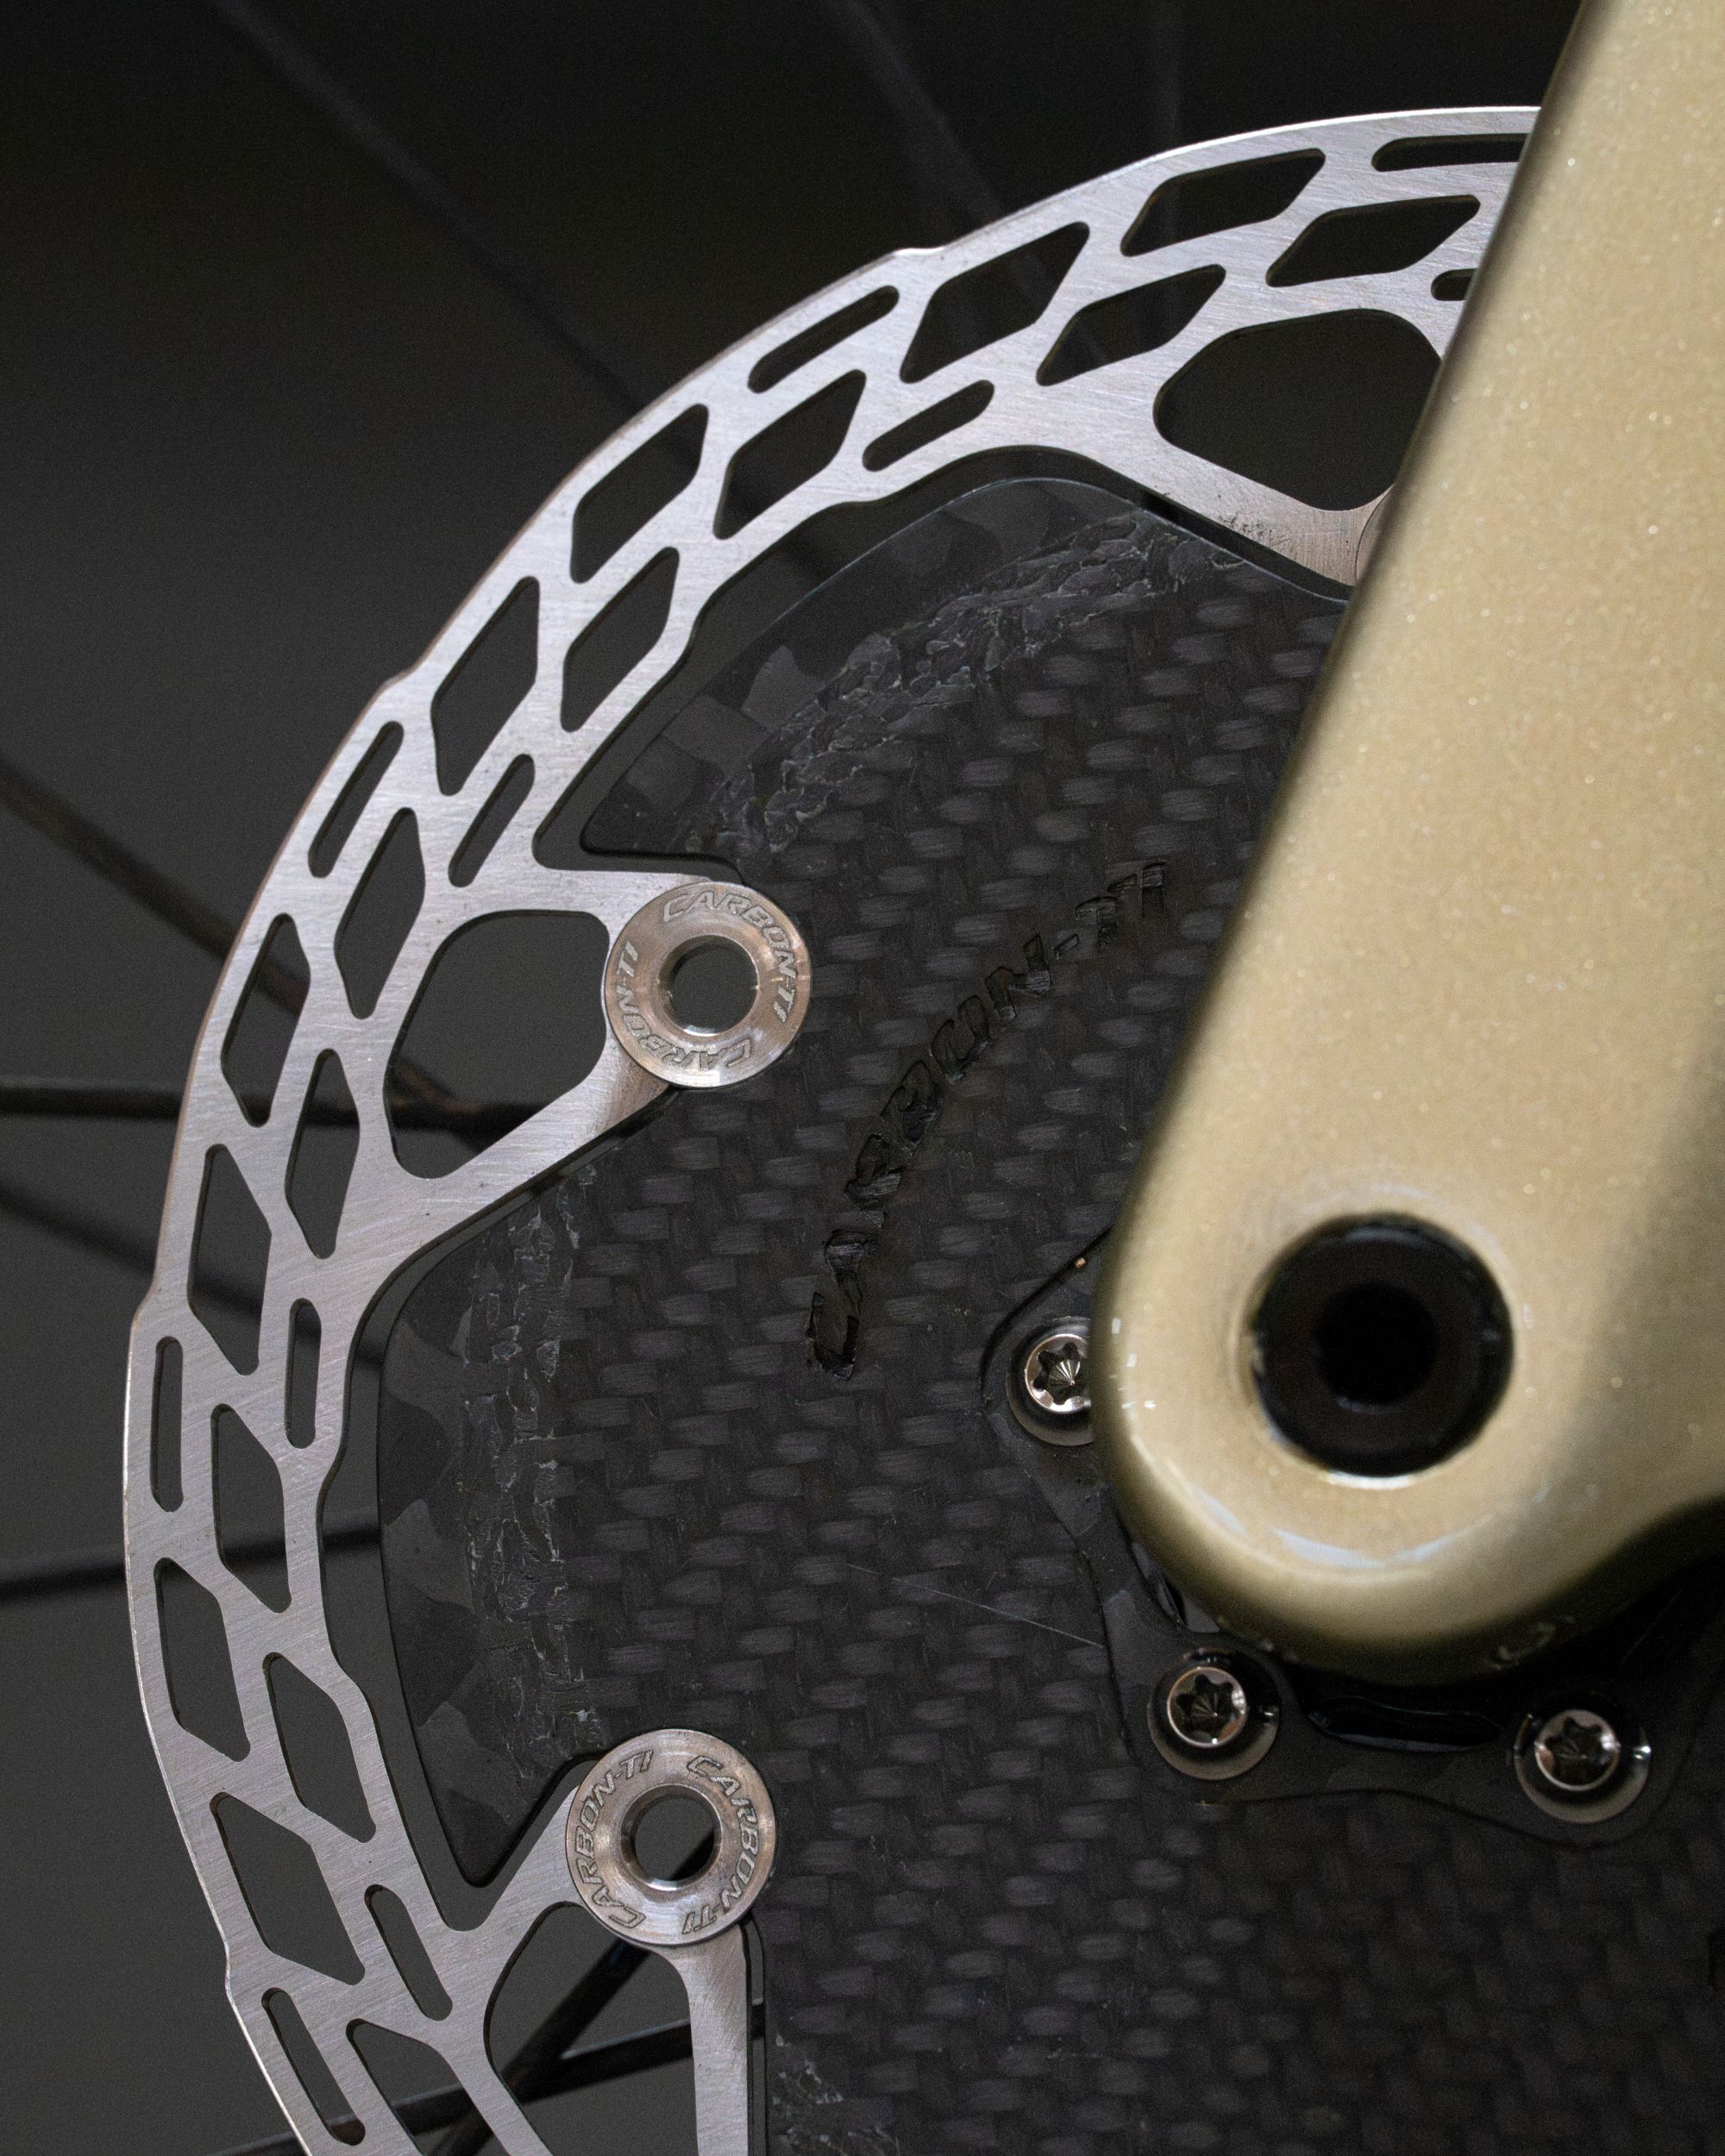
The brake rotors come from Carbon-Ti, which provides components to the UAE Team Emirates-XRG team. Scott
Dangerholm has used the Red brake levers. But rather than the standard Red calipers, which are flat mount, he’s switched to two-piston 612-Parts post-mount aero calipers, along with lightweight Italian Carbon-Ti X-Rotor Aero brake rotors.
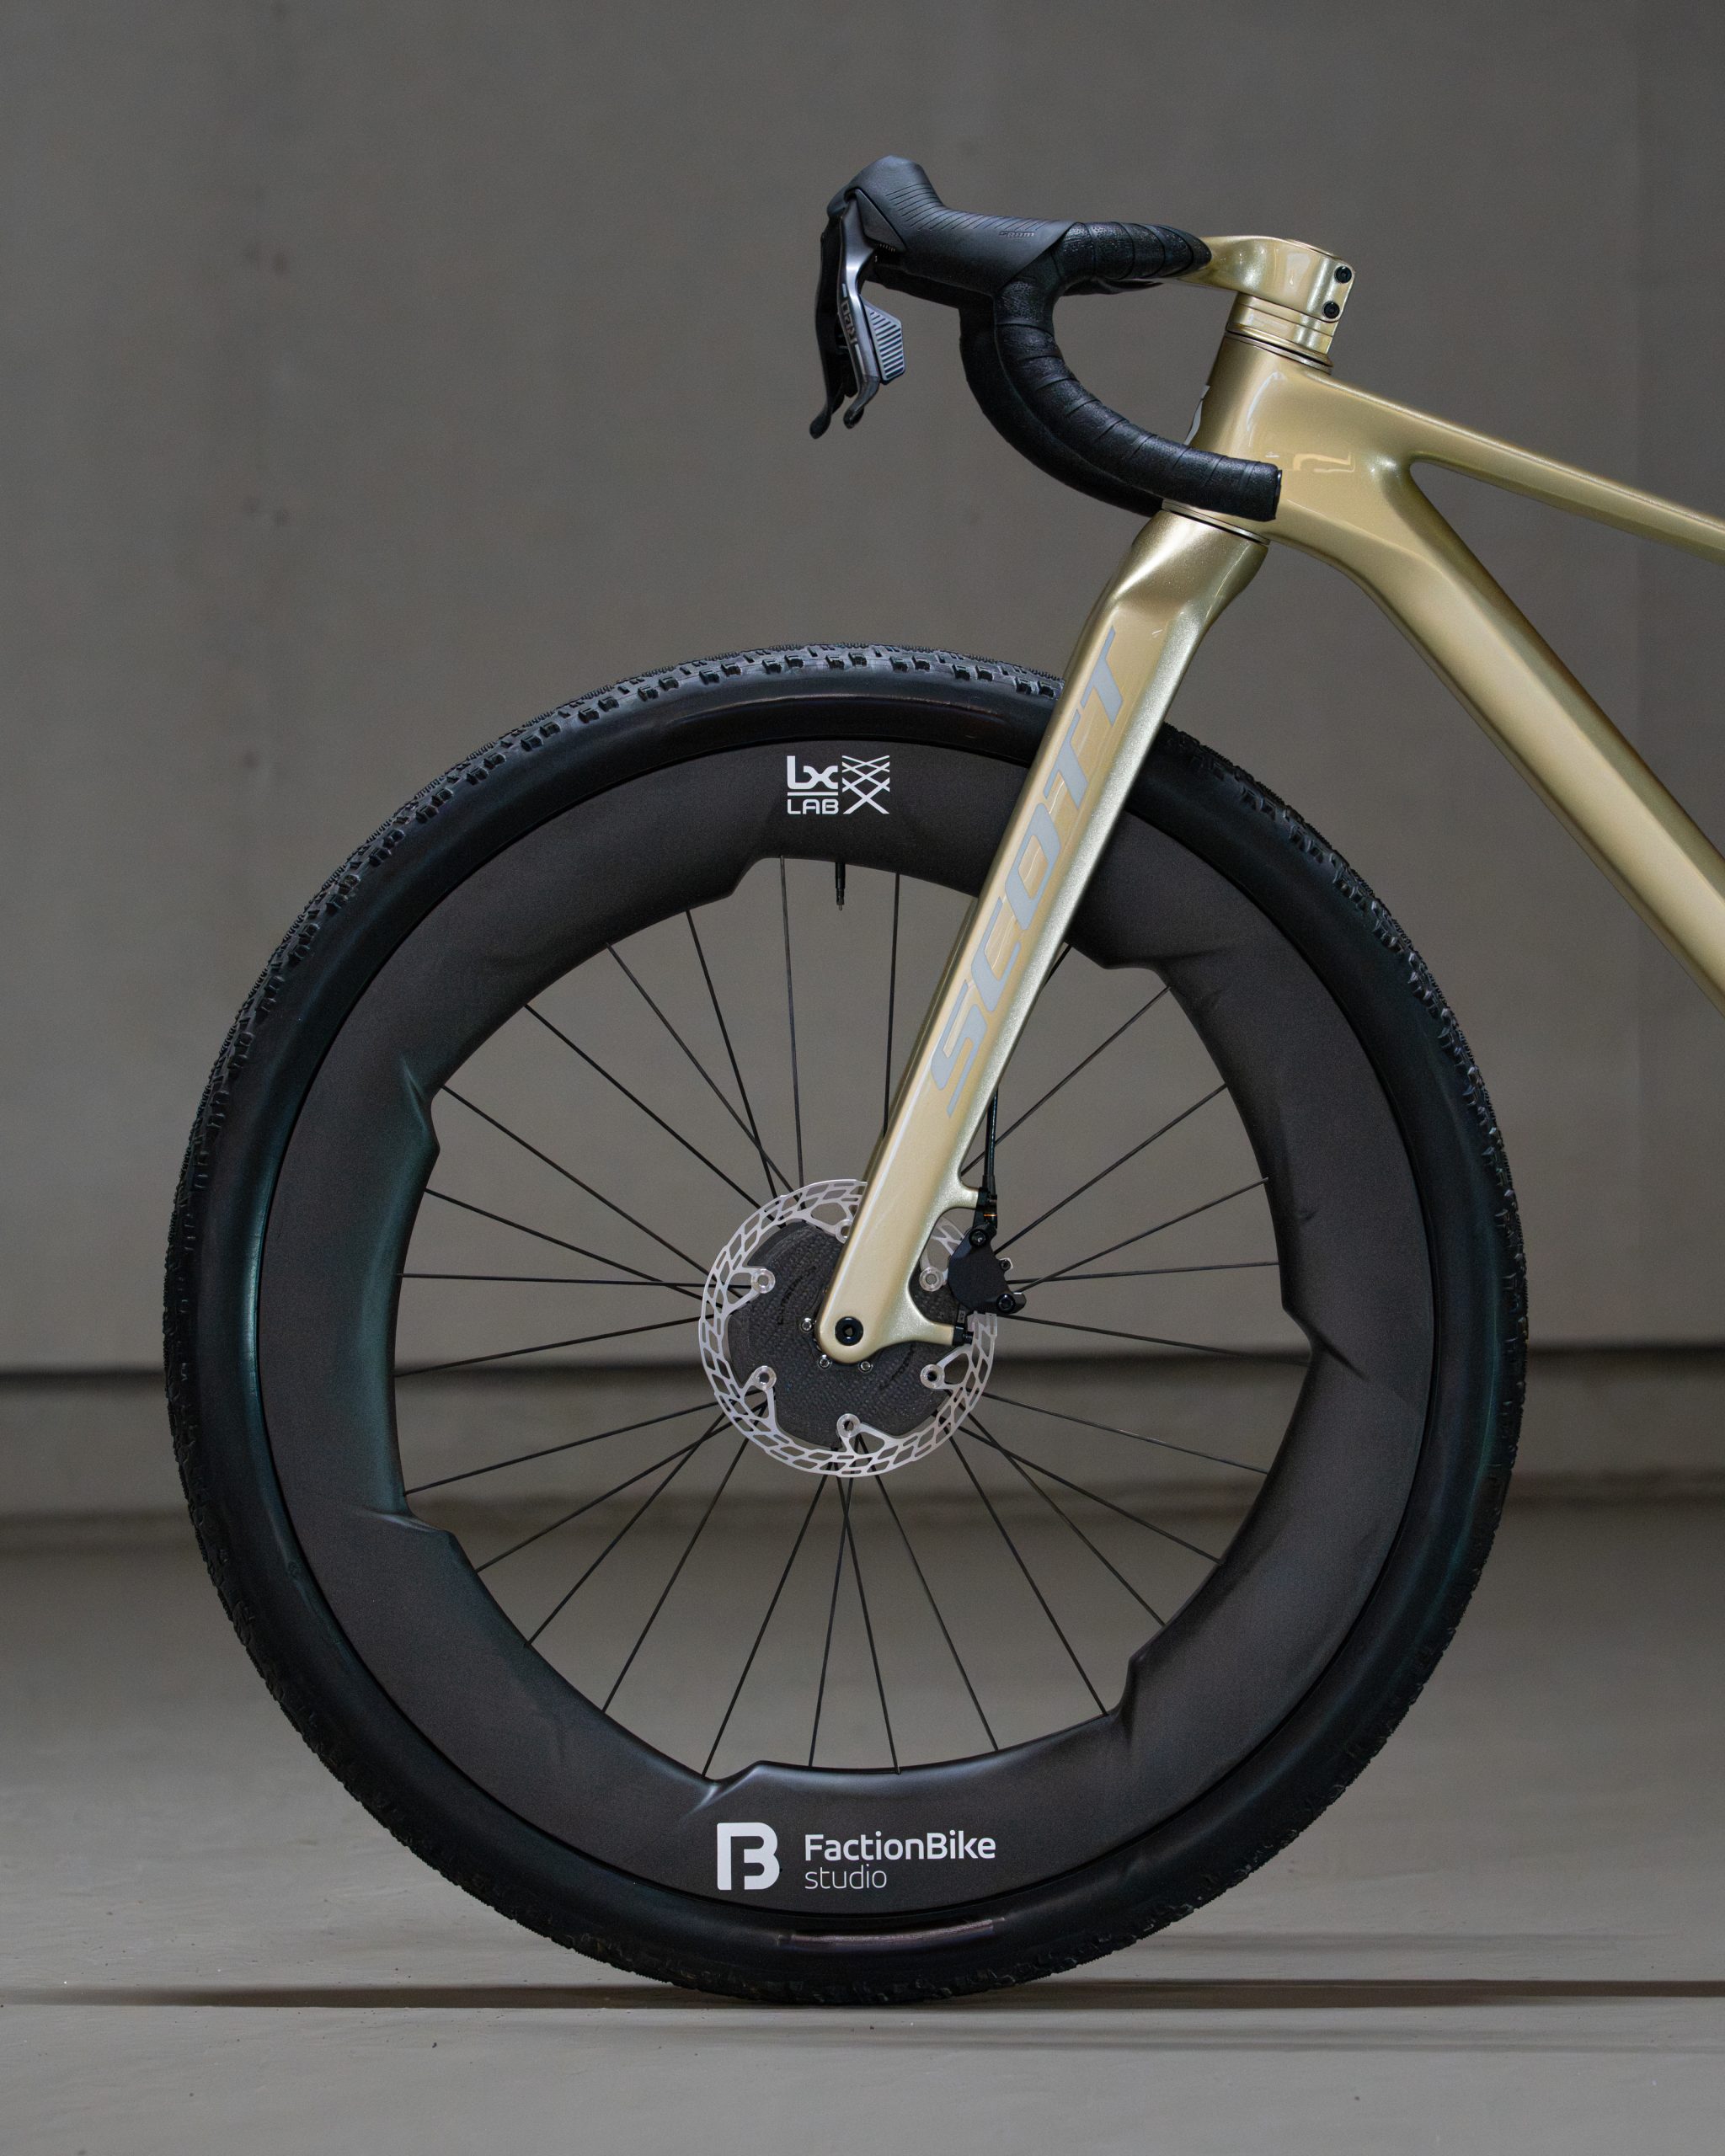
The one-off wheelset has a 45mm internal width. Scott
The wheels haven’t been ignored, with prototype 45mm internal-width, 70mm-deep wave-profile rims developed with a pair of Canadian firms, and designed for aerodynamics and tyre stability with 2.25in MTB tyres.
They’re built onto Extralite HyperSmart 3 hubs with Alpina Hyperlite spokes. The hubs have a Boost adaptor kit and can be specced with a SRAM XDR freehub to fit the SRAM road-spaced cassette.
Dangerholm reckons that, despite the wide tyre stance potentially positioning the shoulder knobs poorly for cornering, it’s rare to lean into a corner enough for this to have an impact when riding on gravel, because you’d wash out first.
He admits the 2.25in Maxxis Aspen ST MaxxSpeed Team Spec MTB tyres probably aren’t going to add much to the bike’s aerodynamics. He’s running TPU inner tubes and has blacked out the logos for cleaner aesthetics.
The chunky tyres should be able to take the bike into terrain where a gravel race bike would struggle. Scott
Dangerholm isn’t the only rider to adapt an MTB for gravel use. Chris Mehlman rode a Pivot LES SL with a drop bar at Unbound XL in 2025. It’s not only customisers who are blurring the boundary between gravel and mountain bikes either. Last year, we highlighted four brands with gravel bikes with clearance for MTB tyres.
We’ve recently seen Ridley launch the Ignite GTX with 2.3in/58mm tyre clearance, while Pinarello’s Grevil MX, as with Dangerholm’s concept, adds an aero road bar to a frame with 50mm tyre clearance and a 100mm-travel suspension fork.
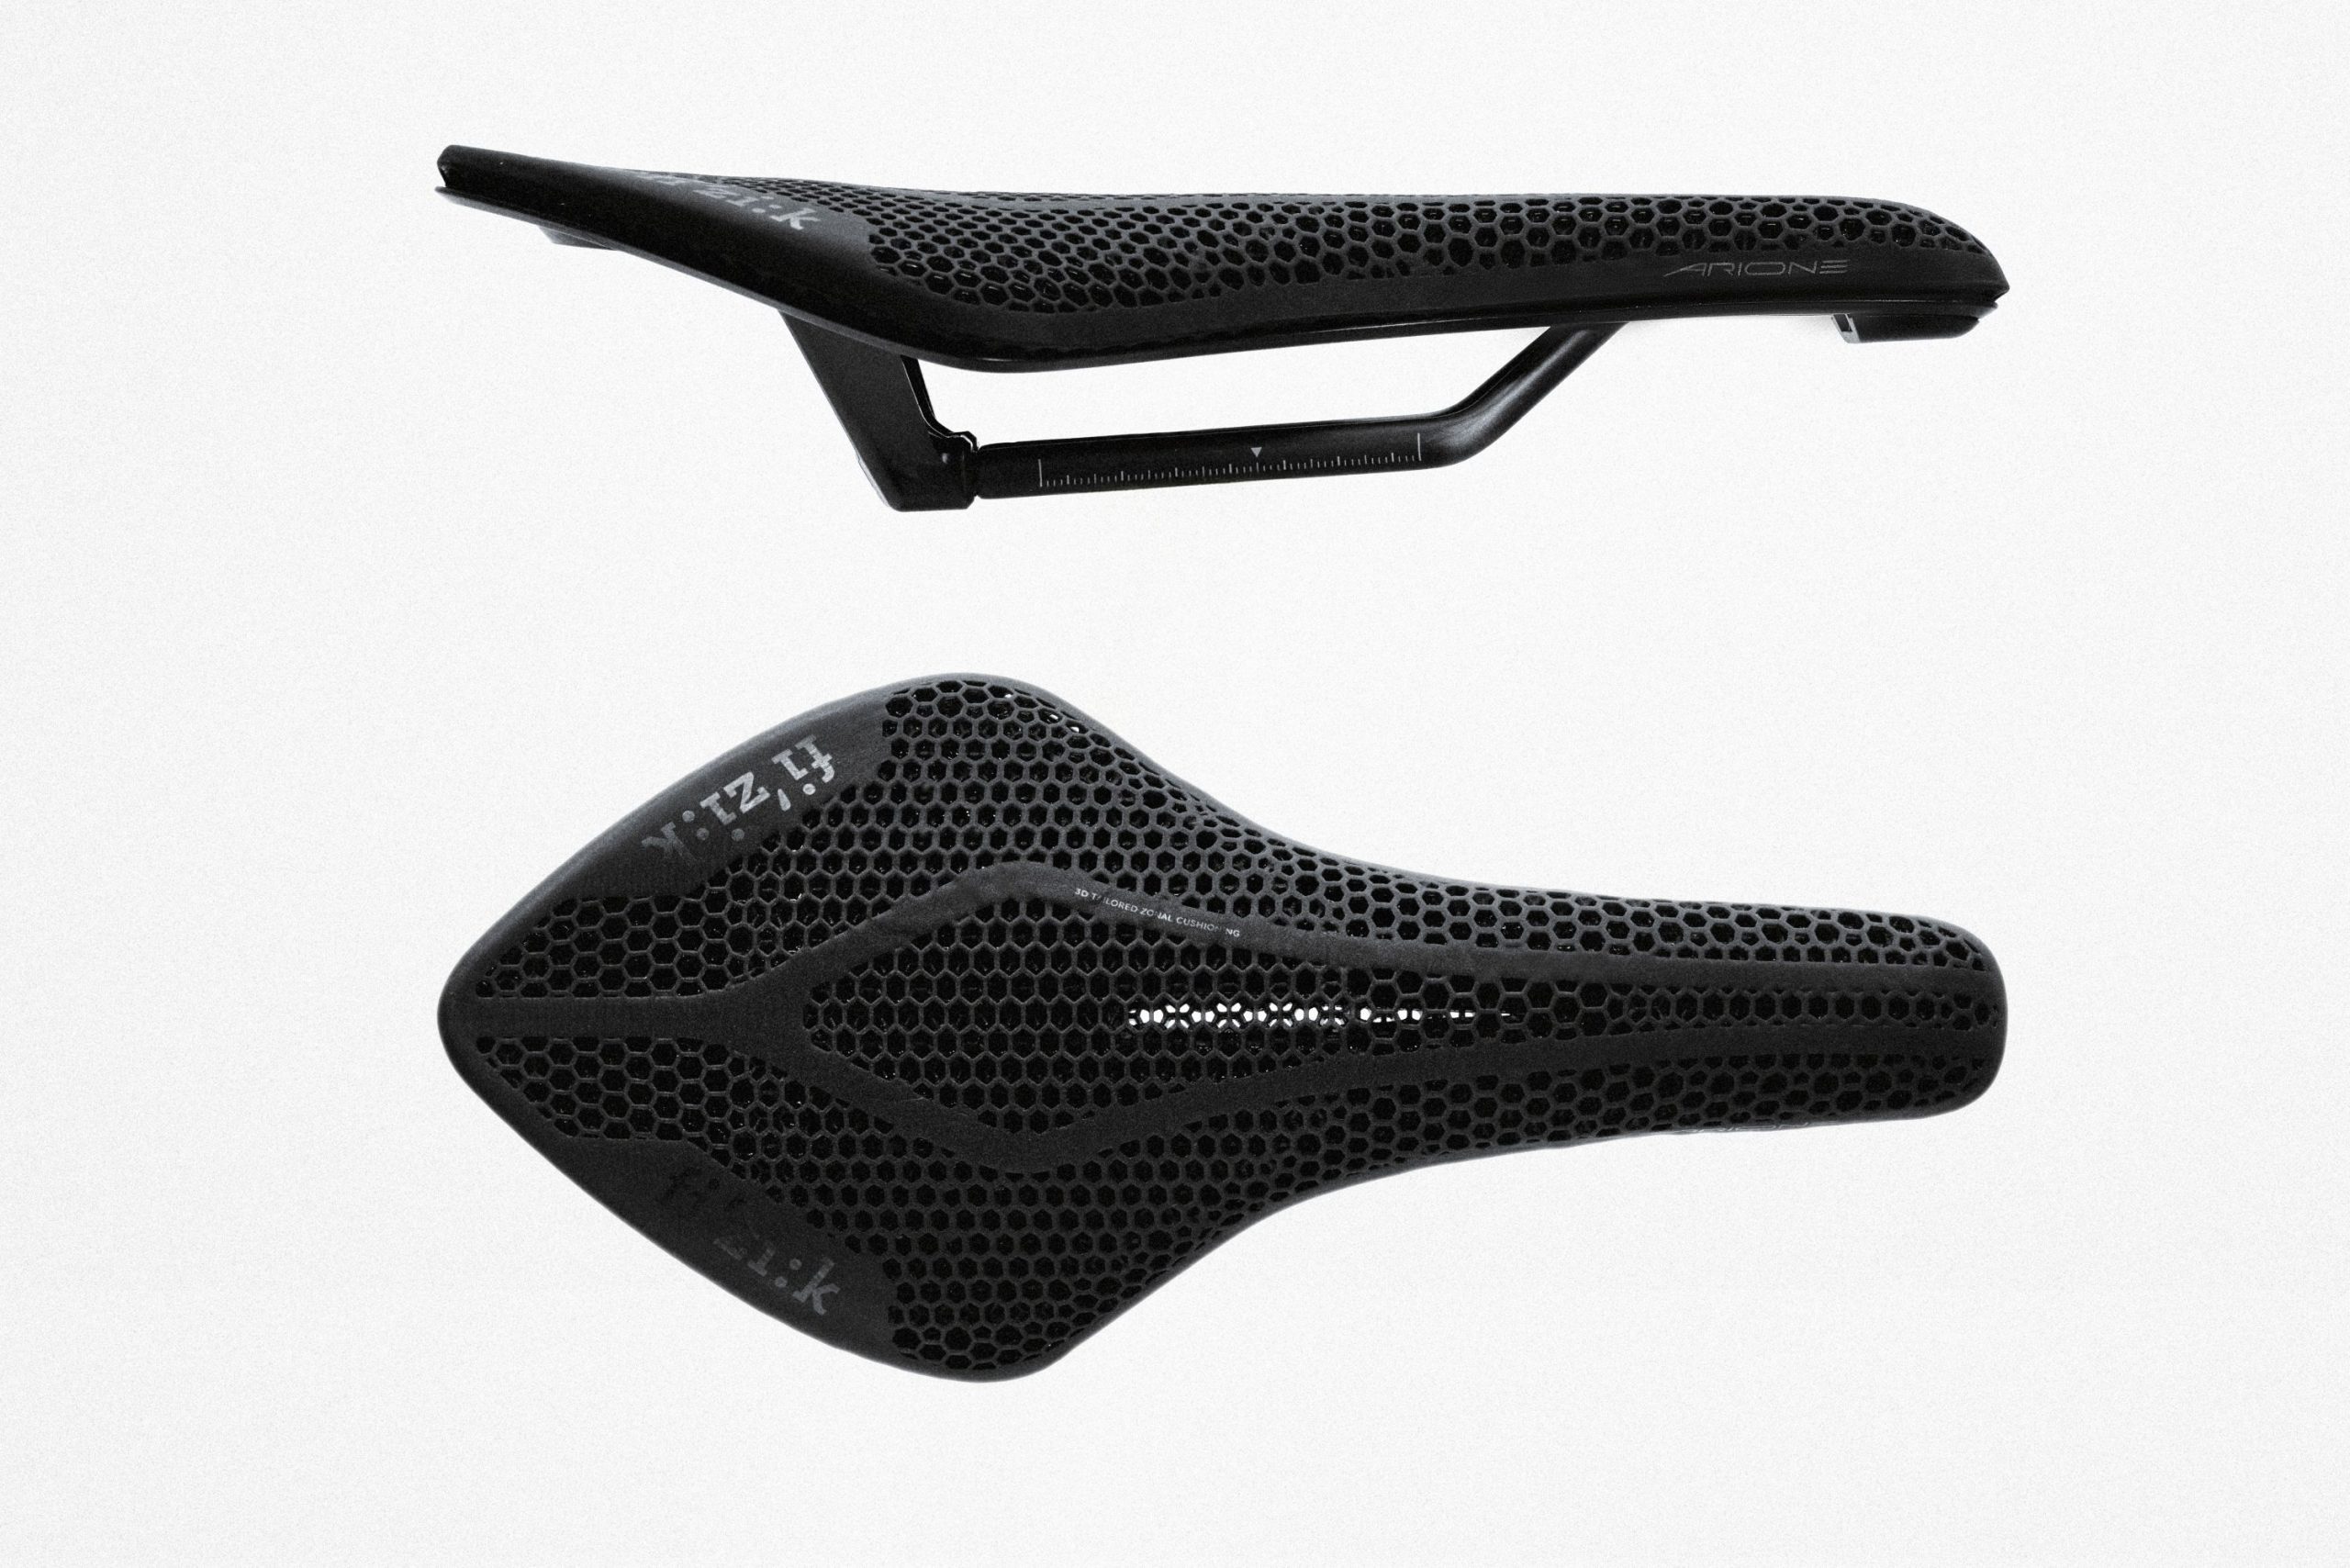
Fizik has relaunched the Arione saddle. The long, flat, narrow, low-weight saddle was launched in 2003 and became a must-have for racers until the mid-2010s, when short-nosed saddles came into fashion.
The relaunched Arione is available with lightweight materials, with a conventionally padded upper as well as a new 3D-printed version.
Fizik says the flat profile and narrow width are designed to offer freedom of movement when racing. It states that this enables a rider to find their ideal power and comfort centres, and reduces pressure when adopting an aero position.
There are two widths available for the Arione, 135mm and 145mm, both with 284mm length. That’s almost 40mm longer than a typical short-nosed saddle.
Adaptive or EVA padding
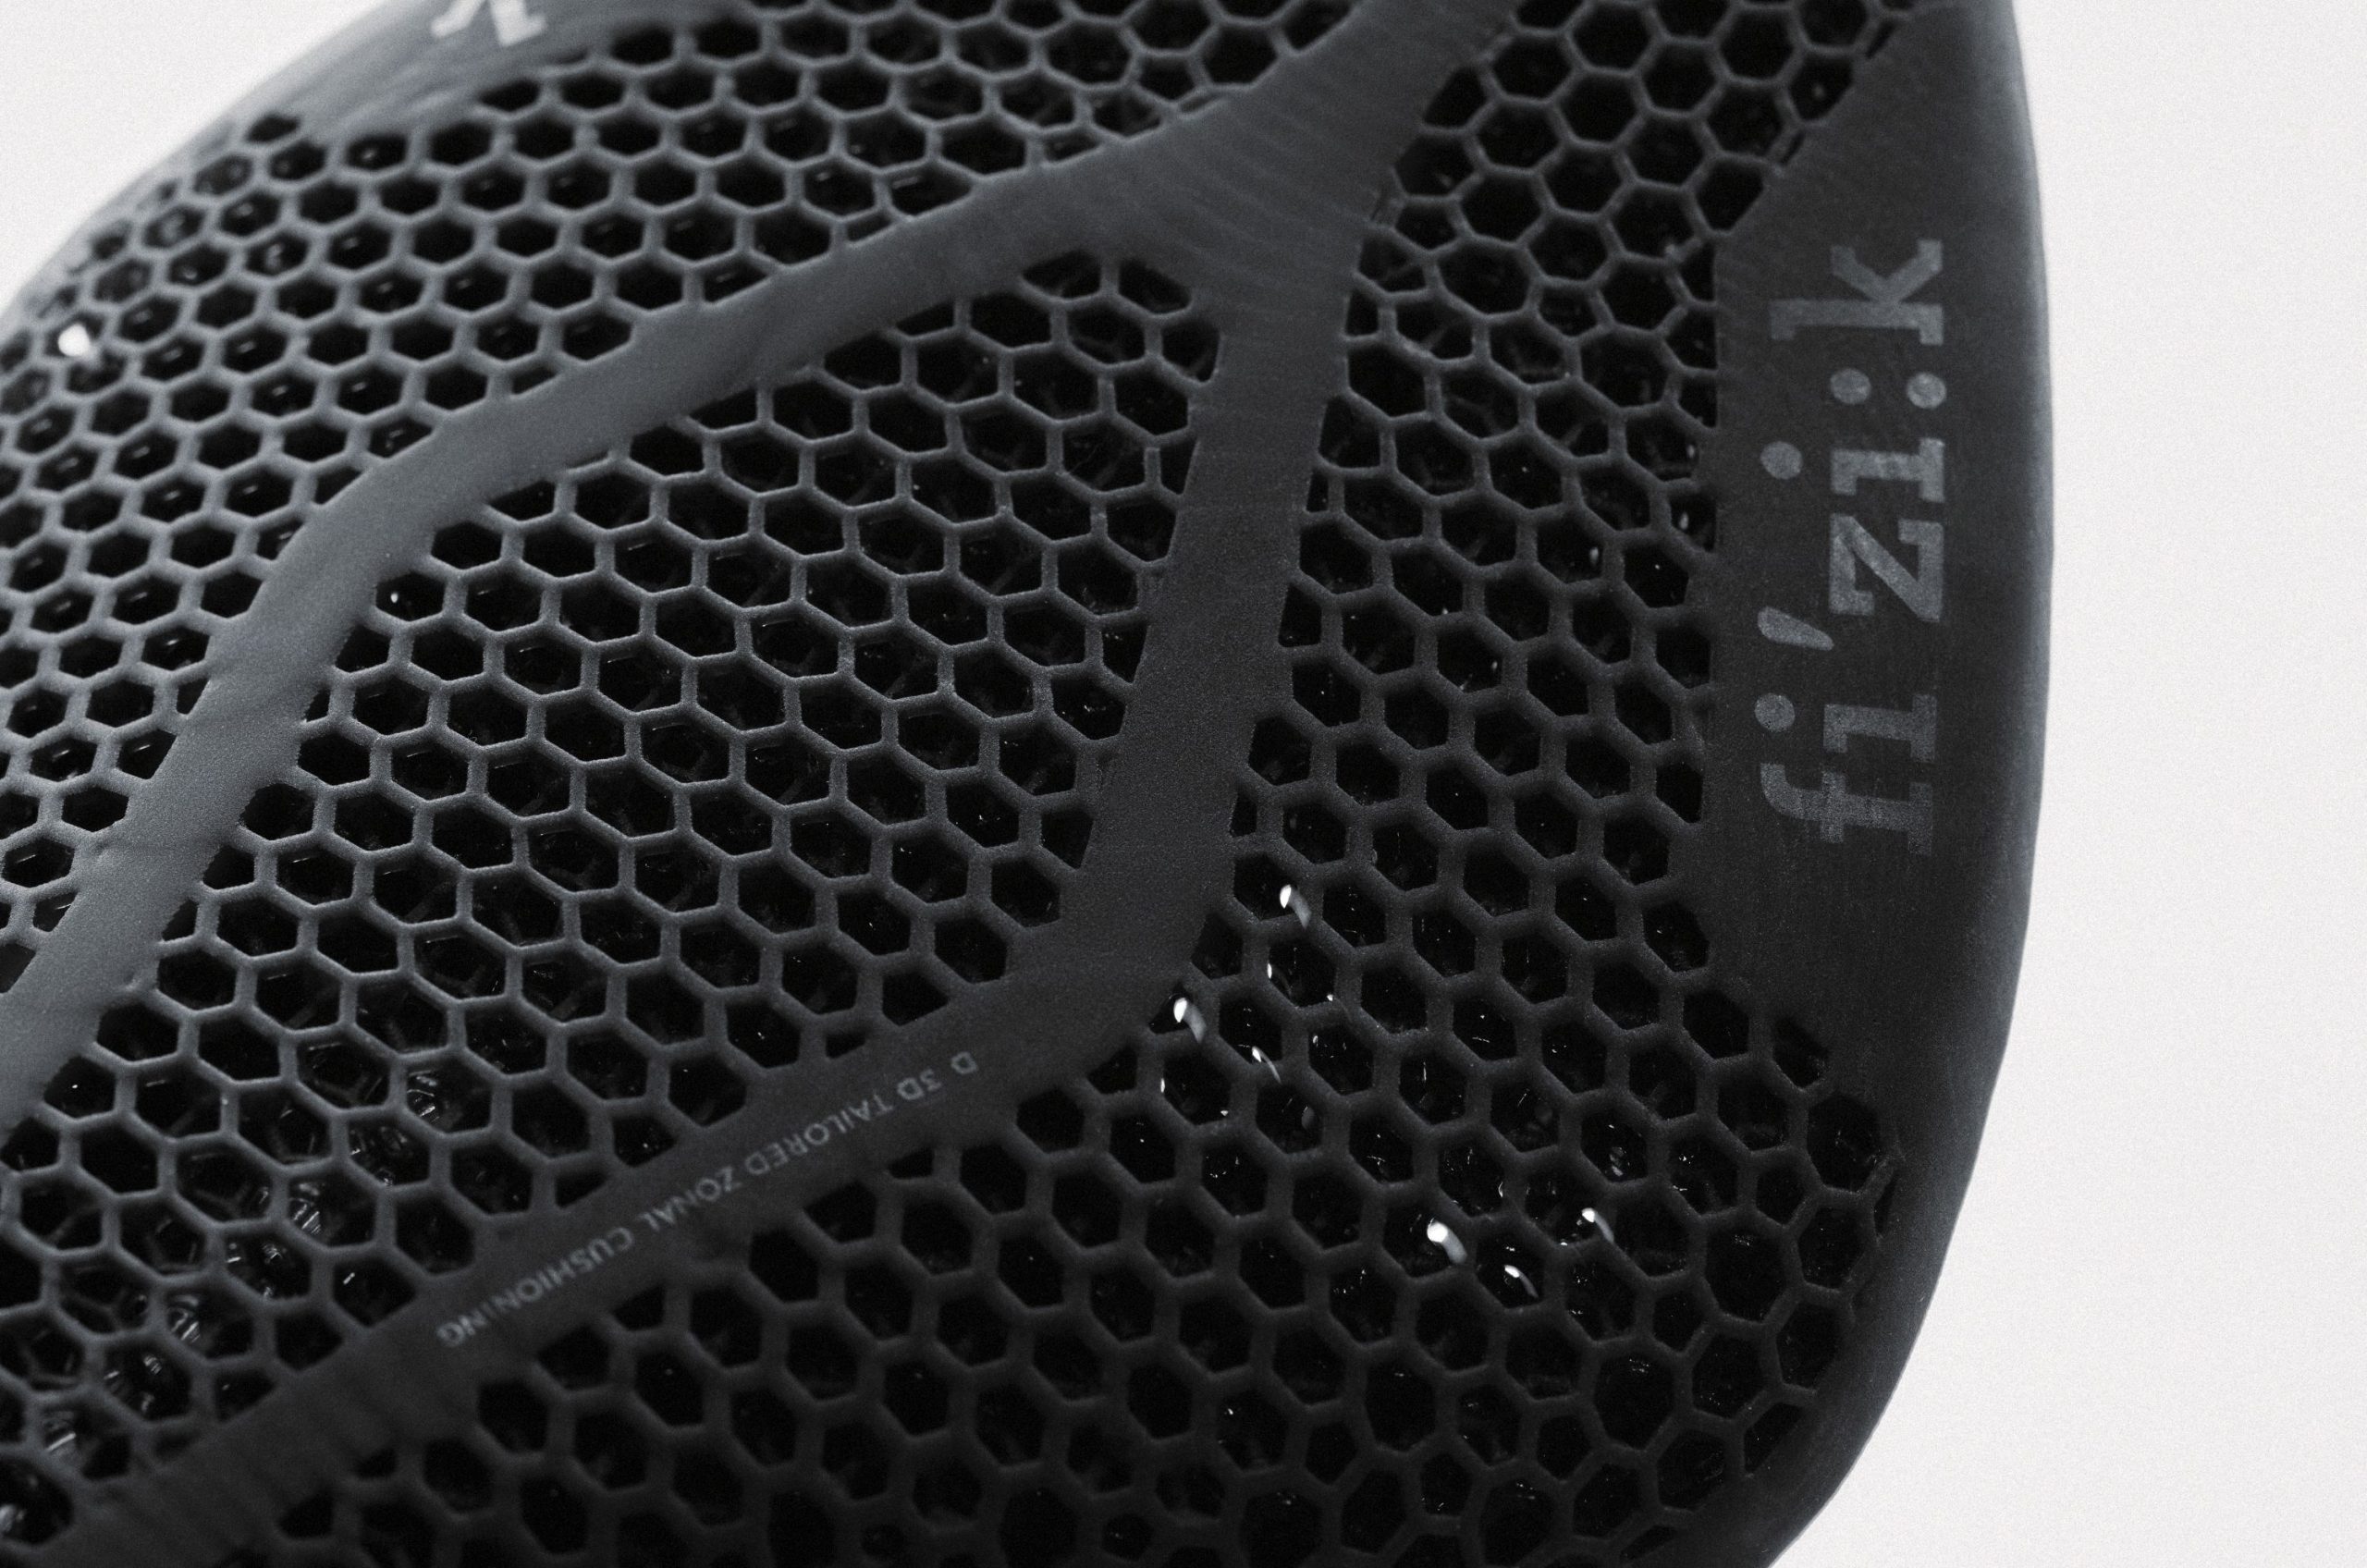
The 3D-printed Adaptive saddle top is designed to relieve pressure points.
The 3D-printed Adaptive padding is designed to offer zonal cushioning, relying on a more yielding central section for comfort. Fizik claims the 3D-printed surface improves weight distribution and offers a 60% reduction in peak saddle pressure.
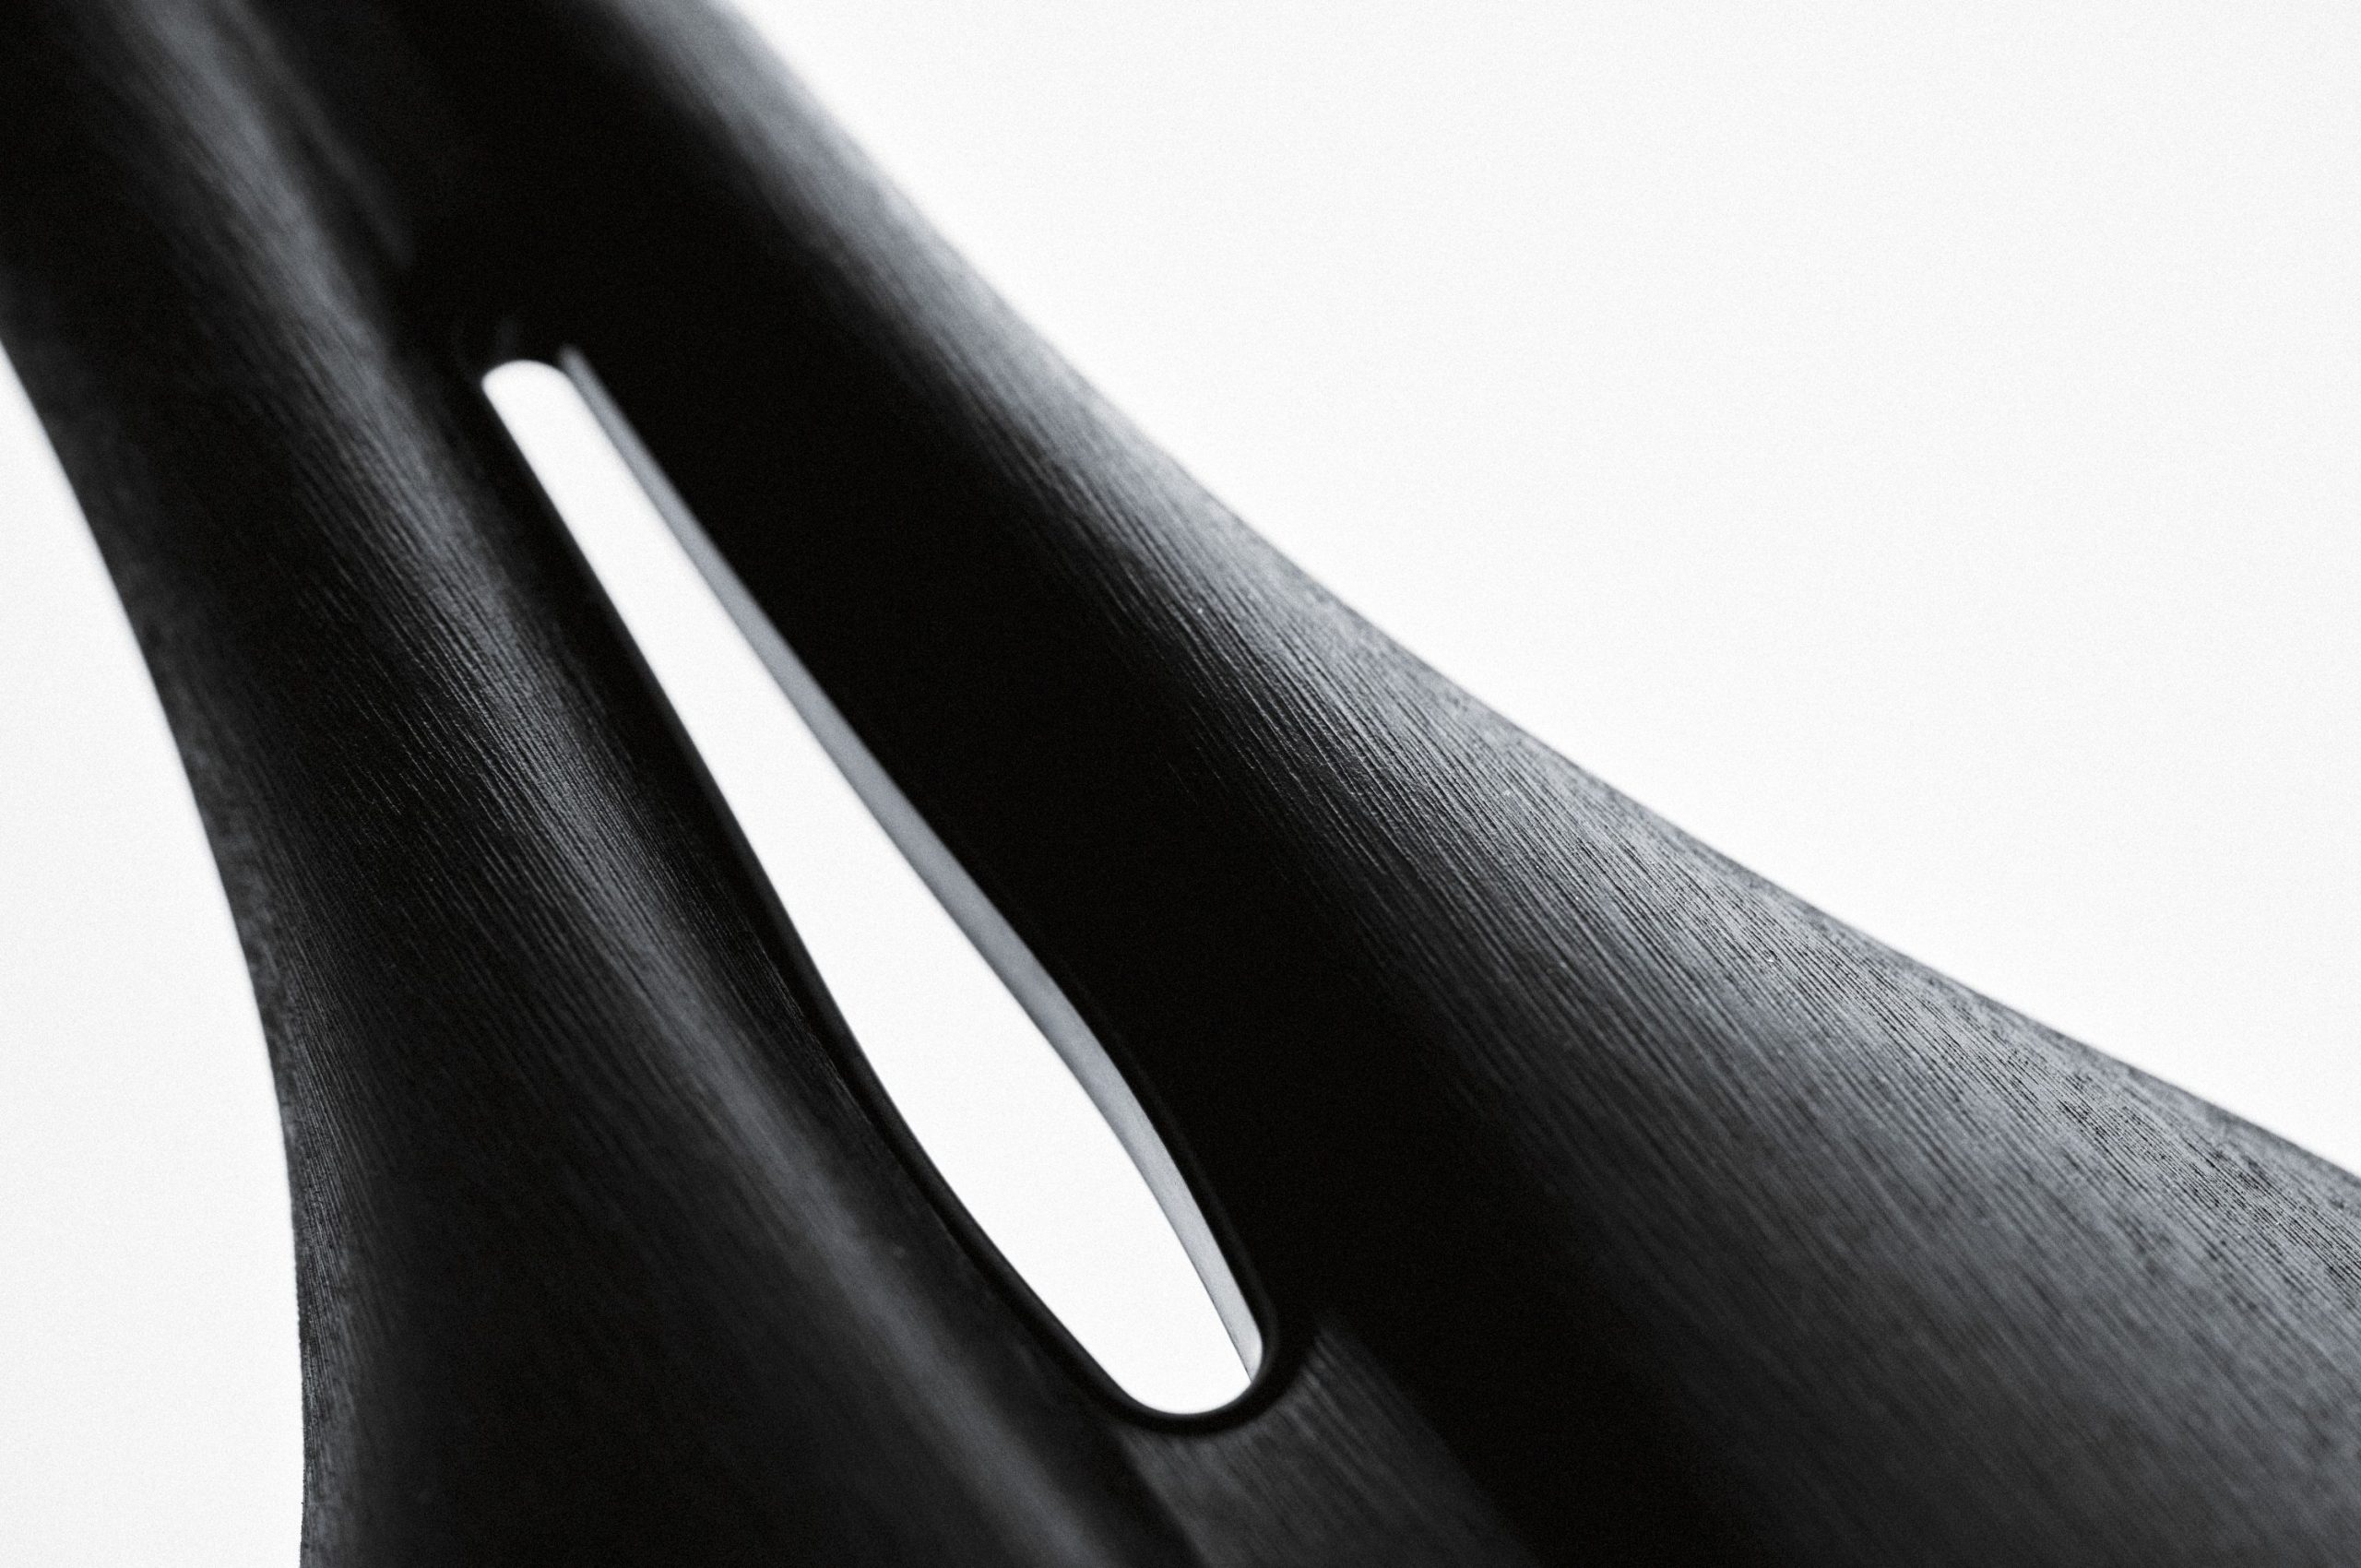
The second option includes injected low-profile EVA padding with a non-slip surface texture. While the Arione originally had a flat surface, the relaunched saddle includes a central pressure-relief channel in the EVA top.
The EVA saddle top is lighter and includes striations to help keep you planted in position.
Both saddle tops are mounted on Fizik’s R1 shell, which combines carbon rails with a carbon-reinforced nylon shell.
You can also get the new Arione and Arione Adaptive saddles on Fizik’s lower-spec R3 shell, which combines a carbon-reinfored nylon shell with the brand’s patented Kium alloy rails.
The standard Arione, with its padded upper, is also available on Fizik’s R5 body with S-alloy rails and a carbon-reinfored nylon shell.
The 135mm saddle has a claimed 184g weight with a 3D-printed upper and 147g with EVA padding. The 145mm width has a stated weight of 190g with a 3D-printed upper and 152g with an EVA upper.
For triathletes, the Arione offers the option to add a bottle cage at the rear.
A retro choice?
The Arione was a classic racing saddle in its time, but is it out of step with modern bike-fit trends?
The relaunched Arione is the longest saddle Fizik offers and bucks the modern trend for short, wide short-nosed saddles.
Short-nosed saddles have been promoted for their ability to hold a rider in one position, without shifting while riding – precisely the opposite of Fizik’s claims for the Arione. This potentially reduces the risk of saddle discomfort from saddle sores and lower-back pain.
They’re favoured, too, for their comfort in a more aggressive aero position and enable the saddle to be positioned further forward over the pedals. In combination with the steeper seat tube angles favoured on modern race bikes, this can open up the hip angle and potentially enable the rider to deliver more power.
For racers, a short-nosed saddle also lowers the risk of contravening the UCI’s regulation requiring the saddle nose to be 50mm behind the bottom bracket centre.
As such, the relaunched Arione saddle is rather regressive, tending to favour a ride position that’s more set back. Will it catch on again? For some riders, the ability to shift around when riding will be welcome, while others may still prefer the locked-in feel of a short-nosed design.
Yesterday, I published a post covering the CORE sensor’s metrics, the science backing them up, and how Zwift and the CORE sensor and app work together. Read it here >
Today, I’ll be discussing my personal experience heat training with CORE in recent weeks. Also included: a pile of tips to help you optimize your heat training. Let’s dive in!
My Heat Training Experience
Cycling provides such an interesting “laboratory” for testing our bodies, doesn’t it? I’m continually fascinated by how different training methods and tools lead to different adaptations in our bodies. Sometimes I feel like I’m more of a lab rat than a human as I test all this stuff out. But it’s just too much fun!
Heat training is particularly compelling because the science behind it is solid, and Zwift provides a well-controlled heat-training environment. It’s really interesting to watch (and feel) in real time as your body reacts to heat stress.
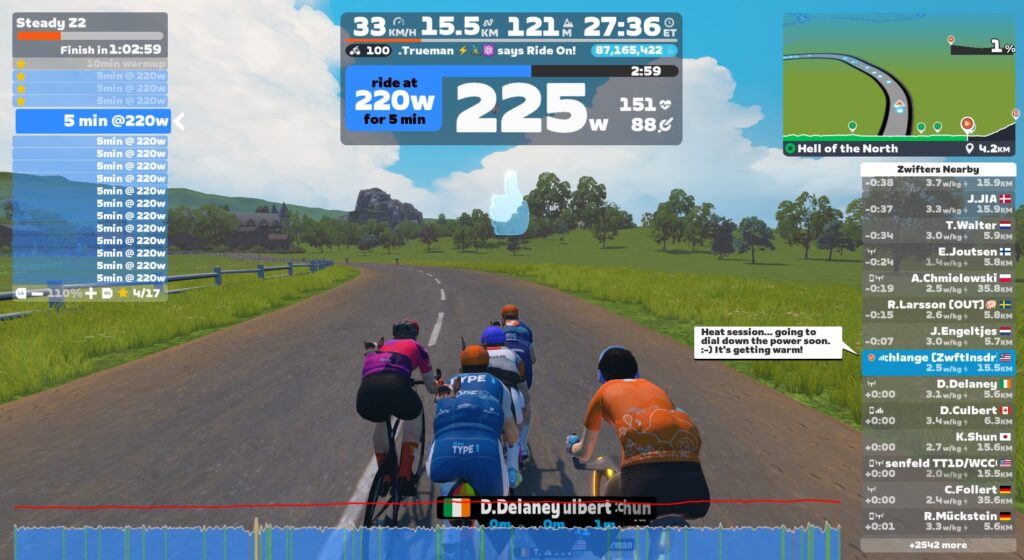
While I did a lot of heat sessions that were free rides or even Zwift group ride events, what I found I enjoyed the most was using ERG mode to precisely control my power output, clicking my Play controller buttons to adjust FTP bias to increase or decrease the power to keep my heart rate in its desired range.
I built a custom ERG workout that was basically 90 minutes of 5-minute zone 2 blocks. I would start with the FTP bias adjusted up to 110% or even 125%, then drop it to keep my heart rate below ~150 (mid zone 3 HR for me).
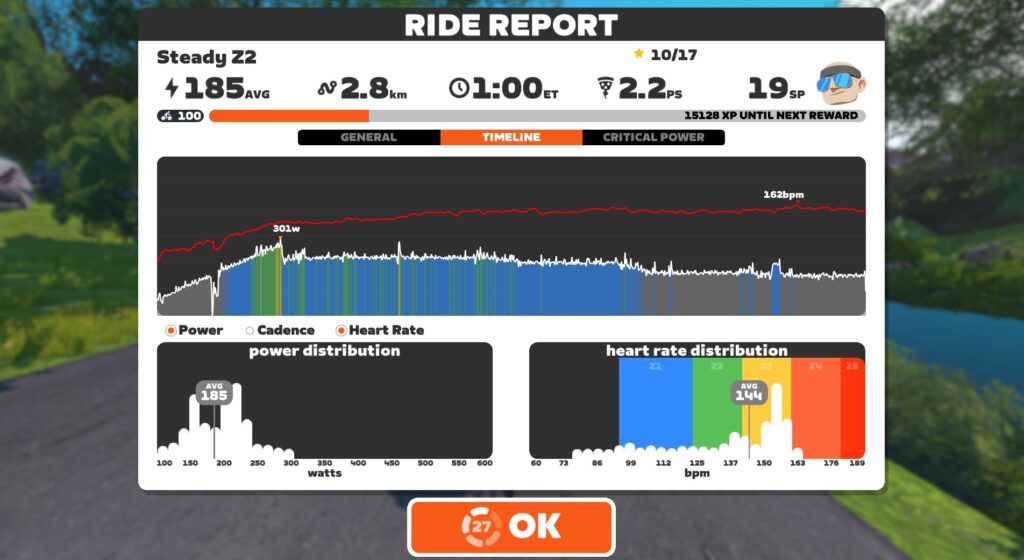
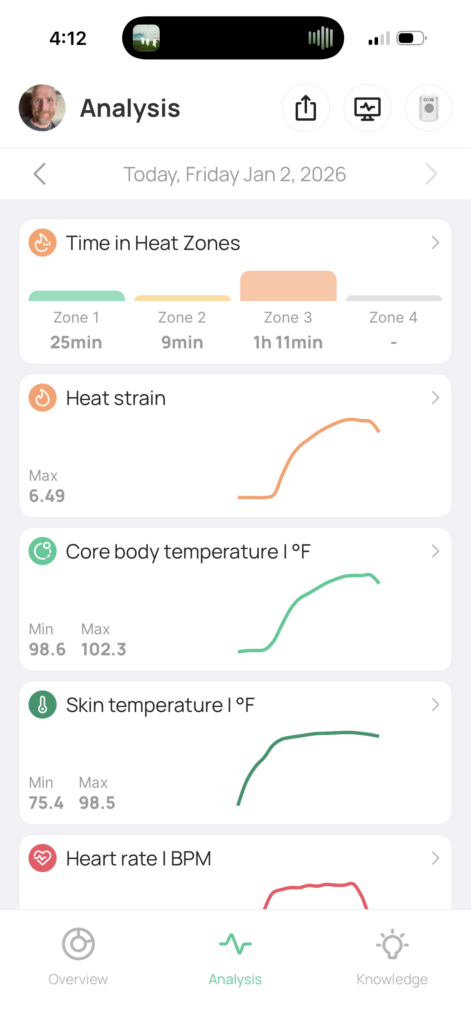
As the workout progressed, eventually my heart rate would get up over 150 and not want to come down, even at low power numbers. That’s when I knew it was about time to wrap it up. Those ERG sessions would end up looking like this:
Note how power decreases over time, while heart rate increases. This is what an increasing core temperature does to your performance, and why you should have good ventilation and a good fan running if you want to perform your best on race day!
My (Anecdotal) Evidence
I’m sure readers will want to know if heat training boosted my performance, and by exactly how much. Unfortunately, I’m going to disappoint you here, because I didn’t go about this in a structured/scientific way.
In hindsight, I should have measured various performance metrics (VO2max, FTP) and even sweat metrics (I have two different sweat sensors sitting here to review) prior to starting my hard heat training block. Then I could have repeated those tests afterward.
But I didn’t do that. In the swirl of testing various trainers, Zwift updates, three different bikes/power meters, enjoying the holidays, and deciding to jump into heat training, I missed that crucial setup step.
So all I can share with you is some anecdotal “evidence.” My feelings. Perceived exertion. Subjective event results. Here they:
I definitely notice that I sweat earlier and more than I used to. This may seem counterintuitive (shouldn’t heat training help you sweat less?), but it’s the body doing a better job of keeping itself cool.
I sense a boost in VO2 power. Despite not training VO2 in a targeted way, I was able to go outside and do a 410W effort for 3 minutes, which is better than I’ve done in a few years. I also notice myself surviving those tough 3-6 minute climbs in Zwift races.
I feel like my aerobic engine has been boosted, allowing me to chug along for long periods of time between zone 2 and 3 power at a lower heart rate.
Heat Training Tips
There’s a lot of information in my heat training posts, but I think the most useful info is in this section. Here’s why: despite the promises of increased performance, I’ve historically struggled to fit heat training into my weekly schedule. Between ZRL races on Tuesdays, leading a 100km ride on Thursdays, and doing a long outdoor session on Saturdays, every time I decided to work on heat training I gave up because it was just too hard to dedicate enough training time to accumulate meaningful heat adaptation.
But then I booked a call with Brian Maiorano, Performance Coach at CORE. He gave me some tips to maximize my heat training sessions. I also saw that I had a 3-week block I could dedicate to heat training. Serendipity!
Here’s my distilled list of tips to help you train with heat successfully.
What To Wear
Unless you want to heat your Pain Cave to uncomfortable levels, you’ll need to wear warm clothing to get your core and skin temperatures high enough to accumulate a meaningful heat training load. Basically, what you’re looking for is clothing that keeps the air off your skin (which stops evaporative cooling) and keeps heat in.
Finding what works for you may take a bit of experimentation. We each have different clothes in our cycling wardrobes, bodies that work differently, and differing pain cave conditions.
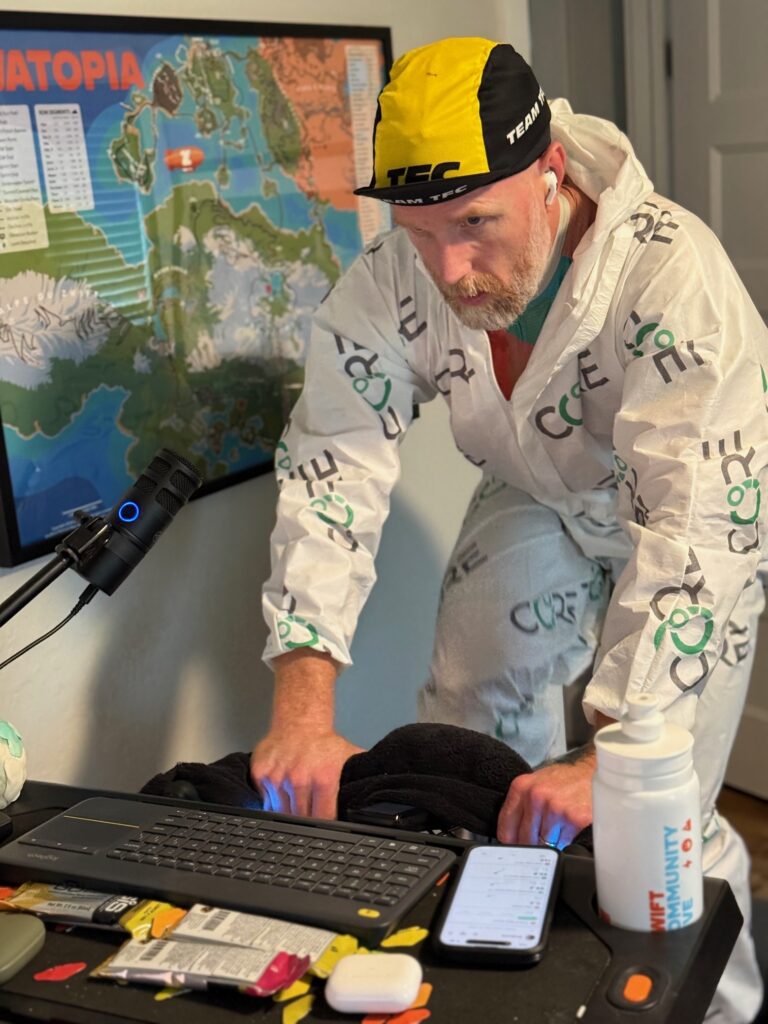
CORE sells a heat training suit, which I’m modeling above. This is what I wore for all my early heat sessions, and I also wore it when I started my big heat training block in December 2025. The suit is nice in that it’s a single article of clothing you can put on over your normal Zwifting kit, and it works, trapping heat and stopping evaporation. The downside of the suit, for me at least, is that it’s not terribly comfortable. The loose fabric can move around and bunch up, the hood can get pulled tight when you sit down after standing up, etc.
Eventually, I bought a cheap “sauna suit” on Amazon. Best $36 I’ve ever spent! The pants I didn’t need, but I wore thermal bibs I already owned, plus an old cycling jersey, plus the sauna suit jacket, a halo headband, and a casquette on top of the headband. Viola! This was the winning combo. It felt fairly comfortable, while also keeping the heat in.
Shoe Drying
While we’re talking about clothes, let’s give a nod to our poor cycling shoes. Mine would be soaked through by the end of a heat session, a pool of sweat having dripped out the holes in the bottom of the shoes, and I could actually pour sweat out of the shoes when I took them off.
After each heat session I would be so sweaty, and my clothes so sweat-soaked, that I would just climb into the shower fully clothed. Shoes and all! I would let the water wash away much of the sweat, stripping off pieces of clothing and purposely rinsing then ringing them out and hanging them on the shower rack.
This removed most of the sweat from the clothes, so they didn’t sit around stinking all day. It also let me reuse my sauna jacket the next day without having to launder it, since it’s made of a material that doesn’t absorb sweat.
Three Sensor Notes
Here are three CORE sensor must-dos:
Don’t wear it backward: What kind of idiot would wear it backward? Me, it turns out. When I first started using the version 2 sensor, it seemed impossibly hard to get my numbers high enough to accumulate meaningful head adaptation. Turns out, the portion of the sensor I was wearing against my skin was supposed to be facing outward. The CORE logo should face out. The side with all the grey text – including the text that says “THIS SIDE ON SKIN” – that goes against your skin.
Enable Automatic Standby: This is enabled by default, but I had disabled it because the previous version of the app labeled it confusingly. Keep it enabled, as it greatly increases battery life!
Pair your HRM: Pair your heart rate monitor to your CORE sensor via the CORE app, then connect directly to the CORE sensor in Zwift. This will deliver the CORE metrics plus your heart rate data to Zwift, while allowing the CORE app to see your heart rate data, increasing the accuracy of your metrics.
Hydration
Heat training shouldn’t involve massive dehydration. You’ll sweat a lot, but you want to be replacing that sweat! Be sure to fill at least two bidons per hour of heat training, and add electrolytes to your water, since you’ll be losing a lot of them.
Weighing myself before and after sessions, I learned that I sweat around 5 bidons worth in 1 hour. Amazing! Your sweat rate may be higher or lower, but I recommend weighing yourself before and after so you know how much you need to drink.
I settled on filling two bidons per hour of riding, along with drinking a lot following each session.
While I tried various electrolyte powders, I used EC Sports’ Electralyte the most due to its good taste, lower cost, and high potassium content. (I tend to be rather potassium-deficient, especially when doing a lot of sweaty training.)
Rehydrating fully/quickly and managing electrolytes isn’t as crucial if you aren’t doing heat training on back-to-back days, but it’s absolutely vital if you’re doing a heavily concentrated heat block like I did. And even then, there were days when it felt like my body was just confused. “You’re sweating out so many electrolytes, and ingesting a lot as well!”
Sweat Wrangling
You may not sweat as much as me, but I promise, you will sweat a lot. You’ll want to have some sort of sweat wrangling scheme in place, because it will get everywhere.
Think of what you’d need to do in your pain cave to keep things clean and undamaged if you were going to empty 4-5 bidons worth of liquid above your bike, then do that. You can always change the setup later, but it’s better to avoid regrets.
What I found worked for me was a beach-sized towel on the floor below my bike (beginning in front of my handlebars and ending past the back of my pedal stroke). This towel would be soaked by the end of the session. I would also have four hand towels within reach. Two would be used to dab my face for sweat, and two would be used on my handlebars to catch sweat before it dripped onto my bars or stem. (I used four towels because I would swap to a dry towel about halfway through the session.)
Session Structure: Start Fast, End Slow
To accumulate maximum Heat Training Load per session, the trick is raising your core and skin temperatures quickly, then keeping them high as long as possible.
Raising them quickly means ramping up your power quickly. The more watts you’re putting out, the more heat your body is dumping into your core. Simple as that. So get on the bike, spin a bit to wake up the legs and heart as long as you need, then ramp up the power for the next 10-20 minutes. This will quickly get your temperatures up.
How high you spike your power in these early minutes is entirely up to you. You could go really high (think race pace), get up into sweet spot territory (~85-95% of FTP), or go lower, perhaps just high tempo. What you do may depend on what sort of effort you’re looking to do that day, because you could do some hard intervals early in your ride, before you get overheated.
Me, I found that during my hard heat training block, I couldn’t hold my power any higher than sweet spot for very long, even early in the workouts. So I would sit in that power window for 10-20 minutes, then settle into zone 2 power, then eventually drop below zone 2 as my core temp continued to rise along with my heart rate.
The big tip CORE’s Brian Maiorano shared with me that helped me get more heat stress is this: when you’re done with your session, don’t just strip everything off and hit the showers to cool down. Instead, sit down and sweat. I would climb off my bike, spread my driest towels on the floor, then sit there for another 15 minutes or so, checking notifications on my phone.
The beauty of this is, you don’t feel like you’re suffering anymore. You’re just sitting there, still sweating, while your temperature and heart rate slowly come down. While this is happening, the CORE app is still recording your metrics, and your elevated temperature and heart rate are still combining to count for more heat training stress, which boosts your session’s Heat Training Load. This added a point or two to each session’s HTL (which is scored from 0 to 10). That’s huge!
Maintaining Adaptations
One interesting thing about heat training is that you don’t need to time it to “peak” at a particular time. You can maintain your high heat adaptation if you prioritize it and work it into your training schedule.
CORE says, “Once you are adapted to the desired level, you can maintain those adaptations by performing 1–3 heat sessions per week. Failure to continue heat training will result in loss of adaptations. Adaptations decrease by about 2.5% for every day without heat training, disappearing entirely within 5–6 weeks.”
10/10 Heat Training Load
Once I learned I’d been wearing the v2 sensor backward, I was looking forward to doing a session with it worn correctly, to see if I could get my numbers up! Here’s that first session, in late November of 2025, when I jumped into an Off the MAAP event and rode in the CORE suit for 90 minutes, accumulating the maximum Heat Training Load possible in one session: a 10 out of 10!
Your Thoughts
Have you done any heat training? Have you used the CORE sensor to do so? Share your thoughts, questions, and experiences below!
If you have questions about heat training, I highly recommend checking out CORE’s support articles, which are impressively detailed and thorough. Visit help.corebodytemp.com.
I like to say, “I was heat training on Zwift before it was cool.” Mostly I like the wordplay, but also, there’s some truth to it: I hadn’t seen or heard of others doing heat training on Zwift when I began doing it in the summer of 2023. It seemed like the perfect training cheat code, though: if heat training delivers on its promise and indoor cycling lets you control your environment, then Zwift could be the place where heat training thrives.
That post was supposed to be part 1 of a series, but that didn’t happen. Instead, I found myself struggling to make sense of the CORE metrics, and when I reached out to CORE for support, I got no reply. So I set the project aside.
Fast-forward to early 2025, and CORE was suddenly very visible in my world: Zwift added CORE metrics to the HUD, and CORE had lots of new staff, a completely revamped app and metrics, and a new version (2) of their sensor. It was time to dive back into the sweat sessions!
The Science
While CORE’s ability to measure your heat training is a relatively new development in the world of cycling, the concept of heat training is not new at all. Cyclists have done it for decades in preparation for hot races, and more recently, riders have embraced heat training to boost overall performance, following the results of various heat-training studies.
If you want to dig into the results of actual studies, here are a few:
What do the studies show? In summary, heat training leads to the following adaptations:
Increased hemoglobin mass
Increased red blood cell volume
Increased VO2max and FTP, in the neighborhood of +3-10%
Earlier onset of sweating and an increased sweat rate
Decreased sodium concentration in your sweat
Notably, these increases are observed in men and women equally, and occur among both elite and amateur athletes. So it’s no surprise that heat training, and specifically heat training with the CORE sensor, has become popular among pro cyclists and triathletes. It offers clear benefits for anyone racing in the heat, but also offers benefits similar to altitude training which lead to performance boosts even in cooler environments. Hence CORE’s mantra: “Train hot, race cool.”
(In fact, various sources have told me that most, if not all, World Tour teams are using CORE for heat training, even though CORE isn’t sponsoring the teams in any way. That should make us sit up and take notice…)
CORE Metrics (Just the Basics)
When I first jumped into heat training in 2023, the testing protocol and tracking were complex. Fortunately, CORE revamped their app and metric to simplify things! Here are the key metrics used when heat training with the CORE sensor:
Core Temperature: your internal temperature
Skin Temperature: your “external” temperature, as measured on your skin
Heat Strain Index (HSI): uses your core and skin temperatures to measure how hard your thermoregulatory system is working to cool itself, on a scale of 0-10 (read more)
Heat Zones: these break HSI into 4 zones
Heat Zone 1: HSI of 0.0-0.9
Heat Zone 2: HSI of 1.0-2.9
Heat Zone 3: HSI of 3.0-6.9
Heat Zone 4: HSI of 7+
Heat Training Load: ranges from 0-10 and measures how much a particular training session contributes to your heat adaptation (read more)
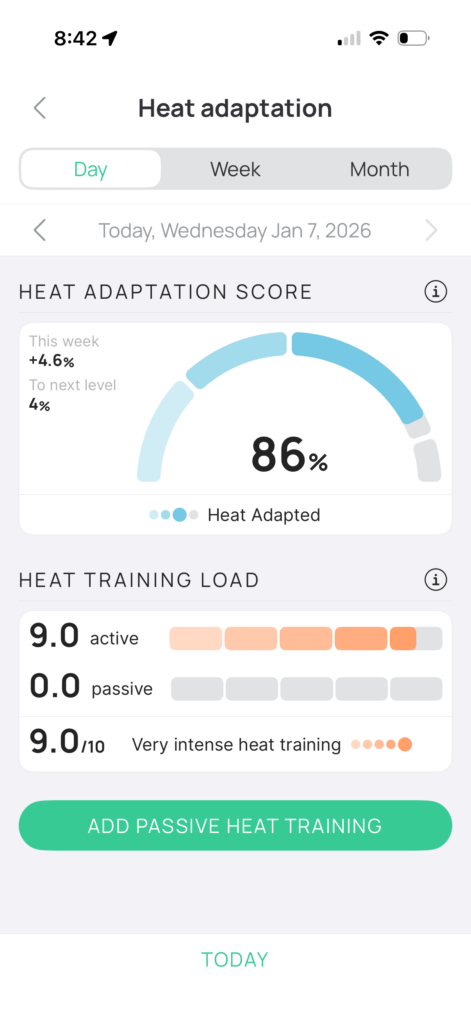
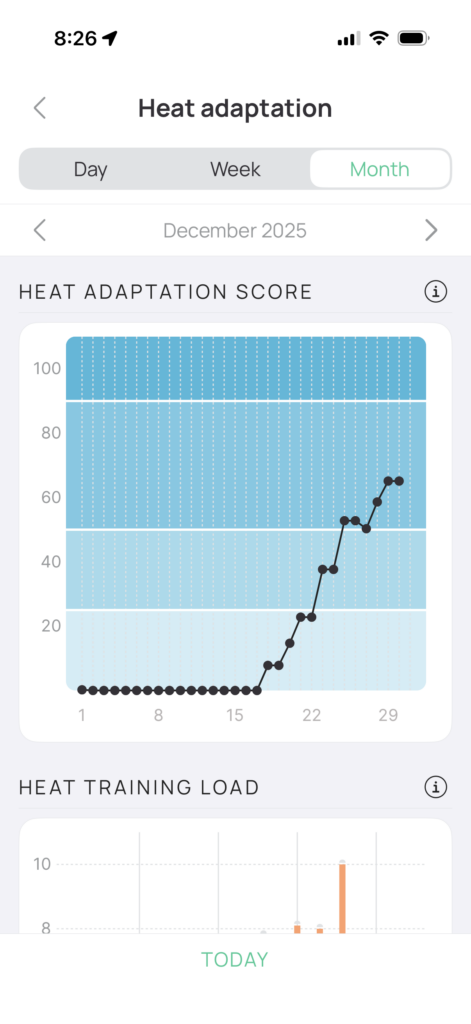
Heat Adaptation Score: tracks your heat adaptation progress to see how much of your potential you’ve reached, on a scale of 0 to 100%
0–24%: Thermal Rookie
25–49%: Heat Accustomed
50–89%: Heat Adapted
90–100%: Heat Champion
Putting all these together, what CORE users typically want to do is get their HSI to increase early in the session, so they are in the higher Heat Zones (zones 3 or 4) where Heat Training Load accumulates more quickly during their session. This results in a higher Heat Training Load for the day, which means their Heat Adaptation Score will increase more quickly.
Zwift Integration: What It Is (and Isn’t)
While CORE is now integrated into Zwift, it’s important to define what “integration” really means in this case. Zwift’s CORE integration simply means there are two CORE metrics available to be shown in the HUD (HSI and Core Temperature), and that data is recorded to your FIT file.
To really use CORE to its fullest, though, you’ll want to run the CORE app on your phone, so it can track your Heat Training Load for your session, and track your ongoing Heat Adaptation Score from day to day.
CORE App Basics
As explained above, despite Zwift’s basic integration with CORE, I think it’s safe to say the CORE app is essential for heat training with the CORE sensor.
The CORE app lets you configure your CORE sensor(s), track metrics for your active heat session, and track your overall Heat Adaptation Score. You can tap the Heat Adaptation Score gauge to see a historic view of your data as well:
Current activityHomescreenHistoric view
The CORE sensor has some on-board memory, so it isn’t just live-streaming data to connected apps… it’s actually storing that data. This is handy if you begin a session but forgot to open the CORE app, as it means you won’t lose that data.
The CORE app has come a long way since its early days. Today, coupled with simplified metrics explained above, it provides a clear view of your heat training progress. Still, there are some improvements I’d like to see:
Refresh frequency: the app doesn’t update its data quickly during an active session, and this can be a bit maddening when you’re sweating profusely and wanting to see your progress toward a higher Heat Training Load. I’d love to see the app update all metrics at least every minute, if possible.
Chart quality: the historic charts can’t be tapped to “drill down” into the data, and I’d like to see that feature added.
Trial By Fire
I’ve bounced in and out of heat training several times in the past years, without ever doing it enough to accumulate meaningful adaptation. That changed when I decided to buckle down and do some earnest heat training at the end of 2025.
Over a 3-week period from mid-December 2025 to early January, I completed heat sessions almost daily, working my way from a Heat Adaptation Score of 0 to 96%. And while the sessions were rather sweaty, I began to look forward to the efforts, to the ridiculousness of dripping so much water on the floor, to seeing my Heat Adaptation Score inch closer to 100%.
I learned a lot during those sessions, including:
What to wear to stay as comfortable as possible, while keeping my temperature high so I could accumulate a lot of adaptation.
How much I needed to drink, and what sort of electrolyte mix to use to facilitate replacing what I was losing.
How to arrange towels on the floor and on my bike and within reach, to control sweat while also keeping laundry loads as small as possible.
How to get my Heat Stress Index to increase quickly in a session, so I could get up to those higher Heat Zones and accumulate heat stress faster, resulting in an overall higher Heat Training Load.
The disgusting joy of sitting on the floor in my sweaty clothes after a session, letting my temperature and heart rate slowly drop while accumulating additional heat stress seemingly “for free” (more on this below as well).
I’ll share more about these learnings in part 3 of this series, publishing tomorrow. Until then, here’s a recording of me riding a Tour de Zwift stage as a heat session. Watch as my power drops from the 200W+ to ~100W, while my heart rate actually increases! The human body is an amazing creation…
More Heat Training Resources
If you have questions about heat training, I highly recommend checking out CORE’s support articles, which are impressively detailed and thorough. Visit help.corebodytemp.com.
Up Next
This article began as one post, but it got way too long. So I’m splitting it into two, with the rest of the post publishing tomorrow. The second part covers my personal experience heat training, including lots of tips and tricks I learned along the way.
Performance improvements are also discussed, but (spoiler alert) I didn’t do a good job of tracking those scientifically, so the hard numbers aren’t really there.
Your Thoughts
Have you done any heat training? Have you used the CORE sensor to do so? Share your thoughts, questions, and experiences below!
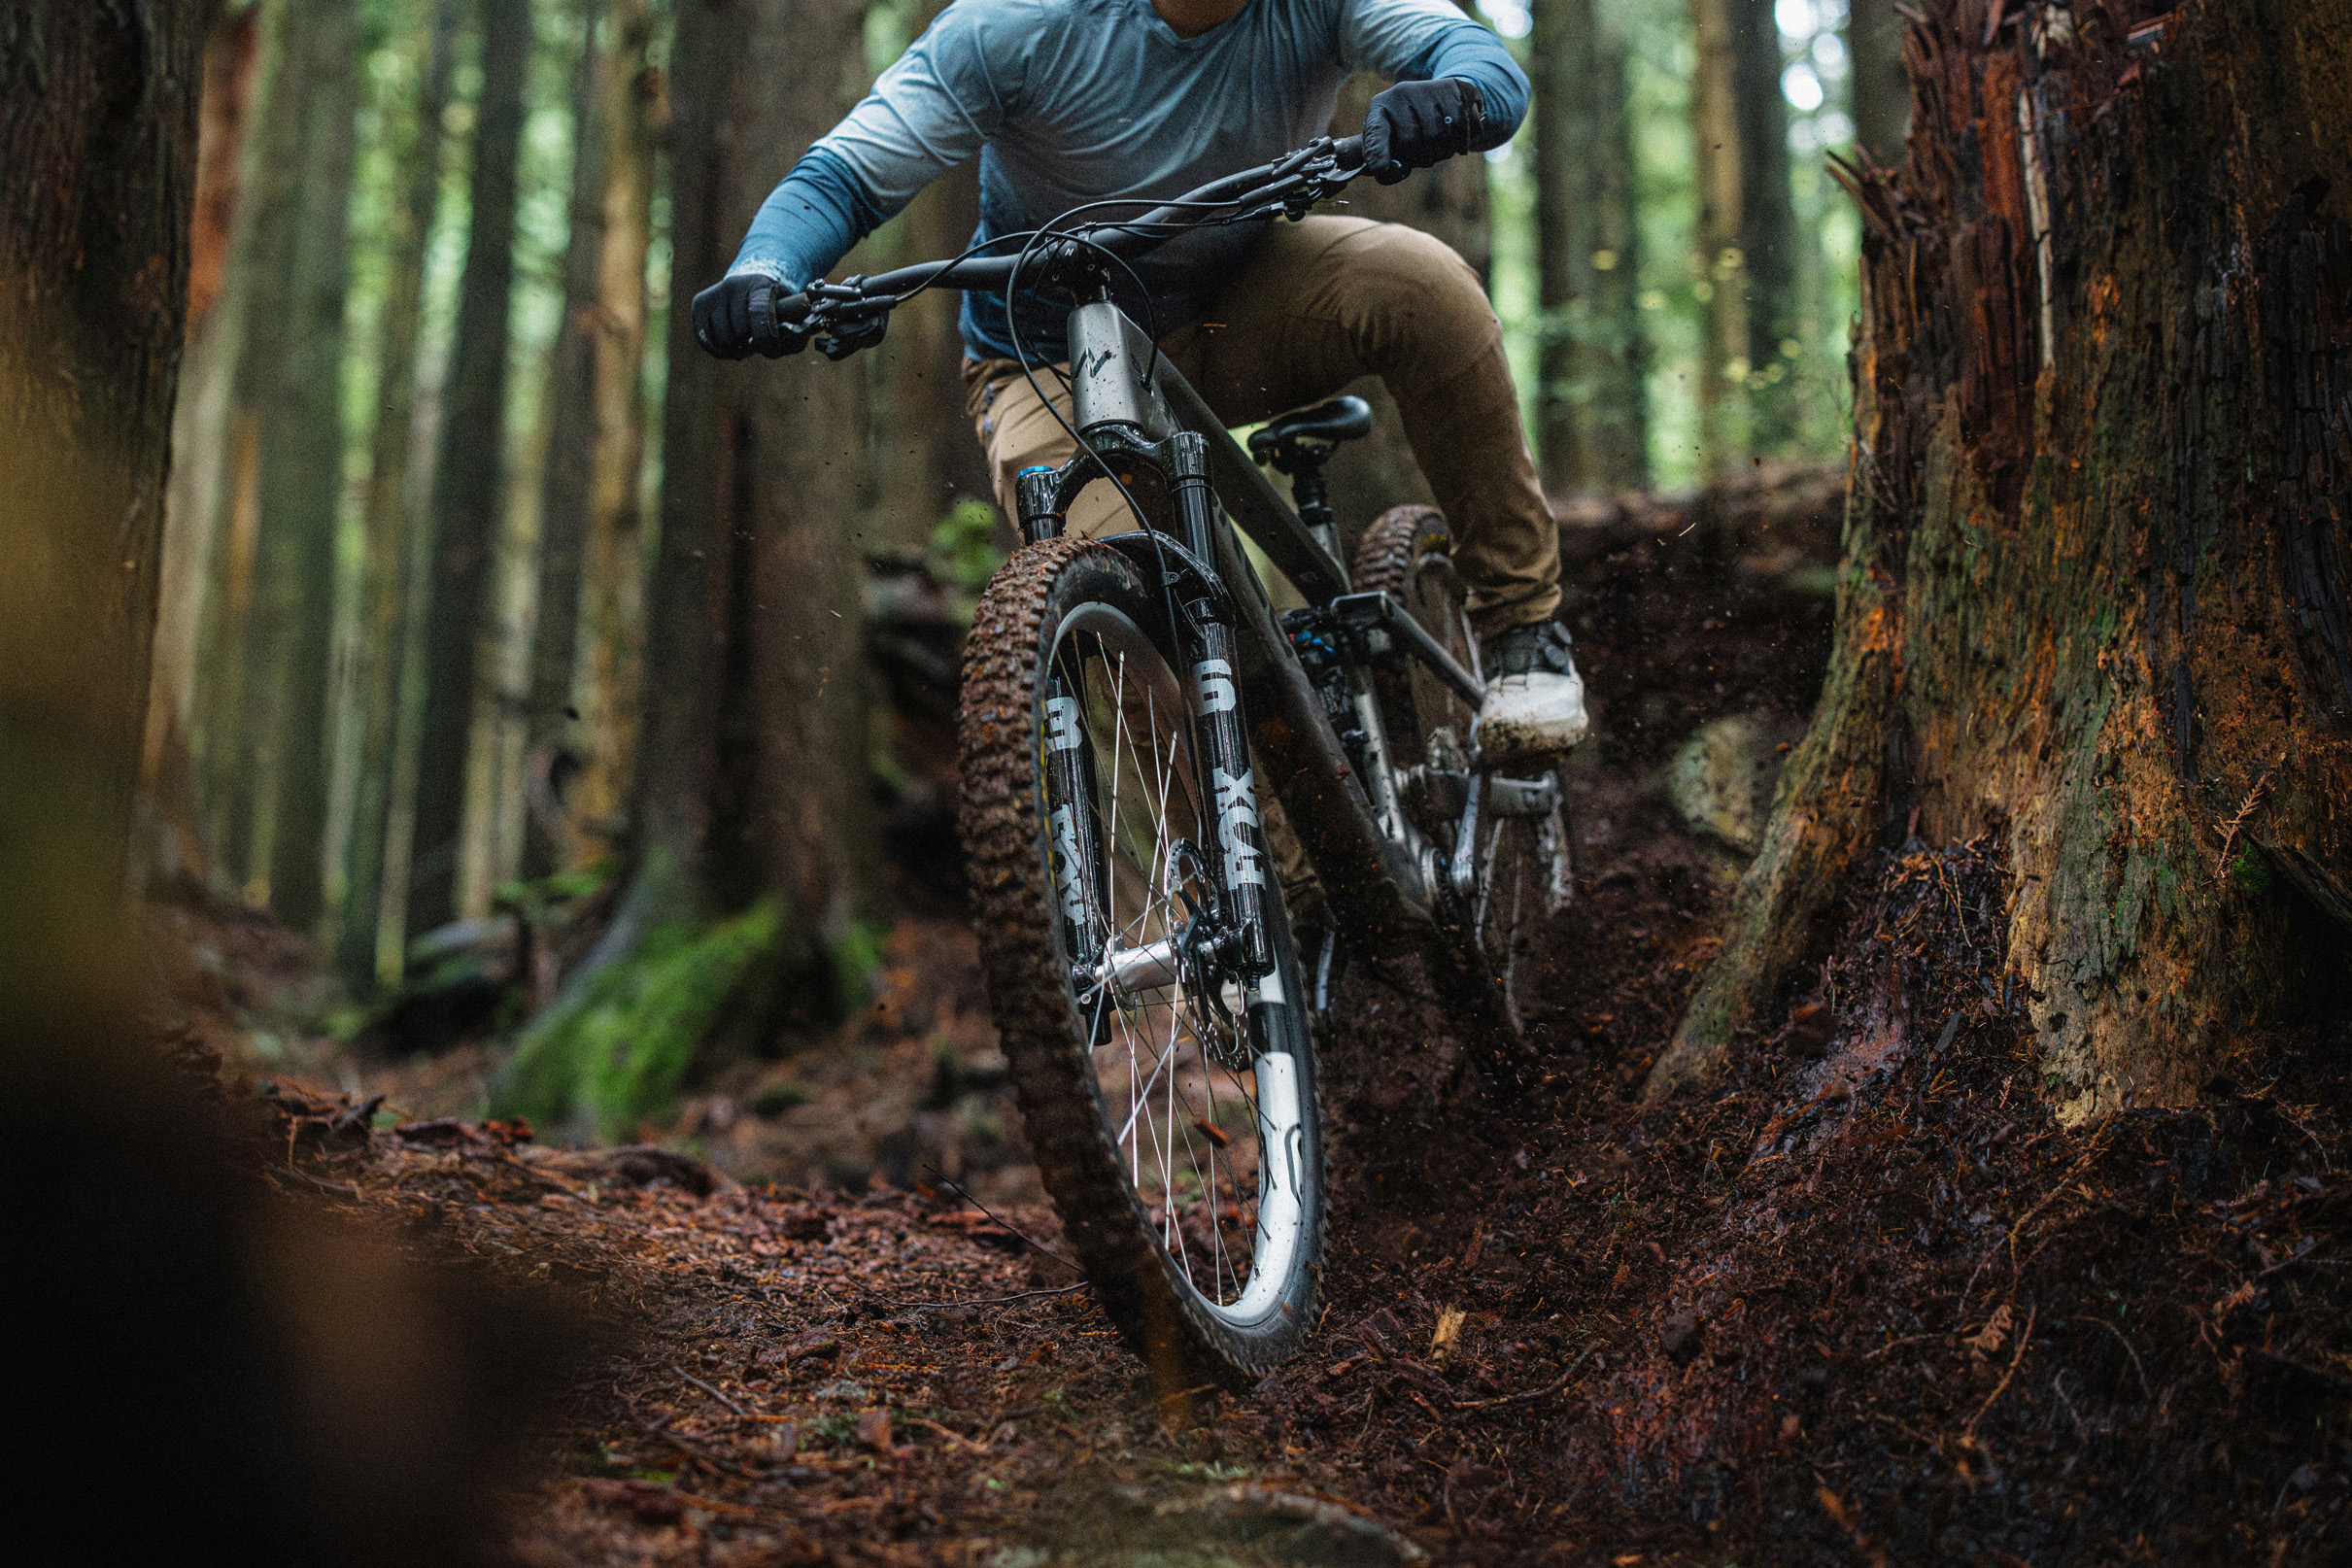
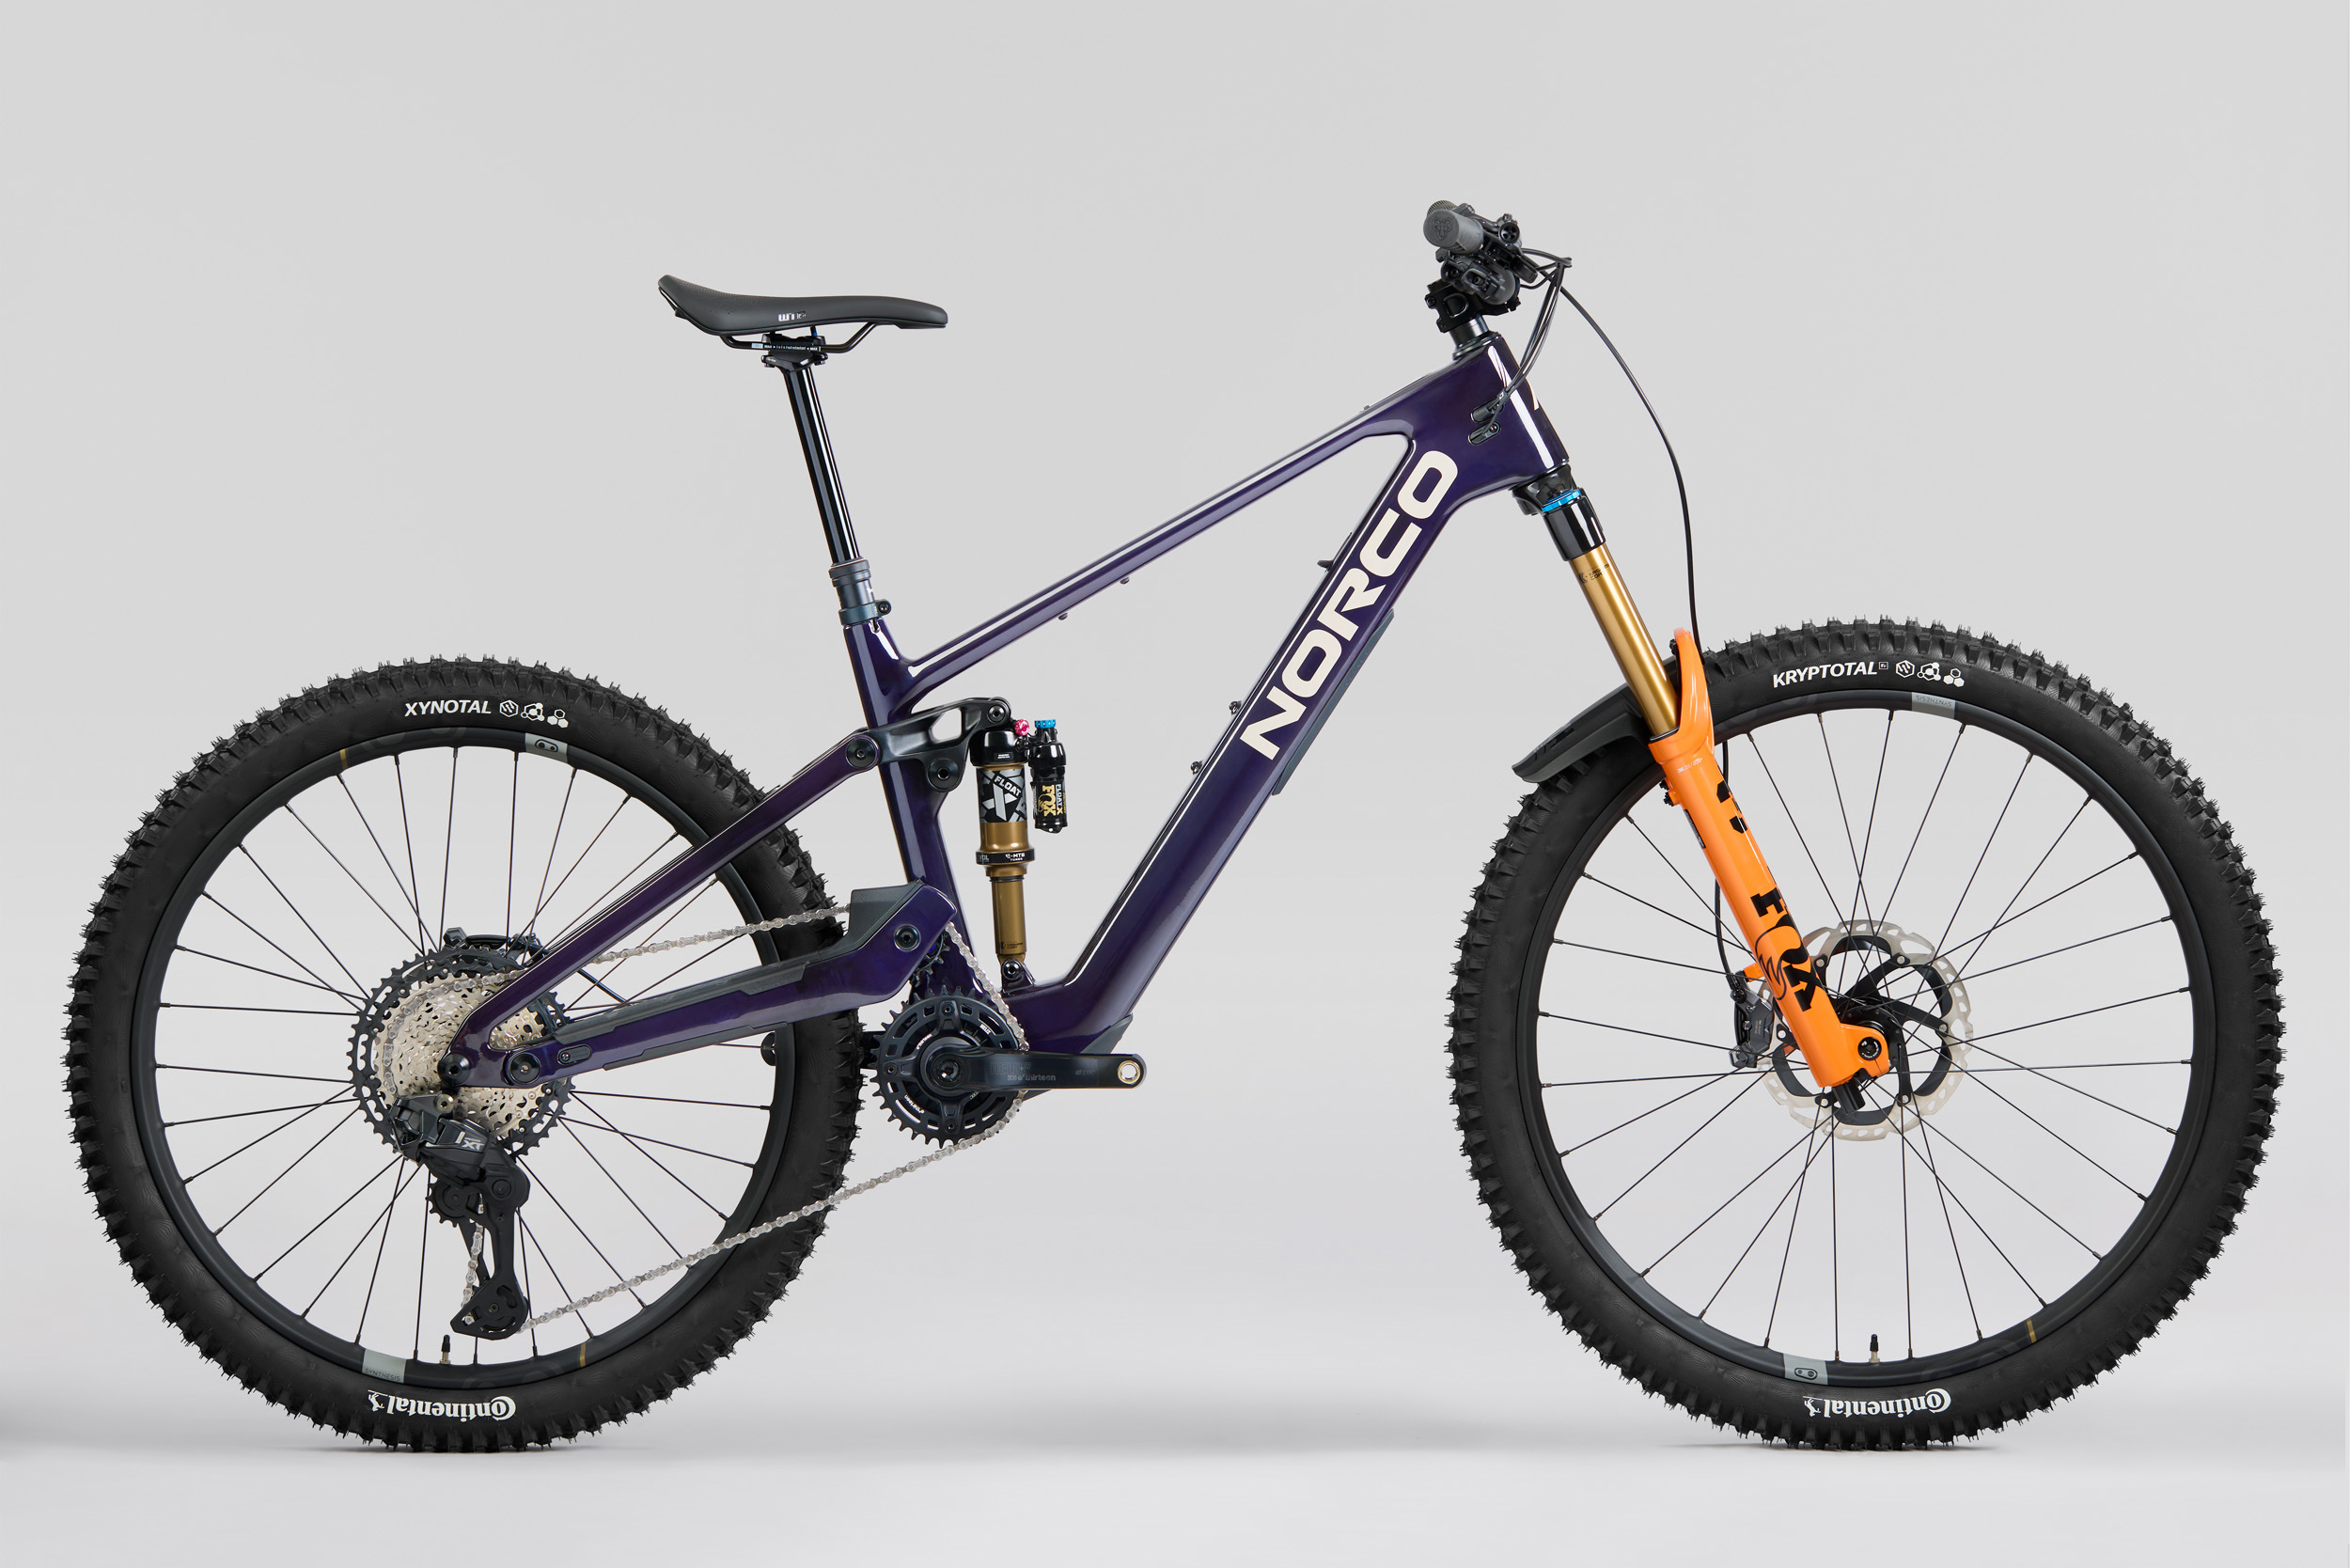
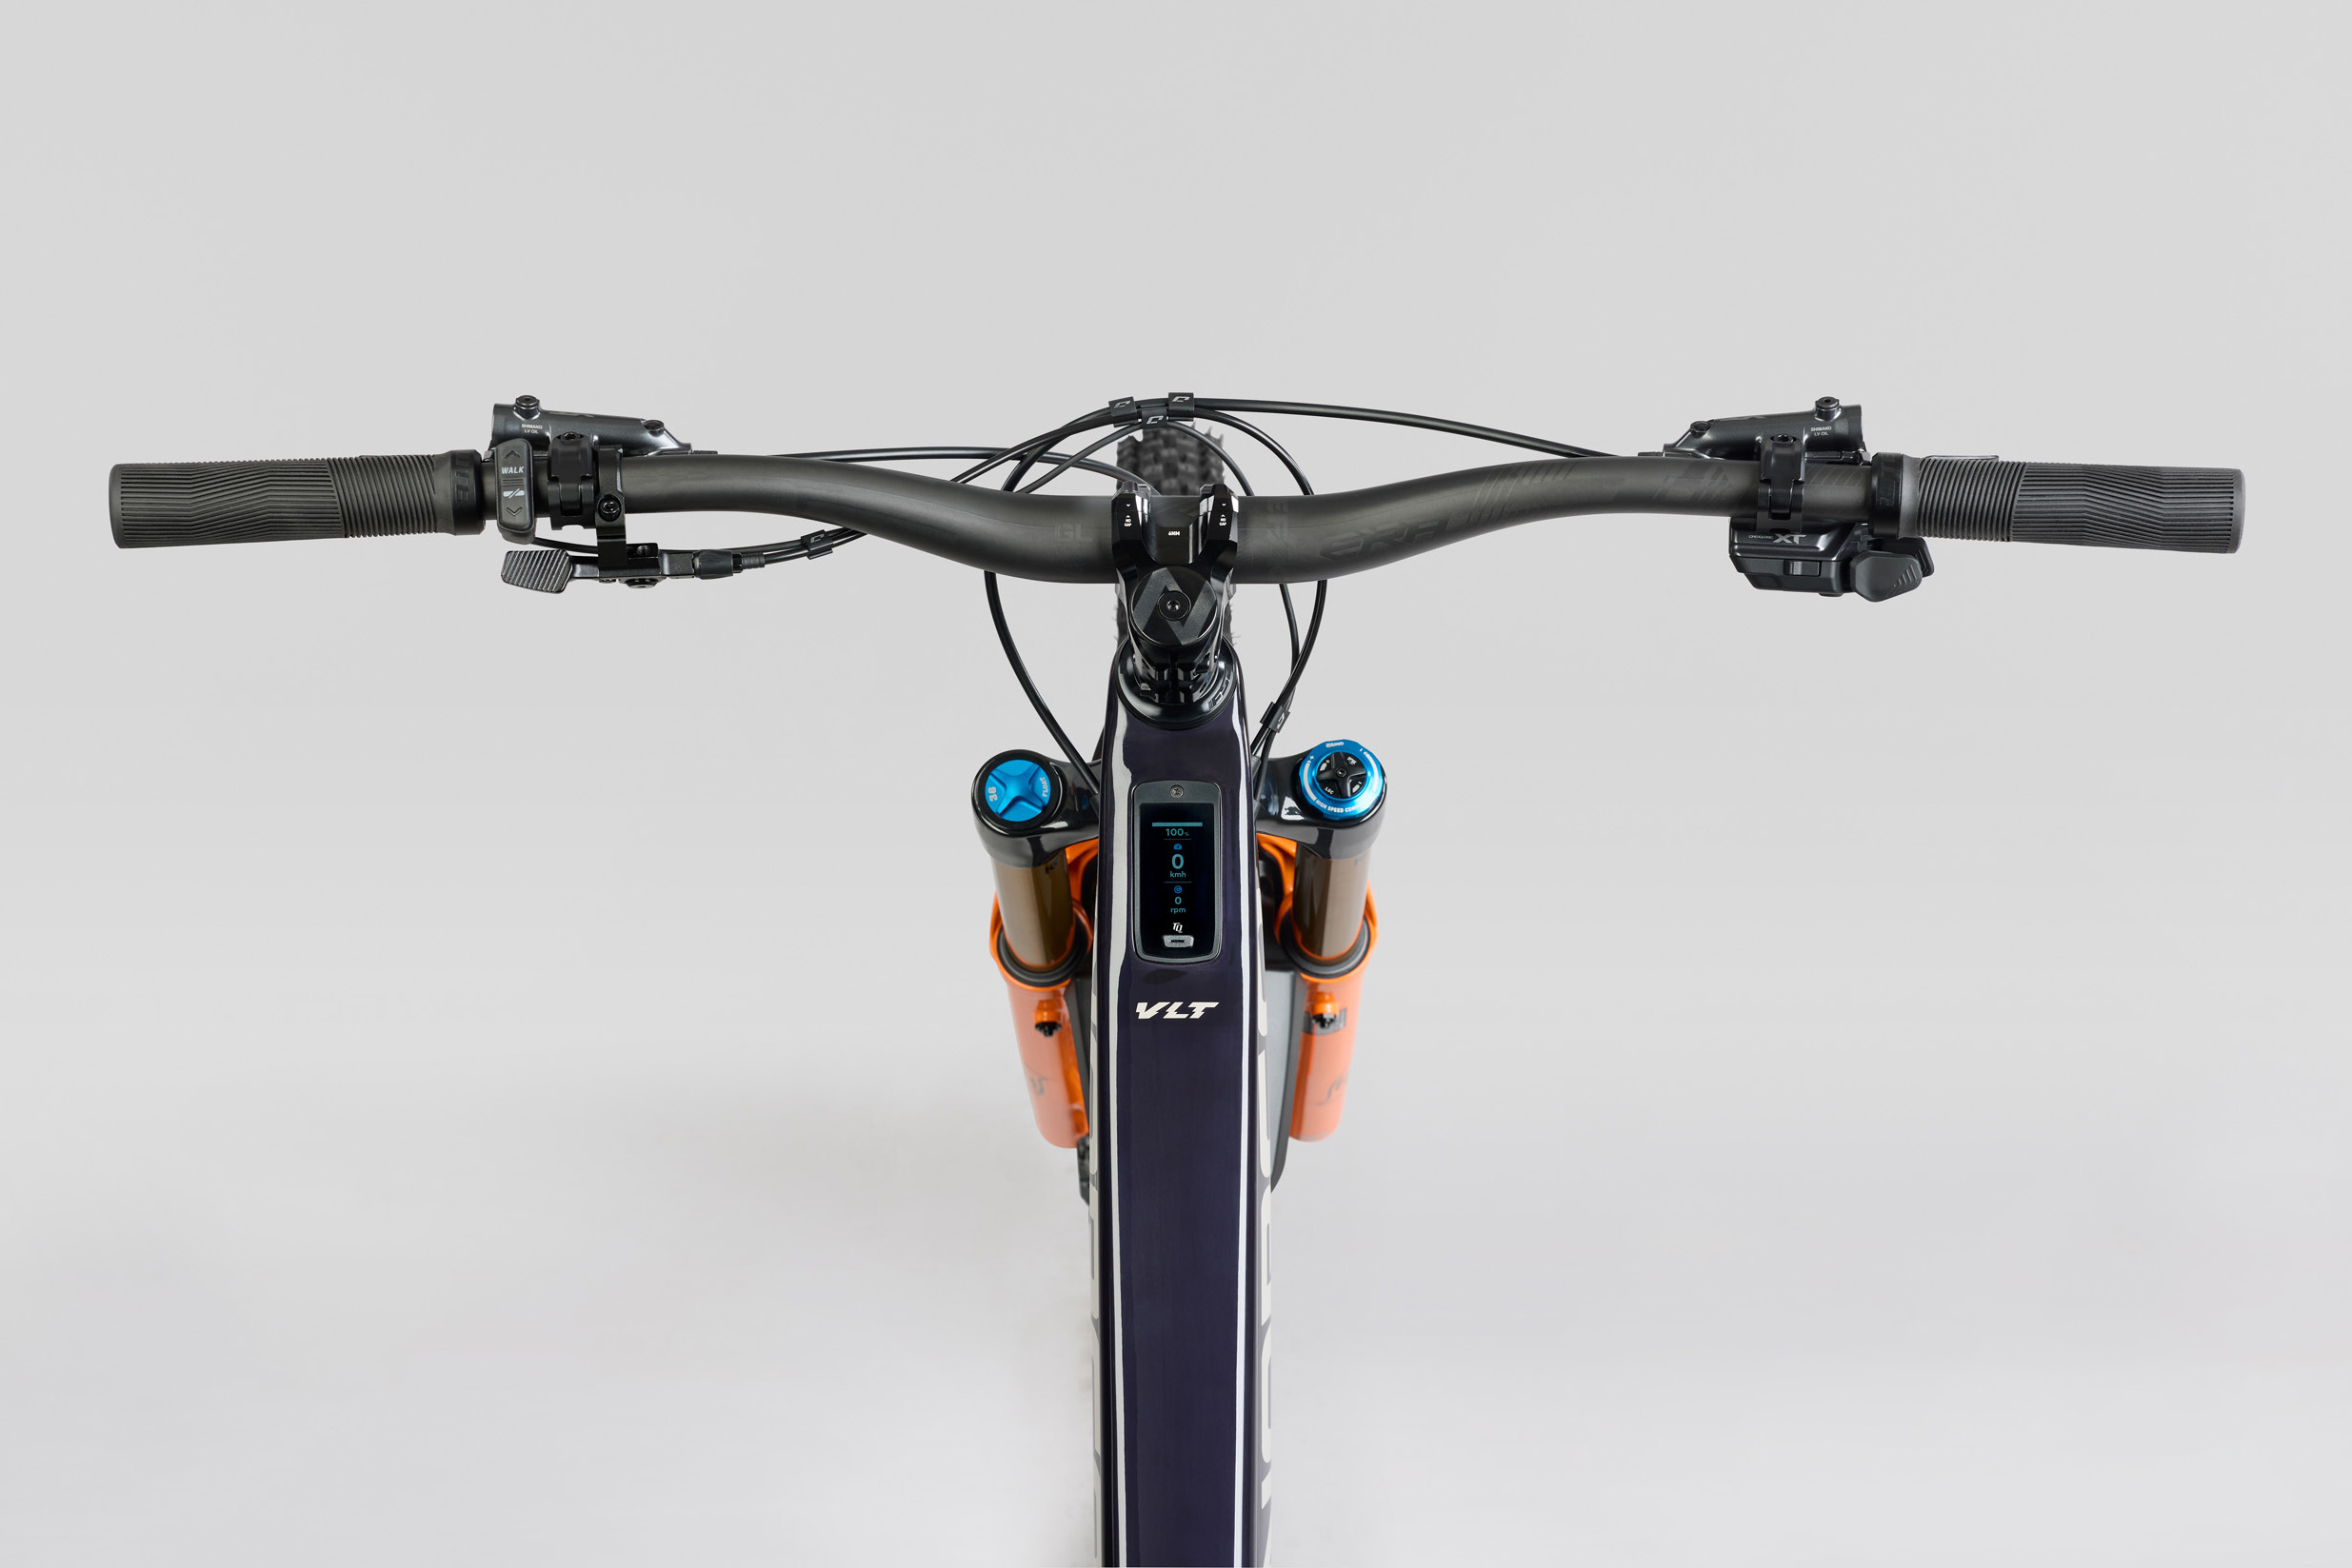
Norco has released the new Sight VLT TQ, a mid-power eMTB designed to deliver what the brand calls a “pilot, not passenger” ride feel.
The new electric mountain bike pairs a full-carbon frame with the compact TQ HPR60 drive system, aiming to blend the handling of a regular trail bike with subtle, seamless motor assistance.
It is built around the all-mountain Sight platform, which sees travel figures of 160mm for the fork and 150mm at the rear using the brand’s VPSHP suspension system.
Norco claims the TQ motor system weighs in at only 1.9kg, making the top-of-the-range Sight VLT TQ C1 top the scales at 19.05kg.
Pricing starts at $6,999 for the Sight VLT TQ C3, increasing to $8,999 for the Sight VLT TQ C2, with the Sight VLT TQ C1 sitting at the top of the range at $10,599.
TQ HPR60 motor
TQ’s motor is one of the lightest on the market. Norco
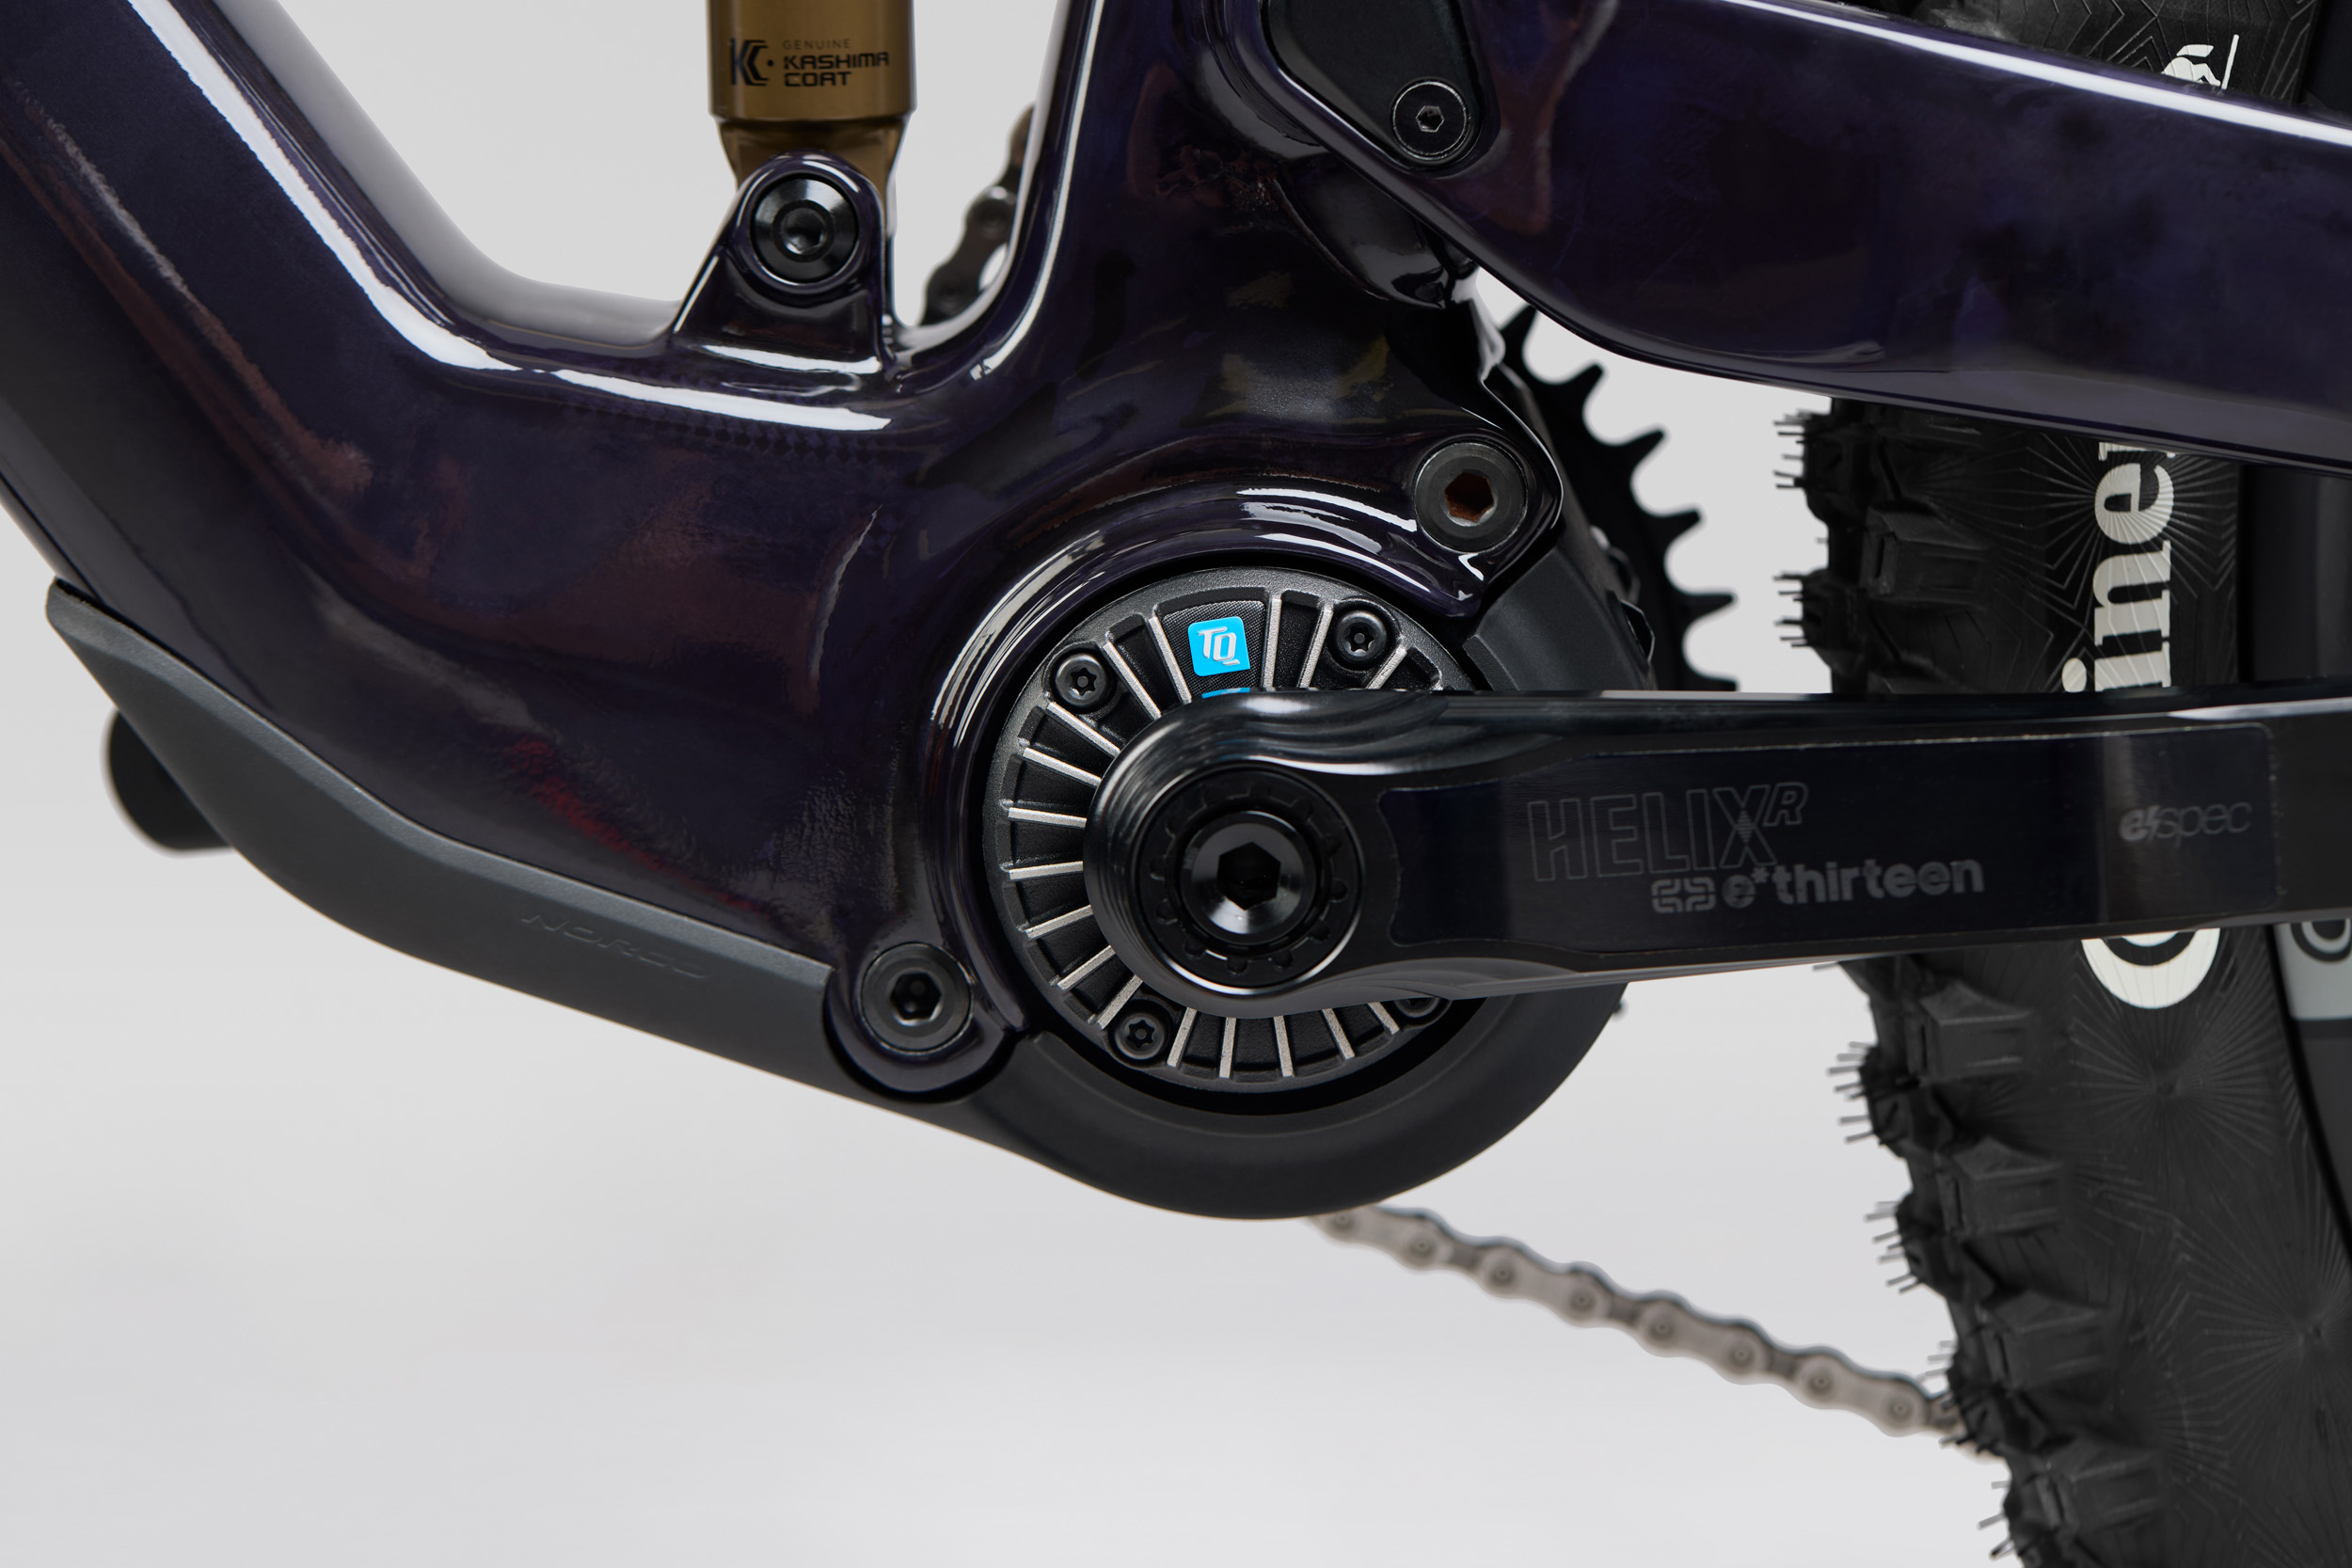
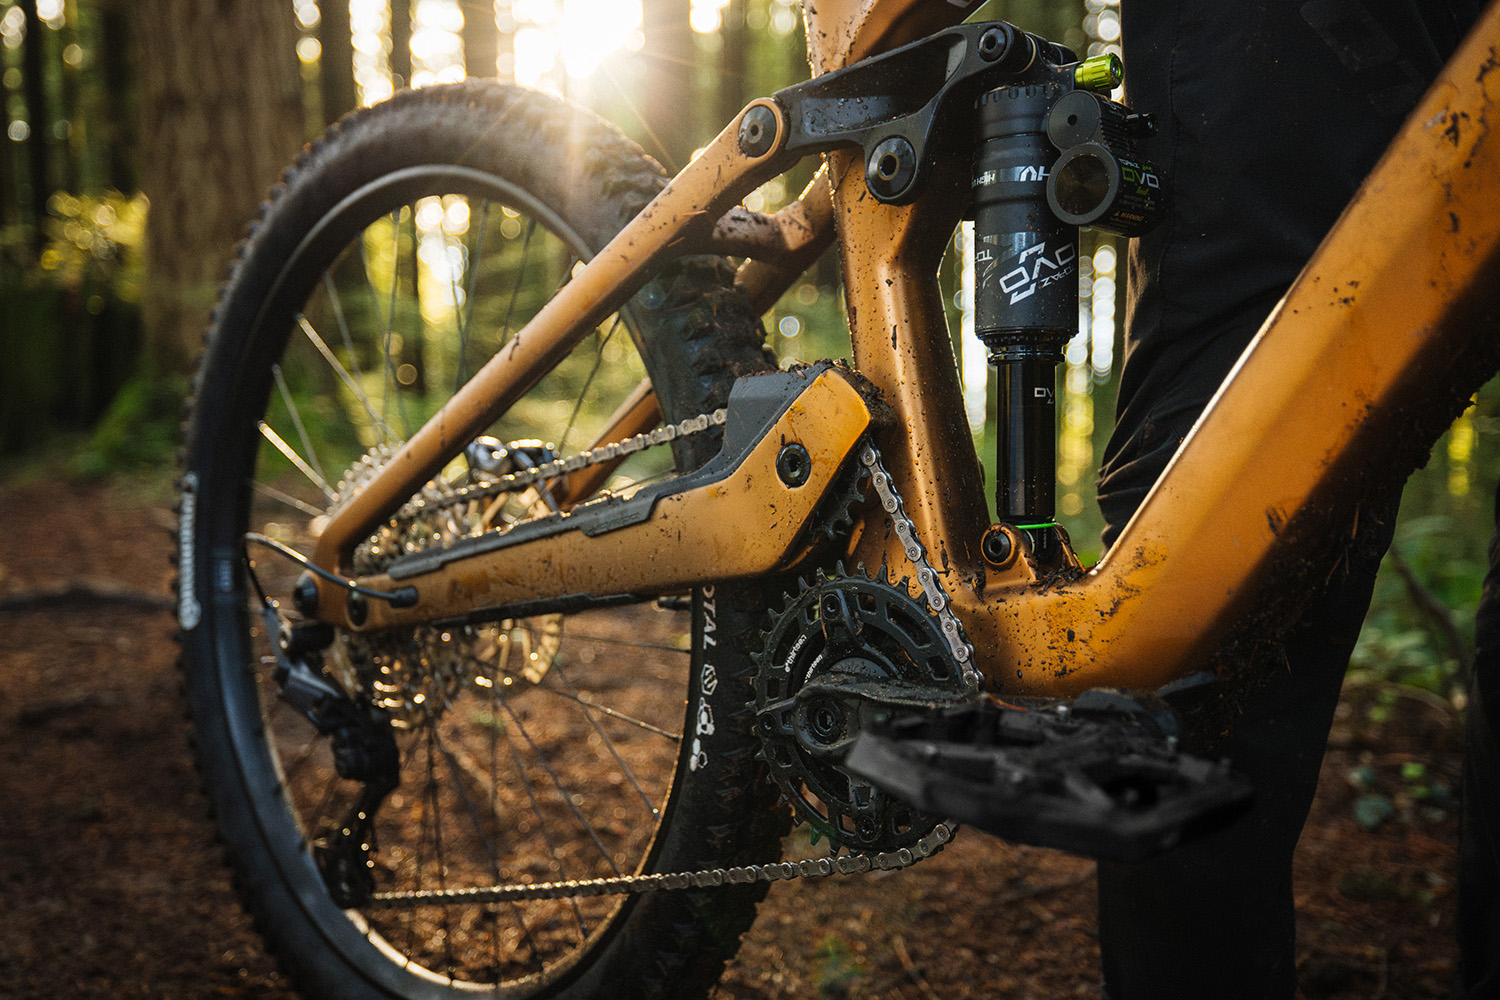
At the heart of the Sight VLT TQ is the TQ HPR60 motor system, giving the bike 60Nm of torque, 350W peak power and up to 200 per cent support.
It features a harmonic pin ring gearbox design, which is said to reduce the number of moving parts while increasing gear overlap.
The result, says Norco, is a lightweight and highly efficient drive unit with a notably quiet, natural ride feel.
The motor is paired with a 580Wh internal battery, with the option to add a 160Wh range extender for longer days in the saddle.
You can customise how the bike delivers power in the TQ app. Norco
You can also tune support characteristics via the TQ app, with updates delivered automatically over Bluetooth.
Norco’s senior product manager, Paul Burnett, says the goal was clear from the outset: balance.
“We wanted to make an eMTB that has the perfect balance of weight and power. The innovative TQ system, combined with our proven Sight VLT platform and VPSHP layout, gave us the ability to accomplish all those goals.”
Mixed wheels, size-specific rear centres and full-carbon frames
The Sight VLT TQ C1 features Fox Factory suspension. Norco
The Sight VLT TQ will be available in five sizes (S1–S5), with Norco’s size-specific rear-centre lengths designed to maintain consistent handling characteristics across the range.
A mixed-wheel, mullet configuration is said to combine front-end stability with rear-end agility.
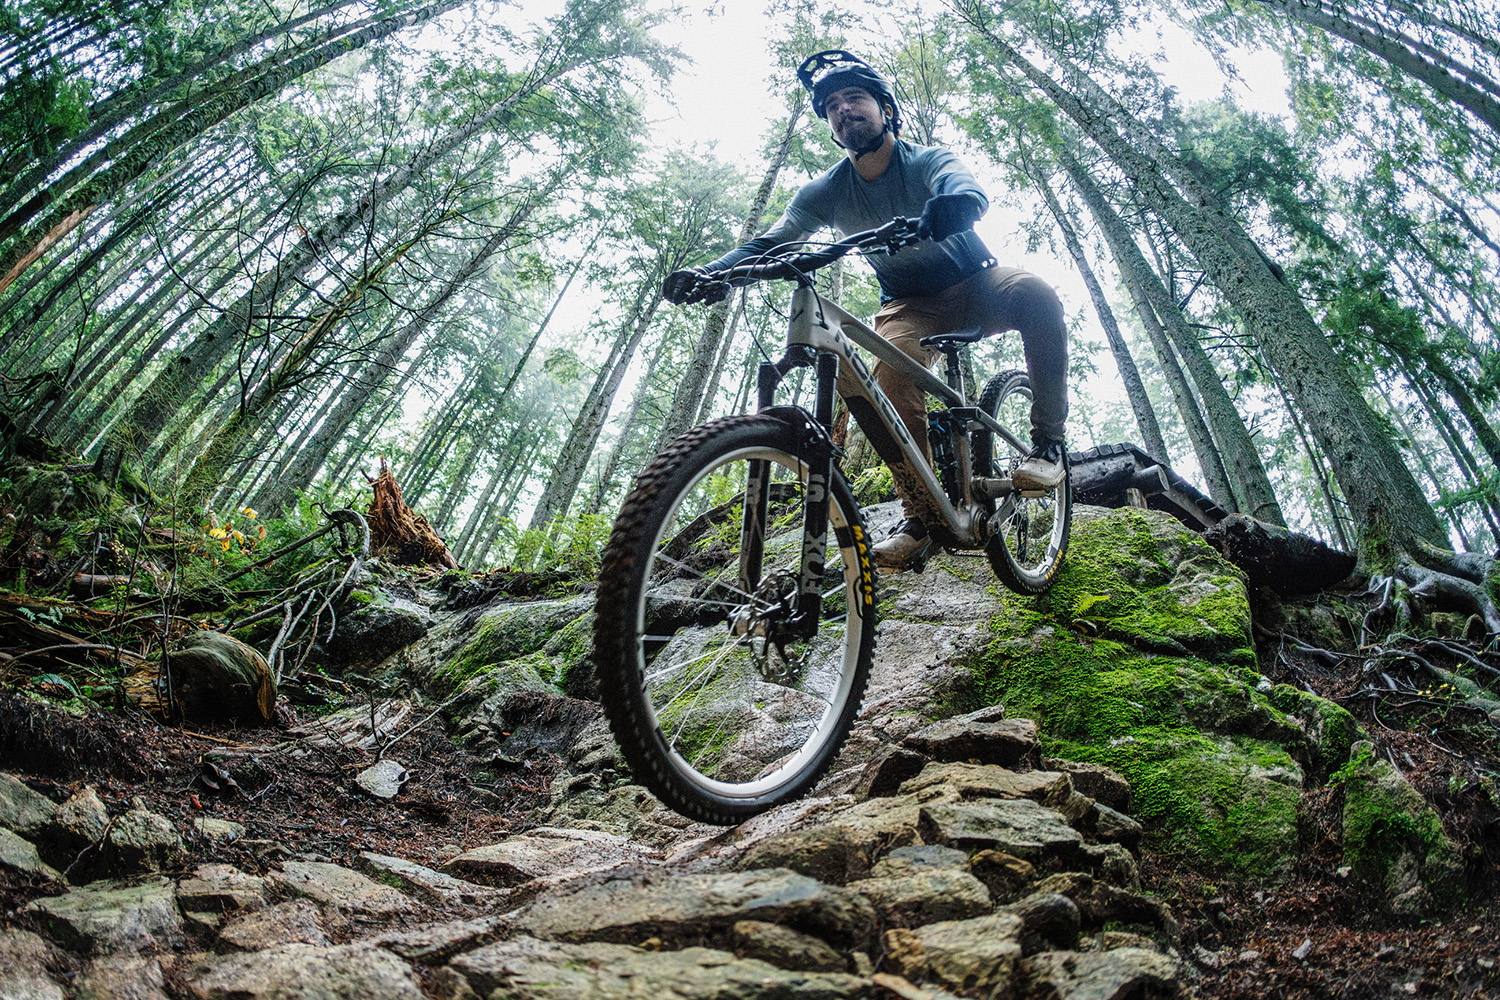
High-pivot eMTBs aren’t common. Norco
Norco’s VPSHP (Virtual Pivot Suspension | High Pivot) layout delivers efficient climbing and composed descending through rough terrain.
Like many high-pivot designs, it increases the rearward axle path to improve suspension performance in technical terrain.
This silver colourway looks amazing. Norco
Norco says the rearward axle path maintains momentum and keeps you on line as speeds pick up and trails get rough.
Enhanced trail experience
Norco says the bike has a “natural feeling”. Norco
Rather than chasing outright torque and performance figures, the Sight VLT TQ is intended to be focused on riders who are yet to take the plunge into riding eMTBs, much like Orbea’s Rallon RS, enhancing rather than overpowering traditional trail riding.
A display is integrated into the top tube. Norco
The brand says the bike is aimed at “the e-curious, the ride-purists, and anyone who wants to unlock more laps without compromise”, with a ride character intended to feel intuitive and unobtrusive.
Cannondale officially launched its much anticipated SuperSix EVO road bike and SuperSlice time trial bike yesterday, and so EF Pro Cycling’s fleet of team bikes has been updated for the 2026 season.
While many bike brands have tacked towards creating race bikes that cater to a broader audience, Cannondale seems to have moved in the other direction with the new SuperSix EVO.
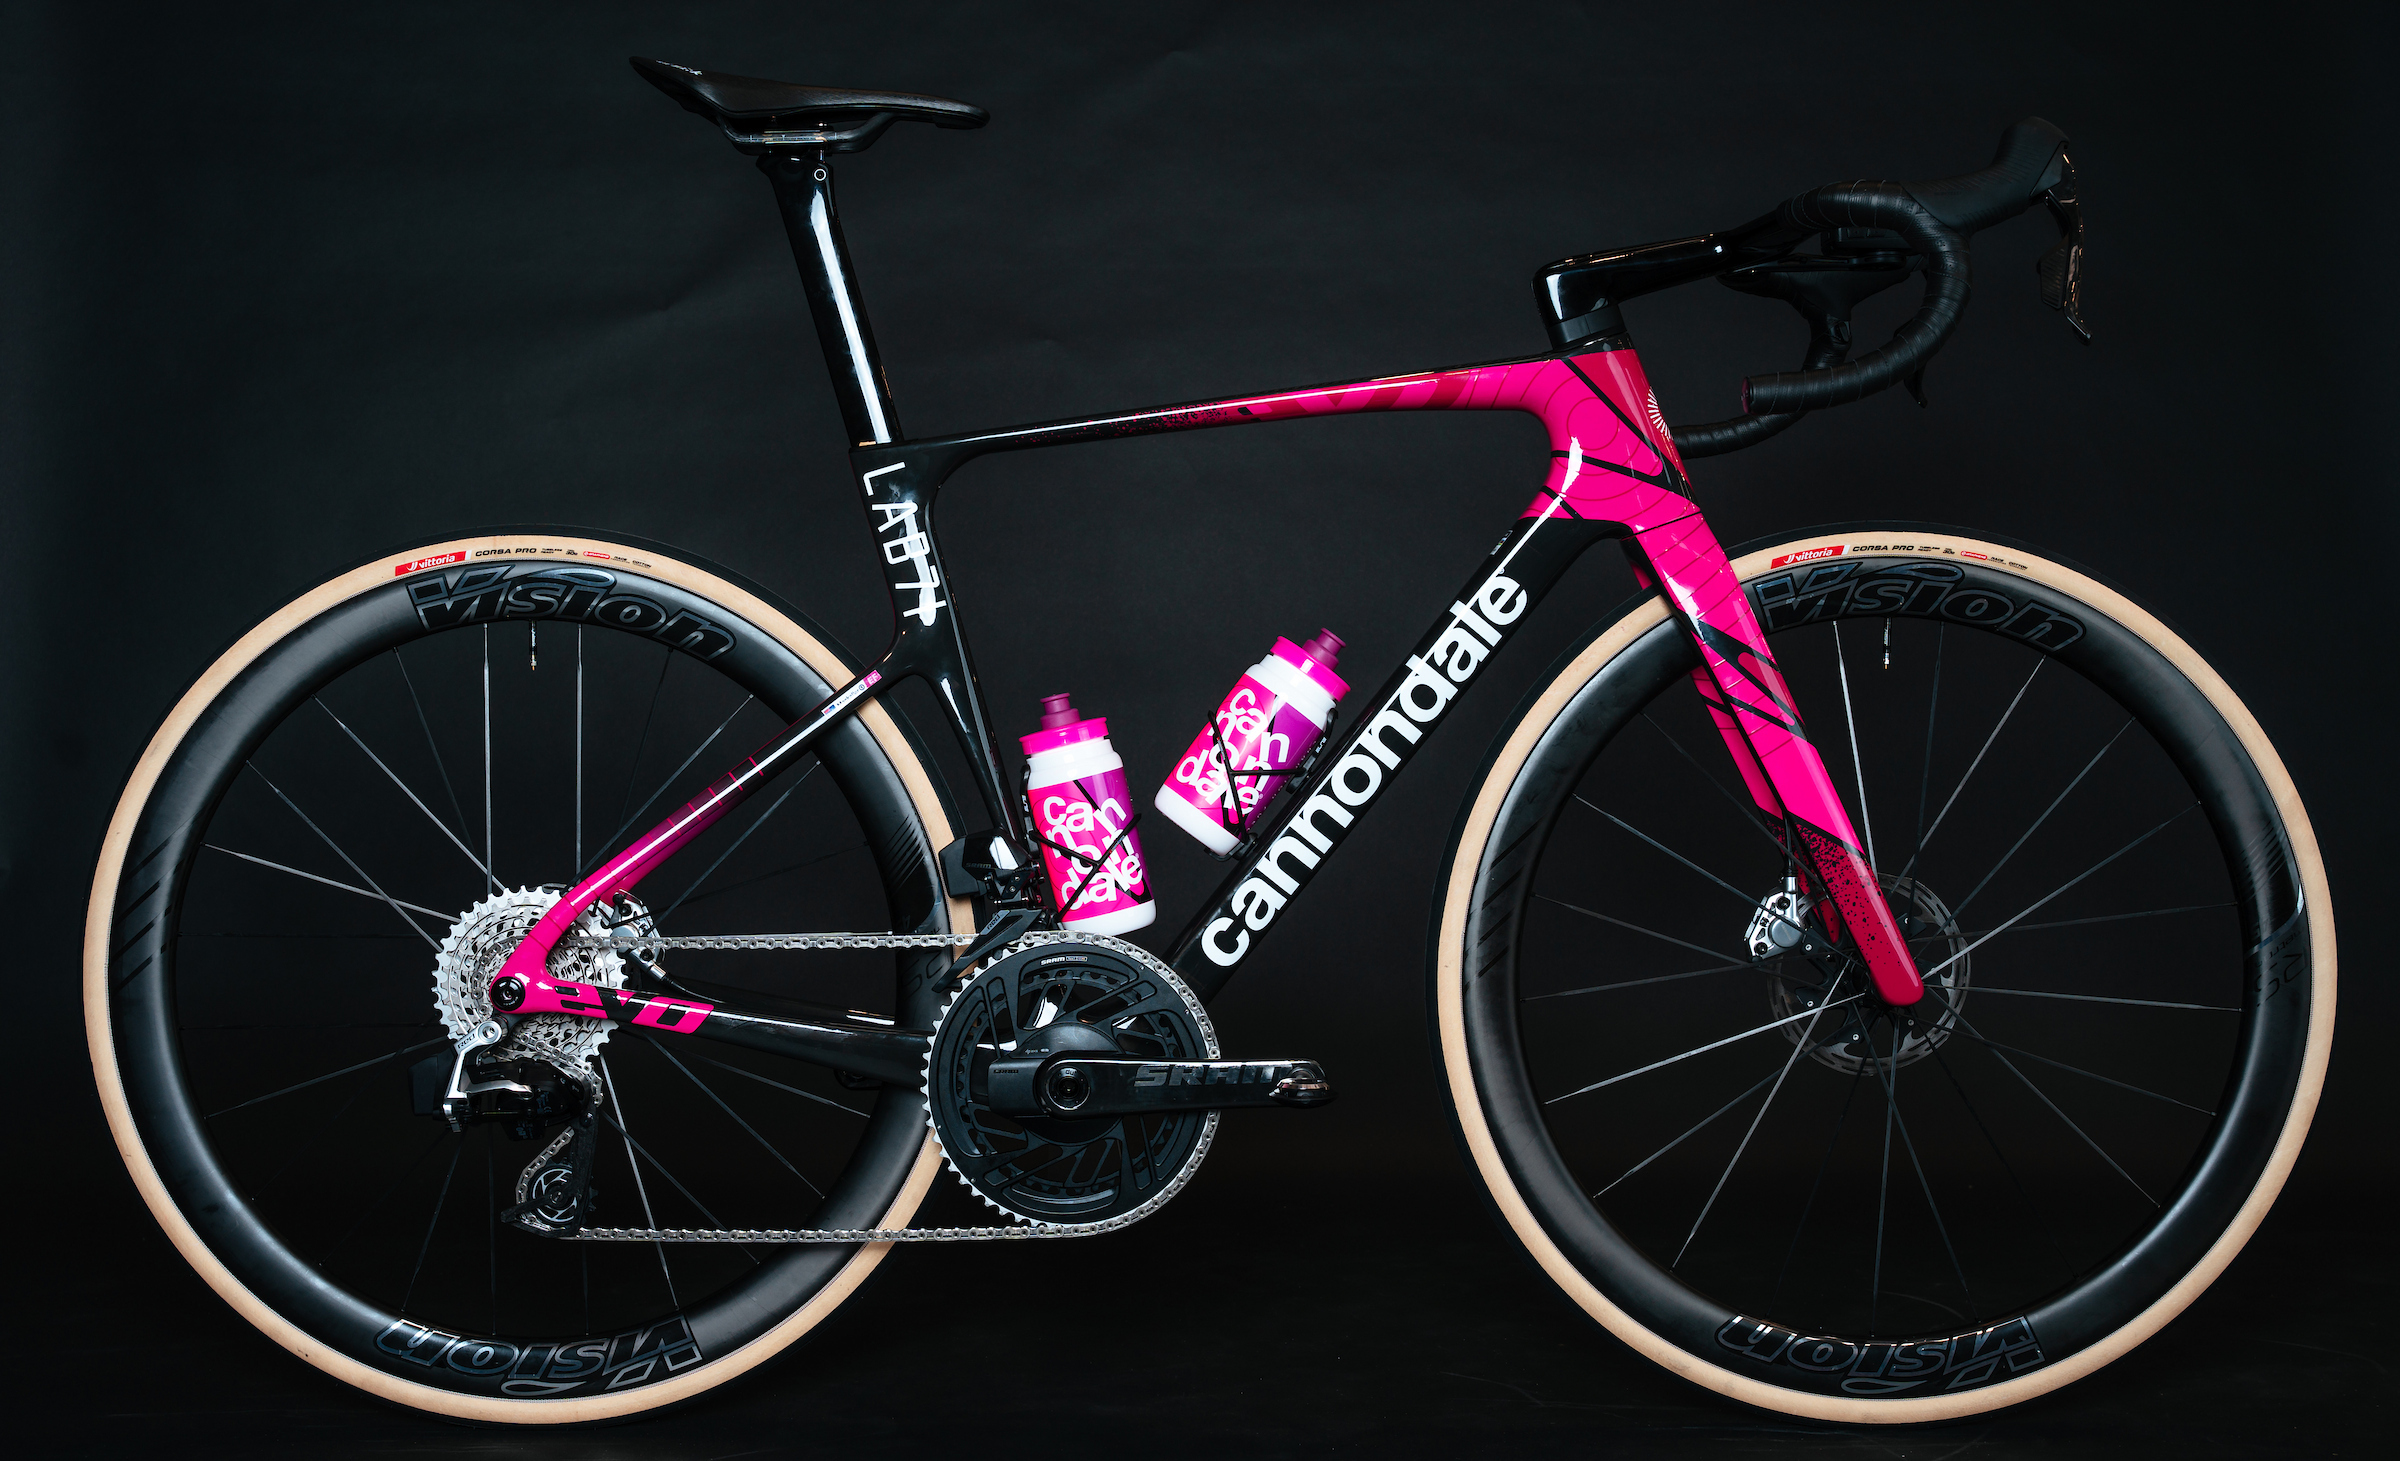
EF Pro Cycling’s new Cannondale SuperSix EVO Lab71 race bike. EF Pro Cycling
Cannondale designed the fifth-generation, all-round race bike with the specific input of EF Pro Cycling’s roster of riders. Cast your mind back to the 2025 Tour de France, and you’ll remember Ben Healy animating much of the race with long-distance attacks and a stint in the yellow jersey.
The geometry of the SuperSix has been made more aggressive with a lower stack – although one that’s now more in line with bikes such as the Specialized Tarmac SL8 – which it’s hard to image hasn’t been done to accommodate Healy’s exploits (Road World Championships 2027, anyone?).
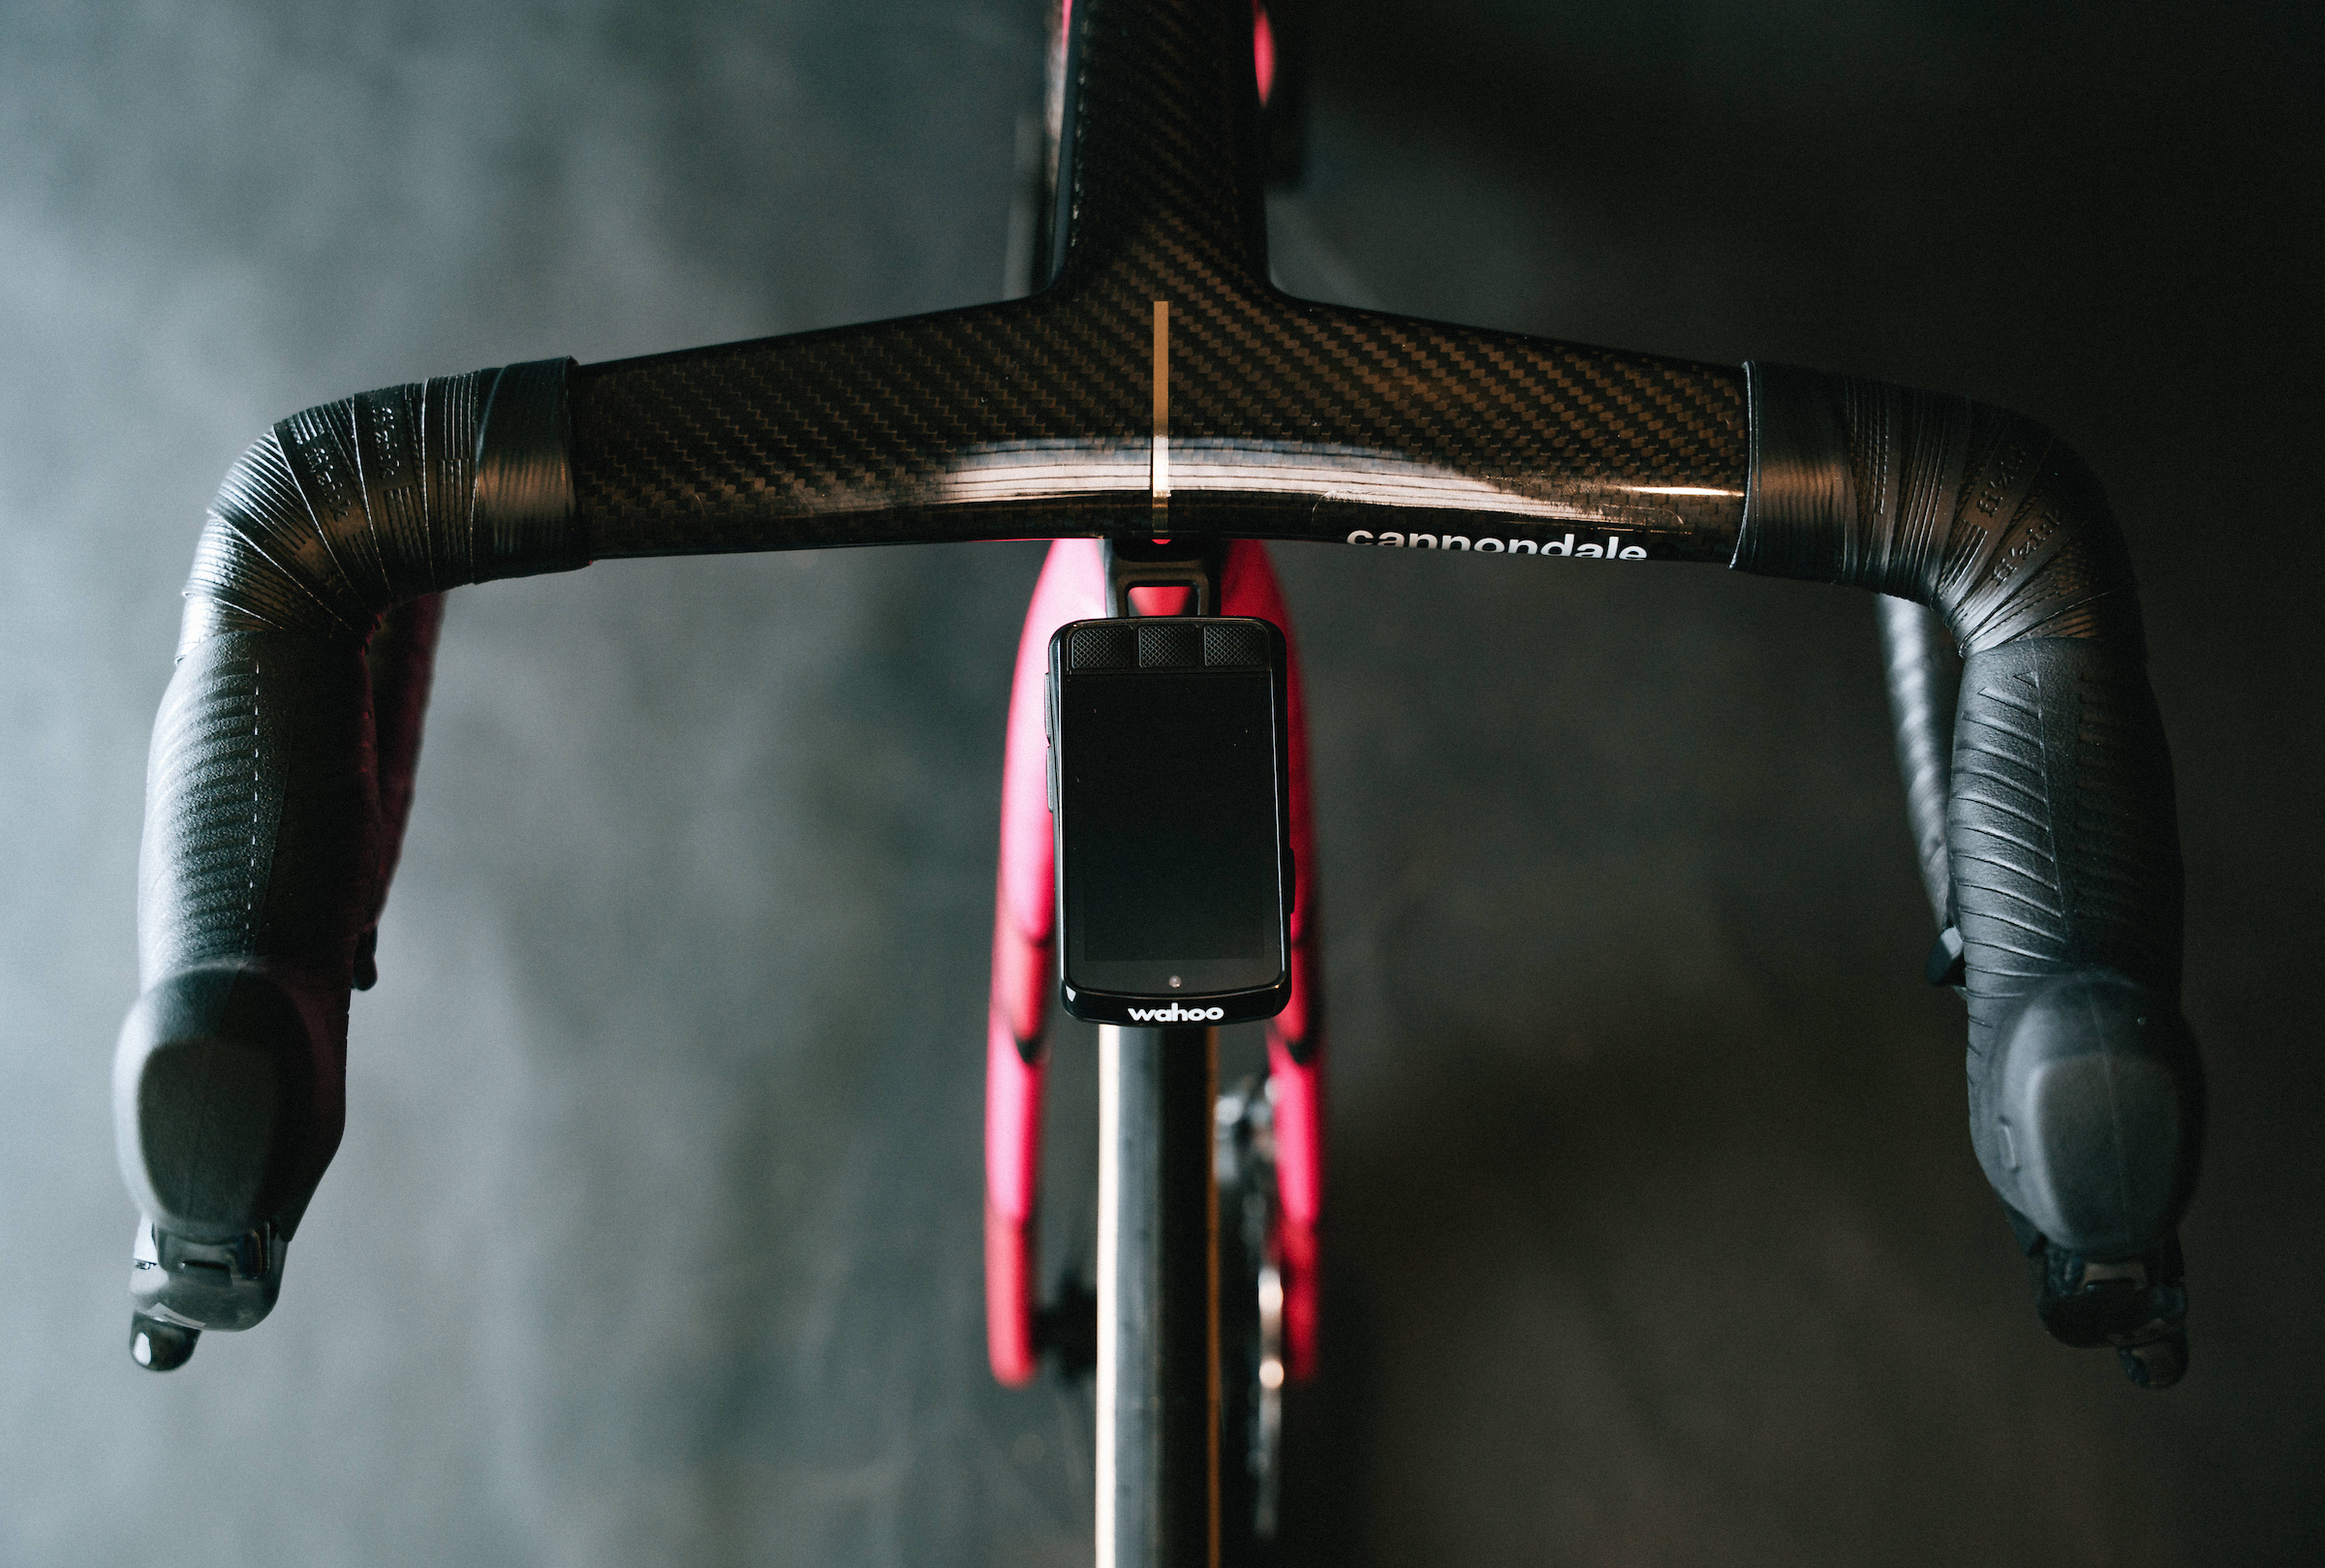
The SuperSix EVO comes with one of two new cockpits, the SL and SystemBar Road (pictured). EF Pro Cycling
You might have to look twice to tell the difference between the new SuperSix and the previous generation, with Cannondale making only small changes to the exterior of the bike for marginal gains in the wind tunnel.
Instead of a radical overhaul, Cannondale focused on reducing the weight of the bike. For EF Pro Cycling’s top-spec SuperSix EVO Lab71 bikes, this means a frame that weighs 728g in a size 56cm. And with changes made elsewhere, including a new cockpit, the new Lab71 bike weighs a claimed 148g less than the fourth-generation SuperSix.
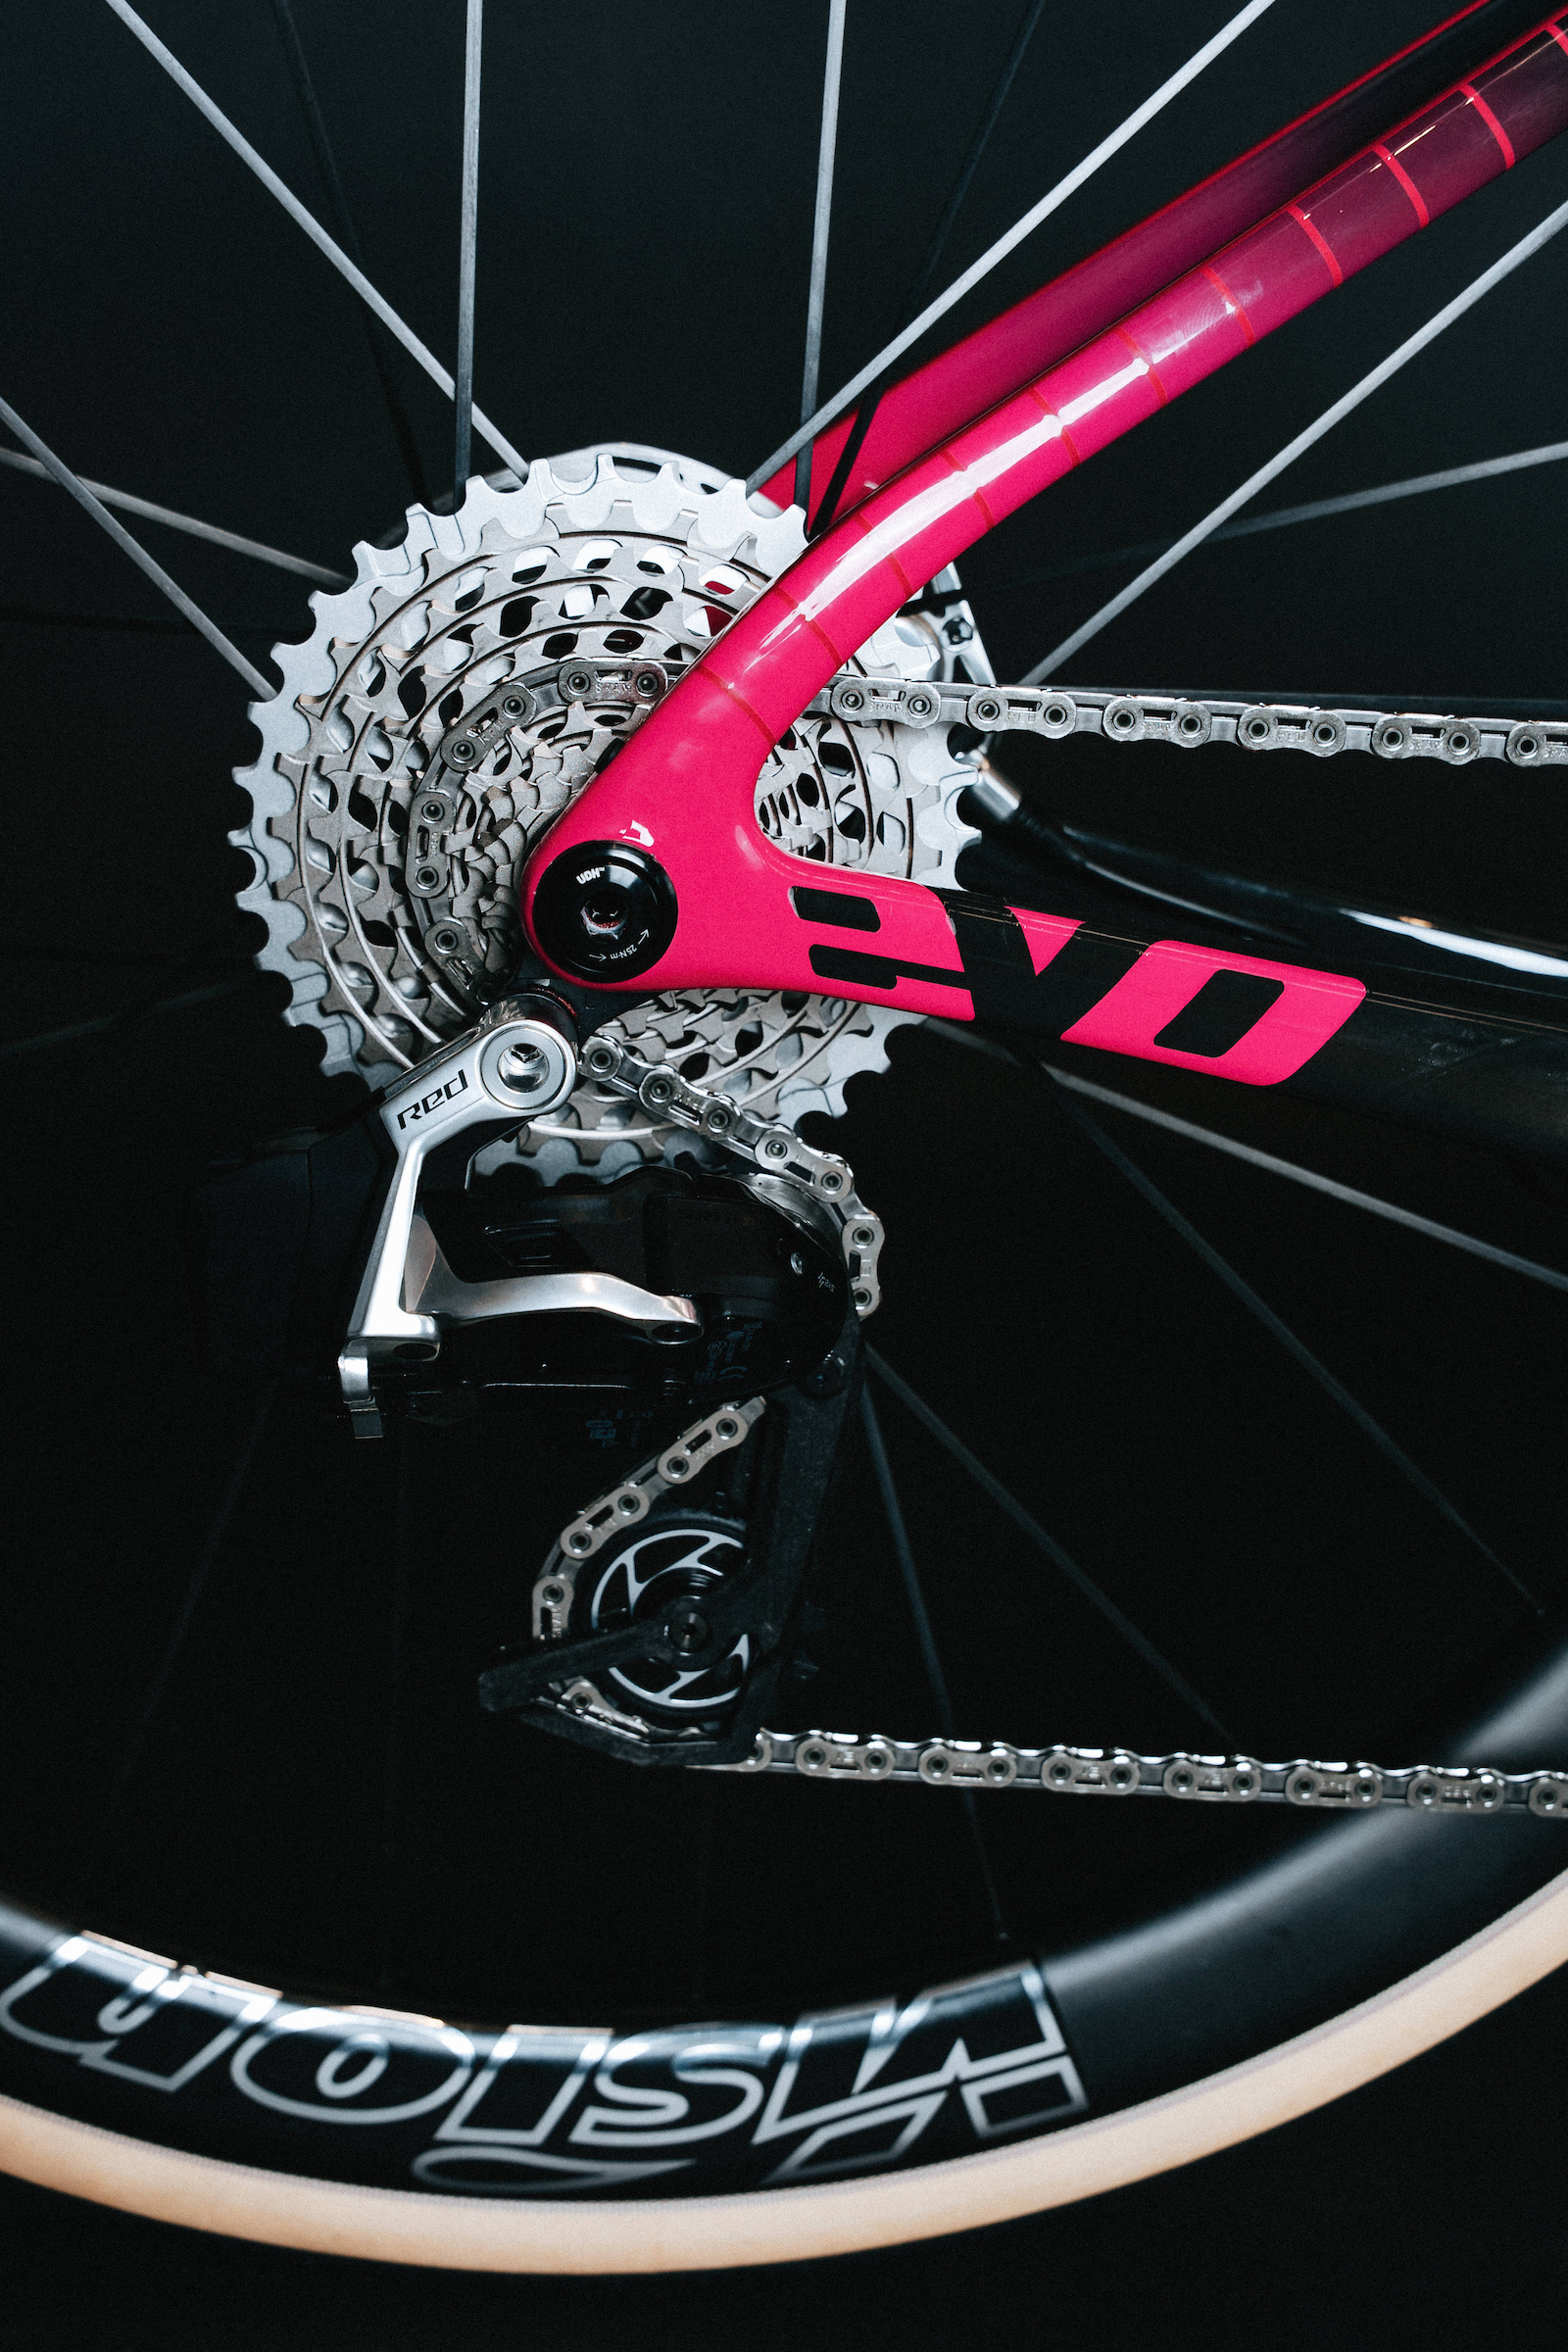
The bikes are fitted with SRAM’s top-spec Red AXS groupset. EF Pro Cycling
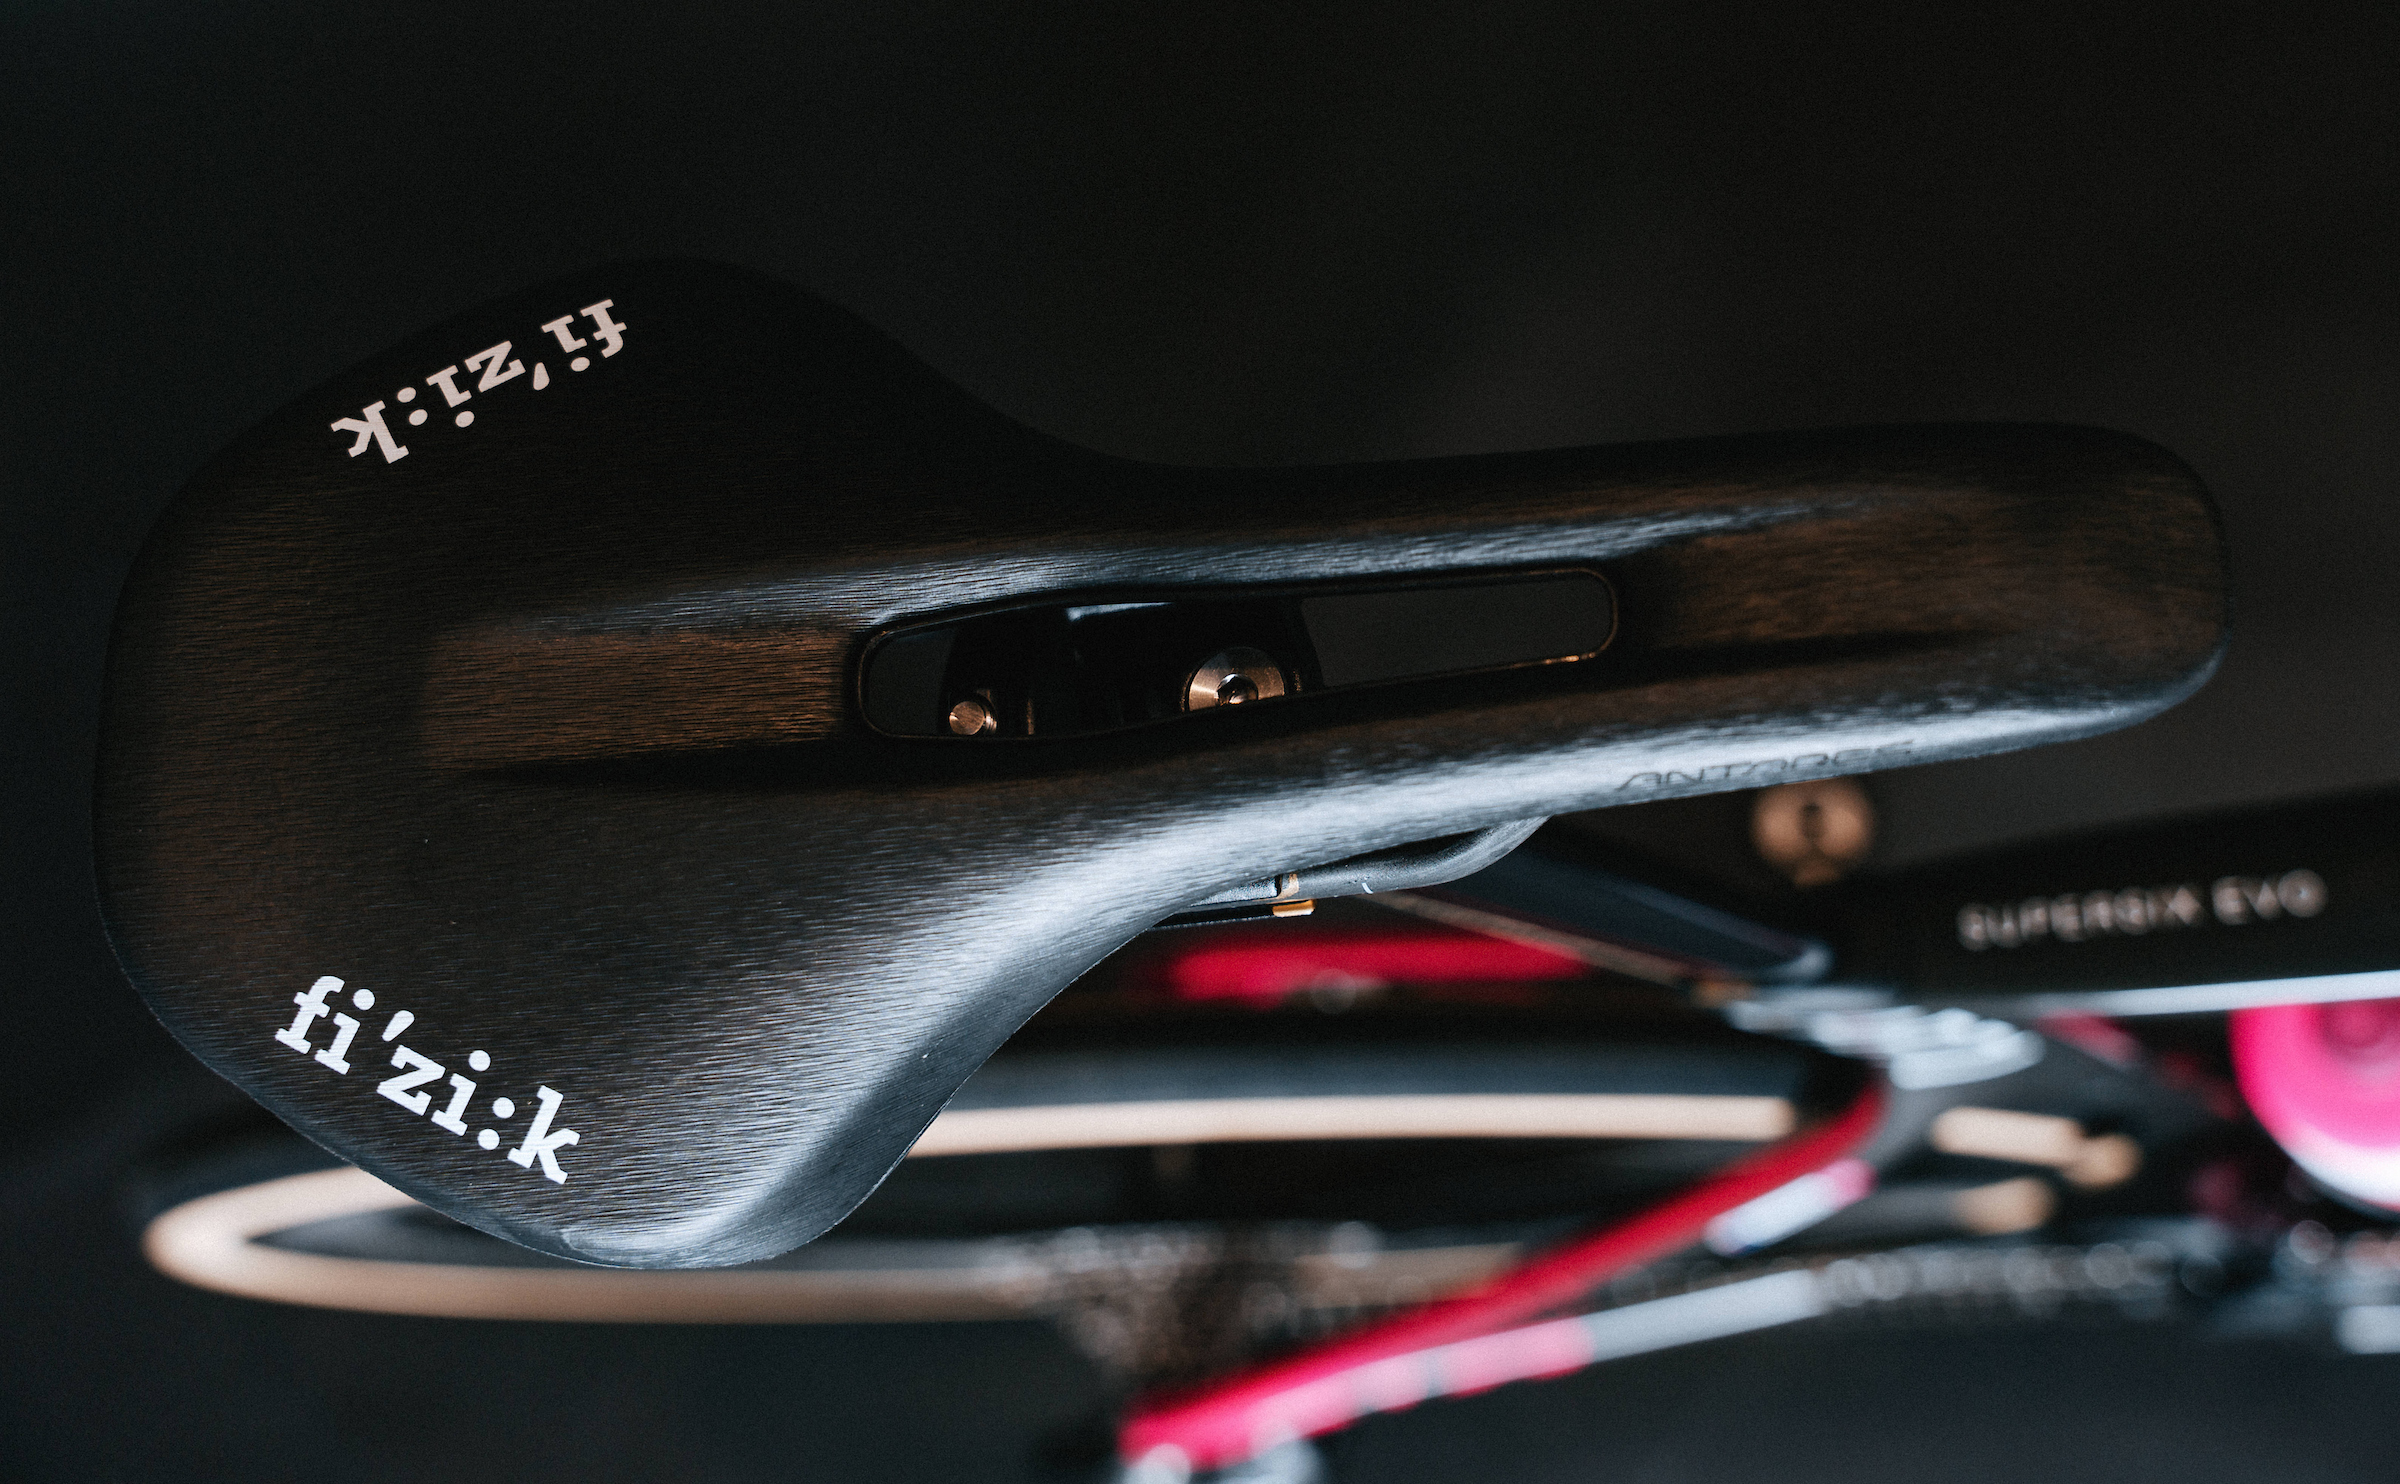
EF Pro Cycling’s bikes have Fizik saddles. EF Pro Cycling
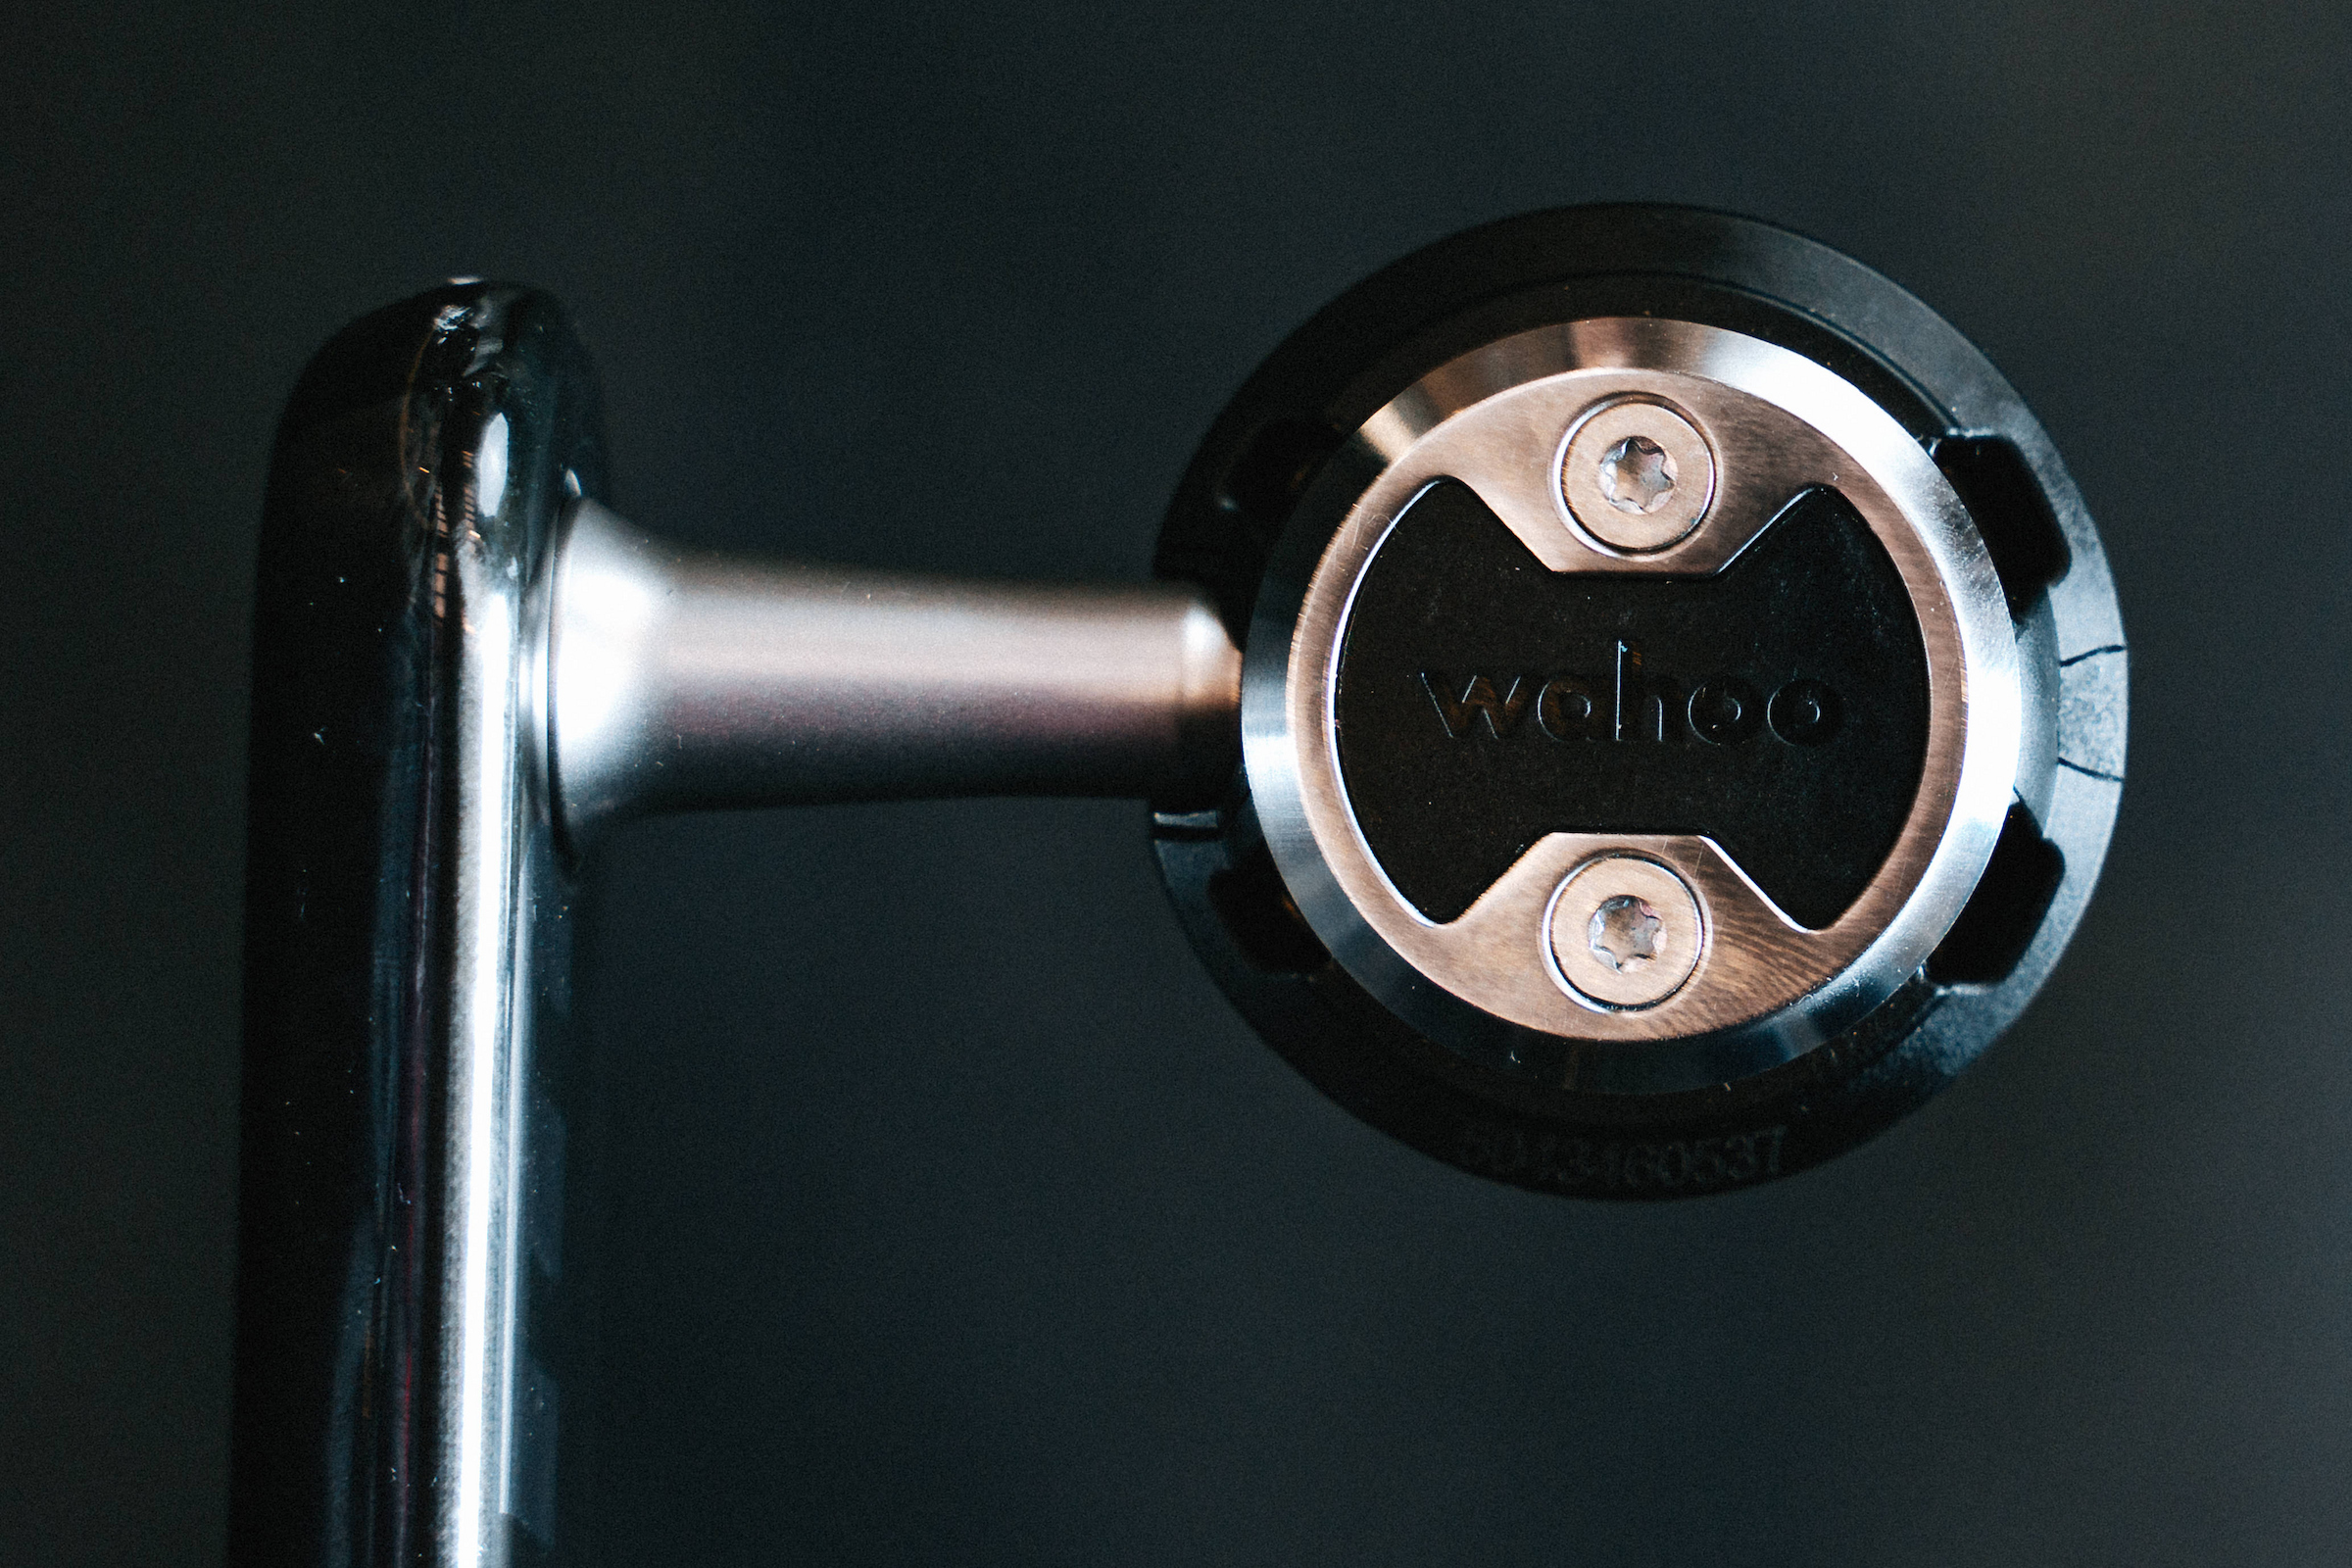
The team continues to use Wahoo Speedplay pedals. EF Pro Cycling
That frame is under snazzy new paintwork for EF’s men’s and women’s teams that sees it keep its unmistakable pink and more mistakable black colour scheme.
Elsewhere, EF Pro Cycling’s new road bike is equipped with a SRAM Red groupset, Vision wheels, a Fizik saddle, Vittoria Cora Pro tyres and Wahoo Speedplay pedals.
New Cannondale SuperSlice
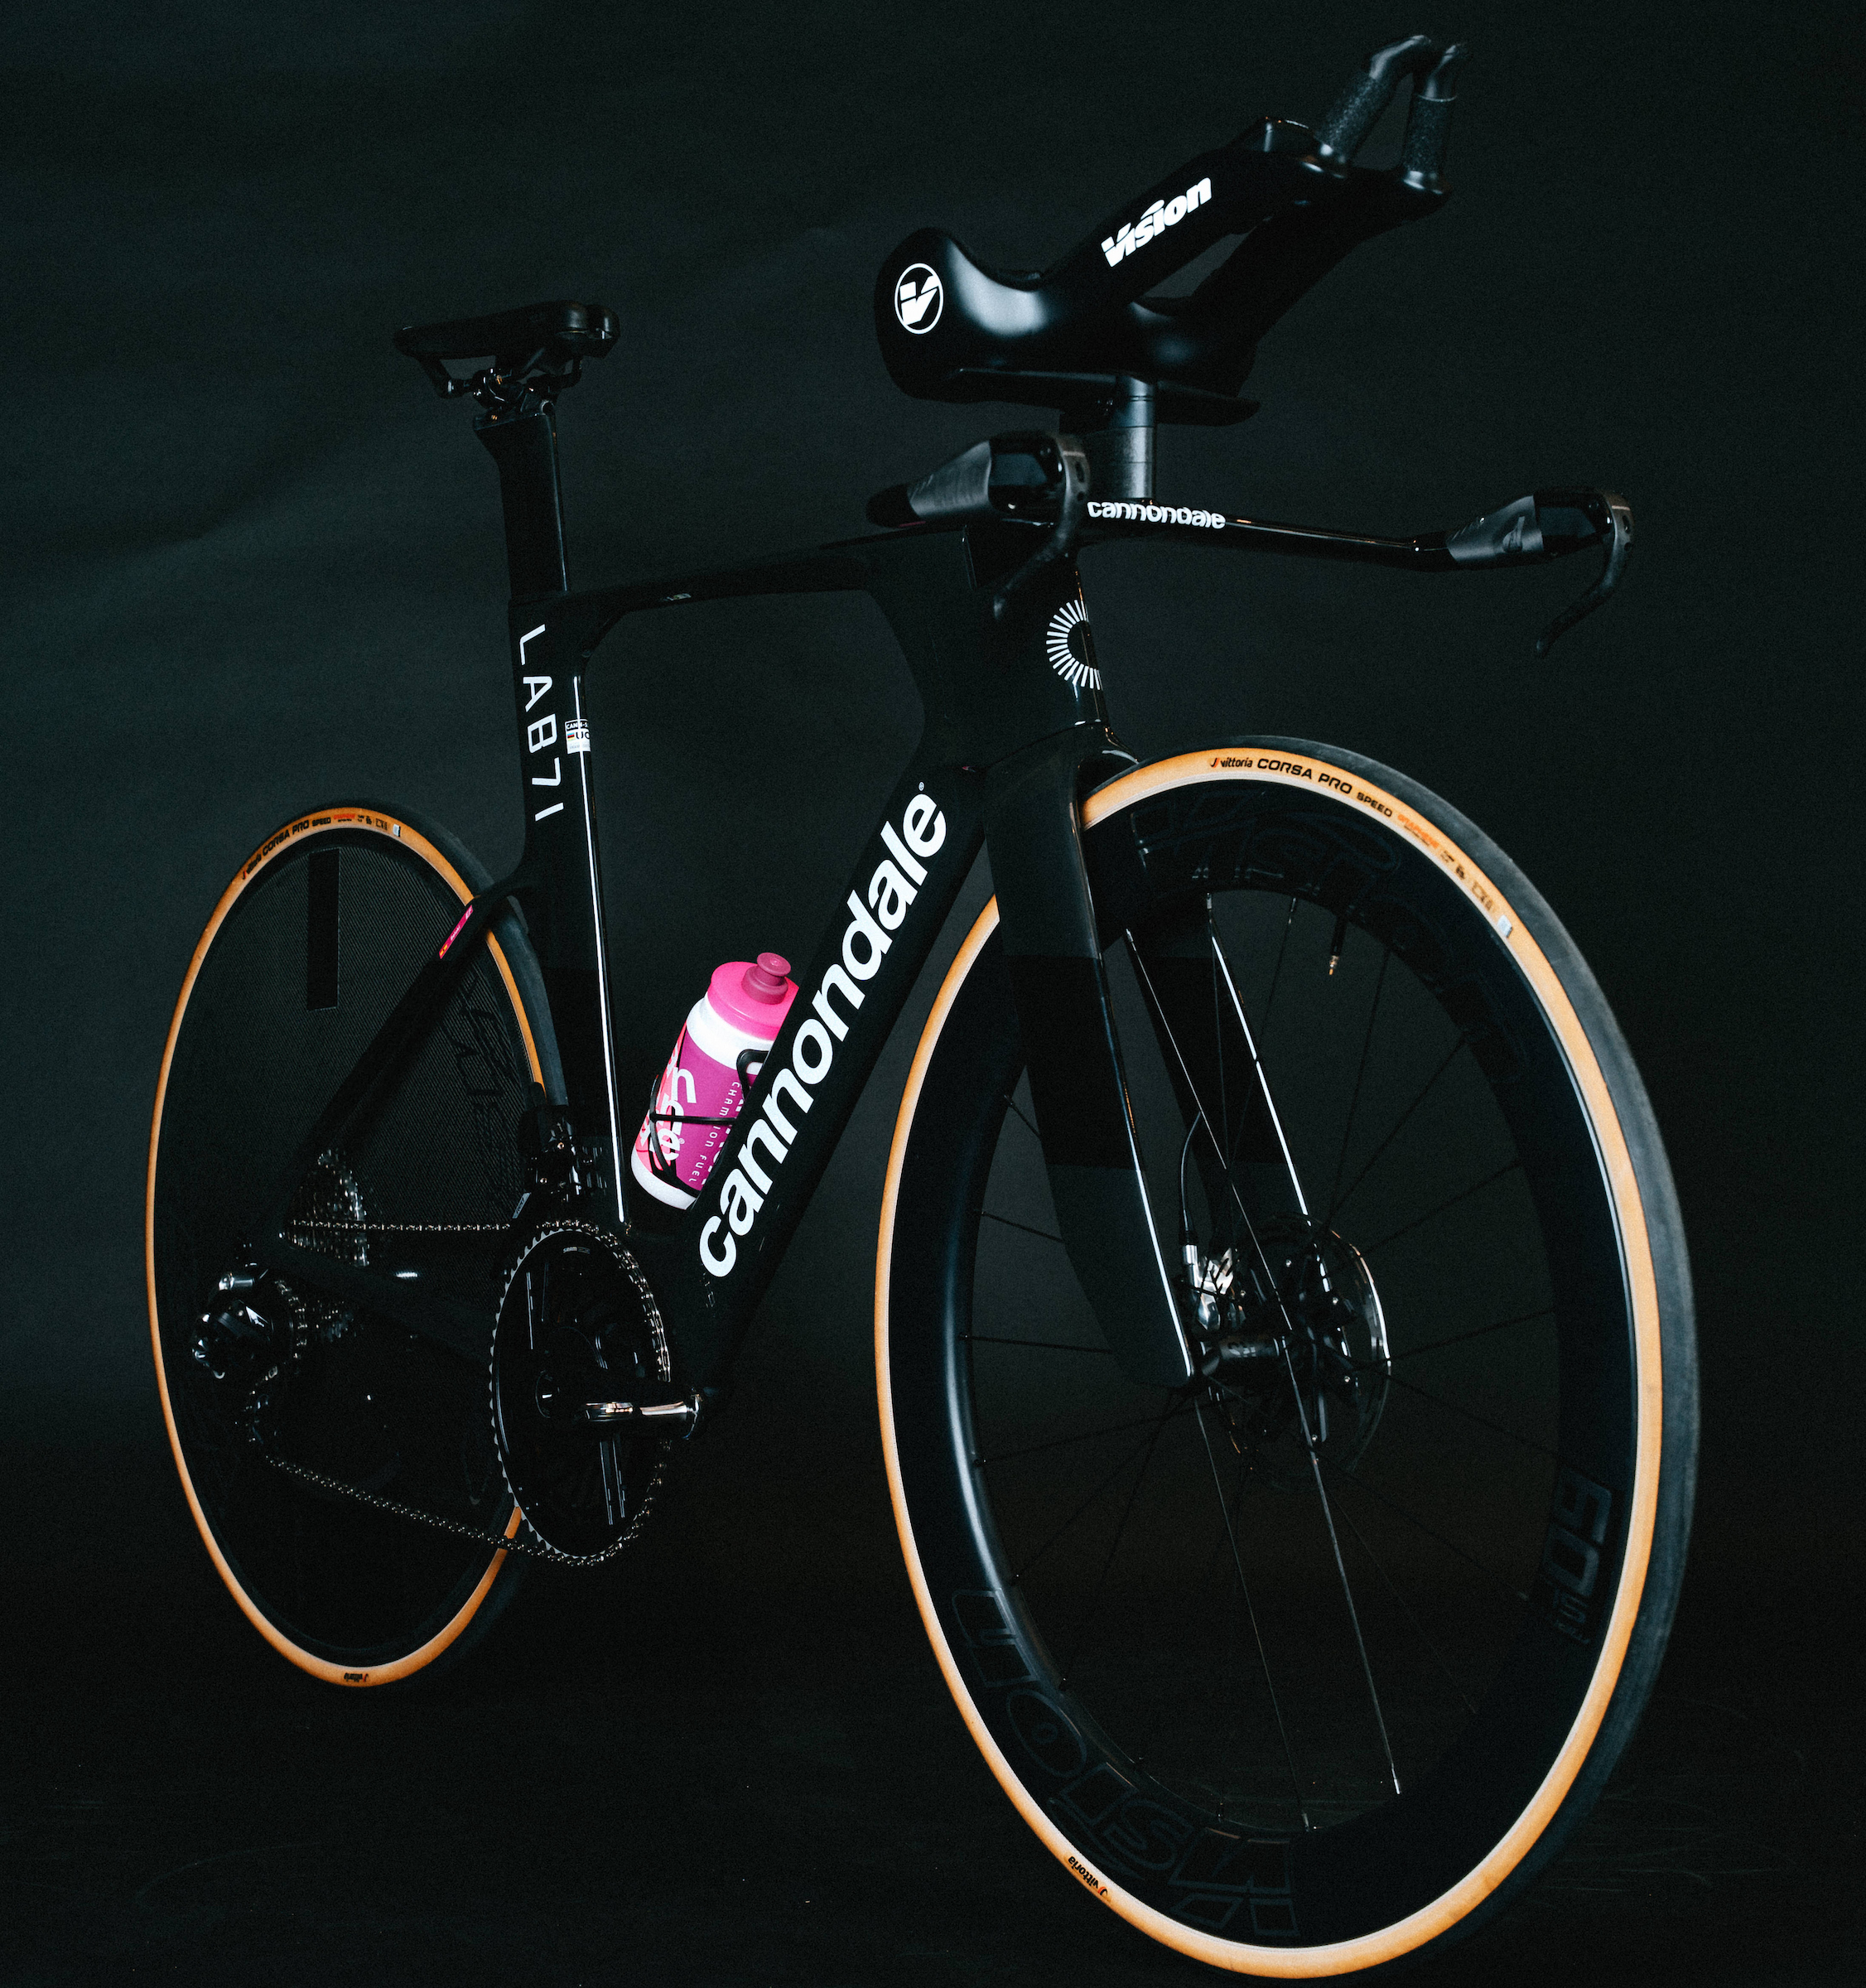
The new Cannondale SuperSlice. EF Pro Cycling
The WorldTour team has also revealed its latest time trial bike, the Cannondale SuperSlice. We saw the new SuperSix in January at the Tour Down Under, but a new SuperSlice seems to have been out in the world far longer.
Whether this is exactly the same bike, we don’t know, but EF Pro Cycling’s latest SuperSlice has a far more modest black paintjob than the over-the-top Rapha x Palace bike.
The most important part, however, is that it‘s part of Cannondale’s ”fastest fleet ever”. The new SuperSlice is said to save 10 watts at 50kph over Cannondale’s previous time trial bike. This 14 per cent drag reduction has meant a weight increase of 60g due to the deeper tube profiles, but that’s only a small change and aerodynamics takes precedent in the race of truth.
Alongside a similar spec list to the SuperSix, EF Pro Cycling’s SuperSlice has Vittoria’s new 30mm Corsa Pro Speed tyres. According to Vittoria, this new size was requested by pro riders, but as Simon von Bromley wrote, it points to the confusion around tyre widths.
EF Pro Cyling team bike specifications
Cannondale Lab71 SuperSix EVO
Frame/fork: Lab71 SuperSix EVO, Gen 5, Ultralight Series 0 Carbon
Drivetrain: SRAM Red AXS
Rims: Vision Metron RS
Tyres: Vittoria Corsa Pro
Bar and stem: Cannondale integrated SystemBar Road, ultralight, full carbon
Saddle: Fizik
Pedals: Wahoo Speedplay
Cannondale Lab71 SuperSlice
Frame: Lab71 SuperSlice, Gen 3, Ultralight Series 0 Carbon
Fork: Deep aero-section SuperSlice Gen 3 Delta Steerer fork
Drivetrain: SRAM Red AXS
Rims: Vision Metron RS
Tyres: Vittoria Corsa Pro Speed, 700x30c
Bar and extensions: SystemBar TT integrated full carbon base bar with Vision MonoRiser and Vision custom extensions
If you’ve noticed that it’s been a little wet of late in the UK, it might be time to consider a bike designed for UK conditions, with the clearance for wider tyres and mudguards, such as the newly updated Kinesis RTD.
Kinesis says RTD stands for Race The Distance, with its aluminium endurance frameset versatile enough for everything from the daily commute to racing across continents and bikepacking adventures.
The RTD’s geometry has been tweaked, with Kinesis claiming it balances responsiveness and stability with predictable handling.
The new frameset includes an oversized down tube, contributing to a stiff front end, while the rear of the bike is made more compliant thanks to a narrow seat tube and flattened seatstays. Frame clearance is 34mm, or 30mm with mudguards – the same as the previous-generation frameset.
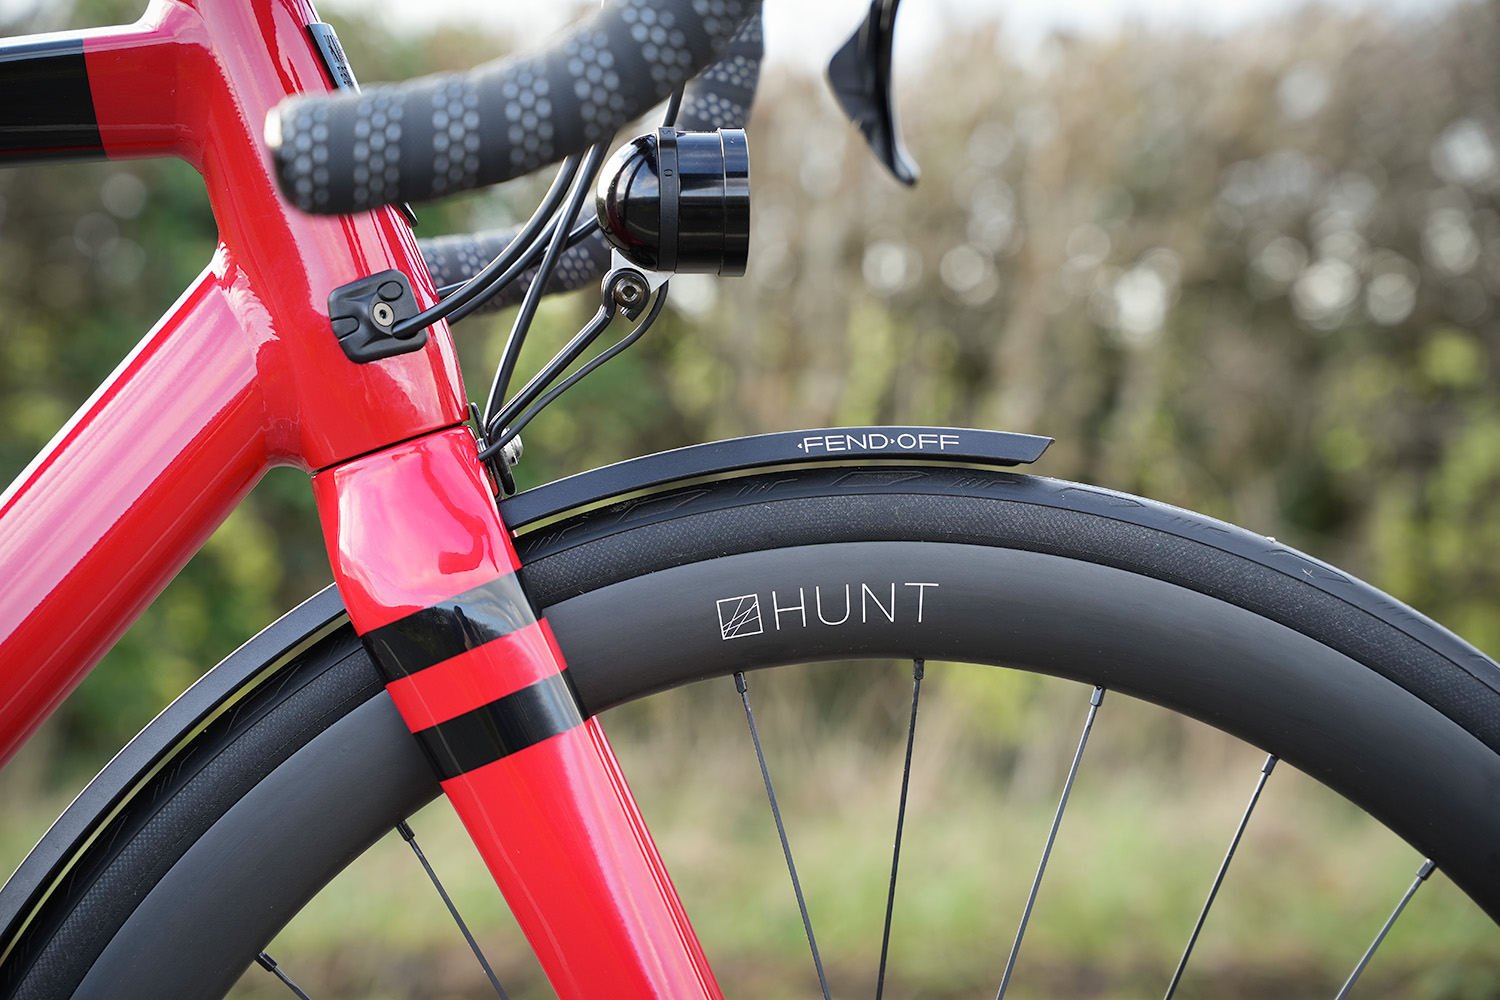
There’s internal routing for the brake hose and a dynamo cable. Kinesis
Made from 6069 aluminium alloy, Kinesis says the RTD proves that aluminium can rival carbon for performance at a more affordable price and with better real-world durability and longevity. The RTD has a claimed frame weight of 1,400g for a size-52cm frame, the same as the earlier RTD.
Kinesis says it’s the only brand to use super-plastic tube forming, which employs high-temperature air rather than the more common hydroforming, and this enables it to produce tubes that are lighter and have more complex shapes. There’s a full range of three bottle cage, rack and mudguard mounts.
As well as the updated geometry, Kinesis offers a greater size range than for the RTD’s predecessor, with eight sizes from XXS to XXL now available, one more than the previous frameset.
Kinesis routes the hoses into the head tube and says it means the down tube can be made lighter. Kinesis
In addition, there’s front-end cable routing into the head tube, which the brand says enables it to use lighter tubing than if there were cable ports in the down tube. The RTD is compatible with both mechanical and electronic 1x and 2x groupsets, on a BSA bottom bracket.
The RTD frame is paired with an all-carbon fork, with internal routing for the brake hose and dynamo cabling. It’s supplied with patented Switch Lever thru-axles with a removable lever.
The Kinesis RTD frameset is available in red only and priced at £950.
The Zwift Games 2026 series began this week, with popular races on new routes! So I decided to join in the fun. This week’s stage is in Makuri Islands on the new Kaze Kicker route, which has just enough climbing to make the race hard and interesting without it feeling impossible for an “overmuscled cyclist” like me:
The “standard” race events alternate hourly between two different racing score range schemes:
With my racing score of 555, range 2 gives me the better chance at a win (since I’m only competing with riders up to a score of 569), while range 1 will probably give me a bigger challenge and a faster overall race time, since I’m competing with riders who have scores up to 650.
As it turned out, my schedule for the day meant I had to race range 1, like it or not. So I jumped in, warmed up, then joined the pens on my virtual Pinerallo Dogma F 2025 with DT Swiss 65 wheels. Let’s roll!
A Hard Start (Pain Cavern)
We rolled out of the Mech Isle start pens, the pack of 38 quickly dropping to 32 as we hammered up to speed.
The route begins with a short (3km) lead-in which (a bit of Zwift nerd trivia here) includes the Tidepool Sprint Reverse segment. It’s the only route in-game that traverses this segment, in fact, but this doesn’t really matter much, as nobody is going to attack a sprint segment on a scratch race, especially with a hard effort just up the road.
One thing worth noting, since some riders in my race clearly didn’t realize it: you only get one powerup for this entire race. Everyone is given a feather at the start, and you get to choose where to use it! Save it for the Pain Cavern climb, or even better, if you know you’ll survive Pain Cavern, save it for Mech Isle corkscrew near the end. (I must say, I do prefer the single powerup approach to the default random powerup approach that randomly gives some riders an advantage over others.)
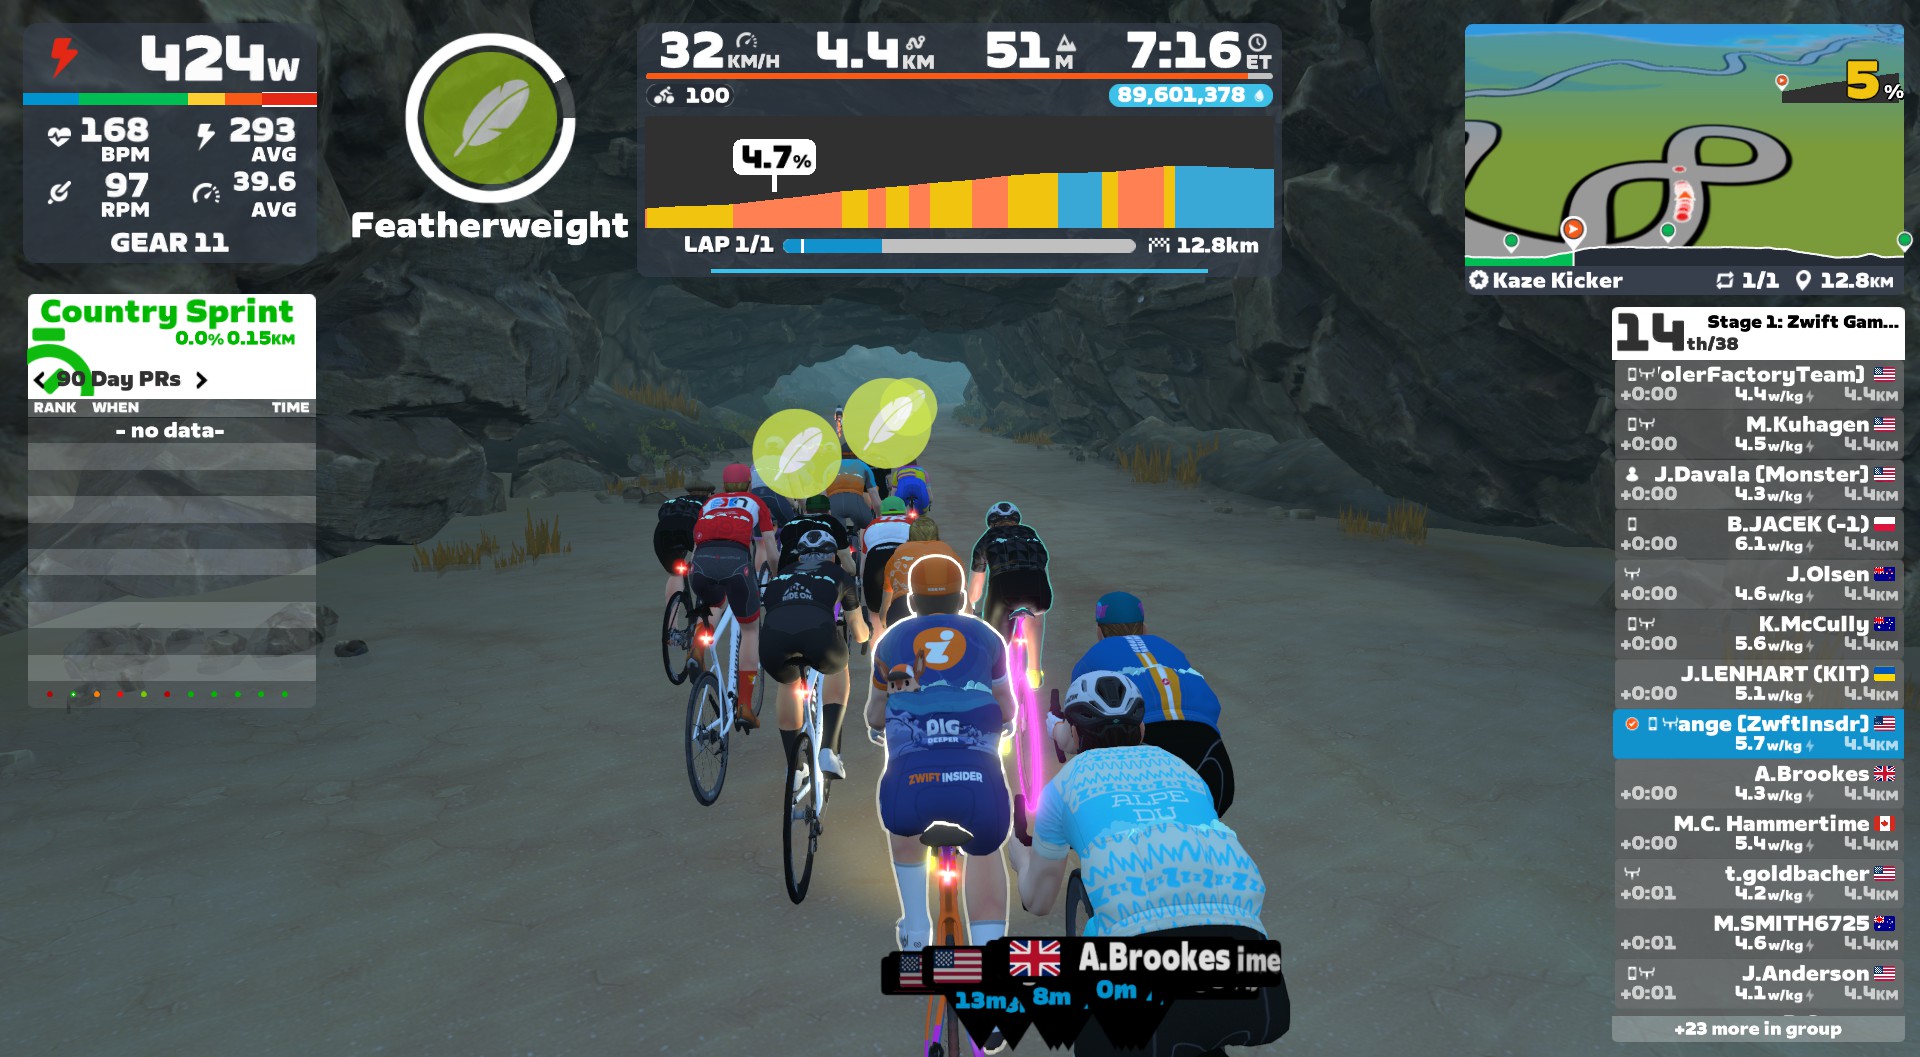
The longest, hardest effort of the race begins in Pain Cavern at the 3.3km mark, when the road tilts up to 5%. The climb is 2.16km long, averaging 3%, and will take most riders 3.5-4.5 minutes to complete.
I’ve been dropped on this climb more times than I haven’t, and it usually happens somewhere in the figure 8 section midway through. So I saved my feather as long as possible, waiting until I was fully in the figure 8 before activating it. Several riders around me had the same idea!
The pack often stretches out as the climb slackens yet continues after the figure 8. Finding a strong wheel can be helpful as speeds increase and drafting becomes more of a factor, and that’s exactly what I did. We had two riders on a breakaway 5 seconds up the road, but I was sitting in the pack of 21, near the limit, as we finished the climb.
I had survived! I was still in the peloton, and discovered after the race that I had shattered my Strava Pain Cavern PR with a time of 3:45 (my previous best was 4:02). Let’s goooo!
The Easy Middle
From 5.5km to 15.3km you’re essentially on flat or downhill roads. This doesn’t mean your race will be easy, since riders may choose to push the pace on the front. But chances are, this bit will be the easiest part of the race.
As we exited Pain Cavern, I just tried to sit efficiently in the draft to grab a bit of recovery time. My heart rate dropped from 172 to 154 over the next 5 minutes, and the burning in my legs went away as I spun a higher cadence at tempo power. Around the northern part of Neokyo we went, the two riders off the front staying away but not increasing their gap in a meaningful way.
(Zwift’s HUD doesn’t do a great job of showing gaps to riders up the road, since you don’t see them in the rider list if you’re sitting in a group of any size. But I was running Sauce for Zwift, so I could see the gap. Gotta love that rider groups feature!)
Exiting Neokyo, we caught the two attackers off the front, then turned into the Slot Canyon for a long descent. Zwifter “MC Hammertime” was providing plenty of color commentary from the peloton, and announced that he was going to take a hard pull on the front. It’s always nice when riders announce their intentions, since it gives everyone time to grab their wheel, which helps the group’s pace stay high and improves our GC rankings (more on that below).
Mech Isle Kicker
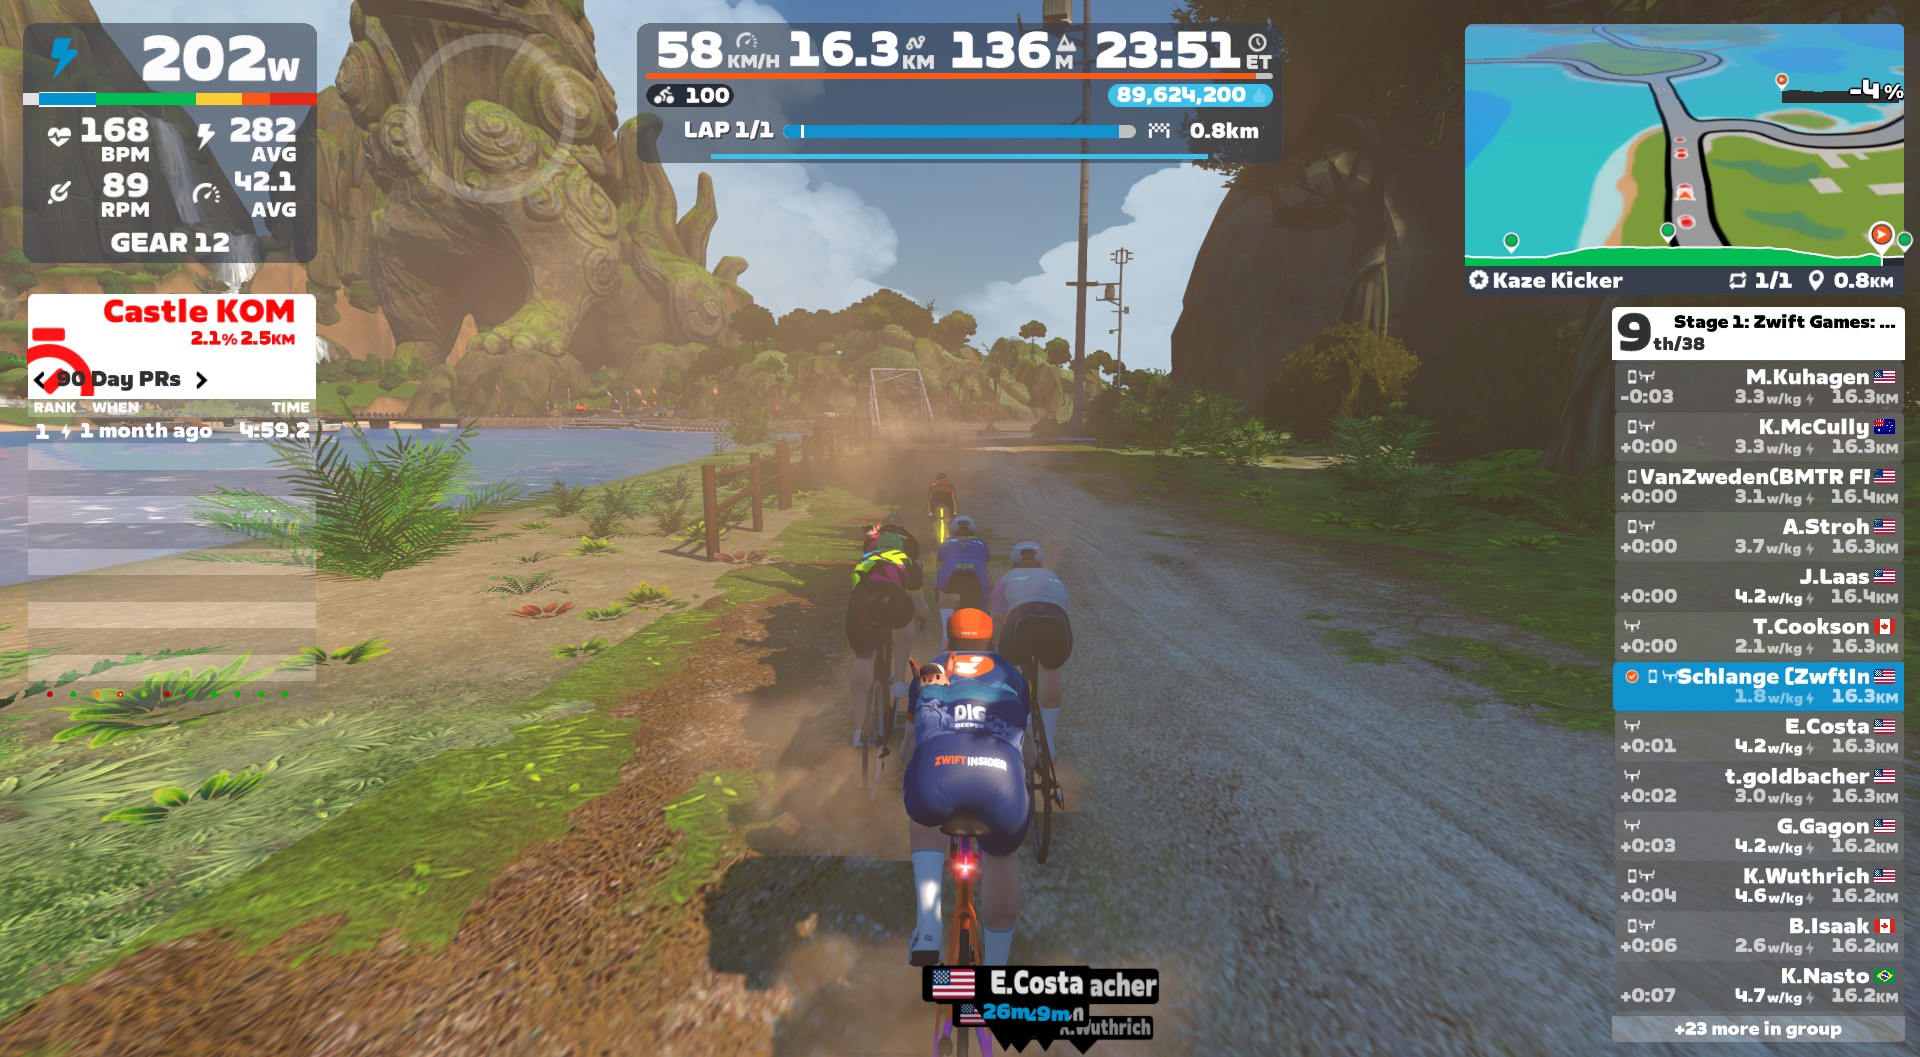
At the 15.3km mark we crossed the wooden bridge and hit the final obstacle of the day: the Mech Isle corkscrew! This little bugger is short enough that I can typically survive it in the peloton, but stronger riders often attack and get a gap. And that’s exactly what happened! I steered to the inside of the turn to shave off precious meters, then one rider, two riders, three riders attacked hard.
I found myself sinking backward, dropping from 3rd to 5th to 7th, with a gap building up the road. I was on the limit in a strung-out group, my legs heavy and burning as we crossed the bridge at the top. And all I could do was watch the race ride away, despite attempting to give chase.
The Finish
After the short descent, there were several riders around me, but everyone had given up on chasing the six riders ahead:
Maybe I’m a nicer guy when I’m glycogen-depleted. Or maybe I’m just dumber? Certainly the latter. I decided to put in a hard pull on the front to try to reel in some riders.
Unfortunately, 40 seconds of hard work did nothing but make my legs hurt. I eased up when it was clear we wouldn’t catch anyone, and a few seconds later, it was time to sprint! I pushed hard for ~10 seconds, crossing the line in 8th.
ZwiftPower gave me a finishing place of 6th, thanks to two riders not being signed up. But does that even matter anymore? Not really, since Zwift Racing Score doesn’t care about ZwiftPower, and neither do the Zwift Games GC Rankings at zwift.com/racing/leagues/zwiftgames2026.
As I write this post (10am Tuesday, Feb 17), my ranking shows as 1646 out of 11298 riders for race 1, with a race time of 24:56. We’ll see how that changes as more riders participate.
This race bumped up my ZRS from 555 to 561, my first score change in two months, since I haven’t been racing scored races.
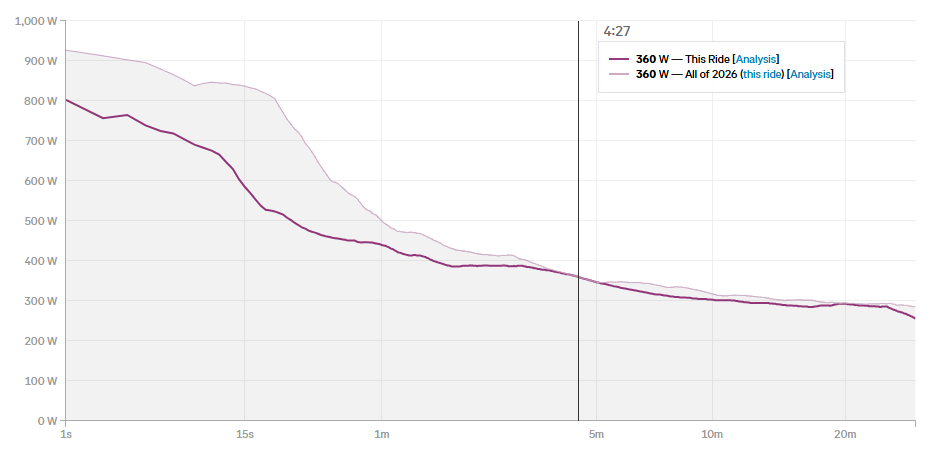
In terms of my actual performance, this was a decently challenging effort, giving me a new power curve PR for 2026 in the VO2max time window:
Could I have raced it smarter for a better result? I don’t think I had the legs to grab onto the riders who got away over the top of the Mech Isle corkscrew, so the only thing I could really change would be not taking that short pull near the end, to save my legs for the final sprint. This may have allowed me to outsprint the one rider in my group who finished ahead of me, improving my result by just one place.
Specialized has released the S-Works Tarmac SL8 Artist Series, featuring artwork from Pieter ‘Parra’ Janssen, Yoon Hyup and Lucas Beaufort on its flagship road frame.
The brand says it has chosen to work with the artists, who are cyclists themselves, to draw on their experiences on and off the bike.
Specialized claims each design expresses a different relationship to movement, colour, rhythm and the feeling of riding the bike.
The S-Works Tarmac SL8 Artist Series frames are priced at £4,999, and once they’re gone, they’re gone forever.
We’ve seen other brands work with artists to turn their bikes into rolling canvases, with Canyon’s MyCanyon Aeroad available with artwork from Felipe Pantone and Elena Salmistraro.
Specialized S-Works Tarmac SL8 Parra
The Parra bike looks as if it’s been ridden through some paint without mudguards. Specialized
Specialized says the Parra-designed bike draws from the colourful 90s cycling culture that first inspired Pieter Janssen, reimagined through his signature curvy, hand-drawn style.
Art bikes seem to be becoming more popular. Specialized
The frame is said to carry the feeling of blasting through colour at high velocity, layered with hidden typography and redrawn elements waiting to be discovered.
The S-Works Tarmac SL8 is the brand’s flagship road bike. Specialized
It’s said to reflect the clarity Janssen finds on the bike and the surge of the cycling high, resulting in a design that feels electric, modern and unmistakably Parra.
Specialized S-Works Tarmac SL8 Yoon Hyup
You can see the dawn and night in Yoon Hyup’s design. Specialized
The brand says Yoon Hyup’s frame captures the sensation of moving fast through the city – quiet, sharp and stealthy in motion.
It’s said to be inspired by dawn and night rides where streetlights stretch ahead like a runway, the design reflecting the blur of night-chase energy as speed turns into flow.
All variants are £4,999. Specialized
There are hand-painted textures and hidden elements that are said to be drawn from Hyup’s riding life, bringing his signature rhythm to the SL8.
Specialized S-Works Tarmac SL8 Lucas Beaufort
The Lucas Beaufort design has a Giro D’Italia flavour. Specialized
Specialized says this frame is shaped by a style rooted in life and experience, carrying hidden layers meant for each rider’s interpretation.
The details look impressive up-close. Specialized
It is said to encourage curiosity, openness and the confidence to follow your own path with joy and hope.
Specialized’s free over-the-air update boosts peak power and torque figures on the 3.1 Motor, fitted to the Turbo Levo 4.
The S-Works Levo 4 gets a 130W power boost to 850W, while torque remains at 111Nm. The non S-Works bikes – which have less power and torque as standard – are upped to 810W and 105Nm from 666W and 101Nm.
In a landscape of power and torque top trumps – with Bosch’s 100Nm and 750W and DJI‘s 120Nm and 1,000W – it looks as though Specialized’s update is a bid to keep its motors as competitive as possible.
Four additional features have been added during the 30-minute over-the-air update.
First is a rider-matched power setting for MicroTune. This new setting is claimed to match motor assistance precisely to rider input – you put in 100W of power to the bike and the motor gives you 100W of support.
Downloading. Specialized Bikes
Specialized says it’s designed to give the rider the “ultimate control” and boosts efficiency.
The transition between the support cut-off at the assistance speed limit has been remapped, and is claimed to be smoother as a result. Support now tapers down towards the speed limiter, helping the bike feel more natural on the trails.
Overrun has also been remapped, with “sharper” behaviour. When you stop pedalling, the overrun is said to be more responsive, with the aim of making it easier for the rider to get up steps, roots, rocks and obstacles.
Walk mode has been given three speed settings; you can now set the bike to move at your pace.
Specialized is keen to extoll the virtues of its over-the-air (OTA) updates, made accessible via the Specialized smartphone app.
According to Specialized, the process should be easy. Specialized Bikes
Marco Sonderegger, the brand’s leader of turbo technology, says: “With over-the-air updates, every Turbo bike becomes a living evolving machine that gets better over time… With a simple software update done from the convenience of their home, riders’ bikes get more powerful, more refined, and more personalised.”
The brand also states “this milestone marks the start of a new era… keeping bikes running the most advanced software Specialized has ever created.”
It’s an arms race
UNNO will be one of the first bike brands to take on the DJI motor, which is one of the most sensitive, responsive drive units available. UNNO
But free OTA updates are nothing new; Bosch’s recent 100Nm and 750W update was delivered to its Gen 5 Performance Line CX motors via the Flow smartphone app
There’s more to it than headline figures, however.
How the power is delivered, and the bike’s assistance or support ratio or percentage are just as important.
The Performance Line CX Gen 5 has 100Nm of torque and 750W of power.
The Bosch Gen 5 motor is hardly lacking in the power or torque departments, but its 1:4 or 400 per cent support ratio can make it feel lacklustre compared to the Avinox’s 1:8 or 800 per cent figure.
100W of rider power gives you up to 400W of Bosch motor power, totalling 500W. In the Avinox camp, 100W of your power will generate up to 800W of motor power, totalling 900W.
As I found in a recent head-to-head test between the Bosch and Avinox, the support ratio makes DJI’s motor shine everywhere.
Specialized doesn’t disclose its support ratios in the same way Bosch and DJI do, making direct comparisons hard.
The Bosch motor isn’t lacking in power, but its support ratio means it feels gutless compared to the DJI Avinox. Roo Fowler / Orbea
Instead, the brand quotes its support and power as a percentage, rather than treating it as a rider amplifier number.
We don’t know how much rider input is required to access the 850W or 810W of peak power on the Turbo 3.1 motor.
Whether or not Specialized’s latest updates will edge it closer to the feel of a DJI motor remains to be seen.
Cannondale has unveiled its latest SuperSix Evo all-round race bike, with a refined geometry and frameset designed to meet the needs of its pro racers.
The bike, which we spotted at the Tour Down Under WorldTour season opener, doesn’t rip up the SuperSix Evo design playbook, but instead sees a series of incremental developments to cut weight while maintaining the previous bike’s aerodynamics.
The geometry has been made more aggressive by reducing the stack by 10mm (resulting in a 4mm increase in effective reach), while the new bike is available with two new one-piece handlebars.
The frameset comes in three carbon tiers – Lab71 (‘0 Series’), Hi-Mod and ‘standard’, weighing from 728g for the frame and 410g for the fork, in a size 56cm.
Prices start from £4,495 for the SuperSix Evo 5 with a Shimano 105 Di2 R7100 groupset, rising to a £12,500 ceiling.
The latest SuperSix Evo sees a more aggressive fit geometry compared to the previous generation. Brazo de Hierro for Cannondale
Despite some brands edging towards making their all-round race bikes slightly less aggressive to help them fit more riders, Cannondale has responded to feedback from its professional riders – such as Ben Healy – to make the SuperSix more aggressive in terms of fit.
This isn’t the surprise it might first appear, though. The previous SuperSix was relatively conservative with a 10mm taller stack and 6mm shorter reach than a Specialized Tarmac SL8, for example, in a size 56cm.
Steve Smith, Cannondale’s engineering manager for road bikes, says that Healy and Kasper Asgreen were key in offering feedback on the old SuperSix Evo – incidentally, both rode Specialized Tarmacs before moving to the EF-Education sponsored team.
Handling was one element pro riders didn’t want changed. Brazo de Hierro for Cannondale
Smith also says the latest Synapse endurance bike had “racy performance added to it”, suggesting this left the SuperSix ripe for an even racier layout.
That said, the head tube angle remains identical at 73 degrees, while the seat tube angle has steepened by 0.2 degrees (in a size 56cm).
When asked, Smith confirmed riders wanted to preserve the handling of the previous bike, so the similarities here are unsurprising.
Cannondale has also added an extra size to the range – with 50 and 52cm offerings rather than a single 51cm size between its 48 and 54cm sizes.
The SystemBar Road is the more aerodynamically optimised cockpit. Ashley Quinlan / Our Media
The frameset continues to sport the brand’s Delta steerer design, which sees brake hoses routed inside the headset bearings, but two new top-tier cockpits have been designed for the new bike.
Cannondale refers to these as the SystemBar Road and the SystemBar SL – the first designed as a more aerodynamic solution, and the latter a lightweight option.
The new bike has two cockpit options – the SystemBar Road (top) and SL. Ashley Quinlan / Our Media
The SystemBar Road features aerofoil tops, which sweep forwards to increase the effective reach to the hoods, with a 20mm flare at the drops. This is available in 10 sizes, ranging from 340-380mm wide (measured centre-to-centre), with 90-140mm effective stem lengths.
The SystemBar SL comes in seven sizes – 380 or 400mm widths, with 90-130mm effective stem lengths, but with more traditional rounded tops that don’t sweep forwards. This is said to weigh 265g, compared to the SystemBar Road’s 375g.
These handlebars come specced with the Lab71 and Hi-Mod grade framesets. Entry-level frame bikes come with a Vision Trimax Carbon Aero handlebar and Cannondale C1 stem.
Tweaks under the skin
Cannondale describes the finish of the SuperSix frame as “immaculate”, realising small weight savings. Ashley Quinlan / Our Media
Cannondale says it has improved upon its carbon manufacturing process to help cut excess material (and therefore weight) from the frames.
A Lab71 frame is said to tip the scales at 728g in a size 56cm (painted, including bonded parts), a Hi-Mod frame 781g, and an entry-level frame 910g. Factoring in the changes made elsewhere, including the handlebars, Cannondale claims a Lab71 bike is 148g lighter than the previous generation.
The latest bike makes the switch to a Universal Derailleur Hanger. Ashley Quinlan / Our Media
Cannondale says every tube is new despite the similar aesthetics, and this yields marginal gains across the entire yaw spectrum in the wind tunnel – albeit the brand won’t divulge by exactly how much.
The smaller changes include a new seatpost-clamp design and a recessed dust cover to help prevent ingress, a new Di2 battery mounting system, plus a switch to SRAM’s Universal Derailleur Hanger design. 32mm tyre clearance remains, alongside a threaded bottom bracket.
Cannondale says the updated bottle cages are 26% lighter than before. Ashley Quinlan / Our Media
Cannondale has stuck with its aero-shaped bottle cage (and bottle) design, but this now features injected carbon for a claimed 26% weight reduction compared to the previous cages. Customers will have the cages and bottles supplied with all Lab71 and Hi-Mod spec bikes. The cages will sport regular round-shaped bottles, too.
Lab71 and Hi-Mod bikes also feature new titanium seatpost bolts, but all bikes come with an integrated out-front mount – a new dedicated unit for Lab71 and Hi-Mod bikes designed for the new handlebars, and a Cannondale Conceal mount for the entry-level machines.
2026 Cannondale SuperSix Evo models and pricing
The SuperSix Evo is available in the established Lab71, Hi-Mod and Carbon tiers. Brazo de Hierro for Cannondale
As mentioned, the SuperSix Evo is available in three frameset specifications – Lab71, Hi-Mod and entry-level ‘Carbon’.
Customers are supplied a set seatpost setback (zero or 15mm offset) and handlebar size with each size bike, with the alternatives available to purchase after market.
The Lab71 and Hi-Mod grade bikes are split into two basic build approaches: aero-oriented and lightweight ‘SL’, while entry-level bikes have one all-round spec. It’s also worth noting that Cannondale has dropped the Hi-Mod and Carbon branding from the bikes’ names, as shown below.
Vittoria has announced a new, 30c version of its Corsa Pro Speed TLR tyres.
Designed for improved grip in wet conditions, Vittoria says this new size was developed “at the request of WorldTour teams”.
The news comes on the same day as Continental announced it has launched a 30mm option for its GP5000 TT TR time trial tyre, and a 35mm option for its G5000 S TR all-rounder.
Available now, the 700x30c Vittoria Corsa Pro Speed TLR costs £89.99 / $125.99 / €95.95 per tyre.
The difference a millimetre makes
Vittoria has launched its biggest time trial tyre yet. Vittoria
The addition of a 30c (or 700x30c / 30-622, officially) option to the Corsa Pro Speed TLR range brings the total number of sizes available to five.
The range starts with a skinny – by modern standards – 24c option, and now goes up to 30c in 2mm nominal increments.
Eagle-eyed readers will note a 29c version already existed, though, so the addition of another model ostensibly only one millimetre wider might seem curious.
The claimed weights for the tyres give an insight into what’s likely going on, though.
A 29c Corsa Pro Speed TLR tyre is claimed to weigh 255g, for example, only 5g more than the 28c version.
In contrast, the new 30c version is claimed to weigh 270g per tyre, 15g more than the 29c version.
The difference is due to the fact the 29c tyre is “Wide Rim Optimised”, which is Vittoria’s label for tyres it has designed for optimal aerodynamic performance with 25mm-wide rims (internal width).
In contrast the new 30mm option looks to be designed with a relatively higher volume casing – Vittoria specifically references the tyre’s “larger air volume and contact patch” in its press release – hence the more significant increase in weight.
Despite a nominal difference in size of just 1mm, the casing size – and therefore volume – of the 30 and 29c tyres is actually markedly different. Vittoria
If that all feels exceptionally confusing then don’t worry – you’re not alone.
This mess is why Josh Poertner, CEO of Silca and the former chairman of the Bicycle Wheel Technical Committee, told BikeRadar “currently the sidewall printed number [on a tyre] is meaningless”.
Instead, Poertner believes the industry should instead quote the “unmounted casing lay-flat width” of tyres, as that would enable riders to make better informed decisions about which tyres are safe to use on their rims.
Although the Corsa Pro Speed TLR was originally pitched as a pure time trial tyre – given its thin casing, low weight and lack of a puncture protection strip beneath the tread – it, and other time trial tyres, have become increasingly popular in pro road races in recent years.
Cannondale has launched the third generation of its SuperSlice time trial/triathlon bike, which it says is the fastest Cannondale ever made. There’s a claimed 10-watt saving at 50km/h from its predecessor, representing a 14% drag reduction.
The new SuperSlice’s overall weight is kept similar to the previous frameset, thanks to Cannondale’s top-spec Lab71 carbon fibre construction in place of the previous frameset’s Hi-Mod carbon. Nevertheless, the brand says the frame weight has increased by 60g due to the additional material needed to maintain strength in the deeper tube sections.
Cannondale claims a size-M frame weighs 1,122g, with the fork adding 610g, the seatpost 267g and the base bar 321g, for a 2,026g total.
The Delta steerer enables Cannondale to keep the front end narrow.
The design incorporates Cannondale’s Delta steerer, now used on the majority of its road bikes, including the new SuperSix Evo road bike, which also launched today. This design enables integrated hose routing through the narrow head tube with its 1⅛-inch top and bottom bearings.
Cannondale has switched to a Universal Derailleur Hanger and a 68mm BSA bottom bracket. It recommends a maximum 64-tooth 1x chainring or a 60/46-tooth 2x, although it says you could go larger still, as do some of the EF Education pros. The frameset is compatible with electronic groupsets only.
Cannondale’s updated design offers more cockpit adjustability and compatibility with Vision mono-riser extensions.
Cannondale has made small changes to the SuperSlice’s steering geometry, claiming its handling is now sharper for fast descents and tight turns.
There’s a larger range of effective seat tube angle adjustability, thanks to a saddle clamp that can be moved forward and back through 45mm. This equates to effective seat tube angles between 74 and 77 degrees.
There’s also a greater range of cockpit adjustability, with 100mm and 120mm reach adjustment, as well as 0 to 30-degree extension angle adjustment.
The bike has a new base bar, the SystemBar TT, which has a mono-riser and is compatible with Vision Speed JS-Bend and Vision TFE EVO extensions. Cannondale says the new cockpit reduces both weight and drag from the second-generation SuperSlice.
Cannondale enables you to equip the SuperSlice for triathlon use, with the Vision bar providing compatibility with the Metron front and Trimax rear hydration systems.
The new SuperSlice is available in sizes XS, S, M and L.

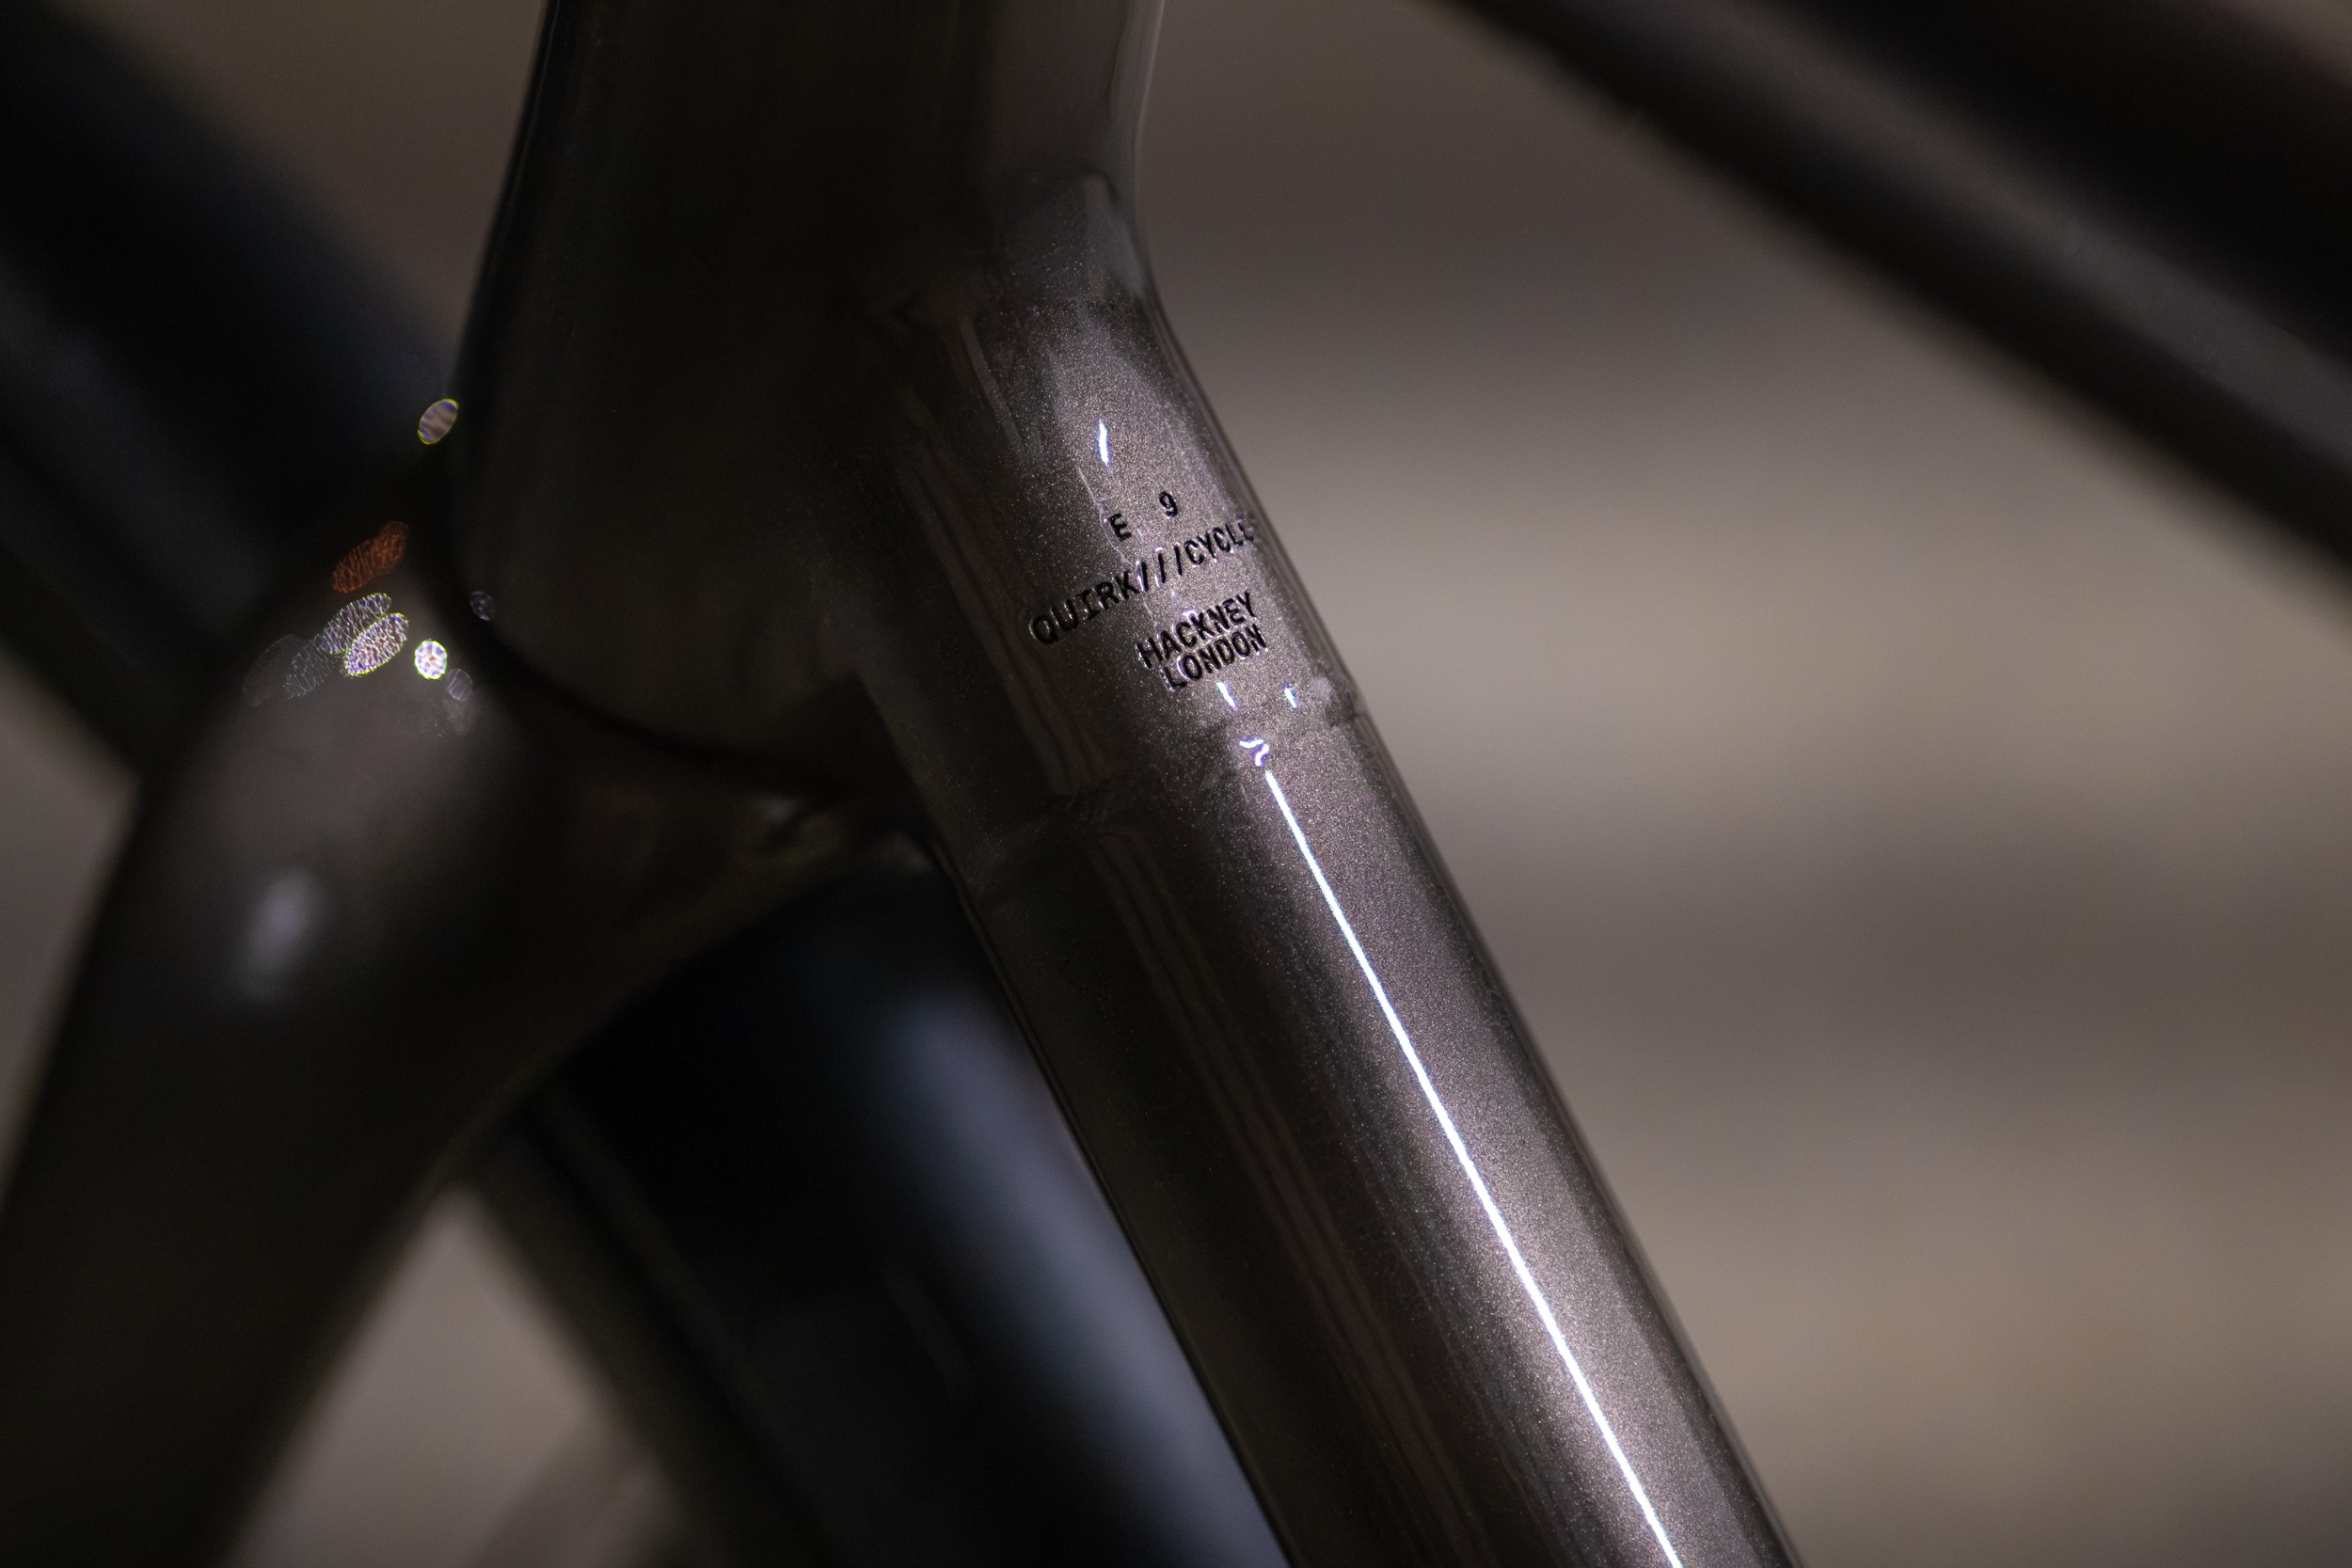
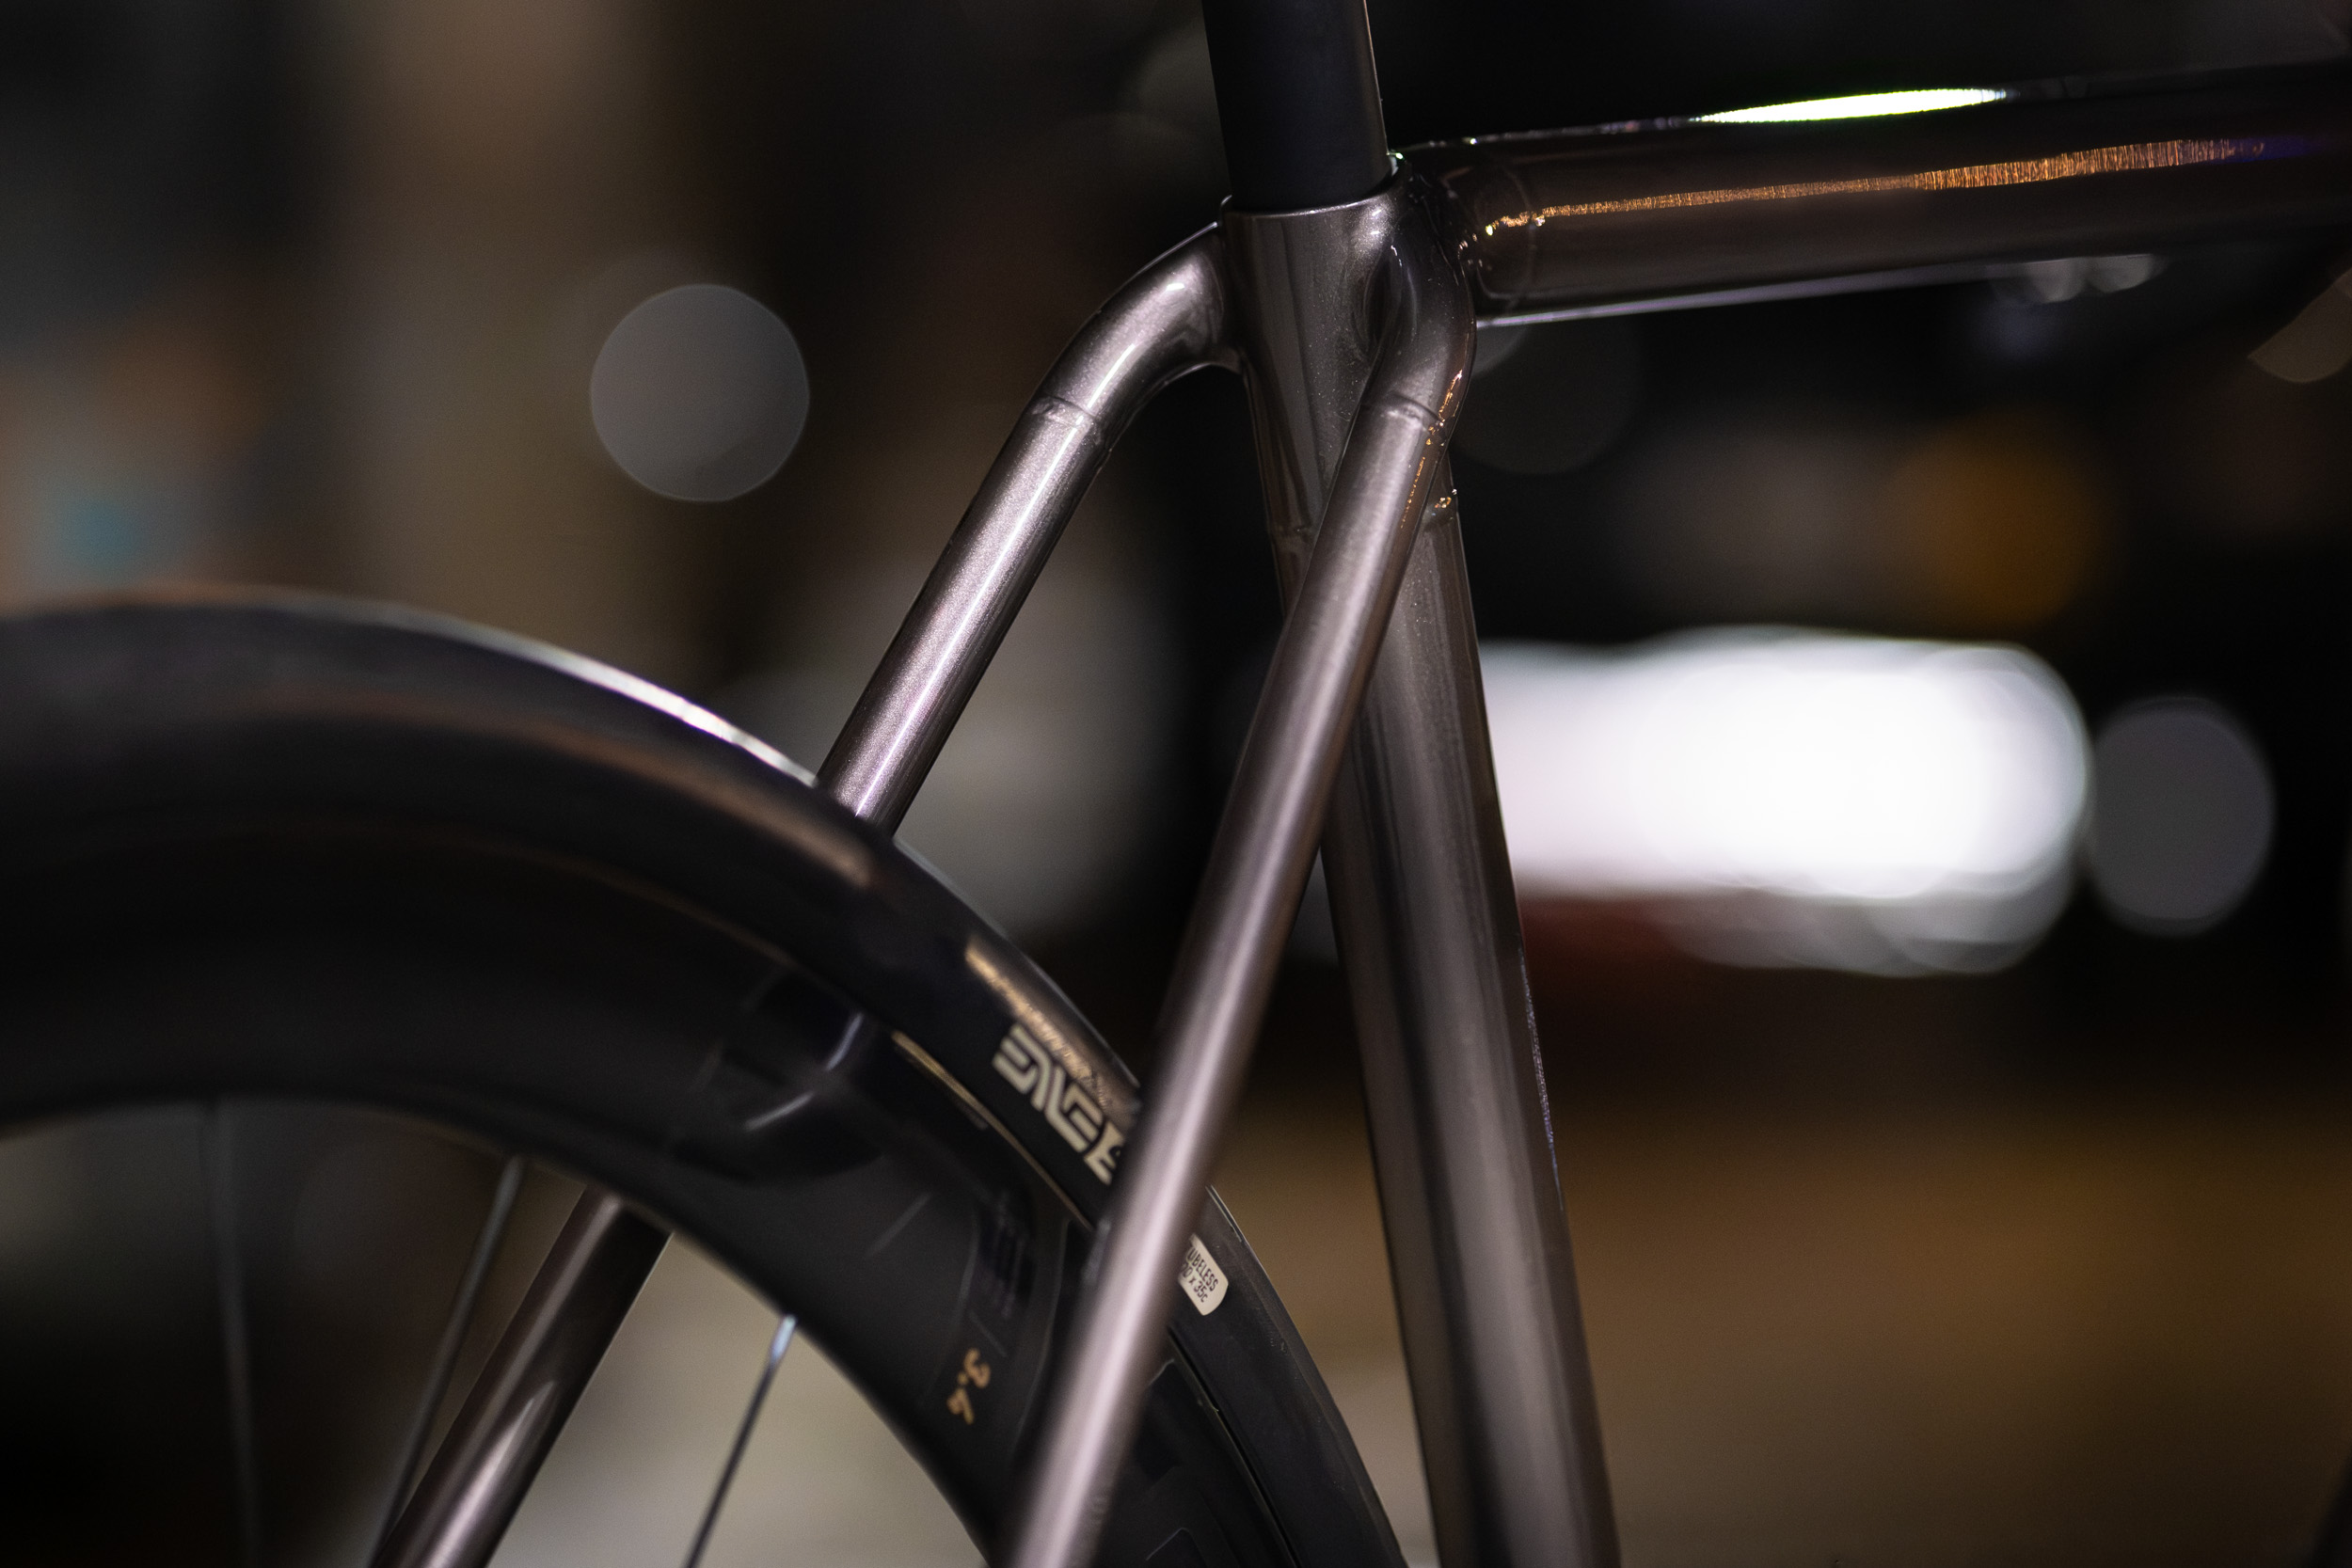
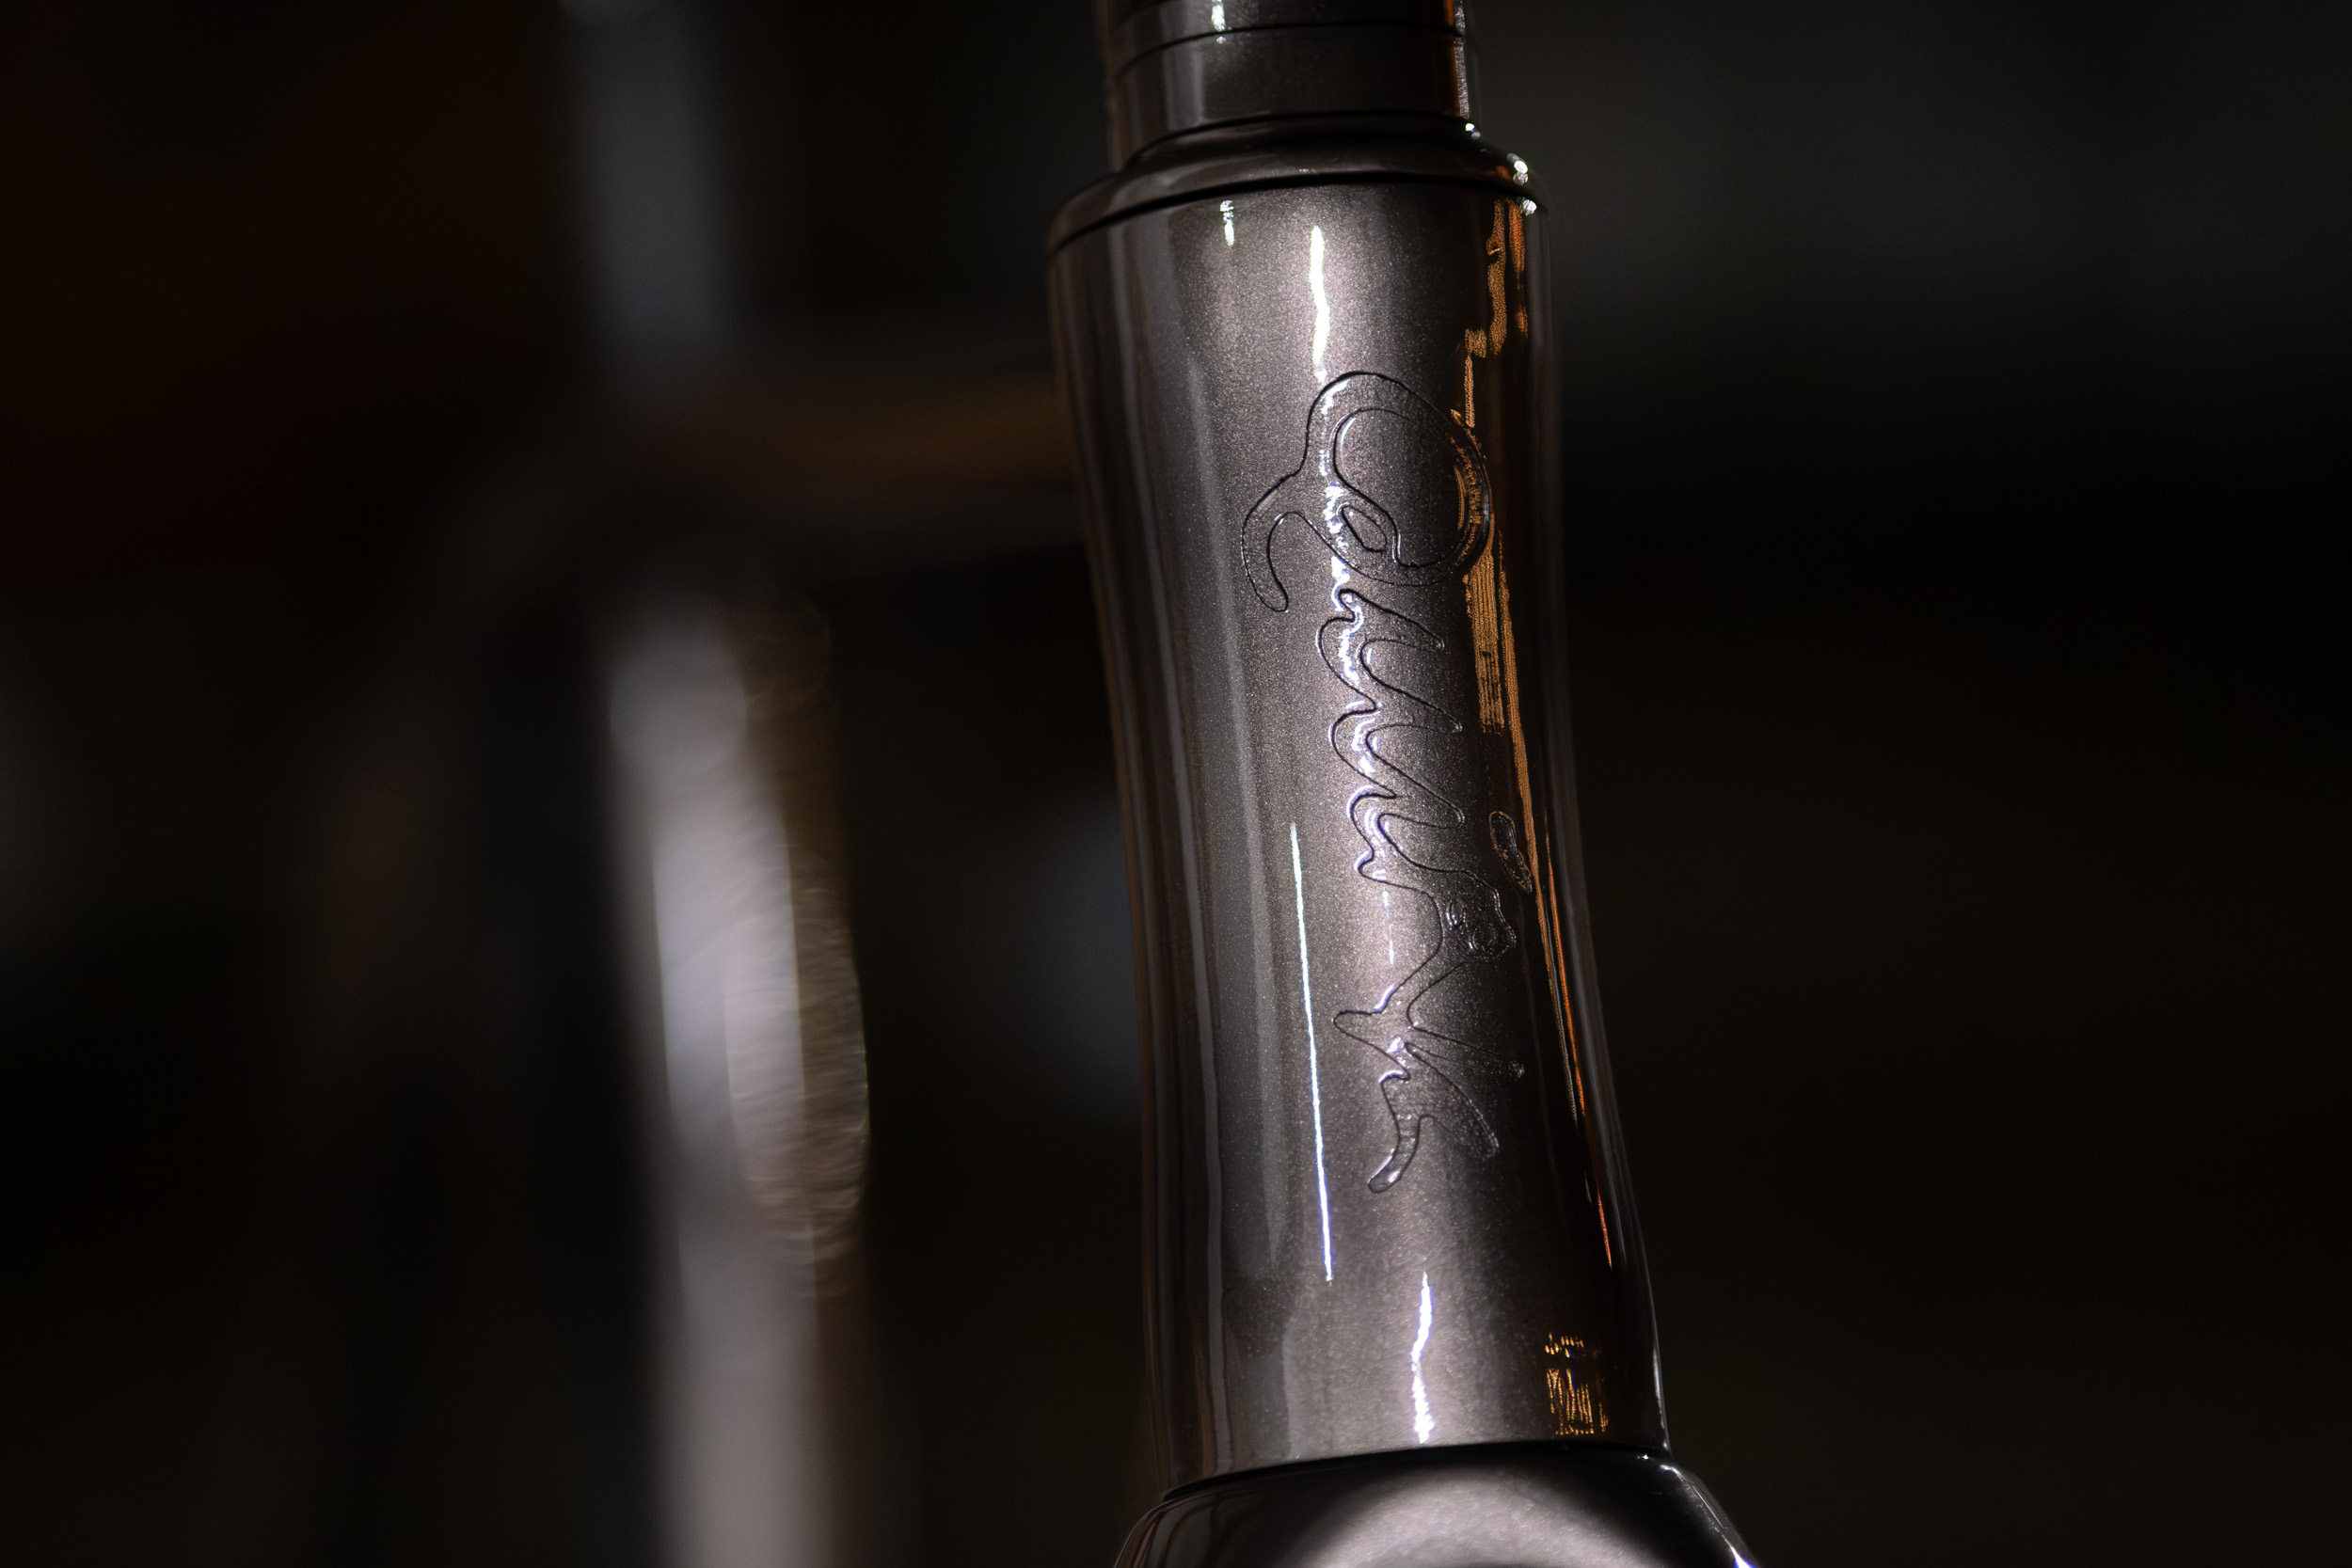
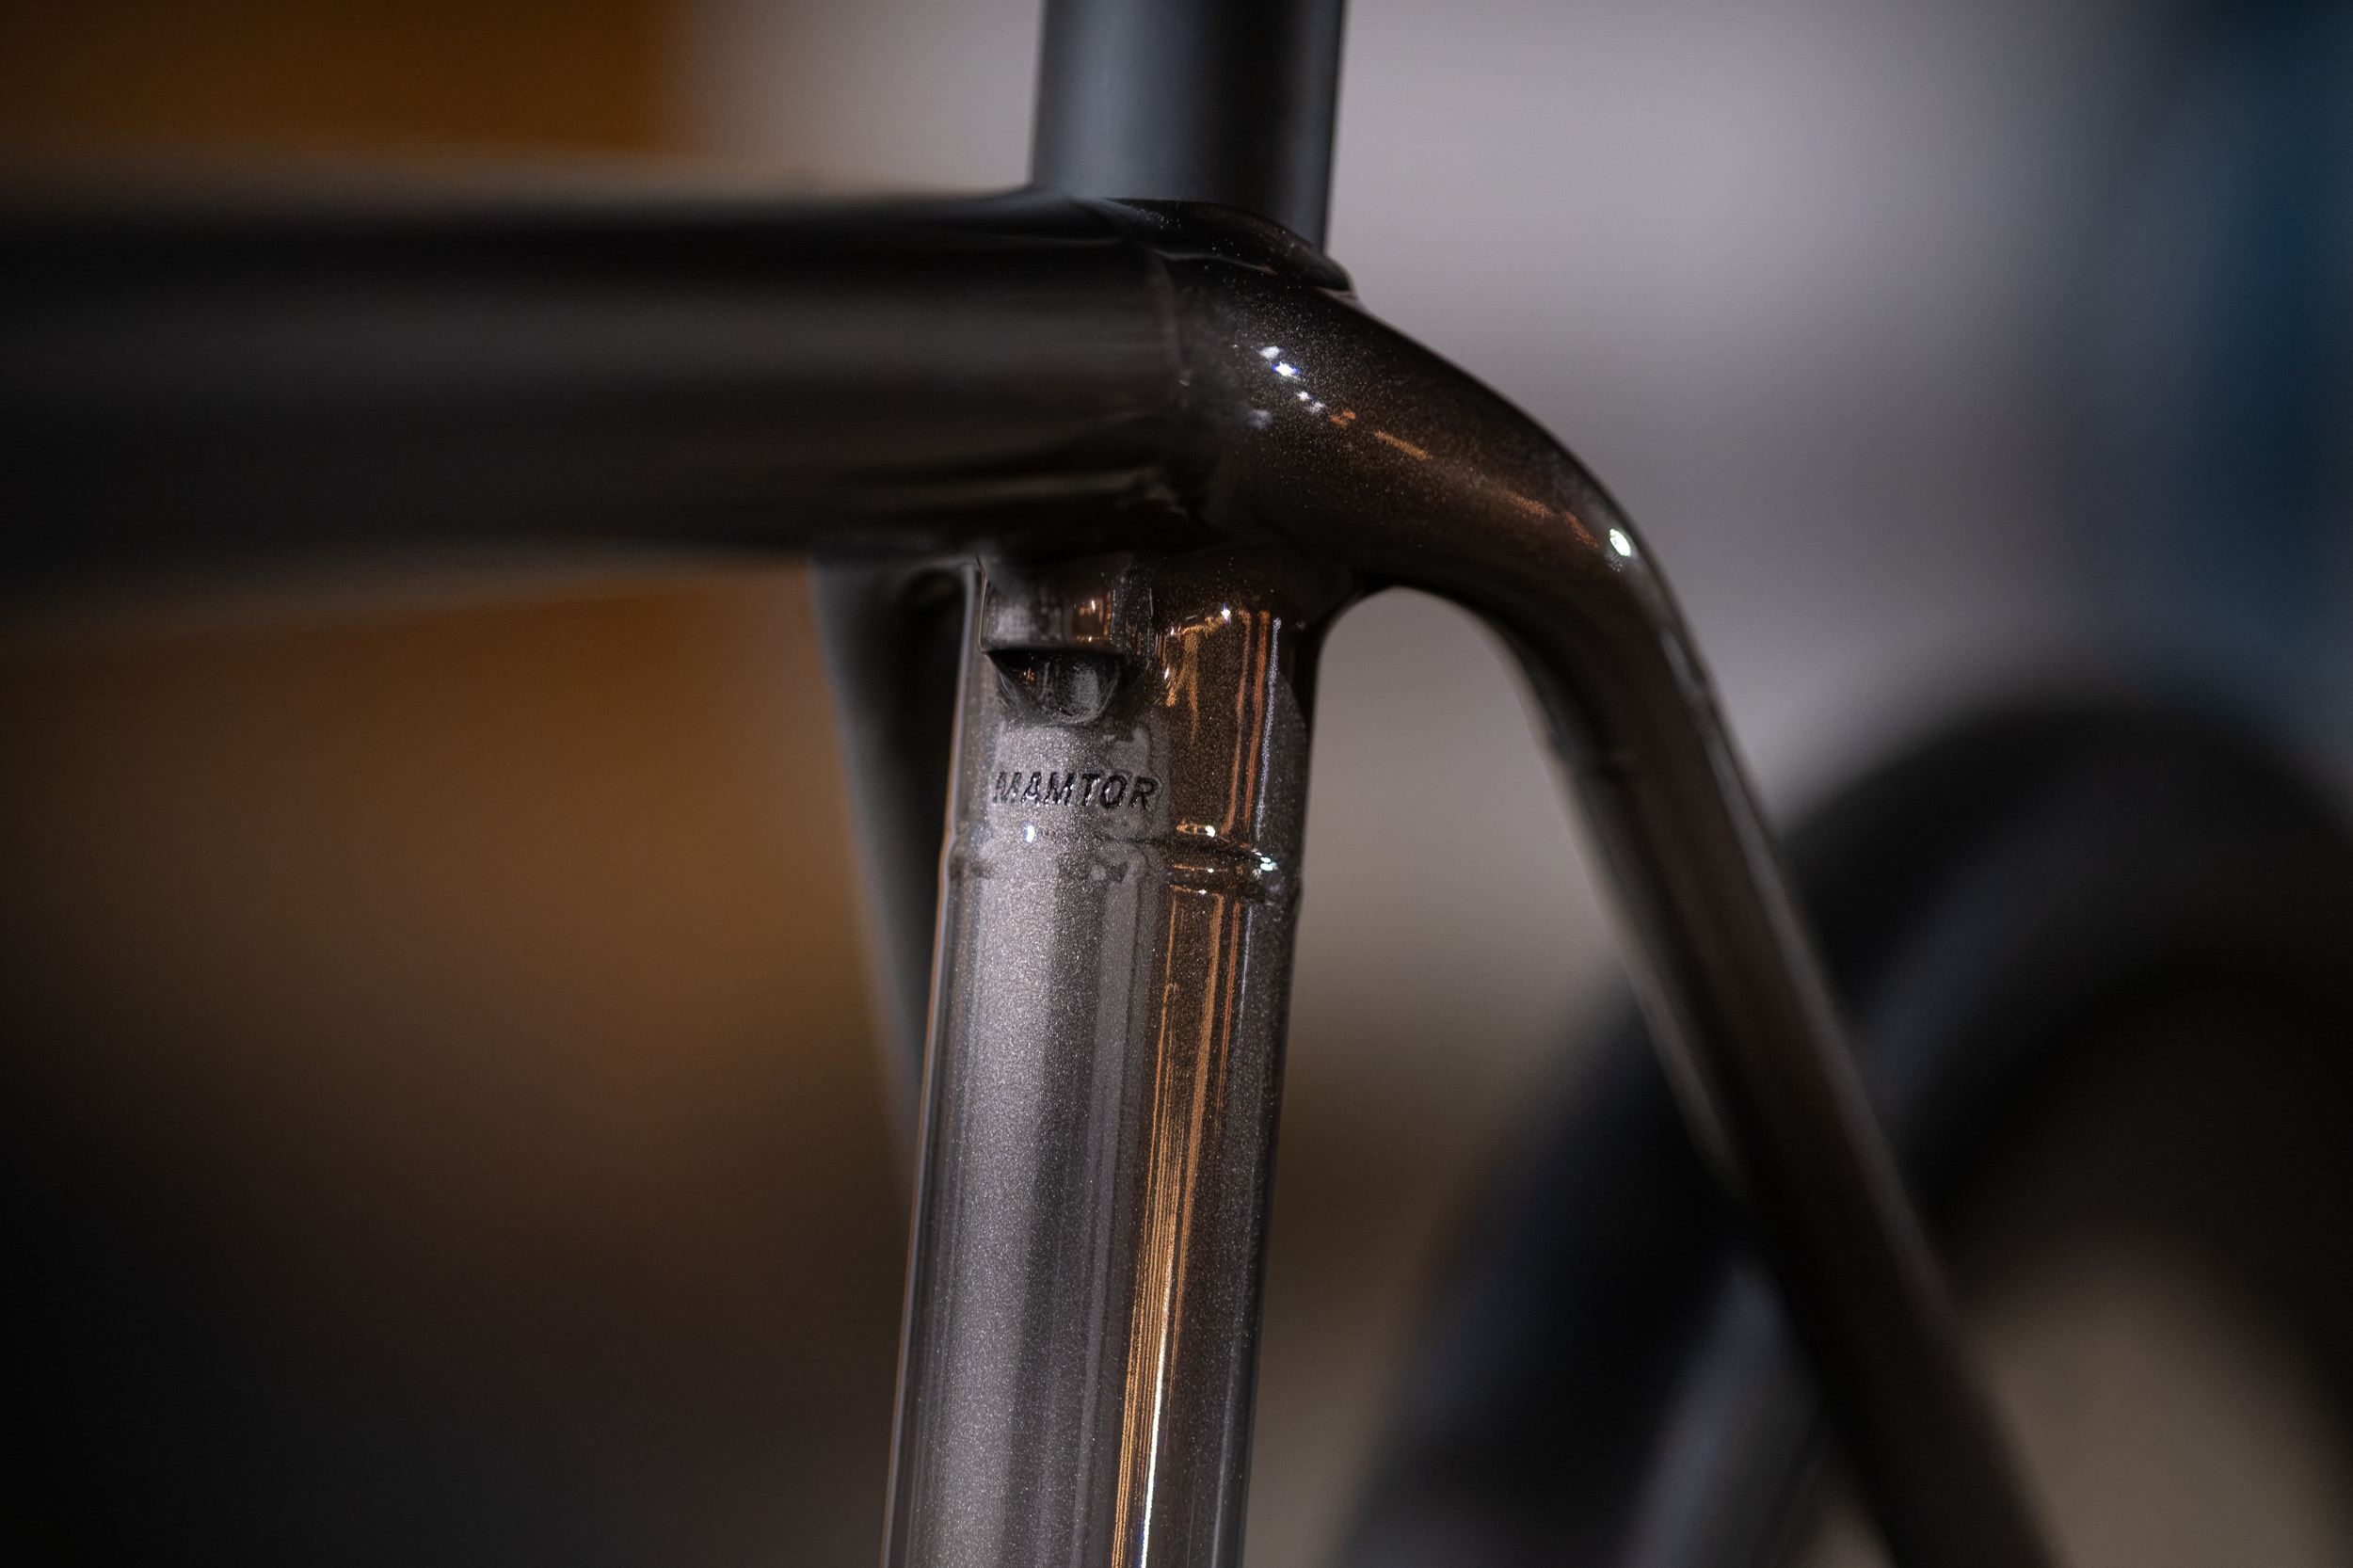
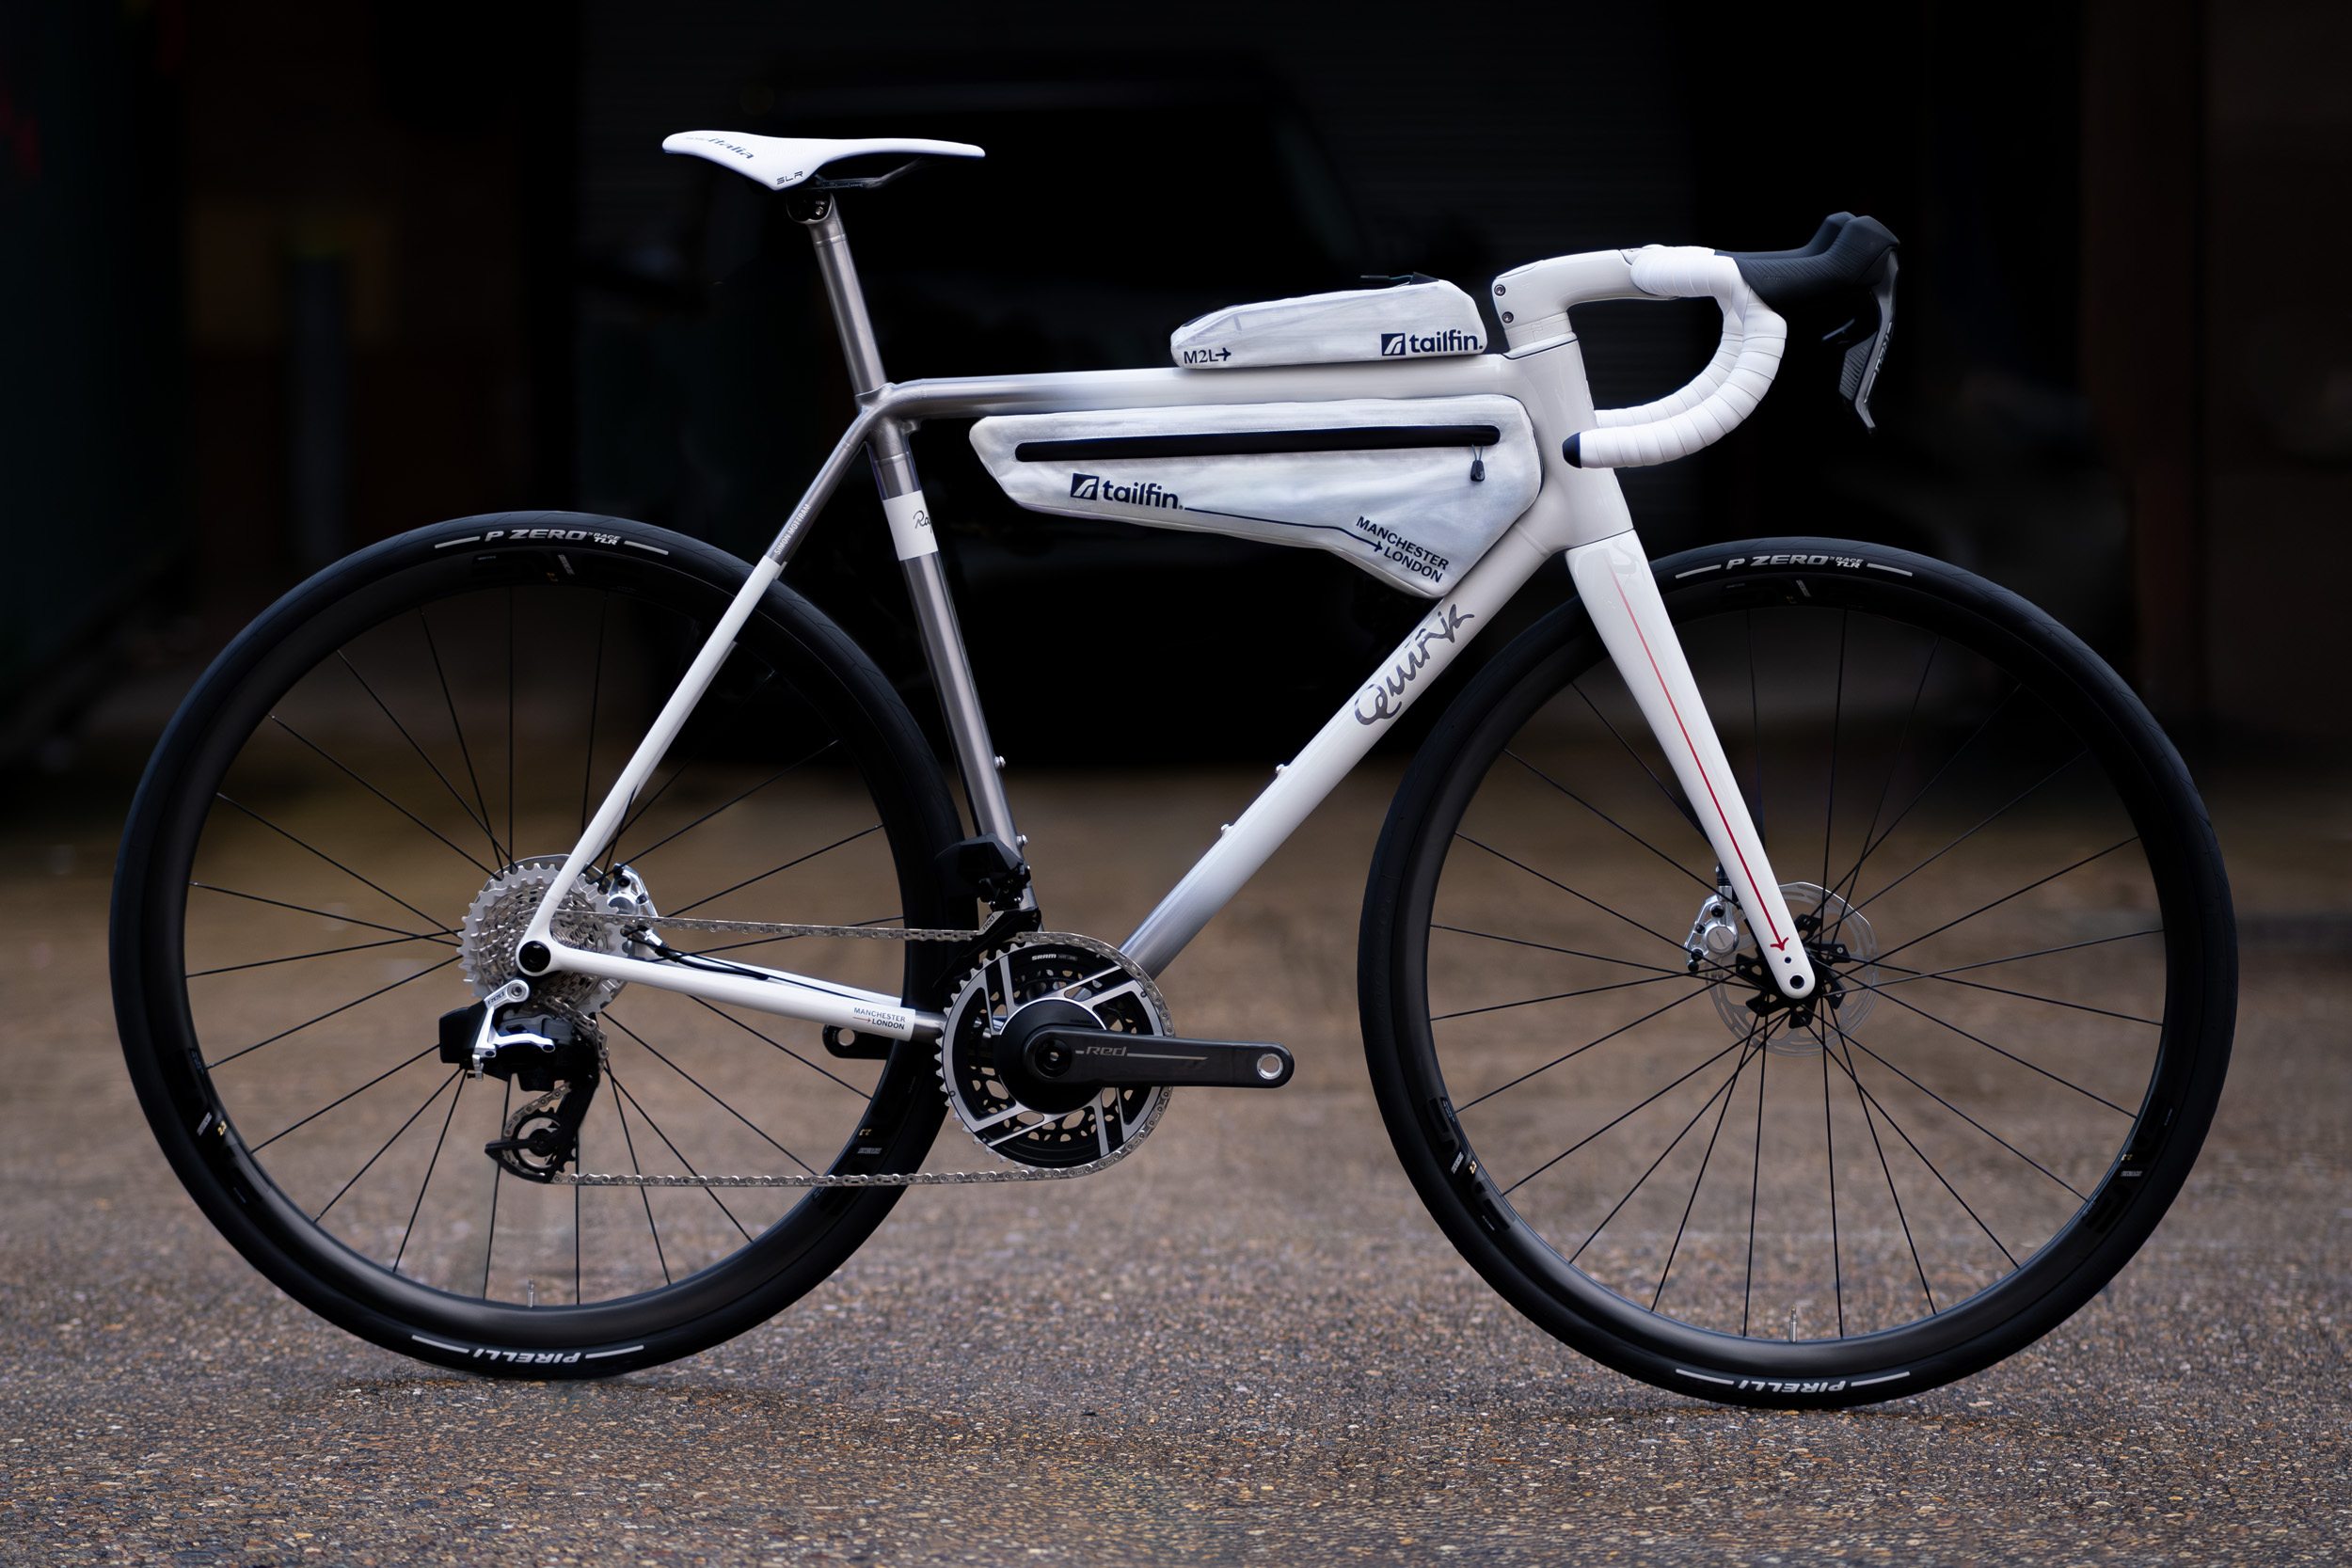
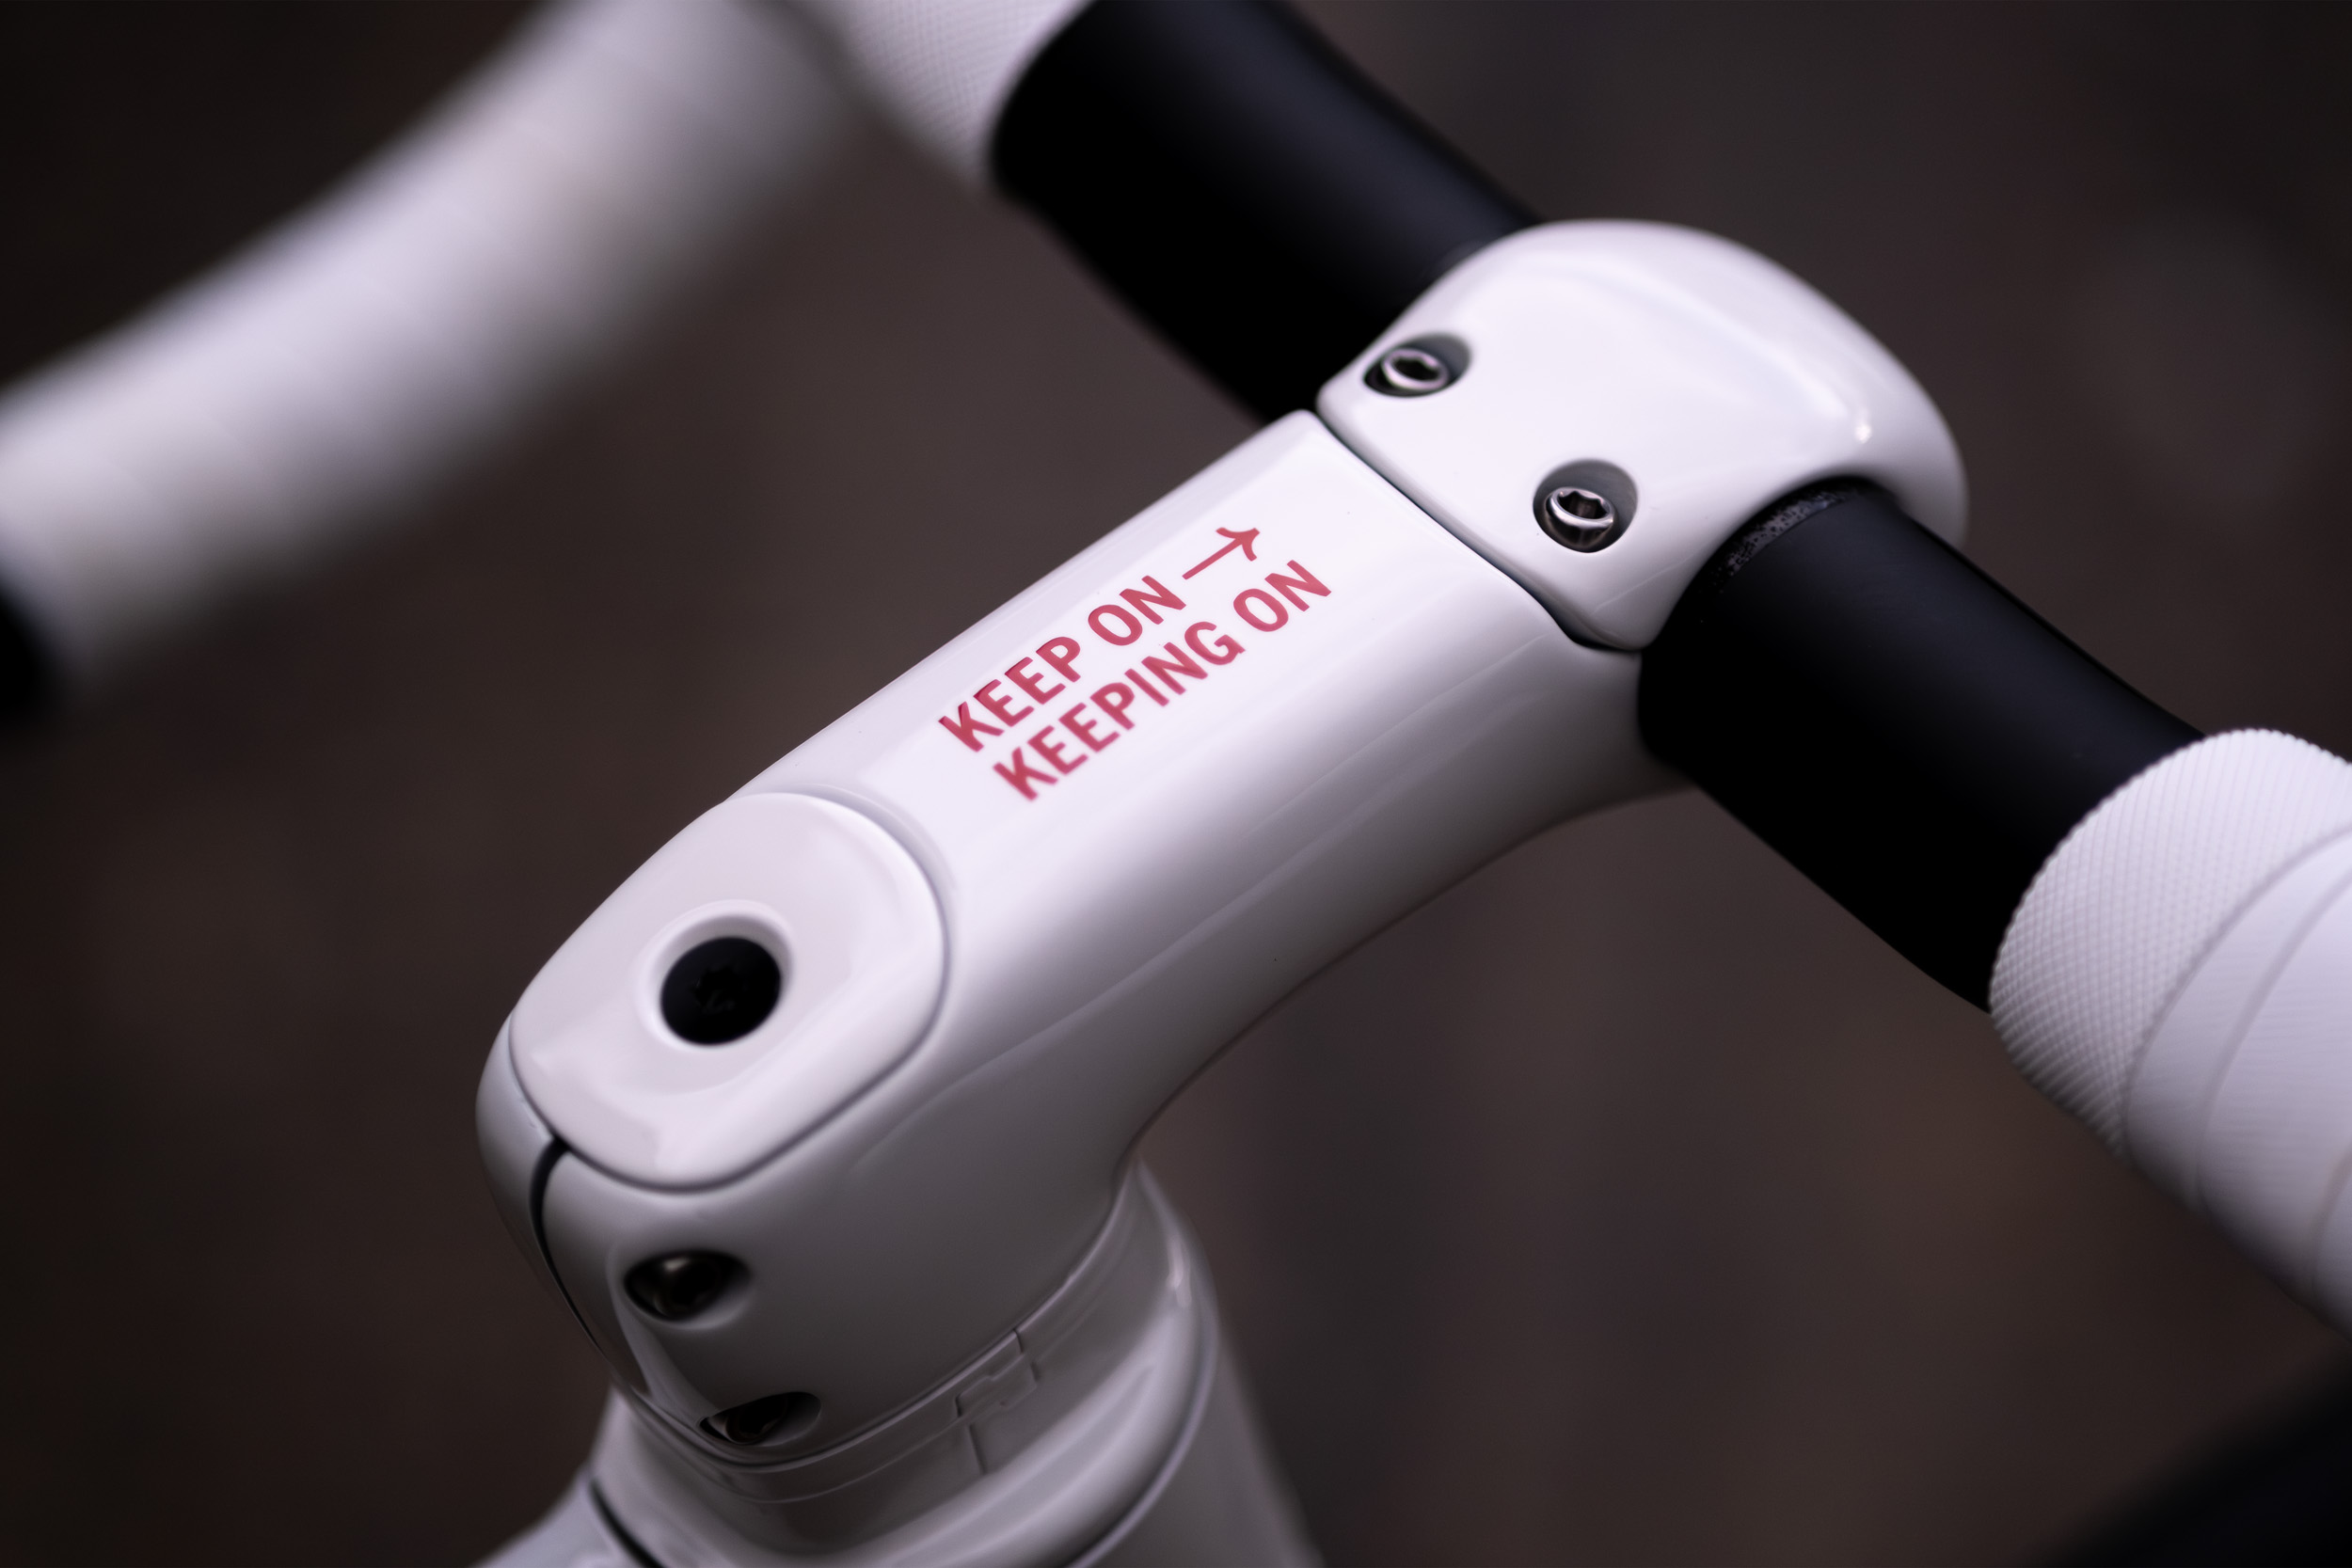
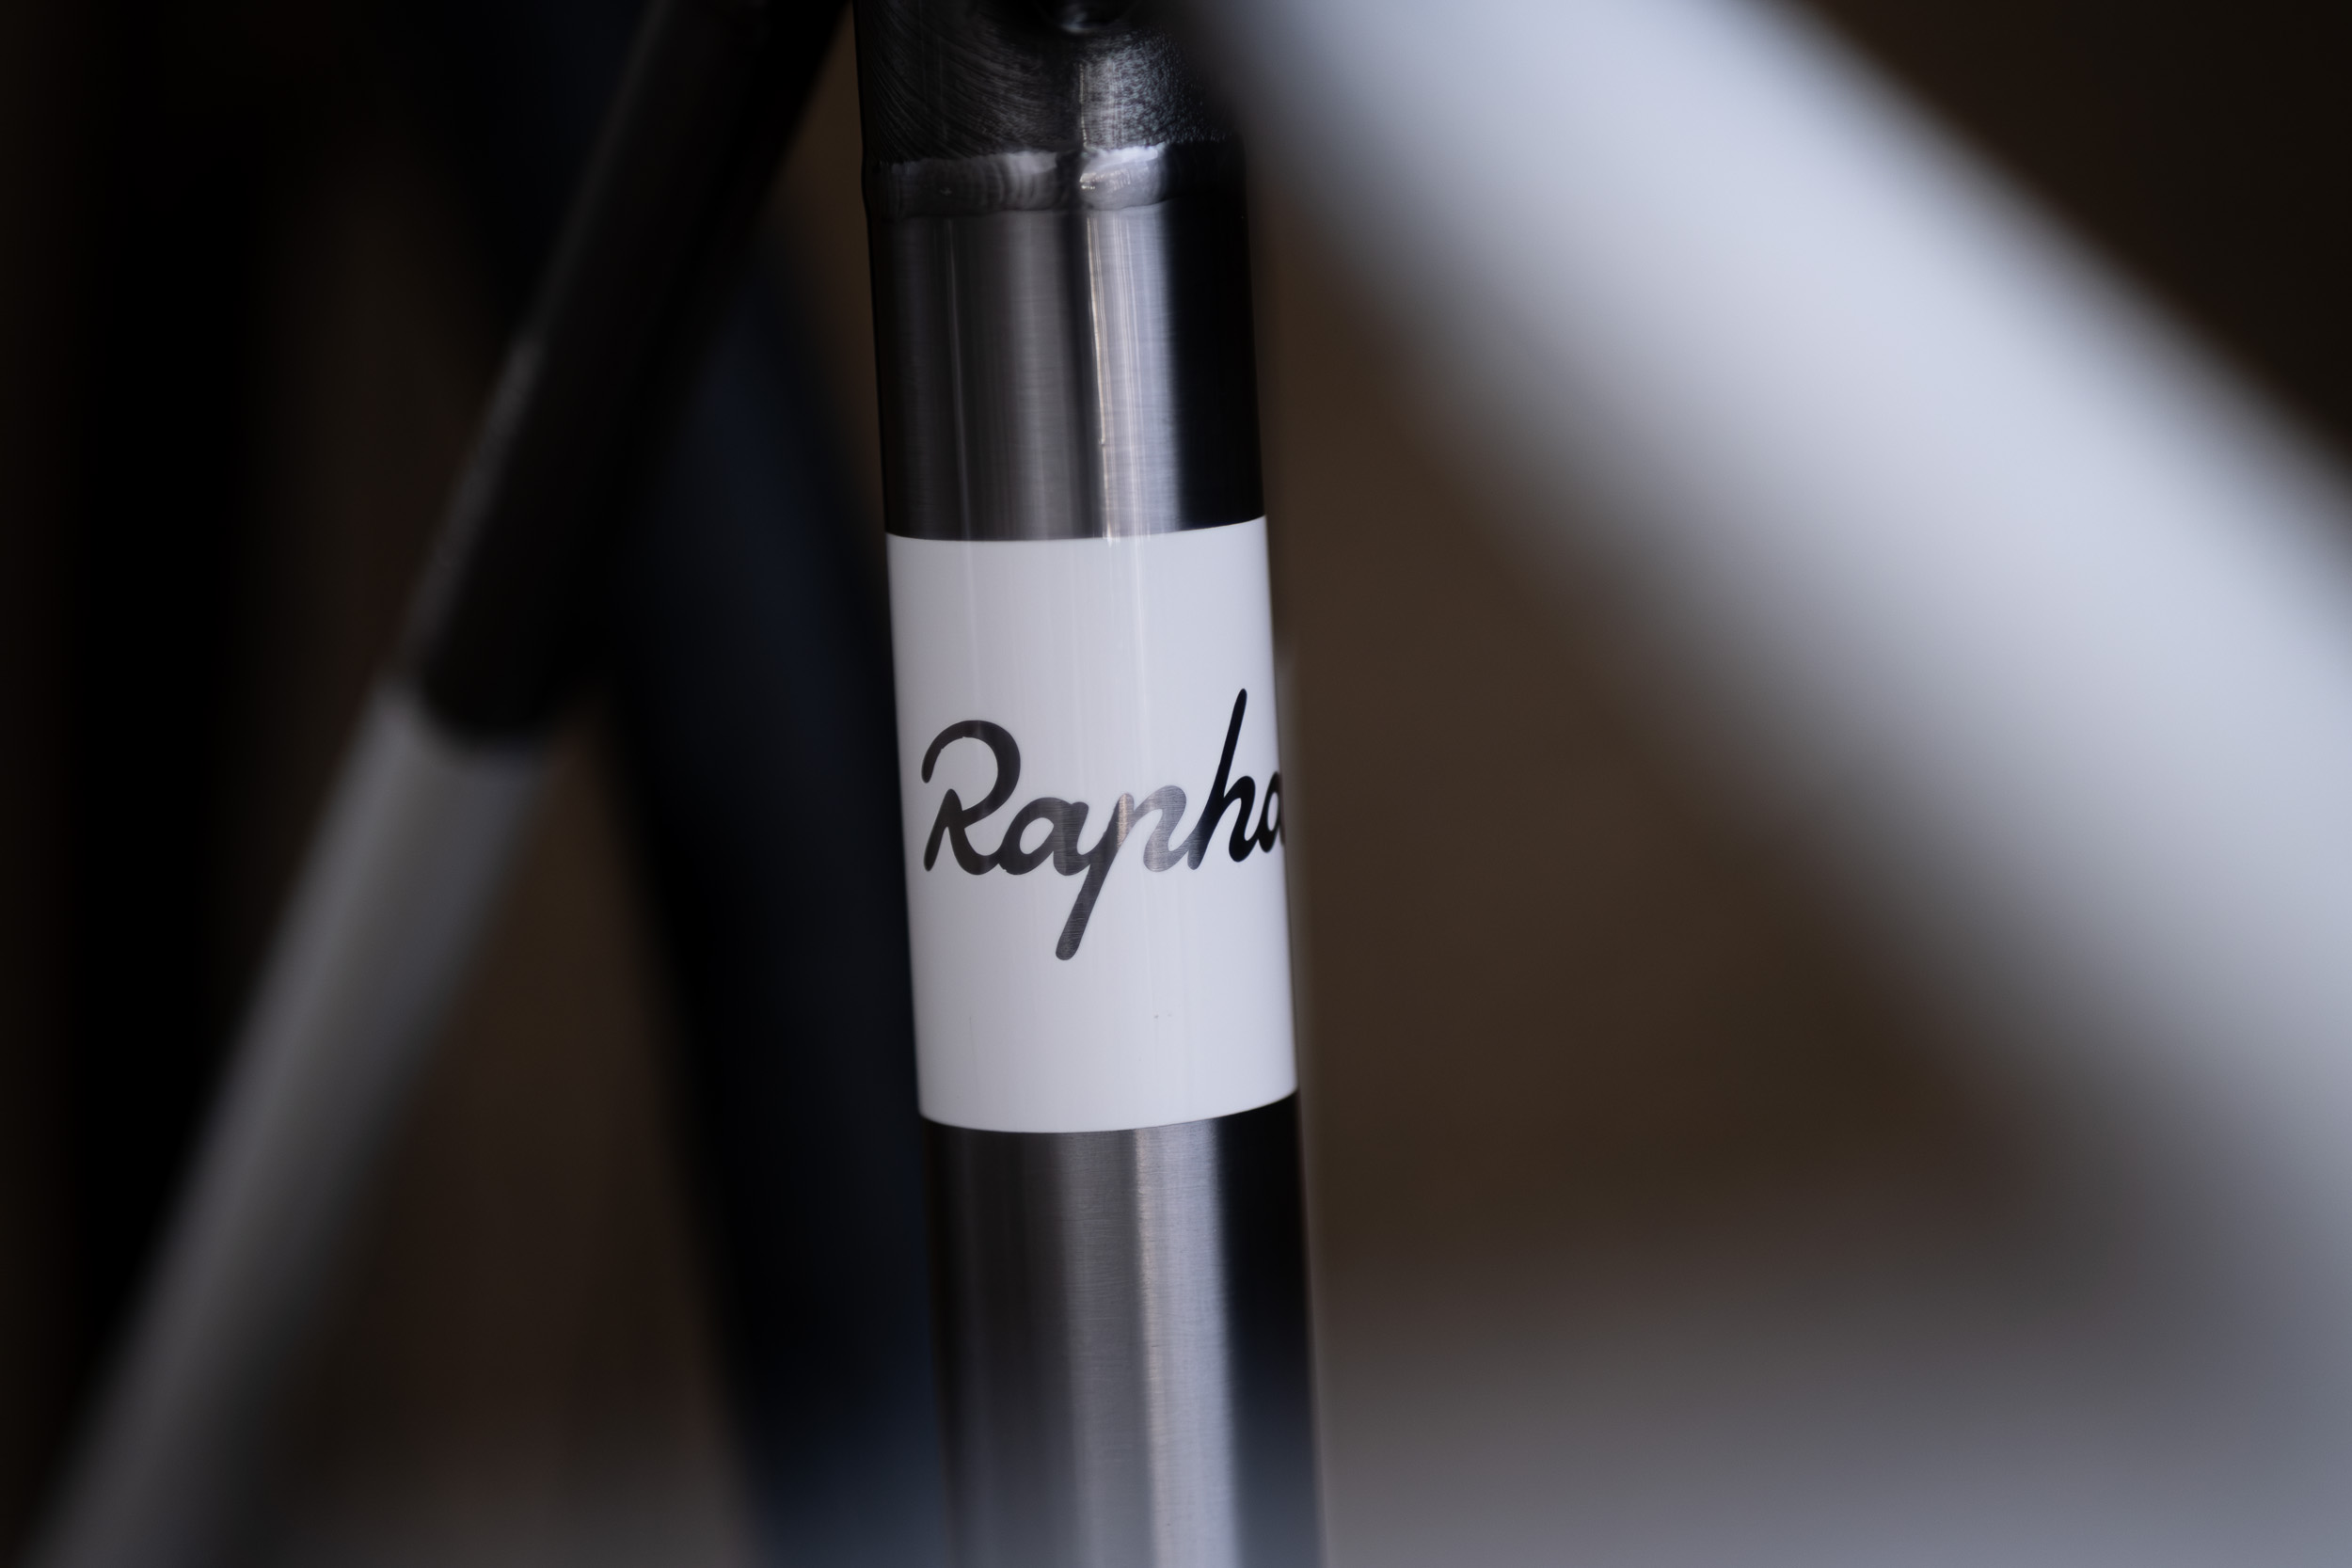
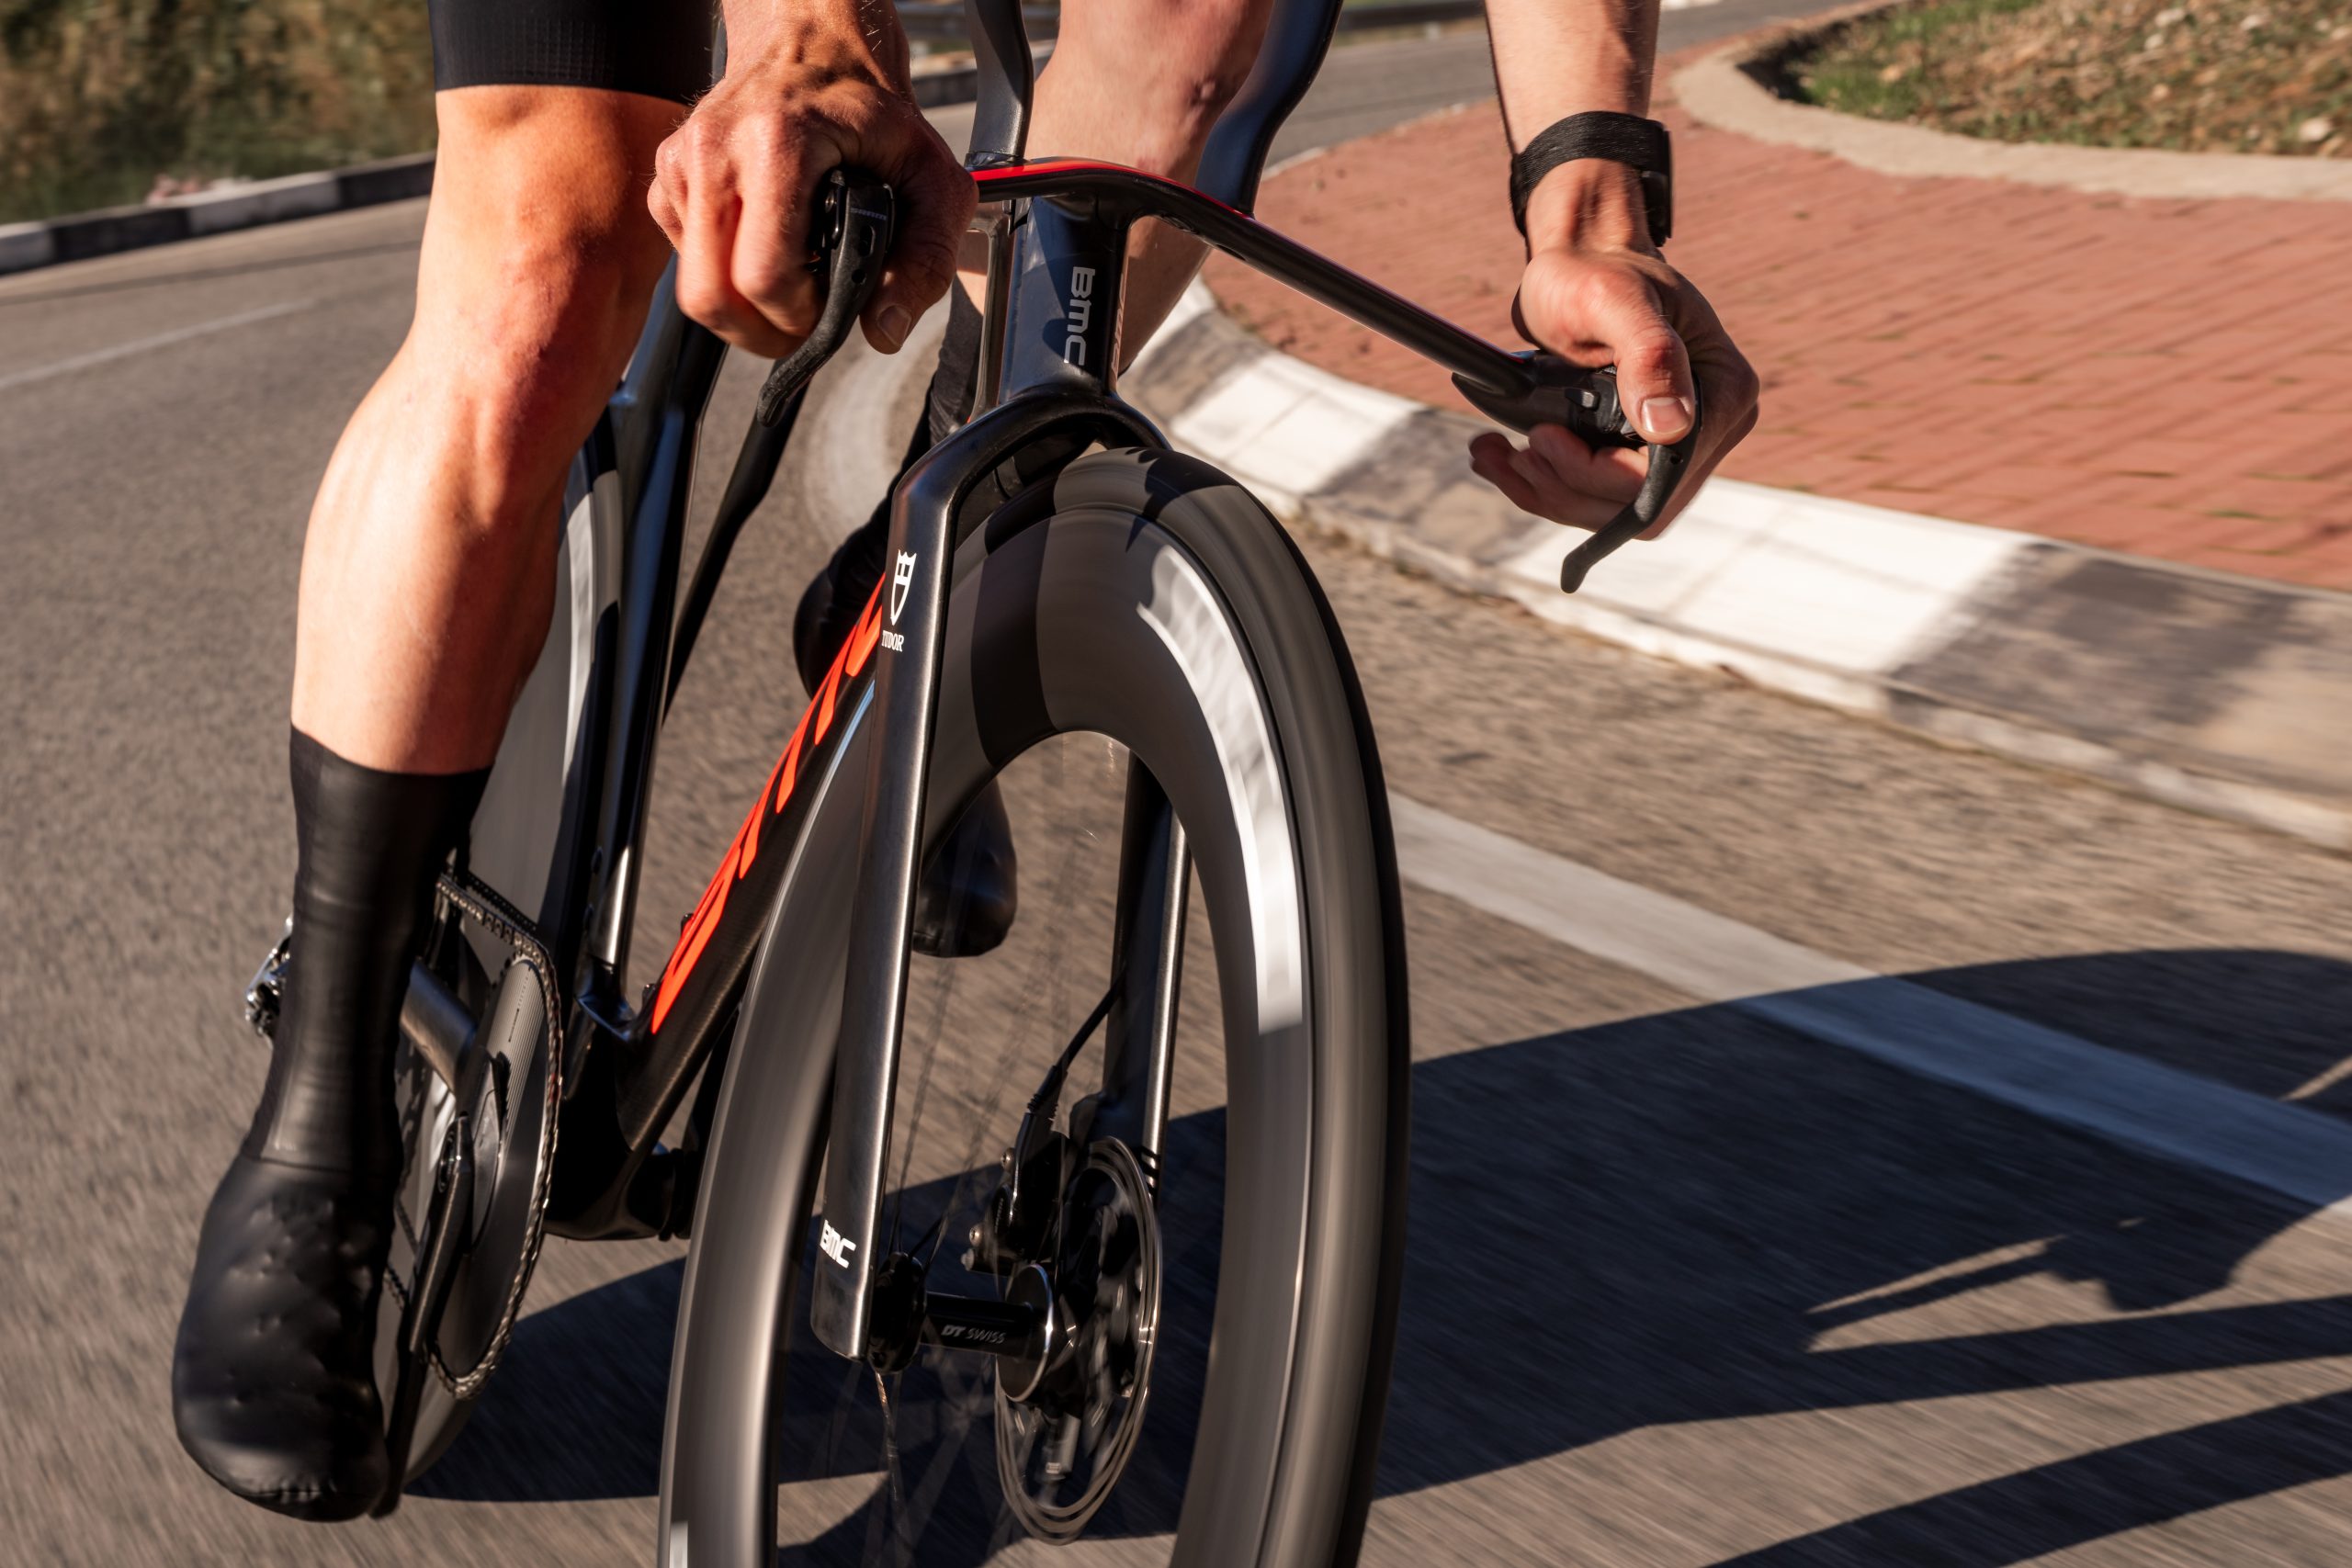
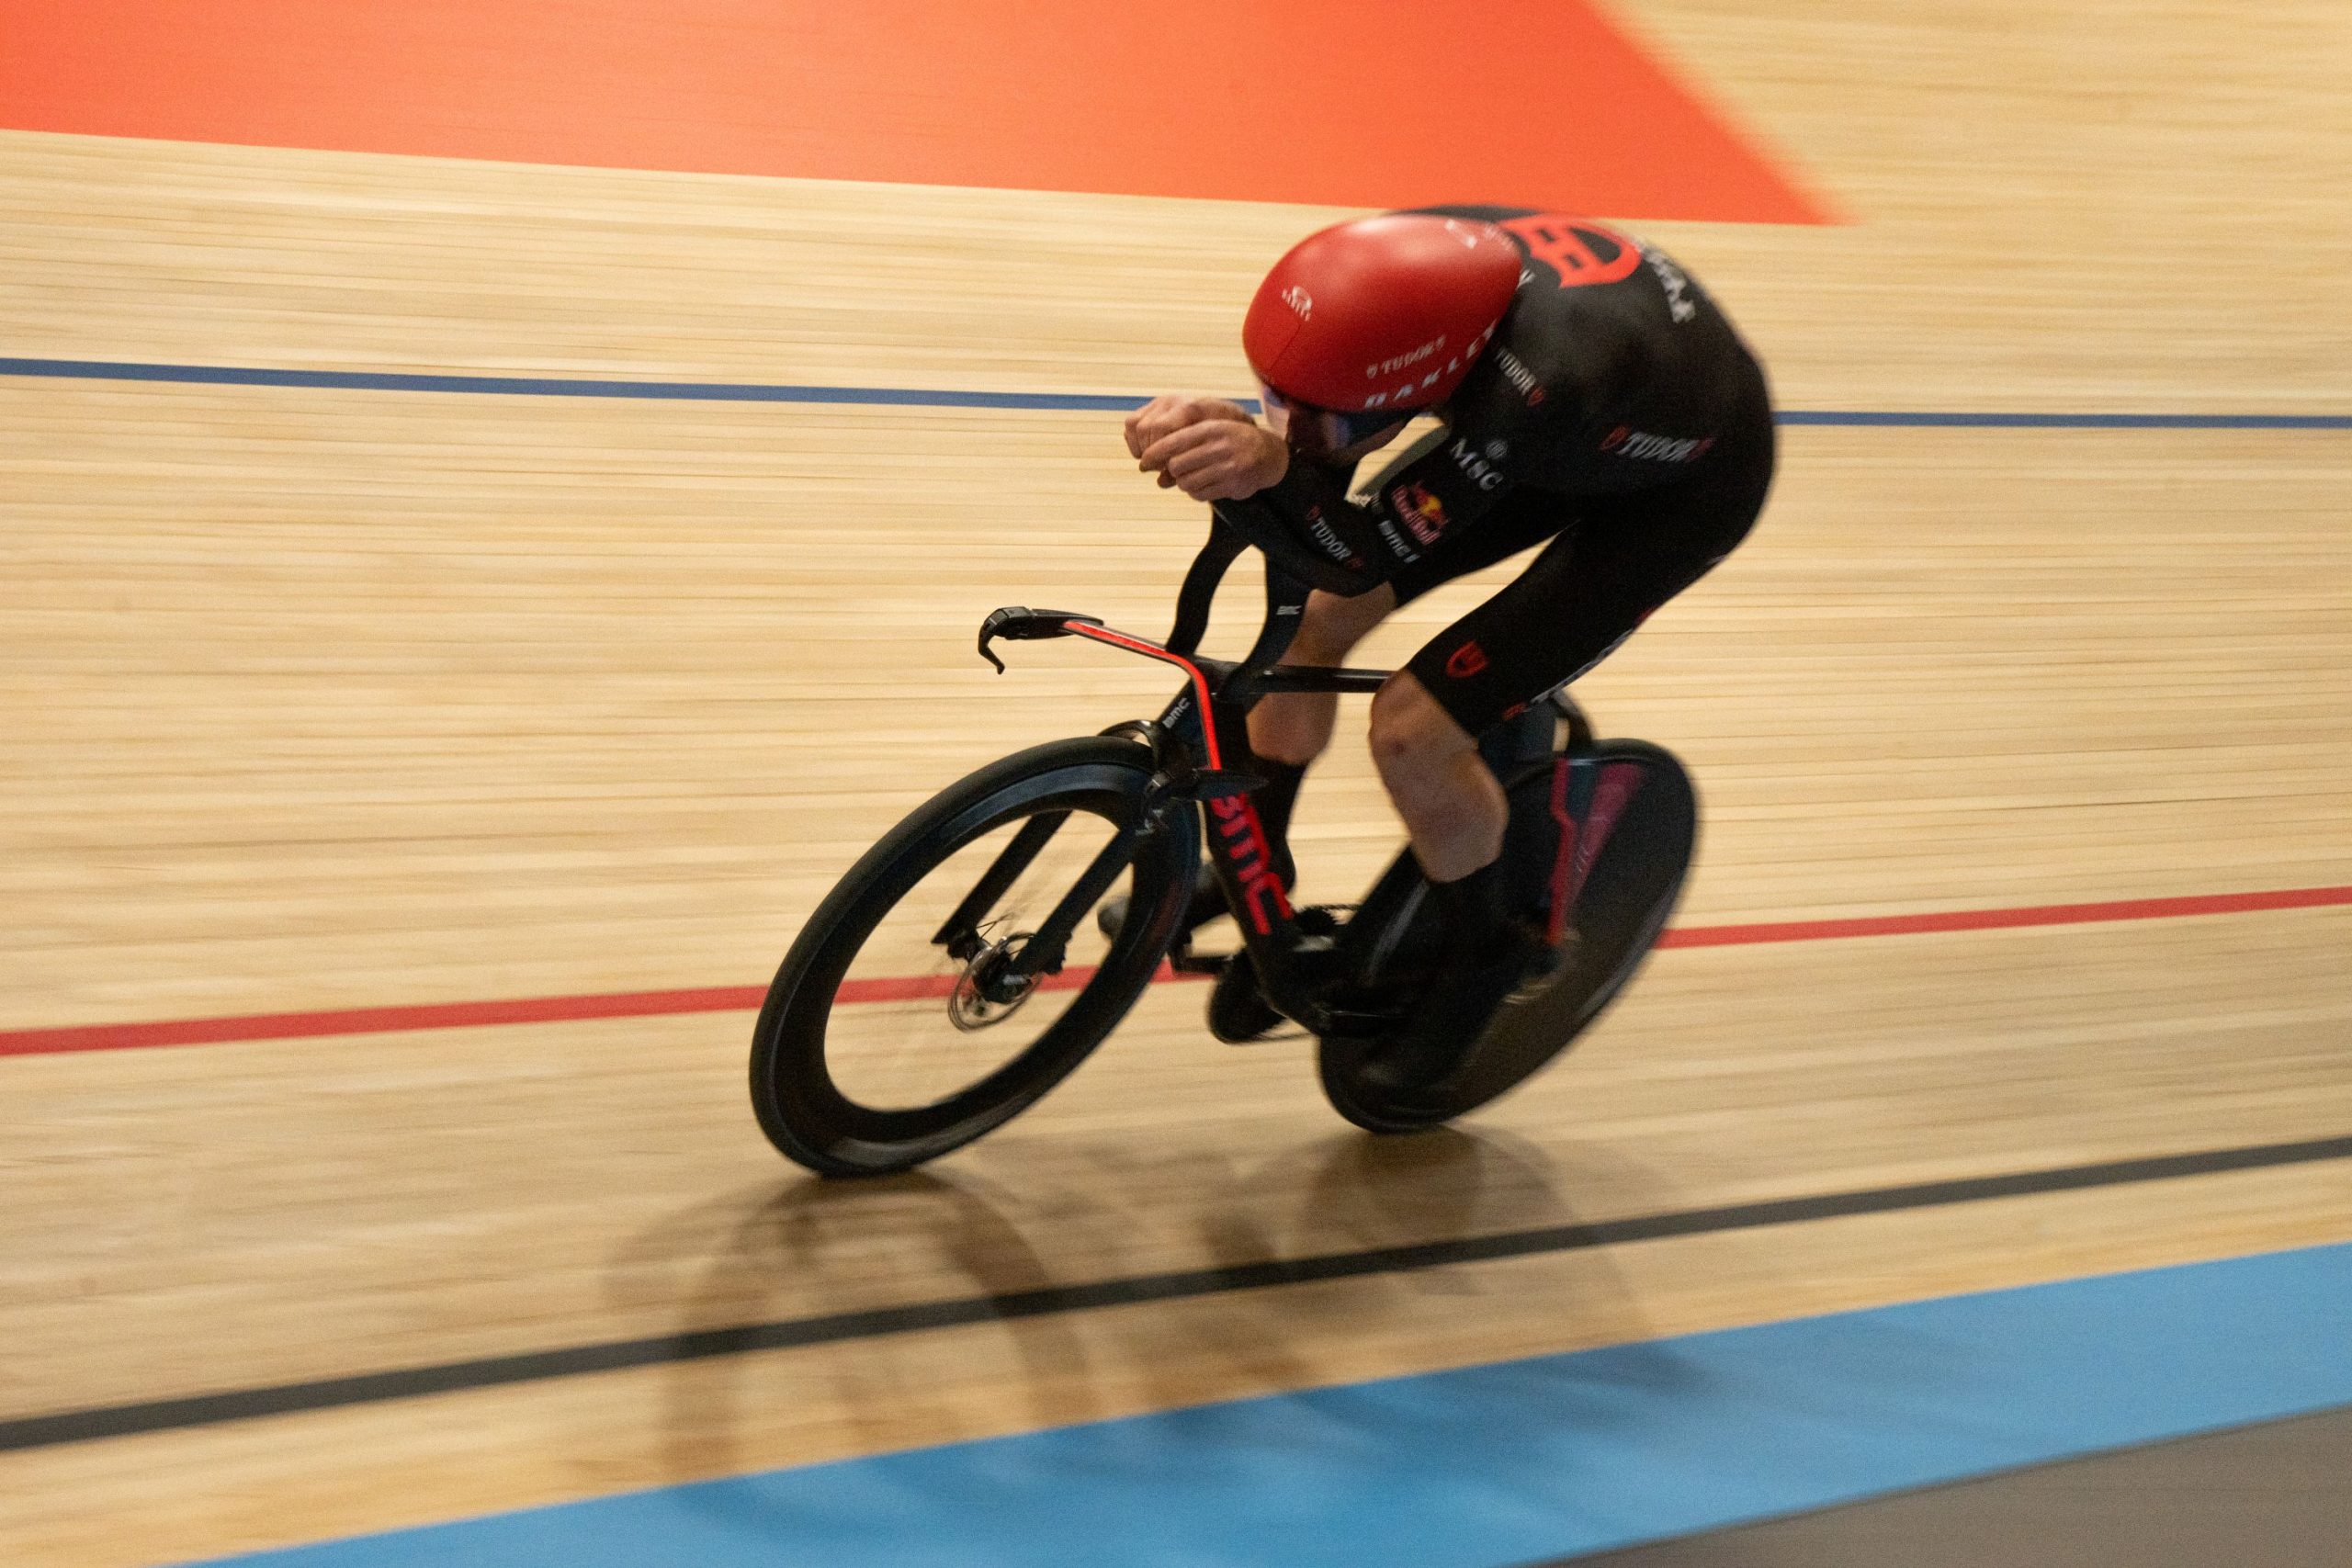
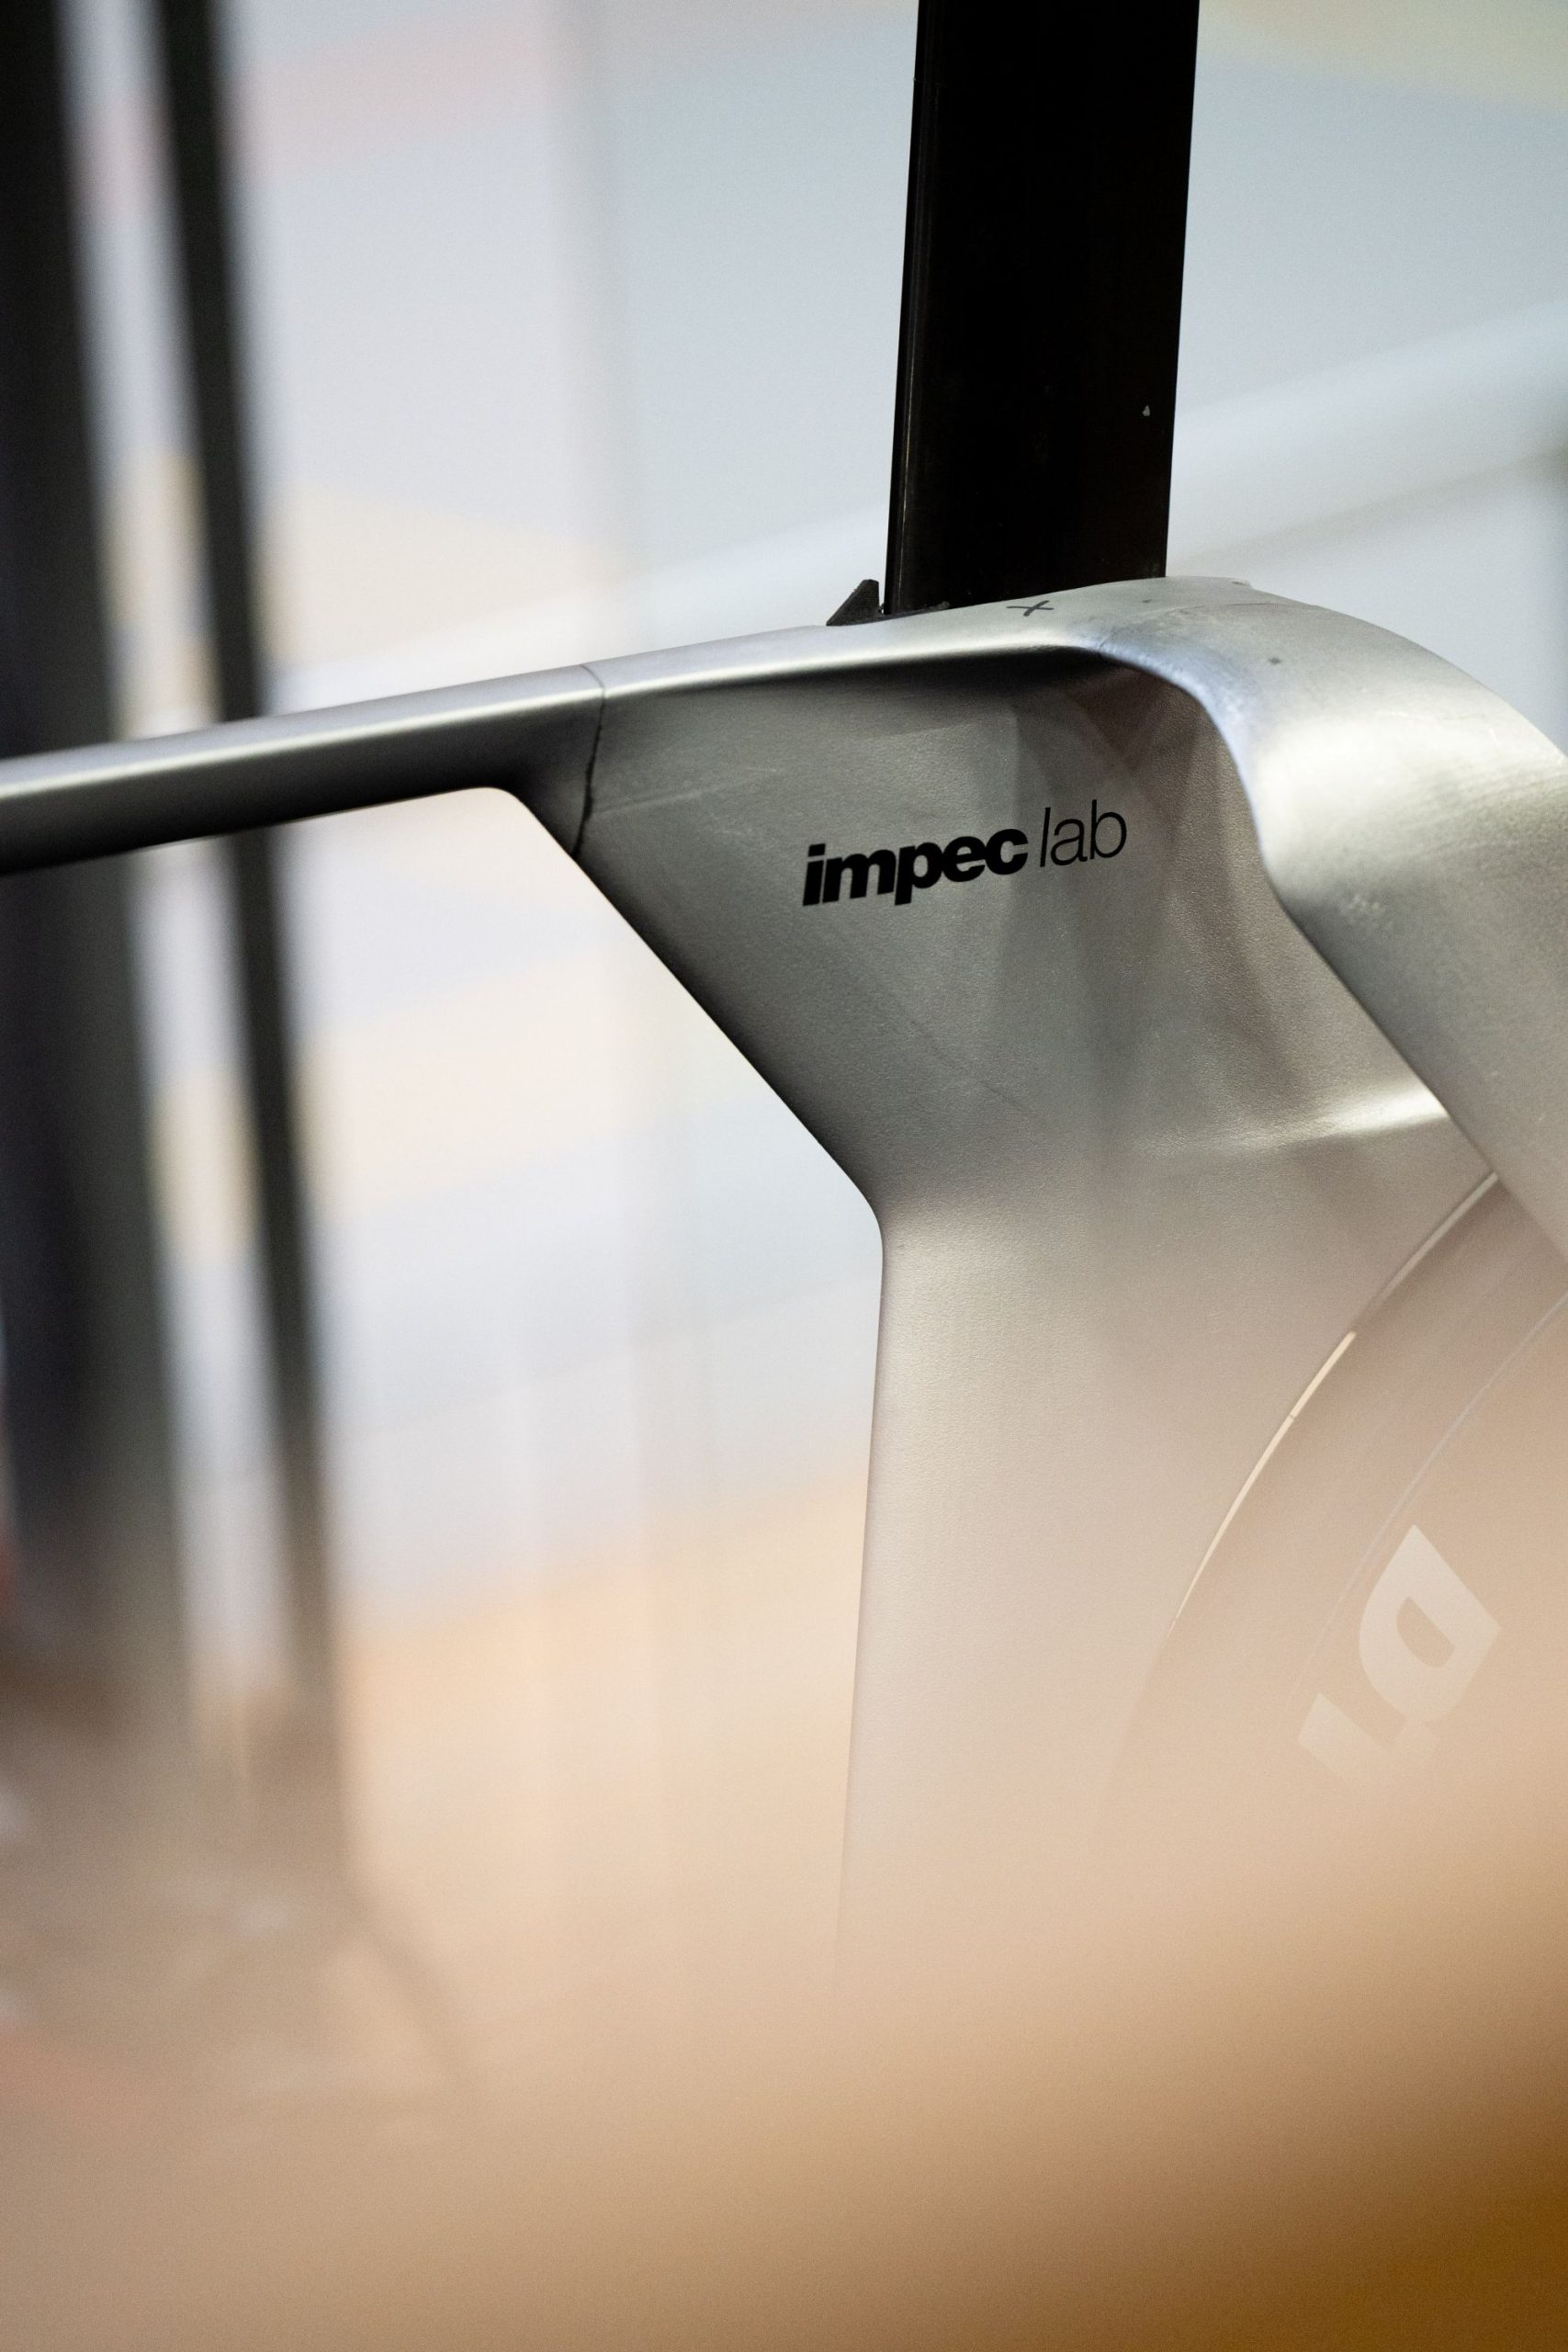
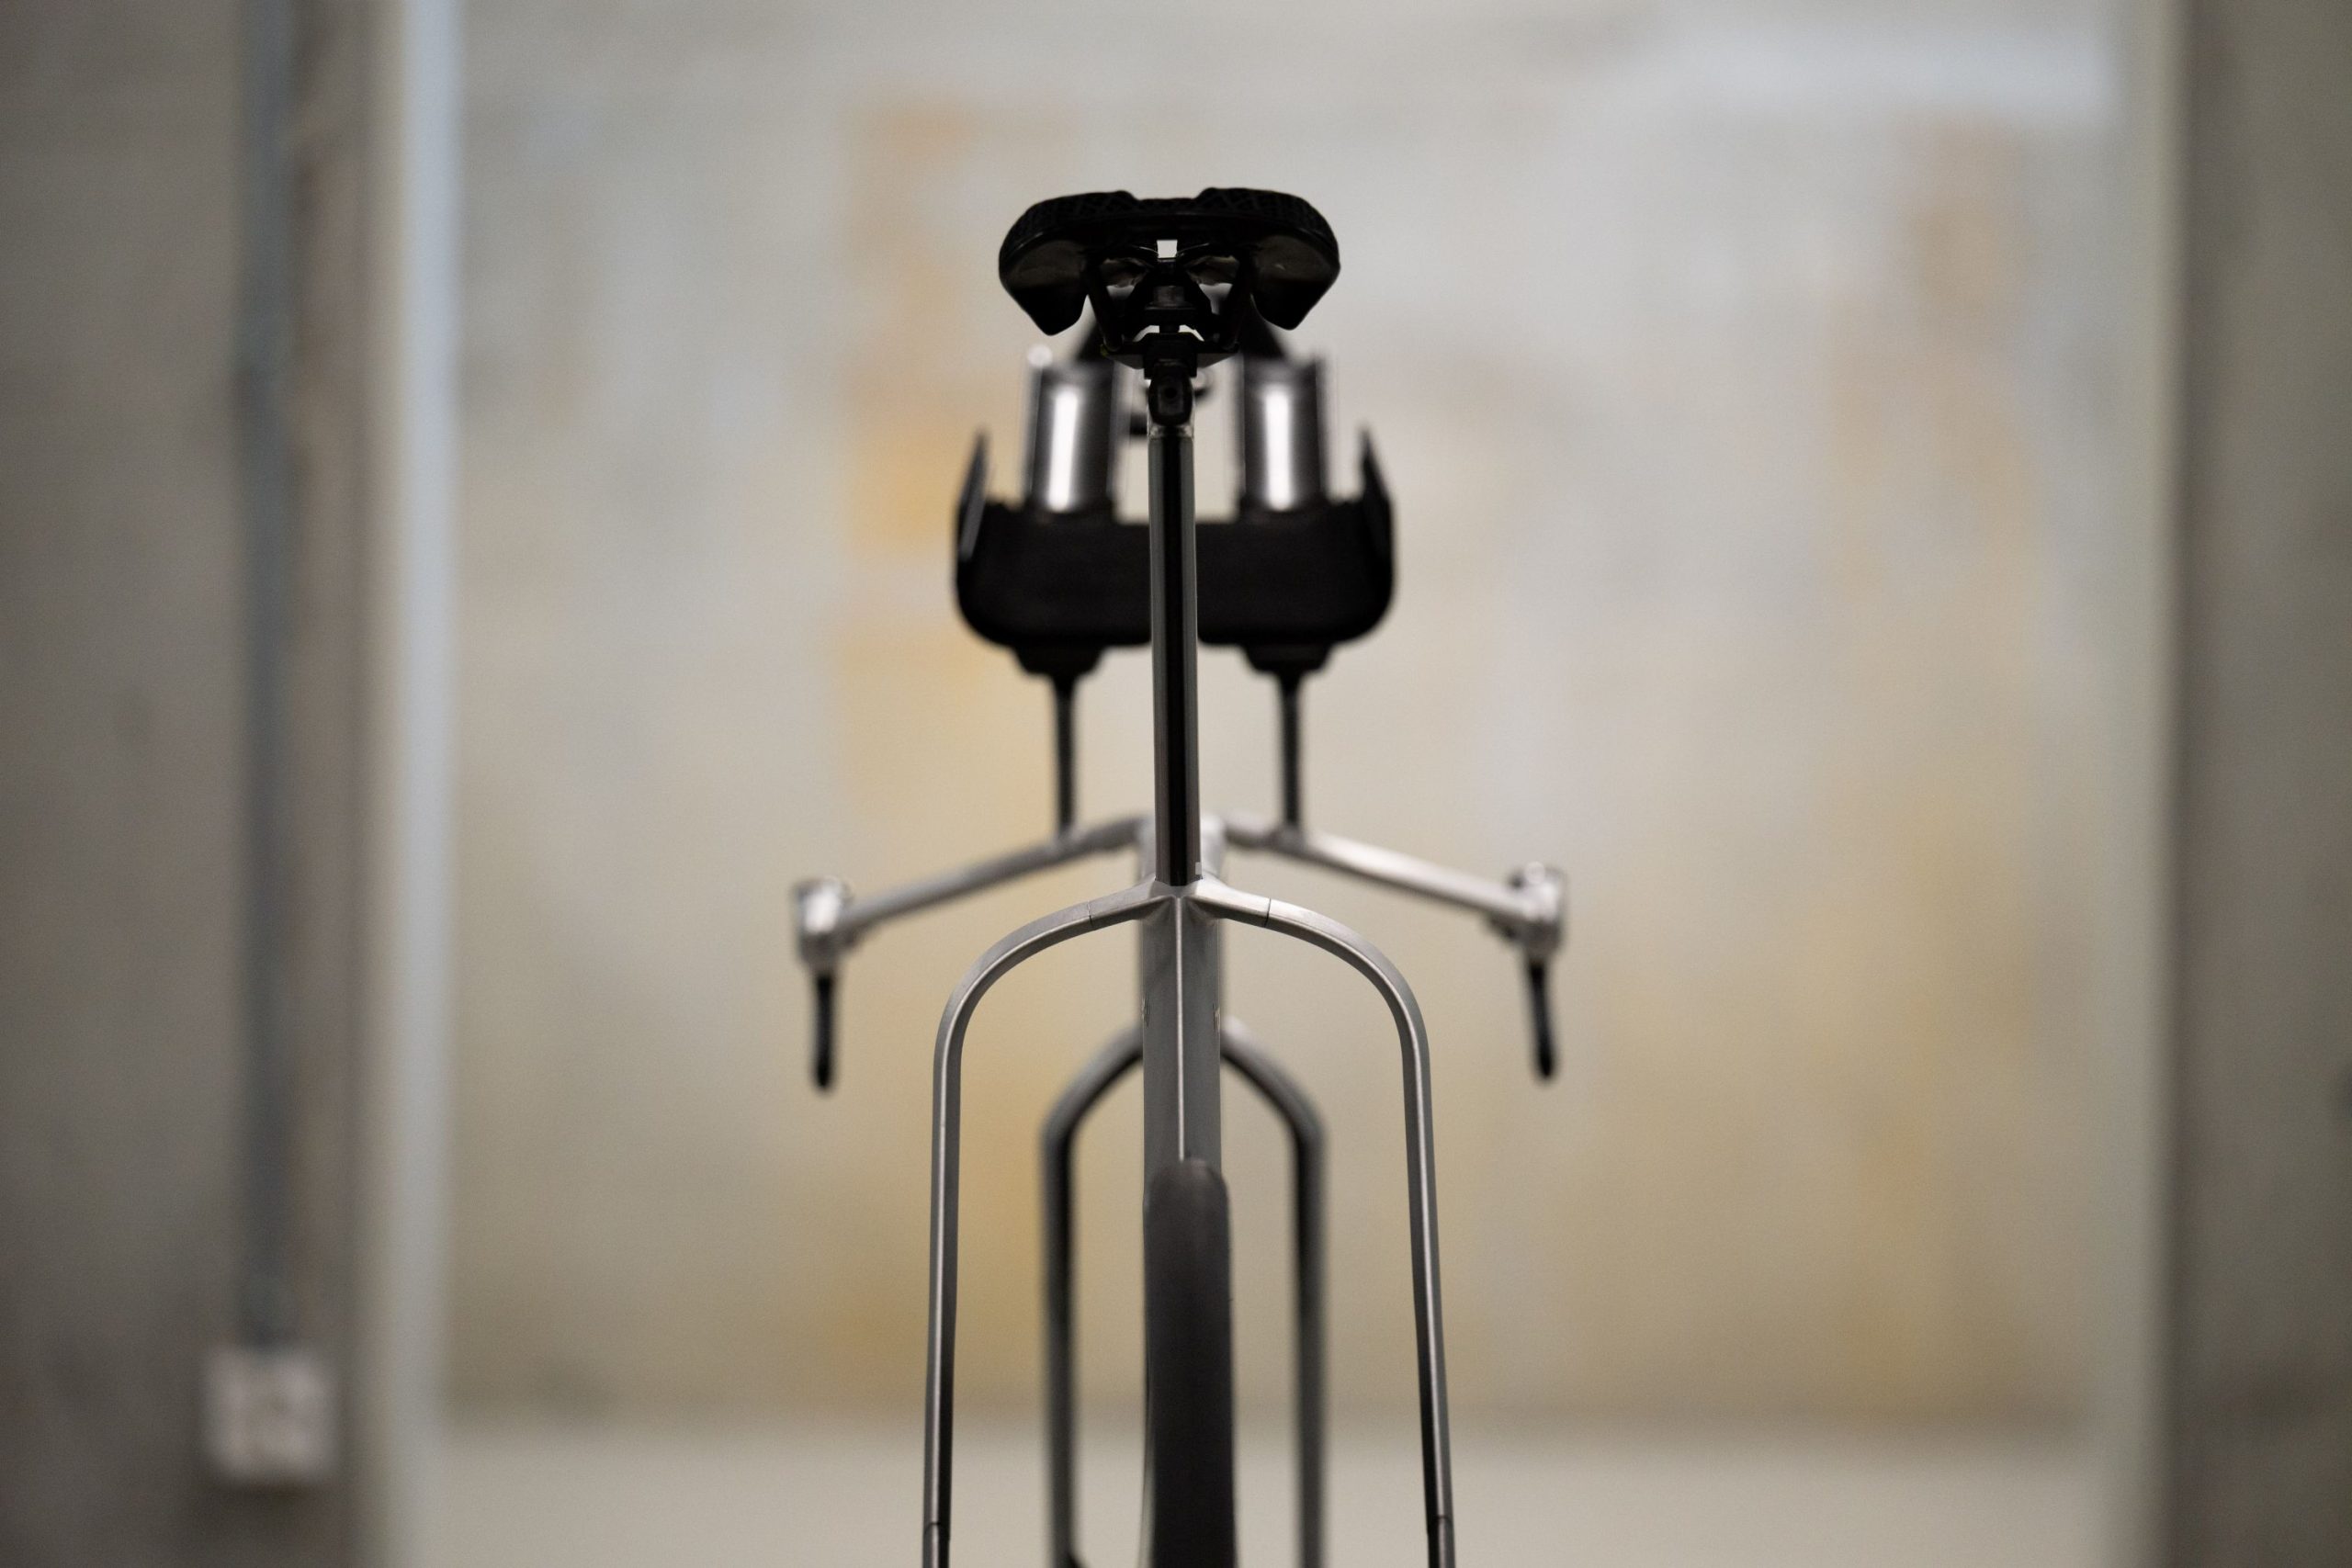
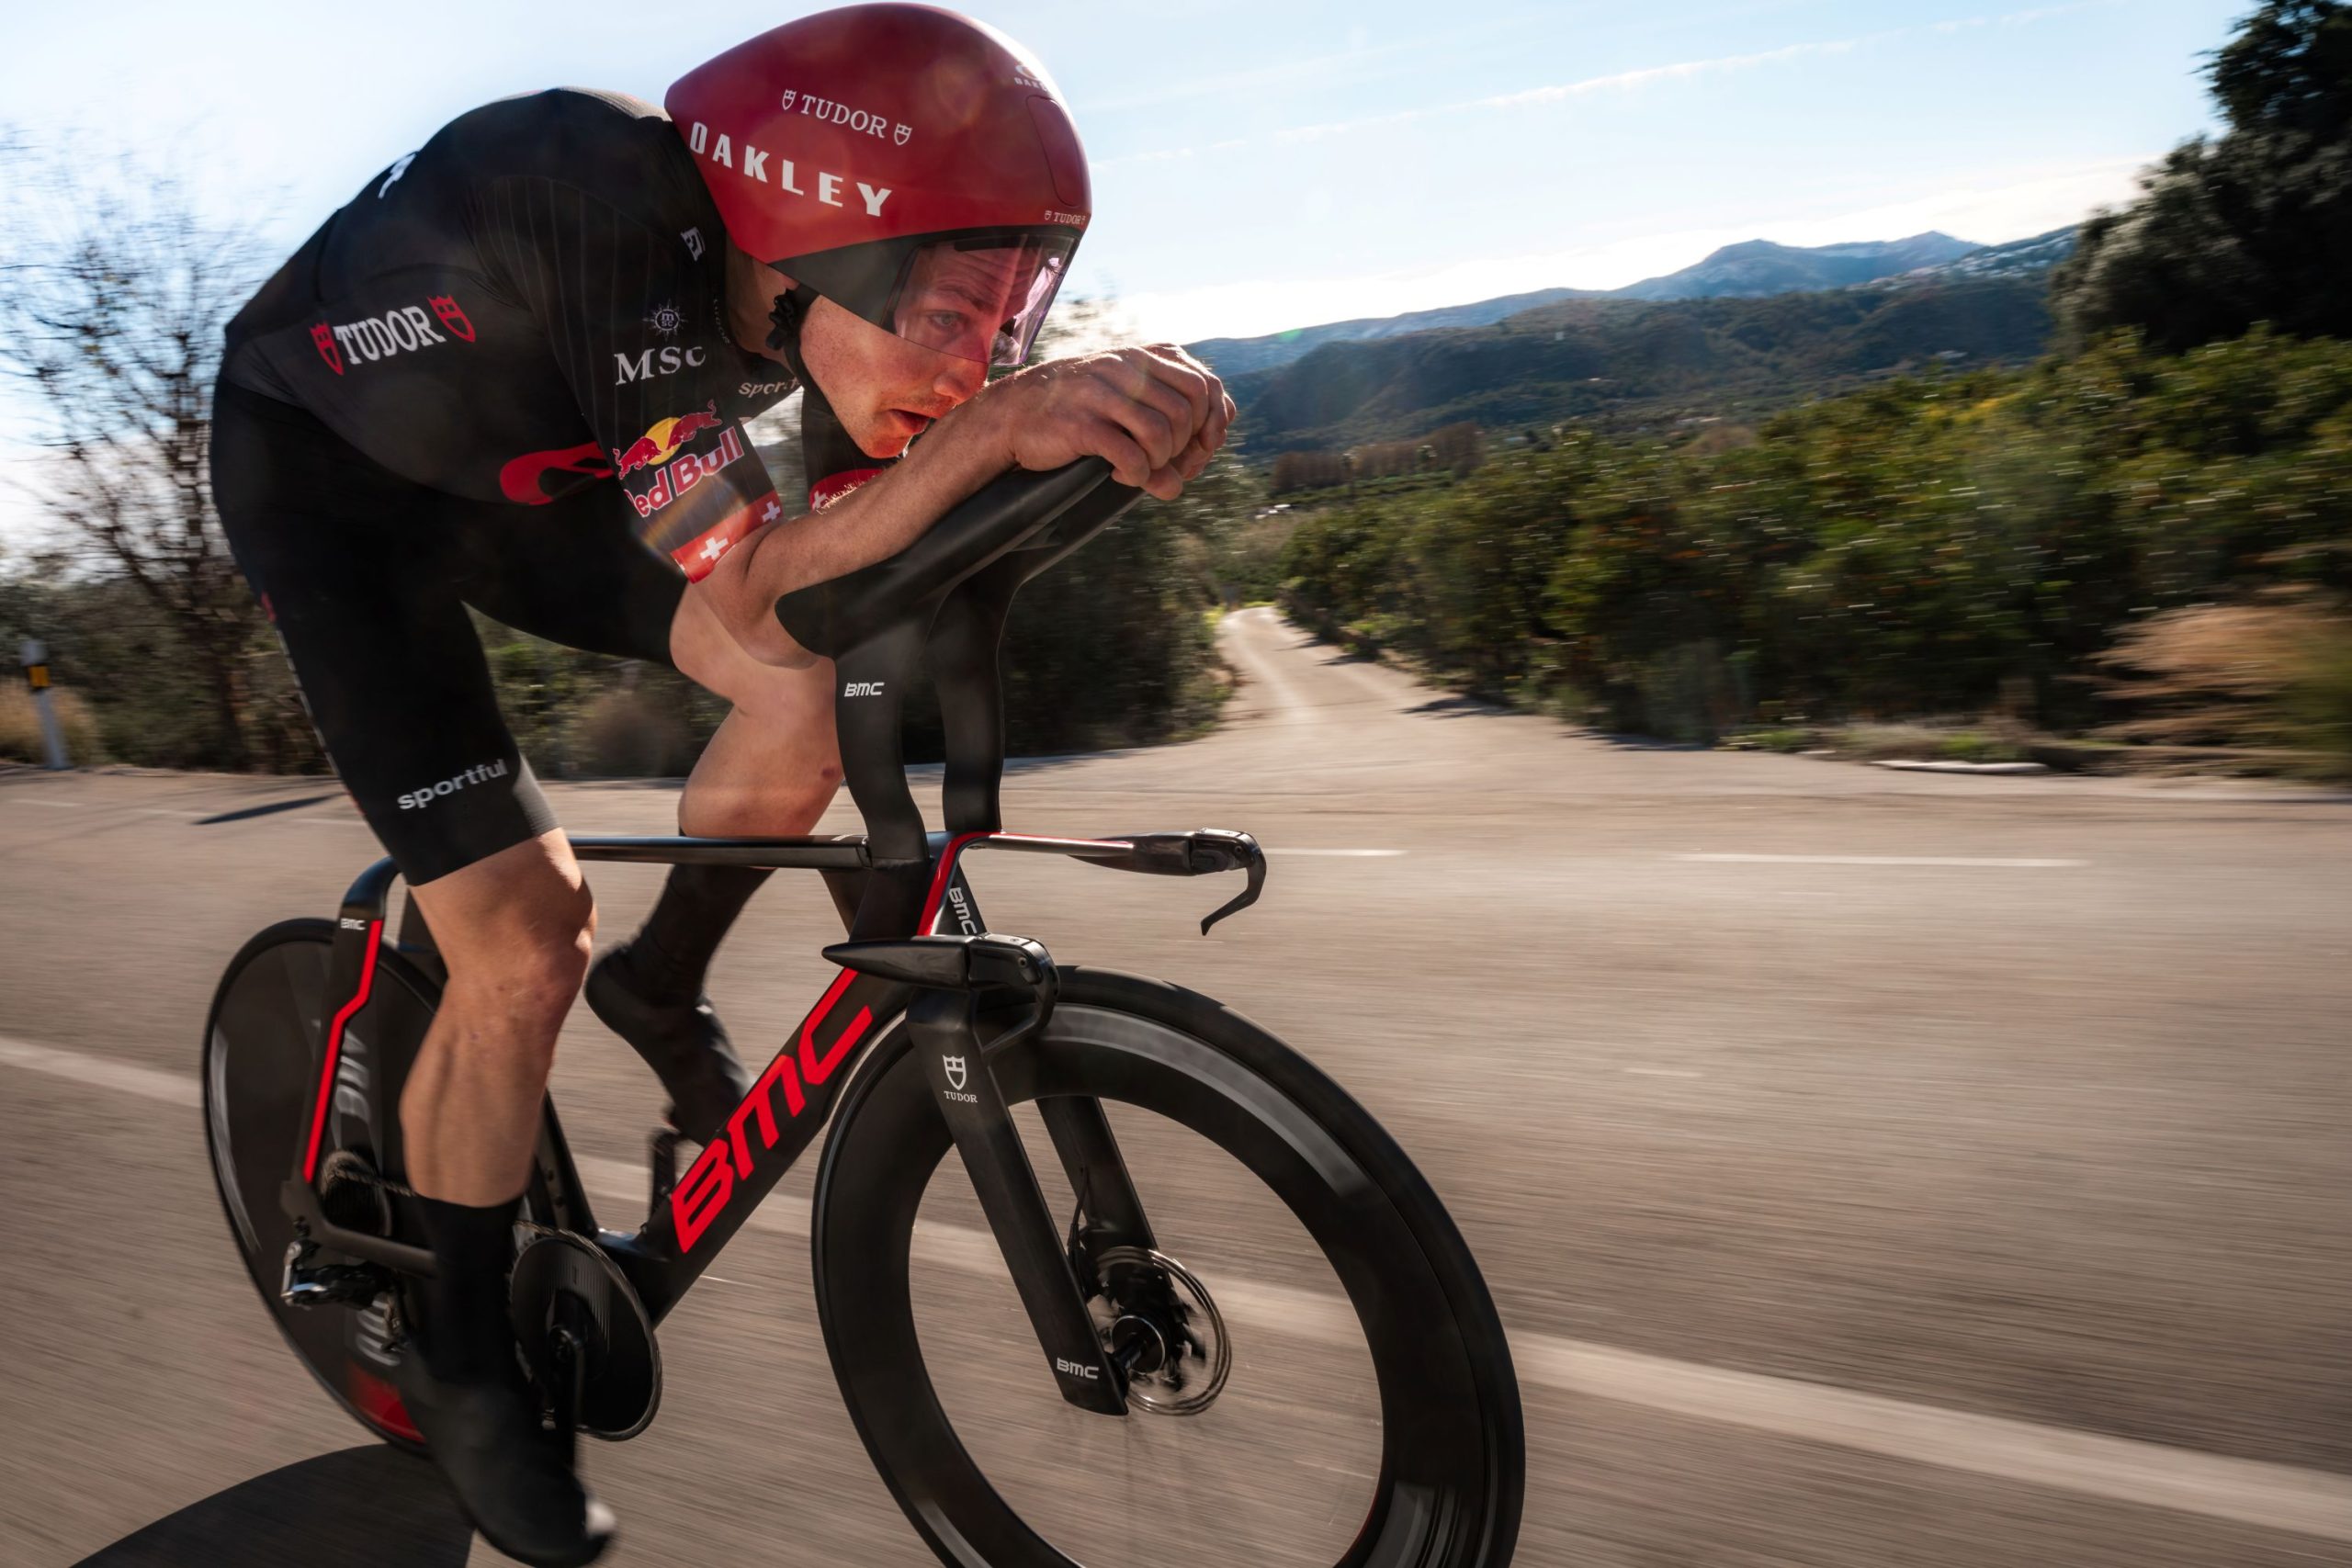
 Zwift Games, Stage 1
 Popular
  BMTR Cares Michael Lander Memorial Ride
 Banded Buddies