
Two Easy Ways to Fix a Leaky Refrigerator Door

When you close your refrigerator door, does an almost suction-cup-like seal form, or does it barely stay shut? If the rubber seal around the perimeter of the refrigerator or freezer door—also known as the gasket—doesn’t come in contact and connect with the inside of the fridge, it means that cold air is likely escaping. It may not seem like a big deal, but your refrigerator or freezer will have to work harder to keep the food inside cool, which means higher energy bills for you. 

But this doesn’t necessarily mean you need to buy a new gasket. If there aren’t any visible cracks, tears, or holes, you may be able to repair your refrigerator seal instead of replacing it. Here are two simple methods to try.

How to fix your refrigerator seal

Once you’ve figured out that your refrigerator or freezer isn’t sealing closed properly—perhaps after taking this one-minute test—there are two simple steps to take that could end up restoring your gasket back to working condition: Cleaning it, and applying silicone grease.

Clean your refrigerator seal

One of the most common reasons a refrigerator or freezer is leaking air is because it’s dirty. When assorted grime, crumbs, and mystery liquids form a film on the gasket, it can prevent a firm seal with suction.  It doesn’t seem like somewhere that should be covered in food spills and stains, but you’d be surprised what ends up and around that strip of rubber.

Here’s my refrigerator seal, for example:
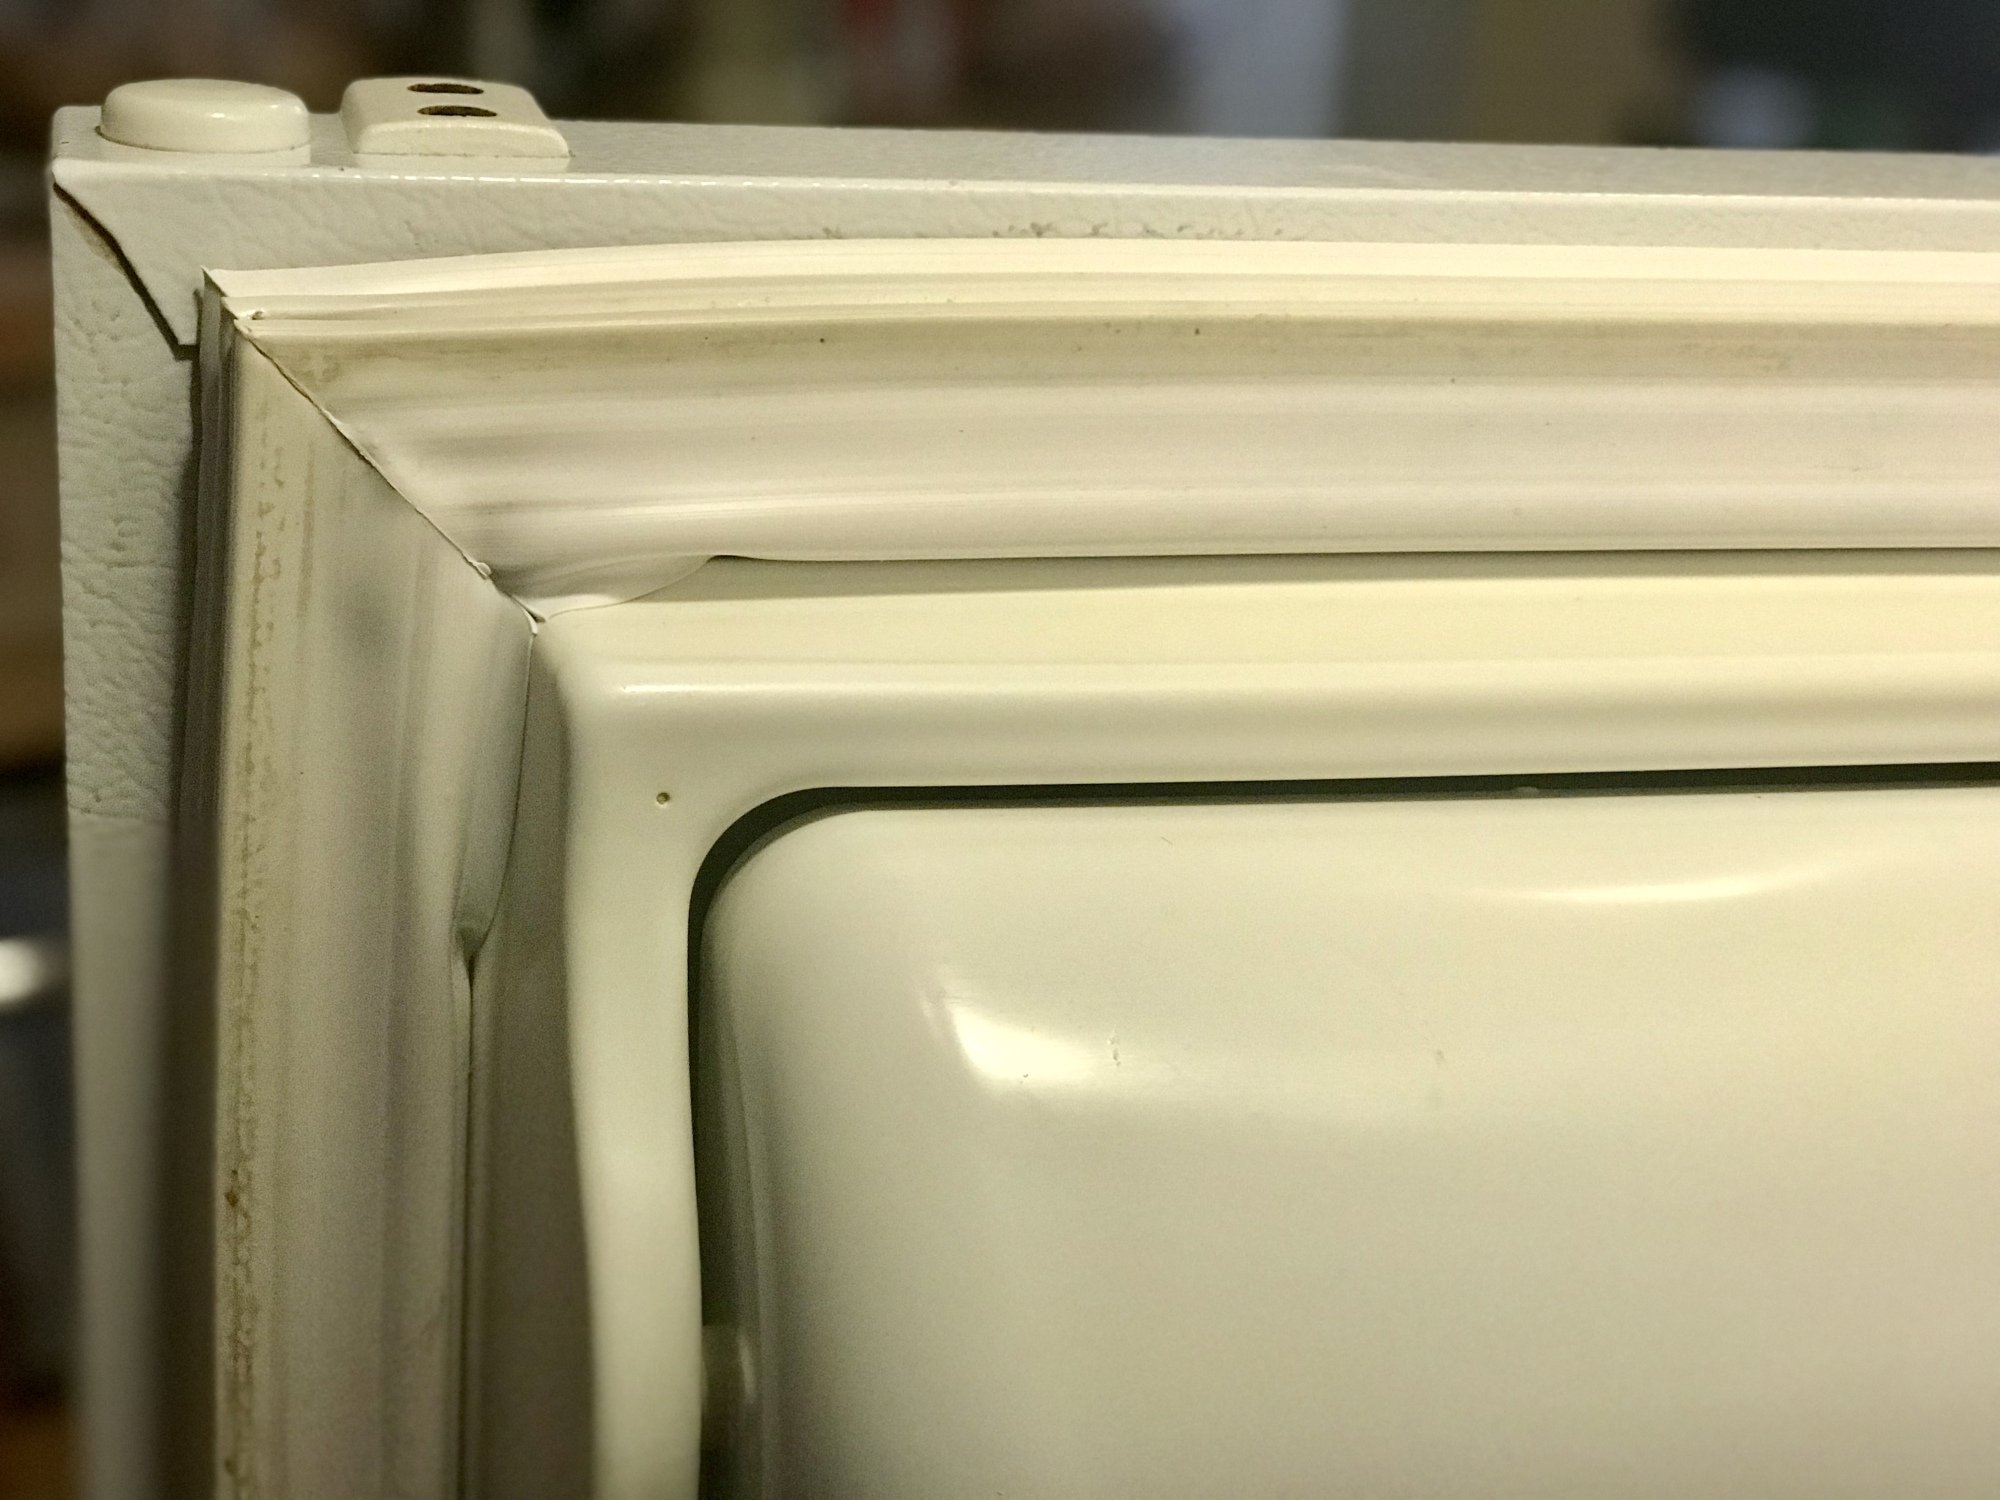
dirty white refrigerator seal gasket

Credit: Elizabeth Yuko

And from the top:
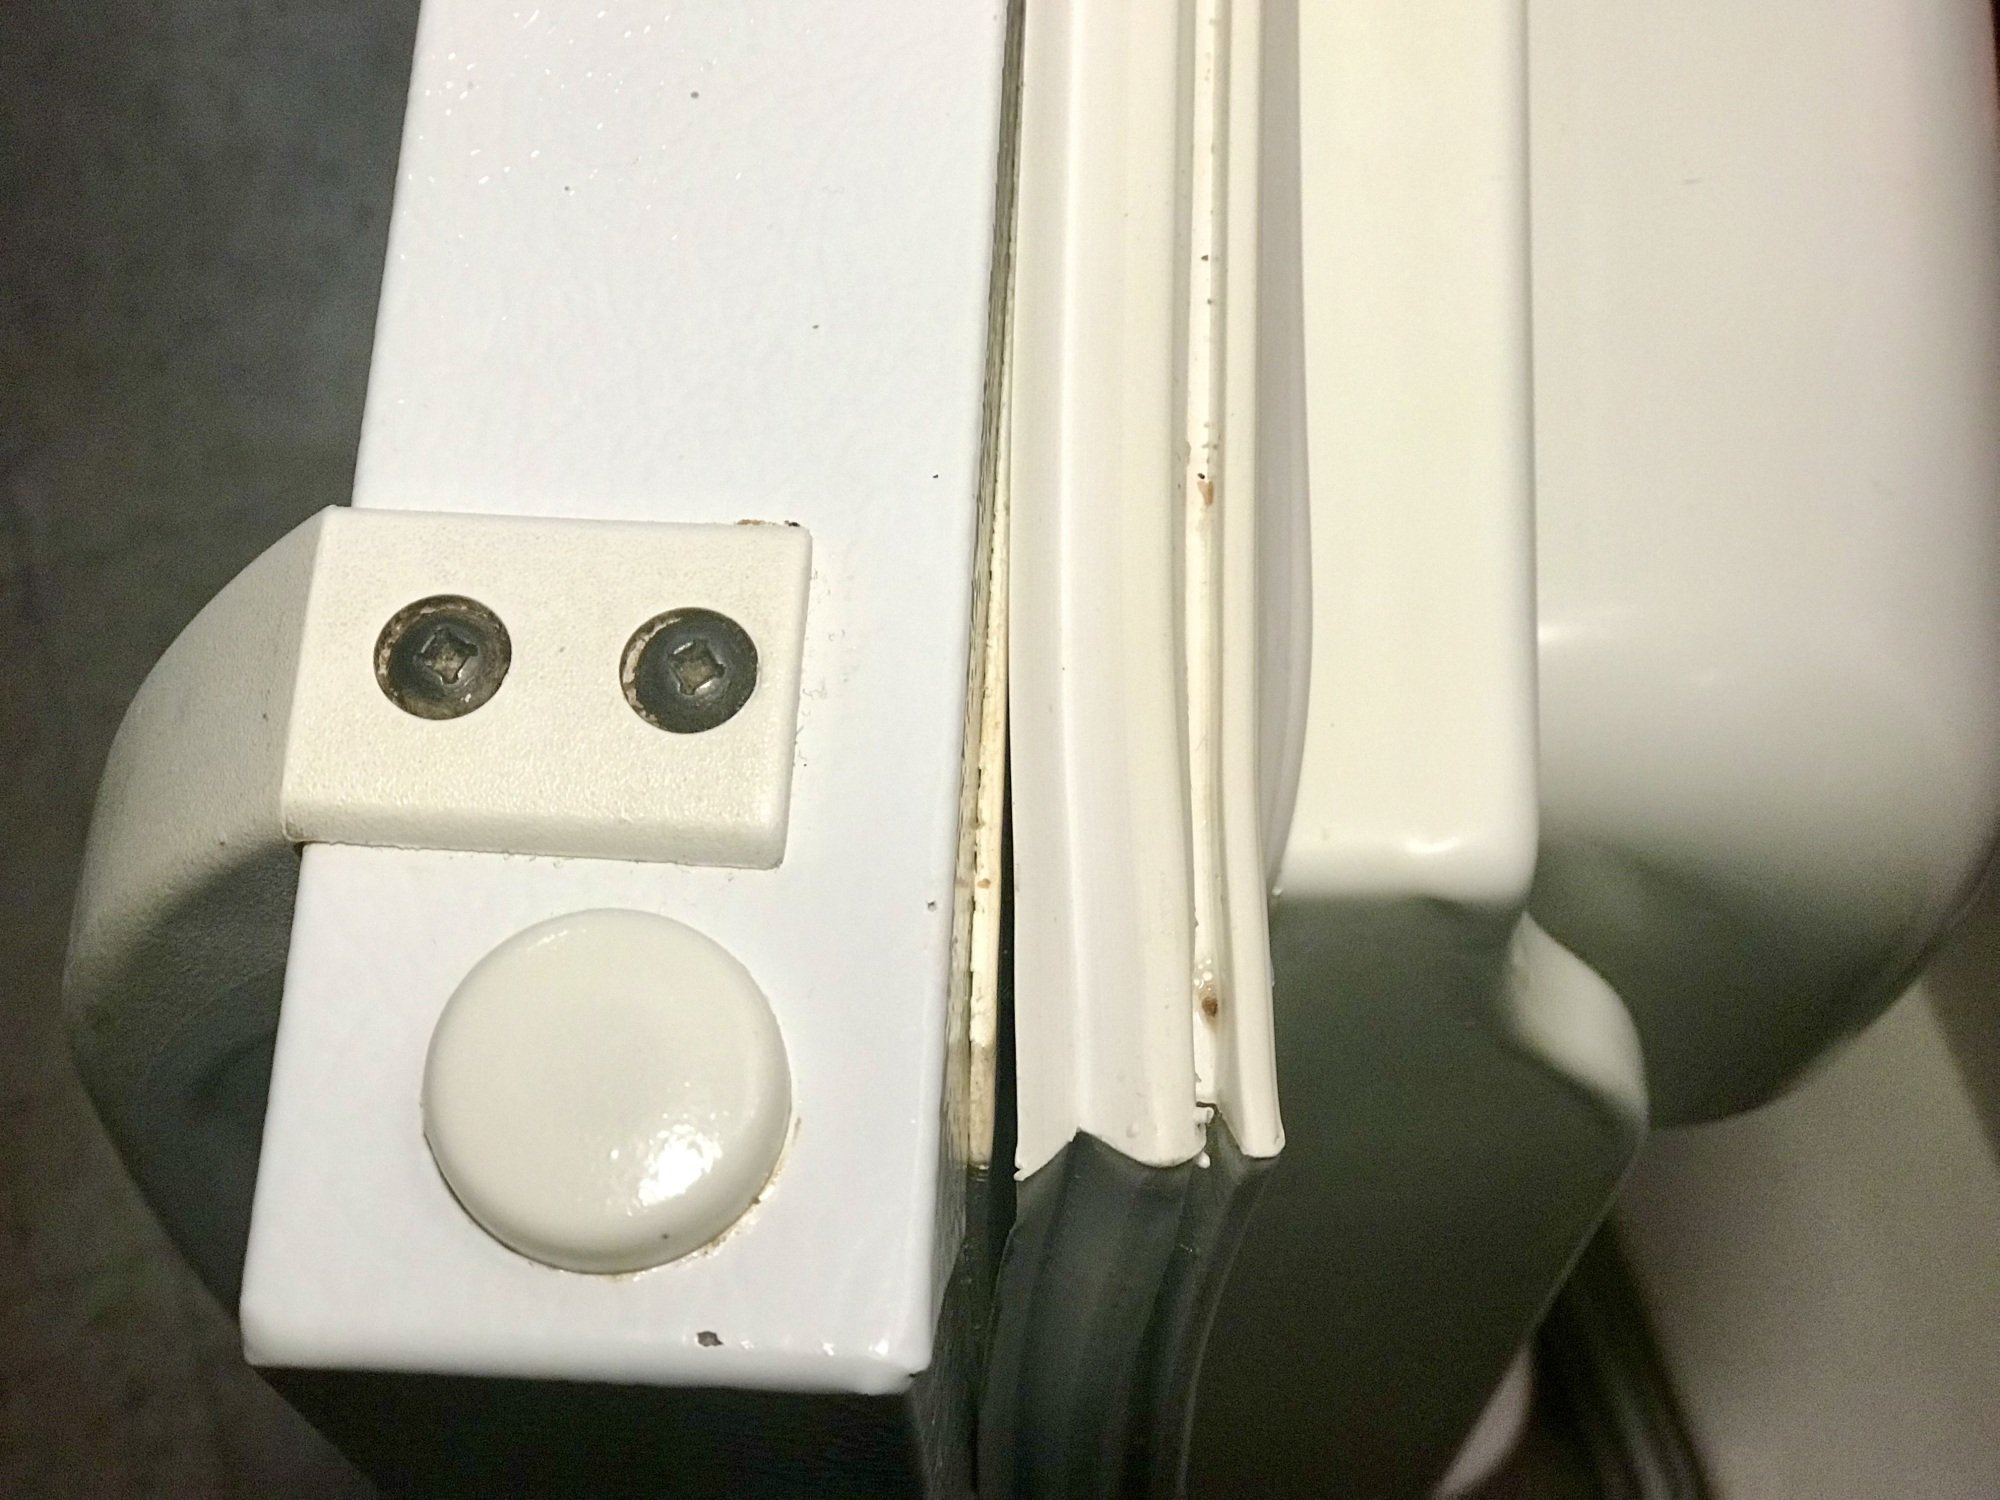
dirty white refrigerator seal gasket

Credit: Elizabeth Yuko

There was a gap at this corner of the seal:
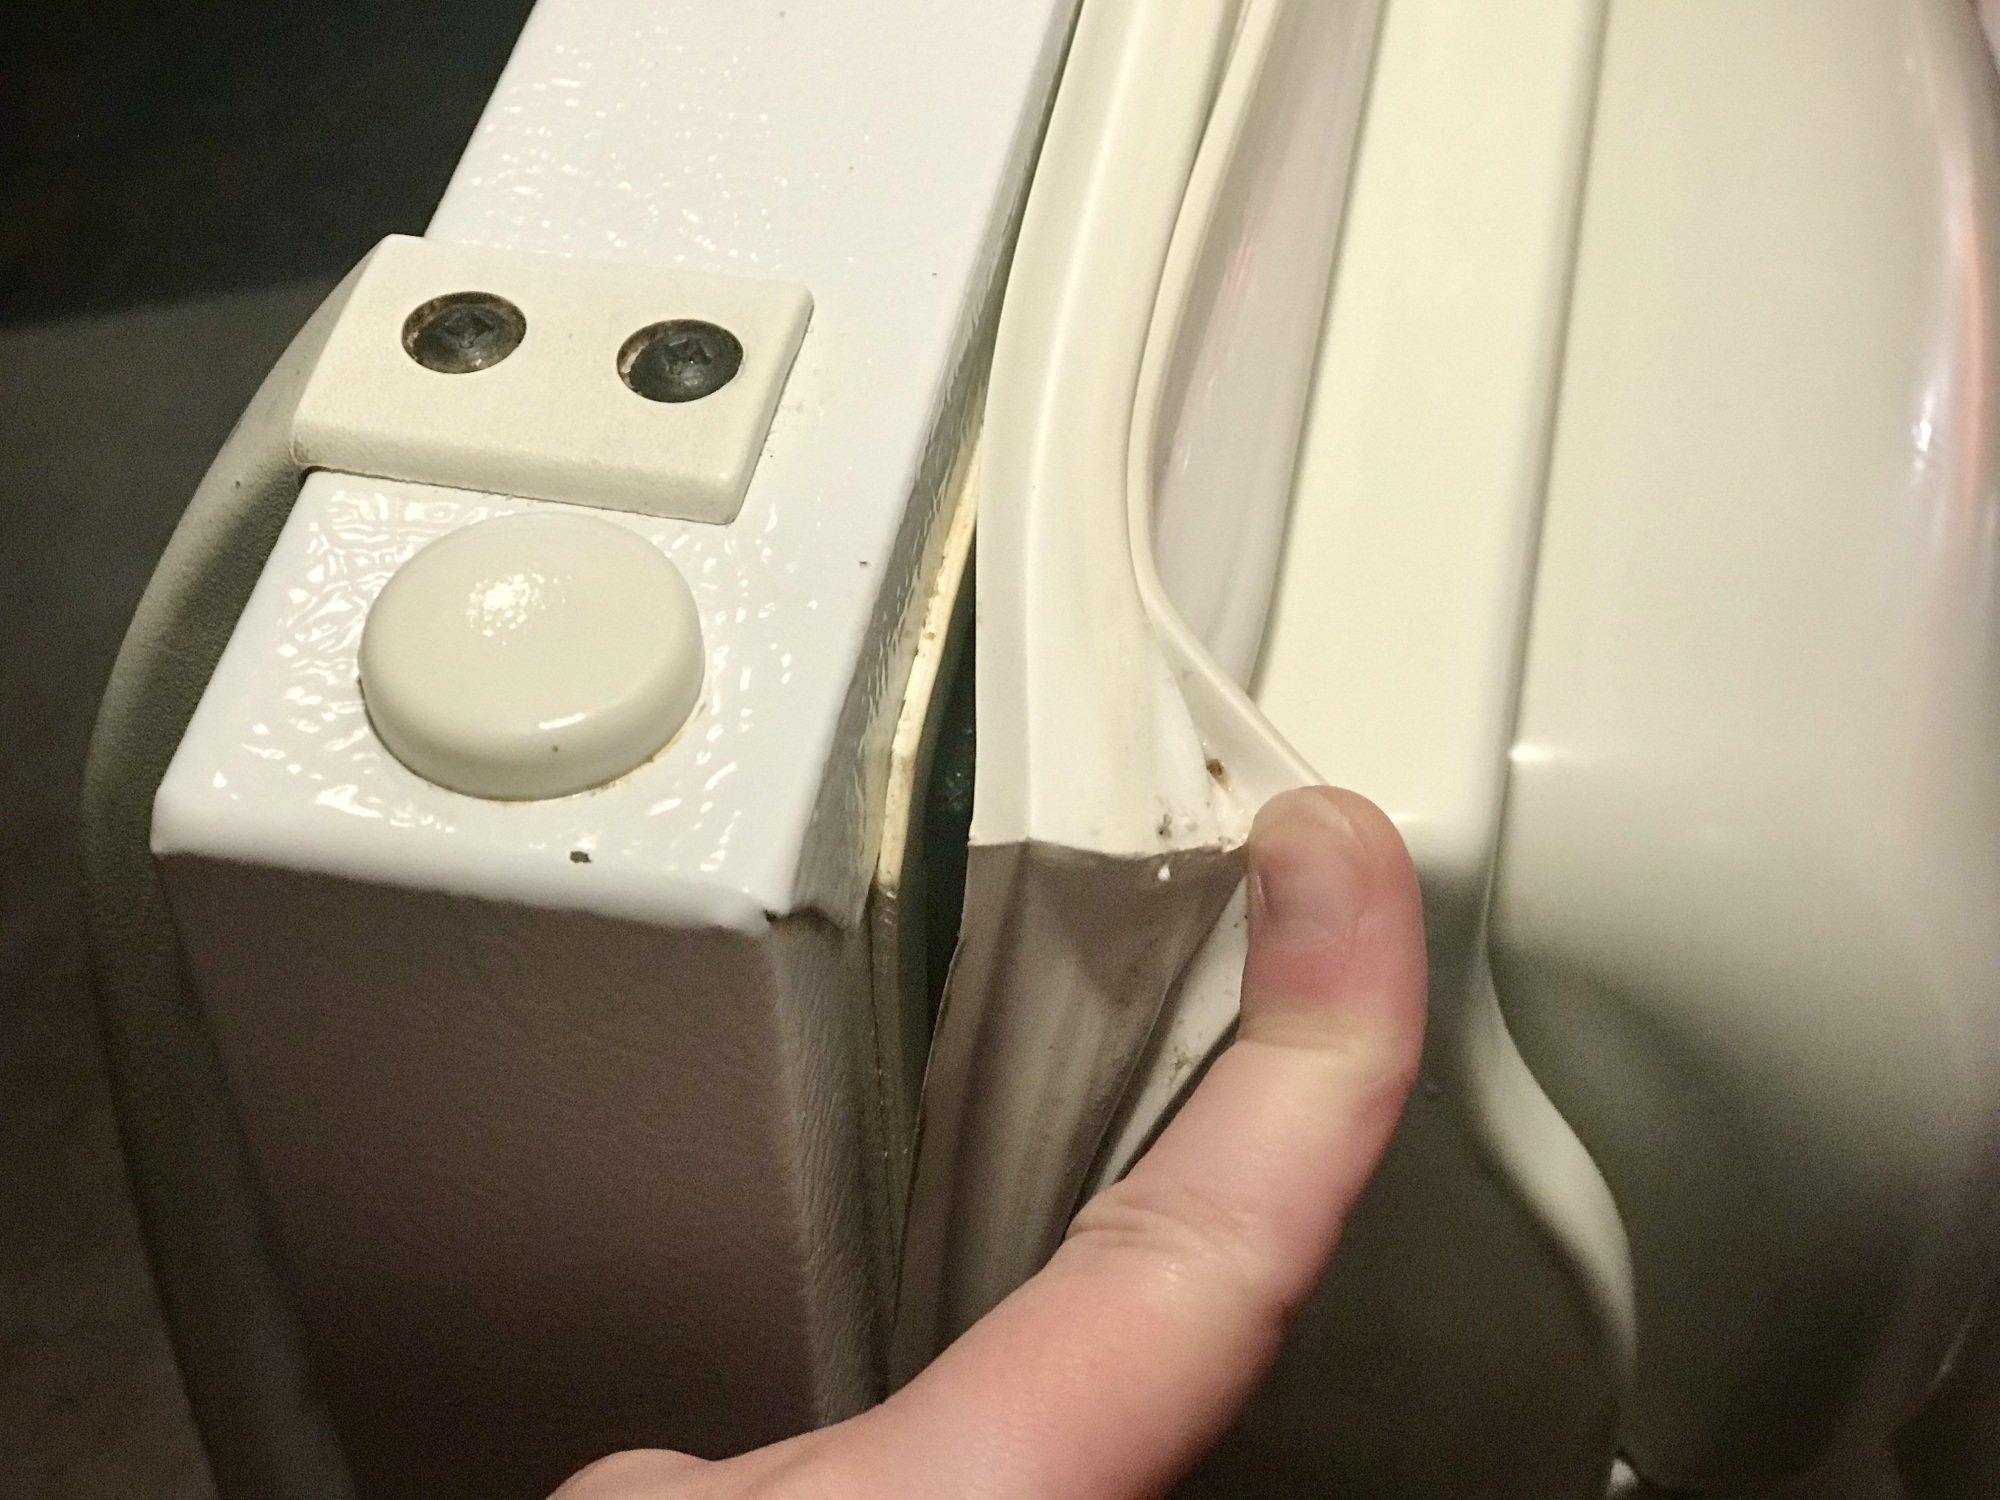
finger pushing white refrigerator seal out of groove

Credit: Elizabeth Yuko

It looked much worse before I cleaned it a few months ago, but it has gotten a little grimy since then.

You don’t need any special supplies to clean your refrigerator gasket. Start by filling up a bucket with warm water, and add a few squirts of liquid dishwashing detergent. Then, dip a rag or sponge into the solution and wipe off any stains, spills, or other gunk from the rubber gasket, its folds, and the areas inside the fridge that it comes in contact with when the door is closed. Use a toothbrush or other small scrub brush to tackle tougher stains. Dry any areas that you washed, and try closing, then opening the refrigerator door.

Here’s mine post-cleaning:
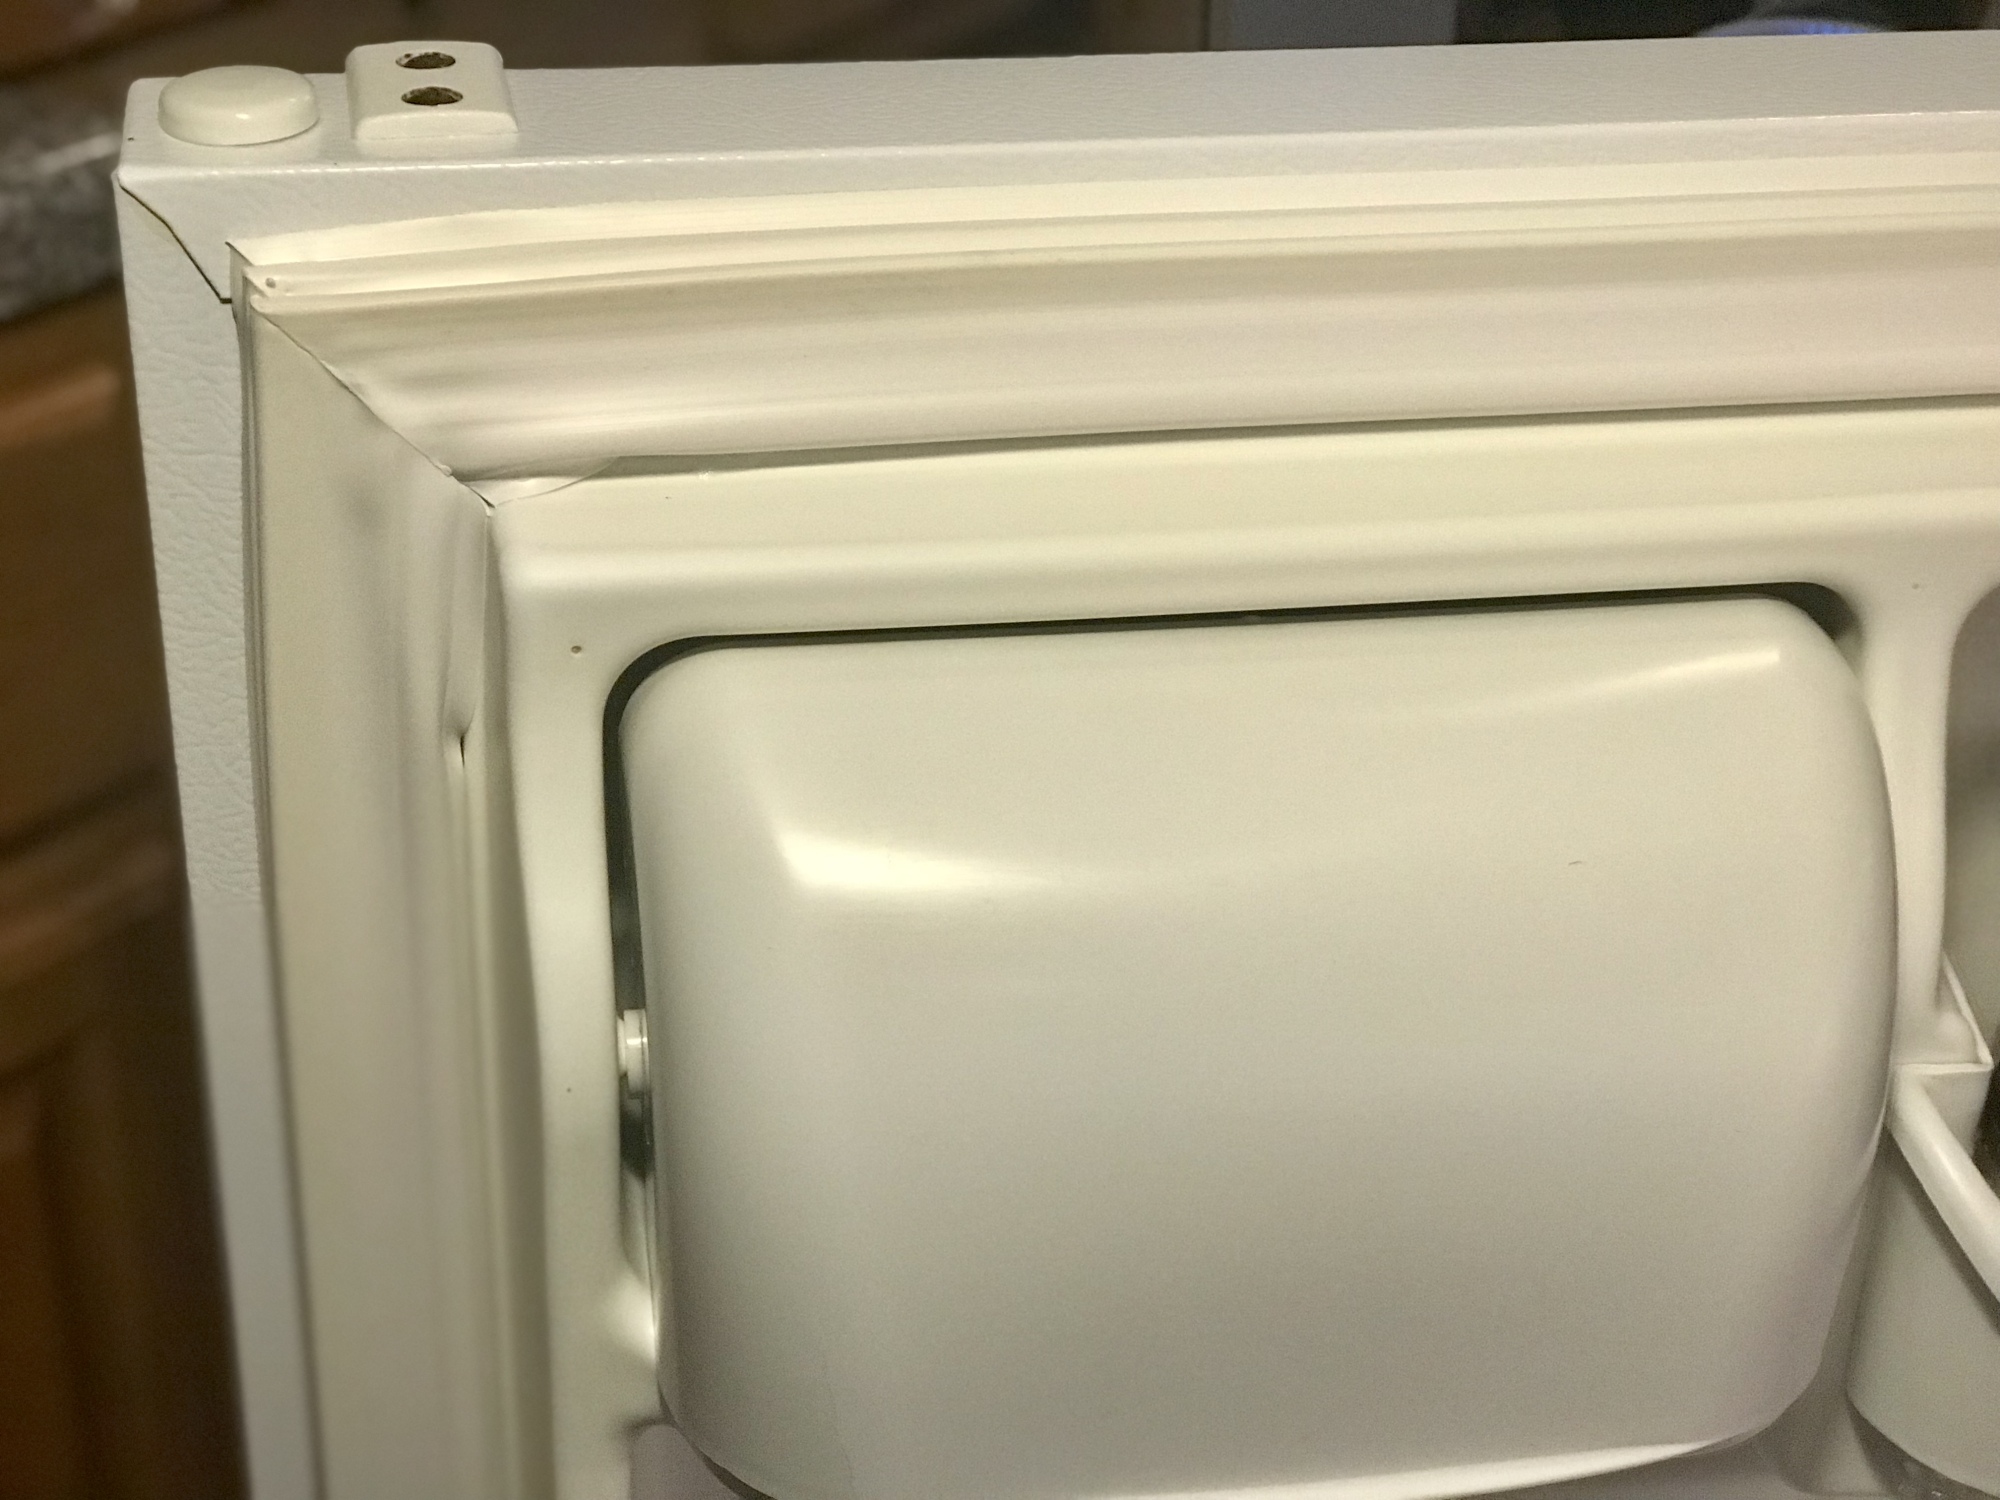
clean white refrigerator seal gasket

Credit: Elizabeth Yuko

Even though my refrigerator seal wasn’t very dirty to begin with, after wiping it down, the seal got noticeably stronger. 

Rehydrate the seal

Refrigerator and freezer gaskets are typically made of rubber or a synthetic alternative. Over time, they can start to dry out, preventing a tight seal from forming. So, if you’ve already cleaned your gasket and it’s still not sealing as much as you’d like it to, rub some silicone grease—also known as plumbers grease—into the rubber, then buff it off with a clean cloth. I used Harvey Plumber’s Faucet and Valve Grease ($5.68 for one ounce tube).
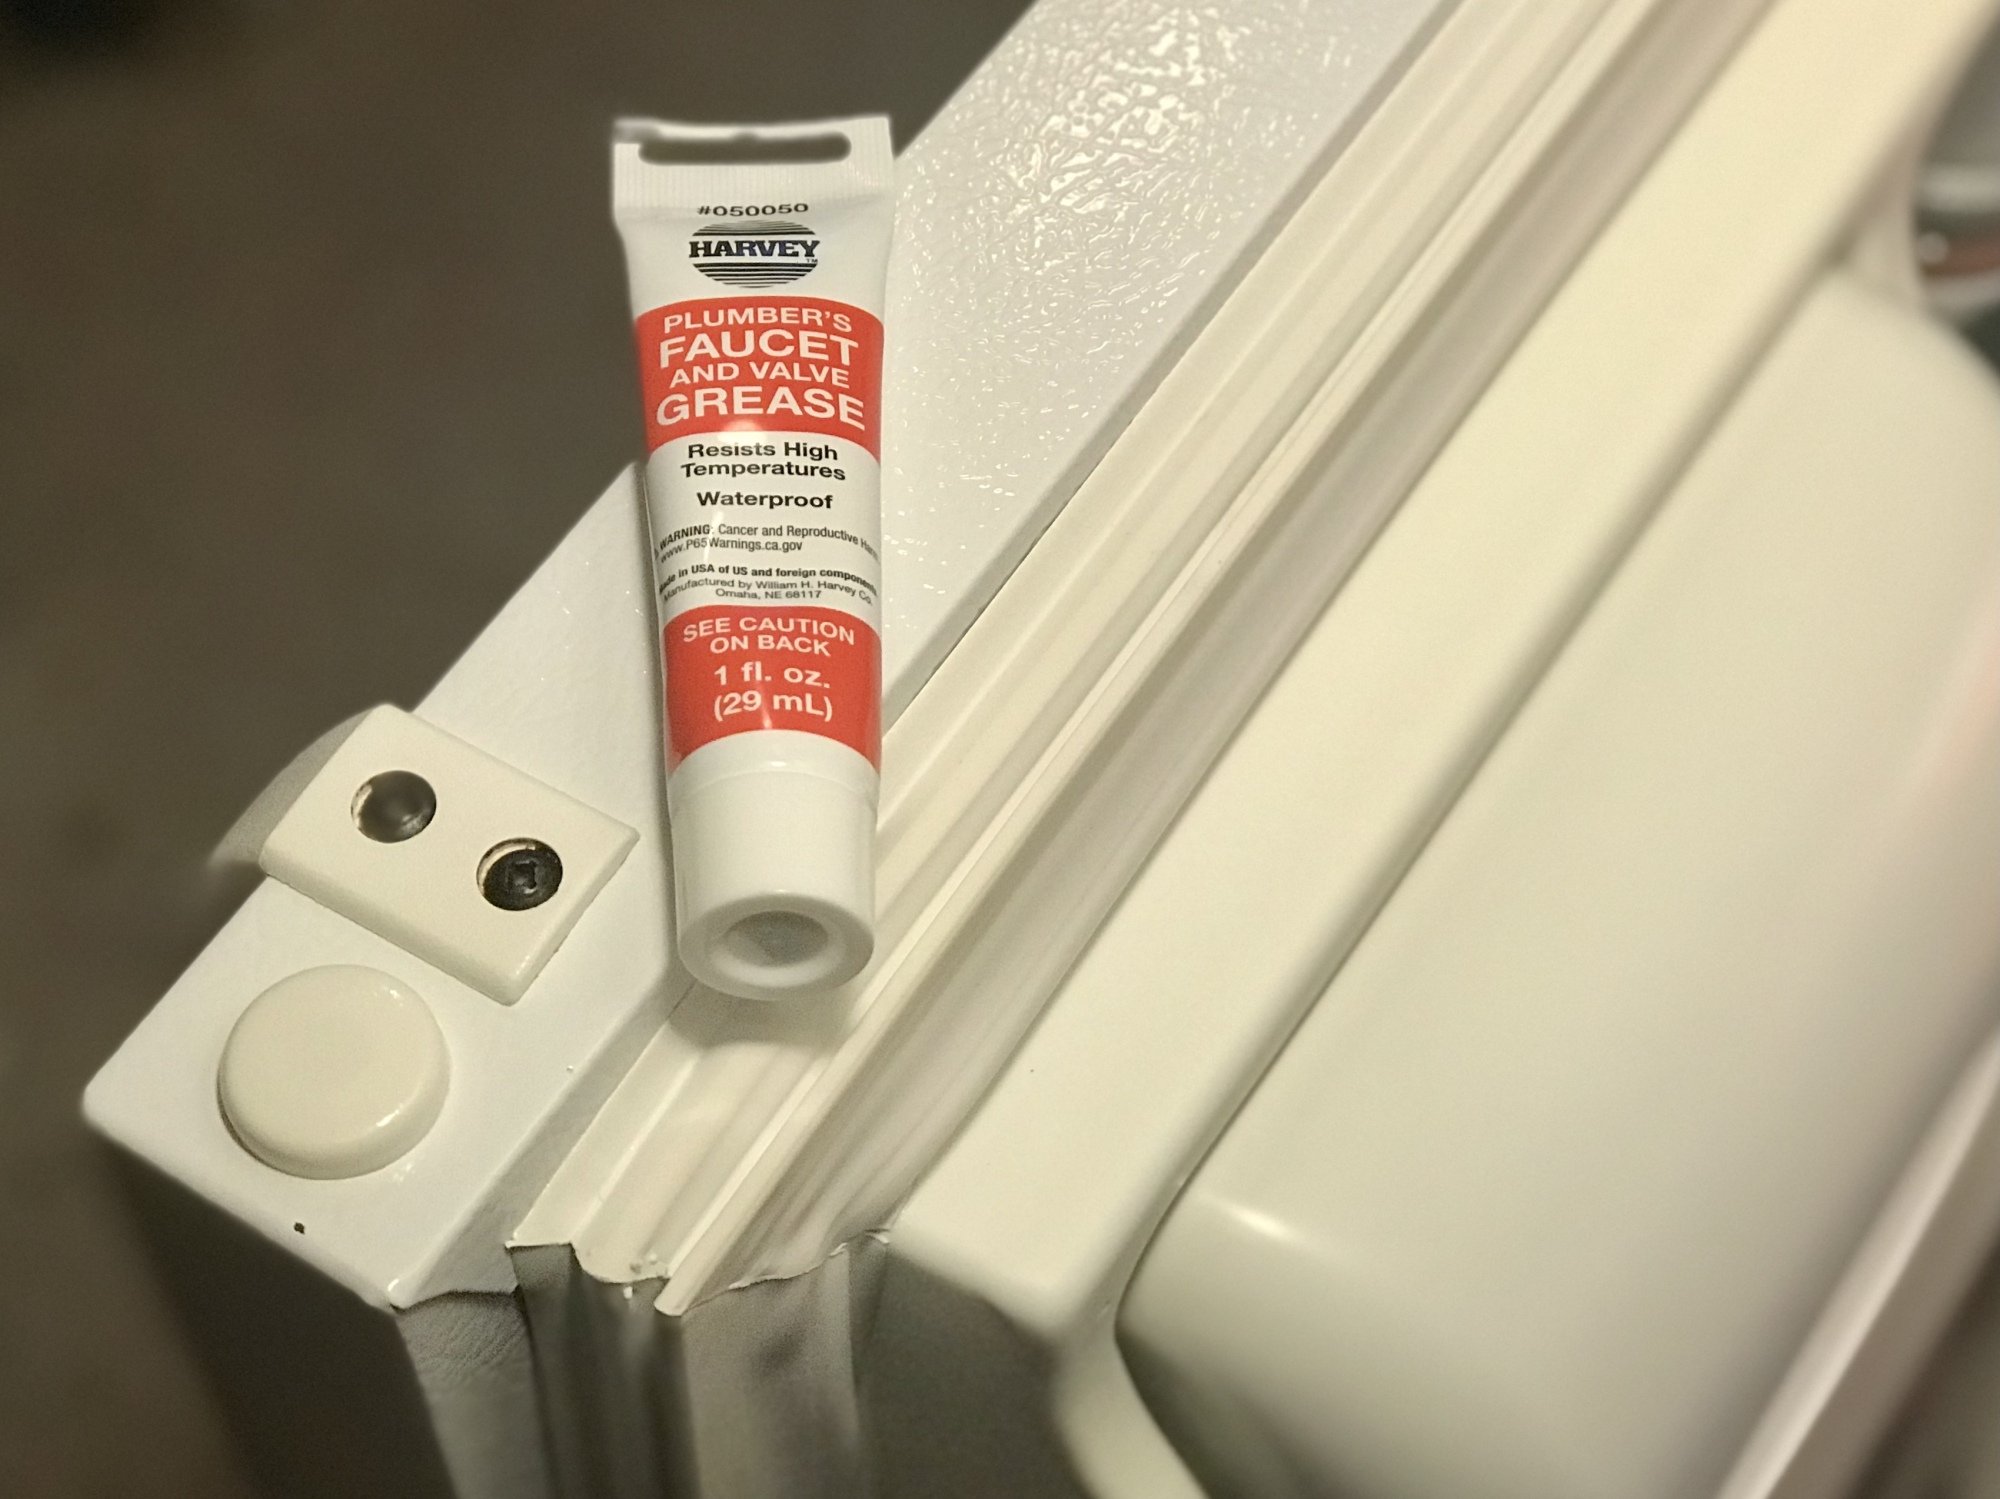
silicone plumbers grease on white refrigerator seal gasket

Credit: Elizabeth Yuko

If any corners or edges of the gasket have come loose, use a cotton swab to apply some silicone grease under rubber, then push it back into place inside the groove.
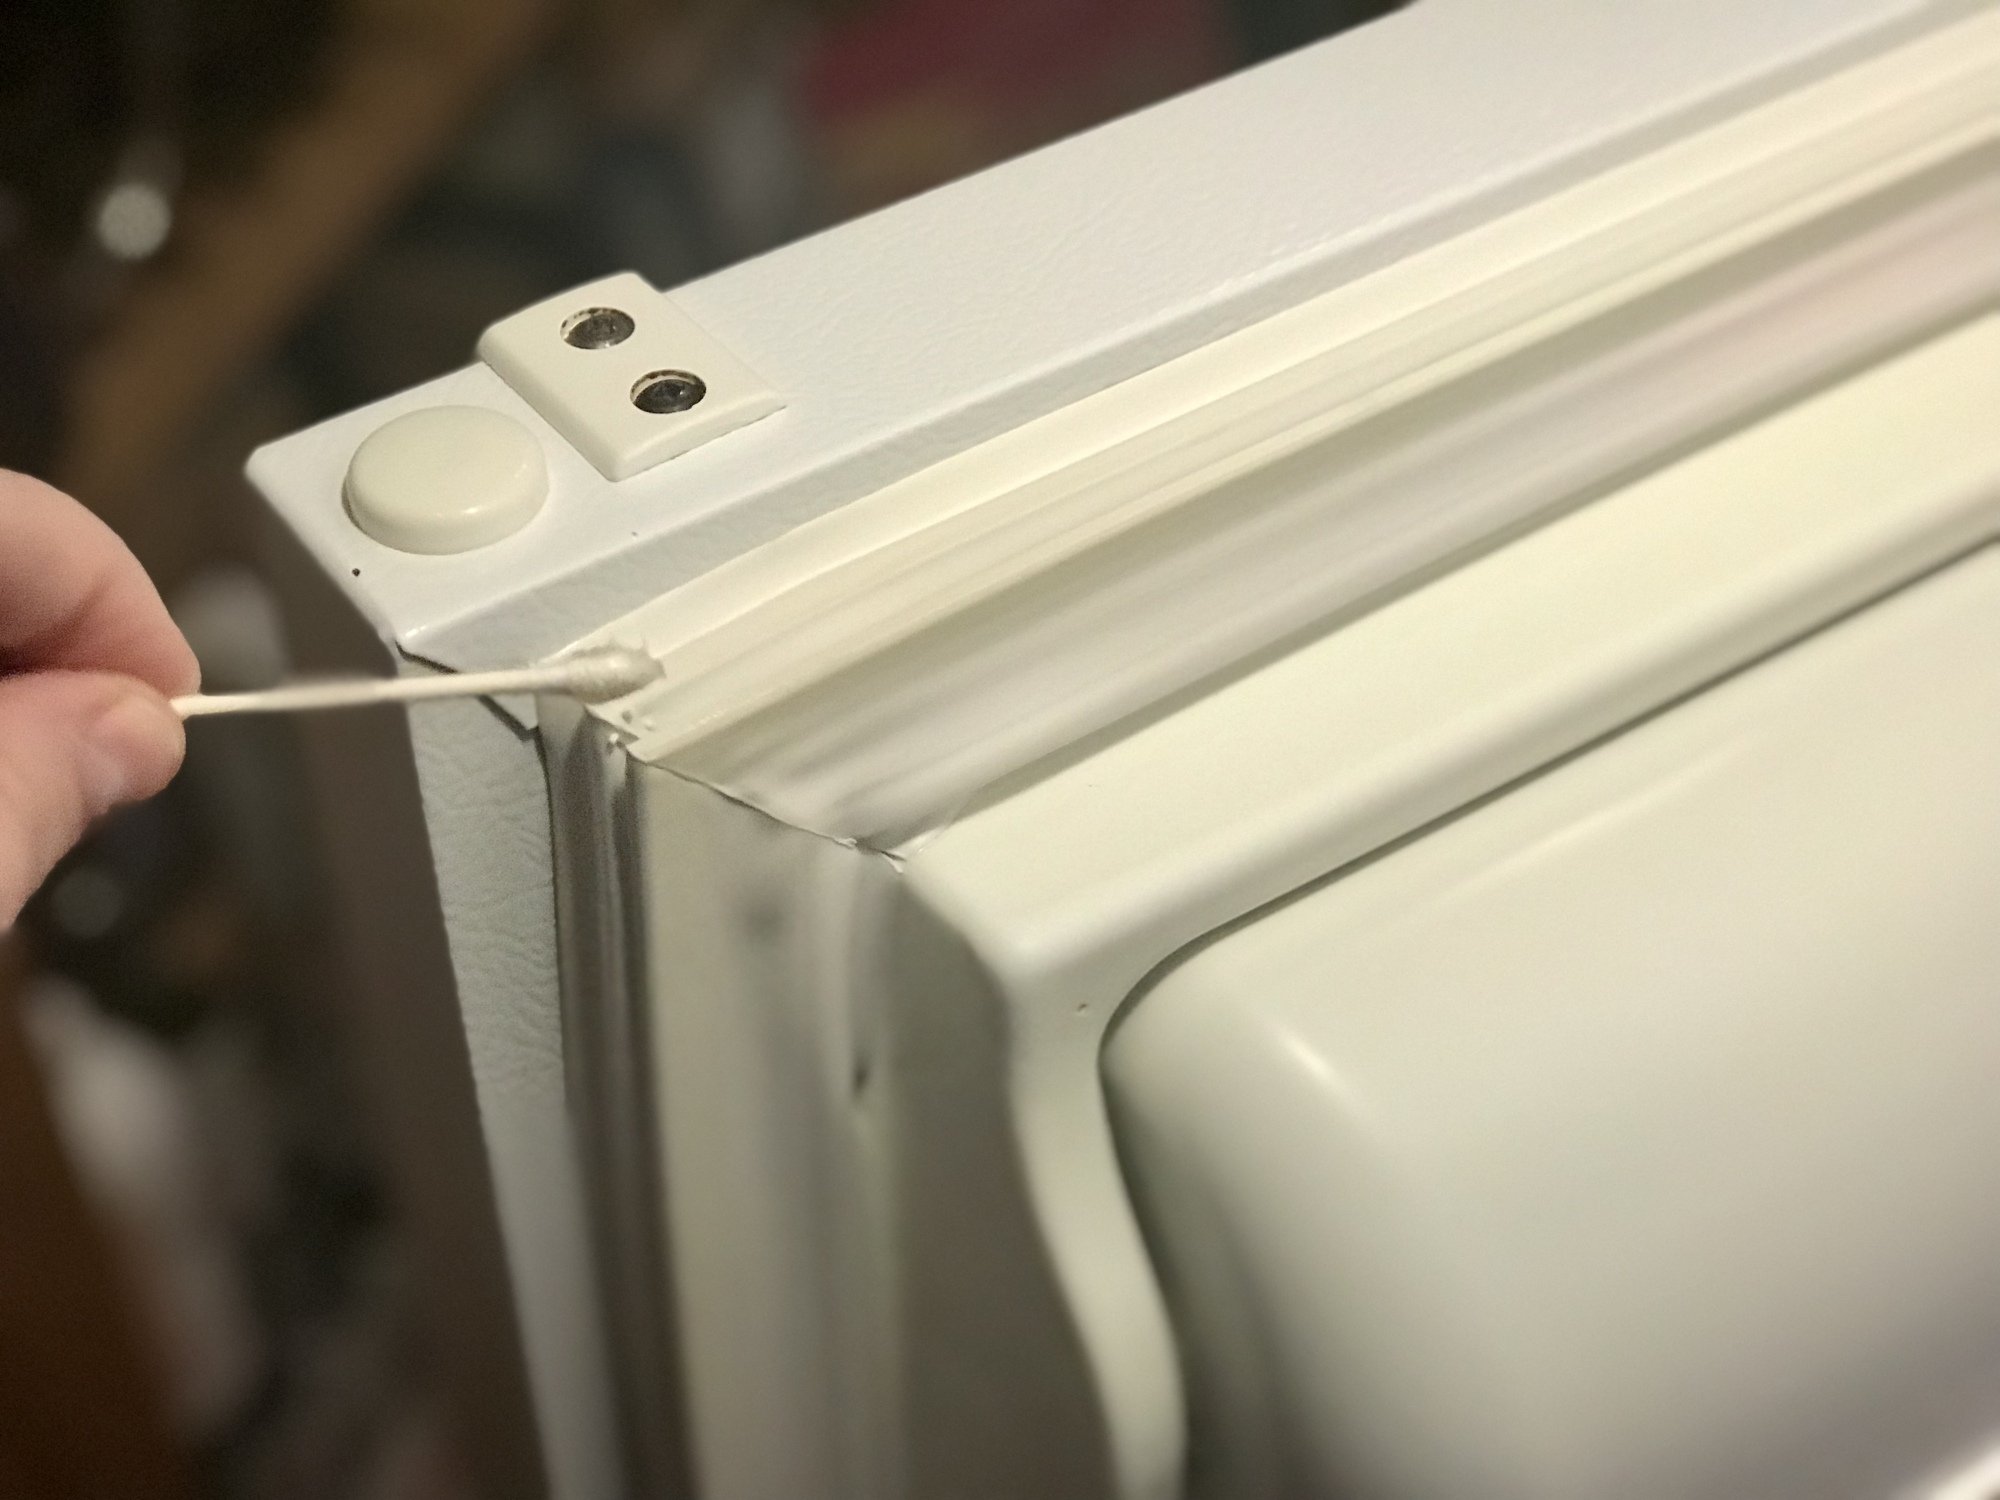
cotton swab applying silicone plumbers grease on white refrigerator seal gasket

Credit: Elizabeth Yuko

One more time, from the top:
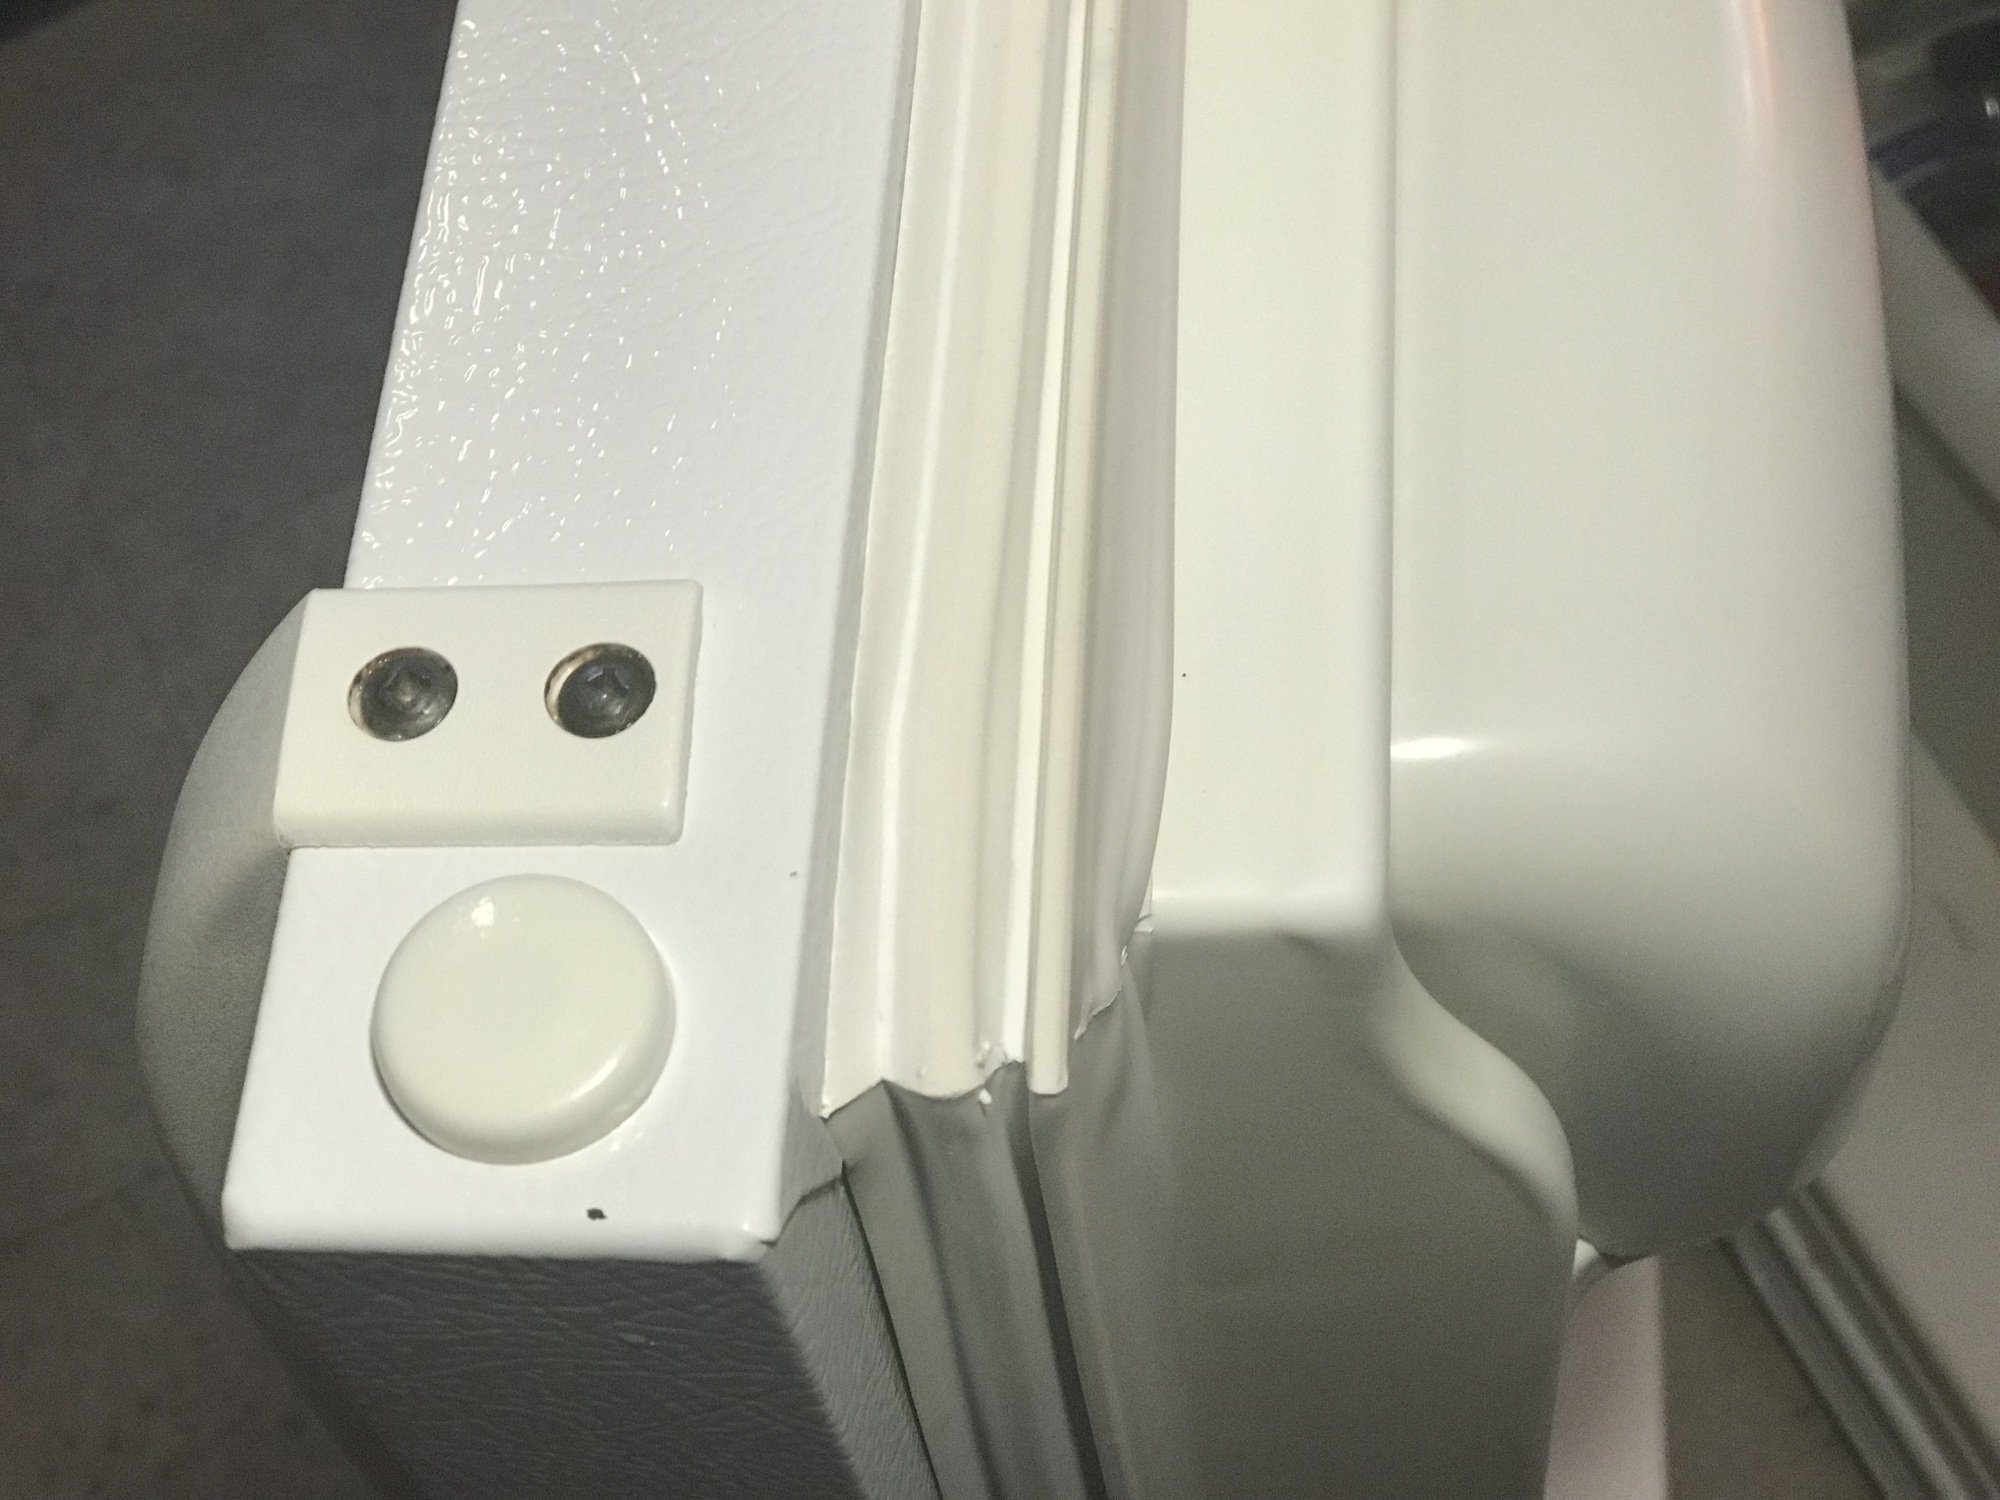
clean white refrigerator seal gasket

Credit: Elizabeth Yuko

Some people suggest using petroleum jelly instead of silicone grease to rehydrate a refrigerator gasket, but avoid doing that if you can. Petroleum jelly cause rubber to break down, and unlike silicone grease, it’s not waterproof.


Source: LifeHacker – Two Easy Ways to Fix a Leaky Refrigerator Door

The Marvels Drama, Fallout TV Show Reveals, and More Top Pop Culture News of the Week

It’s been a wild week in the world of sci-fi, fantasy, superheroes, and more genre fare. The return of Doctor Who for its 60th anniversary, burning Mandalorian questions, and our epic first looks at Fallout and Furiosa all made the list of our most read stories—but here’s a few more highlights you might have missed—Jam…

Read more…


Source: Gizmodo – The Marvels Drama, Fallout TV Show Reveals, and More Top Pop Culture News of the Week

You Can Become a ‘Camp Host’ and Live at National Parks for Free

Existence increasingly resembles a subscription model, and the fees keep going up. Rents continue to be way up from just a few years ago, and buying a house now requires some form of supernatural assistance unless there’s a trust fund of some kind in your life. But when times get tough, folks get creative, and an increasing number of people are looking into the RV or Van Life.

While living in an RV full-time can definitely be cheaper than renting an apartment or buying a house, there are still costs involved. First, you have to buy an RV or camper. Then you need to rent space at campsites, which range from free (on federal land, but with zero utilities or amenities) to almost $15,000 a year at commercial campsites.

That’s still cheaper than most rents, but if you’re in a real money crunch you might be able to reduce your housing and utility costs to zero—and maybe make a little money as well. If that sounds pretty good to you, consider looking into camp host positions.

What’s a camp host?

A camp host or park host is the person who manages a campsite at a national or state park or a private campground. When folks arrive in their RVs, the camp host greets them, sets them up at their campsite, and makes sure they’re hooked up to the water, electricity, and other amenities, if any. The host is typically also responsible for a long list of other duties, including:

  • Maintenance. The camp host typically does light maintenance work, which usually means cleaning bathrooms and other common areas and doing minor repair work.

  • Rule enforcement. Campsites usually have written rules governing what’s allowed, noise levels, and other aspects of camp life. When someone violates those rules or has a complaint, the camp host is expected to deal with the issue.

  • Information. The camp host is expected to be knowledgeable about camp life in general and the specific campsite under their care, and to answer campers’ questions. They’re not generally expected to be experts about the park itself, just the campsite.

The camp host lives right there in the campsite. Requirements to be a camp host are generally pretty light: You have to be at least 18 years old, you must own an RV of some sort (the type and size of that RV might limit the campsites you can work at), and pass a basic background check. Beyond that, some outdoor skills and familiarity with RV camping are essential.

Benefits and downsides

If you own an RV and enjoy the nomadic camping lifestyle, a camp host position can be an excellent way to cut back on your expenses because they almost always include free RV parking and hookups at the site. That means you can live rent-free and utility-free for as long as you serve in the role—plus you won’t be paying to gas up your RV on a regular basis.

Most camp host positions are volunteer jobs, meaning that the free rent, hookups, and WiFi are all you get in compensation. But some camp host jobs pay—up to $66,000 a year. Most camp host jobs will pay close to minimum wage, determined either by the state where it’s located or by the current federal minimum wage. You have to commit to a specific term of service, which can vary from just two weeks to a year-round commitment. You can also potentially string together several short-term positions in order to have free rent all year. Even if a camp host job doesn’t pay, it’s still an incredible way to cut expenses and save money.

Of course, there are potential downsides to consider:

  • The work can be a bit messy, especially cleaning bathrooms.

  • You’re more or less always on duty; if campers have a problem in the middle of the night, you’re the one they’re going to wake up.

  • It’s a physical job, and can be a dirty one. You’ll also be expected to work in all kinds of weather.

  • Utilities vary by campsite. One big pain point for many people is laundry—some campsites offer laundry facilities as part of the camp host perks, but many do not, so you’ll have to consider how you’re washing your clothes.

If you’ve considered all that and think this might be the perfect way to live cheaply and maybe earn some extra cash as well, how do you get a camp host job?

Finding camp host jobs

Finding a camp host position isn’t that different from finding other types of work. There are several ways to look for these jobs:

  • Job boards. Just like any job, you can look for camp hosting positions on sites like Indeed. There are also camper-specific job boards like Kamper Jobs or CoolWorks, and campsite operators like Vista Recreation post hosting jobs needed for their campsites as well.

  • Parks. State and National Parks are always looking for volunteer and paid camp hosts. You can find a lot of information by visiting various state park websites, or contacting the National Park Service or Forest Service.

If you’ve decided to pursue a camp host position, there are a few tips to keep in mind:

  • Plan ahead. Just because these are volunteer or low-paying positions doesn’t mean you can just stroll in and get one. It can take several months between applying for a camp host job and getting it, so research where you want to live and get started early.

  • Be flexible. There are a lot of parks and campsites around the country. If you’re seeking a host job to save some money, be prepared to travel. You might need to line up more than one position if you’re hoping to make this a full-time gig, and moving from one spot to another to keep those free hookups coming can require some logistics.

  • Be certain. The RV camping life isn’t for everyone. If you’re new to it and mainly inspired by your anemic bank account, try a trial run as a camp host before you fully commit.

If you already own a camper, hosting offers a potentially cost-free living situation. If you think the camping lifestyle might work for you, it’s definitely worth checking out.


Source: LifeHacker – You Can Become a ‘Camp Host’ and Live at National Parks for Free

Where to Find the Darkest Skies for Stargazing

I’ve written a lot about different star-gazing opportunities, from meteor showers to interesting planetary alignments, and I usually suggest finding a dark area for best viewing results. But what does “dark” even mean?

The Bortle Scale and the measurement of darkness

The growing prevalence of light pollution caused by our accursed civilization created the need for amateur astronomers to classify which areas in the nighttime sky are dark enough for good stargazing. Enter the “Bortle Scale.” Created in 2000 by astronomer John E. Bortle, the scale breaks darkness into nine levels—from Class 1, the darkest skies, to Class 9, heavily light-polluted urban areas where you’d be lucky to see the North Star. Put simply, for the best stargazing, you want to be in a place with the lowest Bortle number possible. 

Thankfully, there’s technology that can instantly identify the Bortle number of anywhere on earth. If you’re looking for the nearest, darkest spot, you can check out this Light Pollution Map, enter an address or global coordinates, and identify the amount of light pollution anywhere. Don’t be surprised if it’s challenging to find Zone 3 or lower—about 83 percent of the world’s people live under light-polluted skies. Basically, anywhere with even a small city means light pollution.


Recommended products:


Finding the right area to stargaze

A dark night sky isn’t worth anything if you can’t see it, so find somewhere with an unobstructed view of the sky, or at least the part of the sky you want to see. Putting a mountain between you and the city is a great strategy for blocking out light; so is getting to the side of a wilderness area or body of water. Elevation can help too, because you’ll be above the haze, fog, smoke, and smog that can obfuscate your view of the heavens. You don’t necessarily need to travel off themgrid to stargaze, though. There are often spots right off the road—or even big highways—that are suitably dark. It’s not the few small highway lights highway that keep the stars dim; it’s the cumulative effect of all the lights in a city.

Plan around the phase of the moon

A full moon is beautiful, but it will basically blot out dimmer celestial objects; and unlike manmade light pollution, there’s no way you can avoid it except to wait until around a new moon. Clouds will obviously keep you from spotting anything in the sky too, so check the moon phase when you begin planning, and then start checking the weather when you get closer to the days you plan to leave.  

Connect with a local astronomy organization 

Most enthusiasts love to talk shop about their passion, so hook up with a local astronomy club or two to glean their inside knowledge of the best spots nearby to stare at the wonders of the cosmos. They probably have a Facebook page where you can ask questions online, and they probably have regular meet-ups if you’d rather talk to people in person. 

Travel to an even darker place

If you’re planning to travel for longer than one night in search of darker skies, check out the Dark Hotels website. It mashes up the international light pollution map with hotel listings from booking.com and Airbnb’s database. It helps make planning a stargazing trip super easy. 

Visit a Dark Sky park or reserve

If you want to take the guesswork out of stargazing entirely, consider visiting a dark sky park or reserve. These designated nature areas are designed to preserve darkness and provide optimum viewing for planet nerds, and if you visit the website of the International Dark Sky Places program, you’ll find a searchable listing for over 200 spots in 22 countries with “outstanding dark sky conditions and protection practices.”

Book a stay at an astronomy hotel

If you have the cash and like to do your stargazing in style and with as little planning as possible, consider an astro-hotel. Places like the Adero in Scottsdale, AZ provide guests with a dedicated “stargazing lawn” with telescopes and astronomy guides. The Hyatt Maui in Hawaii hosts a nightly “Tour of the Stars” with telescopes on the hotel roof, or you could check out the Northern Lights at the Alaska’s Lodge at Black Rapids. Those are only three of many astro-hotels all over the world.

Make the most of the darkness you have

Maybe you can’t plan a faraway trip to an expensive hotel in an area with a perfect Bortle score, and that’s obviously okay too. Looking up at the sky doesn’t have to be big deal, and the stars are still pretty when you see them from your backyard or fire escape. No matter where you go to stargaze, you can make the most of whatever darkness you have. 

  • Set up your telescope one hour before viewing: If you’re using a ‘scope, they say you should give it an hour for the optics adapt to the conditions.

  • Bring along a lens filter: If you’re using a telescope or binoculars in an area with light pollution, a filter can cut out a significant amount of glare. 

  • Give your eyes a chance to adjust: It takes about a half an hour for your eyes to truly open up to the darkness. Don’t look at your phone or any other source of light during this time, unless your phone is emitting only red light.

  • Set your phone to emit only red light: If you’re going to use your phone, you can change the setting to only red light easily (Red light doesn’t kill your night vision like other colors do.) On an iPhone, go to Settings > Accessibility > Display and Text Size > Color Filters. Click “on,” then “Color Tint,” and move both the “intensity” and the “hue” sliders all the way to the right, and, voila, red phone.

  • Only use a red flashlight: You can navigate with a red flashlight or headlamp, but it won’t affect your night vision like other colored lights will. It’s also the kind thing to do for anyone else who’s out looking at the stars.

  • Keep warm: You can’t go wrong with a wool blanket or two. 

  • Bring a friend: Bring a friend and a dog and a mug of hot chocolate. (This might be the most important rule of stargazing).


Source: LifeHacker – Where to Find the Darkest Skies for Stargazing

The Great Gmail Purge, New Samsung Galaxy S24 Leaks, and More Top Product News of the Week

If you had an old burner Gmail account, this week was your last chance to log in before Google permanently nukes it. Meanwhile, recent Samsung leaks appear to confirm some Samsung Galaxy S24 Ultra renders that had been floating around the internet. Gizmodo’s consumer tech team covered that news and more this week.…

Read more…


Source: Gizmodo – The Great Gmail Purge, New Samsung Galaxy S24 Leaks, and More Top Product News of the Week

How to Get Started Running Emulators on Windows and macOS

You have to go back to the 1970s for the first generation of video game consoles, and many of them have been released since—consoles that have long since become outdated and obsolete. However, if you’re eager to relive the games and platforms of yesteryear (or try them out for the first time), there’s a way: emulators.

Read more…


Source: Gizmodo – How to Get Started Running Emulators on Windows and macOS

The Morning After: Google's geothermal power plant in the desert and more

Sorry to interrupt your Saturday, but did you somehow miss that Google made a geothermal energy plant in the middle of Nevada? You know, that place with all the water for turbines? Or the incredibly dumb way security researchers were able to pull private information from ChatGPT? This week’s YouTube-coated version of TMA covers that and getting far too enthusiastic (or entirely non-plussed) about all these other things from this week in tech.

This week:

Read this:

Not everything on Engadget benefits from heavy paraphrasing and a guy talking at a camera for under 10 minutes. This week, take a look at this great profile of the growth, growth and further growth of ChatGPT, OpenAI’s chatbot. It reframed generative AI for the wider public, and had the biggest tech companies scrambling to catch up. And that was just its first year.

Like email more than video? Subscribe right here for daily reports, direct to your inbox.

This article originally appeared on Engadget at https://www.engadget.com/the-morning-after-googles-geothermal-power-plant-in-the-desert-and-more-140010085.html?src=rss

Source: Engadget – The Morning After: Google’s geothermal power plant in the desert and more

Here's When Rekeying Your Lock Makes More Sense Than Replacing It

Living arrangements change, and sometimes we need to prevent someone who has, once had, or may have a key to our home from being able to use it again. In situations like these, we might assume that changing our locks is the only option, but fortunately, that’s not the case. Instead of replacing an entire lock, it’s often possible to get away with simply rekeying it—a process that’s typically cheaper and easier. Here are some examples of when it makes more sense to rekey a lock than replace it.

What’s the difference between rekeying and replacing a lock?

Replacing or changing a lock involves removing the entire existing door lock and hardware and installing a different lock and hardware. It typically costs between $50 and $300, depending on the type of lock, whether you’re installing it yourself or hiring a professional to do it, and the complexity of the labor. Rekeying a lock, on the other hand, is limited to changing the pins inside the lock itself, so its current keys would no longer work, though the lock and hardware remain the same. This can cost as little as $10 or as much as around $160, based on several factors we’ll discuss below.

When does rekeying a lock make more sense than replacing it?

After years of use, some locks wear down, and no longer function properly. In this scenario, replacing it with a new lock is the solution. Similarly, if someone wants to change the look of a door, they may want to remove their current lock and hardware, and install a new set in a different color or finish. But beyond these relatively straightforward examples, homeowners have to decide between rekeying or replacing their lock if they want all current keys to the house to stop working.

Here are a few examples of when it makes more sense to rekey a lock:

  • If one of your house keys gets lost or stolen

  • If you had a roommate or ex who moved out and you no longer want them to be able to access your home

  • If you have multiple exterior doors with different keys from the same brand and you want them to match

  • If you purchase a new home and want to put off the expense of changing the locks, but want to make sure any current keys no longer work

Can you rekey your own locks?

Rekeying a lock is typically done in one of three ways:

1. Purchasing a rekeying kit and doing everything yourself

It’s not necessarily a beginner-friendly DIY project, so you’ll need some time and patience, along with a rekeying kit specific to the brand and key type of your current lock (e.g., a specific type of Schlage lock). These kits typically cost $12 to $15, and come with the materials you need to rekey six locks. It’s also possible to get a rekeying kit that can be used on any lock from a particular brand, but those usually go for $70 to $100, and they come with a lot of pieces you won’t end up using.

2. Calling a locksmith to come to your home and rekey your lock

You’ll probably pay between $50 and $160 for the convenience, but there are a few situations where this makes sense—like if security is a concern and you need it done quickly, or if you’re trying to rekey locks that have different manufacturers and you don’t want to buy more than one kit, or you have security concerns.

3. Removing the lock from your door and bringing into a hardware store to have it professionally rekeyed

In most cases, this will work out to be the cheapest and easiest option. Be sure to call ahead to make sure that a particular hardware store offers this service. In the past, I’ve had locks rekeyed at Ace Hardware: It took around 15 minutes, and cost $10 per lock with two keys included.


Source: LifeHacker – Here’s When Rekeying Your Lock Makes More Sense Than Replacing It

SpaceX Starship Version 2, Life Extension for Dogs, and More Top Science News of the Week

If you told a person on the street in the 1970s that humans would have no base on the Moon by the year 2000, they’d probably laugh in your face. Well, it’s 2023 and we still lack even the barest of lunar infrastructure. But this week, Alenia Space and the Italian Space Agency sketched out their plans for a sustainable…

Read more…


Source: Gizmodo – SpaceX Starship Version 2, Life Extension for Dogs, and More Top Science News of the Week

Sam Altman's Return, the Mysterious Q, and More of the Top AI News of the Week

If you’re behind on what’s happening with the robot uprising, have no fear. Here’s a quick look at some of the weirdest and wildest artificial intelligence news from the past week. And be sure to check out our weekly newsletter on the biggest developments in AI.

Read more…


Source: Gizmodo – Sam Altman’s Return, the Mysterious Q, and More of the Top AI News of the Week

You Should Install One of These Remote Controls for Your Older Ceiling Fan

Between making our homes more energy efficient, and providing us with a cool breeze, ceiling fans are all the rage here at Lifehacker. We’ve sung the praises of newer bladeless varieties, and why you should reverse their direction during the colder months. Now, we’d like to suggest a relatively inexpensive but game-changing upgrade for your current ceiling fans: installing a remote control.

Some homes have several ceiling fans, so we’ll narrow down our recommendation to ceiling fans in bedrooms, living rooms, and anywhere else you lounge. Who wants the hassle of having to stand up and reach for—then pull down—a chain dangling from above every time they want to adjust the fan or its lights? That’s right: no one.

This is especially true if you wake up in the middle of the night either freezing cold—and need to turn the fan off—or roasting hot, and need to turn it on. All that moving around and stretching to reach the chain will disturb your slumber far more than pressing a few buttons on a remote from the comfort of your bed. If you’re unfamiliar with remote controls for ceiling fans, here’s what to expect in terms of prices, features, and the installation process.

What to consider when buying a ceiling fan remote control

To give you an idea of what’s out there, here are a few examples of highly rated ceiling fan remote controls, and their standout features:

  • YukiHalu Universal Ceiling Fan Remote ($15.08): A solid basic option. The receiver is smaller (2x3x1”) than some that come with other remotes, which makes the installation process a bit easier. It also comes with a wall mount for the remote, so you have the option of using it like a switch, and removing it when that’s more convenient. In addition to turning the lights off and on, and controlling the speed of the fan, the remote also has a shut-off timer. A family member has used this remote for four years without problems.

  • Humpptom Universal Wifi Ceiling Fan Remote ($30.59): A wifi-enabled remote that can be controlled with your phone, Alexa, Google Assistant, or the Smart Life app. While it doesn’t have a shut-off timer, it does come with a dimming option for compatible light bulbs. 

  • Nexete Universal Remote and Wall Switch ($39.97): Comes with both a remote and a wired wall switch, so you can control the fan without having to find the remote. The downside is that the installation process is more complicated. 

Installing a ceiling fan remote control involves basic electrical work, like connecting wires. The overall process is largely the same for most remotes, with slight variations, as noted in the descriptions of the products above.


Source: LifeHacker – You Should Install One of These Remote Controls for Your Older Ceiling Fan

Fedora Linux Flatpak cool apps to try for December

This article introduces projects available in Flathub with installation instructions. Flathub is the place to get and distribute apps for all of Linux. It is powered by Flatpak, allowing Flathub apps to run on almost any Linux distribution. Please read “Getting started with Flatpak“. In order to enable flathub as your flatpak provider, use the instructions […]

Source: LXer – Fedora Linux Flatpak cool apps to try for December

New algorithm finds lots of gene-editing enzymes in environmental DNA

Read 12 remaining paragraphs | Comments


Source: Ars Technica – New algorithm finds lots of gene-editing enzymes in environmental DNA

Amazon Taps SpaceX For Kuiper Launch

An anonymous reader writes: Amazon just inked a deal with chief competitor and Elon Musk-helmed SpaceX to launch internet-beaming satellites — a move that comes even as Amazon founder Jeff Bezos pursues his own space dreams with his own rocket company, Blue Origin, and as SpaceX builds its own internet constellation.

While Musk and Bezos have notoriously been publicly competitive and have a history of openly sparring on social media, with Musk regularly making crude jokes about Bezos and Blue Origin, it is not uncommon for business rivals to team up in the world of rocket launches. Some Amazon satellites will still ride on a large rocket made by Blue Origin, dubbed the New Glenn. But it’s been delayed for years and will make its launch debut next year at the earliest.

Read more of this story at Slashdot.


Source: Slashdot – Amazon Taps SpaceX For Kuiper Launch

Why You Need to Clean Algae From Your Wood Deck (and How to Do It)

Sweeping the leaves, dirt, and debris off your wood deck can be enough to keep it relatively clean—that is, unless it’s coated in a layer of something slimy. In addition to making your deck slippery, and potentially dangerous, the growth of algae, moss, and/or fungi can do some serious damage. Here’s what to know about why your deck is so slippery, how to get rid of the slime, and why it’s so important.

Why is my deck so slippery?

Regardless of whether they’re covering grass, pavement, or a wood deck, fallen leaves make surfaces slippery when it rains. If they’re left on a deck long enough, they keep the wood perpetually moist, and create the ideal conditions for the growth of algae, fungi, or moss. Not only does a coating of algae, fungi, or moss make the deck quite slick, it may also leave green or black stains on the wood, even after the leaves and other debris have been cleared away.

Is algae bad for a deck?

Moisture is the enemy of wood. Over time, constantly damp wood may warp, swell, crack, and eventually, start to rot. When algae, fungi, and moss grow on damp wood, they tend to spread quickly, and make the moisture problem even worse—and, unlike leaves, can’t be easily swept off a deck. 

Even if, for some reason, you’re not concerned about your slippery deck being a falling hazard, and you don’t mind the green or black stains, you should still get rid of any algae, fungi, or moss covering it—it can harm your wood, and shorten your deck’s lifespan. And while algae and the like will cause more extensive damage to untreated lumber, they can grow on, stain, and harm treated wood as well. 

How do you remove algae from a wood deck?

Whether you’re dealing with algae, fungi, or moss growing on your wood deck, here are a few ways to get rid of it:

DIY bleach solution

Most advice on how to remove algae, fungi, or moss growing on your wood deck begins and ends with bleach. If you want to go straight to the hard stuff, and don’t mind working with bleach—and it running off into whatever surrounds your deck—you can make a DIY cleaning solution by mixing the following items in a large bucket:

  • 1 quart of household bleach

  • 3 quarts of warm water

  • ⅓  cup of ammonia-free powdered laundry detergent OR ammonia-free dish soap

Use the solution and a stiff-bristled brush or broom to scrub the slippery and/or stained parts of your deck, then rinse it off with a hose. Repeat the process on any stubborn spots, if needed.

White vinegar and soap solution

Combine one gallon of warm water, one cup of white distilled vinegar, and a few squirts of Dawn dishwashing liquid (or something similar) in a bucket. Once again, use a stiff-bristled brush or broom—we’re partial to the broom version, to avoid bending down and working on our hands and knees—to scrub the deck, then rinse it with a hose. Repeat if necessary. 

Use a premixed solution

There are also plenty of premixed solutions specifically formulated to remove algae, fungi, and or moss from wood decks, including 30 Seconds Outdoor Cleaner, Concrobium House & Deck Wash, and Mold Armor E-Z Deck, Fence & Patio Wash. Follow the directions on the packaging. 

Pressure washing

Though some experts caution against pressure washing a deck, others point out that it’s possible to do it without damaging the wood. The key is to use a fan attachment, and avoid high-pressure settings. If water alone isn’t cutting it, use your pressure washer to apply one of the solutions above—as long as yours is equipped with a tank or basin that allows you to do so.

Once you’ve removed the algae, fungi, or moss from your deck, do what you can to keep it clean, including sweeping any leaves and other debris off your deck right away.


Source: LifeHacker – Why You Need to Clean Algae From Your Wood Deck (and How to Do It)

Porsche summons old-school cool with the 2024 911 Sport Classic

A grey Porsche 911 Sport Classic parked in the Angeles National Forest

Enlarge / We never get tired of seeing the different ways Porsche finds to tweak the venerable 911. It’s outdone itself with the Sport Classic, but the car comes with a price tag that means very few will experience it. (credit: Bradley Iger)

Sports cars have always been emotionally driven purchases, and perhaps no automaker understands this better than Porsche. There are more than two dozen iterations of the 911 on sale today, and while it can sometimes feel like sussing out the differences in character between one variant and another is an exercise in splitting hairs, the new Sport Classic tugs at enthusiasts’ heartstrings in a way that no other modern 911 can.

Part of the Heritage Design Edition series, which includes a 911 Targa as well as two more as-yet-unnamed models, the new Sport Classic leverages the formidable capability of the latest 911 Turbo while delivering a genuinely unique driving experience and a distinct sense of style.

While its purposeful stance comes courtesy of the Turbo’s widened body, elements like the bespoke carbon fiber hood, the Carrera GT-inspired carbon “double bubble” roof, and the eye-catching carbon fiber ducktail rear spoiler—the latter of which pays homage to the iconic 911 Carrera RS 2.7 of the early 1970s—help to provide the Sport Classic with a look all its own. The bodywork is also further differentiated from its Turbo sibling thanks to the deletion of the side intakes, a change that necessitated new tooling to stamp the unique panels that run from underneath the front of the doors all the way to the rear bumper. New inlets installed under the ducktail spoiler are on hand to channel air into the engine’s intake system.

Read 11 remaining paragraphs | Comments


Source: Ars Technica – Porsche summons old-school cool with the 2024 911 Sport Classic